How To Build a Bomber Seat With a Speedway Motors kit

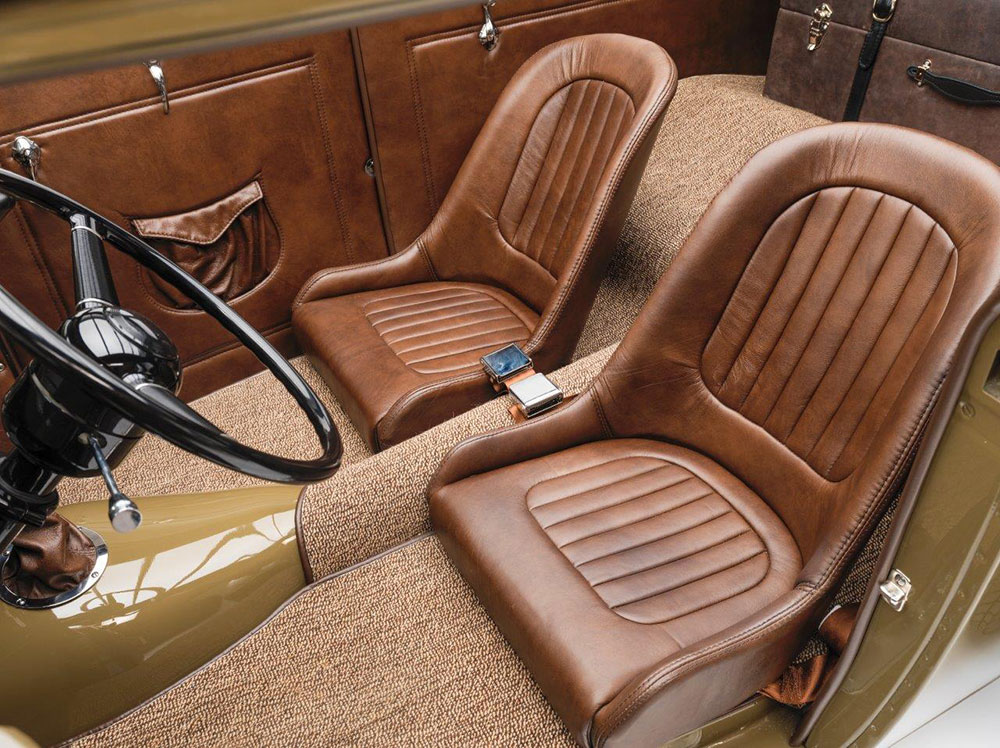
Vintage Bomber Seat With Comfort is a Great Way to Implement Tradition

By Brian Brennan – Photography Courtesy of Speedway Motors

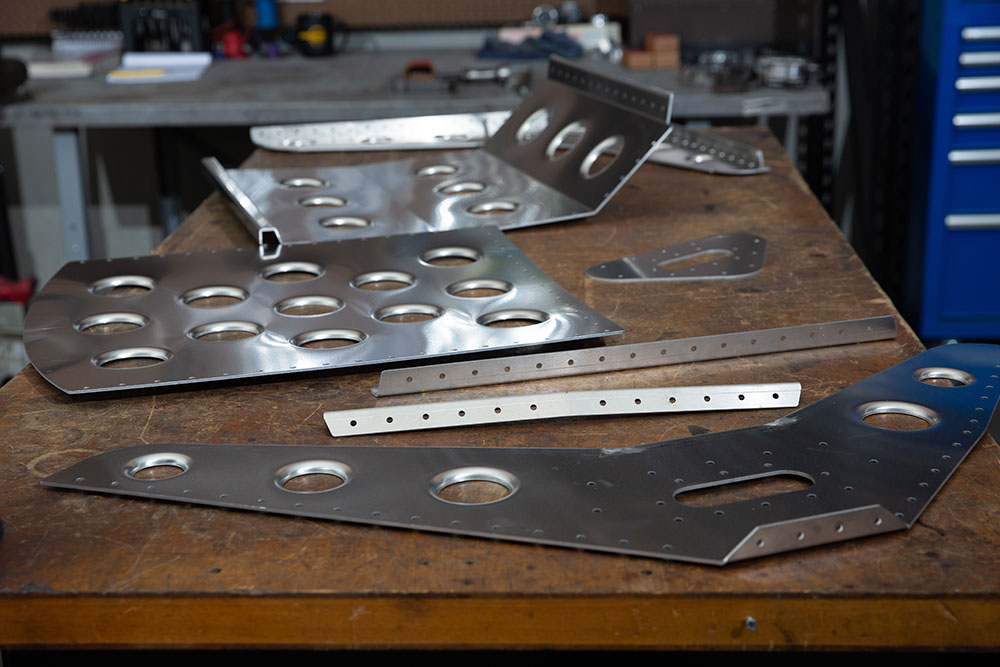
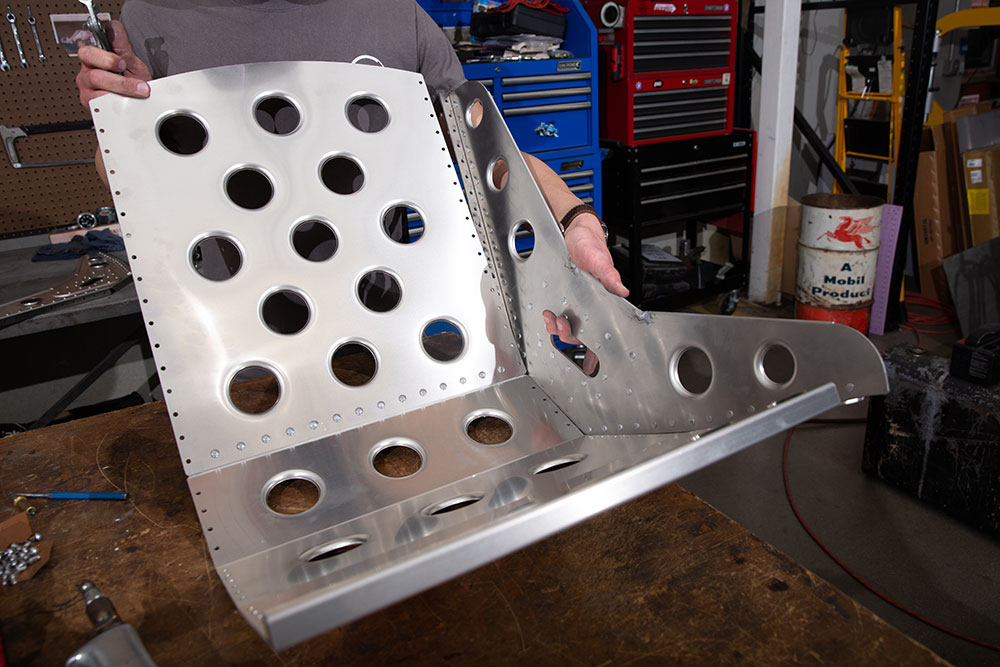
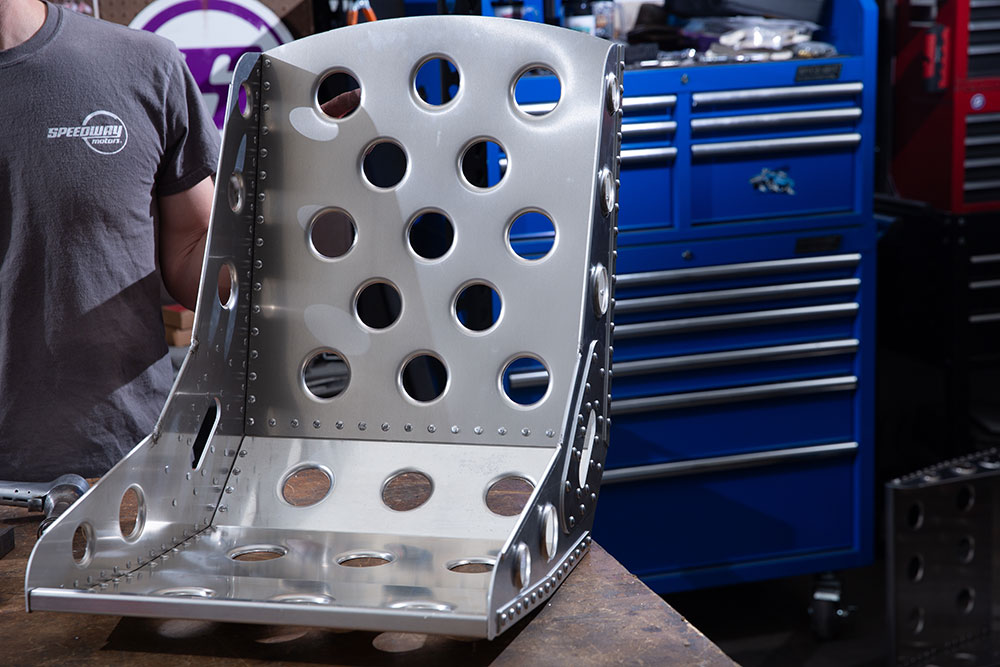
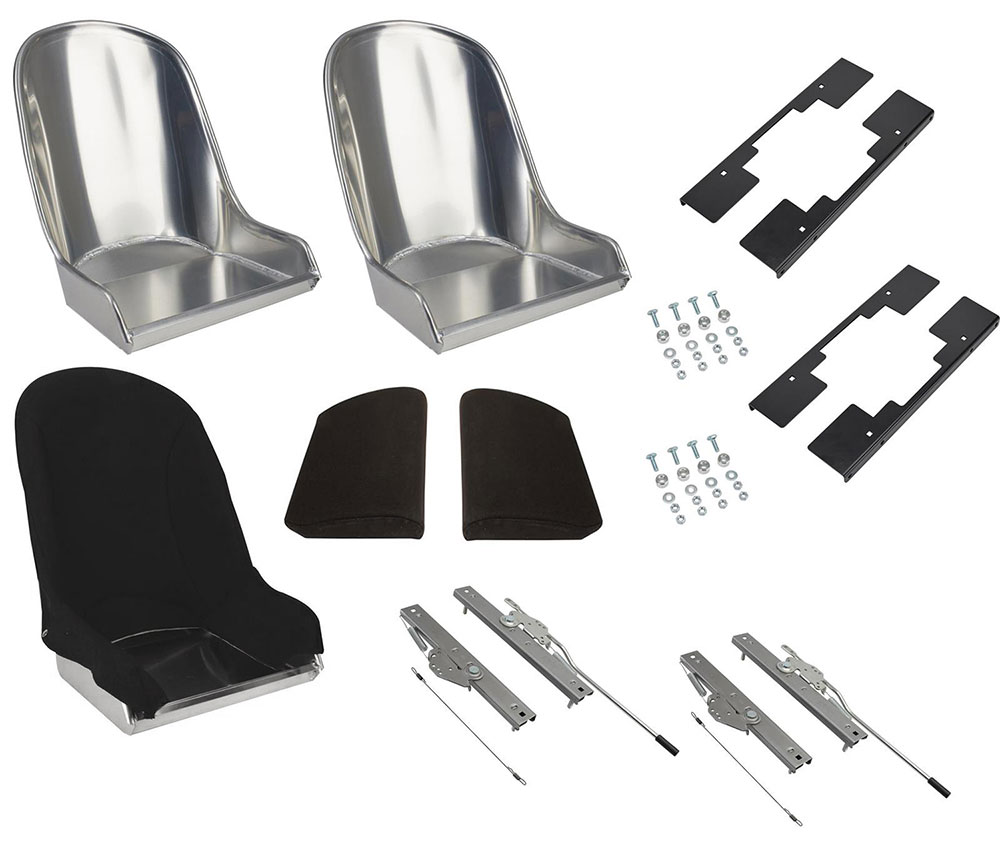
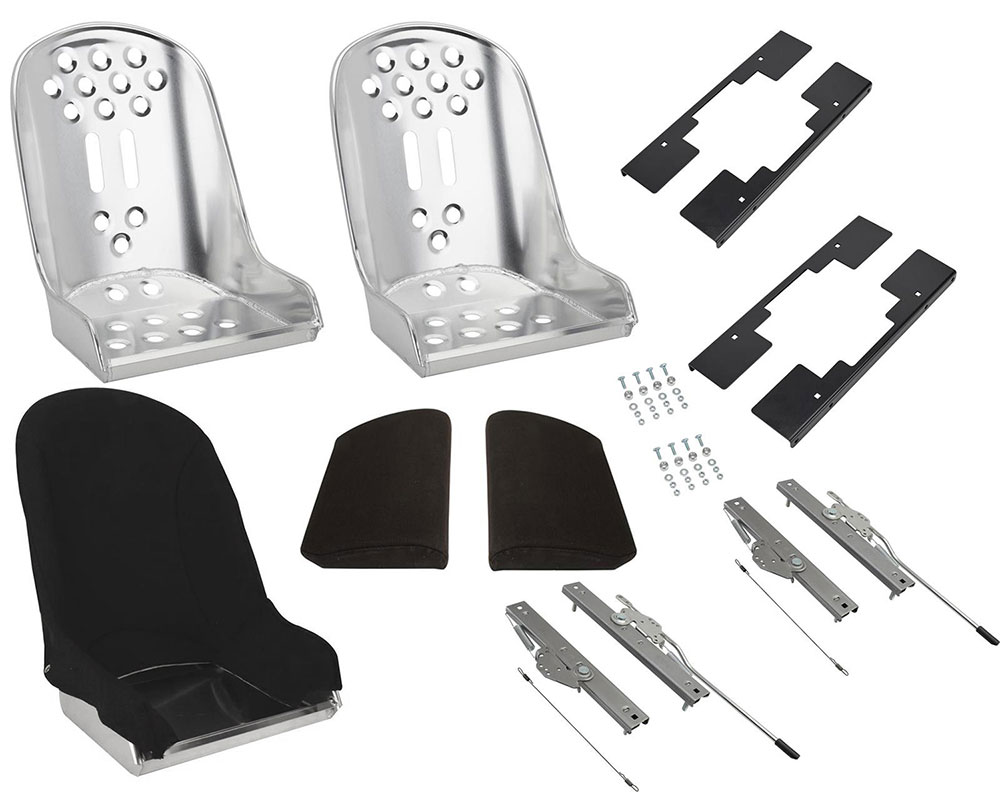
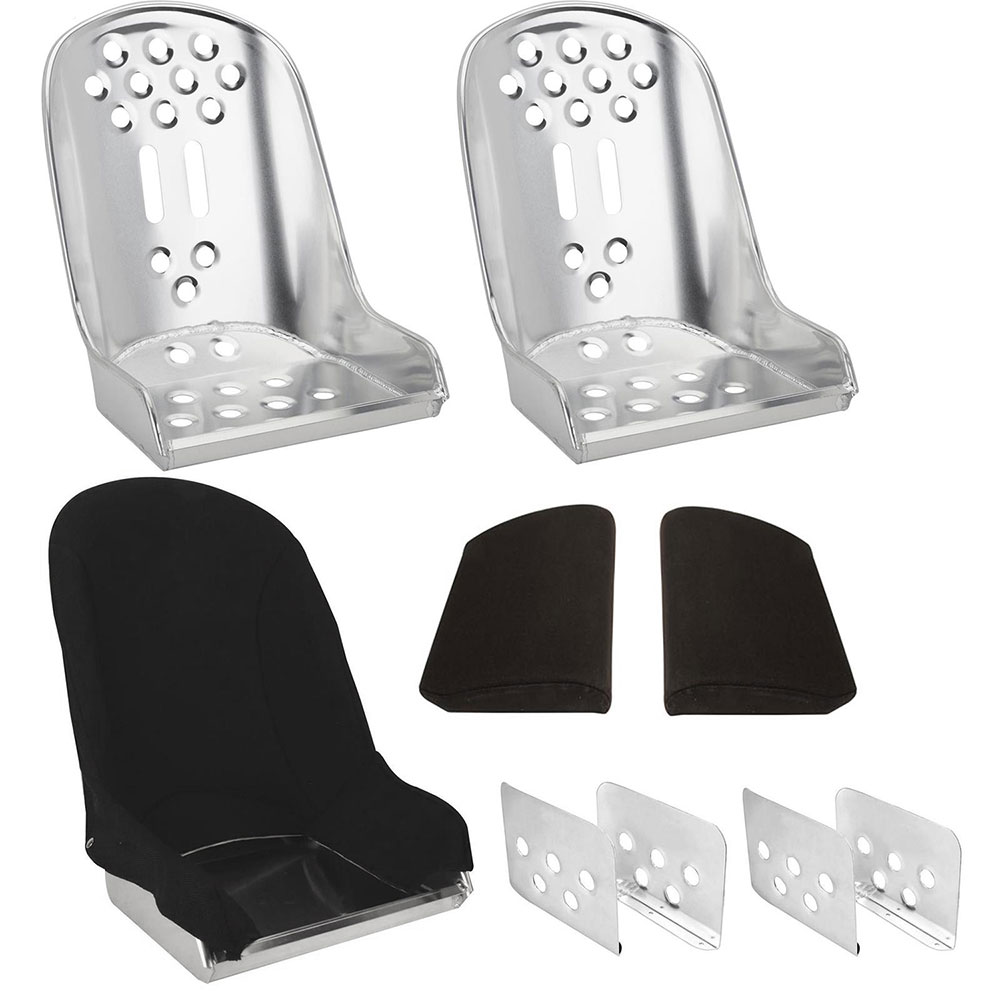
Building a hot rod with a traditional flare usually means the seating will be comprised of a pair of formfitting aluminum bucket seats; something from the vintage-era bomber seats. For the aficionado it would be the seats characteristically found in a World War II–era Fairchild PT-19 trainer. That’s great, but today it would be a lot easier, quicker, and more cost effective to begin with a Speedway Motors (SM) Lightened Aluminum Hot Rod Bomber Seat DIY Kit (PN 91070199). It comes disassembled but well within the capabilities of the average hot rodder to construct. (This kit also comes without the “lightening holes,” if so desired.)

- Advertisement -
02 the bomber seat has found a home in the world of traditional hot rods
Steeped in World War II history, the bomber seat has found a home in the world of traditional hot rods. Here Joe McCollough shows off his handwork in the making of one of Speedway Motors’ (SM) bomber seat kits.

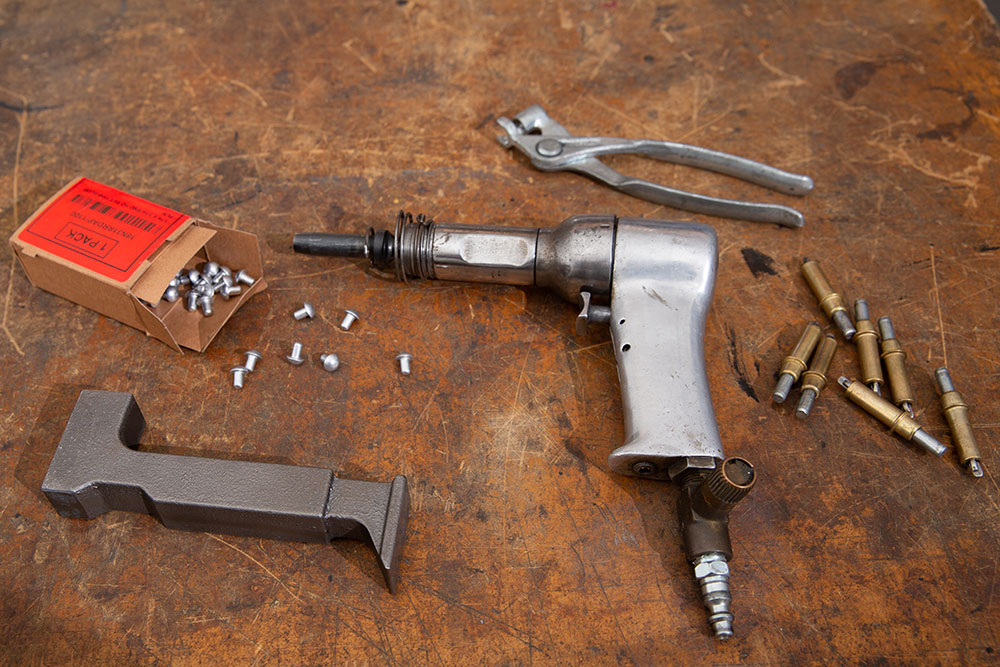
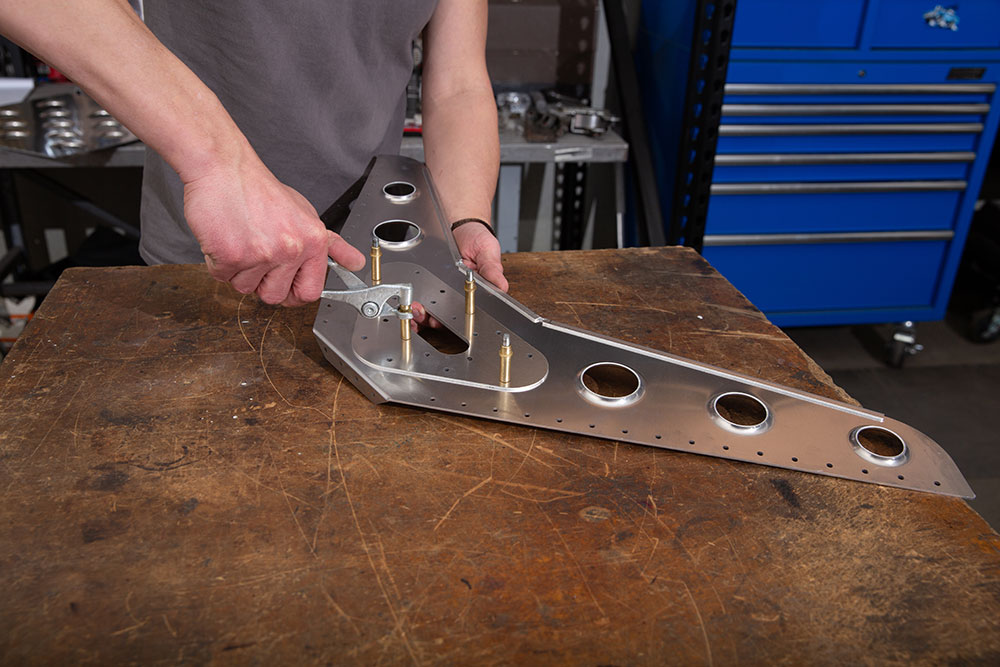
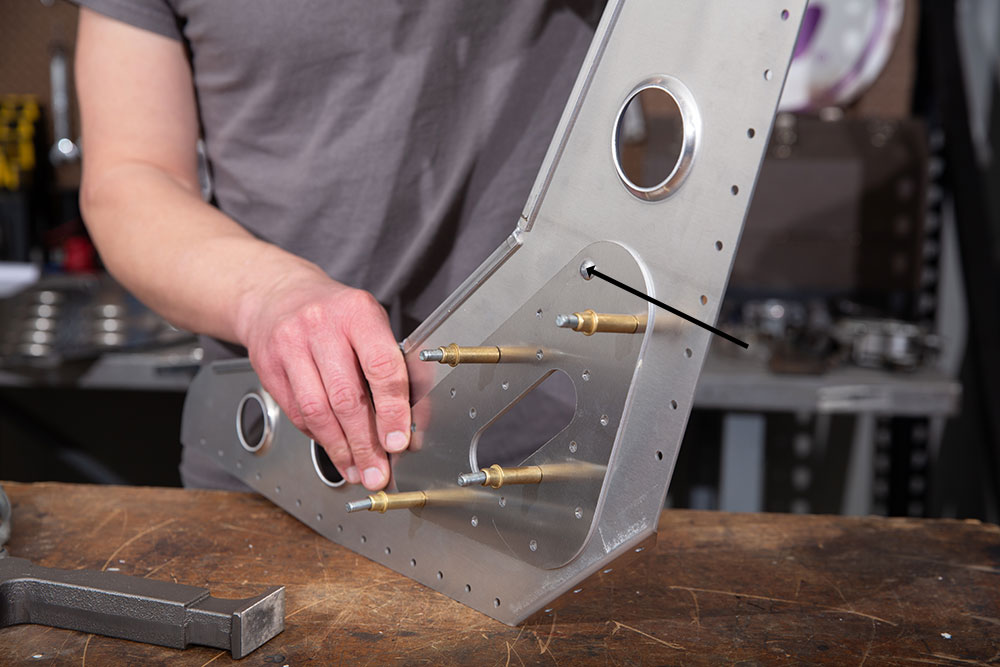
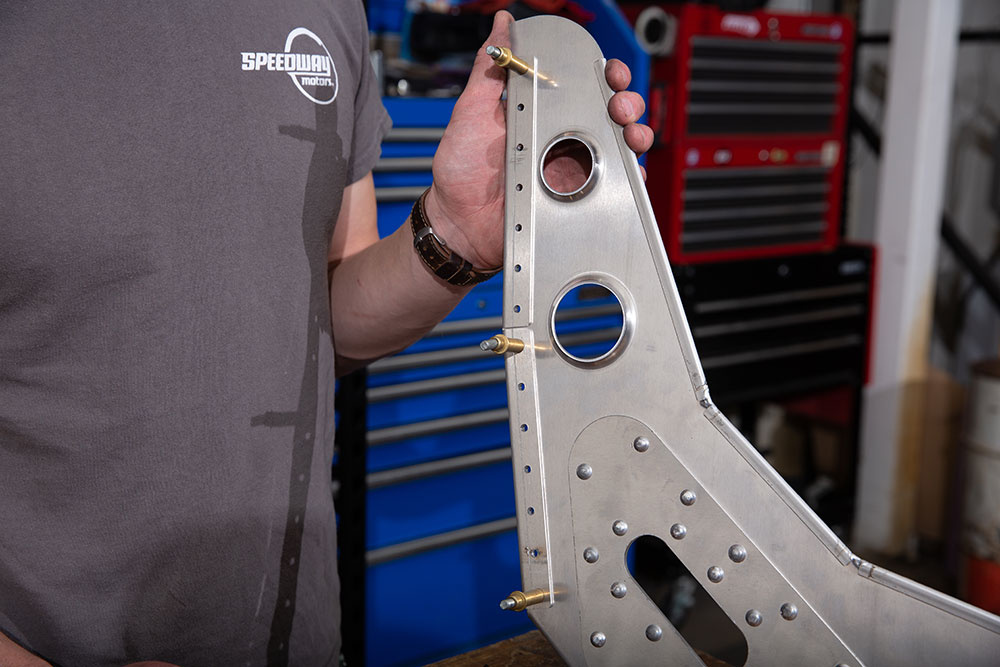
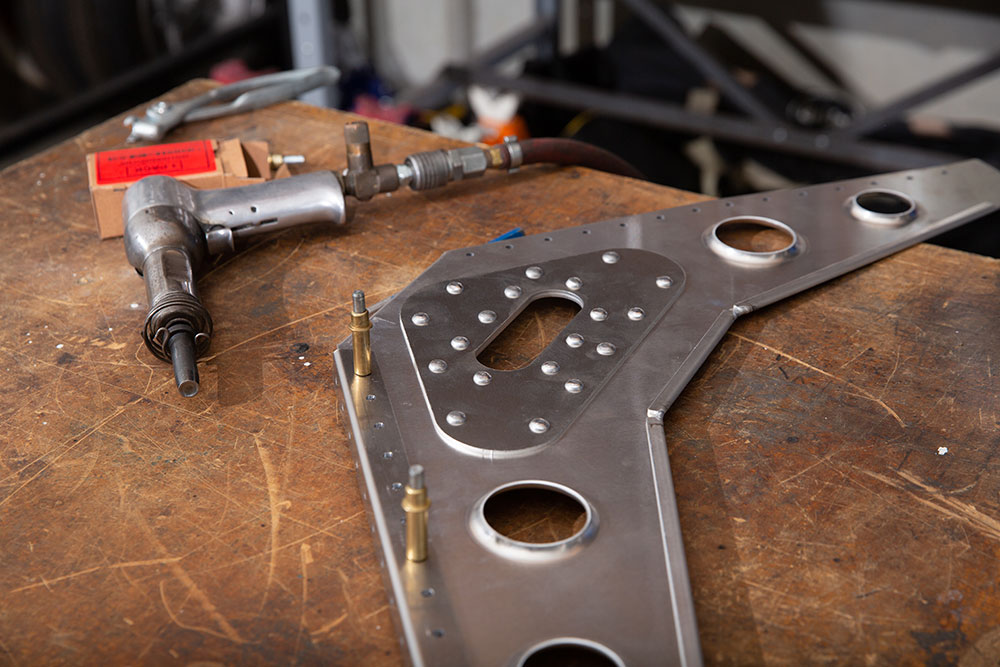
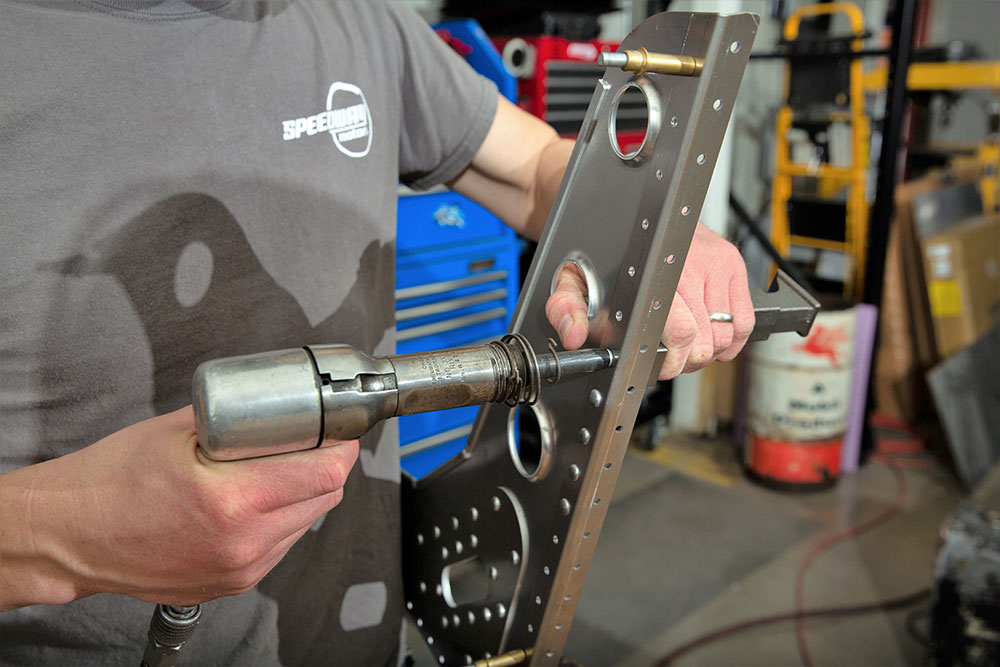
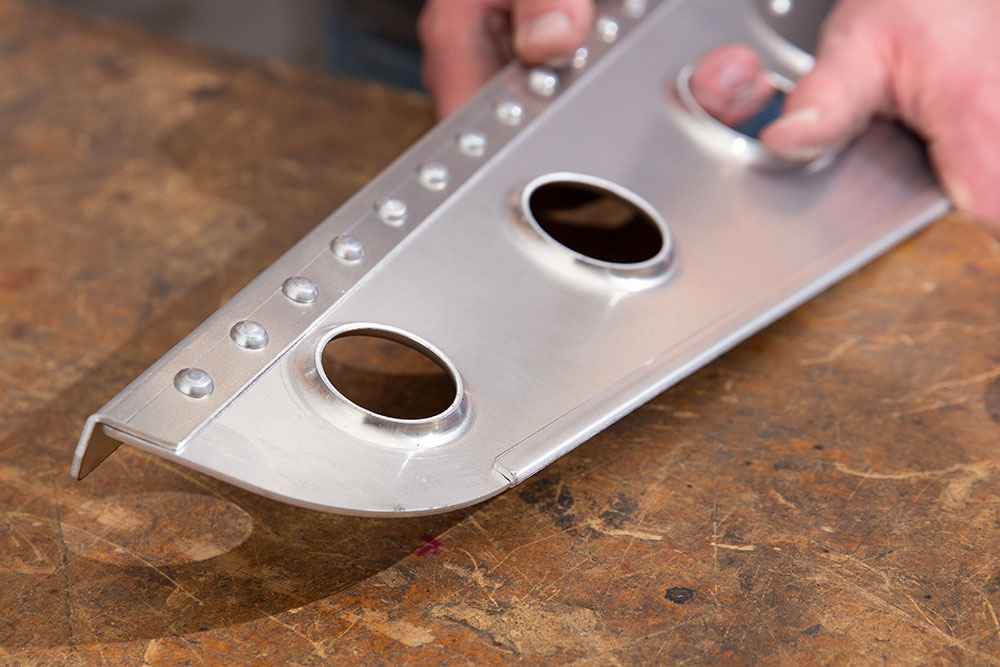
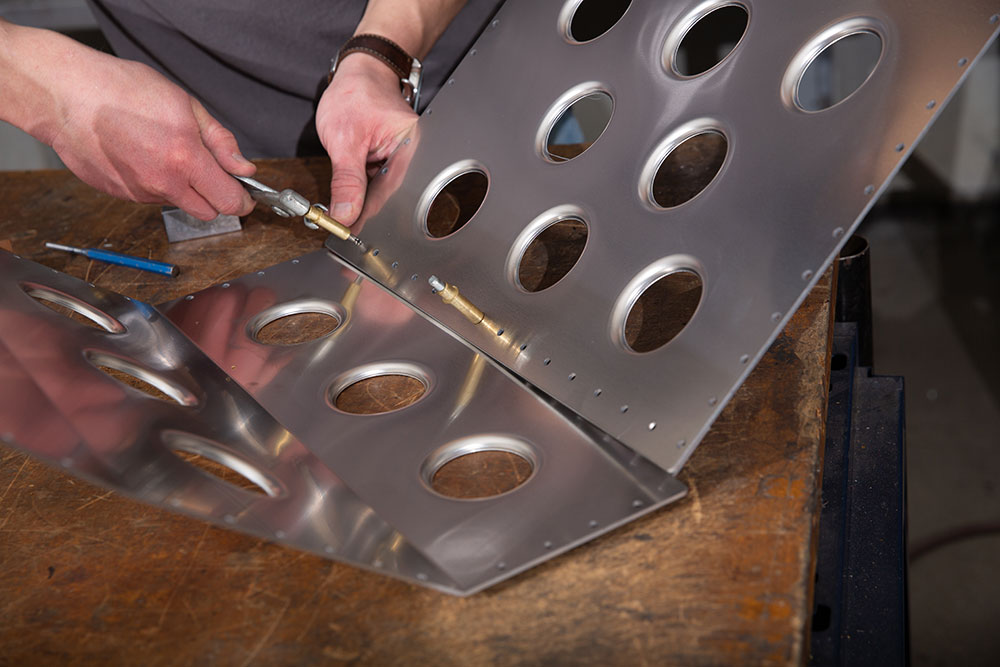
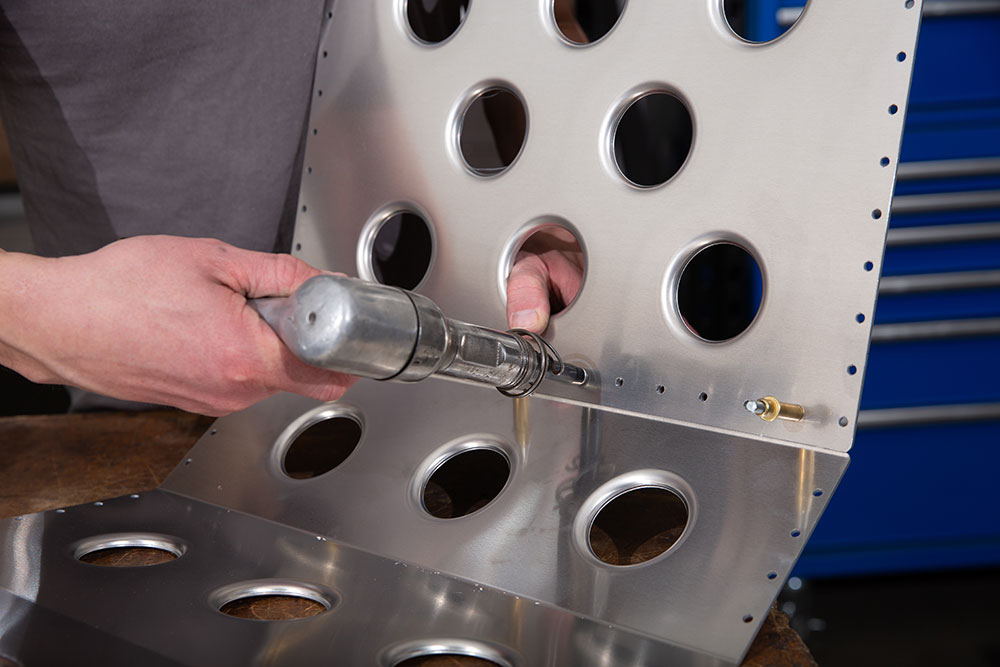
There are well over a 100 rivets used in the SM single-bomber seat. As you can imagine, there is a military spec on how rivets are to be used. In the SM application, authentic aviation rivets are placed to replicate the bomber seat appearance. In their use, SM opted for the “Lightened Aluminum” seats, which means there are 2-inch dimple die holes added to the seat bottom, back, and side brackets. There is also a pair of slots (3-7/8 inch) provided to allow the use of what should be mandatory: seatbelts. This is a DIY kit and is intended for you to assemble the provided panels.

Read More: How To Make a Hot Rod Interior Road Trip Worthy

03 Hot Rod Bomber Seat DIY Kit as delivered and ready for you to assemble
The SM Lightened Aluminum Hot Rod Bomber Seat DIY Kit as delivered and ready for you to assemble (PN 910-70199).

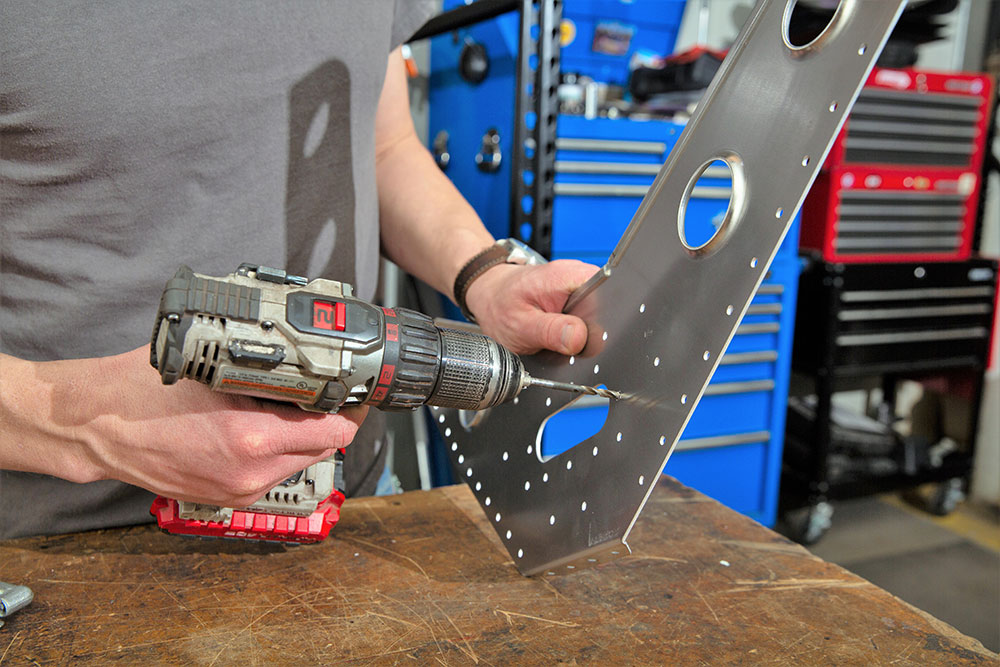
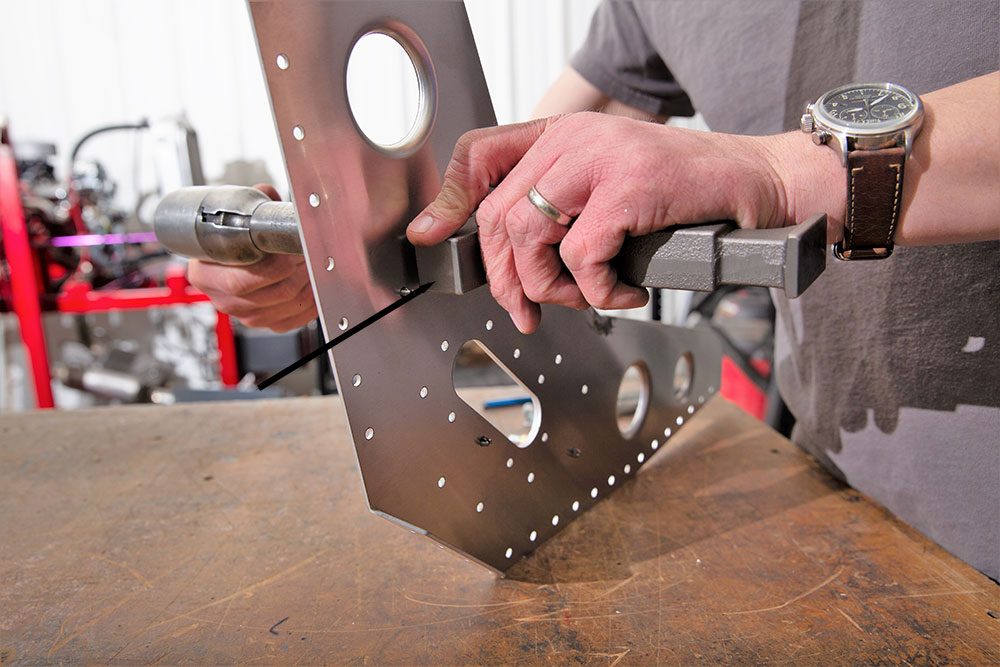
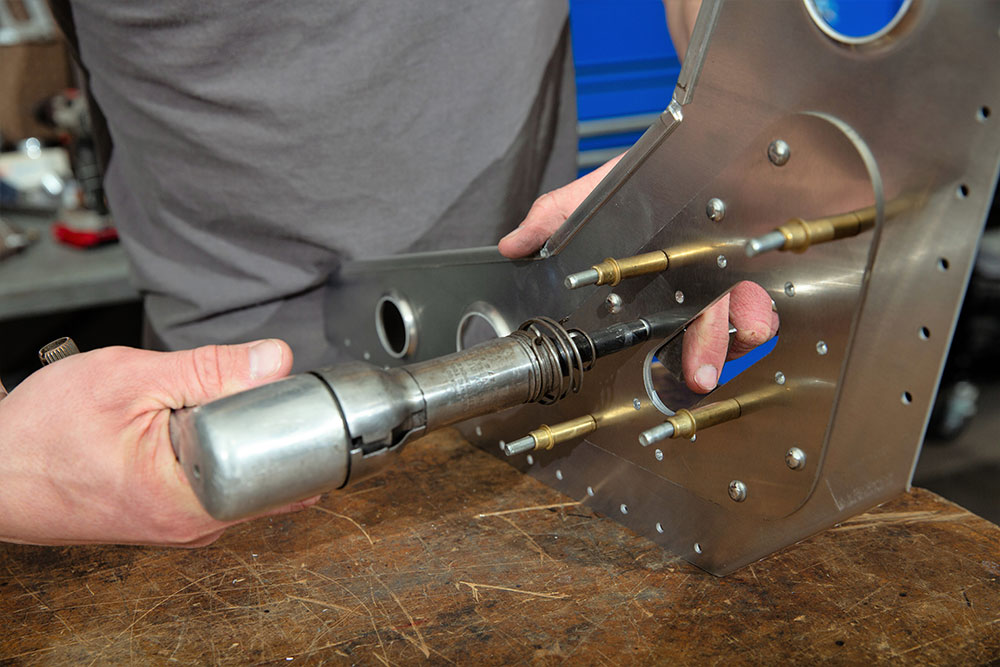
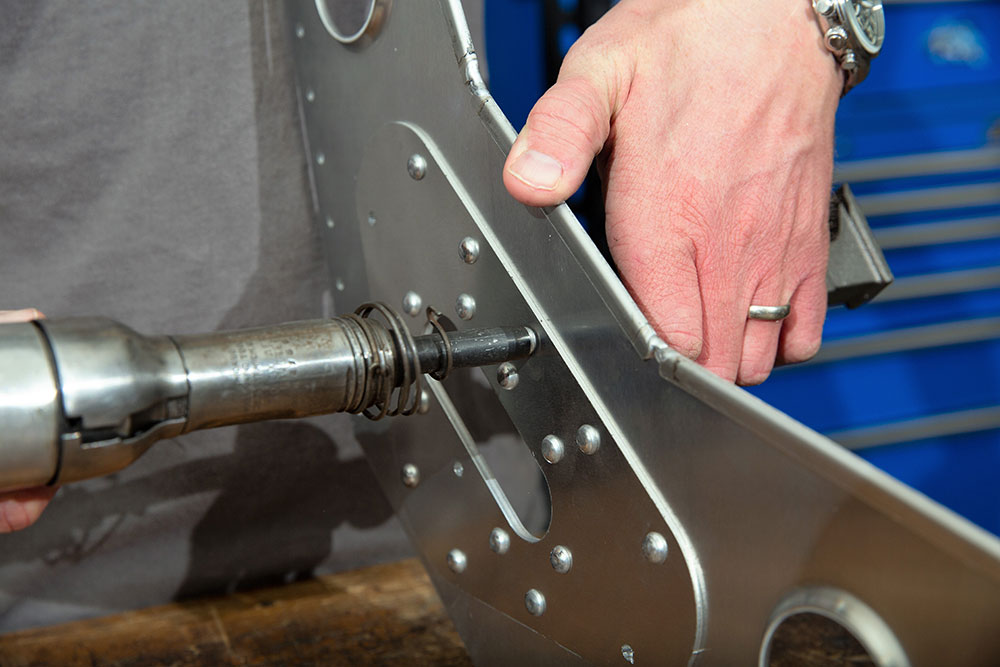
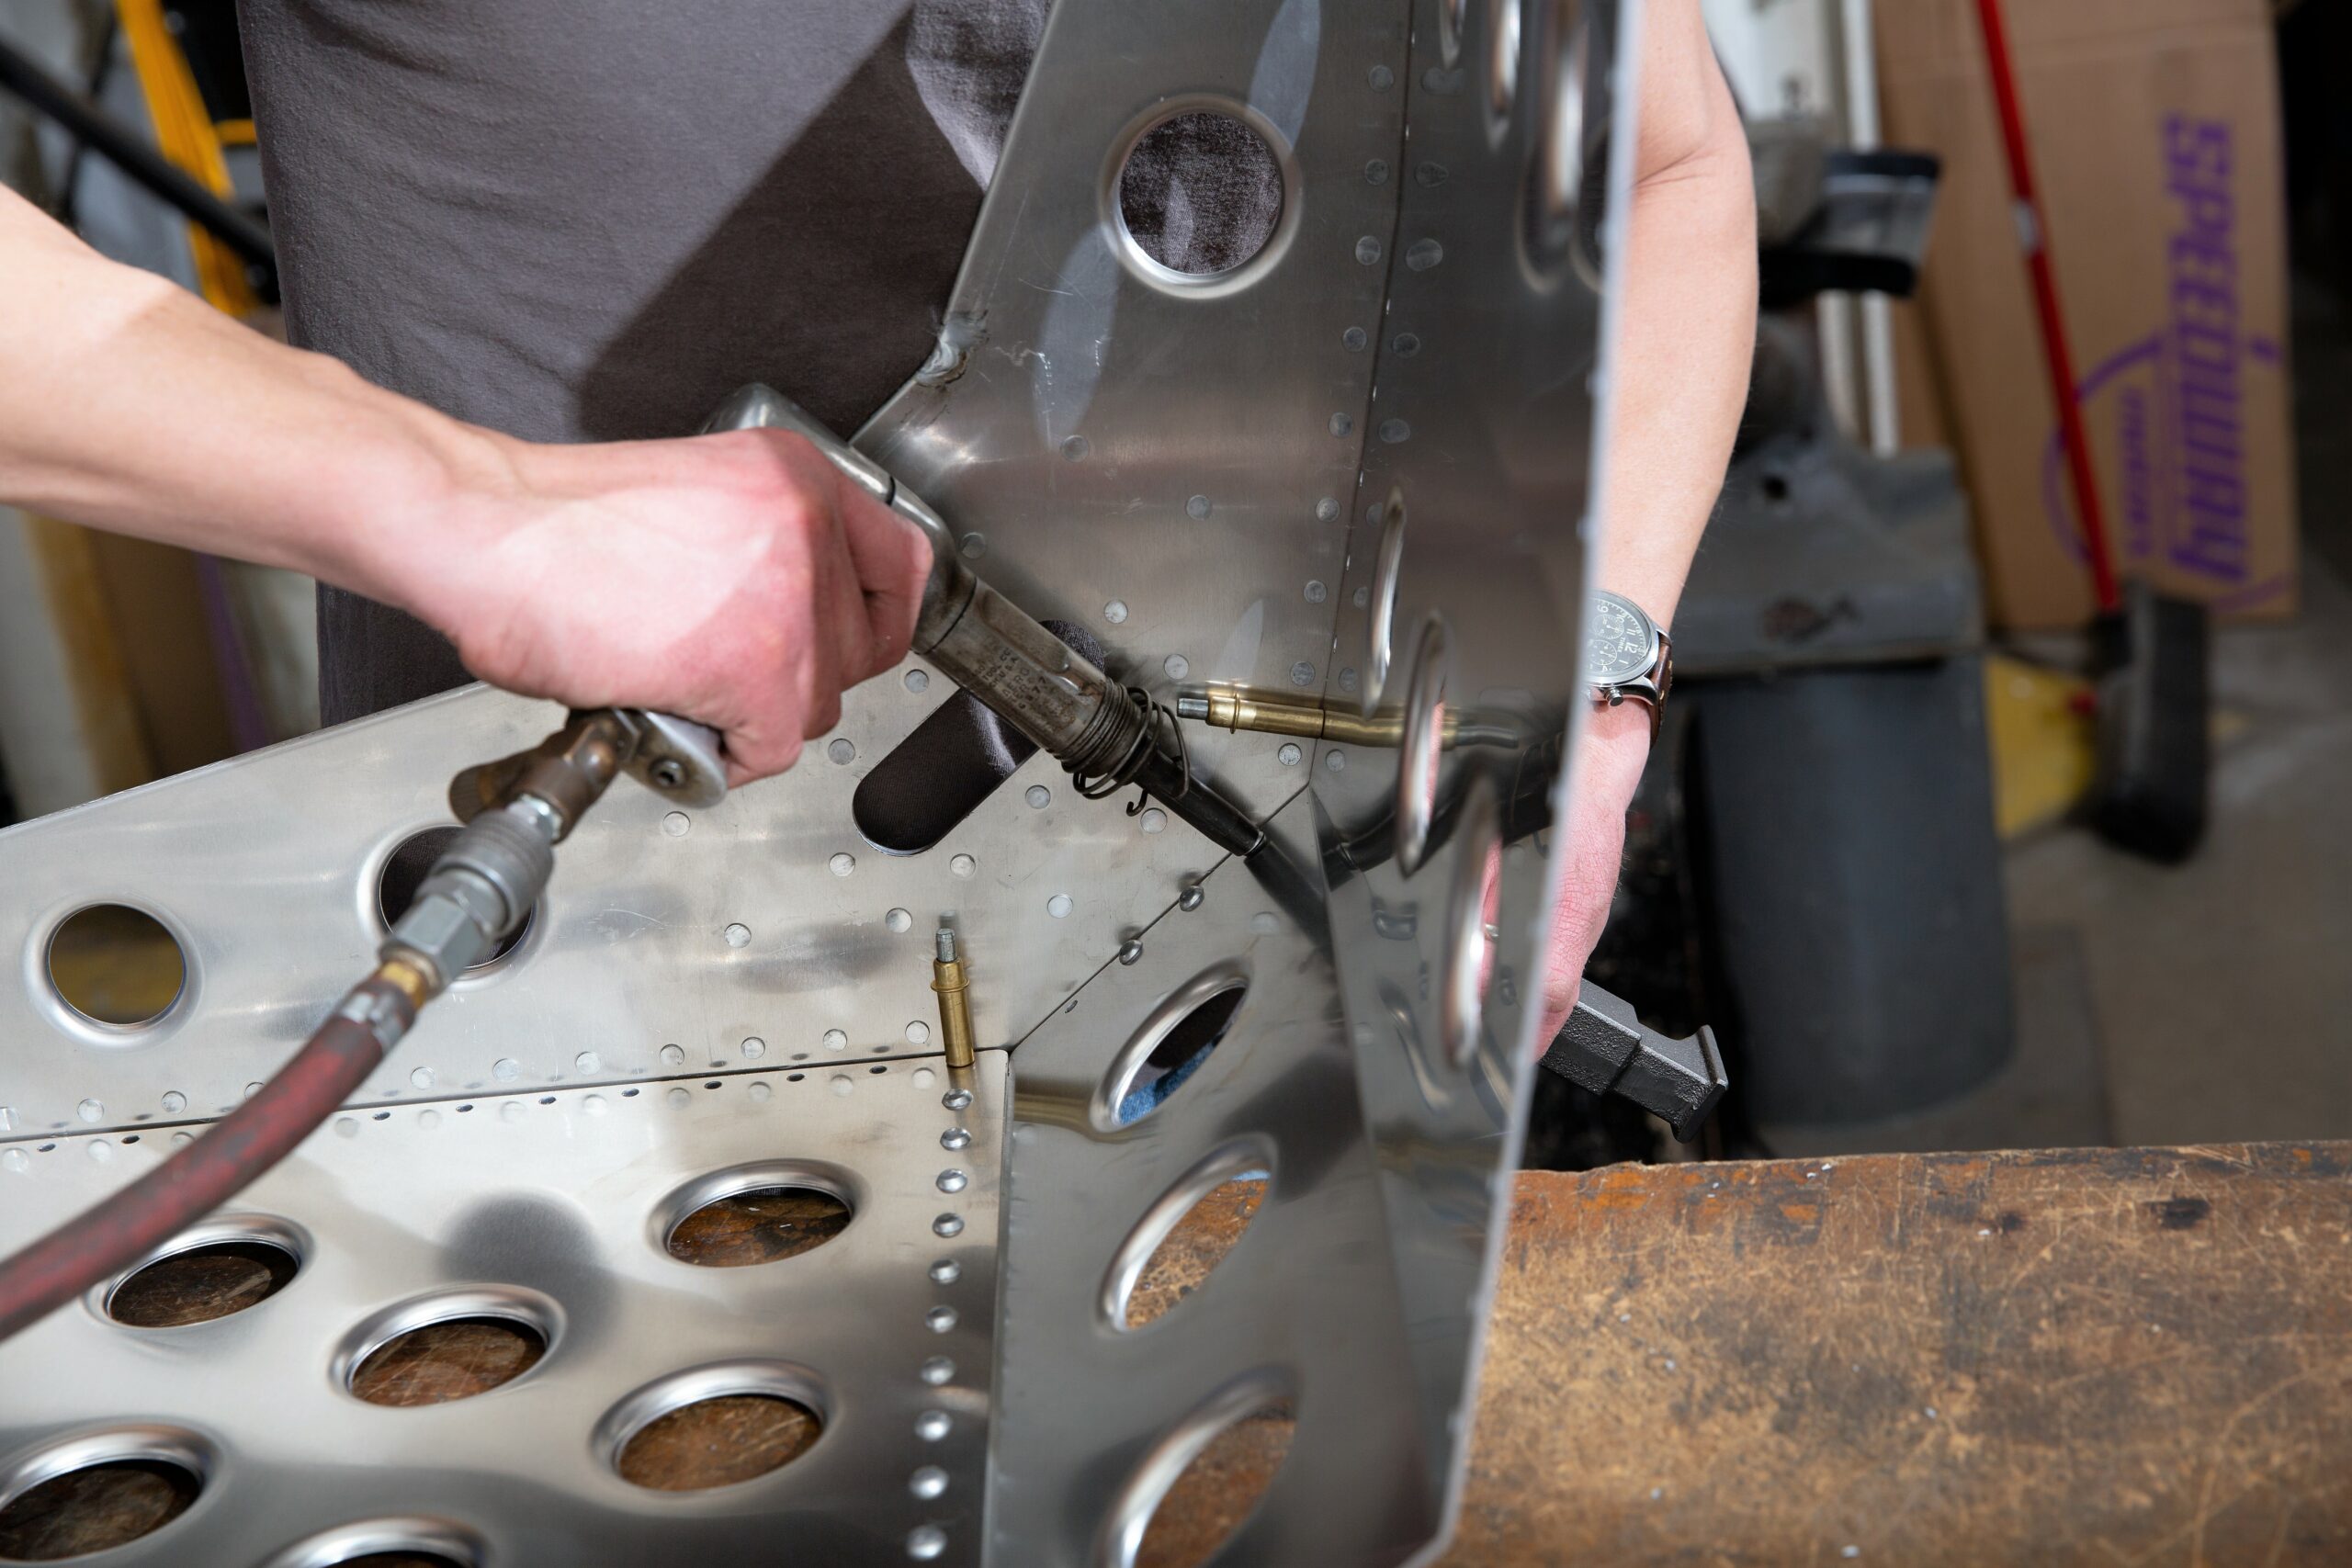
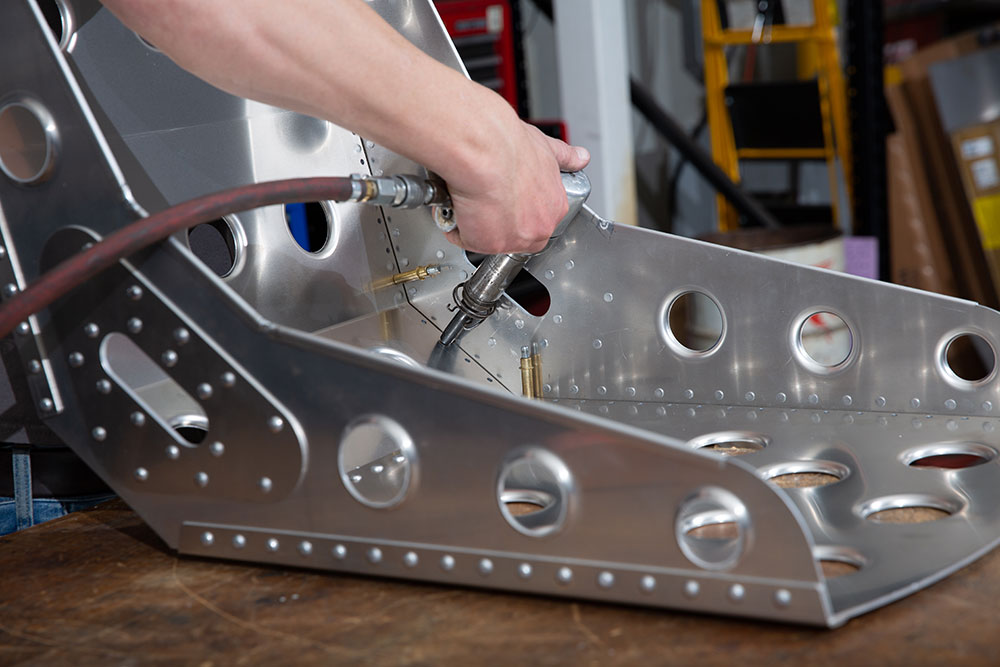
Anytime “DIY” is used this means tools will be required. The implements needed are common and most hot rodders should have most, if not all. Check your toolbox to see what you have and if you don’t, or are missing something, you can check in with SM. Their catalog offers the following: an air hammer (PN 72819750) with control pressure regulator, a 3/16-inch rivet set (PN 91010012), a bucking bar (PN 9101500), 3/16-inch Clecos and Cleco tool kit (PN 9108575), which contains 10 fasteners, and 3/16-inch rivets included with the seat kit. (A note on a bucking bar: They’re made from heat-treated cast iron, any sharp edges are removed, and working surfaces are polished.) Should you find a “gap” in your toolbox, SM will come to the rescue. You can order the required tools directly from SM.

- Advertisement -
04 The required tools are in most hot rodders’ toolboxes
The required tools are in most hot rodders’ toolboxes. If not, here is what’s required, and you can get the tools from SM. Required for the build is an air hammer (PN 72819750) with control pressure regulator, 3/16-inch rivet set (PN 91010012), bucking bar (PN 9101500), 3/16-inch Clecos and Cleco tool kit (PN 9108575), and 3/16-inch rivets included with seat kit.

Obviously, you will need two kits to have a pair of seats. Manufactured in-house at SM, each seat weighs approximately 7 pounds, is made from hand-formed 0.090-inch aluminum plate, and features a 0.340-inch (approximately 11/32-inch) rolled bead edge for both safety and comfort. The seat has an overall height of 22-1/2 inches, width of 17-1/4 inches, a 13-degree seat layback angle, and 6-degree “popup” for thigh support and features an overall inside width of 17 inches. (I have several sets of bomber-style seats and have used lightweight foam pads for added comfort.) They come in an aluminum finish that you can then leave as-is, or you can add a brushed, polished, painted, or powder coated surface.

Read More: Tips On Building A Complete Brake System For Your Hot Rod

05 After receiving your Speedway motors kit make sure to clean out all the holes
Preparation is always key. After receiving your Speedway motors kit make sure to clean out all the holes with a 3/16-inch drill bit, removing any small burrs.

When it comes to mounting the bomber-style seats you have options. Begin with fabricating your own mounts or go directly to the floor. SM also offers seat brackets that can be bolted, riveted, or welded to these seats. Now, these brackets were designed for other, more substantial bomber seats offered by SM. According to them, they should work on the DIY seat kits.

06 first assembly step is to attach the seat belt panel to the side using Clecos
Once you are ready to go, the first assembly step is to attach the seat belt panel to the side using Clecos.

Follow along as we show how one of these lightweight bomber seats is assembled. Next stop is your imagination as to how and where you can use these. MR

- Advertisement -

PN 910-70199 WW2 Bomber Seat Kit

Kit Contents

Quantity PN Description
1 910-71099.1.1 Bottom
1 910-70199.1.2 Back
1 910-70199.2.L Side Plate, Left
1 910-70199.2.R Side Plate, Right
2 910-70199.3 Seat Belt Trim Plate
2 910-70199.4 Brace, Bottom
2 910-70199.5 Brace, Back Corner
4 910-70199.7 Tab, Triangular Mount
2 974-82A269.100 SLD Rivet BG/100, 1/8
Tool 910-04009 Cleco Fasteners, Steel 1/8-inch, 10-pack
Tool 910-04005 Cleco Steel Fasteners Pliers

07 Make sure the rivet head is facing out on the seat belt panels

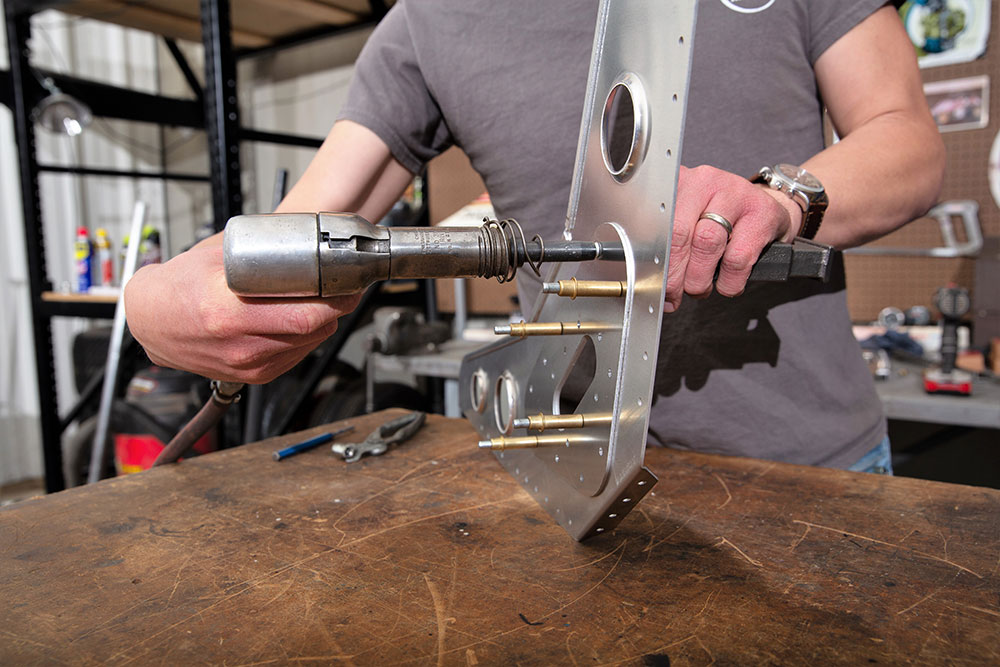
Before installing the first rivet here’s an obvious check. Make sure the rivet head is facing out on the seat belt panels. Rivet set (tool for forming a head) goes on a rivet head.

08 Place the bucking bar to the inside_back of the rivet
Place the bucking bar to the inside/back of the rivet.
09 while the Clecos remain in place holding the seat belt panel
Note the first rivet installed while the Clecos remain in place holding the seat belt panel.
10 continue around the seat belt panel installing the rivets until the job is complete
… continue around the seat belt panel installing the rivets until the job is complete.
11 This is accomplished by removing a Cleco and then installing the rivet
… This is accomplished by removing a Cleco and then installing the rivet and continuing until complete.
13 The bottom corner bracket is positioned via Clecos
The bottom corner bracket is positioned via Clecos. Next step is to rivet the bracket into position.
12 Once seat belt panels are installed you can move onto the corner brackets, which the seatbelt panels are attached to
Once seat belt panels are installed you can move onto the corner brackets, which the seatbelt panels are attached to. Note Clecos are installed in the corner bracket and ready to begin.
14 Remember, the rivets are part of the bomber seat kit
Next, rivet the corner brackets. Remember, the rivets are part of the bomber seat kit.
15 Here the corner bracket of the bomber seat is properly oriented
It’s all about having each of the pieces in the correct relationship to one another. Here the corner bracket of the bomber seat is properly oriented. It’s possible to incorrectly install, so be careful. All angles should match at the ends (as shown here).
16 seat belt bracket and corner bracket are now one component
Here is one seat side finished: seat belt bracket and corner bracket are now one component. Finish both sides before moving on.
17 Here the seat back and the seat bottom are attached using the Clecos
Here the seat back and the seat bottom are attached using the Clecos. Riveting is next.
18 With Clecos in place, the rivets are now used to attach the seat back
With Clecos in place, the rivets are now used to attach the seat back and bottom together.
19 the already-assembled sides are next to be attached
With seat back and bottom attached the already-assembled sides are next to be attached.
20-speedway-motors-aluminum-hot-rod-bomber-seat-kit
Once Clecos are in place the rivet process starts. Note the use of the rivet tool and bucking bar.
21 With one side complete it’s time to move onto the other side
With one side complete it’s time to move onto the other side.
22 There you go. A finished SM Lightened Aluminum Hot Rod Bomber Seat Kit
There you go. A finished SM Lightened Aluminum Hot Rod Bomber Seat Kit. The use of the word “lightened” means that holes come pre-drilled. You can also get the kit without the “lightened holes” drilled.
23 There are other bomber seats available from SM, such as PN 910-0012
There are other bomber seats available from SM, such as PN 910-0012. It has the pad and cover and sliders.
24 Another version is the Lightened Bomber seat (note dimpled holes), PN 910-0013
Another version is the Lightened Bomber seat (note dimpled holes), PN 910-0013. It too has a pad with a cover and sliders.
25 Lightened Bomber Seat with pad and cover plus mounting brackets, PN 910-9996
One more; Lightened Bomber Seat with pad and cover plus mounting brackets, PN 910-9996.

Source
Speedway Motors
(888) 503-4220
speedwaymotors.com

- Advertisement -

Related Articles

Search Our Site

More Modern Rodding

2024 Detroit Autorama Ridler Winning ’53 Corvette

Owned by Dave & Tracey Maxwell & Built By...

First Look 2024 Detroit Autorama Great 8

The 71st Annual Detroit Autorama & The Competition For...

A New Suspension on Jason Scudellari’s Brookville Model A

By Ron Ceridono   -   Photography By Jason Scudellari Over the...

Classic East Coast Styled 1934 Channeled Ford Coupe Personifies Kool

By Chuck Vranas   -   Photography by the Author With regard...

1955 Thunderbird With Shocking Looks & Performance

Coral Orange Ragtop Ford Thunderbird By Brian Brennan   -   Photography...

Dual Master Cylinder Conversion For Your Classic Car

Improving Braking Performance on a 1963 Impala With Classic...
More Modern Rodding

How To Fix Quarter Panel Rust

Patch Panel Install For Rust Repair on Your Vintage...

Hemi Swapped 1932 Ford Roadster

Dave Gray’s Deuce Roadster Built In only 5 Months By...

Under The 1965 Buick Riviera Detroit Speed Chassis

Unmatched Street Performance & Sixties Style By Gerry Burger   -  ...

Rodding Around

Goodguys 2023 Chevrolet Performance Builder of the Year Awards By...

Parting Shot

Gene Winfield Moves From His Longtime Home and Shop By...

MR’s Featured New Products For Your Hot Rod – 2024

Easy Passage This wire pass through kit (billet cover, custom...