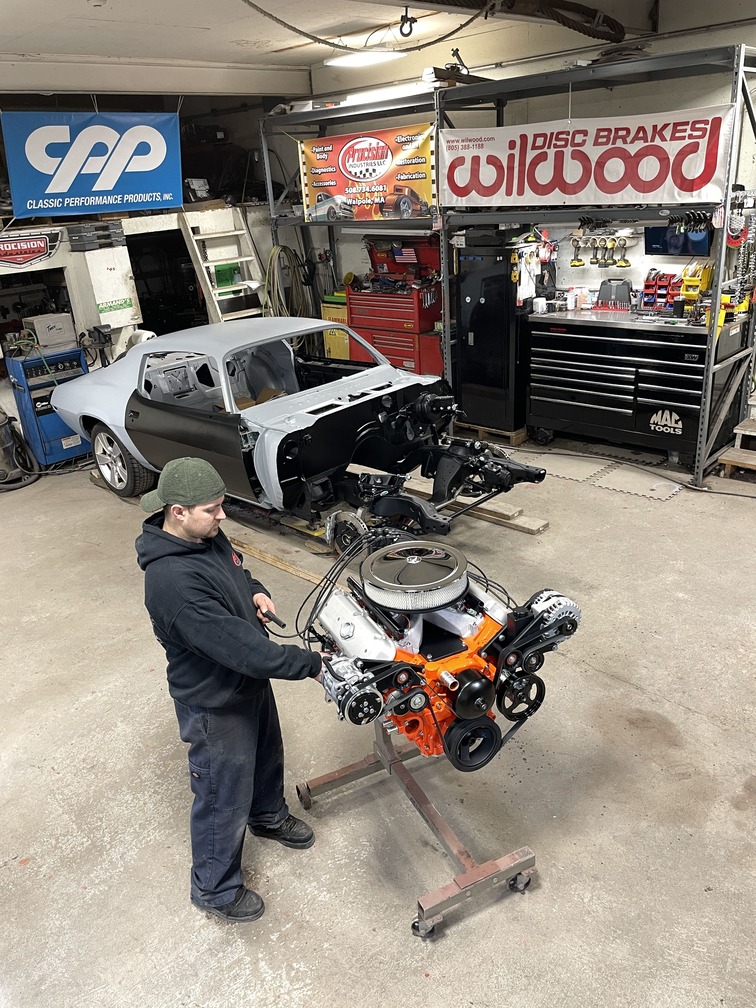
There’s nothing better than the adrenalin rush experienced when planning updates to your driveline, especially when you’ve got a fresh LS waiting to get treated with cutting-edge performance products. Gearing your decisions based on overall horsepower expectations as well as the theme of your car opens up a myriad of underhood possibilities, from OEM to contemporary as well as vintage styles. During our most recent visit to Procision Industries in Taunton, Massachusetts, we met with shop owner Pat O’Brien who had just taken delivery of a freshly built 5.3L LC9 LS long-block for his 1971 Camaro. The base packs all the right goods, including a refreshed rotating assembly, aluminum heads by C3 Automotive Machine, and a Stage II LS1 cam from Brian Tooley Racing.
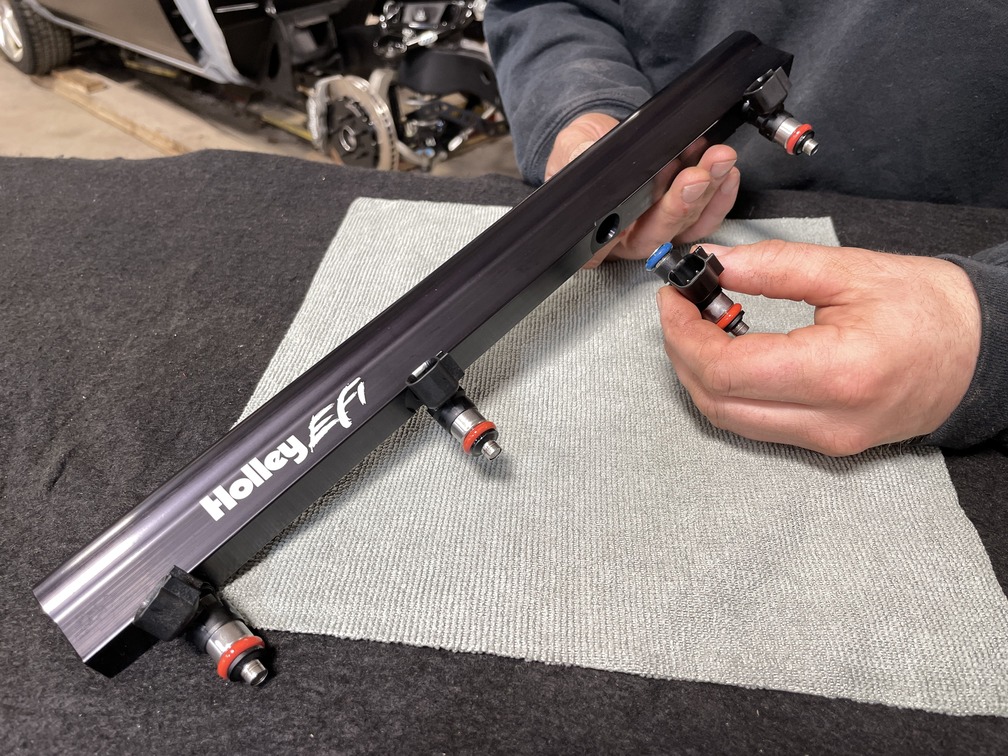
Getting started, Pat O’Brien of Procision Industries in Taunton, Massachusetts, applied a coating of Aeroquip Hose Assembly Lube (PN 222070) to the Summit Racing–supplied ACDelco 42-lb/hr fuel injector blue O-rings, preparing them for installation into the base of the Holley EFI single-plane fuel rail.
This was a perfect opportunity for All Chevy Performance to follow along, especially with the build showcasing affordable LS power in a car that will see plenty of action on both the street and track. Having made the decision to follow an early ’70s-era theme, we checked some of the new traditionally inspired parts available from LS Classic Series by Lokar. Seamlessly blending modern performance technology and vintage looks, their offerings showcase such classic EFI intake systems inspired from Chevrolet’s early Fuelie V-8s, including those from 1957, 1962, and 1963, as well as ones topped by a Tri-Power intake, classic 14-inch chrome air cleaner, and even reproduction-styled air cleaners in stock, L79, and even 409ci V-8 versions.
Holley offers a choice of two different mounting brackets to suit various injector sizes depending on your application. Here, assembly of the Holley EFI fuel rail continued with the supplied hardware using a ½-inch wrench.
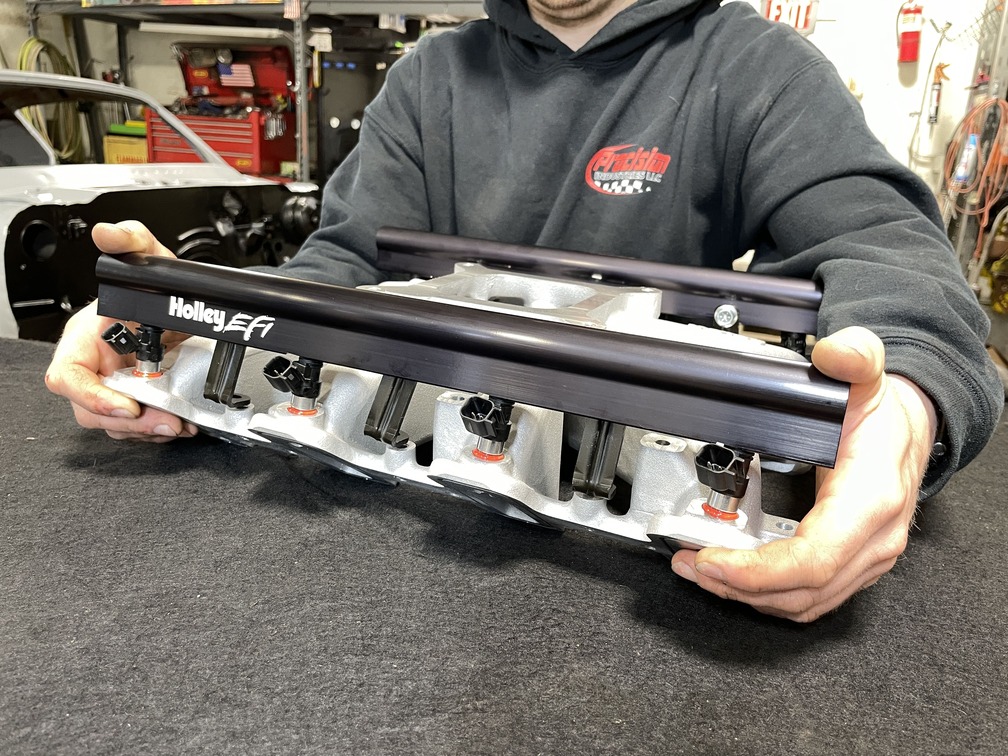
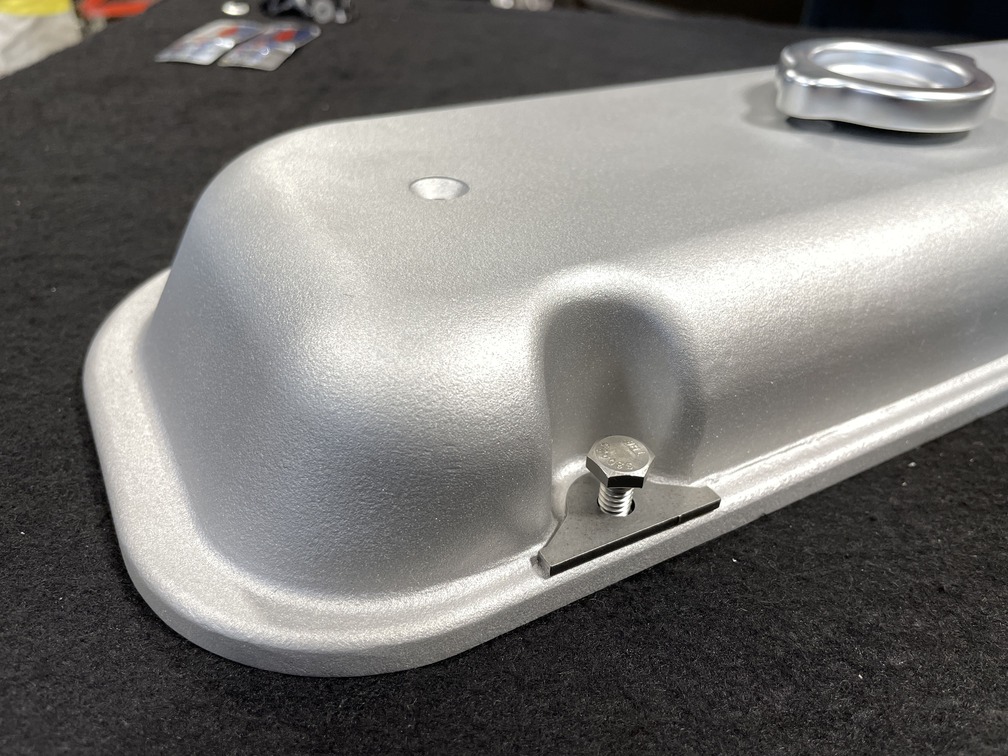
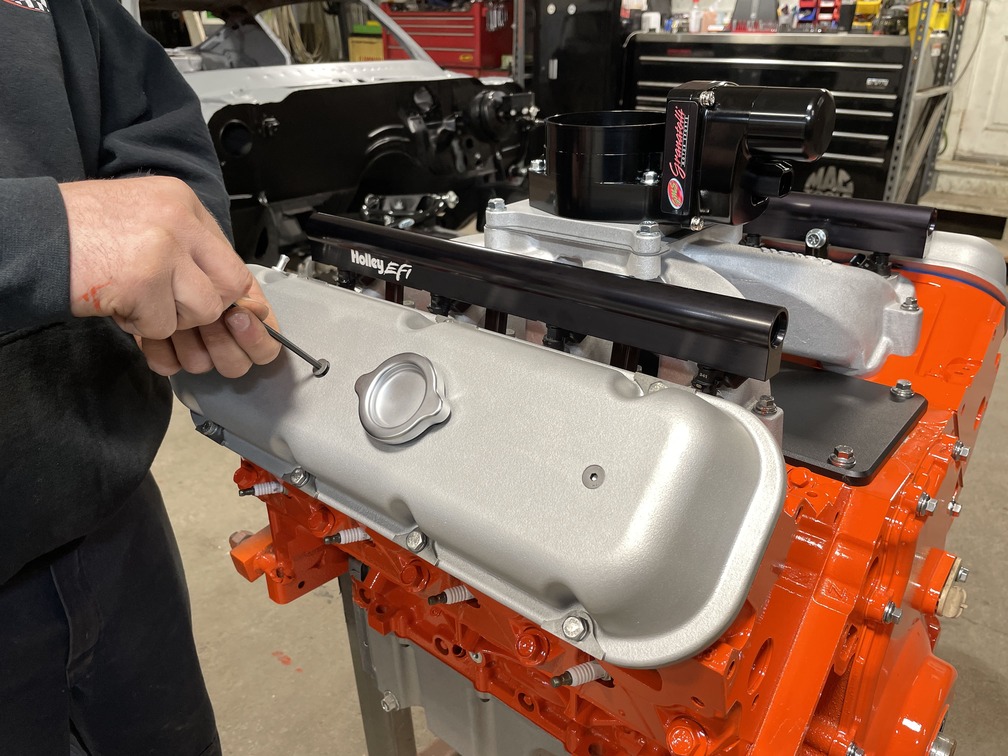
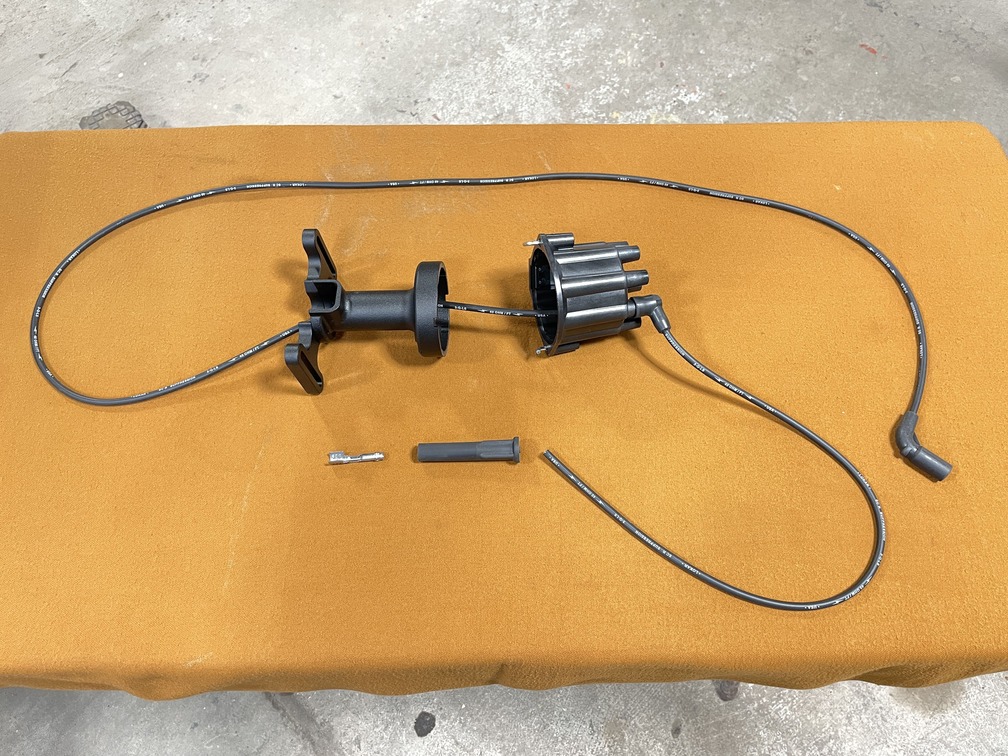
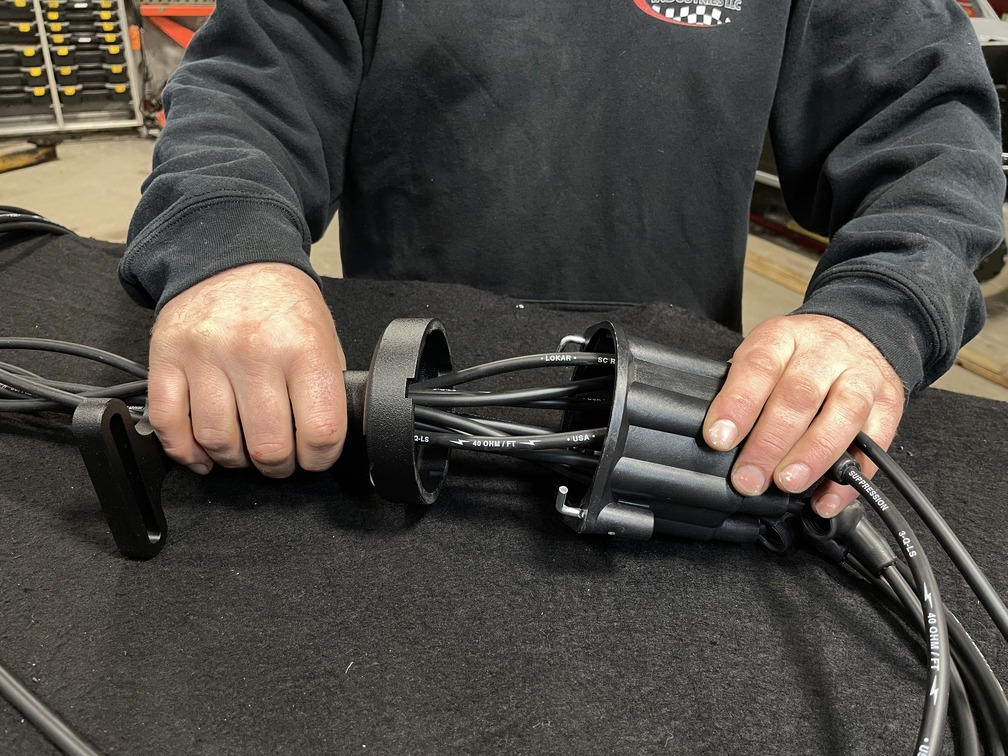
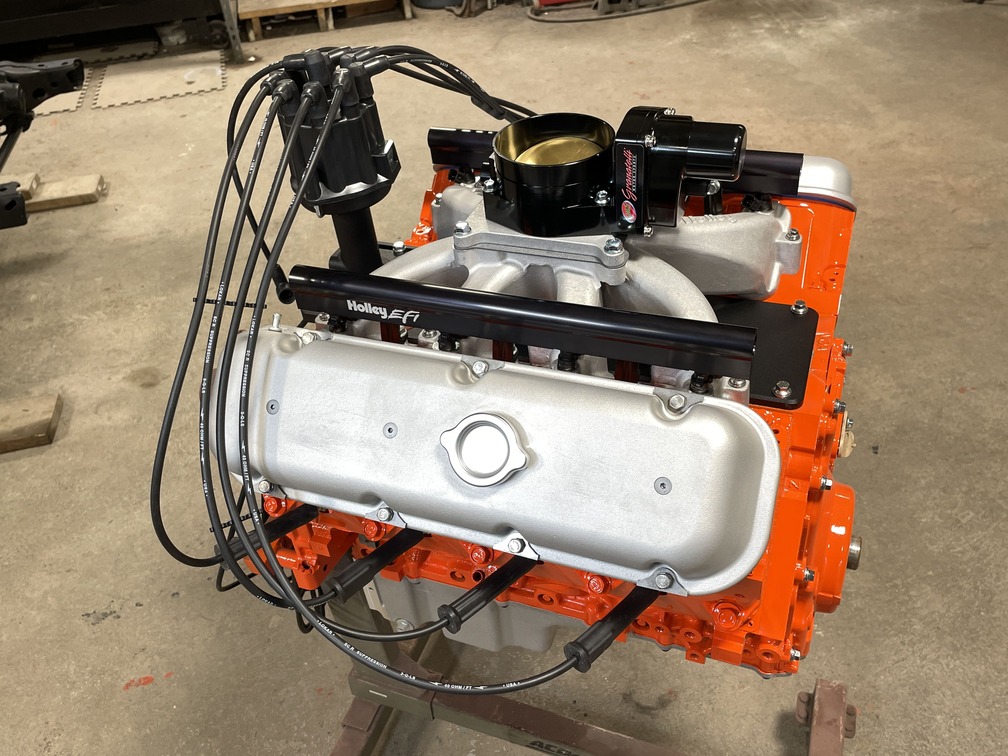
For our application, their 14-inch Classic Intake Kit was selected to bring plenty of nostalgia to the engine compartment, especially since it incorporates a Holley single-plane EFI LS intake with matching fuel rails, along with factory GM fuel injectors and GM 92mm, drive-by-wire throttle body (not included in the kit). To fuse even more of the past into the LS they offer a selection of retro valve covers, including a small-block finned aluminum version, classic 409ci style, and even a big-block Chevy valve cover, which was our choice for this application. Each set is perfectly matched to the LS as a direct fit without the need of spacers while also incorporating a ported PCV fitting/vacuum port and oil splash baffle in one valve cover. One of the coolest parts offered from LS Classic Series is their exclusive 40-ohm per foot LS Distributor and Plug Wire kit, which brings the look of a traditional distributor to your swapped LS with plug wires routed through the base of the hollow-cast aluminum distributor body. This allows for remotely mounting ignition coils using their LS3 coil relocation brackets. Finally, we added in their Gen IV Breather Valley Plate to complete the fresh new look.
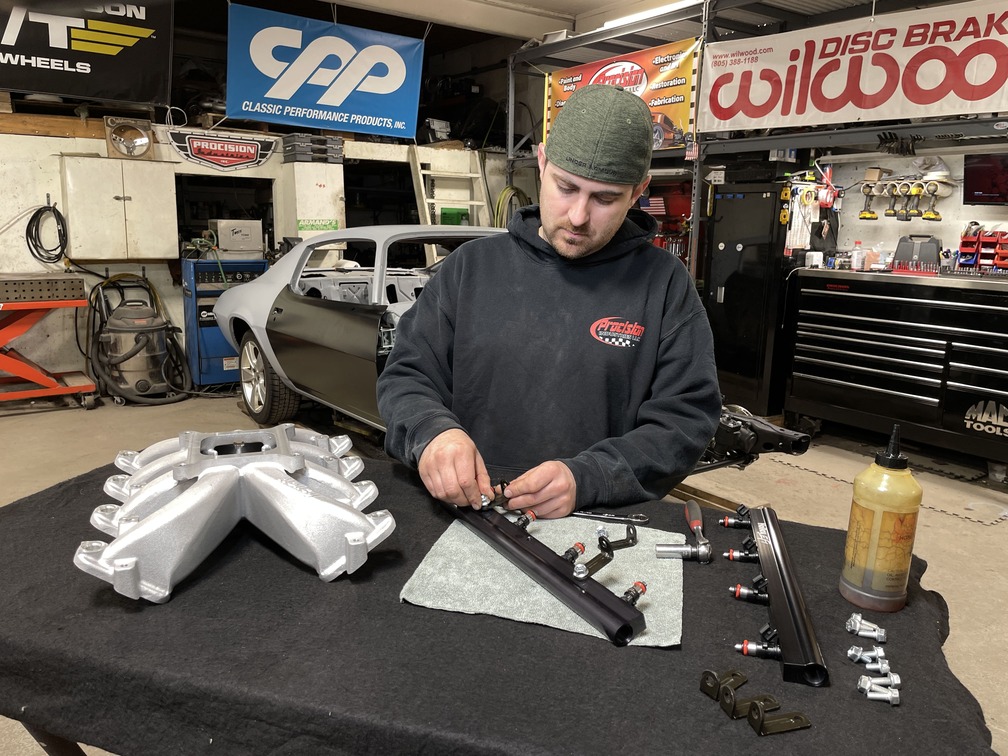
The inside of the fuel injector ports on the Holley Single Plane EFI LS intake were treated to Aeroquip Hose Assembly lube as were the orange O-rings on the injectors prior to being set in place. The mounting brackets were then secured to the intake with the provided hardware.
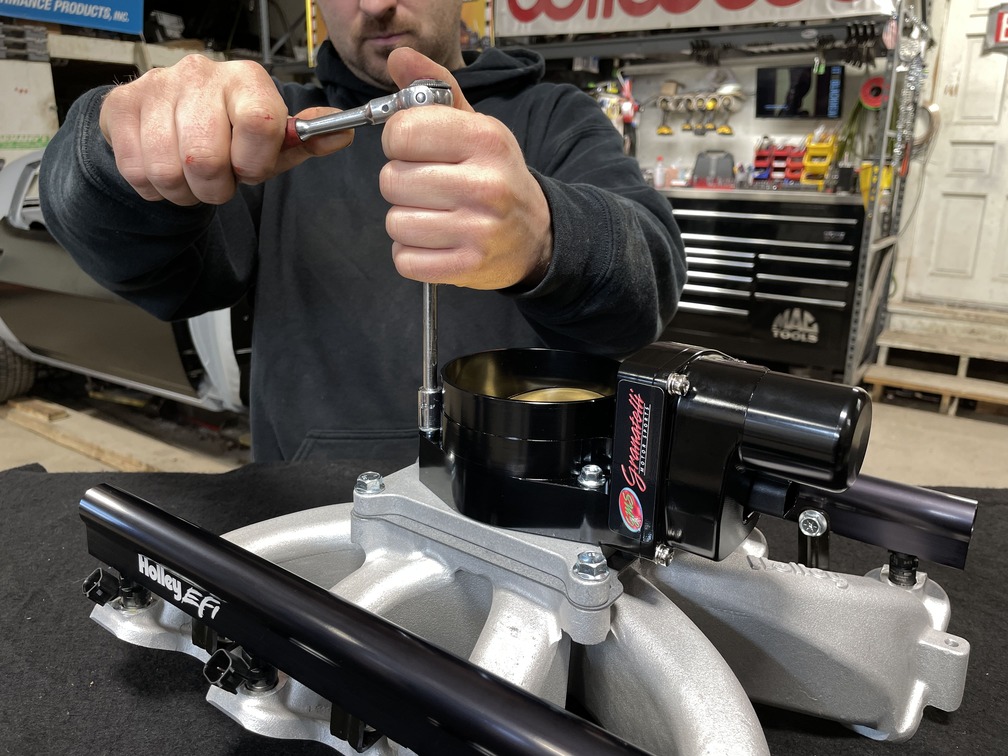
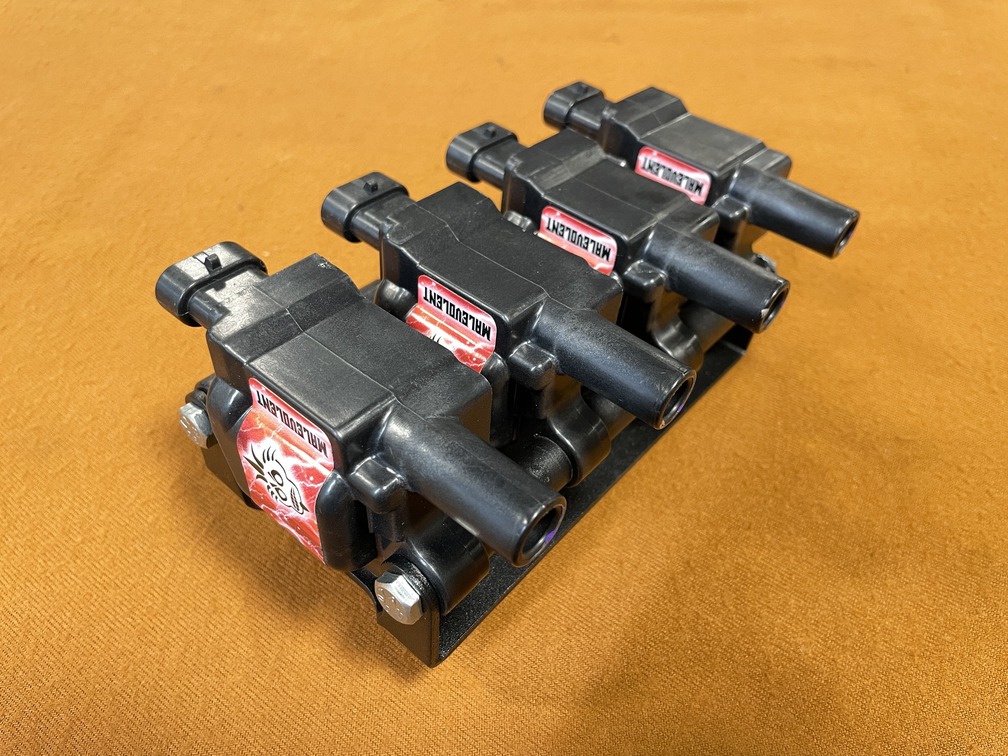
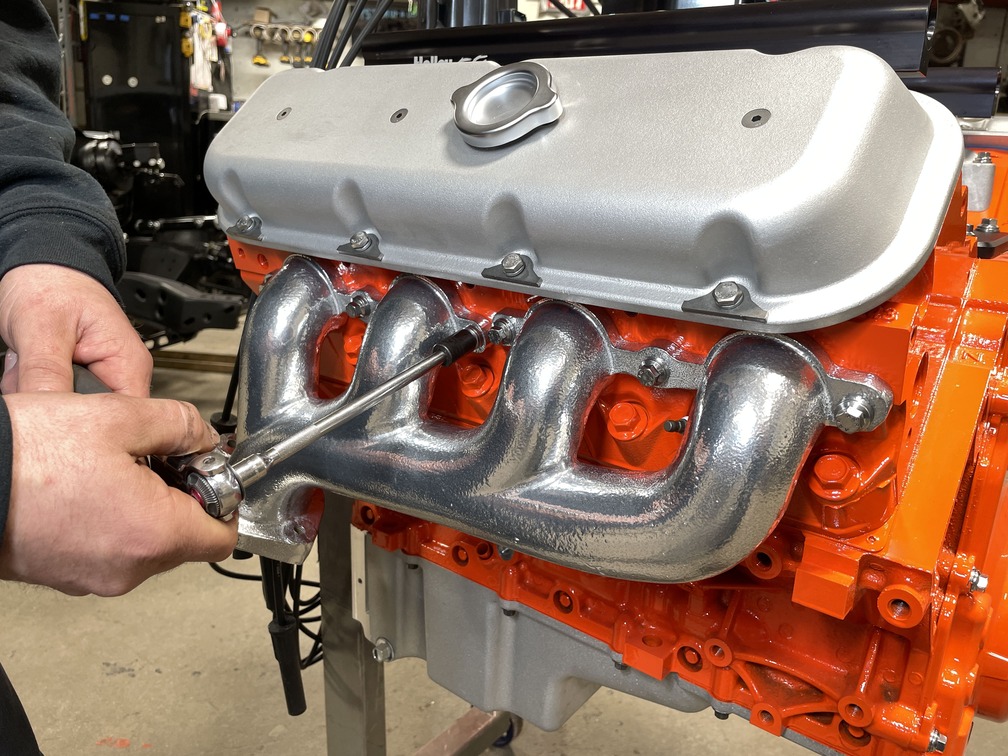
Wanting to give the LS even more bite, it was obvious we needed to focus on increased airflow, ignition, and exhaust. To handle the first two, we contacted Granatelli Motor Sports whose 6061-T6 billet aluminum, 103mm throttle bodies offer a significant increase in airflow over a standard GM 92mm unit across the rpm range, exceeding the demands required for both naturally aspirated and forced-induction applications, resulting in smoother and quicker acceleration. Increased spark means more punch, and to up the ante Granatelli Malevolent coil packs raise the bar as a direct OEM replacement with gains of up to 12 hp over stock, rated at 85,000 V. When it comes time to moving spent gases, the team at Patriot Exhaust Products has you covered with a number of header offerings. For our application, we selected their cast Tight-Tuck headers with a silver metallic ceramic coating, which were perfect for the LS conversion.
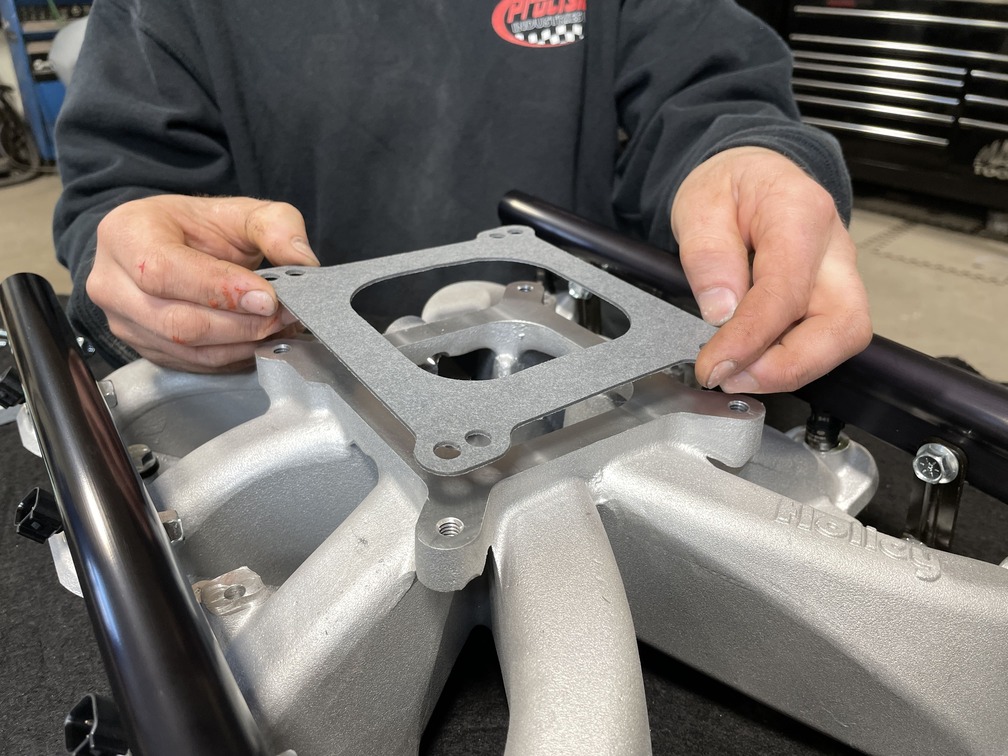
Next, the intake manifold gasket supplied with the LS Classic Series 14-inch Classic Intake kit was set in place.
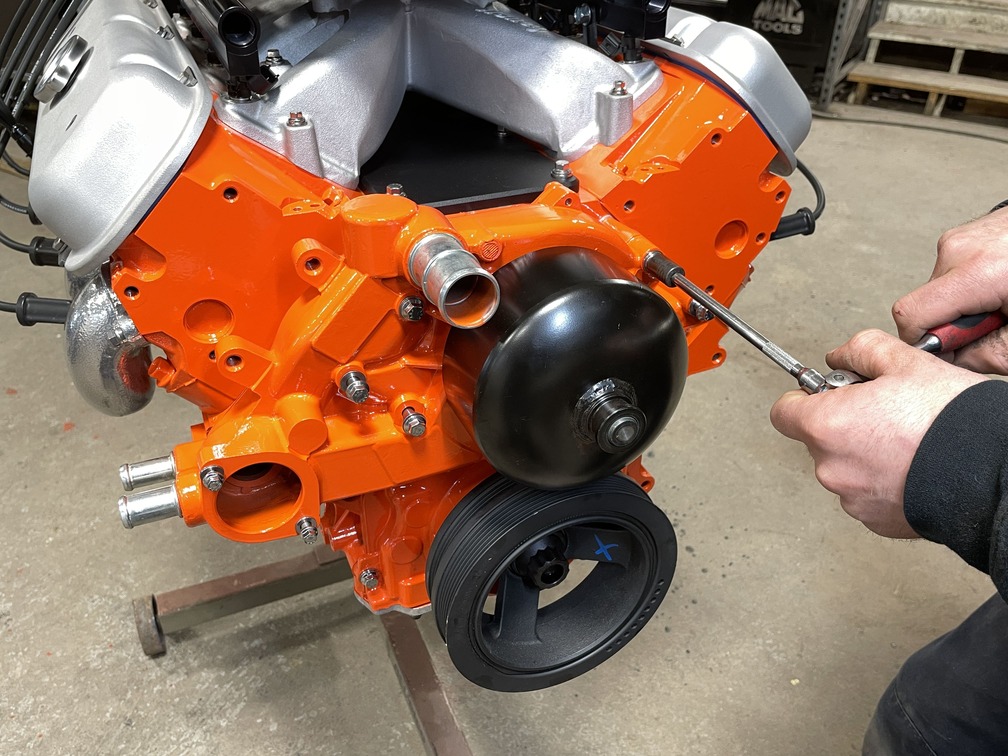
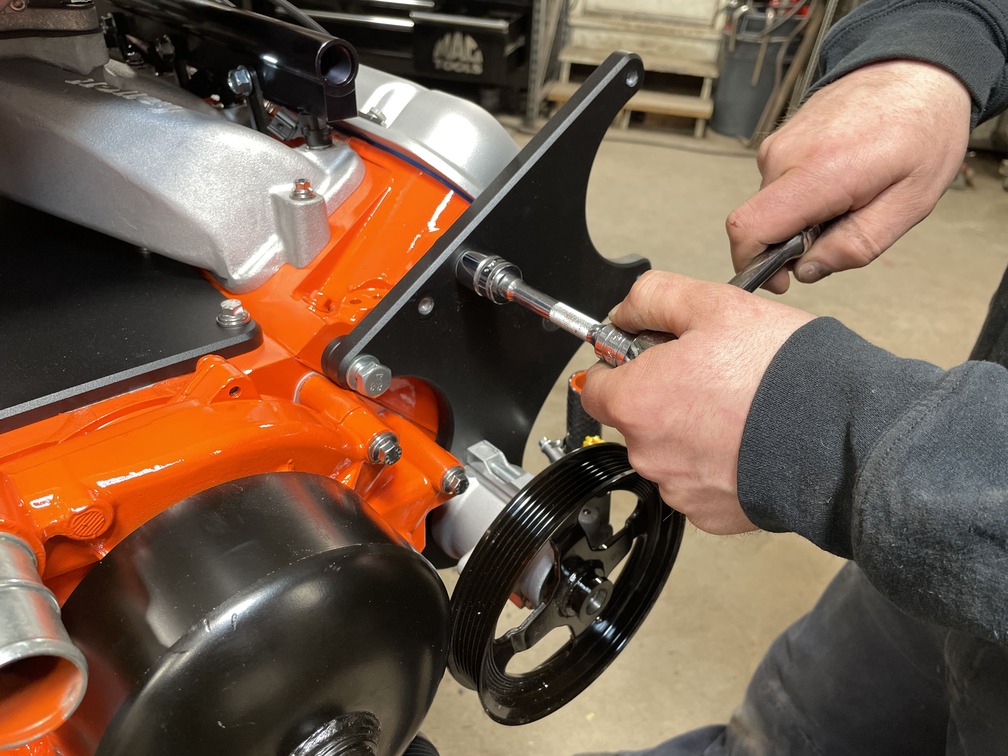
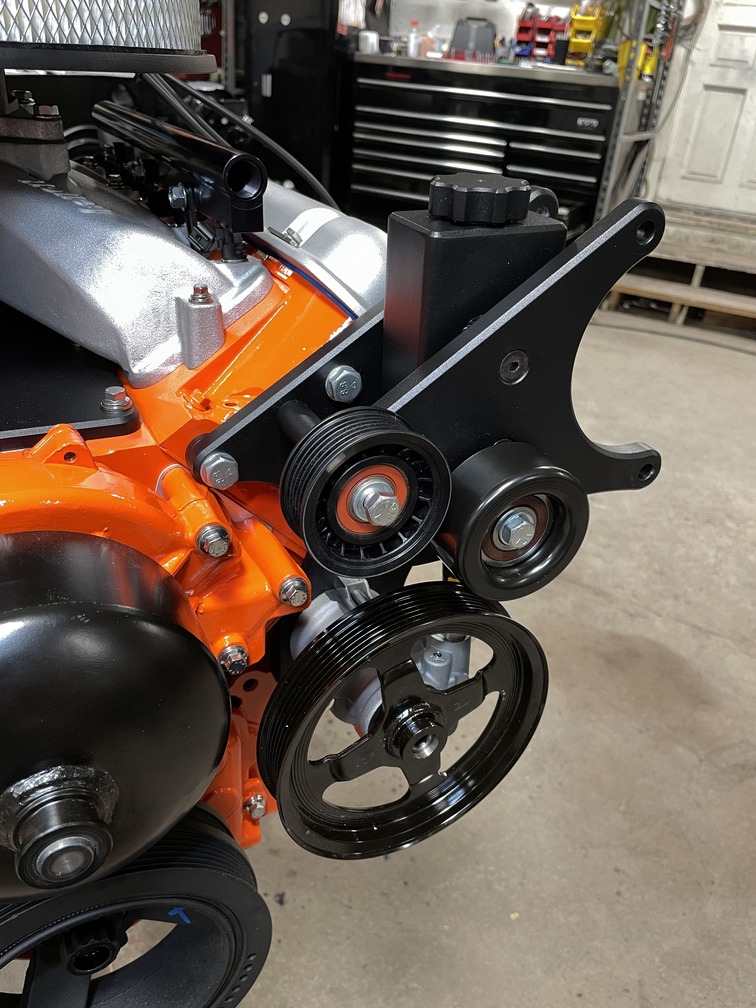
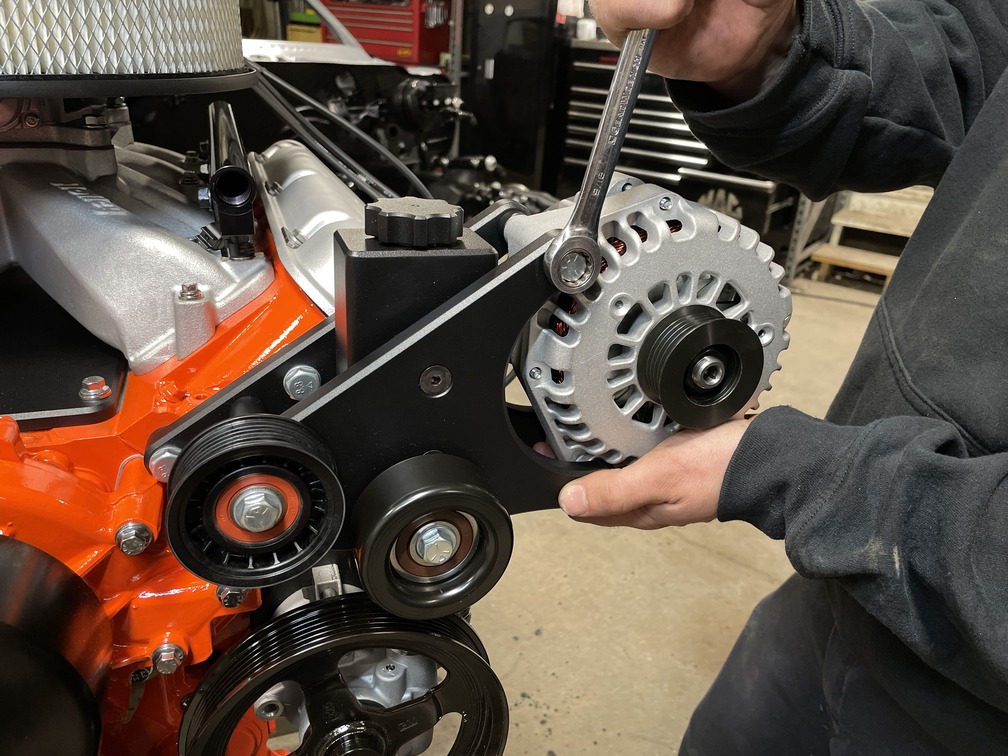
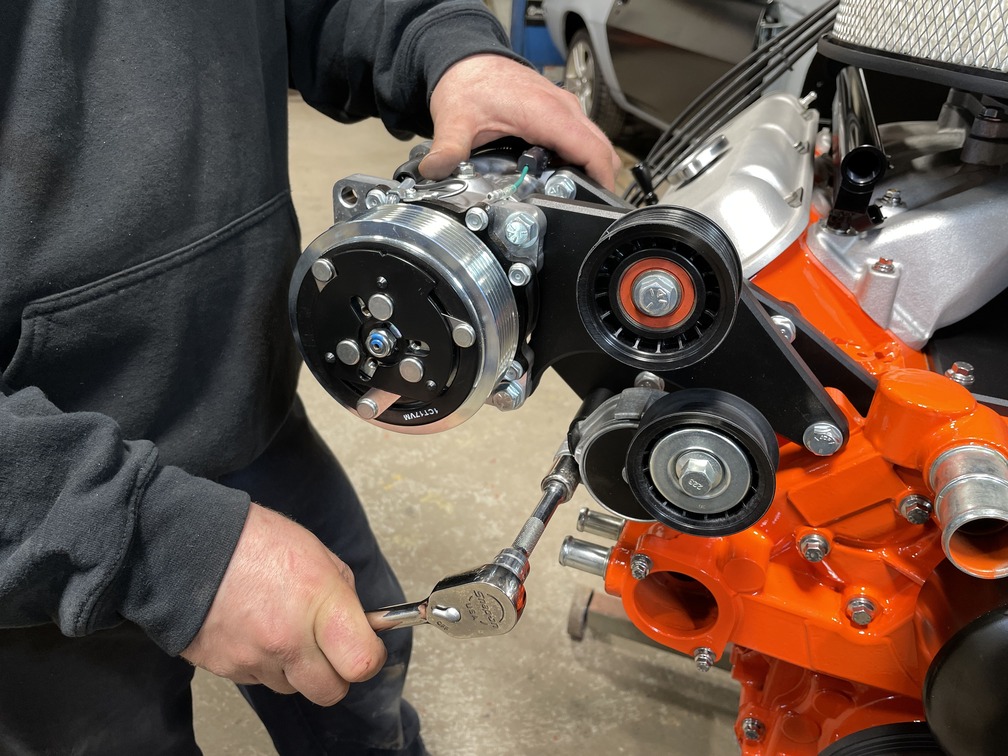
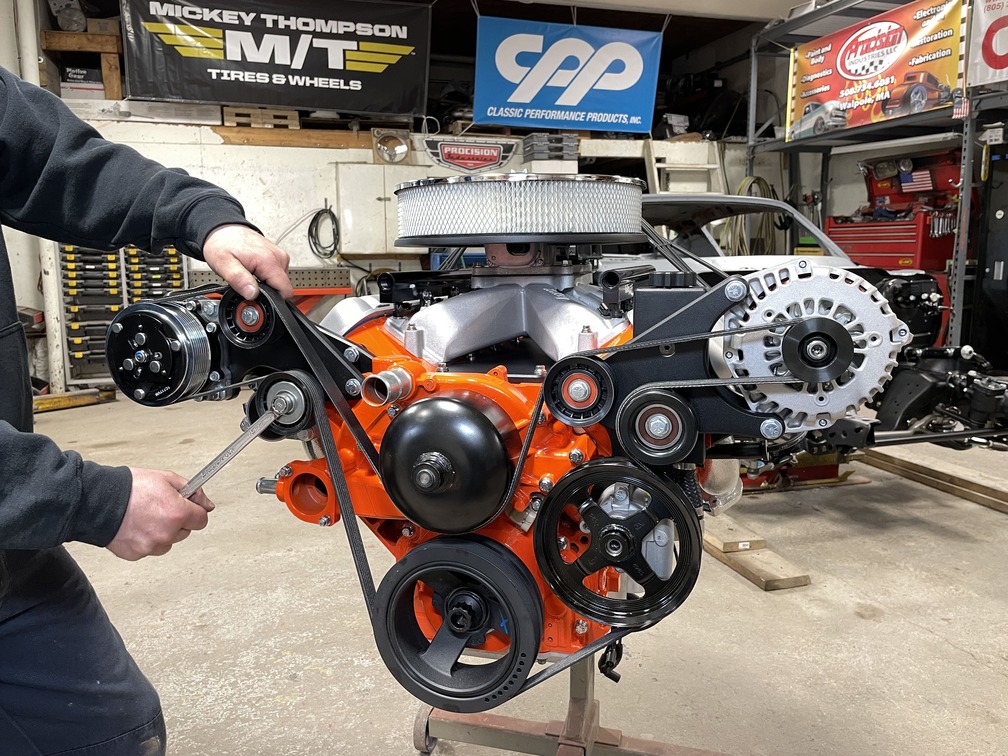
There’s nothing more important for your engine than a well-engineered accessory drive system since it acts as a nerve-center, controlling the power steering, air conditioning, and alternator. The LS Classic Series F-Body Accessory Drive System was the perfect finishing touch with its spring-loaded tensioner and single, six-rib serpentine belt driving all accessories. Included in the kit are a Sanden 709 air compressor, Powermaster 180-amp alternator, GM Type II/TC power steering pump with integrated large-capacity, remote, billet aluminum reservoir, and American-made billet aluminum brackets. Holley’s EFI Terminator X-Max system brings it all together with the latest technology for LS swaps, making it the perfect fit for this second-gen Camaro. Offering a harness with plug-and-play LS engine management, GM drive-by-wire throttle body, and transmission control, it also showcases onboard diagnostic LEDs and built-in one-bar MAP sensor.
Finally, ARP polished stainless hex-head bolts sourced through Summit Racing bring it all together with a shine like no other.
Let’s follow as O’Brien brings this Camaro plenty of hopped-up modern LS power.
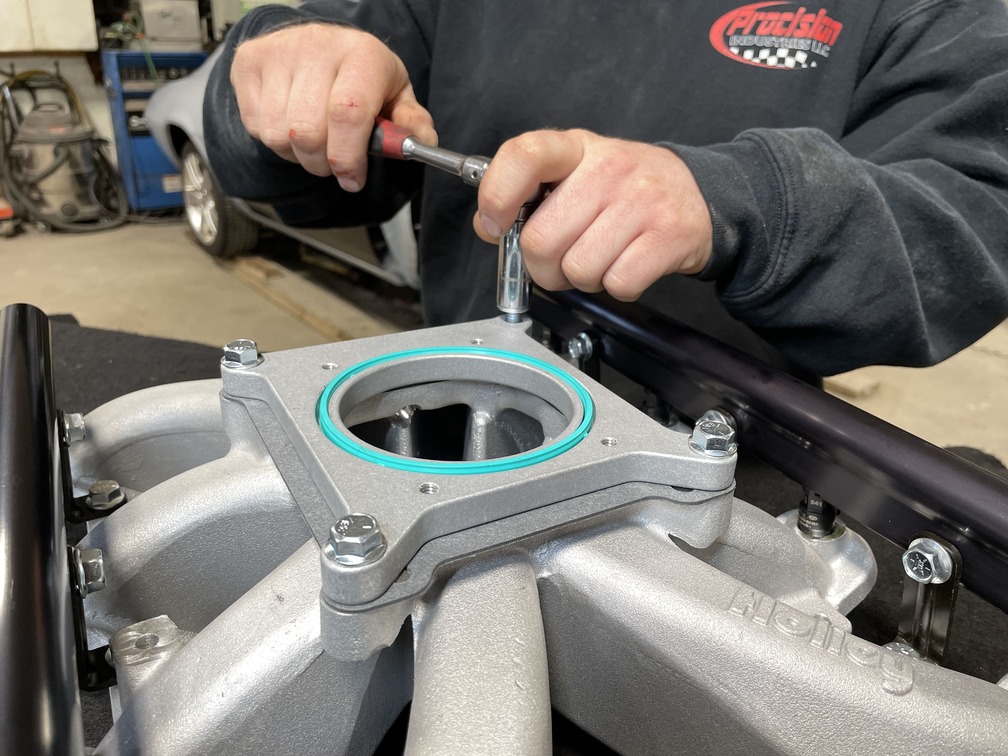
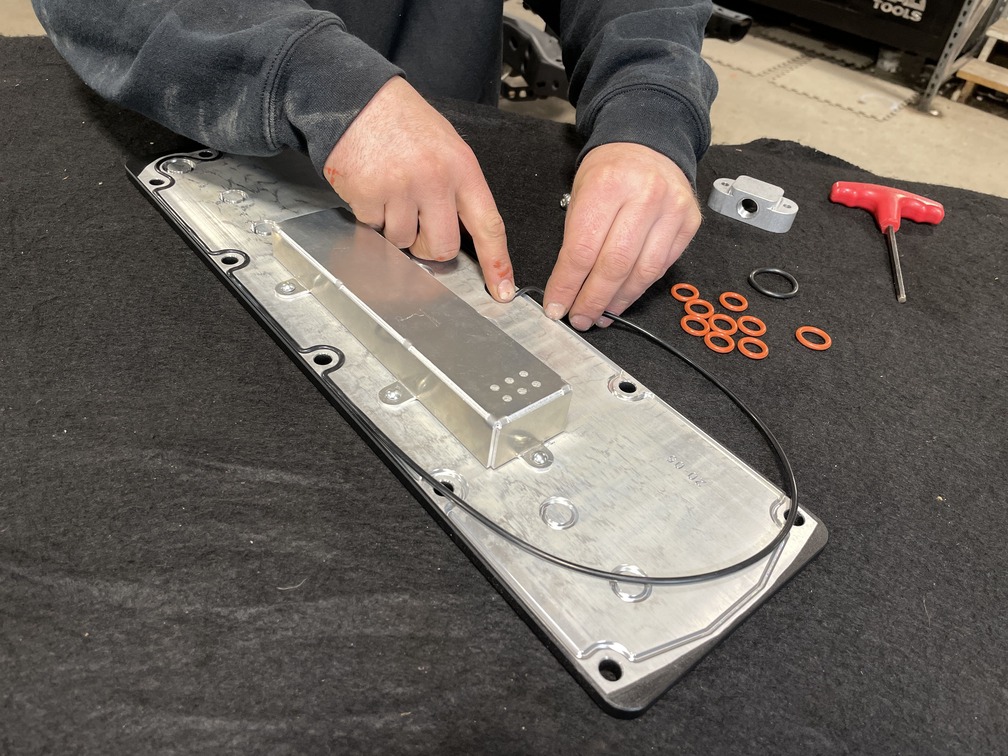
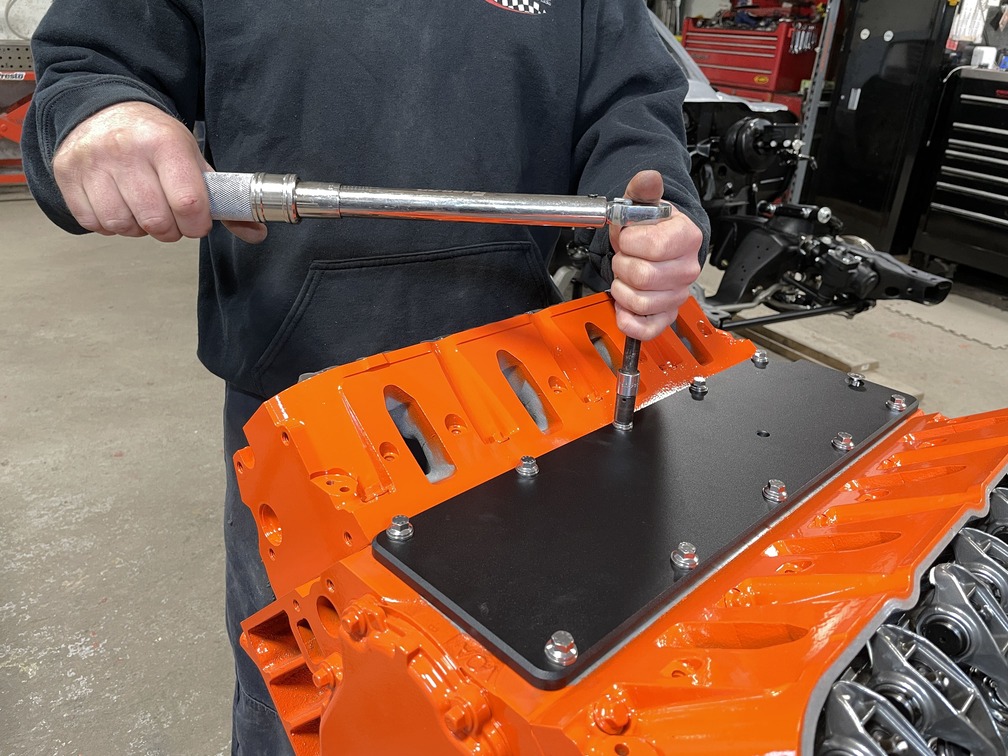
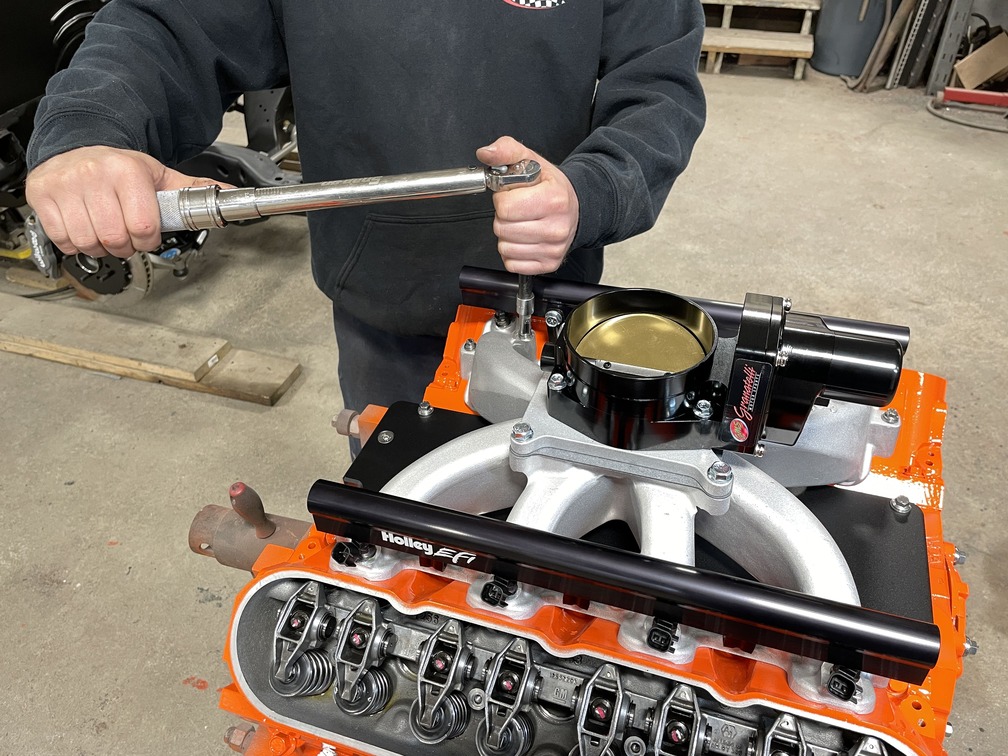
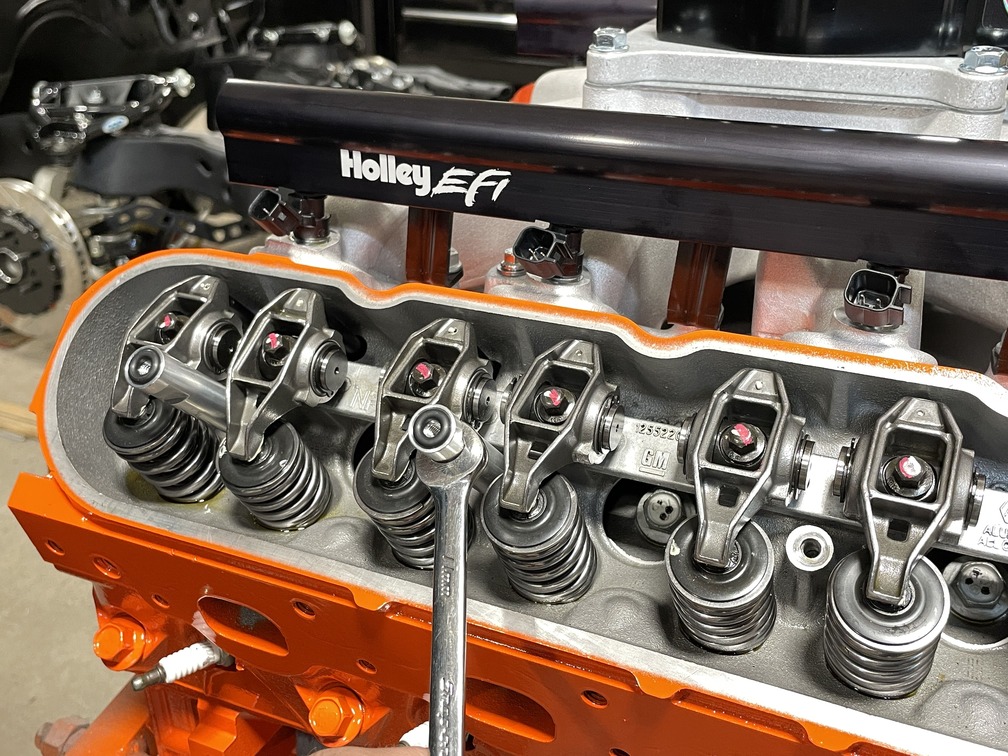
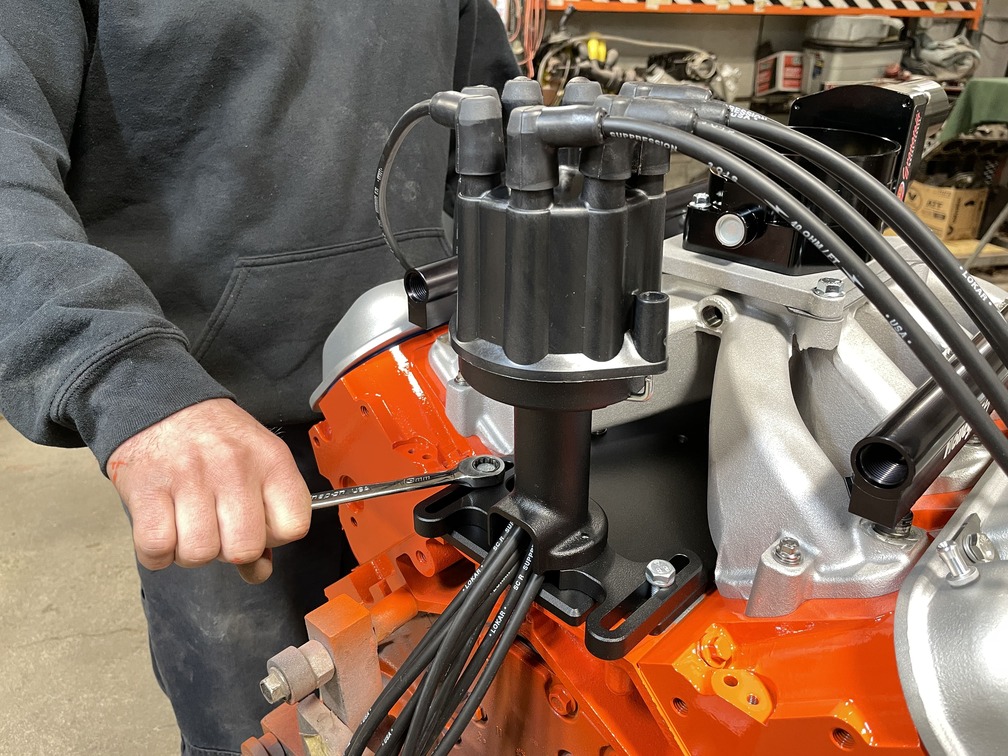
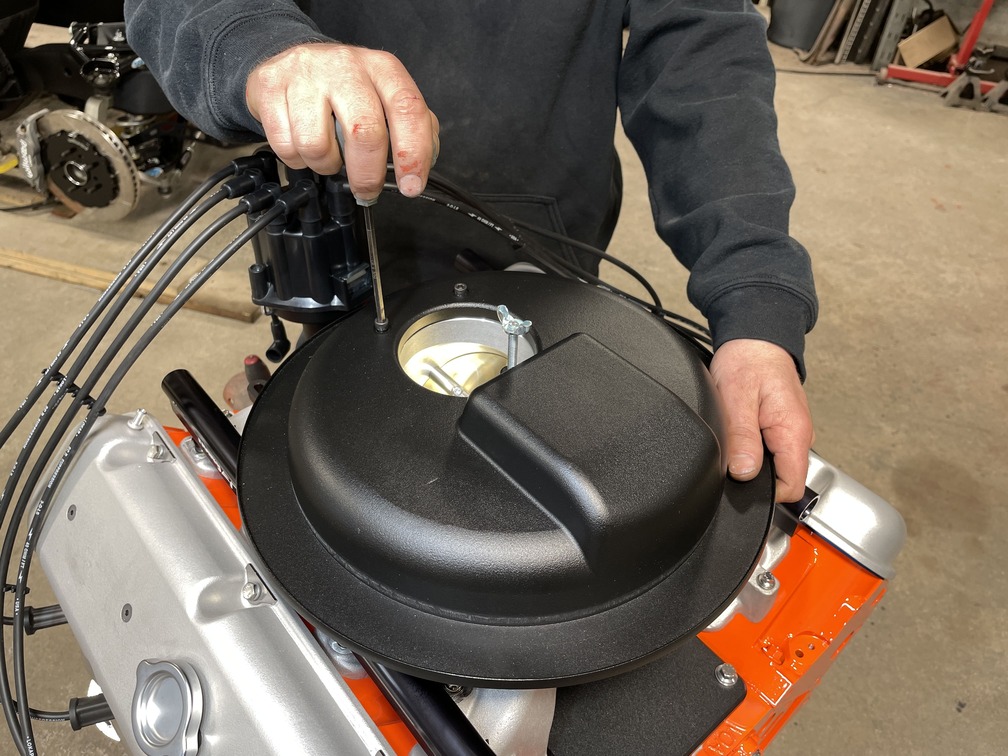
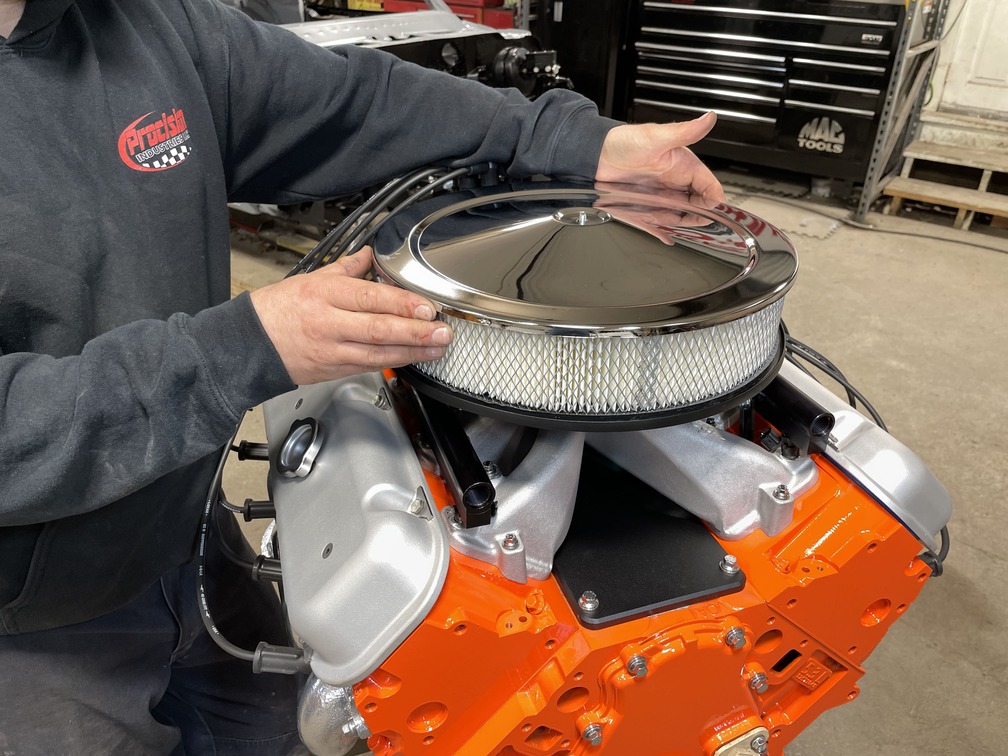
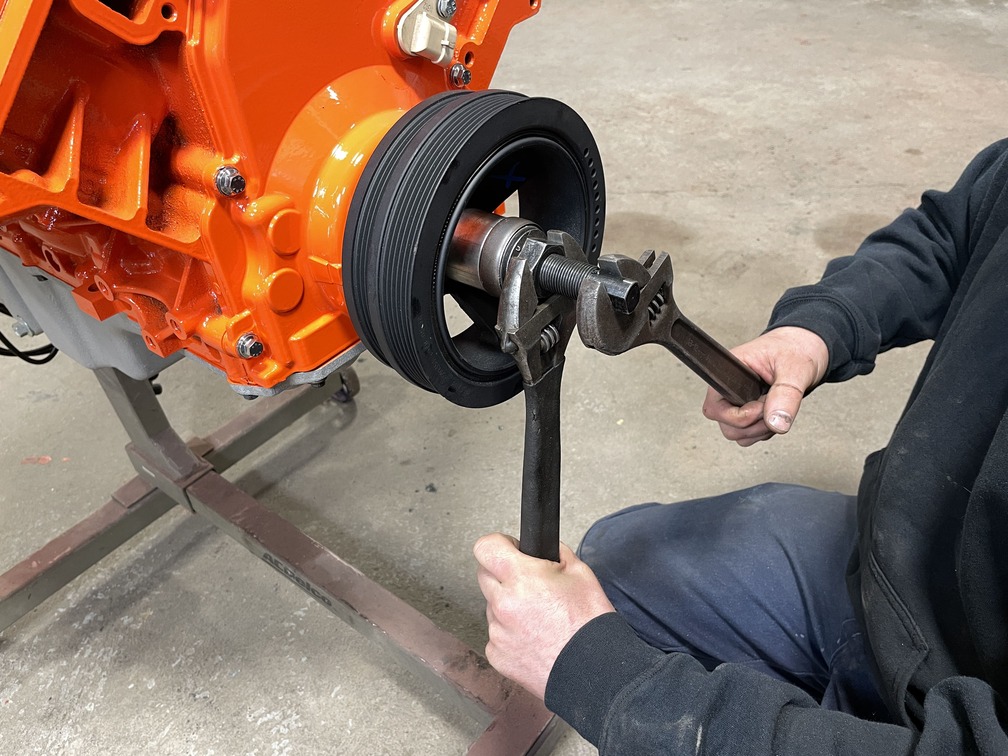
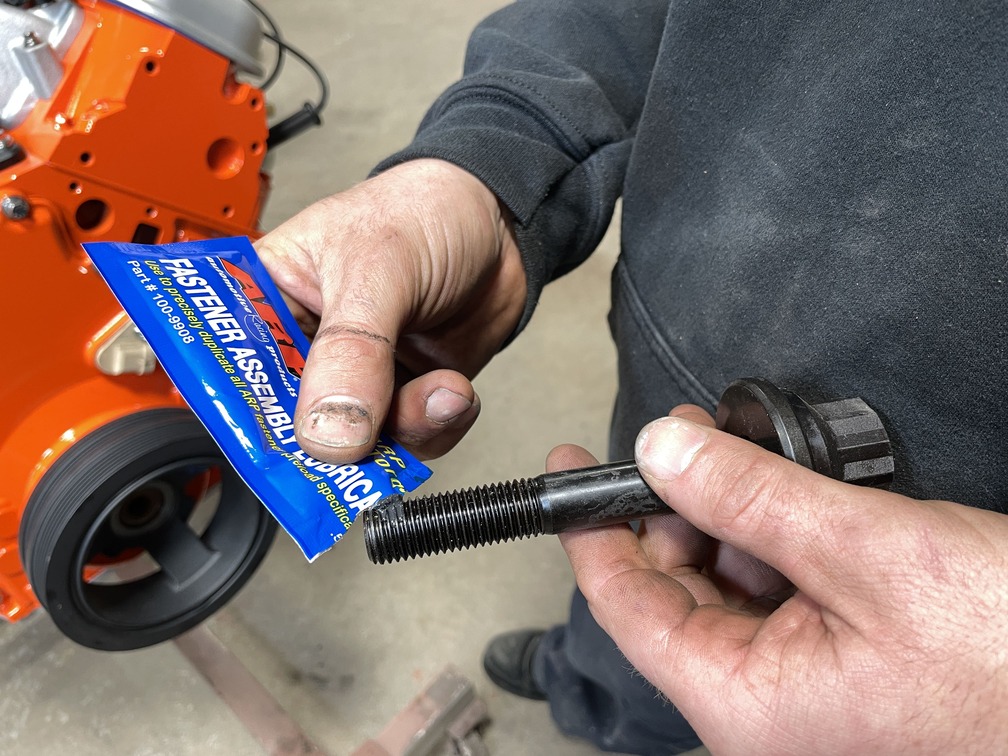
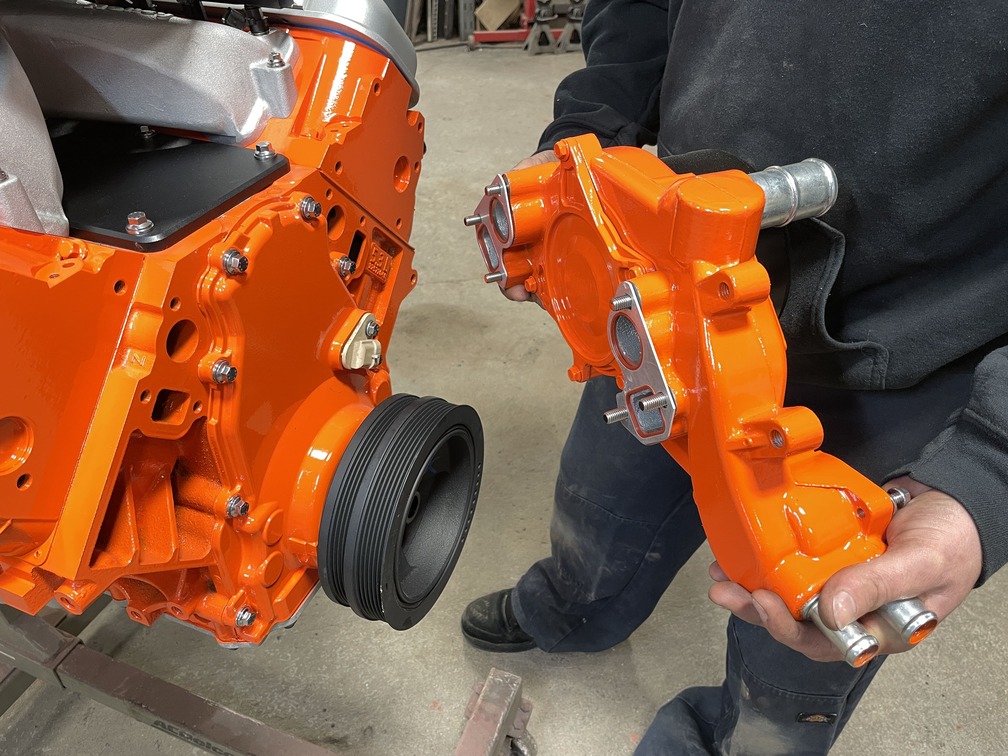
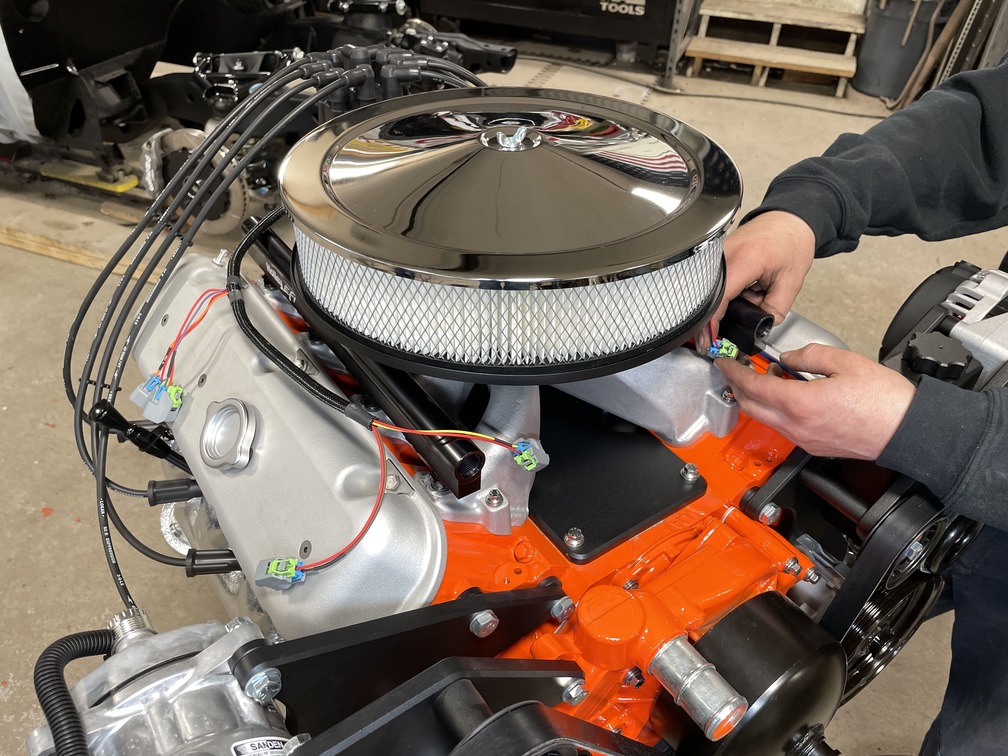
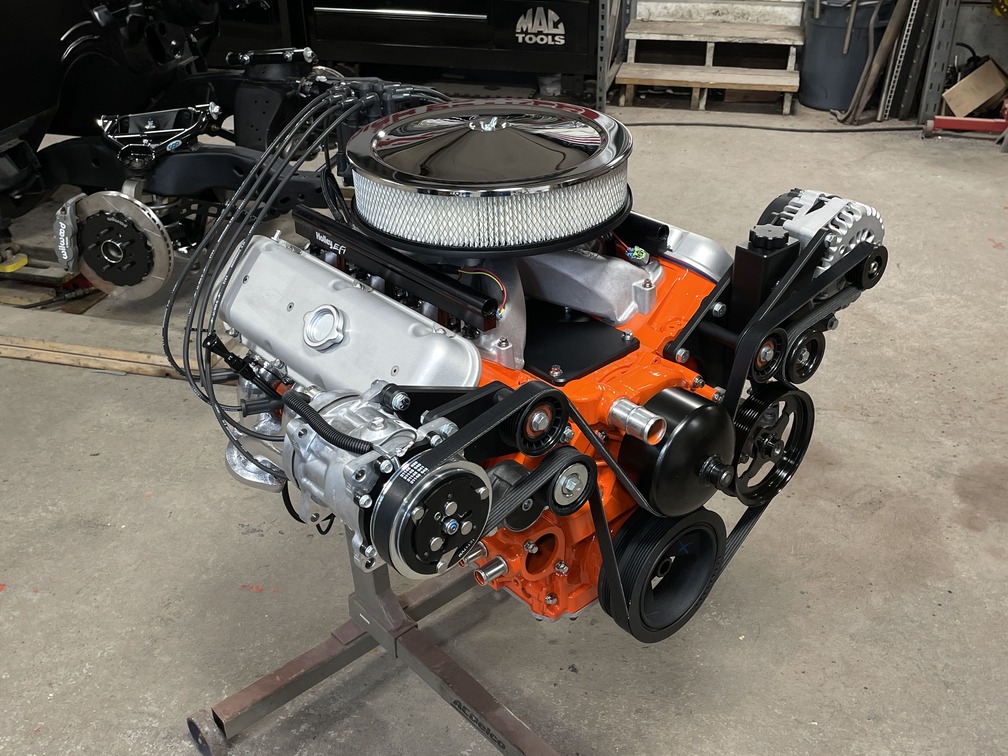
O’Brien followed by installing the throttle body adapter plate to the top of the intake with the provided hardware. Make sure the O-ring groove on the adapter is on the top side and set the provided O-ring in place. Since we are also installing the LS Classic Series simulated distributor and plug wire set, the recessed portion of the adapter plate must face forward on the intake.We decided to up the ante from a stock GM 92mm drive-by-wire throttle body with a 103mm race unit from Granatelli Motor Sports, which was precision-machined from 6061-T6 billet aluminum. The unit utilizes the standard GM six-pin connector and offers a dramatic increase in airflow across the entire rpm range.After test-fitting the intake to the engine for proper fitment, the Holley-provided O-ring cylinder head mounting flange gaskets were then secured in place to the O-ring grooves on the intake.To prepare the LS Classic Series Gen IV Breather Valley Plate for installation, O’Brien installed the supplied valley plate gasket along with the O-rings (two sizes) in the respective areas. Be sure that the valley plate sealing surface on the engine block is clean before starting this step.Precision CNC-machined from 3/8-inch billet aluminum, the valley plate was treated to ARP polished stainless hex-head hardware from Summit Racing (an update to the polished button-head bolts provided in the kit). All bolts and washers were hand-threaded in place with a special countersunk bolt at the rear of the plate. Starting in the center and working your way out in a crisscross pattern, torque all bolts to 18 lb-ft using a torque wrench.The intake was then set atop the mounting flanges, making sure the O-rings were still in the grooves and not being crushed between the flanges. Engine oil was then applied to the threads of the polished ARP hex-head bolts and threaded into place along with the washers. Starting in the center and working your way out in a crisscross pattern, first torque all bolts to 50 in-lb and follow with 106 in-lb using a torque wrench.To install the LS Classic Series big-block Chevy-style valve covers, first place the provided O-rings into the top recess of each valve cover standoff. Then thread the standoffs into the valve cover boltholes in each cylinder head. Tighten each until snug (do not over tighten).Some of the cool parts of the LS Classic Series valve covers are the original-styled load spreaders, hex-head bolts, and lock washers as well as the billet aluminum filler cap on one cover and even vintage-looking Chevrolet Tonawanda factory stickers.With OEM rubber valve cover gaskets secured in place, the covers (with a natural cast finish) were installed. Make sure to mount the cover with the PCV vent to the passenger side with the vent to the rear of the engine. Using the provided flathead bolts, torque to 9 lb-ft with a 5/32 hex bit, starting with the two center bolts and outer bolts last.For a proper vintage look, LS Classic Series’ LS Distributor and Plug Wire kit combines their exclusive extra-long plug wire set with preinstalled 90-degree coil boots, plug-in coil extension harness, and coil relocation brackets for a perfect package. The bare end of their 9-foor-long plug wires thread through the base of the hollow-cast aluminum distributor body up through the distributor cap to the spark plug boot and terminal.Here you can see the final running of the plug wires through the hollow distributor body and distributor cap prior to being finalized for installation to the rear of the engine’s LS Classic Series valley plate.After removing the two rearmost bolts from the engine valley plate, place the distributor onto the valley plate with the plug wire opening at the bottom facing rearward and the bolt slots in the housing aligned with the valley plate boltholes. Note the adjustable slot design base for placement depending on style of air cleaner used. Use the supplied hex bolts with flat washers to secure the unit in place and torque to 18 lb-ft.With the distributor housing in place and all wires routed, the LS definitely captures the look of an injected big-block Chevy V-8.This is truly a clean alternative to mounting your ignition coils thanks to the LS Classic Series LS3 coil relocation brackets. The laser-cut steel brackets were perfectly matched to a set of Granatelli Motor Sports Malevolent coil packs rated at 85,000 V, nearly twice the voltage of the competition.Patriot’s Tight-Tuck cast headers were the perfect solution for the Camaro’s engine compartment, wearing a silver ceramic metallic coating. They were installed using fresh GM exhaust manifold gaskets and polished stainless ARP hex-head bolts and washers from Summit Racing, torqued to factory specs.Next, we modified the LS Classic Series throttle body clamp to accommodate the larger Granatelli Motor Sports 103mm throttle body and continued by installing it with the recess on top. Follow by securing the air cleaner base with the supplied socket-head bolts (four) to the throttle body clamp.The filter element was then placed onto the base and crowned with the chrome 14-inch air cleaner lid secured in place by a wing nut.To prepare for the installation of the LS Classic Series Accessory Drive System, we got started with one of their new harmonic balancers. Here, the balancer was seated in place using an installation tool and torqued to 240 lb-ft.The threads and washer of the 12-point, ARP Harmonic Balancer Bolt were coated with ARP’s exclusive fastener assembly lube and threaded into place.O’Brien prepped and painted the fresh aluminum water pump from LS Classic Series in Chevy orange. He followed with all related gaskets in place for installation.Using ARP polished stainless hex-head bolts, the water pump was torqued into place at 11 lb-ft on the first pass and 22 lb-ft on the second and final pass.Installing the LS Classic Series Accessory Drive System was a snap, starting with the alternator and power steering rear bracket and power steering pump using the supplied hardware, including hex-head bolts, flat-head bolts, washers, and spacers.Next, the alternator and power steering front bracket, along with the power steering reservoir, smooth steel pulley, and plastic grooved pulled, were set in place with a combination of hex-head bolts, flat-head bolts, washers, and spacers.The supplied Powermaster Performance 180-amp alternator was set in place with hex-head bolts, washers, and spacers. Be sure all bolts have been snugly tightened to spec.The rear A/C bracket was then mounted to the passenger-side cylinder head with the supplied hex-head bolts, washers, and spacers followed by installing the A/C compressor to the rear bracket. The front A/C bracket, spring-loaded belt tensioner assembly, and tensioner pulley were then all tightened into place.To complete the installation, the accessory drive six-rib serpentine belt was set in place.For engine management, a Holley EFI Terminator X-Max system was incorporated. Here, O’Brien got started by installing the fuel injector harnesses and will continue with the installation once the driveline is installed into the car.The completed 5.3L LS packs plenty of cutting-edge technology and tire-searing performance, while also paying homage to Chevrolet history harkening back to the mighty big-blocks that used to rule the streets, and to us that’s as cool as it gets!
Sources:
Automotive Racing Products (ARP)
(805) 339-2200 arp-bolts.com
We use cookies to ensure that we give you the best experience on our website. If you continue to use this site we will assume that you are happy with it.