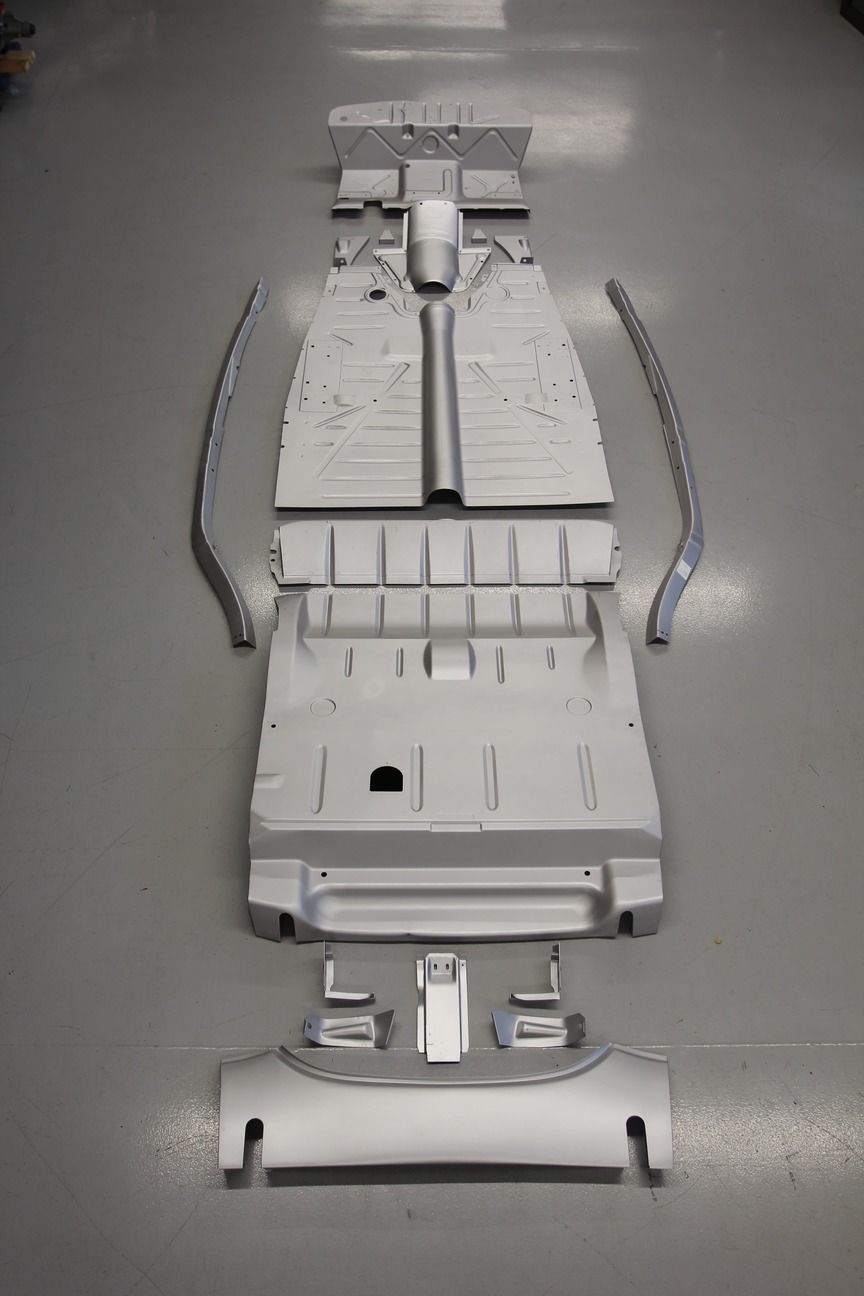
Here are the couple sheetmetal components from United Pacific that we’ll be installing to repair our 1940 coupe. From the top we’ll be replacing the firewall, trans cover, main floorpan, sub rails, middle floor, trunk floor, and under decklid panel. One deviation we’ll be making relates to the middle and trunk floor area. United Pacific’s floorpan is designed to replace what Ford called their five-window coupe. This model came with a bench seat with a tilt-up back that allowed access to a compartment underneath a package tray between the seat and the trunk. Our body is what Ford referred to as a Business coupe, which featured a split bench seat up front and rear, fold-down jump seats. This rear seat design has garnered this body style the nickname “Opera Coupe”, though Ford never referred to it by that name. Likewise, the coupe with the package tray is commonly referred to as a “Business Coupe”, which is technically incorrect, although it makes more sense. The difference in the floorpans allows for additional foot room for the jump-seated passengers in the Opera-ahem, Business Coupe.
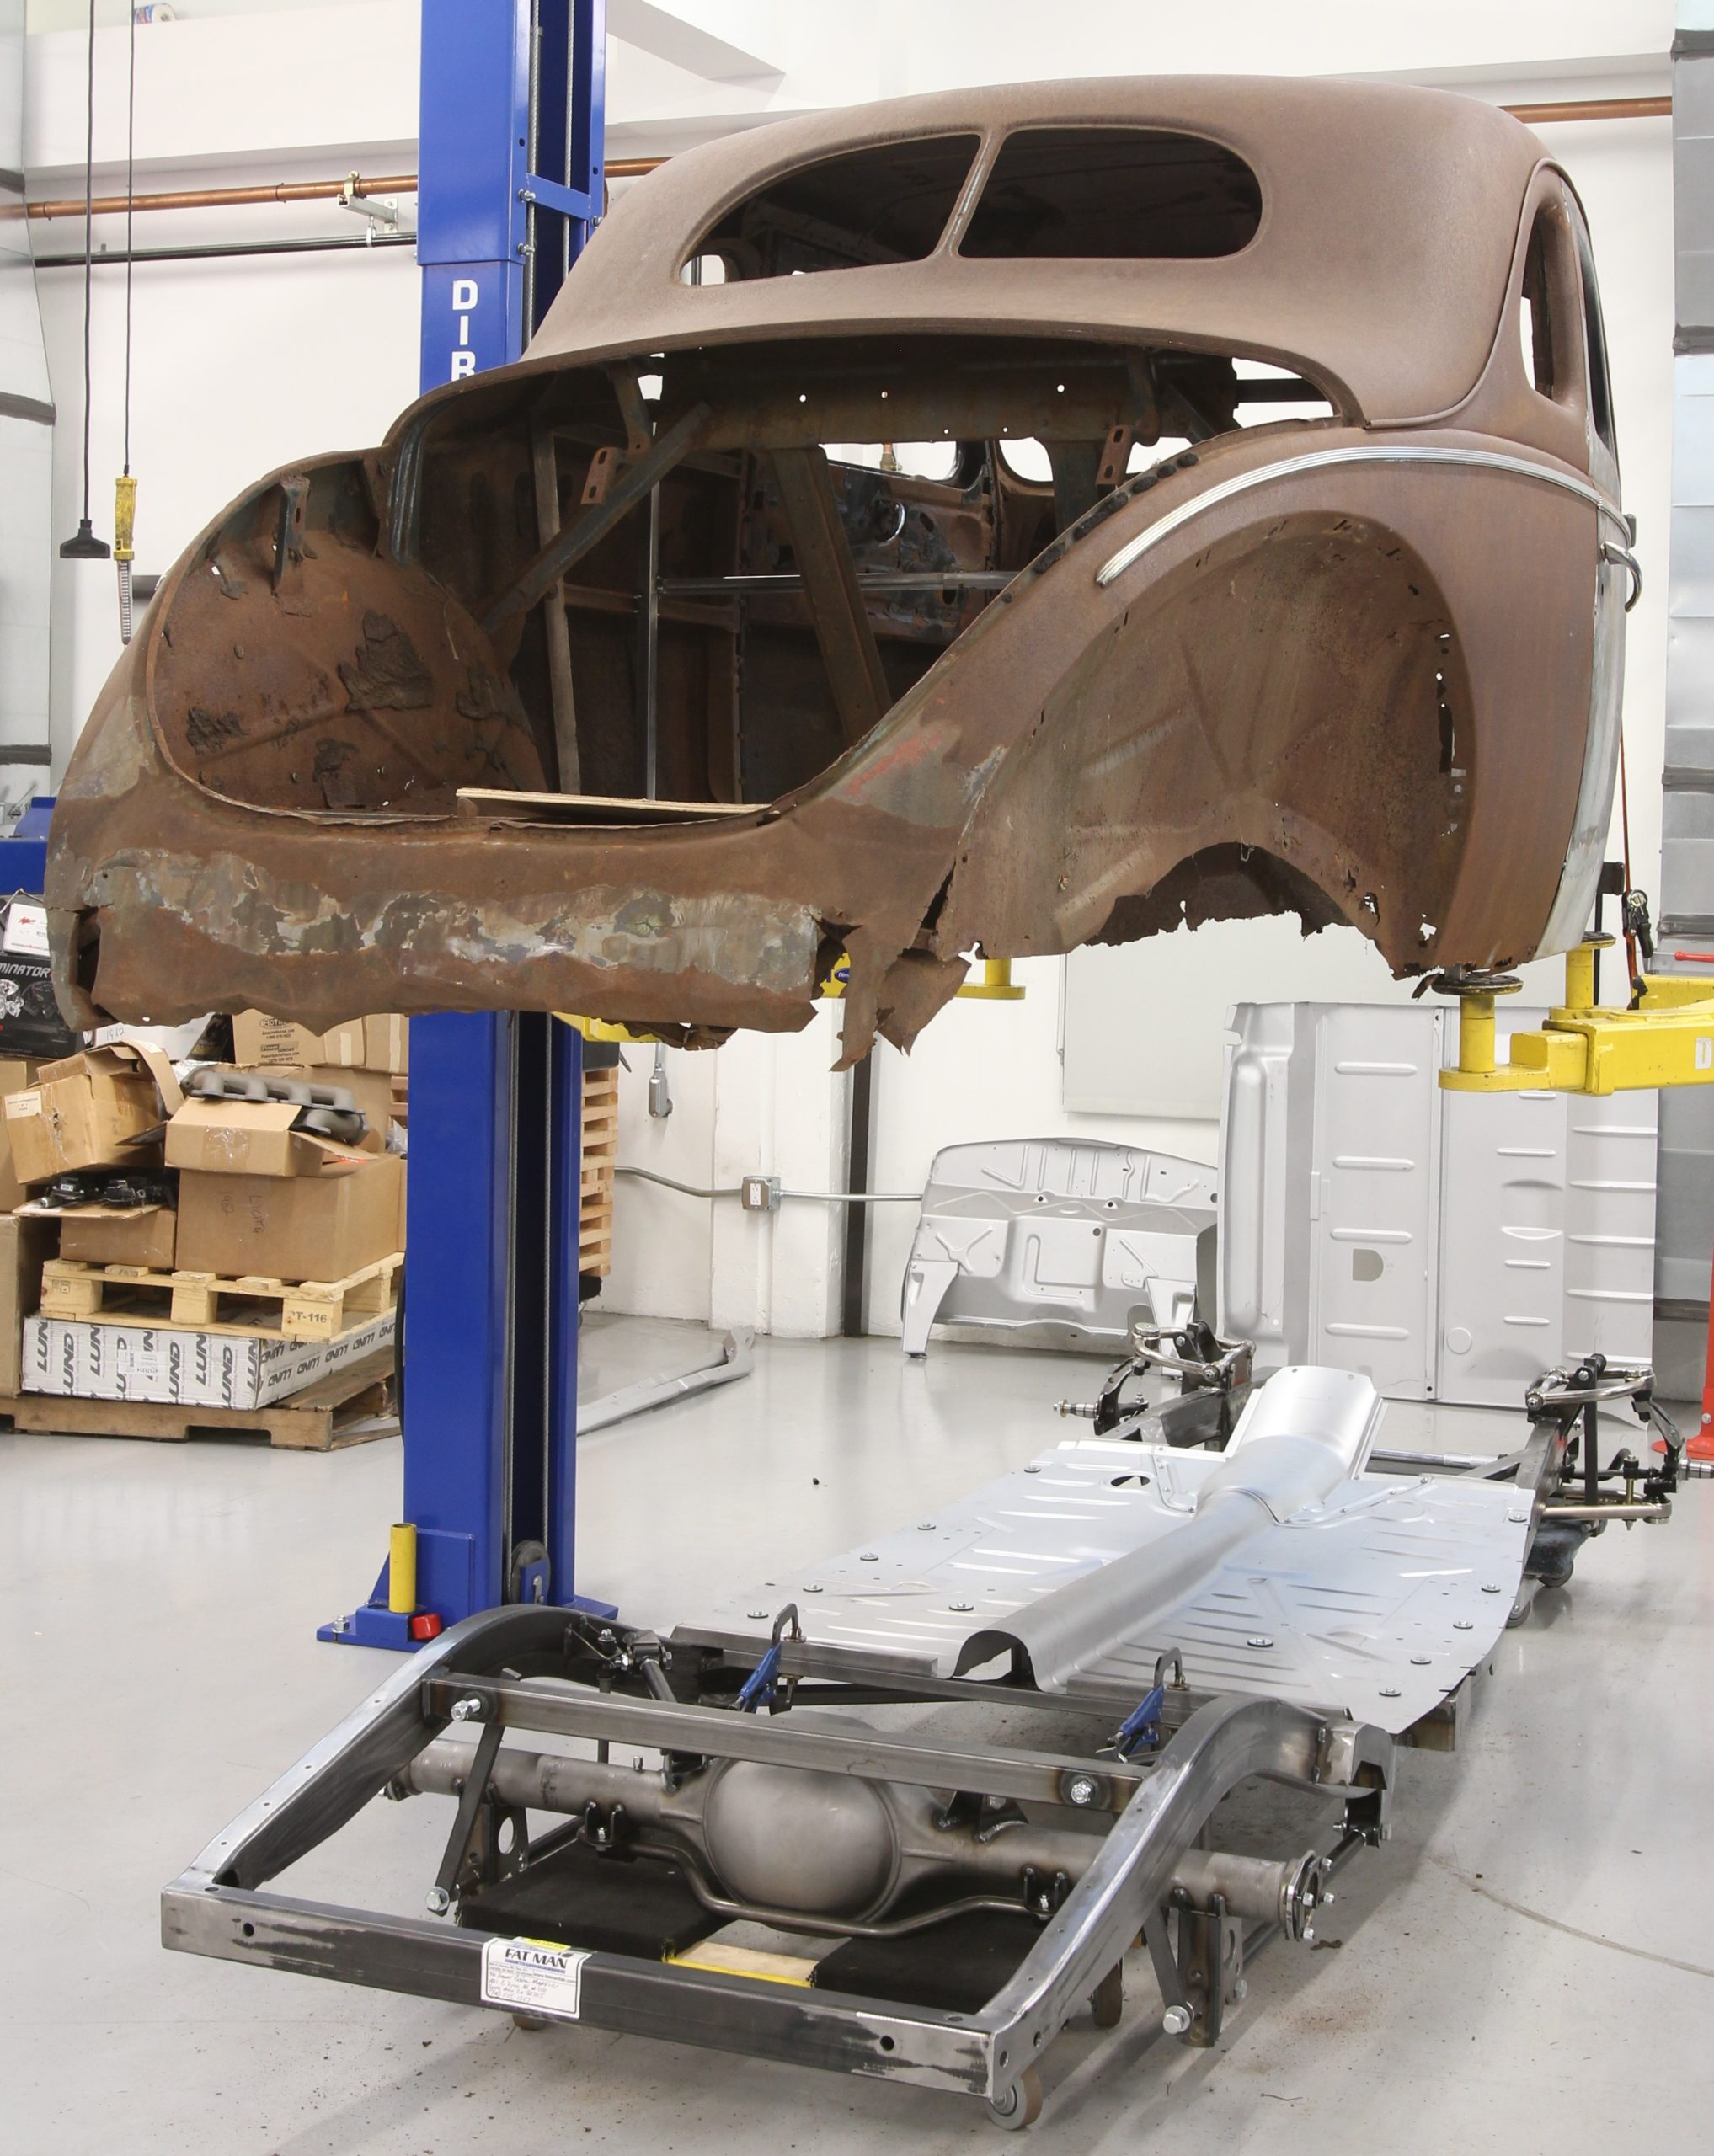
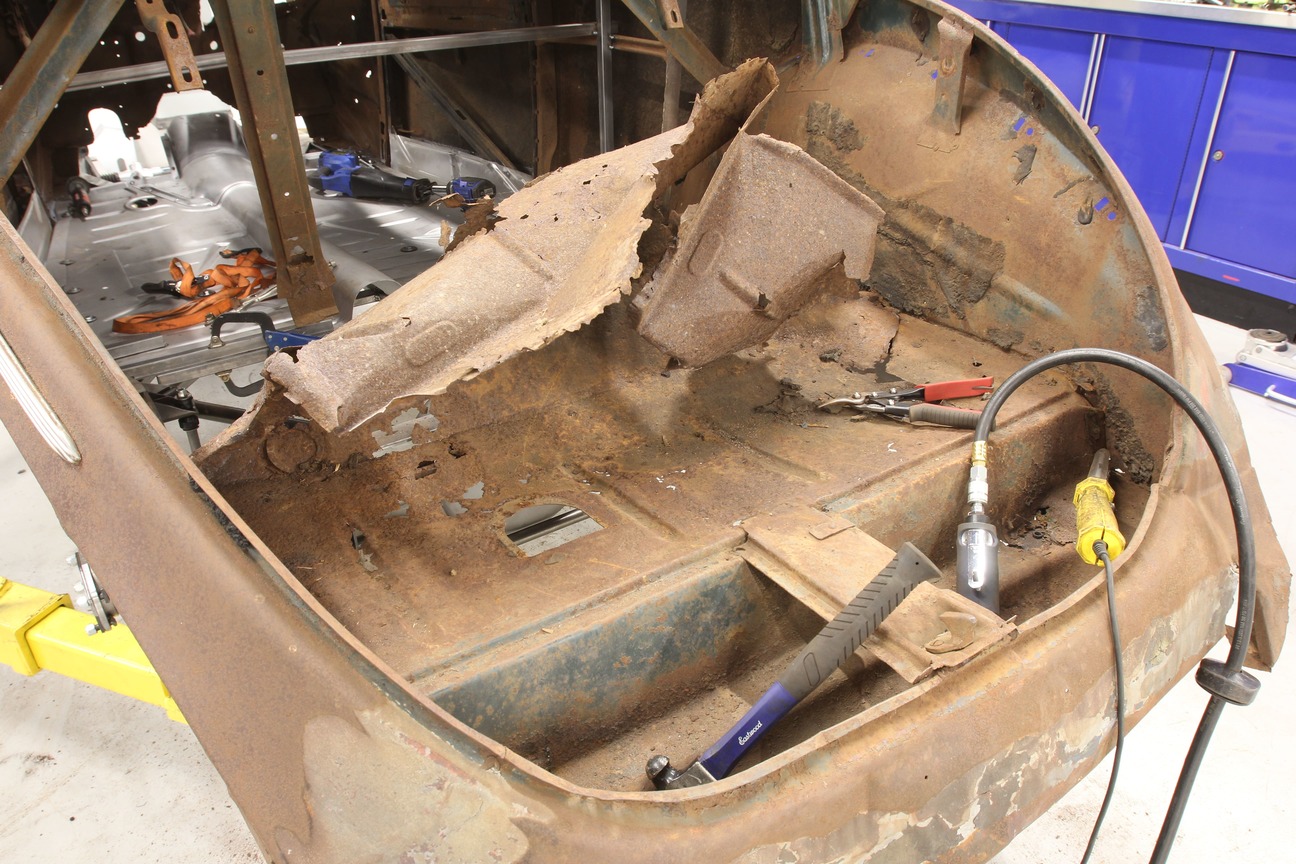
Let’s face it, we’ve come to the time in hot rodding’s long history where it’s very rare to find an unmolested early Ford body that doesn’t need a ton of sheetmetal repair work. Replacing a 1939-1940 Ford rusted-out floorpan is a modern-day evil. Sure, there’s the random “barn find” that surfaces from time-to-time, but the majority of pre-war cars that haven’t seen the road in a half century or more are gonna need a lot of TLC. My 1940 Ford coupe is exactly that.
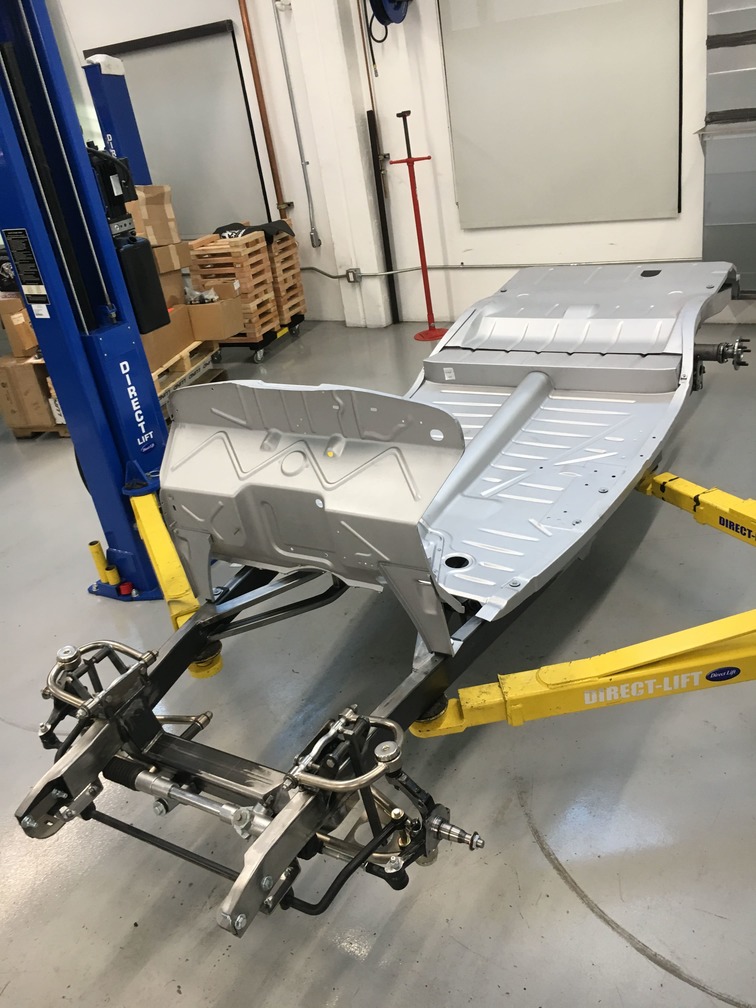
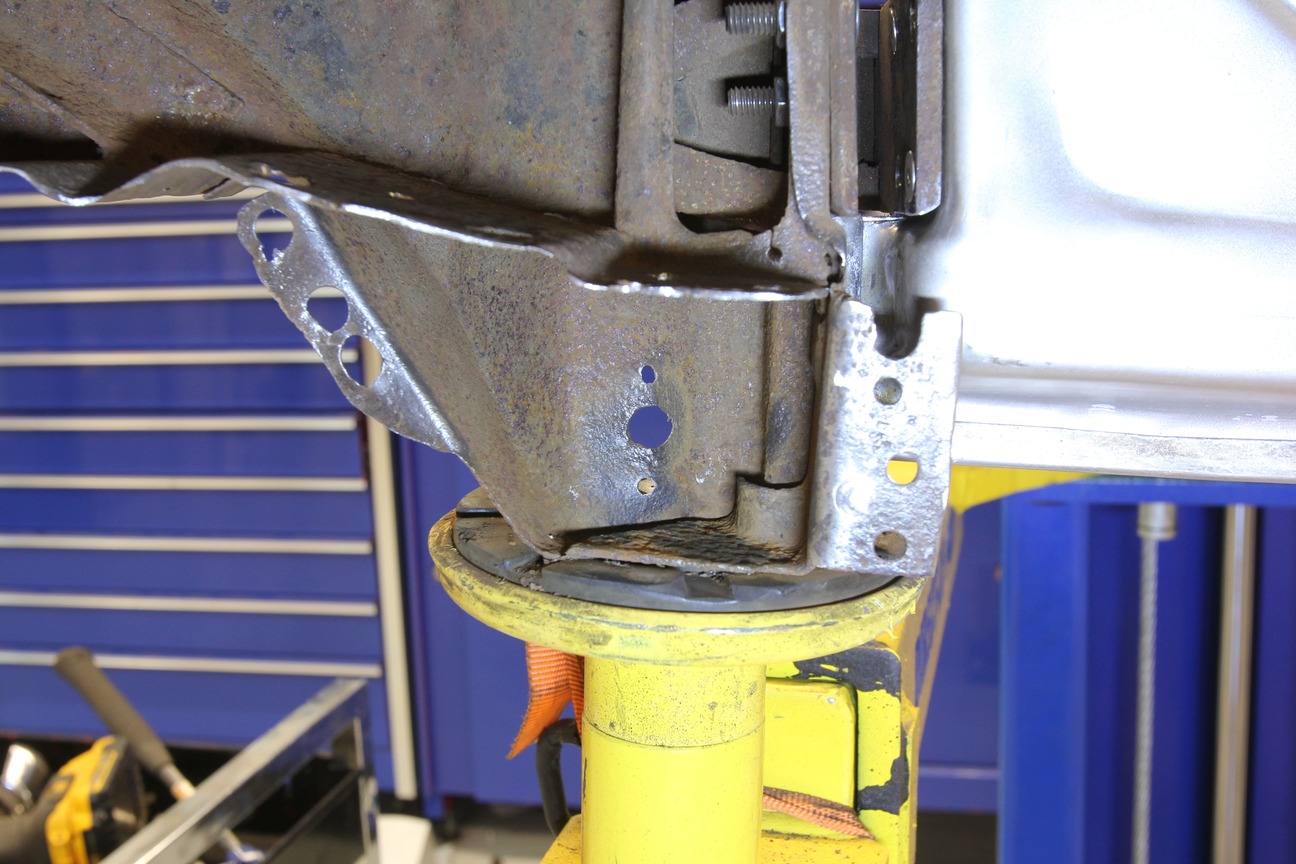
To properly attach the new floorpan to our Fatman chassis, we’ll be using a complete body mounting kit.One of the benefits of using a new chassis is the fact that everybody mounting hole is precisely located, drilled, and tapped, giving us a solid foundation for mounting the new sheetmetal.
Purchased on a lark after my dad forwarded me a link to an online auction, my interest was piqued more out of curiosity than of acquisition. After noticing, on the last day of the auction, that bidding had stalled back on the second day, I thought, “I’ll bid it low. What’s the worst thing that could happen?” Well, the result may not have been the worst thing, but it wasn’t what I was expecting. I won the auction and now needed to get said hunk o’ rust from Wisconsin to California and STAT as winter was coming quick.
That’s not to say that there isn’t a touch of variance once the new floorpan is in place. With the fasteners finger tight, the sheetmetal can be moved ever-so-slightly to get things nice and square.I wanted to do a dry run assembly of all the sheetmetal components so I knew the order in which things needed to be installed. Turns out the body is attached to the sub rails and the sub rails attached to the floor. This also allowed us to inspect the area of the “opera seats” that will need to be modified. Basically, we need to move the transition from the main floor to the trunk back a foot.
I wanted to do a dry run assembly of all the sheetmetal components so I knew the order in which things needed to be installed. Turns out the body is attached to the sub rails and the sub rails attached to the floor. This also allowed us to inspect the area of the “opera seats” that will need to be modified. Basically, we need to move the transition from the main floor to the trunk back a foot.We’re going to install the front floorpan first as everything else seems to attach to it. Bolted in place, a length of 1-inch square tubing is used to support the rear section of the floor.
As one is wont when buying a car sight unseen, I carefully inspected every image and decided that worst case scenario, if I had to simply cut my losses, I could most likely part the car out and break even. That said, I figured that there had to be enough sheetmetal worthy of repair that that situation probably wouldn’t be the case. A few weeks later when the car arrived on my doorstep, I was pleasantly surprised at the condition of the coupe.
The next step is to prepare the body to be set in place. Without the floors and sub rails, our body is very flimsy. Simply lifting it would probably cause the roof to buckle and make matters much worse. So, we need to stiffen things up before we can move it. One of the easiest things we can do to keep things straight and square is to tack weld the doors to the body. But first, we need to square the doors in the opening. This will ensure that when the sub rails and floor are welded to the body, the door opening will be exactly where we want it.Luckily, it only took a couple shims behind the hinges to get the doors nice and square. At this point, a series of tack welds along the B-pillar is all that’s required. Notice that we have already repaired the lower door panels.With the body properly supported, we use a two-post lift to drop the body over the new floors. Here, you can see the existing, rotten sub rails that will need to be trimmed away.With the body back in the air, the offending sheetmetal can be carefully trimmed away. Note the 1-inch square tubing that is resting on the two-post lift’s arm. This is tack welded to the body under the quarter window and attached to a similar section of tubing to support the entire back half of the body.
But, that’s not to say the car was in any kind of “restorable” condition upon delivery. As the images clearly showed, the coupe lacked any type of floorpan, the firewall was damaged beyond repair, and the trunk area also suffered from similar destruction. A decent body otherwise, salvageable sheetmetal, and a complete, original chassis made the deal worthwhile, but it was going to be a long road.
While most of the sheetmetal where the body meets the sub rails is rotten, there are still a few spot welds in the rear wheel opening that needed to be cut away to free the rotten subs. This will allow us to weld the new sub rails to the body until we repair the surrounding area in the future.At the A-pillar, things are slightly more solid and the old spot weld locations can be seen. We’ll be using these to weld the sub rails in place.Here’s what’s left of our sub rails, a pile of rusty junk.With the offending sheetmetal trimmed away, the new sub rails are temporarily set in place to ensure no additional trimming is required.
One of the factors that played into me taking the risk of buying a car sight unseen was the fact that I knew what components could be replaced with new. Case in point, I knew that United Pacific carried new main floors (floorpan), trunk floors, sub rails, under decklid, and firewall replacement panels. Repair panels for the lower rear quarters and lower doors are also available. That alone covers 95 percent of the damage that could be seen. Since the 1940 (and the 1939) Ford has been an extremely popular model since its inception, original parts are common, so it wouldn’t be too hard to piece a solid car back together.
Though our rear fender wells are rather rusty and require further repair, for now the sub rails can be tack welded in place, allowing us to continue with the floor repairs.Up at the lower cowl/A-pillar, like the top of the sub rails, each side will be spot welded to the body as well.Before we do that however, this area received a couple coats of weld-through primer to prevent further rust. Once the sub rails are welded into place, this pocket becomes inaccessible and a great trap for future moisture and debris.The new sub rails and existing body have a handful of body mounting holes that are used to align things up. Clamped in place, a couple tack welds will secure the sub rails to the body while it’s dropped onto the new floorpan.
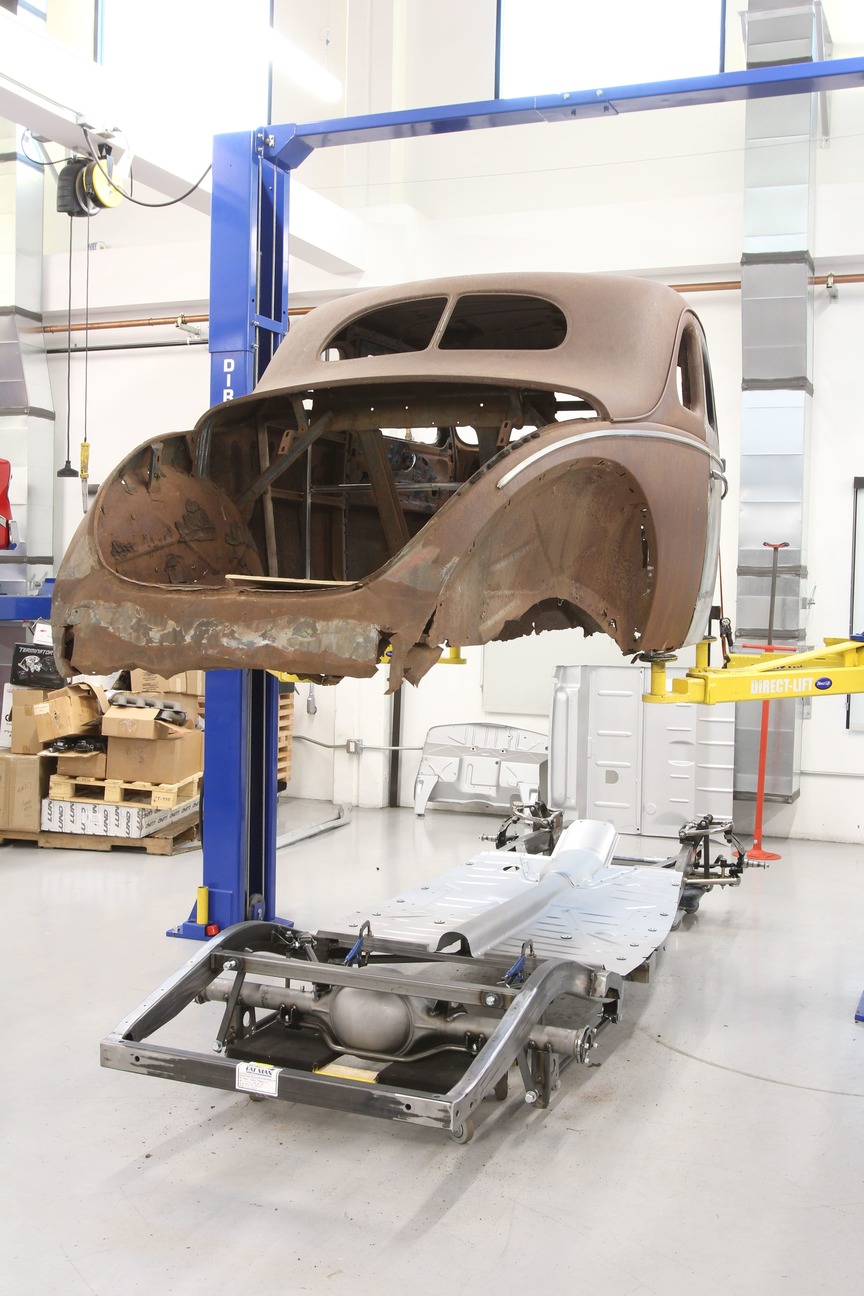
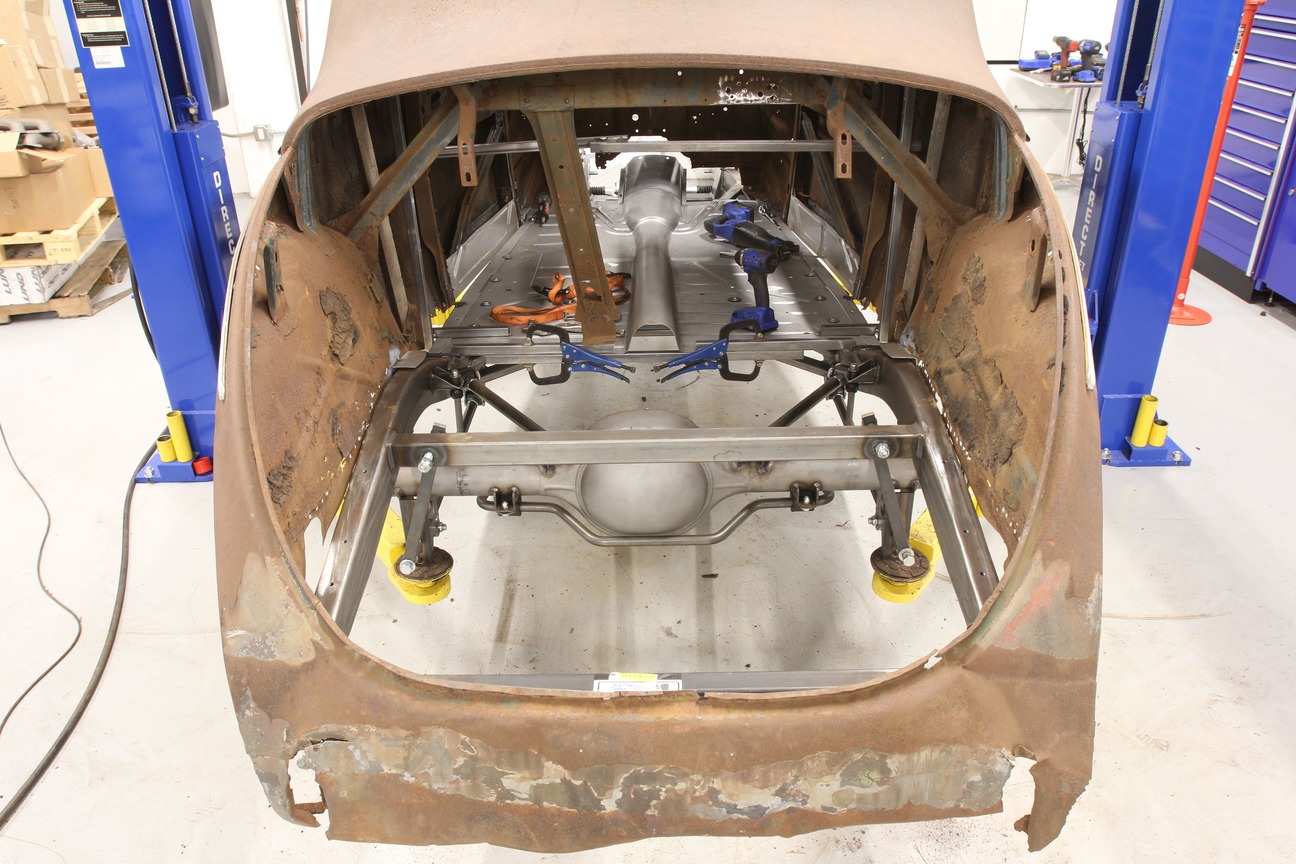
Before we jumped into the fire however, we decided that it would make more sense to scrap the original chassis and opt for a new roller from Fatman Fabrications. Since the condition of our original frame was unknown, we didn’t want to run the risk of rebuilding the body on a crooked, twisted, or otherwise damaged frame. After removing the body and rolling the frame out from under, it turned out to be a good decision as the original chassis had a bit of a twist to it and suffered from some pretty serious rot. Cast aside, we began our body repair by placing the new United Pacific sheetmetal on the new Fatman Fab chassis using a reproduction body mounting kit. Checked and double checked for square, we then set our sights on preparing the shell of our body to receive the new floors.
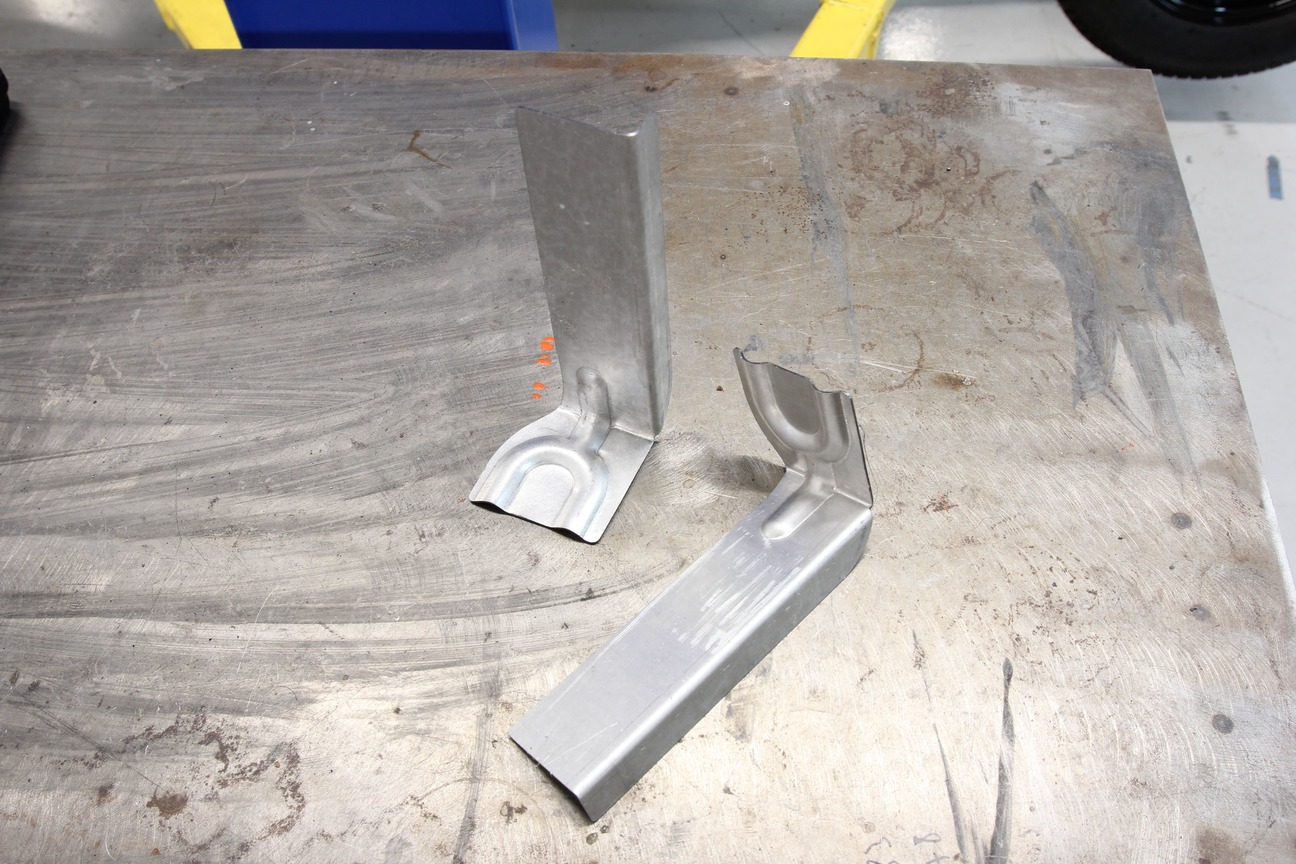
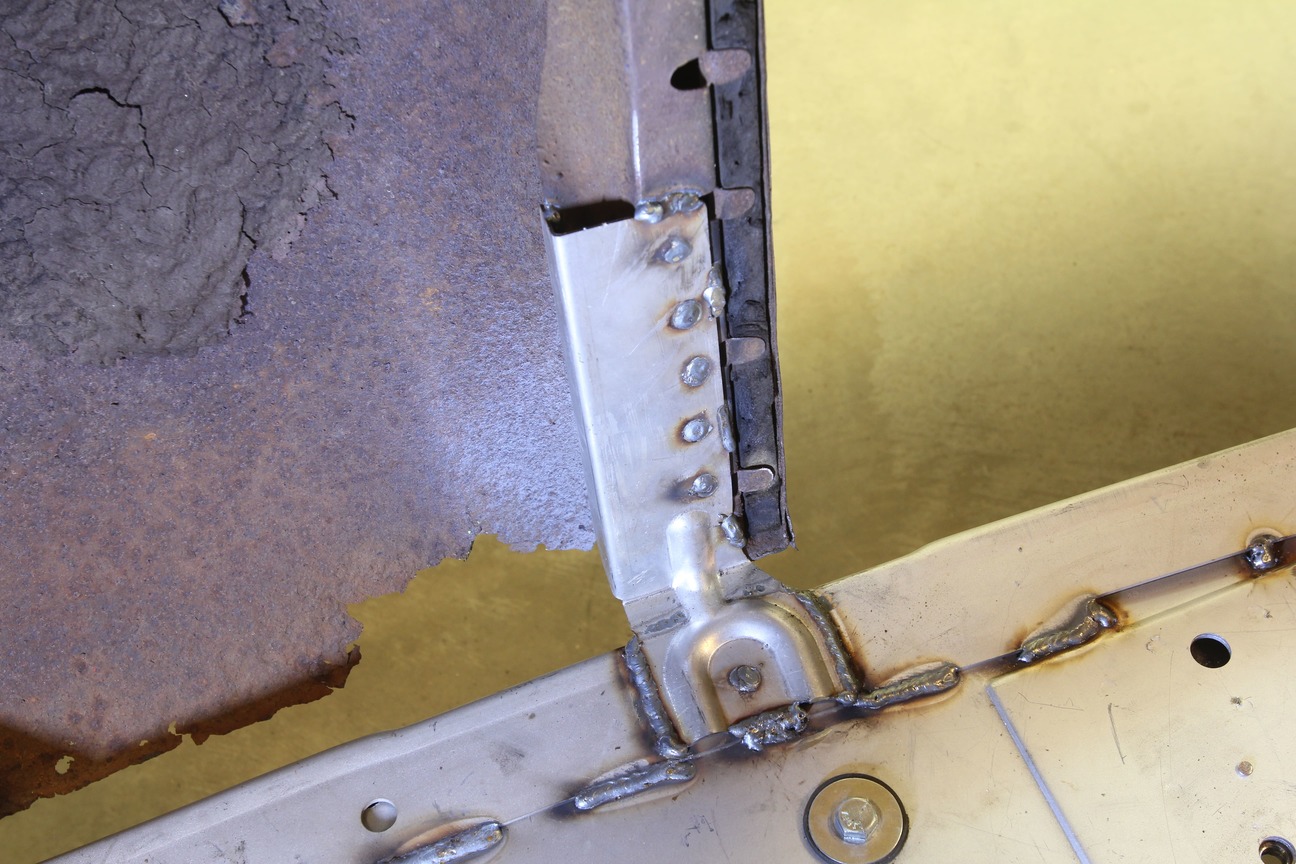
After everything has been checked and double checked, the body is lowered onto the new floor and chassis for the final time before the sub rails are tacked in place.With the sub rails tacked to the body and the assembly resting on the new floor, we decided to remove the middle and trunk floor area before proceeding. Like peeling back, the skin of an onion, the rusty sheetmetal is carefully trimmed and peeled away.This view shows the entire trunk floor area, having been removed, as well as the new front floor section and sub rails.One thing I added that isn’t stock to 1940 Fords are these door post brackets for 1935 to 1936 Ford roadsters and phaetons. The area where our B-pillars contacted the floor was rotten, but the pillars were in decent shape. These brackets allowed us to tie the pillars to the floor while providing additional strength.
Using similar techniques as those used in the original Ford factory for attaching the sub rails and floorpans, the project turned out to make quick headway. After removing myriad spot welds from the rotting panels that were still attached to the original body, those same spot weld locations will function to attach the new sheetmetal. Moving slowly and carefully as the new panels were tack welded in place, our original body was starting to return to a much more solid state. Where the B-pillars hung in the breeze, barely allowing the doors to latch, with the new sub rails and floorpan attached, things were squaring up nicely.
One thing I added that isn’t stock to 1940 Fords are these door post brackets for 1935 to 1936 Ford roadsters and phaetons. The area where our B-pillars contacted the floor was rotten, but the pillars were in decent shape. These brackets allowed us to tie the pillars to the floor while providing additional strength.After removing the rotten trunk floor, it was decided that the body would have to be removed one more time in order to install the trunk floor. Before doing so however, we decided to tack the new floorpan and sub rails so that the body and floor could be removed as a single unit. Here, the new United Pacific trunk floorpan is installed on the chassis in the same manner as that used on the main floor.The body is then dropped back on the chassis and the trunk floor checked for fitment.Before the trunk floor is attached to the body, a handful of measurements are taken to ensure that the floor is square in relation to the chassis and the body.
Repairing and replacing floors in a car this large might seem a daunting task at first. And to be fair, it is a large project. But with the quality of new sheetmetal parts and a patient, watchful eye, a body even as damaged as ours can be brought back to a restorable condition in couple days’ time. MR
Floored…1940 Ford Gets Much Needed Sheetmetal Repair
1 of 42
Here are the couple sheetmetal components from United Pacific that we’ll be installing to repair our 1940 coupe. From the top we’ll be replacing the firewall, trans cover, main floorpan, sub rails, middle floor, trunk floor, and under decklid panel. One deviation we’ll be making relates to the middle and trunk floor area. United Pacific’s floorpan is designed to replace what Ford called their five-window coupe. This model came with a bench seat with a tilt-up back that allowed access to a compartment underneath a package tray between the seat and the trunk. Our body is what Ford referred to as a Business coupe, which featured a split bench seat up front and rear, fold-down jump seats. This rear seat design has garnered this body style the nickname “Opera Coupe”, though Ford never referred to it by that name. Likewise, the coupe with the package tray is commonly referred to as a “Business Coupe”, which is technically incorrect, although it makes more sense. The difference in the floorpans allows for additional foot room for the jump-seated passengers in the Opera-ahem, Business Coupe.
To properly attach the new floorpan to our Fatman chassis, we’ll be using a complete body mounting kit.
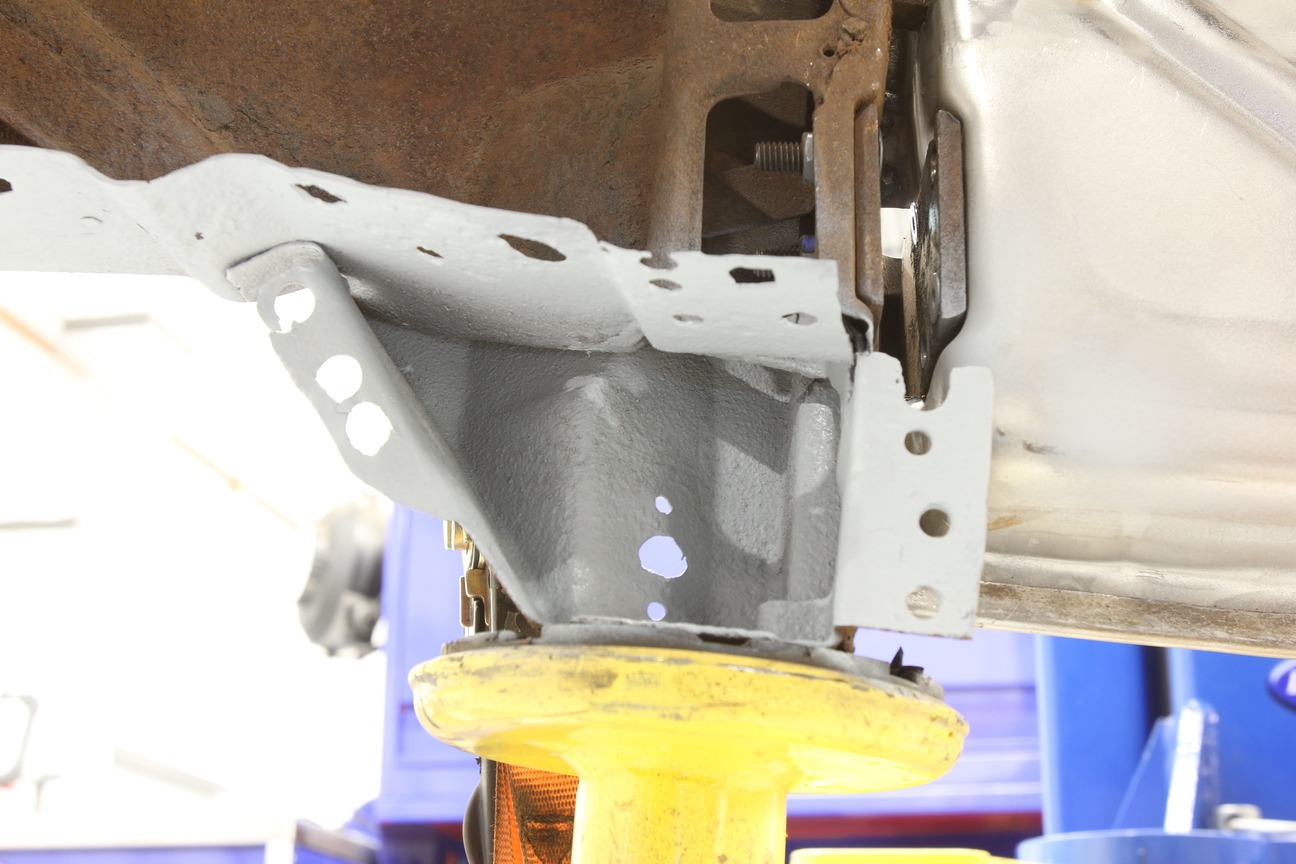
One of the benefits of using a new chassis is the fact that everybody mounting hole is precisely located, drilled, and tapped, giving us a solid foundation for mounting the new sheetmetal.
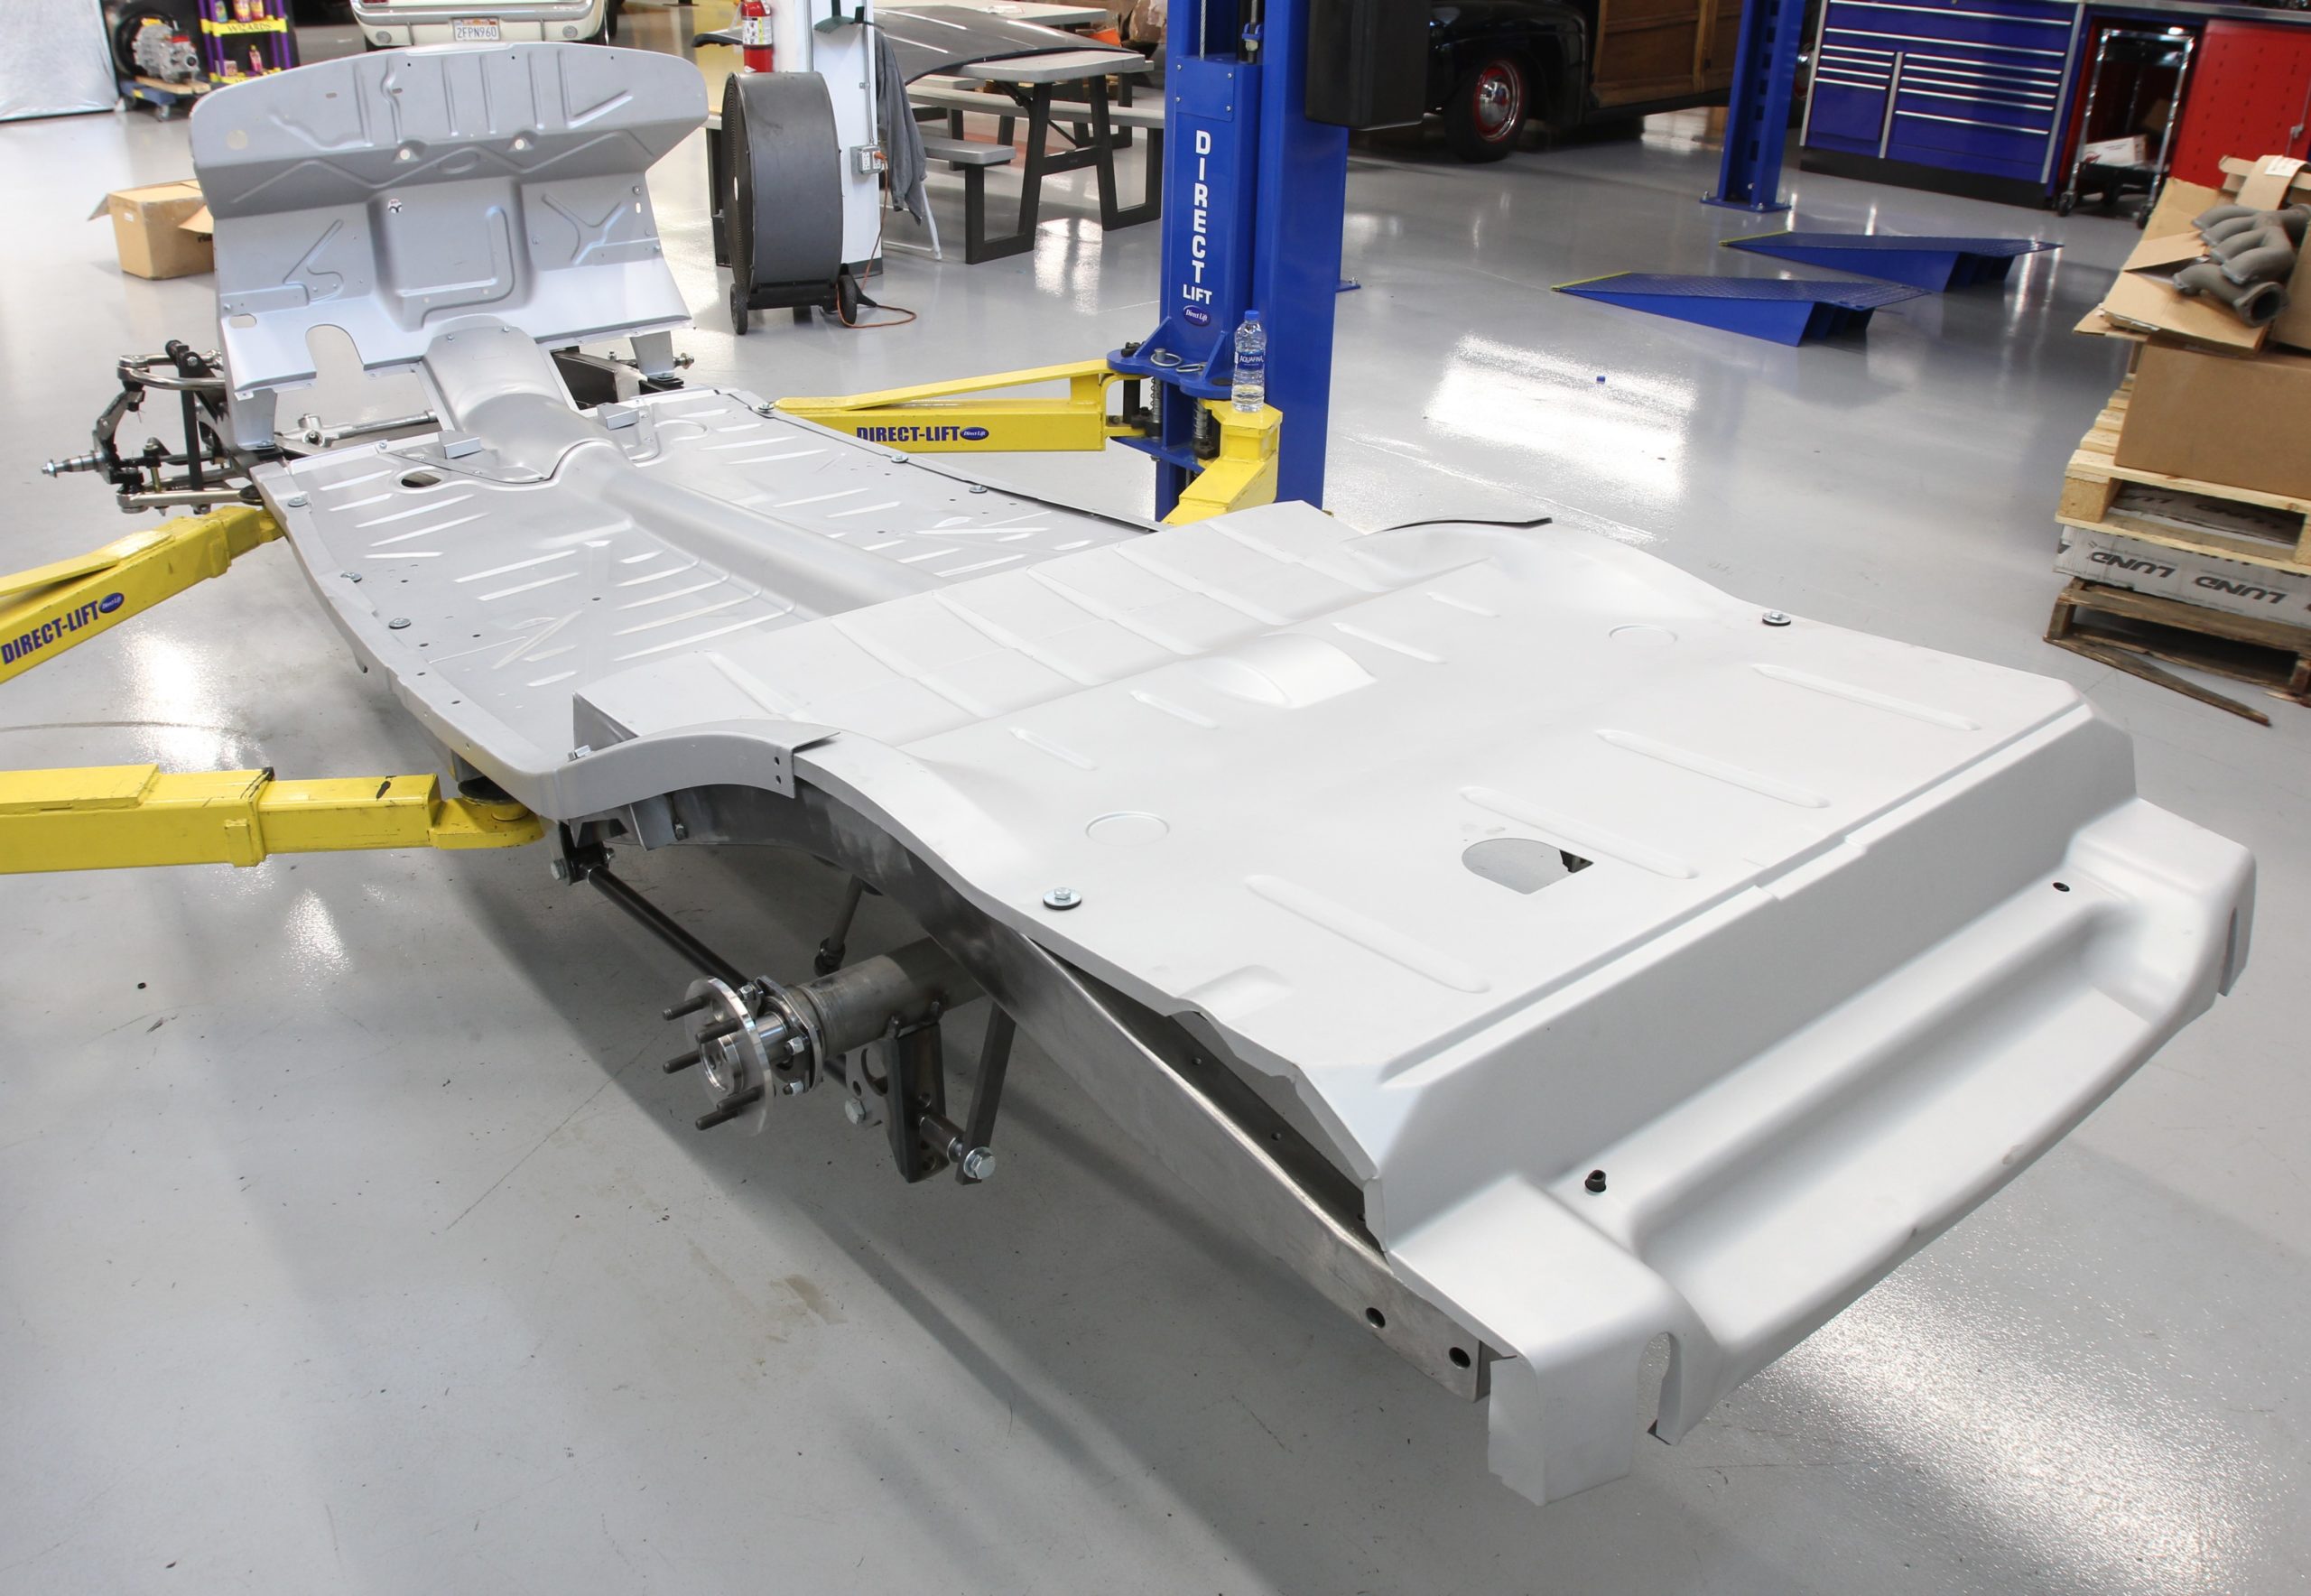
That’s not to say that there isn’t a touch of variance once the new floorpan is in place. With the fasteners finger tight, the sheetmetal can be moved ever-so-slightly to get things nice and square.
I wanted to do a dry run assembly of all the sheetmetal components so I knew the order in which things needed to be installed. Turns out the body is attached to the sub rails and the sub rails attached to the floor. This also allowed us to inspect the area of the “opera seats” that will need to be modified. Basically, we need to move the transition from the main floor to the trunk back a foot.
I wanted to do a dry run assembly of all the sheetmetal components so I knew the order in which things needed to be installed. Turns out the body is attached to the sub rails and the sub rails attached to the floor. This also allowed us to inspect the area of the “opera seats” that will need to be modified. Basically, we need to move the transition from the main floor to the trunk back a foot.
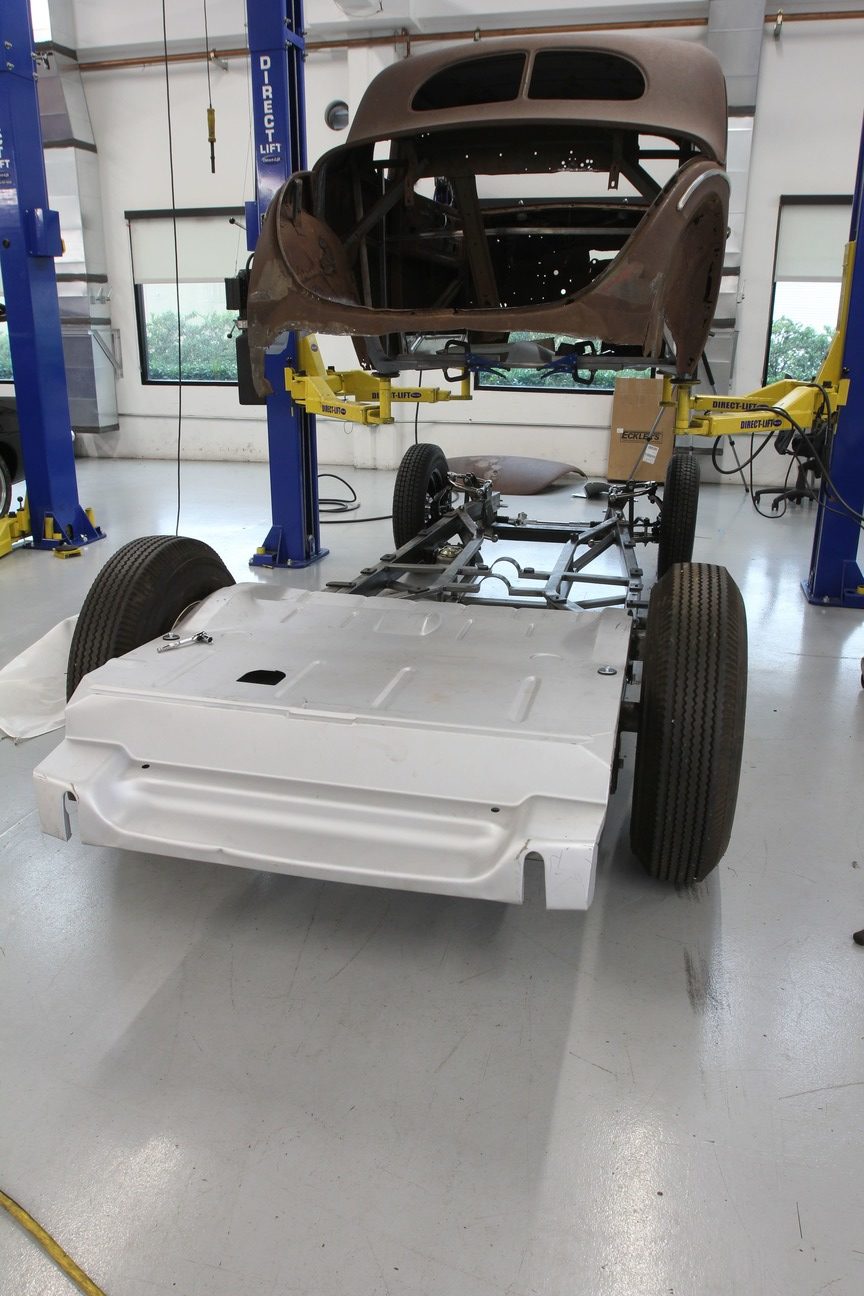
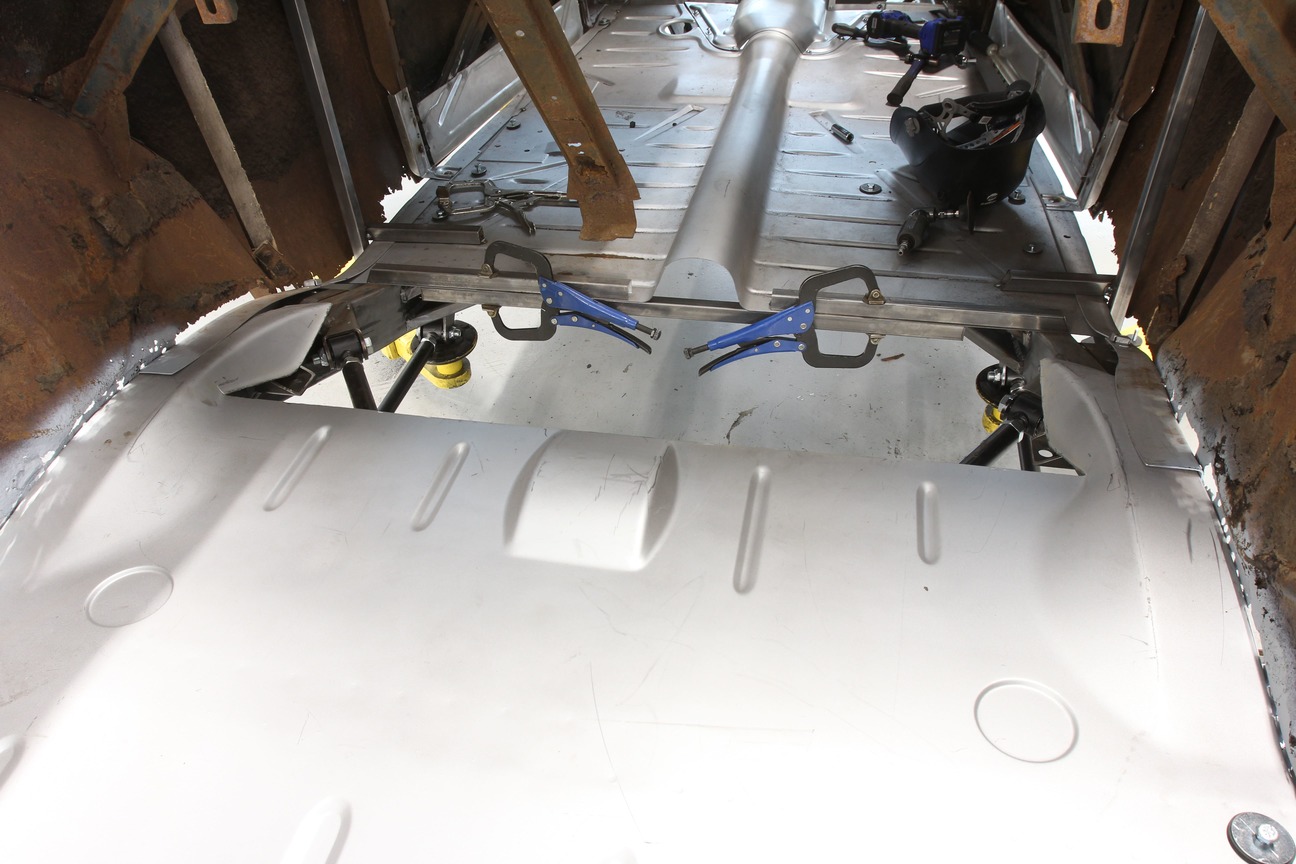
We’re going to install the front floorpan first as everything else seems to attach to it. Bolted in place, a length of 1-inch square tubing is used to support the rear section of the floor.
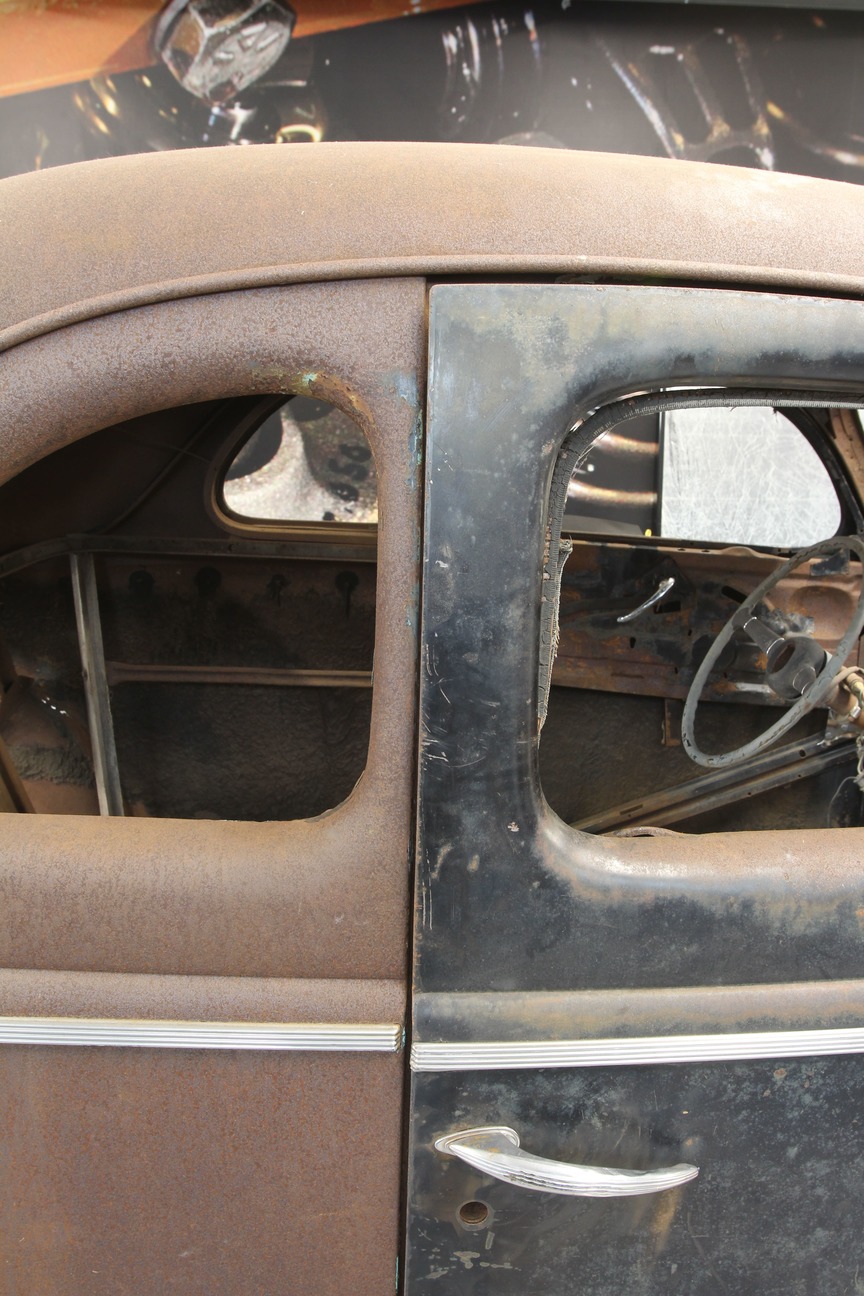
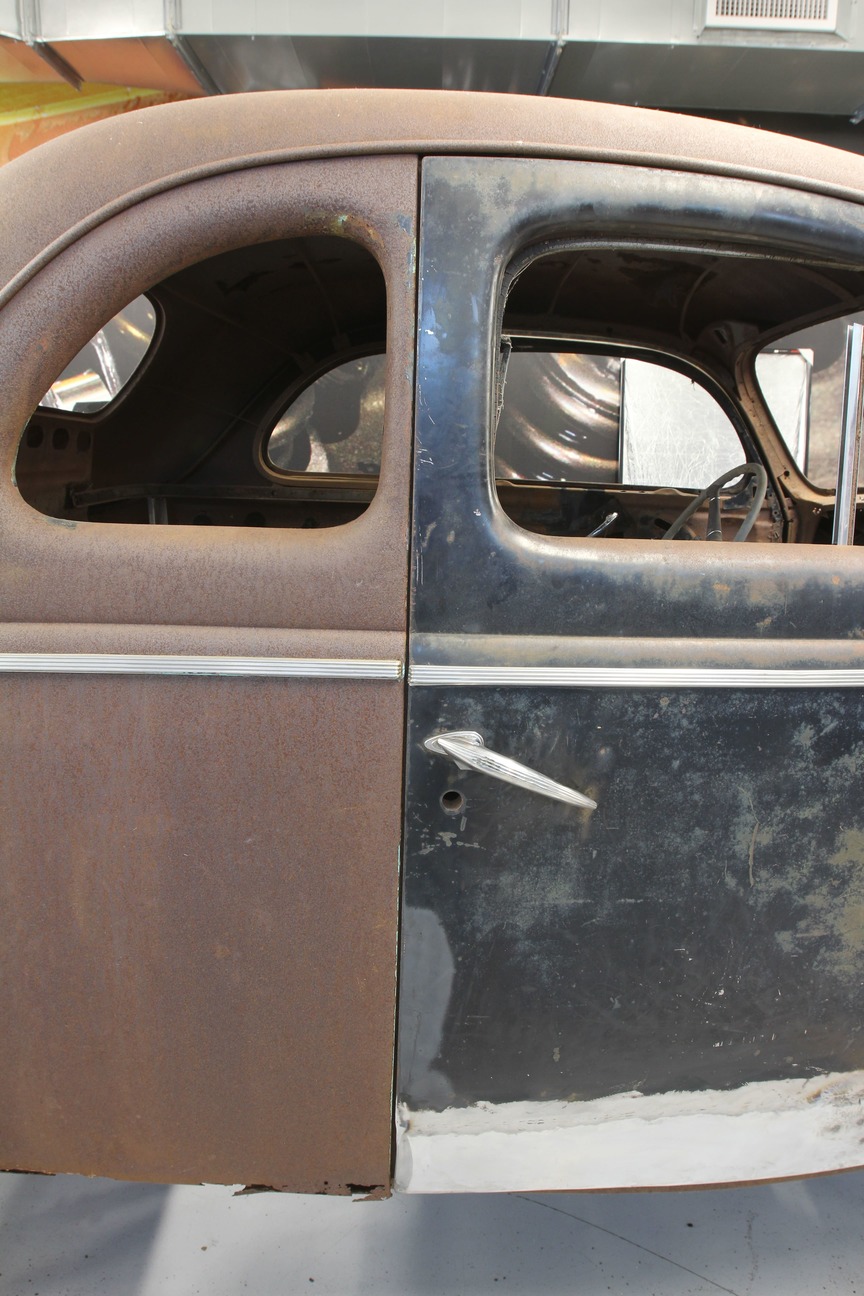
The next step is to prepare the body to be set in place. Without the floors and sub rails, our body is very flimsy. Simply lifting it would probably cause the roof to buckle and make matters much worse. So, we need to stiffen things up before we can move it. One of the easiest things we can do to keep things straight and square is to tack weld the doors to the body. But first, we need to square the doors in the opening. This will ensure that when the sub rails and floor are welded to the body, the door opening will be exactly where we want it.
Luckily, it only took a couple shims behind the hinges to get the doors nice and square. At this point, a series of tack welds along the B-pillar is all that’s required. Notice that we have already repaired the lower door panels.
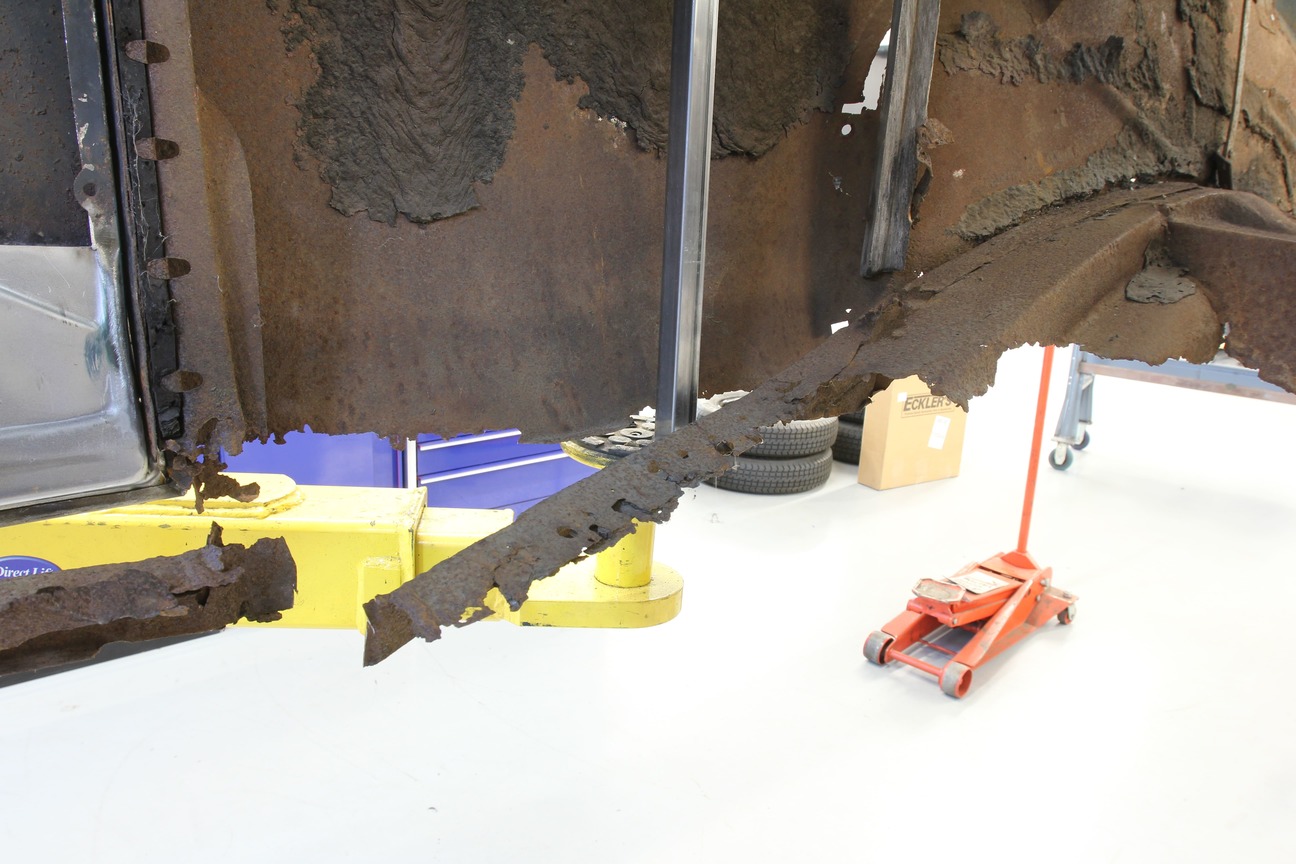
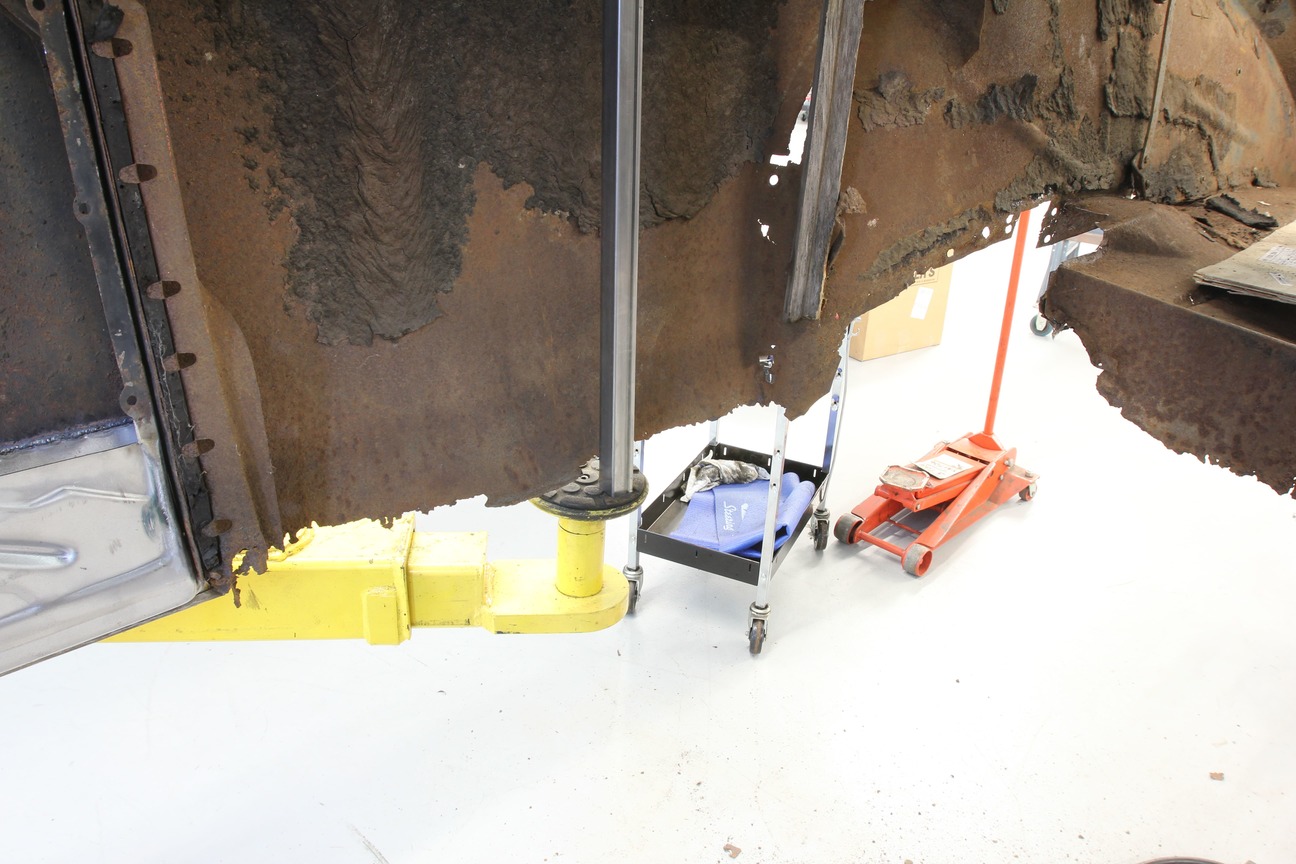
With the body properly supported, we use a two-post lift to drop the body over the new floors. Here, you can see the existing, rotten sub rails that will need to be trimmed away.
With the body back in the air, the offending sheetmetal can be carefully trimmed away. Note the 1-inch square tubing that is resting on the two-post lift’s arm. This is tack welded to the body under the quarter window and attached to a similar section of tubing to support the entire back half of the body.
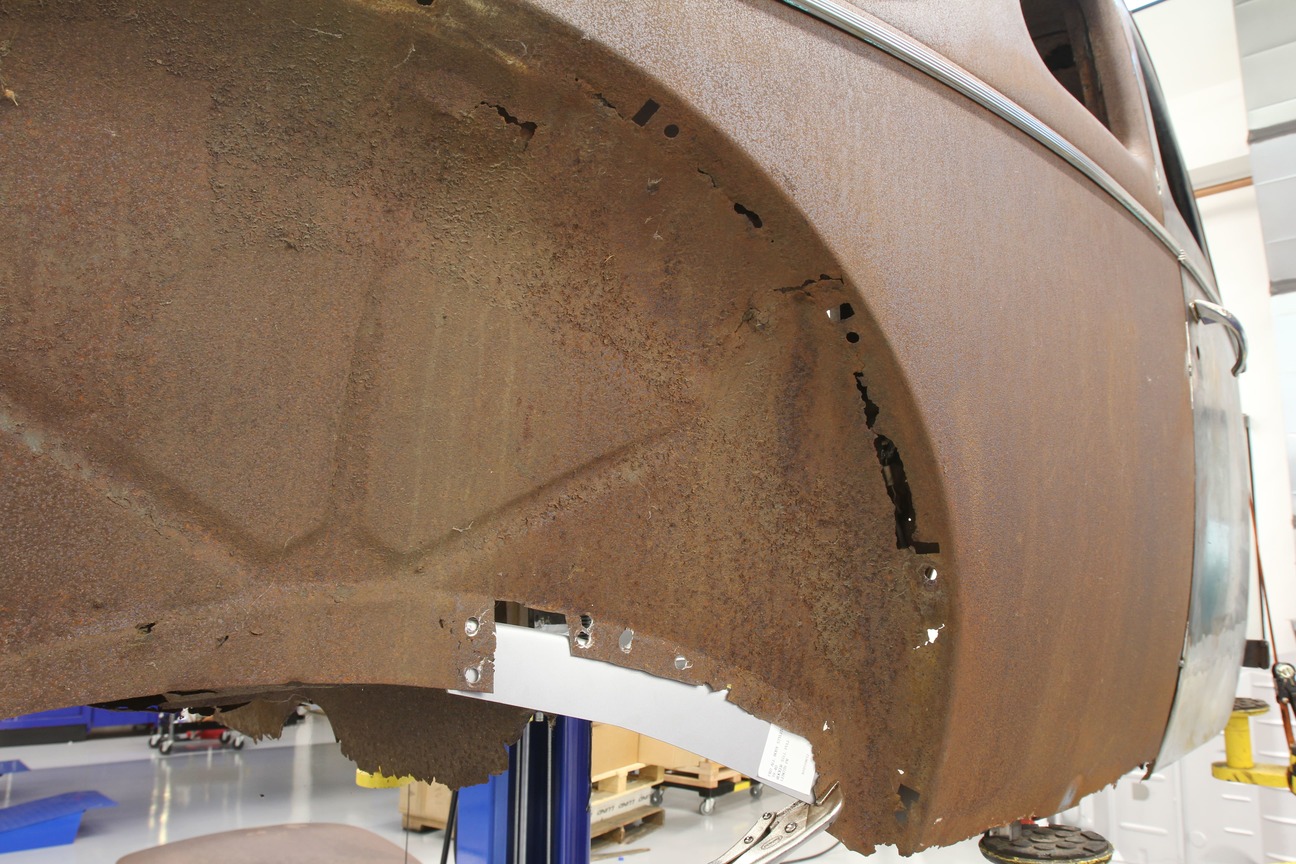
While most of the sheetmetal where the body meets the sub rails is rotten, there are still a few spot welds in the rear wheel opening that needed to be cut away to free the rotten subs. This will allow us to weld the new sub rails to the body until we repair the surrounding area in the future.
At the A-pillar, things are slightly more solid and the old spot weld locations can be seen. We’ll be using these to weld the sub rails in place.
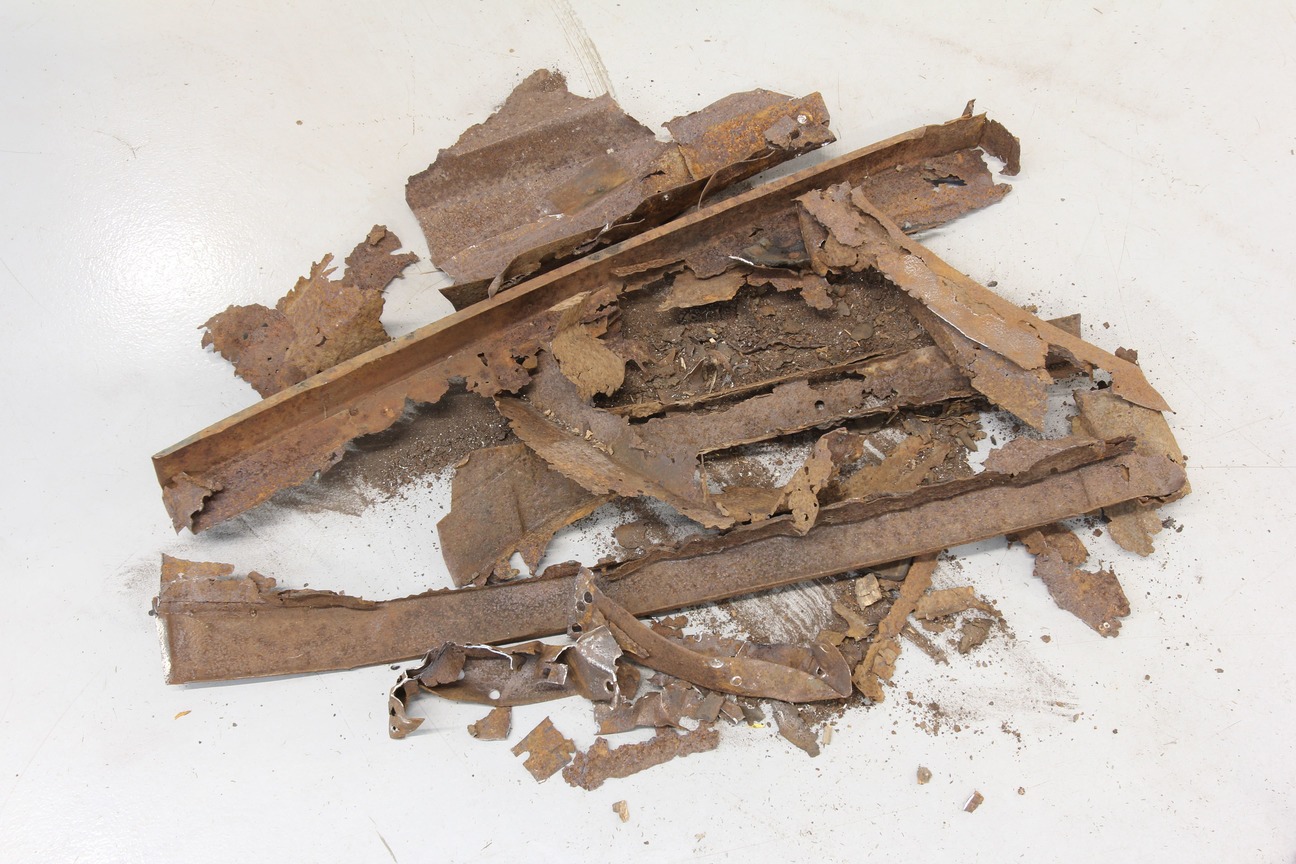
Here’s what’s left of our sub rails, a pile of rusty junk.
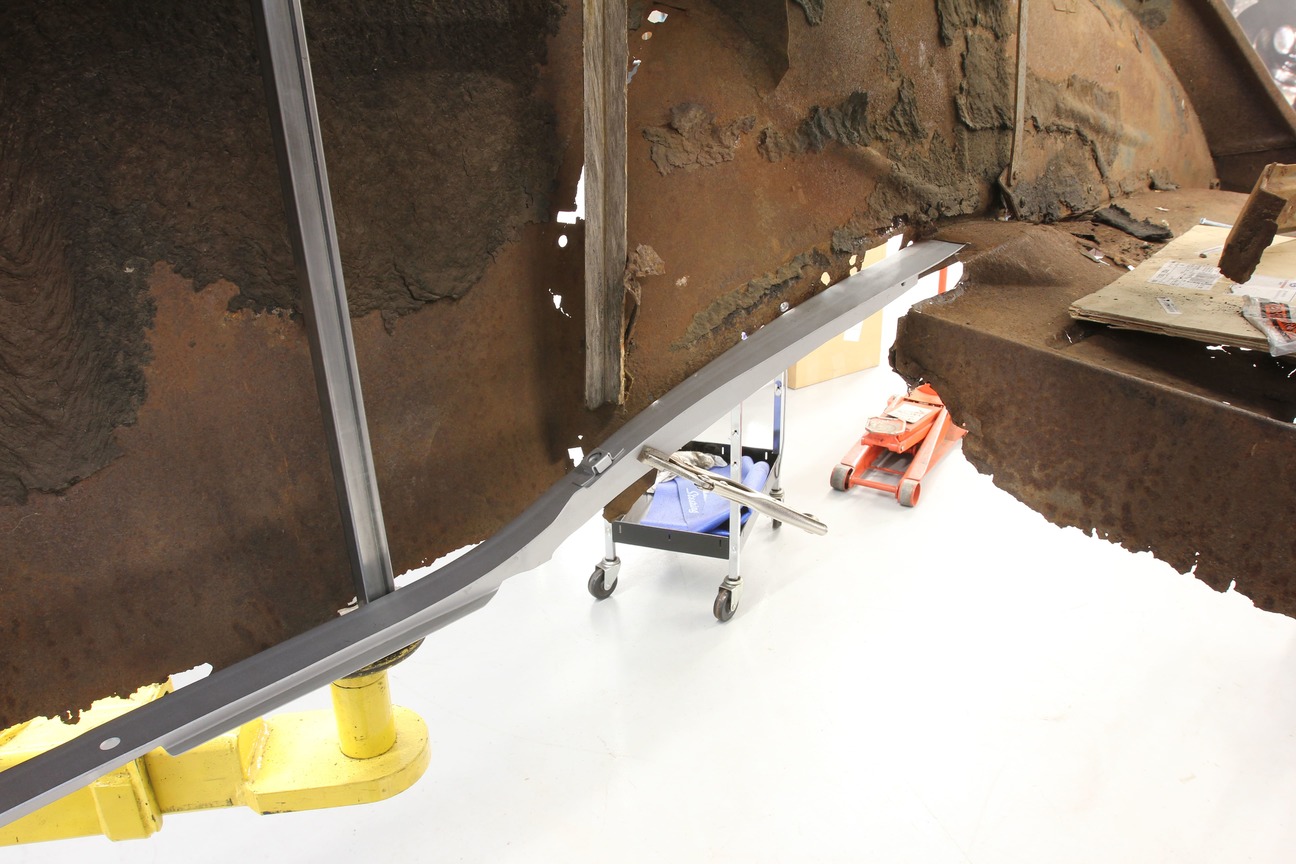
With the offending sheetmetal trimmed away, the new sub rails are temporarily set in place to ensure no additional trimming is required.
Though our rear fender wells are rather rusty and require further repair, for now the sub rails can be tack welded in place, allowing us to continue with the floor repairs.
Up at the lower cowl/A-pillar, like the top of the sub rails, each side will be spot welded to the body as well.
Before we do that however, this area received a couple coats of weld-through primer to prevent further rust. Once the sub rails are welded into place, this pocket becomes inaccessible and a great trap for future moisture and debris.
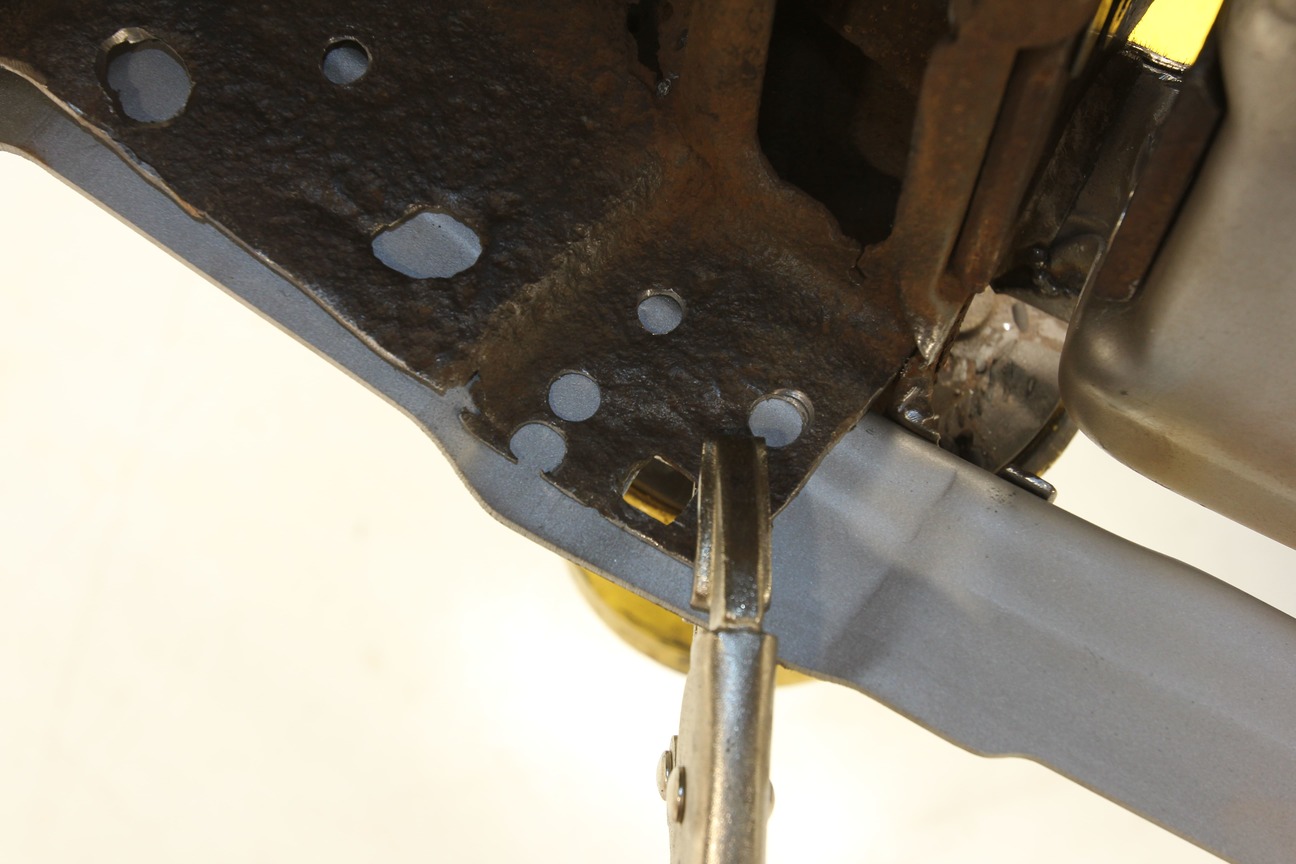
The new sub rails and existing body have a handful of body mounting holes that are used to align things up. Clamped in place, a couple tack welds will secure the sub rails to the body while it’s dropped onto the new floorpan.
After everything has been checked and double checked, the body is lowered onto the new floor and chassis for the final time before the sub rails are tacked in place.
With the sub rails tacked to the body and the assembly resting on the new floor, we decided to remove the middle and trunk floor area before proceeding. Like peeling back, the skin of an onion, the rusty sheetmetal is carefully trimmed and peeled away.
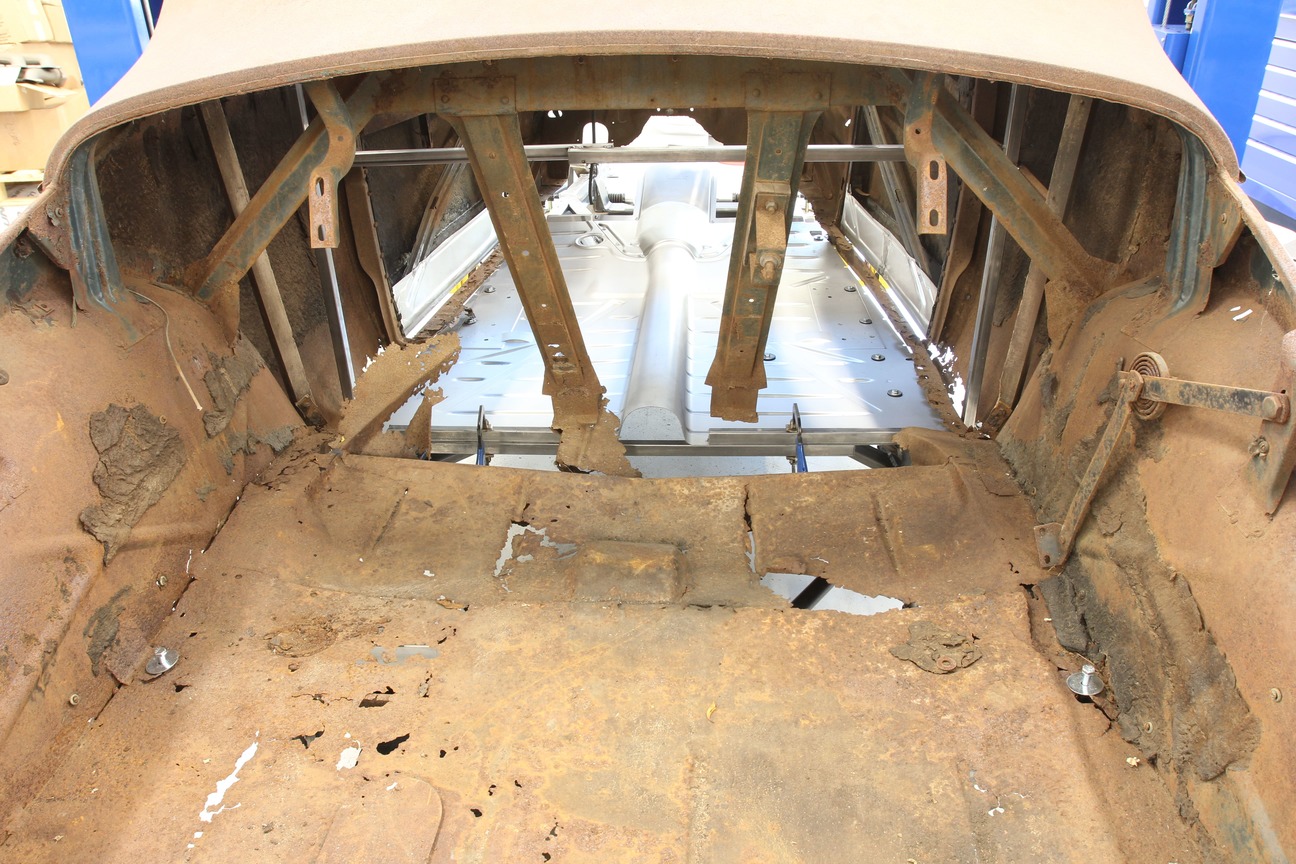
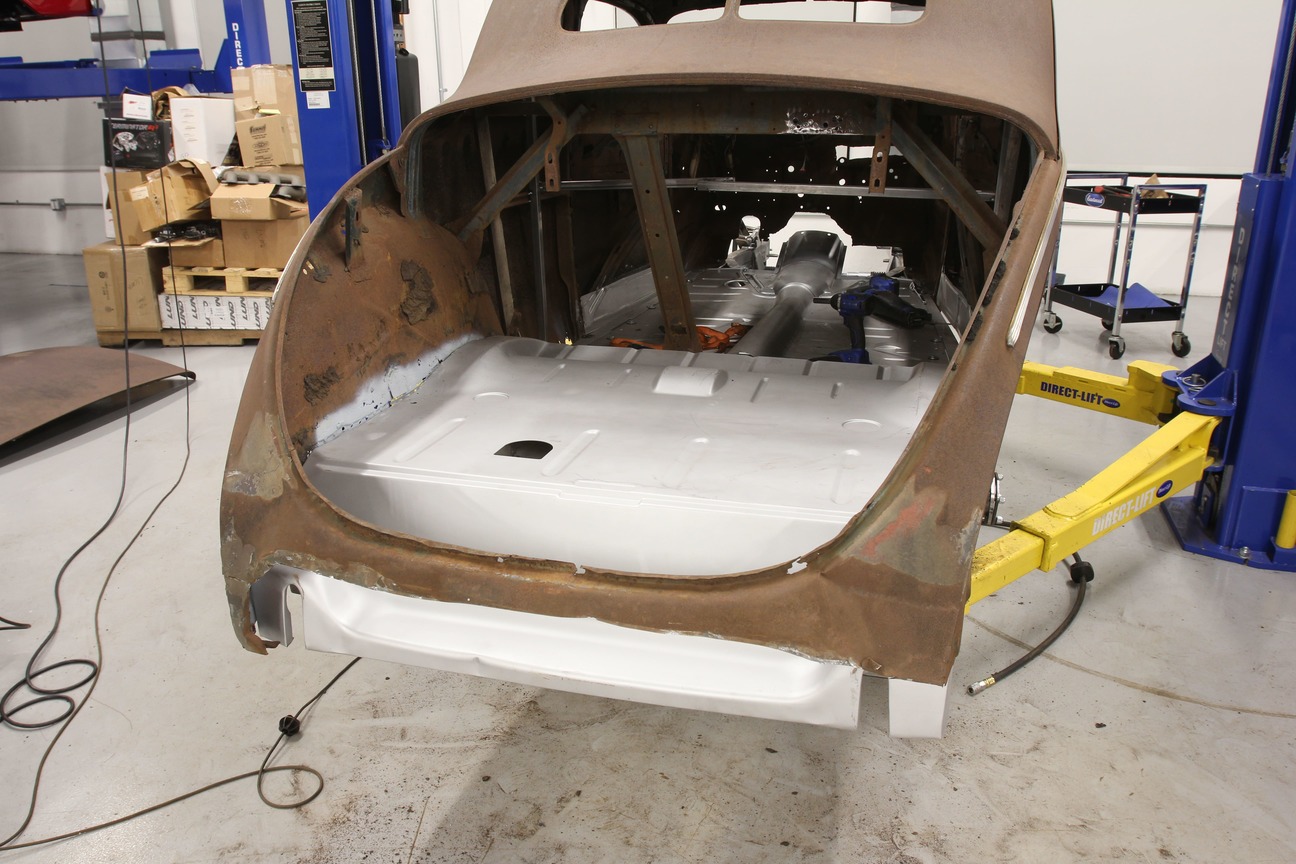
This view shows the entire trunk floor area, having been removed, as well as the new front floor section and sub rails.
One thing I added that isn’t stock to 1940 Fords are these door post brackets for 1935 to 1936 Ford roadsters and phaetons. The area where our B-pillars contacted the floor was rotten, but the pillars were in decent shape. These brackets allowed us to tie the pillars to the floor while providing additional strength.
One thing I added that isn’t stock to 1940 Fords are these door post brackets for 1935 to 1936 Ford roadsters and phaetons. The area where our B-pillars contacted the floor was rotten, but the pillars were in decent shape. These brackets allowed us to tie the pillars to the floor while providing additional strength.
After removing the rotten trunk floor, it was decided that the body would have to be removed one more time in order to install the trunk floor. Before doing so however, we decided to tack the new floorpan and sub rails so that the body and floor could be removed as a single unit. Here, the new United Pacific trunk floorpan is installed on the chassis in the same manner as that used on the main floor.
The body is then dropped back on the chassis and the trunk floor checked for fitment.
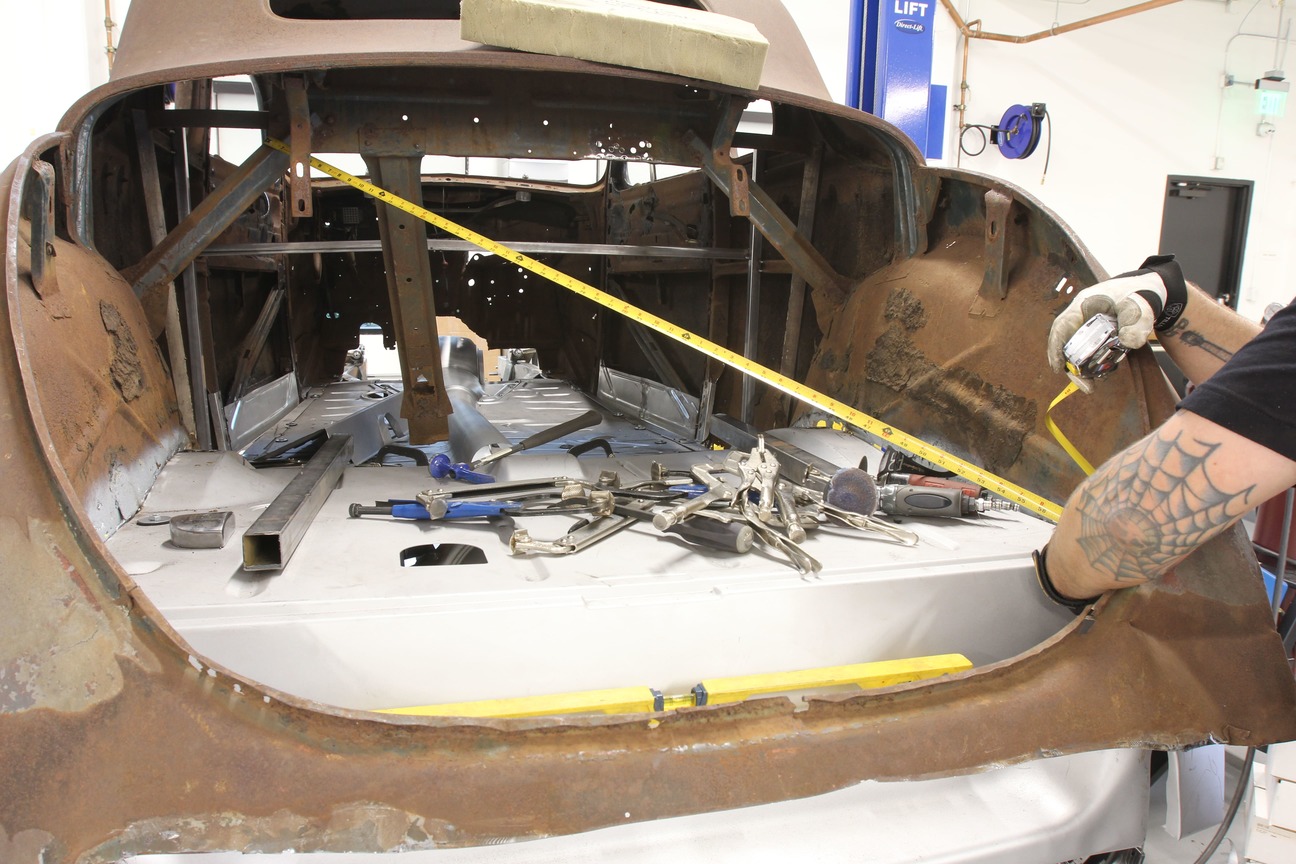
Before the trunk floor is attached to the body, a handful of measurements are taken to ensure that the floor is square in relation to the chassis and the body.
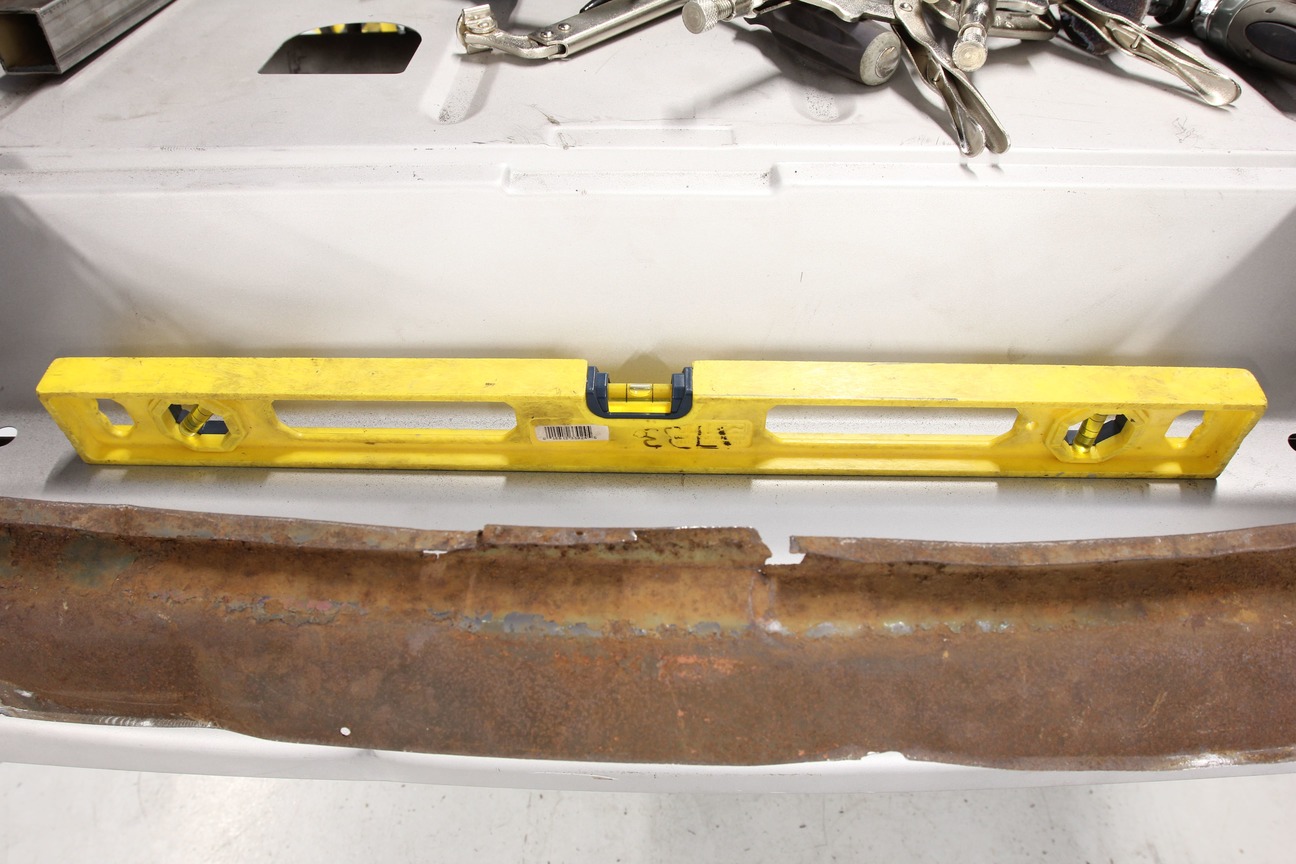
We leveled the chassis and body on the lift to provide another reference point when installing the new floor components. Any flat surface, whether it be on the chassis, body, or new floorpans, should be level.
Like the sub rail attachment area, portions of the rear quarter panel where the trunk floor attaches is in need of further repair. At this point however, a few tack welds are all that’s required to keep us moving forward.
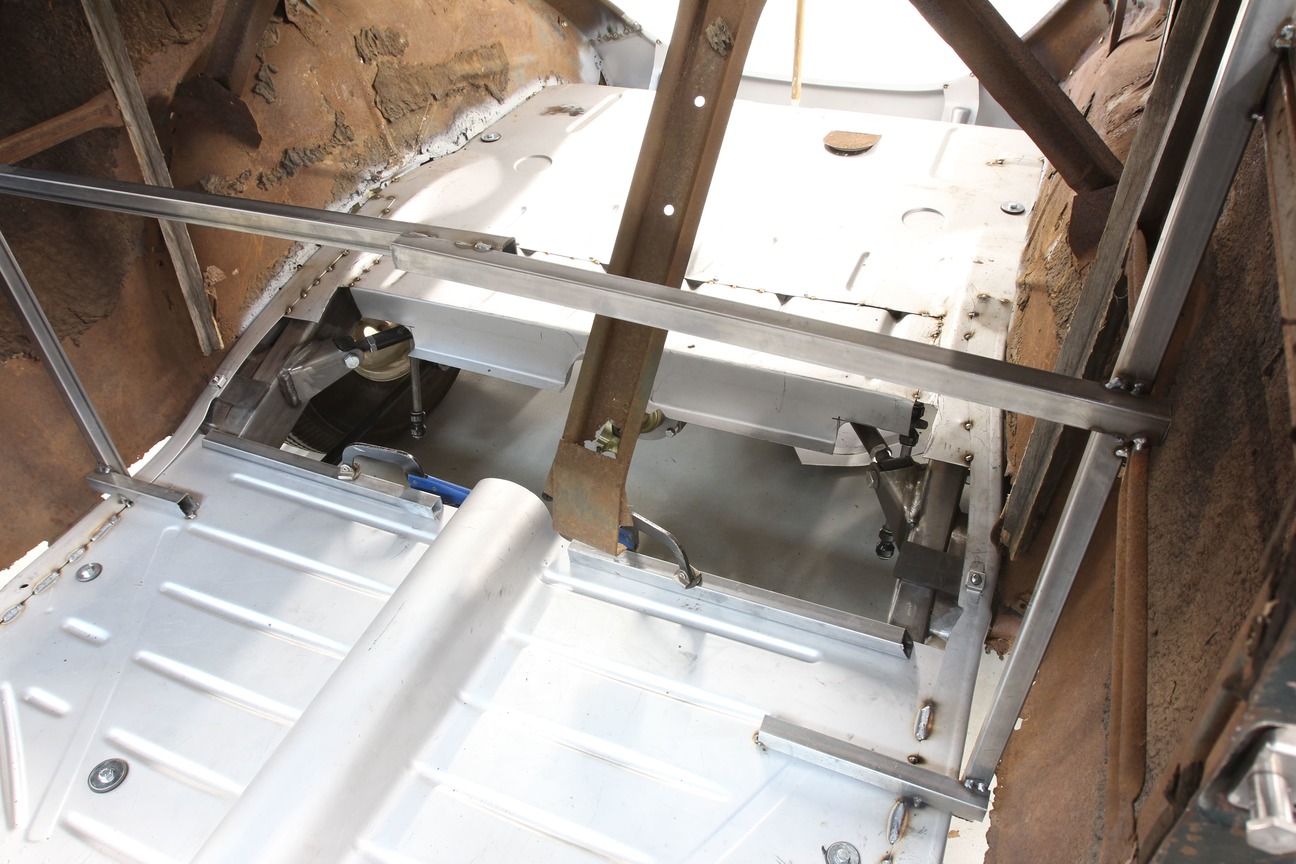
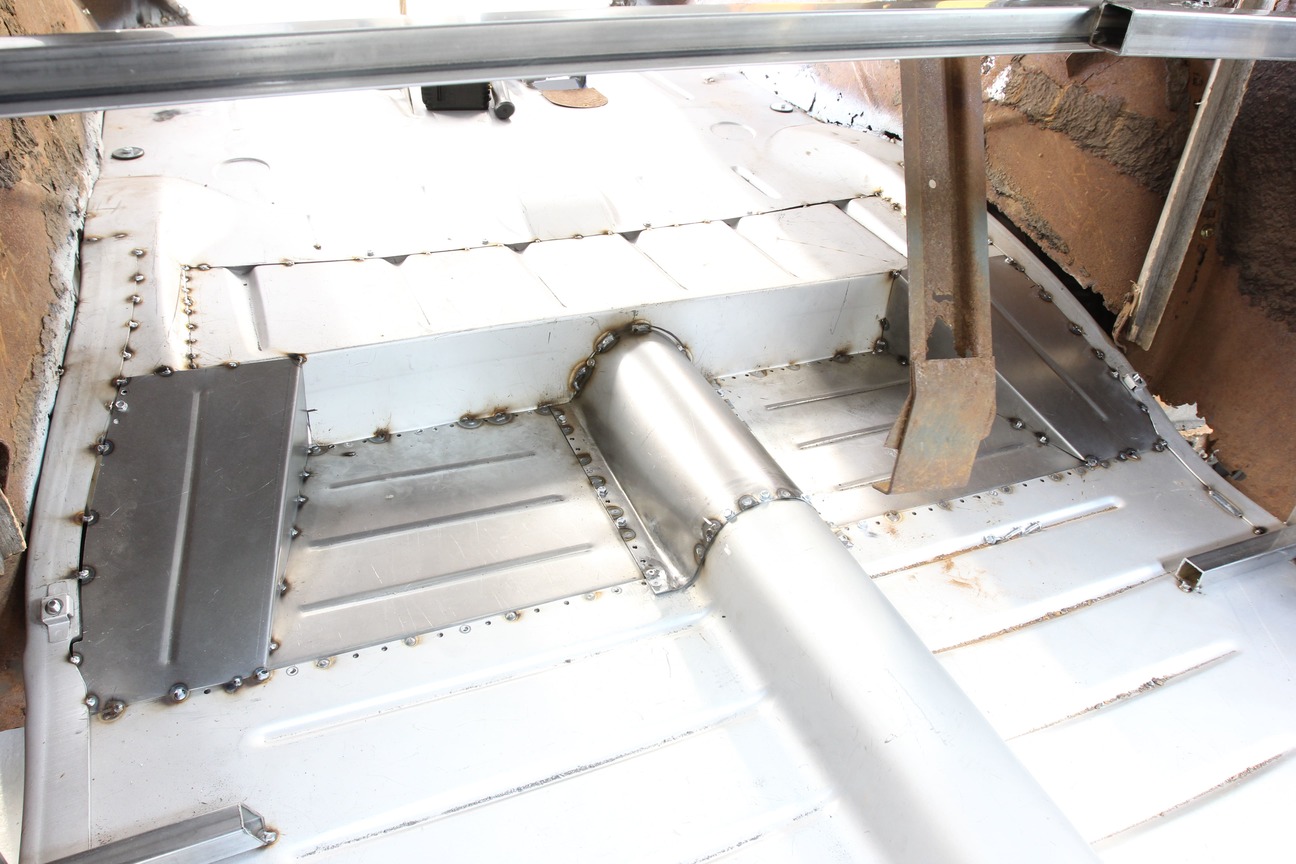
This is the area where our “opera seats” will be located and where we need to modify the floorpans to suit. The five-window coupe floors were raised behind the front seat and then blended into the trunk floor. To allow for additional foot room for the opera-seated passengers, the floor needs to be lengthened before the rise to meet the trunk floor. The triangulated four-link suspension design of the Fatman chassis necessitated additional clearance to be in the floor as well, so two birds, one stone.
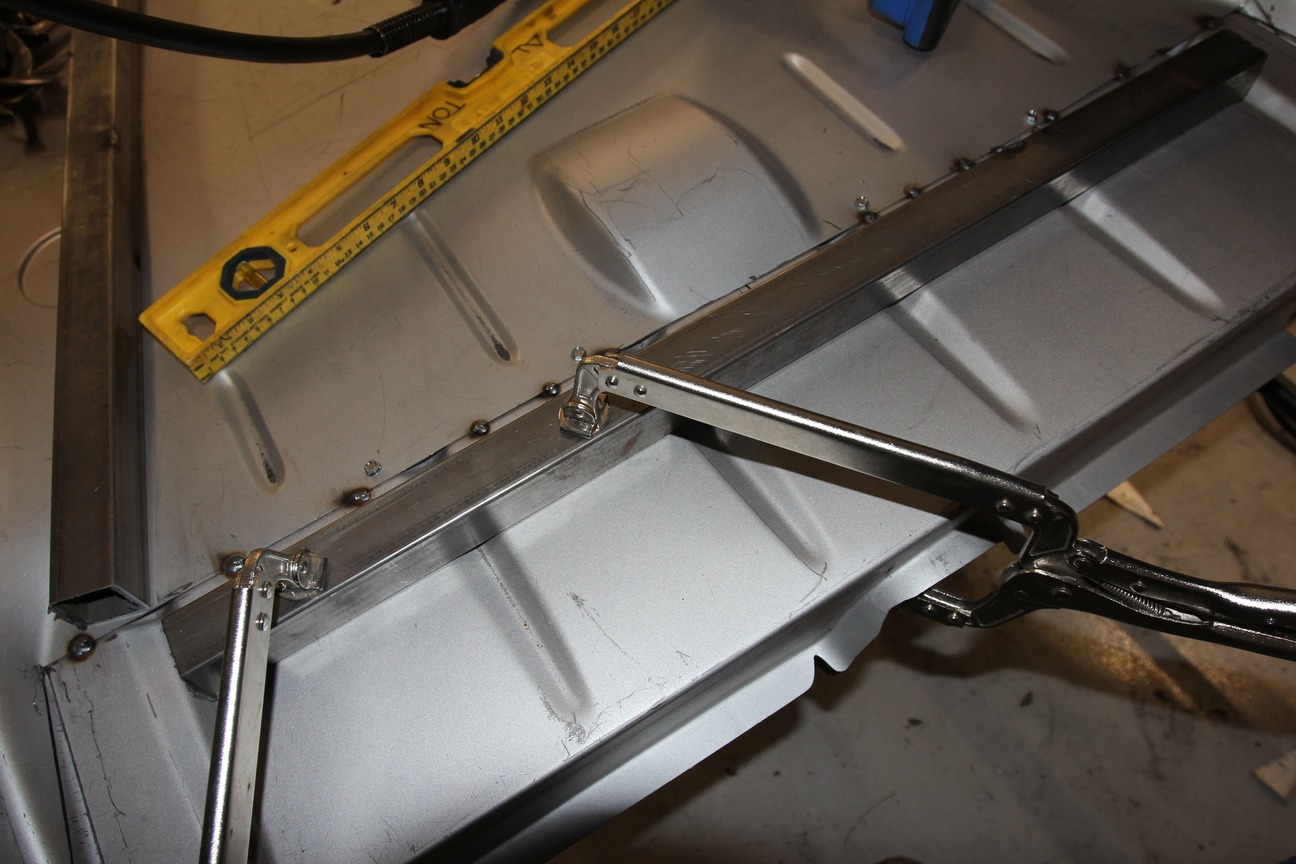
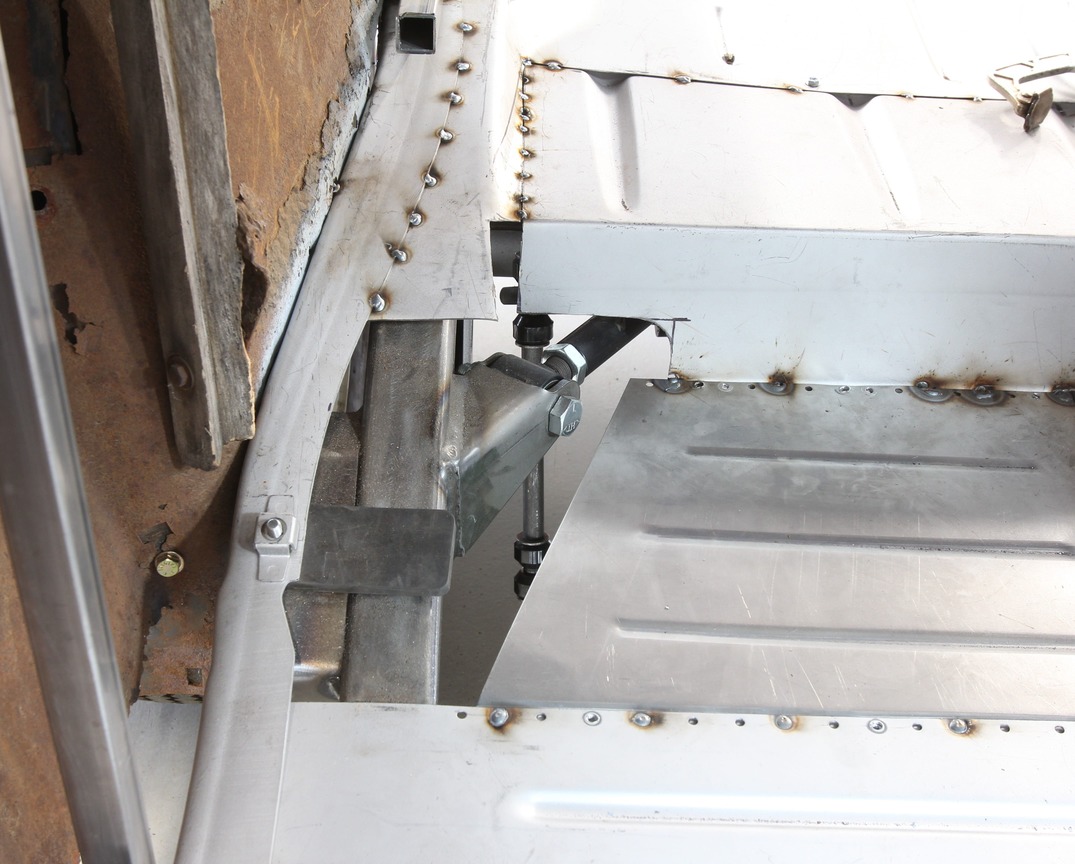
To lengthen the flat surface of the main floor area, I simply trimmed the new kick up section of the trunk floor and moved it rearwards. A section of 1-inch tubing is clamped in place to ensure everything remains flat while the new section is tacked to the trunk floor.
To lengthen the flat surface of the main floor area, I simply trimmed the new kick up section of the trunk floor and moved it rearwards. A section of 1-inch tubing is clamped in place to ensure everything remains flat while the new section is tacked to the trunk floor.
The additional foot room added to the main floor by moving the raised section rearward is apparent from this angle as is the 1-inch square tubing structure that has been supporting the body throughout the process.
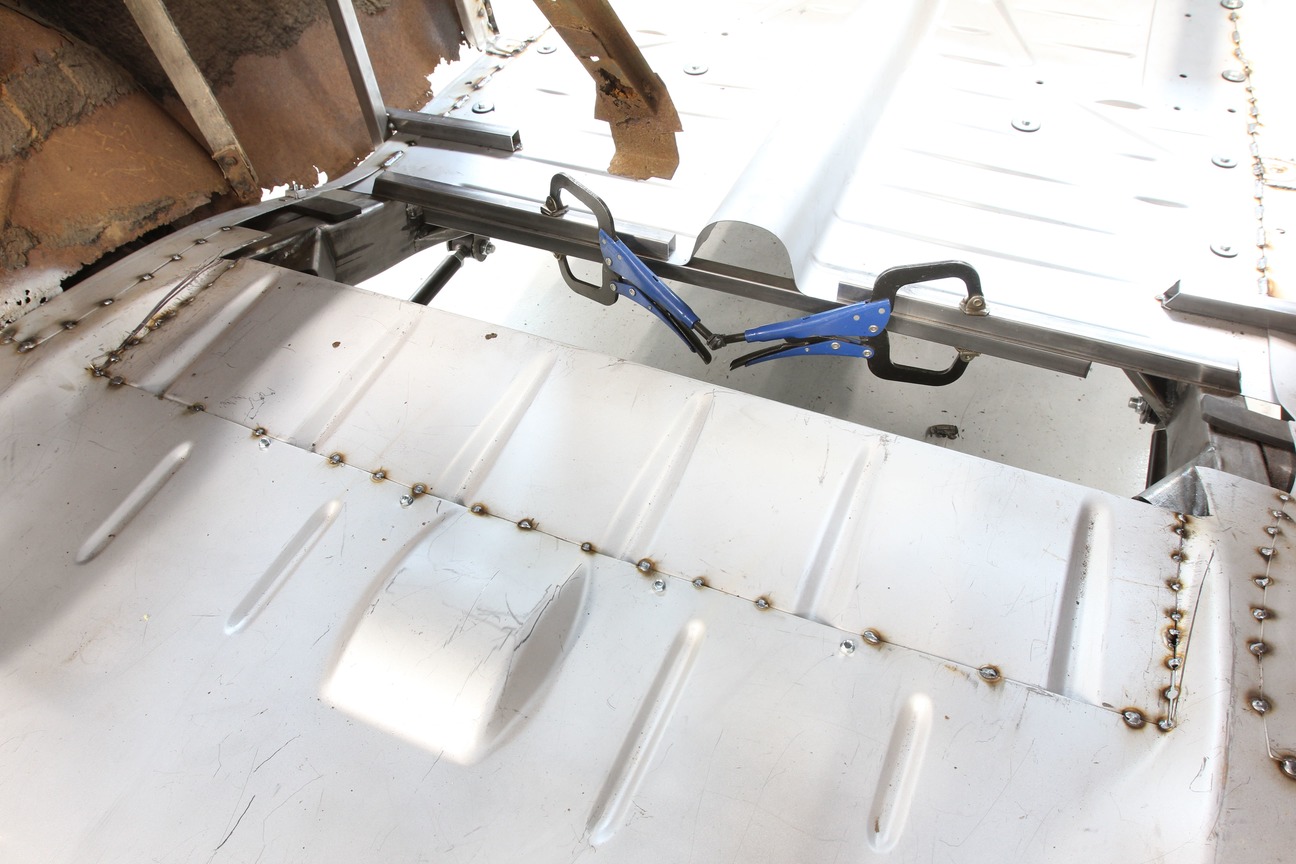
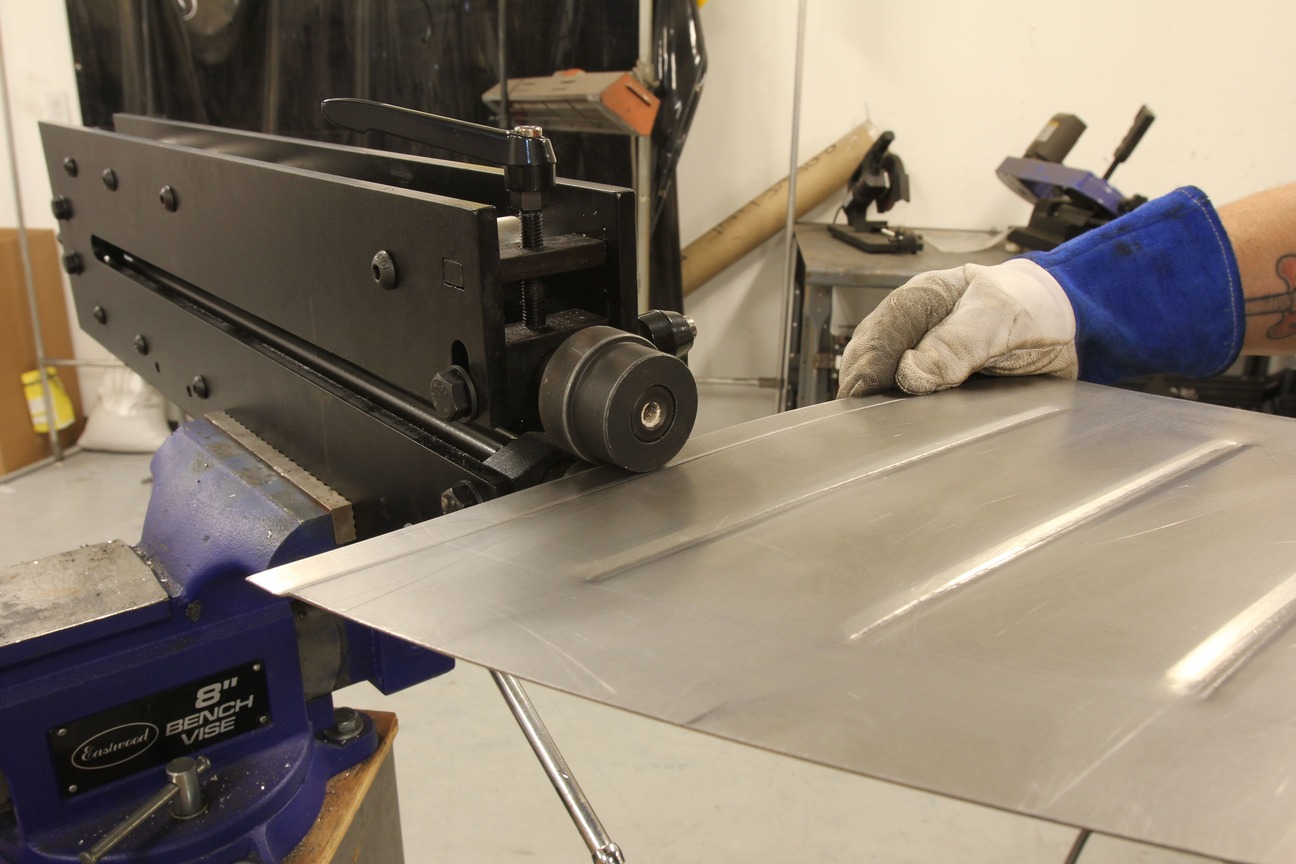
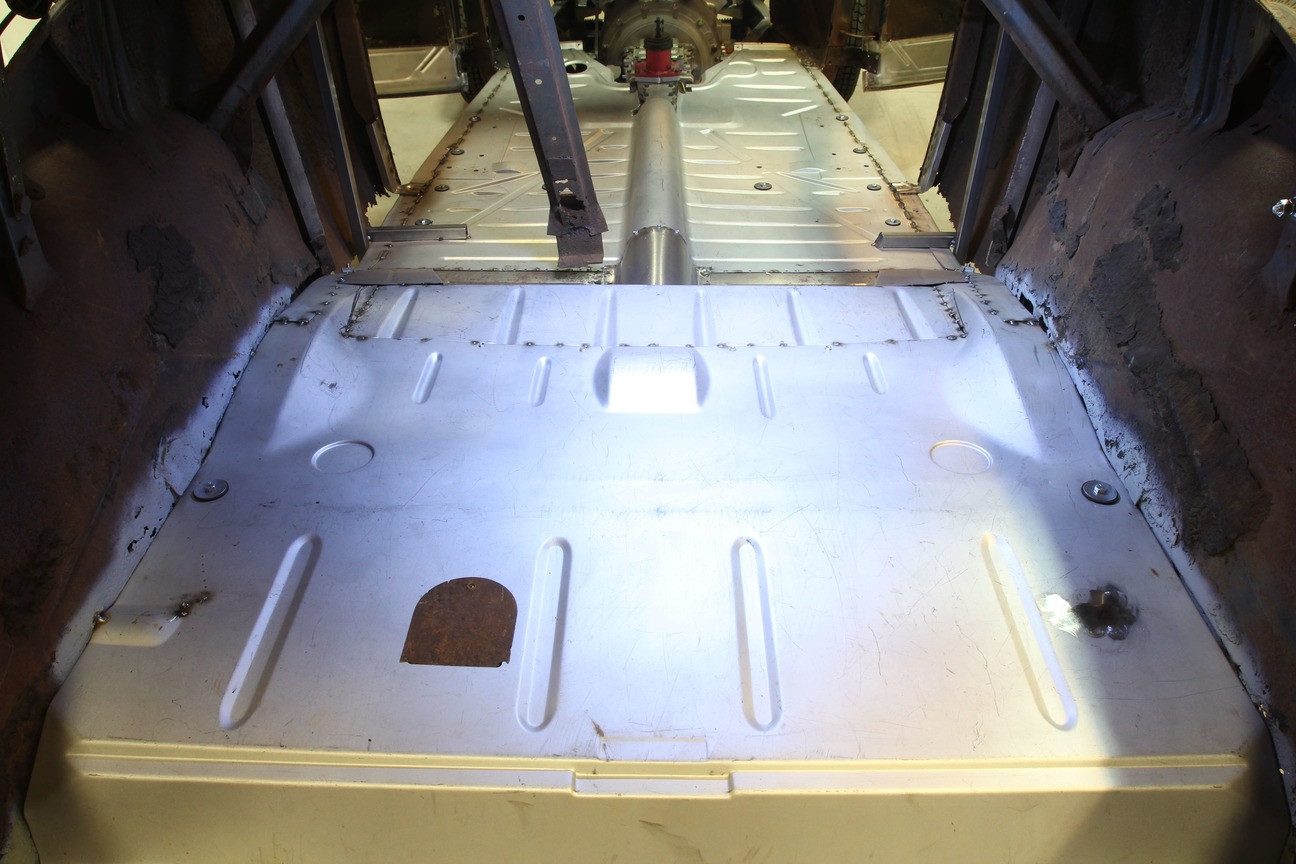
Extending the floor section is a simple manner of fabricating two flat panels, trimmed to fit. We opted to bead roll a couple rows into the surface of each panel to strengthen it and give it a matching look to the existing new floors.
We also added a flange to one end with the bead roller so that it can slip under the main floor section and be spot welded into place.
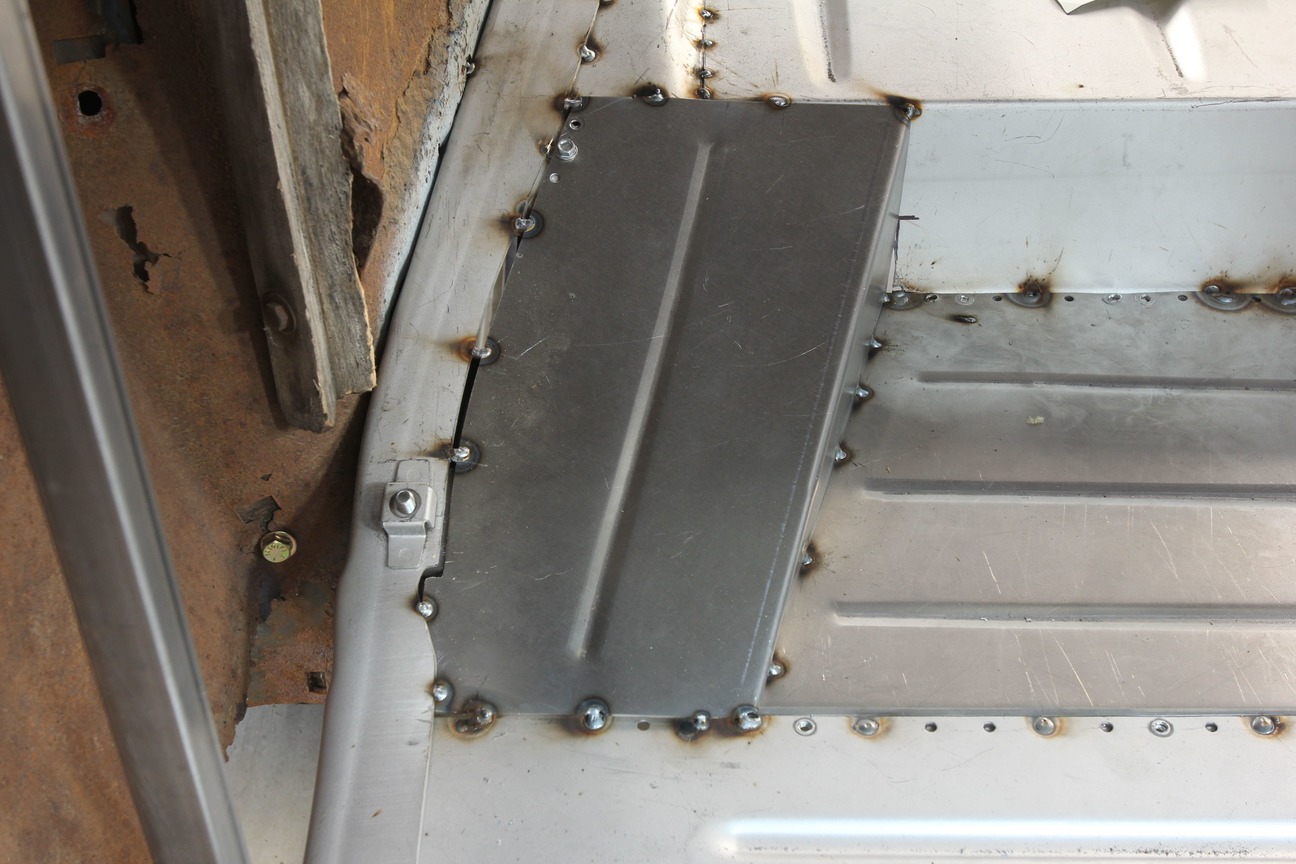
With the panel tacked at both ends, it’s time to address the outer pockets that need filling.
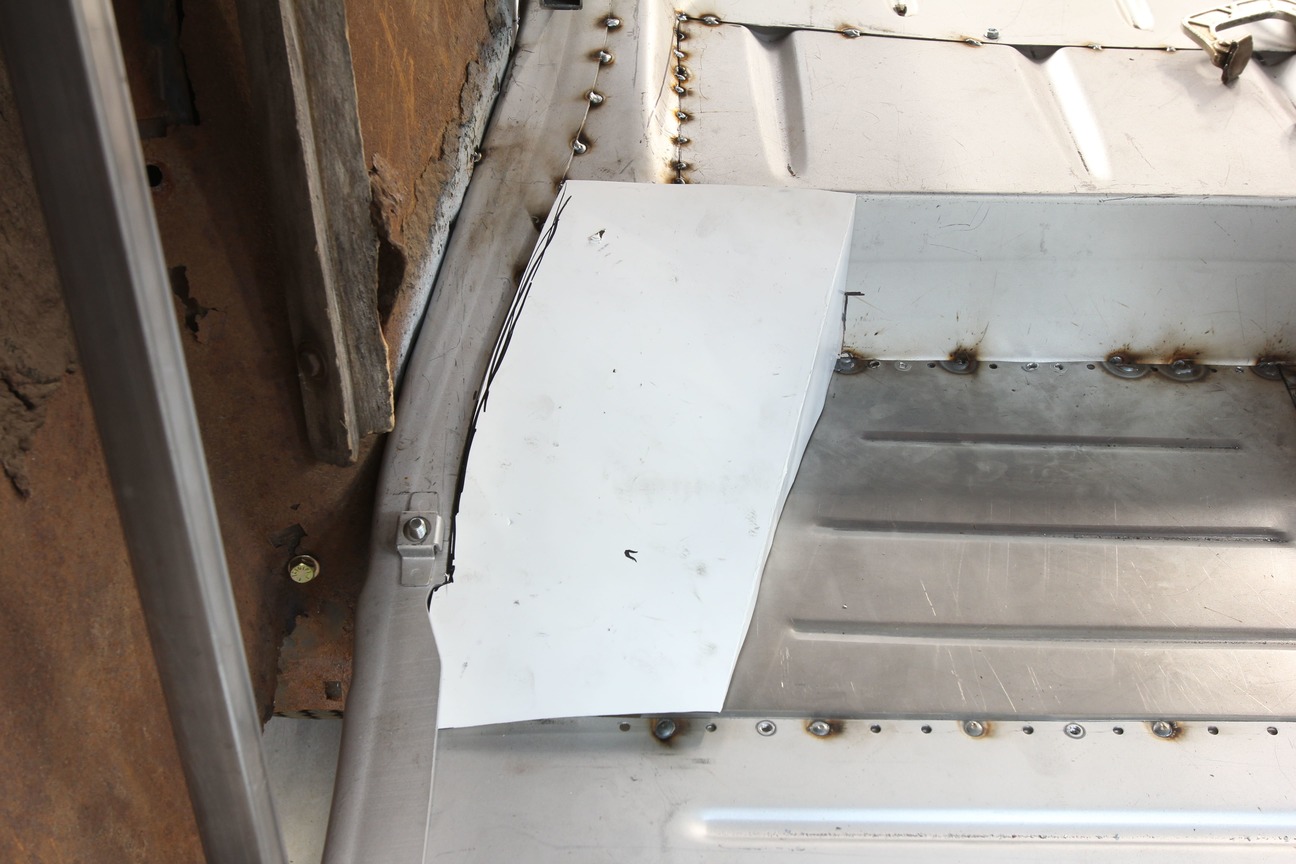
For strength and simplicity, I’d like to make this section out of one piece. First a template is made before the shape is transferred to 18-gauge sheetmetal.
The pocket was made by breaking the one edge and trimming to suit. Note the bead roll that was also applied to this panel.
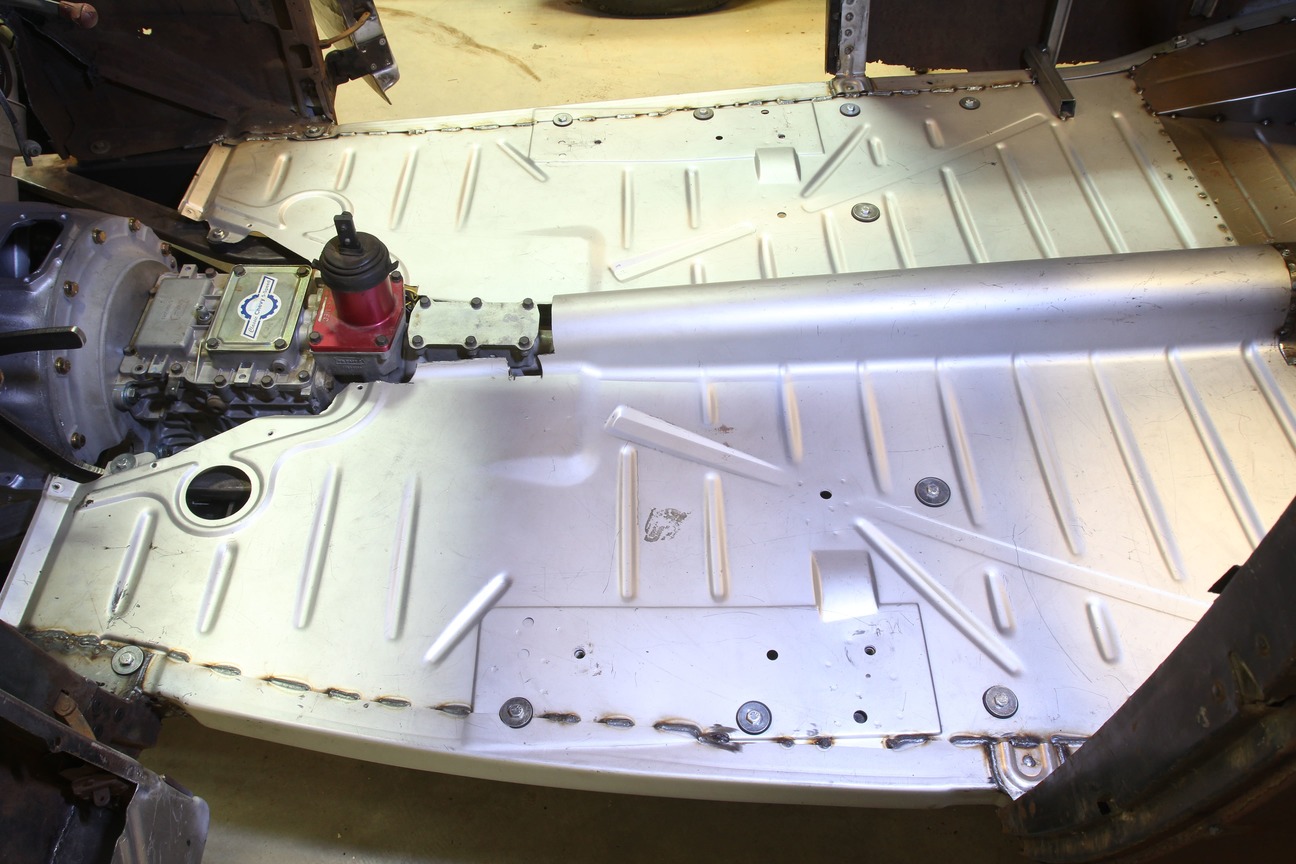
The last piece of the puzzle is to fabricate a small driveshaft tunnel to match the existing new floor’s shape, terminating into the trunk floor kick-up.
With the new floors tacked in place, it’s time to burn the sheetmetal in once and for all before moving on to the firewall and the under decklid panel. Then, it’s a matter of applying seam sealer, undercoating, and a final top coat and these floors are a wrap!
With the new floors tacked in place, it’s time to burn the sheetmetal in once and for all before moving on to the firewall and the under decklid panel. Then, it’s a matter of applying seam sealer, undercoating, and a final top coat and these floors are a wrap!
We use cookies to ensure that we give you the best experience on our website. If you continue to use this site we will assume that you are happy with it.