Even though axle seals are dirt cheap (less than $5 each), it requires an extensive install process. We’ll walk you through it and provide additional parts and tips along the way.
Replacing the Axle Seals in an Early 10-Bolt Rearend
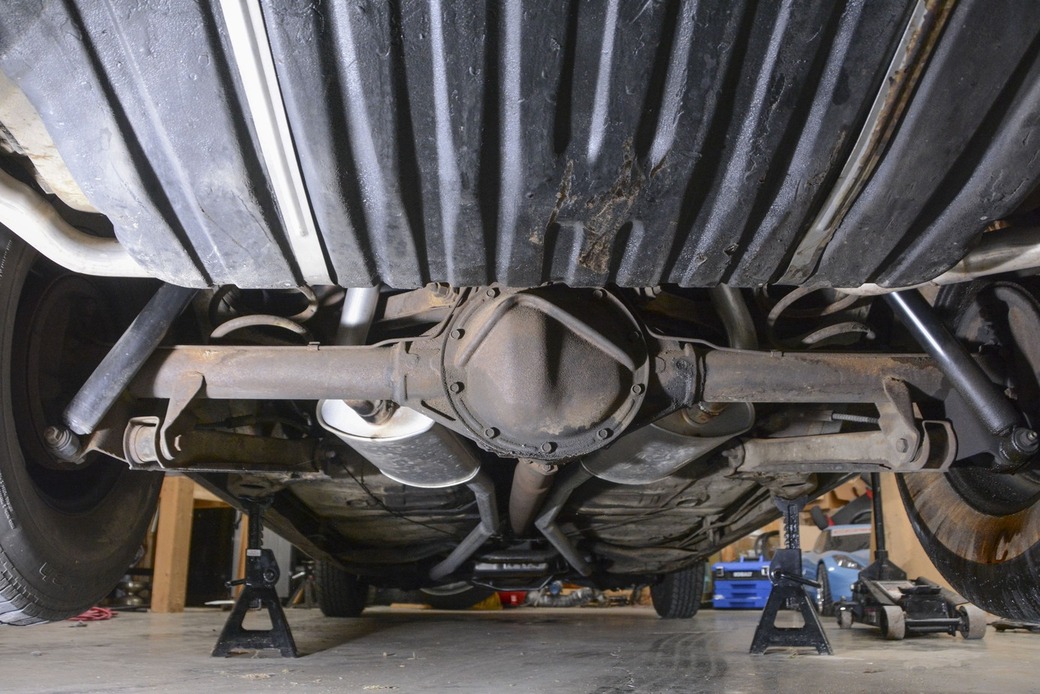
If you drive an old car enough, you’ll run into some regular maintenance issues that can be quite a pain. Such is the case with our ’64 Chevelle daily driver. This is a relatively low-mileage car, just recently turning over the 100,000-mile mark. Even with low mileage and a very easy life, compared to most cars from the muscle car era, this cruiser needed some attention. We’ve logged approximately 40,000 miles in this car, and it’s always been faithful with its 283 and Powerglide. The original 10-bolt rearend is still in place as well.
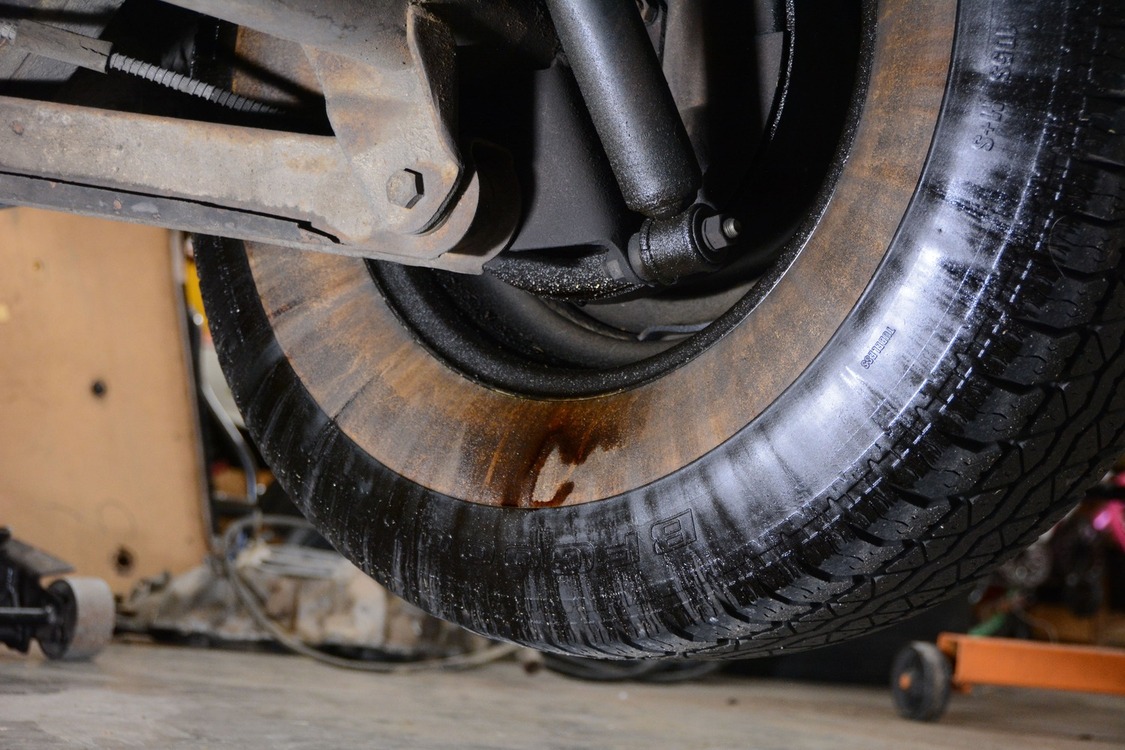
The first clue of a leaky axle seal is the inside of your tire becoming shiny. In our case, we noticed a small spot of oil on the garage floor (underneath the tire) after the car sat for a few days.
Despite the car’s dependability, we noticed an issue on a recent road trip that fast-tracked this long-forgotten maintenance item to the top of our to-do list. The axle seal on the passenger side was slinging gear oil all over the inside of the tire, wheel, and drum brake assembly. Unfortunately, it looked like it had been leaking for quite some time, but it was an “out of sight, out of mind” situation. We didn’t run the rearend dry on gear oil, but once these seals start leaking, it’ll only get worse.
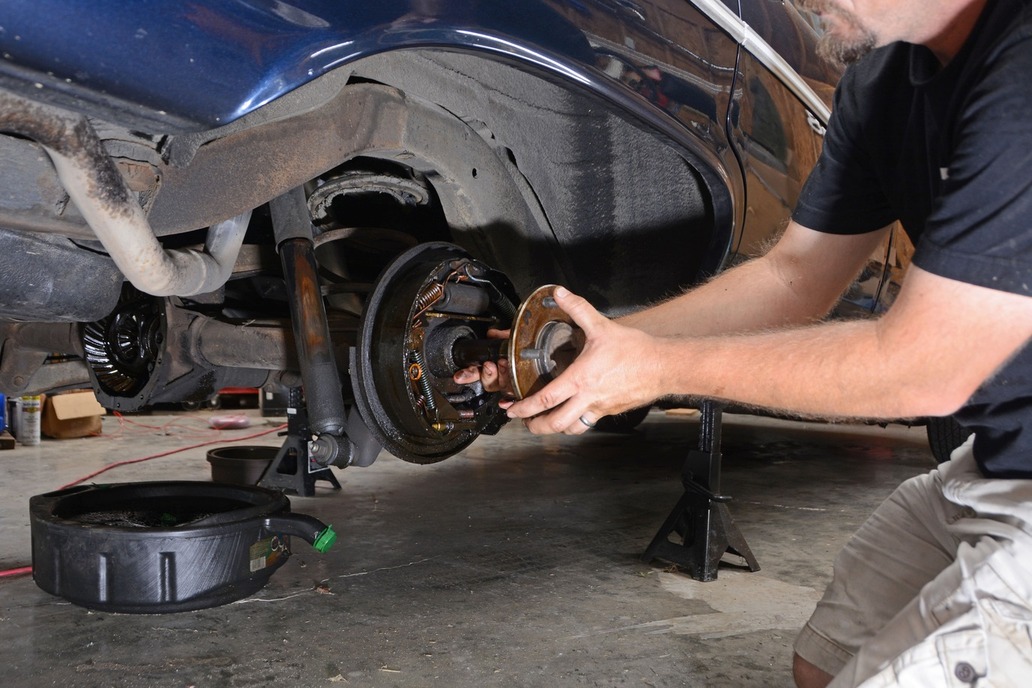
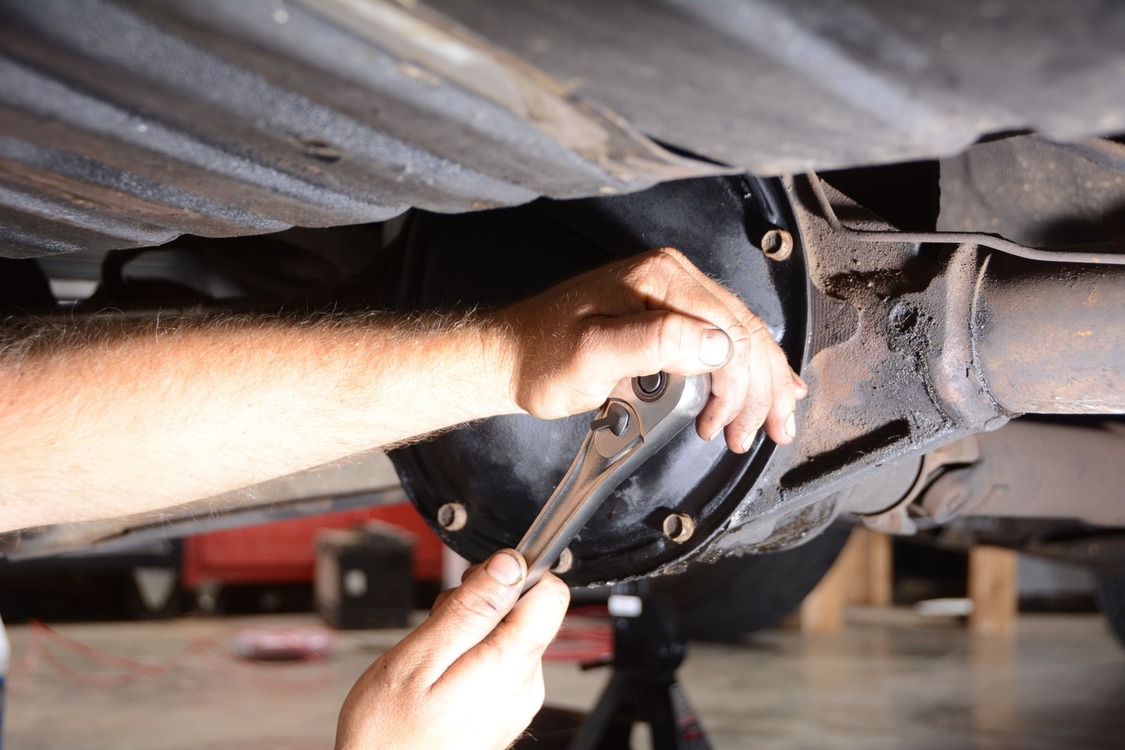
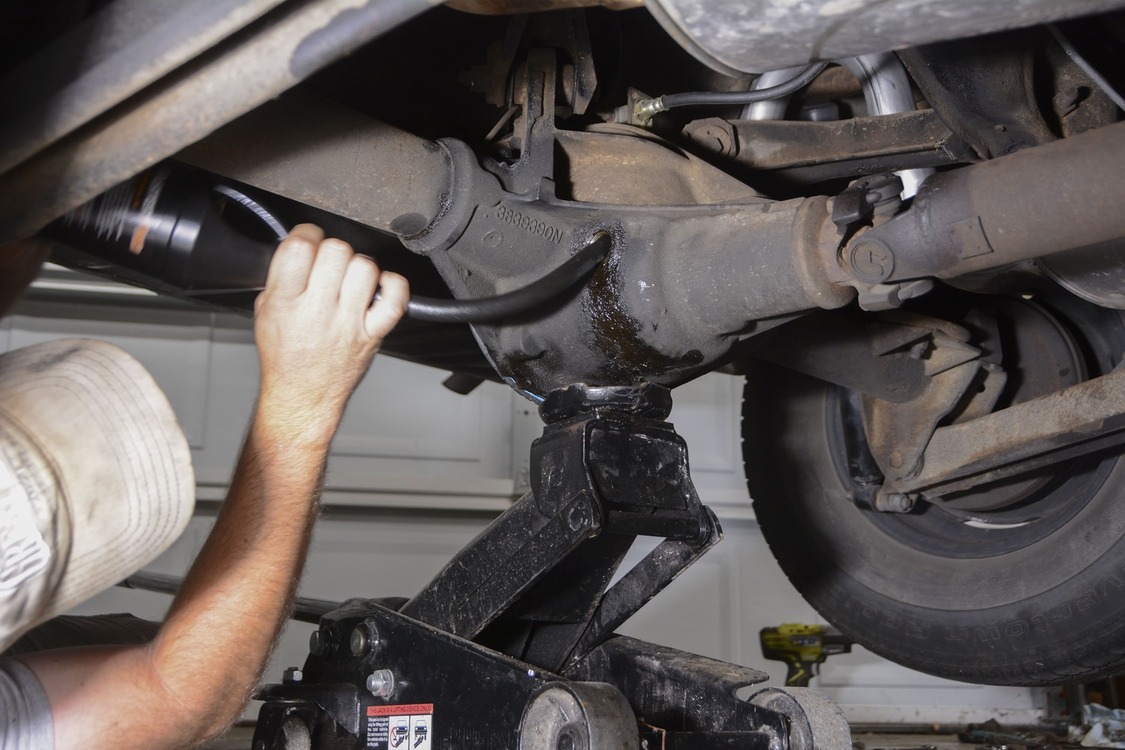
The first step in the process is lifting the back of the car and supporting it with jackstands under the framerails. Then, we remove the jack and let the rearend housing drop.
We went to Summit Racing to see what kind of parts were available. Lucky for us, Summit had the seals in stock for less than $5 per piece. Replacing the axle seals is a relatively extensive job, considering that the parts to fix it come in at less than $10. However, there are a few other expenses involved. Since we had the rearend pulled apart we wanted to replace the bearings. We used high-quality Timken seals and bearings and a Fel-Pro rearend cover gasket, and then grabbed 2 quarts of 80W-90 gear oil.
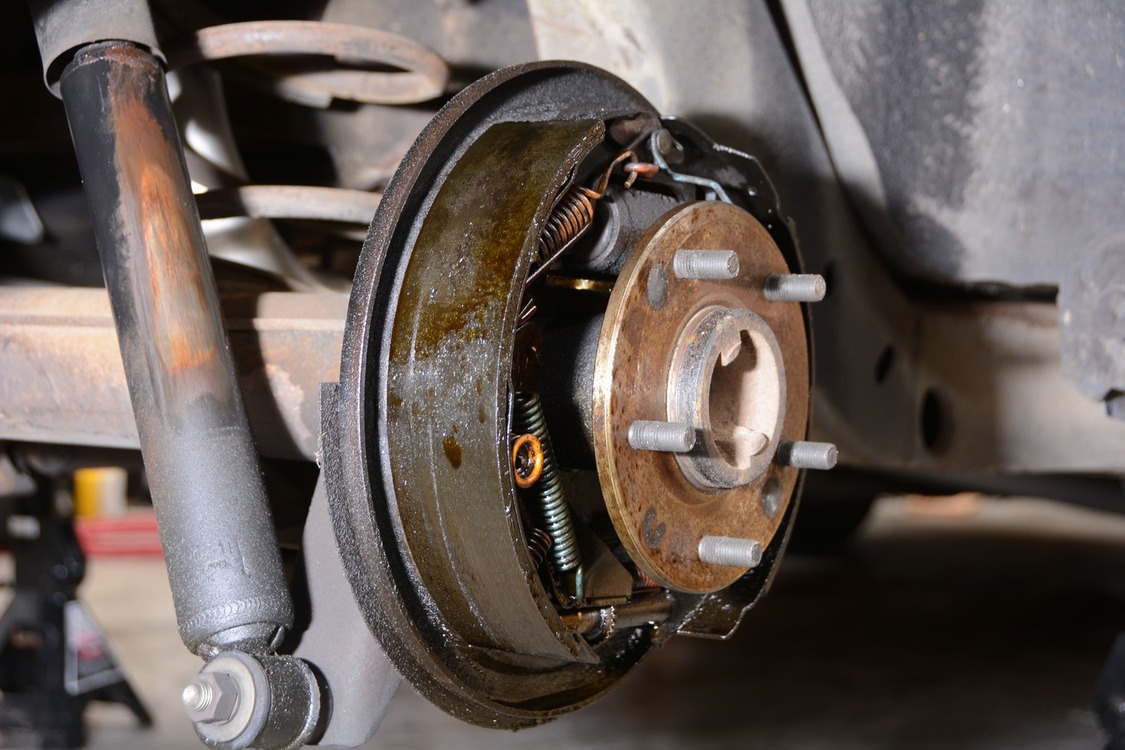
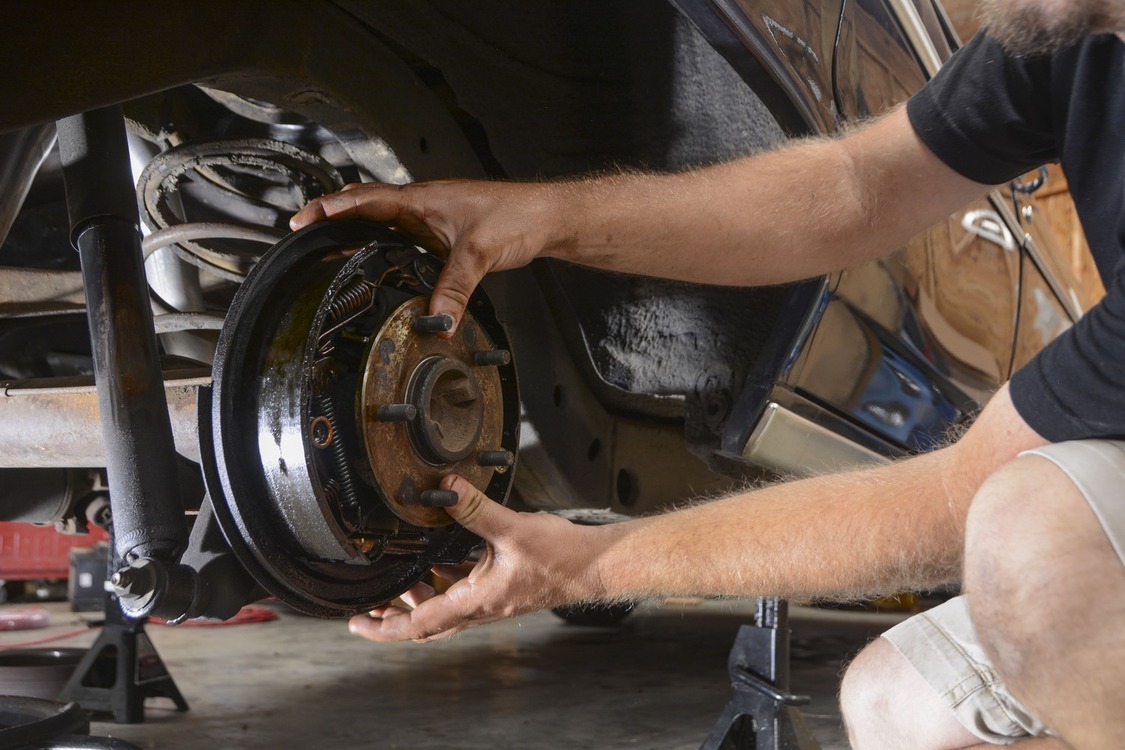
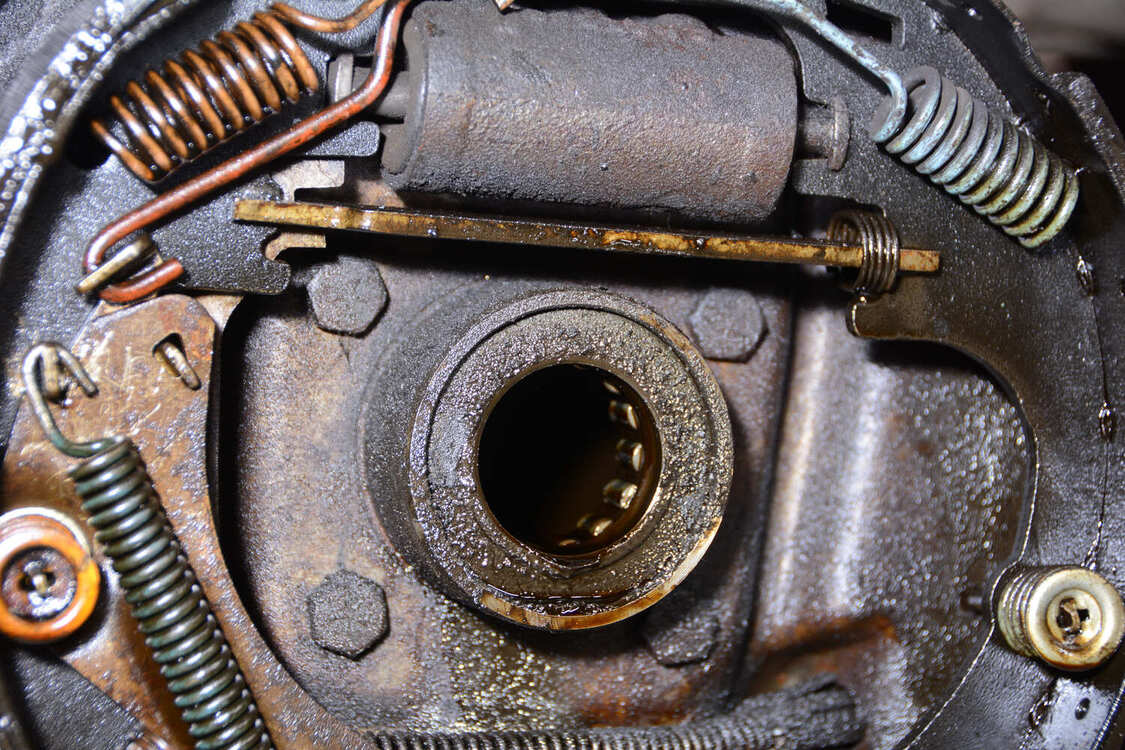
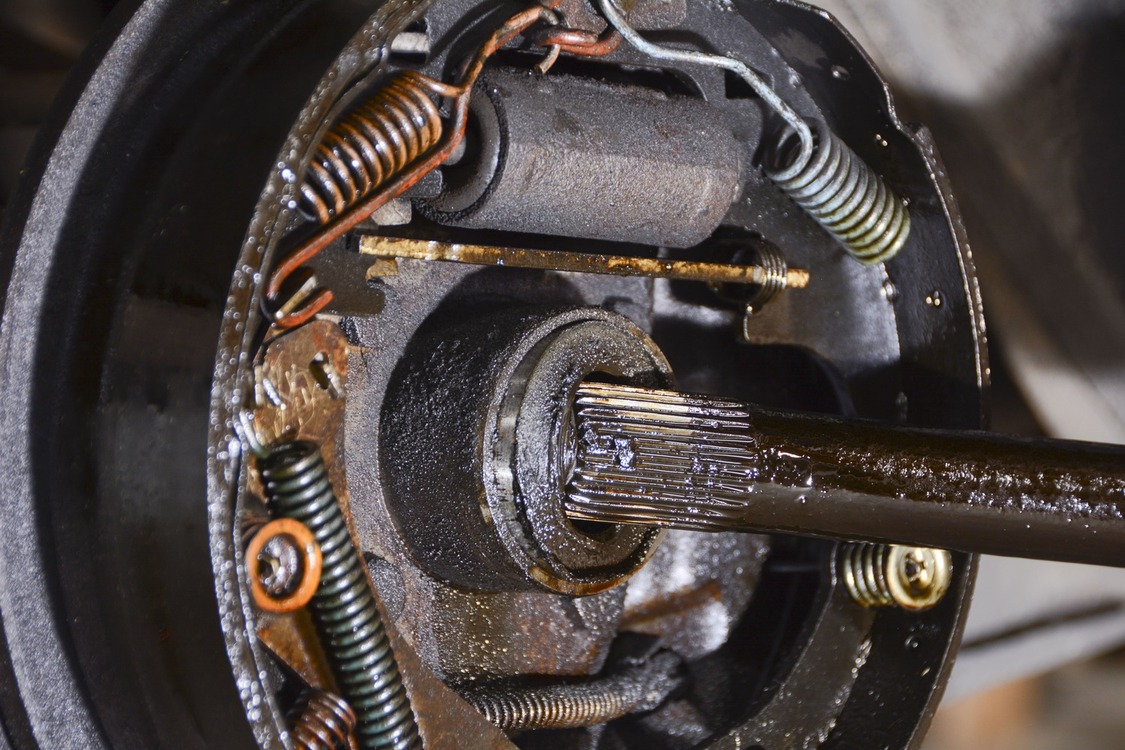
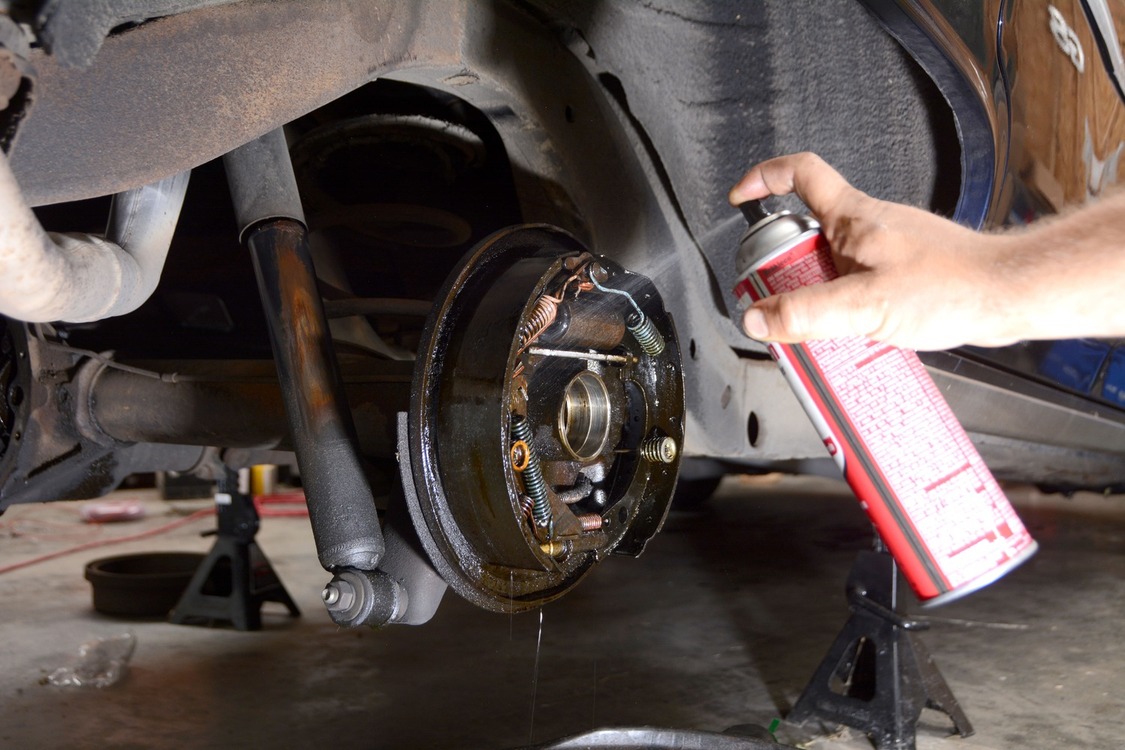
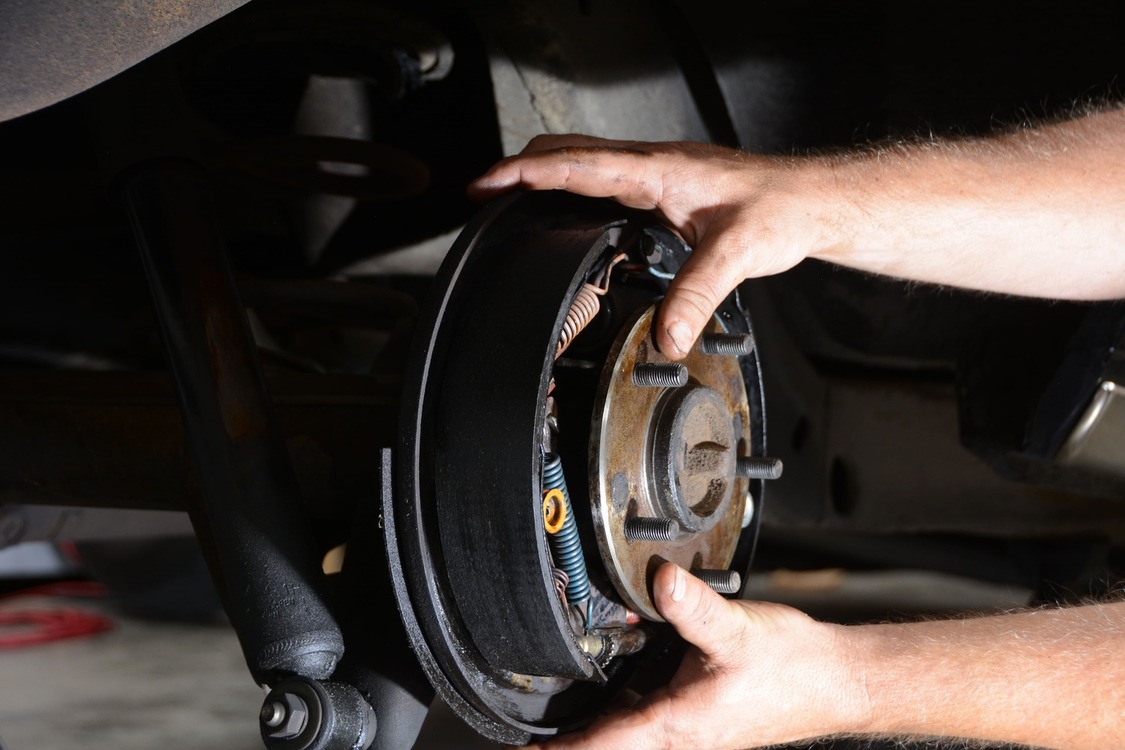
We removed the rear tires and wheels and then removed the brake drums. Notice the saturated brake shoes, backing plates, and hardware. You can clean the parts with brake cleaner, but it’s also a good idea to replace the shoes.
All together, we spent less than $100, and that included a bearing and seal installer tool from Summit Racing. You’ll need to dedicate a few hours to this process, and hiccups could always complicate things. Fortunately, our ’64 Chevelle was a breeze and we were back on the road without any drama, and without slinging gear oil everywhere.
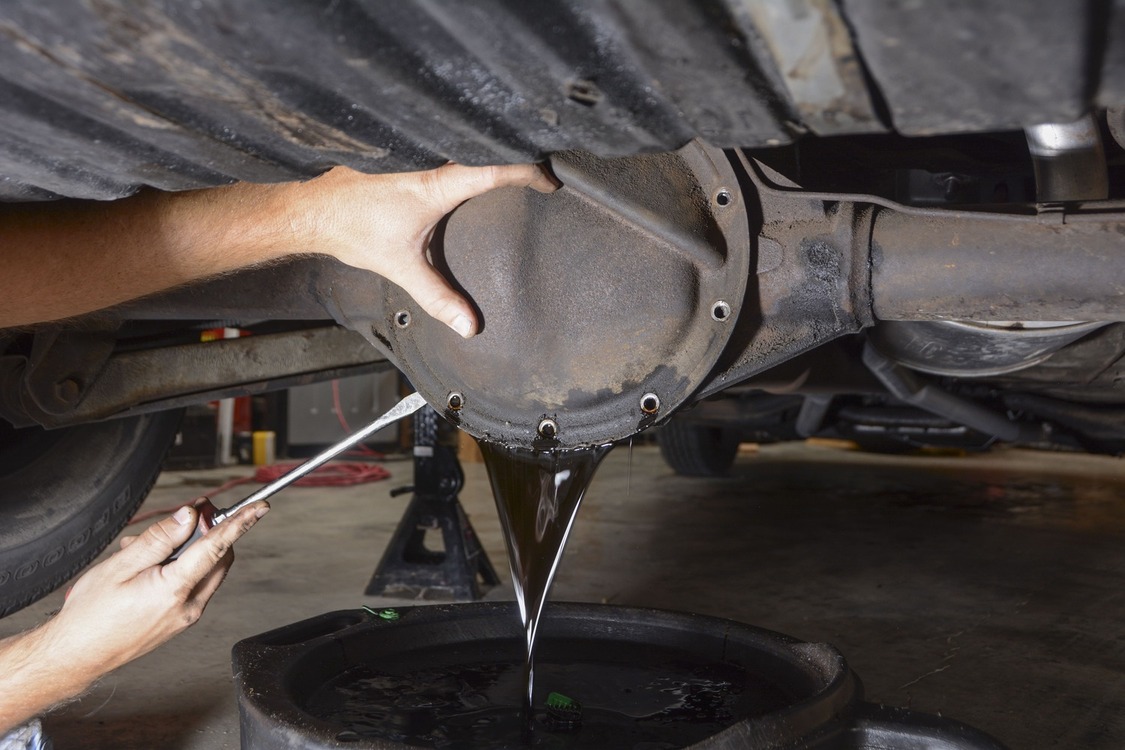
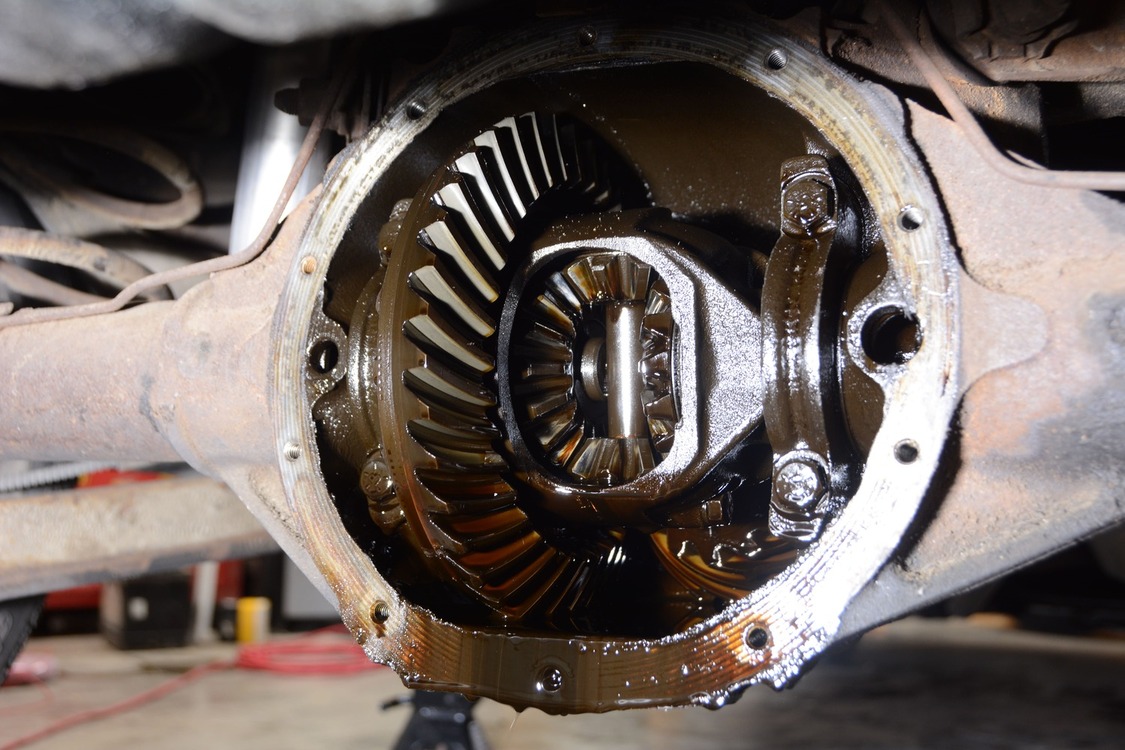
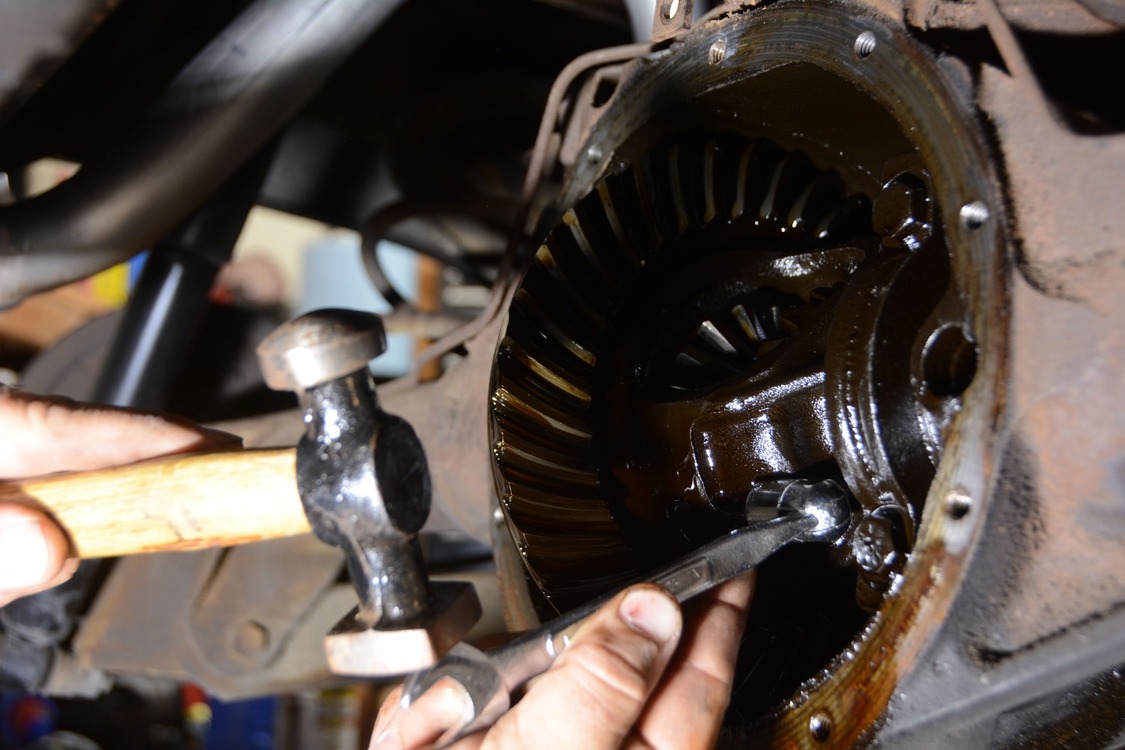
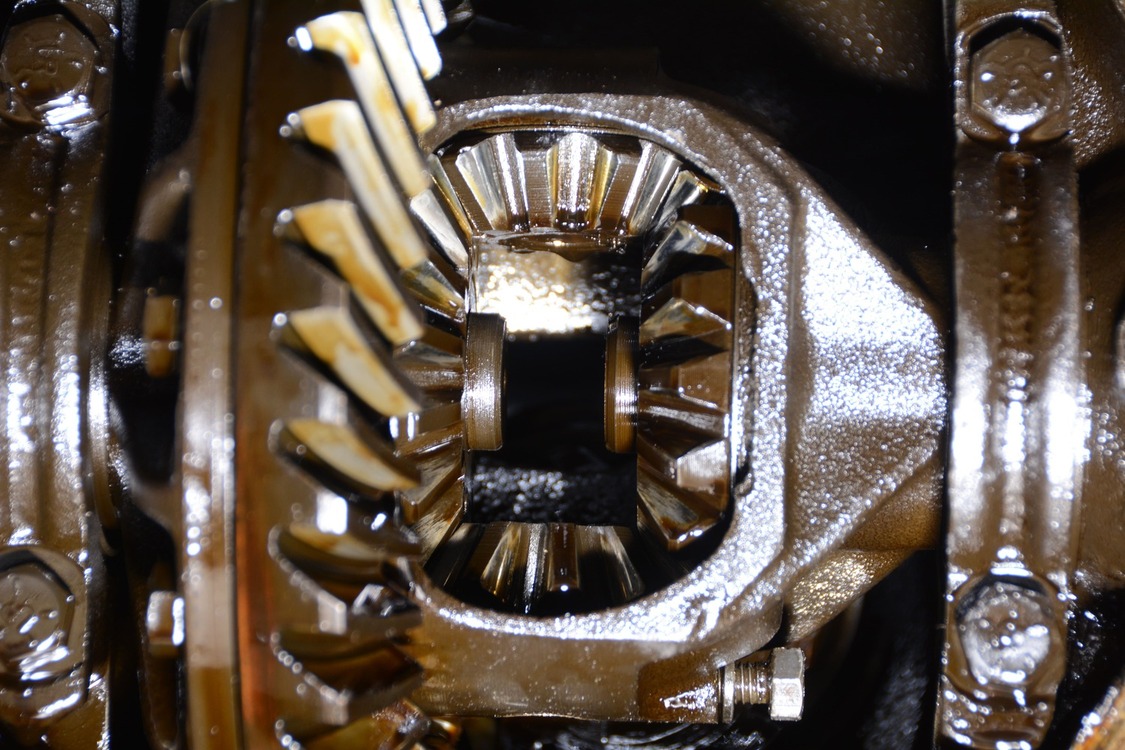
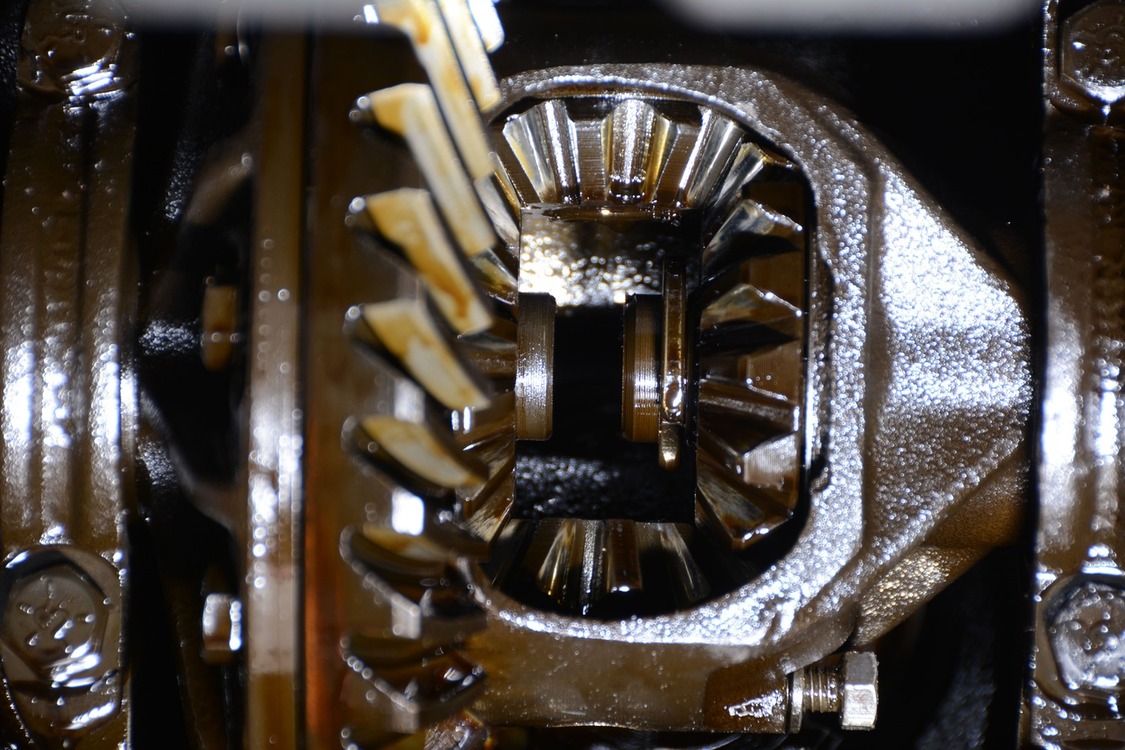
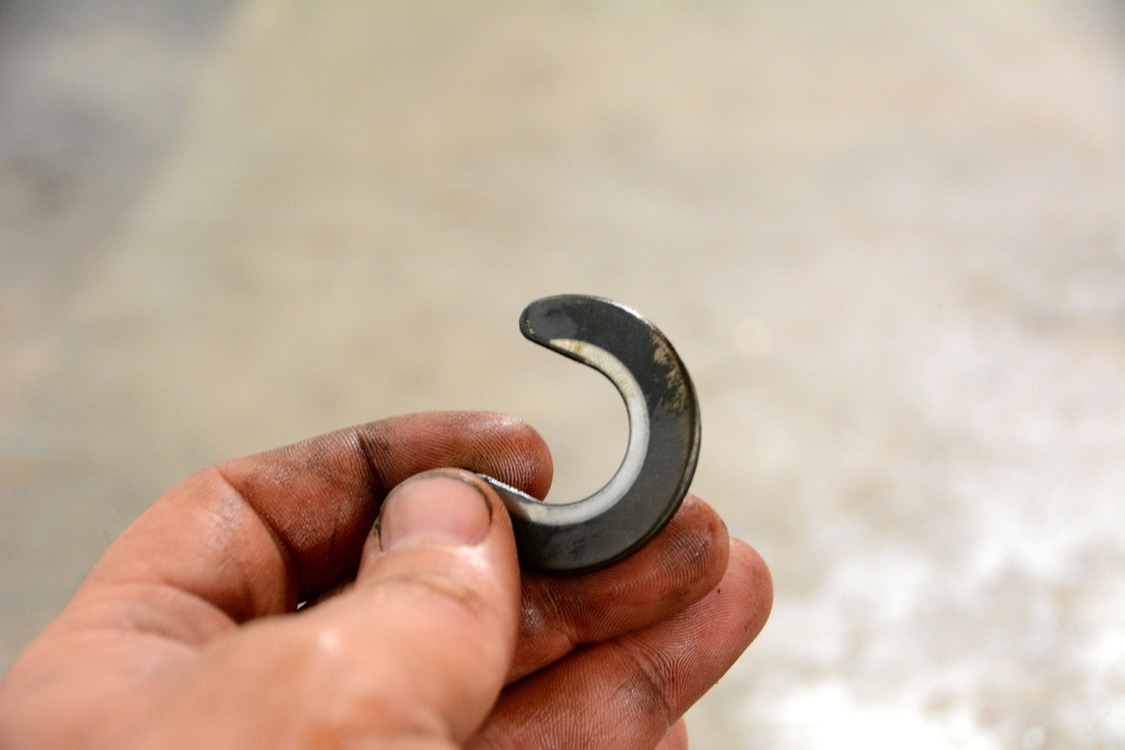
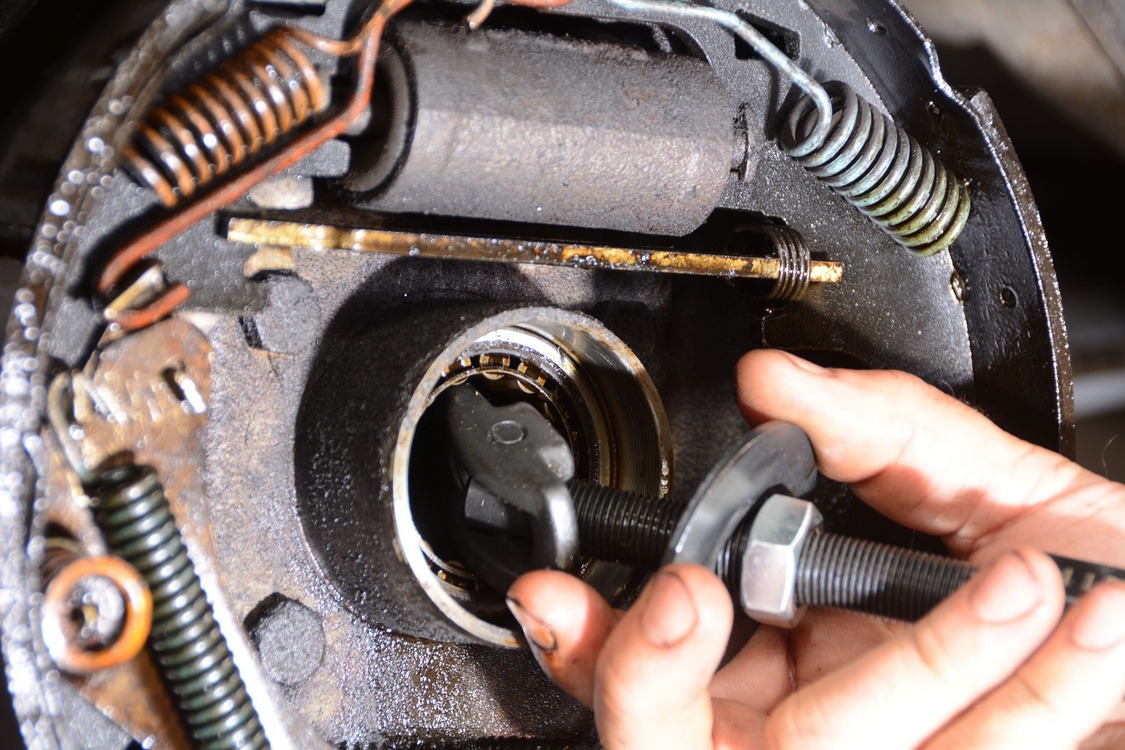
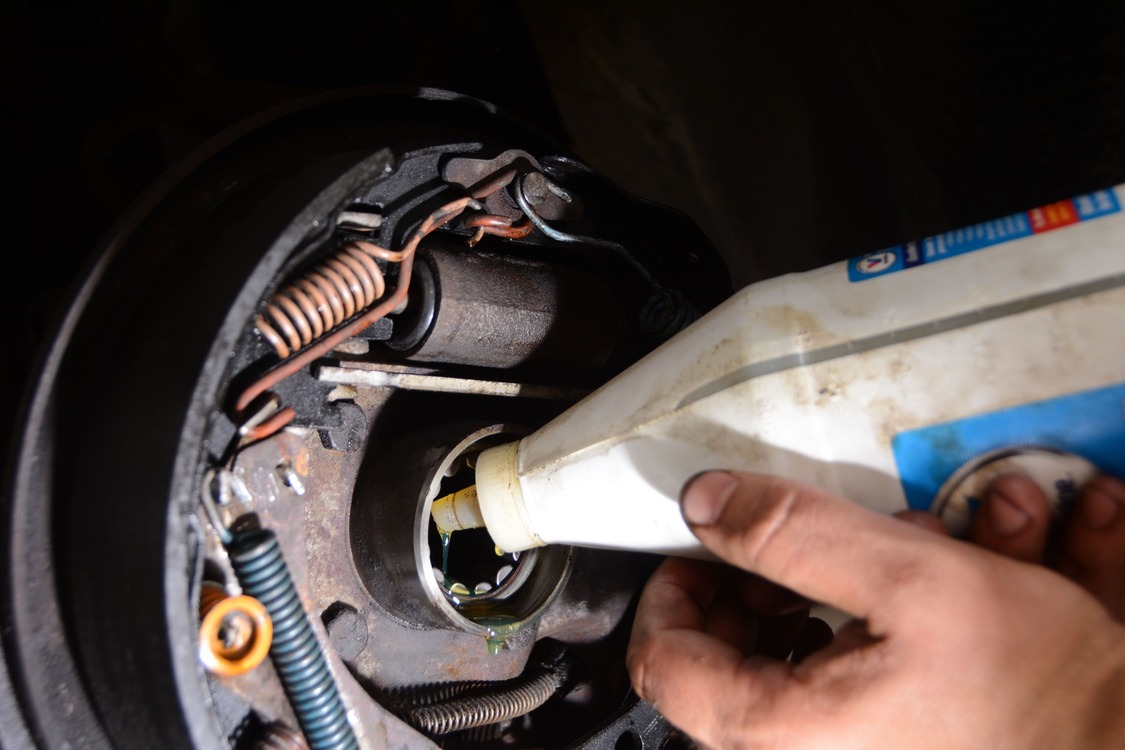
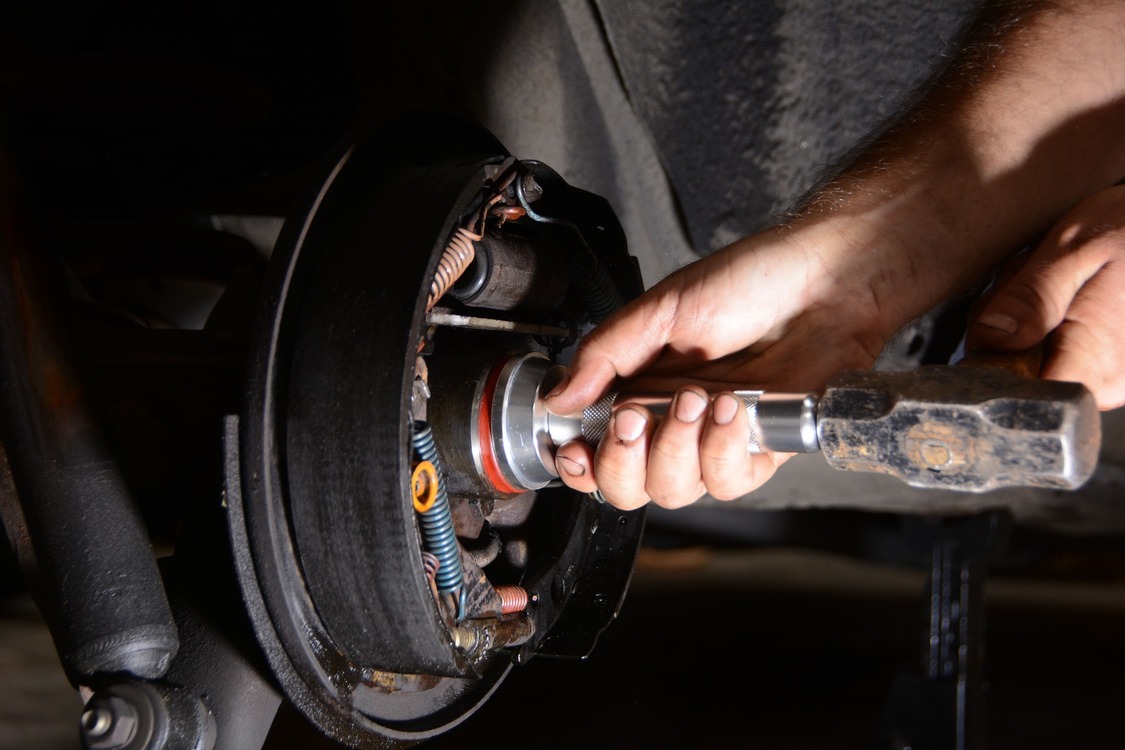
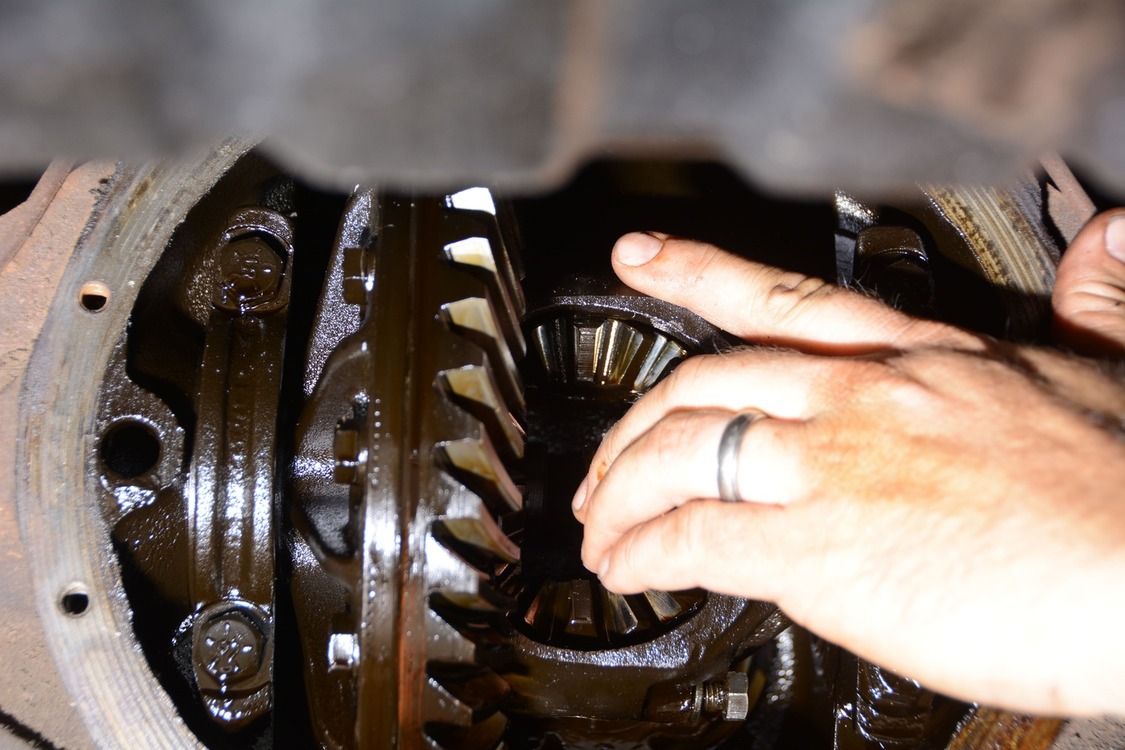
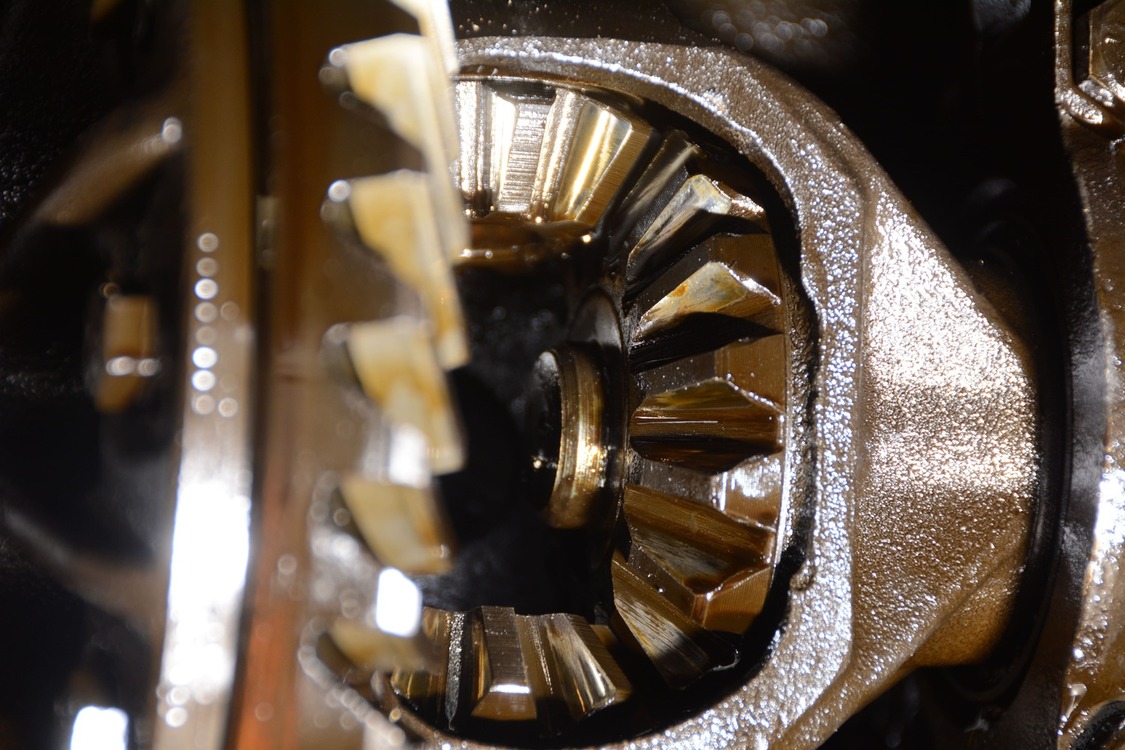
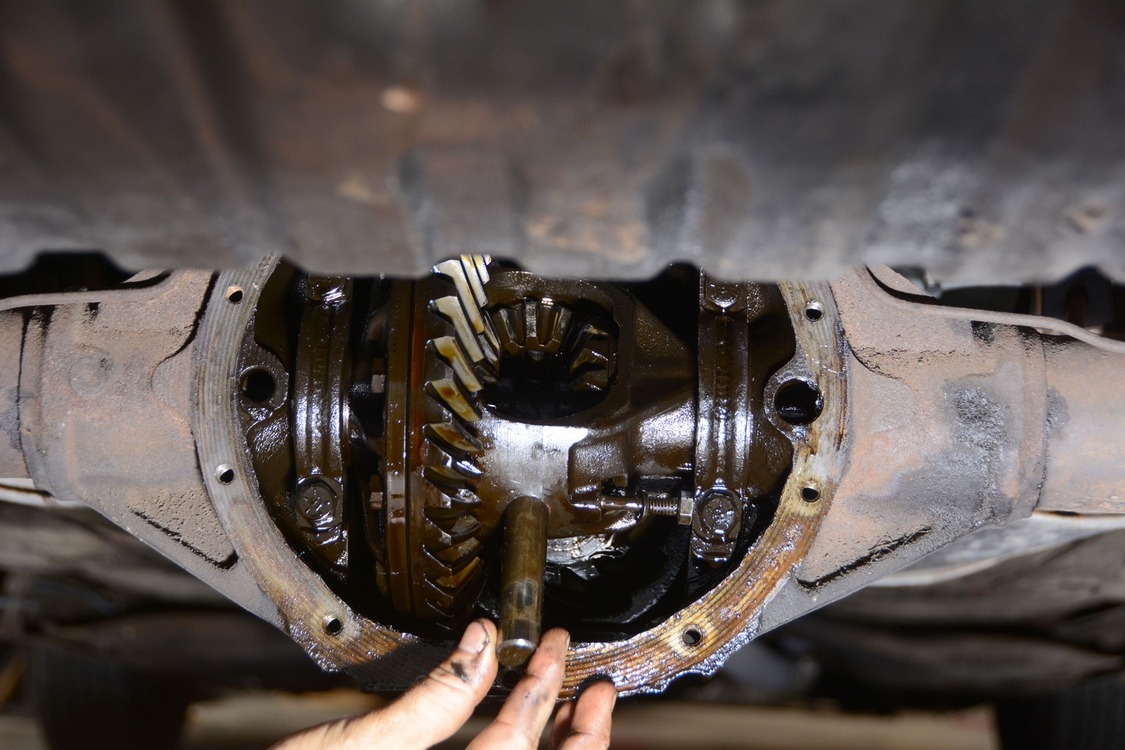
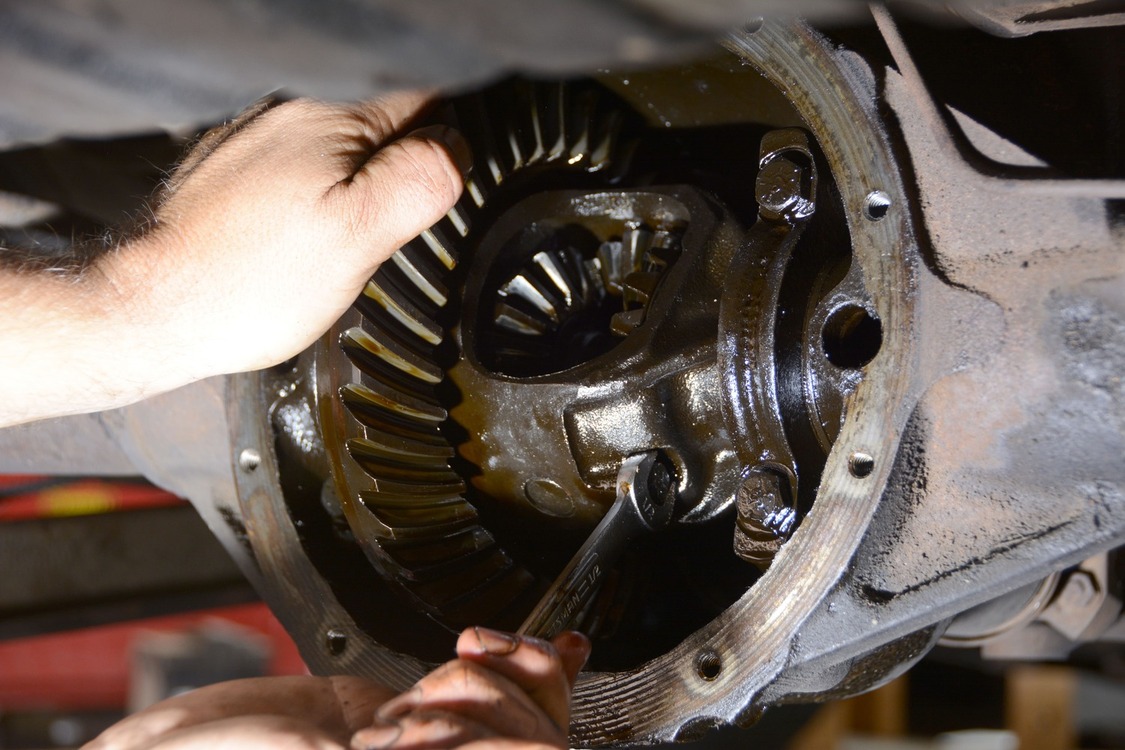
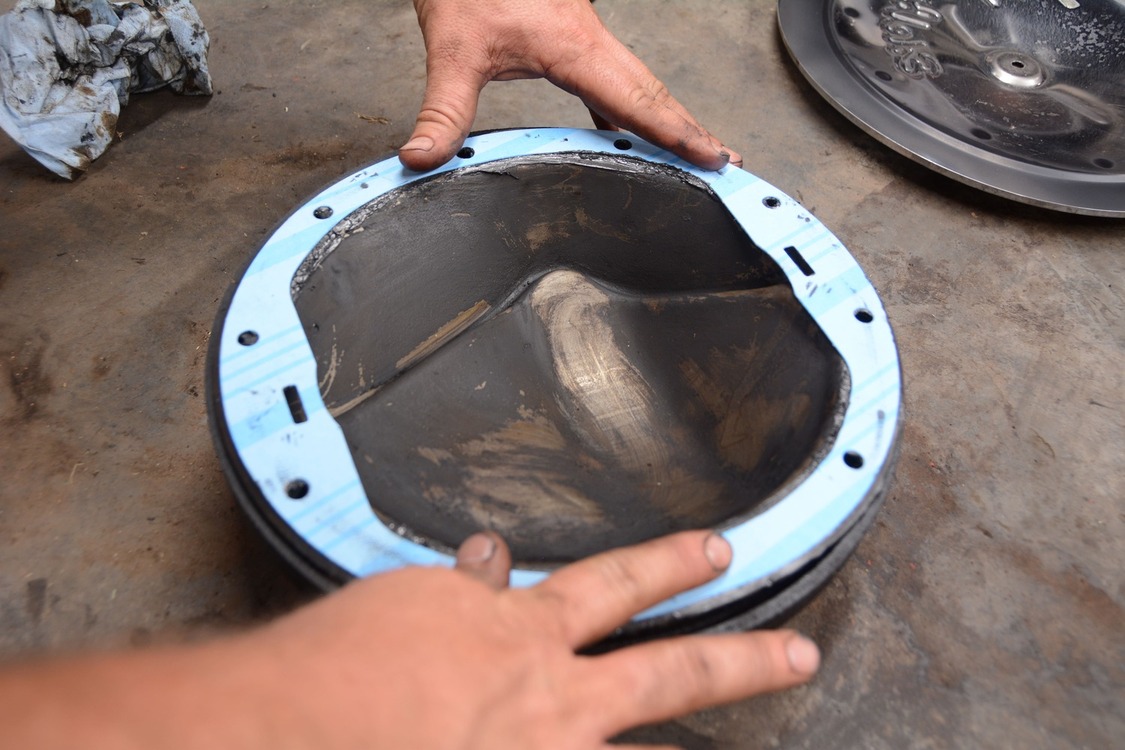
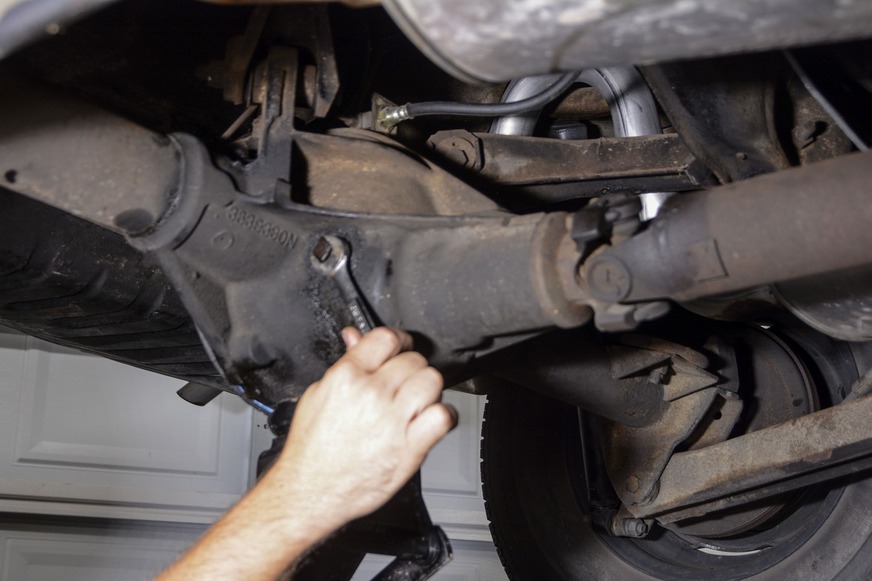
On a 10-bolt rearend, the cover must be removed to pull the axles. We removed the 10 bolts and used a straight screwdriver to gently pry the cover away from the housing.With the cover out of the way, we can see the ring-and-pinion as well as the carrier. Our ’64 Chevelle is all stock underneath with an open differential, but the same principles apply to most 10-bolt rearends.We rotated the carrier to access the single bolt that holds the cross-shaft pin in place. There is not enough room to use a regular socket and ratchet. You can use a 1/2-inch open-end wrench, or in our case, we used a socket combination wrench and tapped it with a hammer to break it loose.The bolt will not come all the way out, but it’s out far enough to remove the cross-shaft pin by hand. The pin can be stubborn on some applications, but it moved freely on our Chevelle.If the cross-shaft pin gets tight (like ours did), you can wrap the pin in a shop towel and then use a good pair of pliers to grab it and pull outward. Just be careful not to damage the pin or use excessive force on it.With the pin completely removed, the axles should be able to move inward without interference.Now we can slide it out from under the car and push the axles inward. It should only move about a 1/2 inch, so it may not feel like it made a big difference, but we’ll take a look under the car to see if the C-clip is exposed.There it is, our C-clip is now accessible and should spin freely. You can use a magnet to remove it or reach in and remove it by hand.This C-clip is the only thing keeping the axle attached to the rearend, so if you’re doing any spirited driving (especially with sticky tires), you should consider installing a C-clip eliminator kit.With the C-clip out of the way, the axle is free to slide completely out of the rearend.Now we have a clear view of the axle seal, and we can see how badly it has been leaking. The bearings look fine, but we already ordered a new pair of bearings so we’ll install them as well.Special tools are available to remove the axle seal, but we used the end of the axle to pry out the old seal. It worked like a charm.We had to use a special bearing puller tool to remove the bearings. A few bumps with the slide hammer and it came right out, but these can sometimes be stubborn.Brake cleaner is used to clean the housing, backing plate, and brake components before we start the reassembly process.A bearing installer from Summit Racing (PN WMR-W83020) is used to make sure the bearing is seated properly without damaging it. There will be a distinct tone difference when the bearing cannot go any further.The new bearings are Timken units from Summit Racing (PN TMK-5707). We poured some gear oil on the bearings, but they don’t need much since they are partially submerged in oil.Now the new seal can be installed with the installer tool. We used Timken axle seals from Summit Racing (PN TMK-8660S). These seals are less than $5 per piece and should stop the gear oil from slinging out.The axle goes back in easily, and we pushed it inward once the axle splines lined up with the carrier.Back under the car, the receiver groove for the C-clip is visible, so we install the C-clip by hand.Once the C-clip is in place, we can pull the axle outward until it stops. We can then repeat this same process on the other axle to replace the seal and bearing.With the other axle seal and bearing replaced, we are ready to reassemble the carrier with the cross-shaft pin. Excessive force is not needed—the pin should slide in easily, as long as the axles are pulled outward.The retaining bolt can be tightened with either a 1/2-inch wrench or a socket combination wrench. A dab of red Loctite on the threads is a good idea.We cleaned the old gasket off the rearend cover with a putty knife and cleaned it with brake cleaner. We laid a bead of RTV on the cover and then installed the Fel-Pro gasket that we sourced from Summit Racing (PN FEL-RDS550281).Although not completely necessary, we blasted a quick coat of rattle-can black on the rearend cover. Then, we installed the 10 original bolts in a crisscross pattern to ensure proper sealing.Finally, we can remove the fill plug and squeeze some 80W-90 gear oil into the rearend until it starts running out of the hole.The fill plug is tightened and we can now take the car off the jackstands and go for a testdrive.
We use cookies to ensure that we give you the best experience on our website. If you continue to use this site we will assume that you are happy with it.