In a perfect world, every car build starts out with a brand-new rolling chassis from Roadster Shop, Art Morrison, Scott’s Hotrods, or some other quality builders. But, in our world, that dream will just have to live in our heads a little bit longer.
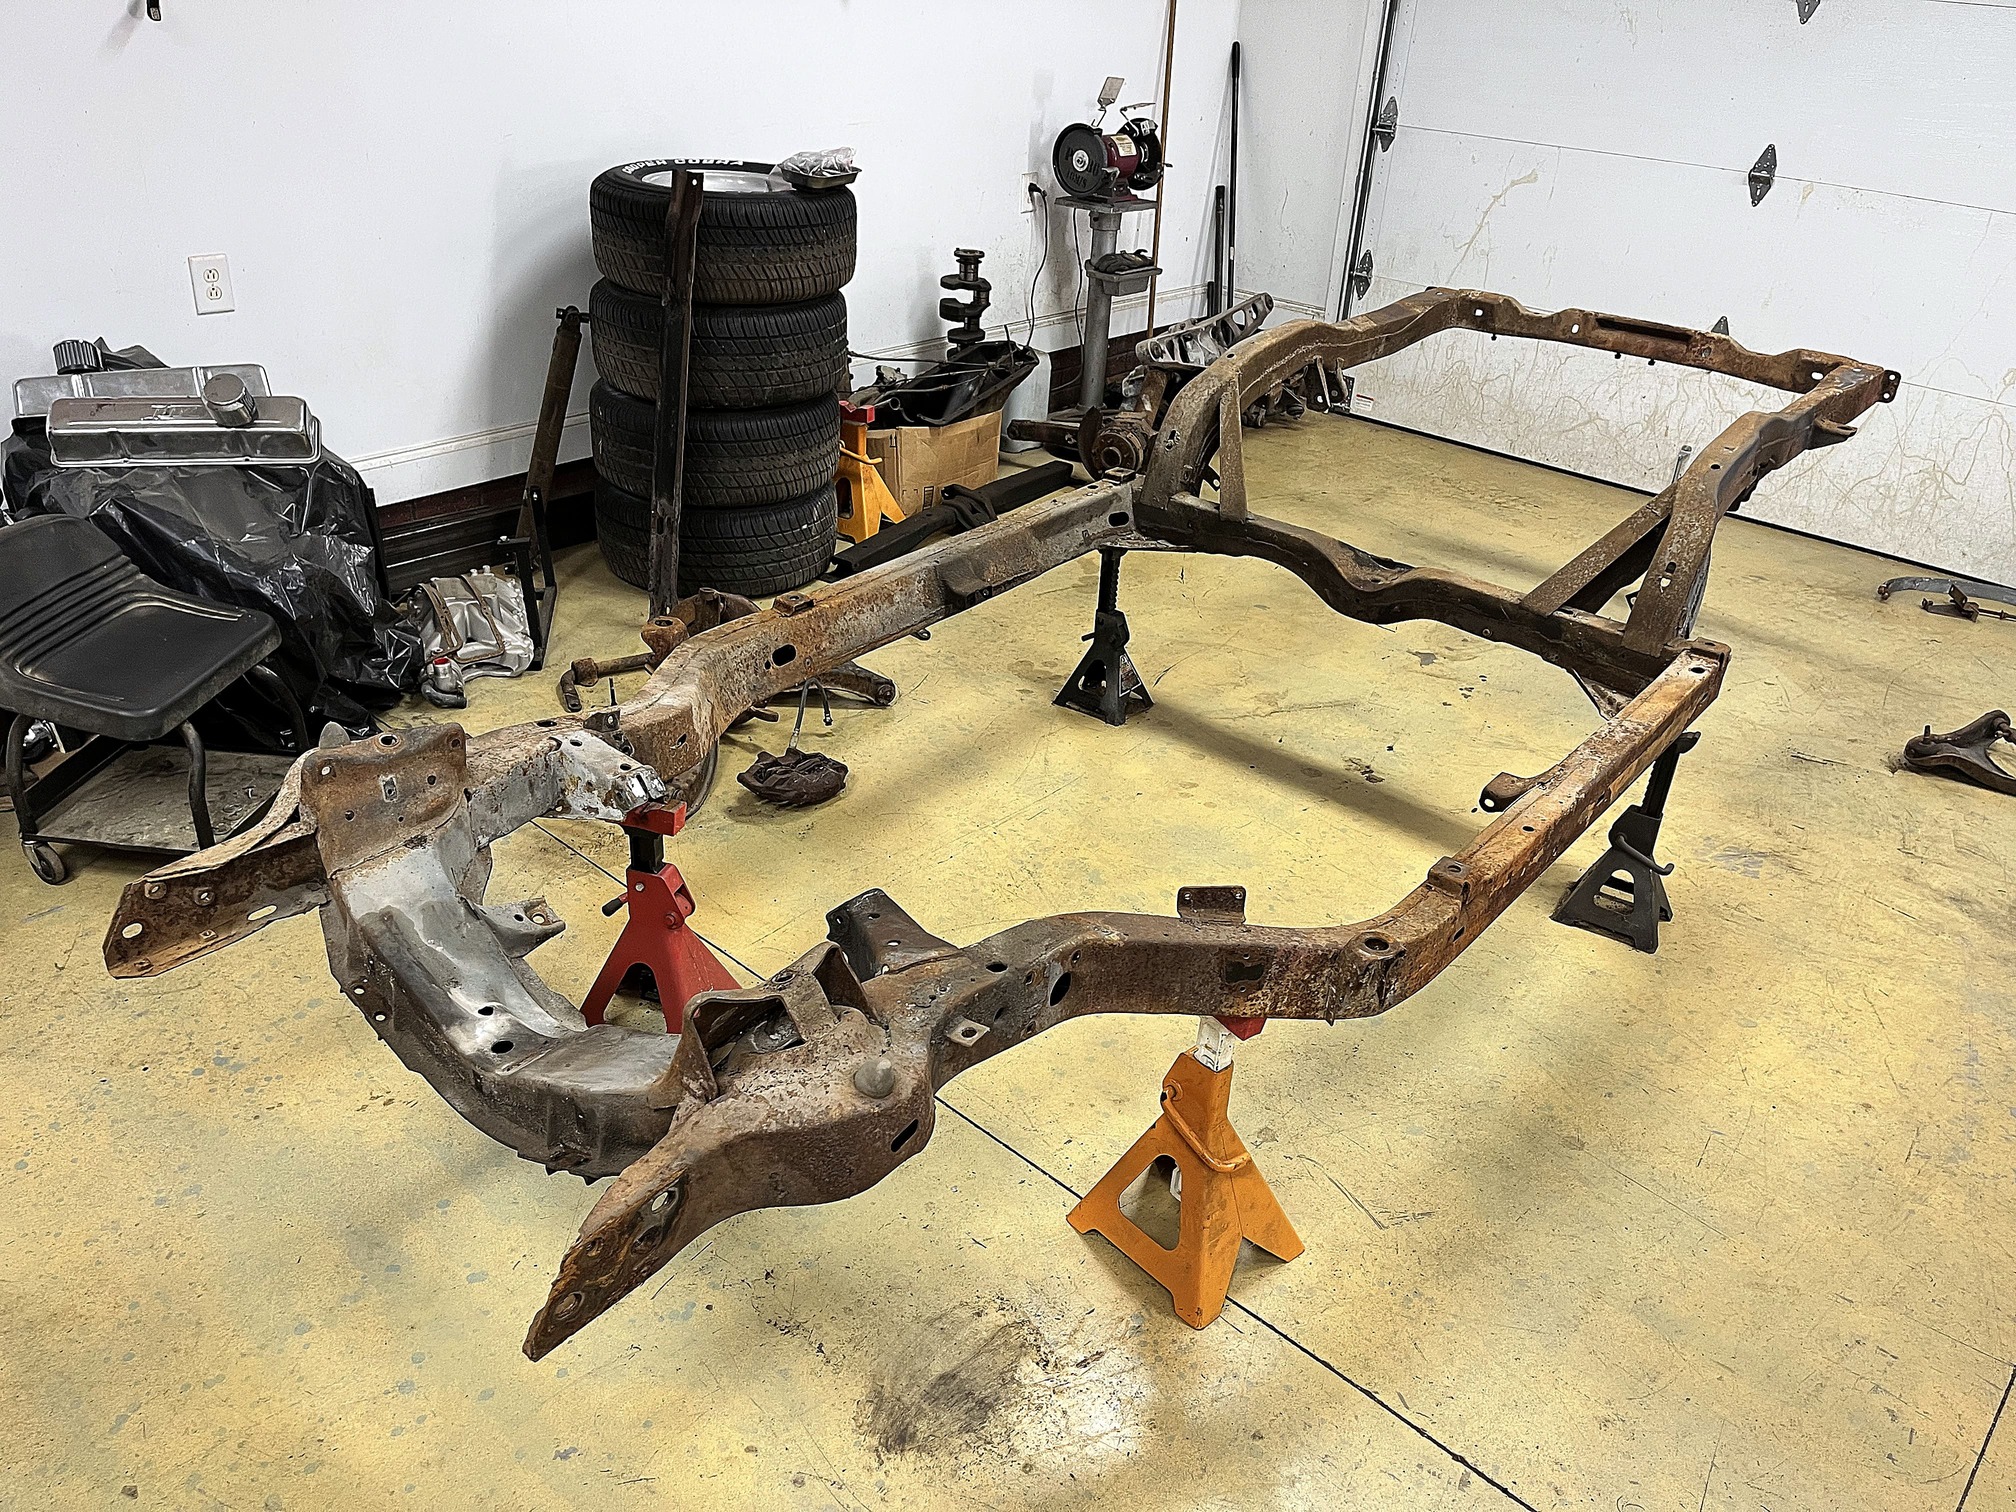
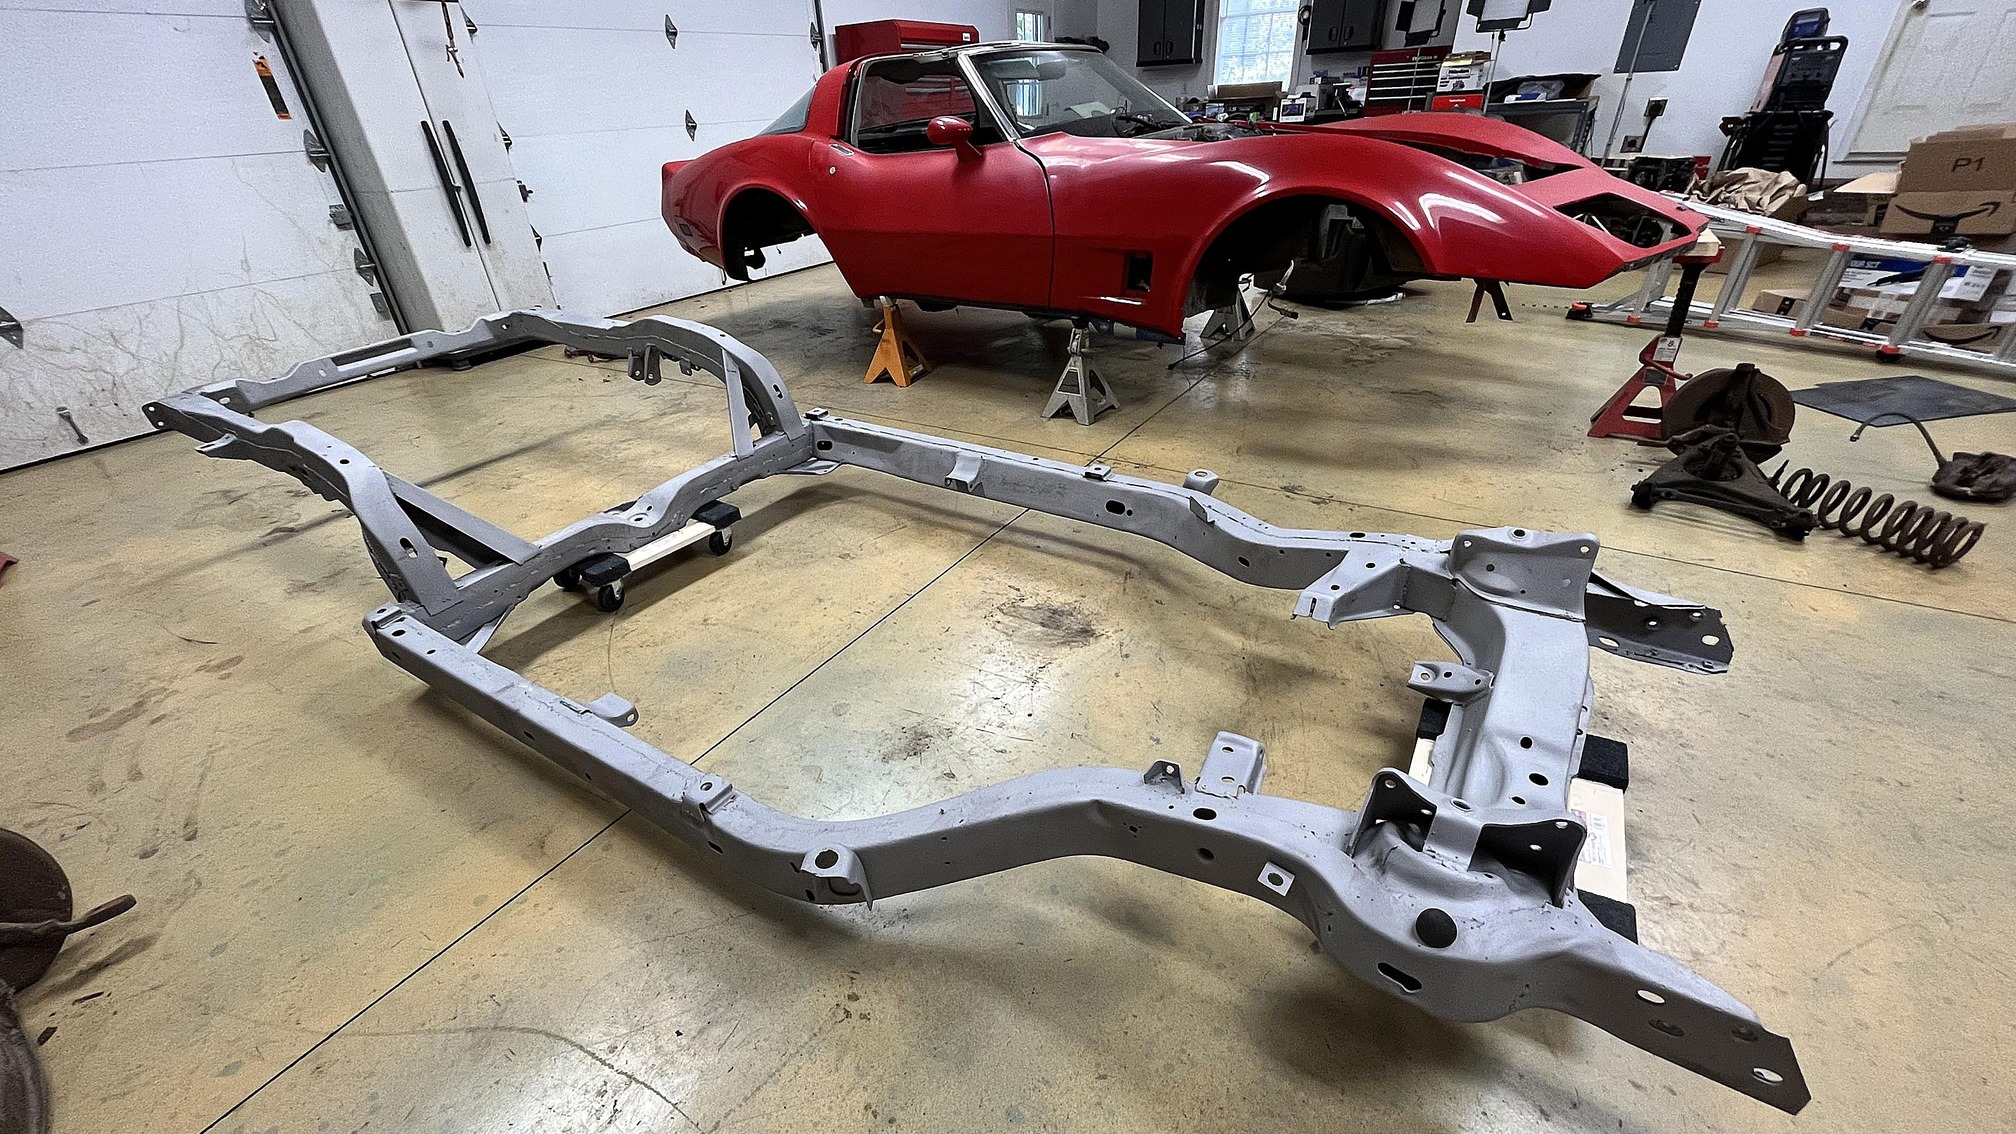
Still, there are things you can do on a limited budget to help bring an old chassis back to life. That’s exactly what we were faced with when we dragged this ’80 Corvette home. The engine was shot, the transmission and most of the interior was missing, and, generally speaking, it was a basket case. But we got it for a good price, and the birdcage seemed to be in good shape—if you know anything about old Corvettes, that’s a big deal. So, it seemed worth saving.
This is the chassis from an ’80 Corvette, but the process is basically the same for any Chevy product—even if it’s a unibody. Overall, this chassis is not too bad. There’s plenty of surface rust but only a few places where the rust has eaten through.
This project, however, is experiencing severe mission creep. Chevrolet switched from fiberglass to steel floorpans in either 1976 or 1977, and the steel floors in our ’80 were severely rusted. In order to get the floors cut out and replaced properly, we decided the body needed to come off the chassis to create enough room to do it right.
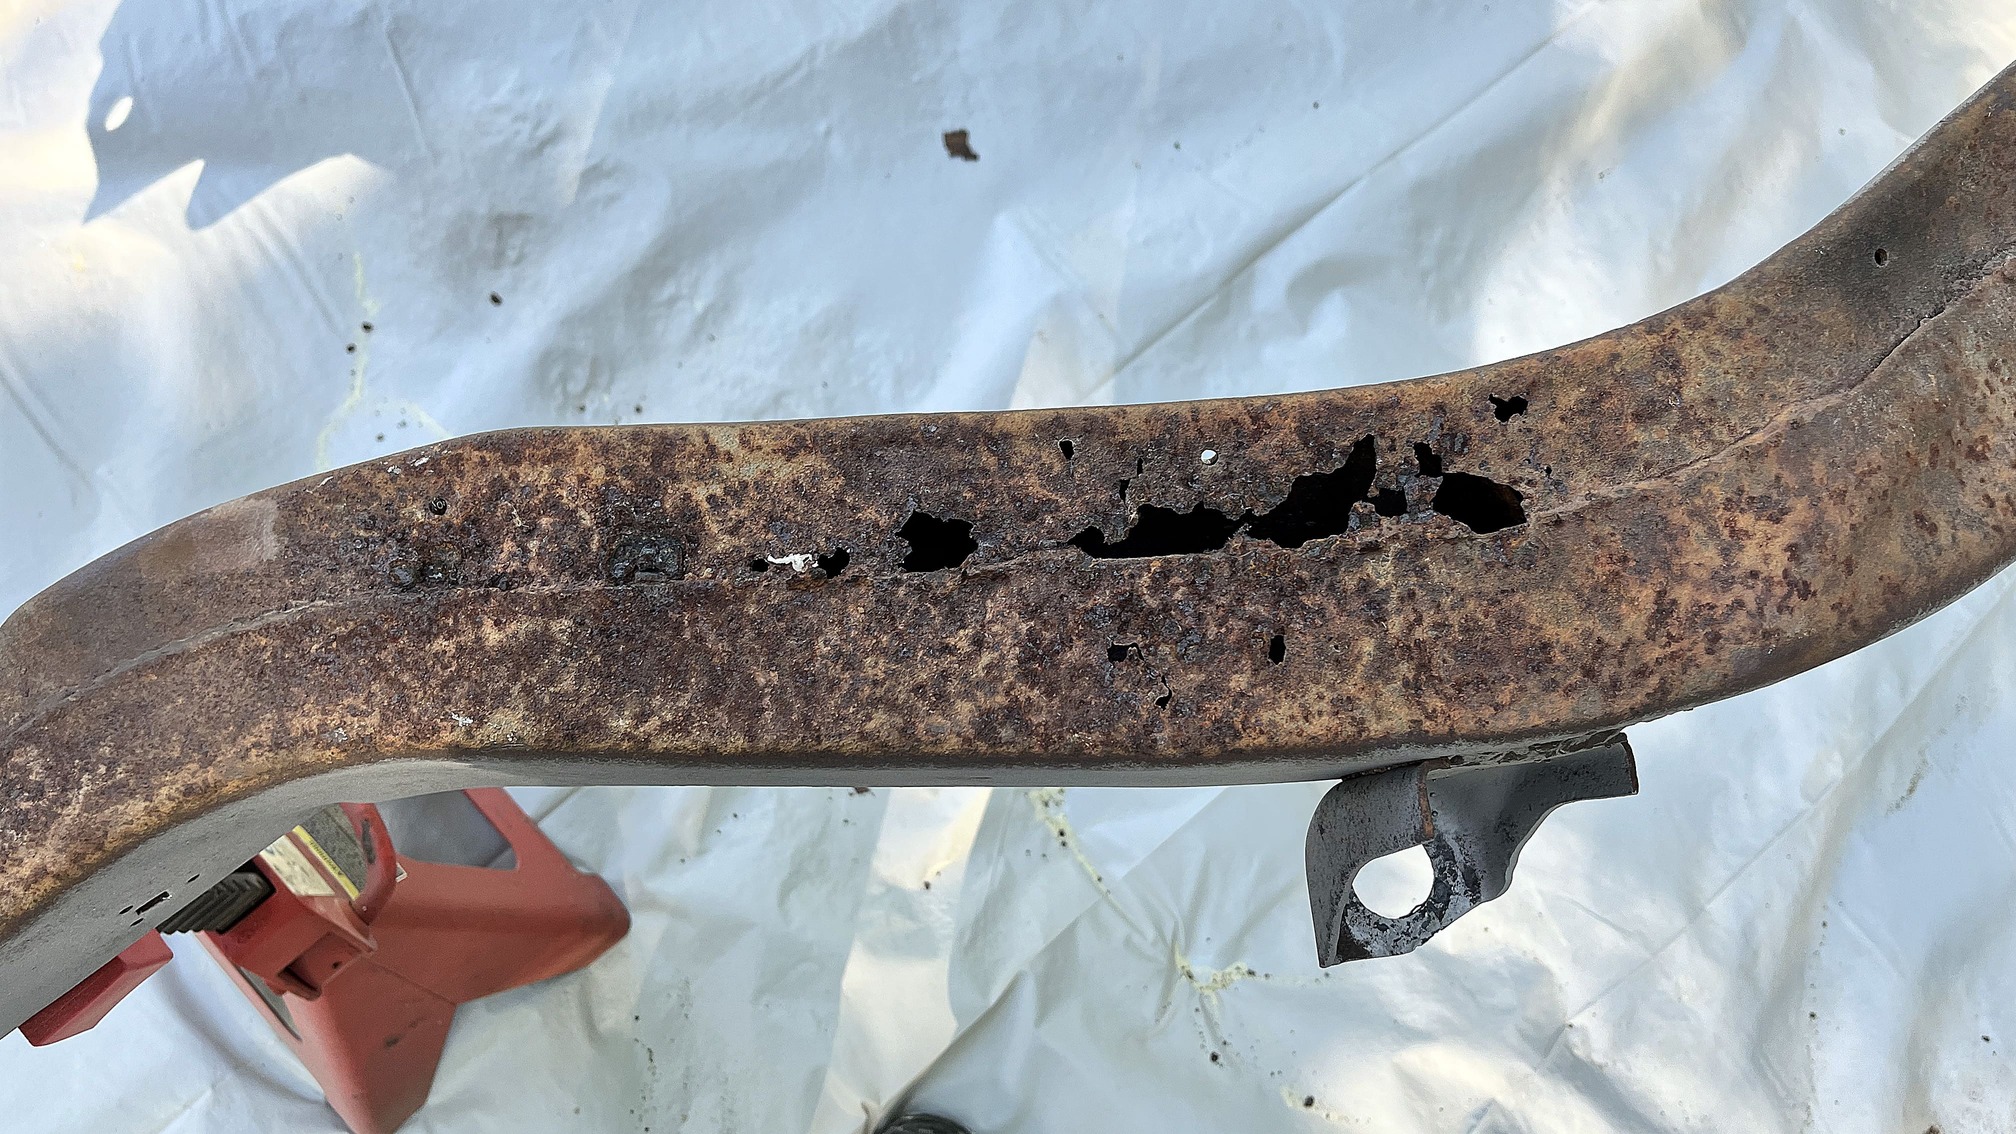
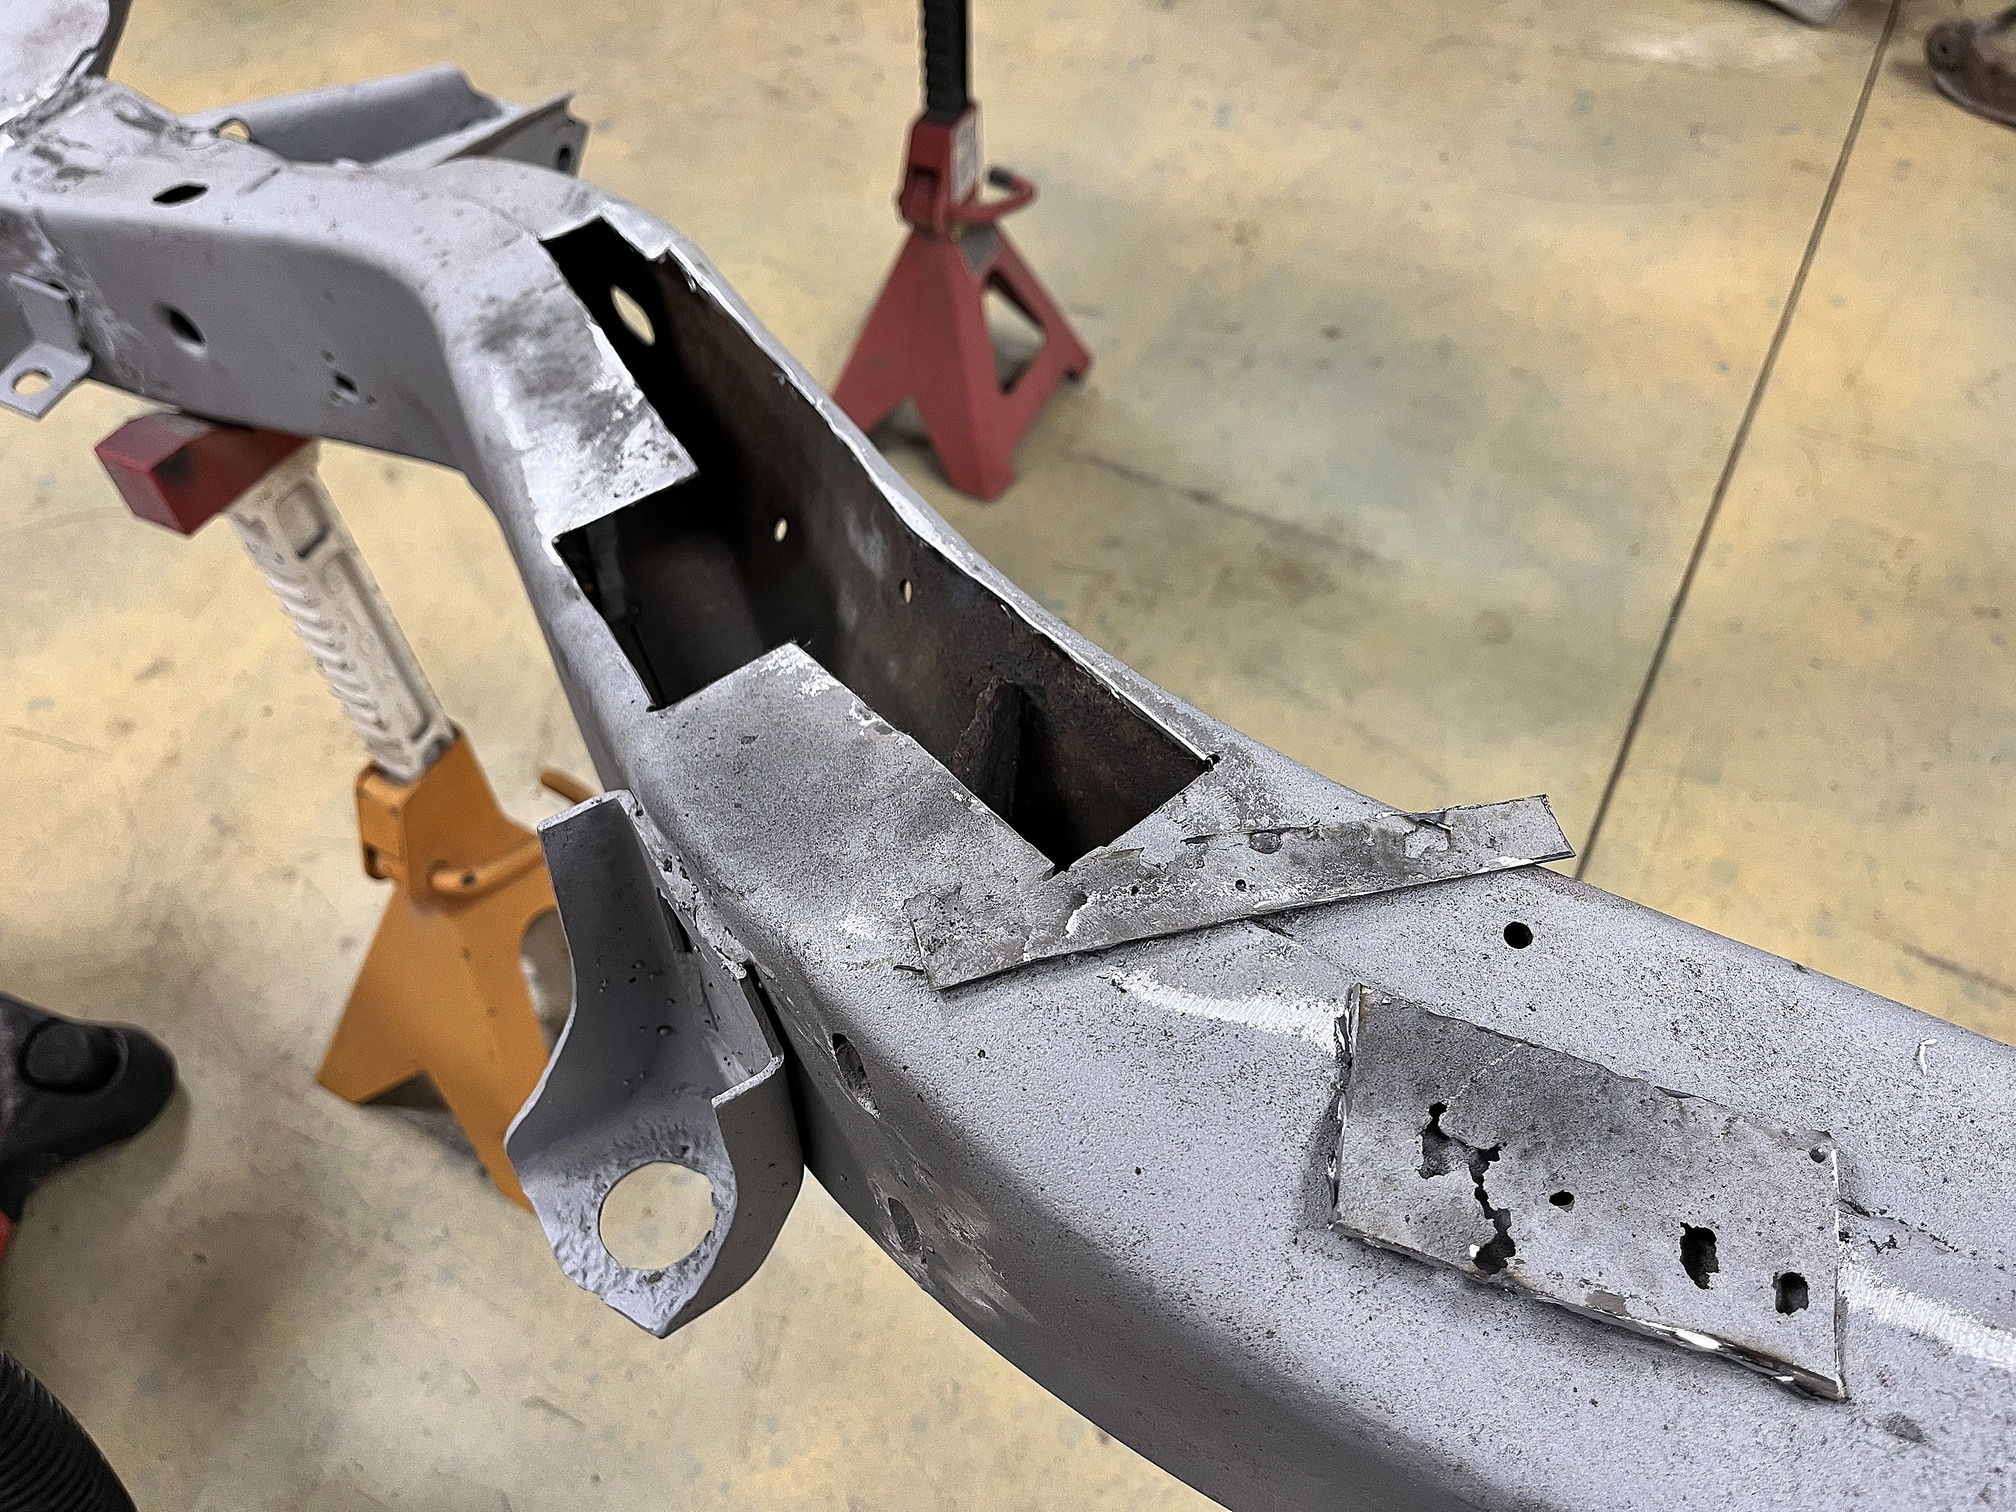
The worst area is the bottom of the frame just behind the front wheel on the driver side. This rot will definitely have to be cut out and patched.
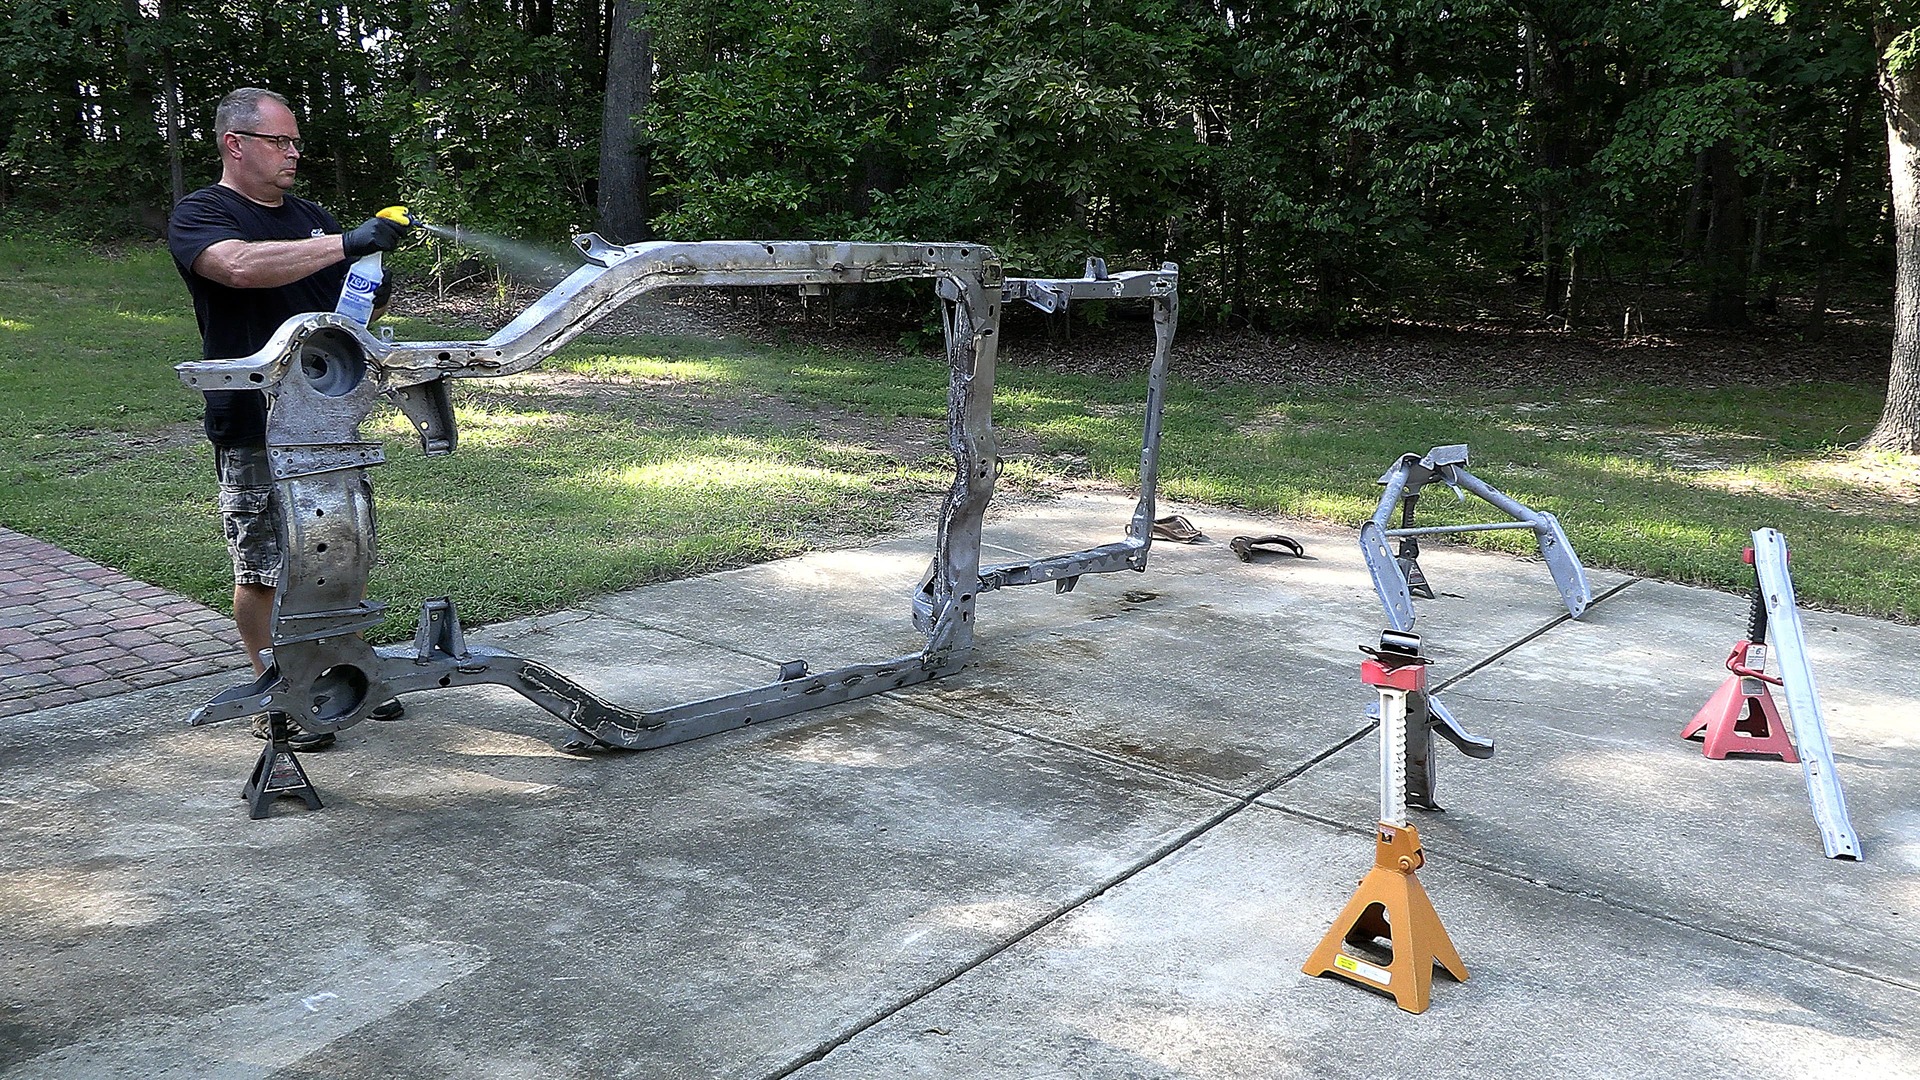
That, in turn, freed up the chassis for a closer inspection. It definitely had a few areas where rust repairs were needed, and a solid coat of surface rust did nothing for its looks. Obviously, we had to go all the way by unbolting the suspension and stripping it down to bare metal before fixing those few rust spots, right?
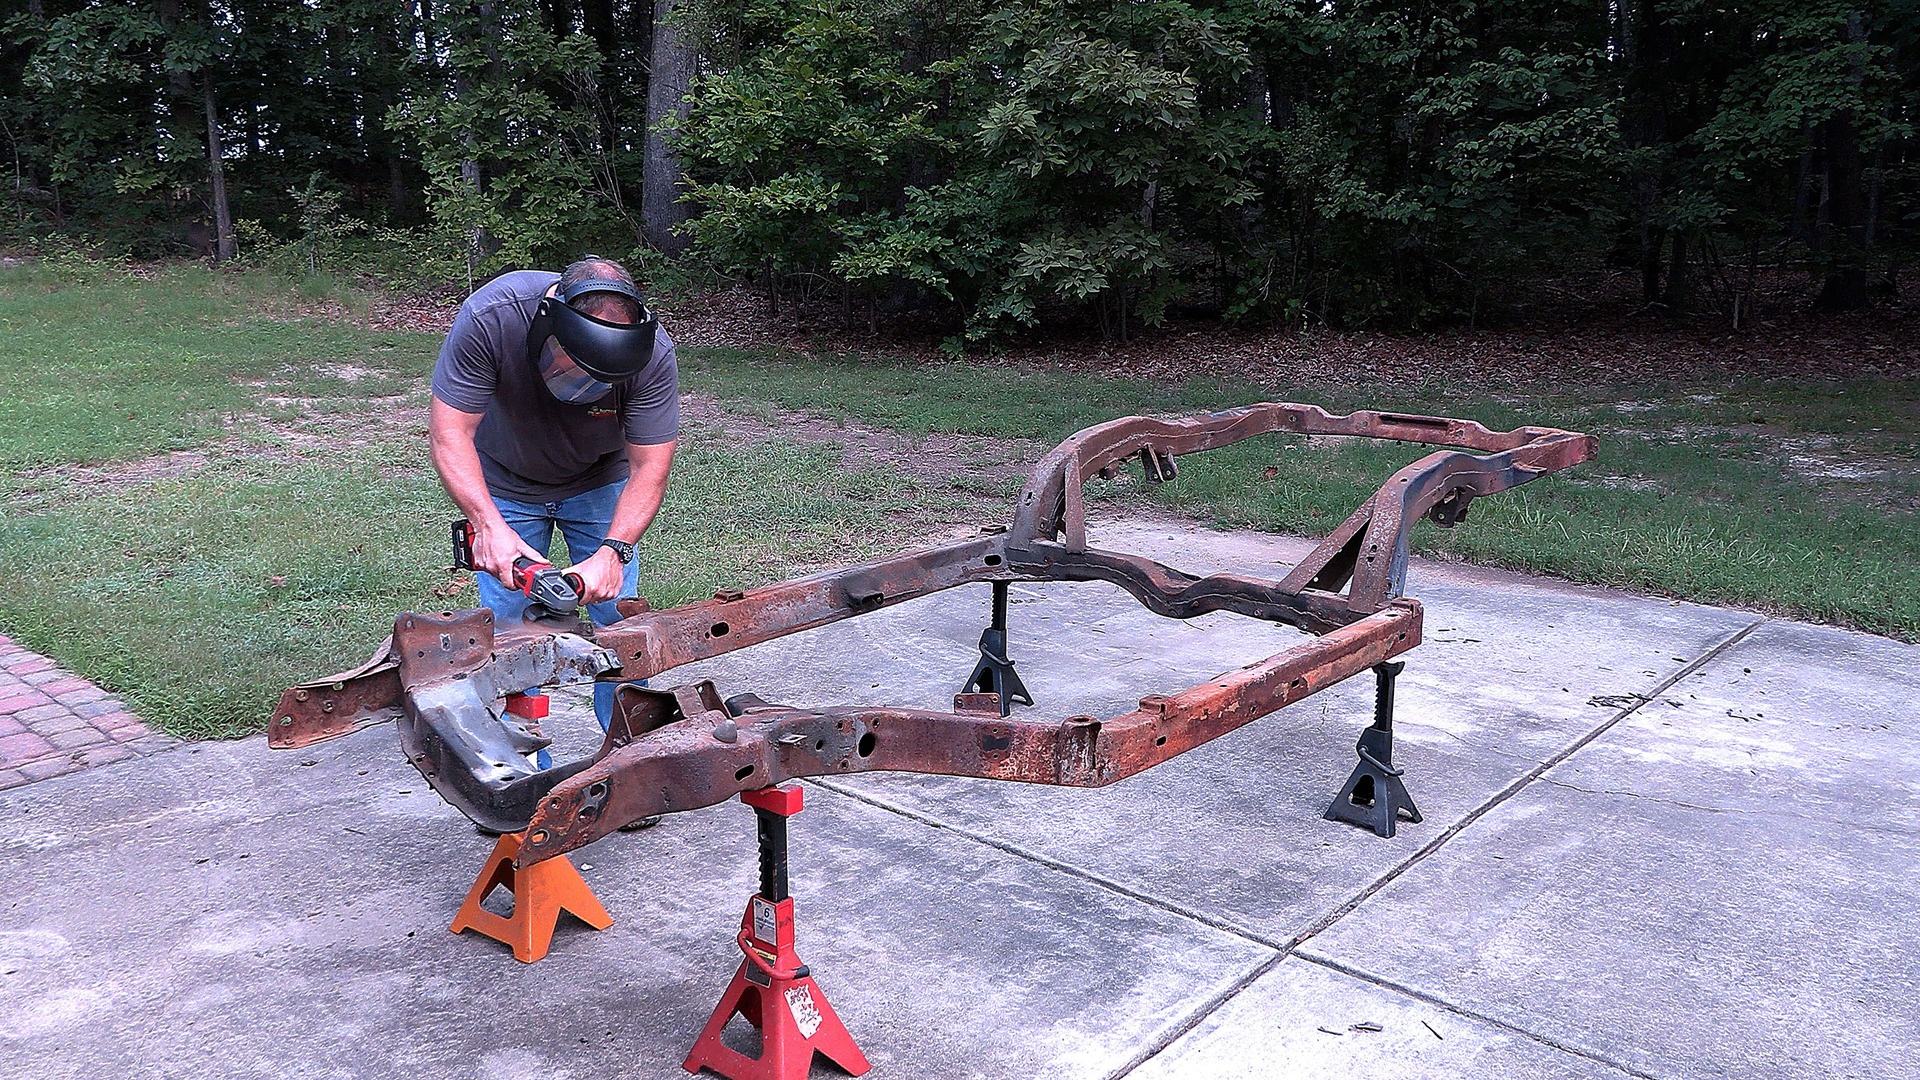
Originally, I planned to strip the rust from the chassis mechanically with a grinder and a stripping disc. But I quickly realized it was going to take forever, and with all the weird angles and curves I would never be able to reach everywhere and get all the rust off to my satisfaction. So, I punted on the original plan and called in the calvary.
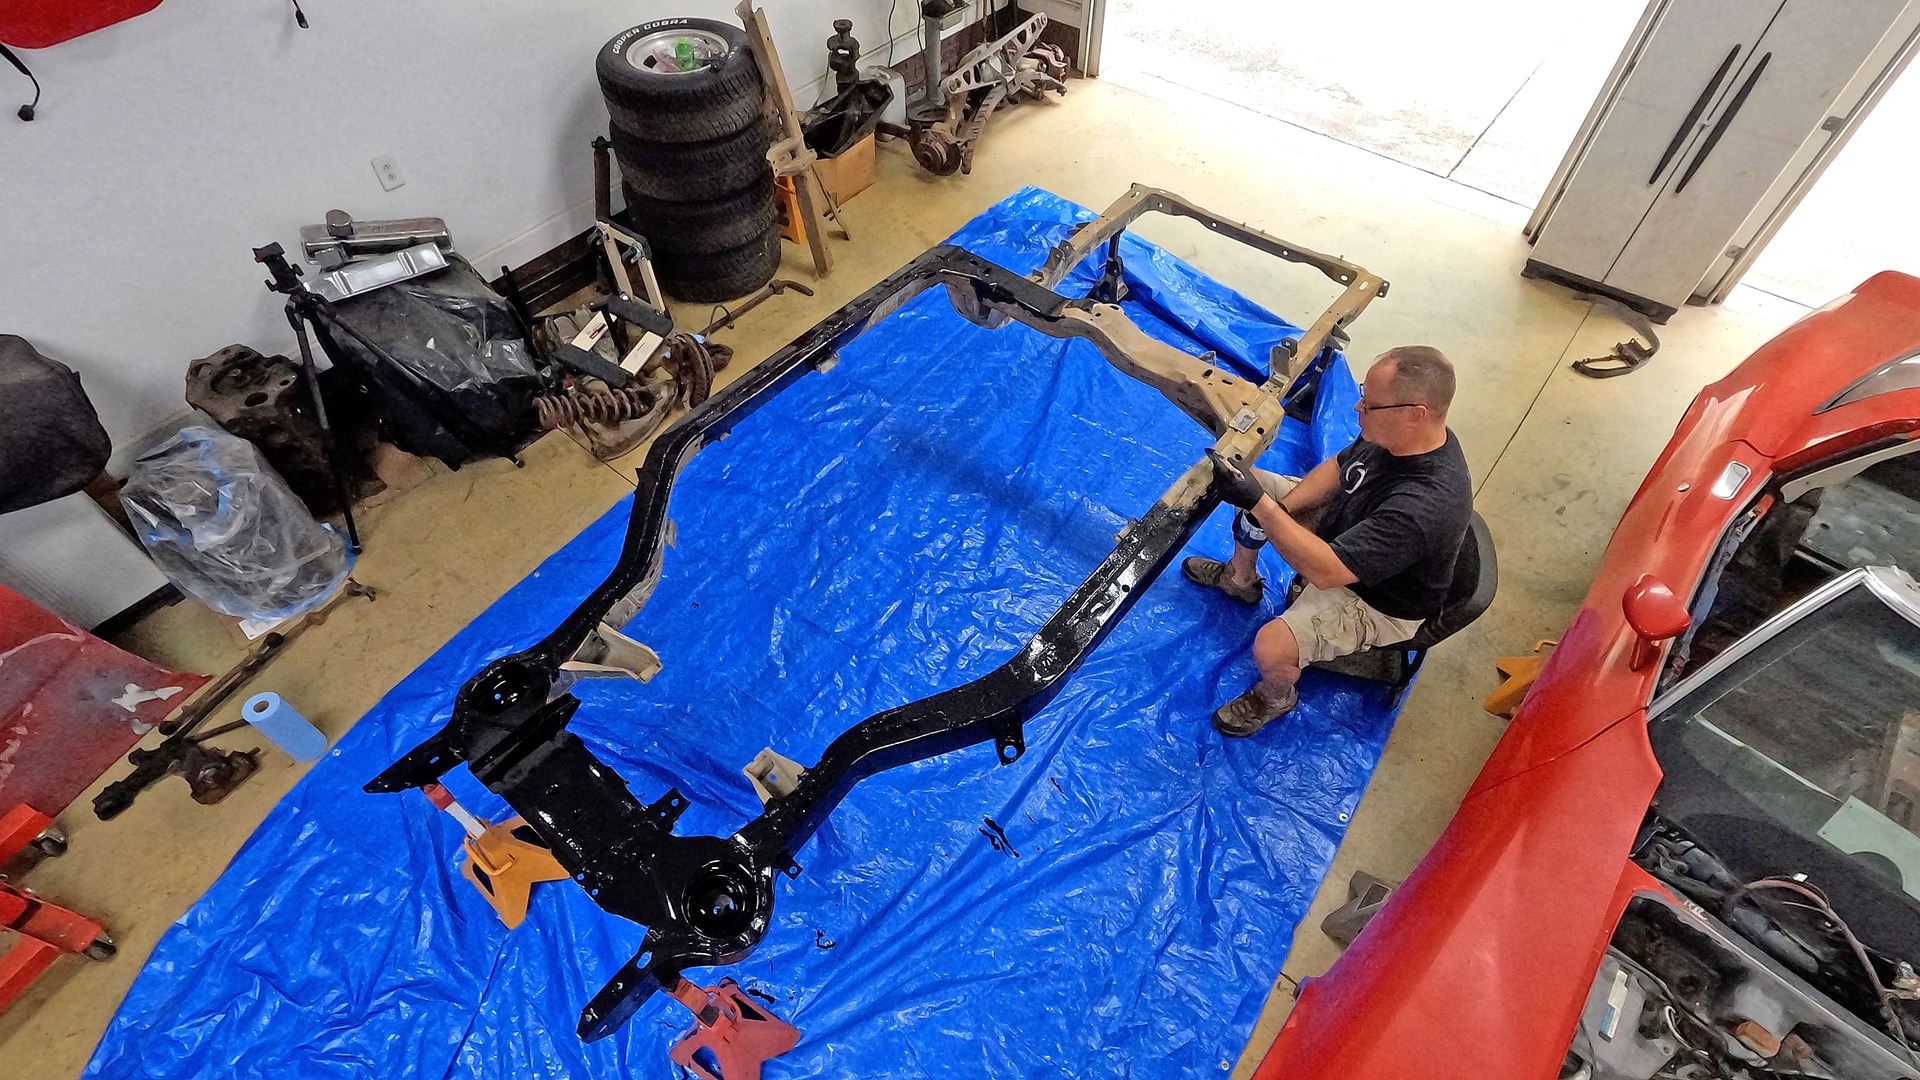
So, while the rotten floorboards were totally ignored, we started yanking everything off the chassis for a complete refurb. The good news here is there is much that can be done to bring a chassis back to spec with minimal cost—as long as you are willing to put in some elbow grease. Plus, nothing we are discussing here is specific to the Corvette. It all applies to any Chevy product, from a Camaro to a C10. Of course, a unibody car like a Camaro means you can’t pull the body off the chassis, but you can still strip and coat the underside to protect it from rust for years to come like we’ll do here.
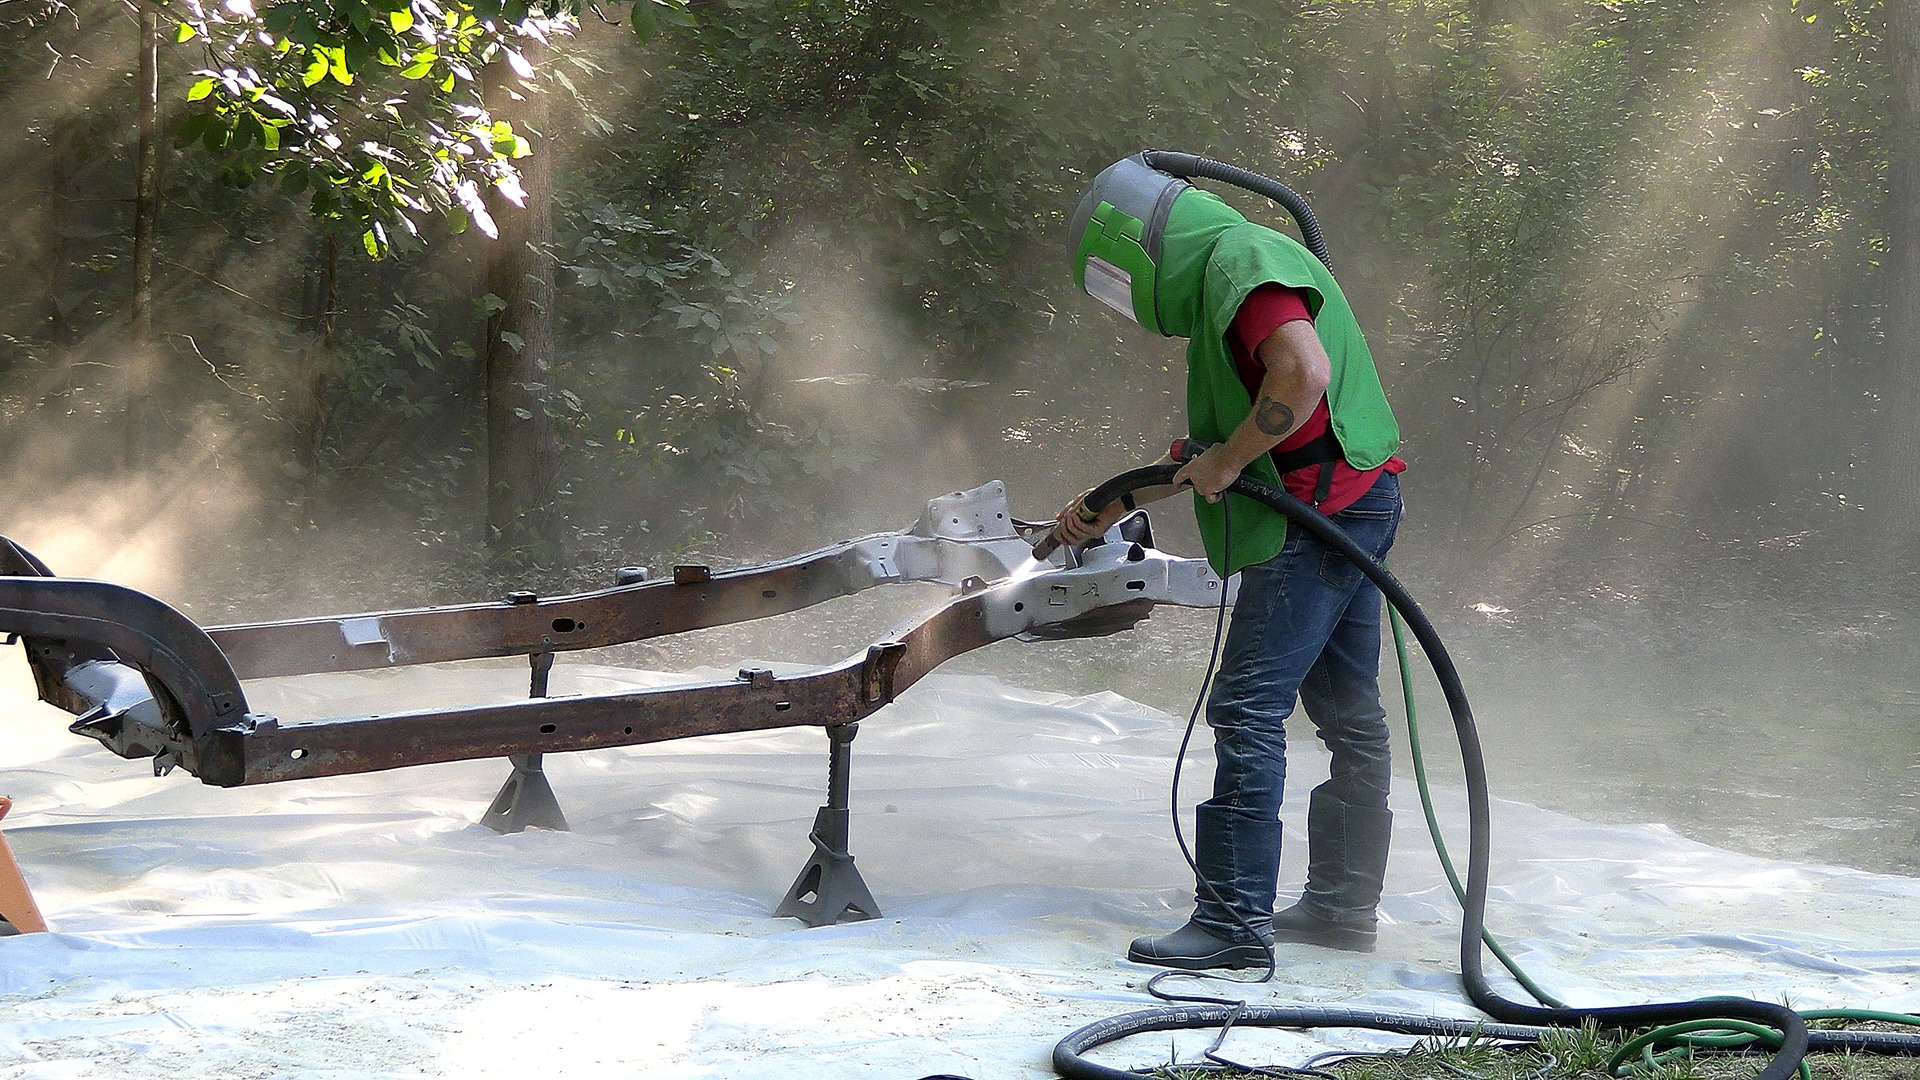
Even though I wanted to do this on the cheap, I spent $600 to have a mobile crew come in and blast the entire chassis. They were able to reach into all of the crevices I couldn’t with the grinder, and the glass beads they use are non-toxic and safe for the environment. Seeing the results, I definitely think it was money well spent.
Besides fixing rust, a major part of this chassis refurb will be coating the metal to protect it from oxidation and additional rust damage in the future. A fresh coat of paint is better than nothing, but it has to be constantly protected or it won’t last. Powdercoat is even better when it comes to protecting a car’s chassis and underbody, but it requires immaculate preparation of the steel—including complete rust removal—and it can get pretty expensive.
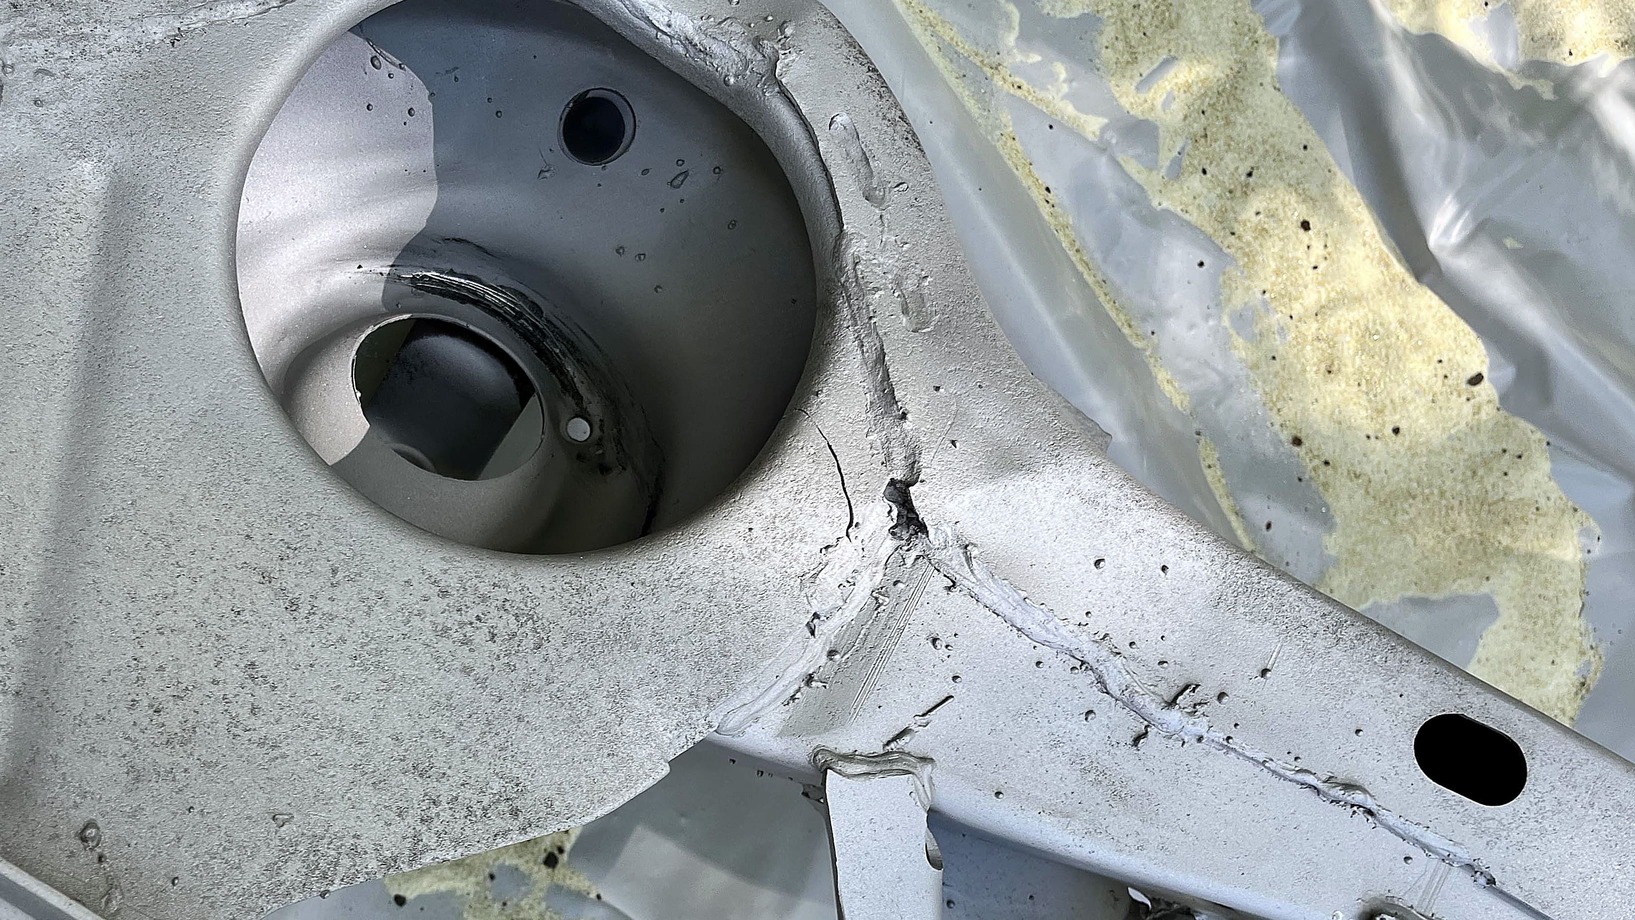
Here’s a great reason to have a chassis thoroughly stripped of rust. After blasting we quickly spotted this crack around the underside of the spring bucket. It was practically invisible with all the surface rust, but now that we’ve found it we can get it welded up so it won’t cause real problems somewhere down the road.
Our solution needed to check all the boxes. We didn’t want to deal with the wait of sending stuff out so it has to be something that can be done in the typical home shop. It has to be cost effective. And most of all, it has to be an absolutely excellent long-term protectant against rust, road grit, and a wide variety of chemicals.
The finished result back in the shop. The next step is to spend a couple hours with an air hose and a shop vac trying to get all the glass beads out of the inside of the chassis.
So, we went with a kit from POR-15. The “POR” stands for “Paint Over Rust,” which you can literally do. That’s because even though it can be applied with either a brush or sprayed on, this stuff isn’t paint. Almost all paints dry by using a volatile organic compound or even water that evaporates out, causing the paint to harden. POR-15, however, actually cures by absorbing moisture out of the air, and the end result is a sort of shell around the metal that is quite hard and impervious to moisture. That also means that no moisture can get to the steel to cause additional oxidation.
Here you can see the section cut out to remove the rust on the underside of the chassis. It kept growing as I found and cut out the thinned metal that had been eaten by rust.
How does a material become impervious to moisture by absorbing moisture? I don’t understand it myself. Black magic? All I know is it works, POR-15 uses its own in-house chemists and it’s made right here in the USA.
You can follow along with the process in the photos and captions that go with each. But we can tell you the results turned out excellent. We’ve heard others complain about the product, but the “failures” are almost always the result of one of two mistakes.
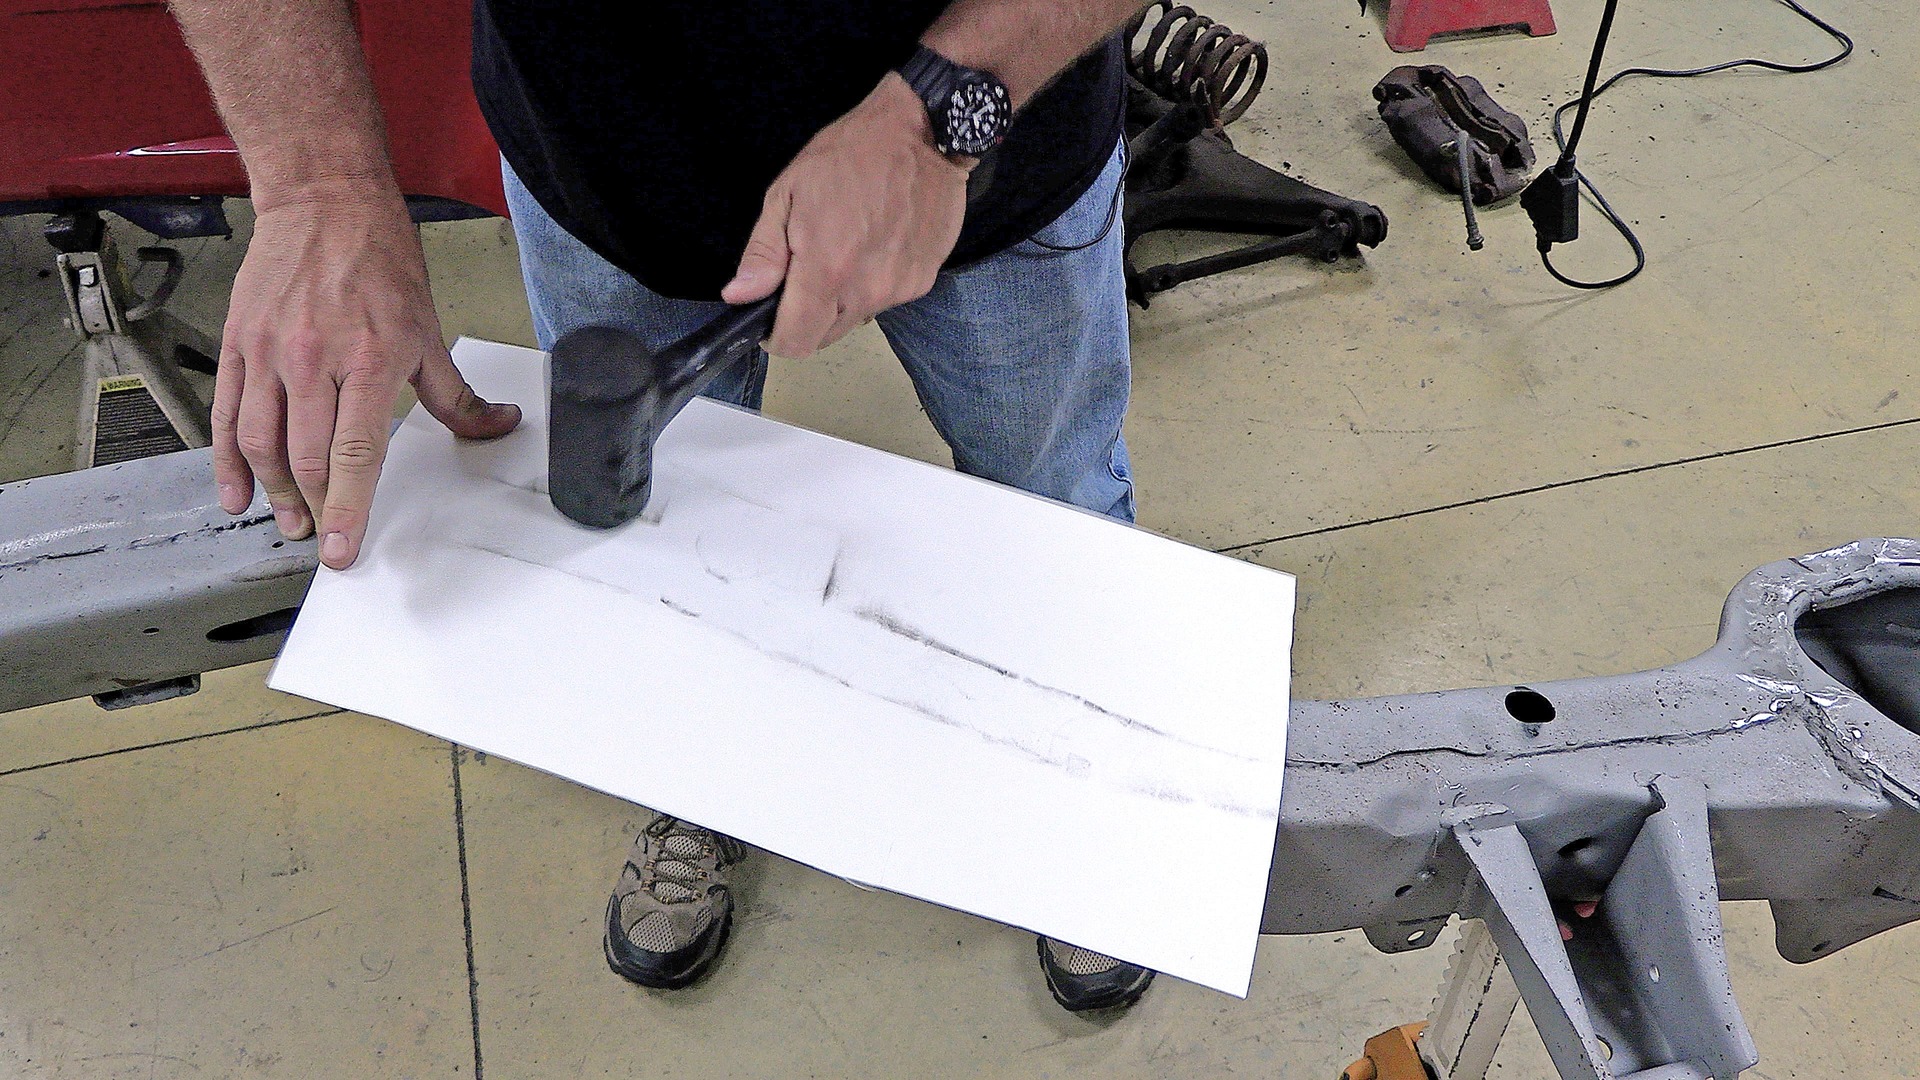
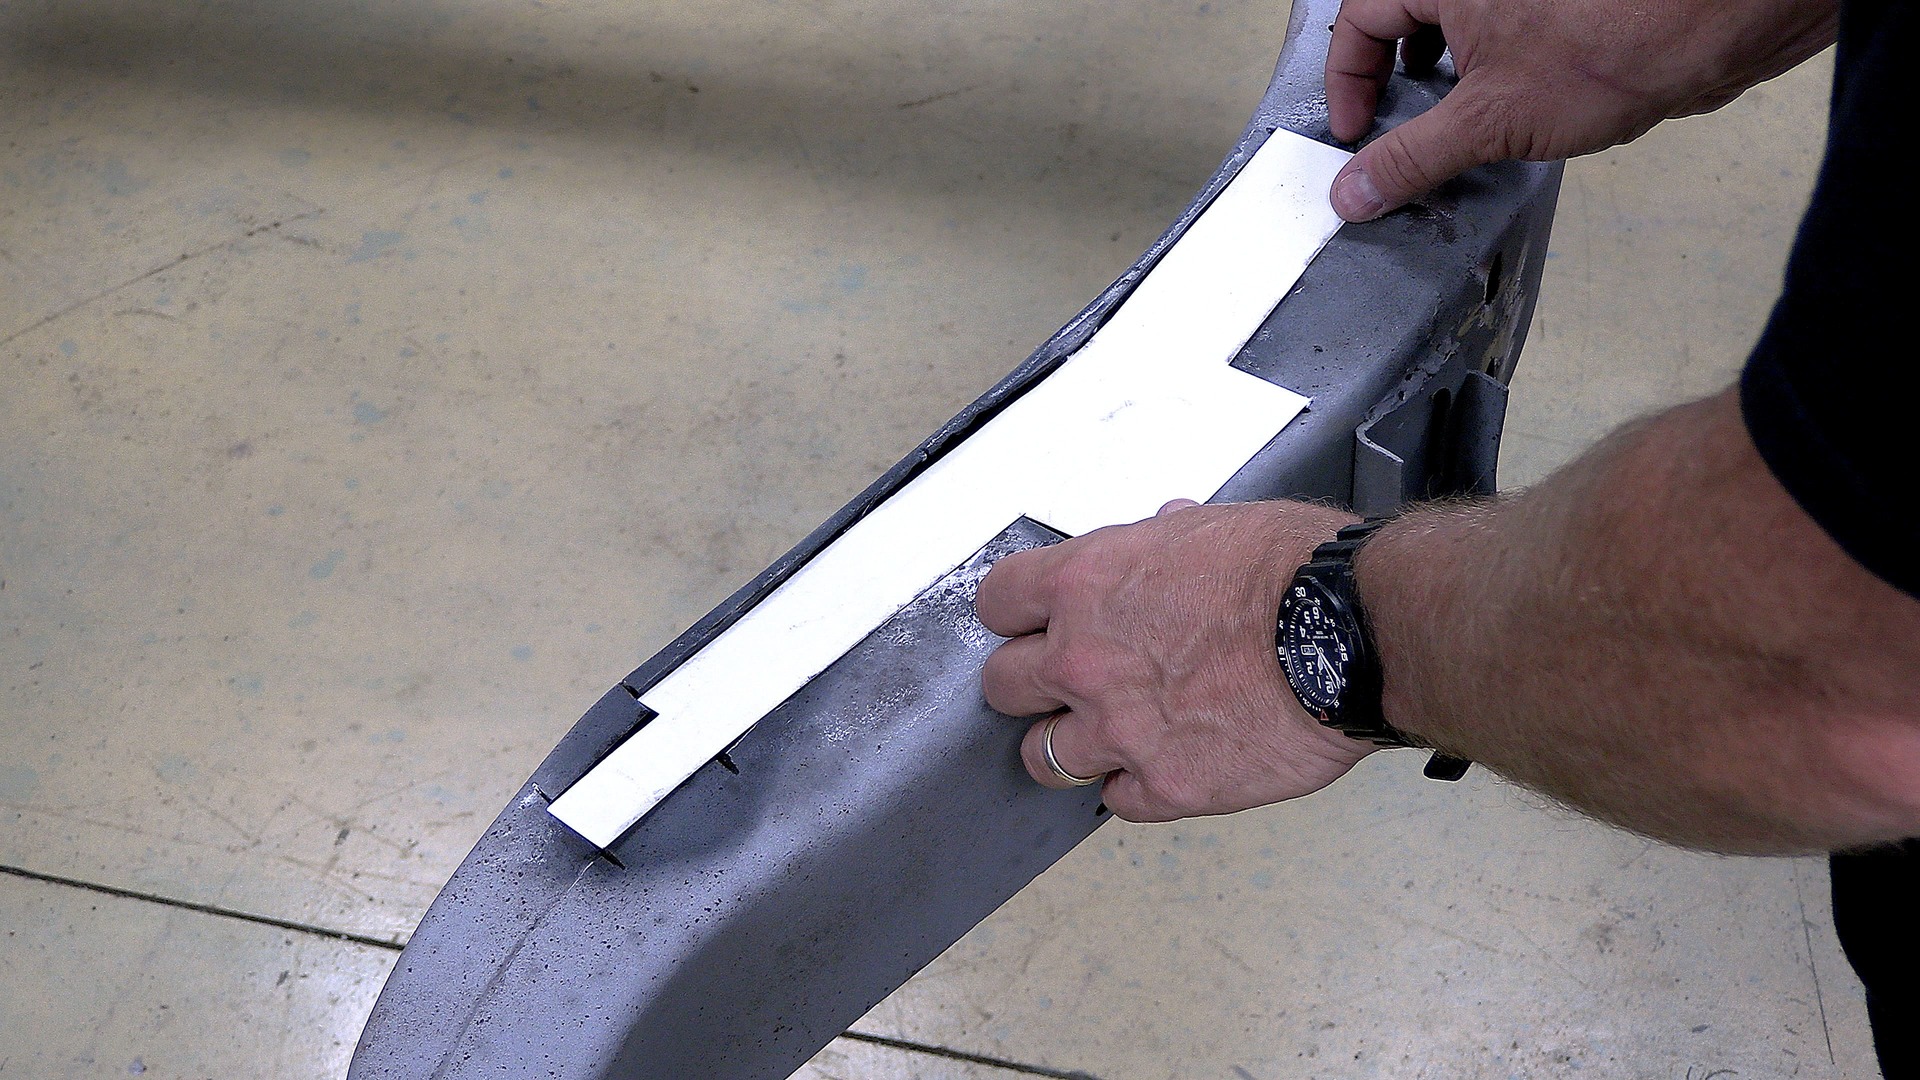
Lots of people have their own methods for making patch panels, but the way that seems to work best for me is to place a piece of poster board over the area you want to patch and then tap around the edges with a rubber mallet or any hammer with at least a mildly malleable face. This leaves a ridge around the edges that you can see and use as a line to cut out.
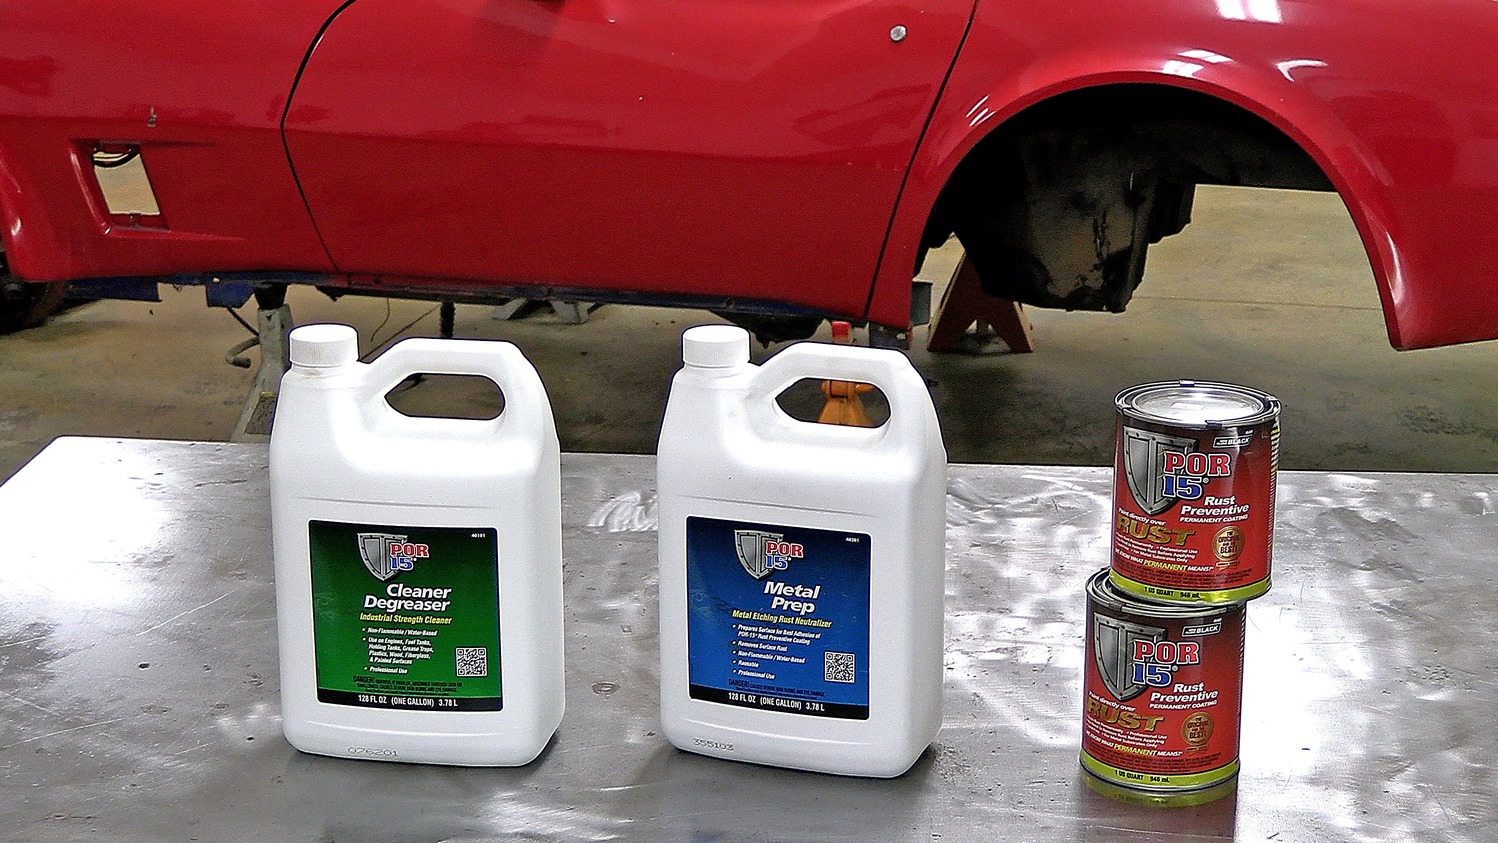
Probably the most common mistake is improper surface prep. Yes, the POR does stand for paint over rust, but it doesn’t mean you can also paint over dirt or grease. The metal to be coated must be properly cleaned so that the POR-15 can properly adhere to it. This also means that any loose rust must also be removed, either by sandblasting or wire brushing. That’s why we always recommend using one of POR-15’s kits that includes not only the POR-15 product itself, but also a cleaner/degreaser and a metal etch. This not only properly cleans the metal but also ensures that it has some texture so that the POR-15 can chemically bond with the surface and not flake off over time. You can put POR-15 directly on rusted metal, but the results will almost always be better if you use a degreaser and etching product to ensure you’ve got the best surface for it to adhere to.
Here’s my pattern. There was one area where I cut away too much of the poster board, but that’s no big deal. I just taped another piece onto it and re-cut it to the correct dimension.
Second, POR-15 can sometimes be blamed for failing when it isn’t properly protected. POR-15 is extremely resistant to moisture, scratching, and chipping, but it doesn’t handle the sun quite as well. If POR-15 is exposed to UV rays, it can break down, or get “chalky” over time. Fortunately, the solution is simple: If whatever you apply POR-15 to is somewhere it can be exposed to the sun, just apply a topcoat to protect it. You can use regular paint, or POR-15 also sells several topcoat products depending on the application.
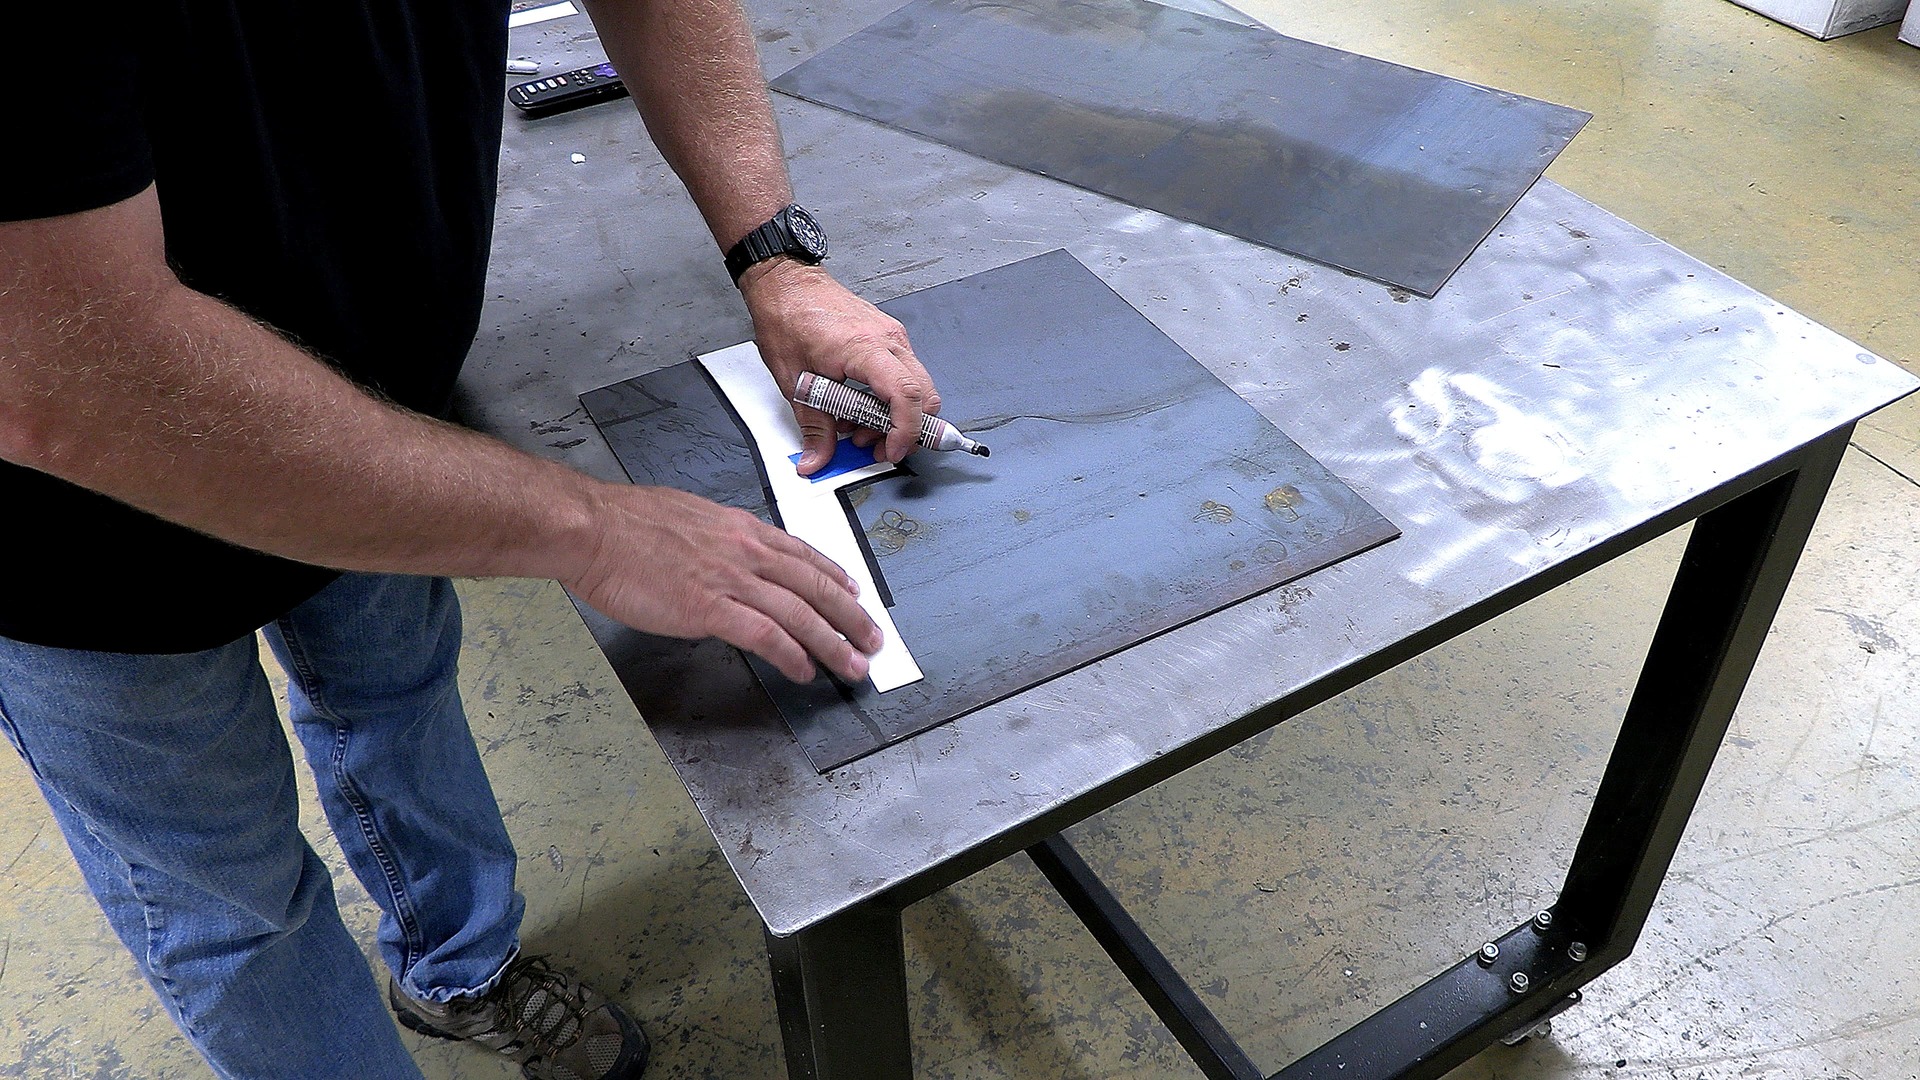
I picked up some 11-gauge steel from my local fab shop, which pretty closely matches the thickness of the steel used in the frame. Often, you can save some money by asking for “drops,” which are essentially the leftovers from a larger job. Metal shops will usually be happy to sell these at a discount, otherwise they’ll likely just be thrown into a scrap bin for recycling. Anyhow, these drops were more than large enough to transfer the pattern onto.
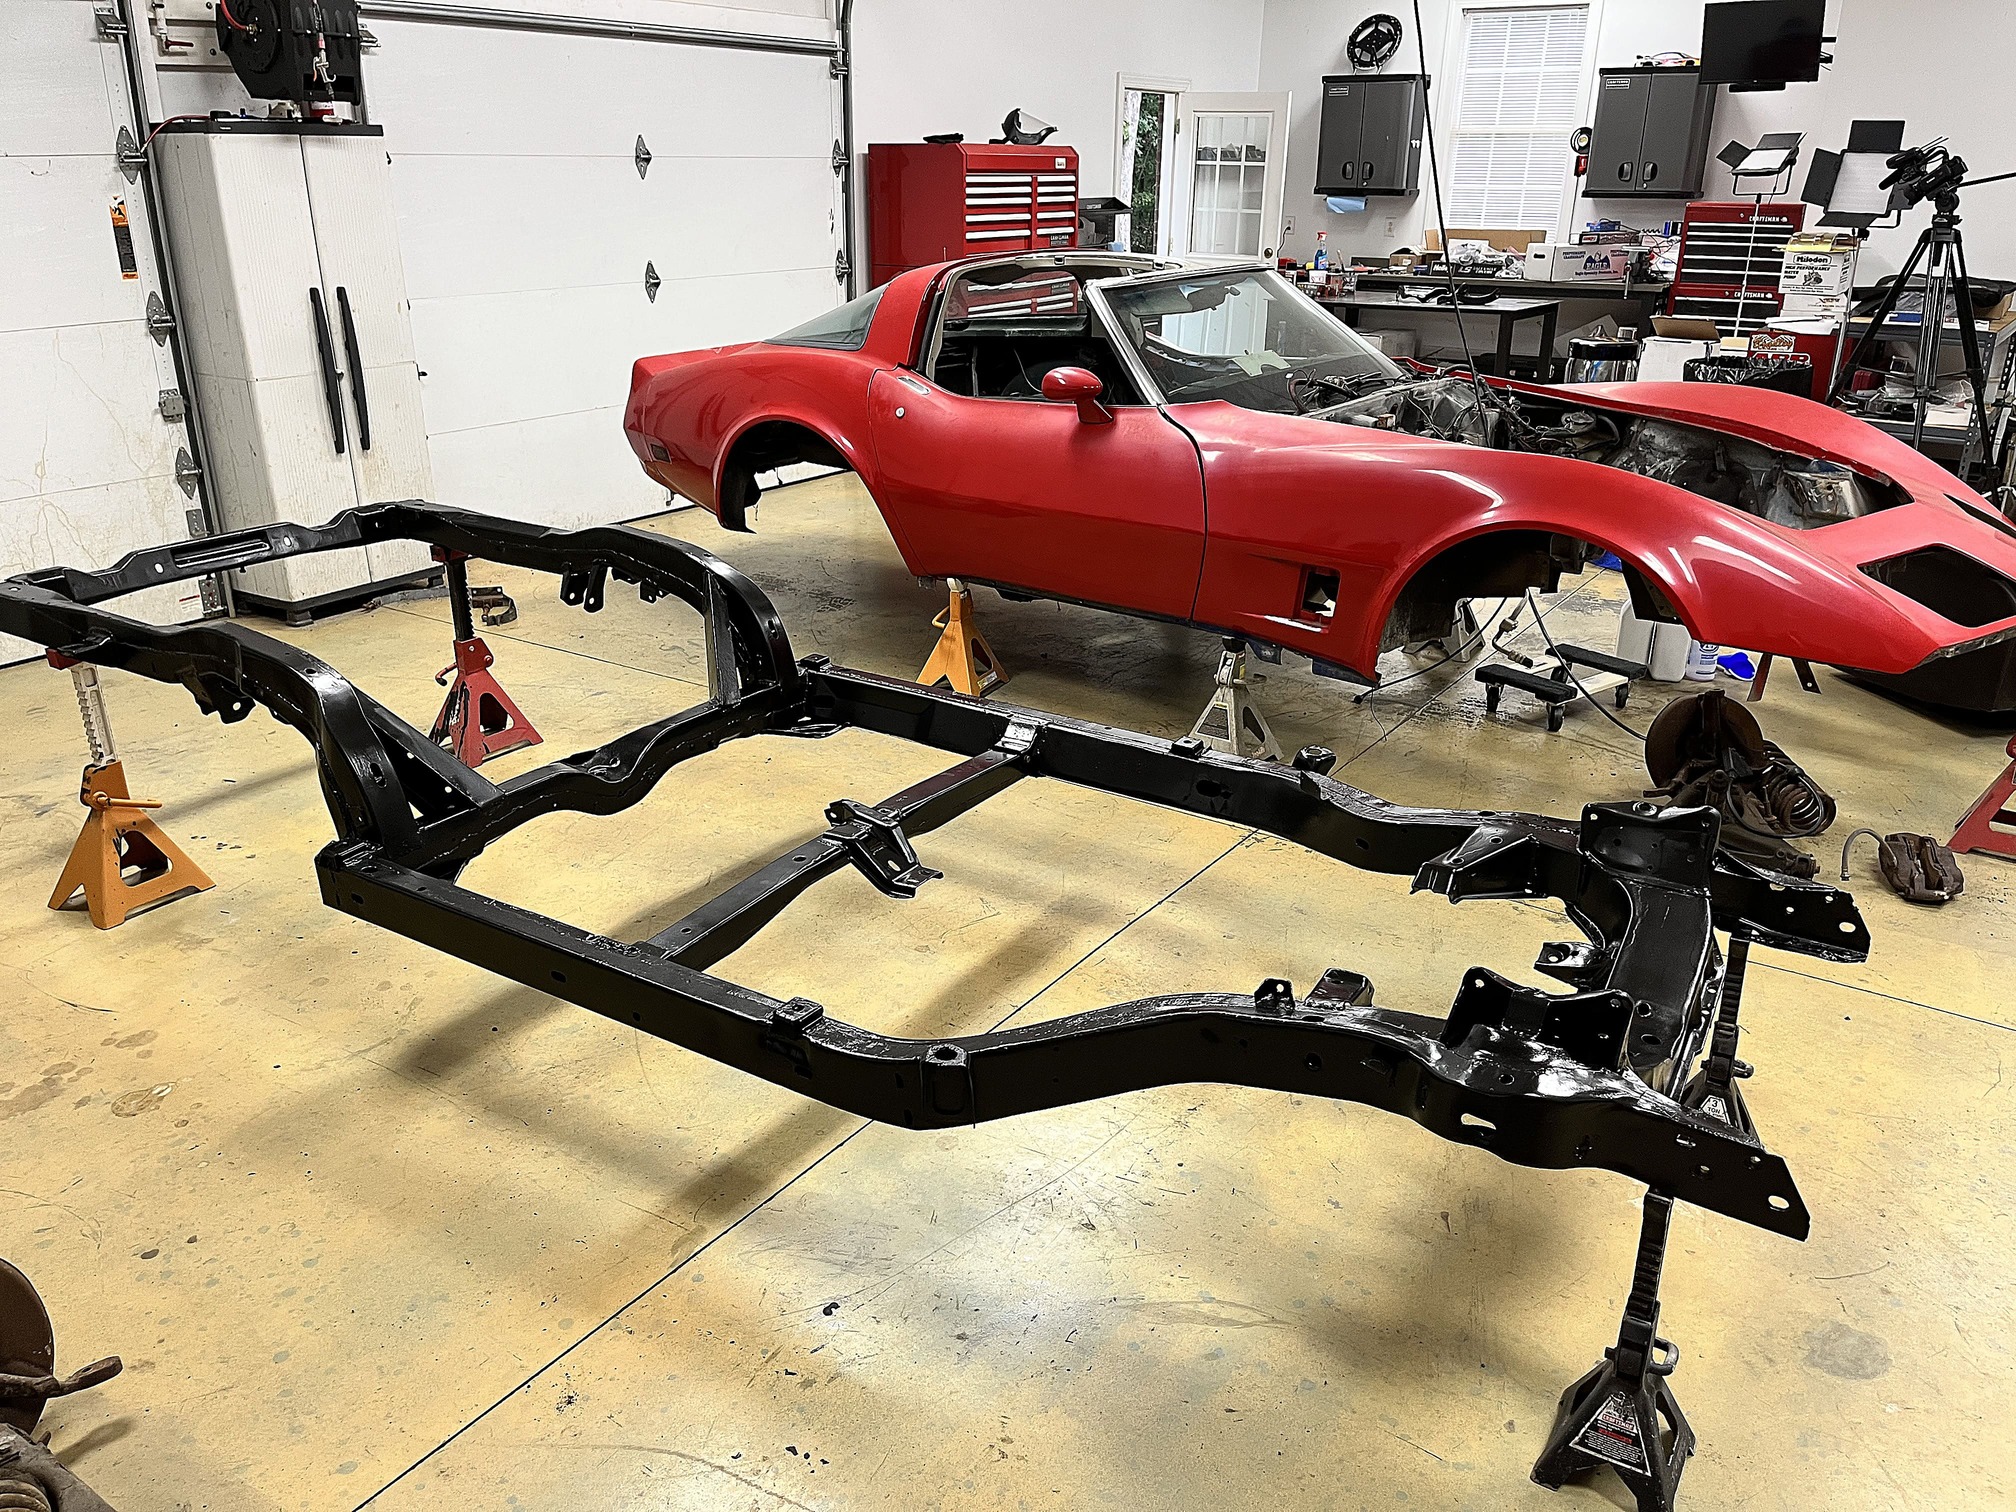
So, check out our chassis revival. The process of patching up the rust didn’t go perfectly, but we’re very happy with the results of applying the protective coating and confident the chassis is ready for many more years of service.
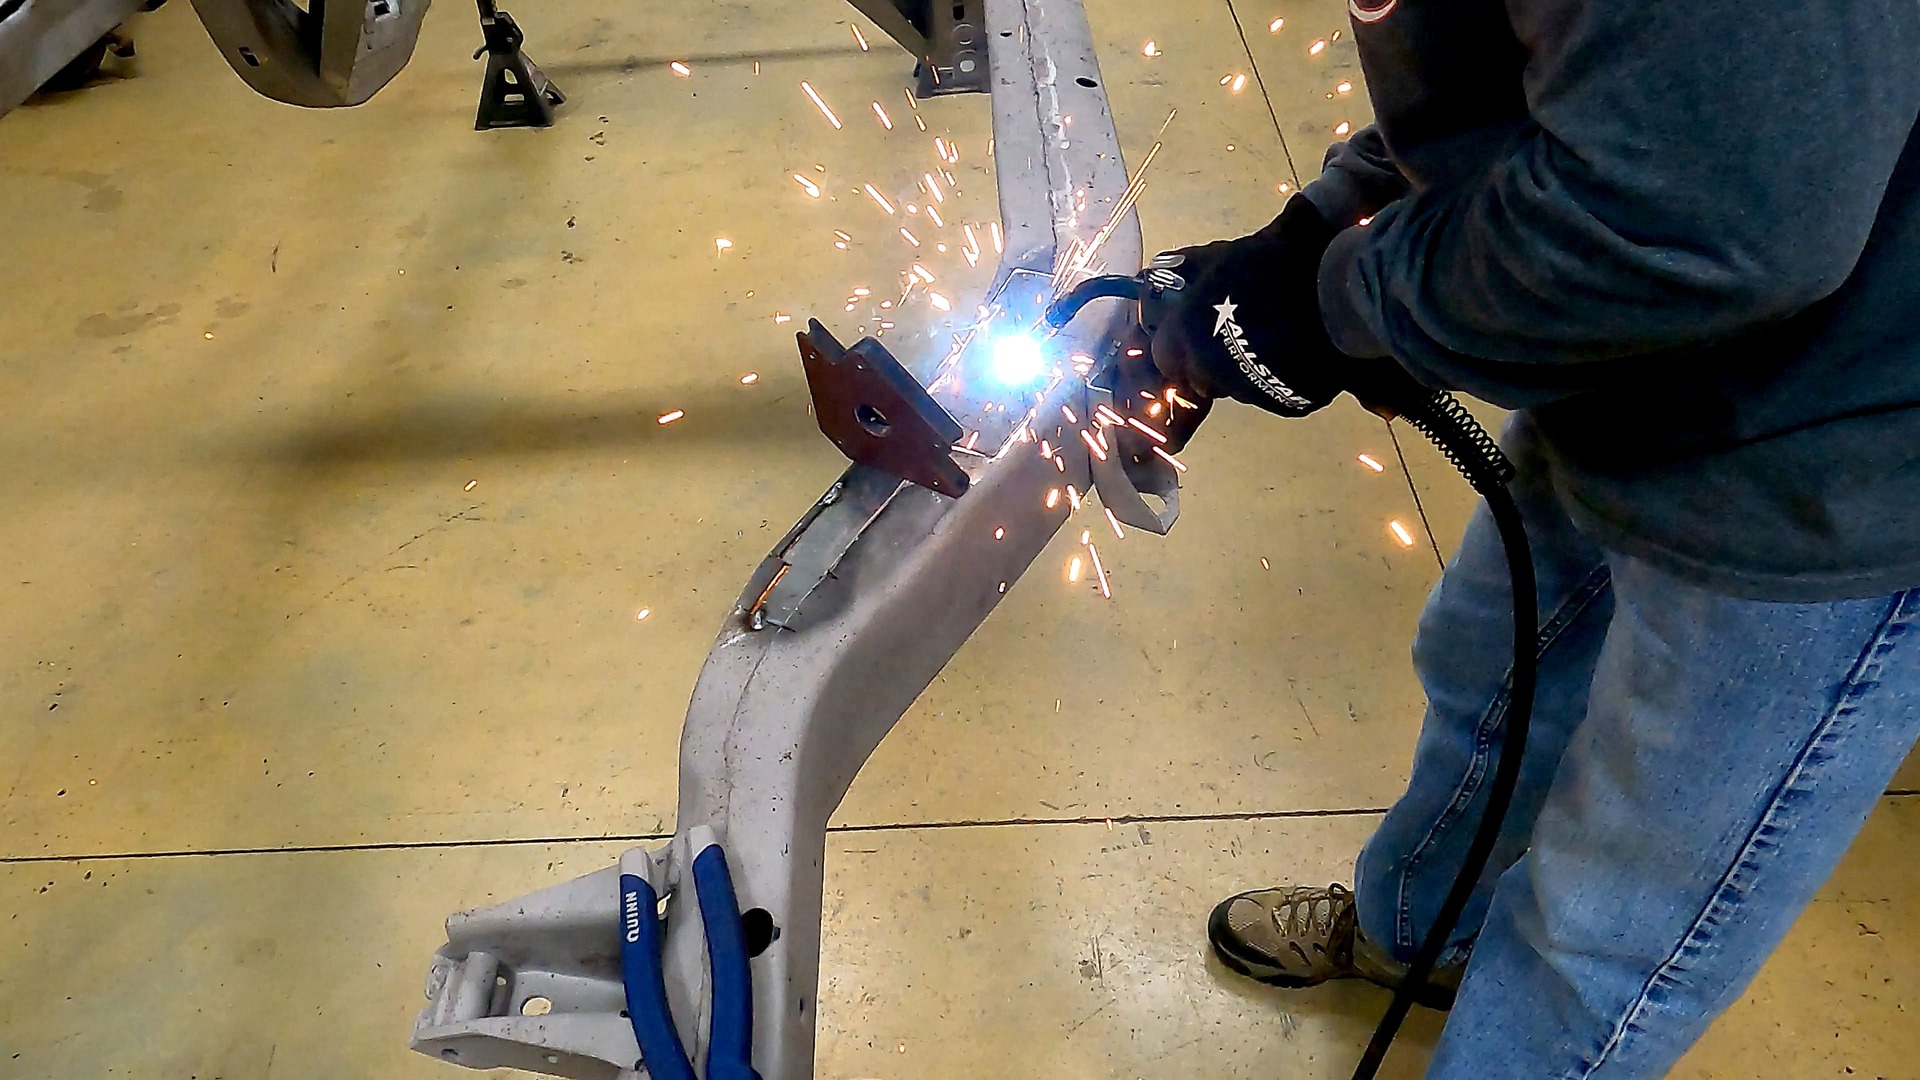
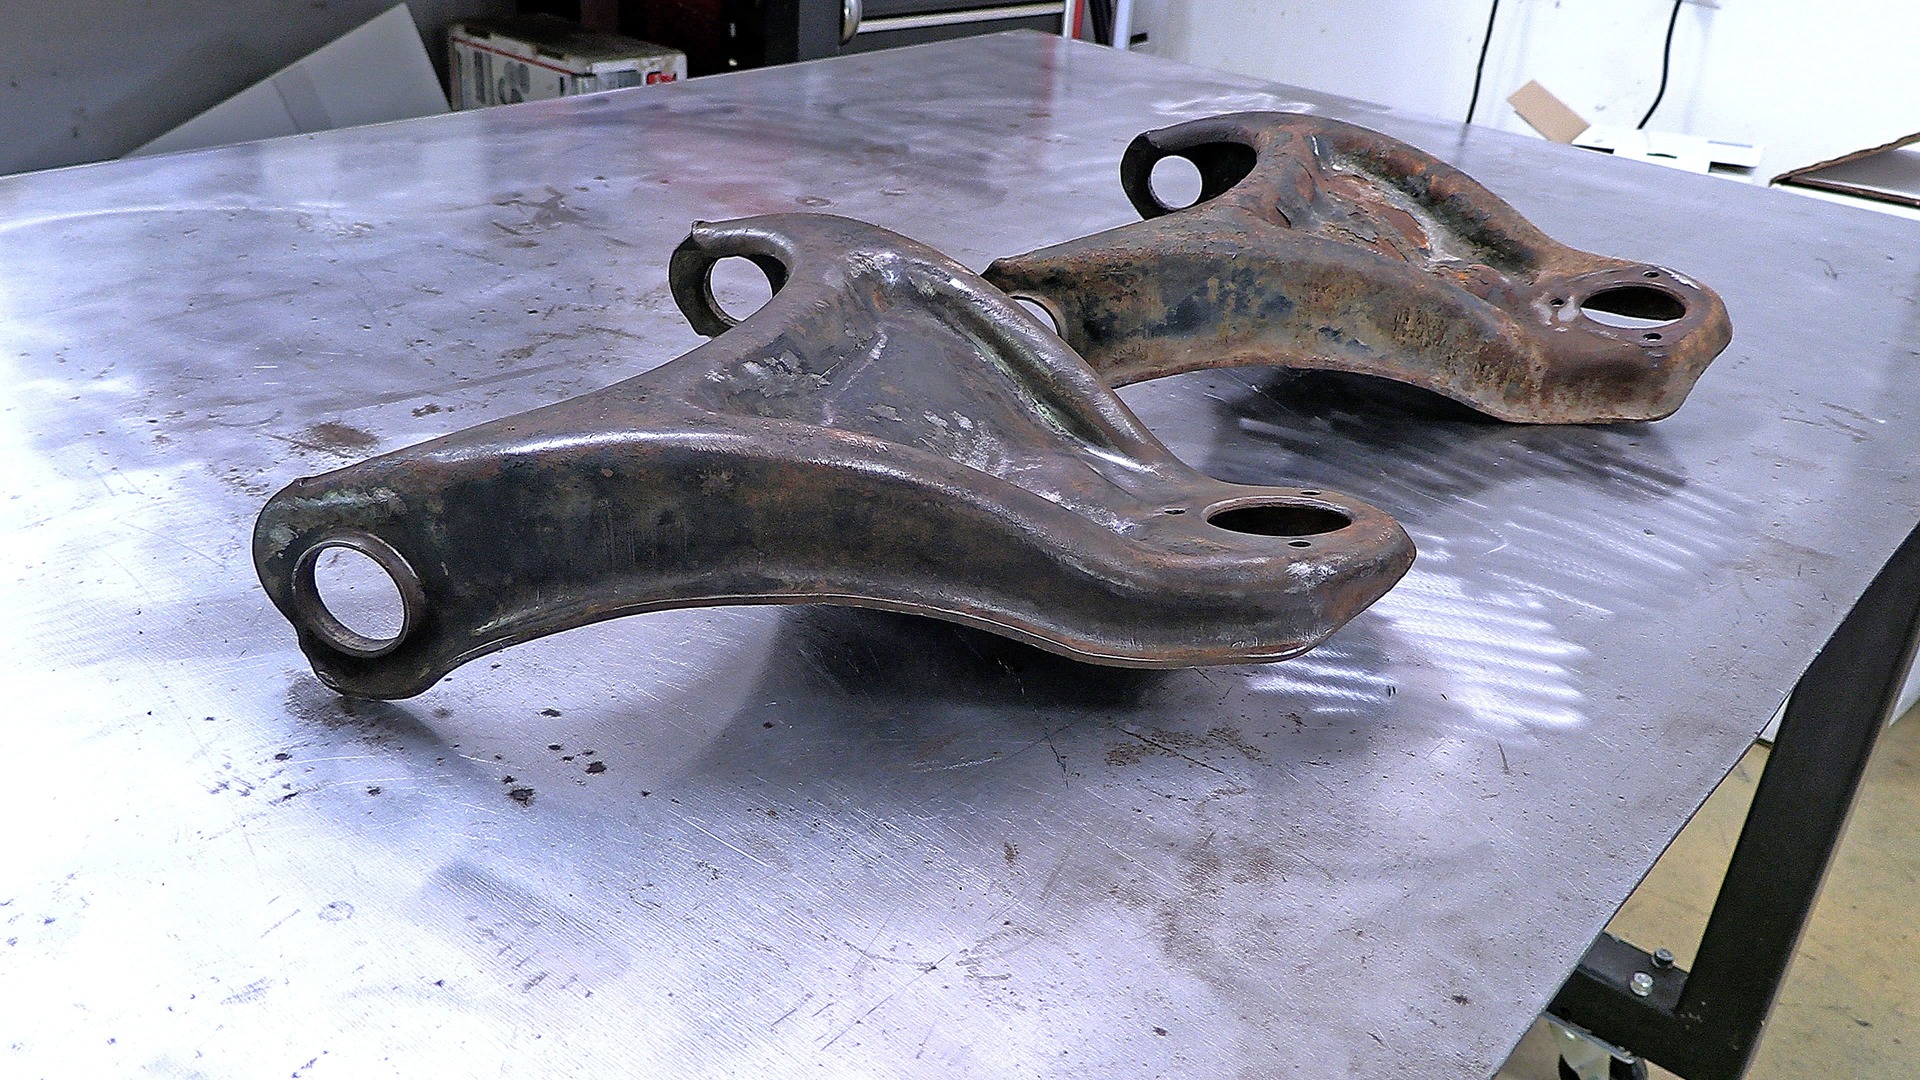
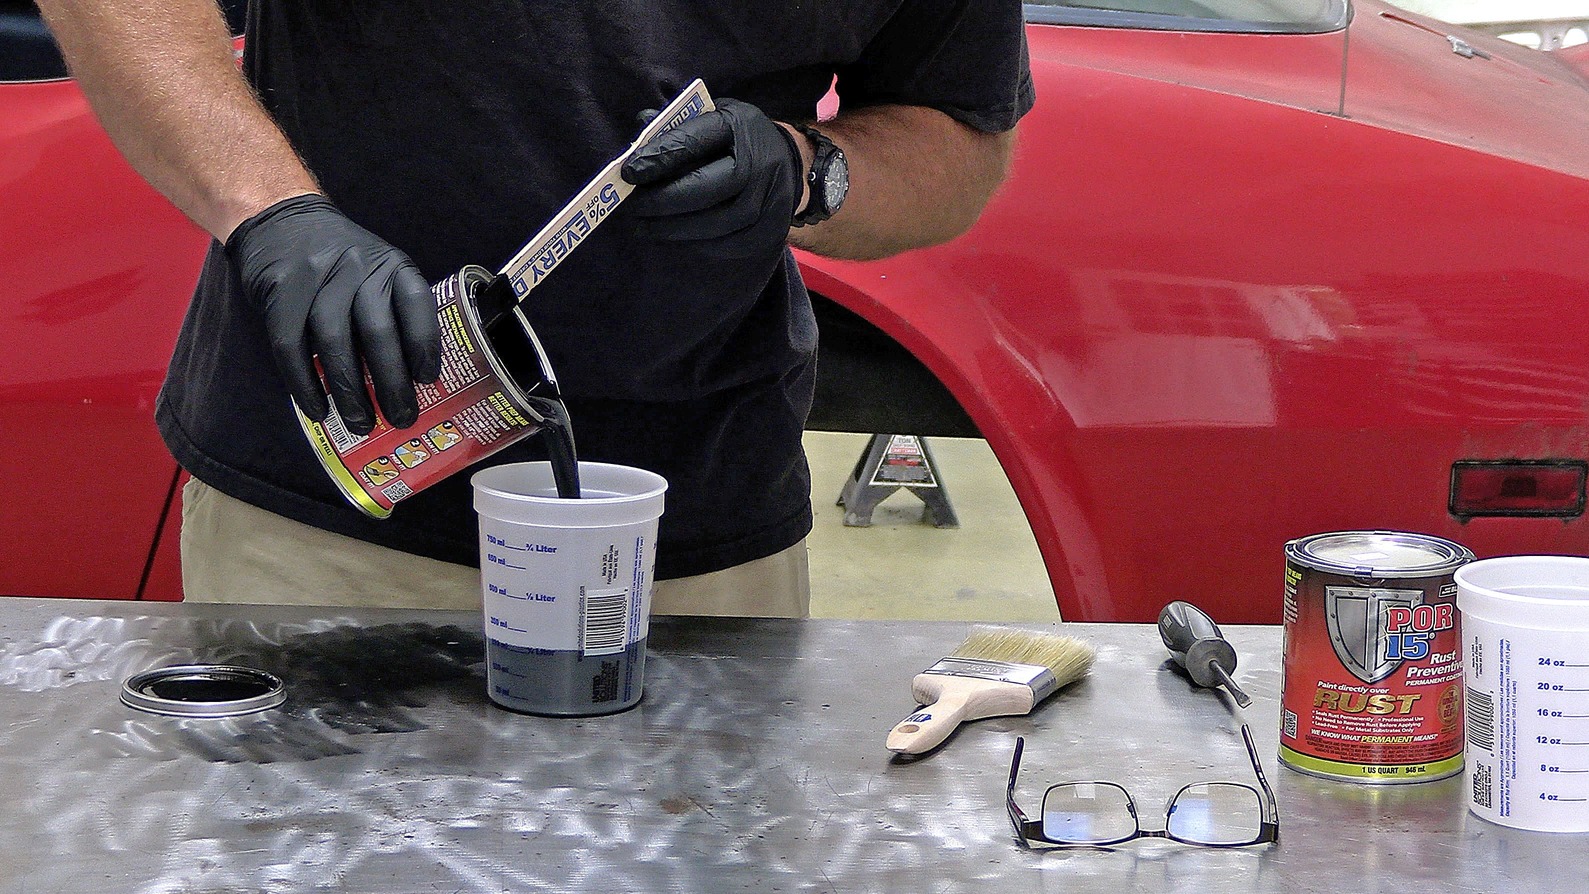
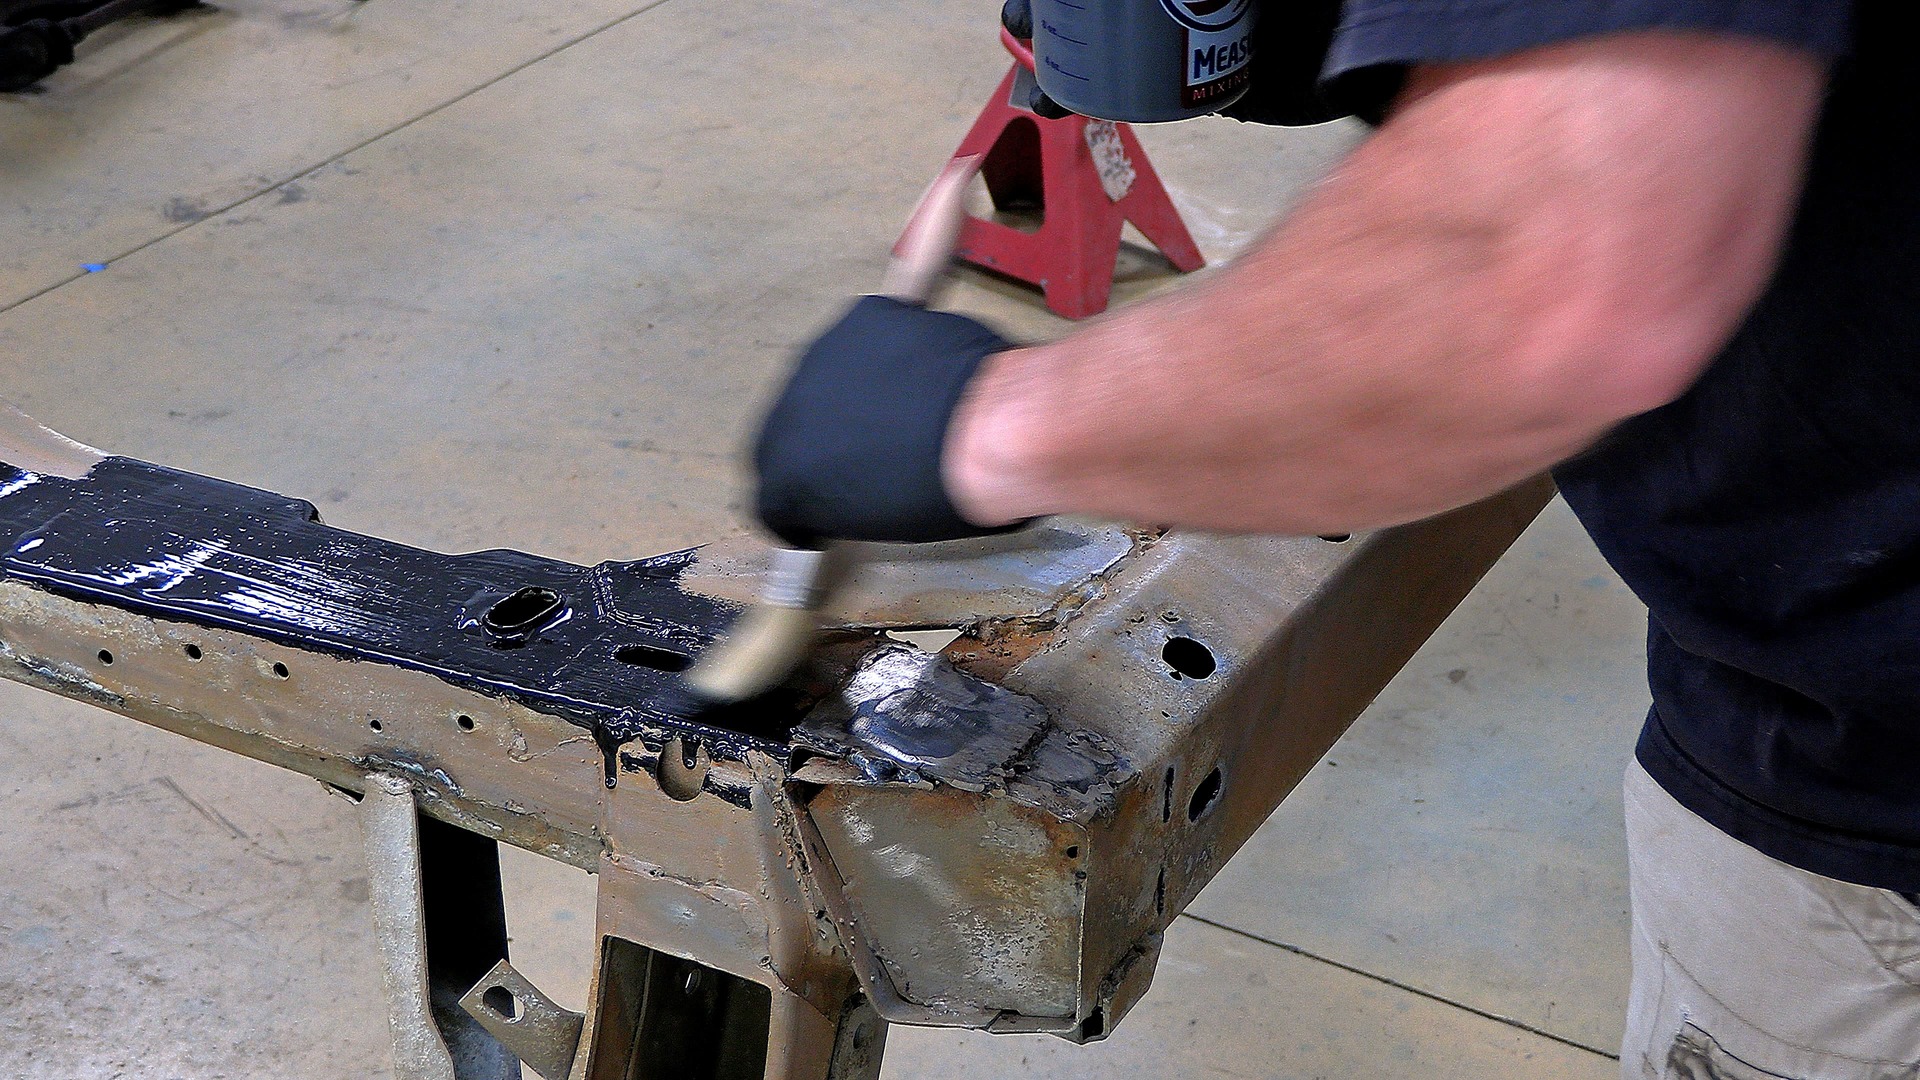
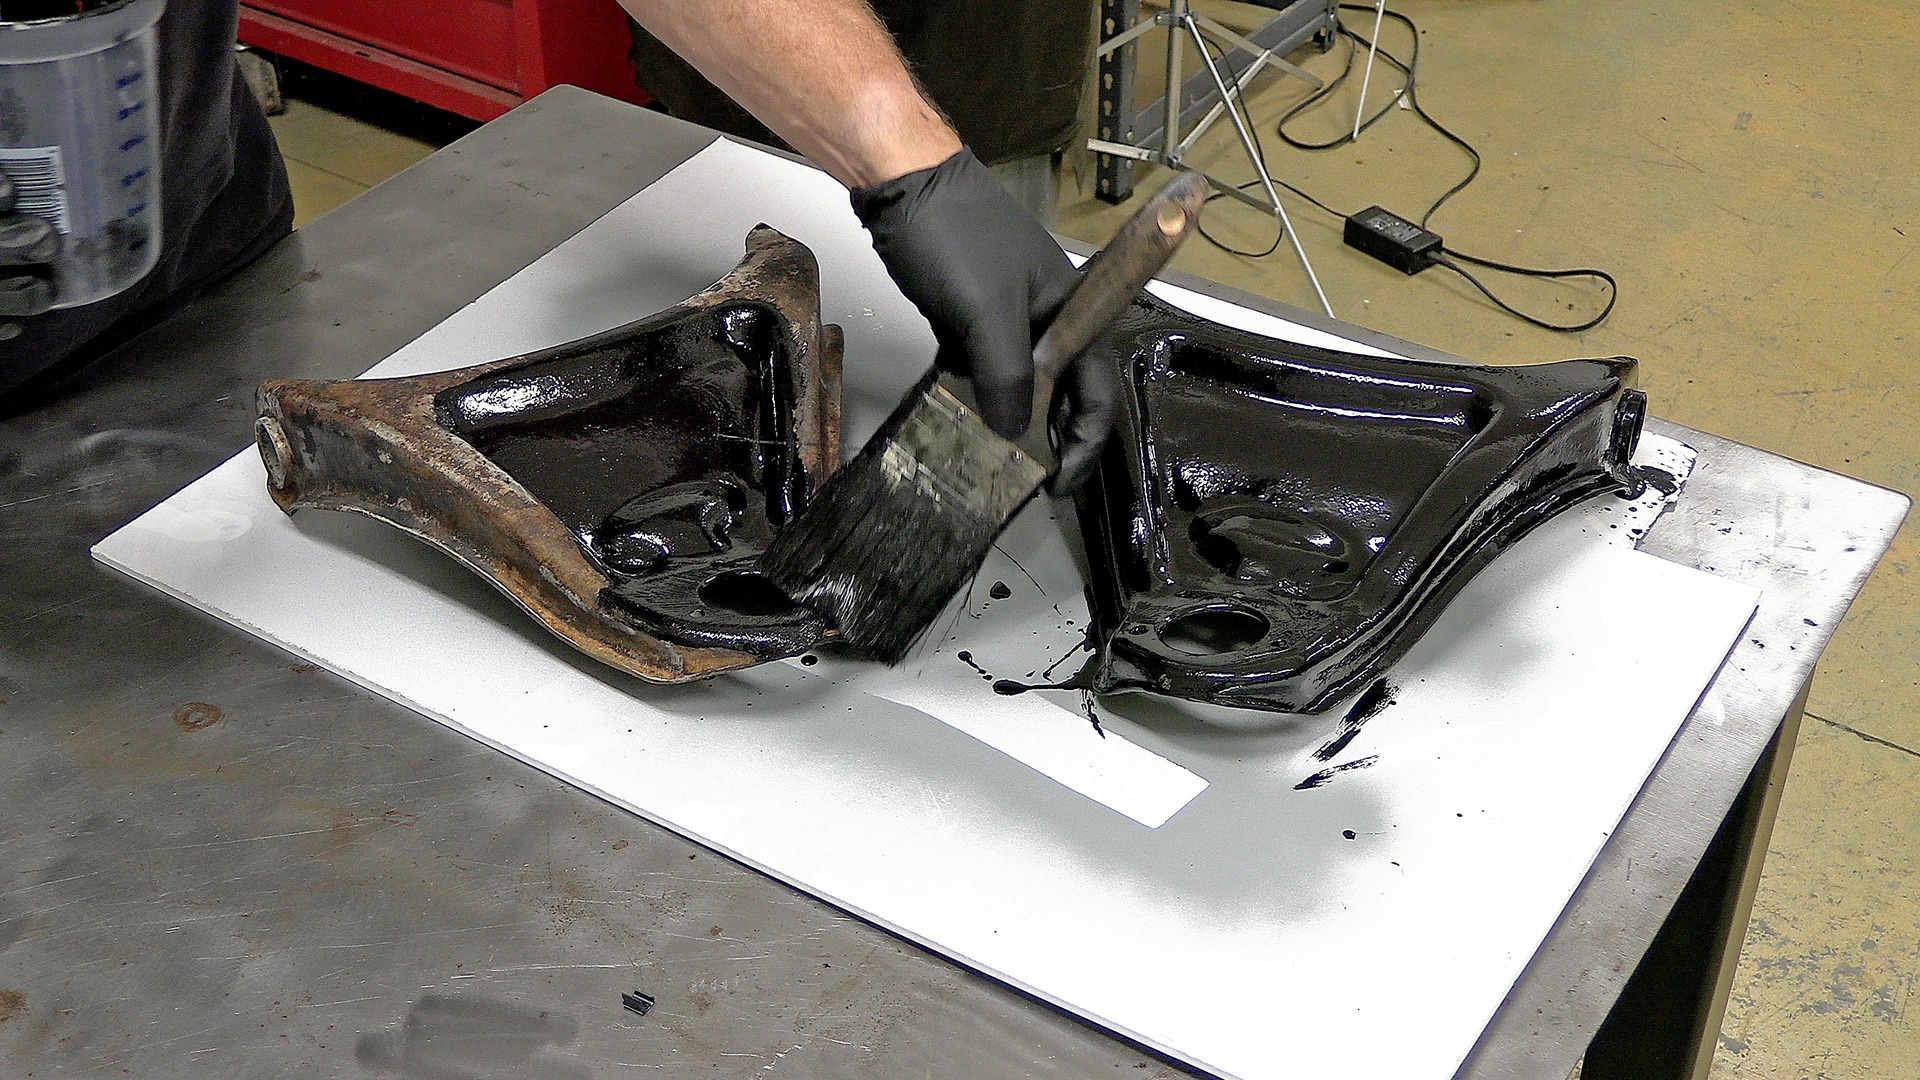
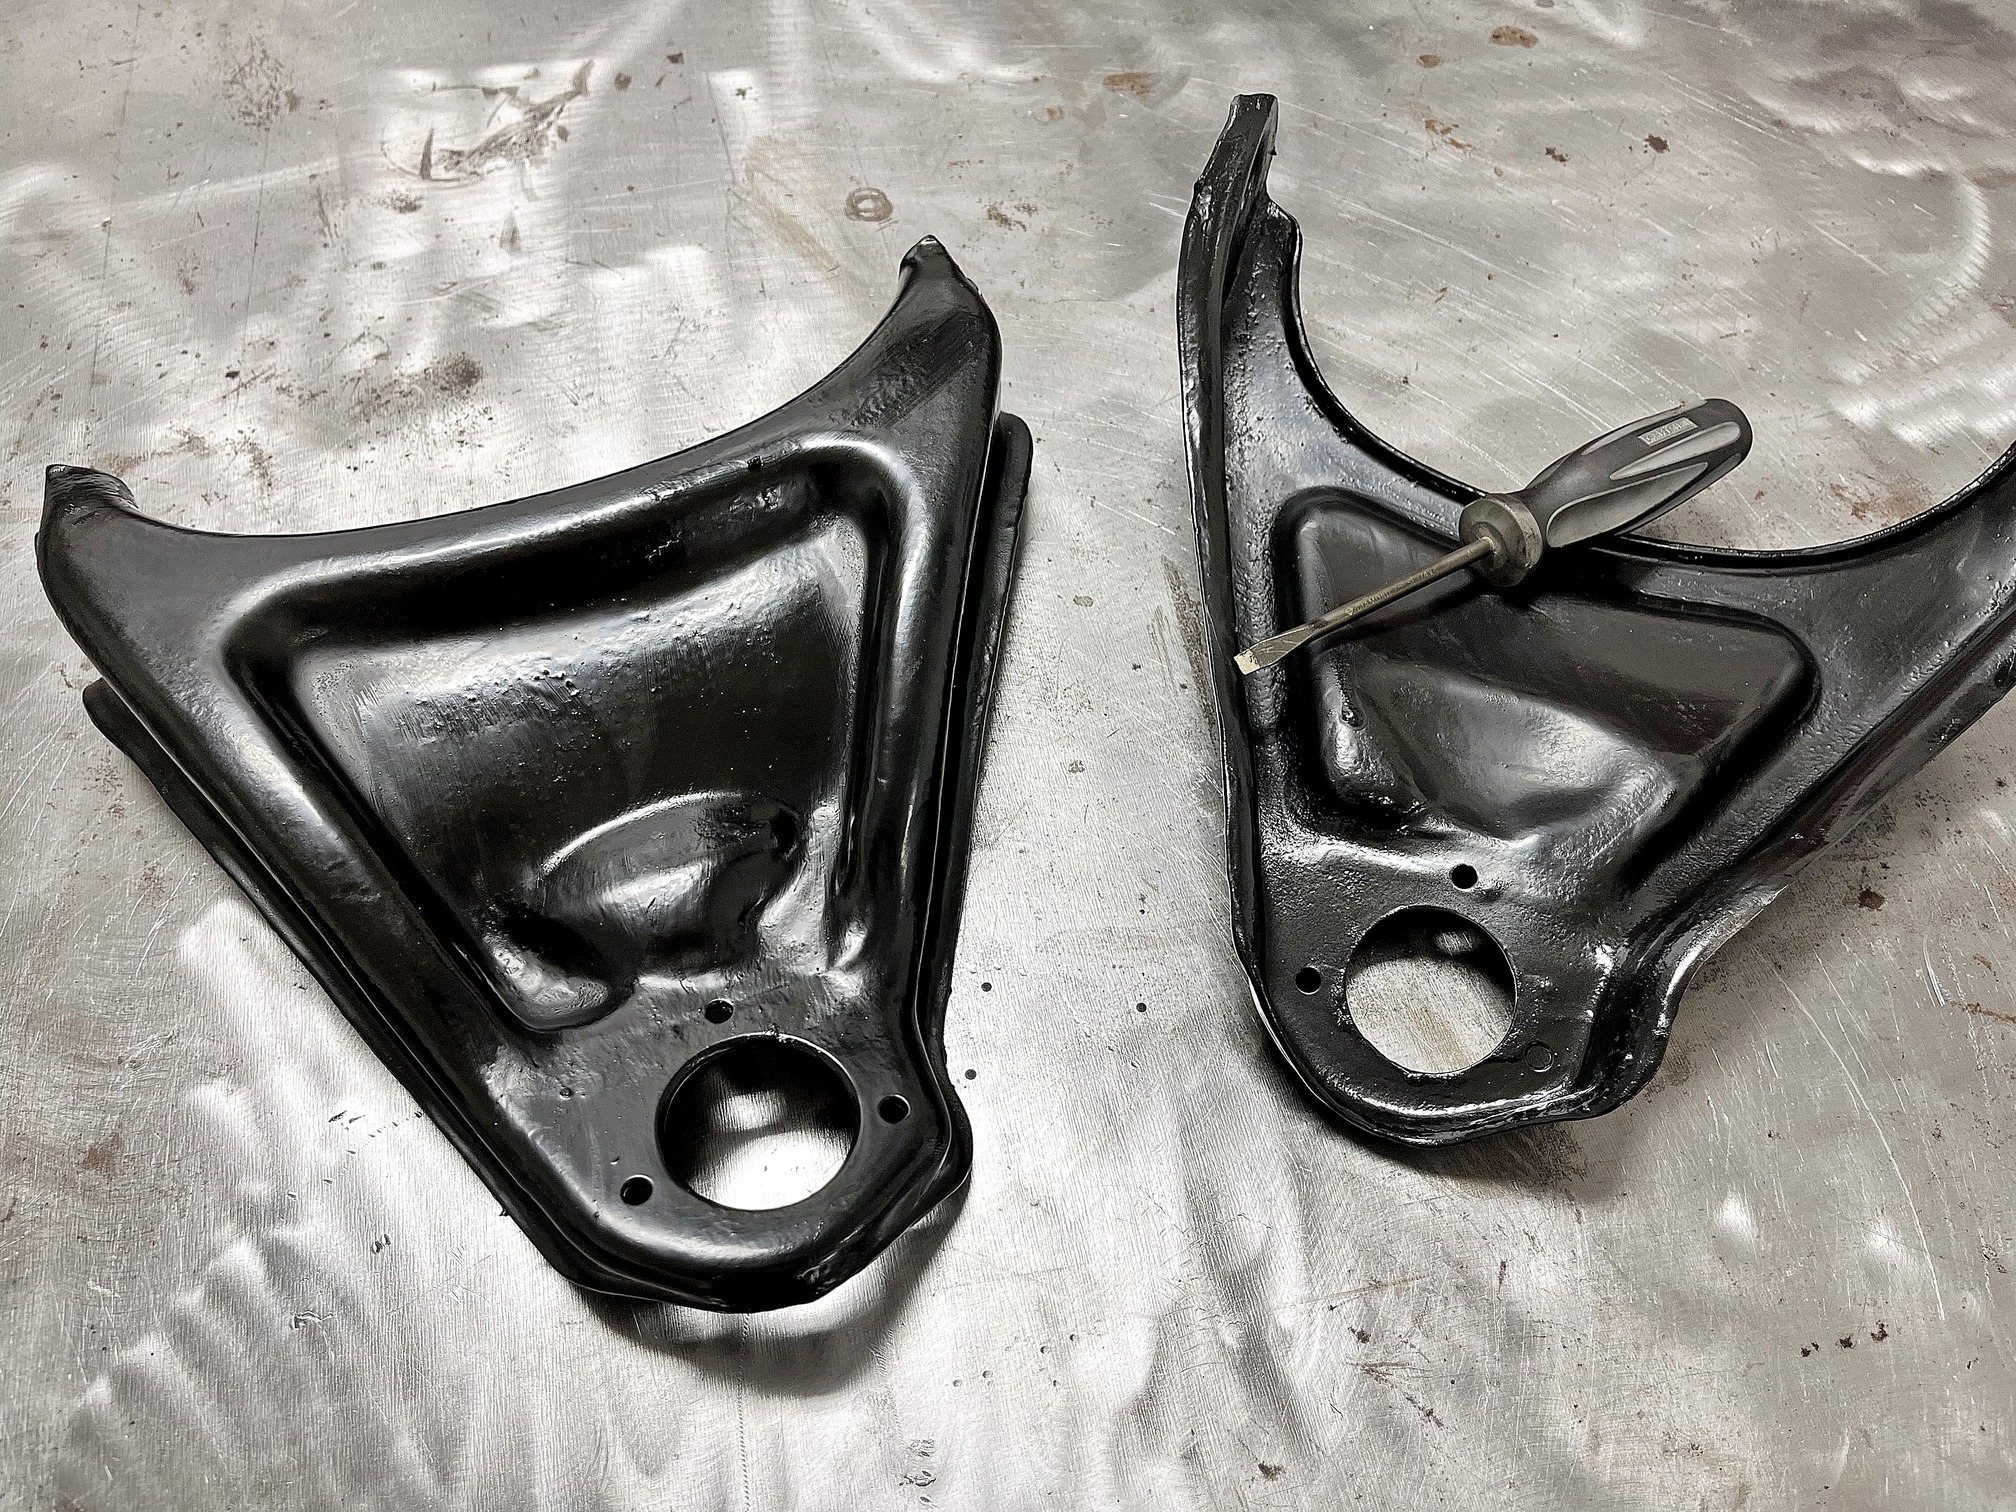
After cutting out the patch panels, a large welder’s magnet holds it flush to the frame while I tack weld it into position. Looking back on this, I probably would have been better off to break the patch panel into smaller pieces and ensure that each fits snugly in the frame. With this piece, some of the gaps were larger than I liked, and I had to do too much bridging with the welder. I’m confident the patch panel is welded in firmly, but the welds aren’t exactly what anyone would call pretty.Applying POR-15 on a freshly blasted and cleaned chassis doesn’t seem like much of a test. Of course, the POR-15 will perform well in ideal conditions, so we decided to give the stuff a real challenge with the upper control arms. Instead of blasting them, we just cleaned them up (barely) with a wire brush on a grinder. Here, you can see the control arm in the foreground has been “cleaned” compared to the one that’s yet to be cleaned up in the background. There isn’t any loose rust, but it’s nowhere close to pristine.Here’s the kit we sourced from POR-15. From left to right is a gallon of cleaner/degreaser, a gallon of metal etch, and 2 quarts of POR-15 in semigloss black (there’s also gloss black, silver, gray, and clear), which should be more than enough to cover our chassis.Just like any painting job, the key to a quality finish lies in the preparation. I put the degreaser and the metal etch in spray bottles I picked up from my local hardware store. POR-15 recommends spraying on their cleaner/degreaser and allowing it to sit for 15 minutes or so before washing it off with clean water. Next, I used an air hose to help dry the chassis before repeating the process with the metal etch. Again, after 15 minutes or so I washed off the metal etch with a water hose and dried the chassis a second time. I also did the same thing with the upper control arms.POR-15 actually cures by absorbing moisture from the atmosphere. Incidentally, more humidity means the POR-15 will dry faster. I’m in North Carolina, where the humidity doesn’t drop below 70 percent until sometime in November, so to keep the POR-15 fresh, I just poured out small amounts into a paint cup and kept the container sealed as much as possible. By the way, this stuff should be stirred but never shaken.The POR-15 is surprisingly thin for something that is going to dry into a hard shell. They recommend you brush it on in two thin coats. It does brush on quite easily, but because it is so thin you do need to be careful about runs.If I were to honestly describe my painting skills, think pre-schooler picking his boogers while finger painting. I can’t help but get the stuff everywhere. So, it didn’t take long for me to realize I needed to put down a drop cover. I also quickly realized I was being way too heavy handed with the thickness. I was glopping the POR-15 into all the hard-to-reach areas of the chassis trying to make sure I got everything covered. So, I abandoned the idea of two thin coats and just went with one thicker coat. It is against POR-15’s recommendations, but they say the only drawback with one thick coat is it may leave brush marks—and I’m willing to risk it.I did, however, do it correctly with the upper control arms we’re using as a test case. I brushed on a thin coat, allowed the POR-15 to dry until it was tacky, then brushed on a second thin coat.Here’s the result with the upper control arms. Not only do they look fantastic, I also tried scratching them with a screwdriver and the POR-15 proved to be surprisingly resistant.Finally, here’s a look at the completed chassis. It also looks great. Because the chassis will be underneath the car and never be exposed to UV rays, a topcoat isn’t necessary. So, at this point it is ready for reassembly. Applying the POR-15 was surprisingly easy and we can be confident this 42-year-old chassis is well protected for years to come.
We use cookies to ensure that we give you the best experience on our website. If you continue to use this site we will assume that you are happy with it.