When it comes to building a classic truck, it should come as no surprise that as aftermarket components are added or other-than-stock setups are incorporated, OE-style hard lines and hoses no longer work. Changes in locations, orientations, sizing, and the like all contribute to this factor, making it difficult to use original equipment to mate the new components. Our C10 project is a perfect example of this. The brakes, suspension, and drivetrain have been upgraded, resulting in custom plumbing for the brake and fuel system having been required. So, when it came time to tie together the late-model 4L60E transmission to the aftermarket Afco Racing radiator, it was already assumed that we’d be making custom lines.
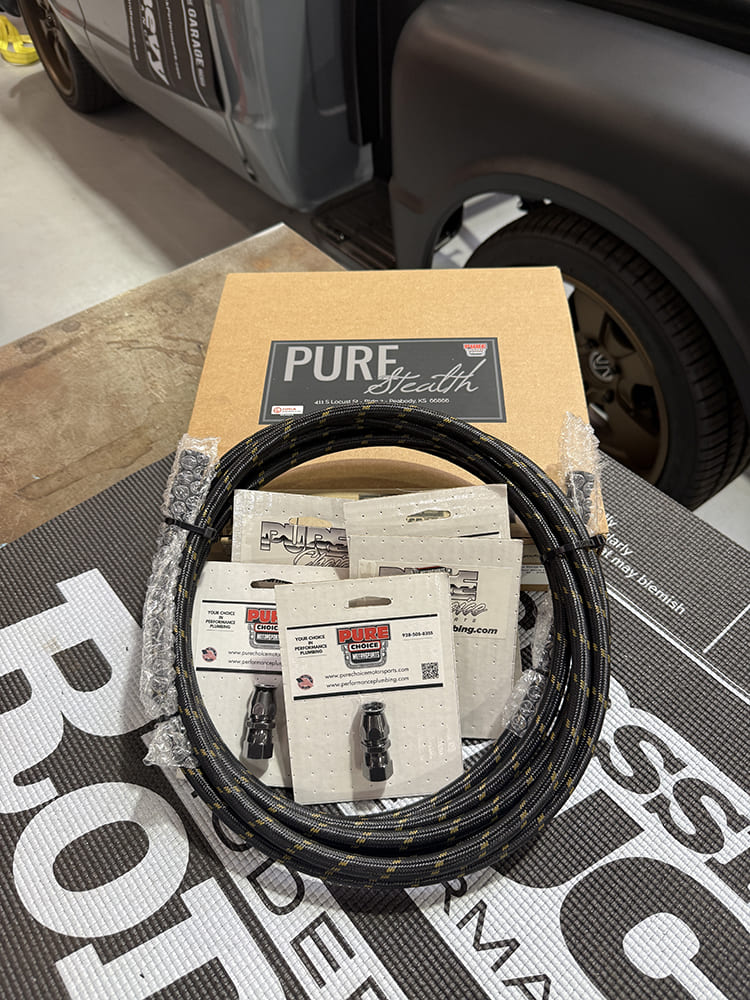
To transport the 4L60E’s transmission fluid to and from the Afco radiator, we opted to use a variety of AN-6 fittings and PTFE hose from Pure Choice Motorsports. PTFE (Polytetrafluoroethylene) hose is a stainless braided hose with a special Teflon liner designed to increase temperature and chemical resistance. Pure Choice offers a variety of color and braiding options when it comes to the outer layer of their hose; we chose Triple Bronze to match the wheels and other components on the C10.
Back in the day, a C10 equipped with an automatic transmission and integral trans cooler in the radiator likely had a combination of hard lines and hoses, affixed with hose clamps around flared/barbed fittings. In fact, the 4L60E transmission in our pickup came equipped with fittings designed for a flared hard line. While we could have accommodated these fittings and designed a pair of hard lines to suit our situation, instead, it was decided to go with a more reliable method to the hose clamp route, using AN fittings and stainless braided hose instead.
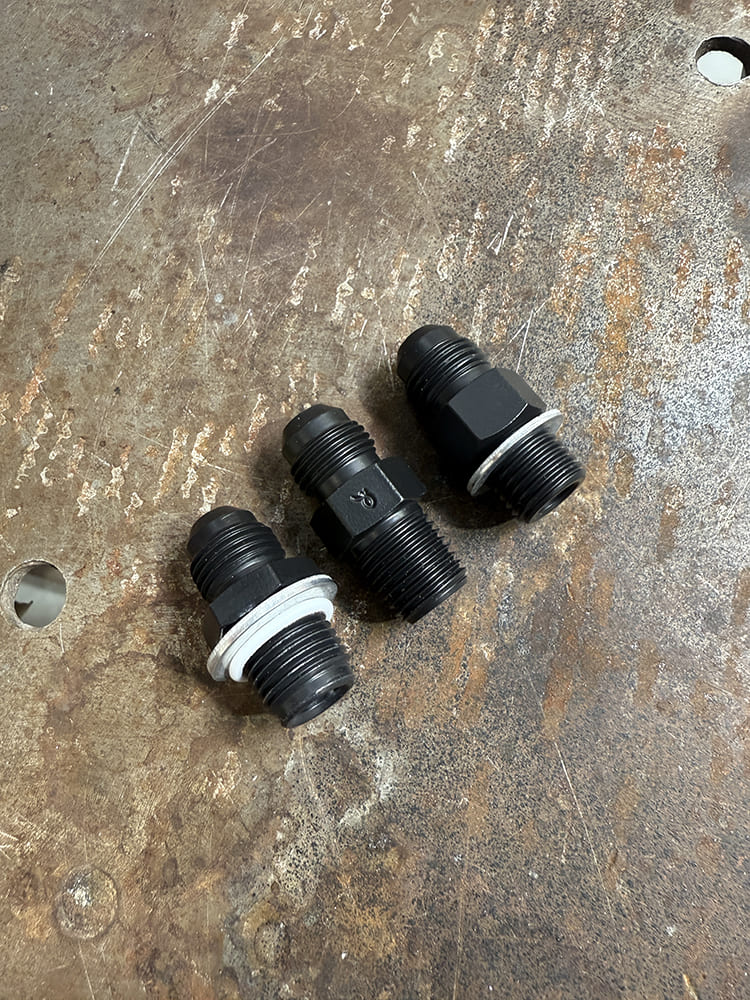
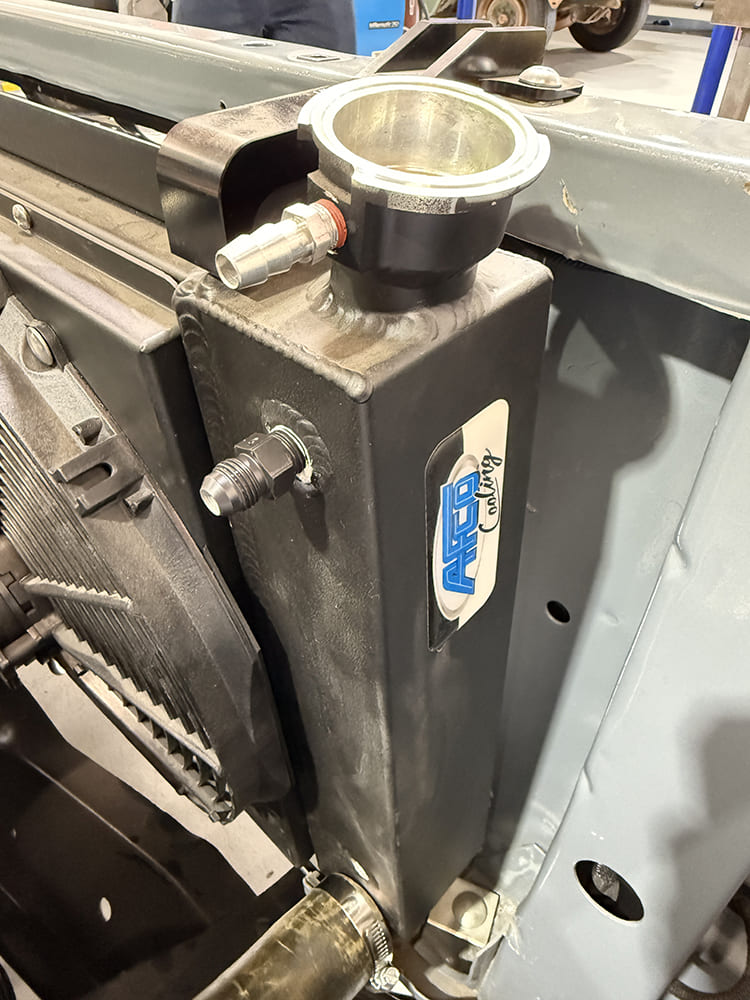
For our application, there are three different AN-6 male fittings that might apply. From left, is an AN-6 male to 9/16×18-inch (PN X12062), 1/4-inch NPT (PN X816-06S), and 1/4-inch NPS (PN X12076). The first fitting is typical for the transmission-side fittings for late-model 4L60/80E transmissions. The trans in our truck turned out to be an earlier case, requiring the 1/4-inch NPS fittings. The 1/4-inch NPT fittings will be used at the radiator side, screwing into a pair of bungs attached to the built-in trans cooler.
The use of stainless braided hose offers many positive improvements over typical rubber trans cooler hoses of the past; it’s more durable, capable of higher pressures, and is resistant to a wide range of chemicals. The fittings used are also more reliable than the hose clamps of yore, which means that once installed, they’re unlikely to ever develop a leak. Couple that with the fact that the finished assemblies are far more attractive and it’s hard to beat the combination—reliability and appearance for the win!
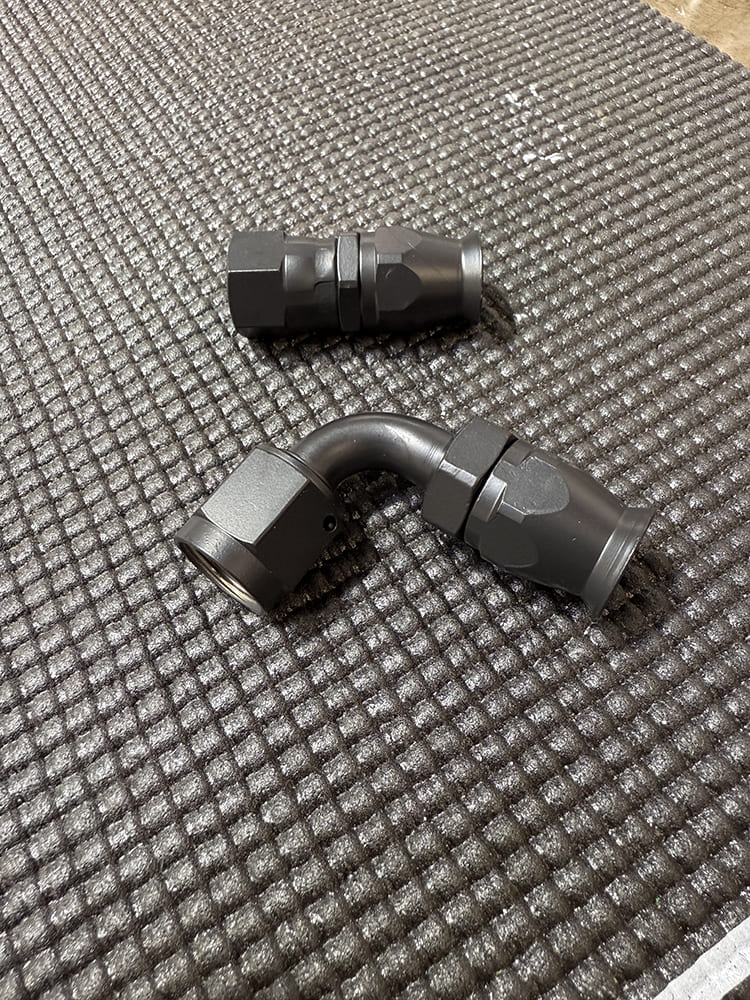
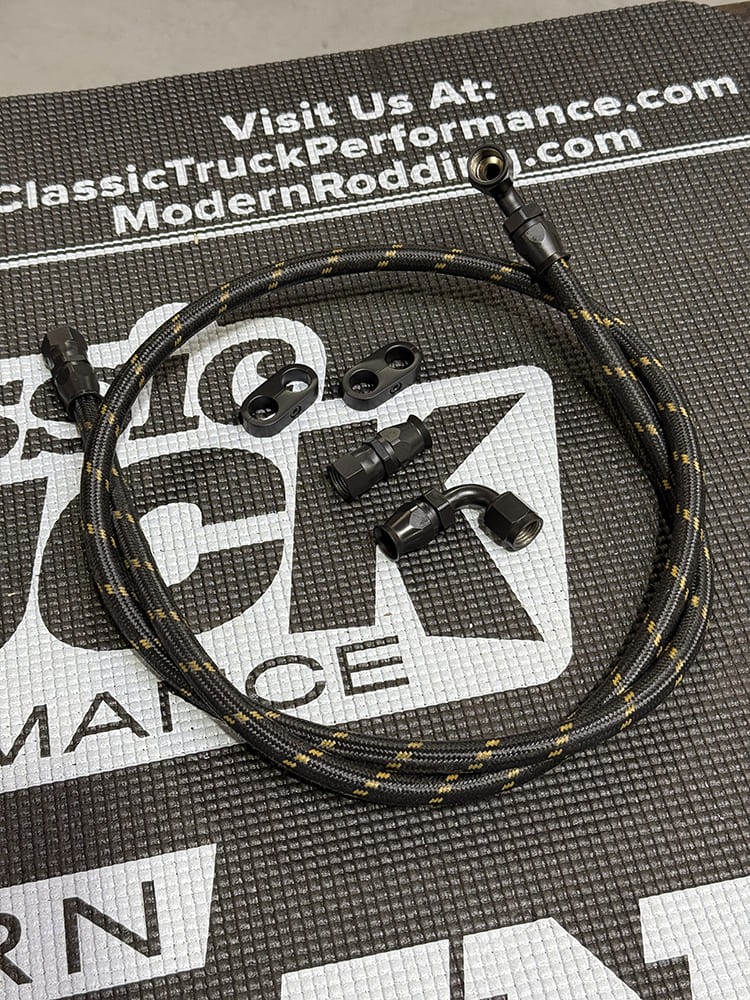
The hose ends are assembled using PTFE hose only and consist of three components: a fitting/nipple, brass olive, and nut. They are available in three variations as well: straight (PN X100-0106S), 90-degree (PN X100-9006S), and 45-degree (PN X100-4506S) (not shown).
When it came time to choose a line of products in which to build our trans lines from, there was no doubt than to go with the offering provided by Pure Choice Motorsports. Their Pure Stealth hose and fitting product line “is the embodiment of refined performance, where functionality and visual sophistication come together seamlessly. Engineered for the most discerning builders, Pure Stealth is designed with an uncompromising attention to detail, making it the ultimate choice for projects where perfection isn’t optional, it’s expected.”
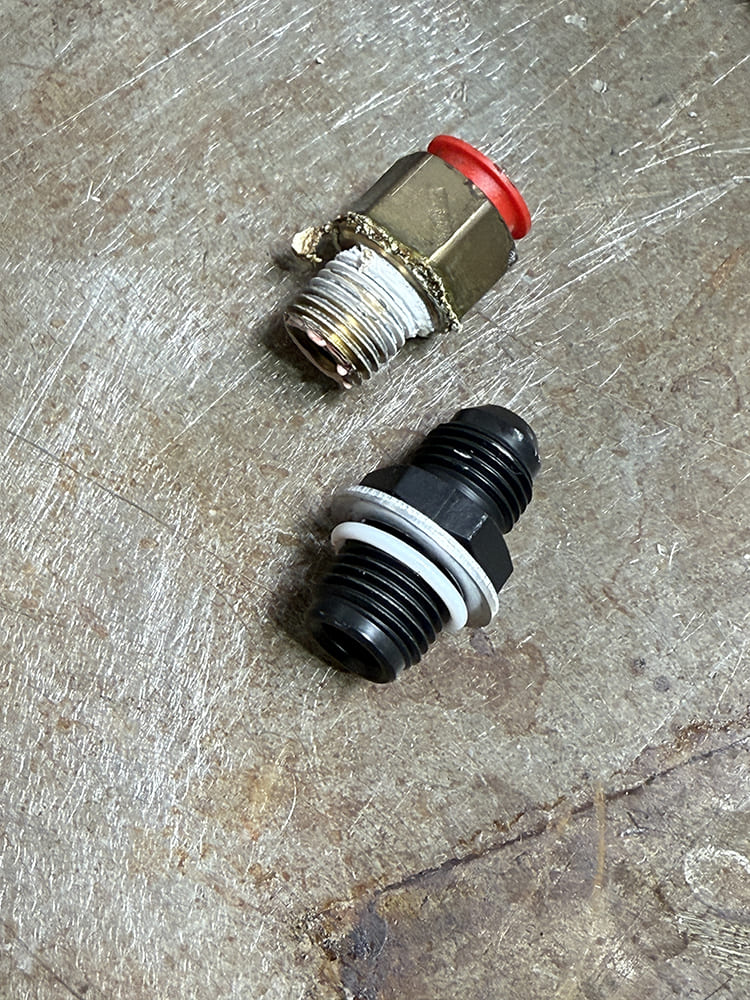
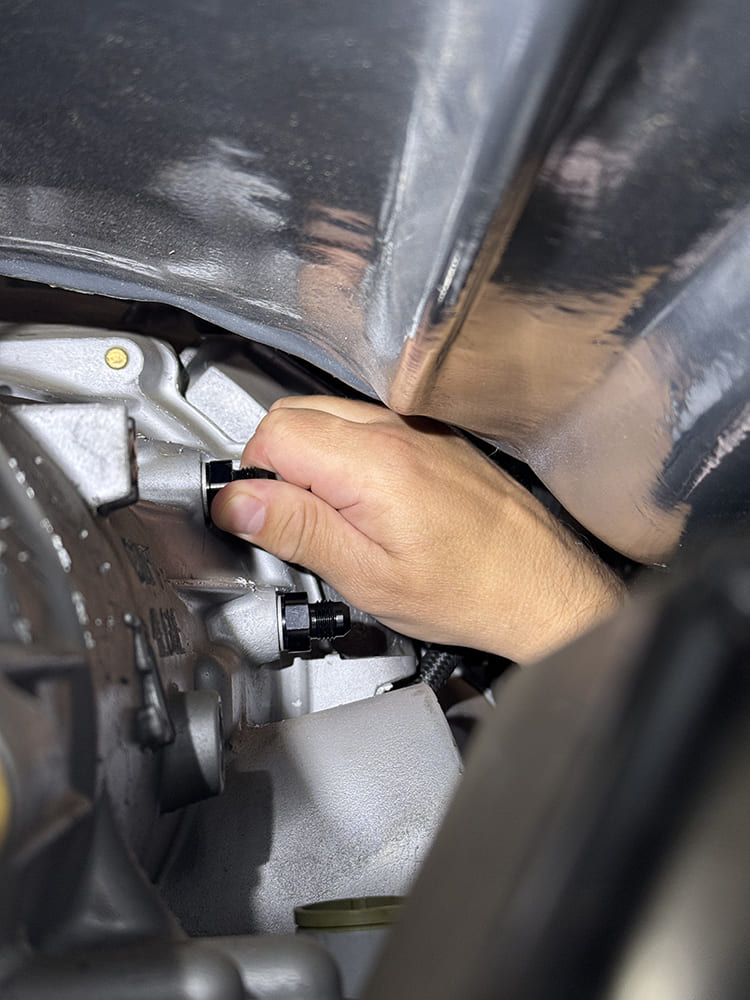
The stock fittings in the 4L60-E transmission are designed to be used with flared hard line. We’ll need to swap these with the appropriate fittings to accept an AN-6 hose.
We think you’ll agree as we work through creating a pair of PTFE hose assemblies to keep our 4L60E transmission nice and cool. CTP
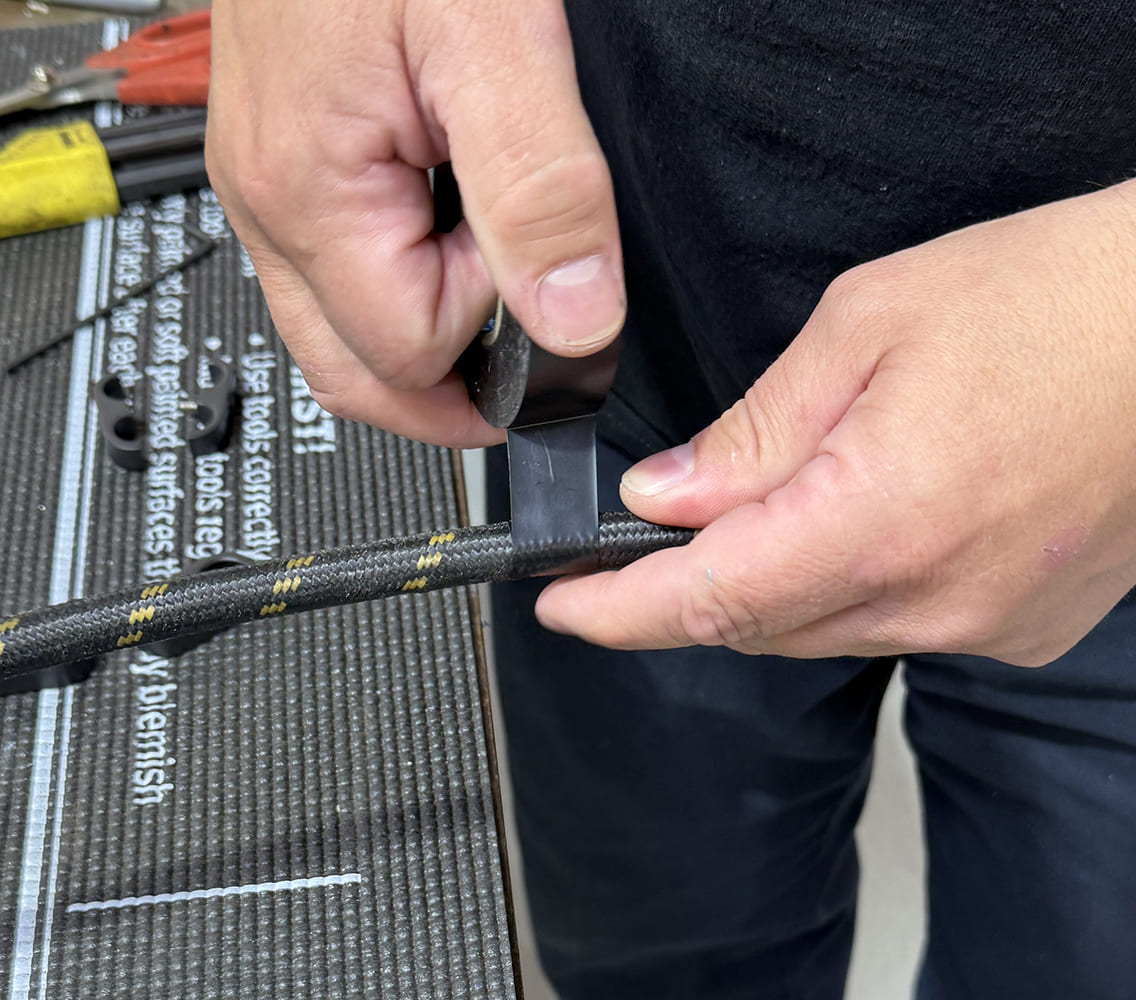
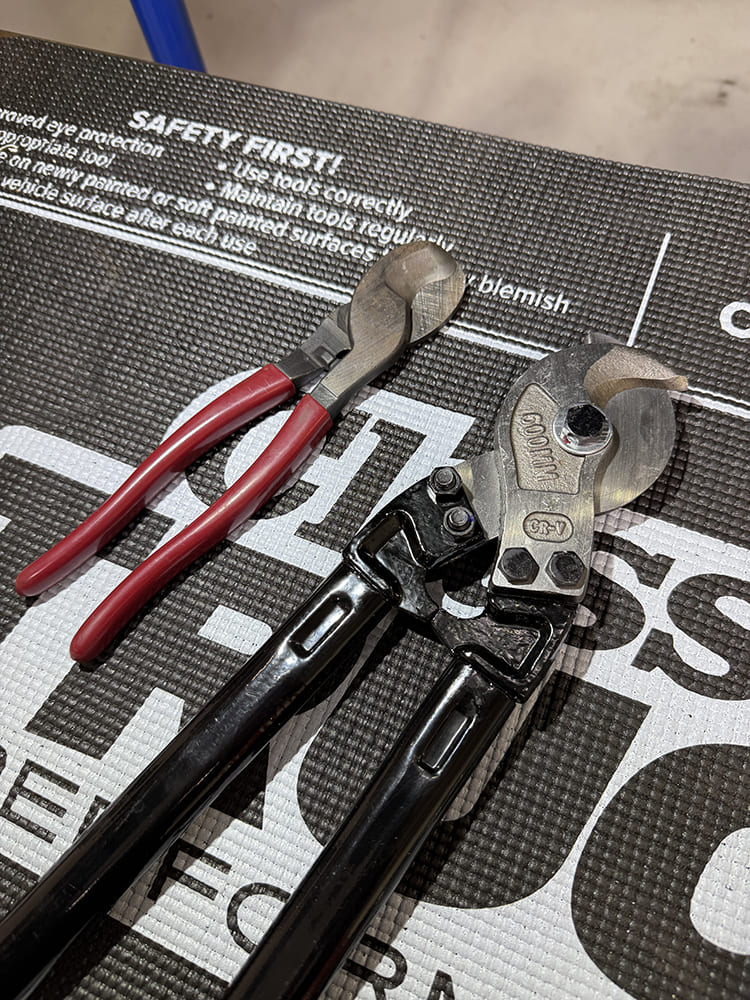
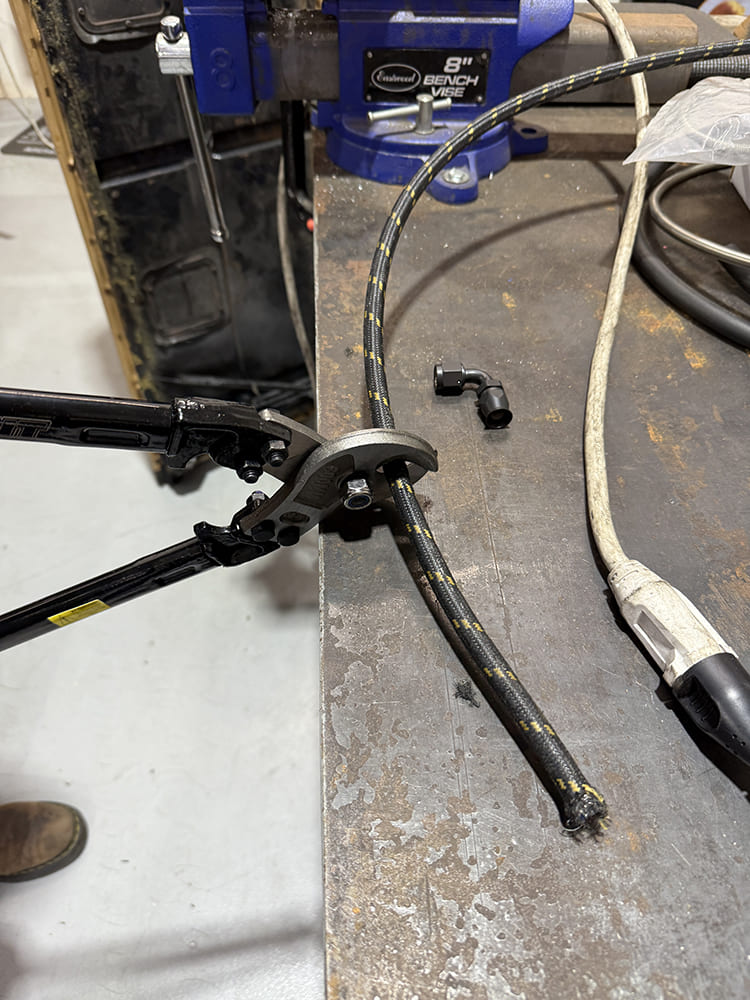
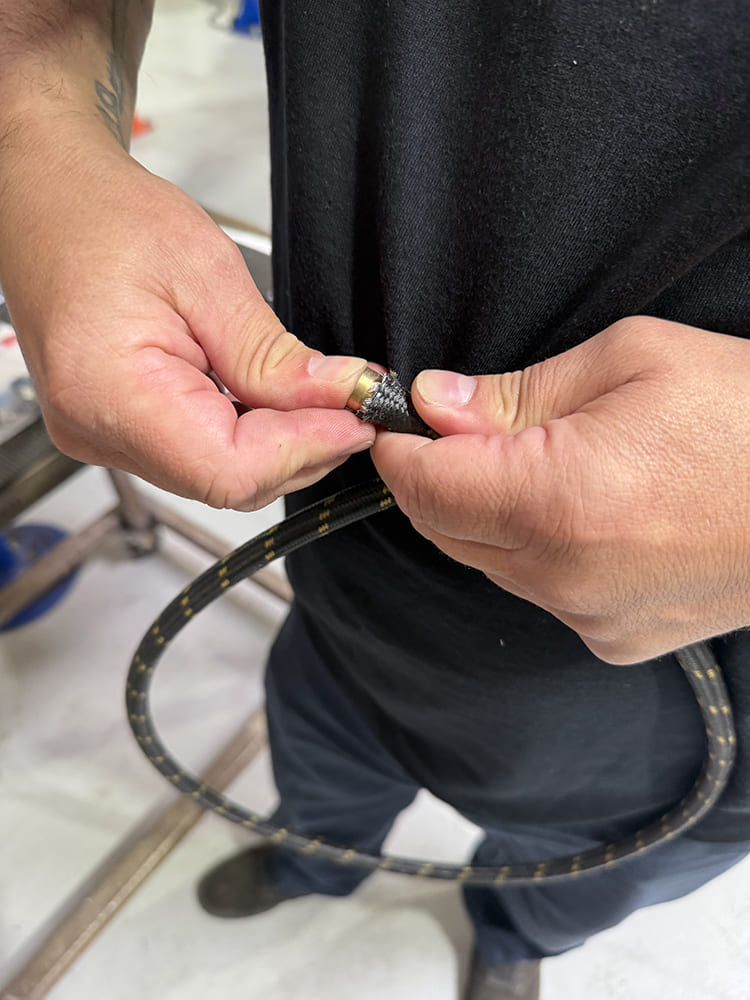
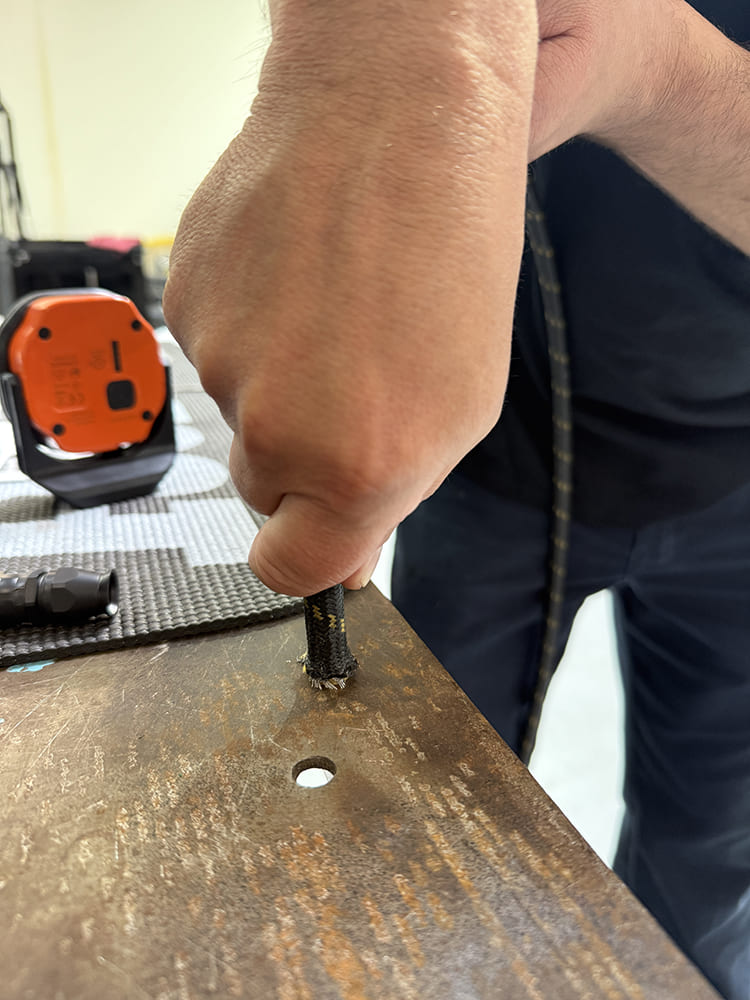
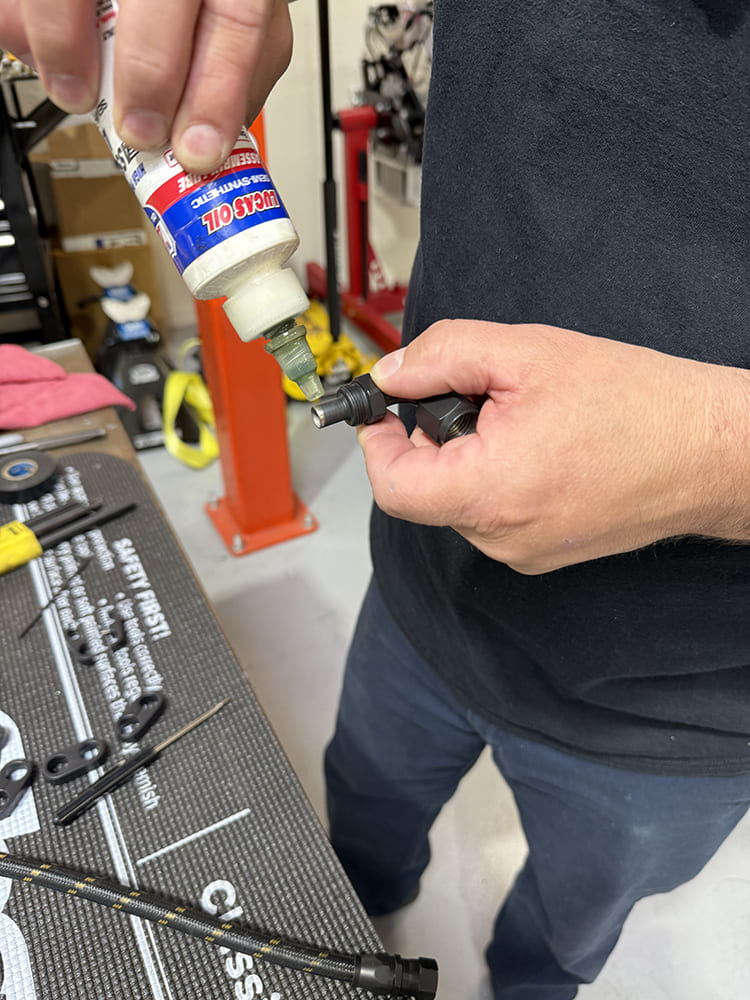
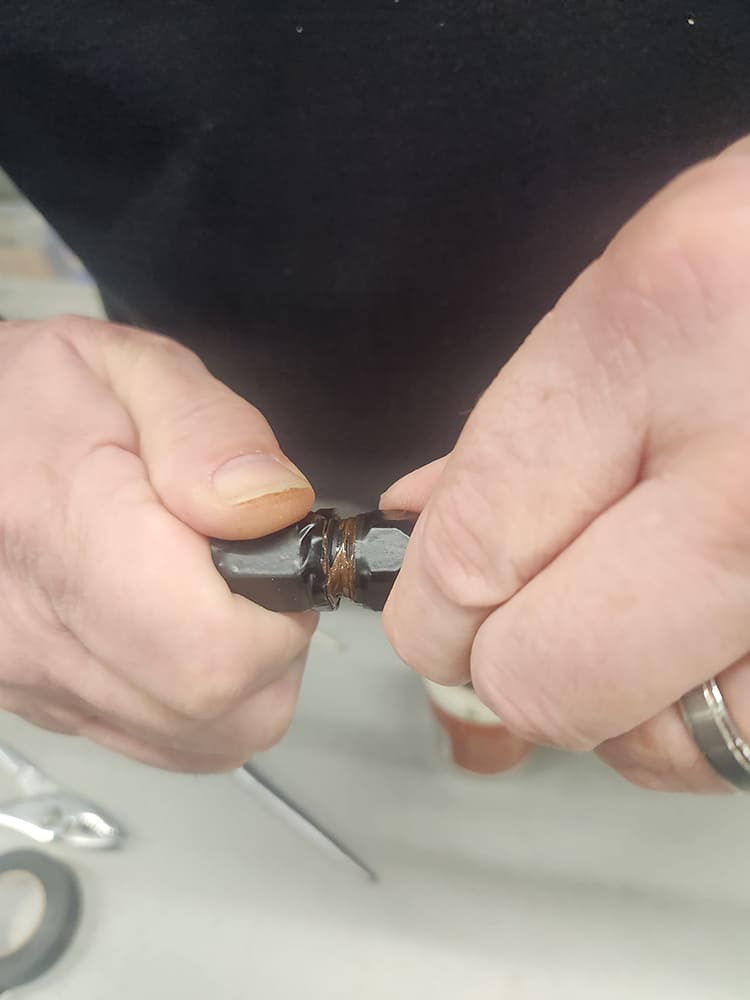
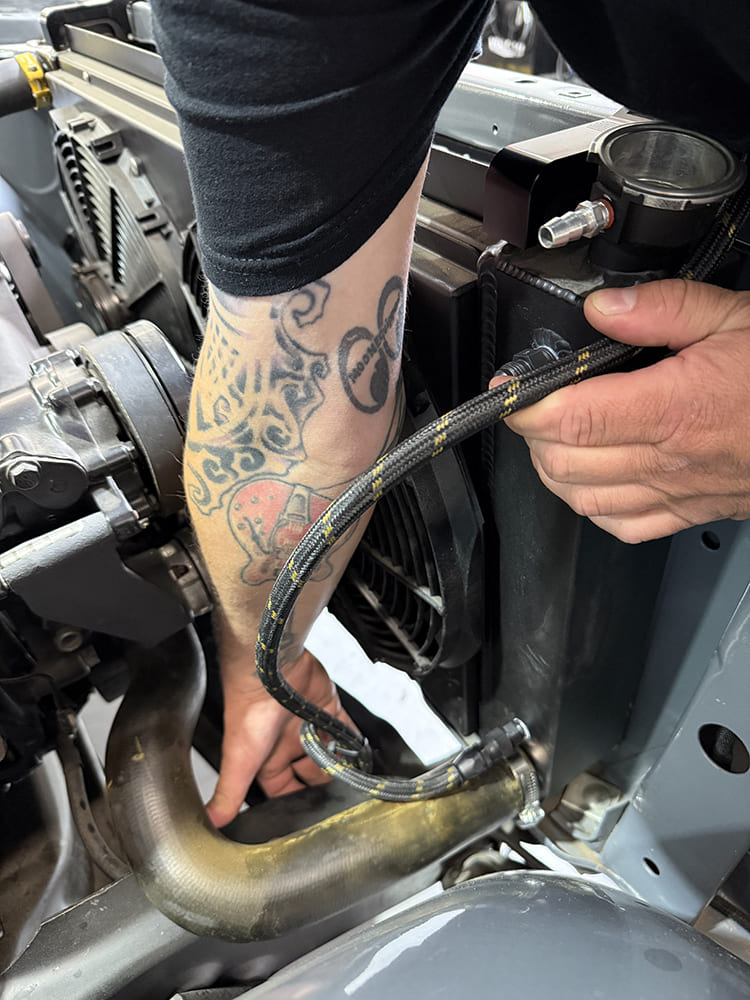
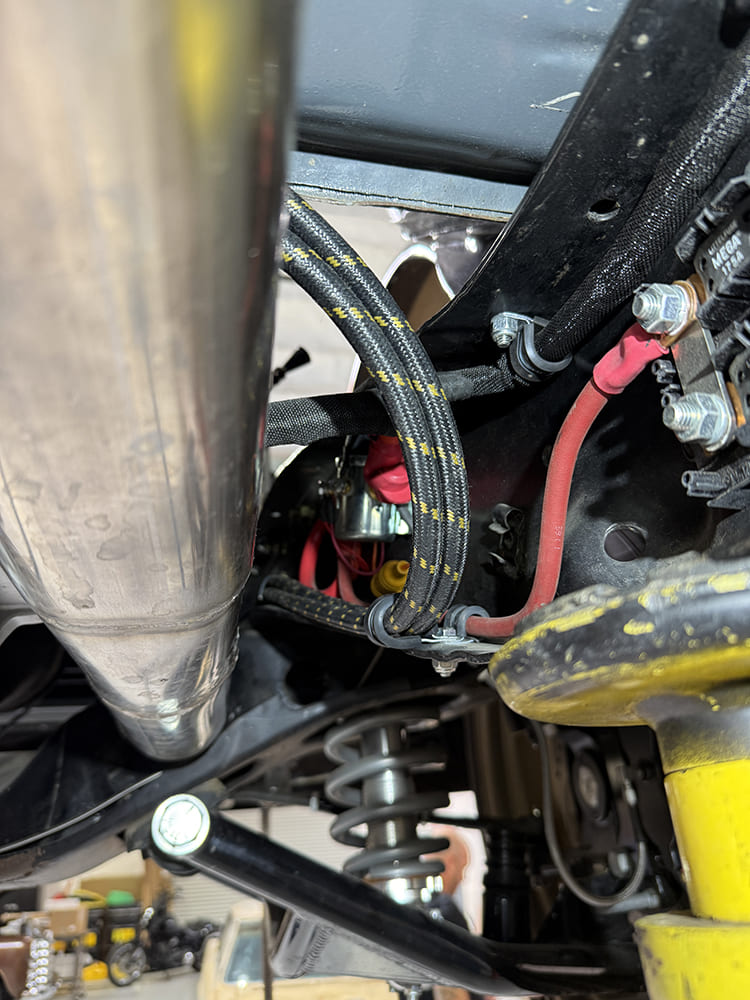
These AN-6 x 1/4-inch NPS (PN X12076) from Pure Choice will allow us to do just that. Note that since the threads of the NPS fittings are straight, a sealing washer is used.Here, the two trans fittings are installed and we’re ready to make our first hose.To achieve a leak-free assembly, it’s of utmost importance to make a square cut through the entirety of the hose, with as little crushing as possible. Wrapping the area of the hose to be cut with a single course of masking or electrical tape helps keep the braided stainless wire from fraying.A sharp cutting tool designed specifically for cutting stainless braided hose is an absolute necessity in order to cut the PTFE hose without crushing the internal liner and to shear through the outer stainless steel braid. The cutter on the left didn’t cut it, while the larger, purpose-built cutter on the right got the job done.
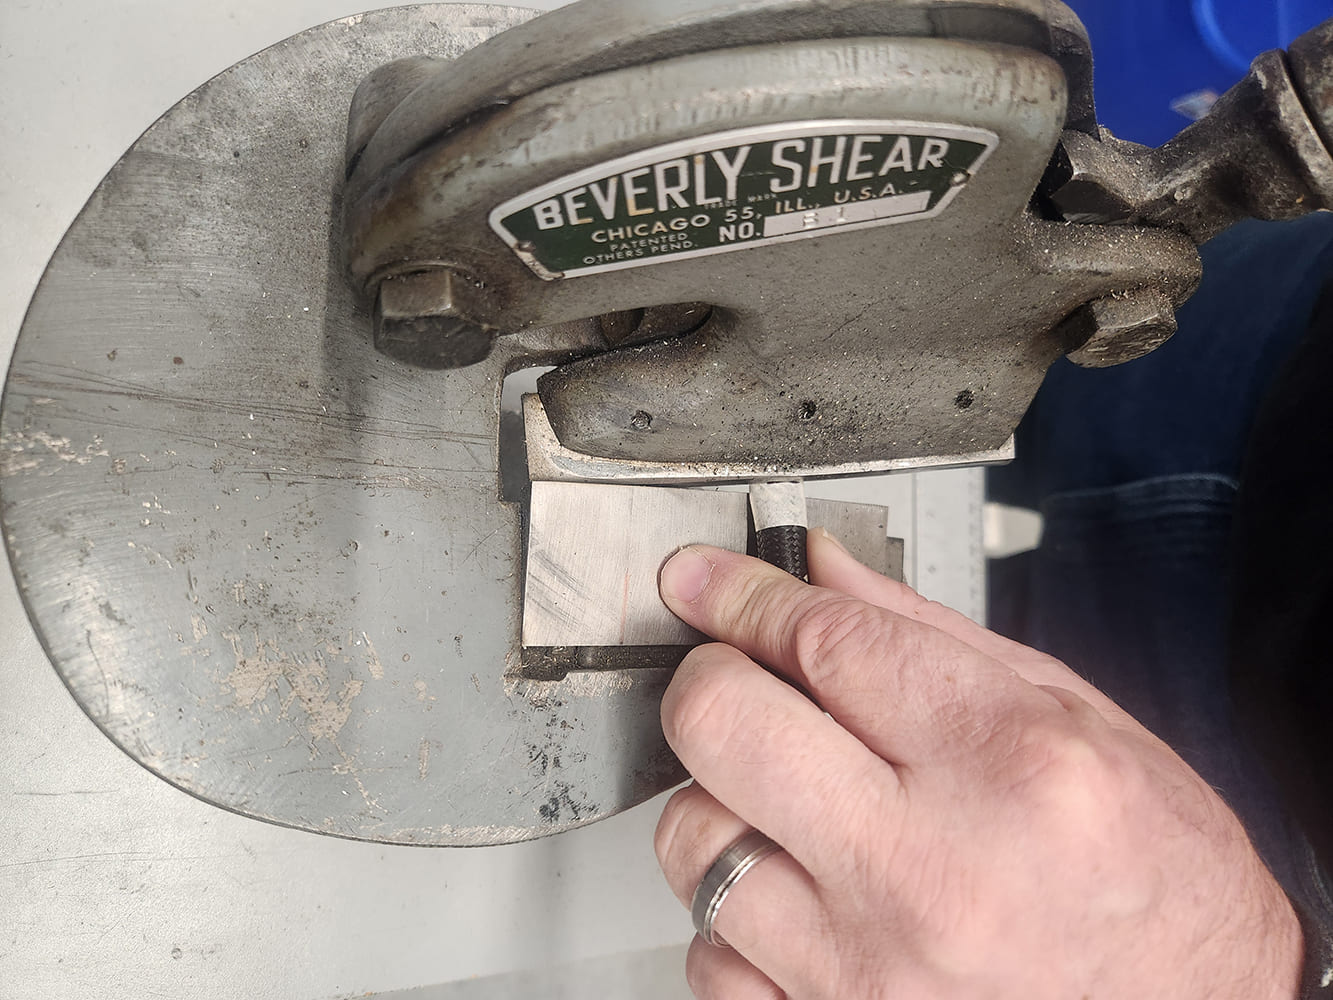
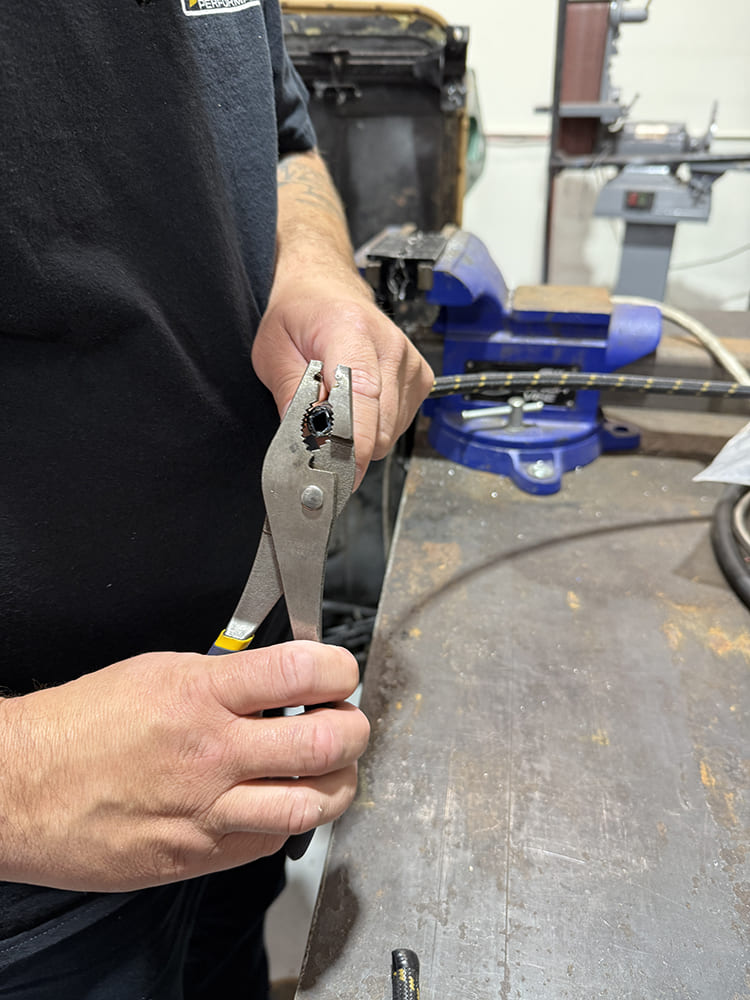
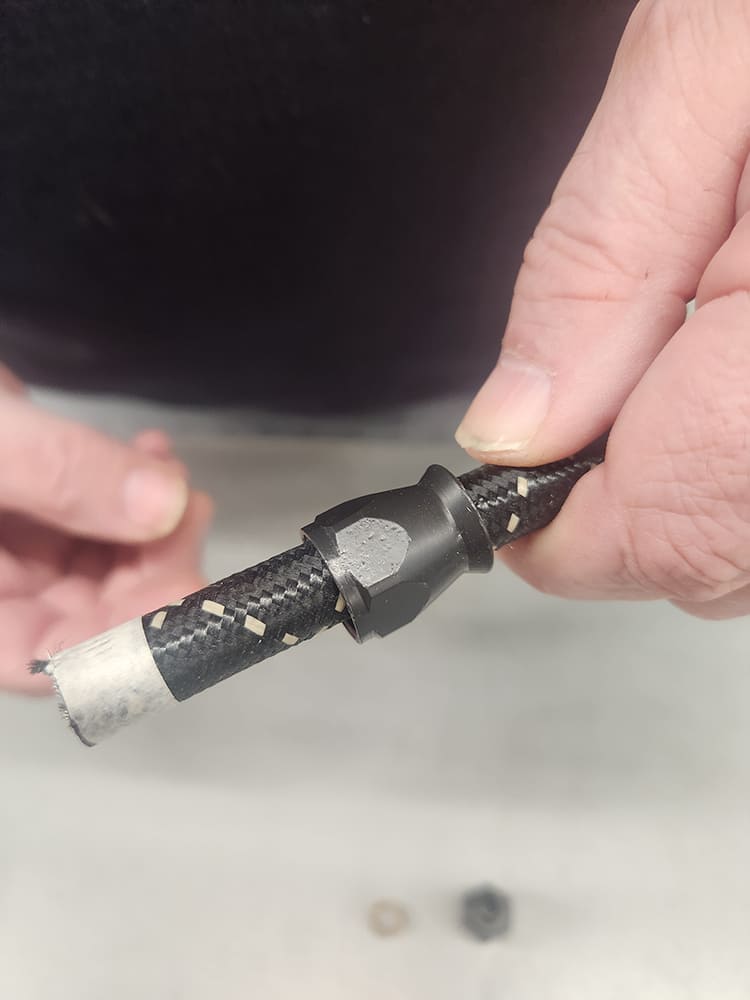
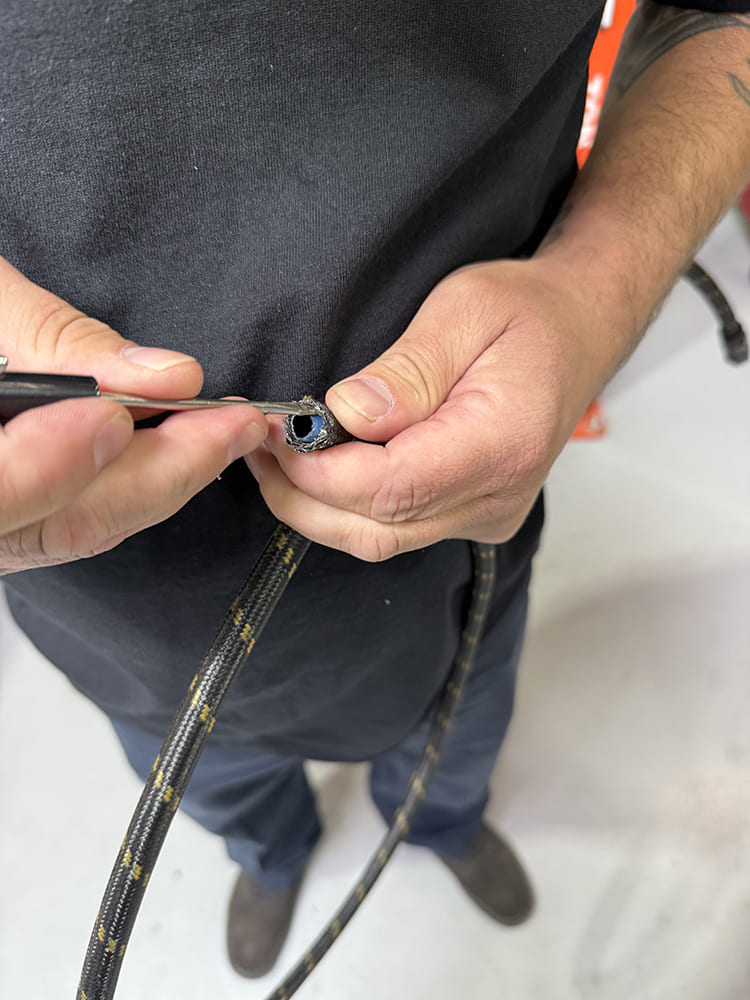
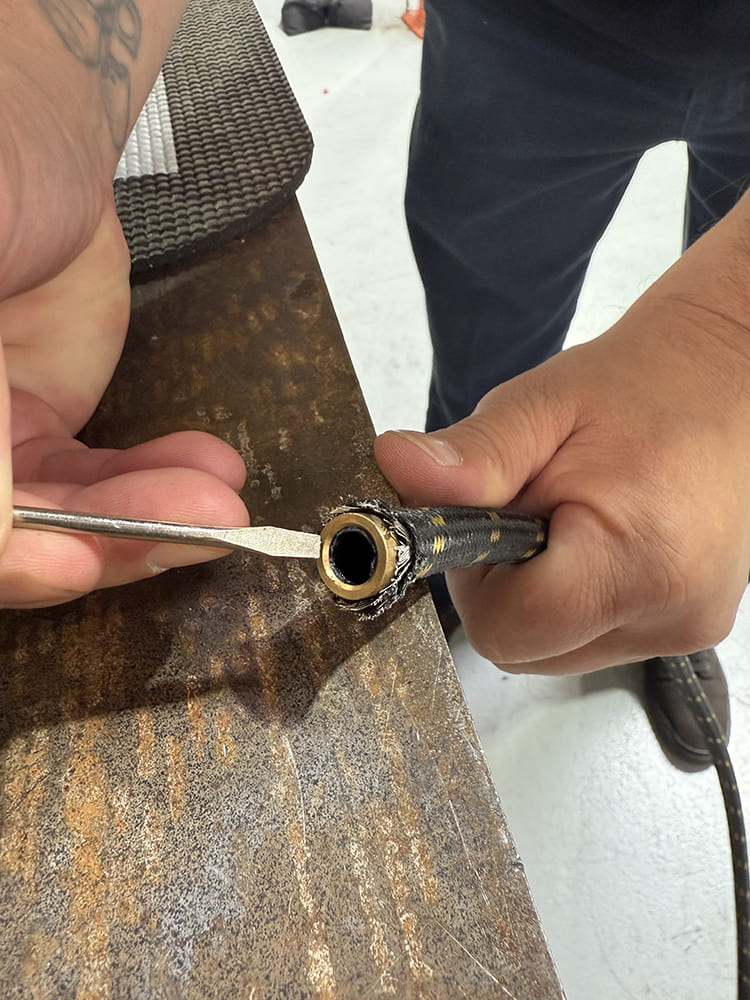
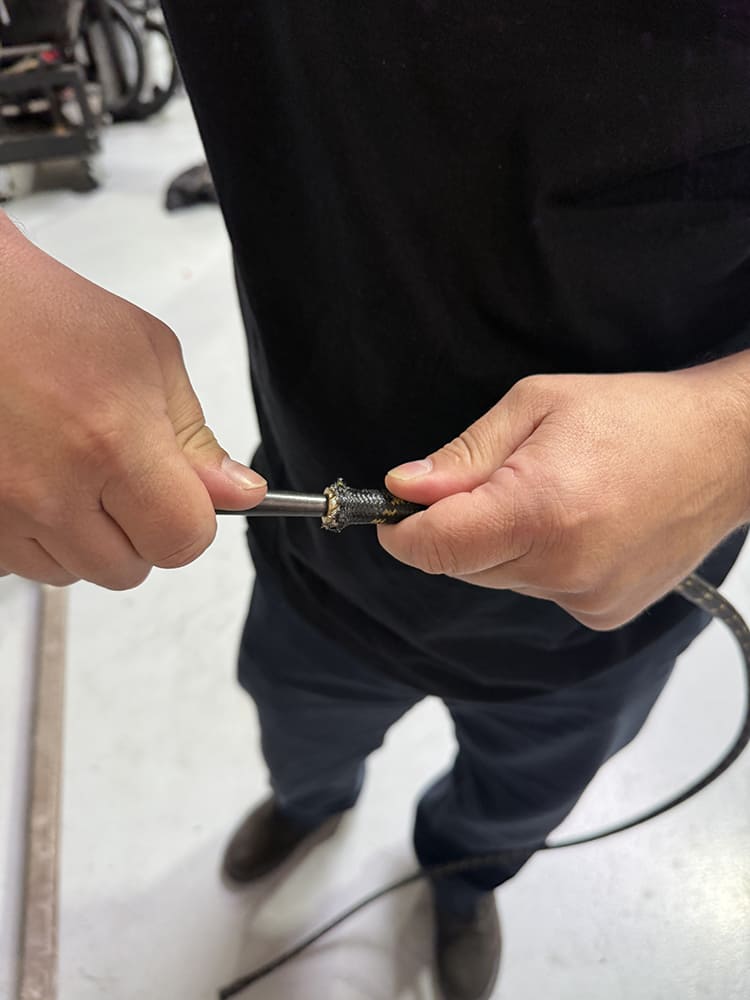
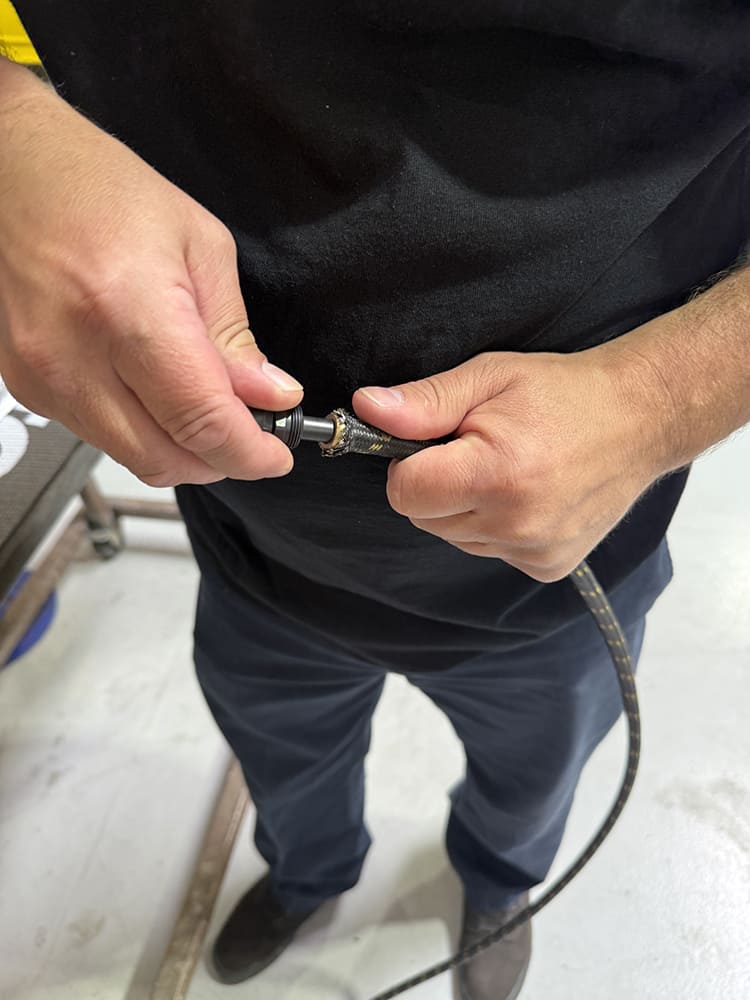
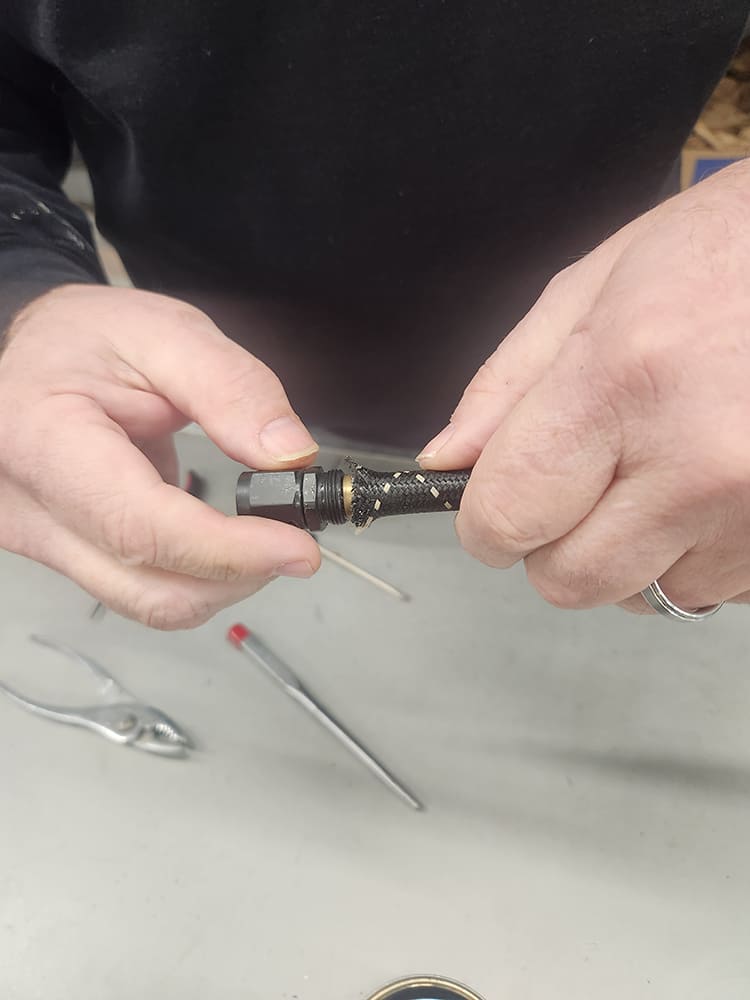
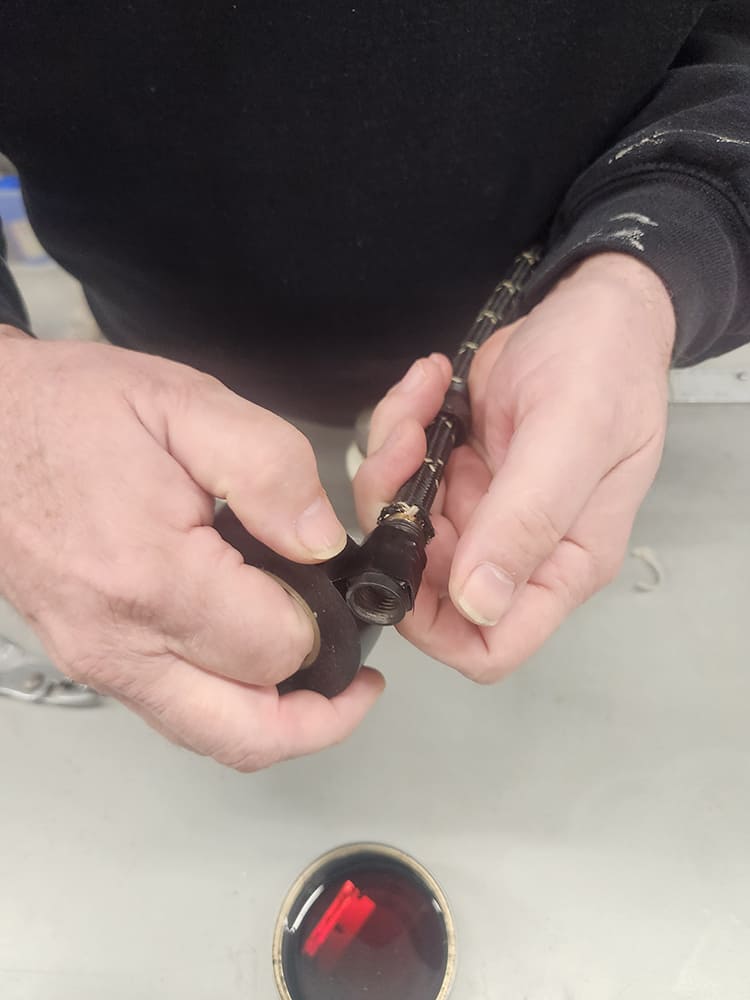
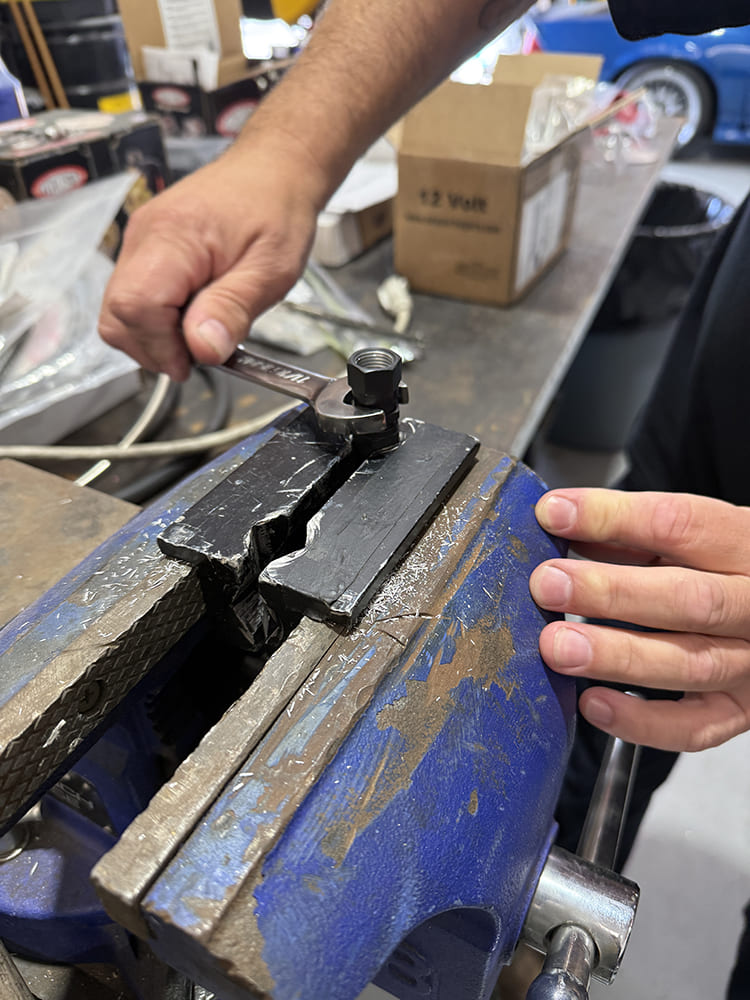
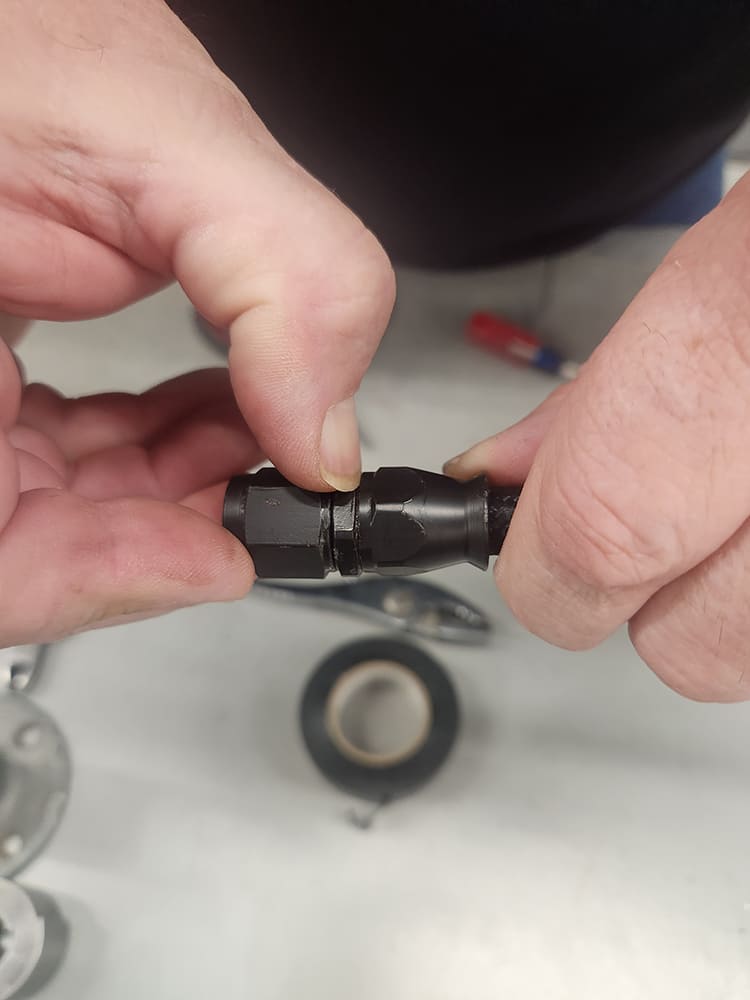
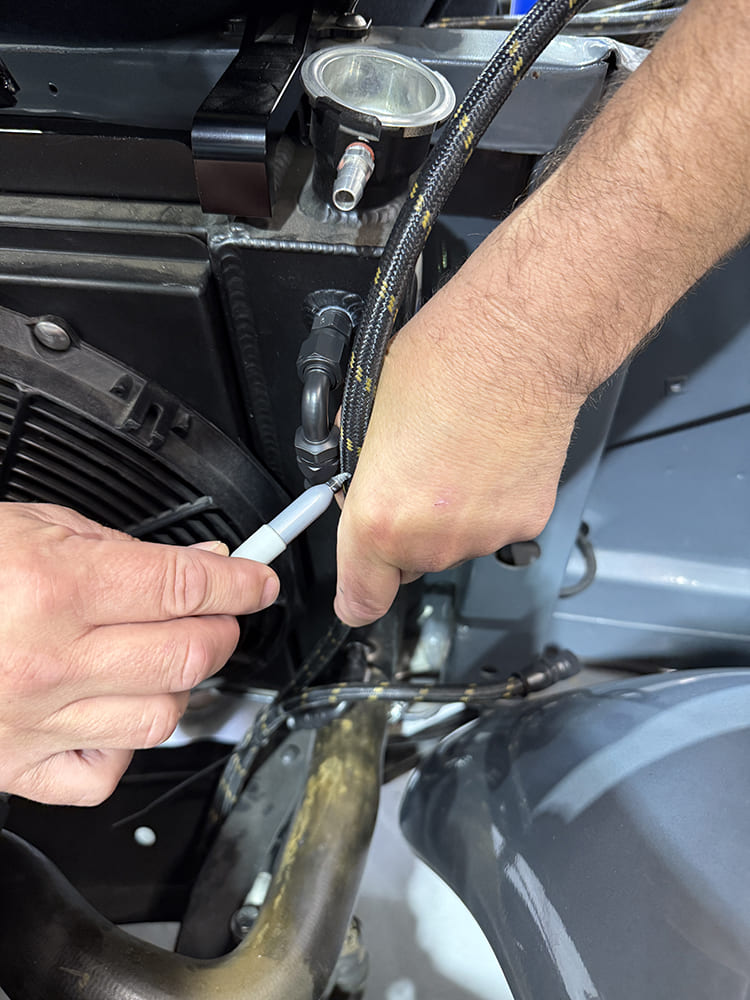
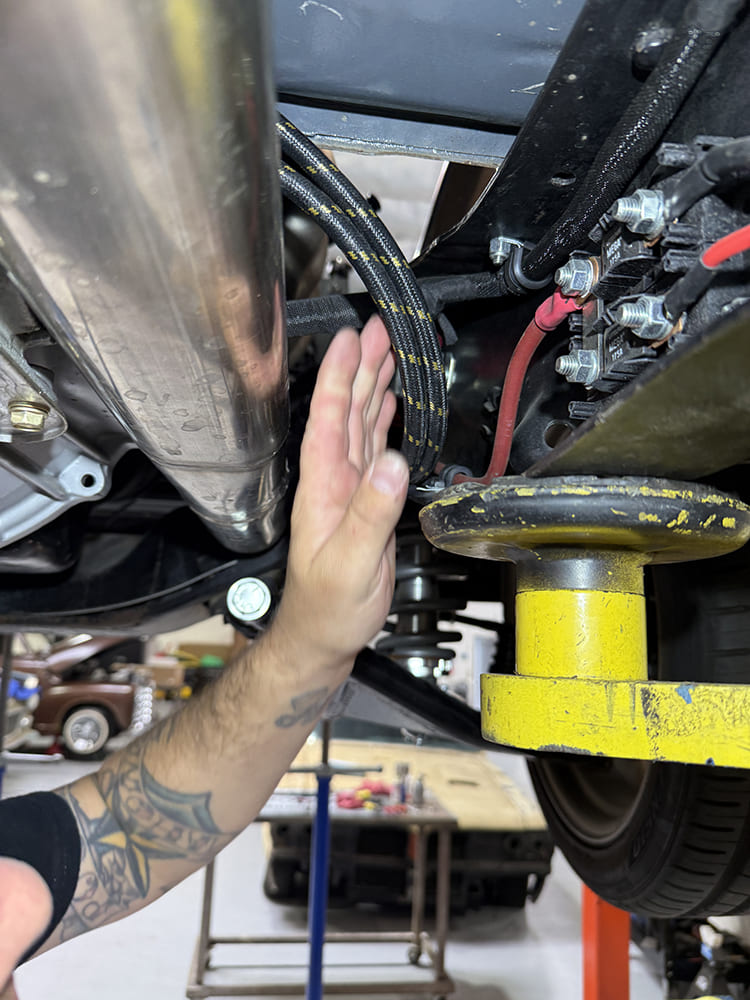
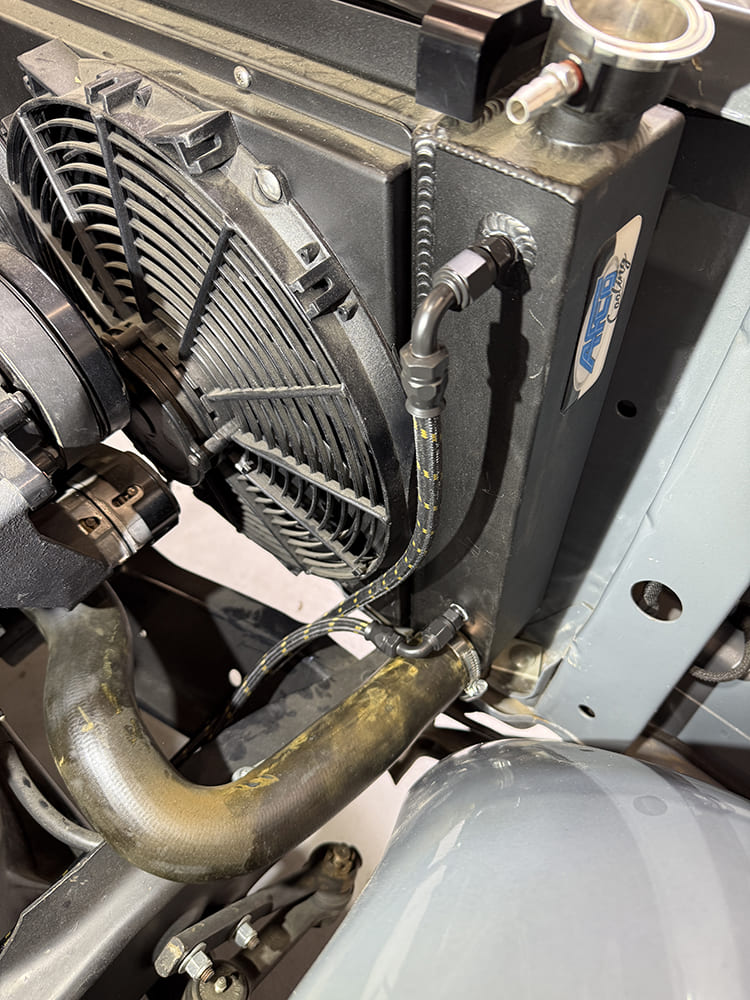
While a large, handheld cutter can be convenient when cutting hose in place, a Beverly Shear works great to slice the hose when it’s possible to take it to the workbench.Regardless of the process, it will likely be necessary to carefully massage the hose back to shape using a pair of pliers.Next, the nut portion of the fitting is slid over the end of the hose with the threaded portion toward the cut end. Once the nut is slid in place, the tape on the end of the hose can be removed.Using a small screwdriver, the inner Teflon liner and the stainless braided outer sleeve are carefully separated to make installation of the brass olive easier.With the two separated, the brass olive is set in place …… and driven home by pushing firmly on a work surface.Here, you can see the brass olive has been successfully installed between the outer stainless braid and the inner Teflon liner.Next, a drift is used to gently flatten and smooth the liner.Installing the nipple fitting is next, assisted by a little transmission fluid.The nipple fitting installs between the inner liner and the brass olive and needs to be installed carefully to not nick or otherwise damage the liner. The nipple should easily slide into place.Here, the nipple fitting is fully installed.To protect the proprietary ceramic coating on the fitting during final assembly, the hex portion is wrapped in electrical tape.To avoid cross threading of the nipple assembly and nut, antiseize is applied to the threaded portion of the assembly and the two hand tightened.The hose end is then placed in a set of soft jaws and, holding the hex side of the nipple, the nut is tightened onto the hose.While the nut is rotated home, it’s stopped just before the two fittings contact (about the width of a fingernail). This will allow the hose to rotate approximately 240 degrees clockwise during installation.We assembled two hose ends at the same time and attached one to each fitting at the trans. We’ll route the hoses from this end to the radiator.We ordered our Afco radiator with a built-in transmission cooler, so attaching the lines is a simple matter of screwing in a pair of Pure Choice 1/4-inch NPT to AN-6 fittings.Our initial thought was to use straight fittings at either end of each hose. But, after initial installation, it was decided that 90-degree hose ends at the radiator side would make for a cleaner install.Luckily, this change of direction simply meant we needed to trim a bit of length off each hose end and swap out the straight fittings with 90s.Here’s an assembled hose, fittings, and clamps.The routing of the trans lines needs to be free and clear of any heat source as well as anything that might rub through the hoses.A P-clamp is used in this situation to keep the lines safely and permanently situated away from any trouble.With the straight fittings swapped out for the 90s, the radiator end of the trans cooler lines are nice and tidy.
We use cookies to ensure that we give you the best experience on our website. If you continue to use this site we will assume that you are happy with it.