Way back in 1994, back when I’d just begun my career in the magazine industry, I picked up a cherry 1954 Chevy Bel Air in San Bernardino, California, for $1,300 and had started to do some upgrades on it with Custom Rodder. Having the pleasure of working closely with my journalistic mentor, MiniTruckin’ editor Courtney “Tito” Hallowell (RIP), he suggested I follow the growing trend at the time and instead of simply static dropping the ’54, have it airbagged. Problem was, there were no kits back then. Fortunately, there were people like Brian Jendro (The Chop Shop in Escondido, California) who didn’t need any kits … just a torch, a welder, and a technically motivated imagination. (I’m sure someone will correct me, but to the best of my knowledge, that was the first “non-mini-truck” air suspension installation document in print!)
Fast-forward literally 30 years and I find myself once again with a Jendro-built air suspension in my recently acquired 1948 Chevy pickup. Four-linked (back-halved) and MII-equipped (looks to be a Heidts universal IFS on a custom-built front subframe), the truck’s Master Image Custom’s style (can’t talk about “vintage” air ride without mentioning my old friend Rob Maggi and the late Sean Mahaney!) manual valve control system was truly nostalgic, but my days of not caring about actual ride height and ’bag pressure have long since disappeared, and additionally, the well-used front airbags had developed leaks, so …
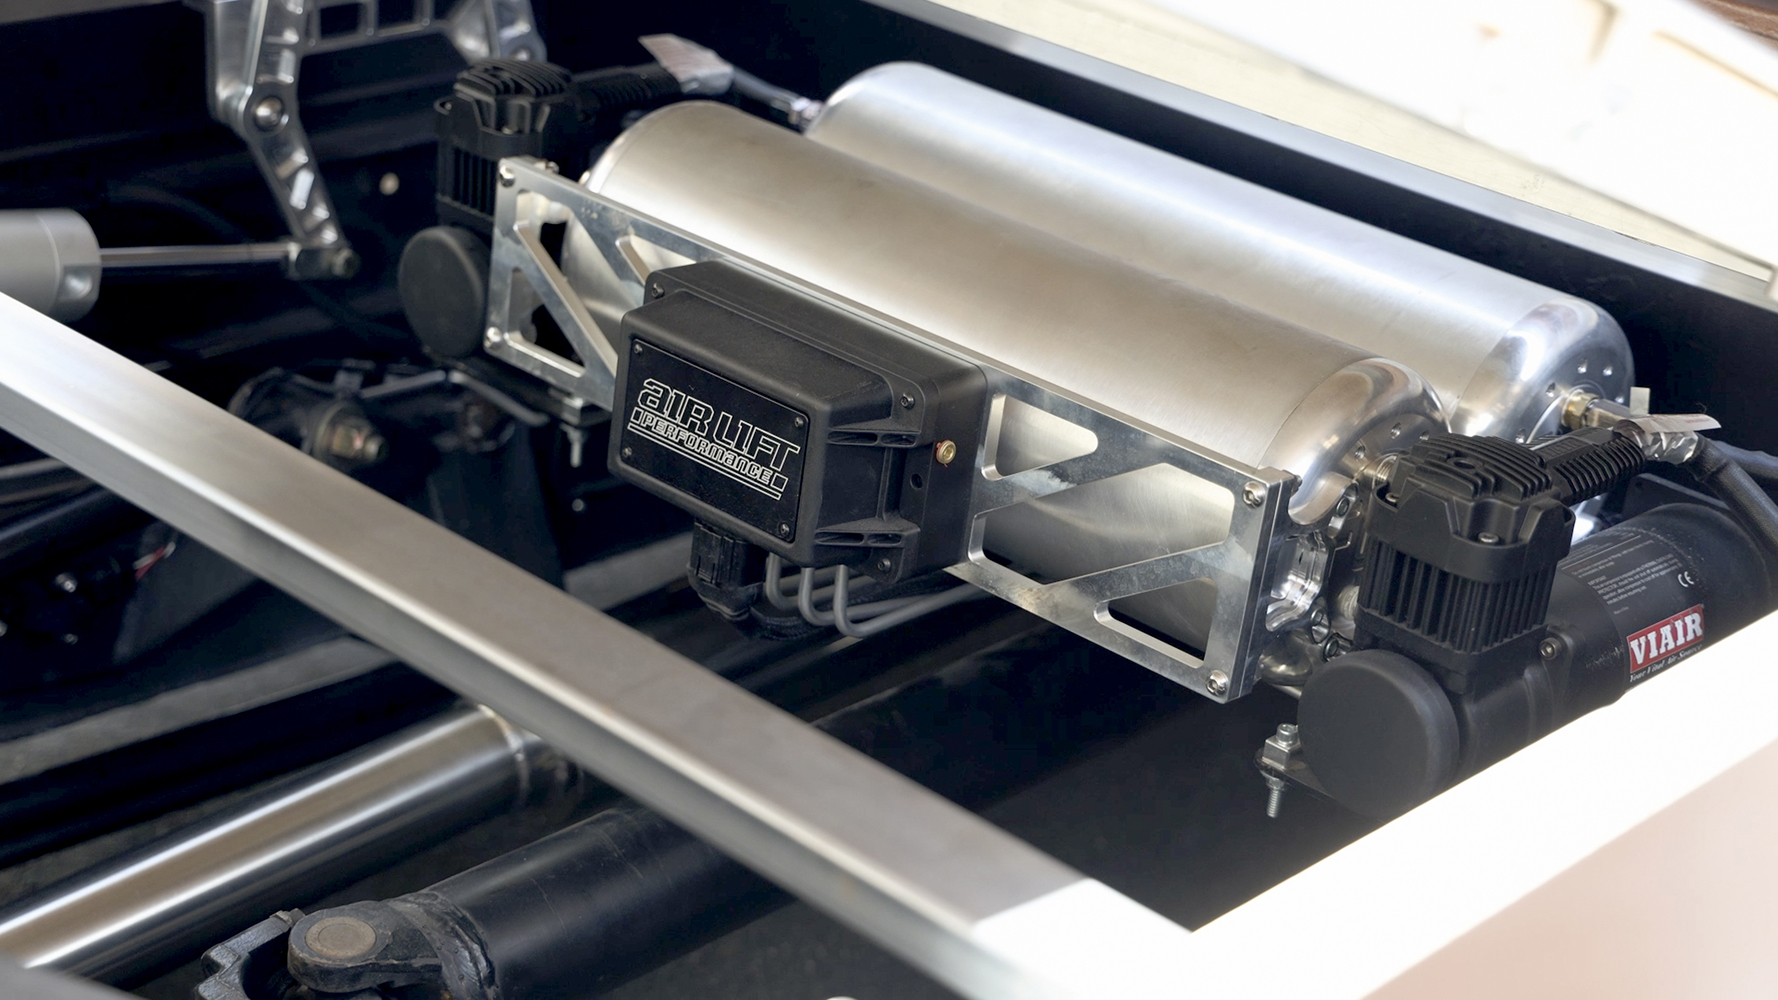
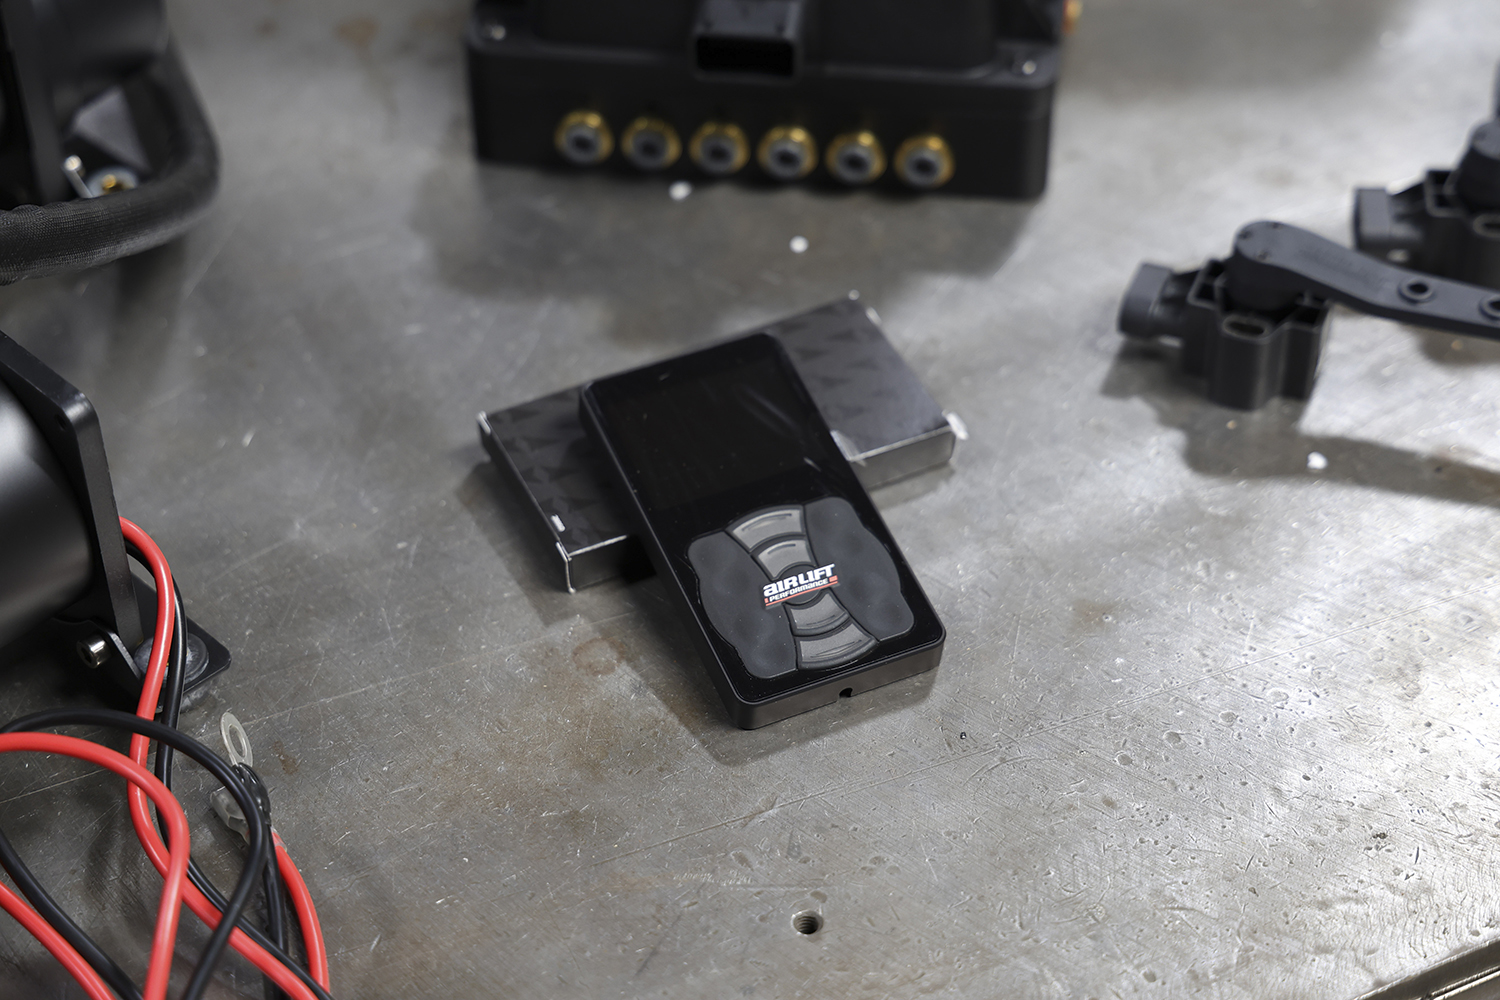
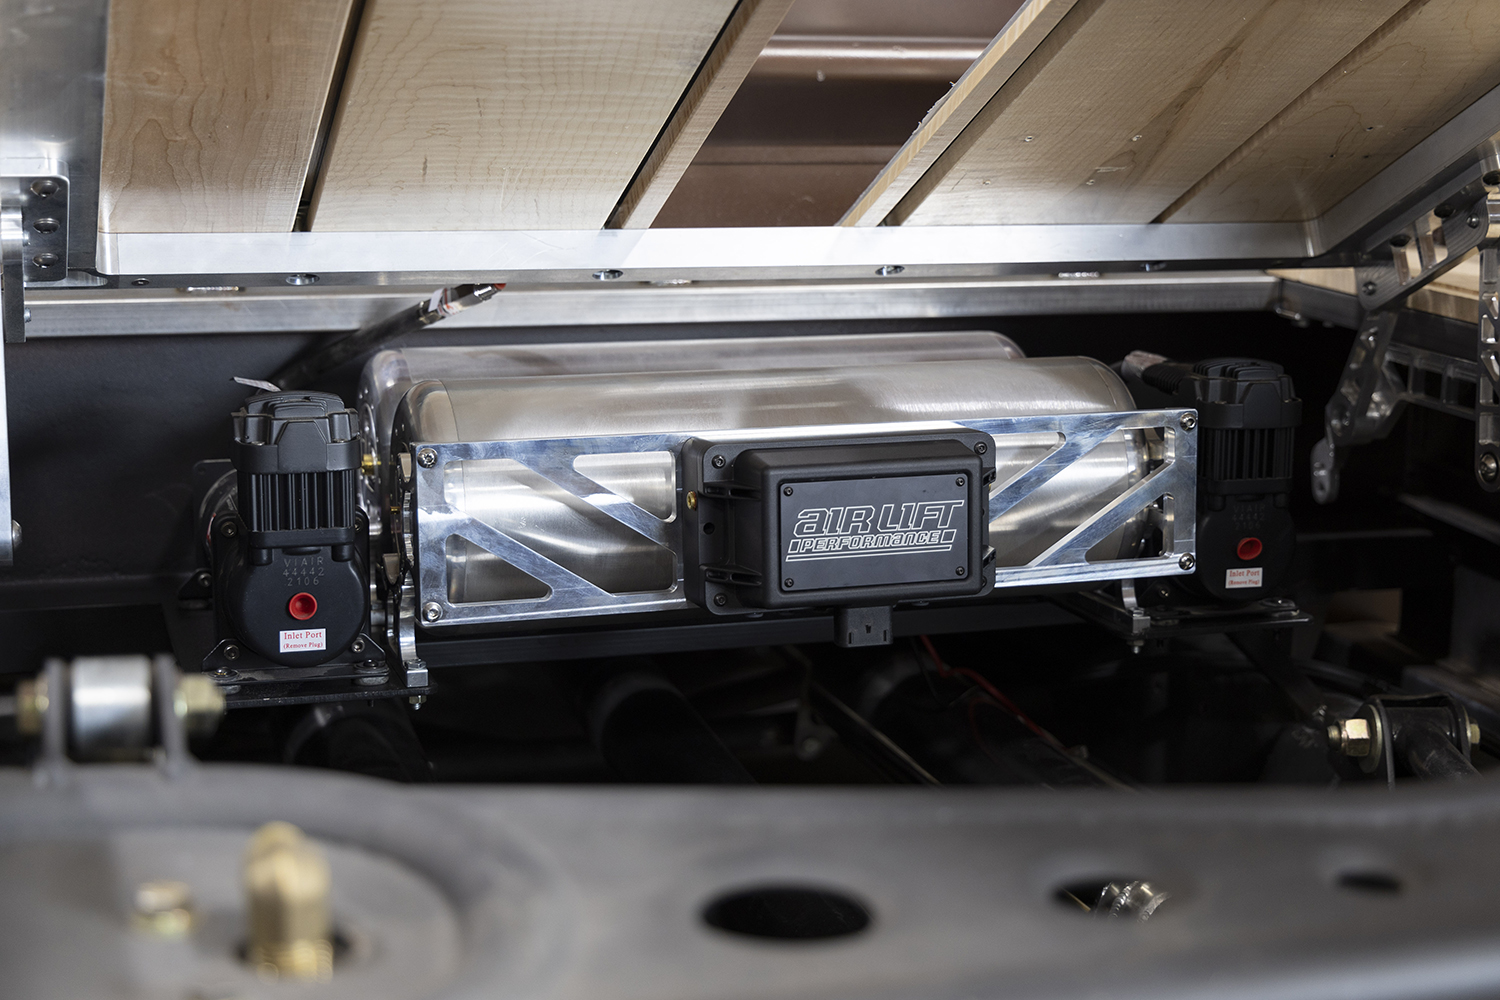
The Air Lift Performance 3H/FLO Airride control system for the 1948 Chevy in all its glory at Old Anvil, ready to replace the truly nostalgic manual valve system installed eons ago by my old buddy, Brian Jendro.
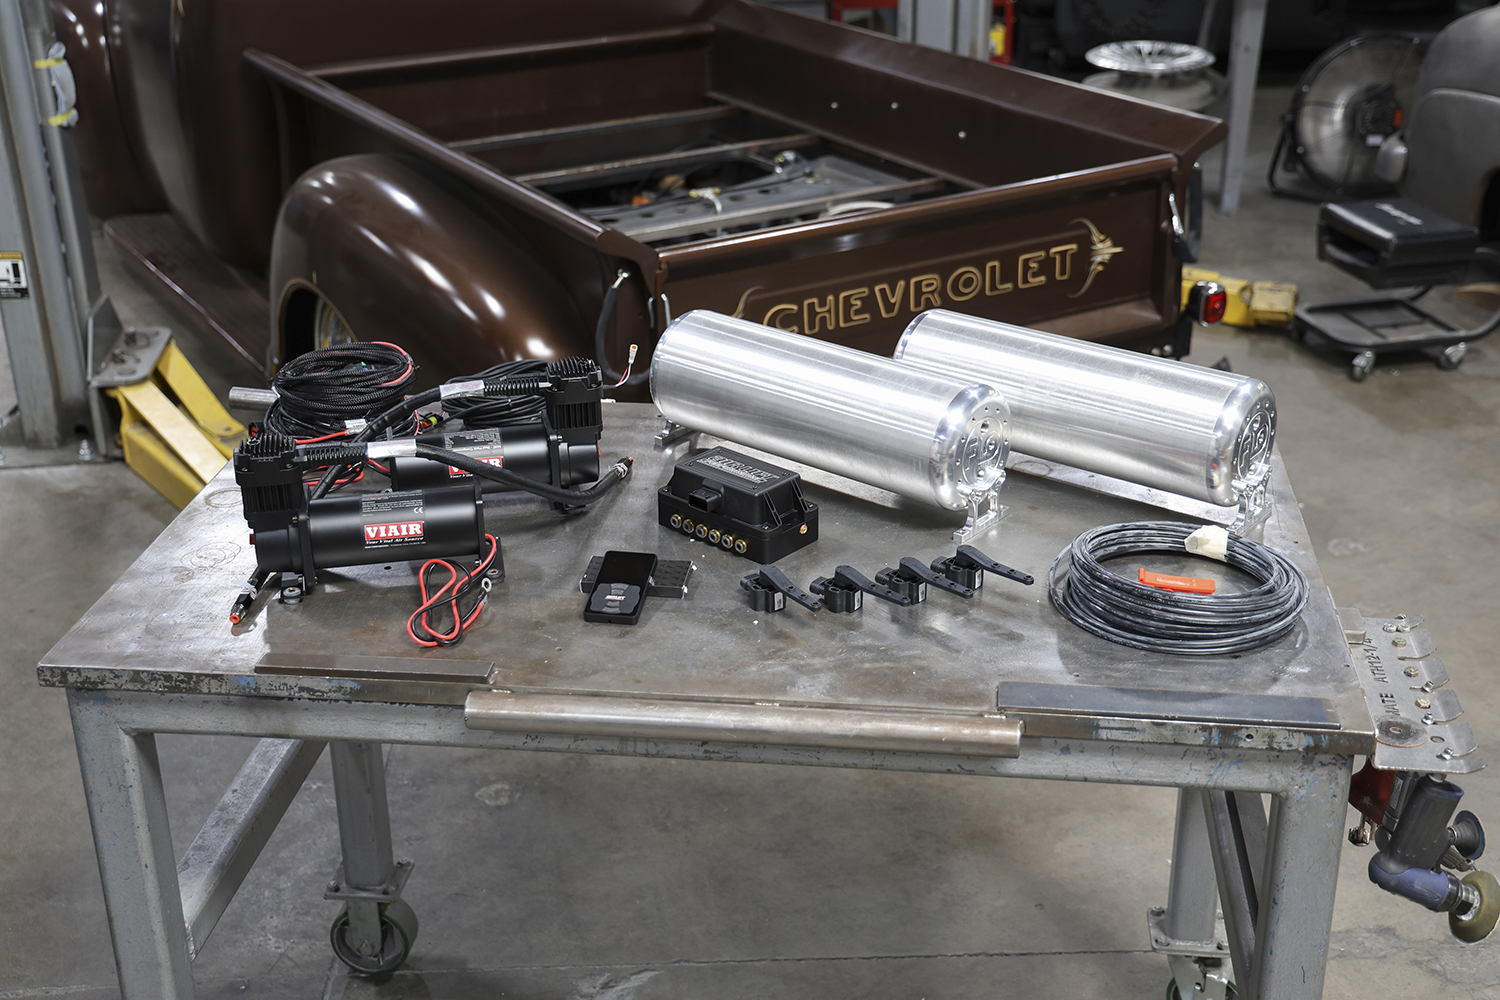
A quick discussion with my once-colleague now Air Lift Performance (which, ironically, was who Jendro and I used for the ’bags and paddle switches on the ’54 three decades ago!) at SEMA regarding the situation led to developing a game plan to install Air Lift’s 3H (height-sensor controlled) programmable air-ride management along with a FLO Air dual-tank mounting system and a quartet of new dual-convoluted air springs. The next step was to find someone in SoCal to handle the install, as Jendro had long since relocated out of state!
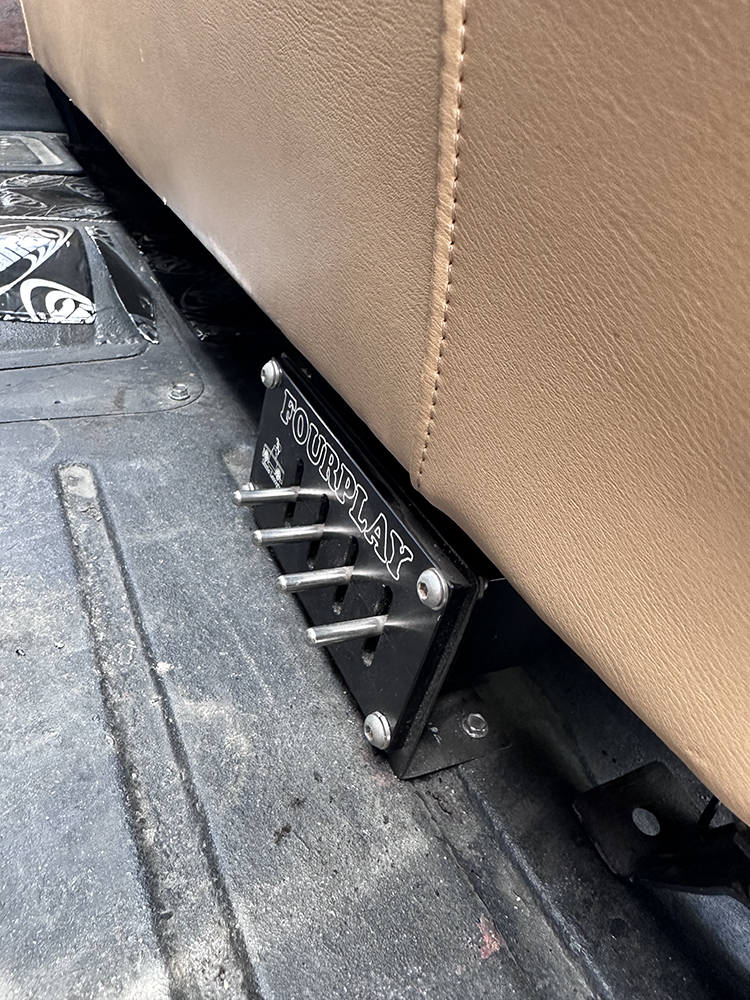
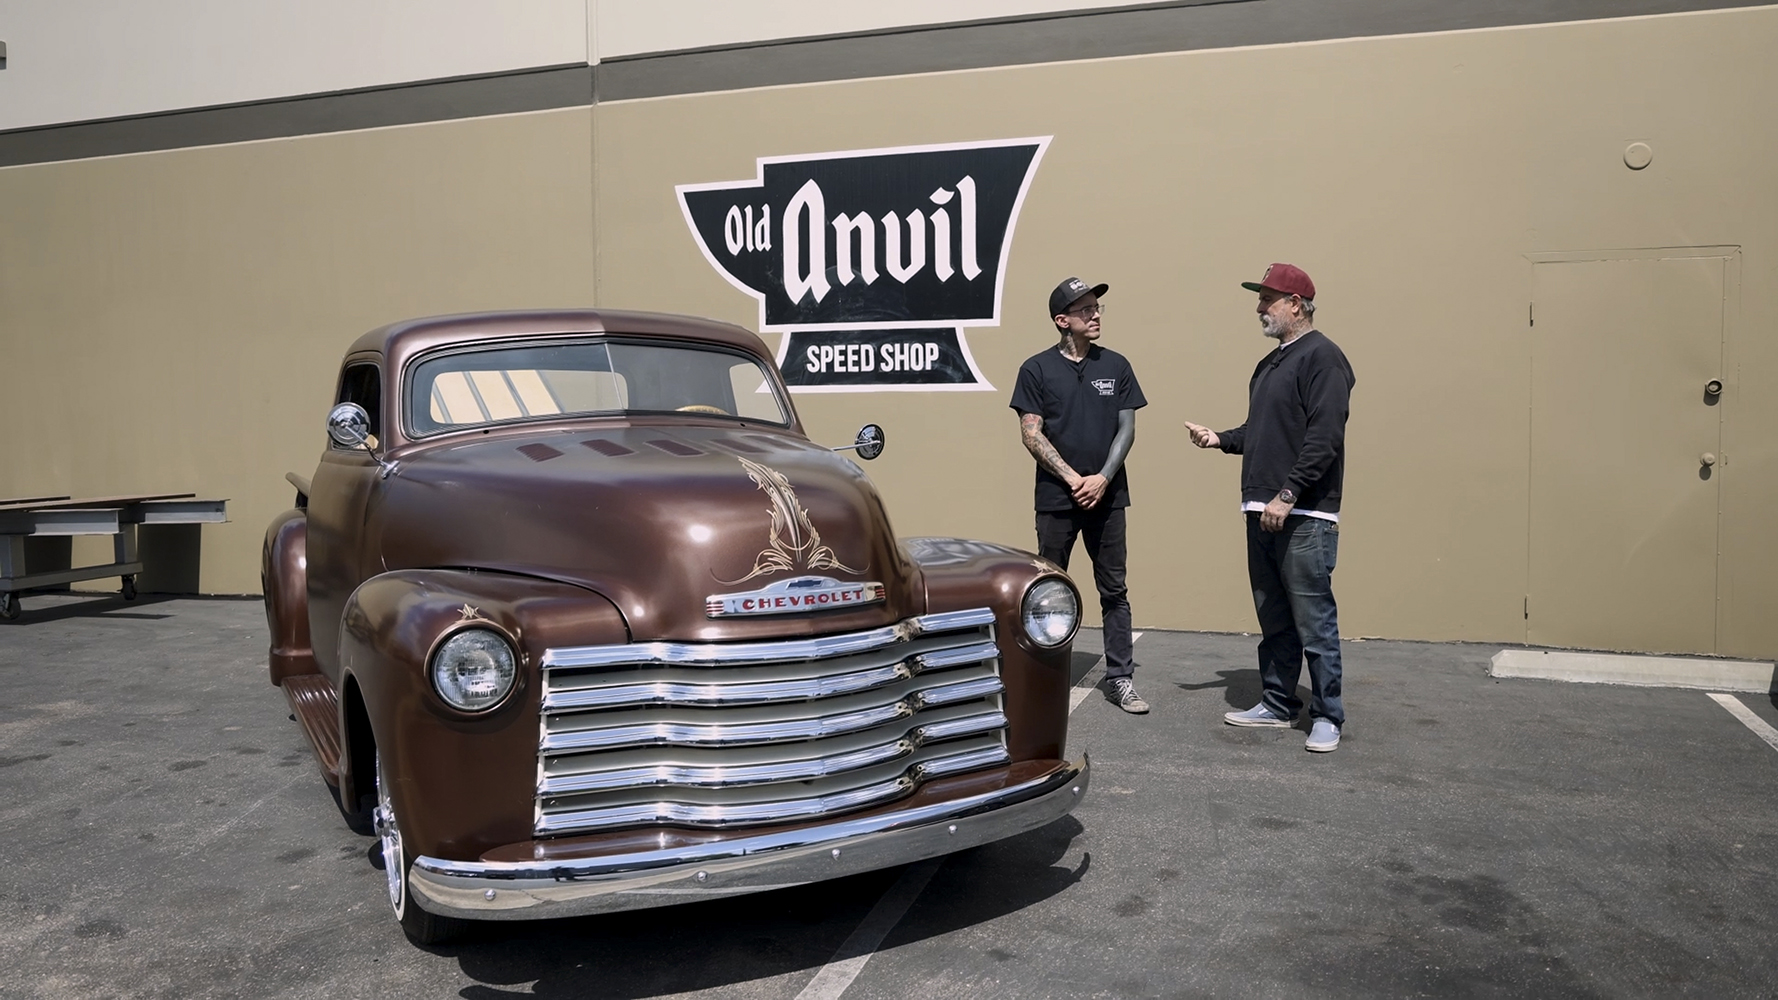
At the following Grand National Roadster Show I struck up a conversation with Old Anvil Speed Shop’s Paul Bosserman—initially regarding their new All Access VIP bed floor access kit, but eventually we got into the possibility of Old Anvil doing the Air Lift/FLO Air install as well. Bosserman ended up agreeing to do both (you’ll be seeing that Bed Wood & Parts collab coming soon!), as his pneumatically actuated floor system taps off the suspension’s pressurized air supply. Also, Bosserman and his crew are proficient when it comes to hardline plumbing, and this would be a perfect time to showcase that with some of the airlines.
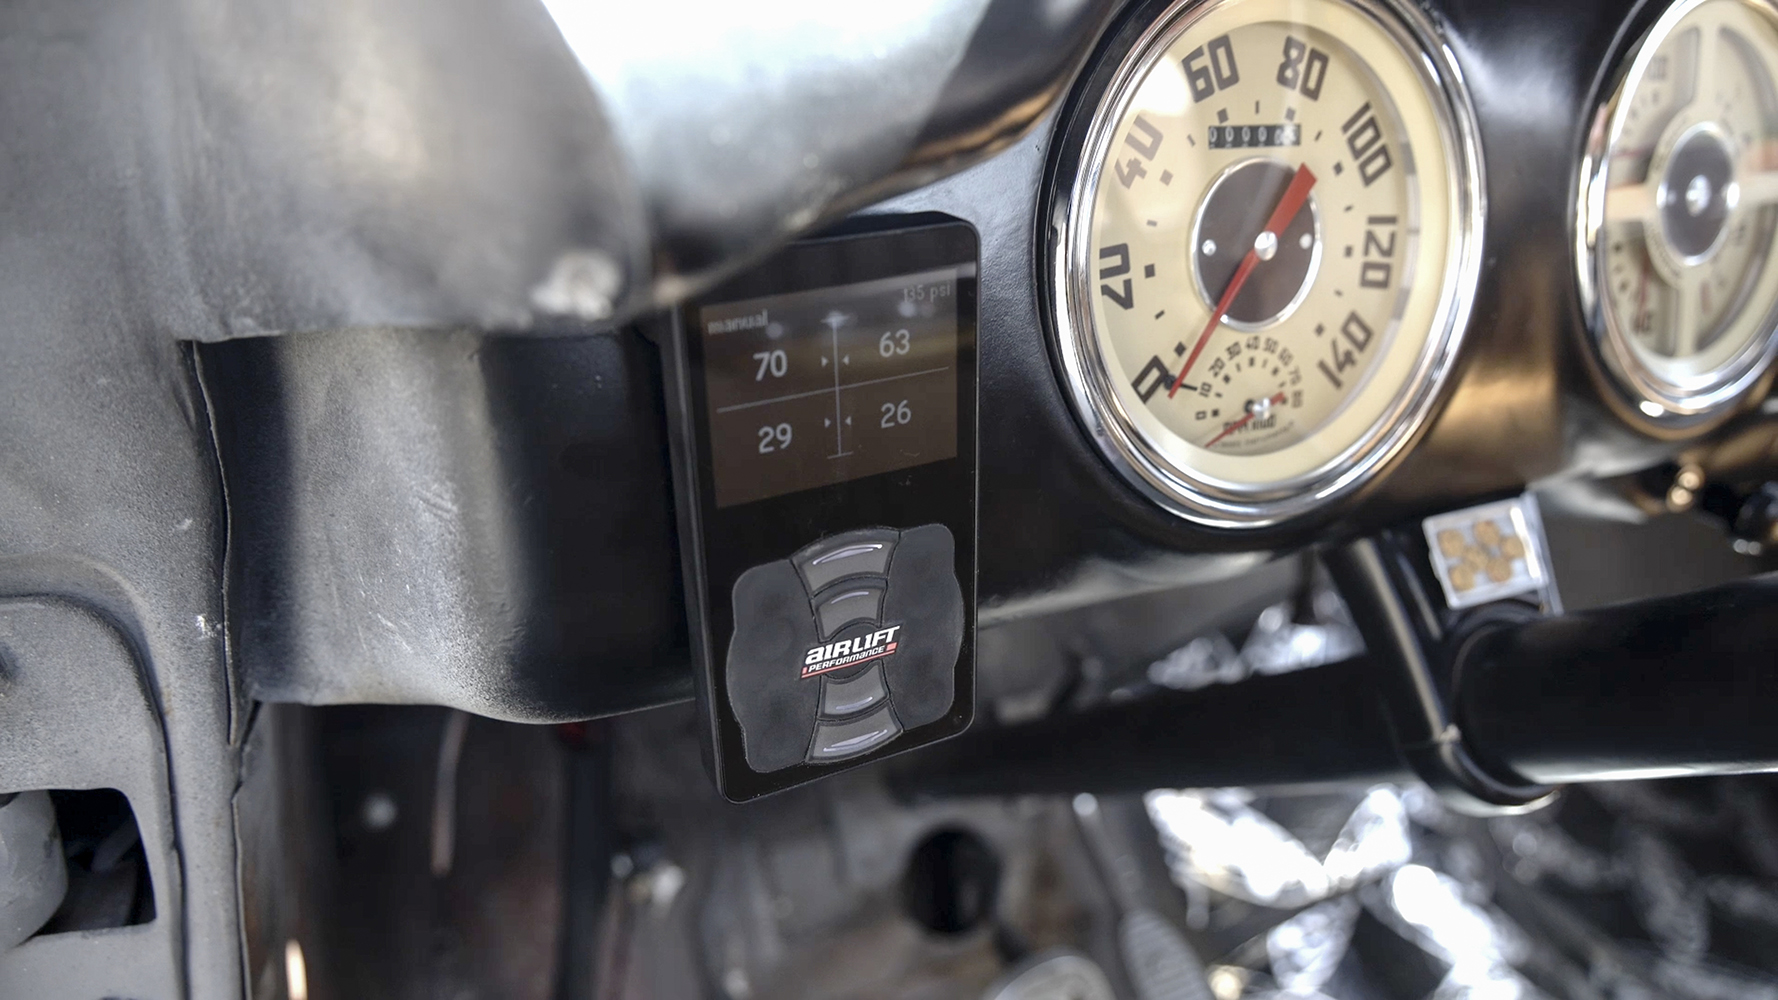
Old versus new: straight up/down, front/back 1/2-inch manual valves with no indication of pressure let alone height (back in the day you knew how high you needed to be!); fully programmable, four-wheel, height-sensed ride height control with Air Lift’s iPhone-sized controller (with Bluetooth capability to manage from your iPhone or Android device as well).
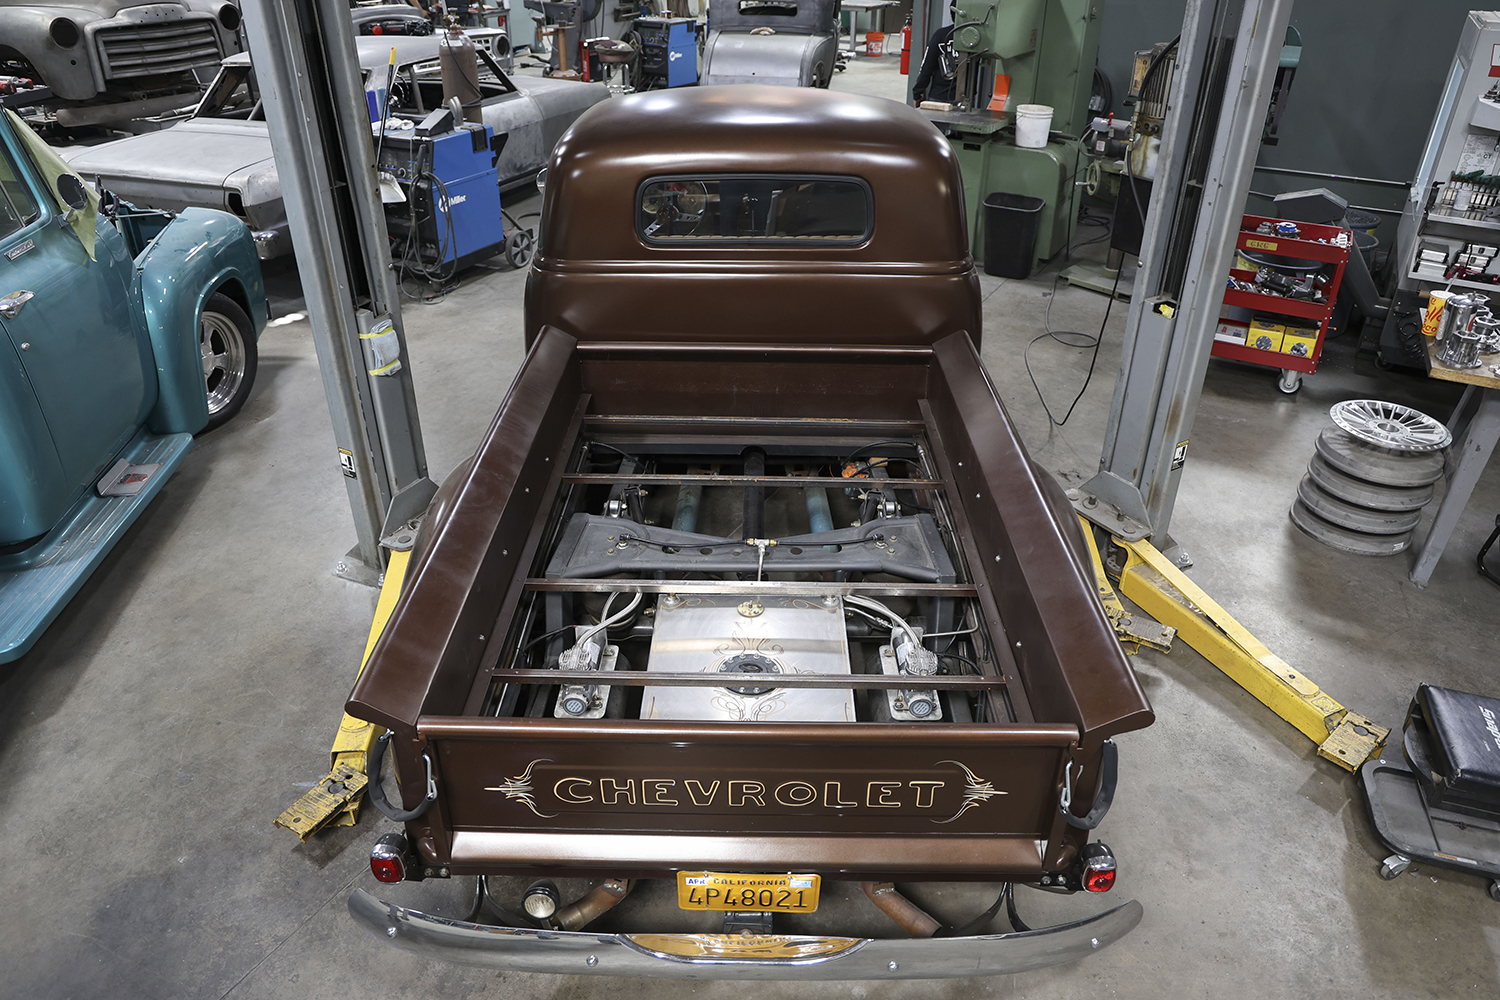
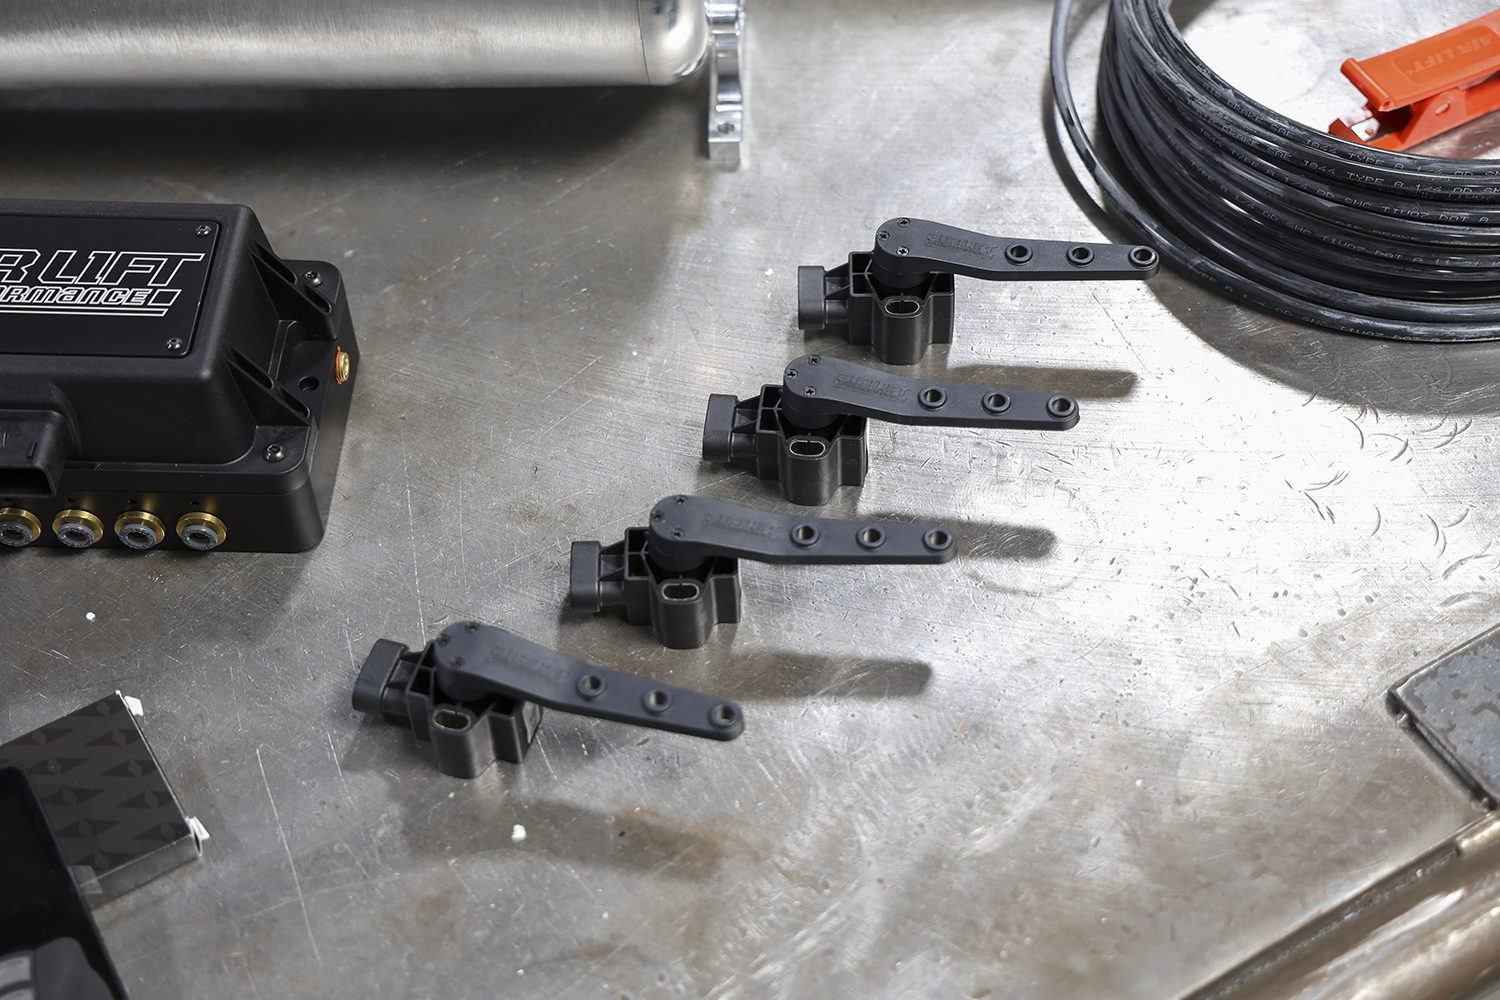
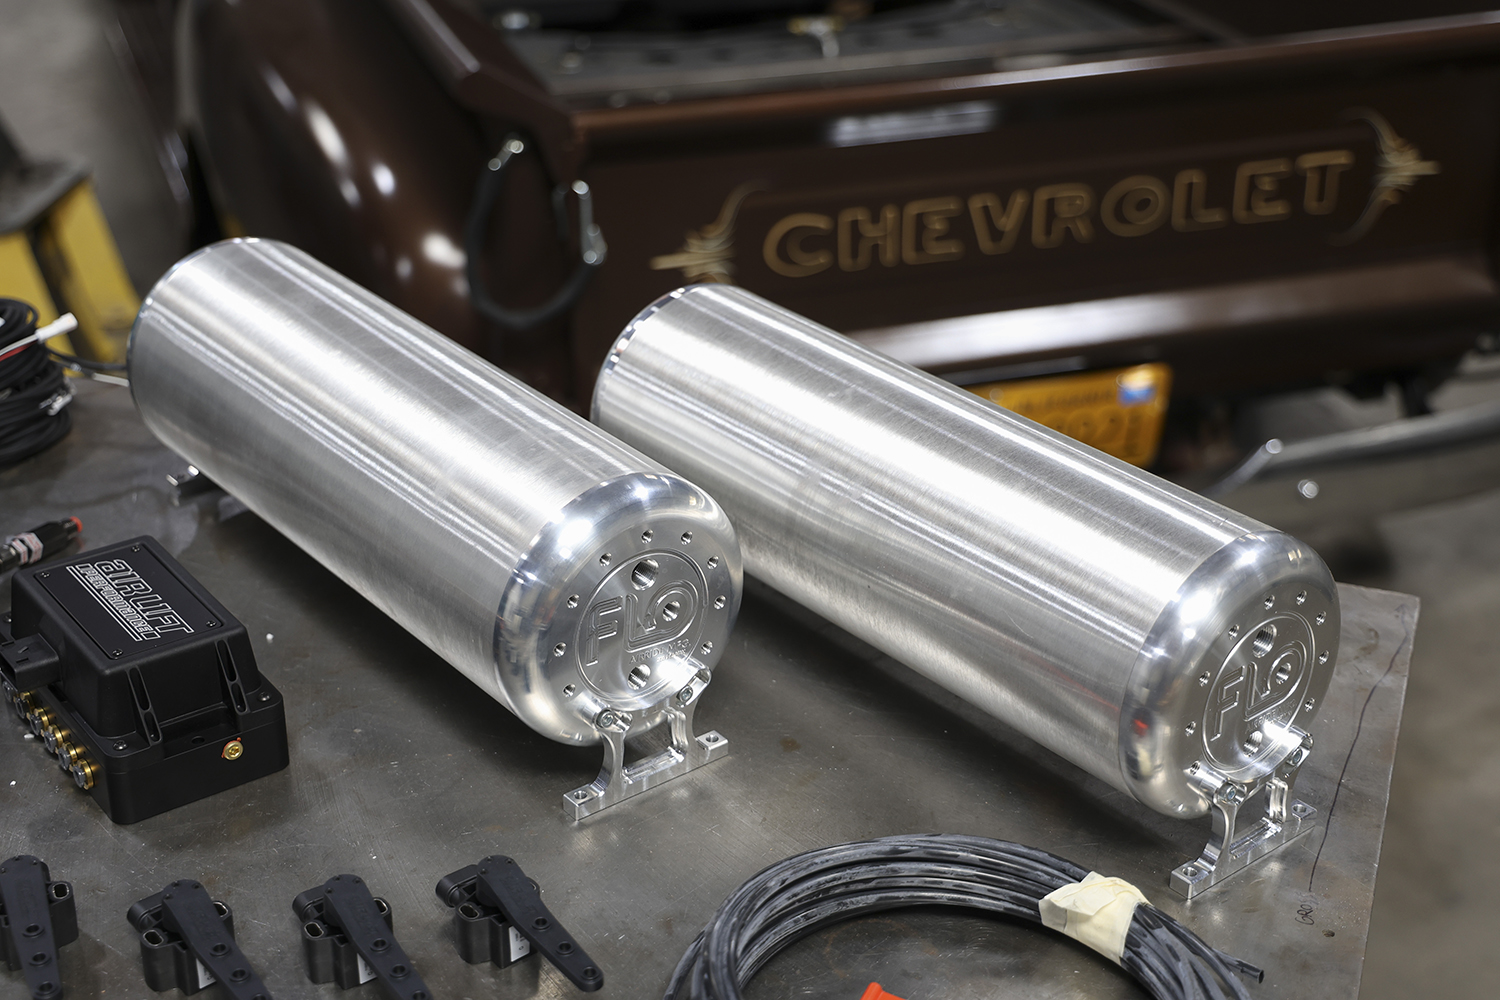
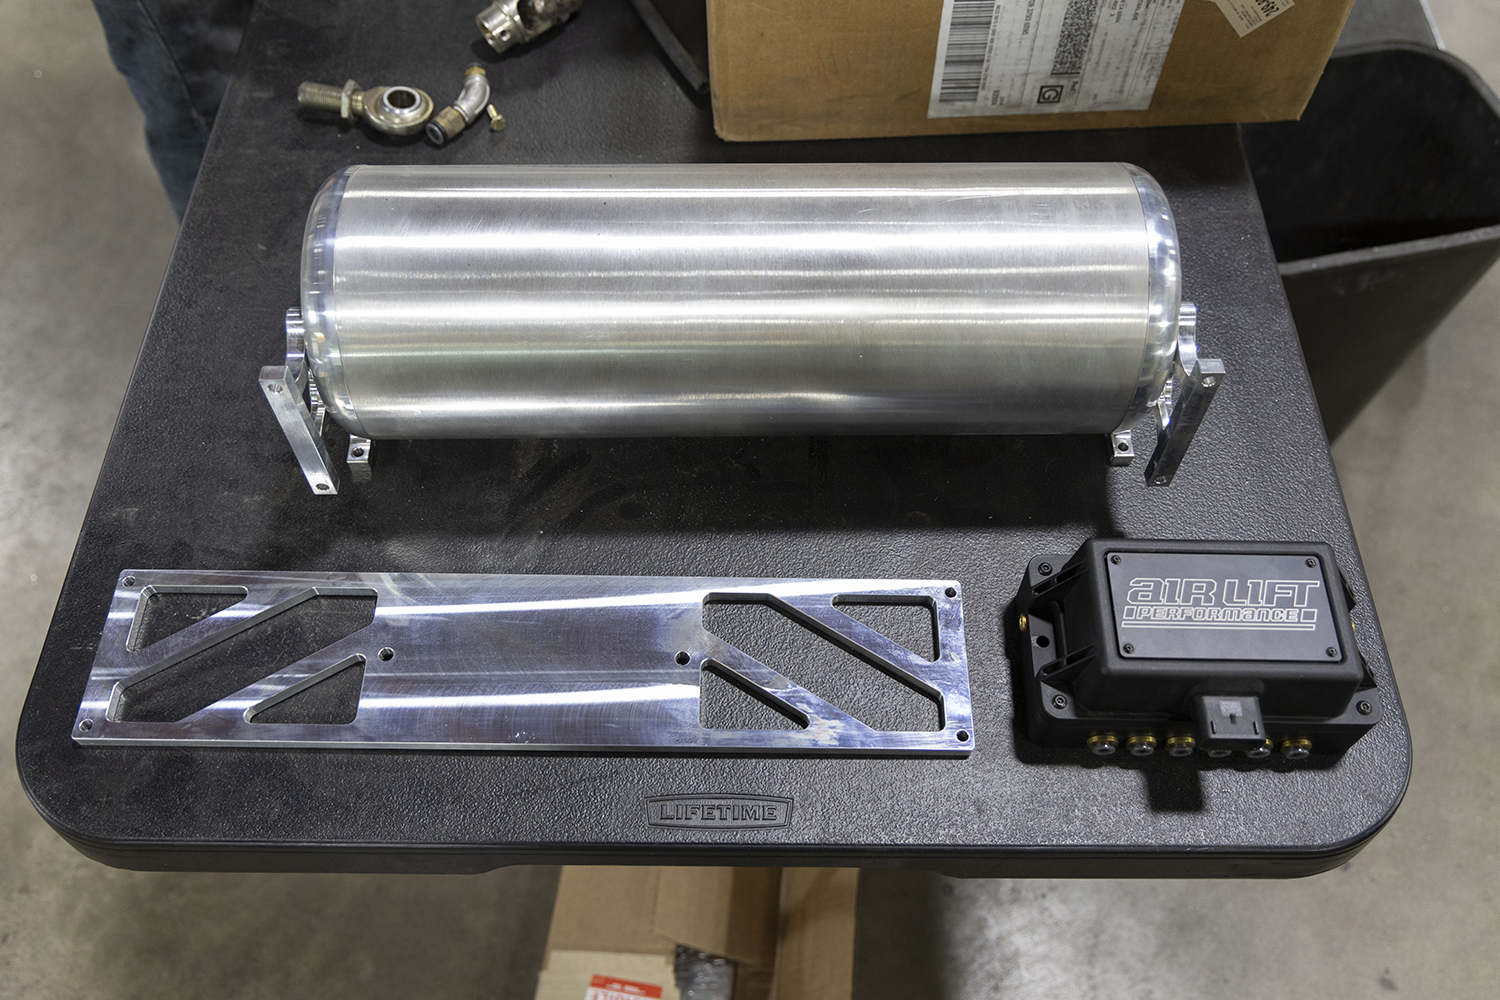
Regarding the Air Lift kit, Mike supplied us with Air Lift’s complete 3H system (fully programmable digital control module with hard-wired—and Bluetooth capable—controller, individual height sensors, dual ViAir 444C compressors, wiring harness, and 3/8-inch nylon airline) along with four replacement airbags and FLO Air’s dual 18-inch modular tank system with billet mounts. Old Anvil supplied the technical knowhow and hands-on skillset, and collaboratively, we/I ended up with a fully modernized, digitally programmable (non-leaking) air ride system that, now with the articulating All Access bed floor, can proudly be displayed in public, whether at the gas station topping off or at Dino’s showing off!
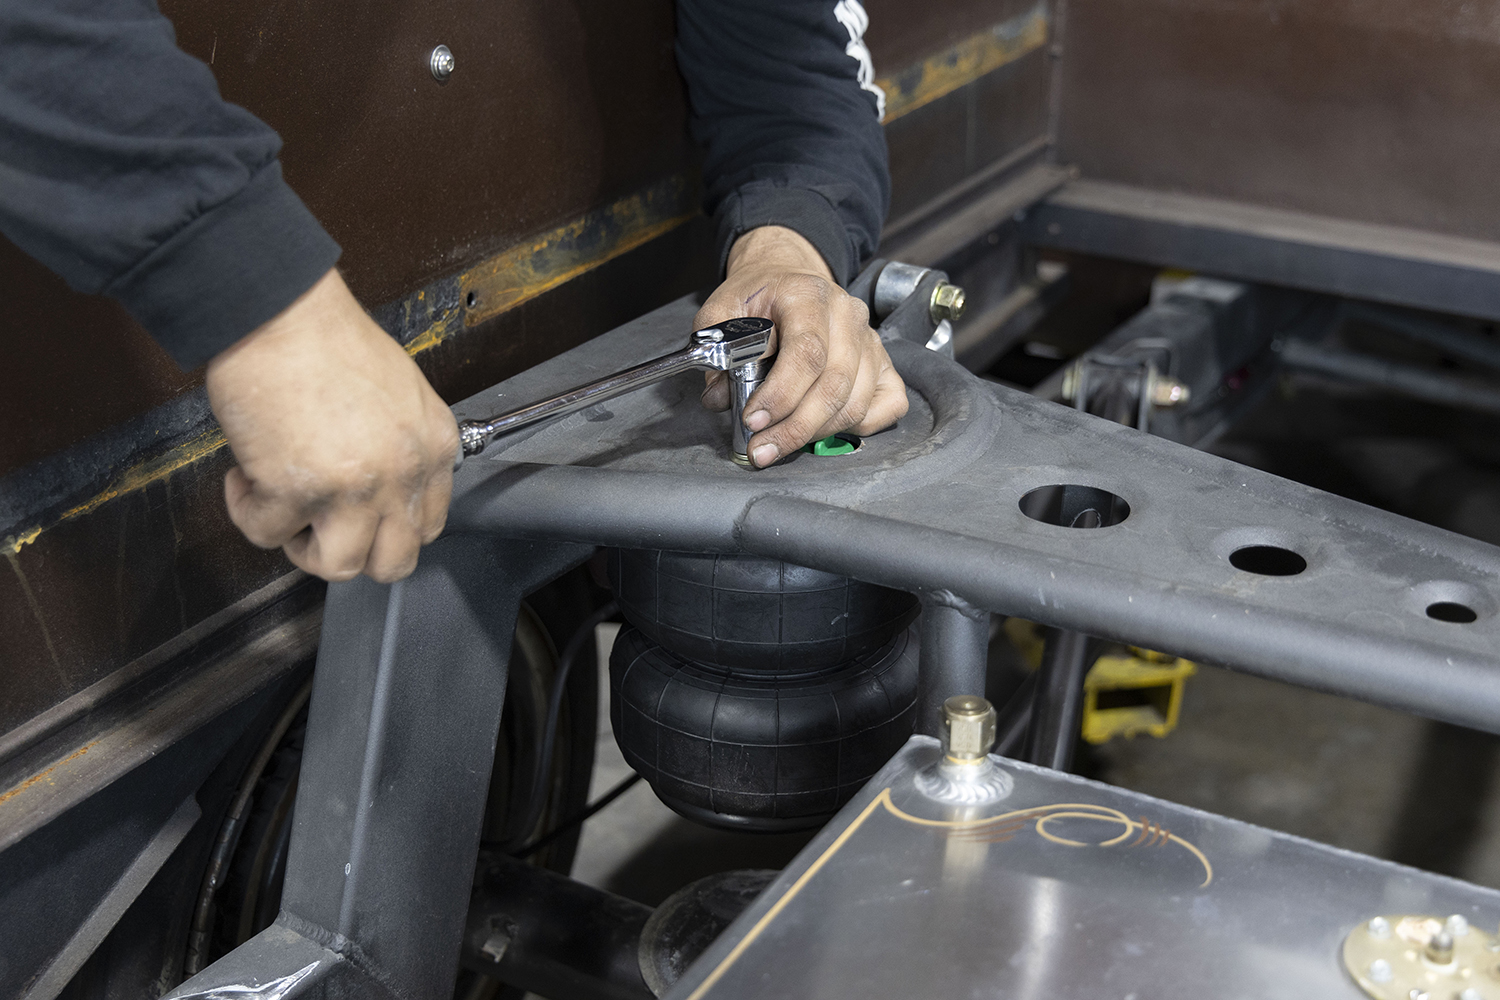
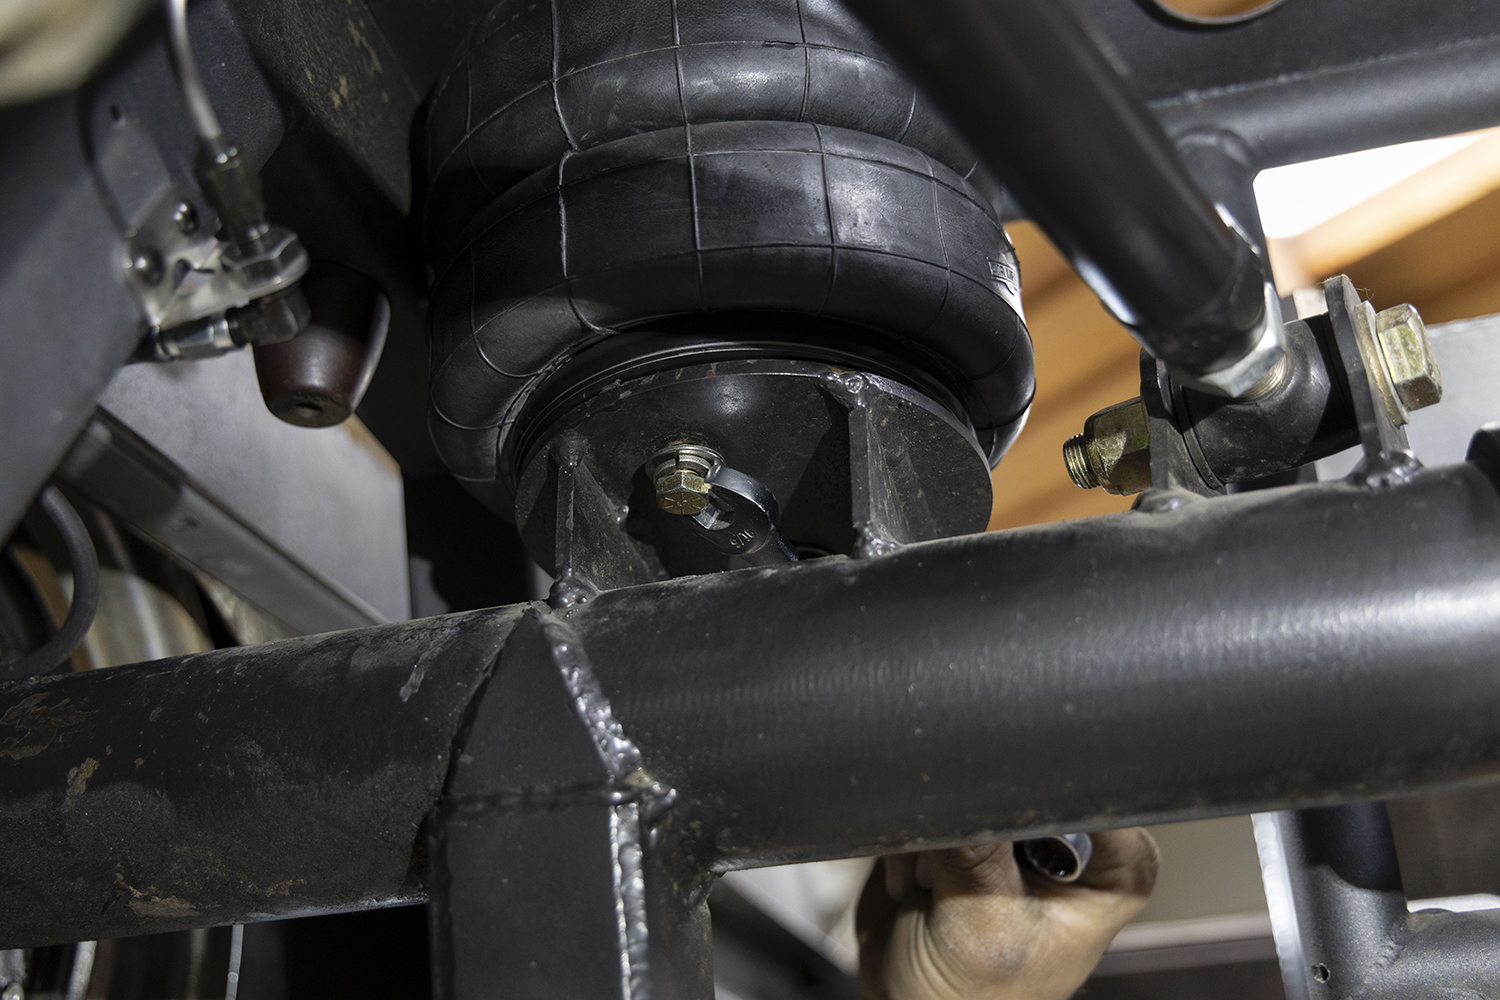
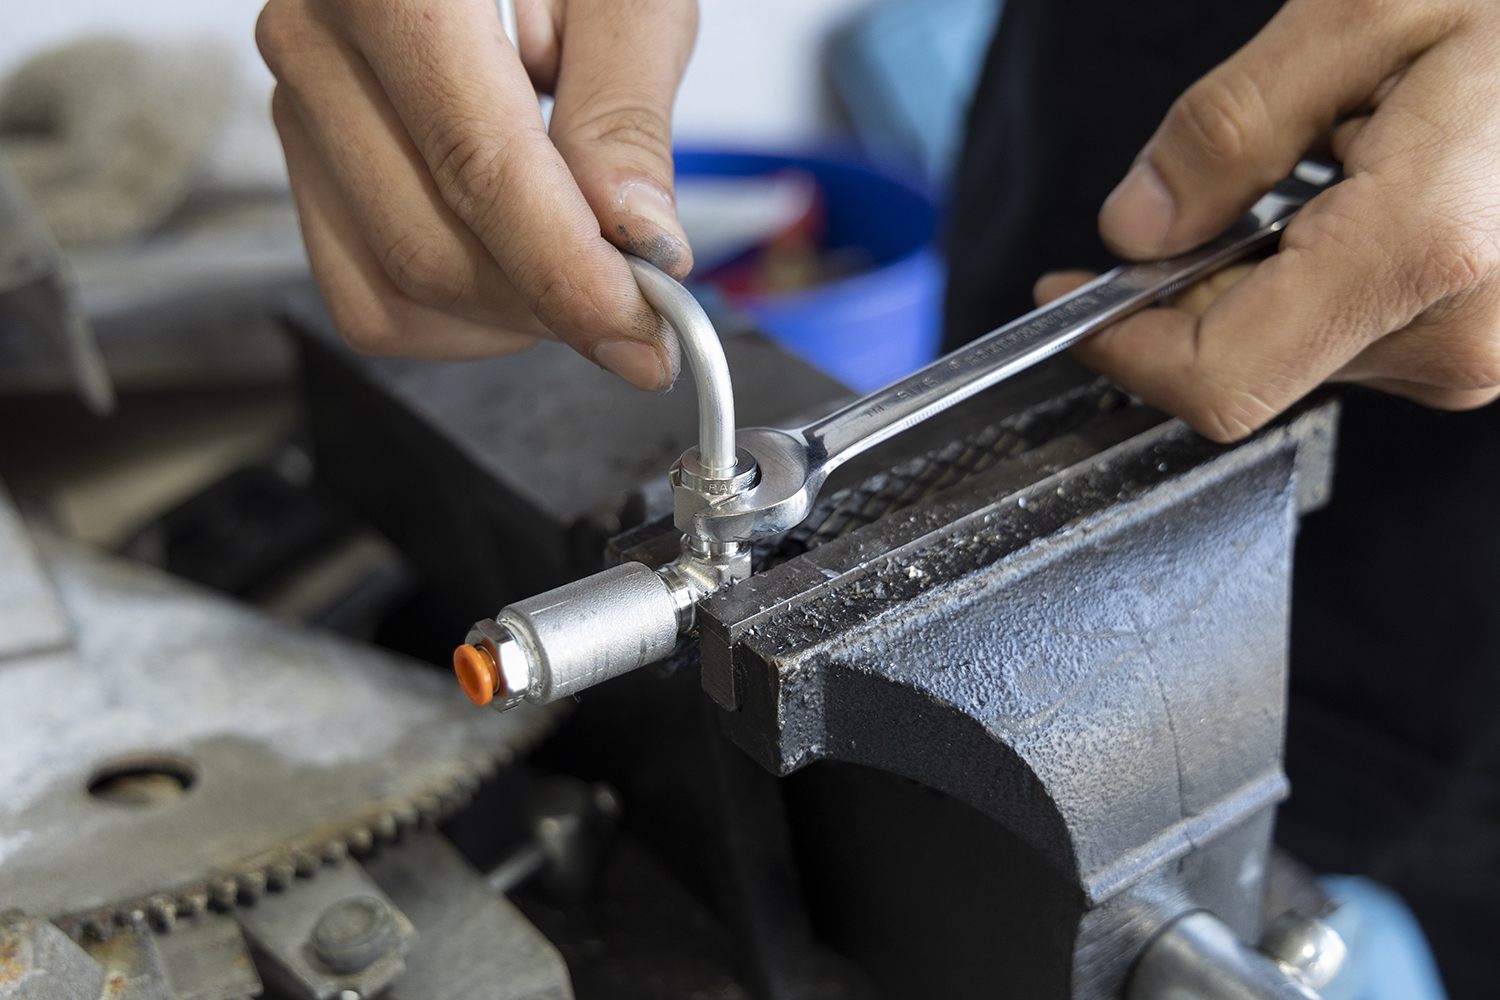
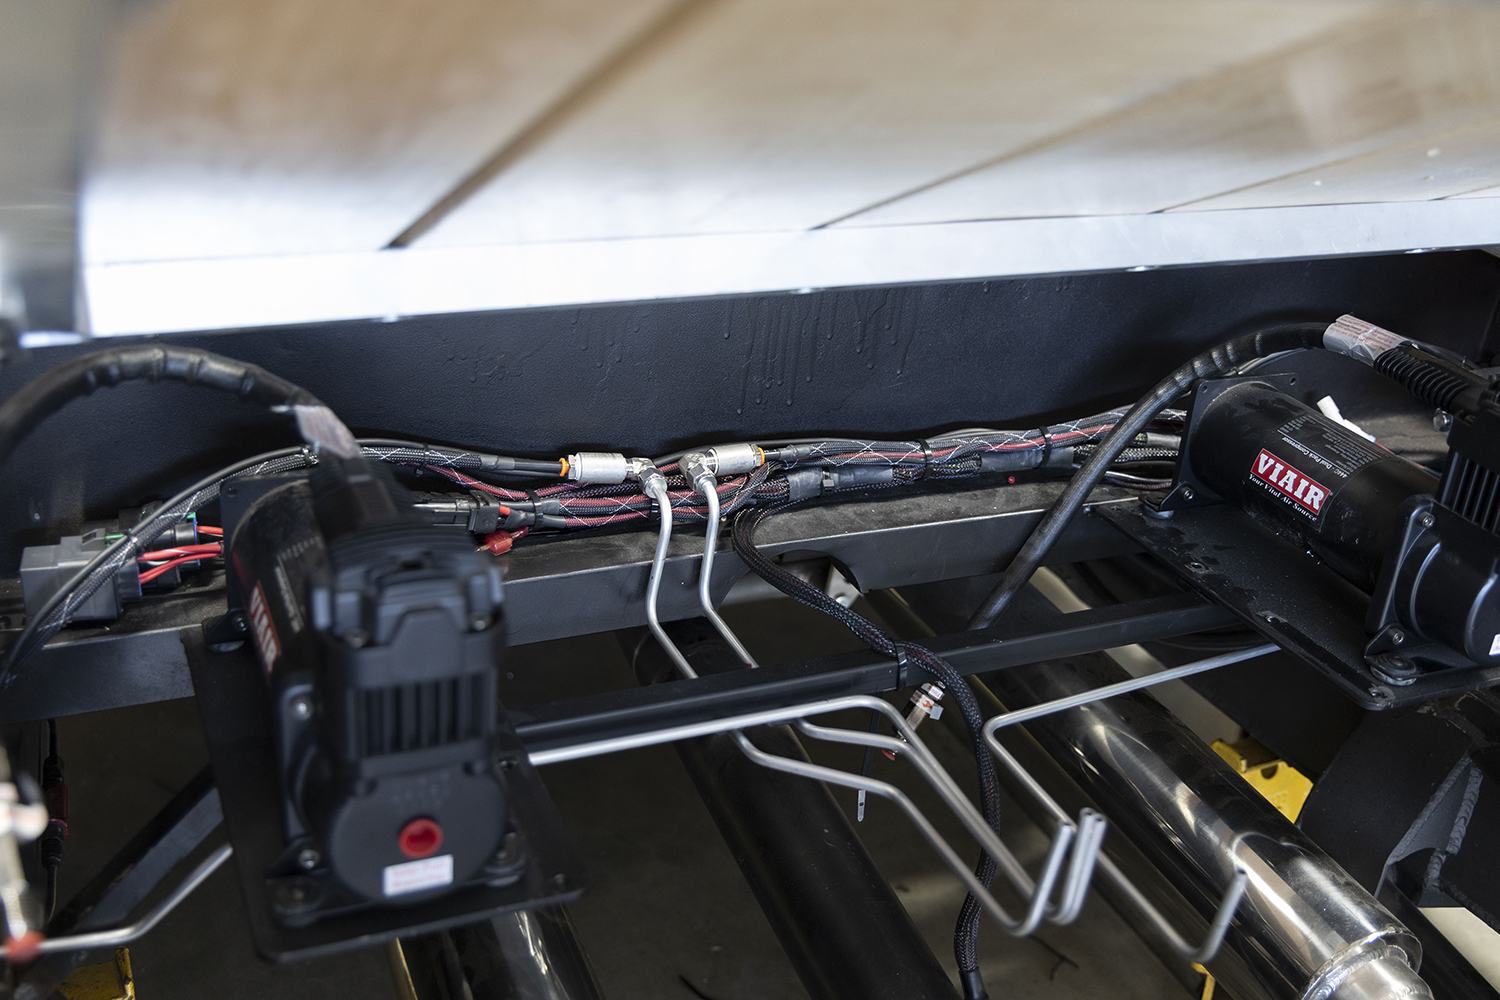
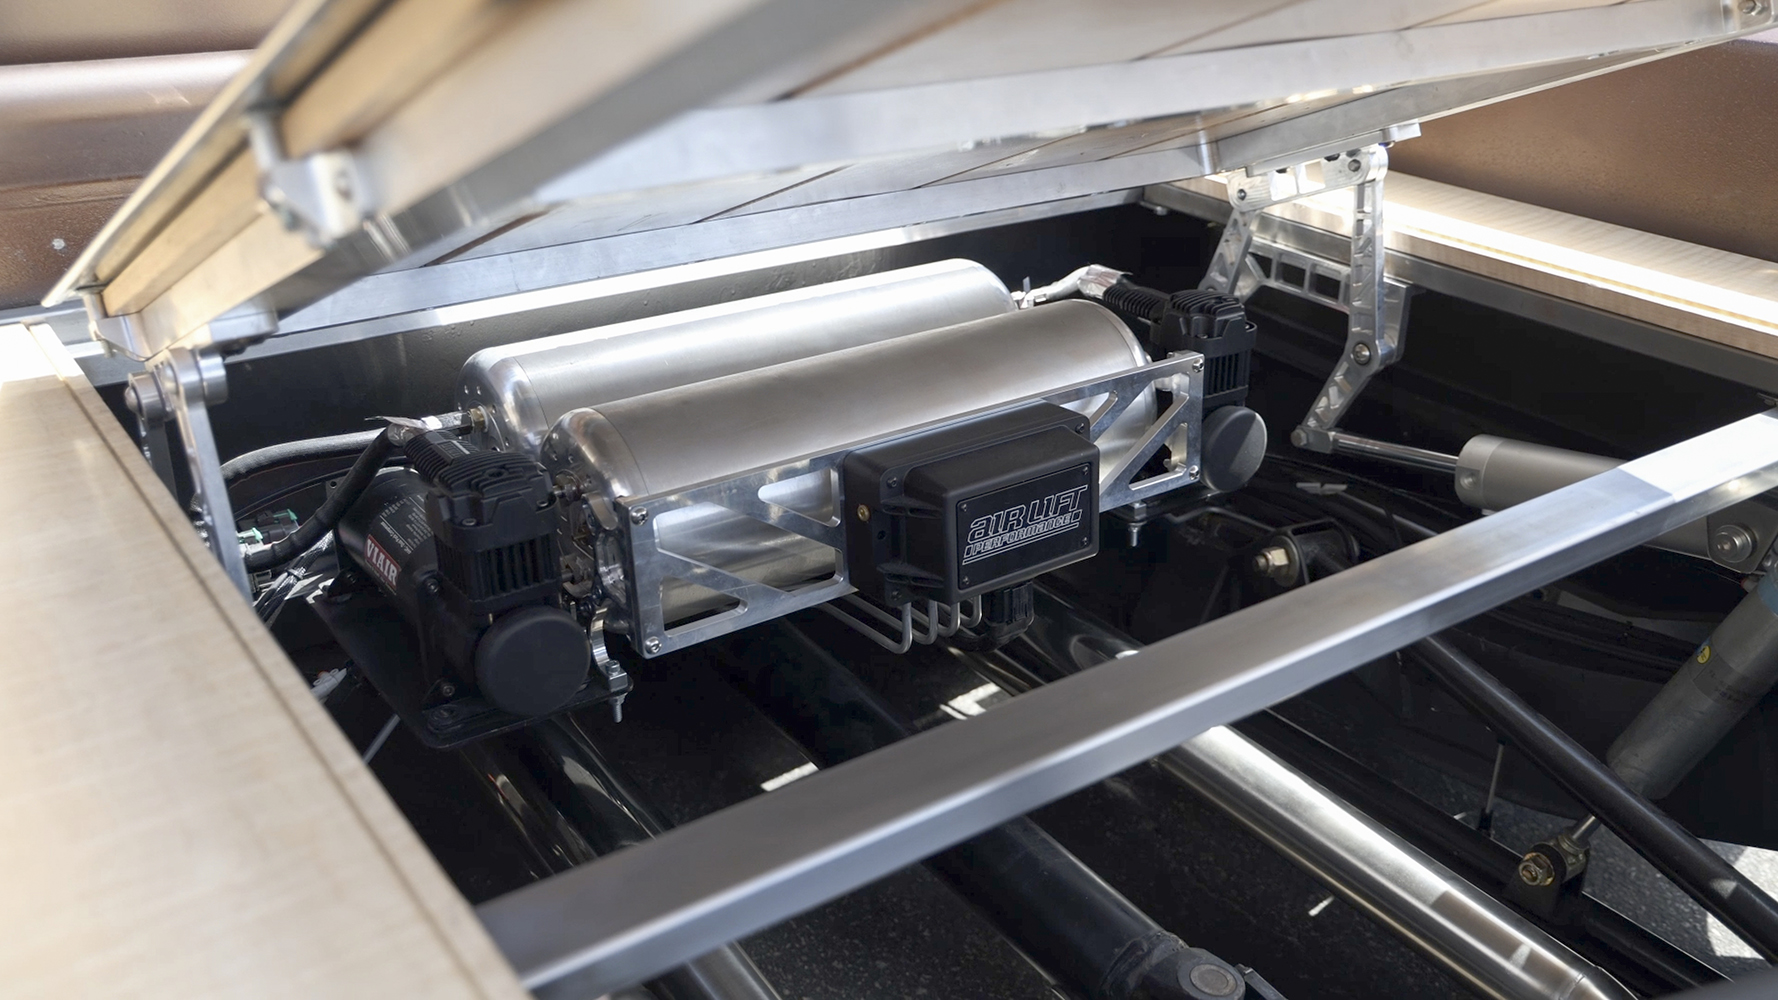
While Air Lift does offer a “pressure” regulated system (the 3P), as pointed out, ours is the 3H “height” regulated, which relies on four individual vehicle height sensors included in the kit. Mounting location and subsequent articulation are key to ensure a properly regulated system!The manual system used two compressors, however, air supply was regulated to one single tank—the new FLO Air modular setup utilizes two 18-inch, 200-psi tanks (2 gallons each) with their unique billet mounting brackets (which Old Anvil opted for two additional ones, as you’re about to see), 225-pound pressure relief valves (installed).The first thing Old Anvil did was swap the worn-out airbags for brand-new 2,500-pound dual-convoluted air springs that Air Lift supplied.
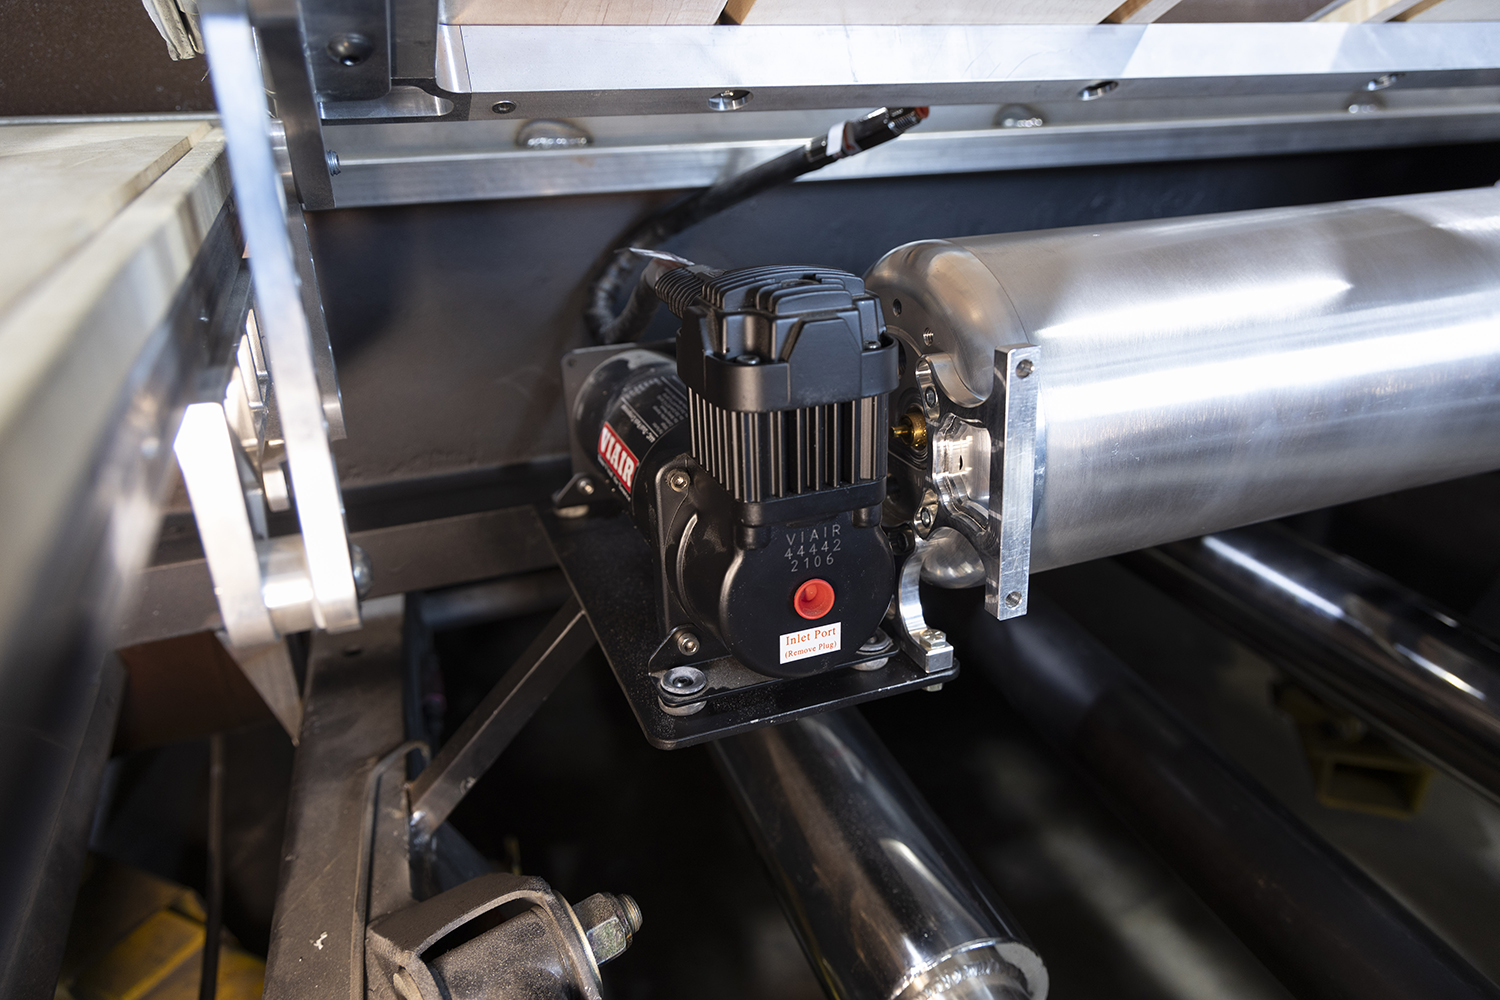
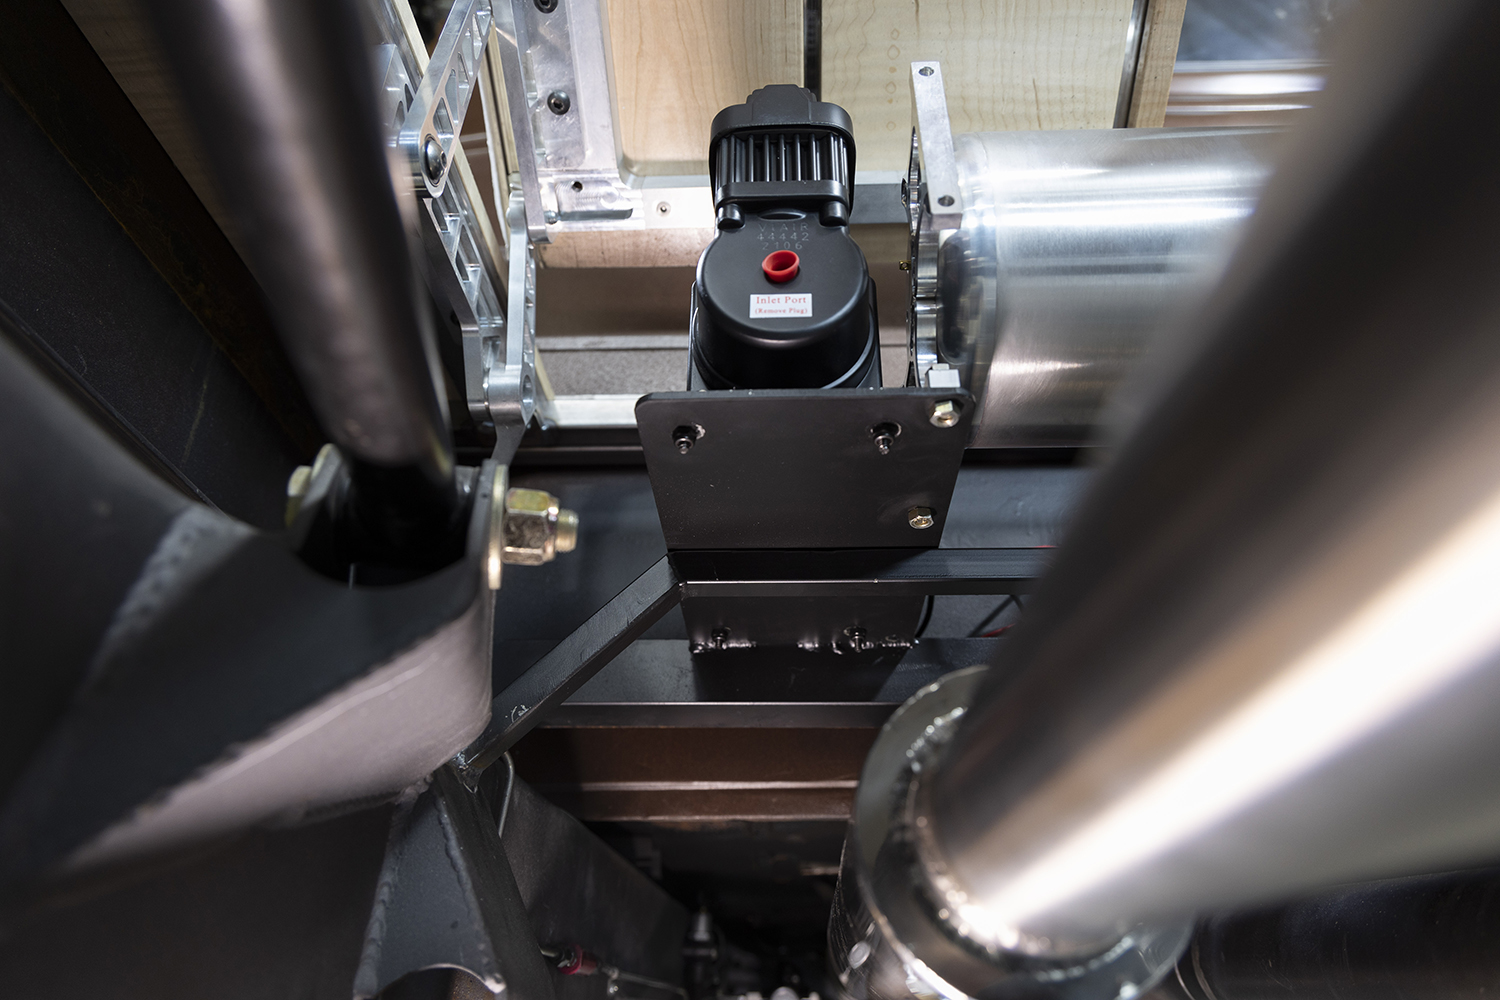
Next, a platform was fabricated in which to mount the compressors off to each side of the parallel-situated air tanks (rather than off the face of the tank) using square tubing and plate steel (that ties into the framerails toward the front of the bed).
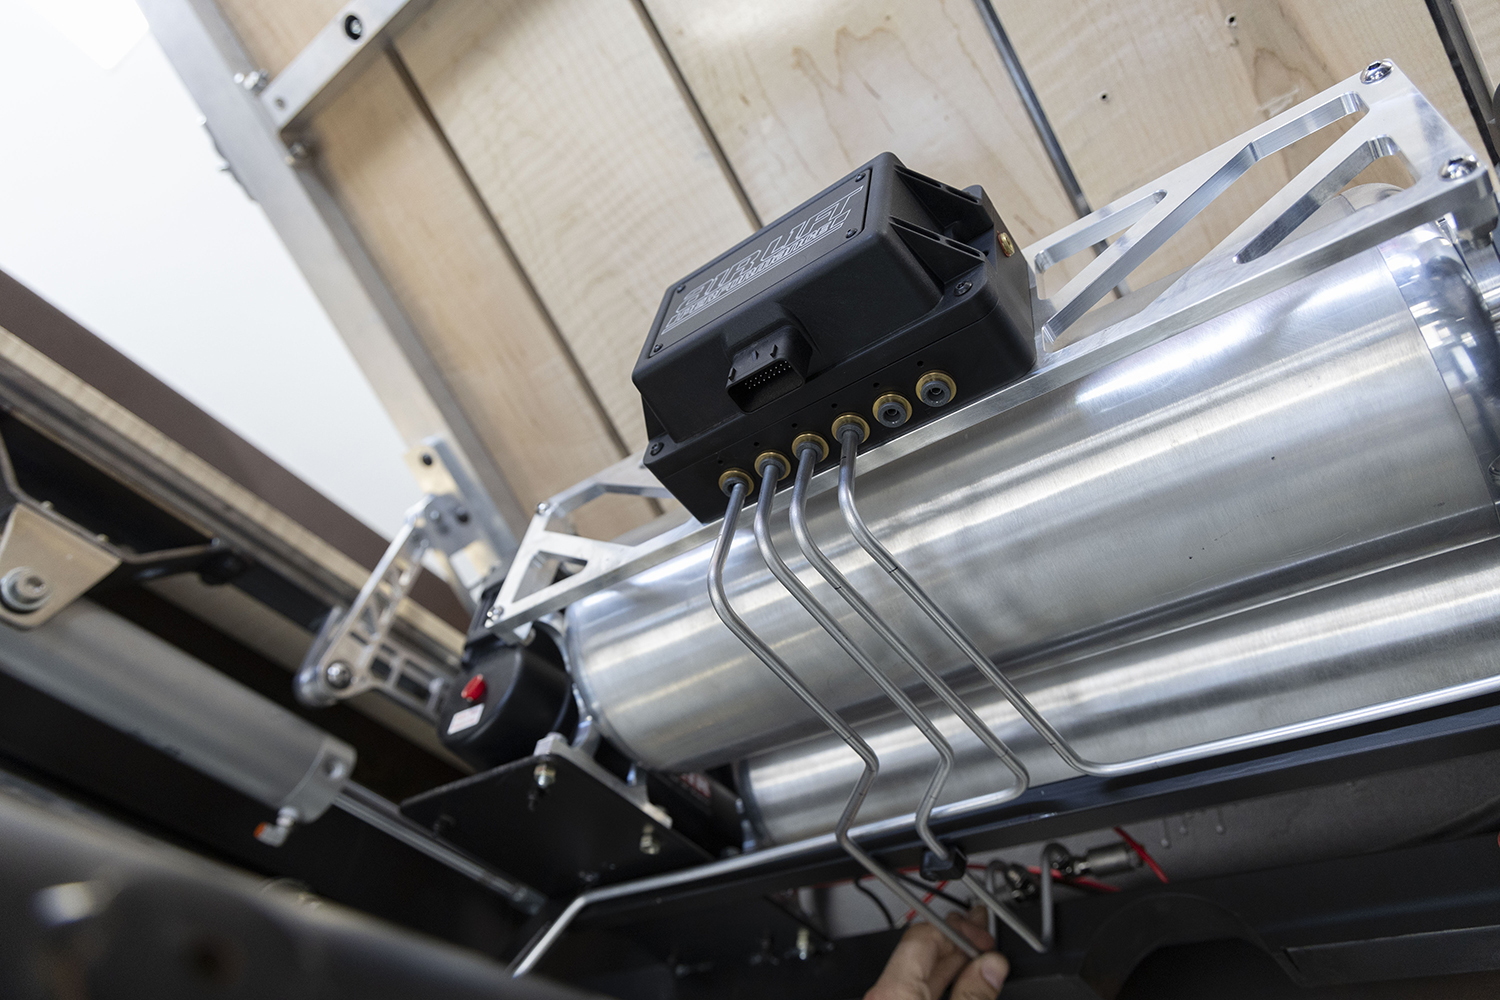
Old Anvil then machined an aluminum bridge that will attach to the additional FLO Air tank mounting brackets …
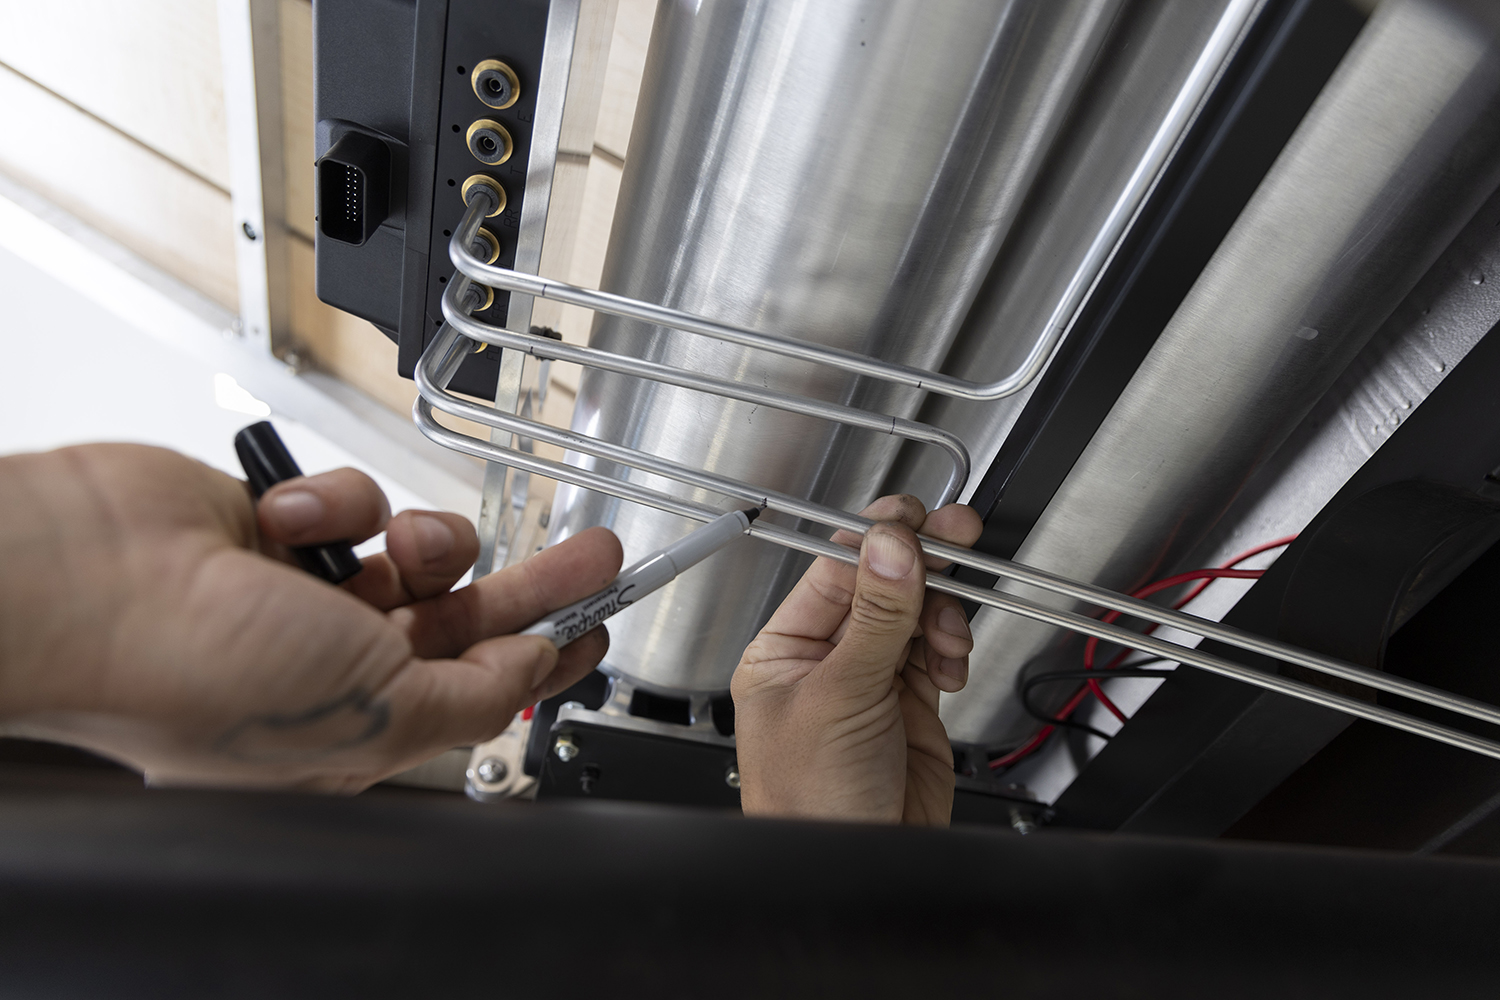
… so as to configure the Air Lift controller as such! Fancy.For the main supply to the ECU, 1/4-inch hardlines were formed, routing back to the front bed panel.
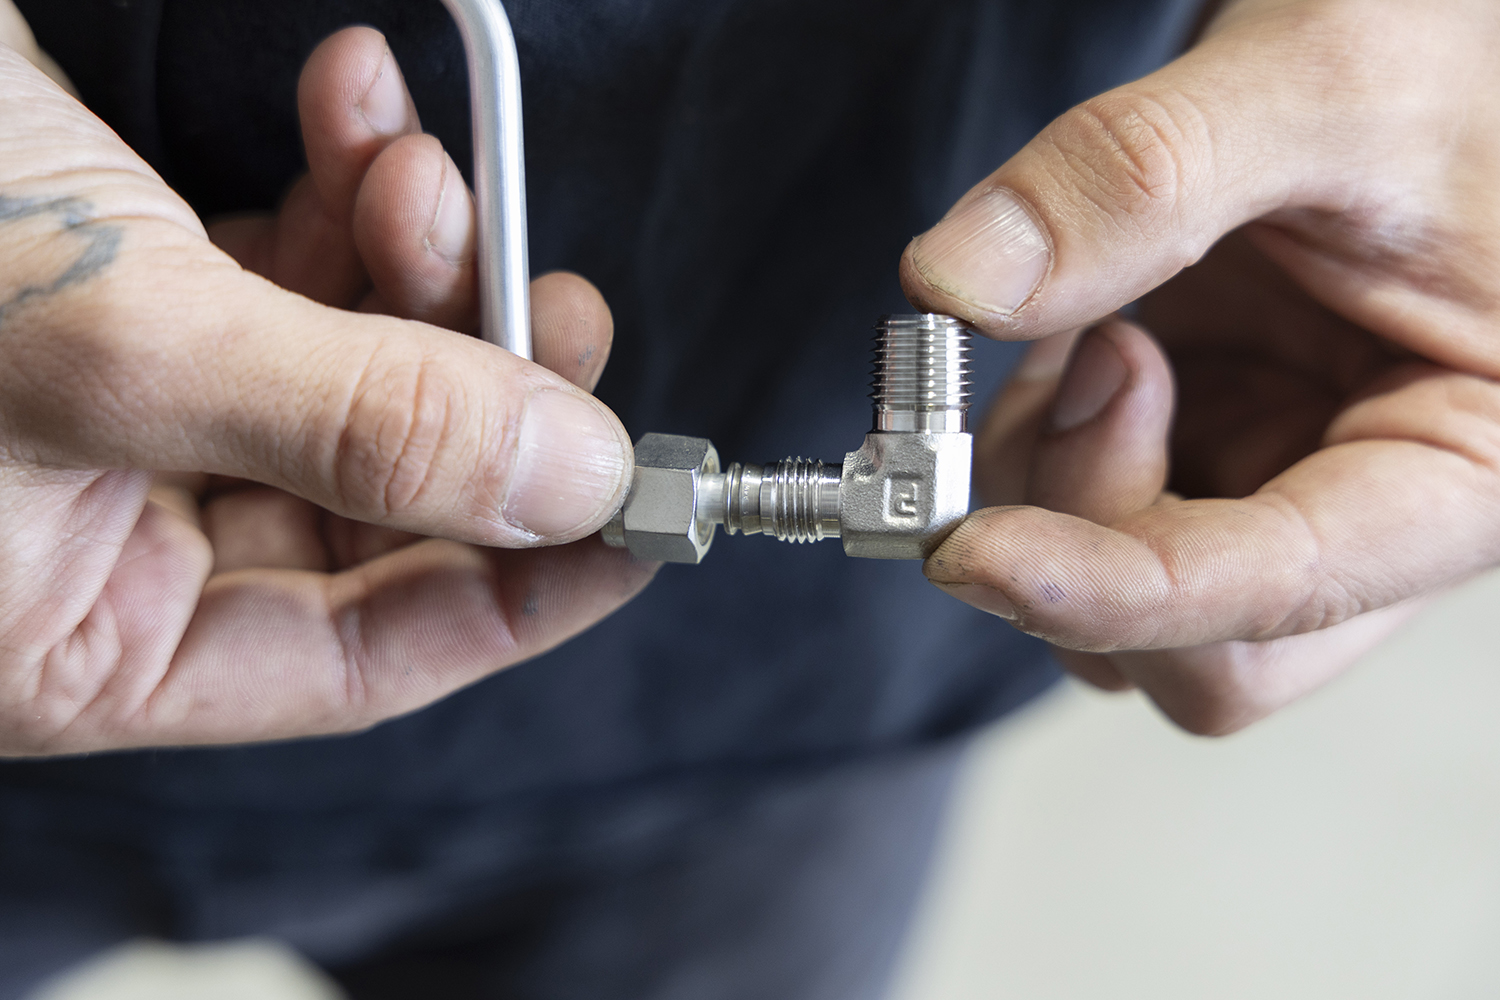
Since the bulk of the airbag lines were the supplied nylon tubing from Air Lift, AN to PTC (push to connect) adapter fittings were used.
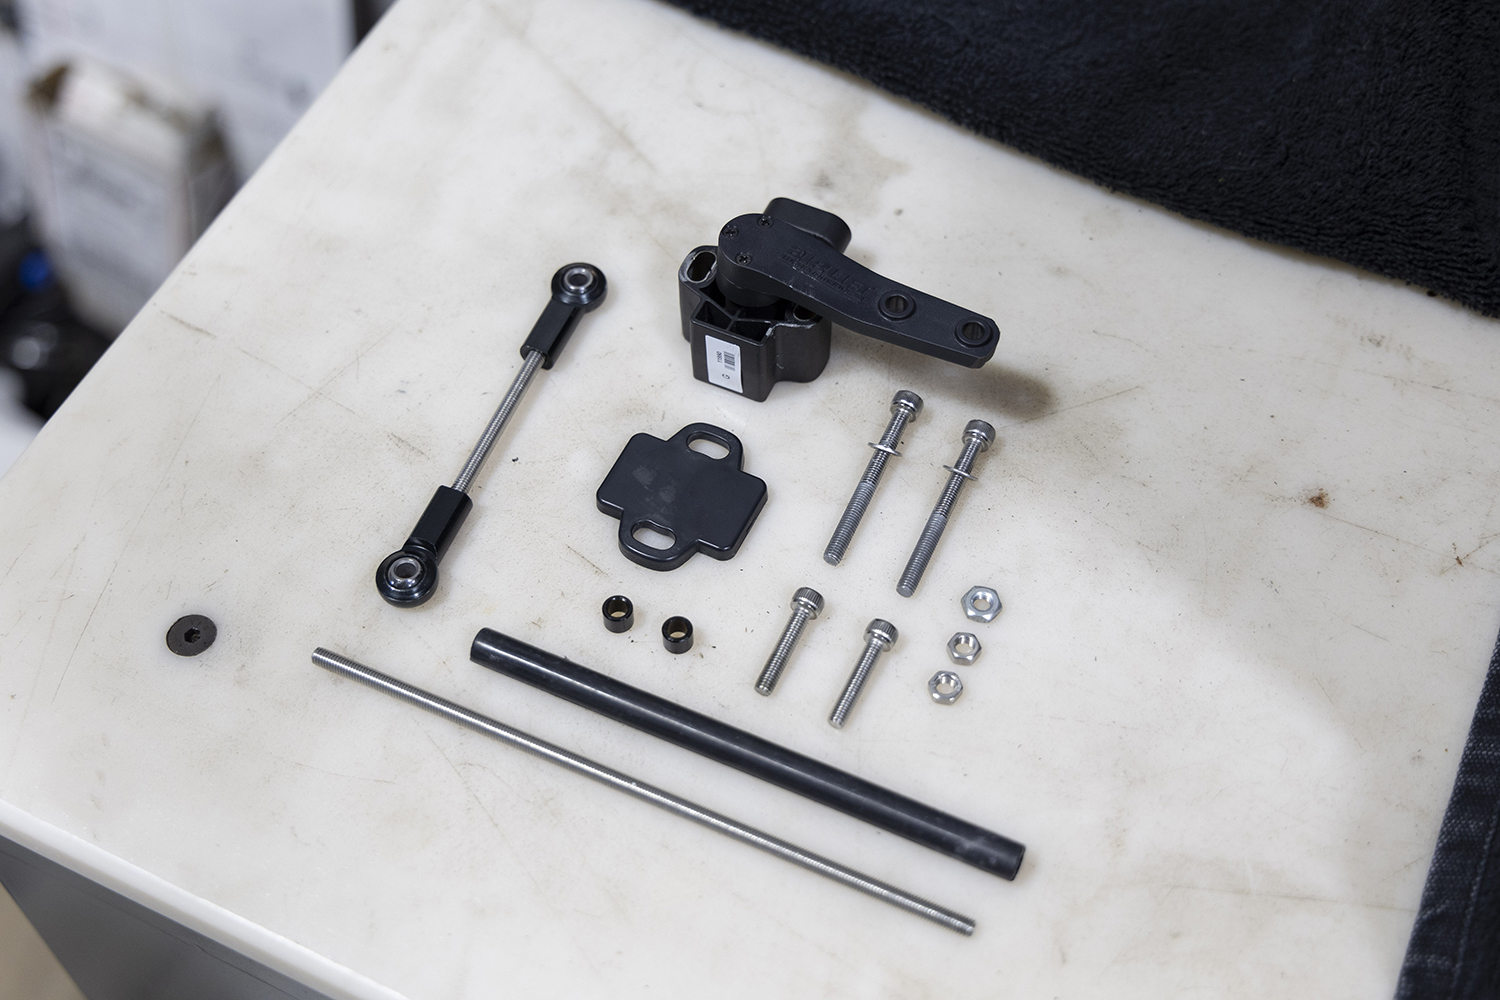
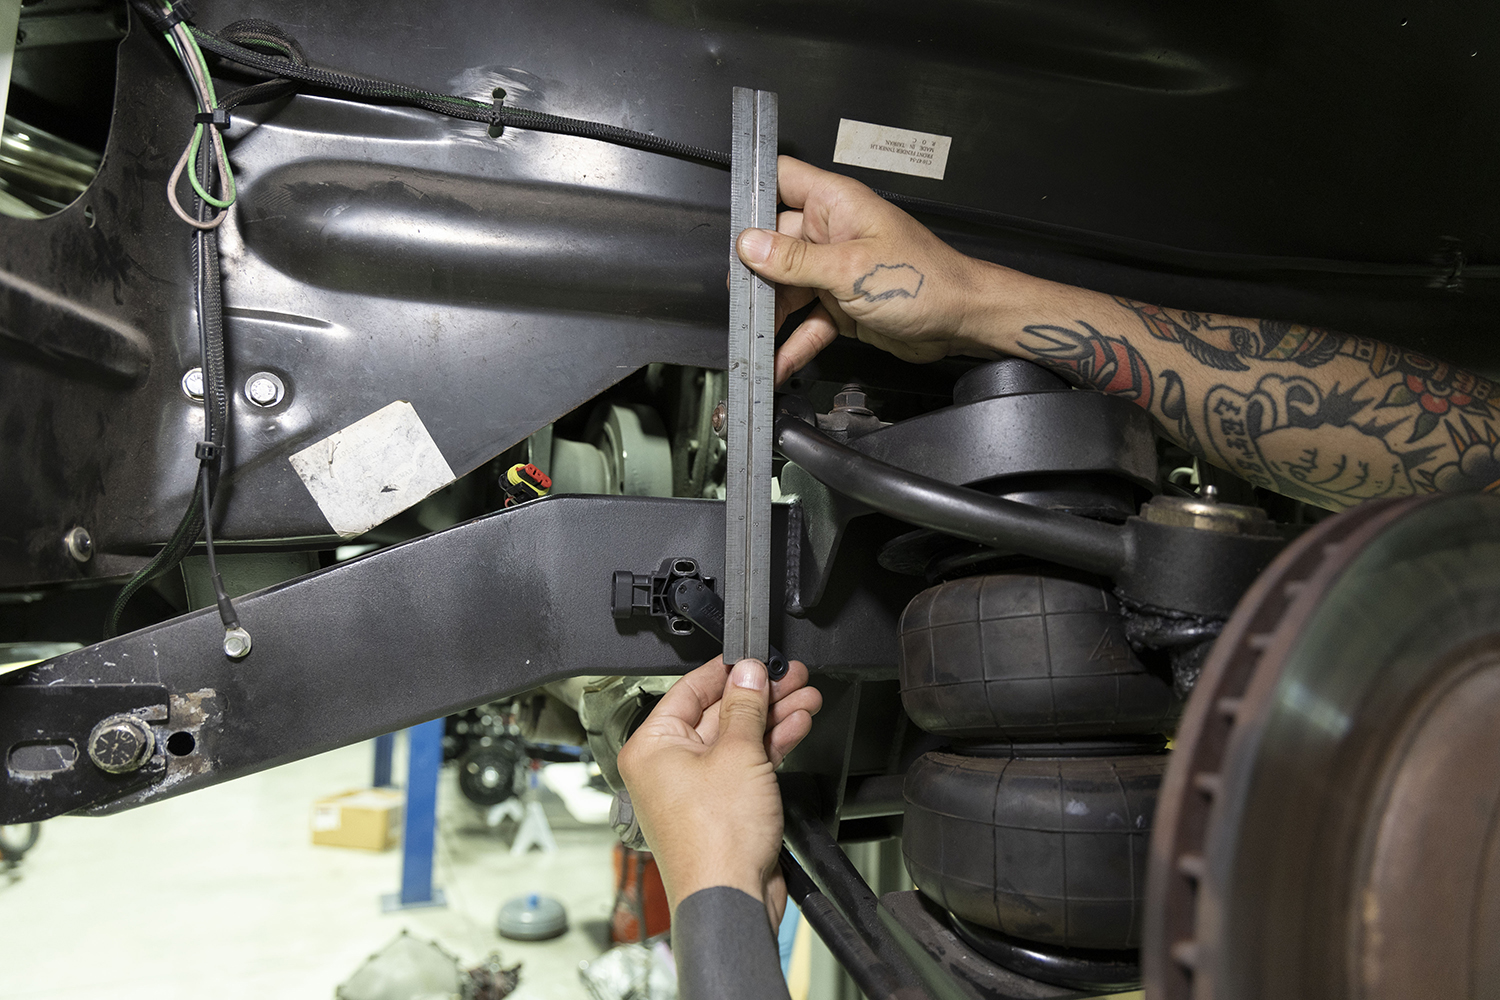
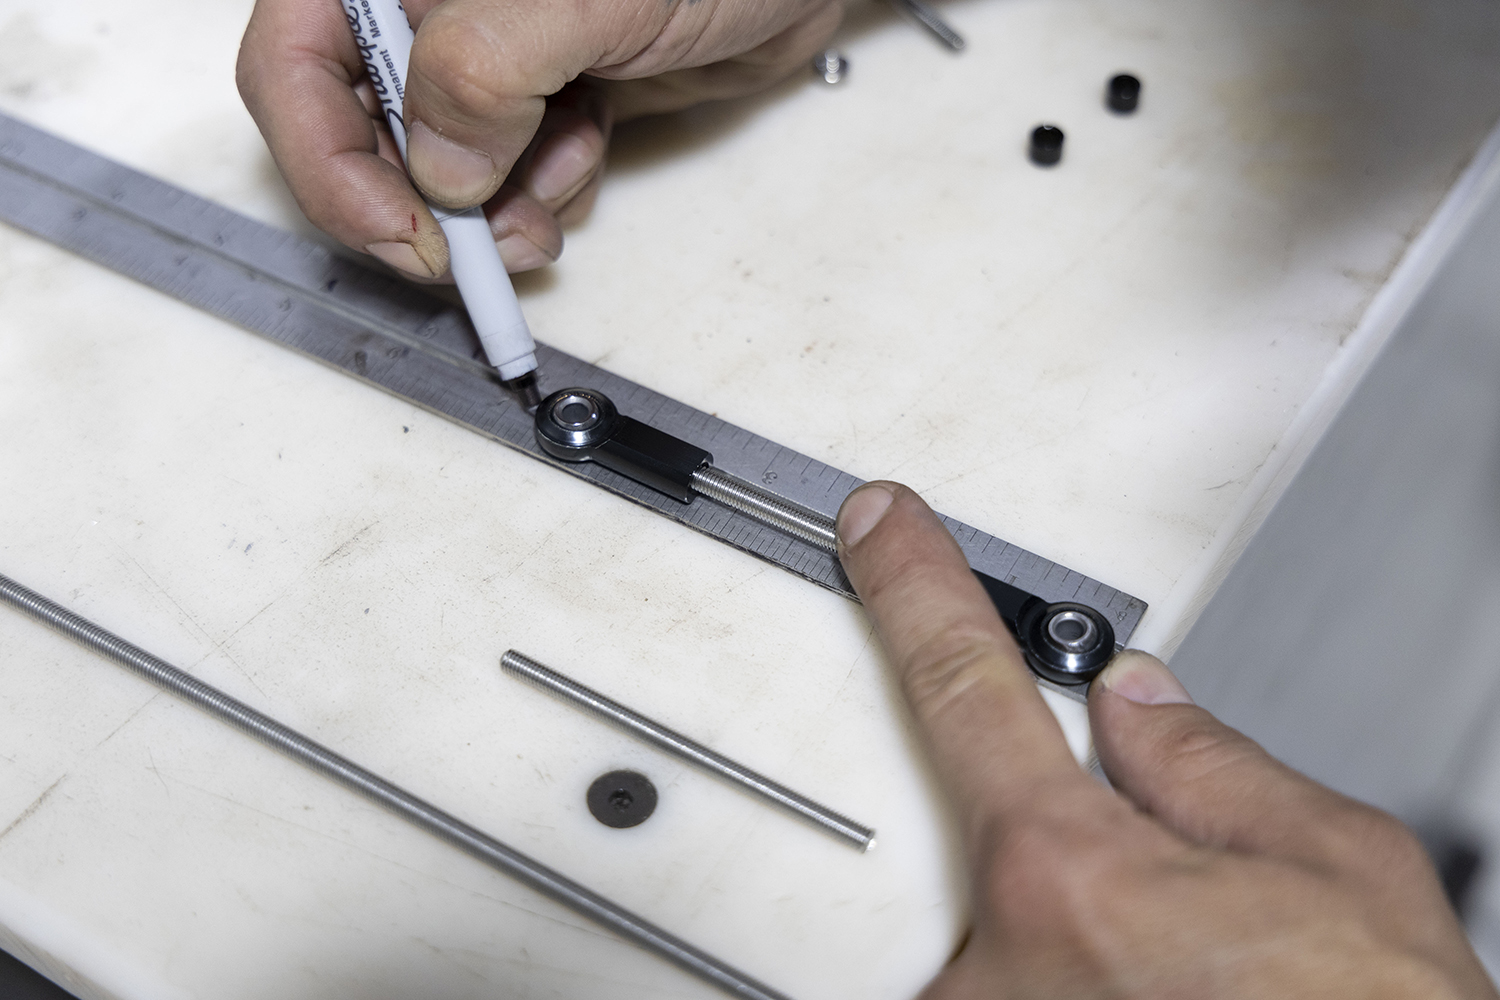
With the tanks removed, exposing the mounting platform Old Anvil built, you can see the completed plumbing as well as the Air Lift 3H wiring harness (all nicely loomed and shrink-tubed).Once the leads for the height sensors were routed to each individual wheel, the sensors themselves could be located, mounted, and set up.The goal is to achieve sufficient suspension articulation without any binding between the suspension itself and the sensor arm. Once that’s determined …… the sensor arm linkage can be cut to length (both the all thread and the nylon sleeve).
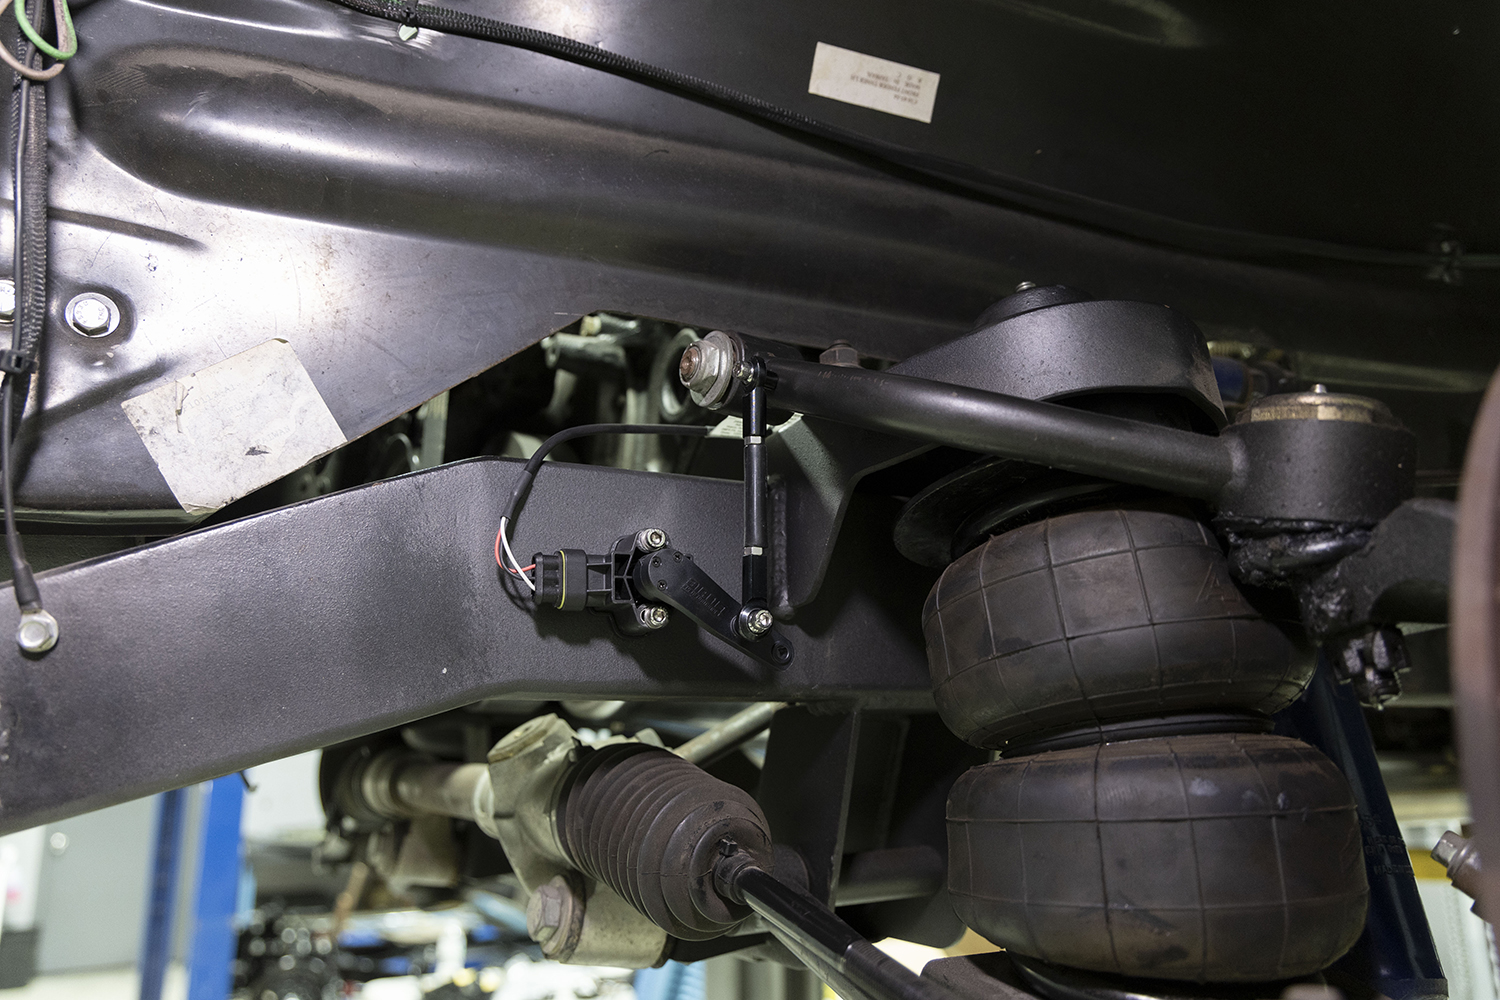
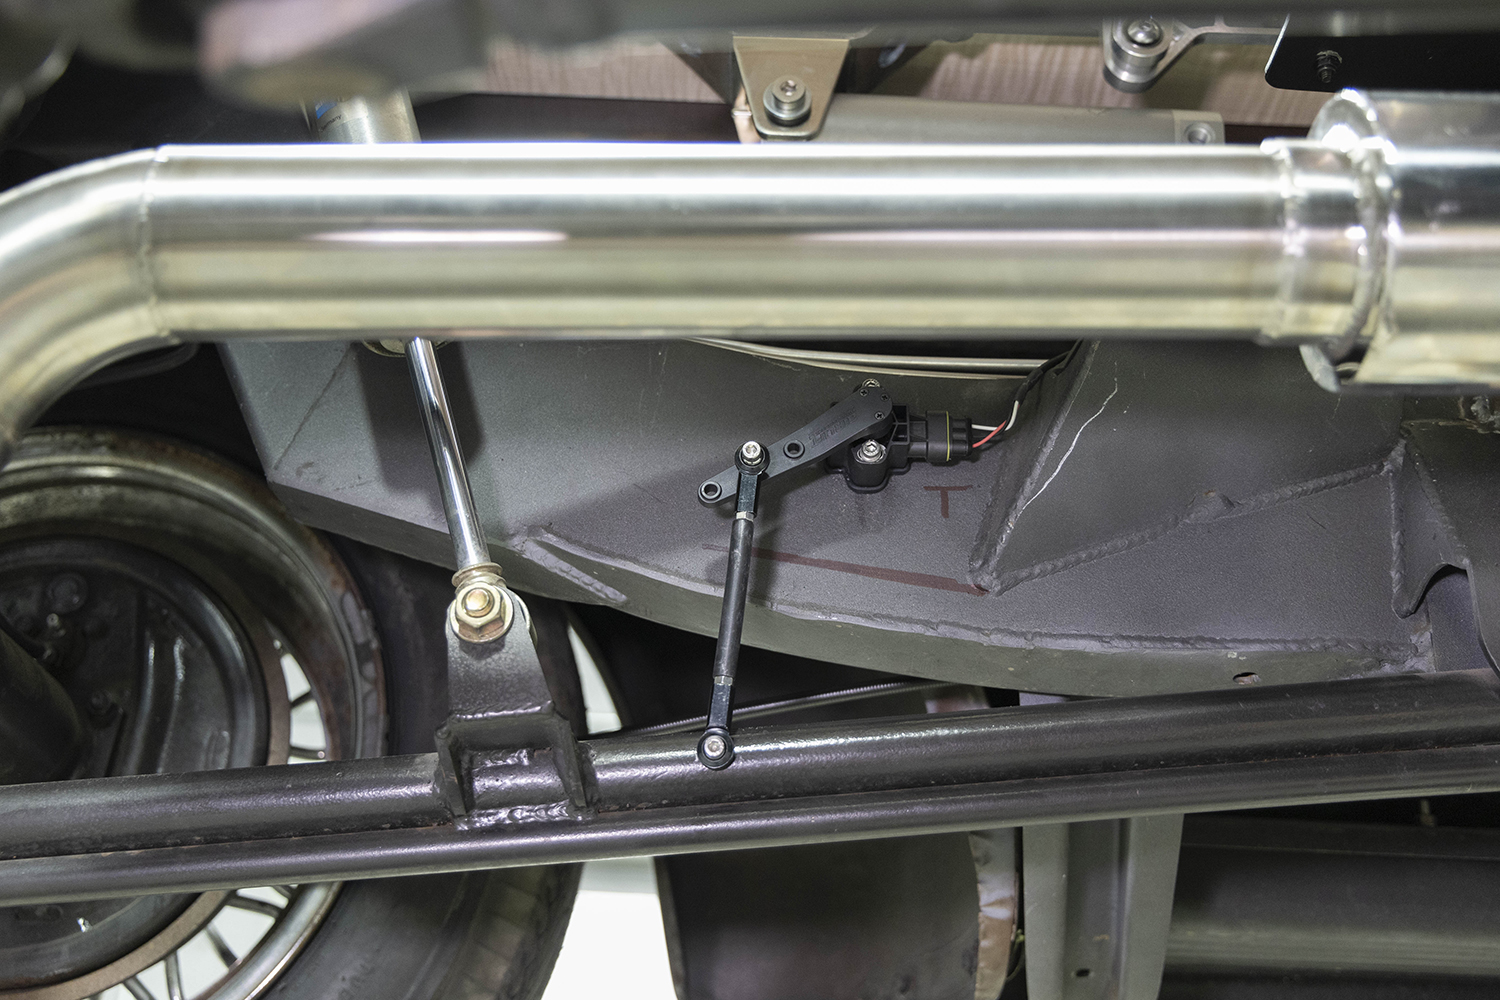
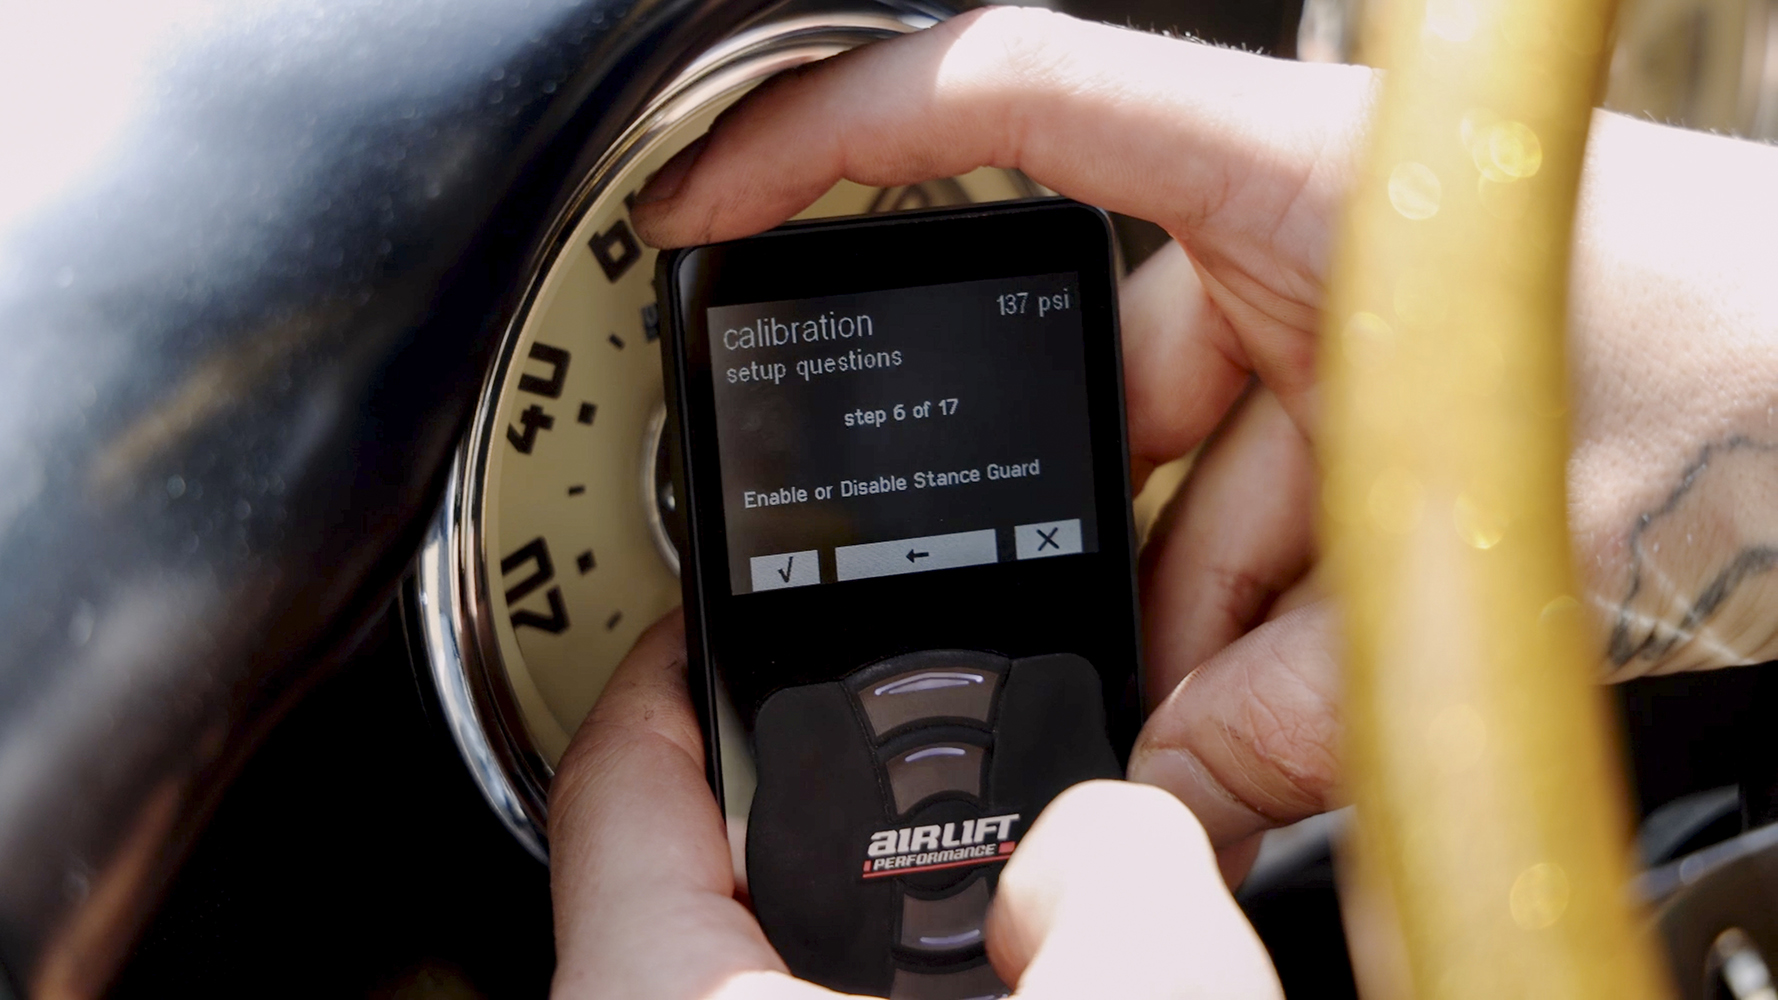
Mounted, configured, wired, and ready to go: the front height sensors work off the upper A-arm while the rears read off the lower four-link bar to give the ECU its ride height setting parameters.With the system completely plumbed, wired, and test run, it’s time for programming. The 3H system is automatically adaptable to varying road conditions and/or load capacity (passengers and carrying payload) but can be programmed with five different presets. Once it self-configures, the user (in this case, Nick Prols) can set up the preferred heights for parking, cruising, highway use, and so on.Old Anvil Velcro-mounted the hard-wired controller to the dash—once Clampdown Competition and I wrap up the American Autowire harness swap (in progress as I write this), I’ll likely configure a permanent location in the center of the cab to be hidden in a future custom console.Thanks to Old Anvil Speed Shop’s All Access VIP pneumatically operated bed floor kit (with Bed Wood’s custom-tailored Curly Maple flooring), the completed Air Lift Performance/FLO Airride management system is both easy to show off and, if ever necessary, serviceable as well!Prols trying to explain the setup/programming process was like my mom trying to explain trigonometry to me back in high school—good thing I’ve got the Air Lift Performance 3 app on my phone to keep my memory refreshed … and my air-ride system functioning properly!
We use cookies to ensure that we give you the best experience on our website. If you continue to use this site we will assume that you are happy with it.