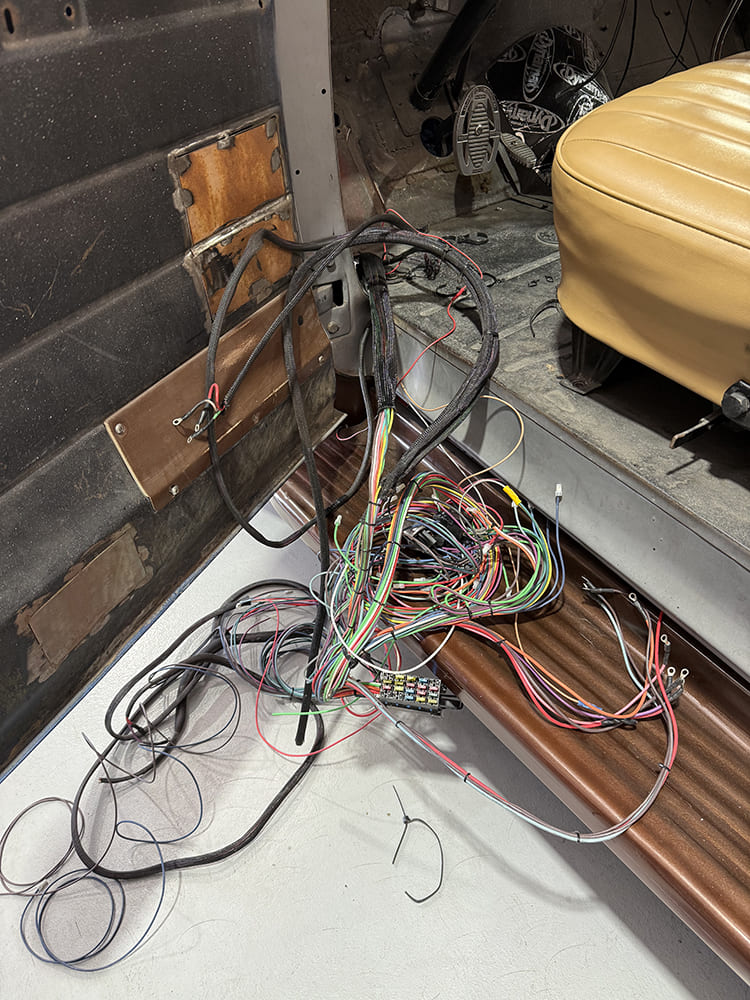
When it comes to wiring a classic truck from scratch, there seems to be two different camps: those who are willing to take on the challenge and those who refuse. While the task can be daunting, and electrical systems, in general, complicated and confusing, one doesn’t need to hold a degree in electrical engineering to connect a load to a source. In fact, upgrading a classic truck’s electrical system can be downright simple when using a kit like American Autowire’s Highway 22 Plus. One of the most challenging aspects of installing some aftermarket harnesses comes from the overwhelming number of wires exiting the prefabricated fuse panel. That spaghetti nest of wiring can make it very difficult to narrow down each circuit and remain concentrated on it and it alone.
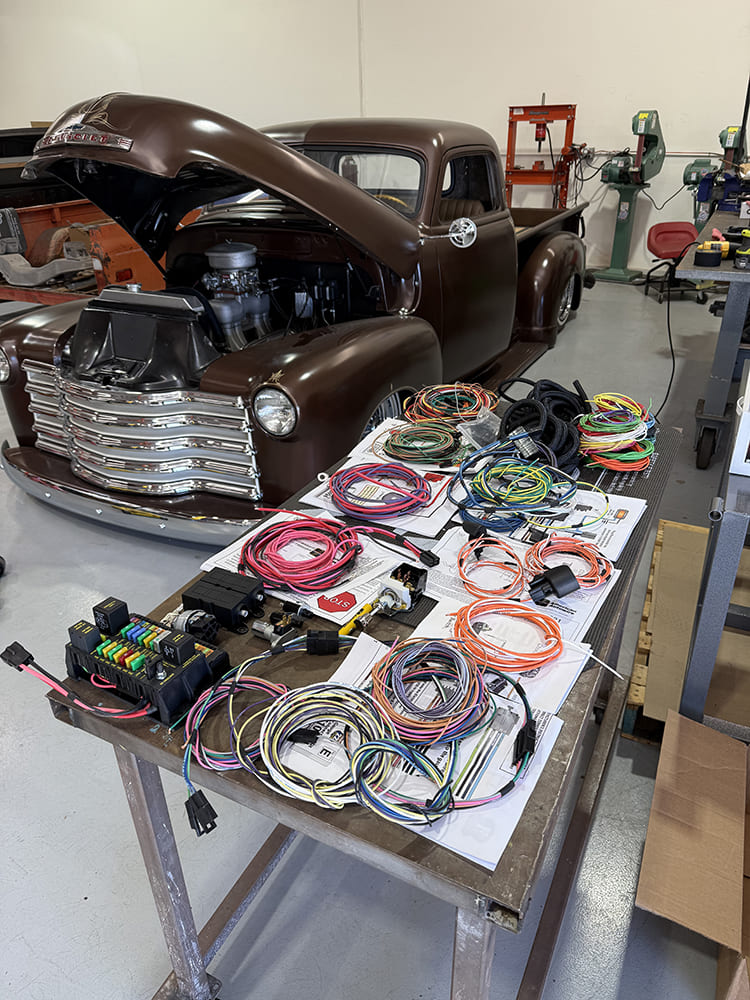
A previous owner had done a decent job of rewiring the truck, but the harness was still a bit of a mess. While everything was fused properly, there were no provisions for turn signals and the ability to add any additional components was limited. To handle the additional loads due to the airbag system and electric fuel pump, as well as future-proofing for A/C and power wipers, it was decided to replace the existing harness with a new Highway 22 Plus wiring kit from American Autowire (PN 510760).
But the Highway 22 Plus takes a different approach by connecting each circuit to the fuse panel, one by one, as each circuit is completed. This keeps the jobsite nice and clean and allows the installer the freedom to work on a single circuit at a time. While we won’t be taking that elementary of an approach, instead handling numerous circuits at a time, it is possible to simplify it as such. But when it comes to the Highway 22 Plus kit, it doesn’t make much sense to take things one circuit at a time, since many of the components come preterminated to the corresponding switch (headlight, ignition, and so on). This allows the end user to route each wire individually, while slowly building up each bundle, carefully routing it to suit.
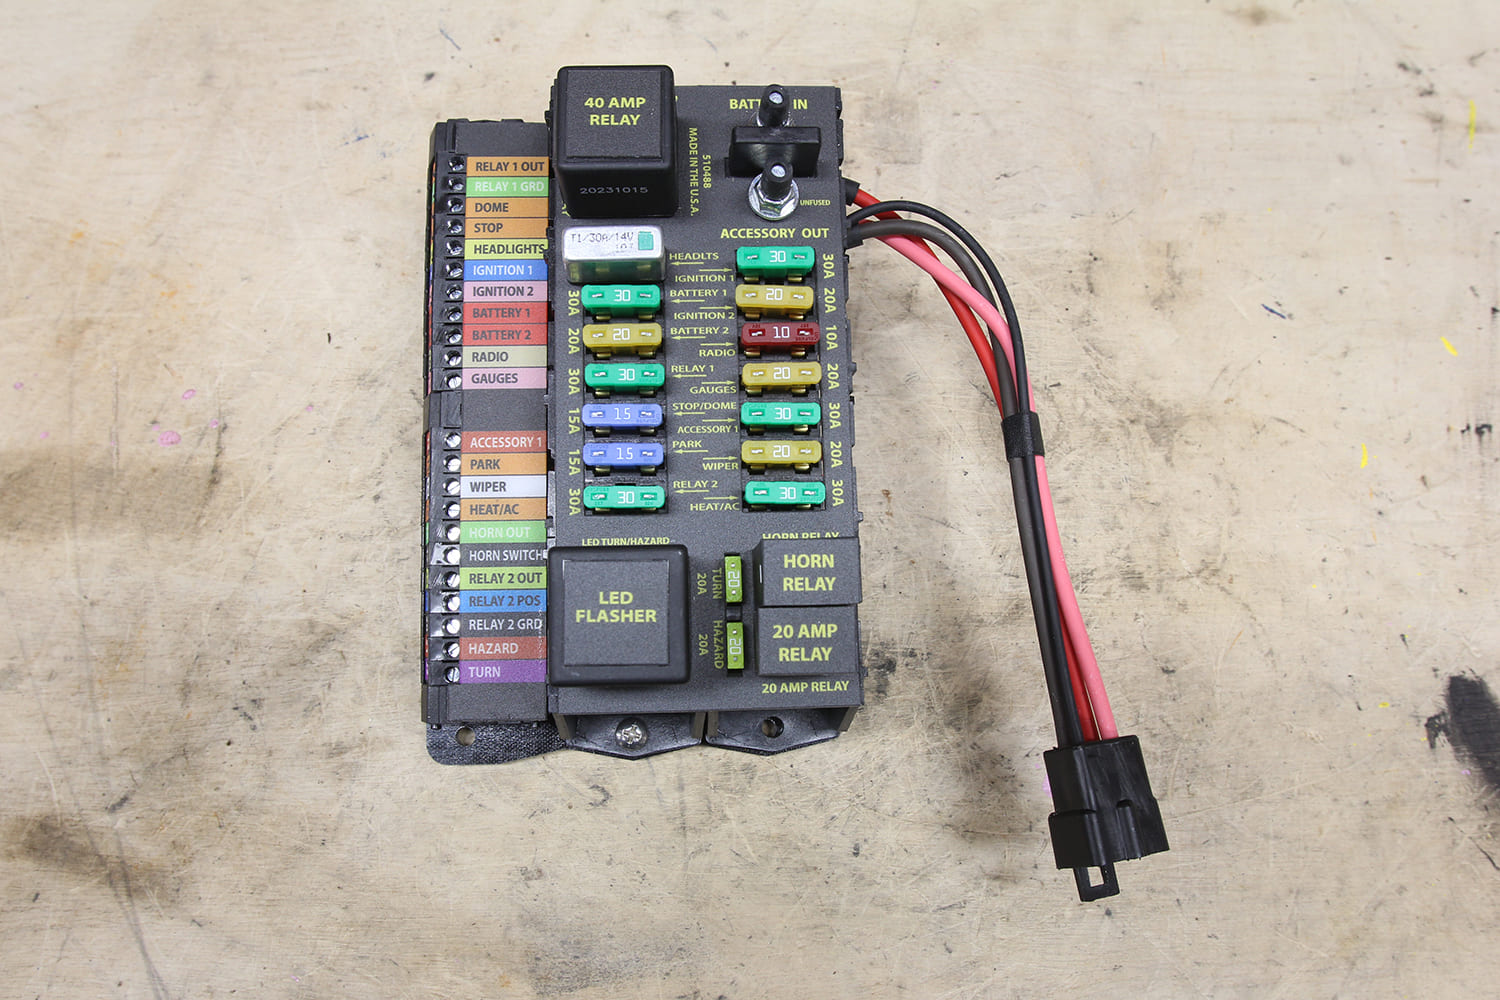
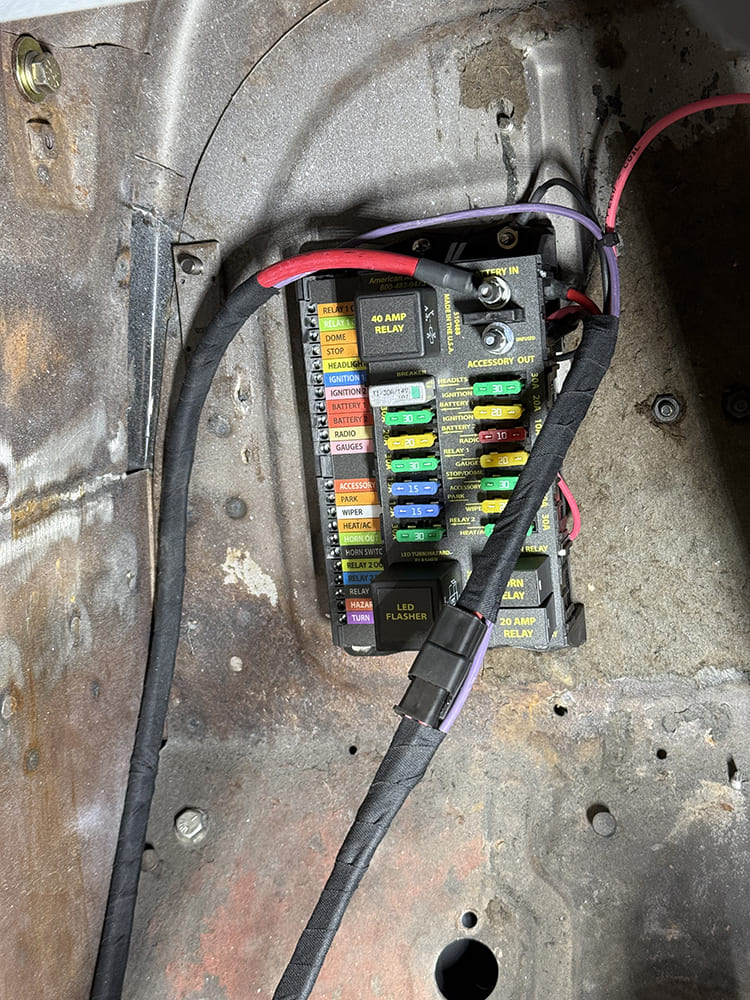
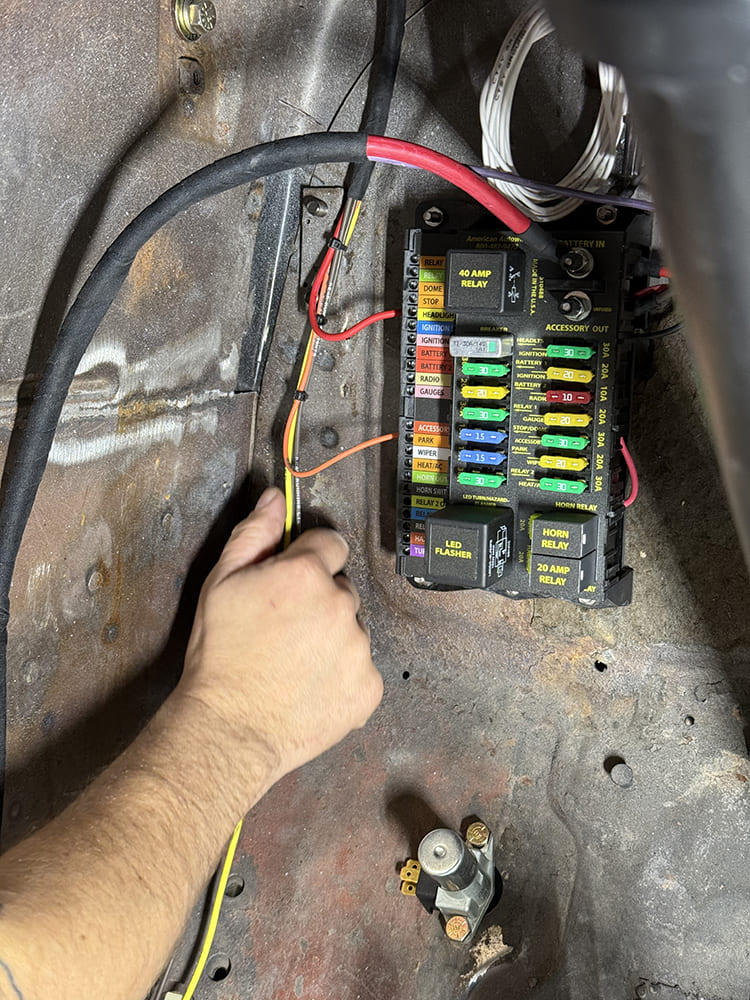
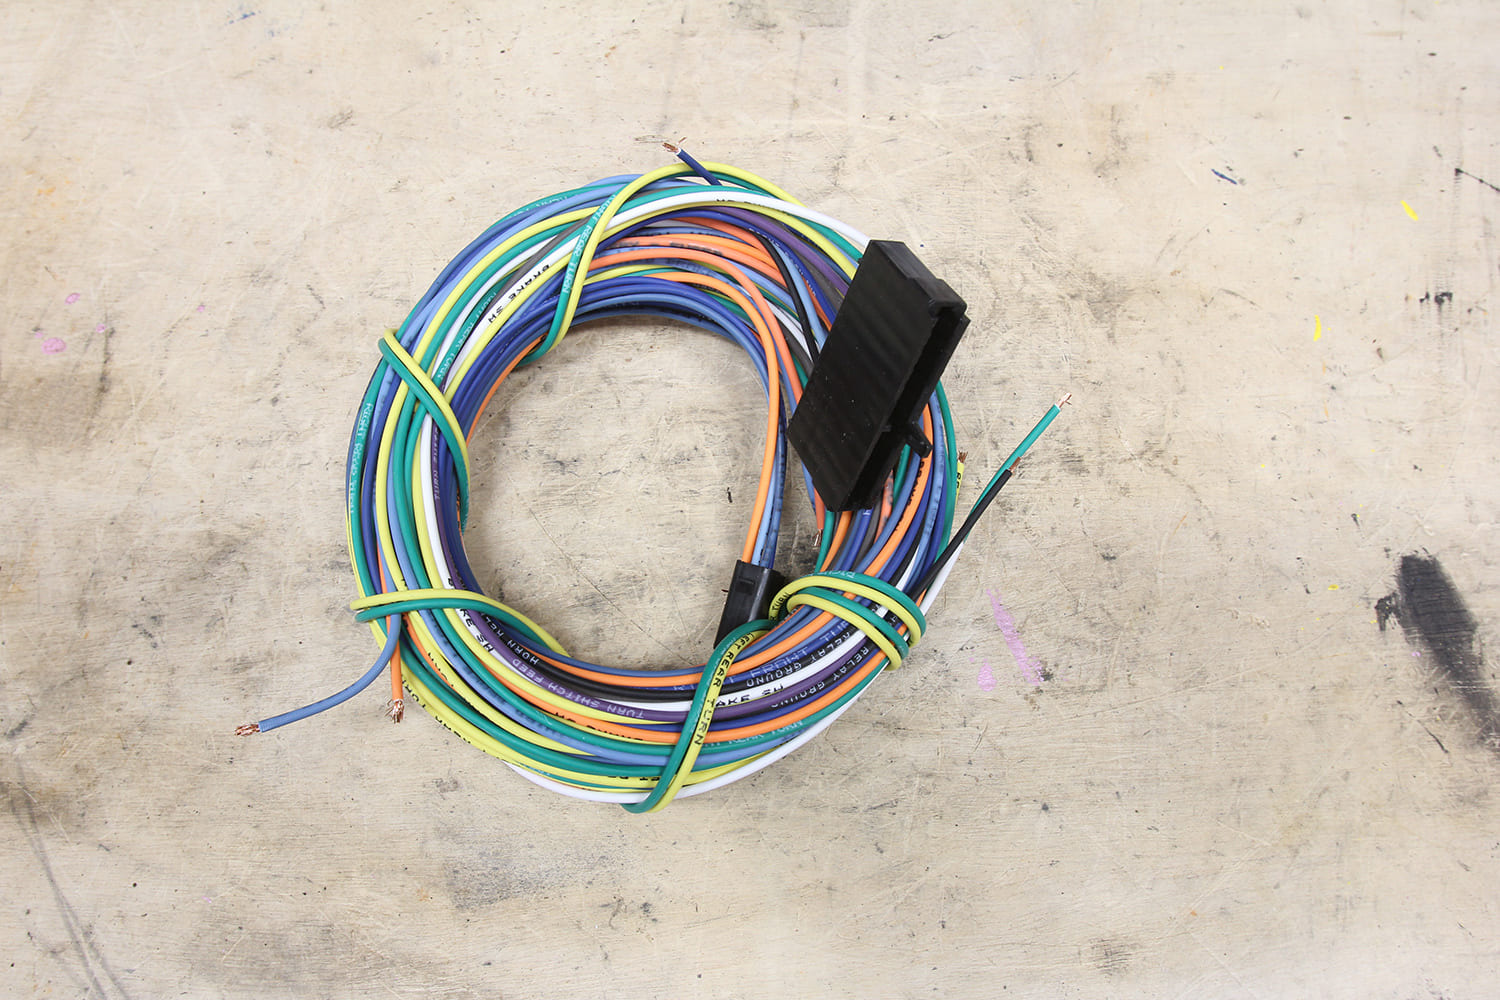
The foundation of our upgraded wiring system is this 22-circuit fuse panel that includes a built-in LED flasher and two separate relay circuits to power an electric fan, fuel pump, and so on.
The decision to upgrade the wiring on our 1948 Chevy was twofold, and, truth be told, not absolutely necessary. The truck ran and drove fine, and the headlights and taillights operated as well, but the stock column didn’t facilitate turn signals and the ability to add more accessories in the future was limited. Since the plan is to add A/C, electric wipers, and a new steering column that did include turn signal capabilities, we needed those additional capabilities. The more we dove into the existing wiring harness, the more obvious it became that the best decision would be to gut the existing wiring and start over from scratch.
Wiring a vehicle from scratch can be an intimidating task. Thankfully American Autowire breaks their kit into smaller segments, arranged alphabetically, that can be ran individually.
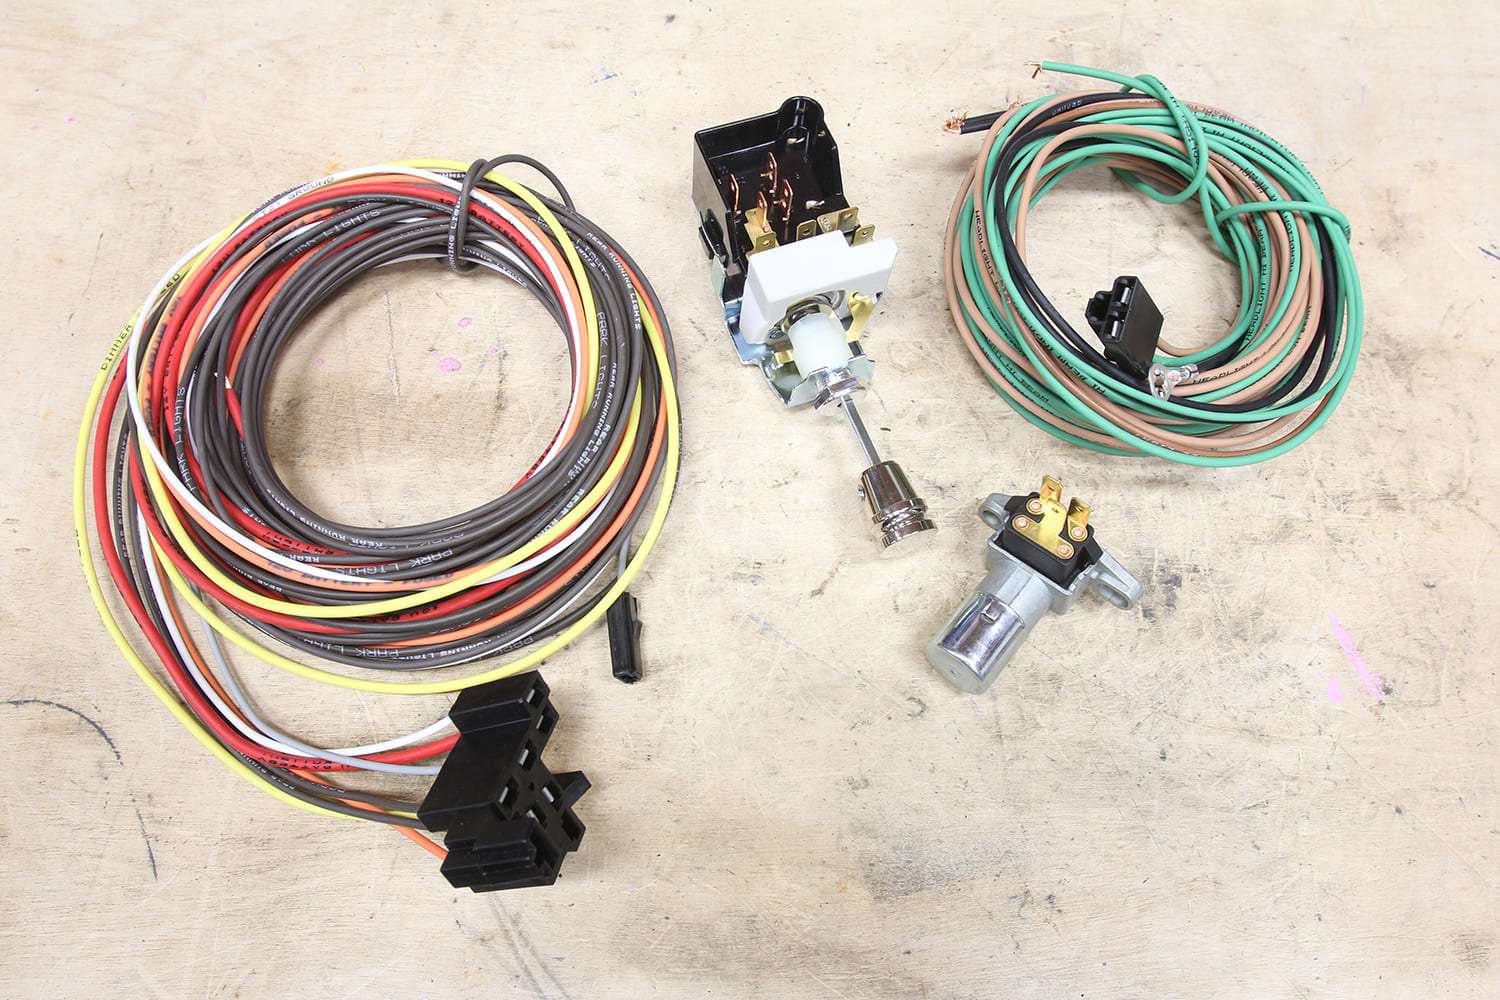
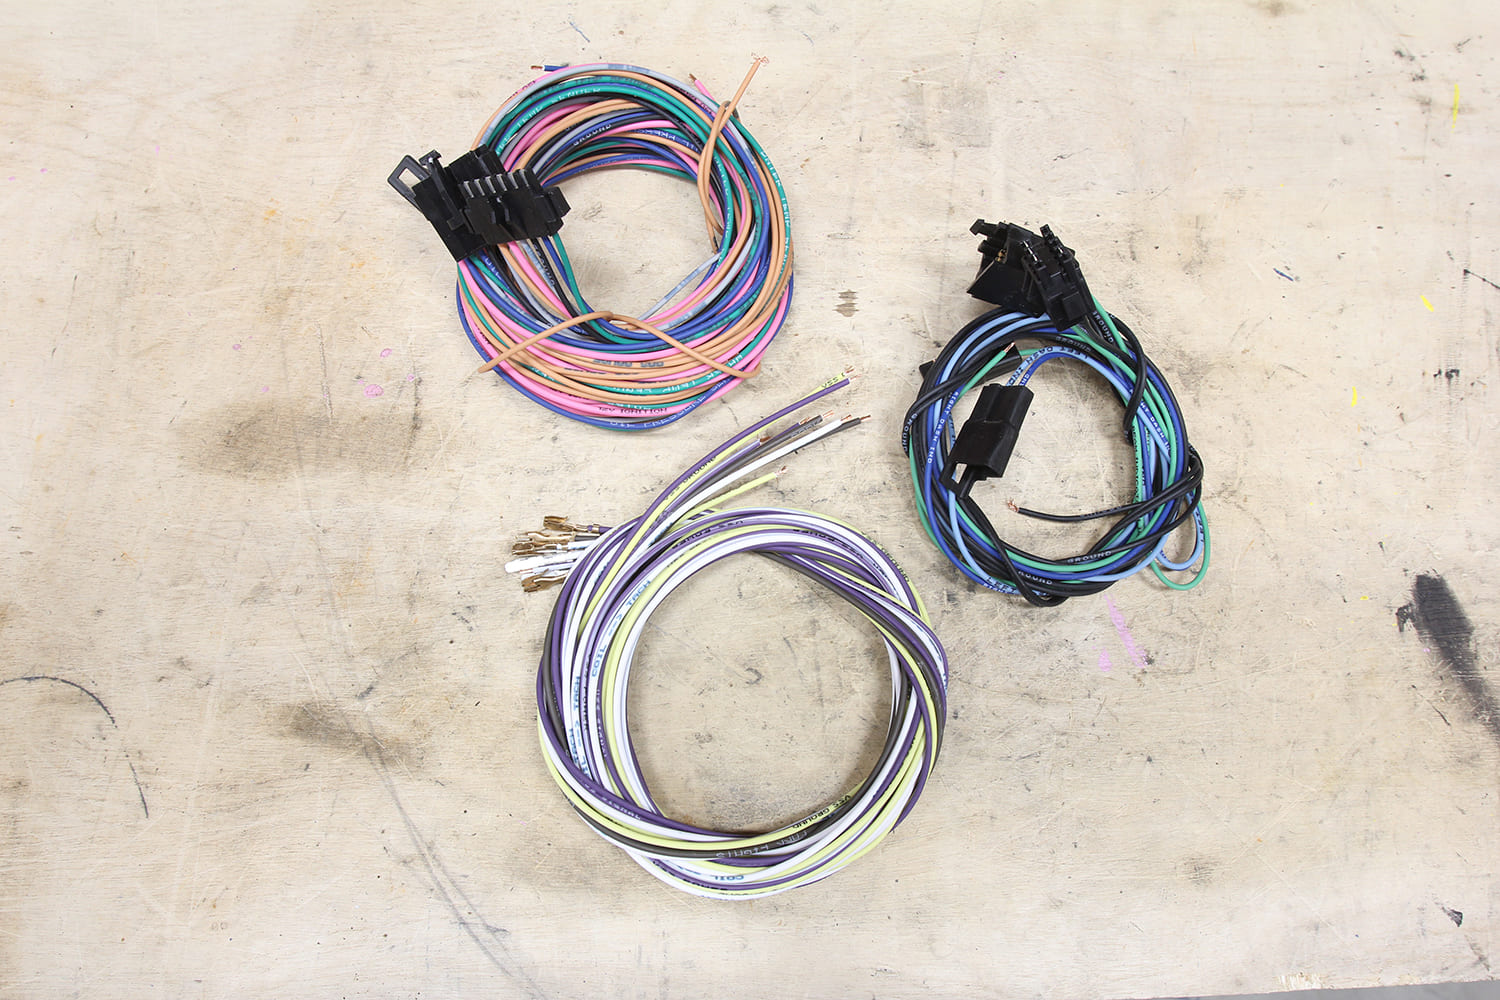
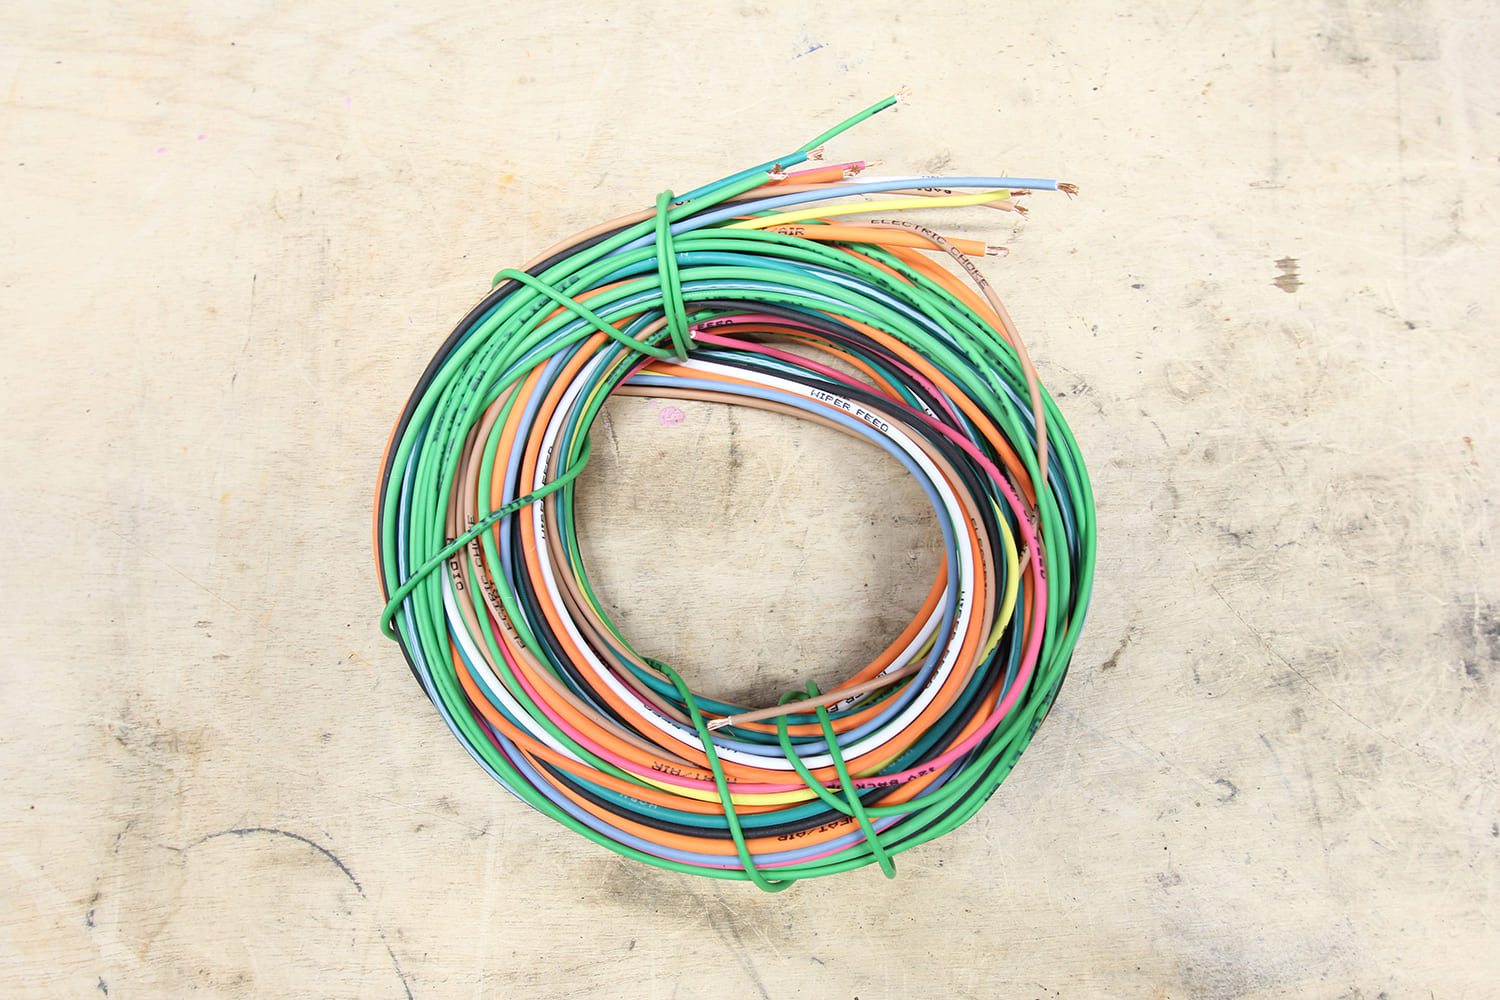
American Autowire’s Highway 22 Plus kit offers 22 circuits, making it capable of handling just about any custom pickup build, but it also offers a handful of additional features. Two preinstalled relays allow for integrated installation of high-amperage draw components, such as an electric fuel pump or fan, negating the need for additional, external relays and wiring. Easy-to-read, labeled GXL wiring is also color-coded in traditional GM fashion and sized to suit modern amperage draw components (power windshield wipers). The composite assembly features a self-locking, screw clamp interface that allows the user to run each wire individually, terminating each circuit as desired. Full-color, tabloid-sized instructions provide the user with a step-by-step process, taking the frustration out of wiring an entire vehicle.
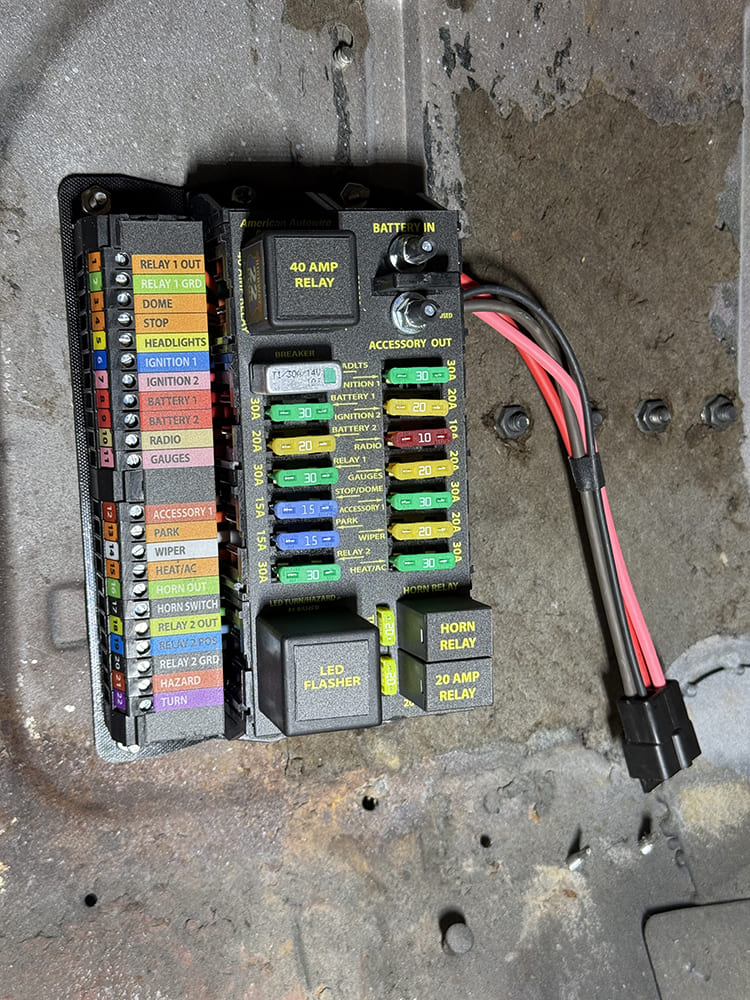
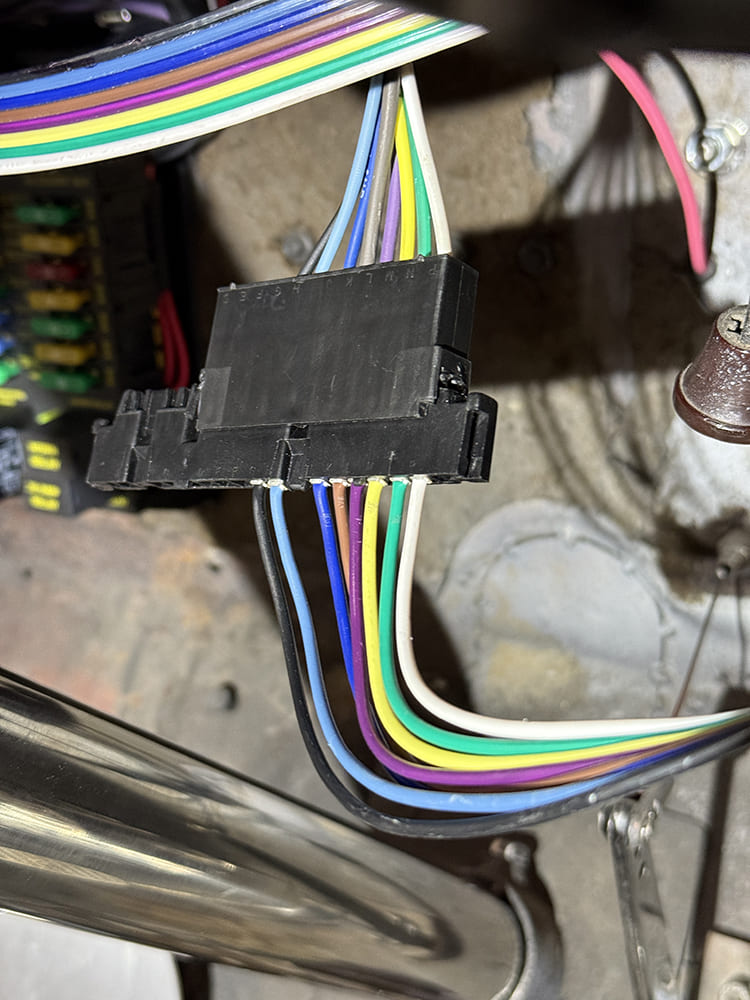
Before we can start running any wires, the fuse panel needs to be mounted. We chose an easy-to-access spot on the driver side interior firewall.
While we can’t cover every tiny nuance of a wiring job in this small space, we’re going to take you through the step-by-step process to showcase how simple and easy it can be to wire a truck yourself. Using a kit like the Highway 22 Plus, the guesswork has been removed with a manner of simplicity added.
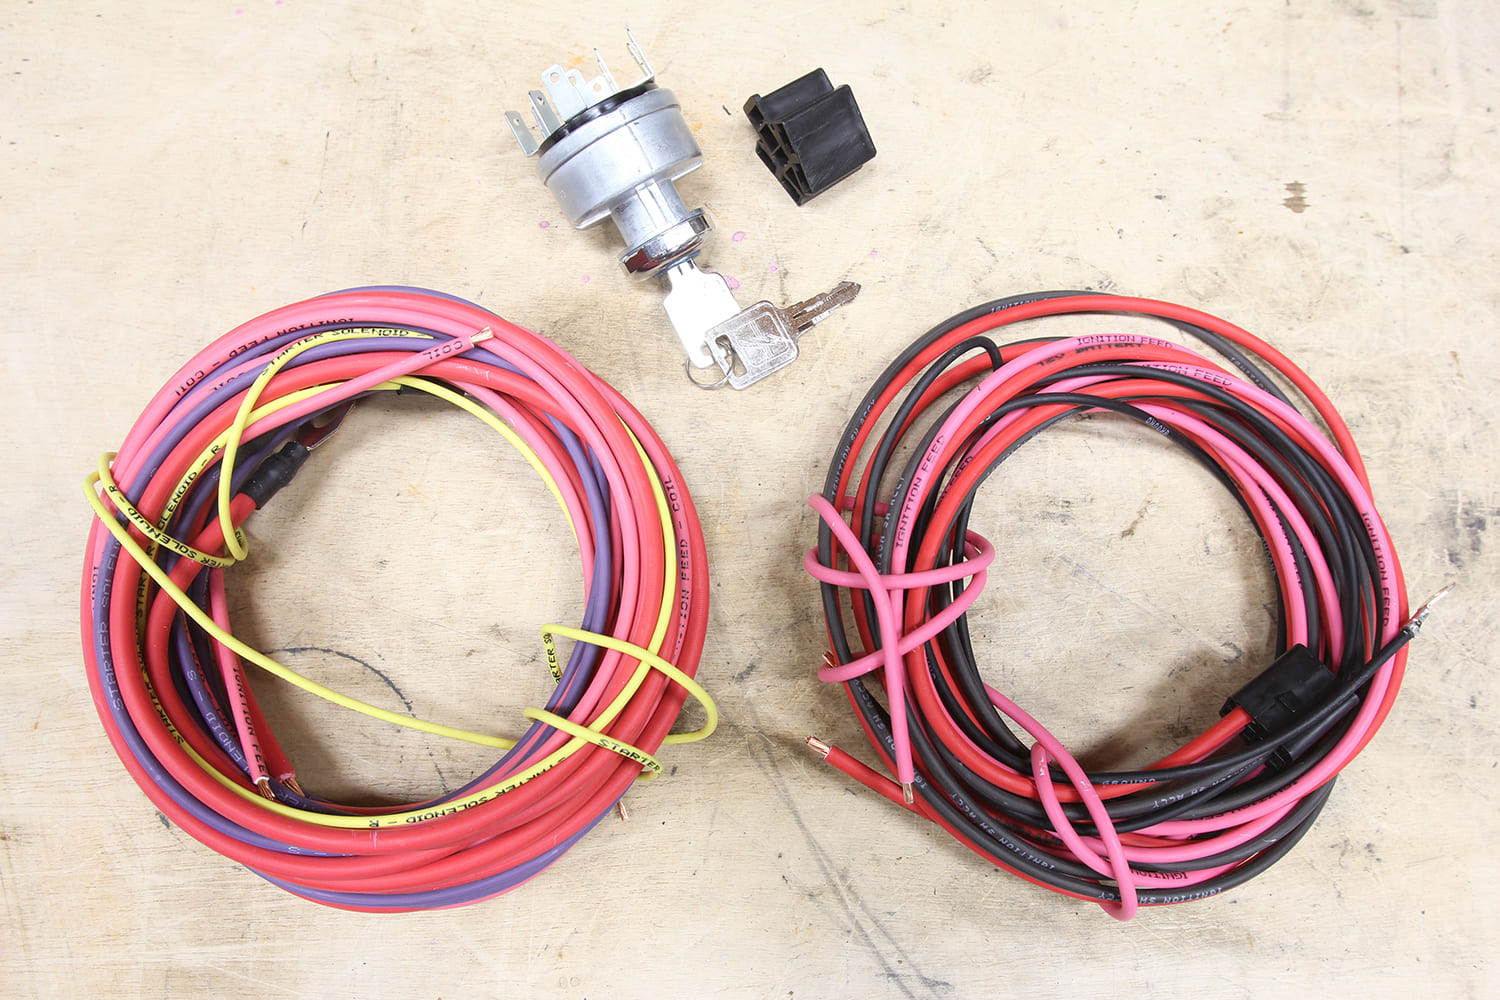
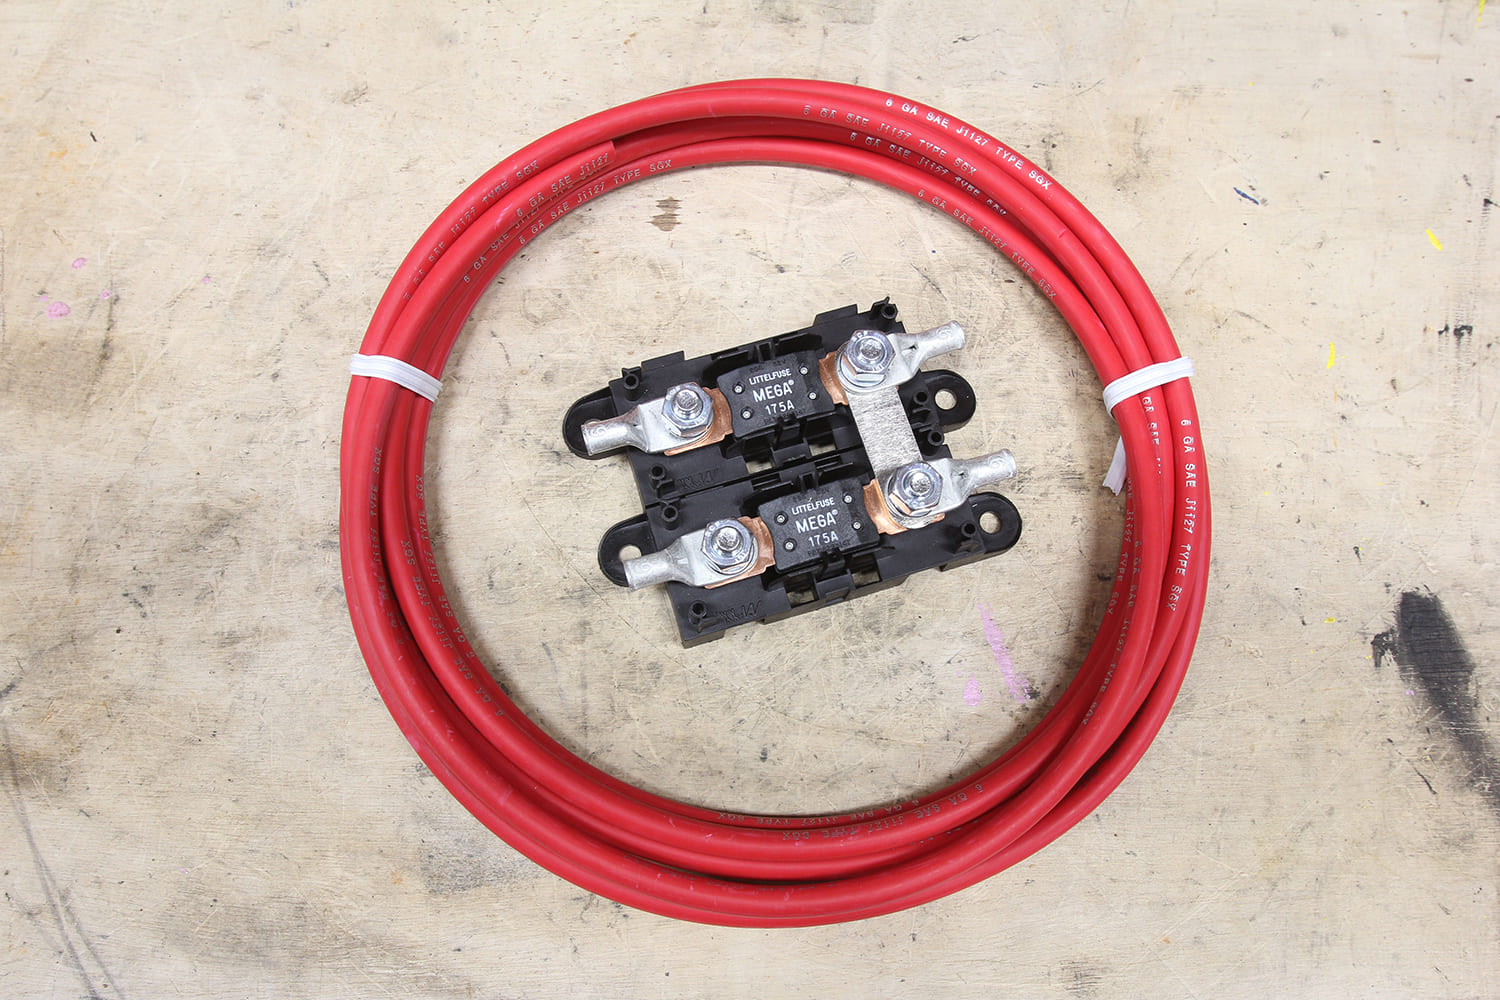
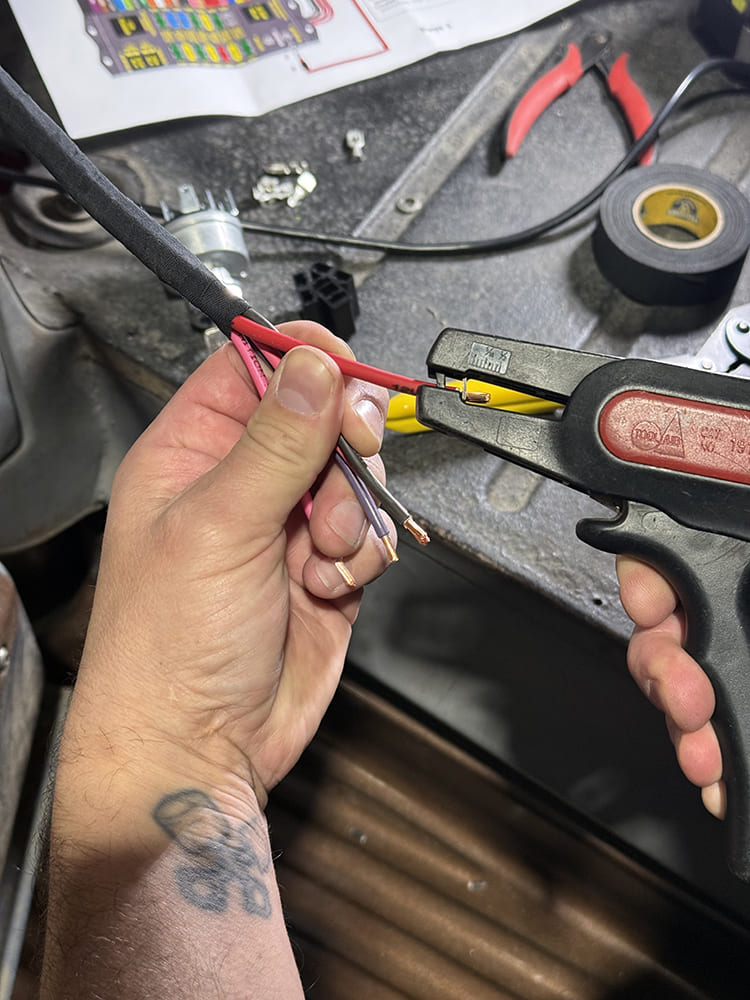
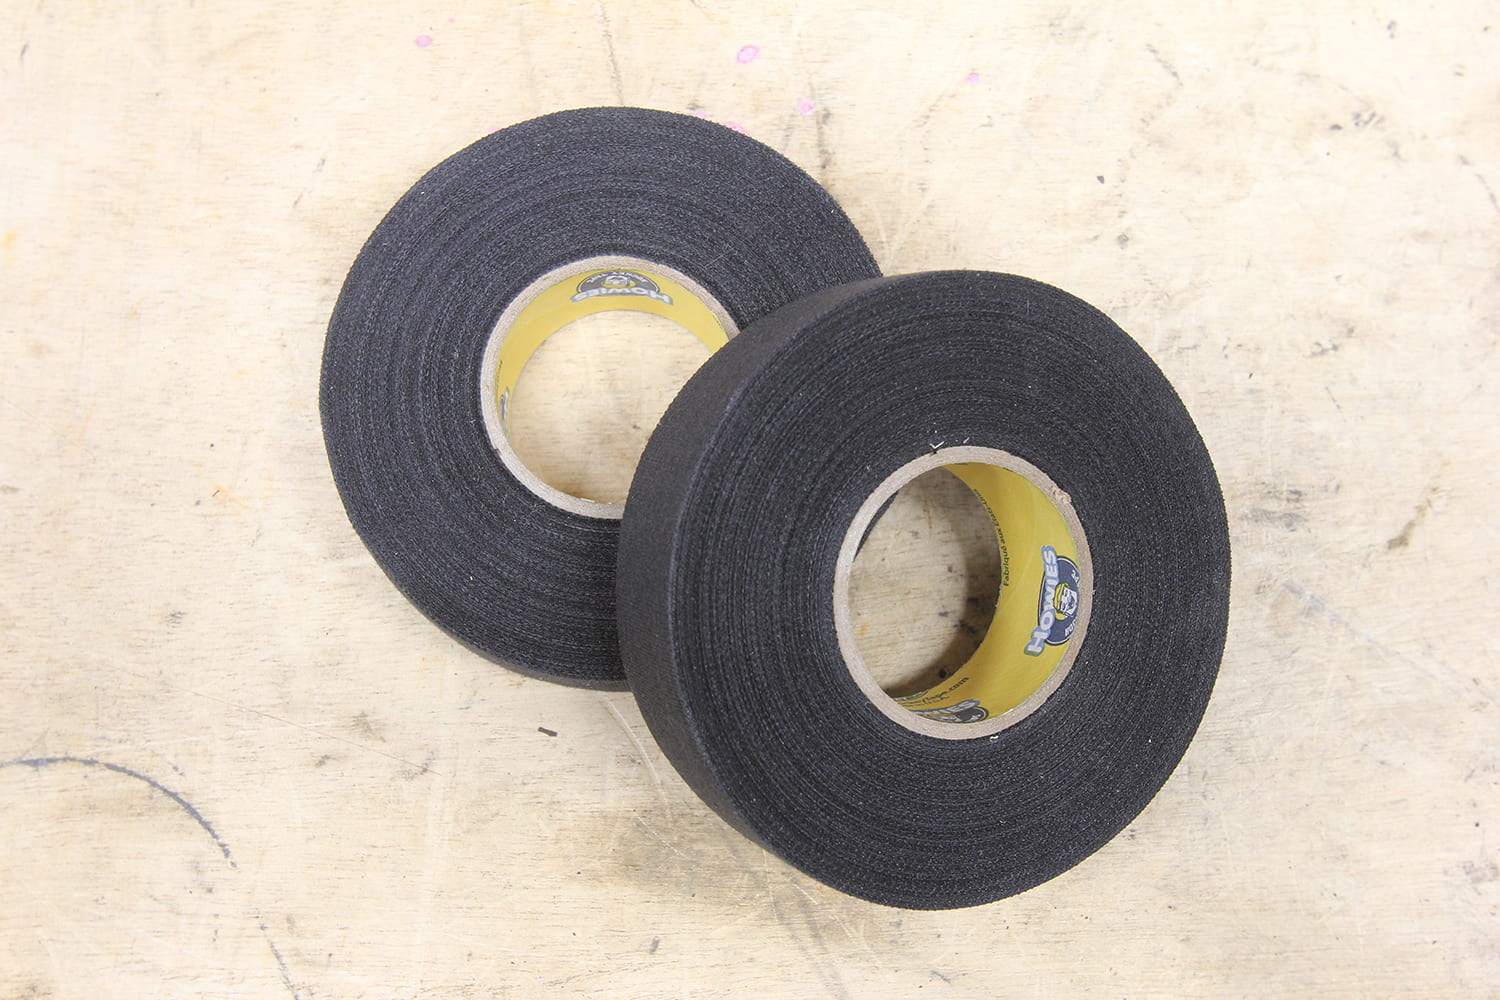
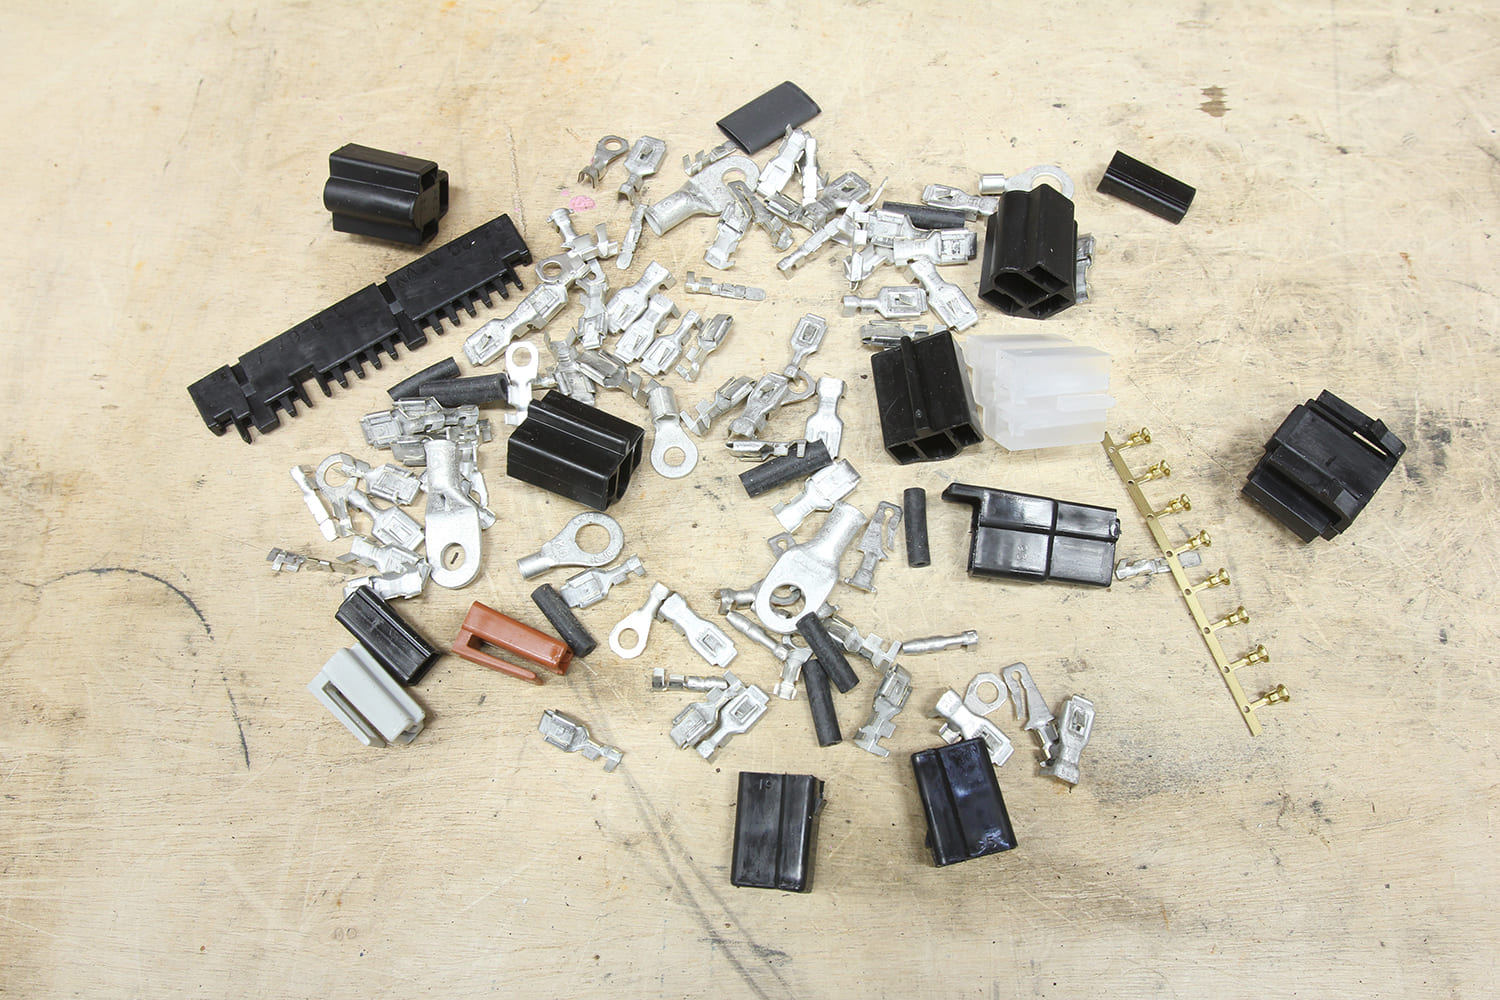
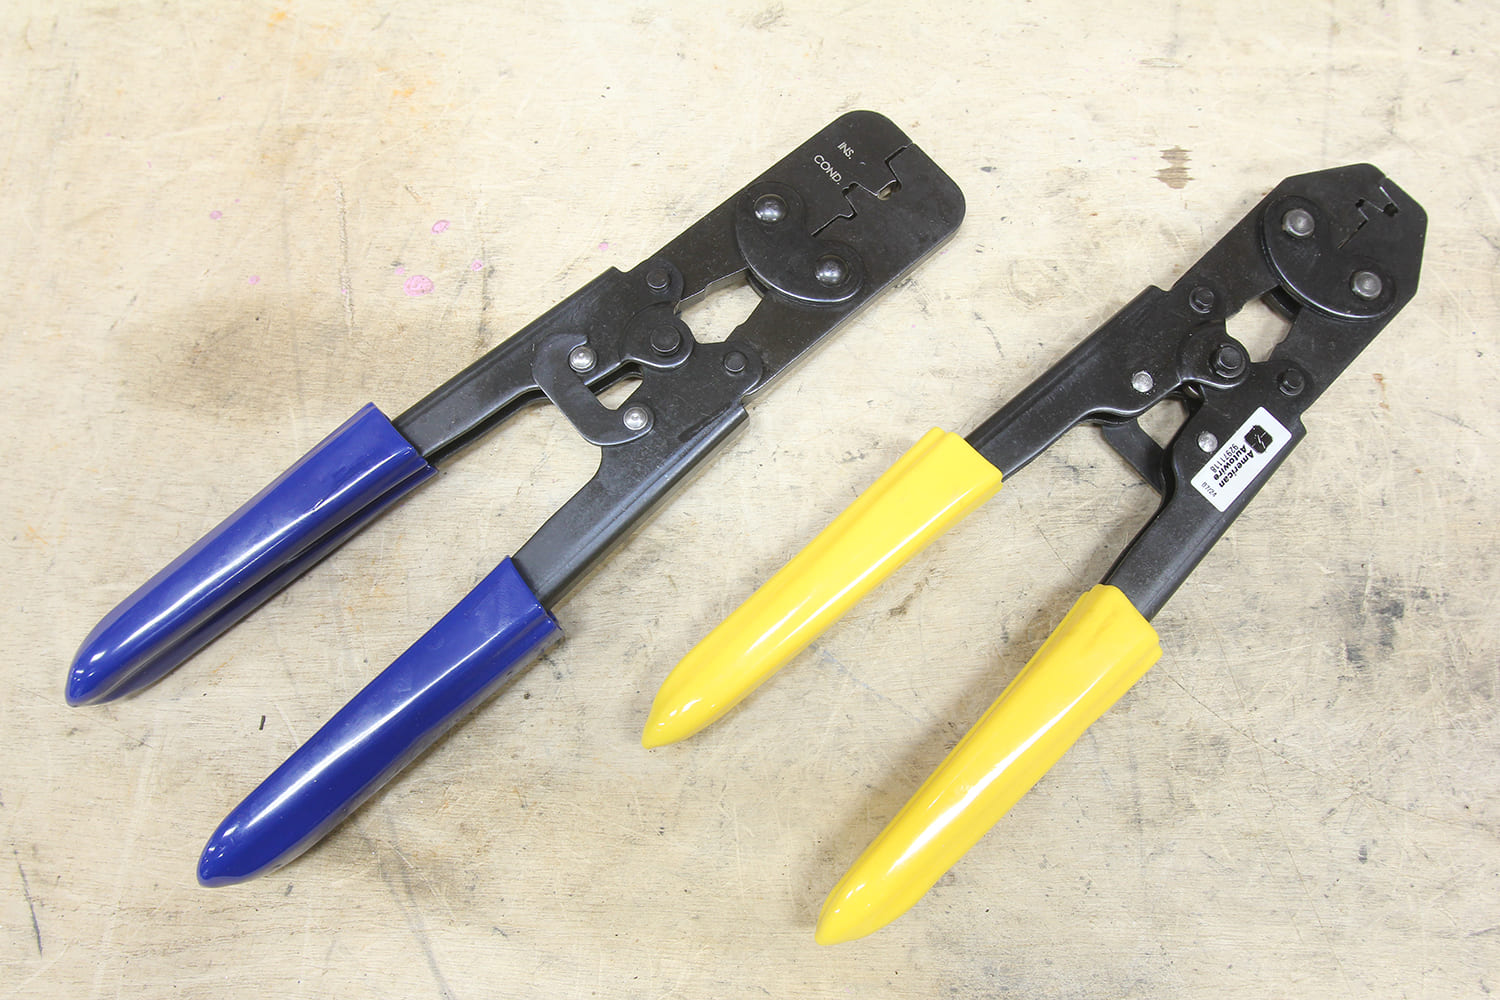
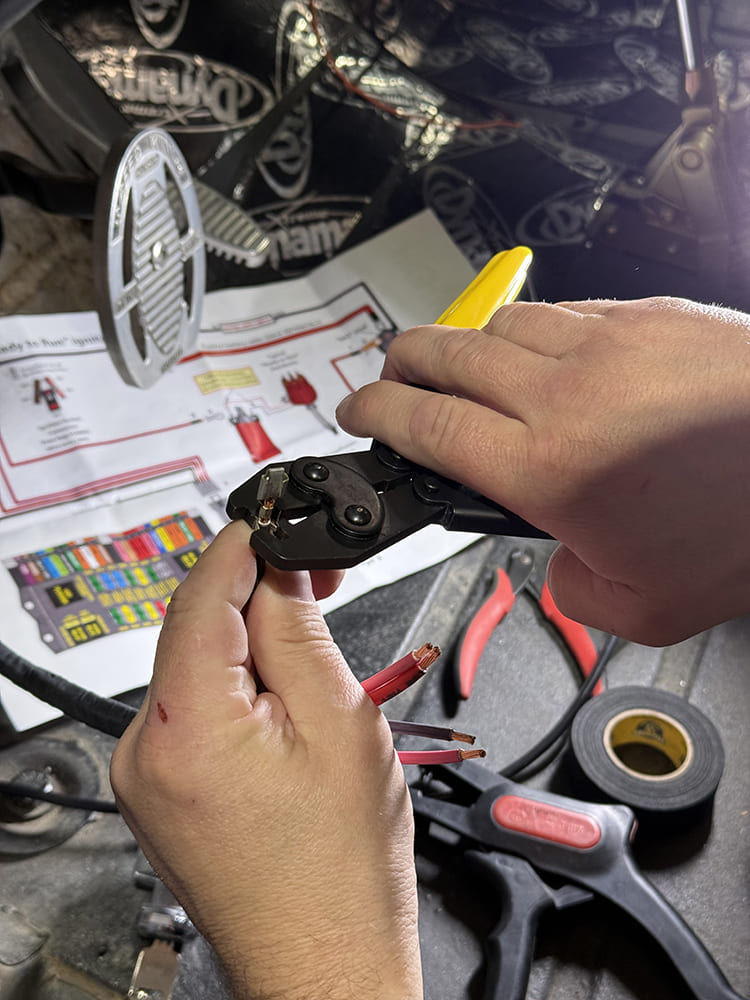
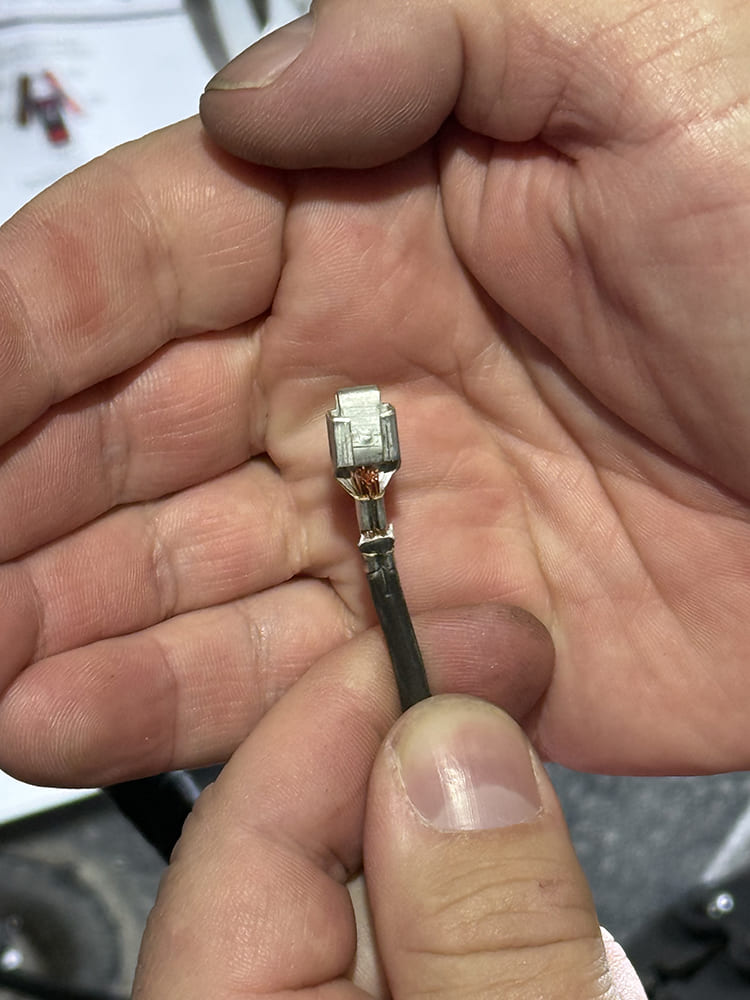
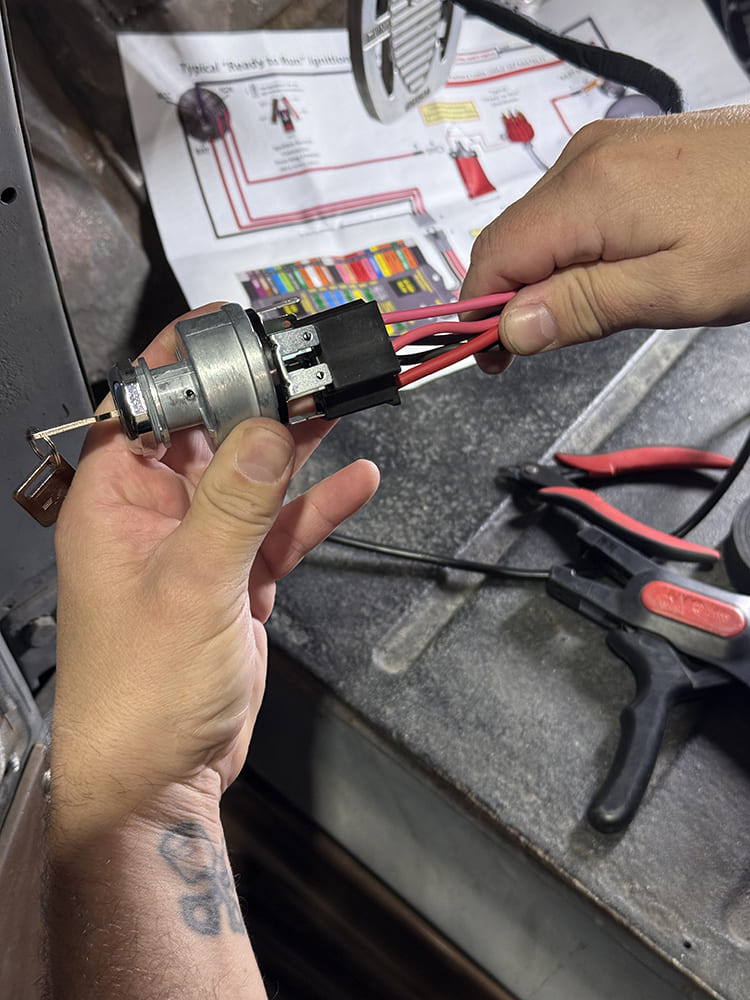
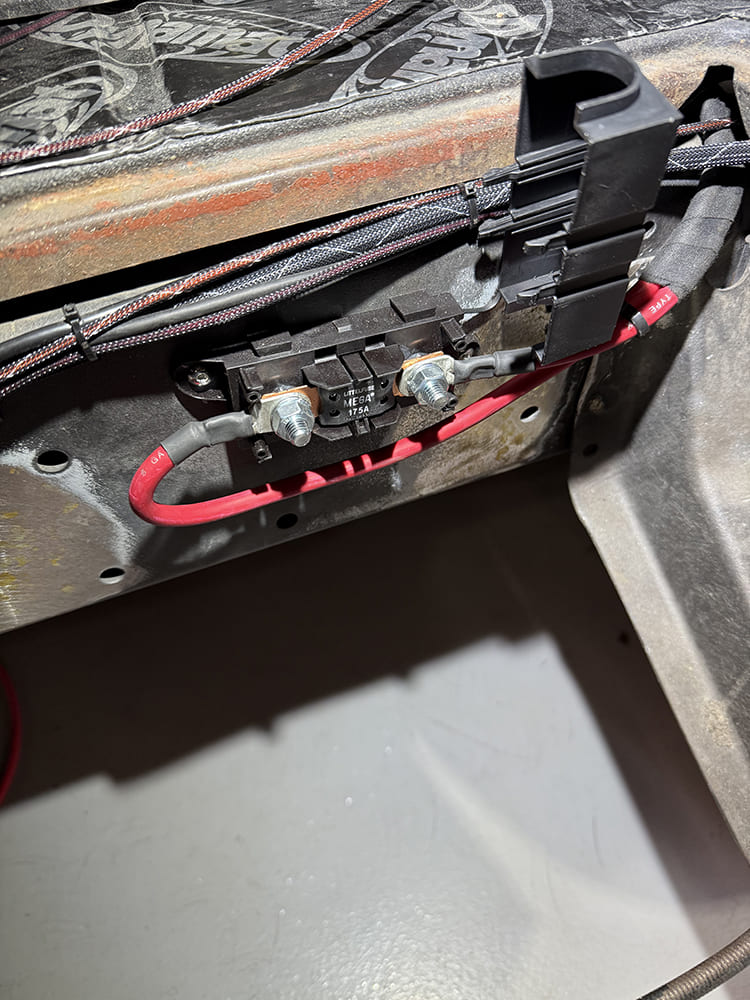
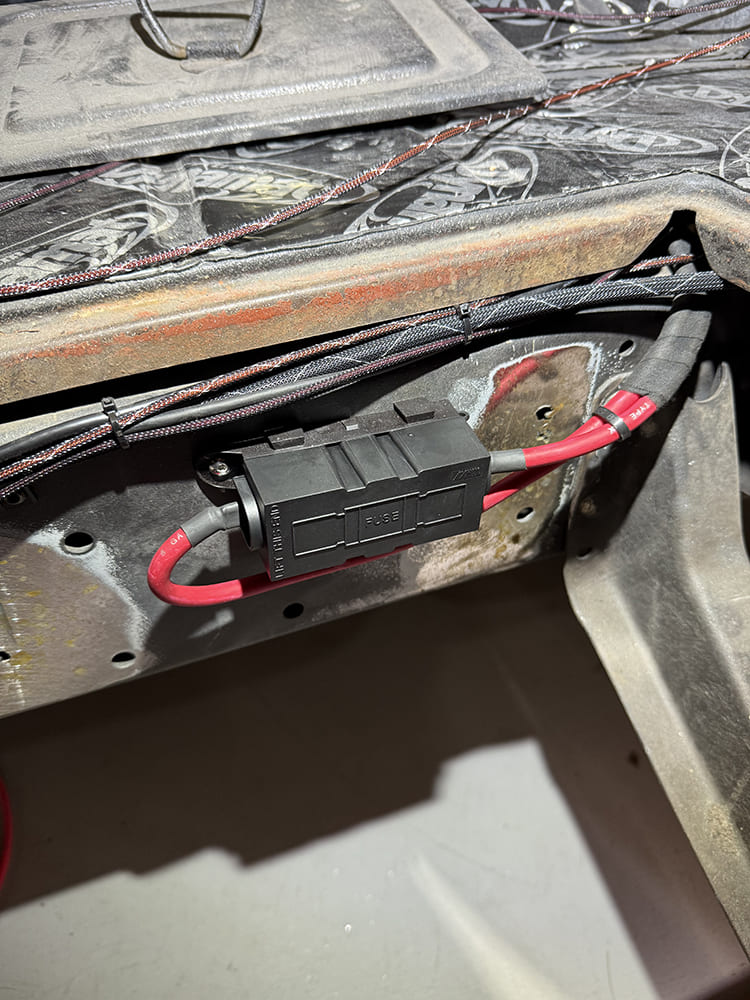
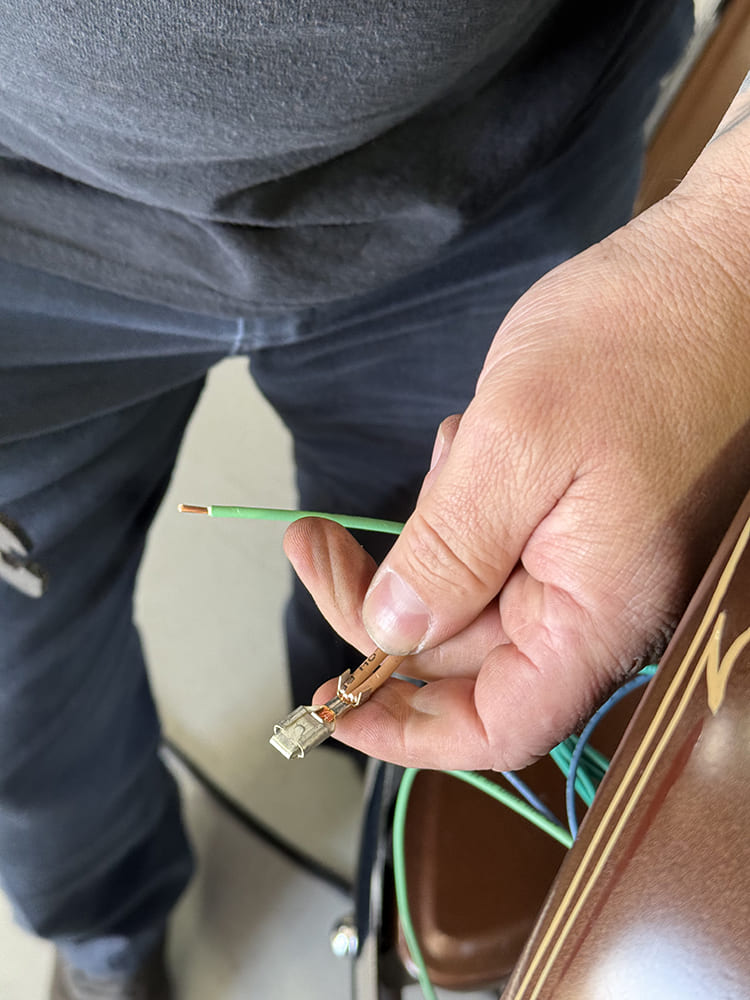
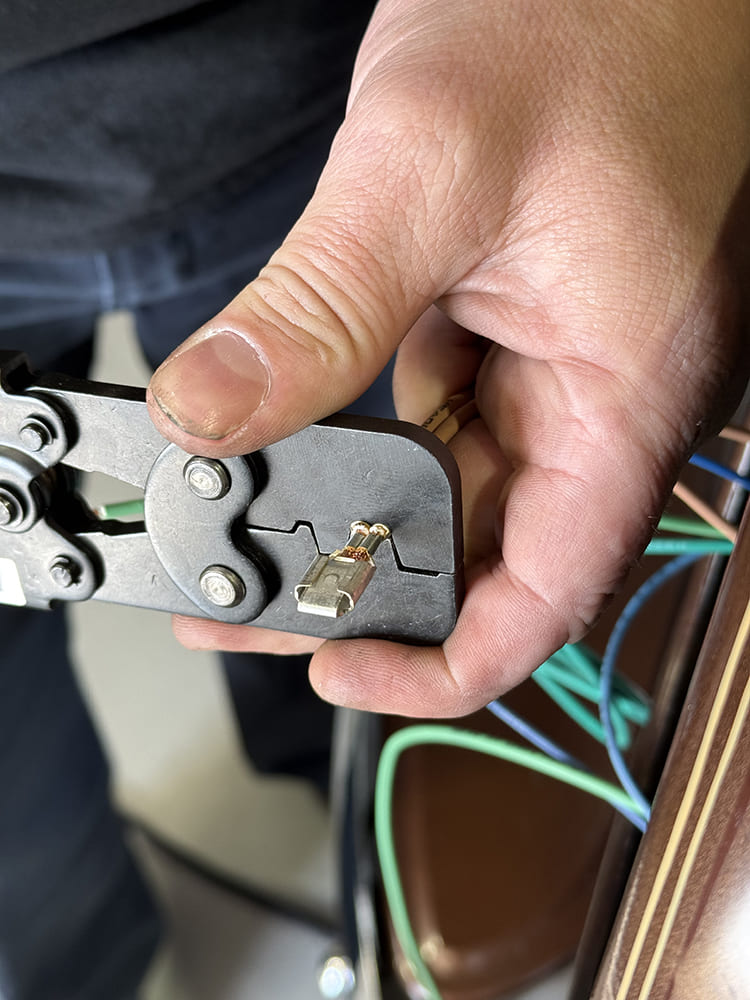
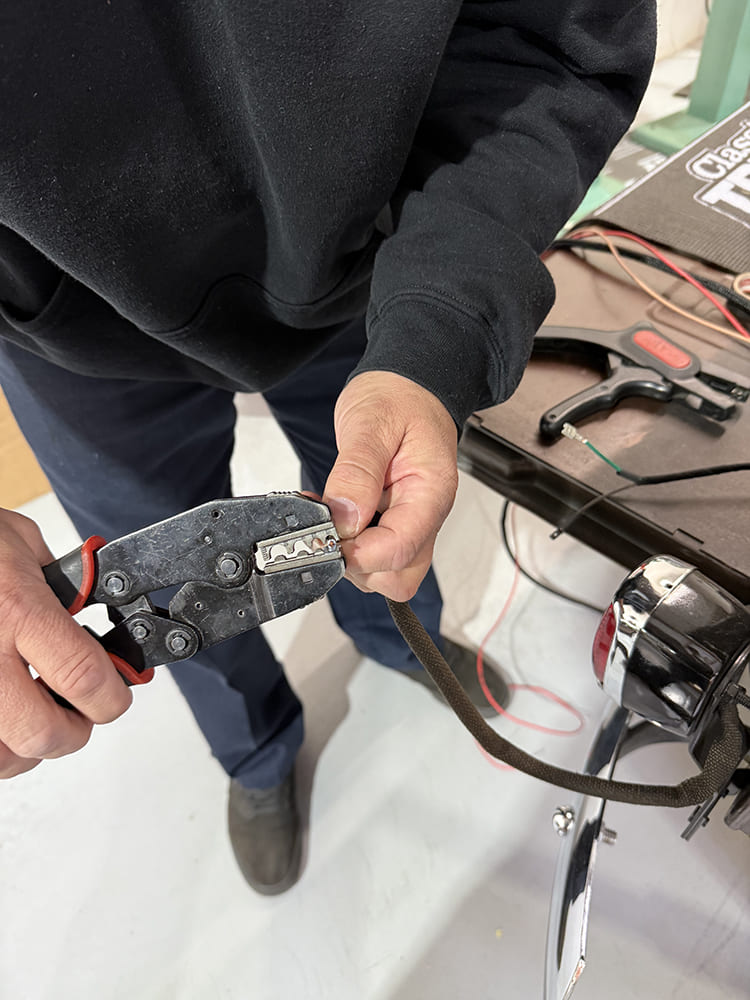
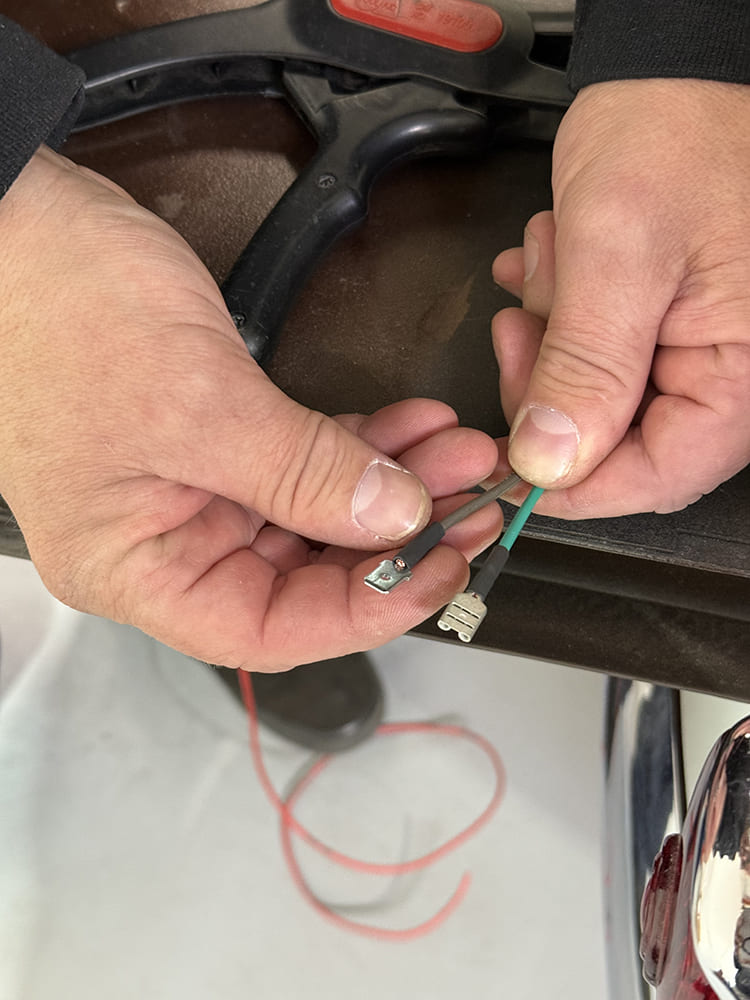
The Ignition Switch and Starter Kit (Bag A) contain the first components we’ll be installing, which consists of a new ignition switch and the wiring to connect it to the fuse panel, ignition, and starter.Also included in the kit is a pair of 175-amp Megafuse boxes and six-gauge wiring that will protect and power the fuse panel.Like much of the Highway 22 Plus wiring kit, the ignition switch pigtail has a connector already terminated at one end with a length of wires that will need to be cut-to-fit and terminals crimped. Here, the pigtail (IGN, ACC, and BATT) has been connected to the fuse panel and taped together, along with a purple (SOL) wire and an additional pink (IGN COIL) wire. The terminated red six-gauge wire has also been attached to the “Battery In,” which will provide power for the entire vehicle. This wire and the purple wire are taped together and routed across the truck toward the starter.As mentioned, the ignition switch pigtail is unterminated at the switch end and needs to be cut to length, wires stripped, and terminals crimped in place.As the individual wires in our harness are grouped together in separate branch circuits, the wires are taped up using cloth adhesive tape (PM485-007), also available from American Autowire. This provides a clean way to finish the harness, that results in an OE look.There are a variety of different terminals provided in the Highway 22 Plus kit that will need to be crimped to their respective wire(s) as we make our way through the wiring job.Properly crimping those terminals is essential, thus, using anything but the proper tool is not an option. Pictured here are two crimping tools offered by American Autowire (PN 510587) that will tackle any of these open-barrel type terminals.Crimping an open barrel terminal is pretty straightforward once the wire has been properly stripped and inserted into the terminal. These terminals typically require two different crimping processes to secure not only the bare wires, but also the insulation of the wire. This second process provides strain relief for the wire/terminal connection, ensuring an even more reliable connection.
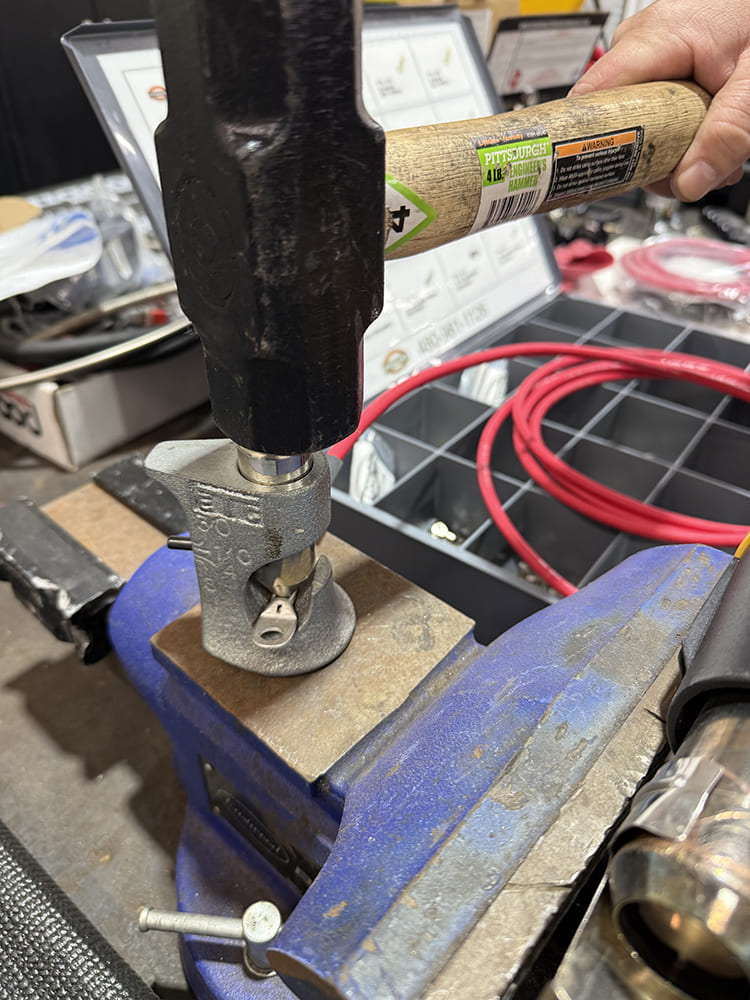
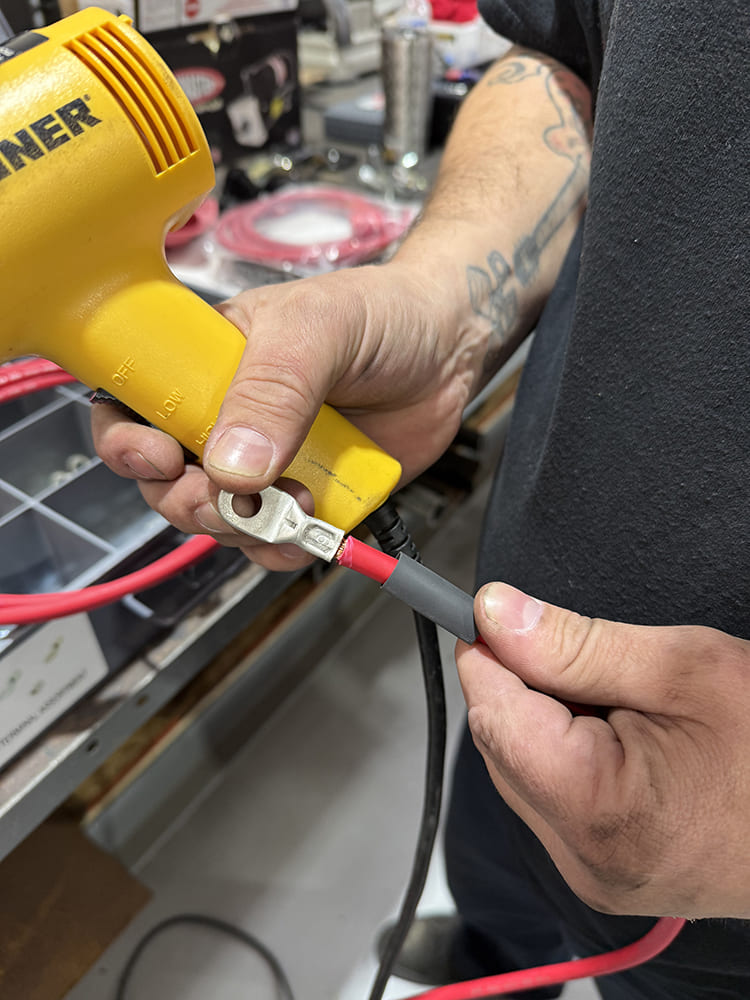
With all the terminals for the ignition switch wires crimped in place, each wire is installed in their respective space in the ignition switch connector. The connector is then firmly attached to the switch, providing a very secure final installation; one that won’t pull off the back of the switch without some serious effort.Crimping larger wires, like the six-gauge wire that will be providing power to the fuse panel, requires a different type of crimping tool. Here, a hammer crimping or battery lug tool is being used to crimp a closed-barrel eyelet terminal to that larger wire.After crimping, a section of heat shrink tubing is applied over the connection and shrunk to fit using a heat gun.We opted to mount the Megafuse boxes where the battery was originally located on the ’48. This not only provides close proximity with the starter but also provides a protected location for the fuses and easy access via the battery door on the floor of the cab. Here, the wire running from the BATT terminal on the starter has been attached to one end of the Maxifuse box, while the other end has been attached to the wire previously ran from the main BAT terminal on the fuse panel.
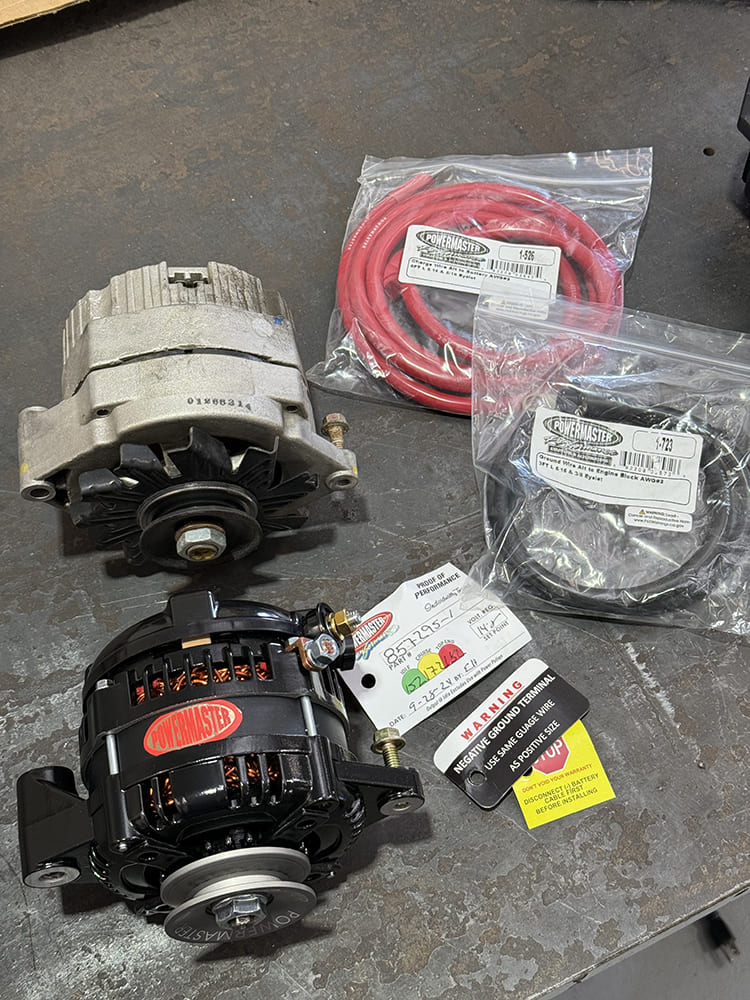
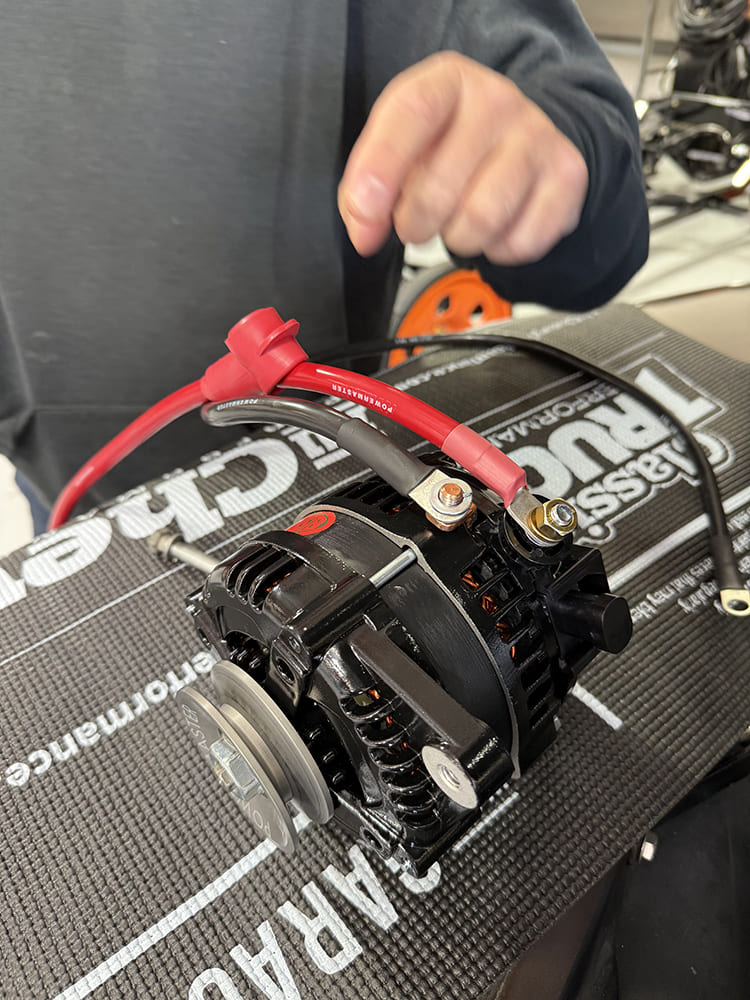
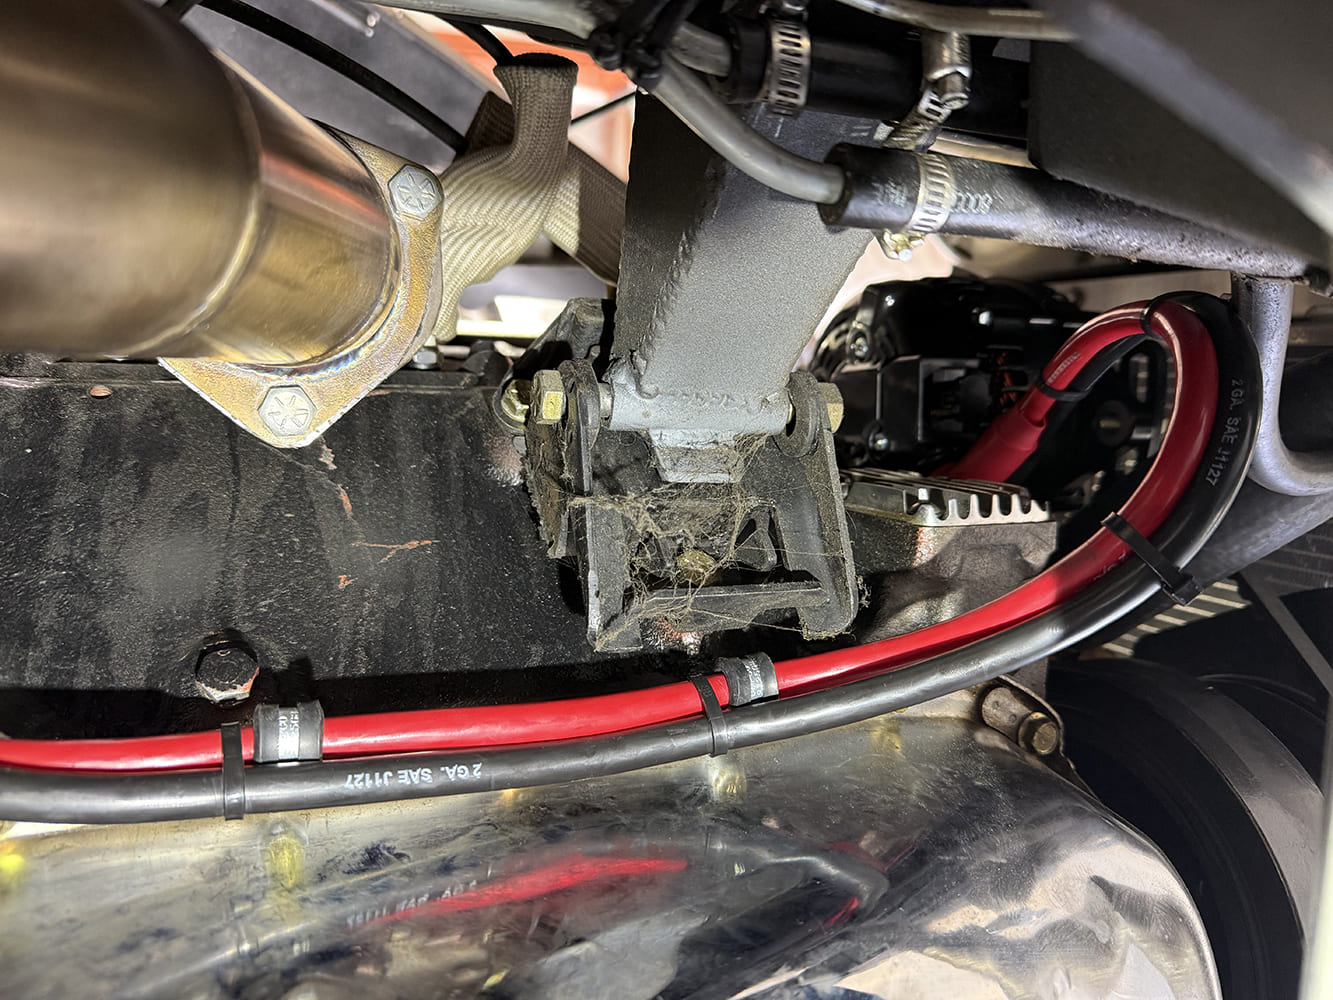
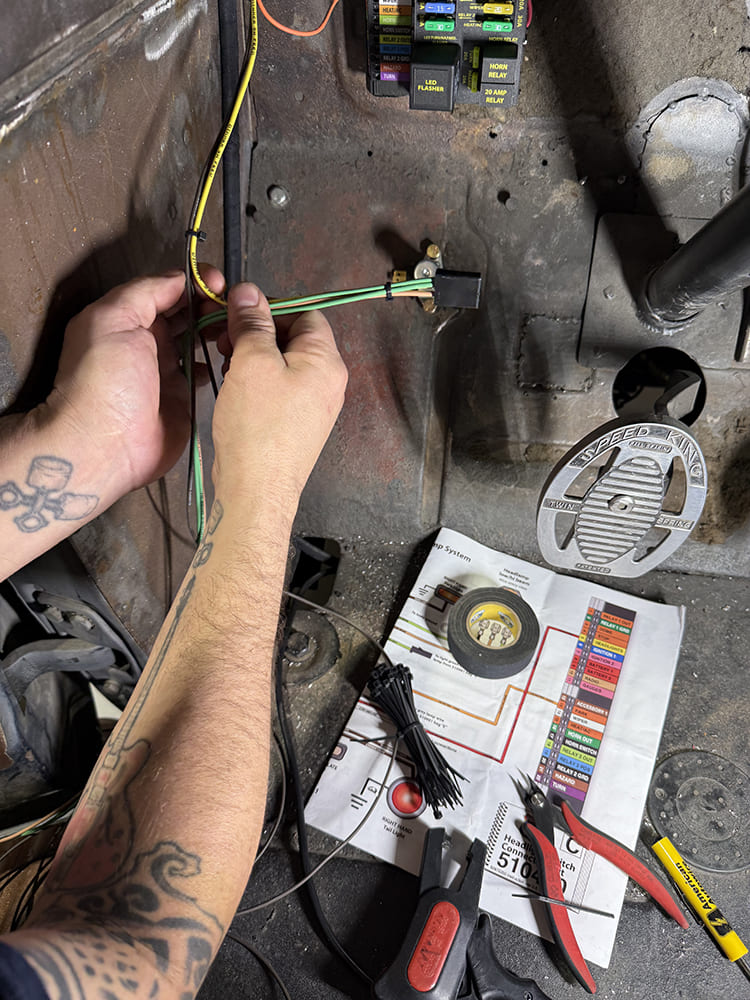
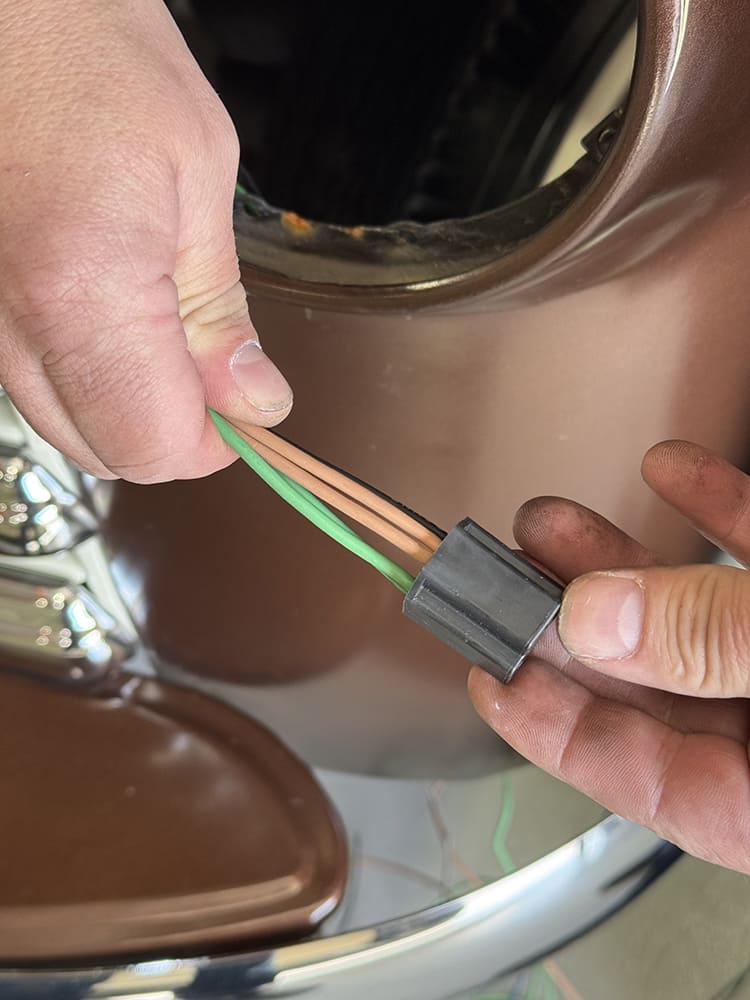
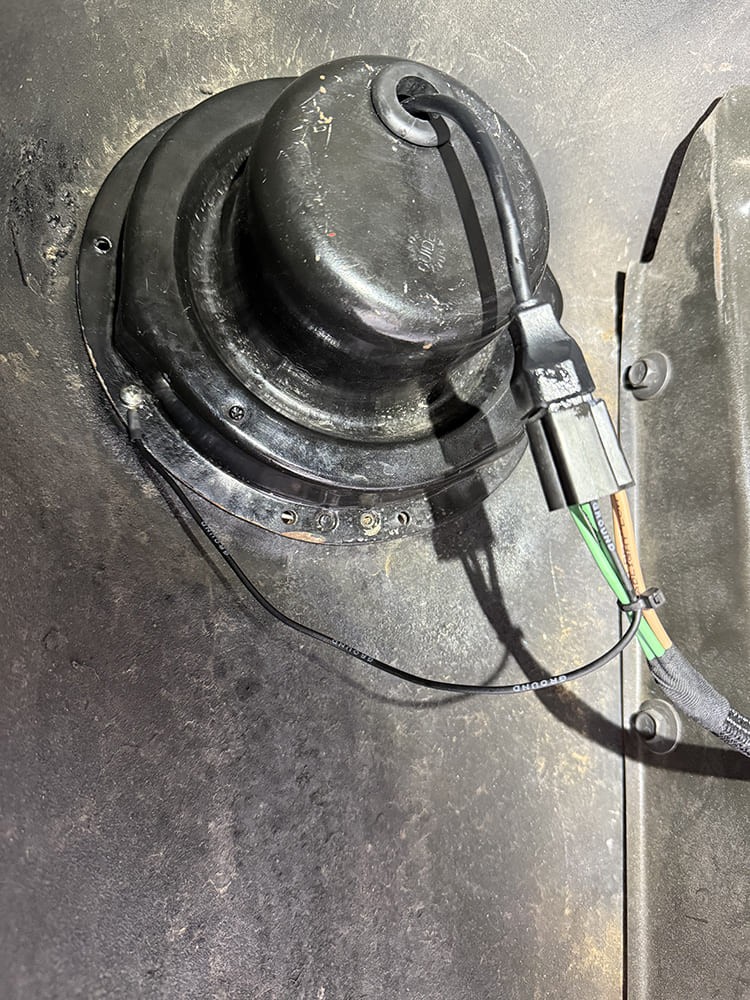
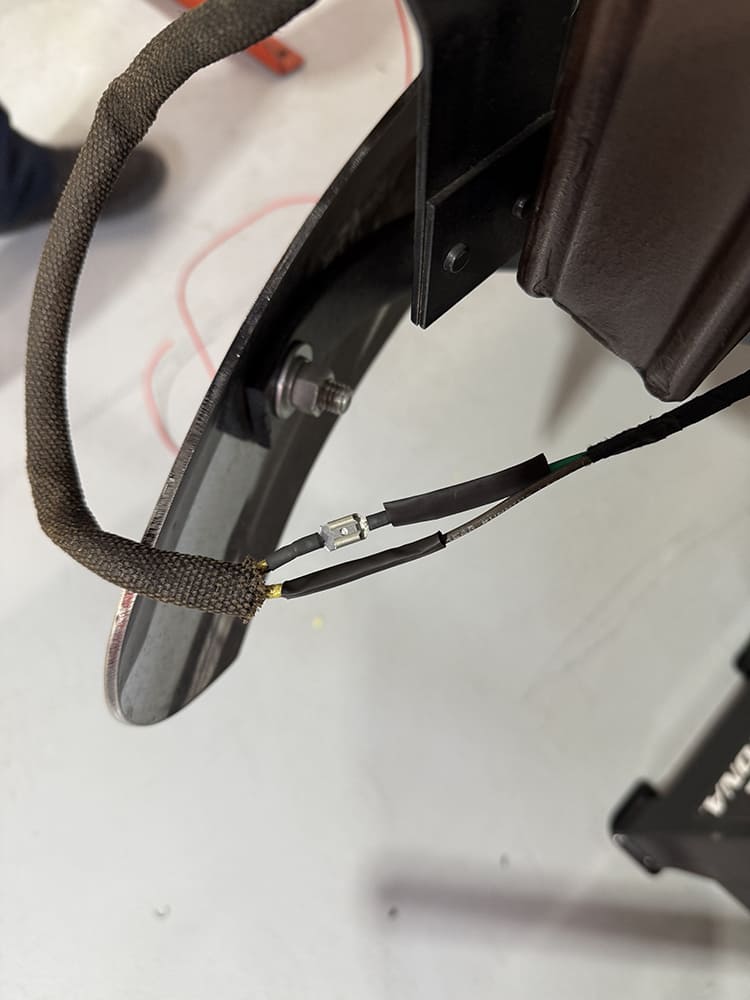
The next step in the installation instructions provided with the Highway 22 Plus kit is the alternator connection kit. Since the alternator in our ’48 was suspect, it was decided to swap it out for a higher-amp unit from Powermaster Performance, so we’re going to deviate ever so slightly from the instructions. Capable of providing up to 182 amps on the top end and 152 amps at idle, this alternator is perfect to future-proof the ’48 when it comes time for additional accessories. In addition to the alternator, we also opted to pick up a pair of 2ga charge wires from Powermaster (PNs 1-526 and 1-723) to ensure that our electrical system is functioning at its optimum capability.The power post is common amongst most all one-wire style alternators, but where the Powermaster unit differs is the provided ground lug, ensuring that the alternator is properly grounded to the vehicle, ensuring maximum charging.Safe, secure routing of the alternator’s charge wire is an absolute must.Up next is the Headlight Switch Kit (Bag C). Note the provided headlight and dimmer switch, included in the Highway 22 Plus kit in addition to the terminated harnesses for both.There are two wires coming from the headlight switch harness that need to be attached to the fuse panel. These are the 12V BATT feed for the headlights and the 12V BATT feed for the park lights circuit. The rest of the wires will continue to their respective loads.Moving down the firewall, we find the dimmer switch. Here terminates the yellow dimmer switch feed wire coming from the headlight switch. This provides power to both the high- and low-beam headlights. The brown and green wires coming from the dimmer switch will terminate at the low- and high-beam headlight connectors, respectively.
Up at the front of the truck, the headlight harness has been routed, taped, and clamped securely under the inner fender, and we’re ready to terminate each wire. Since we need to power both sides using one wire, we’re going to combine two wires on the driver side for both the high- and low-beam circuits using a provided double-open-barrel terminal, crimped using the appropriate crimper. This allows us to piggyback the passenger side headlight off the same connector.
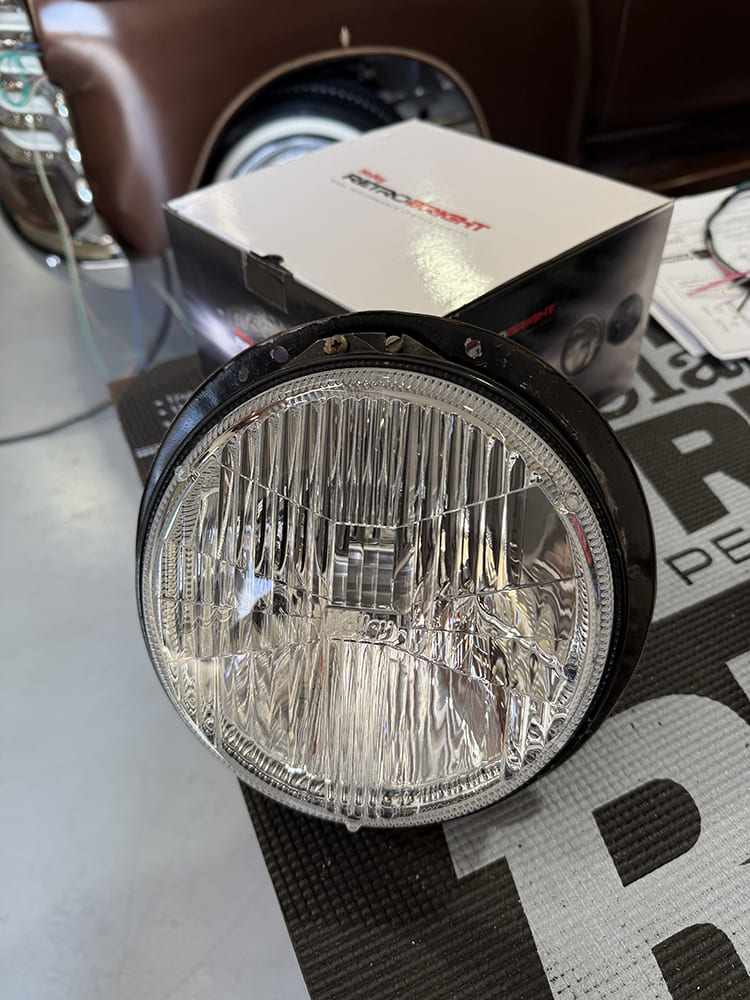
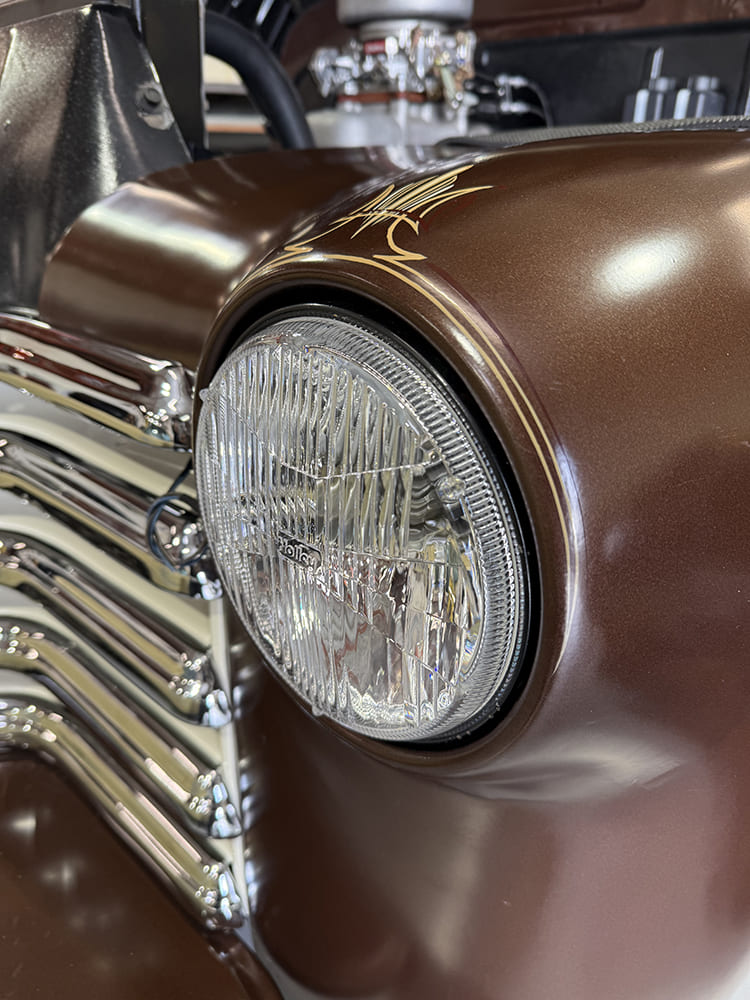
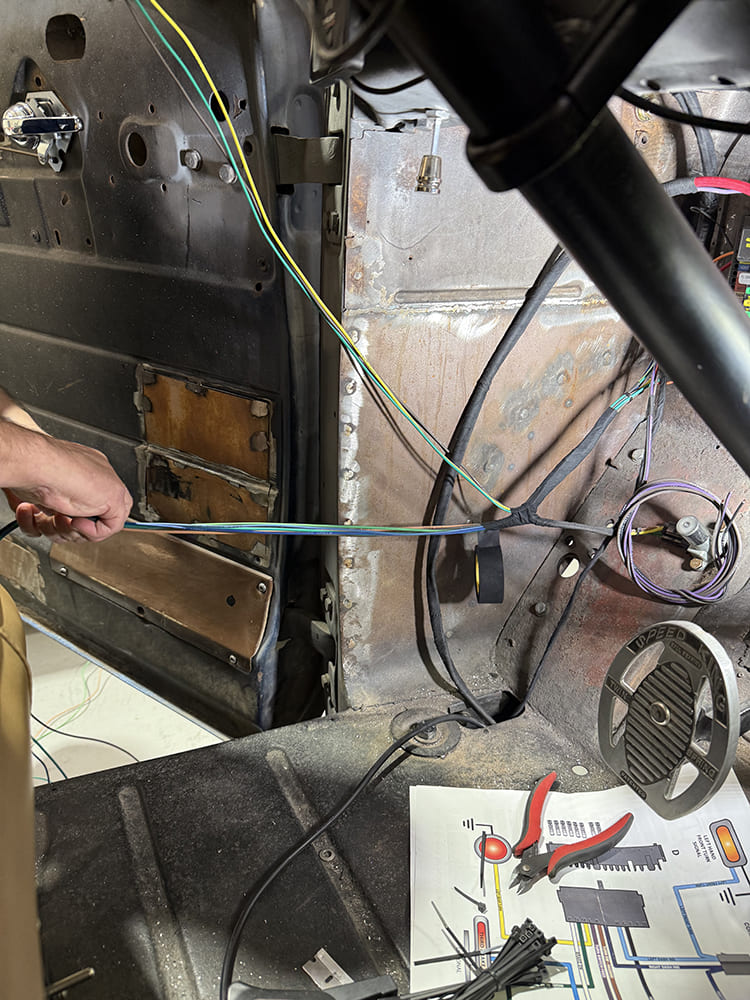
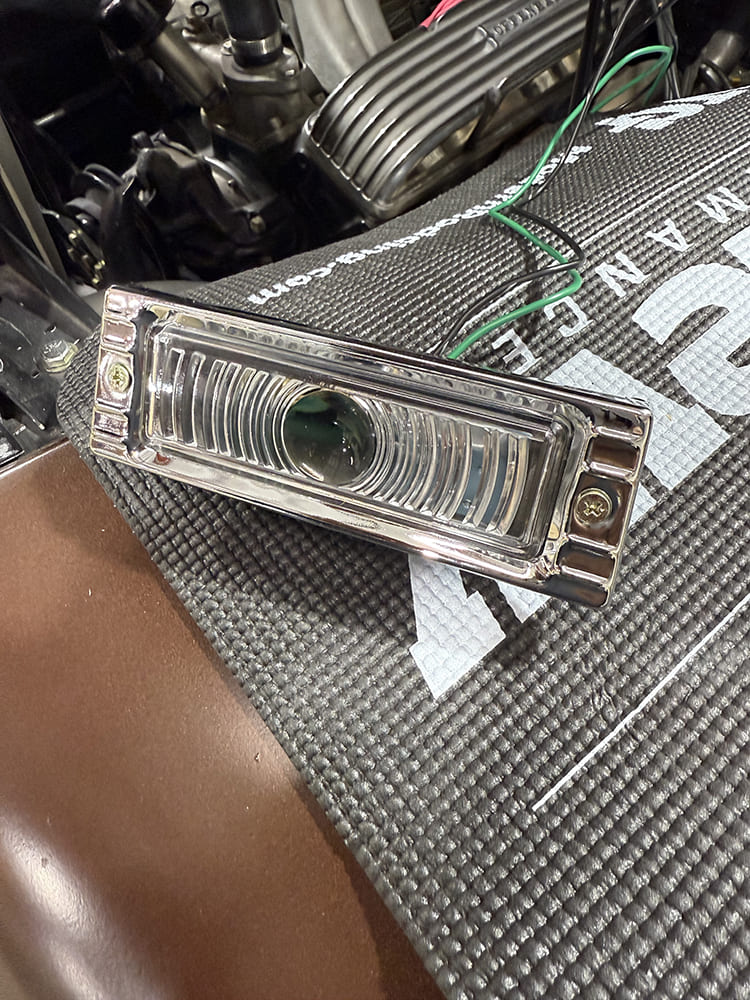
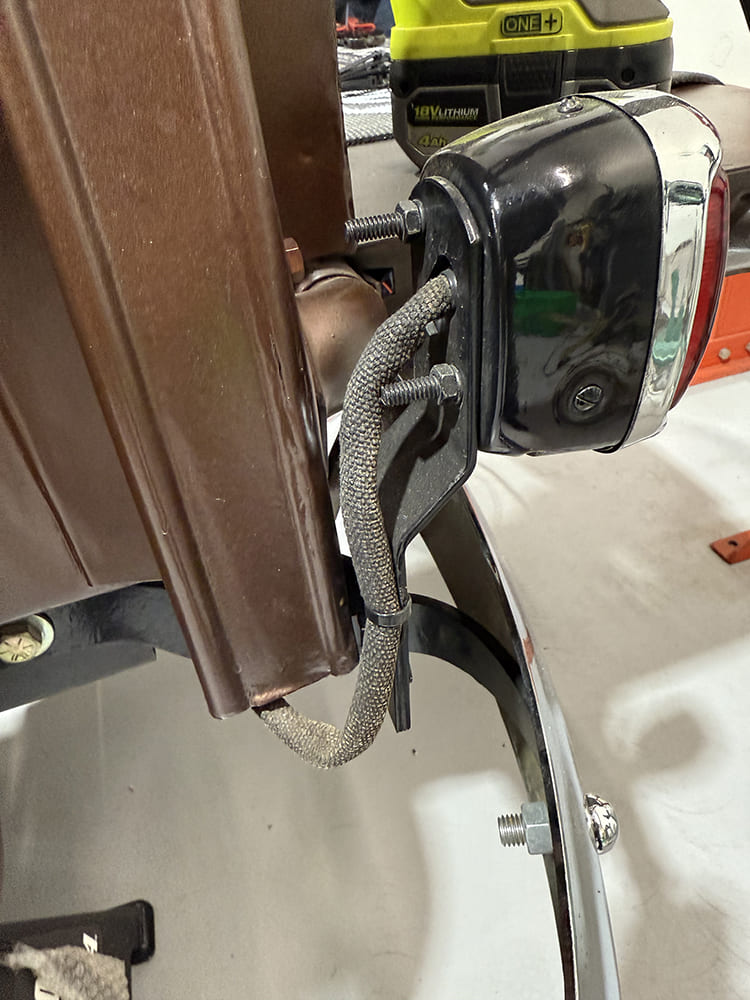
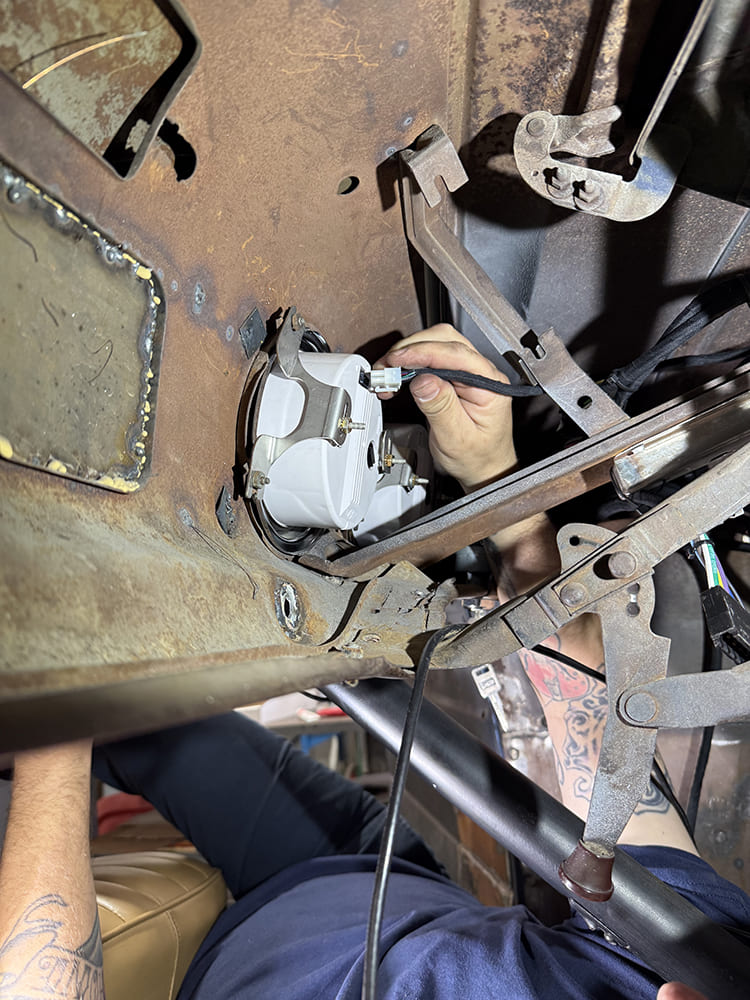
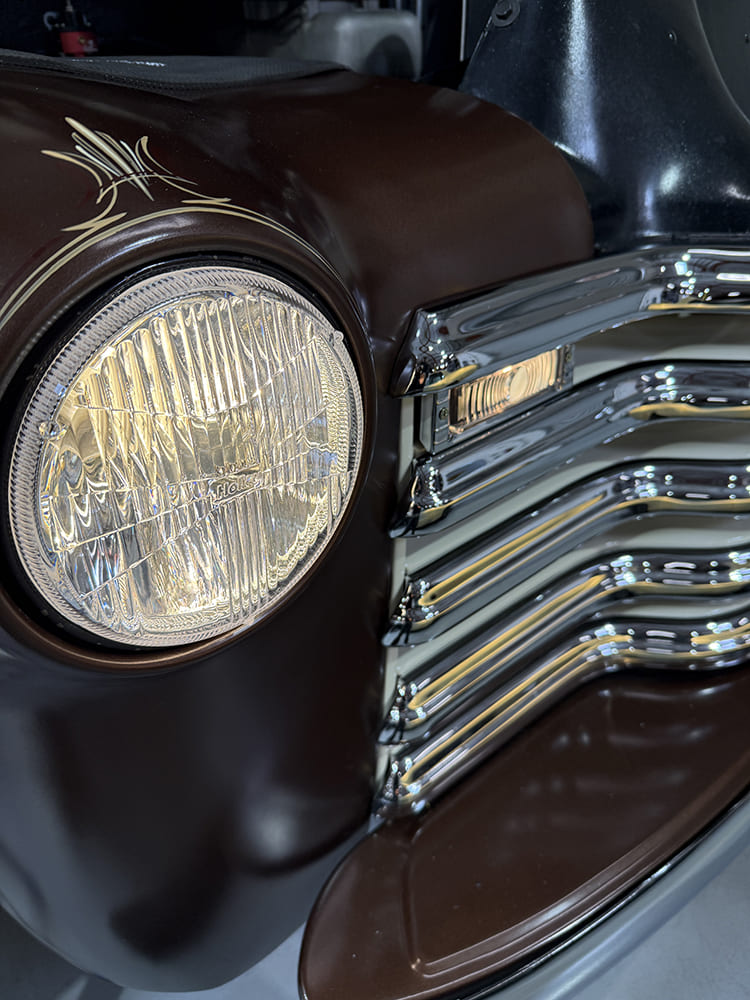
Another upgrade we opted to make was to replace the old sealed-beam headlights with a more modern LED headlight from Holley. These RetroBright LED Headlights (PN LFRB135) feature plug-and-play capabilities, better visibility, and six times longer life. Three times as bright as original headlights, they also create less heat and use less power than similarly powered bulbs, all while retaining a traditional, sealed-beam appearance.The terminated headlight connector plugs right into the pigtail coming off the backside of the Holley RetroBright LEDs.The fluted lens of the Holley headlights look similar to traditional sealed beams, while providing exceptional performance.The Steering Column/Turn Signal Connection Kit (Bag D) is next. This harness is preterminated at the steering column connector, with the other end of the wires terminating at their respective loads/feeds. This harness provides us with both front and rear turn signals and stoplights.
As the harness is routed and taped, it’s split into three sections, one to the front of the truck, one to the rear, and one to the fuse panel to provide 12 V of power feed to the hazards and turn switch and ground for the horn relay. Power from the fuse panel to the brake light switch activates the stoplights via the column connector.Front turn and park light wires will be routed along with the headlight harness to power the park light assemblies.Rear running and stop/turn wires are routed to their respective taillight assemblies, where male and female push-on terminals are crimped in place. Note that for these closed-barrel terminals a different crimping tool is used. Using different connectors ensure that if the taillight is ever disconnected, the proper circuits can be reattached without question.
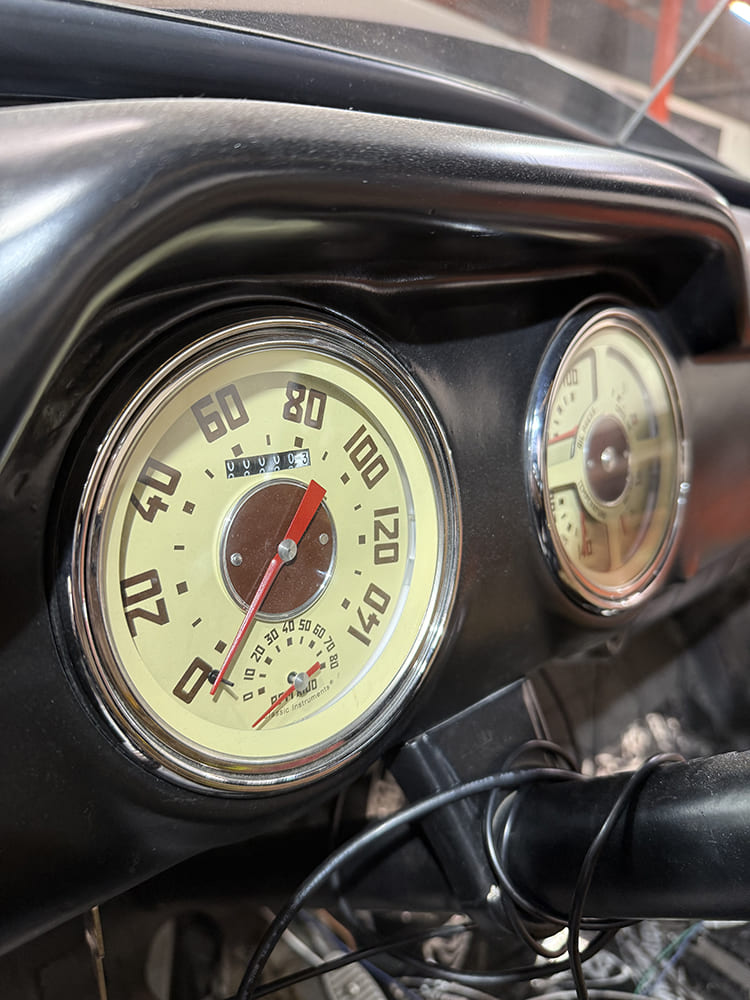
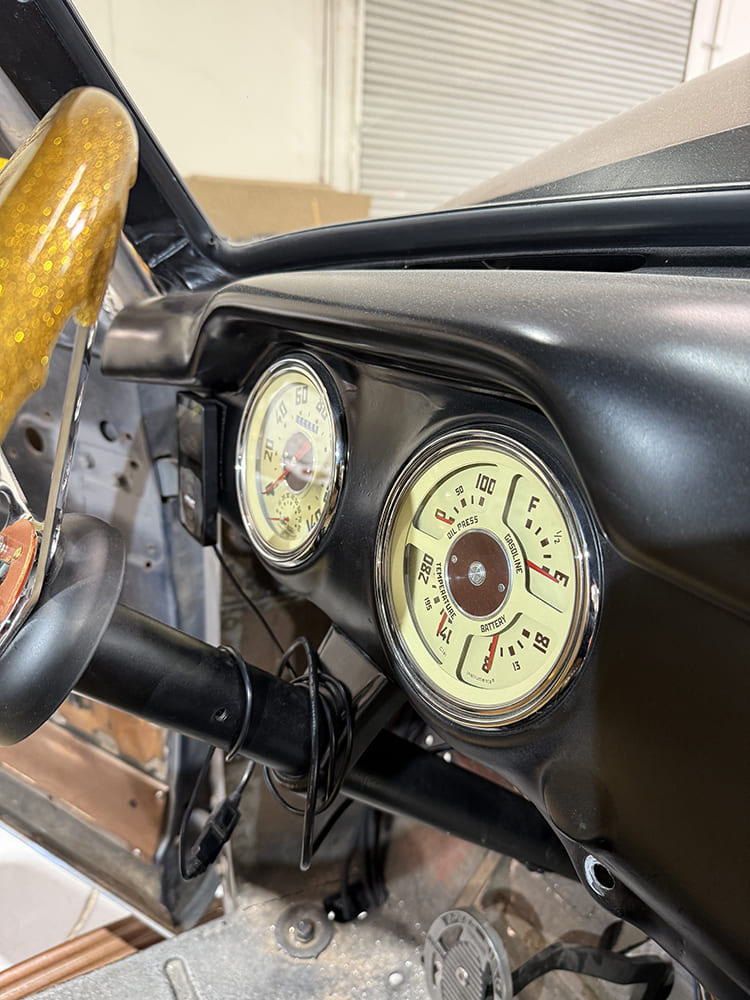
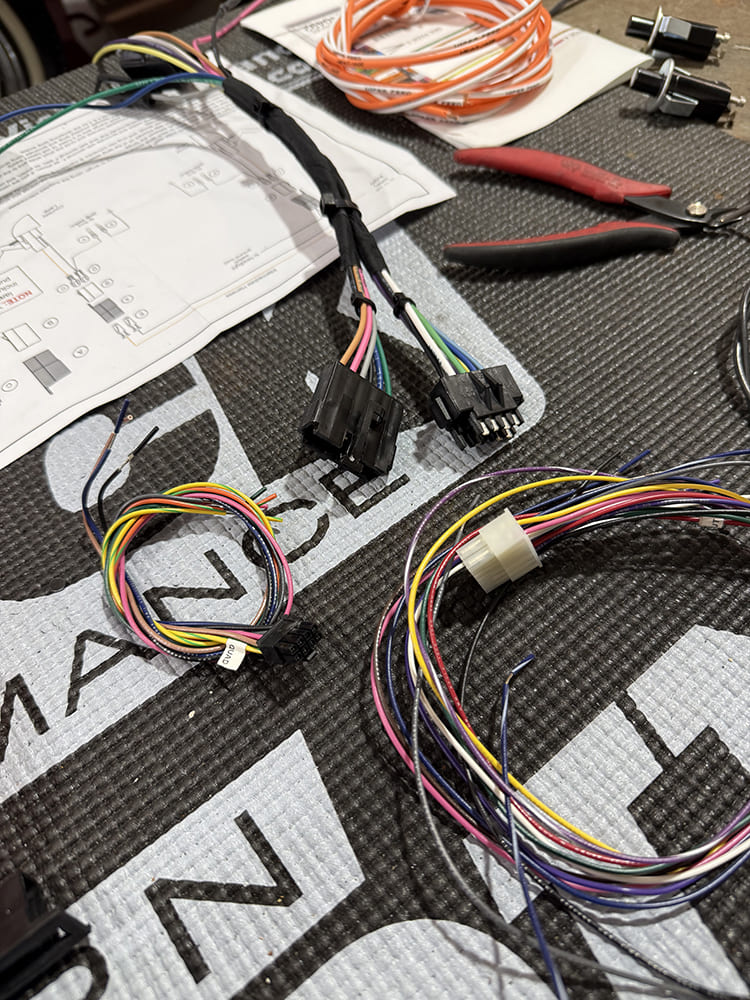
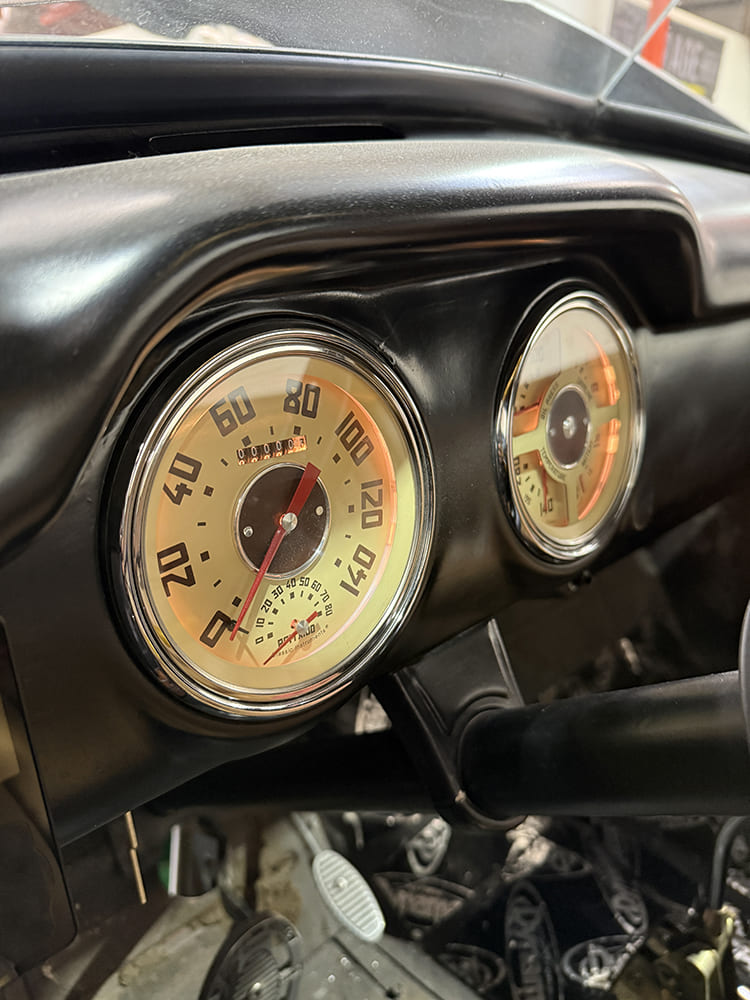
Once the push-on terminals are connected, they are covered with shrink tubing to prevent any shorting from occurring.The junction is then tucked inside asphalt-covered loom.Bag E brings us back inside the cab, turning our attention to the gauges. The Highway 22 Plus kit includes everything we need to tie any gauge kit to the appropriate sending units and sources to provide everything from electric speedo (VSS) readings to turn signal and high-beam indication.Like many of the components, we’ve upgraded the dash to a pair of Classic Instruments gauges (PN CT47GM62), with a speedo/tach combo on one side …… and a quad gauge featuring fuel level, water temp, volts, and oil pressure on the other.Mating the two is just a matter of matching the wires from one harness to the other and crimping on the proper terminal for the connector.The gauge harness simply plugs into the back of each gauge cluster, while the opposite end is attached to their respective sending unit, signal, or 12V source.Last but not least is the Accessory Connection Kit (Bag F). This includes source wires to power a radio, electric wiper motor, climate-control unit, electric choke, and more. Wires for the two built-in relays are also included in this harness if required.With the wiring complete, you can see how clean the final installation of the Highway 22 Plus kit can be.
We use cookies to ensure that we give you the best experience on our website. If you continue to use this site we will assume that you are happy with it.