Recently, we showed you the way to get an already-upholstered, full custom interior for your classic C10 and avoid the wait of having a professional upholstery shop do it for you. But that’s not the only way to reupholster your truck without having to leave the comfy confines of your own garage!
For folks with the ’47-53 Chevy/GMC trucks who are after retaining that original Chevy Advance Design inner charm—and aren’t afraid to bust some knuckles—Chevs of the 40’s have practically everything needed … inside and out!
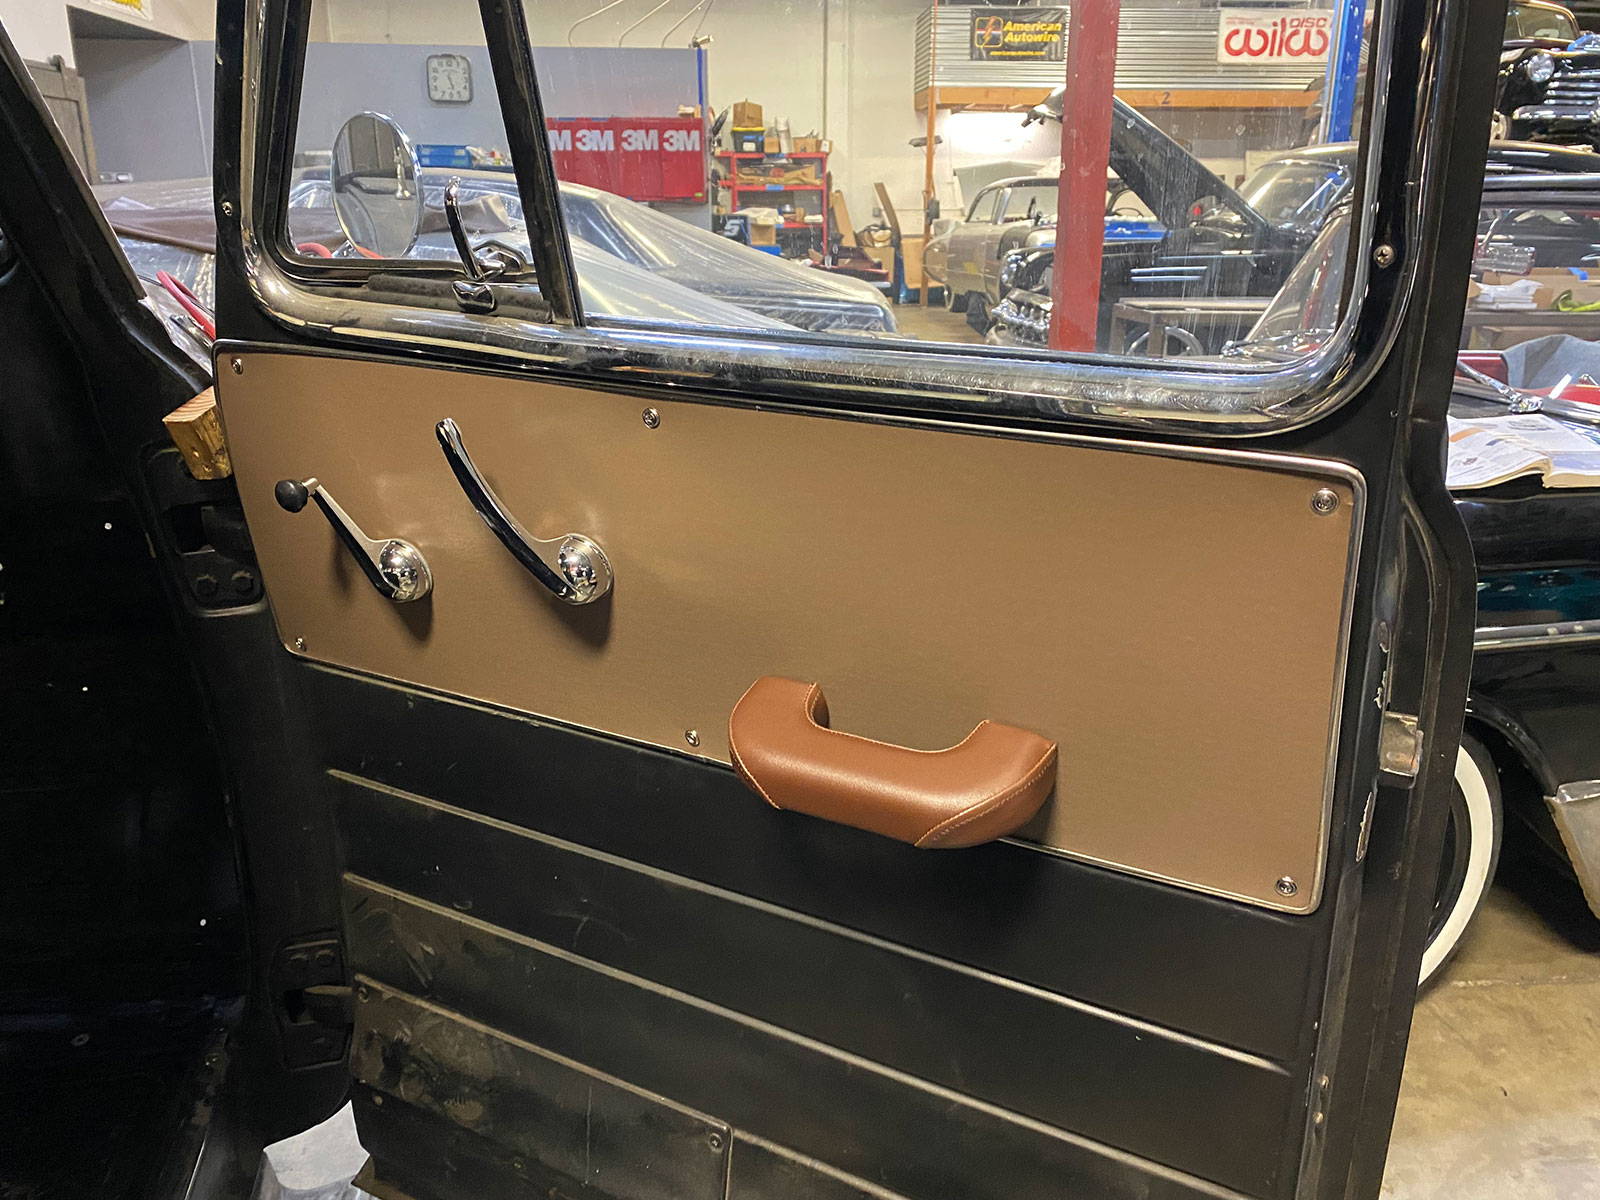
From repro headliners and door panels to seat covers and door handles/window cranks and so on, if you’re looking to give that old Chevy (or GMC) cab new life—and enjoy the ride that much more—Chevs of the 40’s is your one-stop shop. We found that out after obtaining their latest catalog and thumbing through from cover to cover in an attempt to find some miscellaneous (missing) exterior items on a customer’s truck at Jimenez Bros Customs.
After
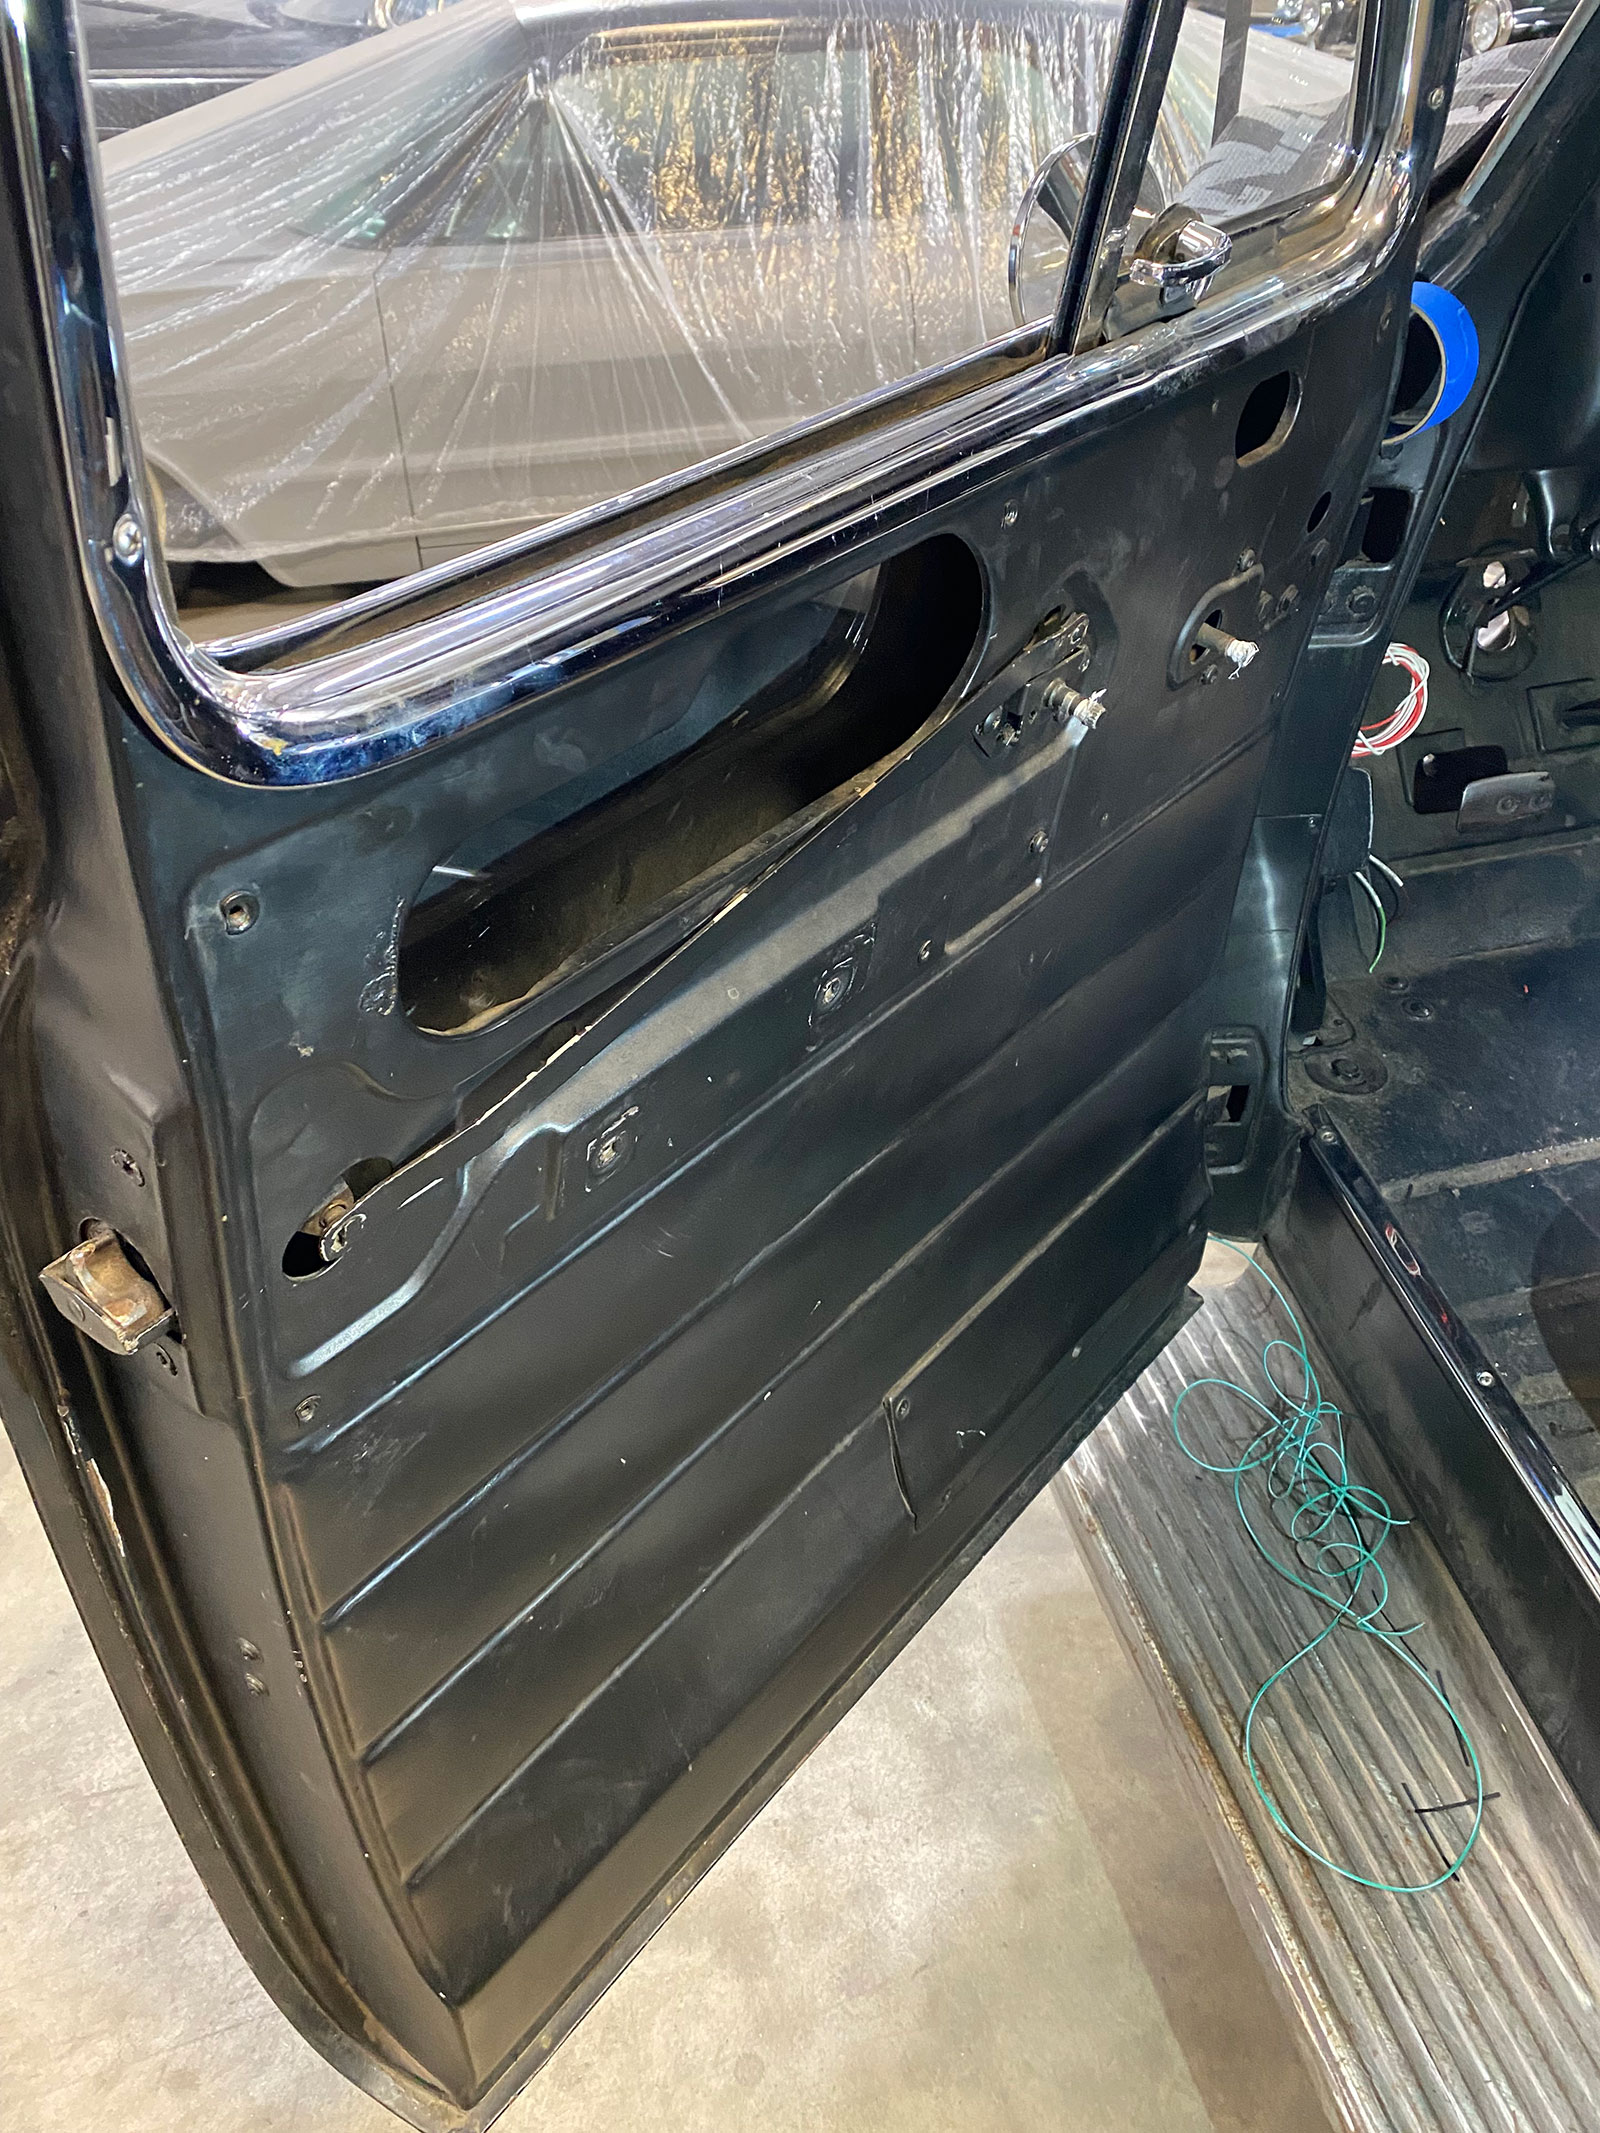
As we inventoried the list of parts, we noticed the truck’s seat was rather forlorn, and the door panels were non-existent, as well as a few other items. One quick call to the owner gave the green light to acquire the interior components, and within a few days we were giving the inner cab sanctum the makeover it deserved … or at least the one we felt it deserved!
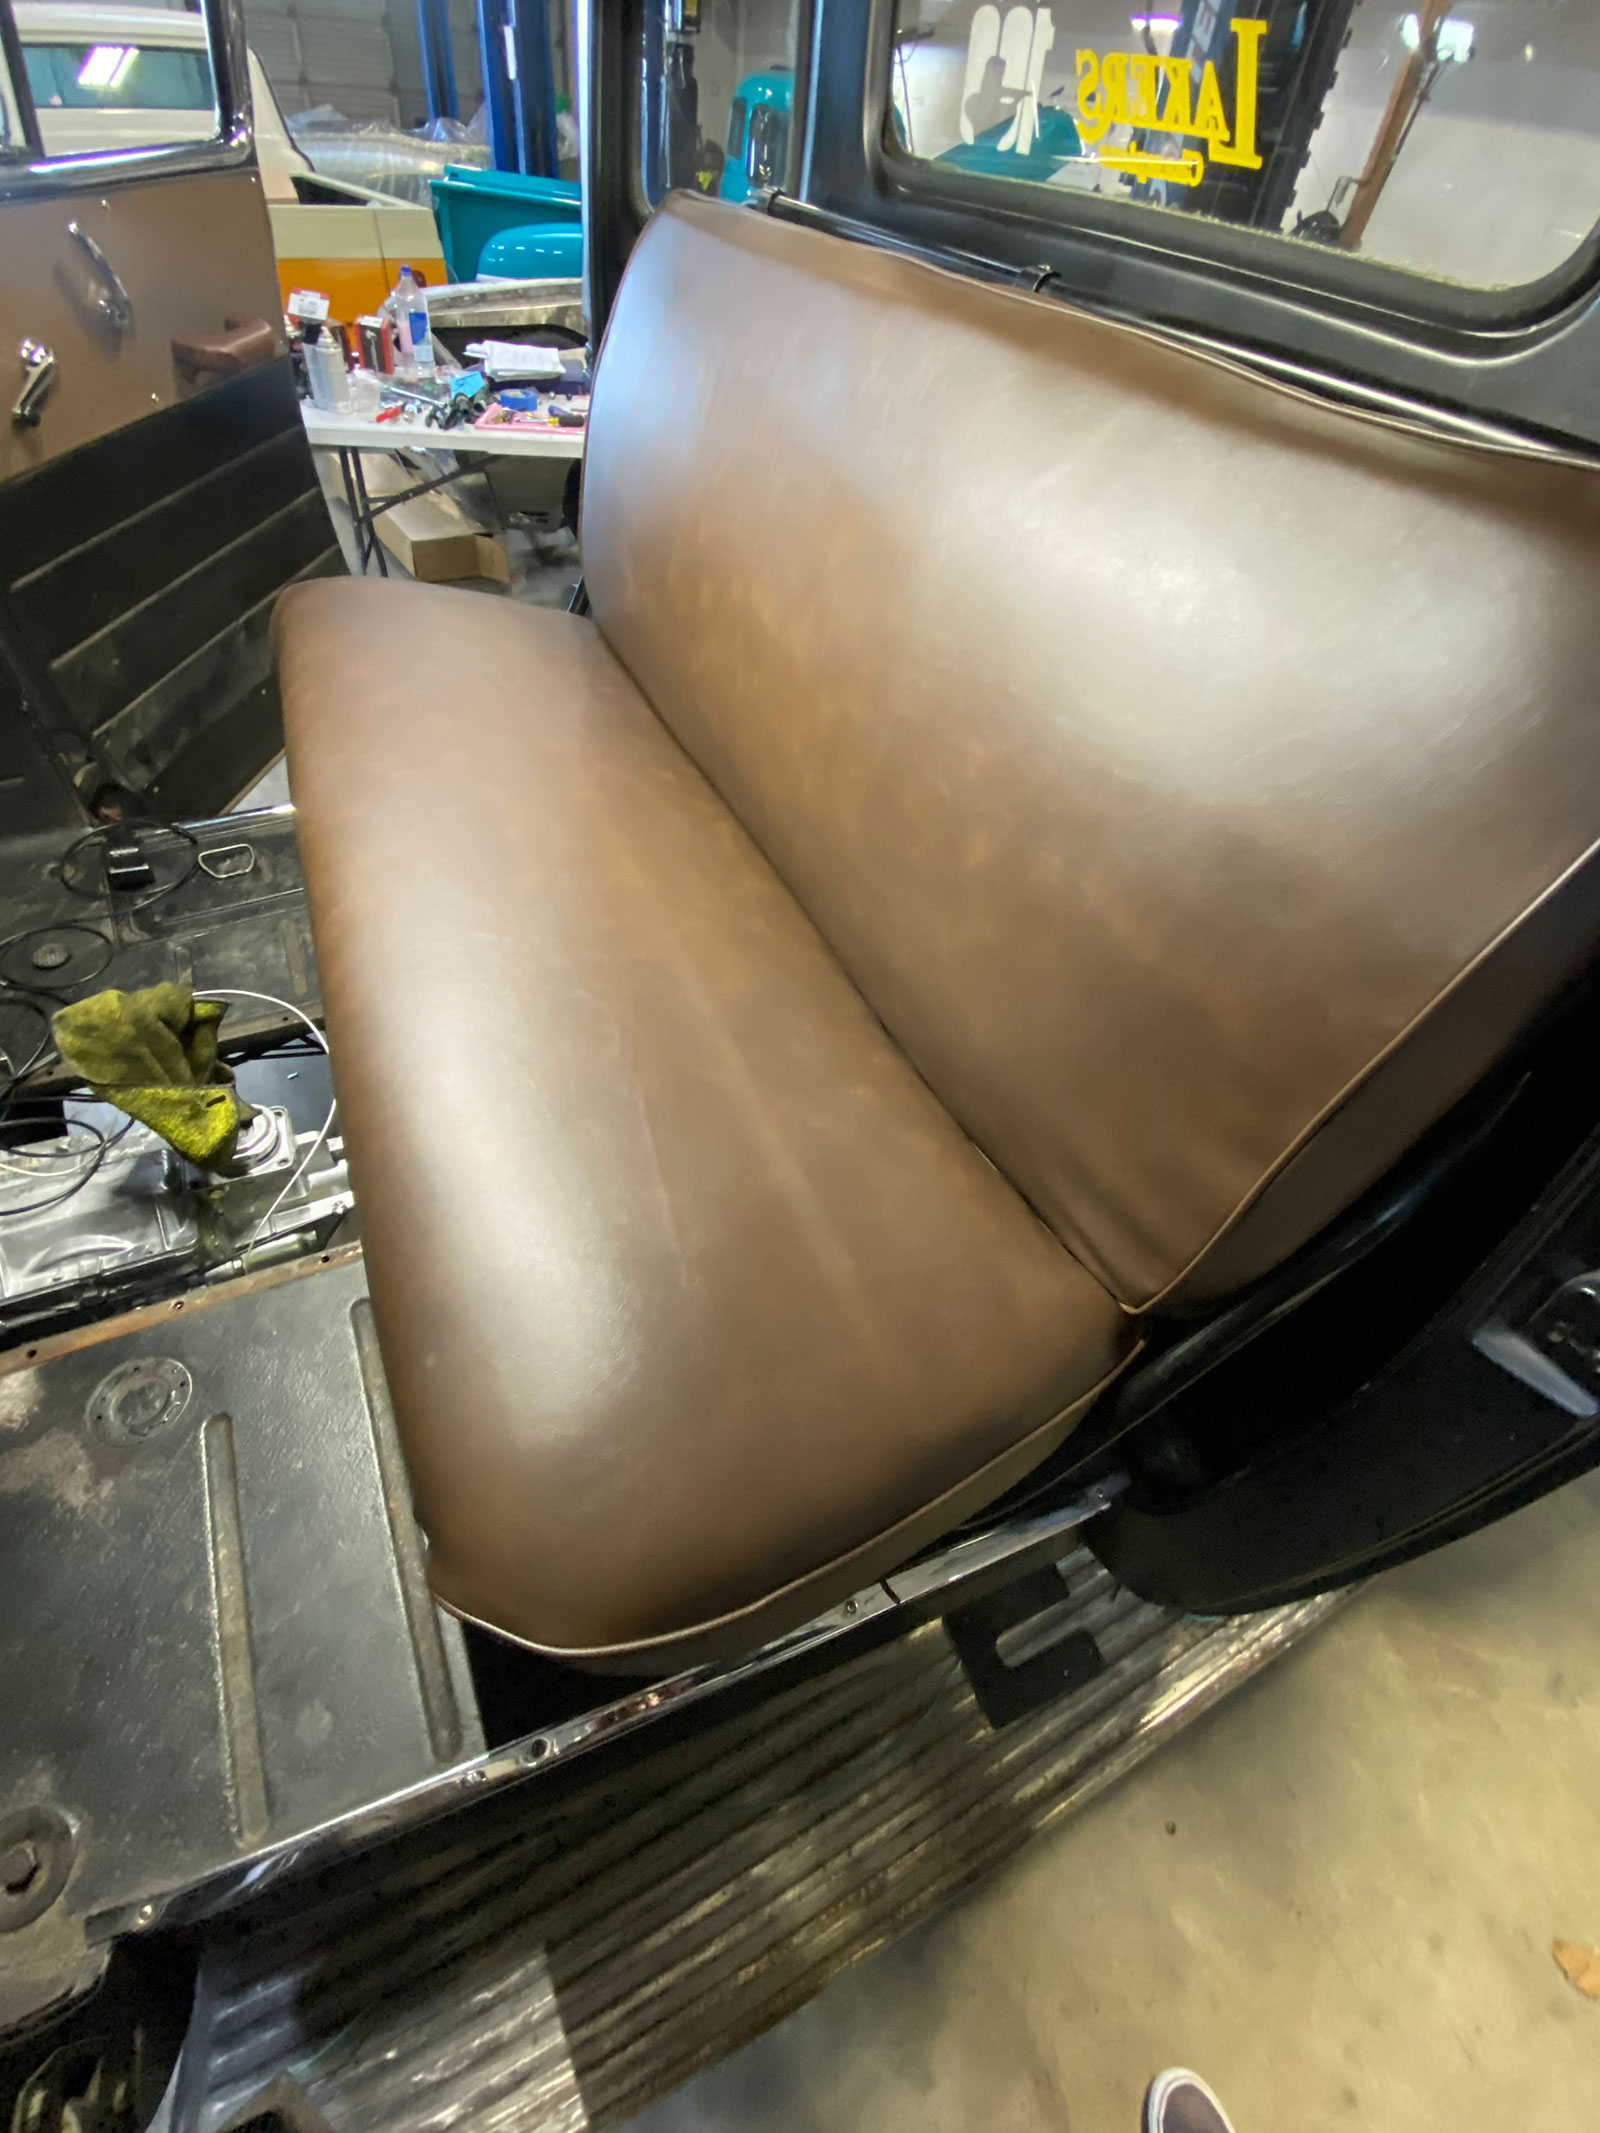
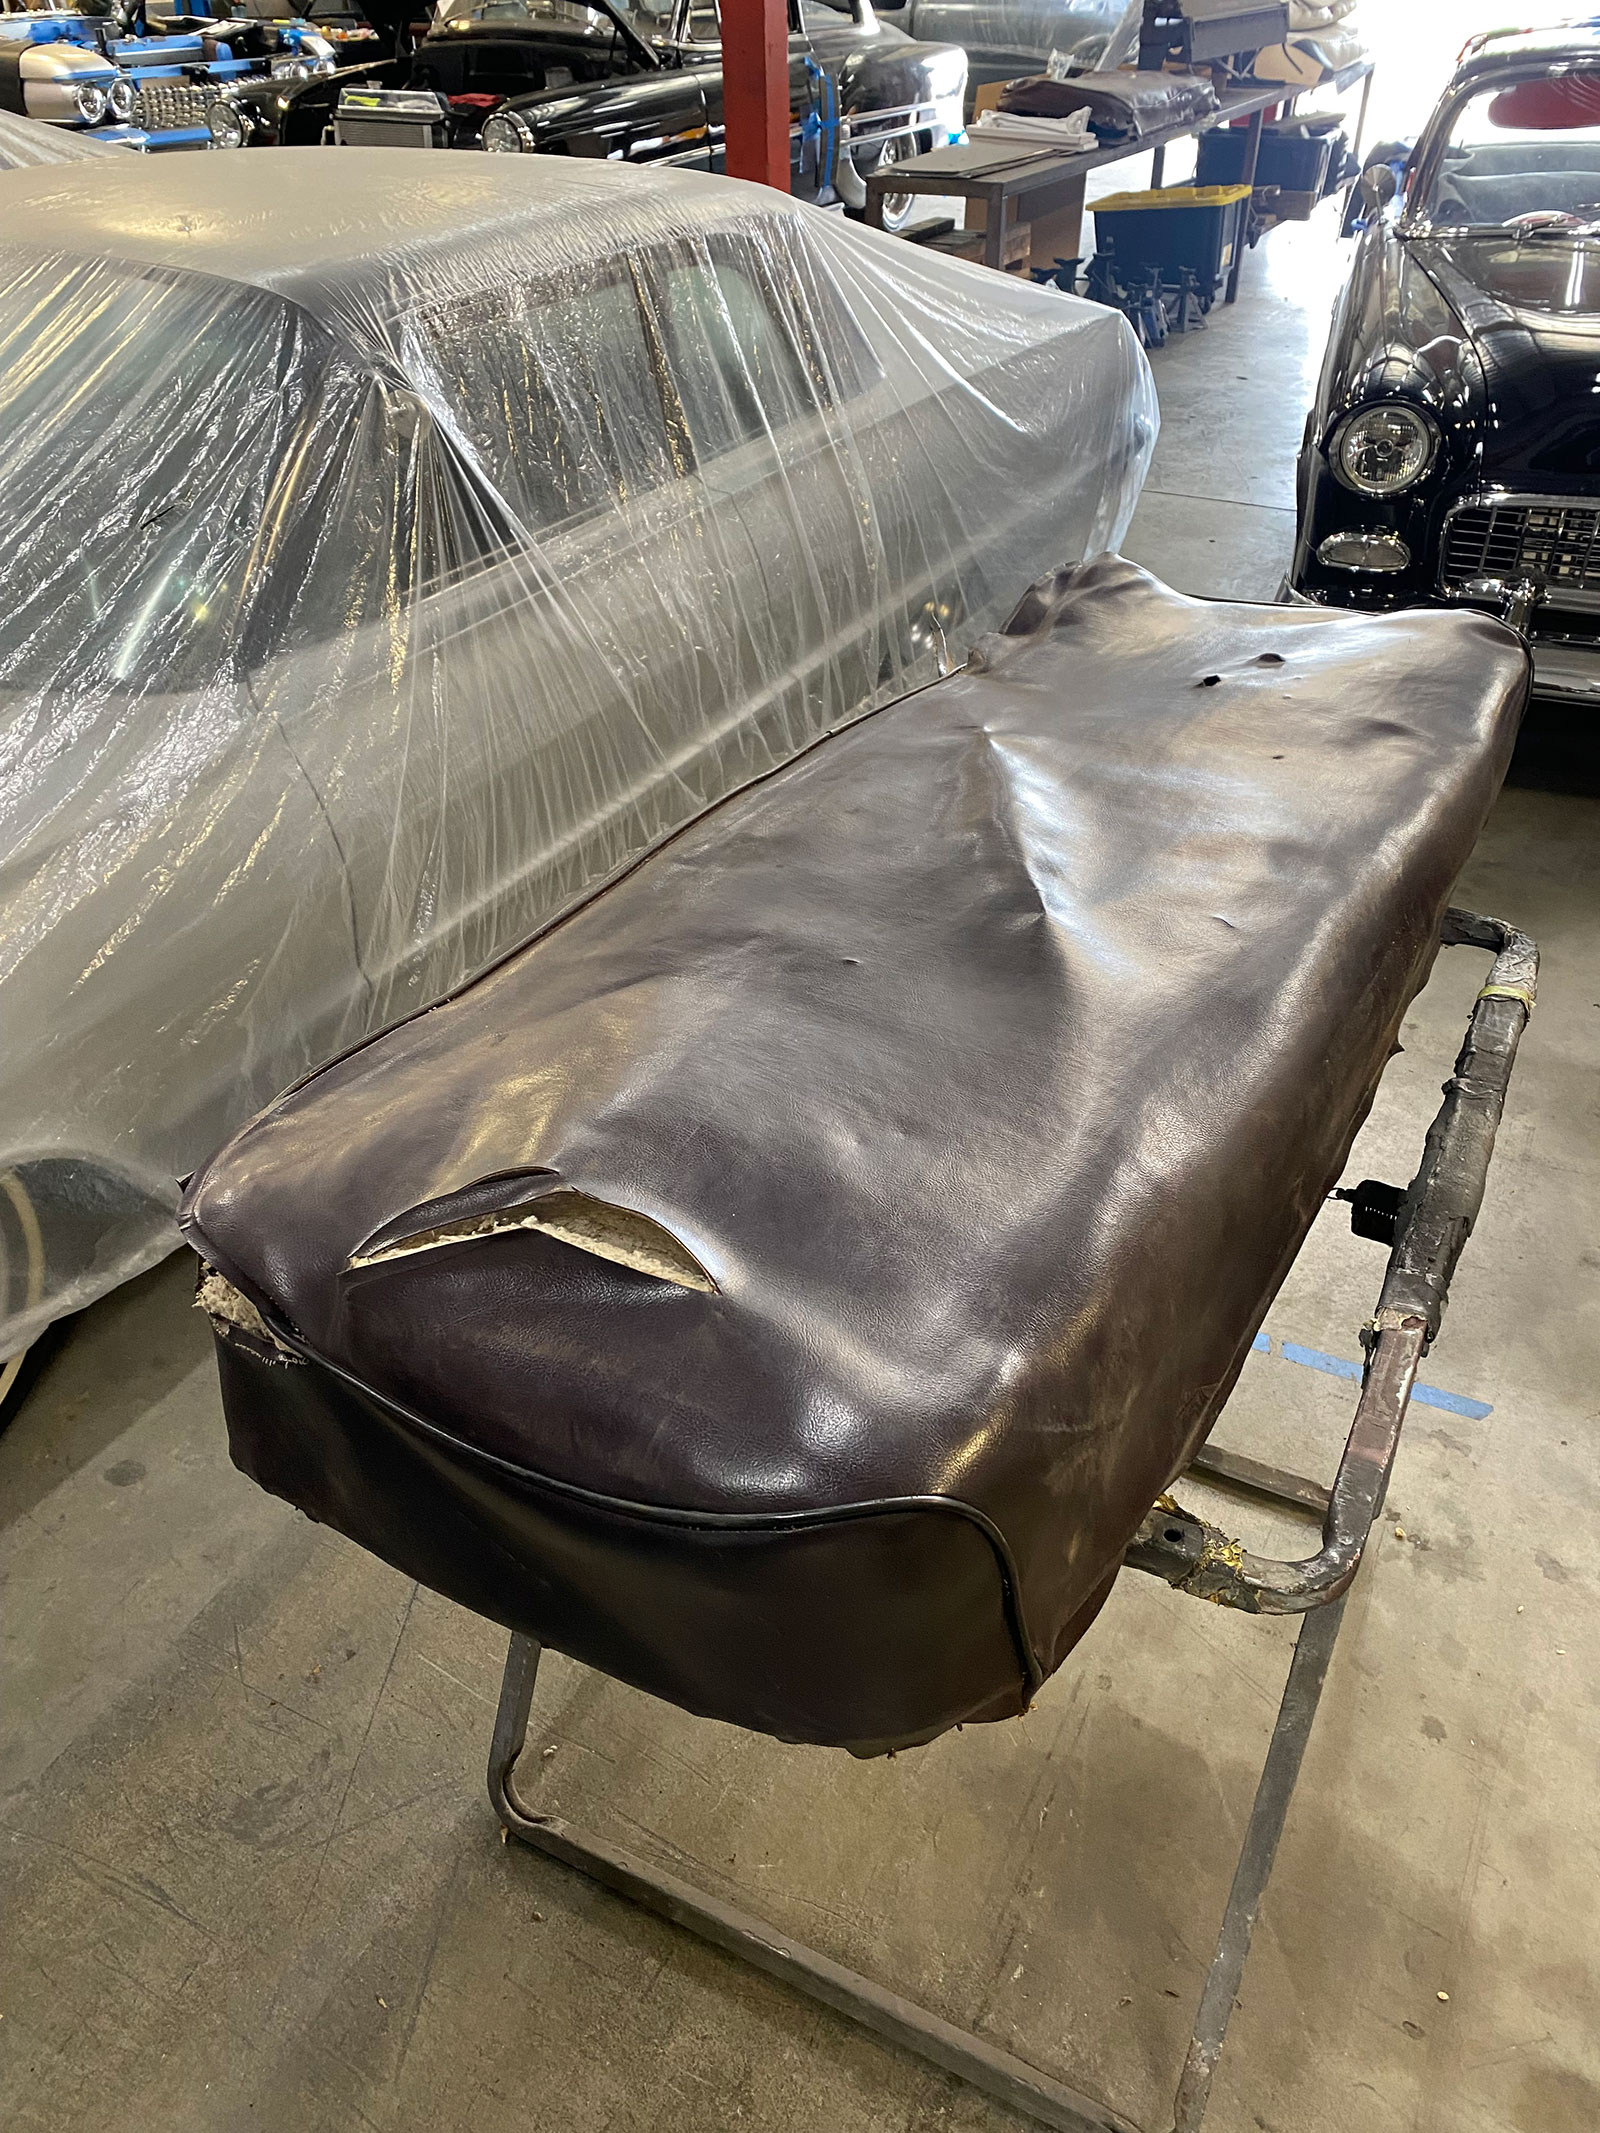
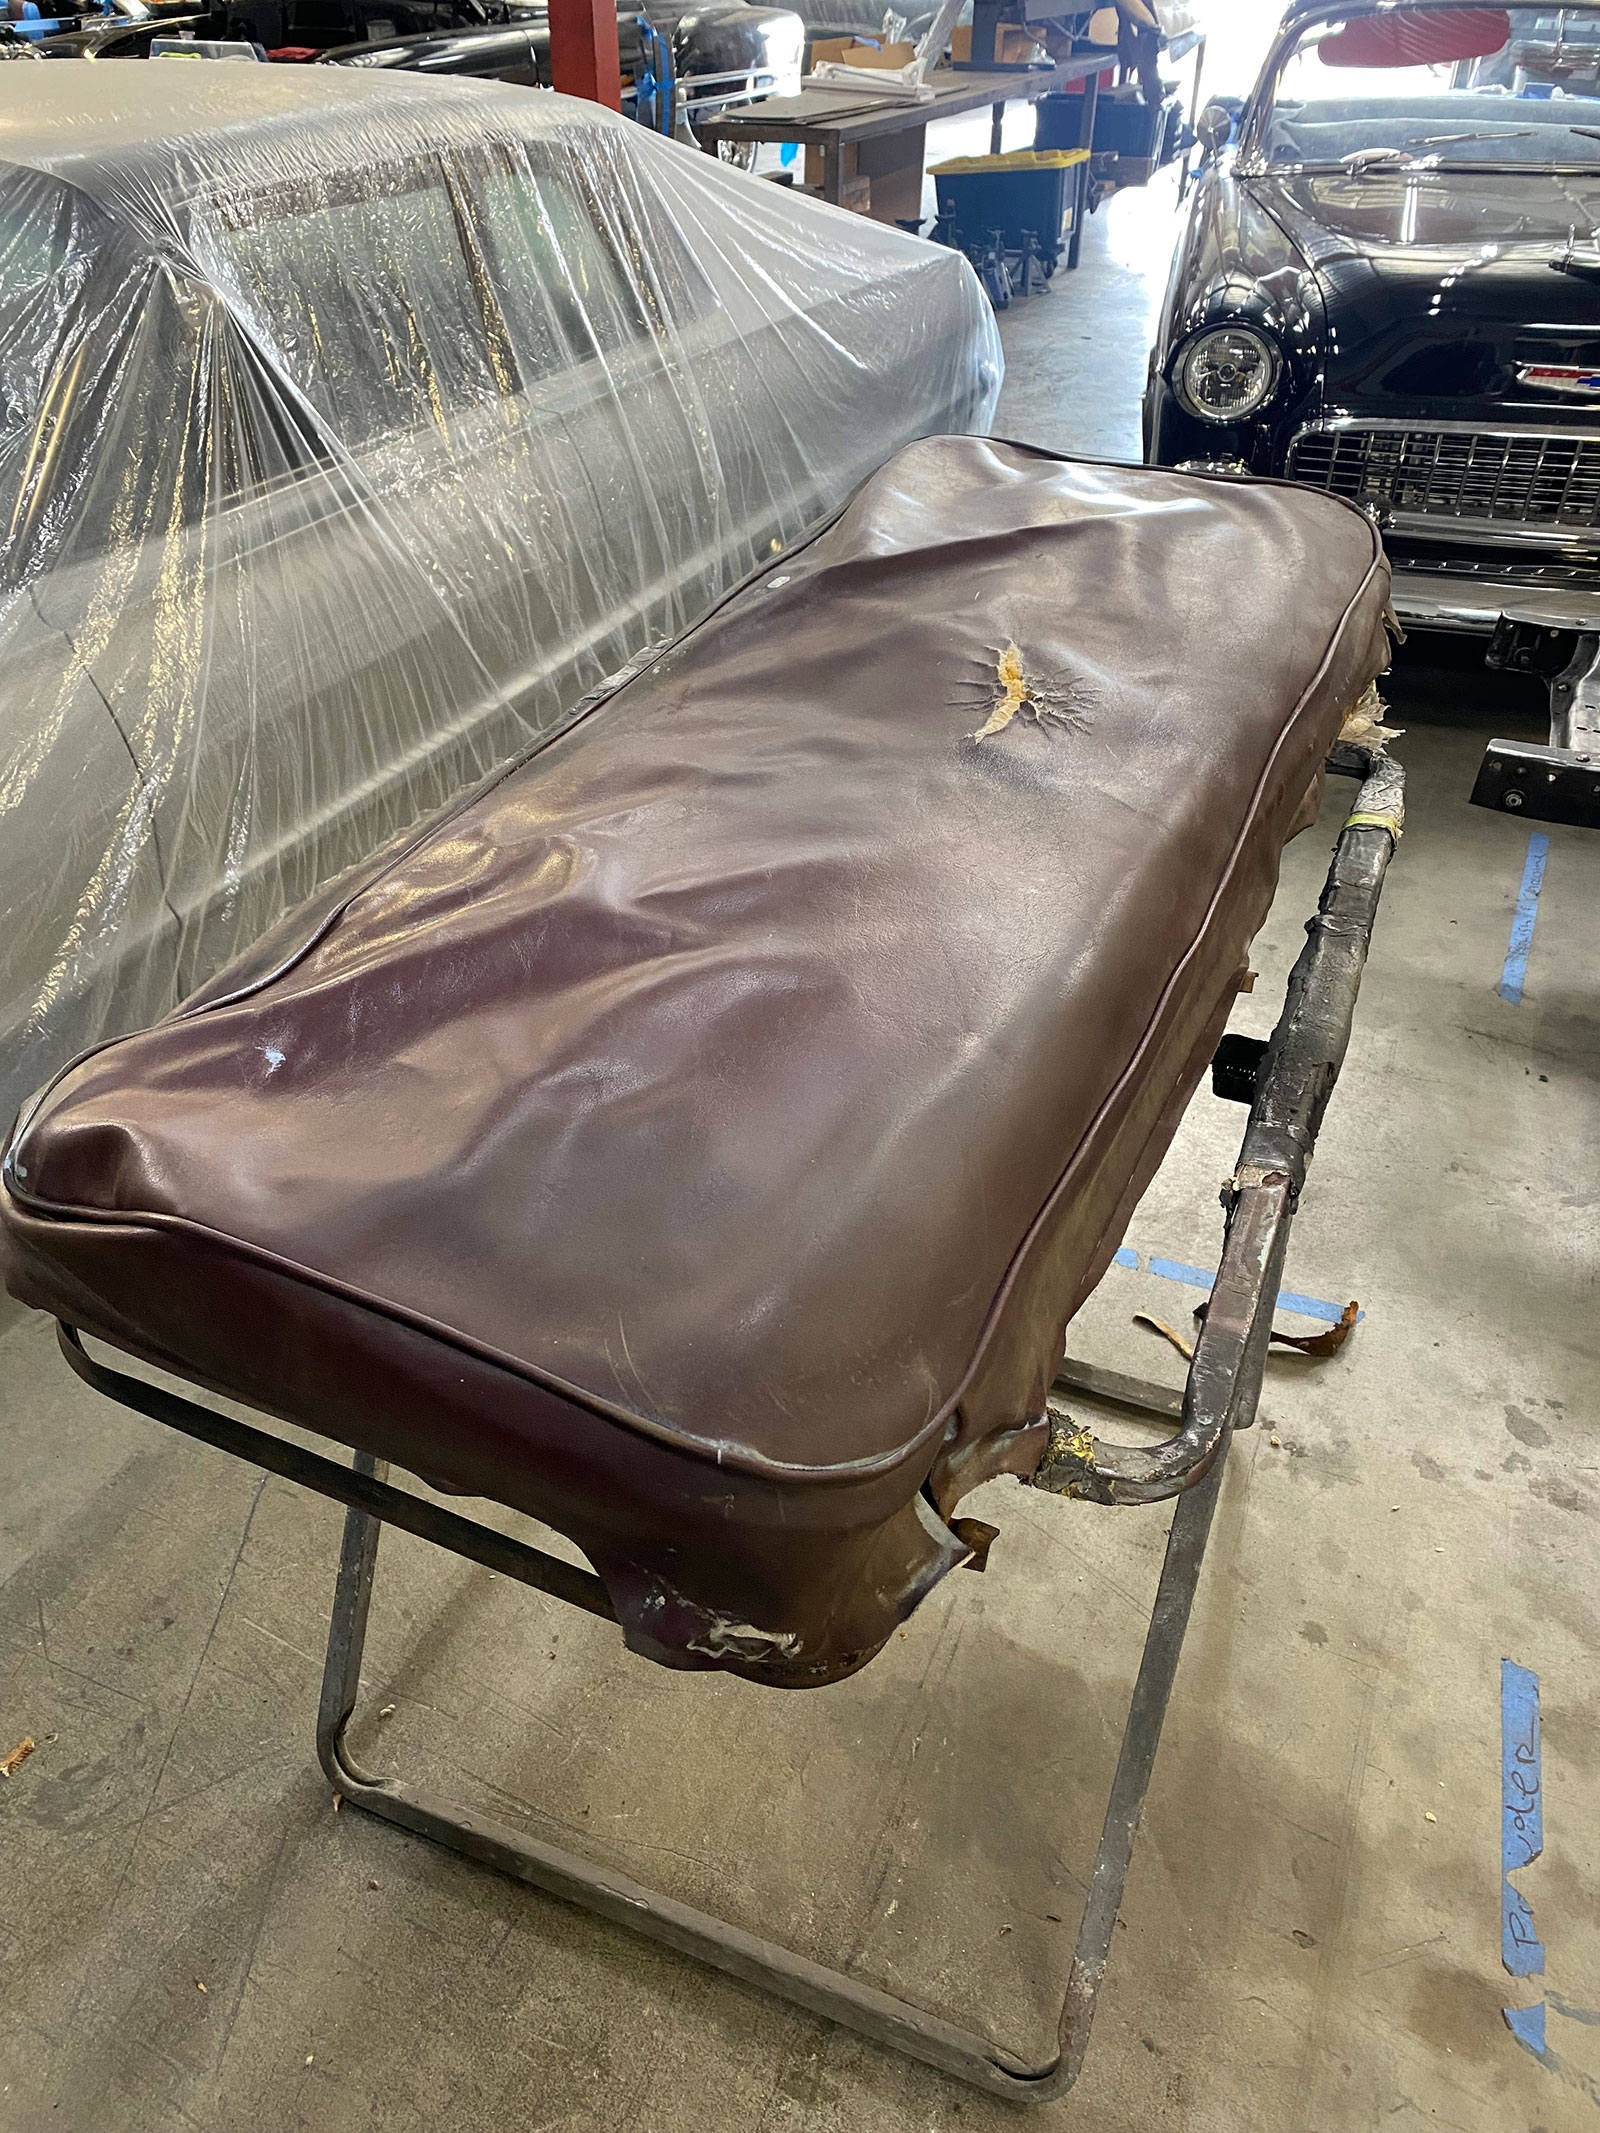
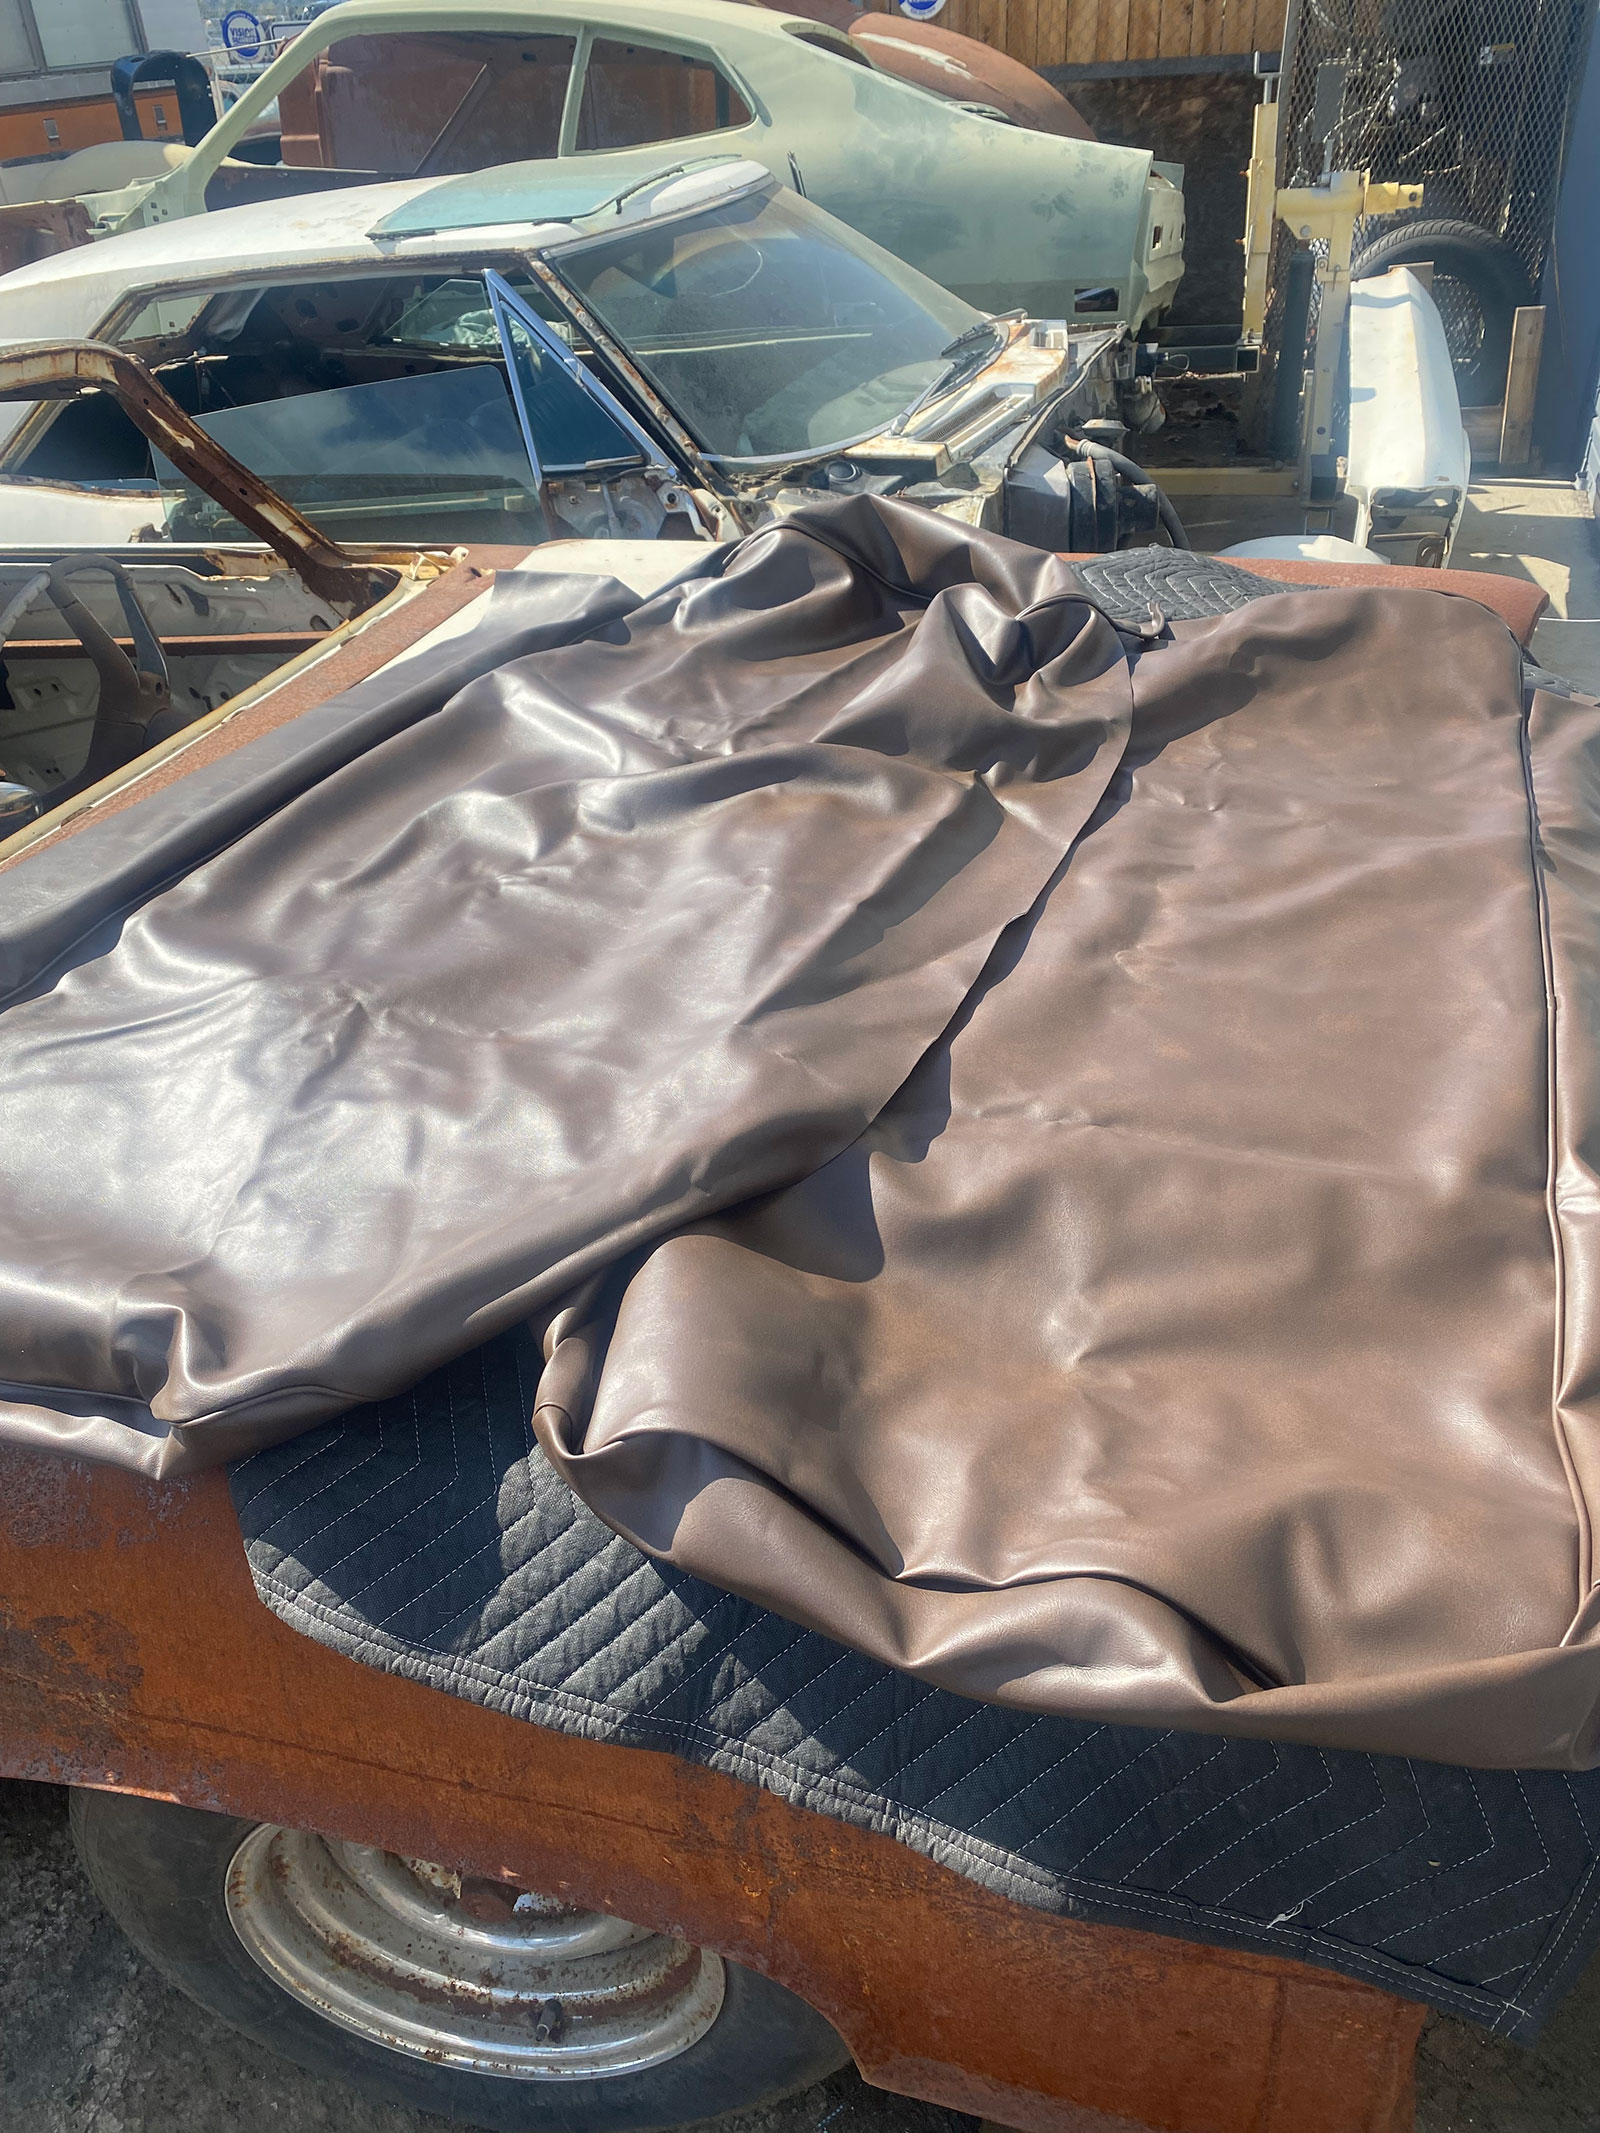
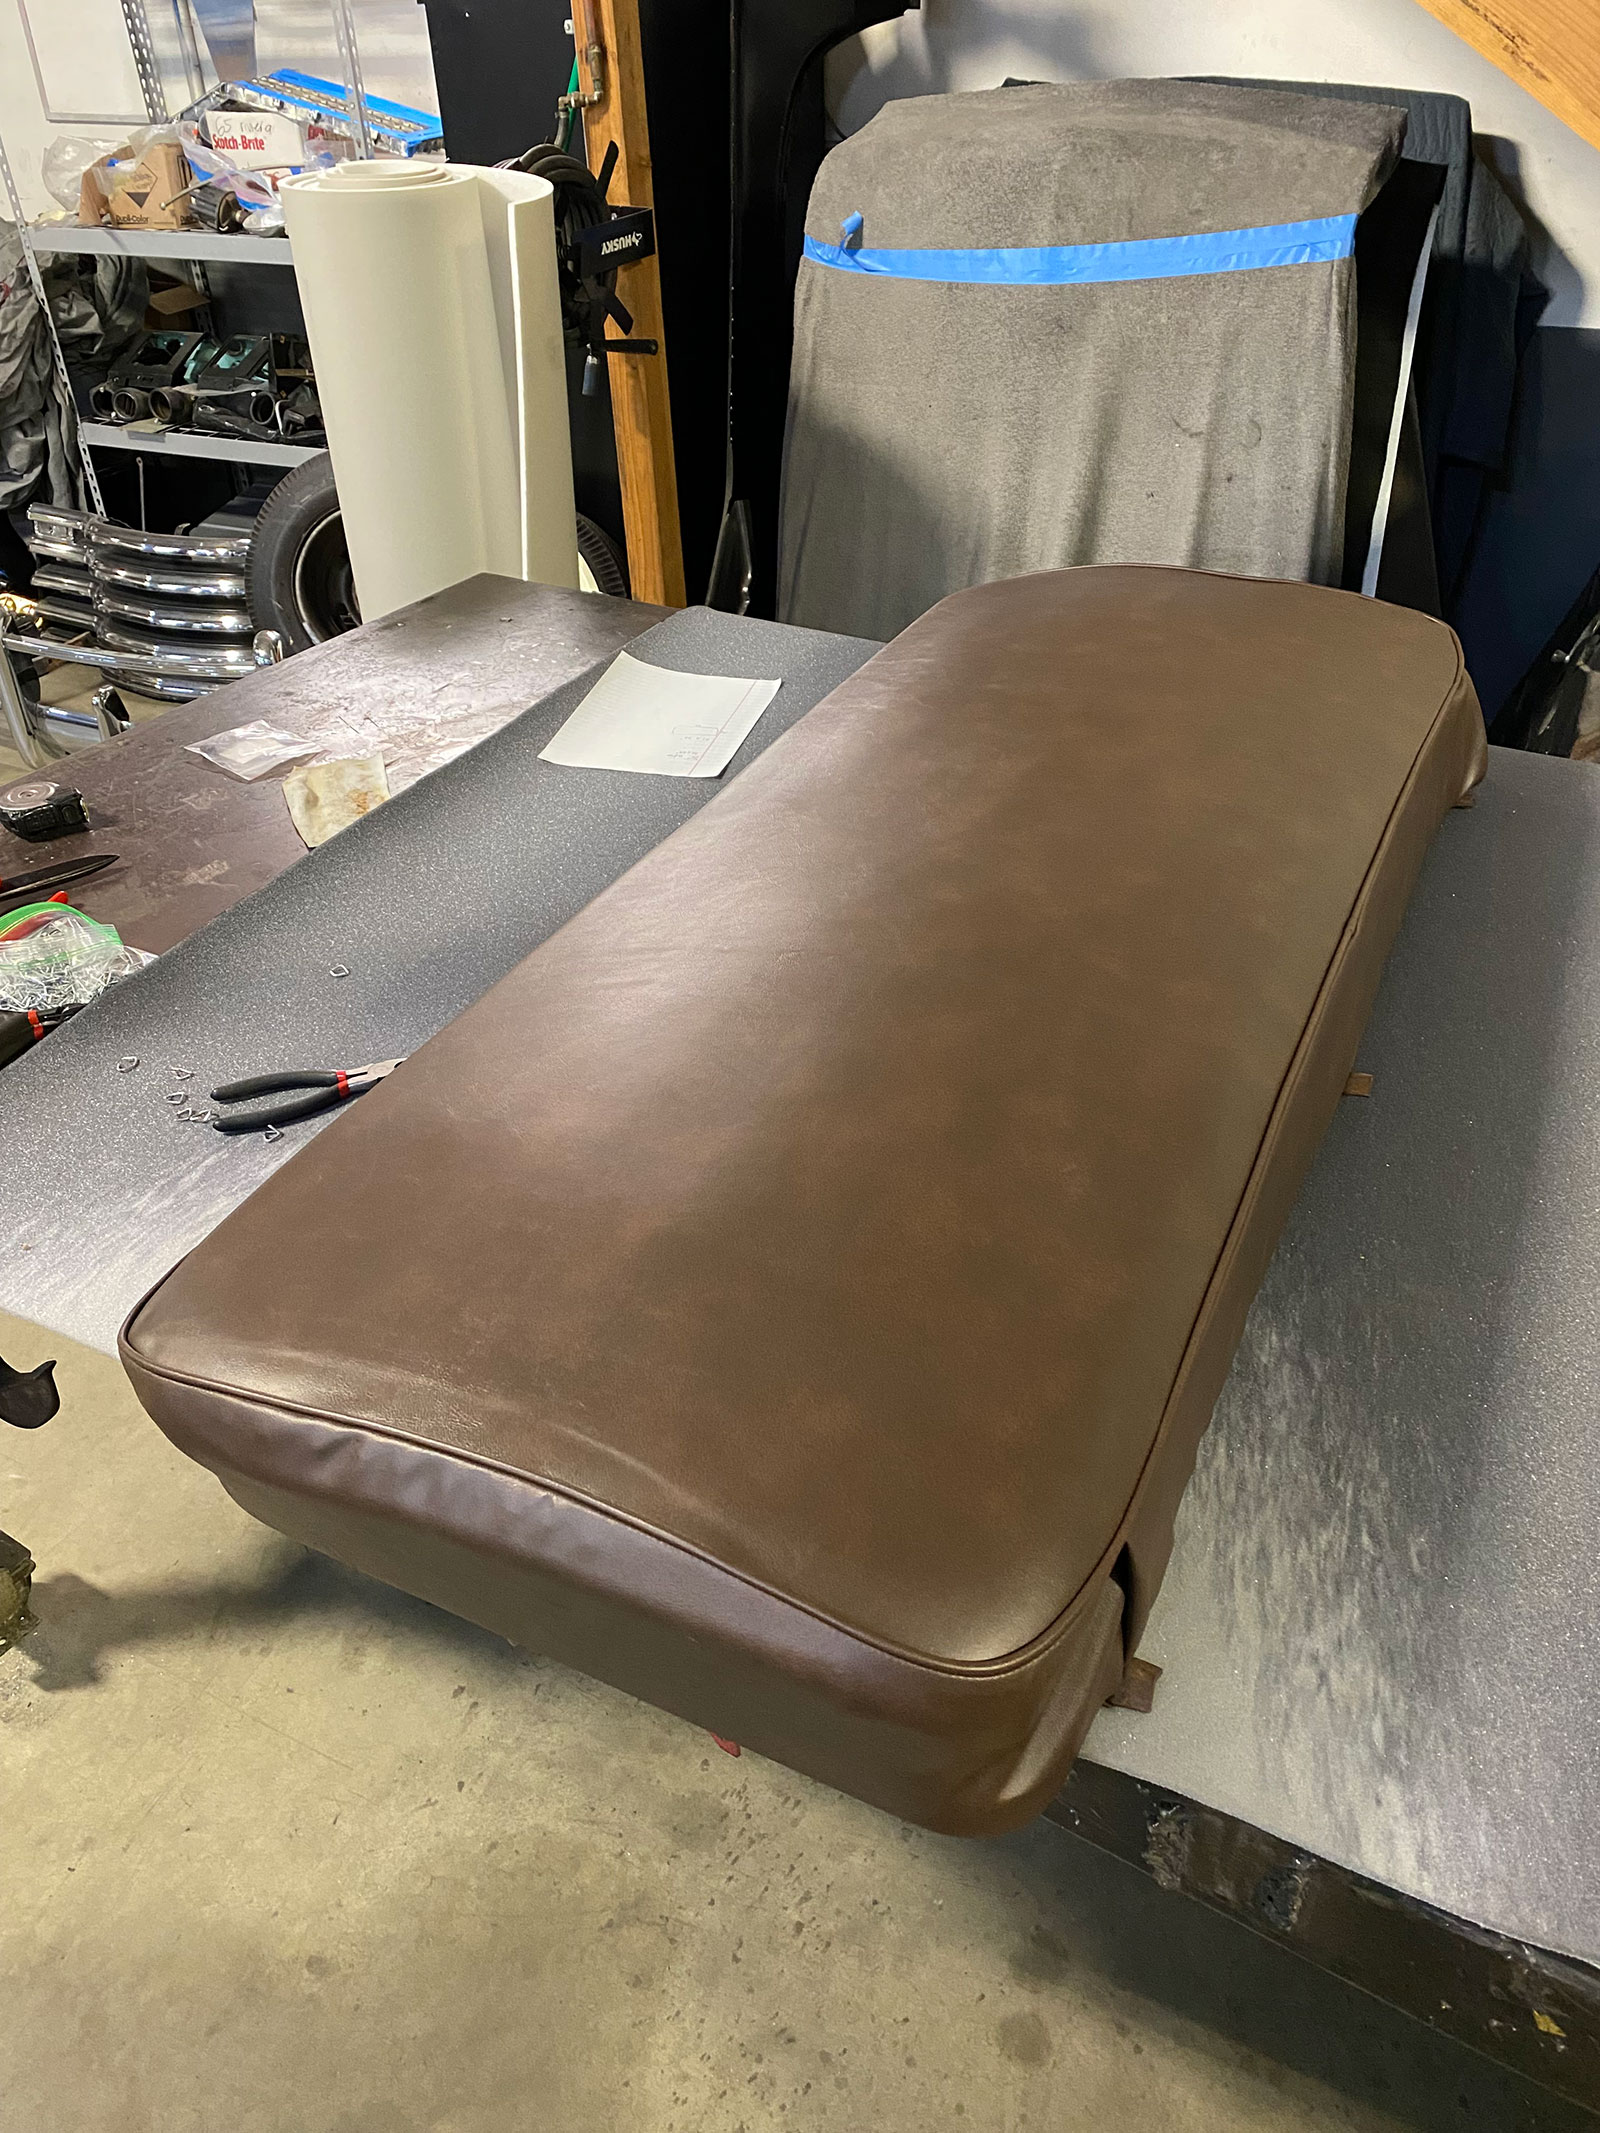
The existing seat in the 1952 Chevy Truck may have had a certain amount of patina charm, but it was pretty uncomfortable, to say the least. We’re about to fix that last part and retain the truck’s OG allure!
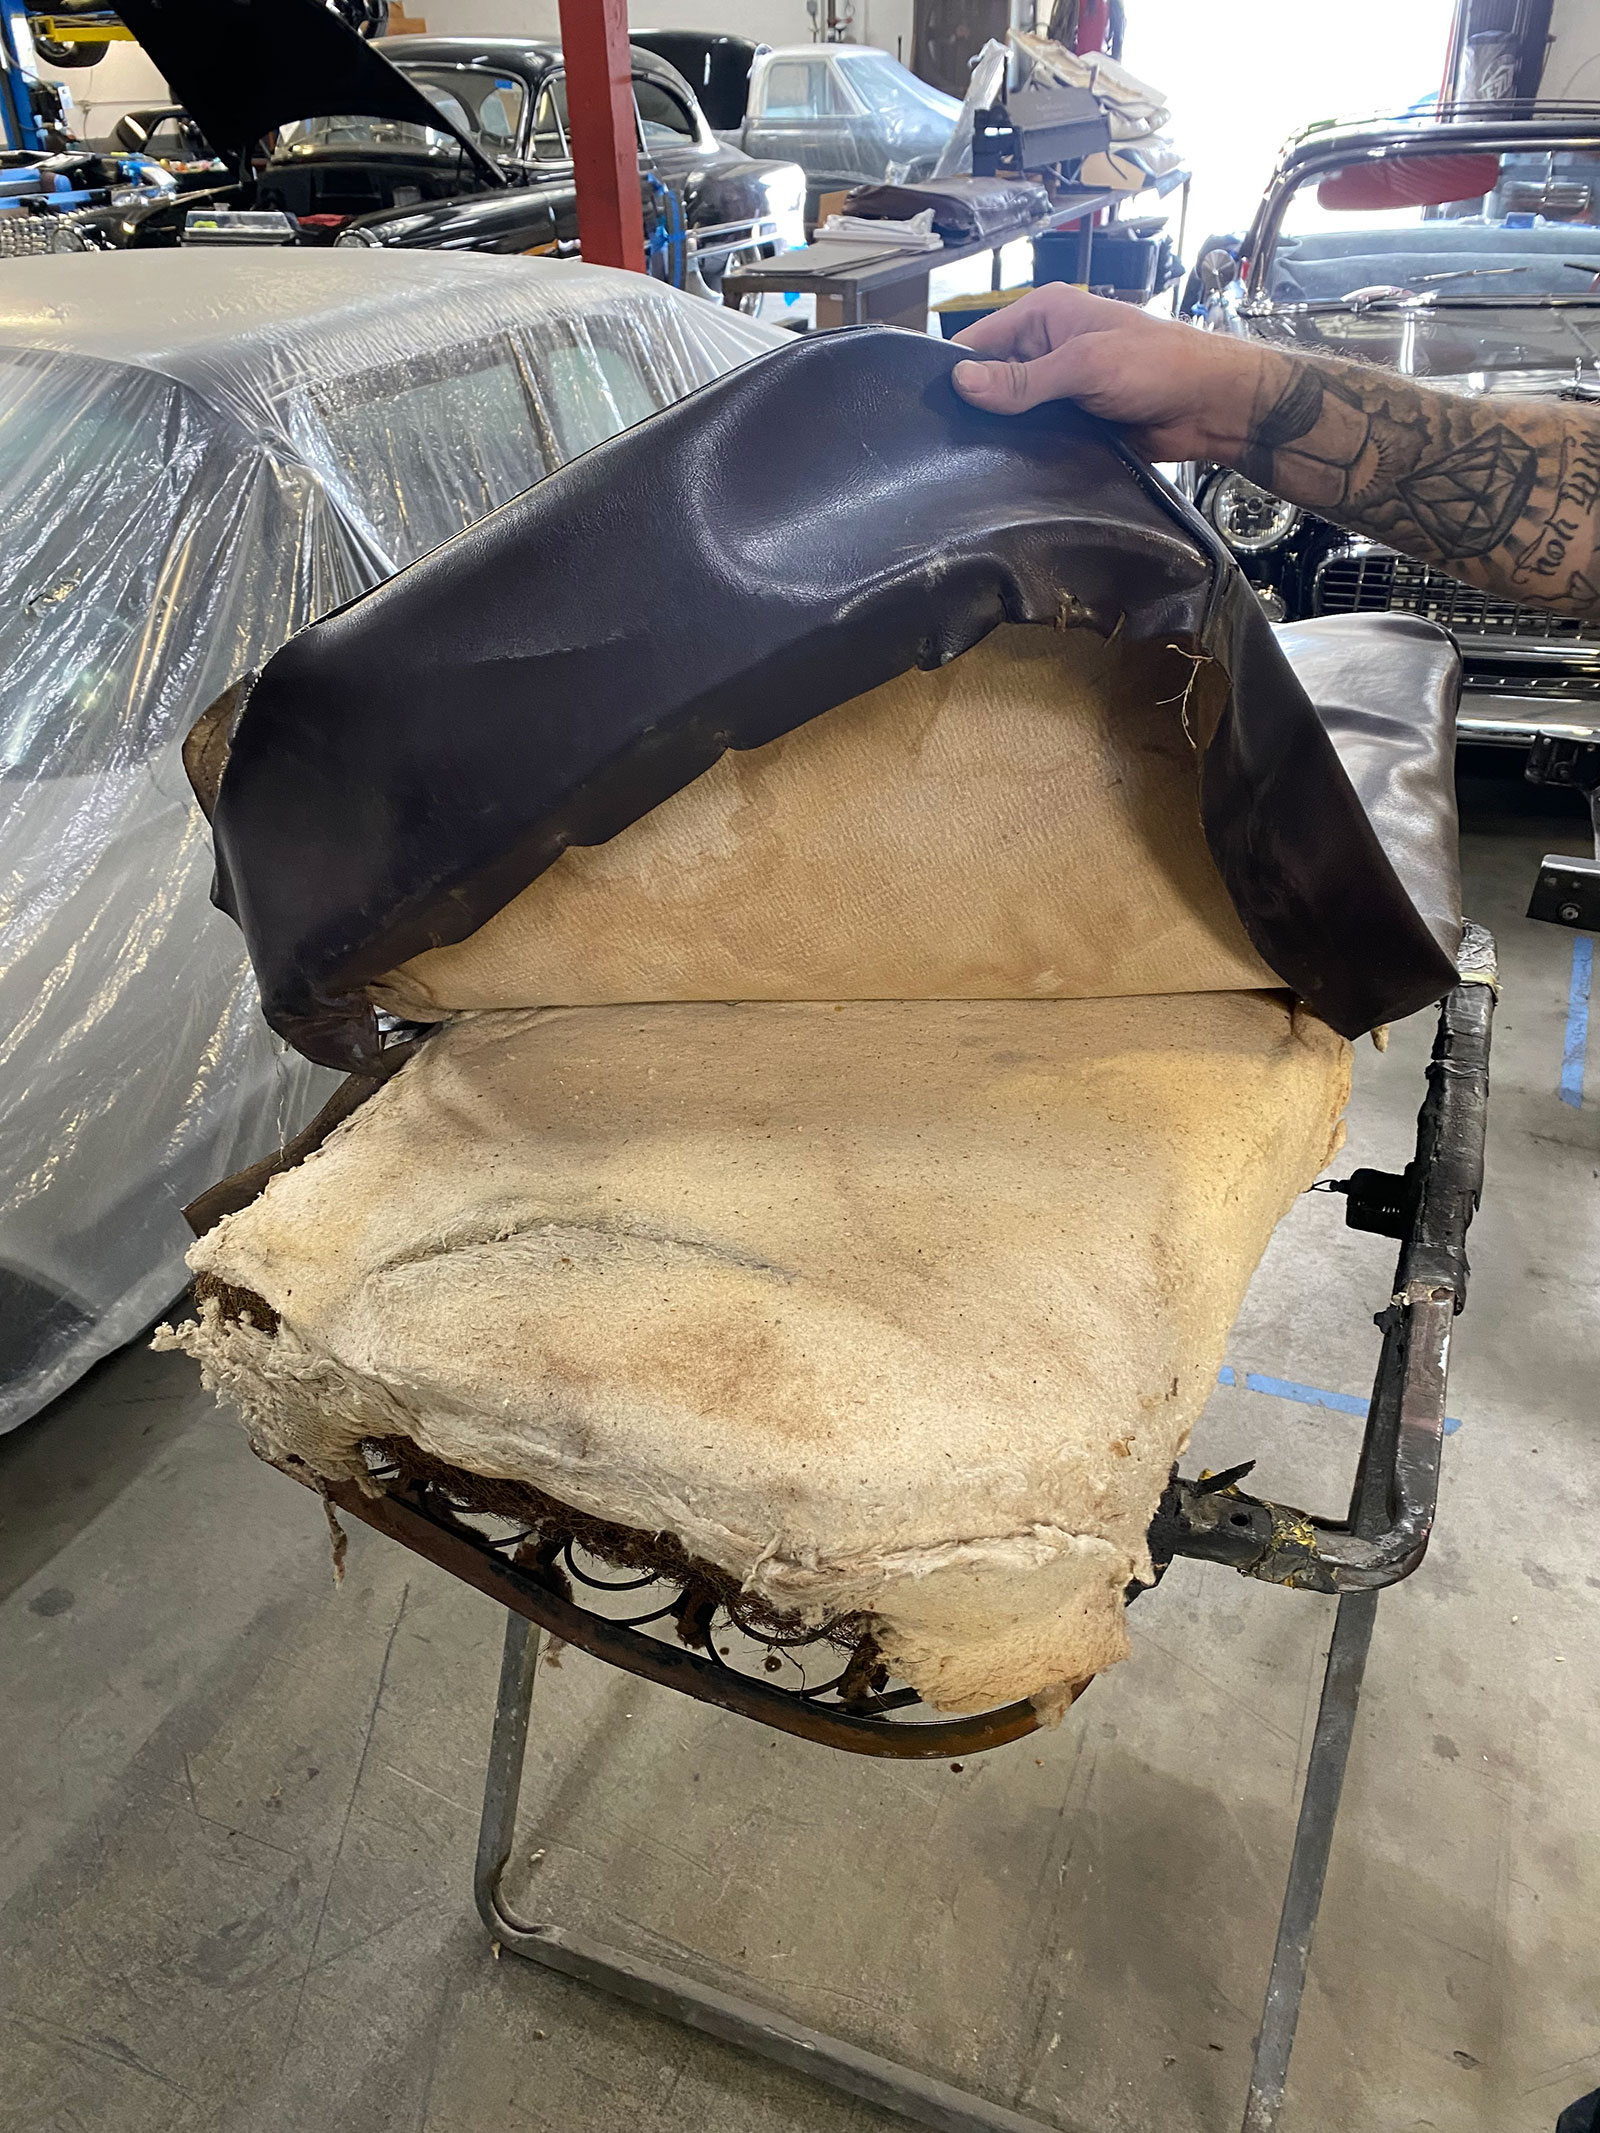
Now, we’ll be the first to admit: neither the staff of CTP nor Jimenez Bros. are “professional upholsterers”! Those of you reading this who happen to be upholsterers by trade will likely spot some discrepancies in our seat-recovering process—not to mention the results! However, our point was to show that even the most inexperienced could not only attempt but pull off the job with more than satisfactory results … we think!
Ideally, we’d really liked to have replaced the foam altogether with new “formed” high-density foam bases—but since that wasn’t available to us at the time, we’ll keep the original cotton material (Chevs carries the original-style batting) on the seat back and the existing foam on the bottom as the bases.
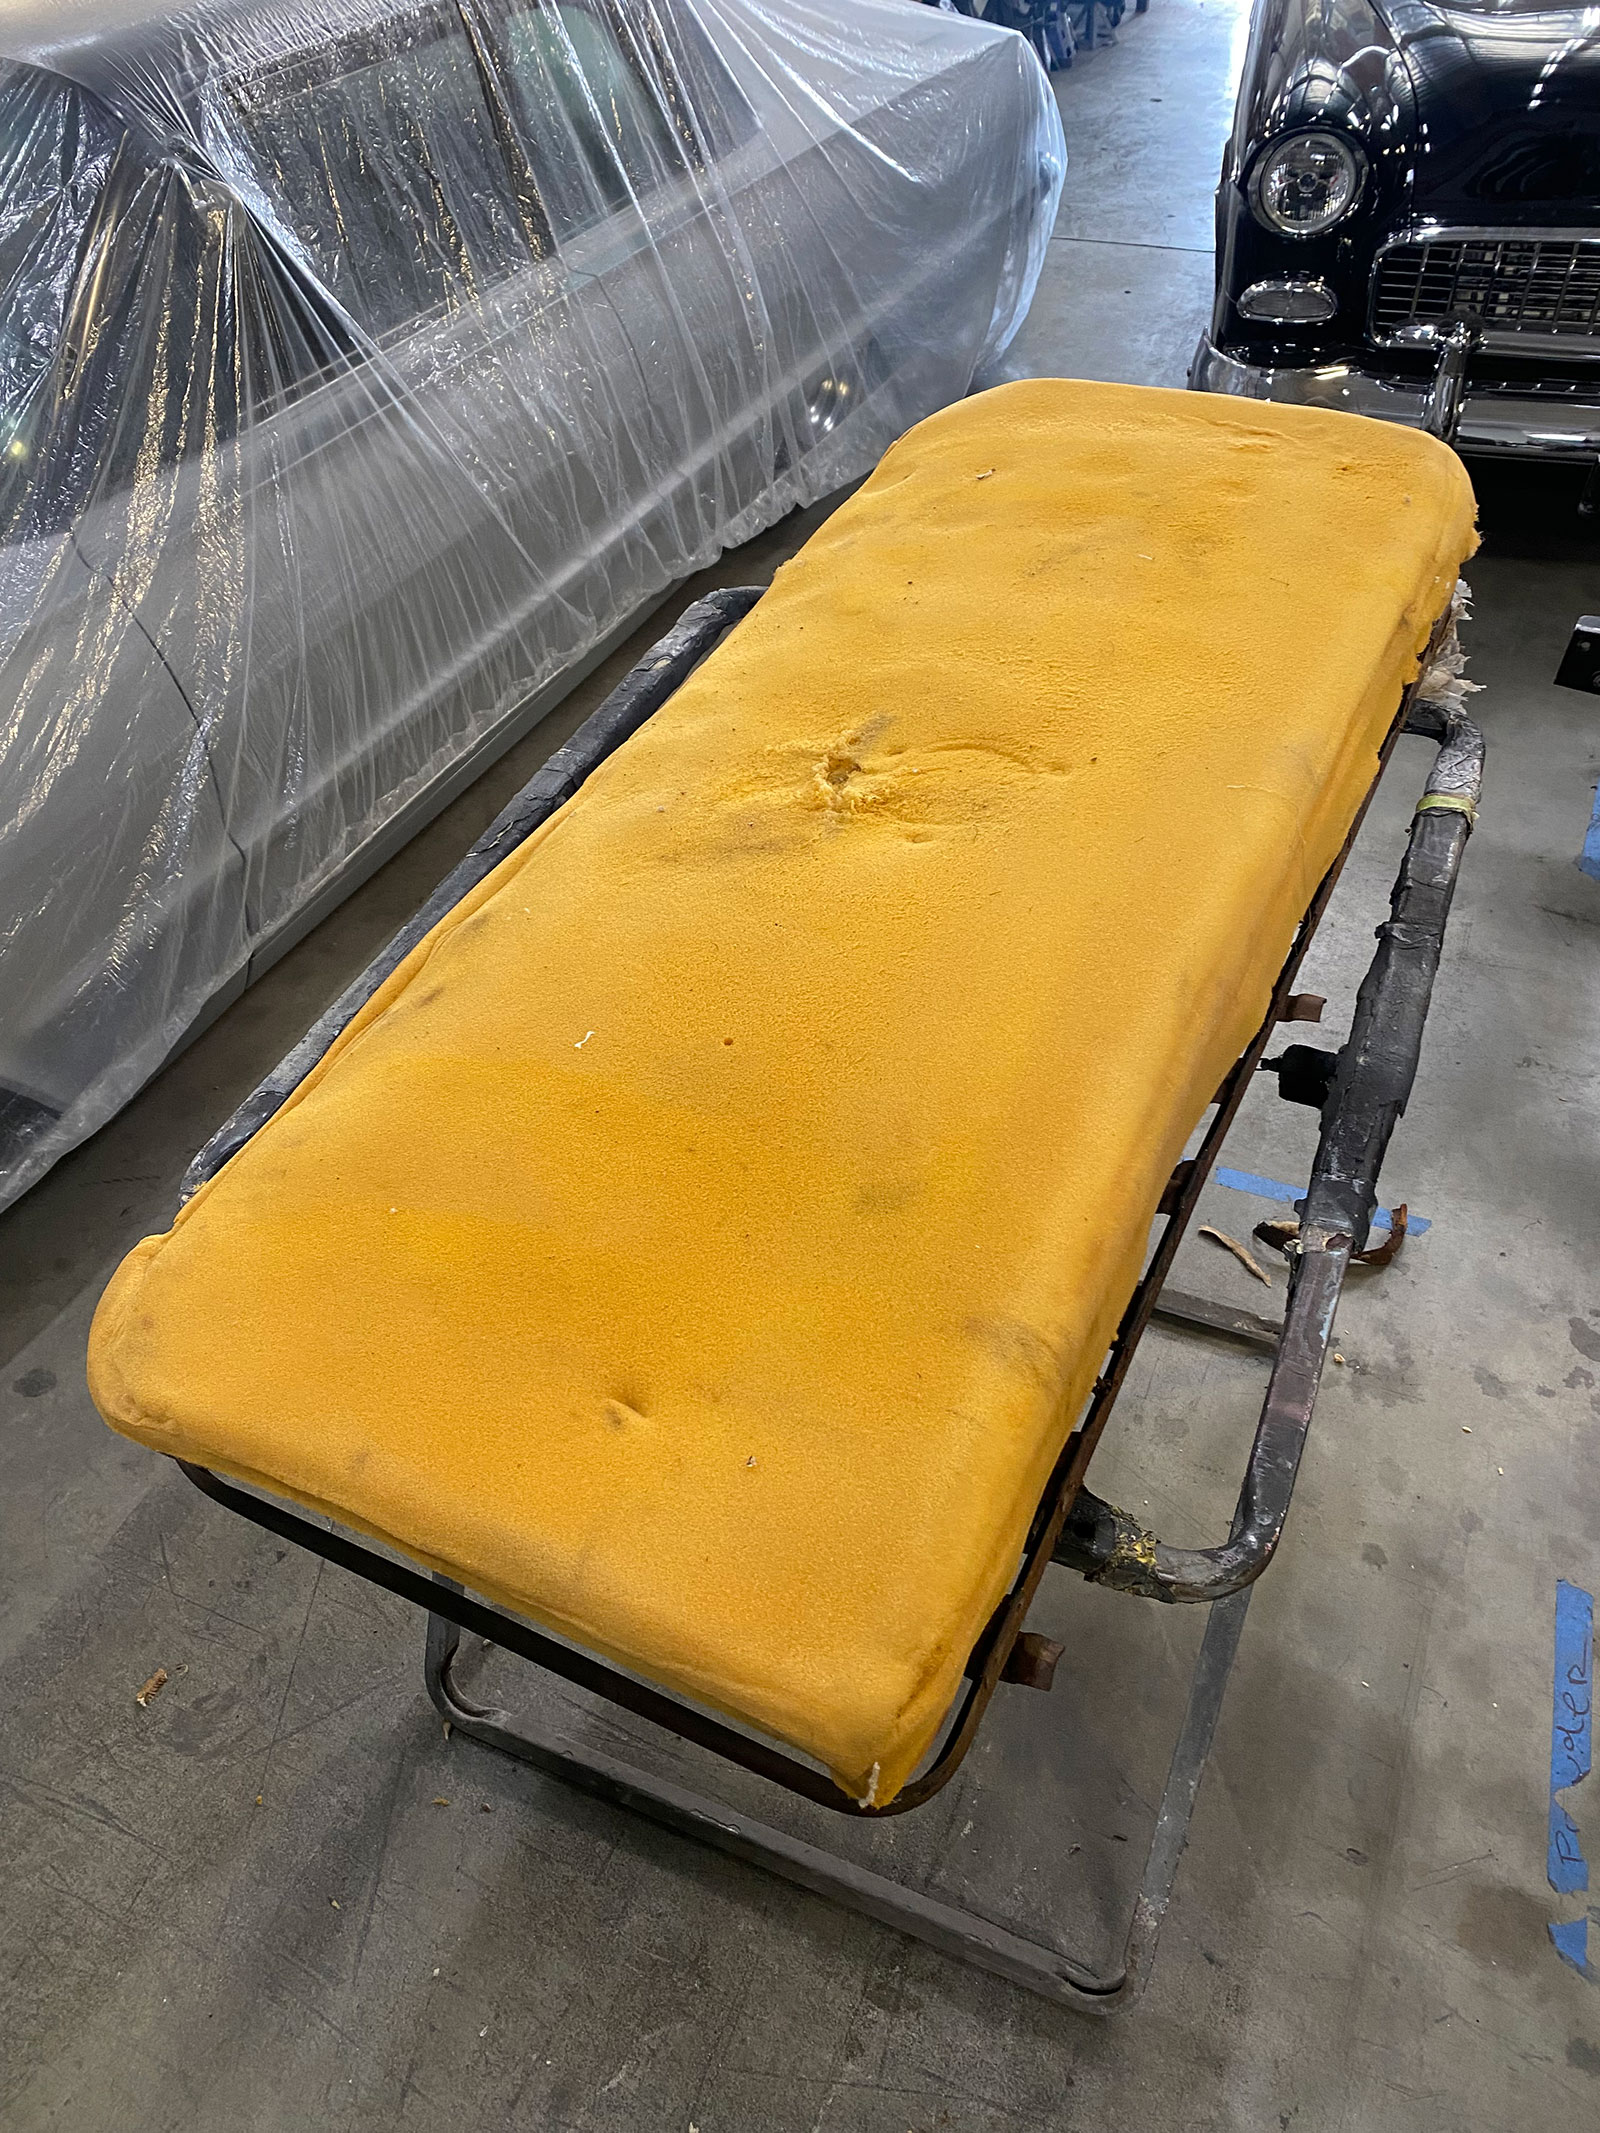
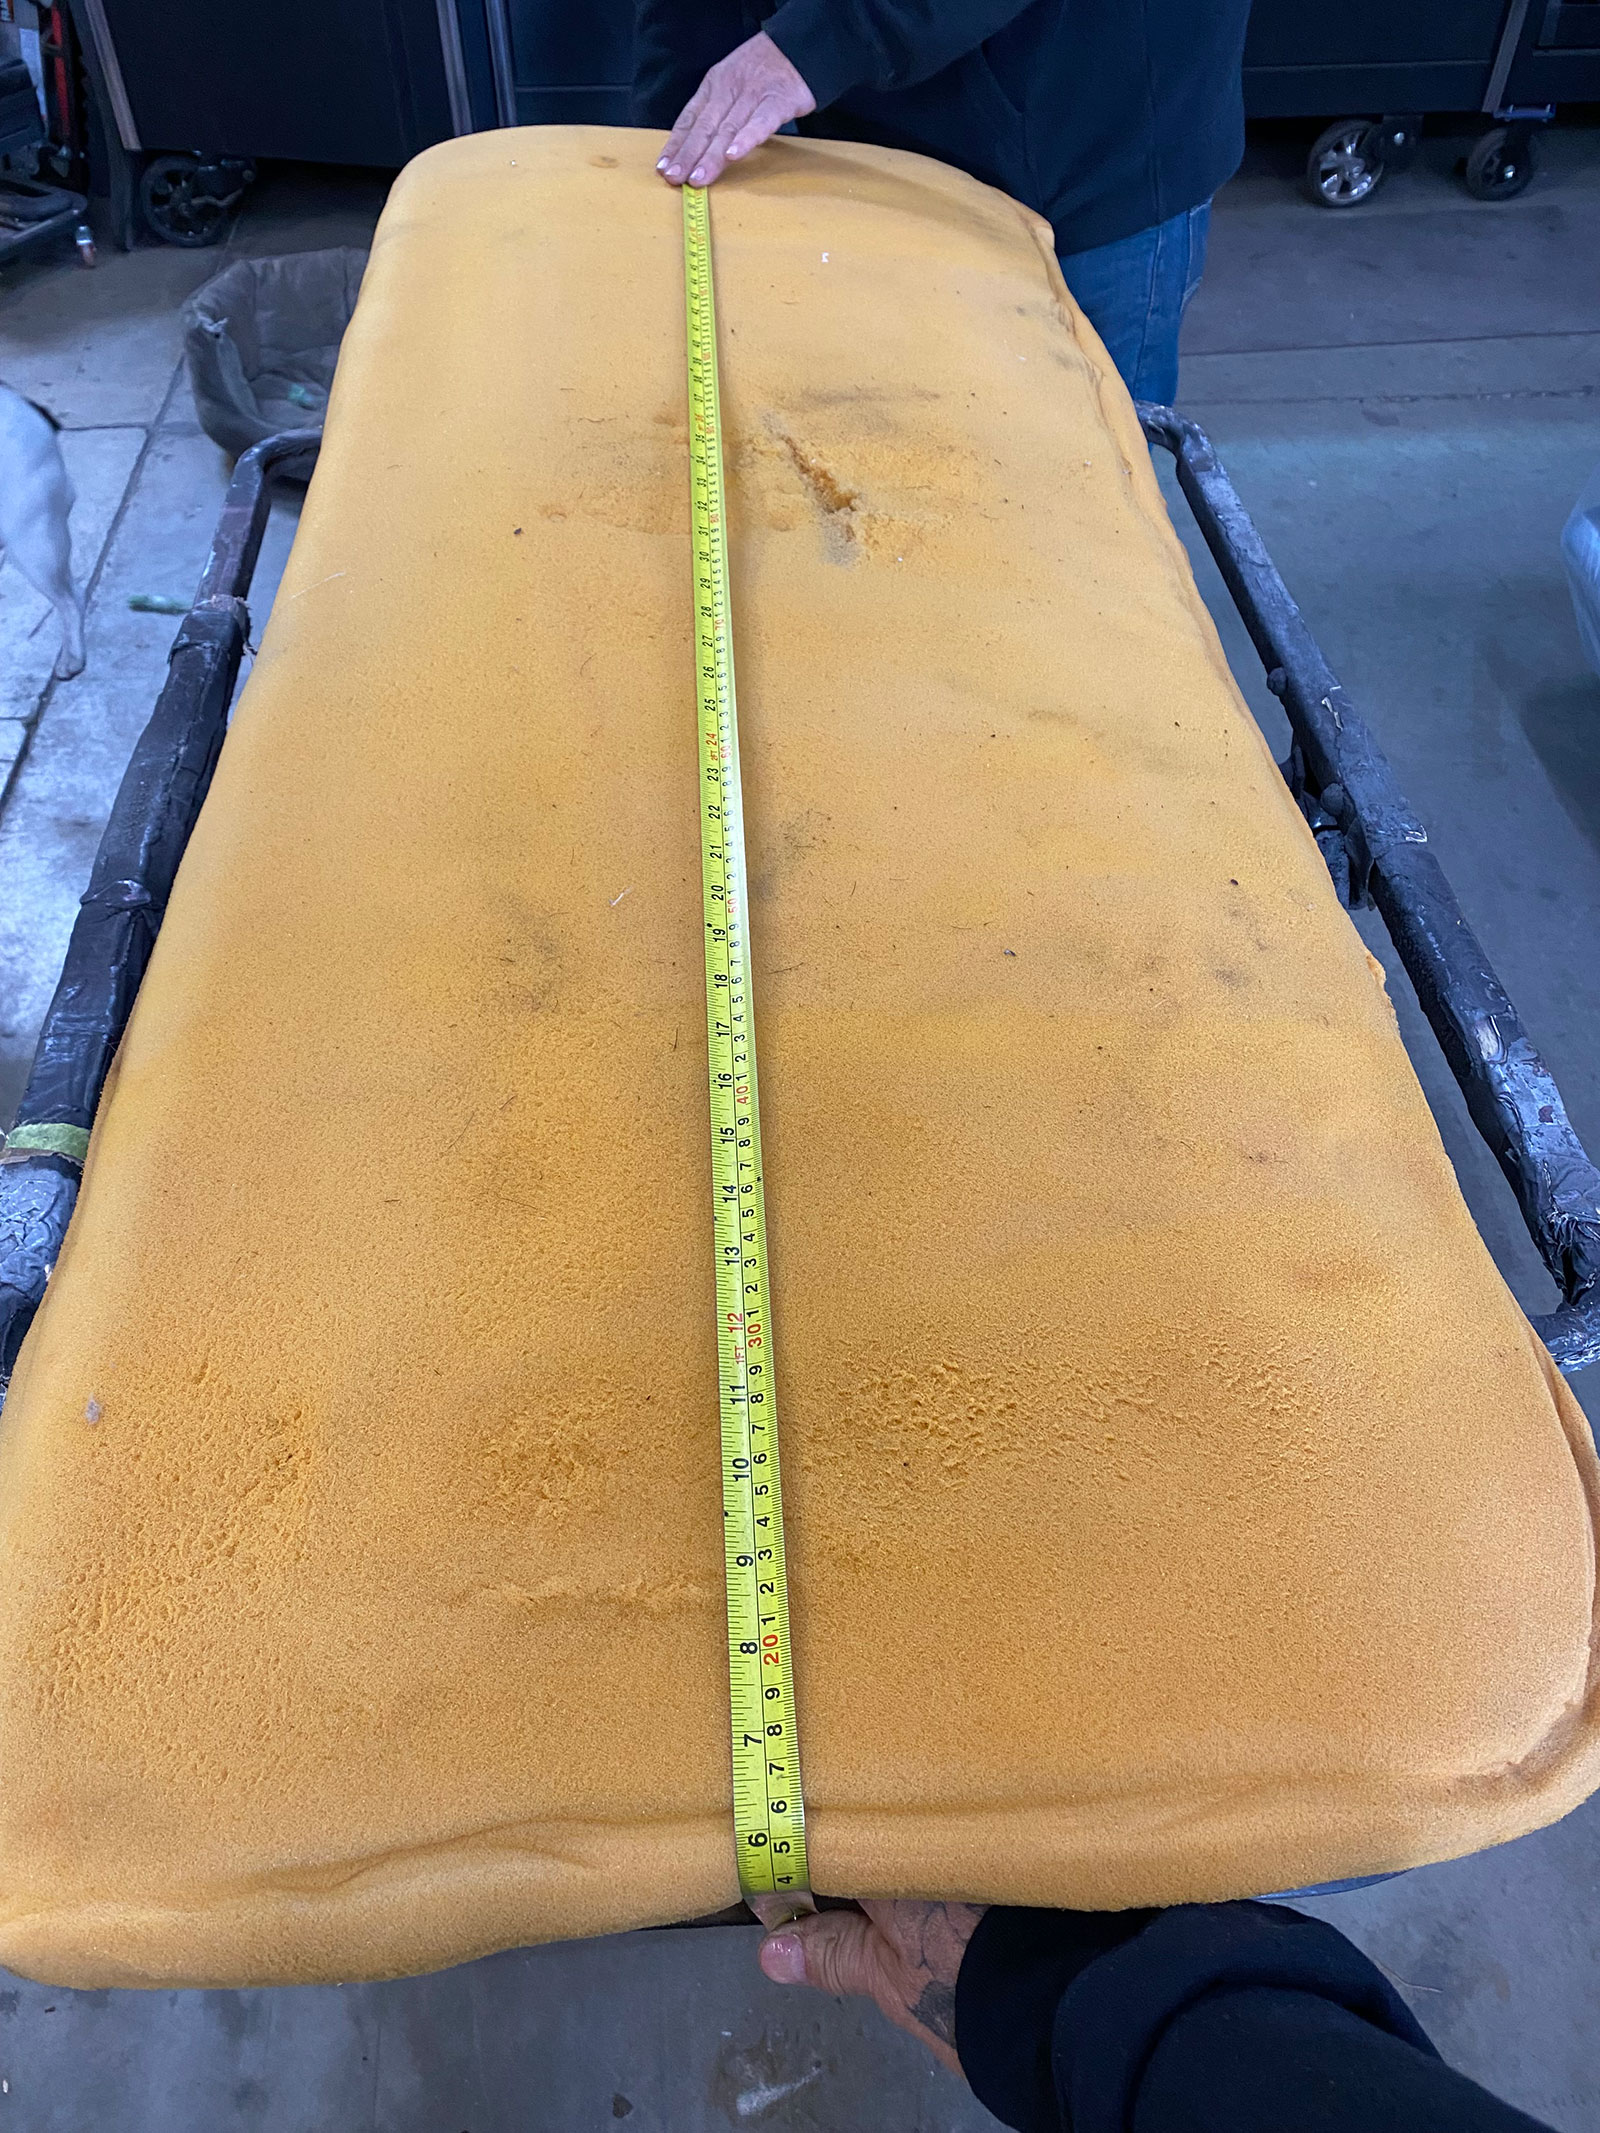
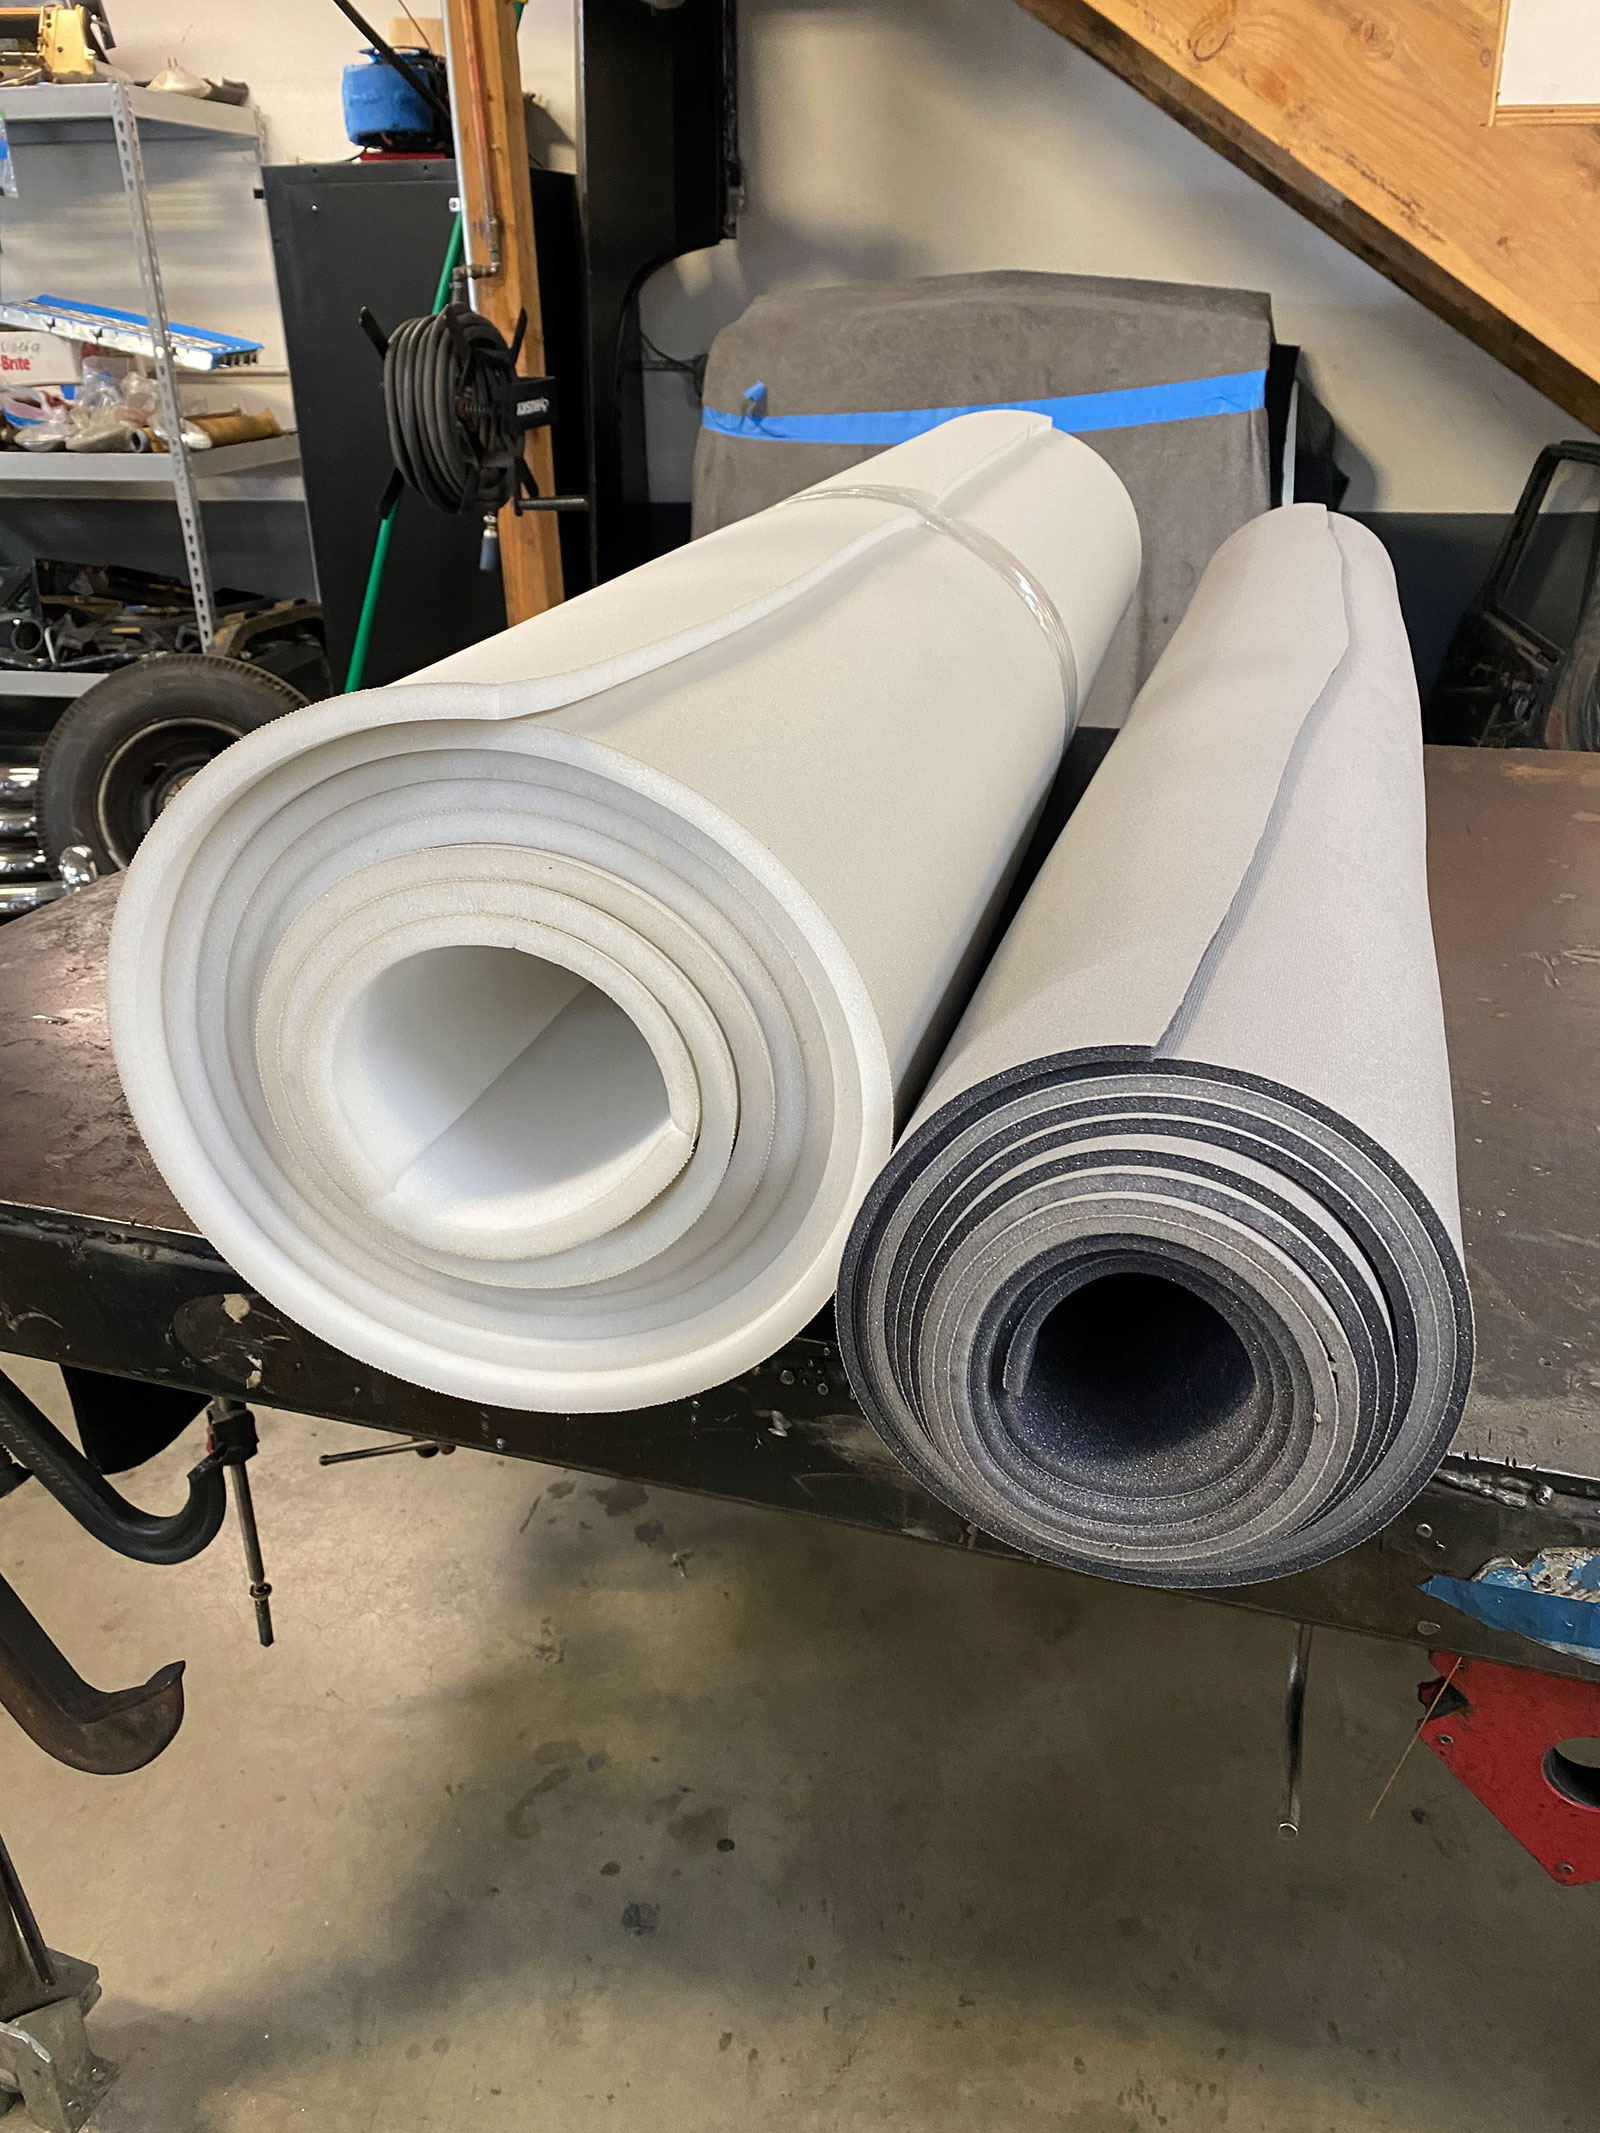
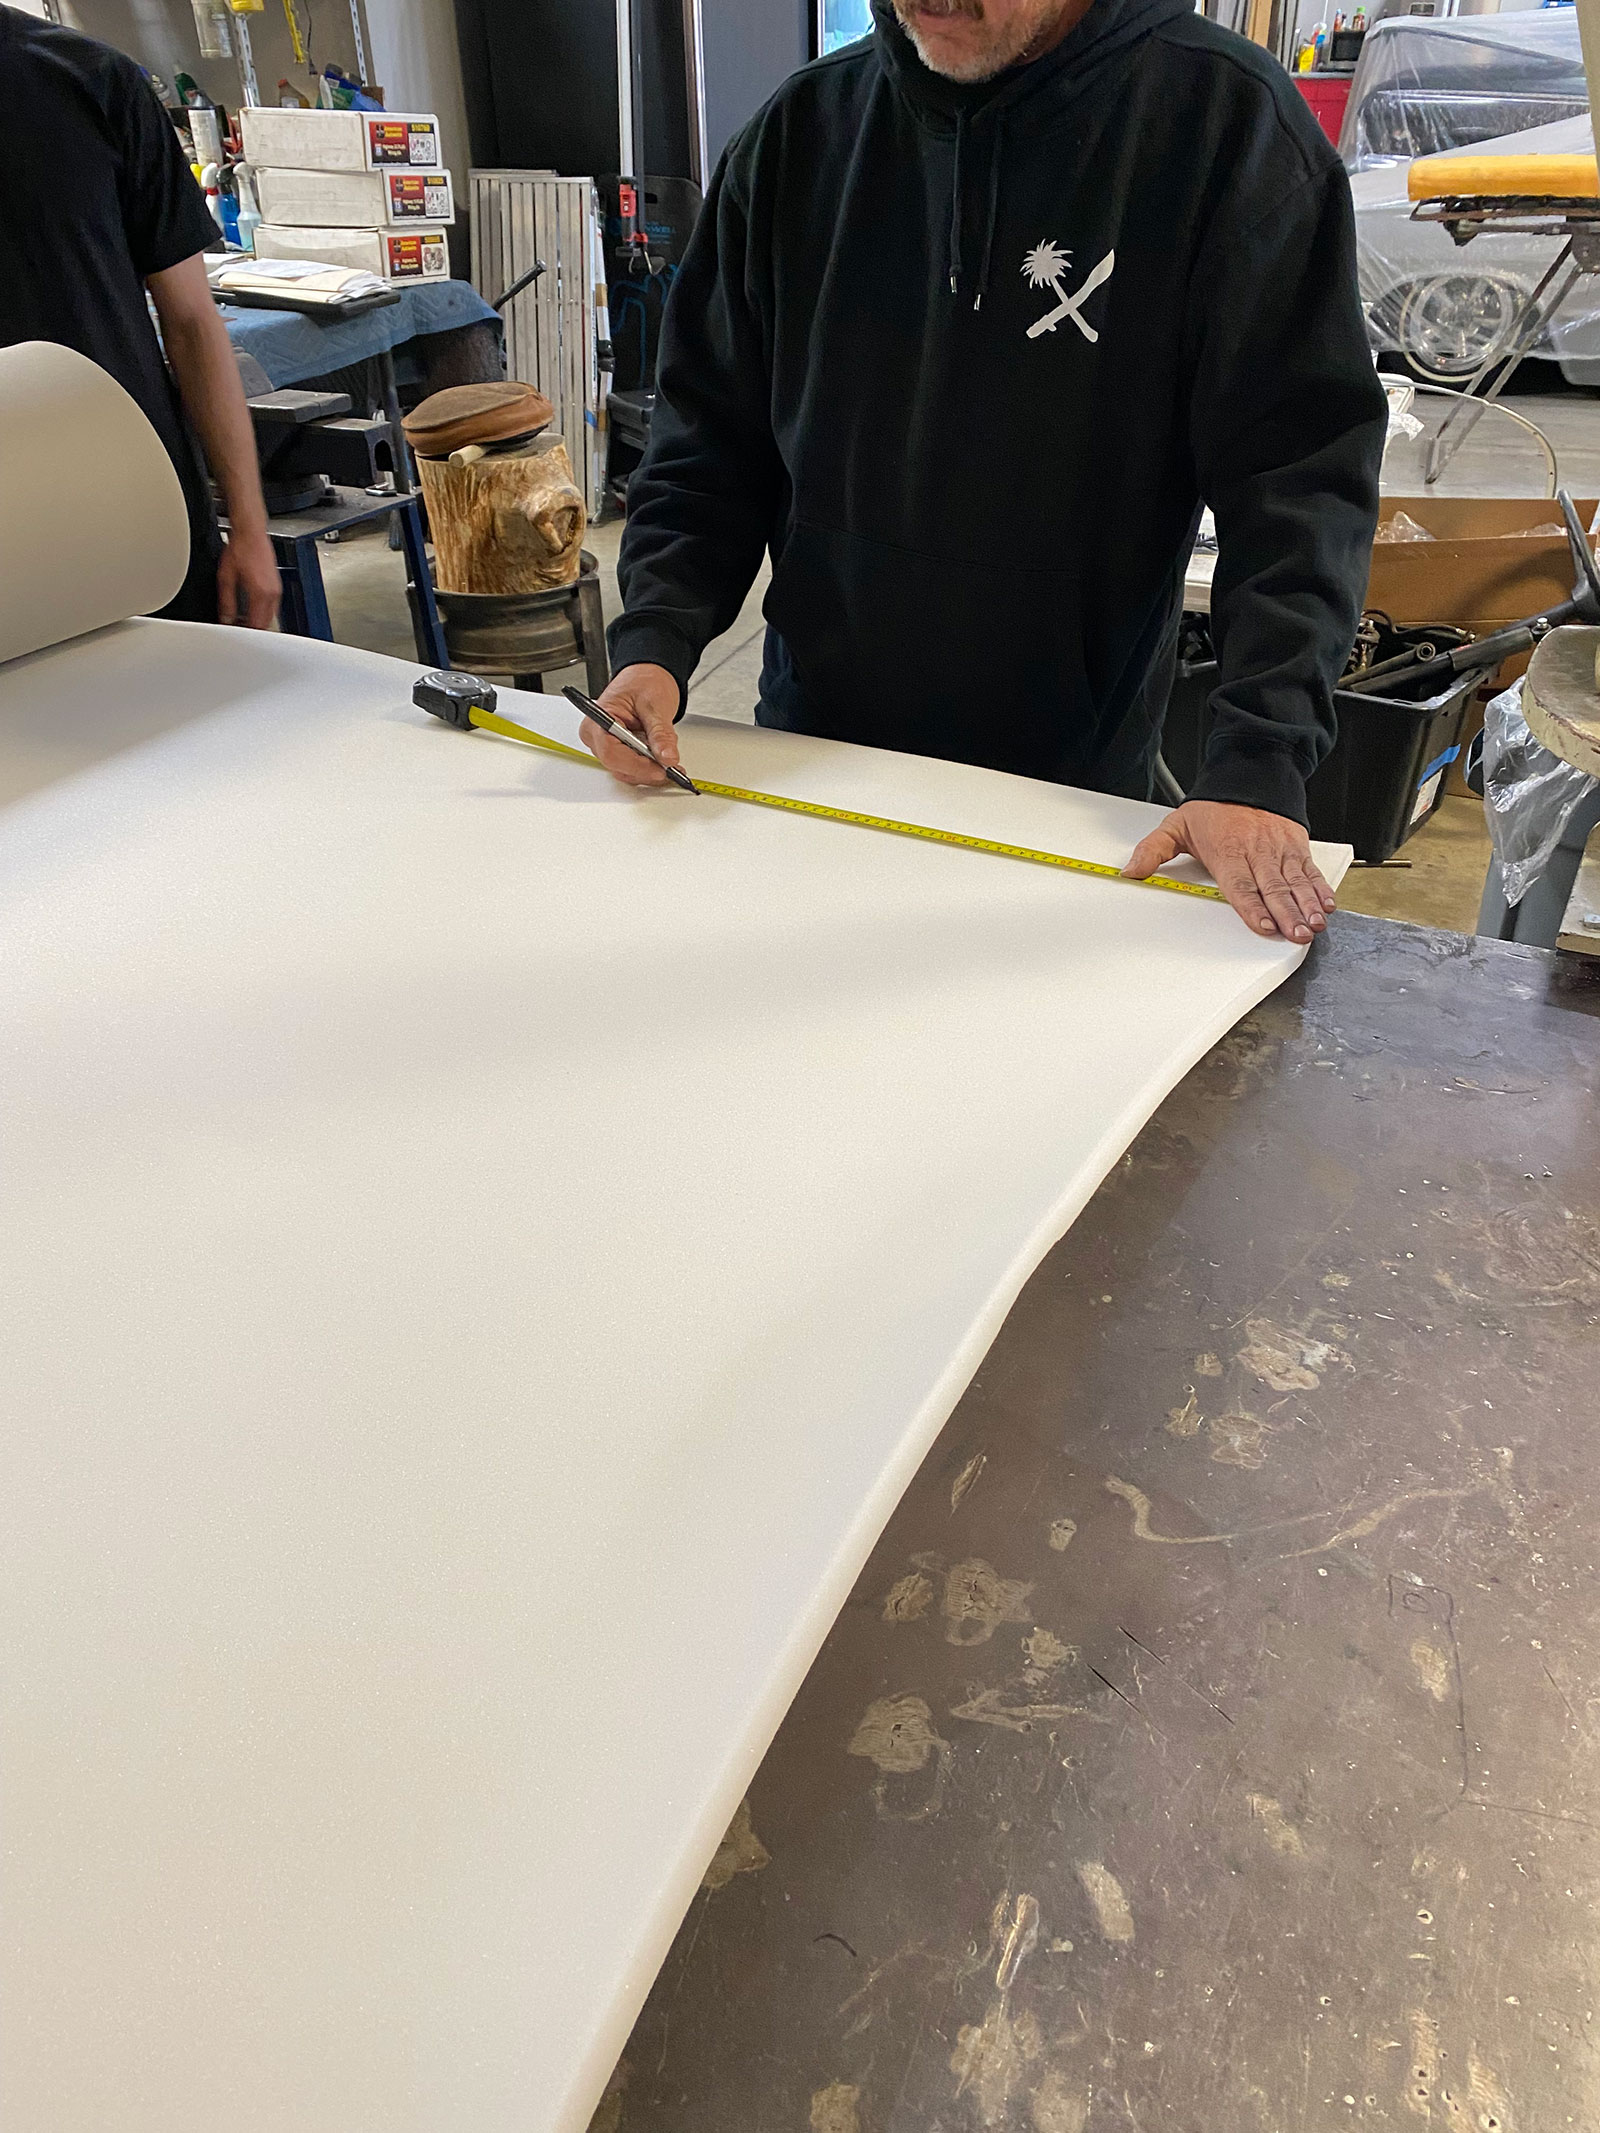
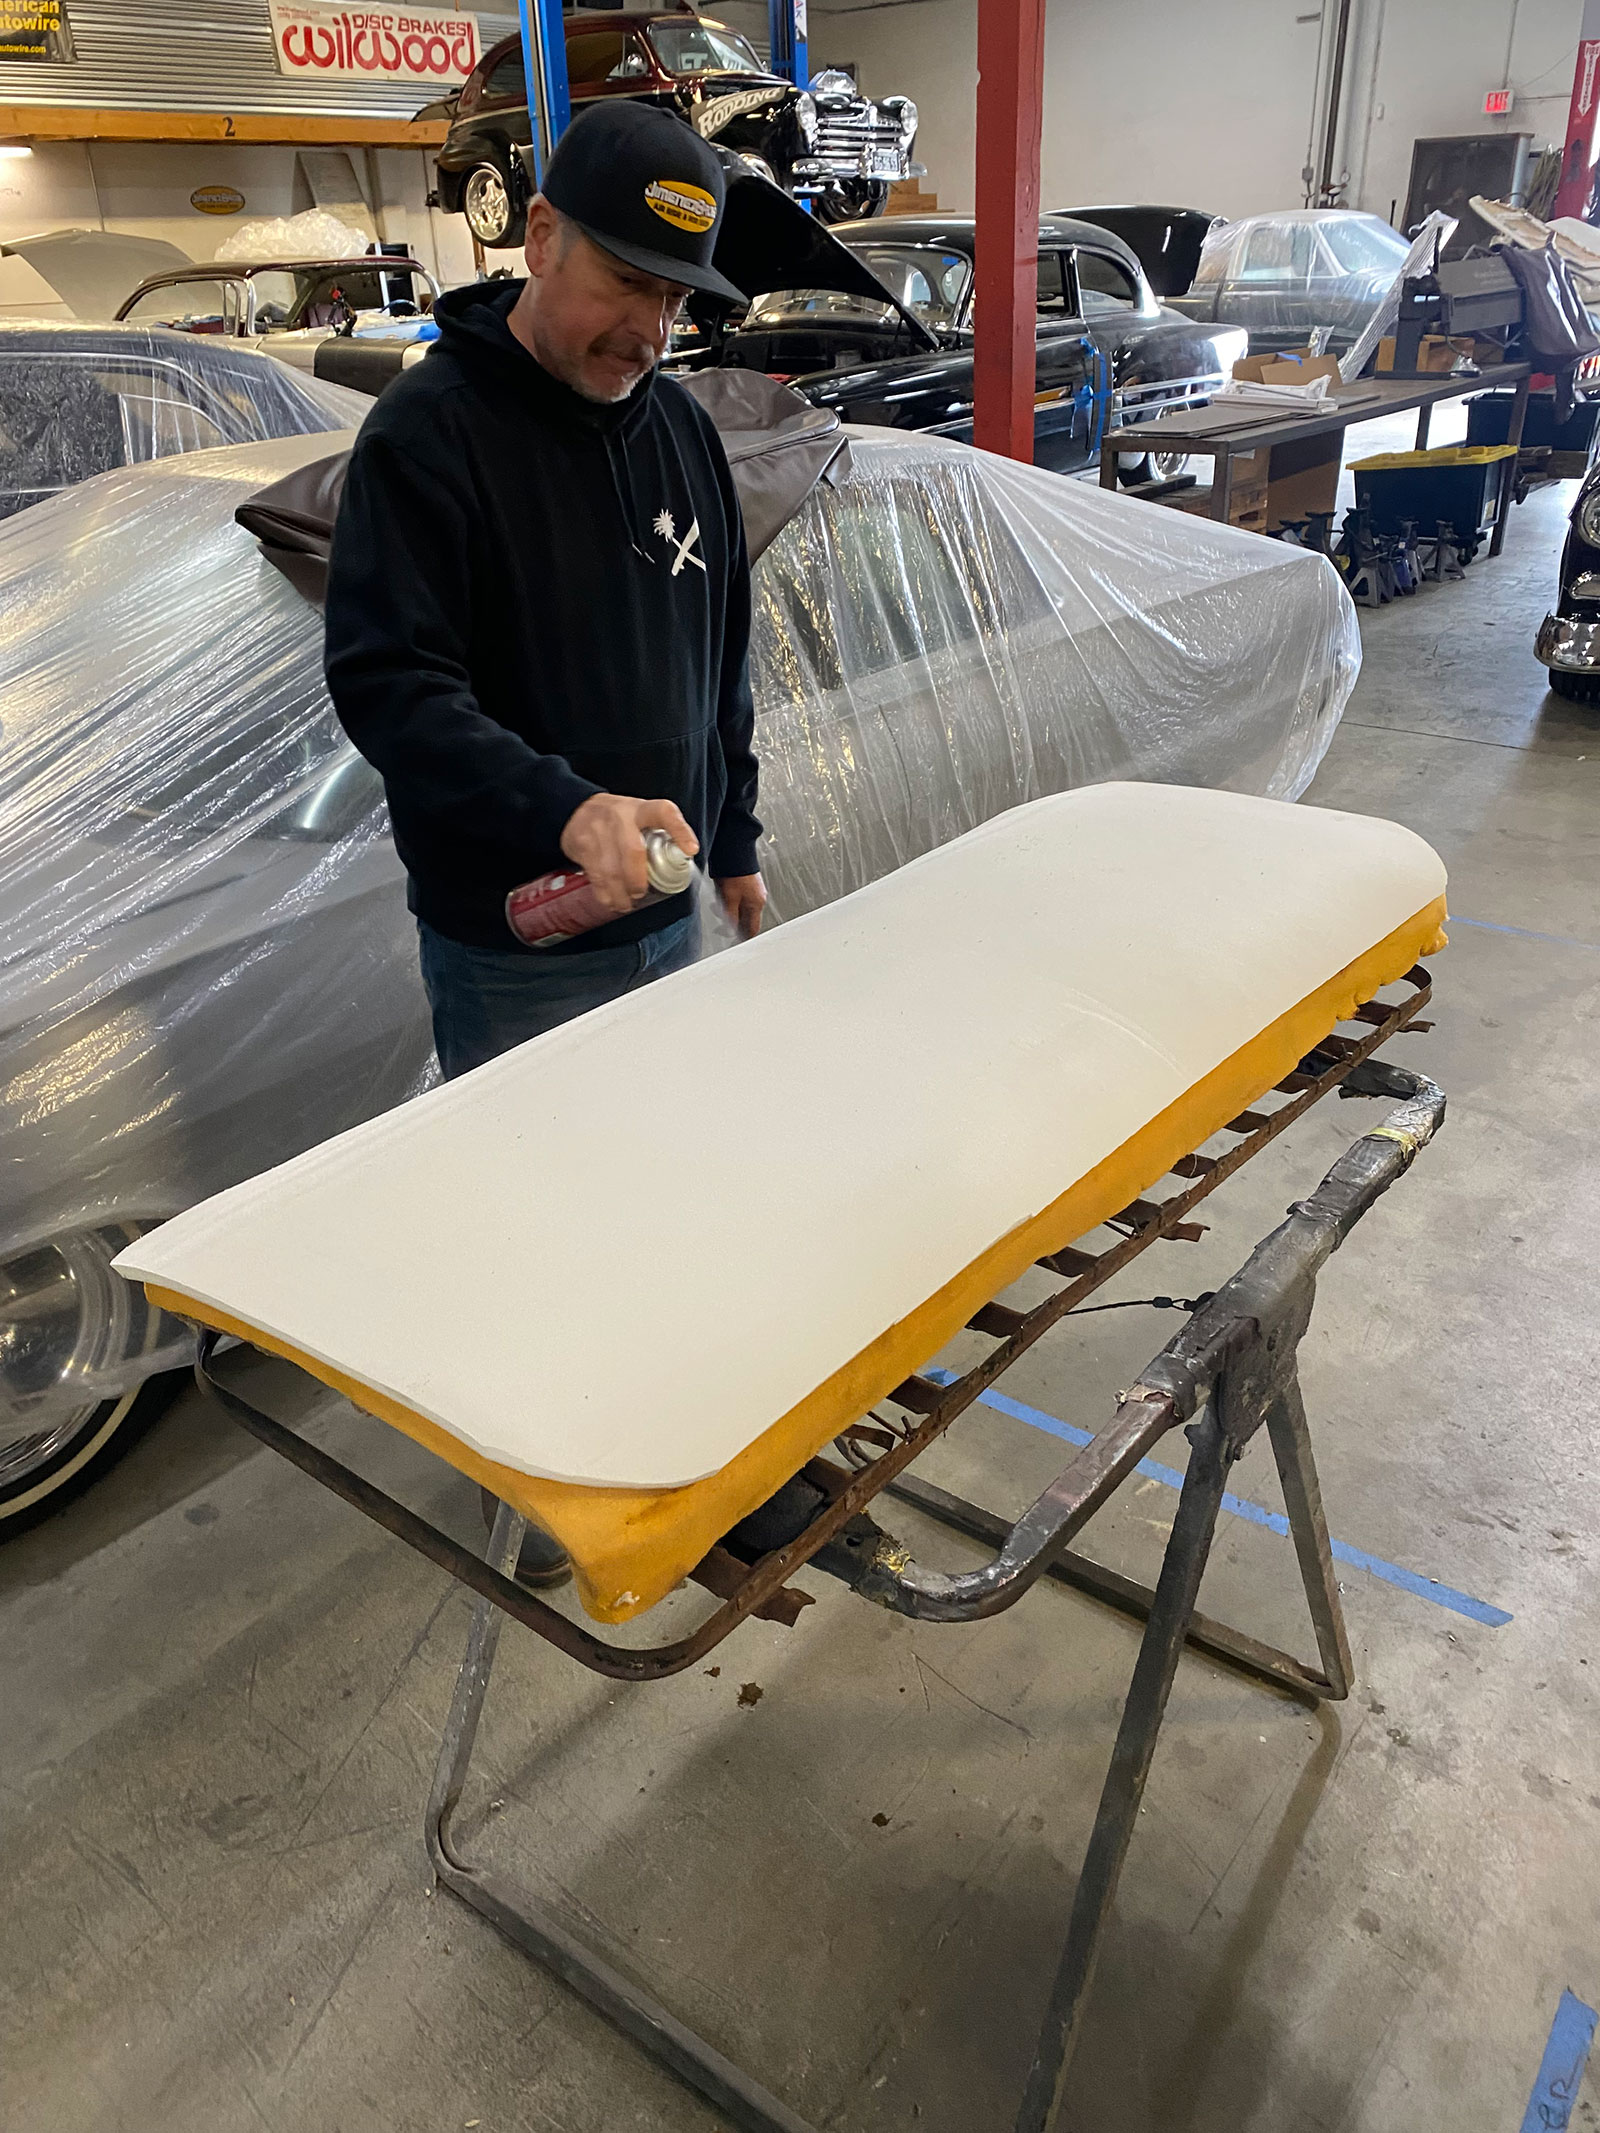
We’ll be adding new layers of foam on both seat sections, so to give us an idea of how much material to purchase, we took some quick measurements.Before heading off to J&J Auto Fabrics, we laid the new Chevs of the 40’s seat cover sections out in the warm sun to help “unwrinkle” the vinyl material for us.J&J Auto Fabrics offers two types of foam for our purposes: 1/2-inch DBL scrim foam (for the initial layer) and 1/4-inch seat pad (for the top layer); both feature a laminated knit backing.Starting with the scrim foam, we measured, marked, and cut out our base piece for the bottom seat cushion—keeping it oversize to allow plenty of material to work with.
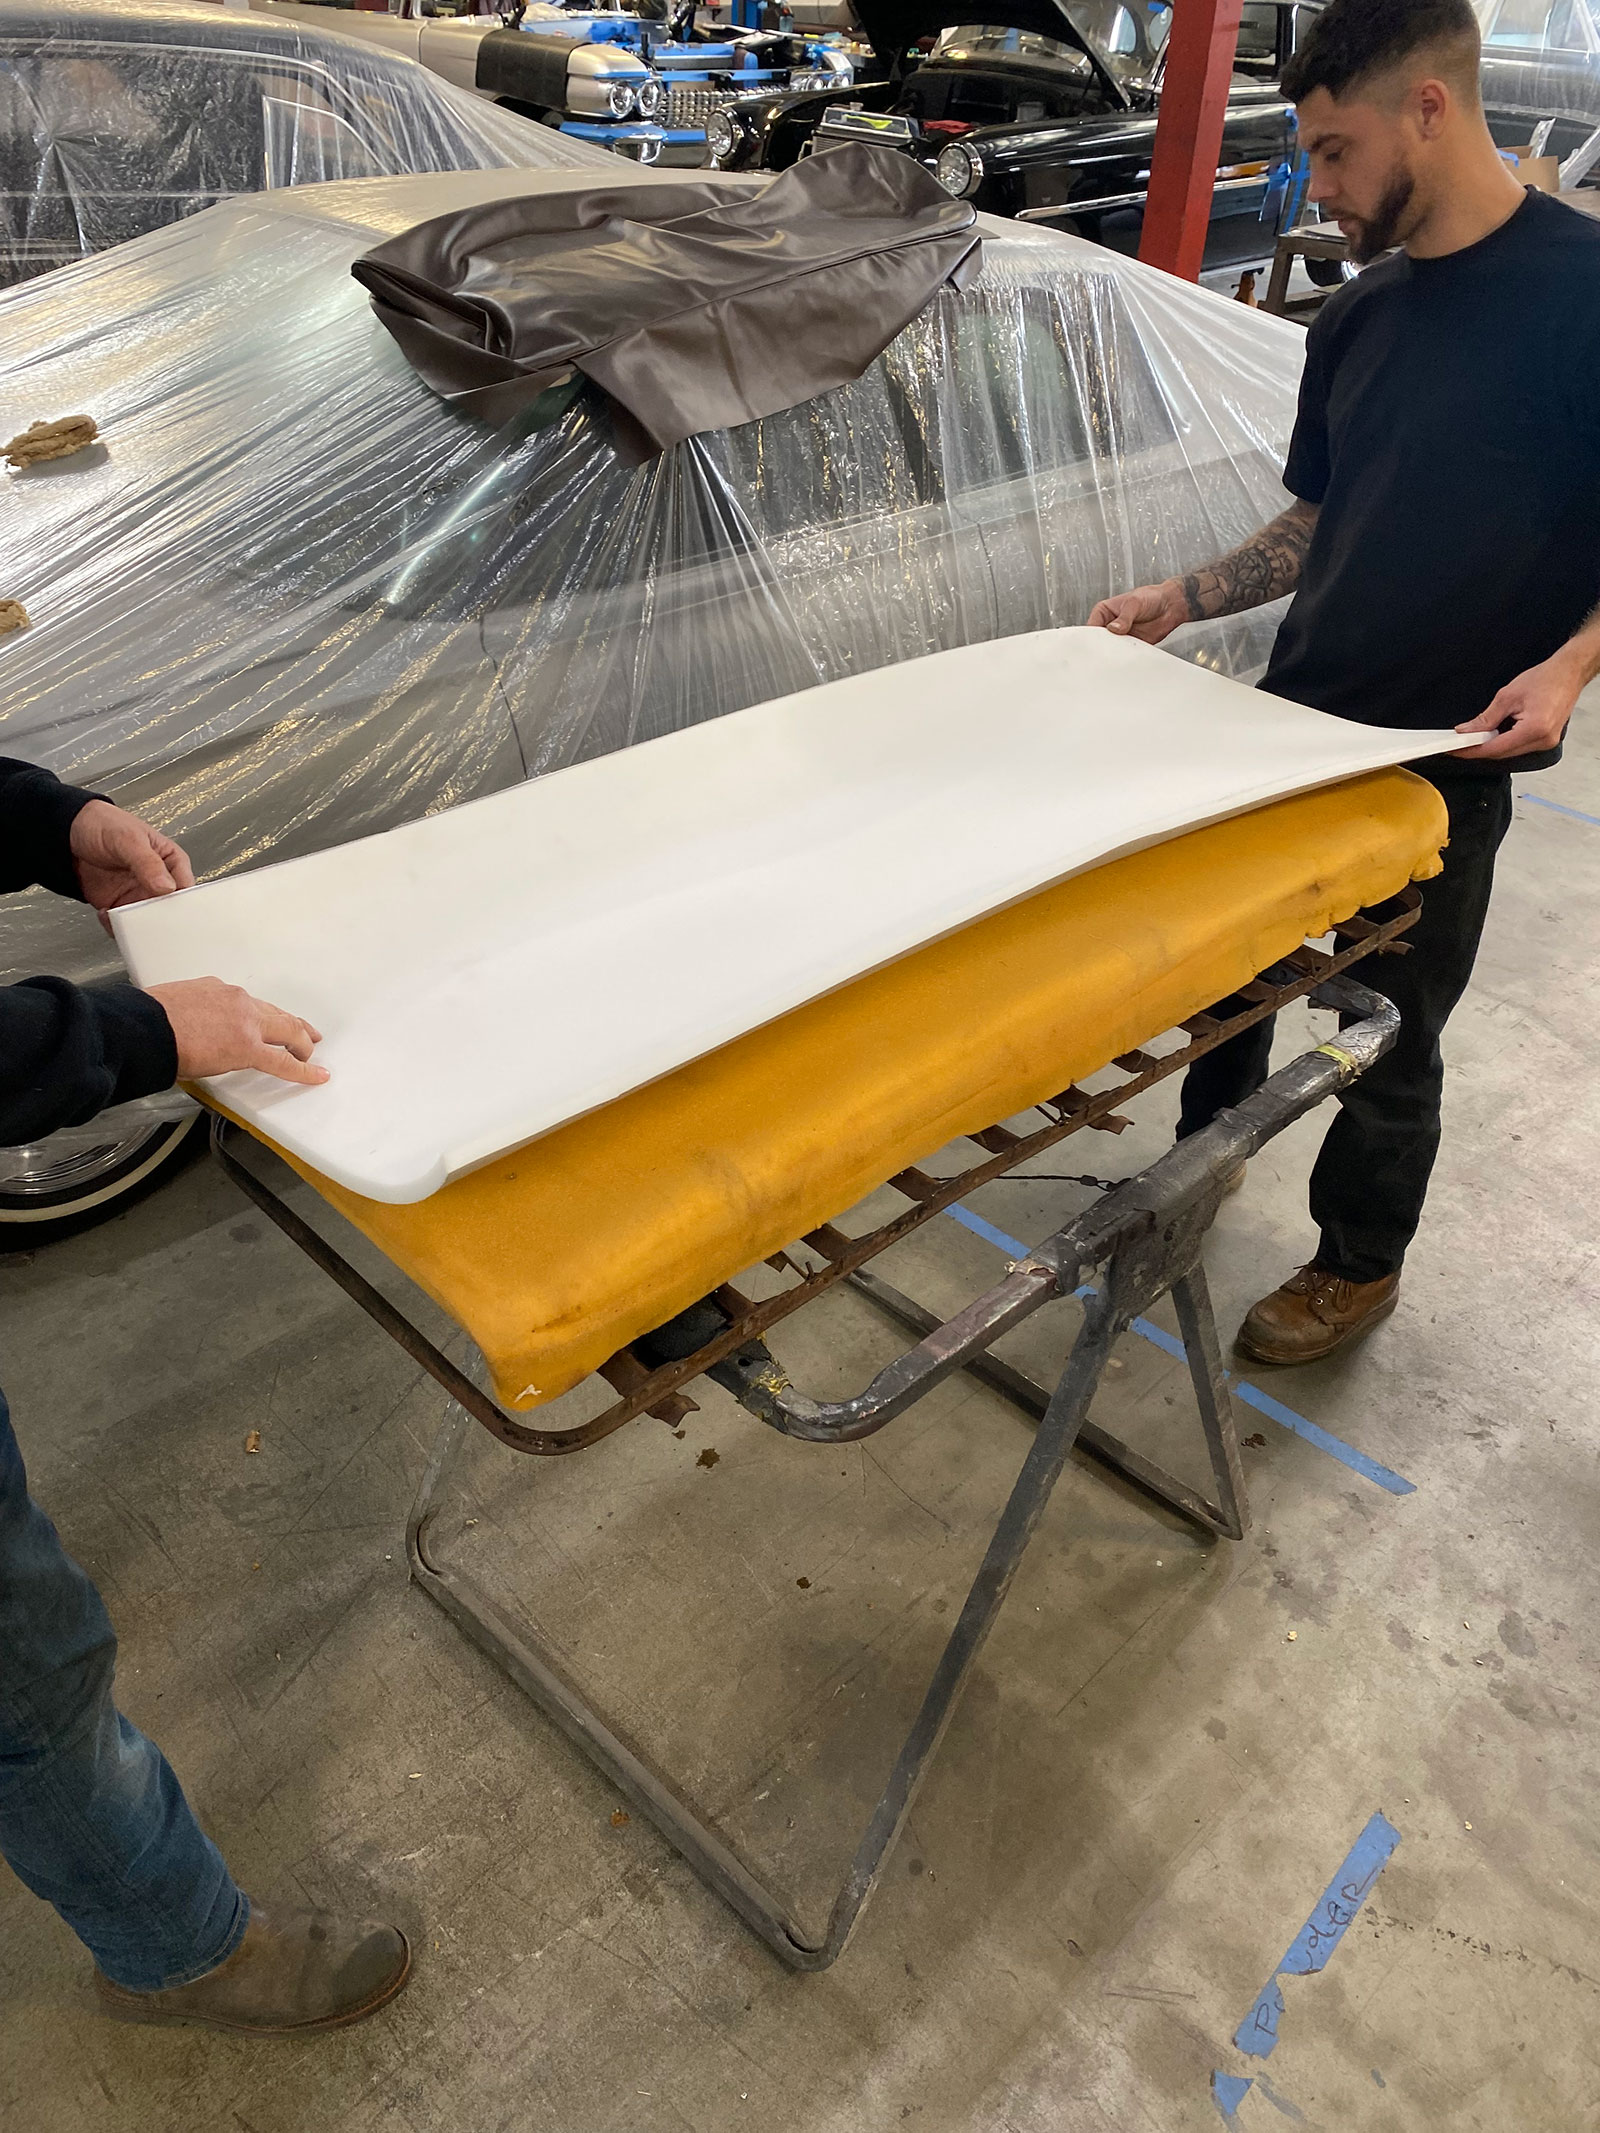
Since the existing foam already had a basic “shape” to it, albeit somewhat wonky, we opted to shape the new base to the top only and leave the sides as-was.Both sides of the scrim foam (as well as the old foam) were sprayed with 3M’s Super 77—one side to attach and adhere to the base, the other to attach and secure the forthcoming seat pad foam layer (which also received a coat of spray adhesive to the bottom side only).
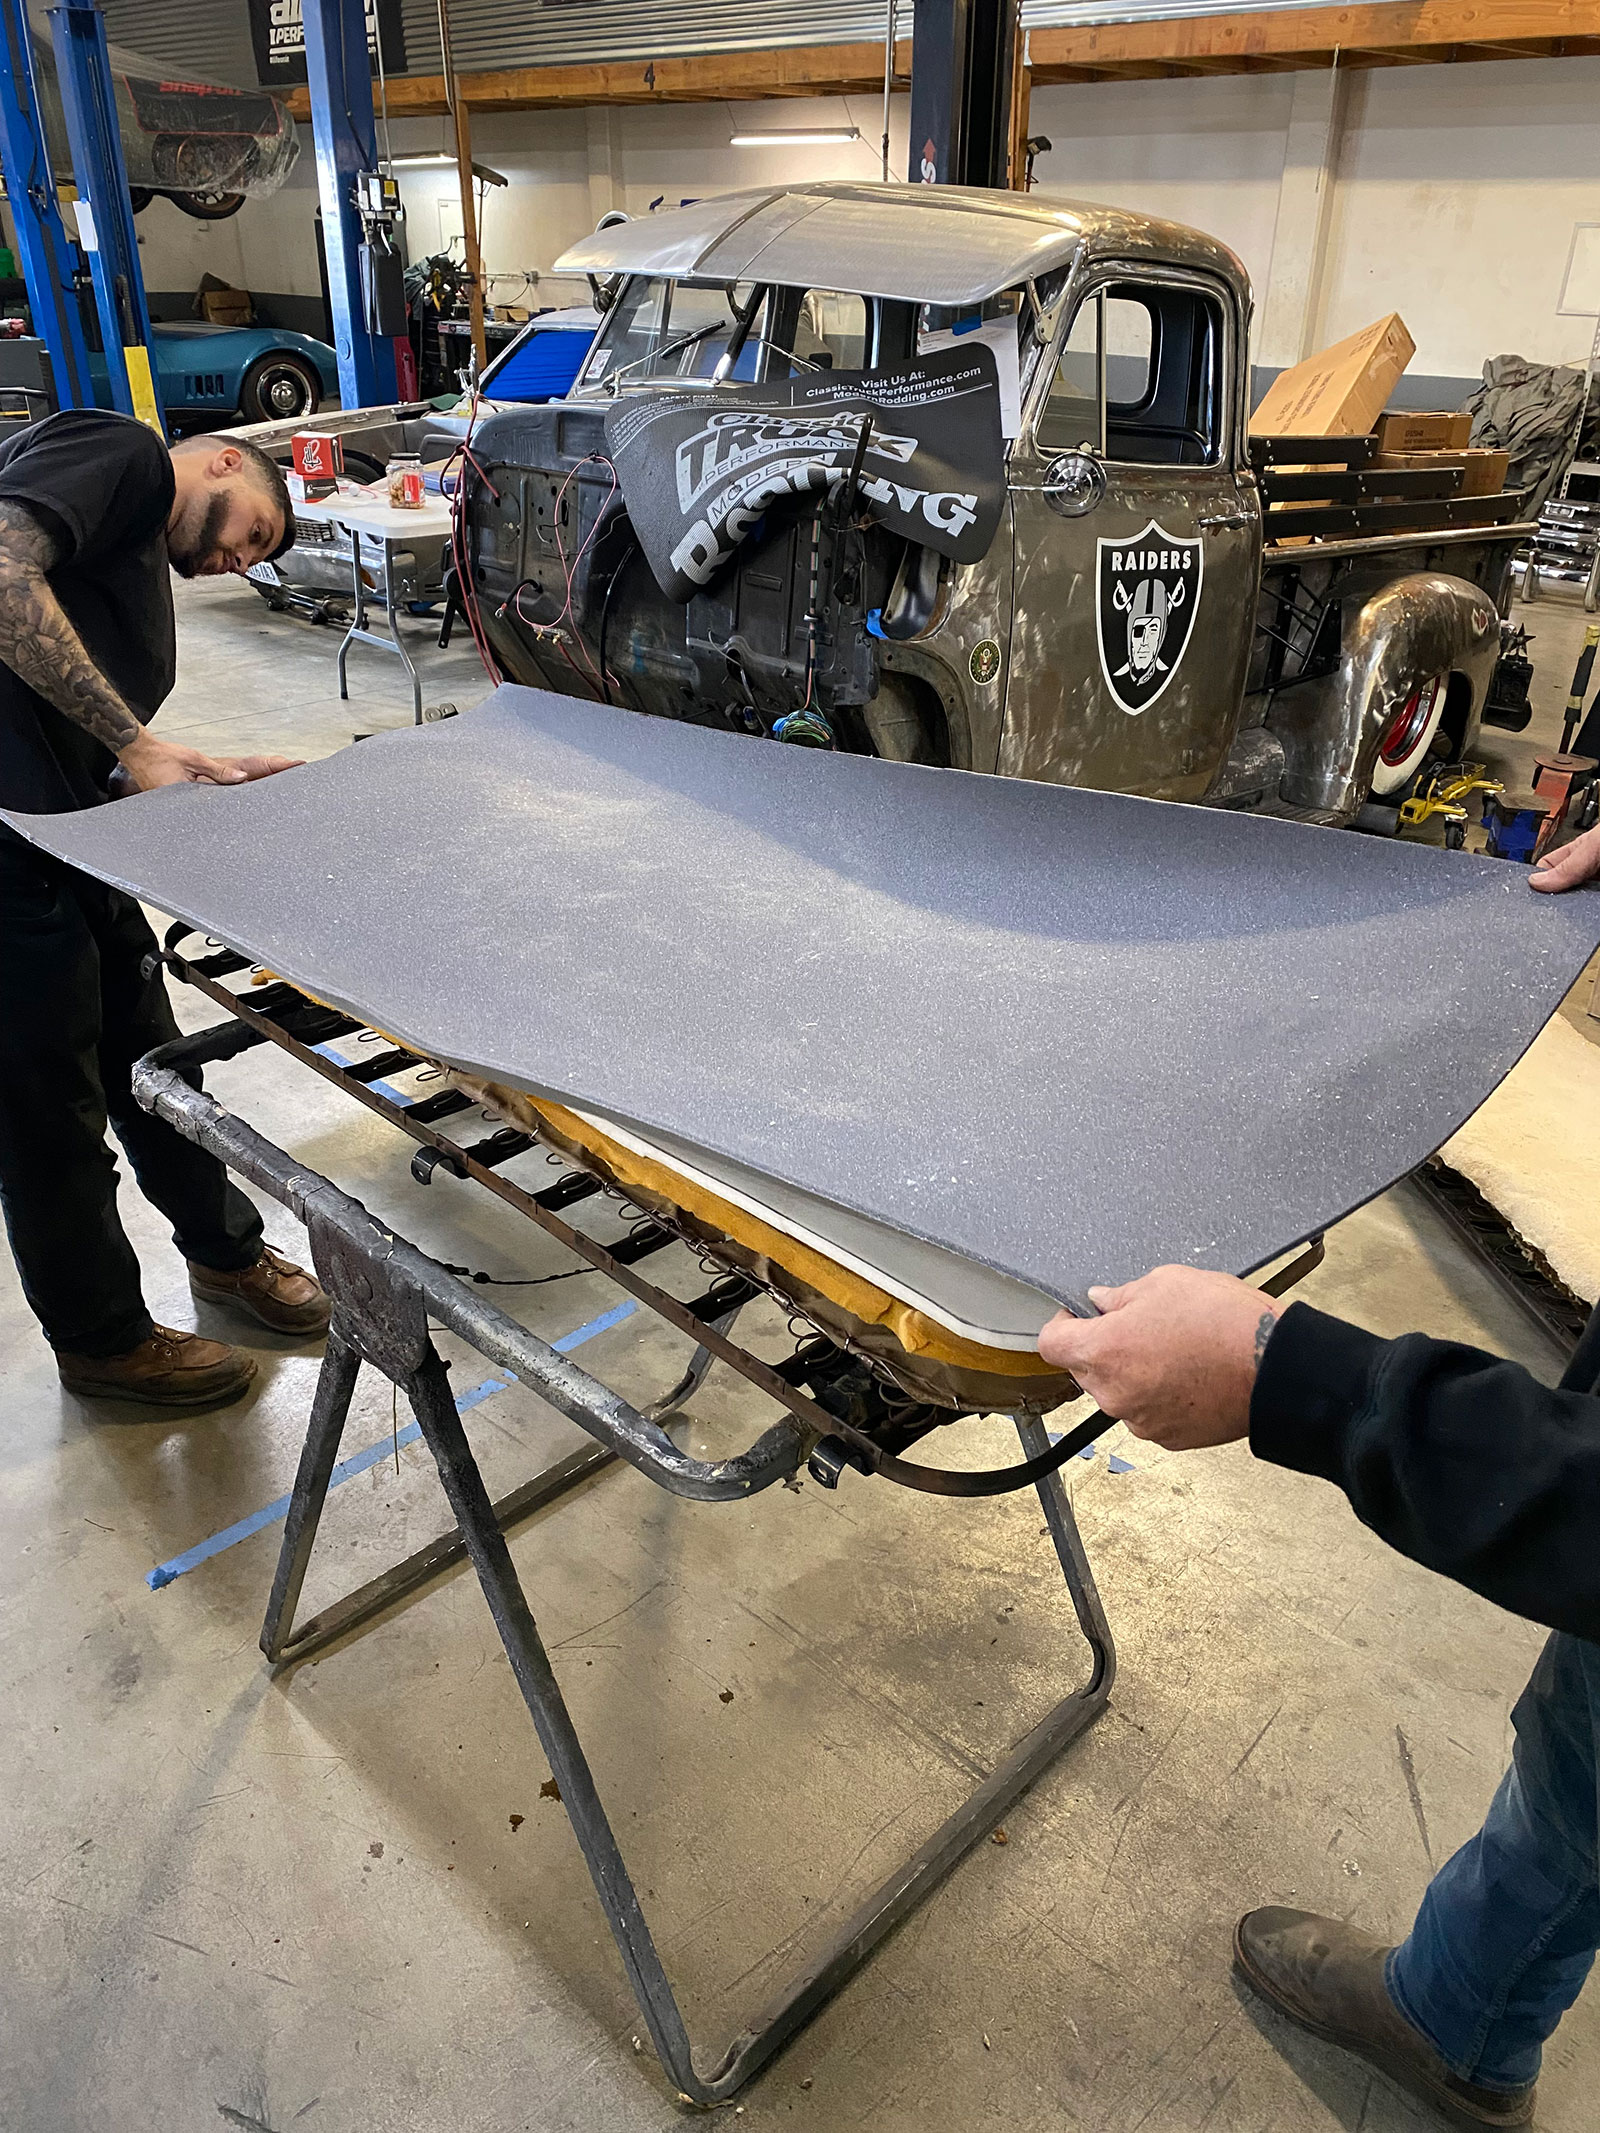
With the new seat cover nice and warm and smoothed out, we gave it a quick test-fit over the newly padded seat base to see how we were looking shape-wise. Once satisfied, we could move on with attaching the cover(s) to the original seat frames.
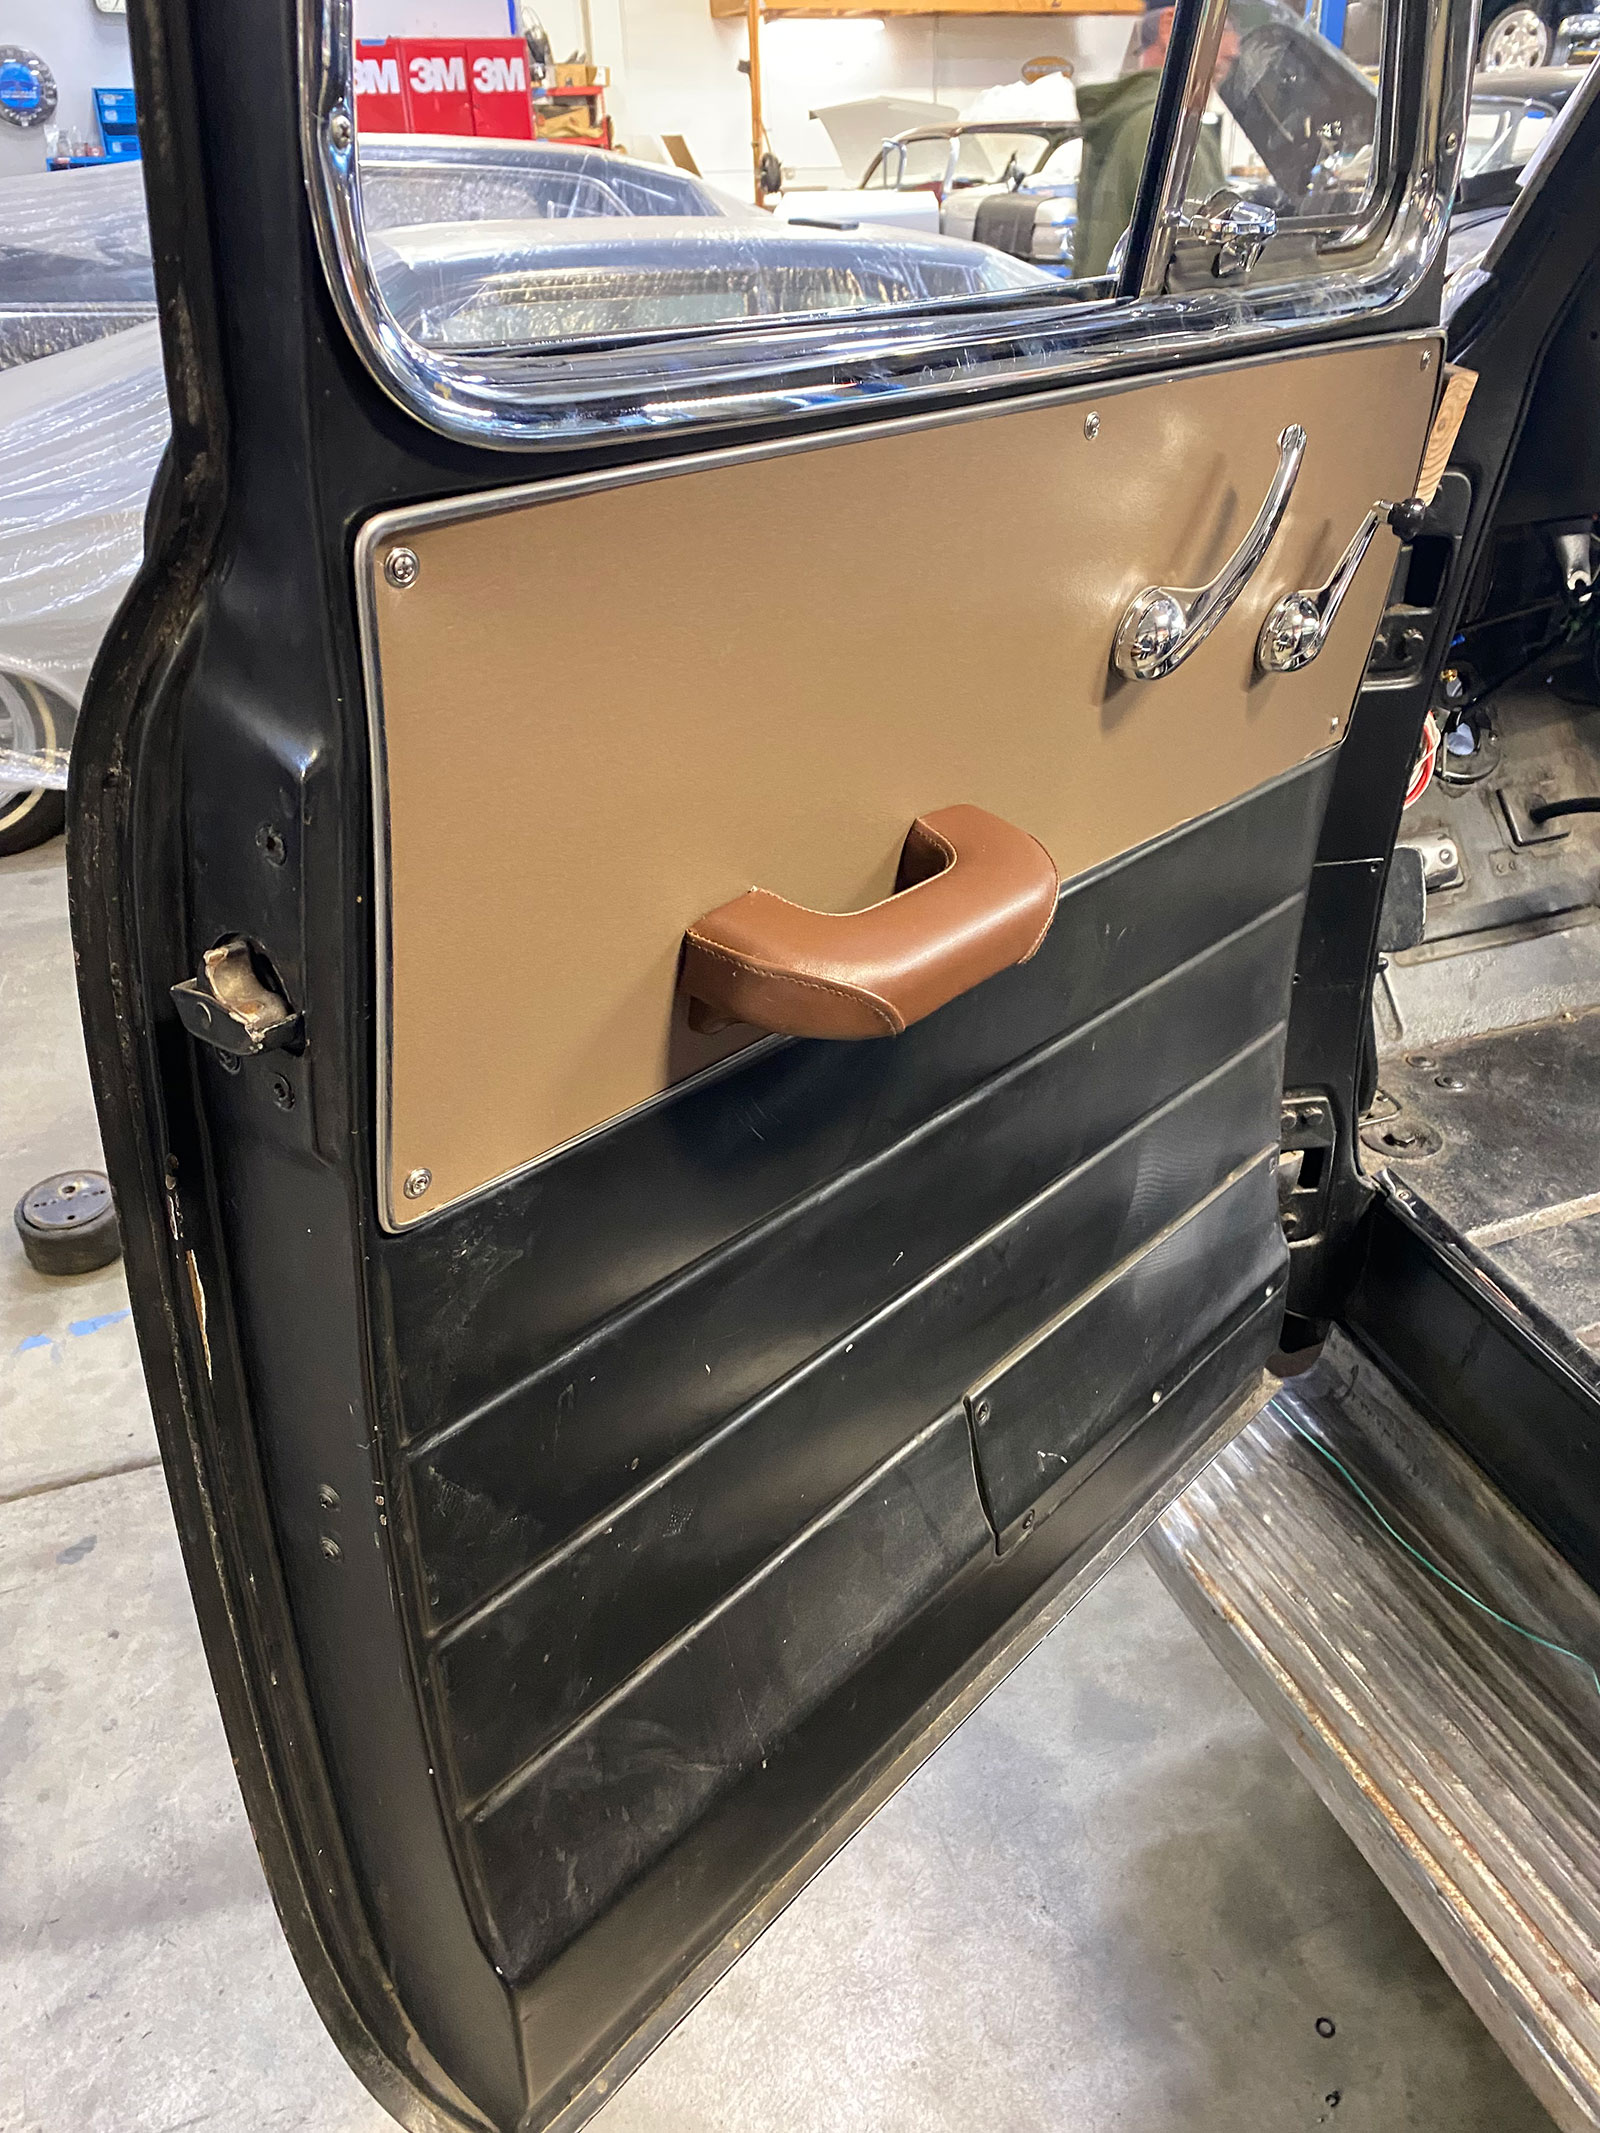
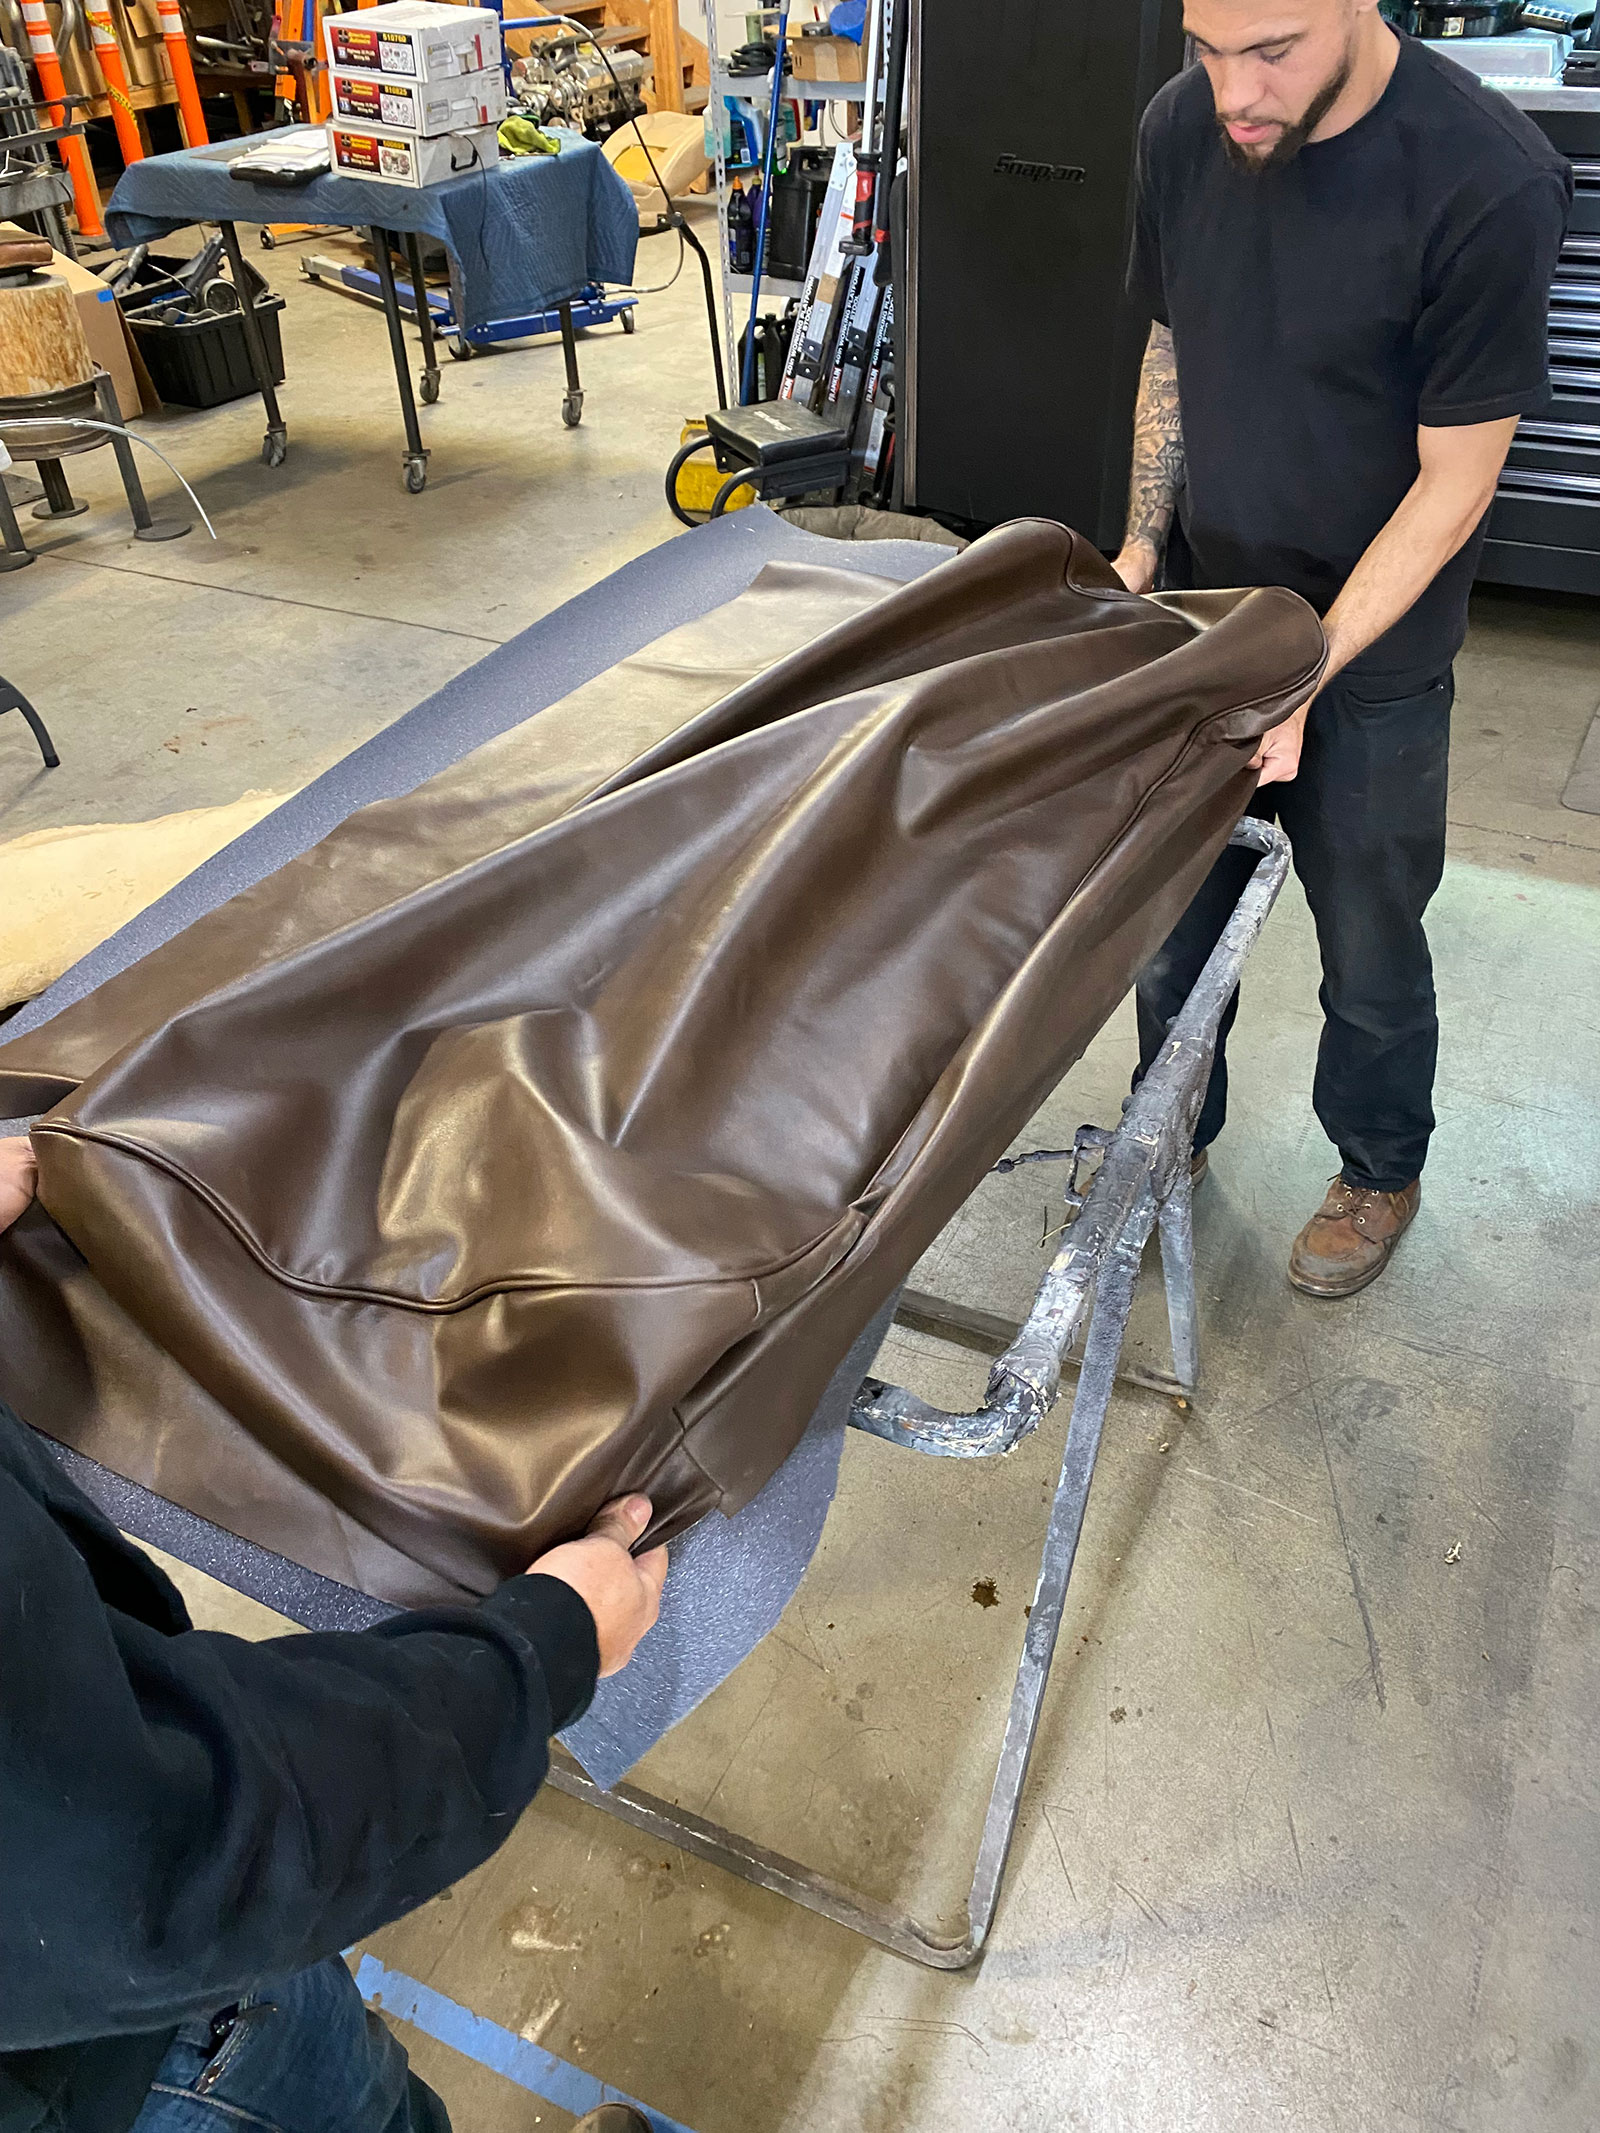
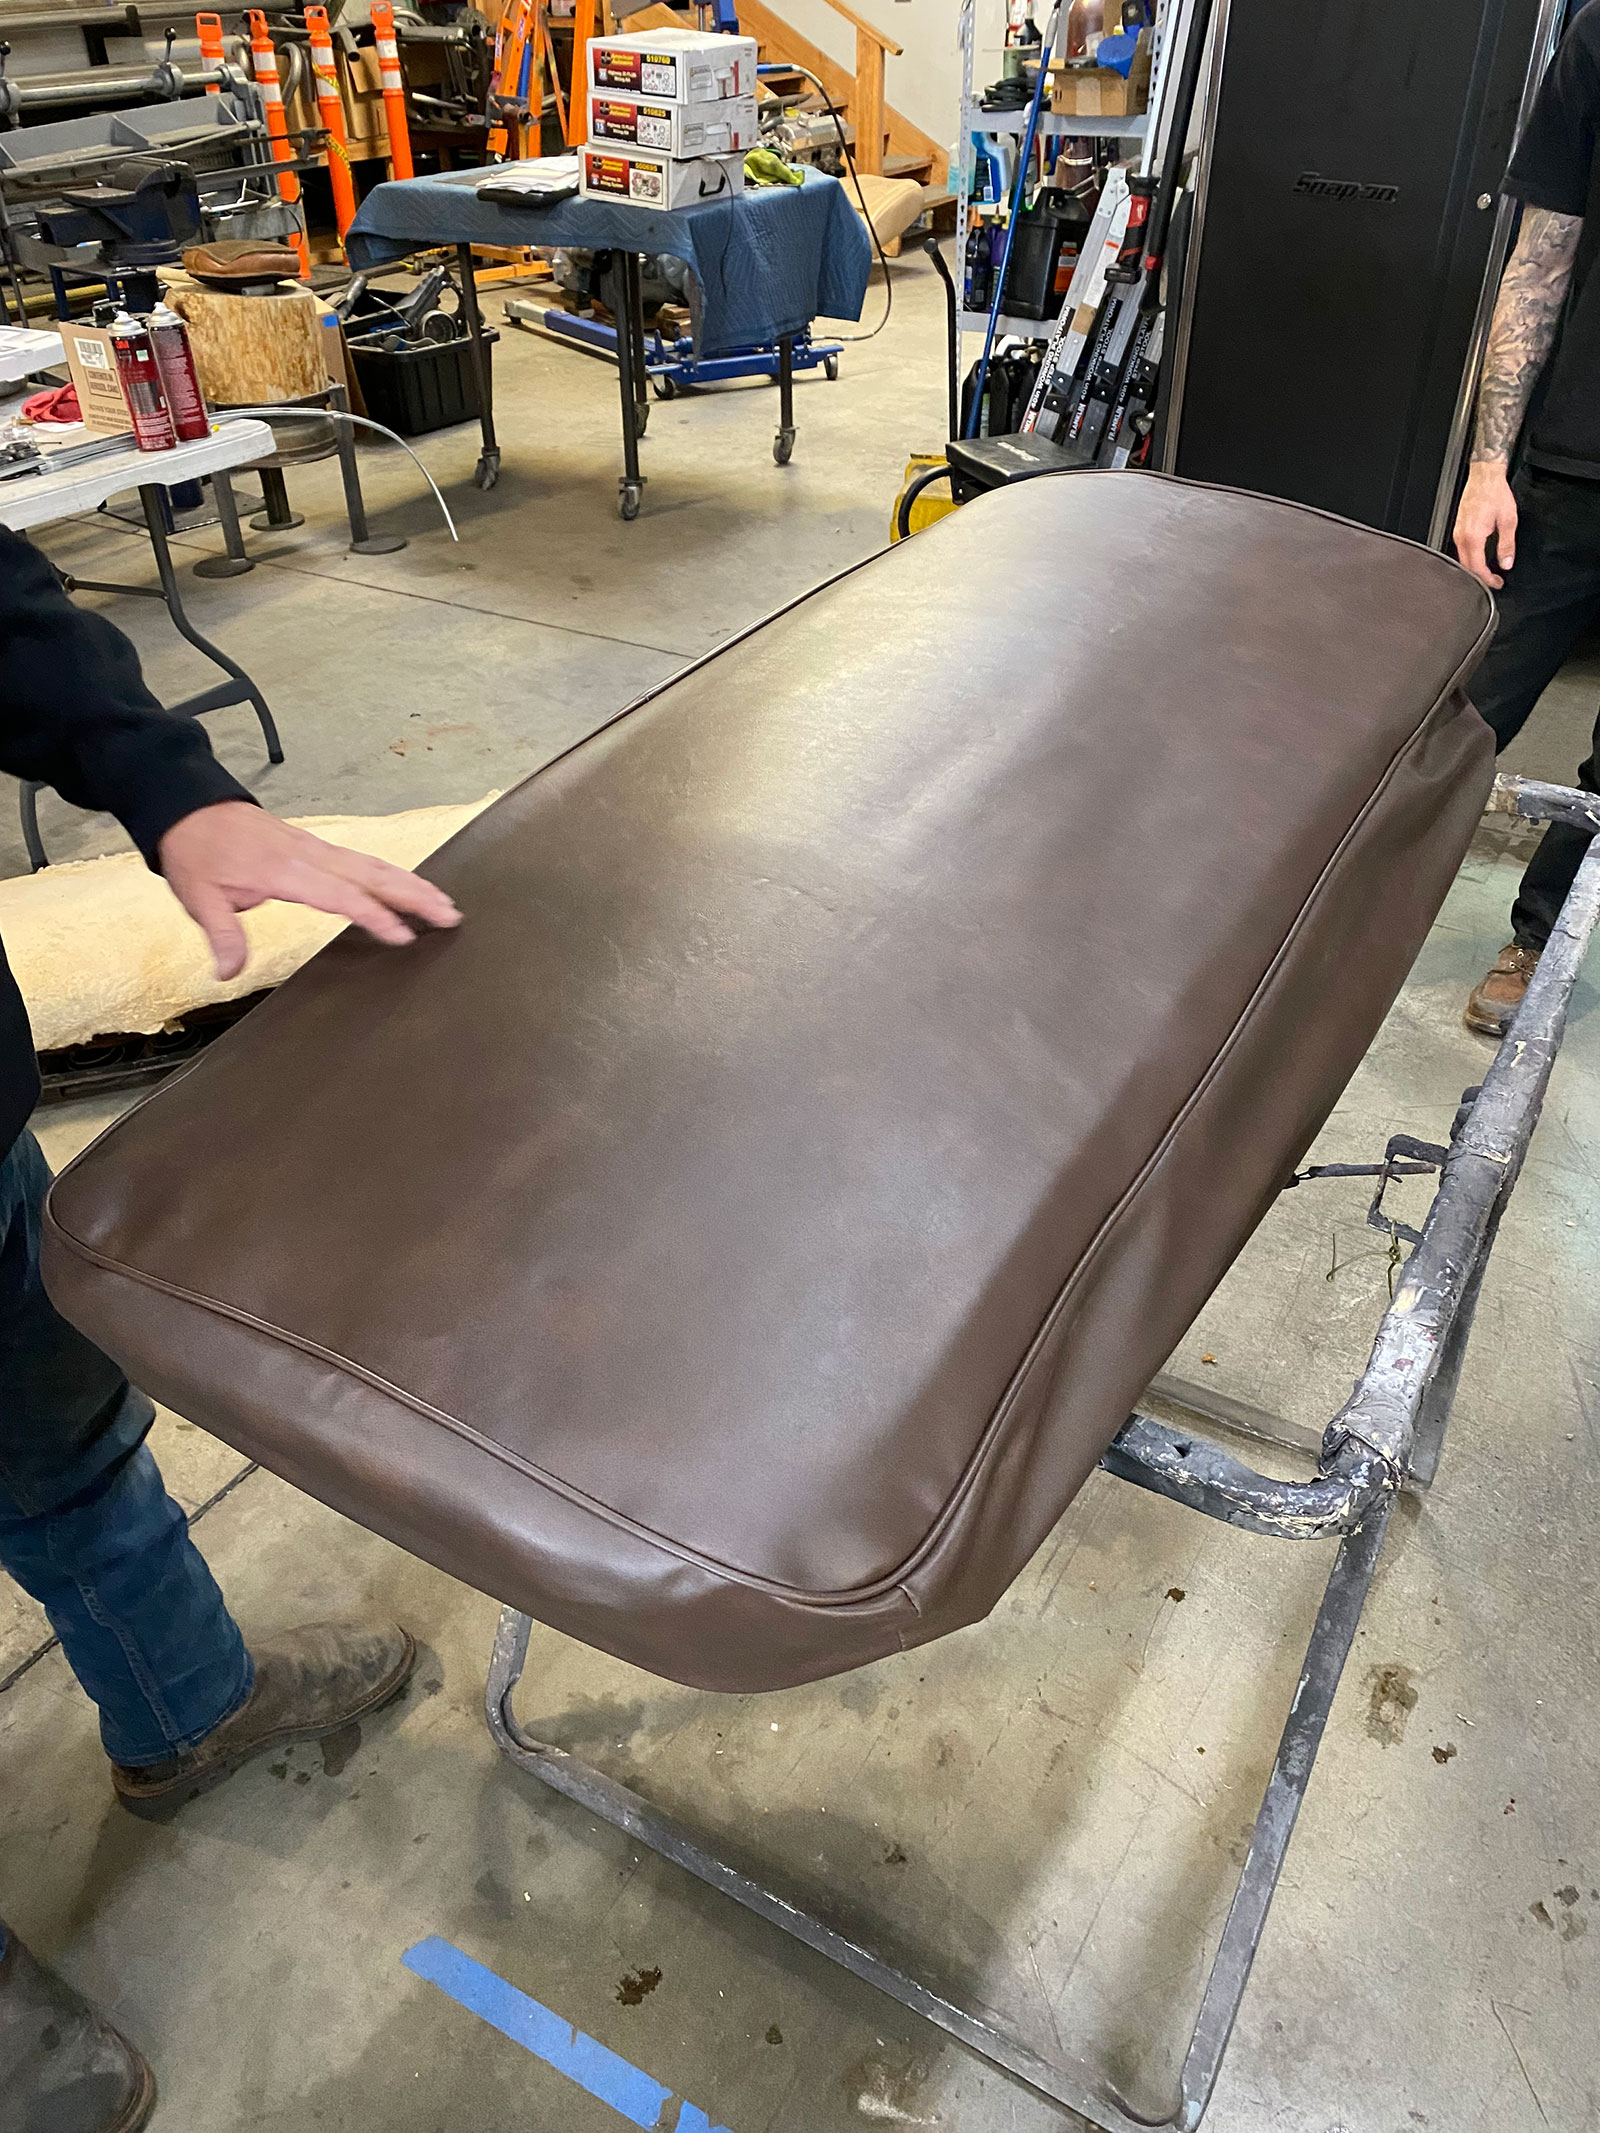
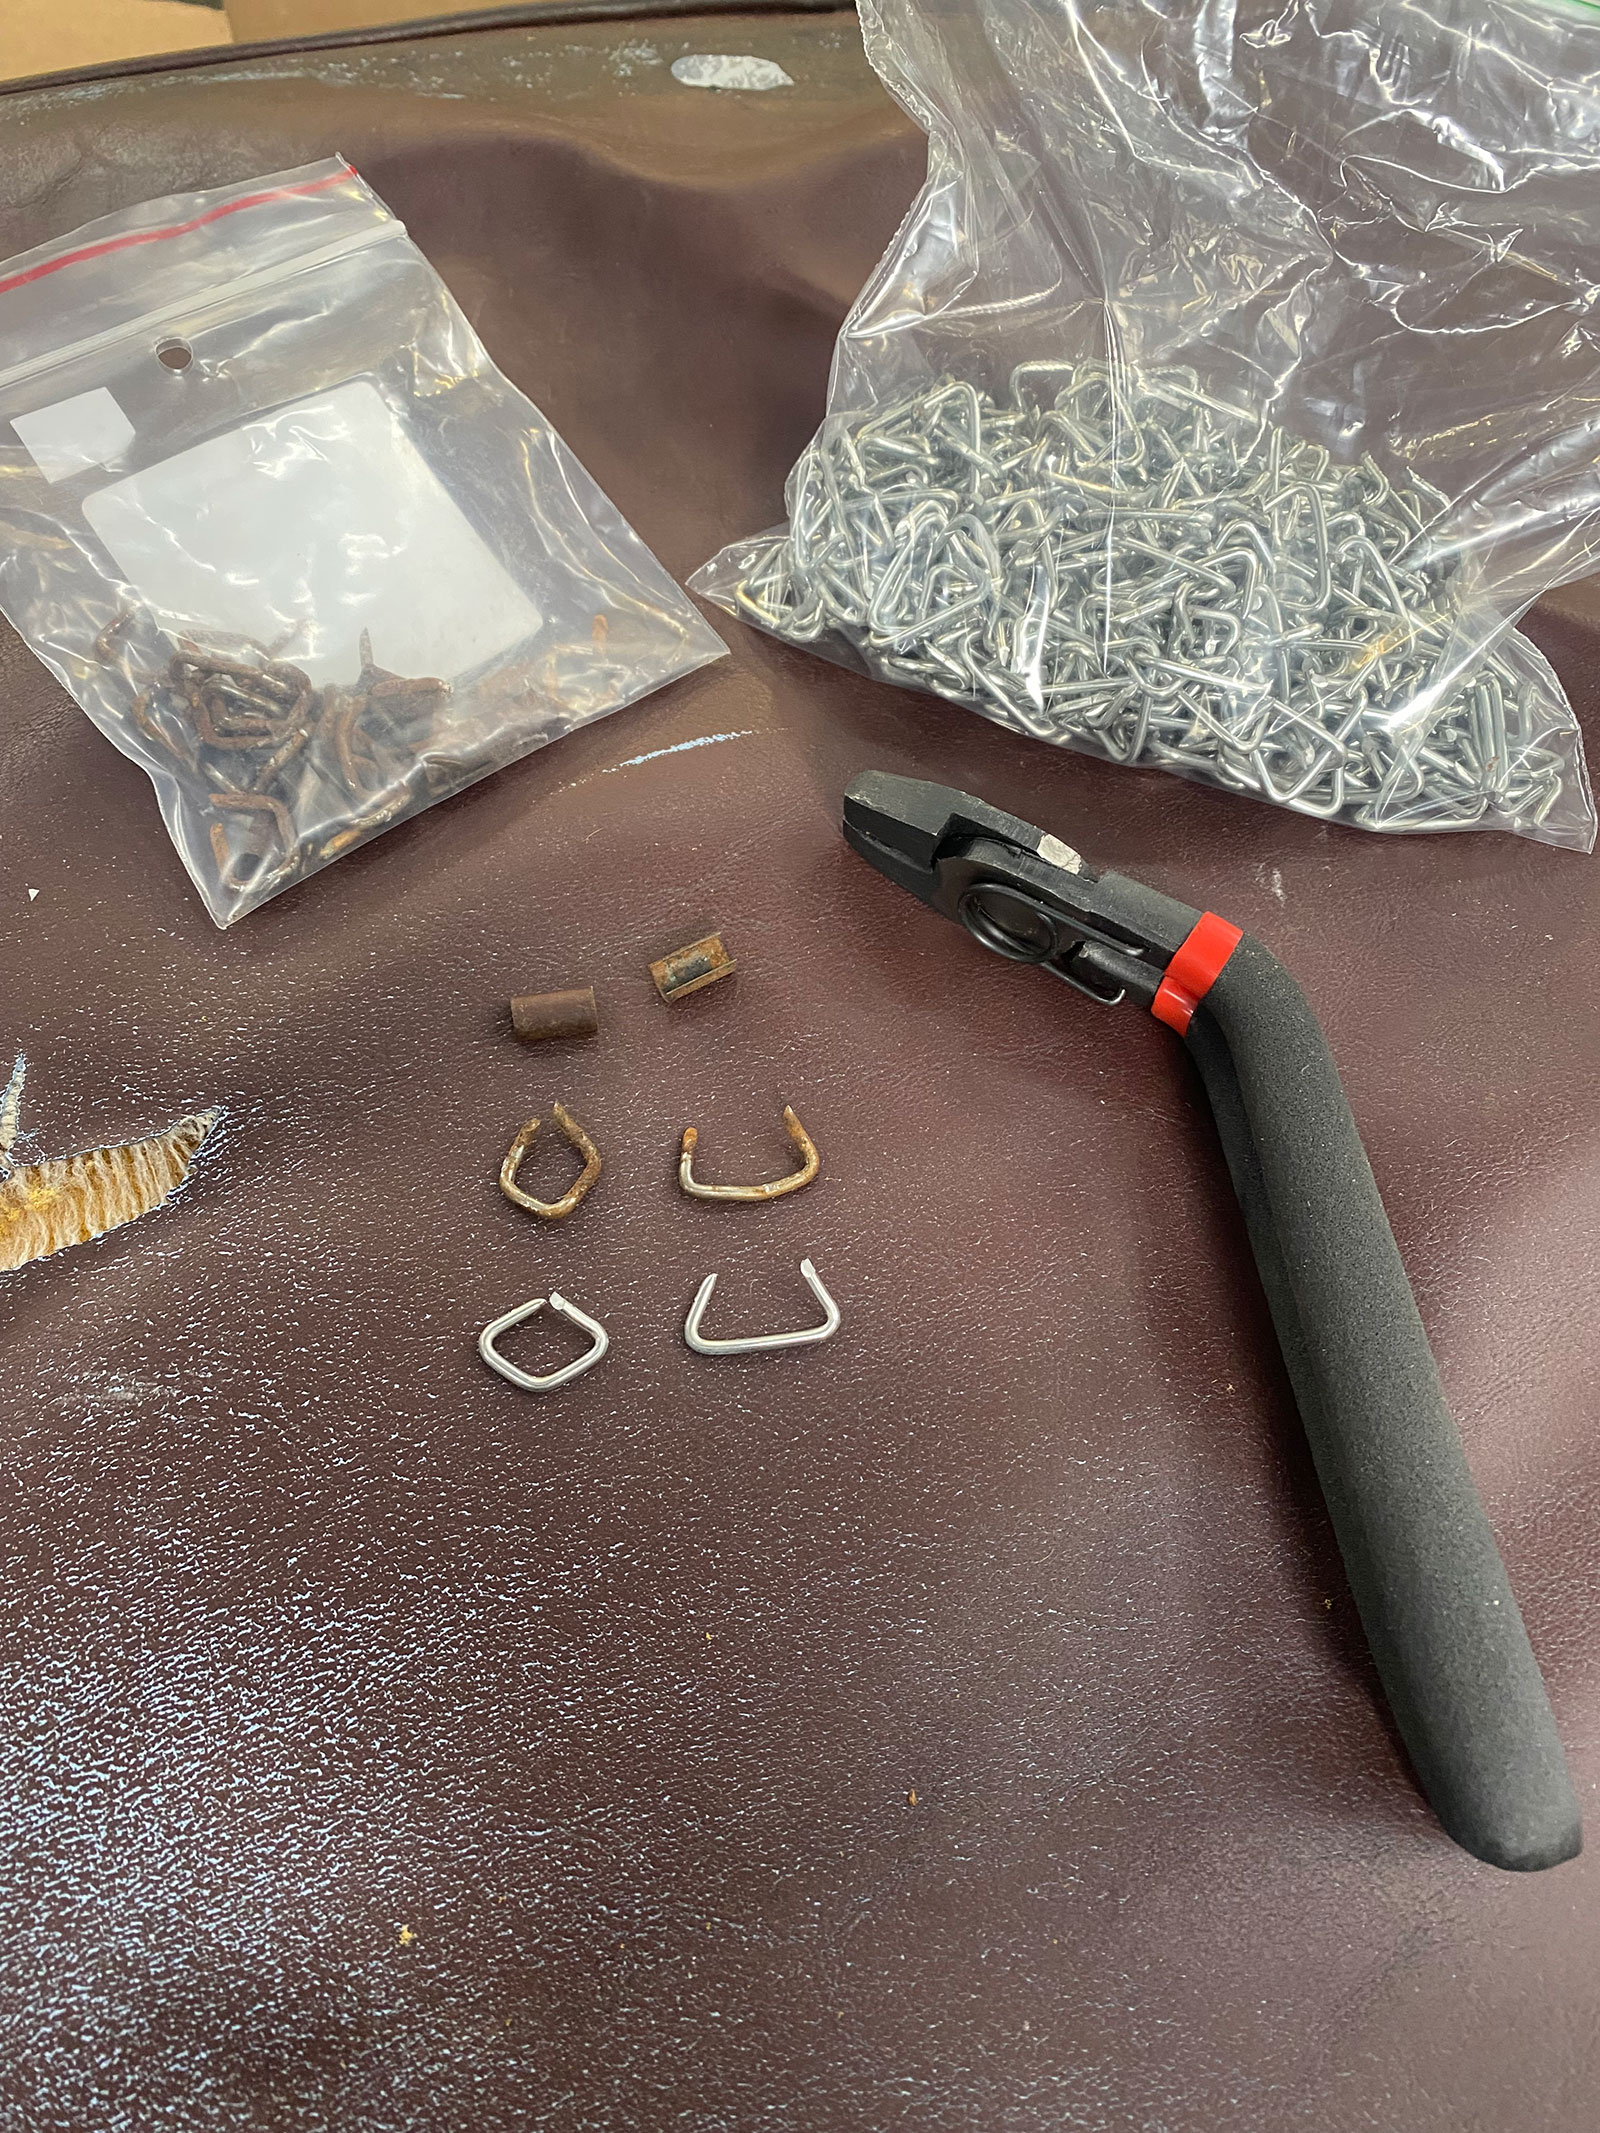
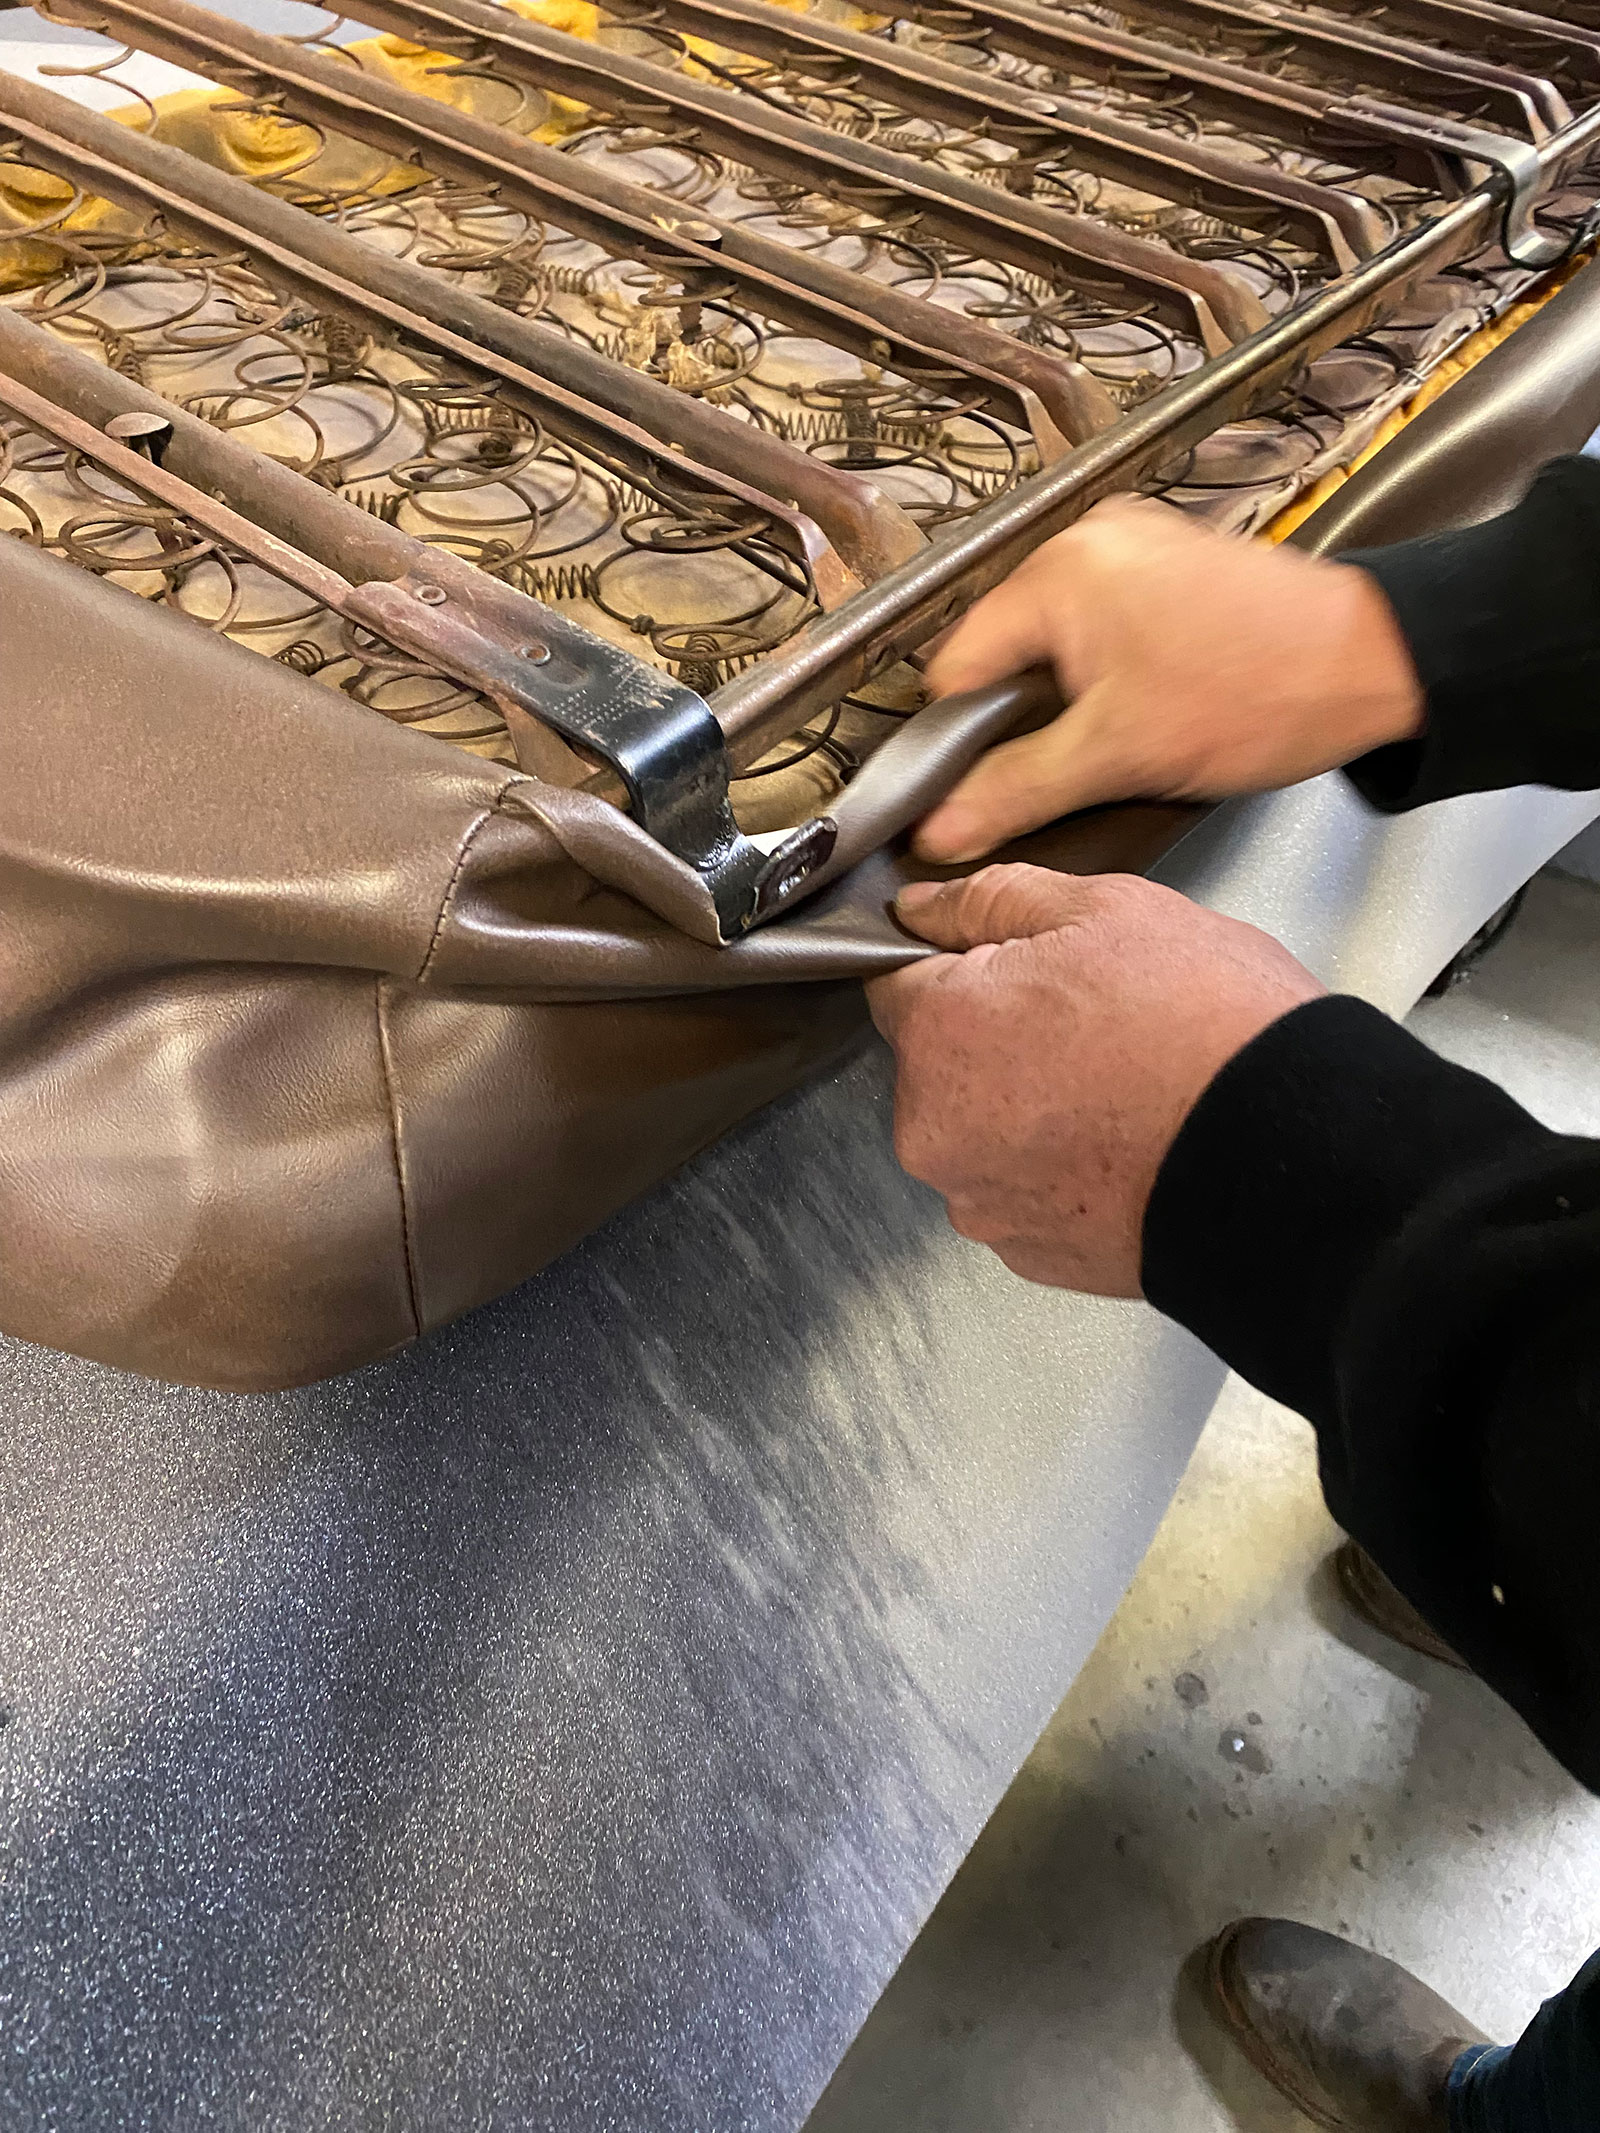
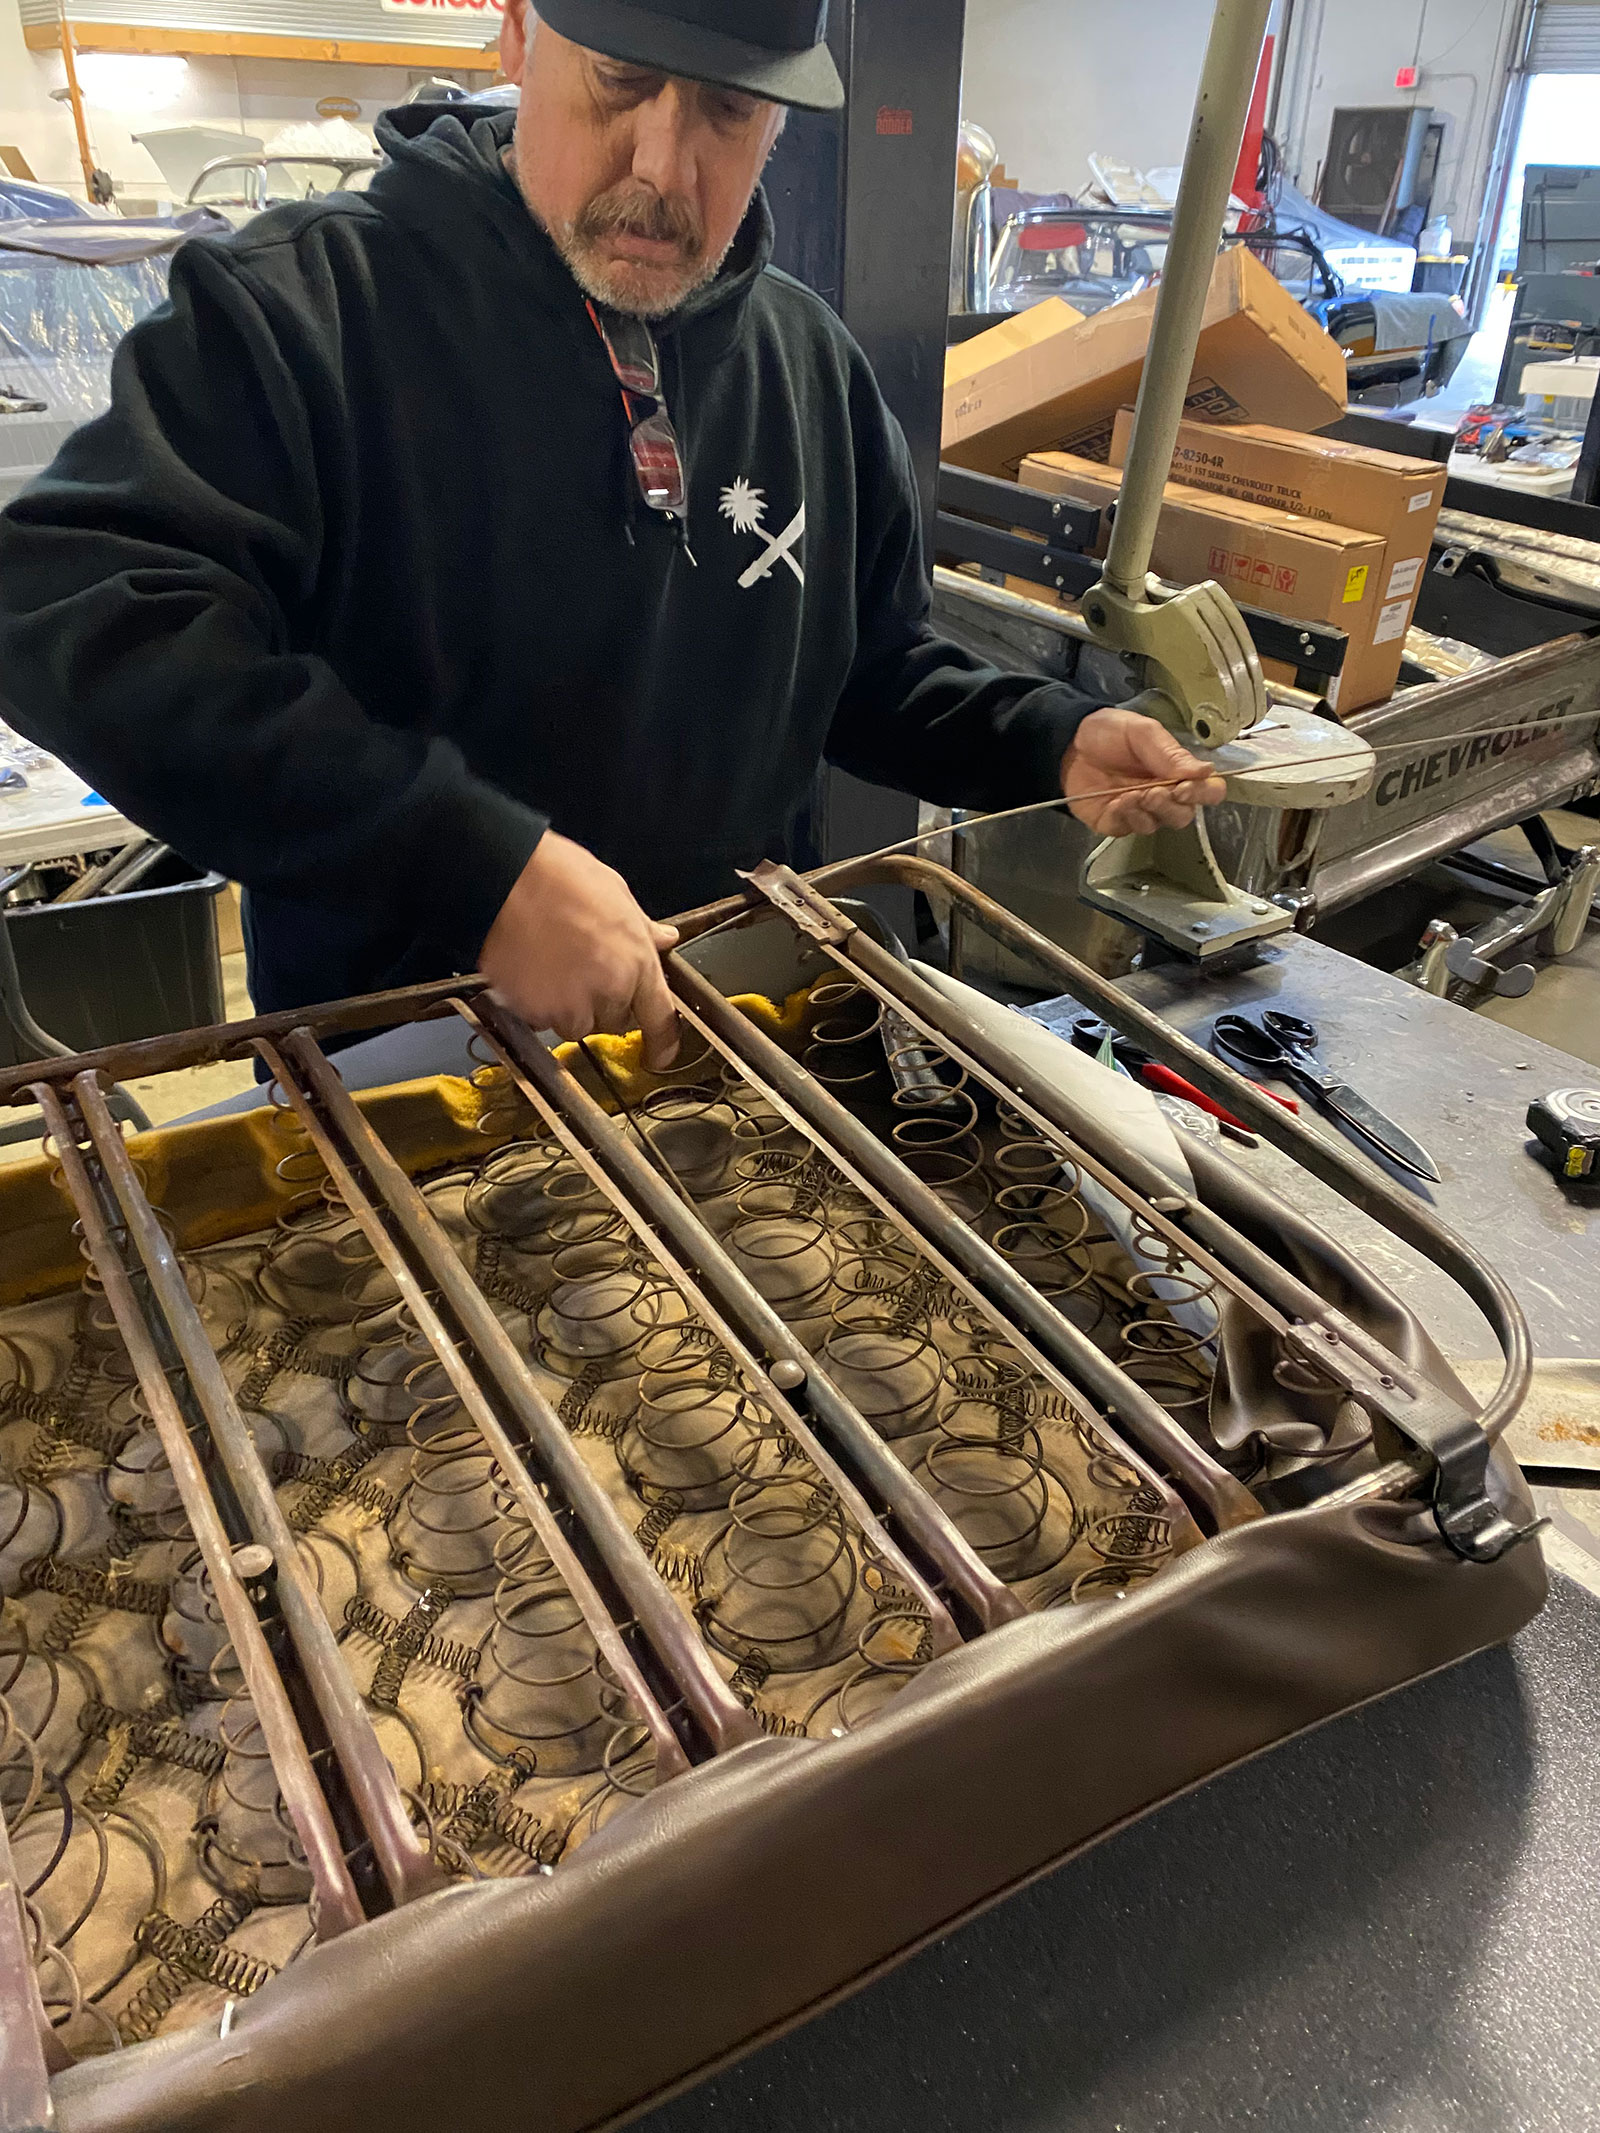
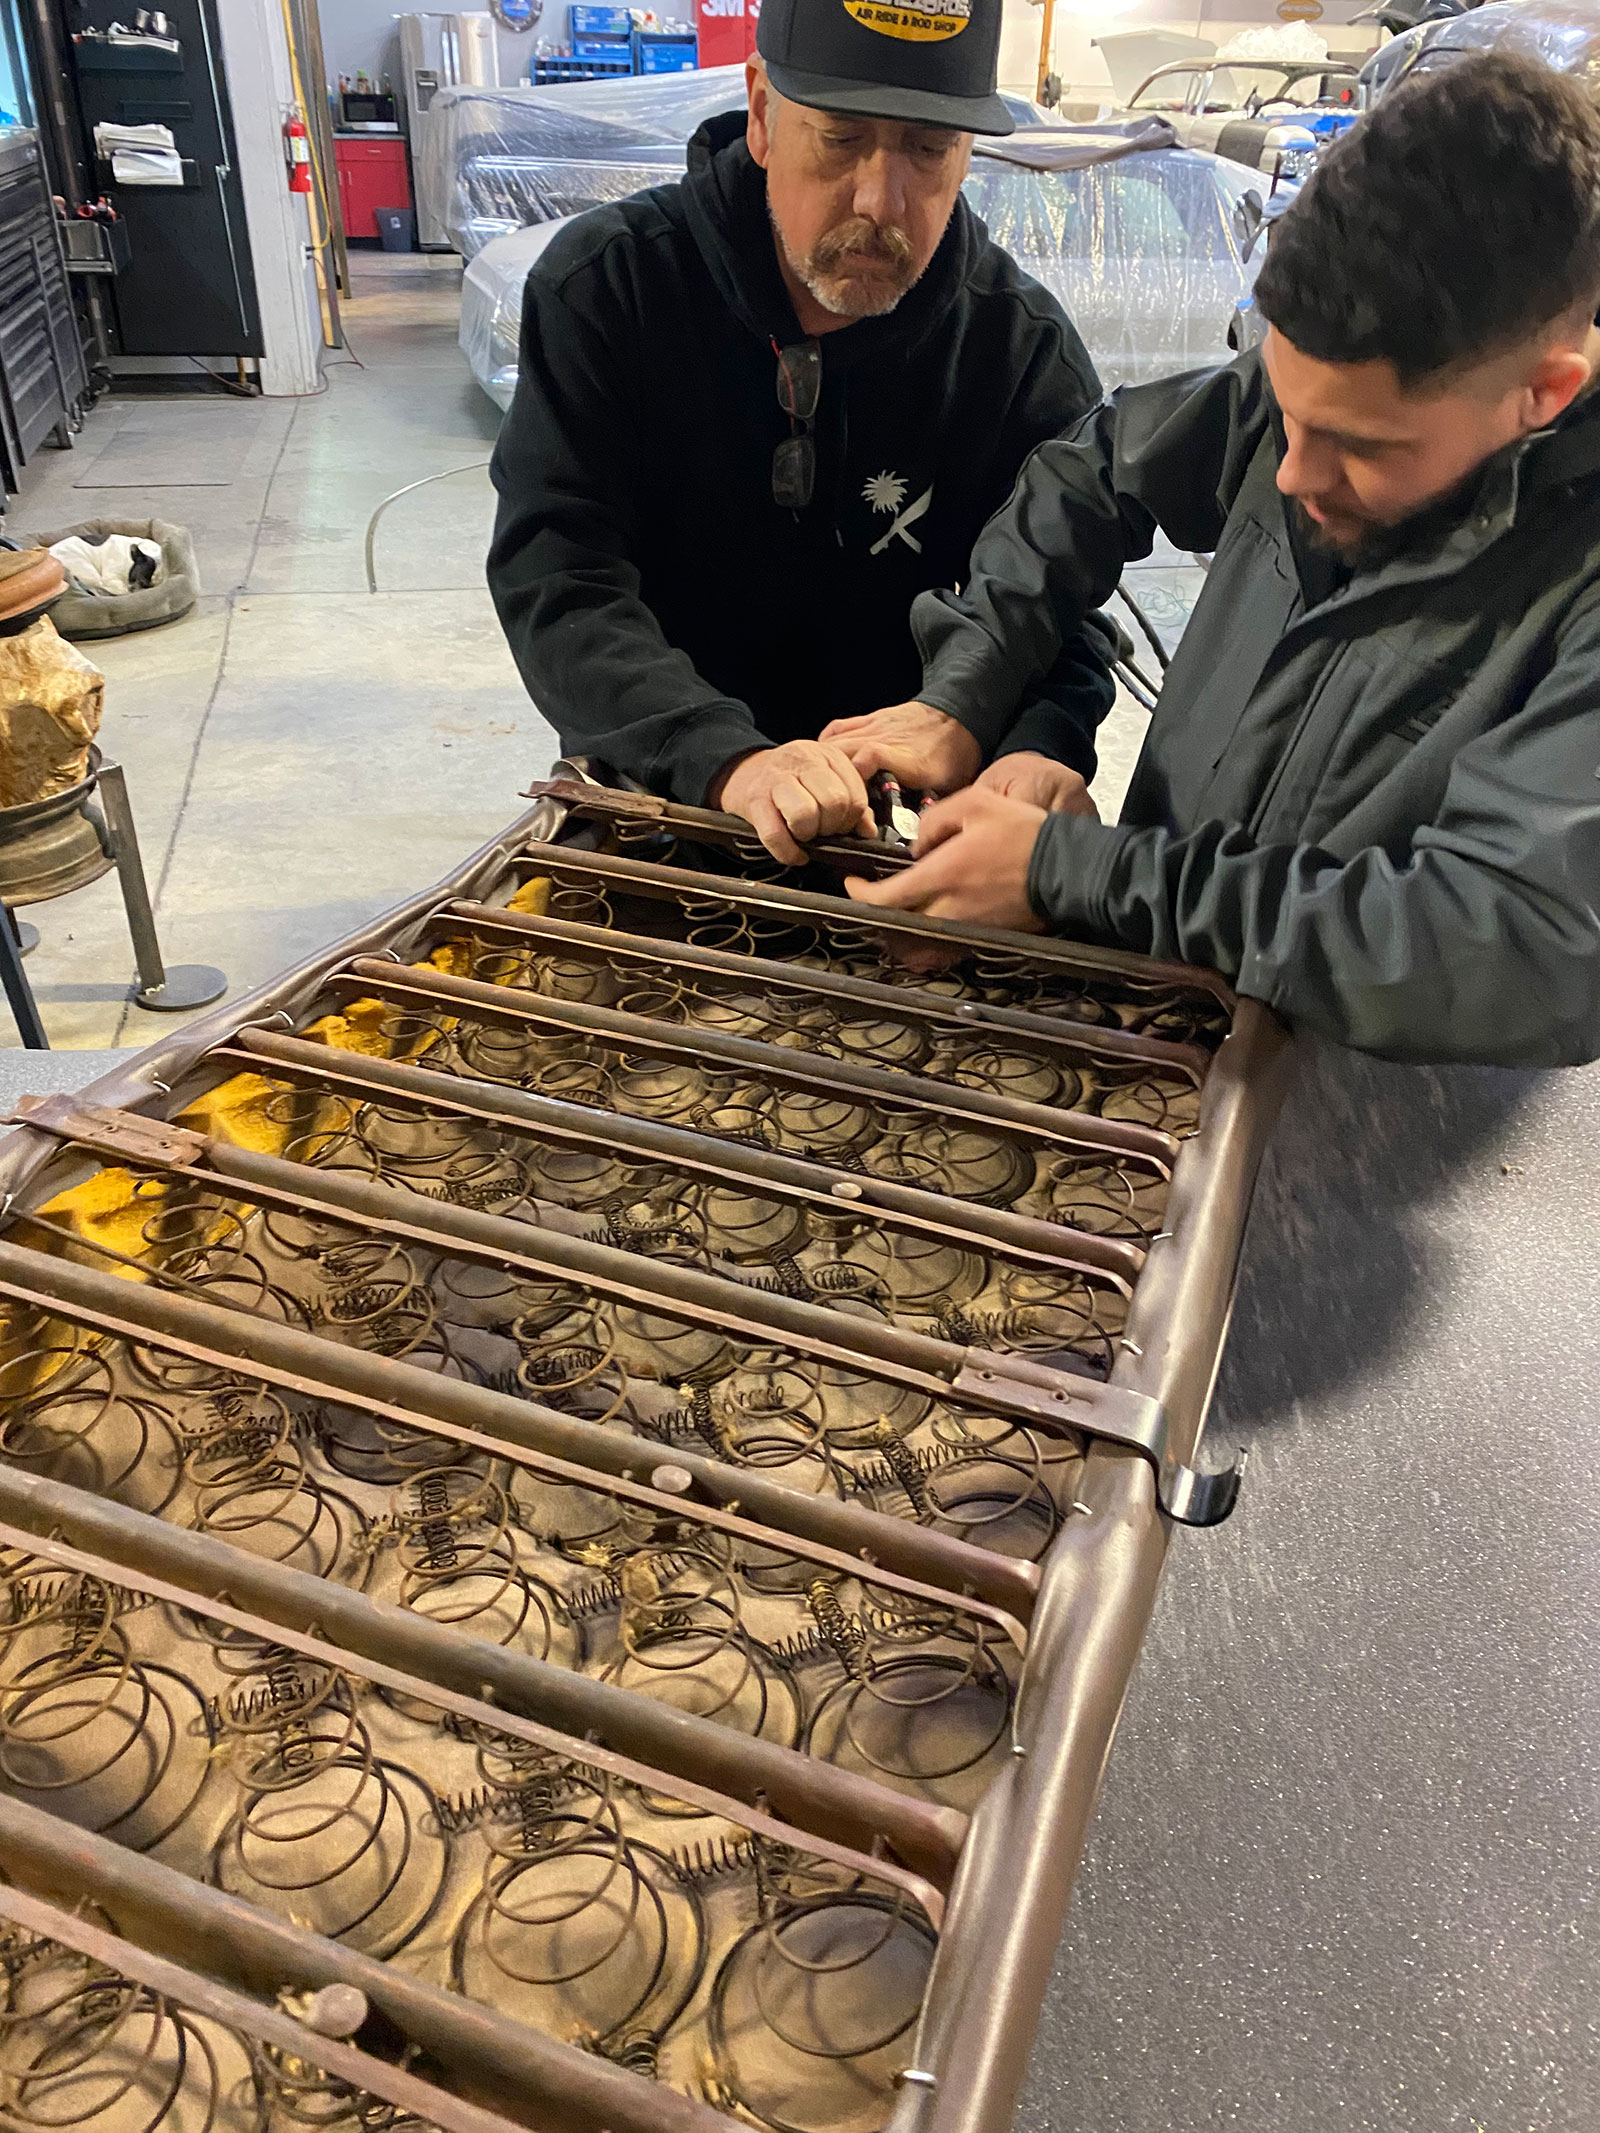
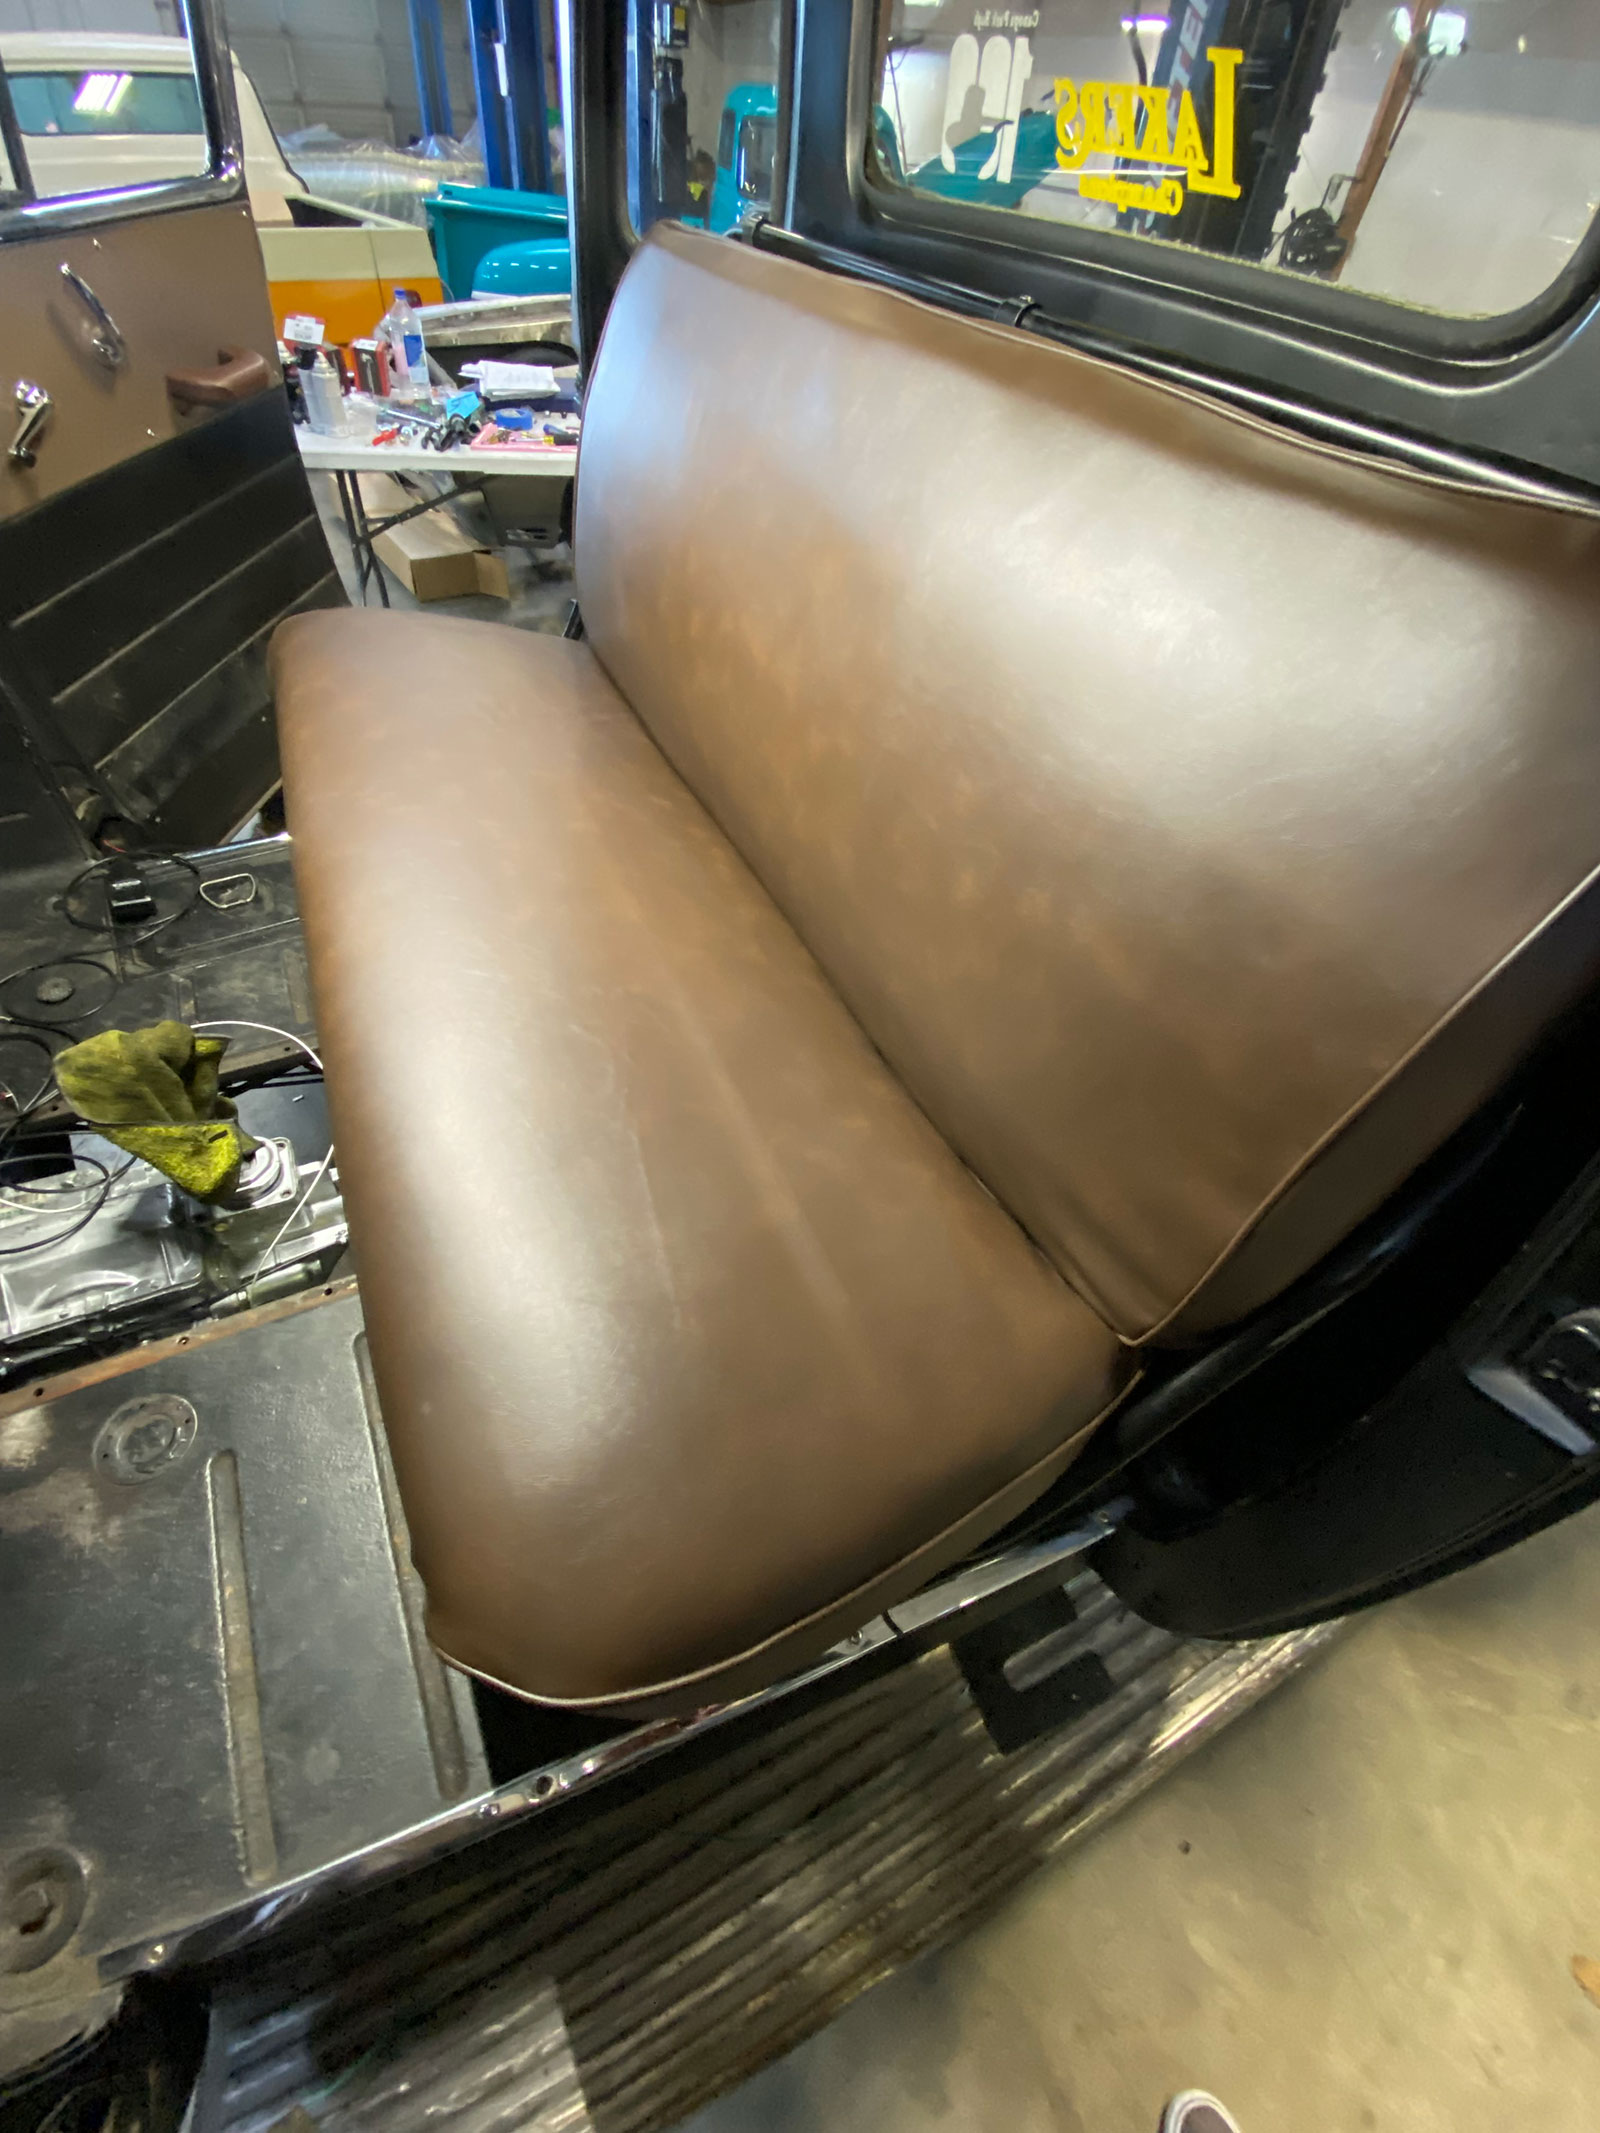
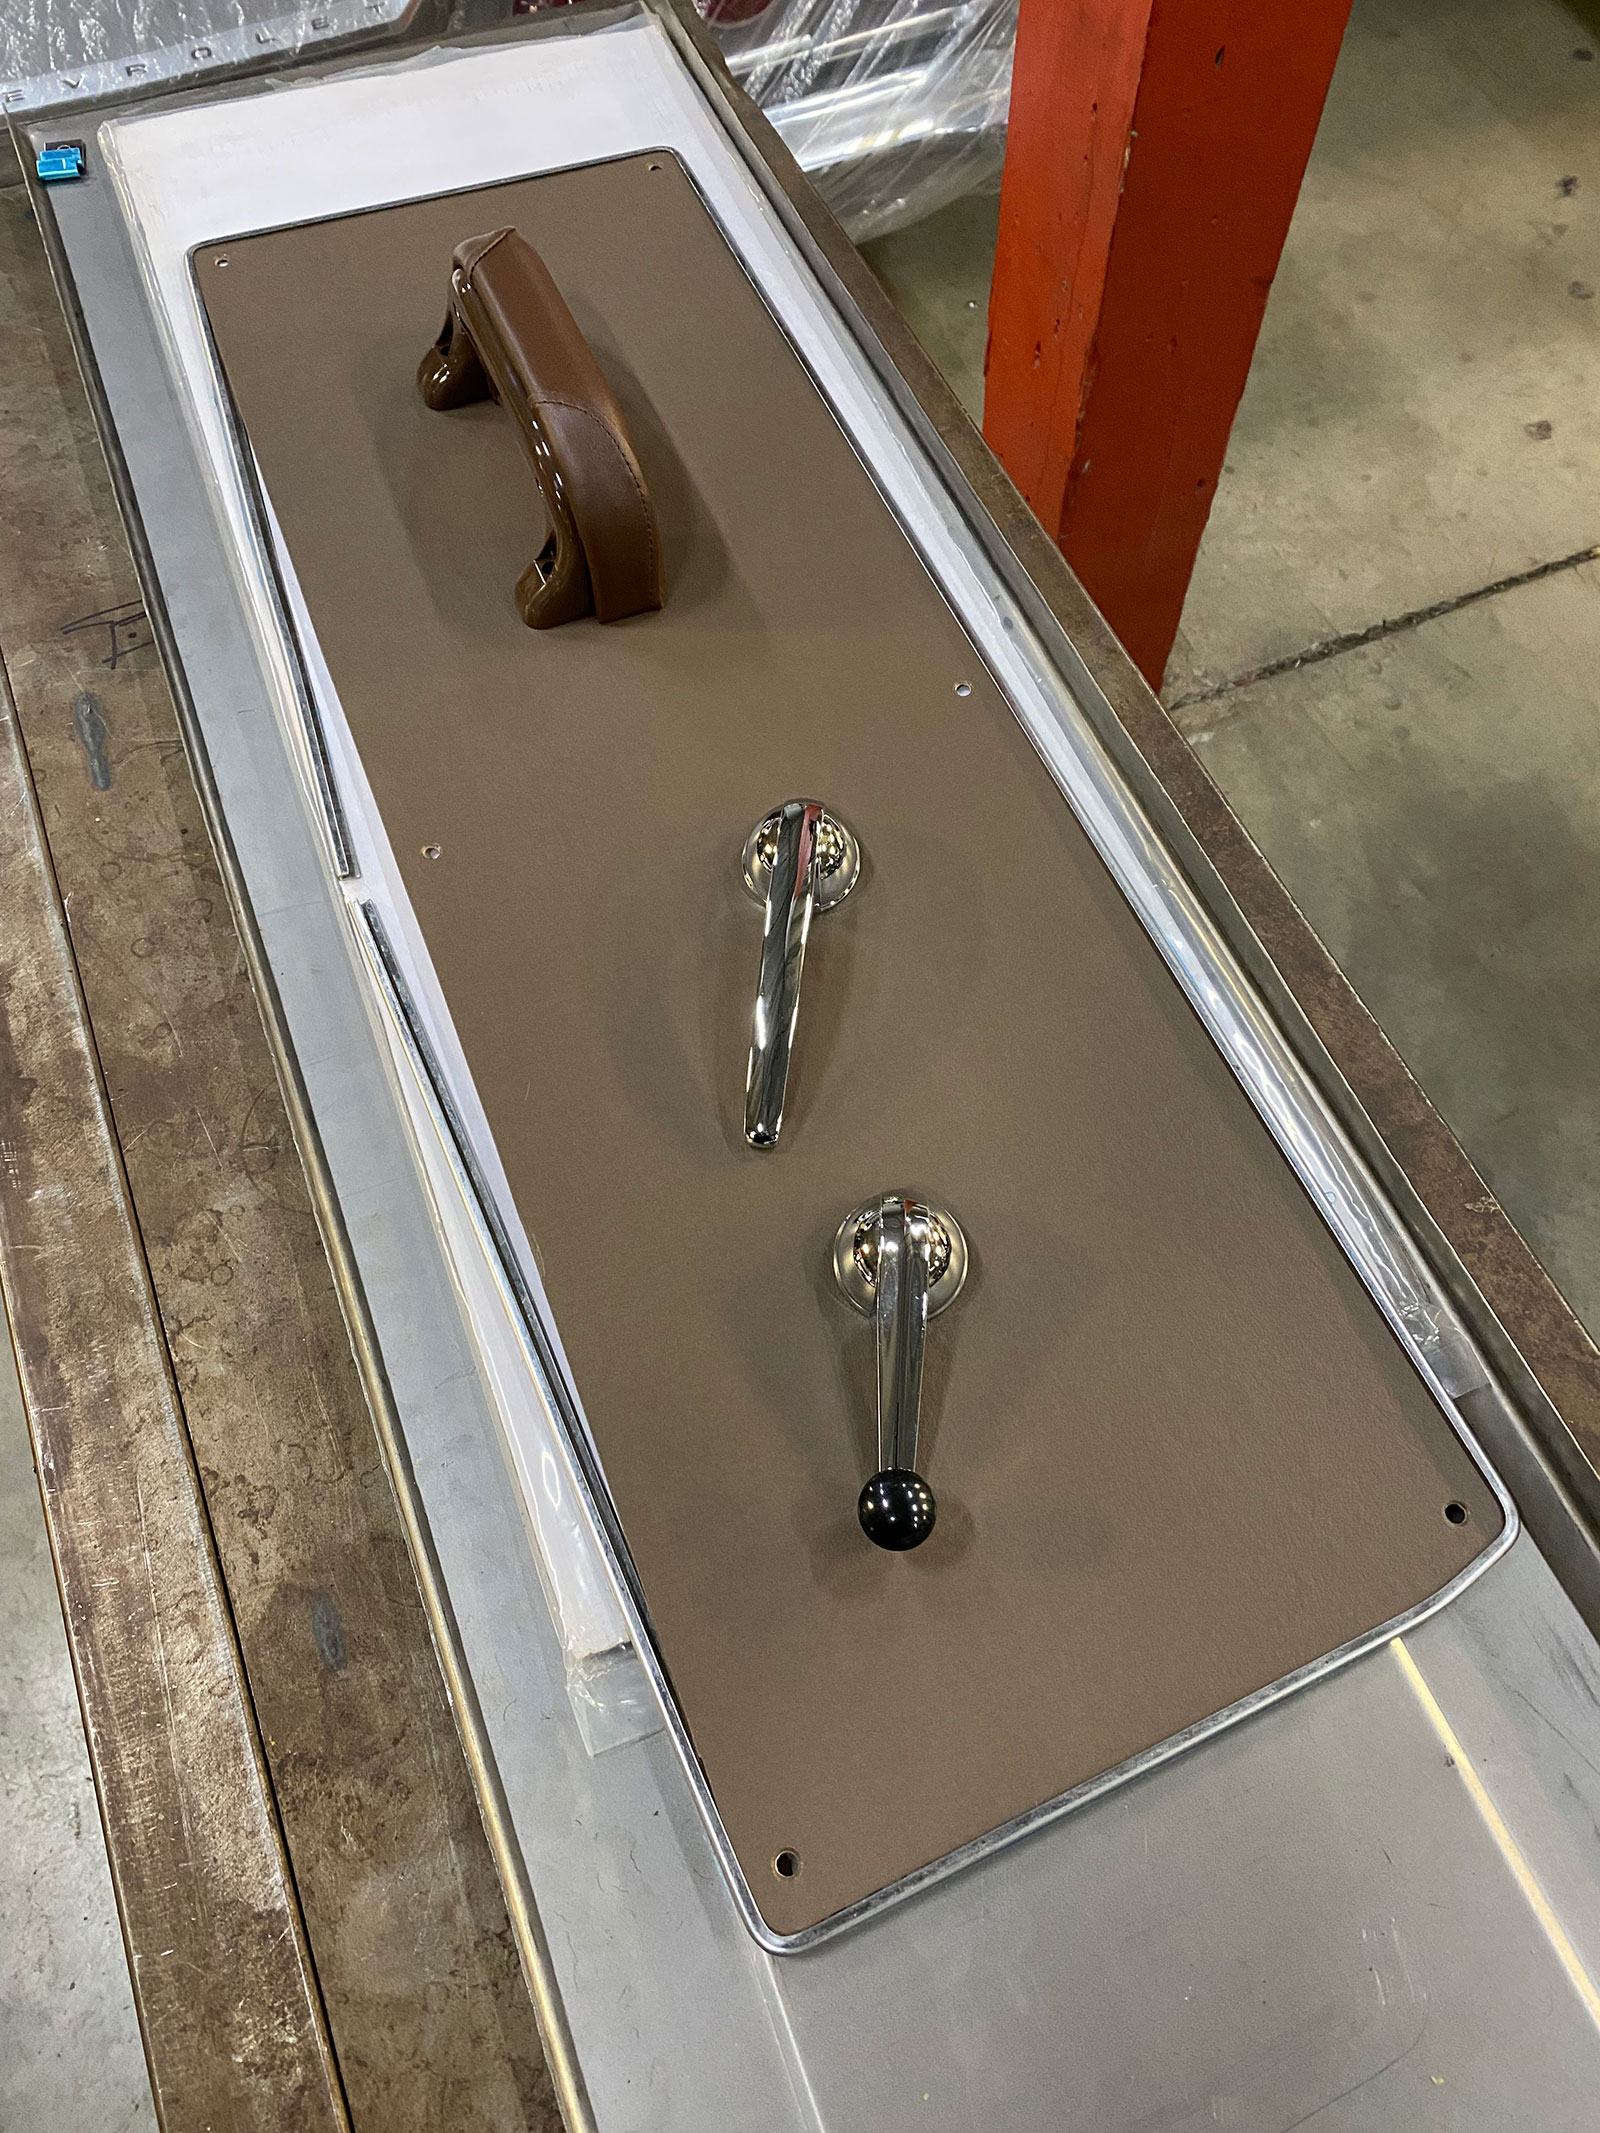
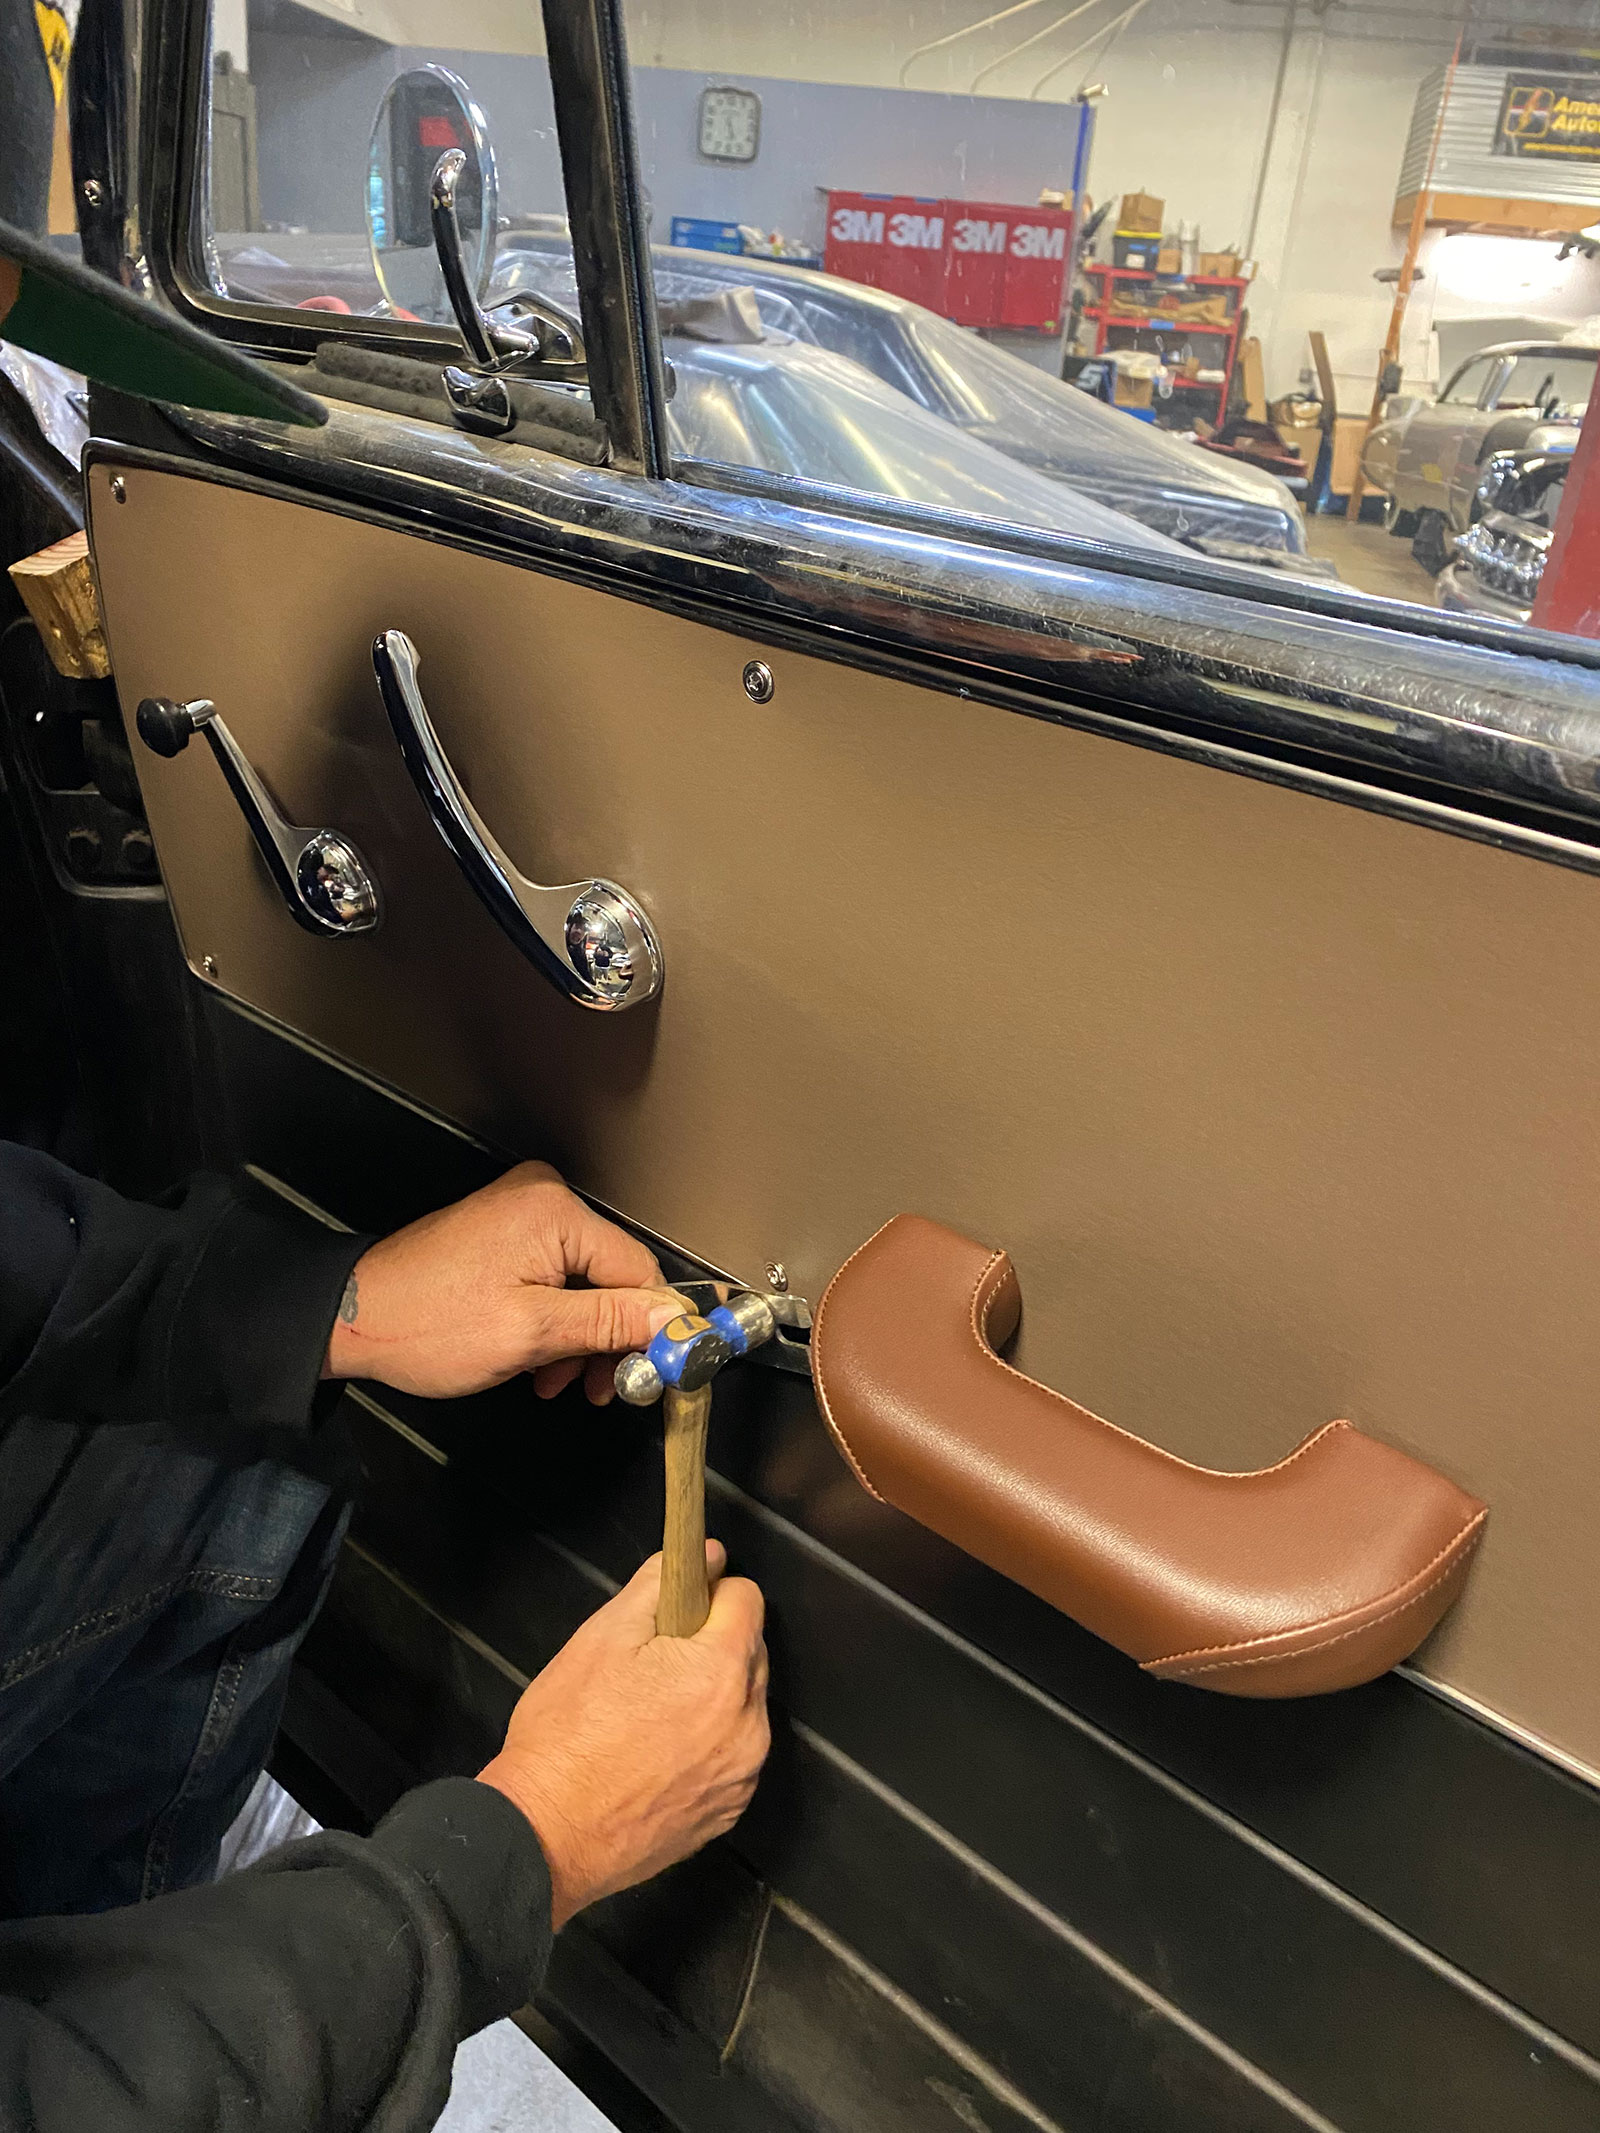
While we were at J&J Auto Fabrics, we also picked up a bag of hog rings as well as a pair of spring-loaded hog ring pliers since we forgot to do so when ordering the seat cover from Chevs of the 40’s. (FYI, Chevs has the same quality tool/staples for a fraction of the price!)Before attaching, we made sure the seat cover was properly stretched and fitted around all the seat frame features to allow the cover to ultimately fit as uniformly as possible—or, as uniformly as we were able to achieve! (Here, it’s important to get the vinyl in and around the seat back’s upper attachment tabs, especially since that part of the seat is visible all the time.)Finding suitable attachment points for the seat cover when using hog rings can be difficult in certain areas on the frames (the original sheet metal clips we were able to save when removing the old cover proved unusable in the end) …… so we ended up inserting a length of 1/16 cold roll for the bottom edge of the seat back in which the material was fastened to.Working from front to back, or vice versa, the seat covers were stretched tight as they were hog ringed to the frames, always referring to the piping alignment for fitment reference.Not too shabby for an amateur job.Stainless interior screws (with integrated washers—the same that came with the door panels) were used to attach the seat back to the Chevy’s external base frame loop.Then the newly wrapped bottom cushion was popped in place, and the seat upgrade portion was complete. Obviously, any upholsterer worth his salt will find some fault in our amateur job, but, ultimately, the owner was happy!To bring the doors some new life, we also ordered Chevs of the 40’s repop panel inserts, stainless trim, armrests, and window cranks/door handles …… all of which install with little effort and absolutely zero upholstery knowledge!The result definitely ties everything together perfectly. Chevs of the 40’s also offers new sun visors and original-style headliner kits to completely finish off your ’47-53 Chevy/GMC truck’s interior.
We use cookies to ensure that we give you the best experience on our website. If you continue to use this site we will assume that you are happy with it.