Consistent Cranking

Tips on Choosing and Installing a Starter

By the ACP Staff

Let’s be honest; most of us never really think about the starter bolted to the bottom right side of your engine until it’s too late. Too late meaning the starter is struggling to turn over your Chevy, grinding on the ring gear, or only makes a click noise with no cranking whatsoever.

- Advertisement -

Before you utter a grunt or let out a few explicit terms that echo off the garage door, ask yourself a few questions: Did you choose a starter that was capable of handling the cubic inch or compression of your engine? Did you measure the pinion gear mesh or engagement when you first installed the starter? What is the condition of the battery, and did you update the size of the battery cable?

001 Before you even consider bolting in your new starter make sure the mounting pad is clean of paint and grime
Before you even consider bolting in your new starter, make sure the mounting pad is clean of paint and grime. This is the main source of grounding for the hundreds of amps the starter pulls during cranking. Also, this is a good time to confirm a quality ground from the engine block to the battery negative.

These are common questions you should ask yourself when choosing and installing a new starter. They’re also questions that the team at Powermaster Performance asks people every day. With over 30 years of designing and manufacturing high-performance starters (and alternators), they have a pretty good idea on what it takes to not only build a performance starter but also what steps are needed to choose and install the right starter for your application.

002 Powermaster offers a line of Original Look starters that have been hot rodded internally
Unless you’re working on a restoration project, there’s just no reason to settle on the huge, heavy starters that a classic Chevy was equipped from the factory since gear reduction and mini starters are more efficient and deliver increased torque. That said, for the resto project, Powermaster offers a line of Original Look starters that have been hot-rodded internally.

Read more: A Barrage of Battery Options

- Advertisement -

Installing a starter on a Chevy engine is easy, but there are definitely some questions to ask about your application when choosing a starter. We hit up Powermaster for a few tips and insights to consider in order to assemble a long-lasting, reliable starting system.

003 starters are supplied with new mounting hardware–use them
All Chevy V-8 (and V-6) starters are supplied with new mounting hardware–use them! In most cases these bolts have unique knurled shafts to hold the starter solid during cranking. Without these bolts the starter may give just a smidgen and over time that movement will grow and cause issues.

Beyond the physical size, consider the cubic inch and compression of your engine. If you’re cranking a 572 ci, compared to a 4.8L LS, you’re going to want to step up the torque rating. Same for engines with 12:1 compression compared to 9:1. Powermaster recommends at least 160 lb-ft of torque for engines under 10.5:1 compression, 180 lb-ft for up to 12:1, and for anything over that go with a 200 lb-ft rating. And remember, going overkill on a starter isn’t going to hurt anything.

004 A multi strand copper cable is recommended and consider the distance from the battery connection when selecting the gauge cable
To ensure the best operation and longevity of any starter, provide it with the voltage and current it needs by using high-quality cables. A multi-strand, copper cable is recommended and consider the distance from the battery connection when selecting the gauge cable. Remember, you really can’t use too large of a cable!

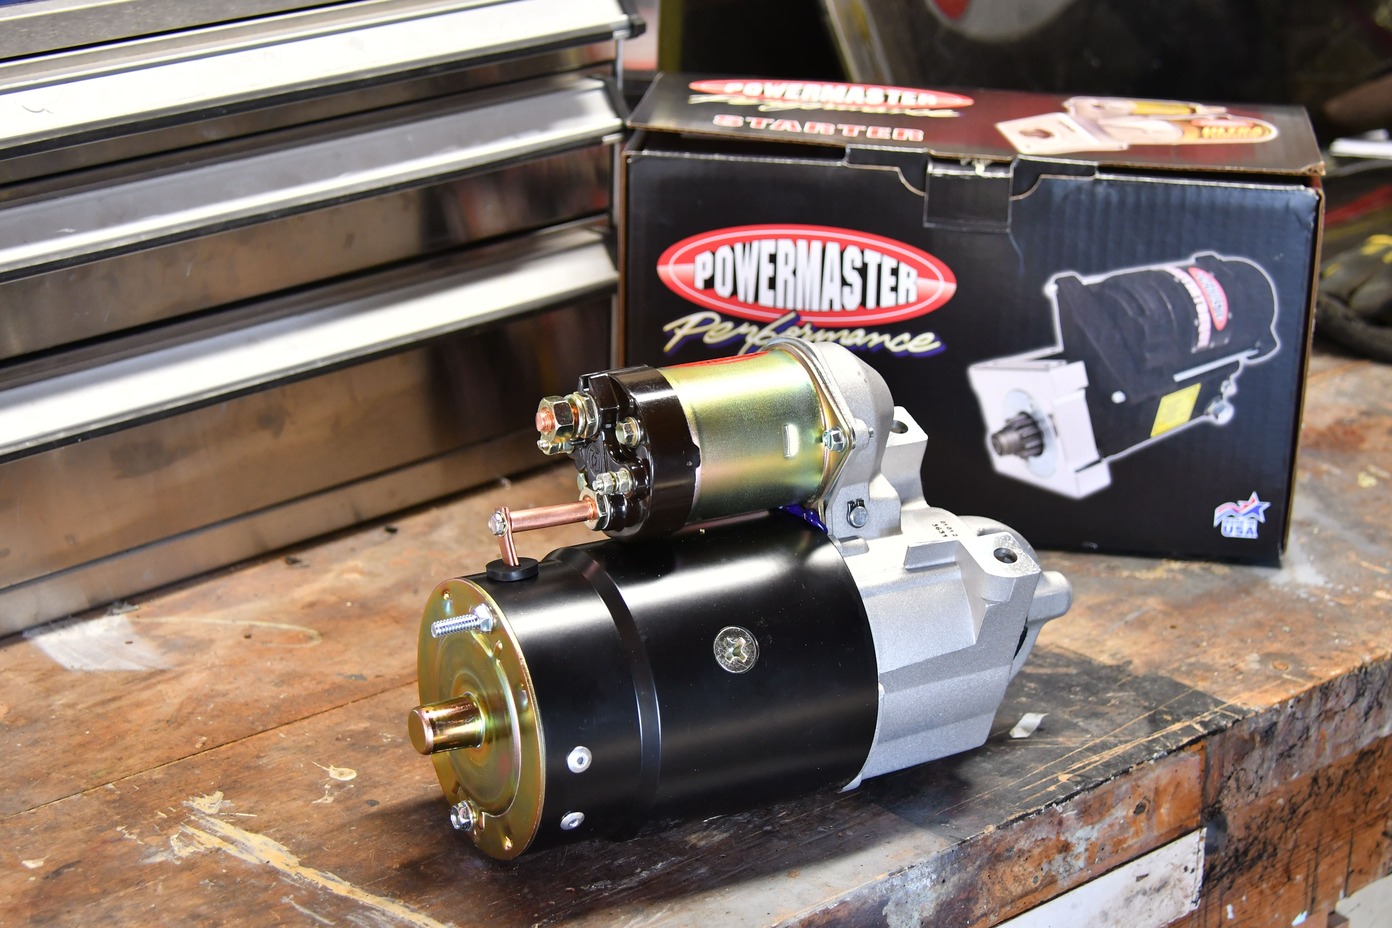
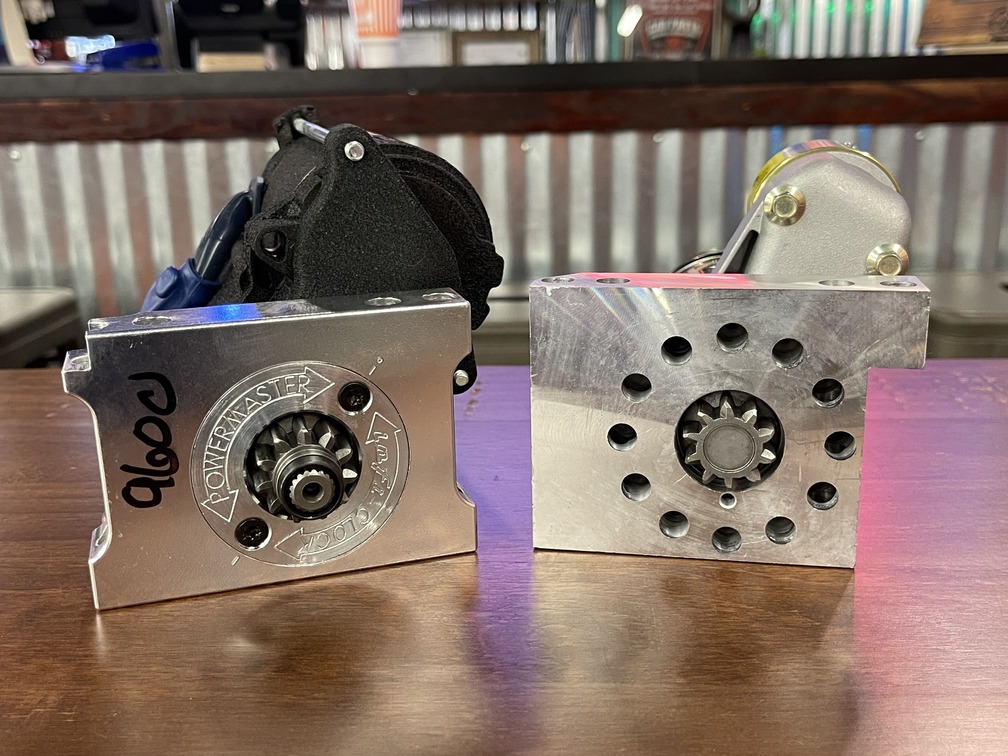
One Powermaster starter that falls squarely into our world of muscle machines and modern restomods is their XS Torque series. The XS Torque delivers 200 lb-ft of torque through a 4.4:1 gear reduction with a 1.8hp motor. The starter solenoid used is built to handle higher temperatures, which makes this a solid solution for engines that experience hot soak issues.

005 engine starter tech

- Advertisement -

Another useful feature of the XS Torque is an adjustable mounting block. Powermaster’s Infi-Clock technology allows the solenoid to be rotated 360 degrees around the engine assembly so it can be made to fit by clearing most headers or oil pan kickouts. This also comes in handy to simplify the wiring connections.

006 including their unique Infi CLOCK adjustment
If your application has an oil pan kickout or custom headers that may interfere with the starter, find a starter with a clock-able mount. Powermaster offers two different styles, including their unique Infi-CLOCK adjustment (left). This adjustment design allows the starter motor assembly to be rotated 360 degrees to reposition the solenoid to solve clearance issues.

Check it out: Personal-Sized Battery Jump Boxes Serve a Purpose

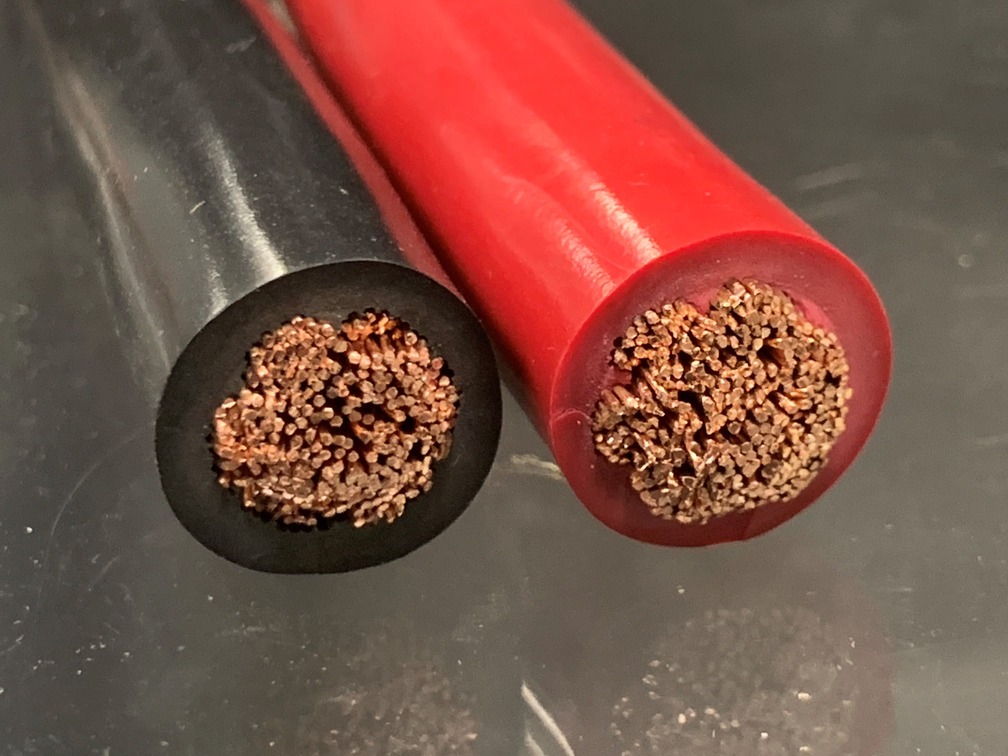
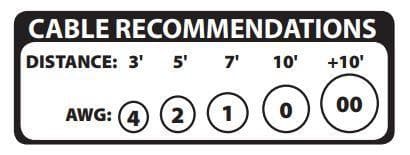
Speaking of wiring, you can have the highest torque starter ever made but if the battery cable and solenoid wiring aren’t up to the task, it’s going to lead to poor cranking performance and eventual failure. The importance of using high-quality, multi-strand, copper cable cannot be understated. Remember, high-torque starters can pull hundreds of amps and the cable (and battery) must be ready to handle the added current. Note that the location of the battery is going to play a role in choosing the gauge wiring used. The further the distance, the heavier gauge you’ll need and remember to use proper sized terminals and ring lugs.

007 it should be 0 100 to 0 250 inch
With the starter mounted, first check the pinion gear to ring gear clearance; it should be 0.100 to 0.250 inch. Be sure to inspect this clearance in three or four locations by rotating the ring gear.

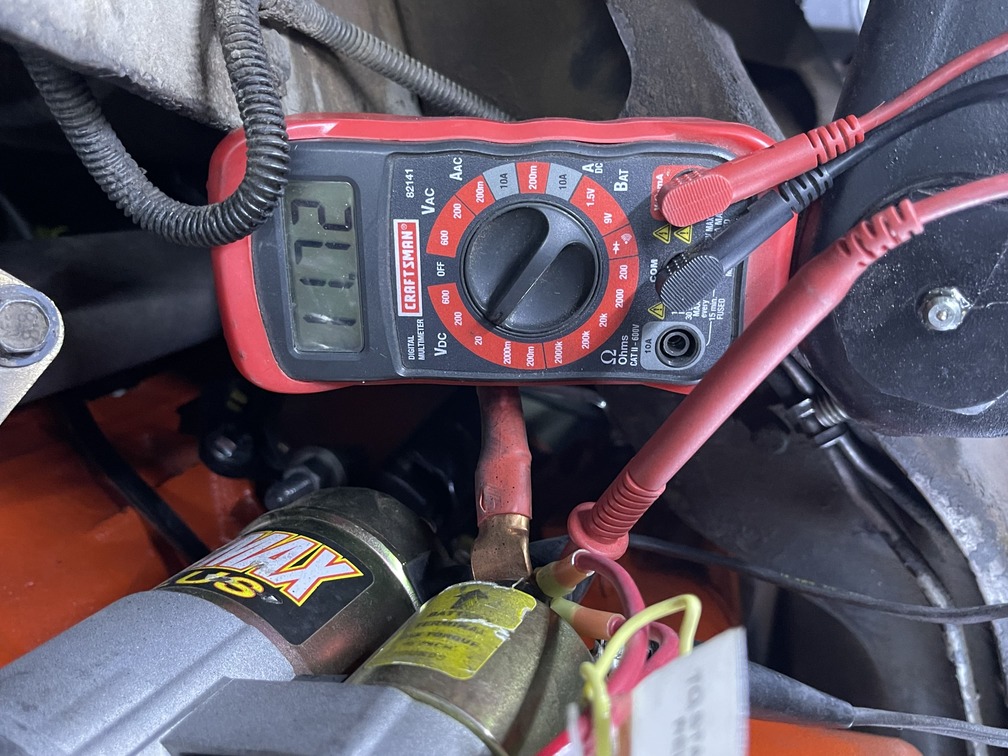
Powermaster recommends at least 11 V on both the battery cable connection and the solenoid connection during cranking. If the voltage is consistently under 11 V during cranking, it will lead to burns inside the solenoid and a good chance of being stranded. No matter what brand or size starter you choose, poor wiring will result in poor cranking performance and lead to starter failure.

008 important to check the mesh of the two gears
It’s important to check the mesh of the two gears. By pulling out the pinion gear, you can measure the mesh of the ring gear teeth to the pinion gear. The distance should be 0.020 to 0.035 inch or about the size of a standard paper clip. If it’s too tight install one of the shims supplied between the starter and the engine block and measure again.

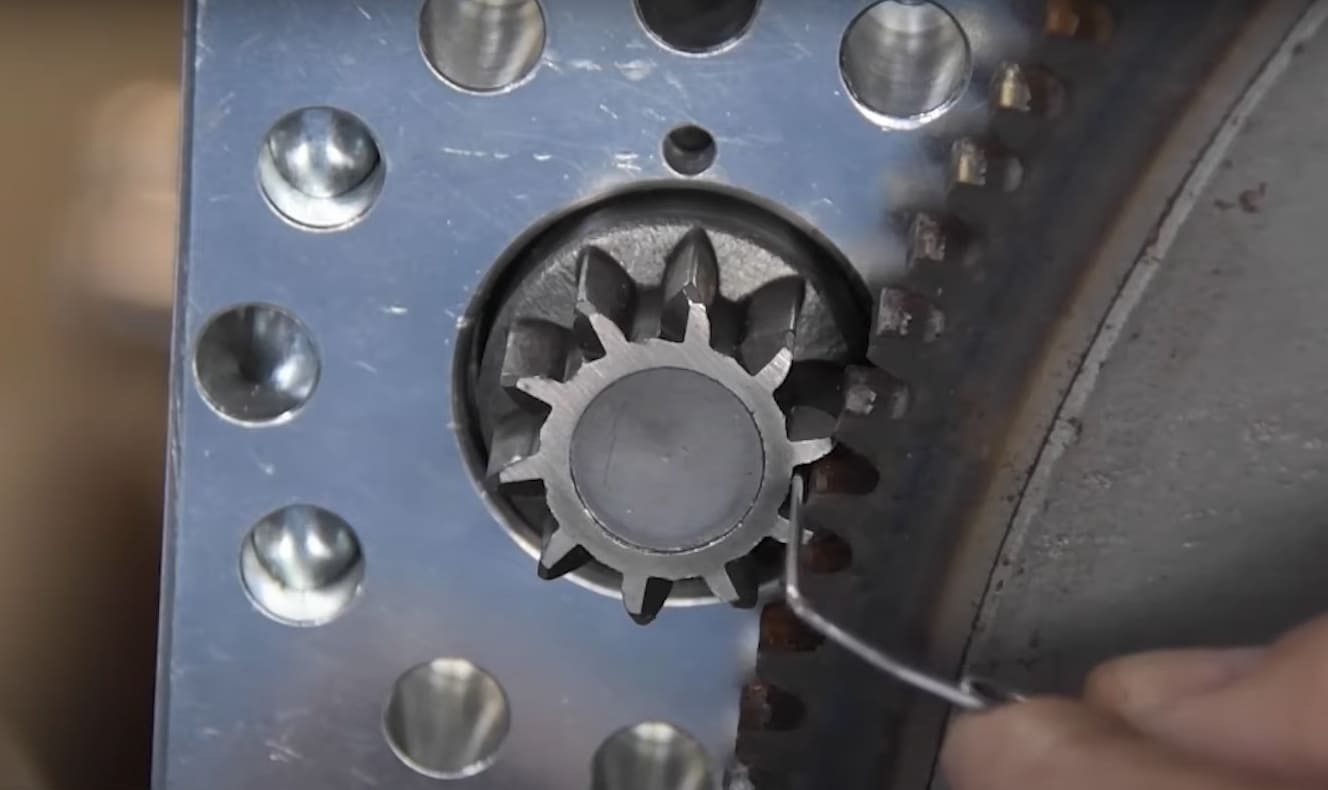
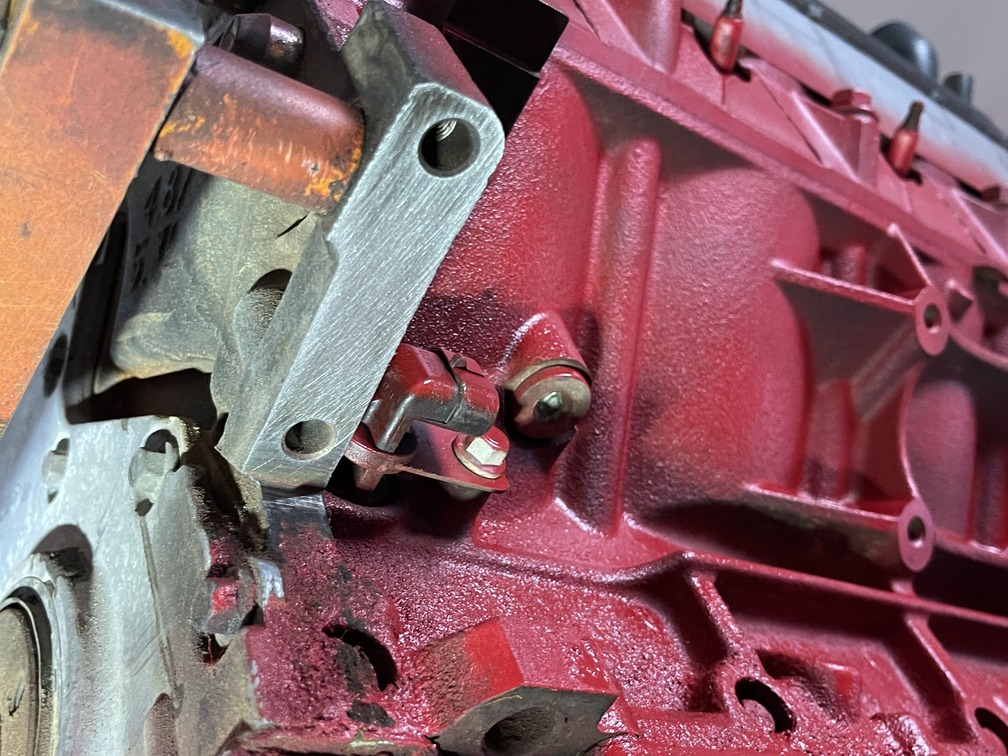
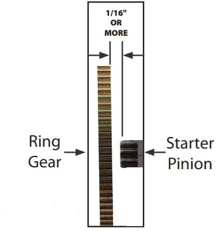
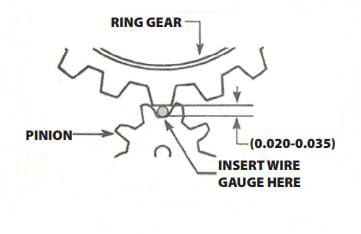
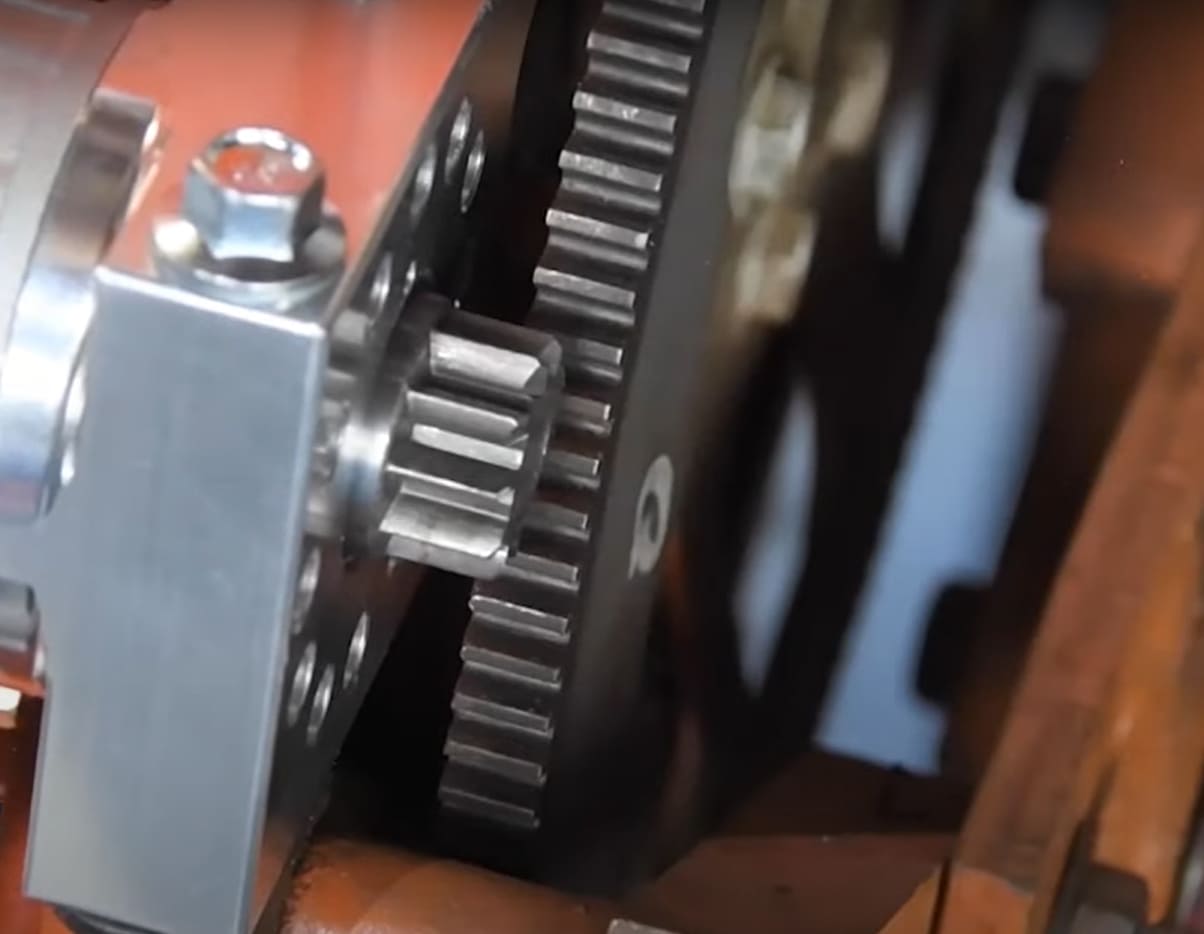
Before installing a new starter, Powermaster stresses to check a few simple clearances during the installation, such as pinion clearance, pinion depth, and the mesh between the gear teeth that shown here. These steps will ensure the best starter performance and durability for your Chevy.

009 engine starter tech

010 check the engagement of the pinion gear
With the gear mesh confirmed, time to check the engagement of the pinion gear. Pull the pinion gear out, or supply 12 V to the ignition terminal of the starter (for no more than 10 seconds). A rule of thumb is for the pinion gear to be about ½ to 2/3 engaged with the ring gear. If the pinion gear of the starter is engaging too far into the ring gear, an internal shim must be installed between the starter housing and the mounting block.
011 Make sure the battery is fully charged and ensure there are at least 11 V on the battery terminal during cranking
If you experience any cranking issues, or if you want to confirm proper voltage at the starter, dig out your friendly voltmeter. It’s best to disable the ignition so a friend can crank the starter while you watch the voltage on the battery cable connection. Make sure the battery is fully charged and ensure there are at least 11 V on the battery terminal during cranking. While you’re there, be sure to check the ignition (small wire) terminal as well. If there are less than 11 V while cranking, inspect the wiring and terminals.

Source

Powermaster Performance
(630) 957-4019
powermasterperformance.com

- Advertisement -

Related Articles

Search Our Site

More Chevy Performance

How to Avoid Fuel Starvation Problems When Building High Horsepower LT1 Engines

By Jeff Huneycutt   -   Photography by the Author Critics have...

Fresh Fuel Delivery for a Crusty 1977 Nova

By Tommy Lee Byrd   -   Photography by the Author If...

Double Dose of 1969 COPO Camaros With Different Personalities

By Scotty Lachenauer   -   Photography by the Author We’ve all...

Suspension Upgrade: Aldan’s Coilover Kits for C2 and C3 Corvettes and Full-Size Chevys

By Ron Ceridono   -   Photography by the Author Hot rodders...

Totally Custom Pro Touring-Style 1967 Chevy Chevelle

By Nick Licata   -   Photography by John Jackson Growing up...

Firing Up — All Chevy Celebrates its Third Anniversary

With the Jan. ’24 issue of All Chevy Performance...
More Chevy Performance

Firing Up – Decisions, Decisions

By Nick Licata Being an automotive magazine editor, I get...

2023 MUSCLE CAR AND CORVETTE NATIONALS

Another Year of Fresh GM Muscle at MCACN By John...

Longevity

Tom Schauppner’s ’56 Chevy Bel Air By Nick Licata   -  ...

Chevy Concepts – 1970 Camaro

Artwork by Tavis Highlander Instagram @tavishighlander TavisHighlander.com Vehicle Builder: Vintage Fabrication, Independence,...

Back to Basics

Keeping Drum Brakes in Service is Simple and Affordable By...

Zora Inspired

Mike Schultz’s 1965 Corvette Grand Sport Tribute By Nick Licata  ...