How to Repair and Customize Chrome Plated Die-Cast Metal Trim Pieces

Customize and Repair Ford Phaeton Bullnose Grille Ornament

By Gerry Burger – Photography By The Author

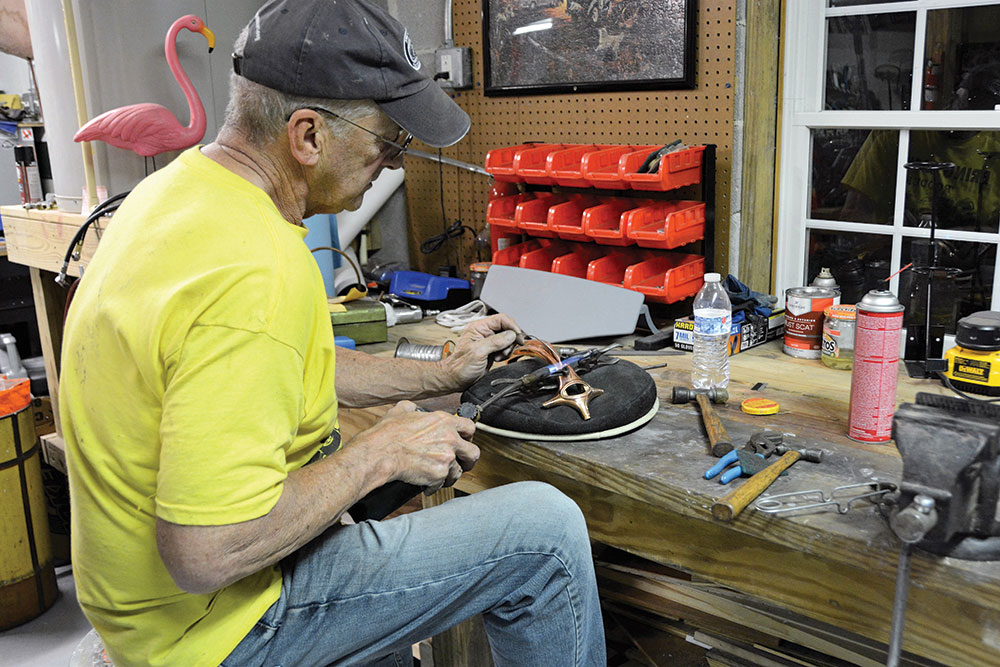
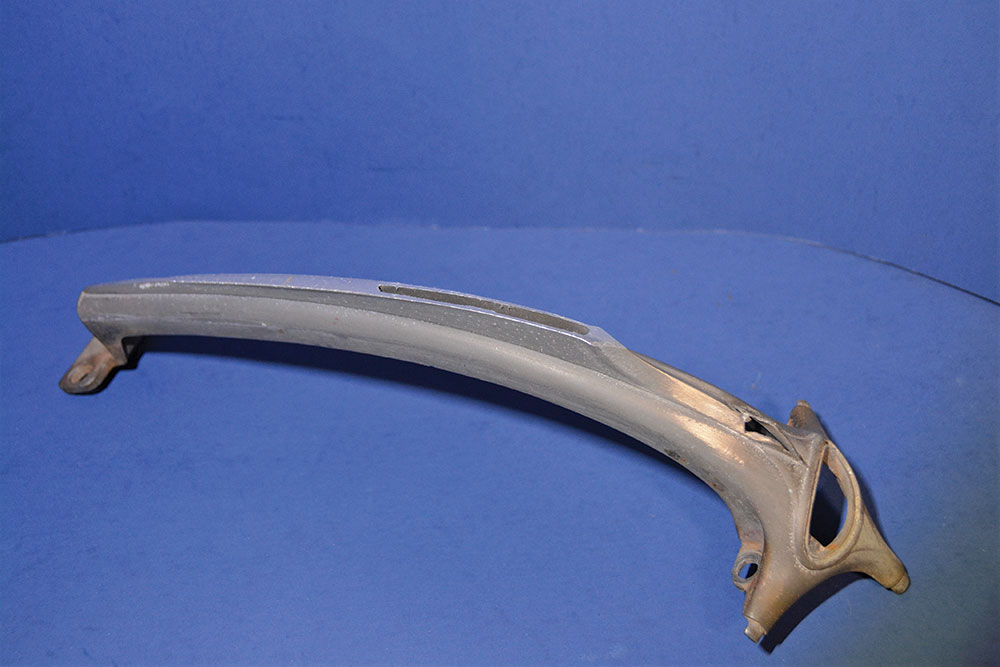
My latest project is a flathead powered 1936 Ford Phaeton being built as an early ’50s hot rod/custom. Recently we came across the original chrome plated, die-cast grille ornament with the V8 emblem intact, but two holes where a greyhound had once been. We decided to grind down the finned portion of the ornament to a lower profile, to remove the damaged portion, giving us a “semi-bullnose” look. Working with die-cast pot metal can be difficult, but follow along and we’ll show you how to repair, fill, and smooth it for chrome plating.

- Advertisement -

Building a hot rod of any era is a stream of choices—some big, some small—but they all contribute to the finished package. One thing we learned early on was to pick a theme and make every decision fit that style. Many cars built in the ‘50s blurred the lines between rod and custom, with performance under the hood and some custom details and paint on the outside. That is the very theme for our 1936, with a built Flattie under hood and a conservative custom approach on the outside.

02-ford-bullnose-hood-ornament-damaged-original-V8-greyhound
This is our original 1936 Ford hood ornament. It once held a V-8 emblem and a greyhound but we wanted a cleaner look.

More How To Tips: How To Make Custom Headlights For Your Hot Rod

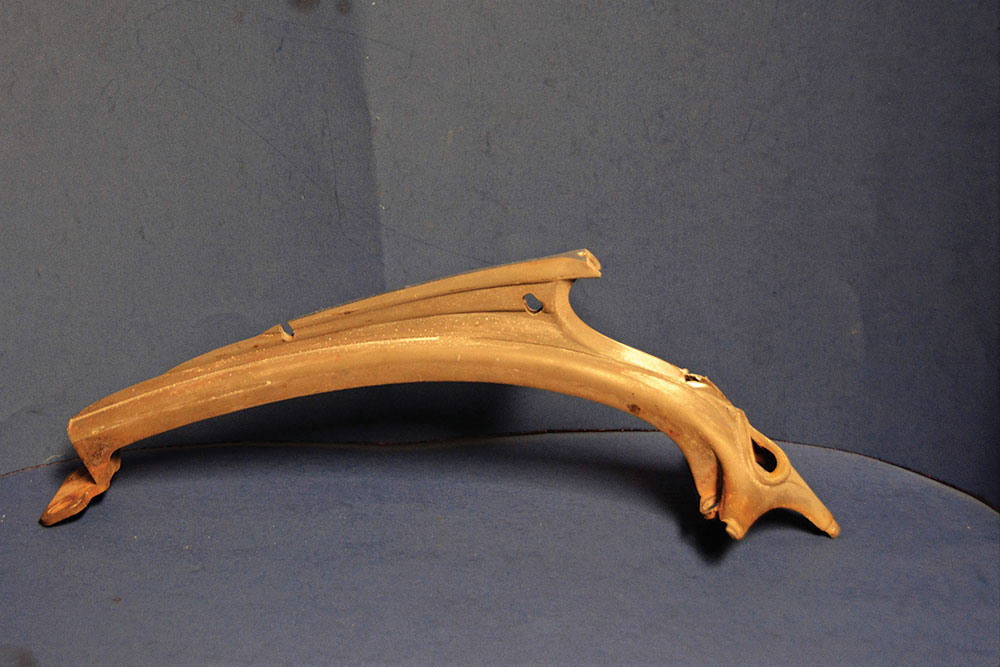
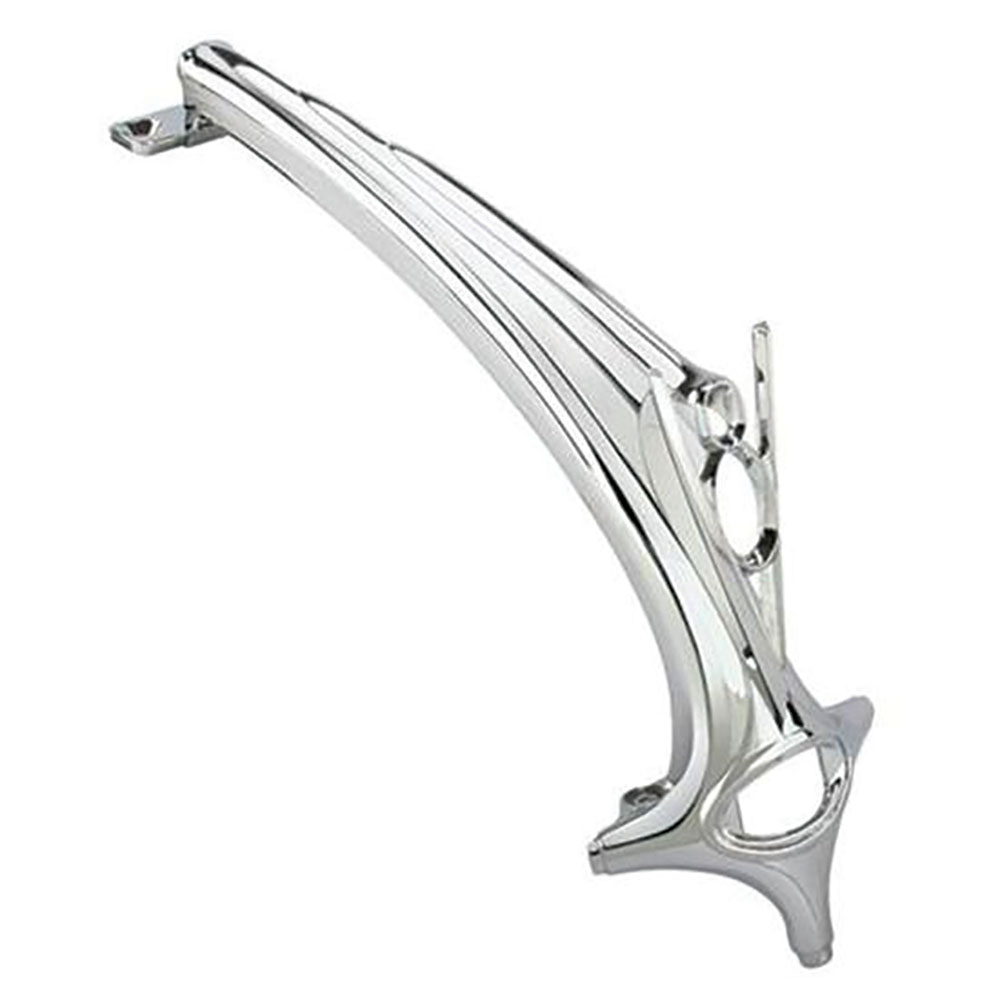
We’ve been doing the bodywork, and while stacking parts on a shelf (all neatly marked for the memory impaired) we came across the original grille ornament. The die-cast pot metal was in overall good condition, however, two holes drilled in the top finned portion on top told us a greyhound had once adorned it. While greyhound ornaments are cool, in keeping with the theme of the car, we thought a simple Ford bullnose ornament like the 1936 Ford Chrome Radiator Trim Bezel from Speedway Motors would be a quick-and-easy solution. But then we began to think about making our own bullnose piece, with a custom twist that would make it unique.We envisioned removing the V8, and grinding down the finned portion of the ornament to a lower profile, giving us a “semi-bullnose” look.

- Advertisement -

More How To Tips: This Ford Phaeton Gets Some European Flair

03-ford-bullnose-hood-ornament-sharpie-line-shows-cut
We drew a black line on the piece to help visualize what it would look like after some careful cutting.

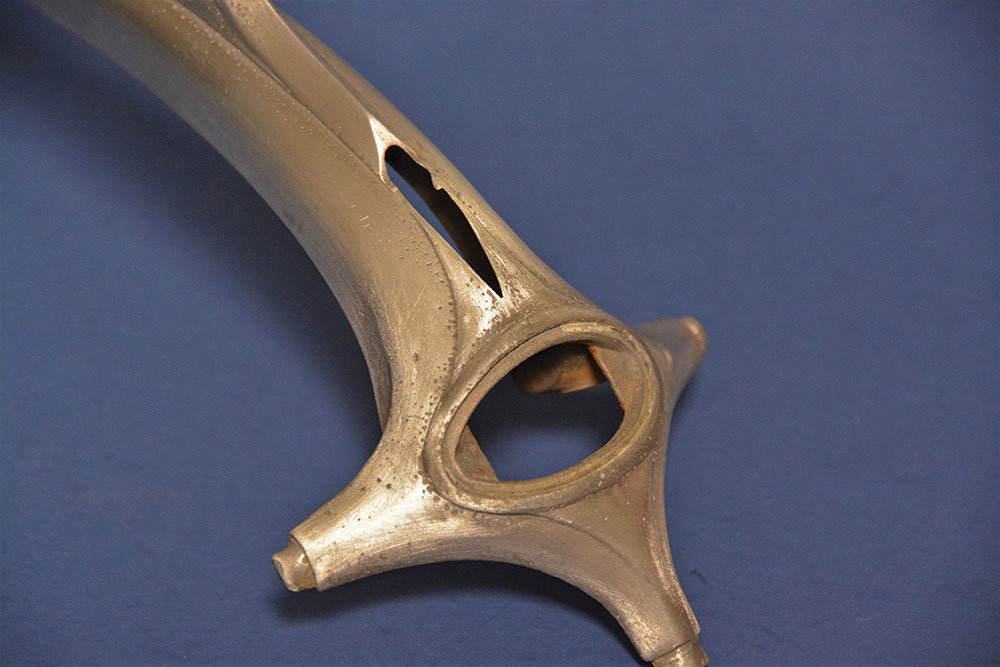
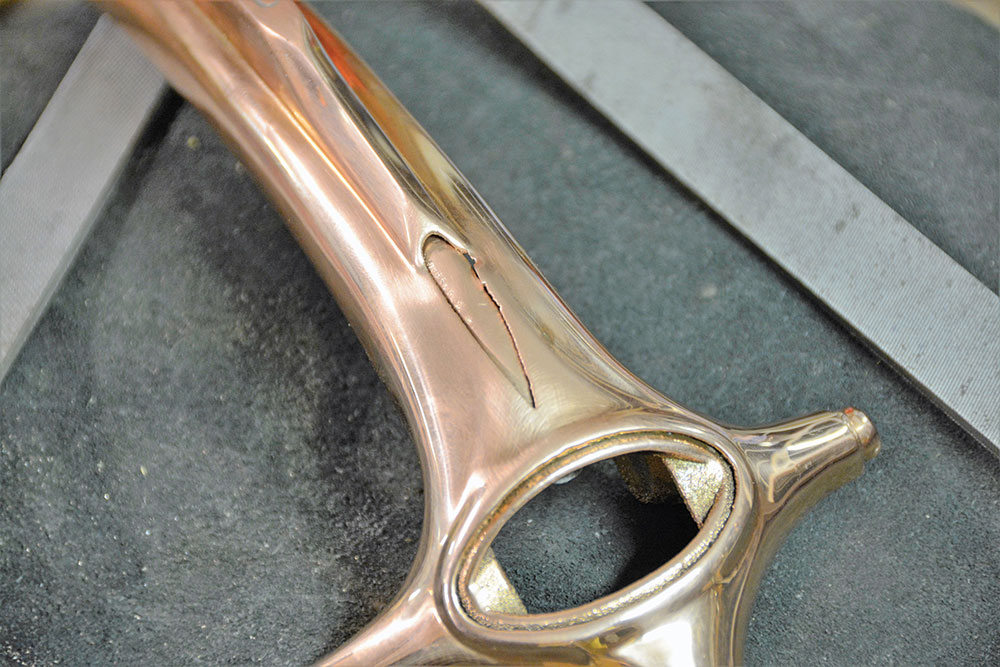
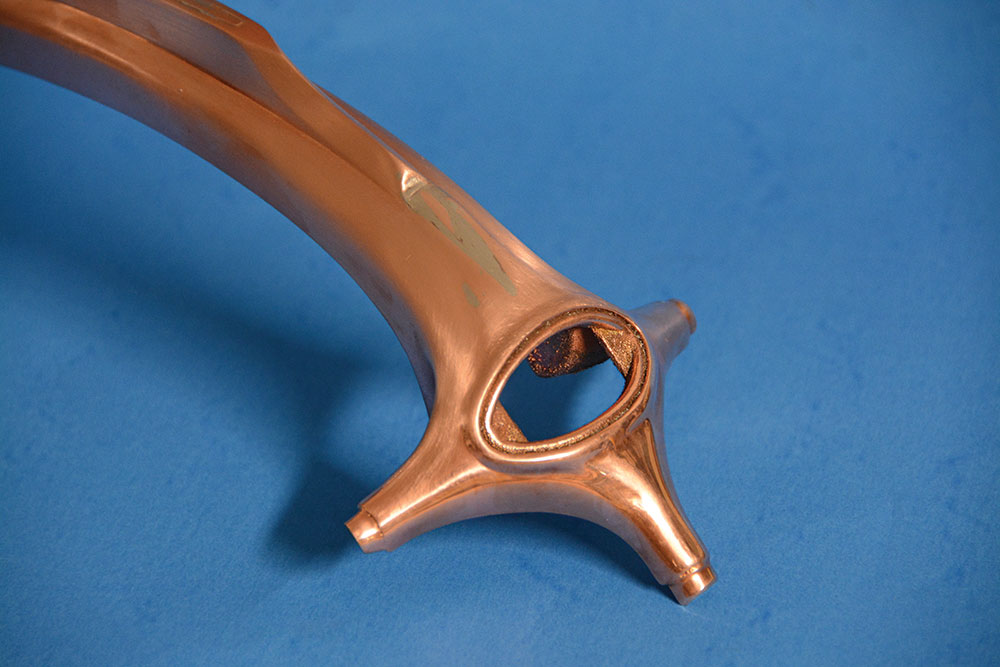
Since the hood ornament is die-cast pot metal, removing metal is easy—so easy you must work carefully not to remove too much material. Some marking with a Sharpie indicated we could trim the piece to eliminate the two holes and achieve our desired lower profile. A die grinder and cut-off wheel took off most of the die-cast piece and we finished shaping with files and sandpaper. We sanded the ornament down to a 400-grit finish and spent some time viewing it from various angles. The piece flowed nicely but we now had the problem of filling the resulting openings caused by removing the V8 emblem and removing the top of the fin.

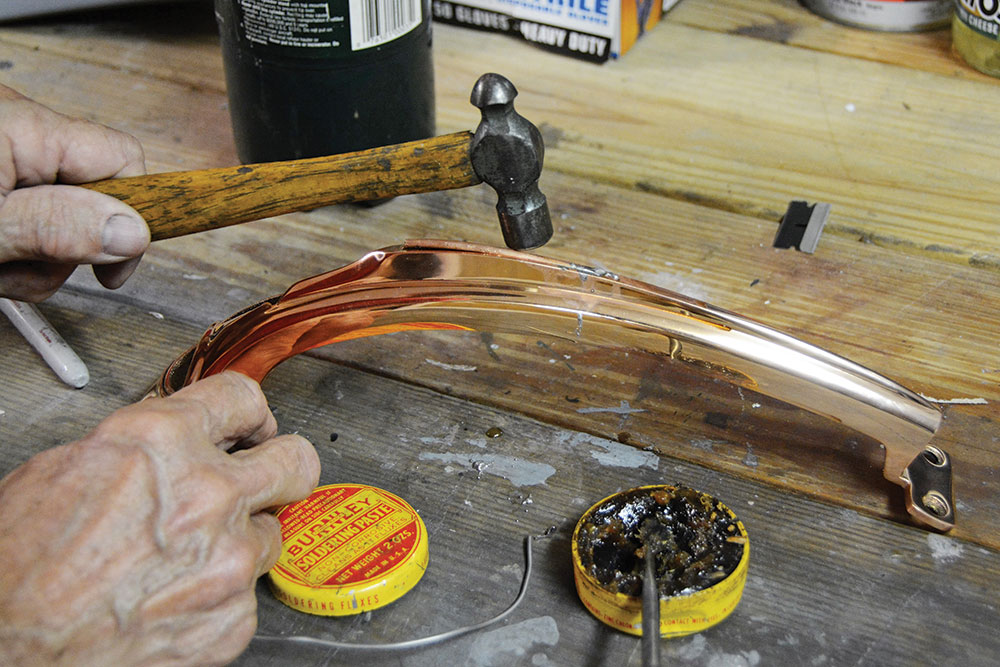
Working with die-cast white metal is difficult, but working with copper is relatively straight-forward. So, one trick is to convert this die-cast piece into a copper piece by plating it. We spoke to our friends at Advanced Plating about having them copper plating it, then returning it to us where we would solder copper filler pieces in place, before returning it to Advanced Plating for more copper and a final chrome plating. We opted to do this at home for two reasons: One, we enjoy doing these little projects that make a big difference; two, we’re cheap and wanted to save a little money. It should be mentioned that Advanced Plating is fully equipped to do the entire die-cast metal repair and filling process, and this type of repair and modification can be done to virtually any die-cast piece.

04-ford-bullnose-hood-ornament-true-eliminates-Ford-oval-emblem
While a true bullnose eliminates the Ford oval, we opted to keep the oval emblem, making our one-off custom piece a “semi-bullnose.”

More How To Tips: Installing a Universal Fuel Sending Unit and Fuel Tank – 1936 Ford Project

- Advertisement -

And so, satisfied with our final shaping of the die-cast metal piece, it was carefully boxed up and shipped to Advanced Plating for stripping of what remained of the original chrome plating, followed by copper plating. Remember to plan ahead for chrome plating as all good chrome shops have a backlog of parts to plate. Generally plan on at least a couple months to get chrome done and a simple call to the plating shop will give you an idea of how long it may take to complete your job. Our piece fell into the production line and a couple of months later the grille ornament returned, glistening in all its copper glory. In this drive-thru window, overnight-shipping world, there are still some things that just take time.

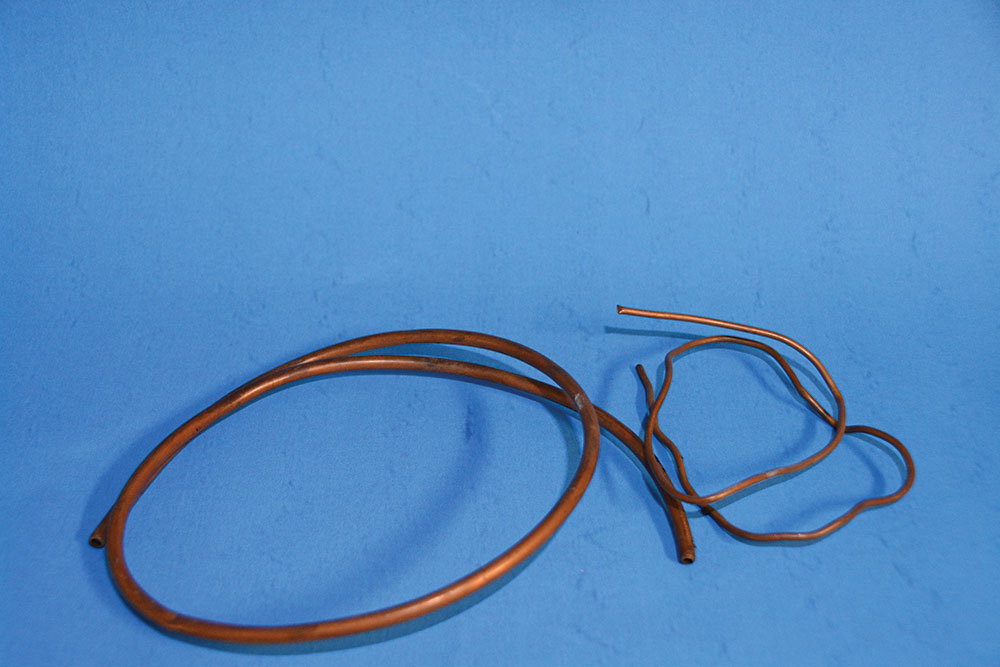
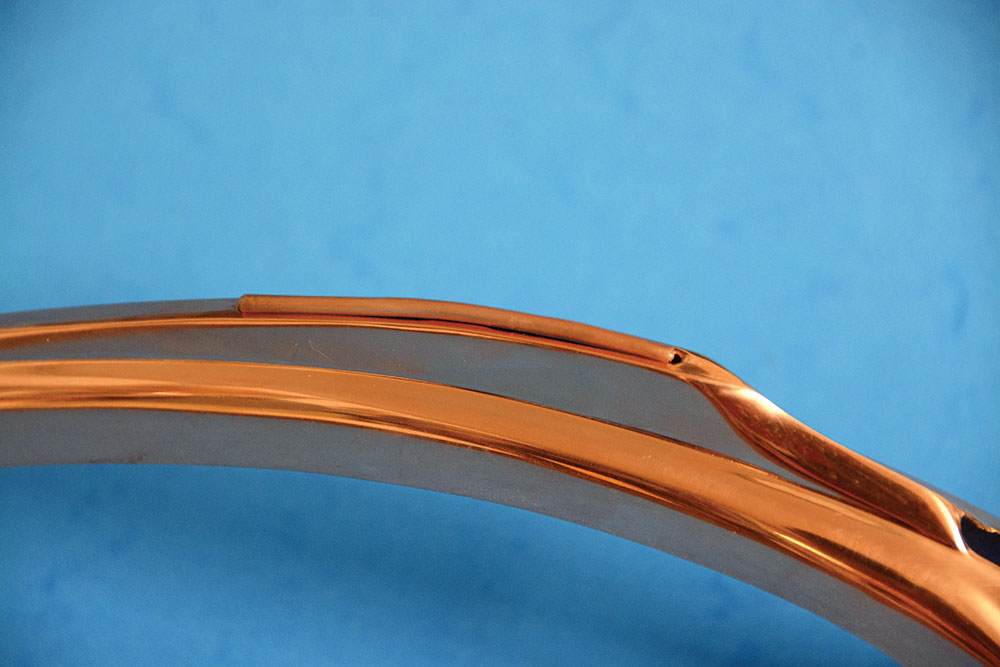
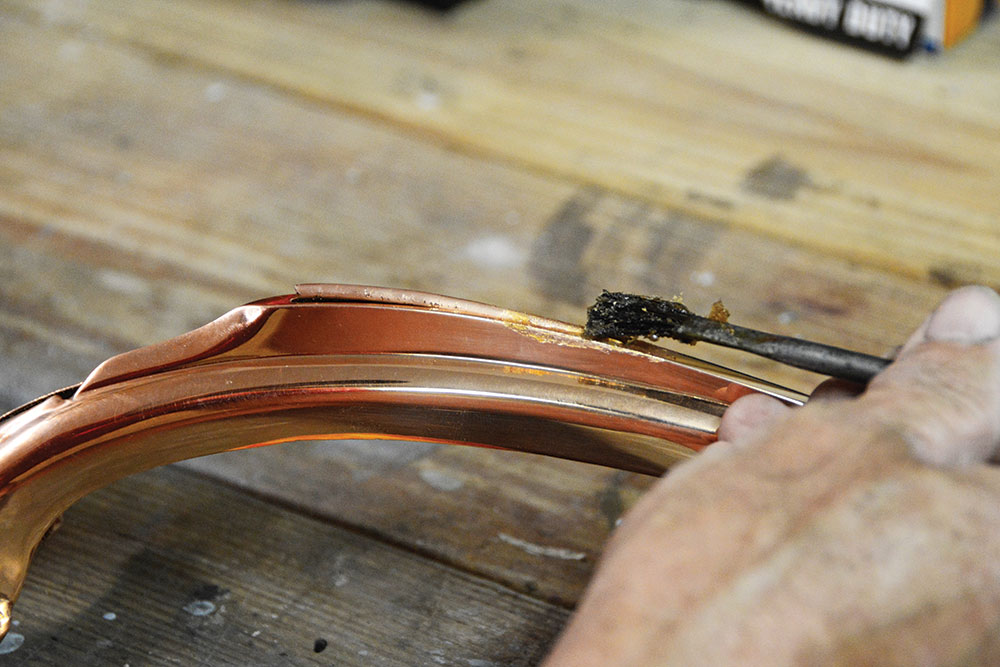
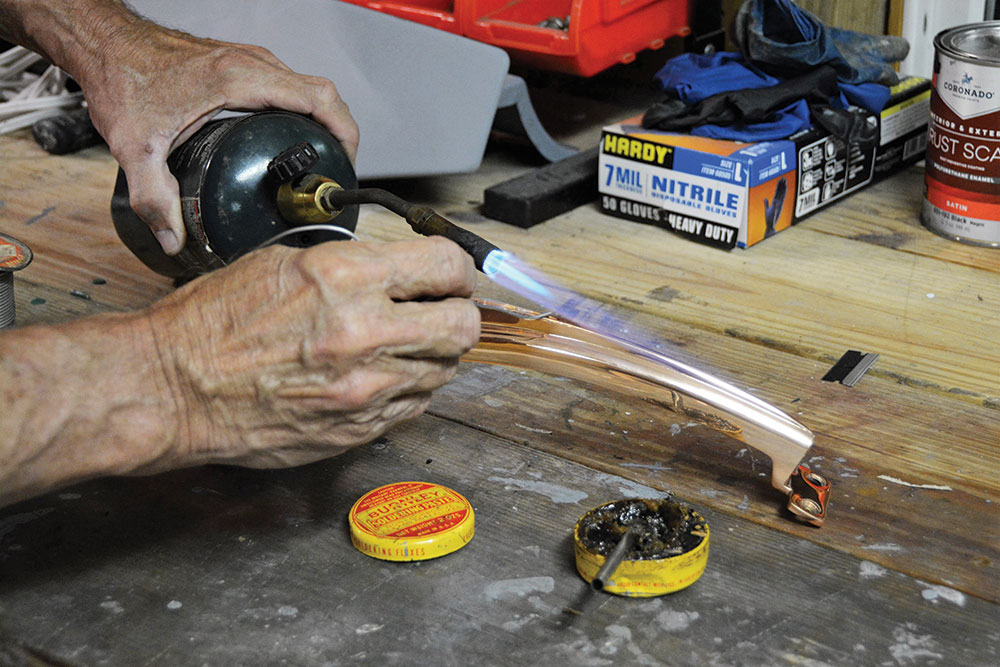
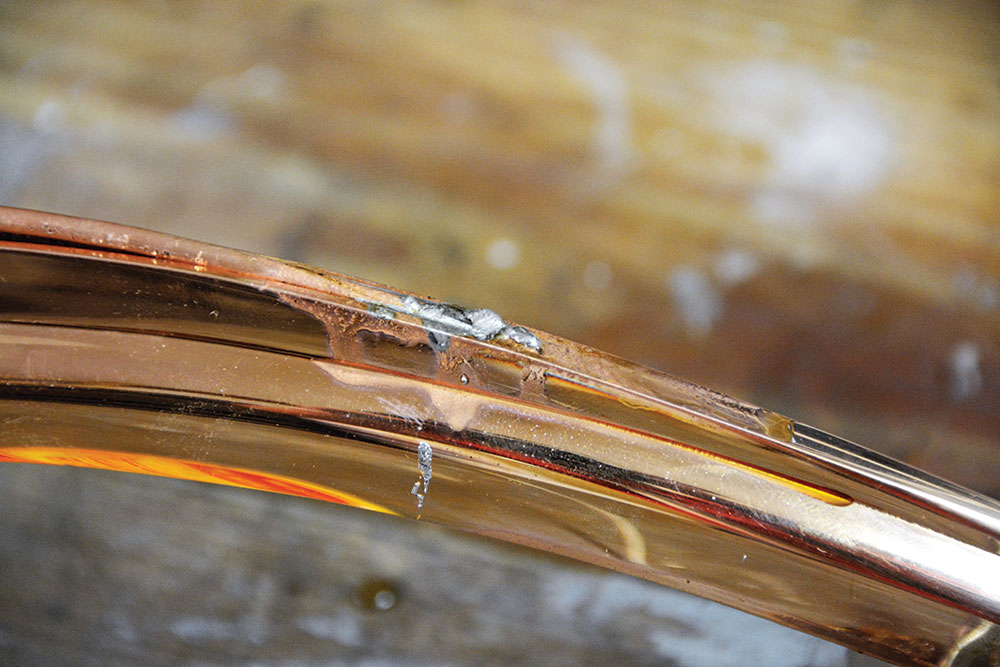
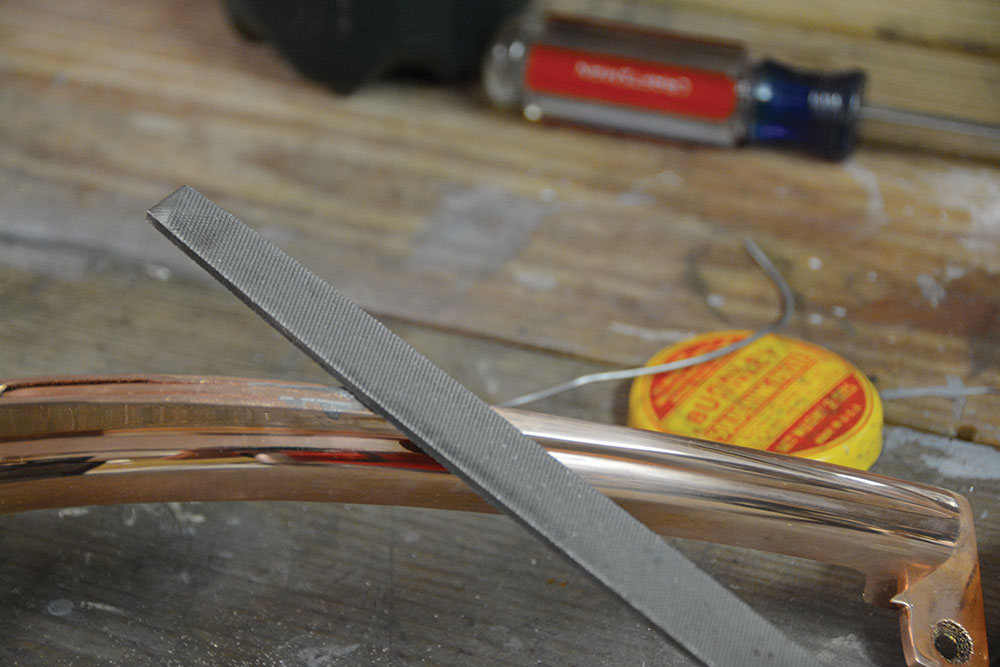
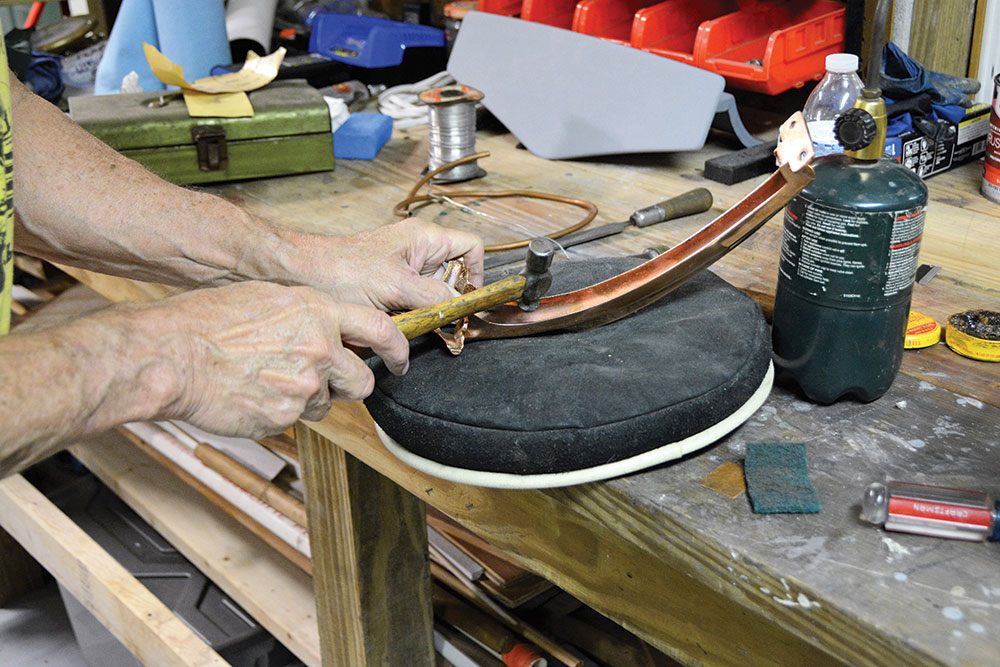
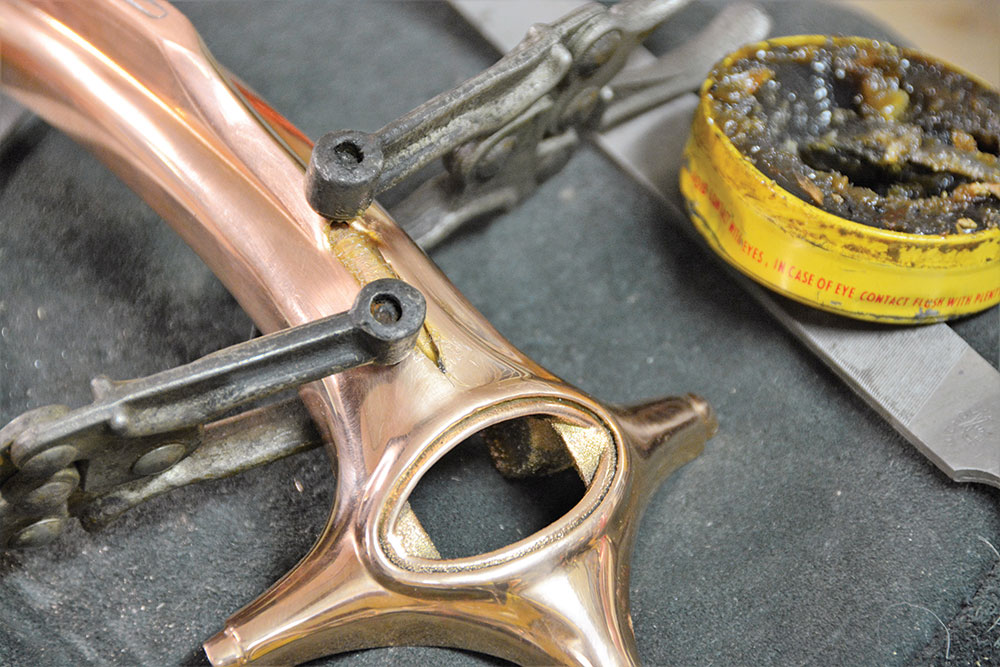
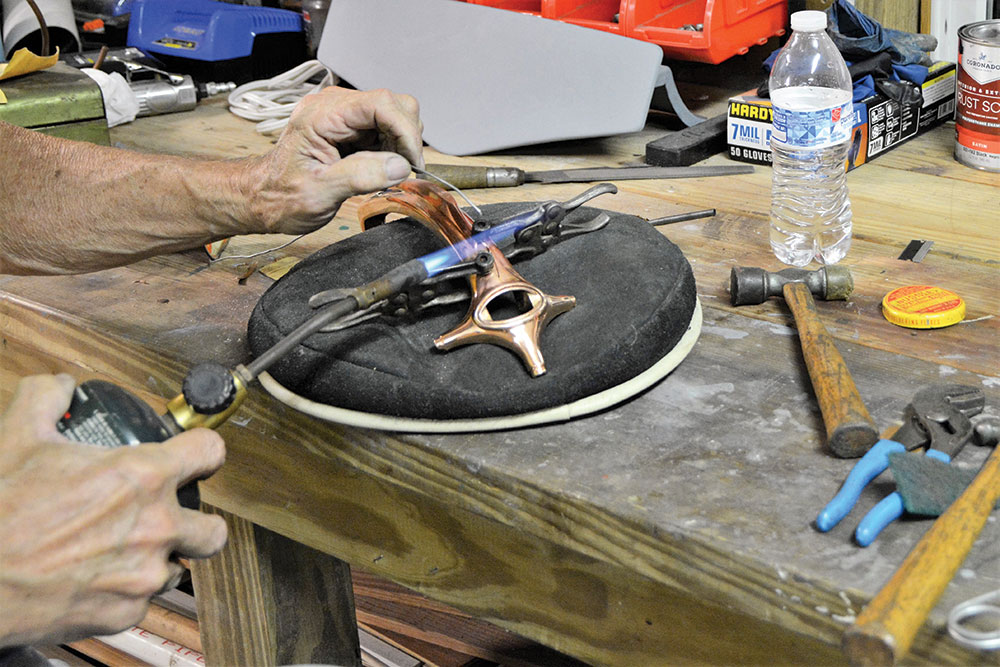
Finding copper material to fill the voids proved to be fairly simple. Since the piece is basically hollow, a simple piece of 1/8-inch copper tubing was gently shaped to fill the long void on top of the ornament. This involved bending it by hand and then squeezing it in a vise to slightly flatten the copper tube. The tubing was fit from the underside to the ornament and then we soldered one end in place; think of this as a “tack-solder,” much like a tack weld. This allowed us to gently tap the copper tube up into the void. The operative word here is GENTLE; die-cast is not known for its strength so you must be careful not to damage the piece. With the tubing fit to the opening it was soldered from the top to fill the seams between the tubing and the hood ornament. Allow the solder to build up above the piece. Since the lead solder is very easy to work, fill it high and then carefully file it down to the proper profile. Once the filing has formed the initial shape, finish the piece with a soft sanding block and sandpaper. We first sanded with 320-grit and finished the work with 400-grit.

05-ford-bullnose-hood-ornament-die-grinder-cutoff-wheel-quickly-removes-pot-metal
A die grinder and cut-off wheel made quick work of removing the unwanted portion of the pot-metal fin. We cut above the line and carefully worked with files to remove the rest of the material.

The front opening is a bit irregular, but using the same tubing technique (this time we used 1/4-inch tube) we shaped a filler piece and soldered it in place followed by more of the filing and sanding to smooth the piece. Satisfied with the shape and finish of the piece it was returned to Advanced Plating for final finish, copper, and chrome plating. You can use the copper and solder method to repair all sorts of die-cast, chrome plated pot metal trim in this way.

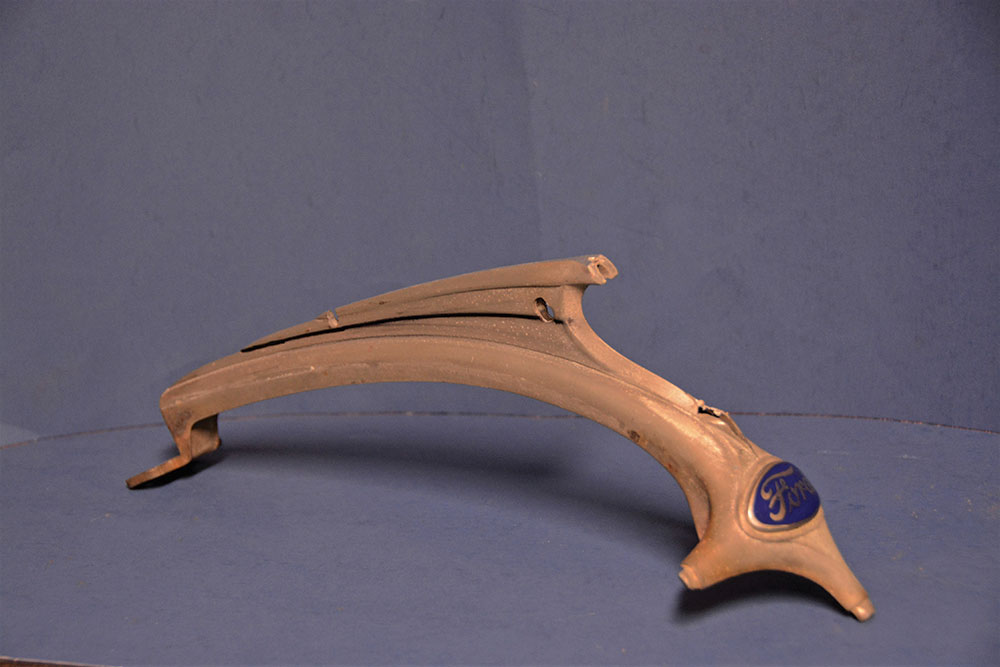
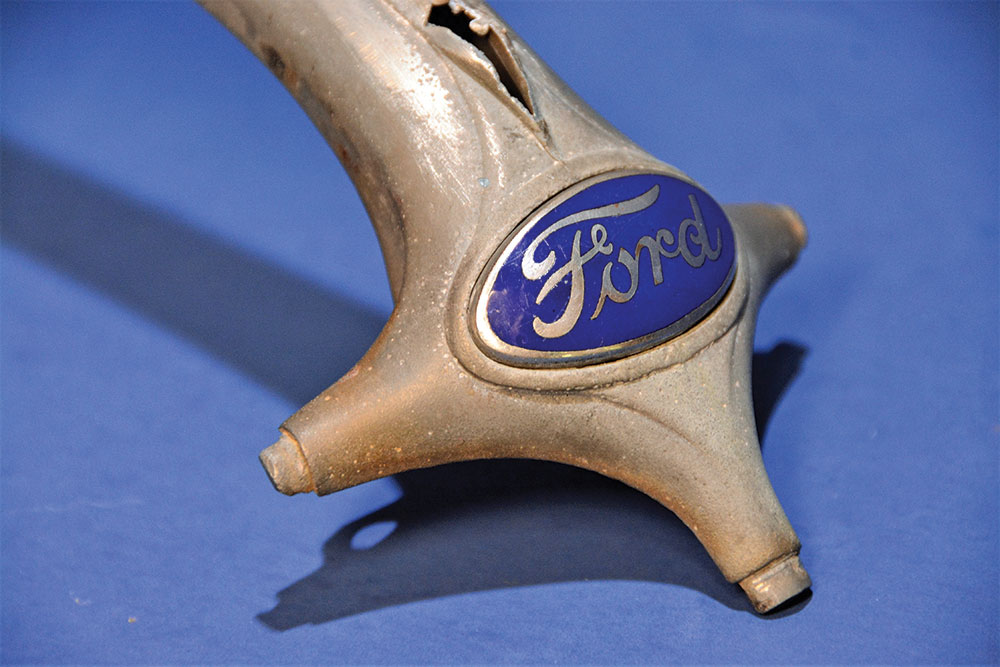
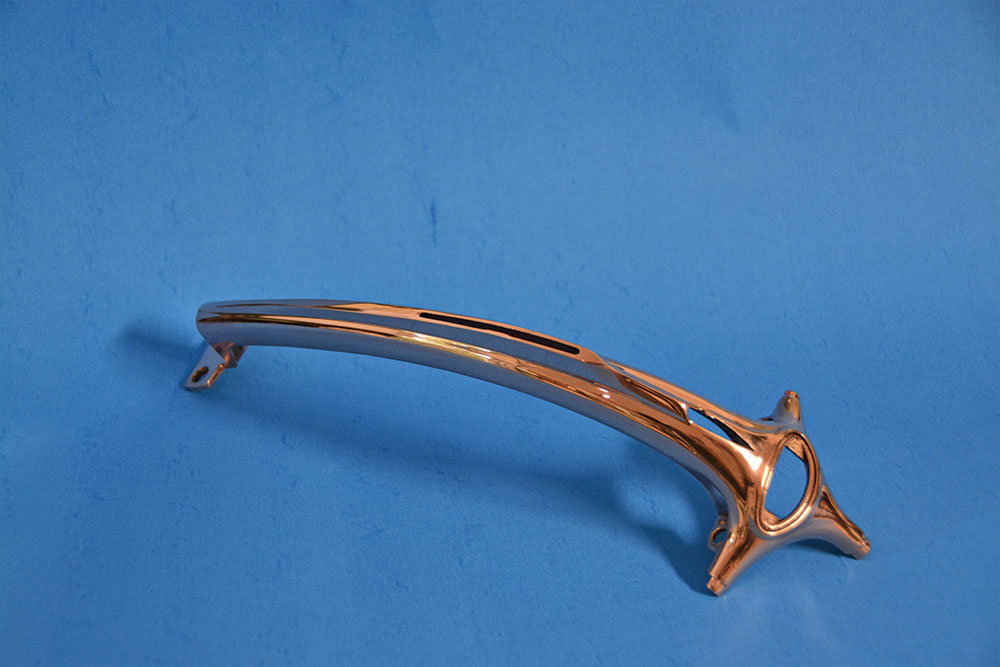
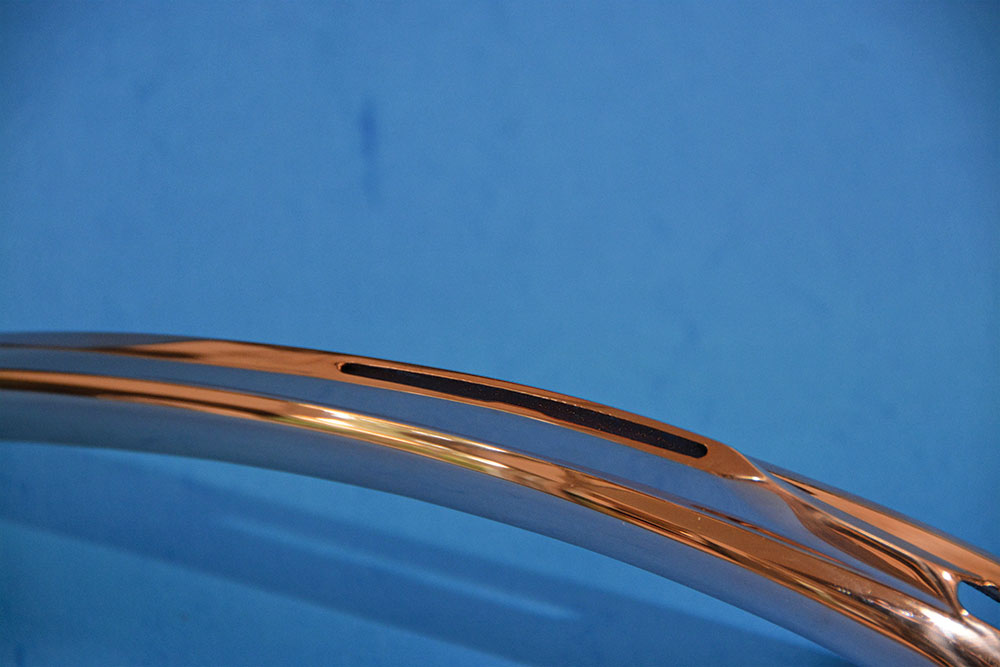
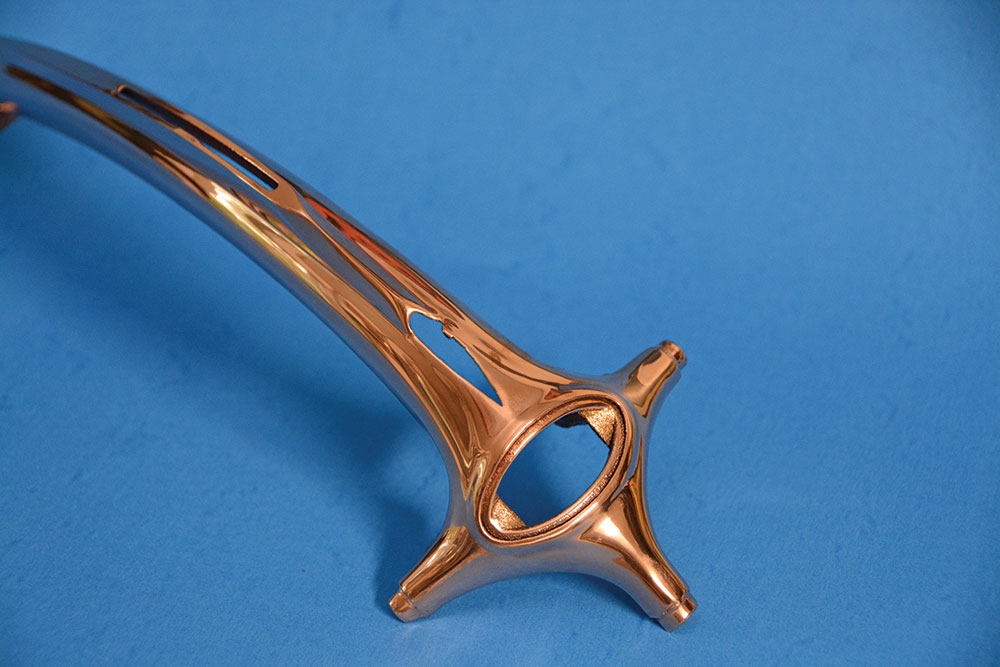
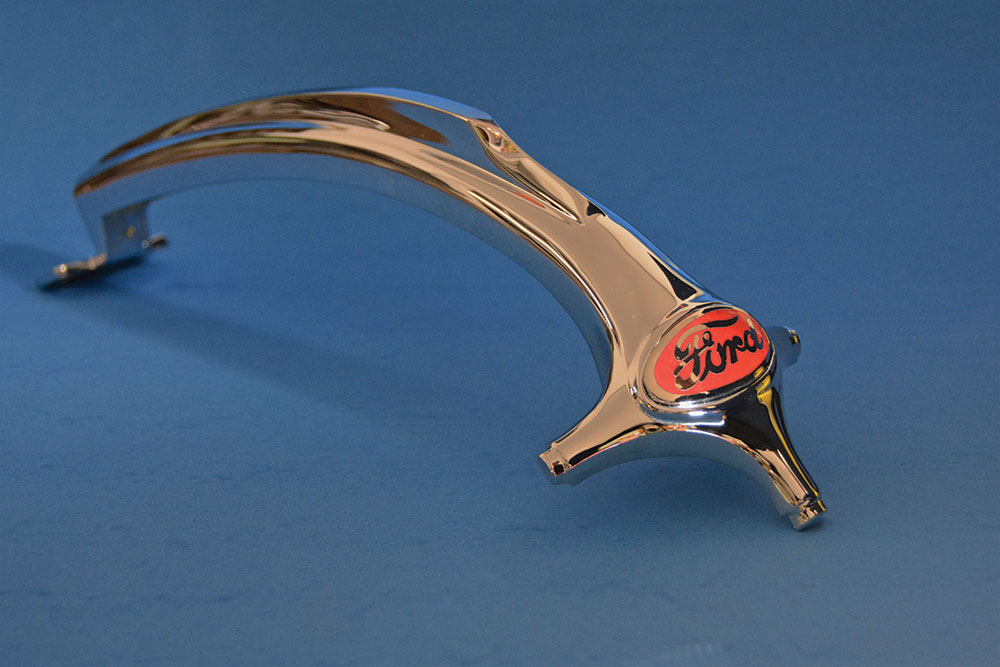
When we received the piece back in finished chrome plating, we were more than pleased. The plating was impeccable but beyond that we were pleased with the overall custom shape of the piece. It will be one of those things that most people may never notice, but such subtle changes are what make a car special and we are pleased knowing our hood ornament is one of one. MR

06-ford-bullnose-hood-ornament-filing-sanding-block-final-custom-shape
After careful filing and then sanding the die-cast metal with a soft sanding block we achieved this final shape. It’s cleaner than the original shape but a bit more ornate than a true bullnose piece.
07-ford-bullnose-hood-ornament-damage-V8-emblem-ready-for-plating
The opening above the oval once held the original V-8 emblem. After a bit of quick sanding we were done with that hole and the piece was sent off to Advanced Plating for finish work and copper plating.
08-ford-bullnose-hood-ornament-Advance-Plating-smooth-remove-pits-copper
Here’s the piece after the metal masters at Advanced Plating worked the piece smooth to remove pitting and then applied the copper plating.
09-ford-bullnose-hood-ornament-fill-long-hole-top
Our first task was to fill the long rectangular opening on top of the hood ornament.
10-ford-bullnose-hood-ornament-copper-tubing-filler
We decided to use small copper tubing (1/8 and 1/4 inch) for filler material. It is easy to work with and fills the void nicely.
11-ford-bullnose-hood-ornament-arch-copper-tubing-match-profile-fill-hole
After arching a piece of 1/4-inch copper tubing to fit the profile we checked it for fit. This piece will be installed from the underside of the hood ornament.
12-ford-bullnose-hood-ornament-clean-copper-Scotch-Brite-flux-solder
After cleaning the copper tube with a piece of Scotch-Brite we coated the area to be soldered with flux. It is imperative that you clean copper prior to soldering.
13-ford-bullnose-hood-ornament-propane-torch-solder-copper-tube-final-shaping
A propane torch was used to solder one end of the tubing in place. This “tack solder” will allow us to do the final forming of the tubing.
14-ford-bullnose-hood-ornament-solder-run-extra-filler-for-filing-smooth
Be sure the solder has “run” around the tube. Then build up the solder so you have enough filler material to file down.
15-ford-bullnose-hood-ornament-gently-shape-small-hammer
With the tubing soldered on one end we gently tapped the tubing into place. Gently is the key word here, and we used the smallest hammer we own to do the work.
16-ford-bullnose-hood-ornament-file-solder-down-final-contour
Lead solder works very easily so a file will quickly dress the solder down to the final contour.
17-ford-bullnose-hood-ornament-final-sanding-block-320-400
The final finish is achieved with a soft sanding block and 320-grit sandpaper followed by 400-grit.
18-ford-bullnose-hood-ornament-fill-irregular-hole-front
Next, we turned our attention to the irregular shaped opening in the front of the piece.
19-ford-bullnose-hood-ornament-flatten-copper-tubing-shape-hole
We flattened a piece of 1/4-inch copper tubing in the vise before gently tapping it into place from the back side of the ornament.
20-ford-bullnose-hood-ornament-shape-clean-copper-scrub-flux
Here you can see the tubing has nicely filled the opening. Also note the filler piece has been sanded clean to prepare for solder.
21-ford-bullnose-hood-ornament-clamp-tubing-solder-fill
Two small clamps hold the piece in place and we have applied the flux to prepare for the solder. The clamps are removed as soldering progresses.
22-ford-bullnose-hood-ornament-heat-propane-torch-fill-solder
Once again, the propane torch is used for the soldering process. Minimize the heated area and do not overheat the piece. Remember, under that copper is an 84-year-old die-cast metal piece.
23-ford-bullnose-hood-ornament-filie-sand-smooth-chrome-plating
We used the same technique to finish this filler piece. Filing followed by careful sanding gave us a perfect radius and shape. Now the piece was ready to be sent back to Advanced Plating for the final chrome plating process.
24-ford-bullnose-hood-ornament-Speedway-Motors-Reproduction-V8-grille
It should be mentioned that Speedway Motors sells a very nice reproduction of the original ornament that would simply bolt in place.
26-ford-bullnose-hood-ornament-Advance-Plating-chrome-oval-emblem
Here is the final piece; the team at Advanced Plating did a flawless job. We opted to replace the blue Ford emblem with a new red Ford oval as a final custom touch. In the end we were extremely pleased with this project.

Sources
Advanced Plating
(615) 227-6900
advancedplating.com

Speedway Motors
(800) 979-0122
speedwaymotors.com

- Advertisement -

Related Articles

Search Our Site

More Modern Rodding

Rodding Around – Automotive Racing Products& South City Rod & Custom Receive Accolades

Automotive Racing Products Named HRIA Business of the Year...

Purple Reign: Custom Pinstriped Merc Coupe

Brian Omatsu's 1951 Mercury Coupe: Blending Styles from Classic...

Parting Shot: Isky’s Tribute Ford Roadster

Dennis Taylor’s Modern-Day Representation Of Isky’s Ford Roadster At...

2024 Detroit Autorama Ridler Winning ’53 Corvette

Owned by Dave & Tracey Maxwell & Built By...

First Look 2024 Detroit Autorama Great 8

The 71st Annual Detroit Autorama & The Competition For...

A New Suspension on Jason Scudellari’s Brookville Model A

By Ron Ceridono   -   Photography By Jason Scudellari Over the...
More Modern Rodding

2024 Barrett-Jackson Cup Top Five Finalist Revealed – 1968 Ford Mustang

From the Shop of East Bay Muscle Cars Comes...

David’s Dream 1938 Ford Coupe Build

David Burgard’s Good-Looking Hot Rod Ford Coupe By Dale Moreau ...

2024 Barrett-Jackson Cup First Look At Competitors

Country’s Best-Looking Hot Rods, Trucks, and More Compete For...

How To Fix Quarter Panel Rust

Patch Panel Install For Rust Repair on Your Vintage...

Hemi Swapped 1932 Ford Roadster

Dave Gray’s Deuce Roadster Built In only 5 Months By...

Under The 1965 Buick Riviera Detroit Speed Chassis

Unmatched Street Performance & Sixties Style By Gerry Burger   -  ...