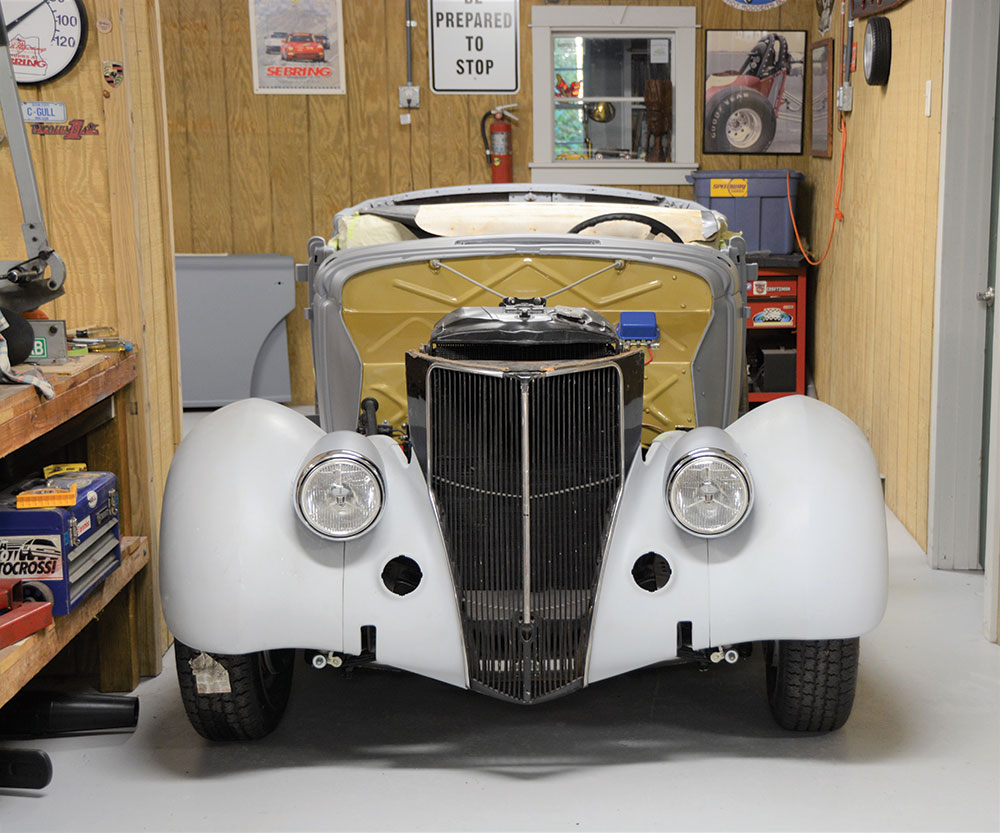
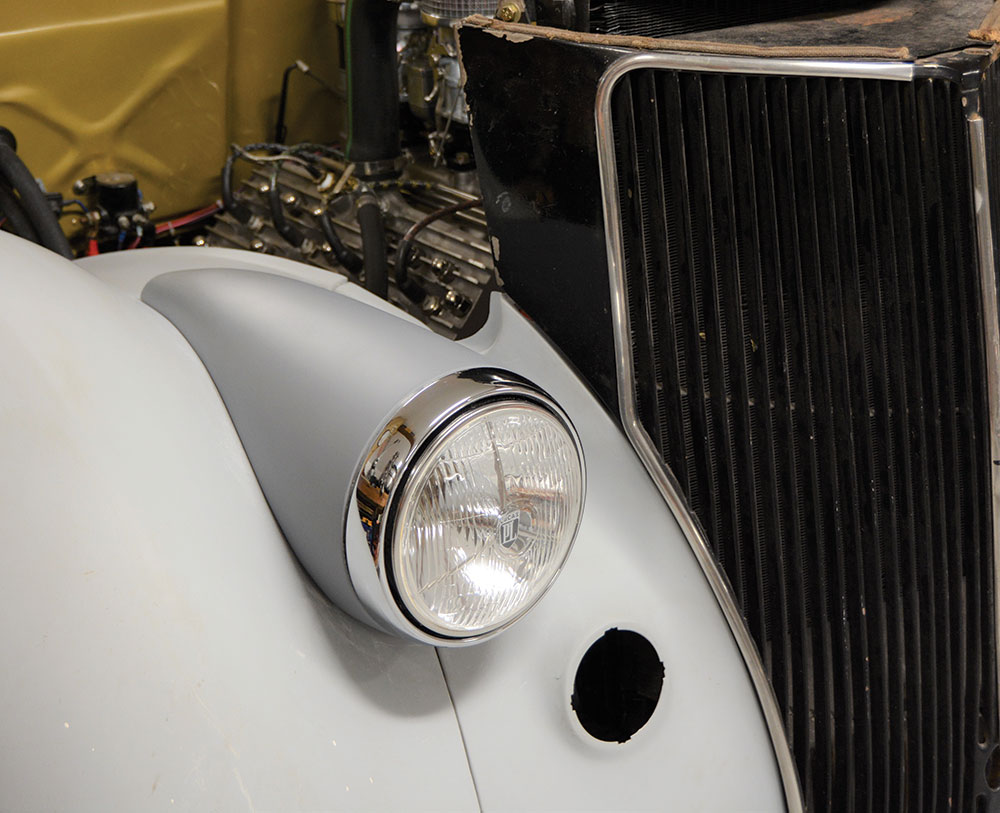
The ’36 Ford lends itself to early customizing trends and few things have a more dramatic effect than eliminating the stock headlights in favor of a pair of ’41 Chevy truck lights.
’40s Chevy Truck Headlights Provide Mood Lighting for the ’36 Ford Phaeton
By the mid ’30s automotive styling was rapidly changing. The last Ford with a flat, vertical grille with independent grille shell was the 1932 Ford. The following year, for the 1933 Ford, the grille shell was eliminated and the grille leaned back to meet the hood. But for 1934, the Ford’s grille had a more pronounced V-shape and by 1935 the Ford fenders became fat. These rapid automotive design changes made for some interesting blending of old and new parts. So, taking lessons from that era, we install custom headlights stolen from a 1940s Chevy Truck and install them on our 1936 Phaeton.
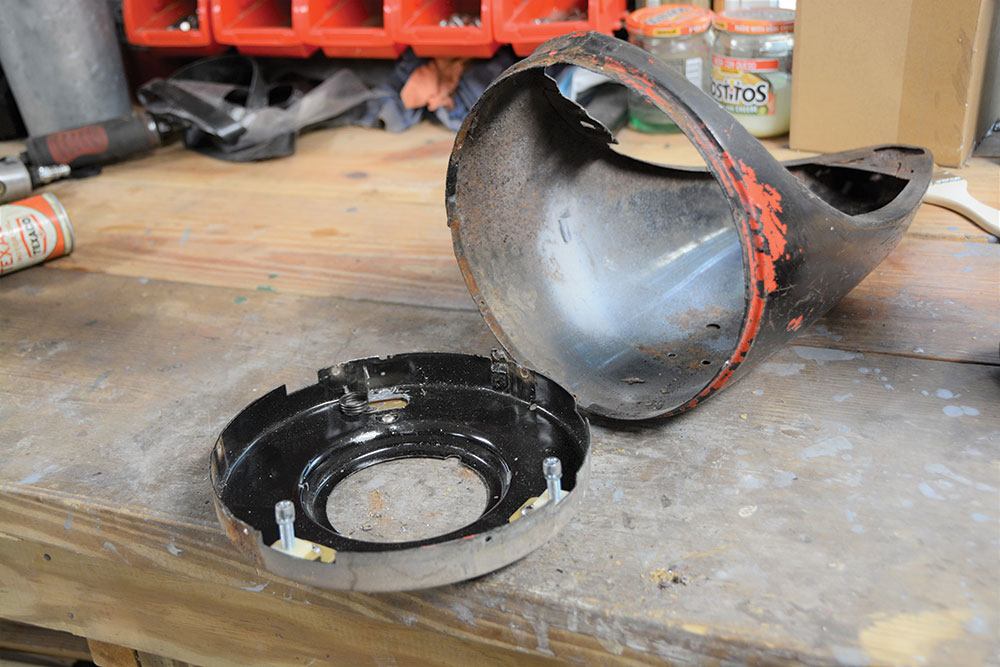
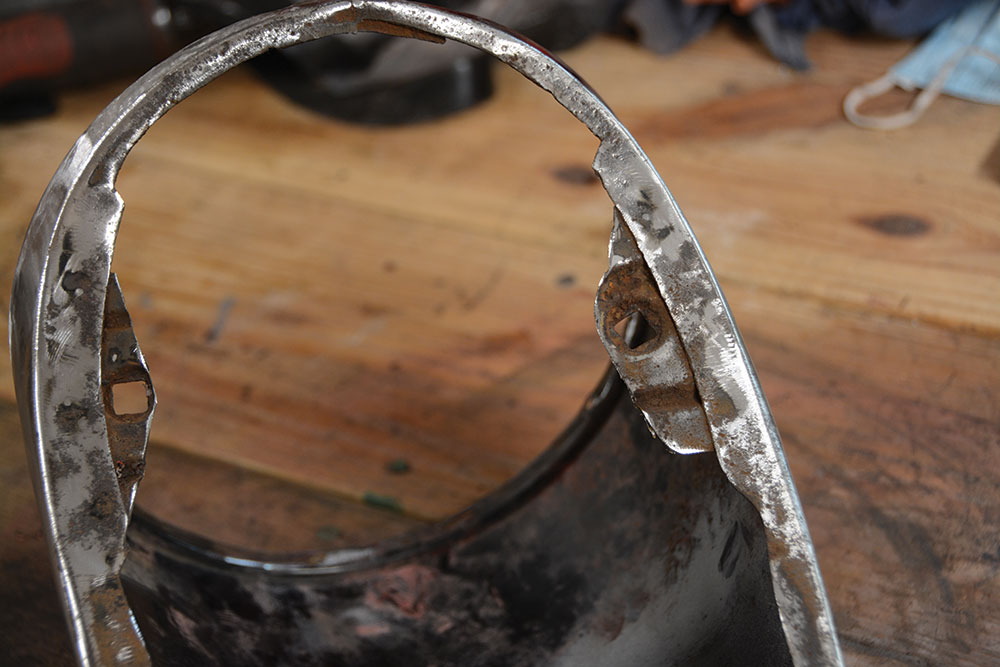
Carefully drill the heads off the rivets that hold the seal beam housing in the GM headlight body and set it aside. They will be reinstalled with new rivets later.
In my humble opinion, while the ’36 Ford is handsome in original form, there are things that look too old for the car. First is the factory bumper with the center drop to facilitate access to the crank hole, the bumper looks like a ’34 piece. Also, the independent headlights mounted atop rotund fenders date the car. By 1937 Ford had advanced the design of the lights, the hood, and the bumpers. The headlights were molded in the fenders, the hood top was one-piece hinged at the rear and the first straight front bumper appeared. None of these styling changes were lost on early hot rodders and customizers, updating power and style is the very definition of early hot rodding.
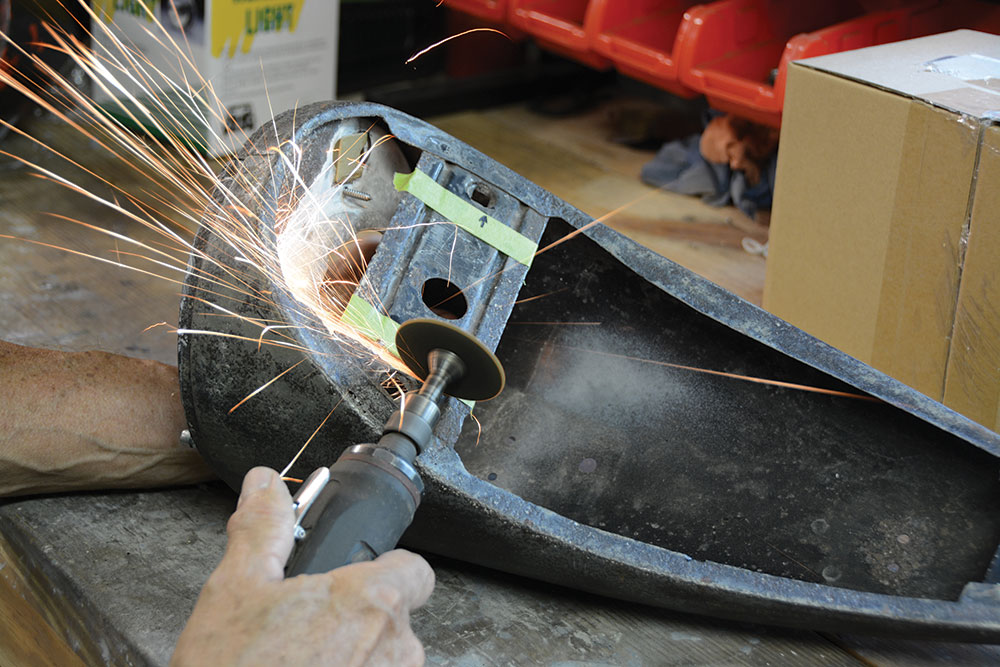
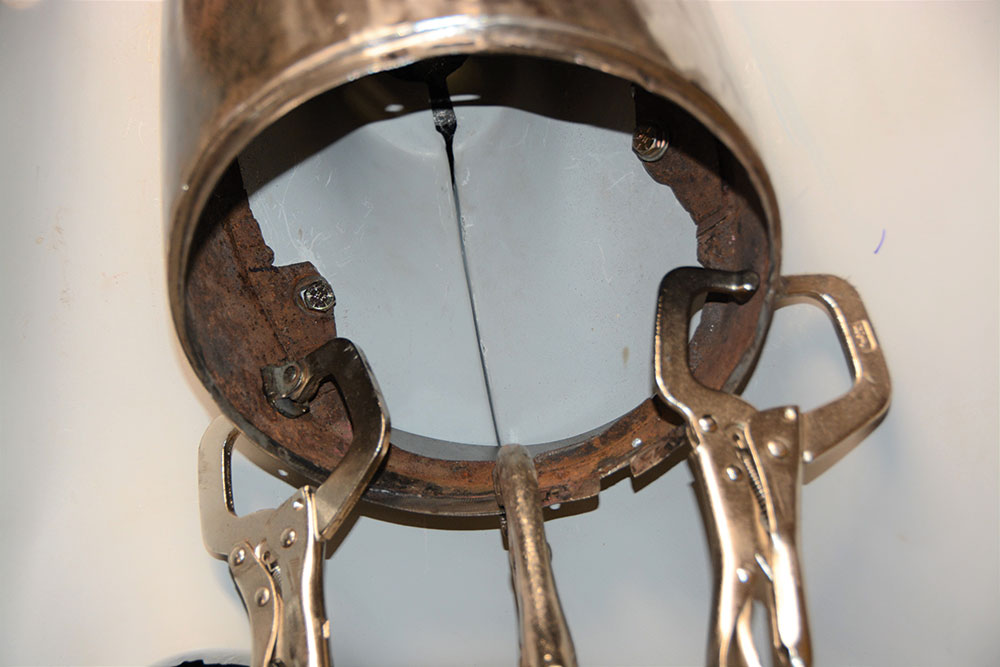
We cut the center out of the original Chevy truck headlight mount as it prevents the headlight housing from resting on the ’36 Ford fender.
Hot rods and customs tend to take you on a journey and we’re not talking about driving to some faraway hot rod show. No, we’re talking about building a car from the ground up and allowing the car to “talk to you,” letting you know just what it needs. In the case of our ’36 Ford phaeton it all began by eliminating the rear-mounted spare tire, the stock bumpers, and taillights. Uncertain of proper tail lights, when we saw a set of ’40 Packard rear lights we knew they were the ones. Along with highly modified ’39 Buick bumpers the ol’ ’36 Ford was talking loud and clear, it was headed toward the early custom look in the Westergard tradition. It became clear stock headlights could no longer light the way on our phaeton.
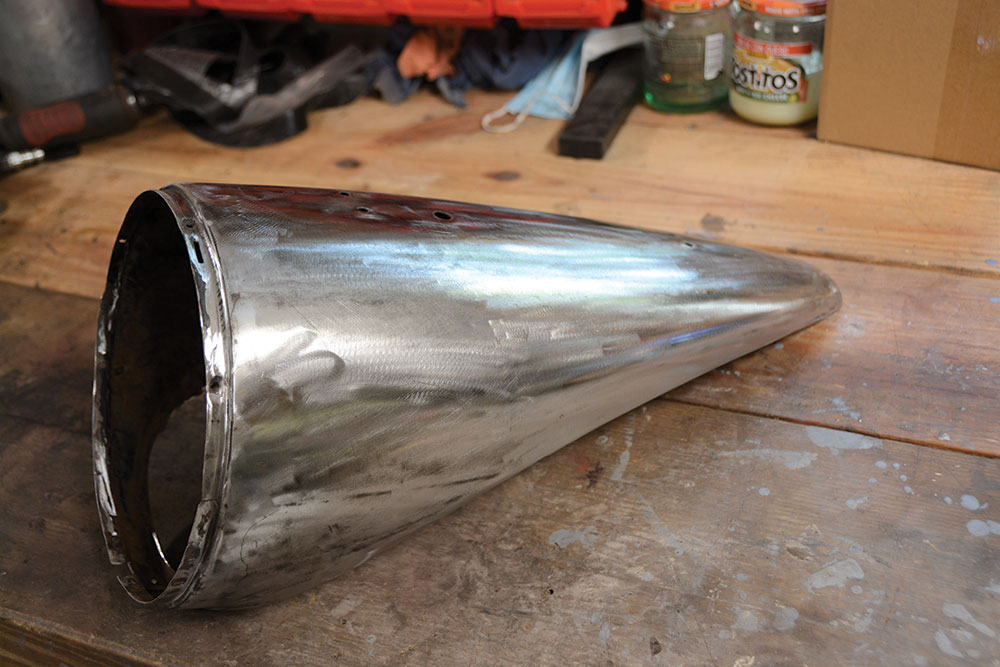
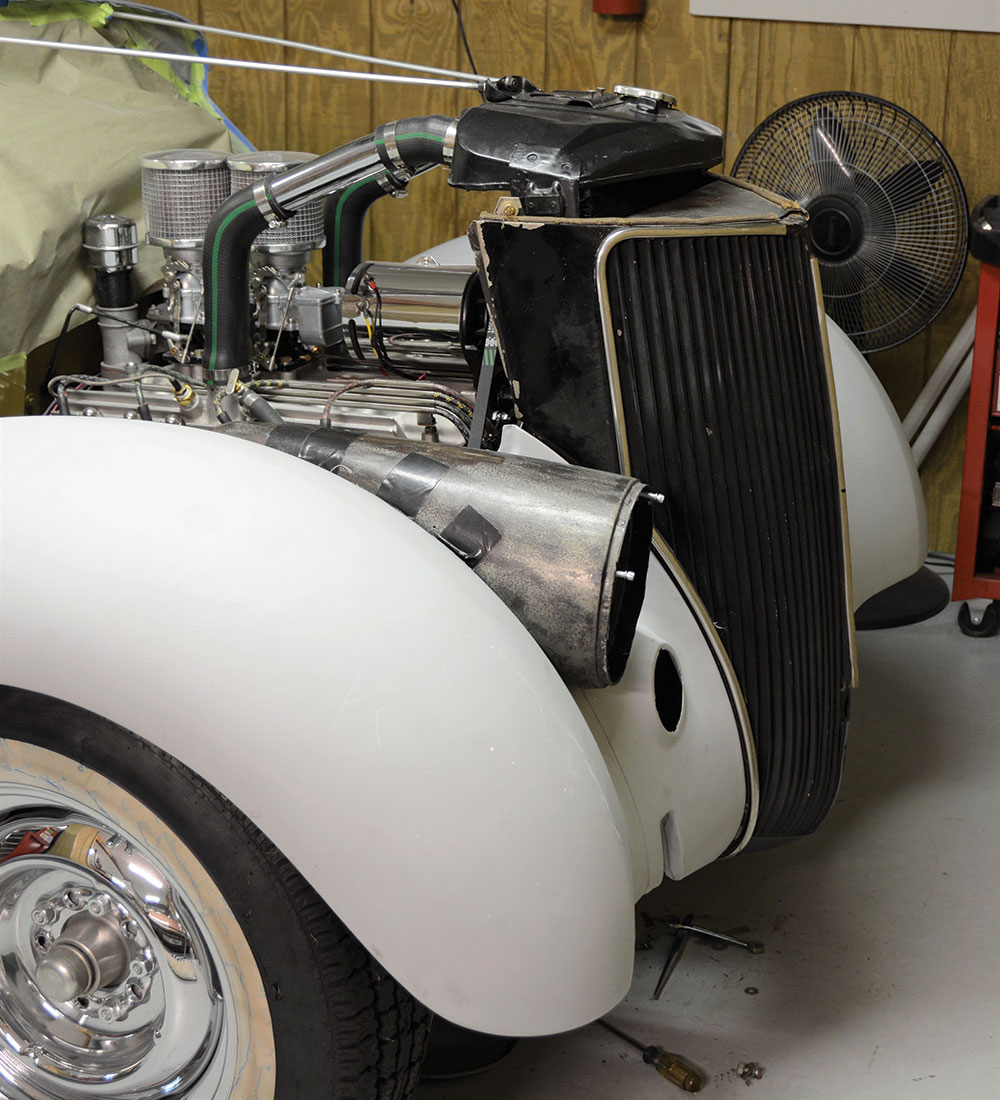
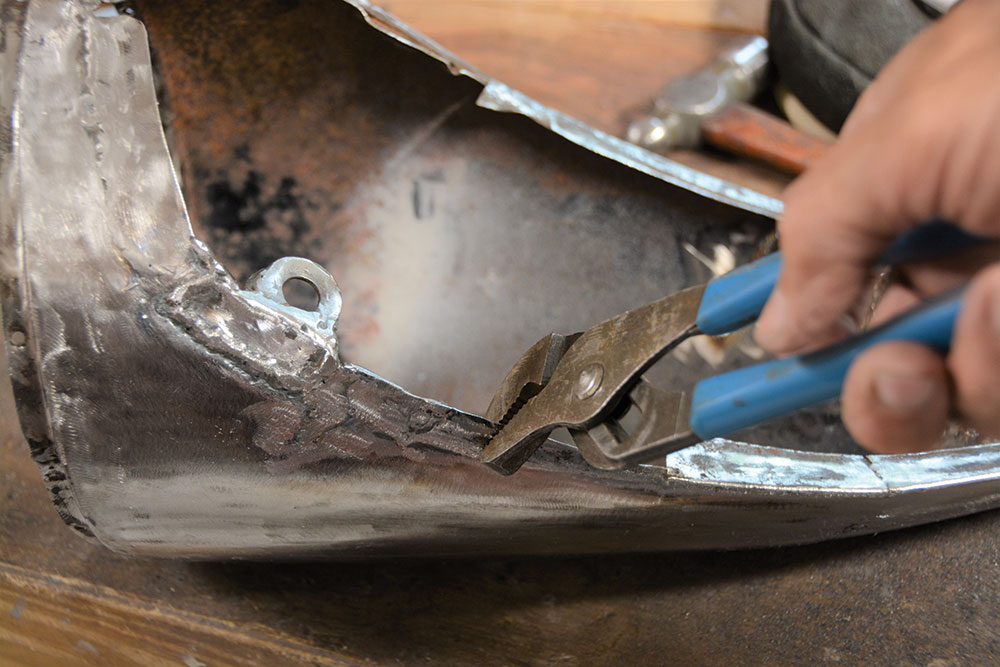
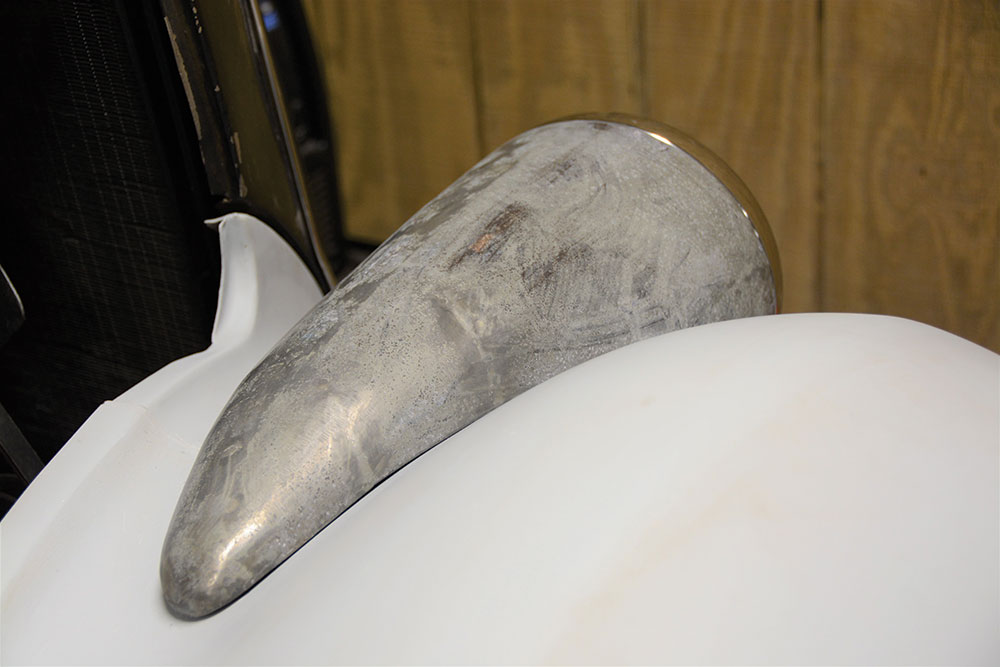
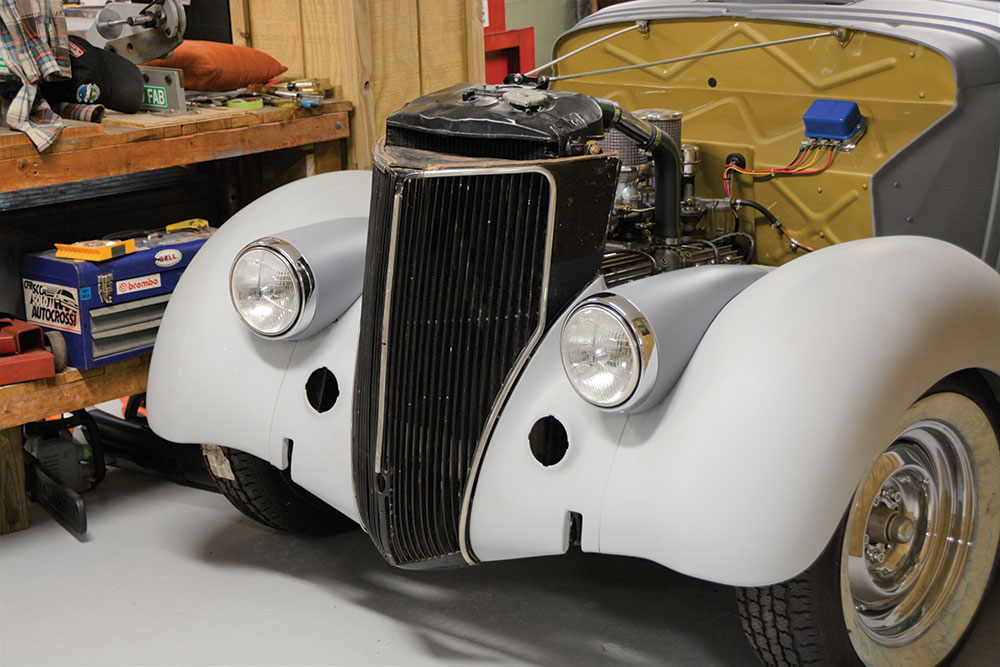
The Chevy headlight has similar front contours but the rear half of the headlight is way too straight and must be recontoured to fit the Ford fender.
Once again, we turned to the early custom look and decided to mount later Chevy headlights directly to the fenders. This is a traditional treatment used by customizers in the ’40s and ’50s. No doubt influenced by the elegant European cars like Jaguars, dropping the headlights low in the fenders added a sleek, expensive, fast appearance to your old ’36 Ford. While ’40 Chevy headlights are one of the better fits on a ’36 Ford fender, we opted for a set of ’41-’46 Chevy truck headlights. Reasoning was simple, availability and price.
In the process of removing the original center brace from the GM headlight we saved the two outer mounting holes. These holes would be used to attach the light to the ’36 Ford fender.
The task at hand was to reshape the lights so they perfectly matched the contour of the fender. Interestingly enough, the actual contouring of the light was a fairly straight-forward process once you located the lights on the Ford fender. Locating the lights is largely a matter of “eyeball engineering” and since the fenders are curved, the grille leans rearward, the GM headlights are curved, it was quite a challenge deciding when they were finally straight. It seemed they really wanted to be cross-eyed, so take your time (and then some) carefully locating the lights. An angle finder and a straightedge will tell you when the lights are vertical, which is an important consideration for both aesthetics and being able to focus the lights. Honestly finding the correct location of the lights drove me crazy. (Editor’s note: A relatively short ride for Burger. —B.B.)
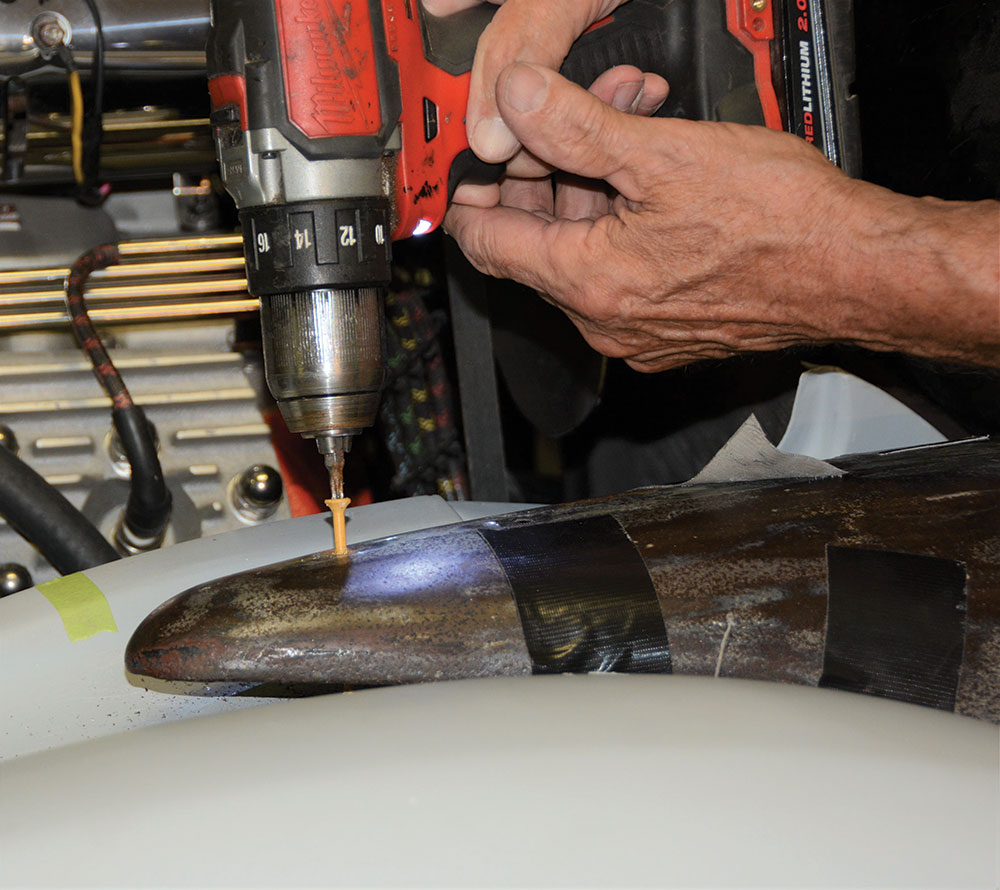
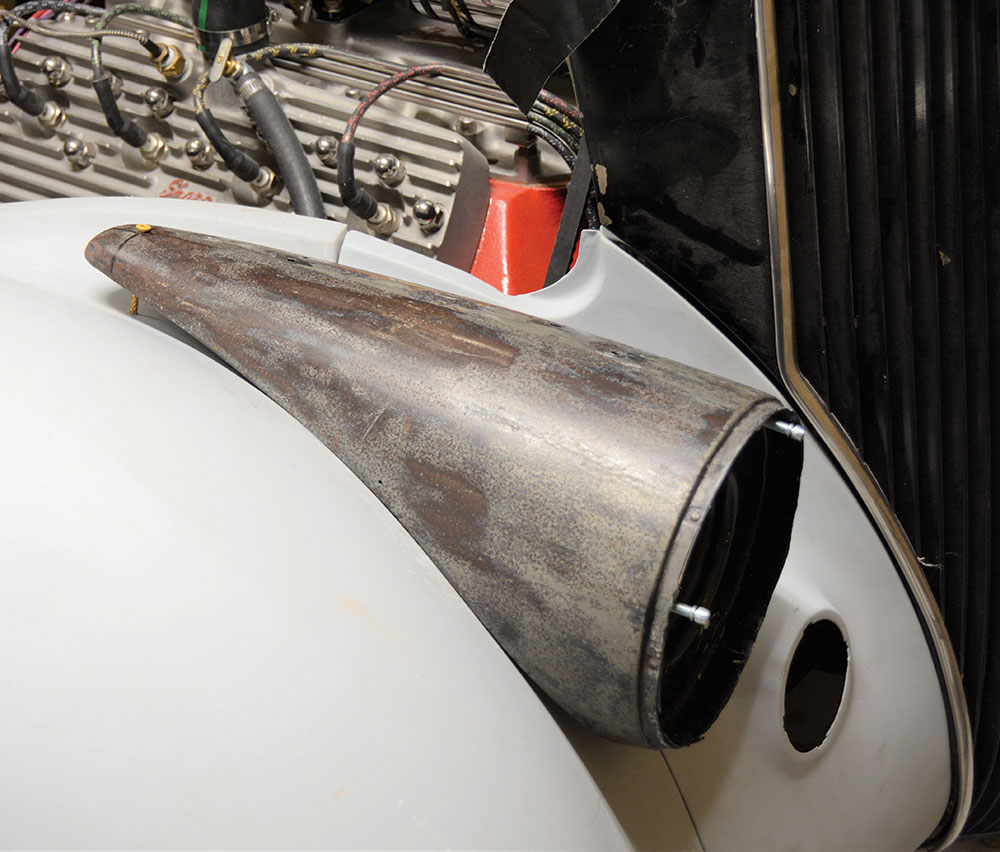
Our initial testfit of the GM headlight involved duct tape to get an idea where the light would fit best. Finding the best location for the lights is the tricky part of this entire process.
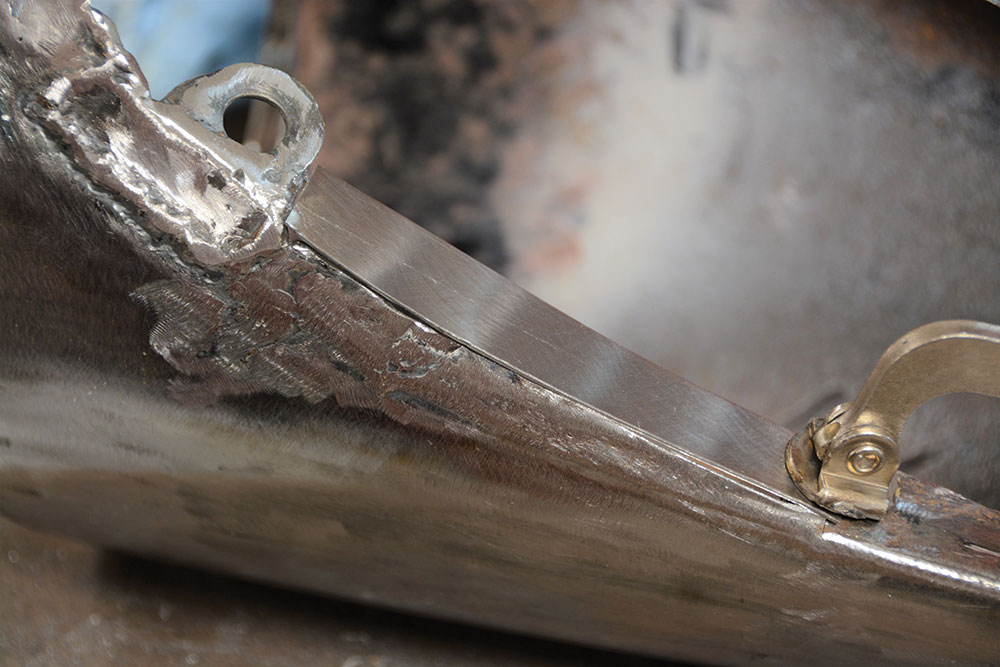
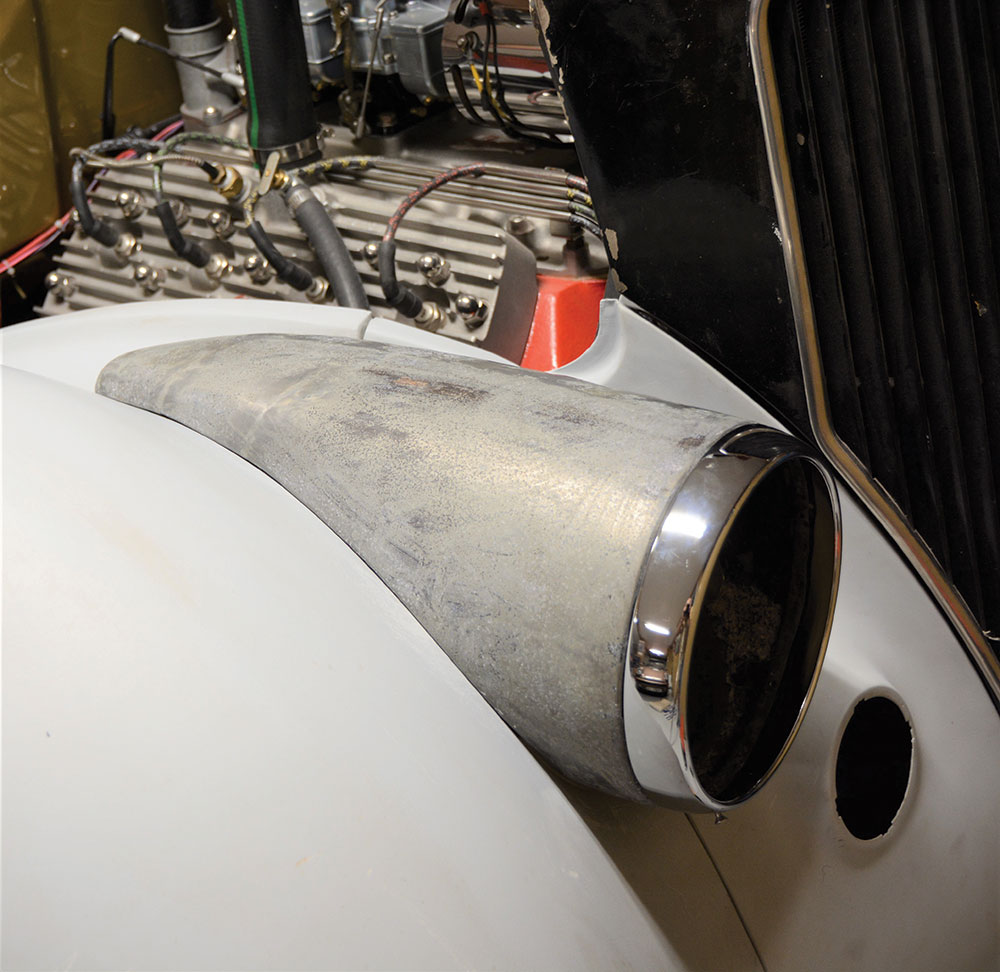
With the GM headlights finally located on the Ford fender we drilled a hole through the light and through the fender to locate the rear of the light. We used a 3-inch-long screw designed for wood decks to hold it in place simply because that’s what was on hand. This single screw allowed us to still adjust the light side to side and also raise and lower the rear of the light. In the end the outside, front half of the light had a near-perfect contour for our ’36 Ford fender, but the rear of the light was standing a full inch above the fender. So, the recontouring process would take place from roughly the center of the light rearward on the outside, while on the inside of the light we would be adding metal to the front half of the light to meet the fender, and also recontouring the back half. Under the front of the light metal must be added to extend the light back to the fender. If this sounds like a lot of work, it is, but work slowly (actually my only speed now) and it will work out quite nicely.
After much moving around, we drilled a single hole through the rear of the light down through the Ford fender to establish the rear mounting point.
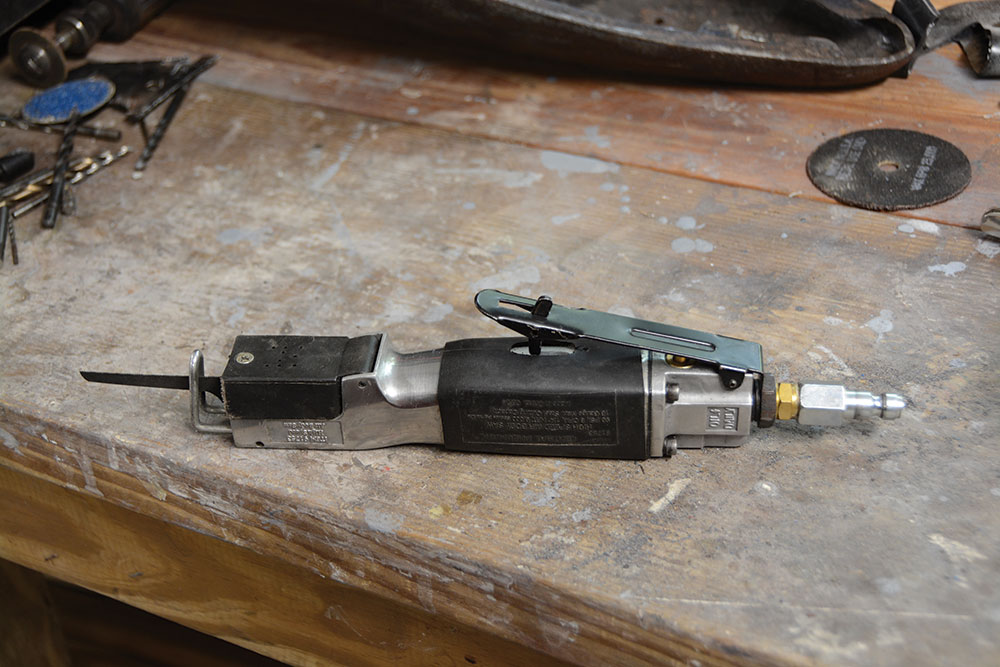
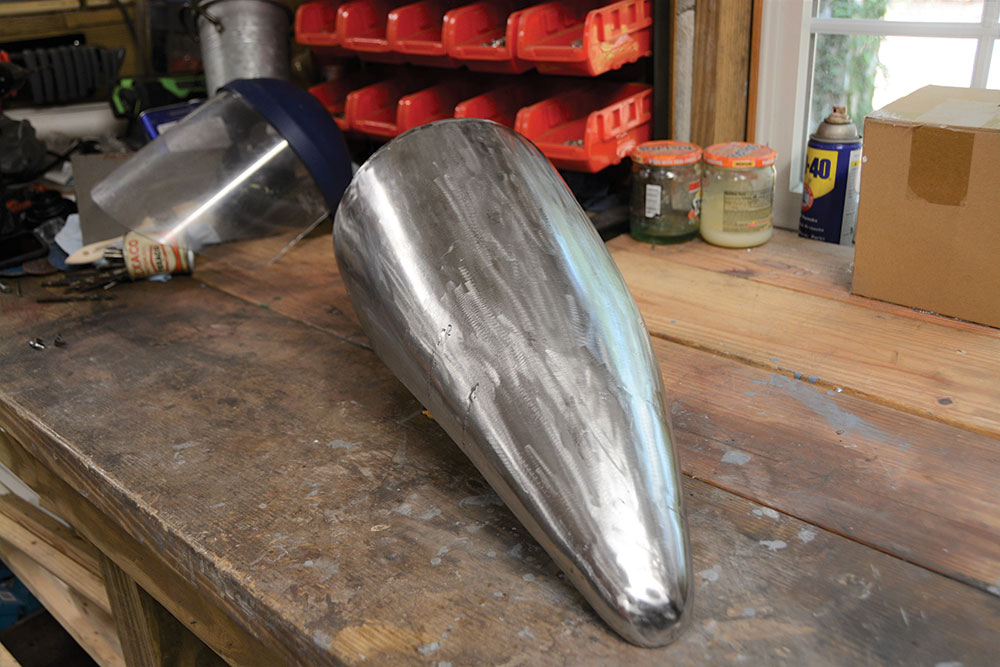
Tools required are basic bodywork tools, hammer, dolly, and bead bag, along with welding equipment. We found the small pneumatic reciprocating saw from Harbor Freight to be invaluable in slicing the lights. After that it’s cutting, bending, and welding. We won’t go into great detail here, rather we will save the space for more photos showing the process. This is part one of the story, mounting the lights, in part two we will deal with re-indexing the seal beams so they are straight in the buckets. Since we opted to use Lucas PL700 tripod headlamps, curved lens lights this was critical. But for now, let’s get those headlights mounted. MR
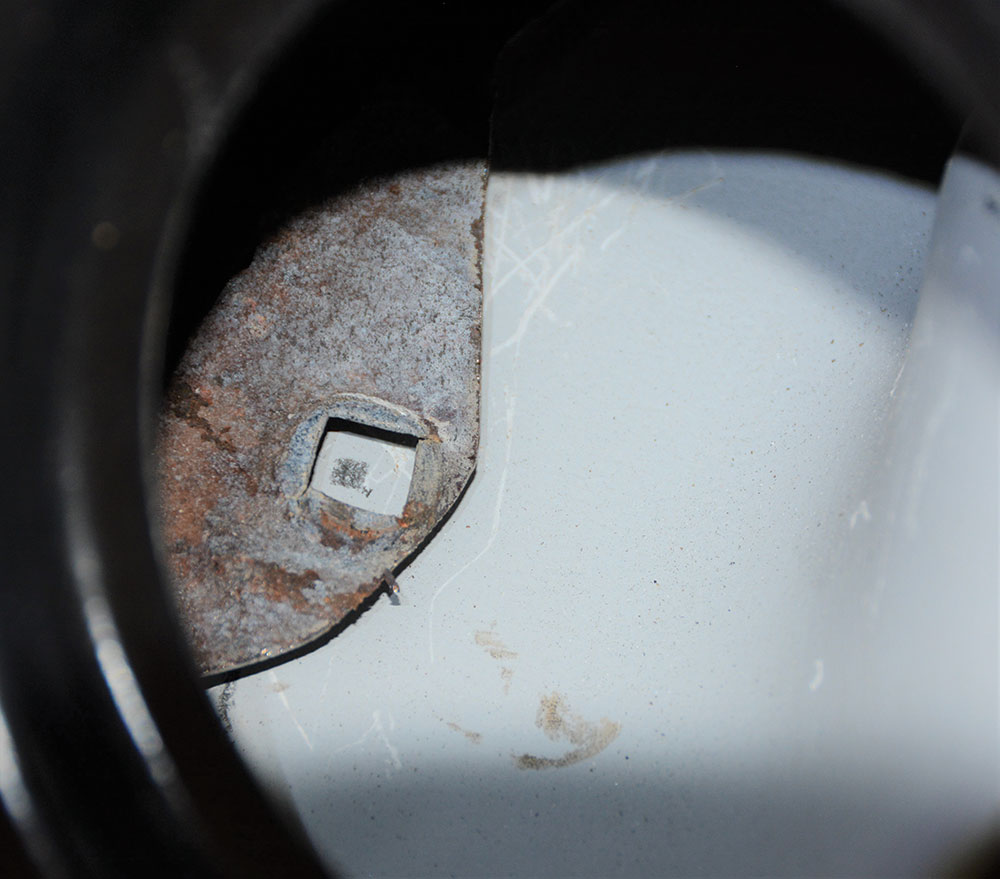
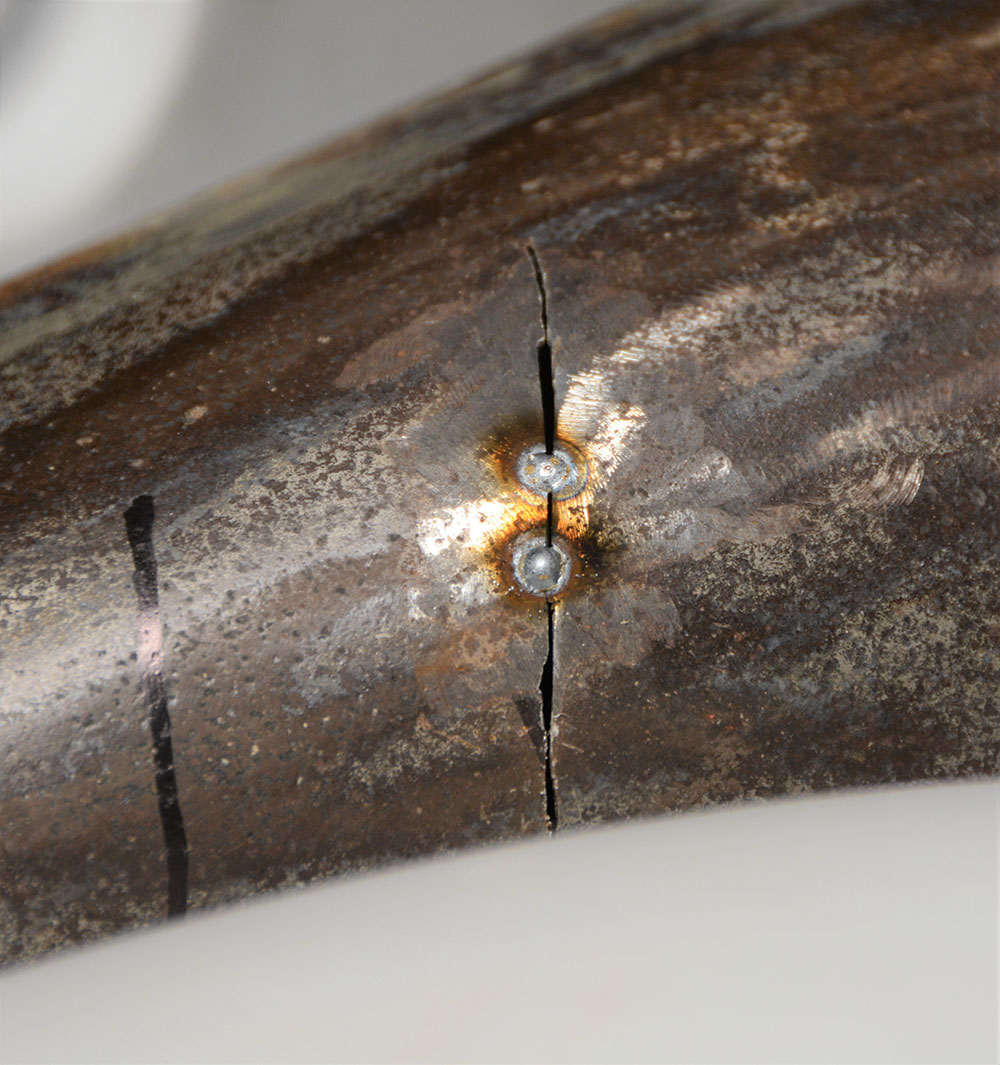
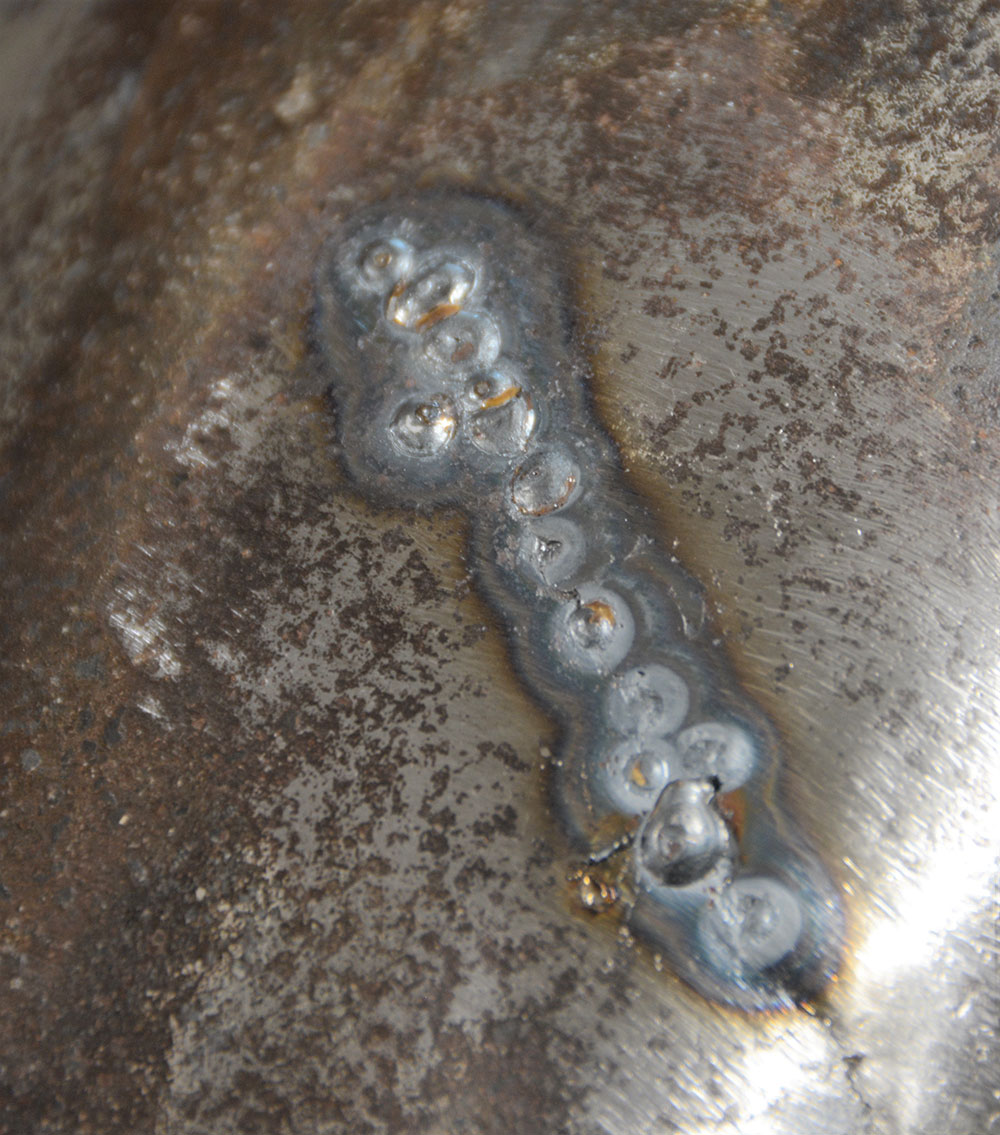
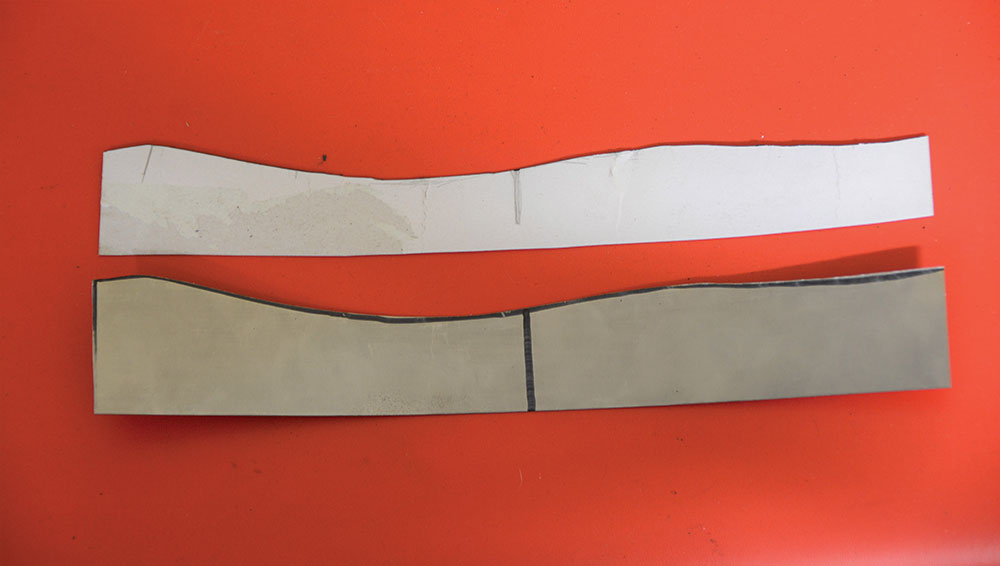
We used a 3-inch-long wood deck screw to hold the light in place. We used that simply because it was the longest fastener we had on hand. This would allow us to slightly raise or lower the rear of the light to achieve the best fit.A straightedge and an angle finder helped us locate the light perpendicular to the ground. This is important for final adjustment and focusing of the Chevy headlights. It is also cosmetically important for the lights to be vertical.Reaching inside the headlight, we marked the outboard mounting hole on the fender. A 1/4-20 bolt will hold the light in place.The outside front half of the ’41 Chevy truck headlight contour matched our ’36 Ford fender quite nicely. The rear of the light stands a full inch above the fender. This will need to be recontoured.Here you can see the two mounting holes in the fender. Final minor tweaking to get the lights to look “just right” involved filing the front hole into a short slot. The inboard front mounting hole has not yet been drilled.When it came time to do the slicing and dicing, we found this small pneumatic reciprocating saw from Harbor Freight to be invaluable. Be sure to order a pack of extra blades.We first marked the headlight housing with a sharpie for a visual idea of how to cut the light. Then we used our small saw to make a wedge cut. A similar cut was made on the inside of the light. Be sure to make the wedge cut up high enough in the headlight housing to prevent a bulge as the metal is bent down.A couple of tack welds held the light in perfect position. Our passenger side Chevy headlight had surface rust that was ground off at the weld points. The remainder of the surface rust will be dealt with later.We ground the inside of the headlight housing clean and welded from the inside with the light clamped to a copper sheet on our welding table. This minimized the amount of grinding required on the outside of the headlight.After dressing off the weld we test fit the light to the Ford fender and were very pleased with the progress of fitting the light to the fender. We made and welded a similar cut on the inside of the light.Moving toward the rear we made two more cuts, one on the outside and one on the inside. We tack welded both cuts while the light was mounted to the Ford fender before bringing the light to the bench for some final fitting.Both of these rear cuts required some gentle persuasion to align the gaps and eliminate any bulge formed on top of the light from bending it down to meet the Ford fender.One final cut was required at the very rear of the light. Note it is a wedge cut too that will close up as the light is bent down to meet the Ford fender.We now have the outside of the GM headlight fitting very nicely to the Ford fender. Next, we will turn our attention to the inside of the light.Fitting the inside of the Chevy headlight to the Ford fender involved adding metal at the front of the light so it would reach the fender. Rather than add new metal we cut the original flange and bent it out straight with the side of the light.A little bit of hammer work on the bench flattened the sheetmetal and, in the process, we filled the gap between the light and the Ford fender.After carefully grinding the newly flattened sheet metal to fit the radius of the Ford fender we cut a piece of 18-gauge sheet metal and used it to form a new flange.We closed in the rear of the light and after marking the hole location from the underside of the fender we drilled the hole. For ease of installation, we later welded a 1/4-20 bolt into this hole so the rear mount becomes a stud.The lights now fit the Ford fender very nicely on both sides, but there was a glaring gap at the bottom of the headlight below the seal beam. After making a cardboard template we cut a piece of 18-gauge sheet metal.Rolling the proper radius on the new filler piece of sheet metal was easy thanks to the top side of the light. Yes, we have a roller but sometimes forming over a panel is just as easy.We clamped the new metal in place and marked the piece so it could be trimmed to fit. We left about a 1/16-inch gap between the new sheetmetal and the fender to permit water to drain. This gap cannot be seen unless you are laying down looking up at the light.After dealing with the surface rust on the side headlight we bolted it in place to check the final fit. We were pleased with the look and fit of the new light.Looking from the rear you can see the ’41 Chevy truck light gives a very modern look to the ’36 Ford fender. The truck light uses a thin rubber gasket between the light and fender, we are not sure if we will use a gasket.The driver side light had virtually no surface rust and proved to be easier to metalwork. We’ll need a skim coat of filler to provide a perfect final surface.Next month in part two of this story we will fit the new Lucas PL700 tripod headlamps to the ’41 headlight housing, which involves rotating the seal beam housing for proper orientation. We just couldn’t resist showing you the finished product.While getting the headlights mounted perfectly straight on the fenders was a challenge, in the end we were thrilled with the new look. In combination with our ’39 Buick bumper these lights totally transform the look of our ’36 Ford phaeton. The lights are finished in Summit Racing Epoxy primer SUM-UP220G.
We use cookies to ensure that we give you the best experience on our website. If you continue to use this site we will assume that you are happy with it.