For someone who’s become too accustomed to manual steering over the years (that’s me), any power-assist upgrade is a noticeable difference. More often than not, it’s a huge improvement; other times, well, it just changes the whole steering dynamic altogether in kind of a weird way—thus, the somewhat set-in-my-ways preference for a manual steering setup.
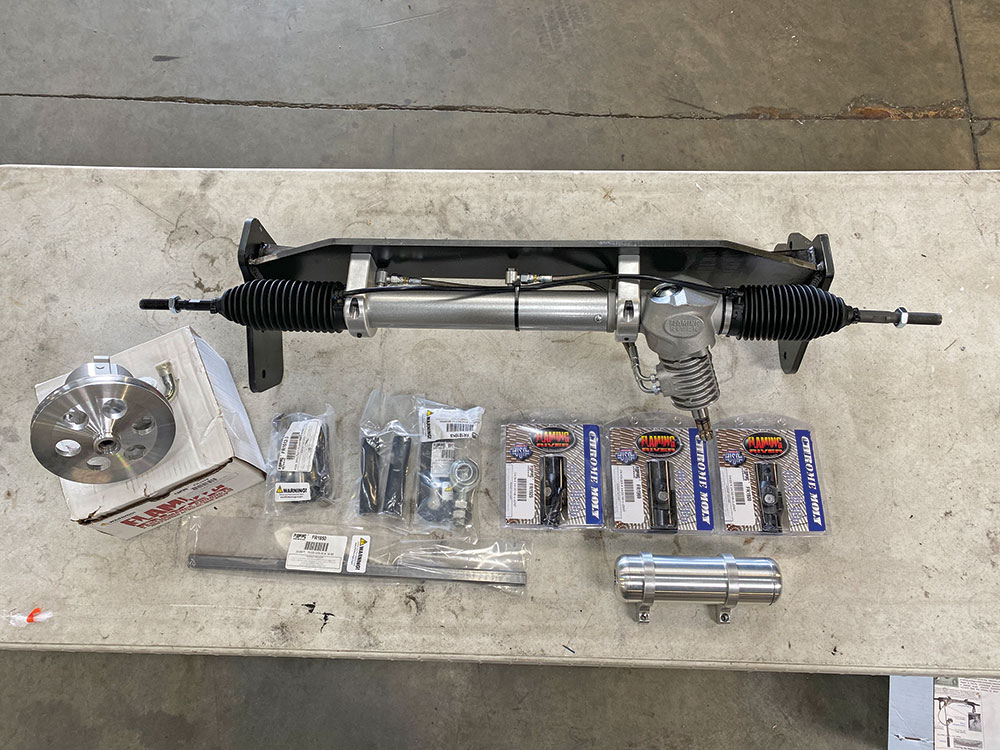
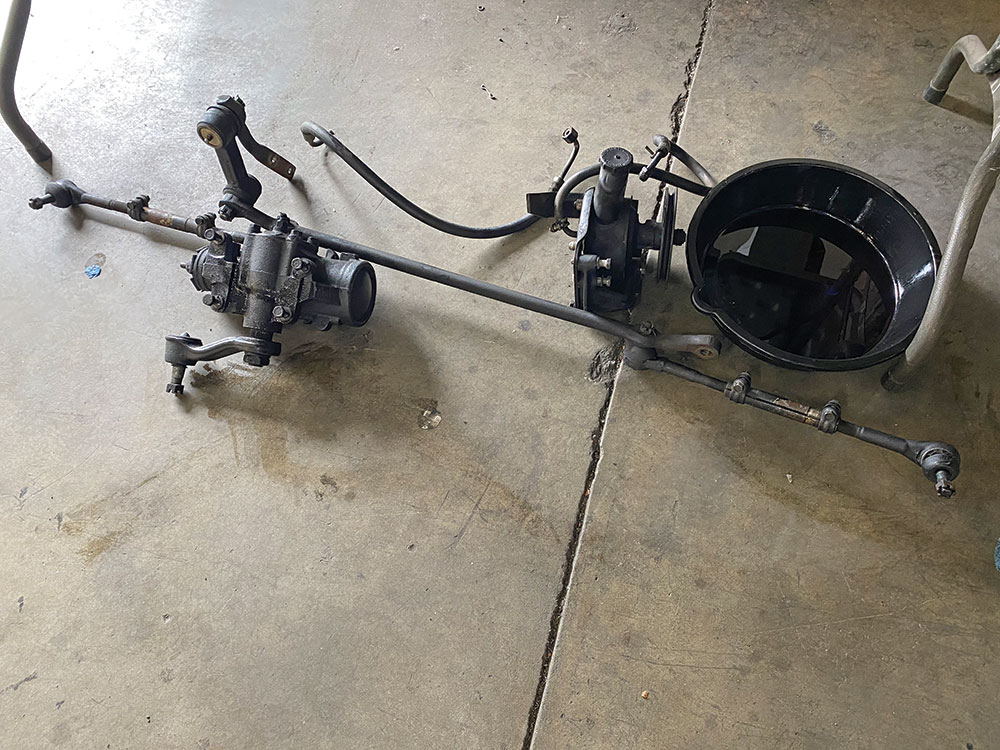
Minus the tilt steering column (and related components), this is what comprises Flaming River’s direct bolt-in power steering rack-and-pinion conversion kit: Flaming River’s billet-servo power rack (with beefy 0.98-inch steering linkage) captured in a 3/8-inch plate cradle; U-joints, intermediate shaft, and heim support; GM Type II power steering pump with pulley, adjustable bracket, and aluminum power steering fluid reservoir; and all necessary hardware.
Of course the older I get, the less predominant that non-power preference is starting to become. So, when it was brought to my attention that Jimenez Bros Air Ride and Rod Shop was planning on installing a Flaming RiverC10 Rack-and-PinionPower Steering Conversion Kit in a ’67-72 C10, my initial thought was, “Wow, they make such a thing?!” But also, I wondered what the benefits over a new Saginaw power steering box and updated pump were? No sooner did I ponder when the owner of the C10 in question arrived and proceeded to inform me of a recent experience he had driving a rack-equipped C10, which cleared any doubts I may have had thinking he was just doing it to be different or one-up his buddies!
After receiving a full complement of Classic Performance Products suspension components (Totally Tubular coilover and disc brake conversion front and rear), it became more evident that the factory power steering needed some attention. But instead of replacing, the owner opted to go the power steering rack route!
When the kit (PN FR319KTPL—minus the polished steering column as the truck already had a Flaming River steering column installed!) arrived, well, let’s just say any doubts I may have had regarding the strength and integrity of the cradle-style application were instantly put to rest. Not only did Flaming River upsize the rack’s steering arms to 0.98 inch (versus 0.75), but they’ve also beefed up the cradle itself to 3/8-inch steel plate, so there’s no fear of any stress flexing under hard cornering pressure.
Flaming River’s “full” kit (PN FR319KTPL) includes tilt steering column and related shift linkage (for column shift applications), however, this truck had already been updated accordingly.
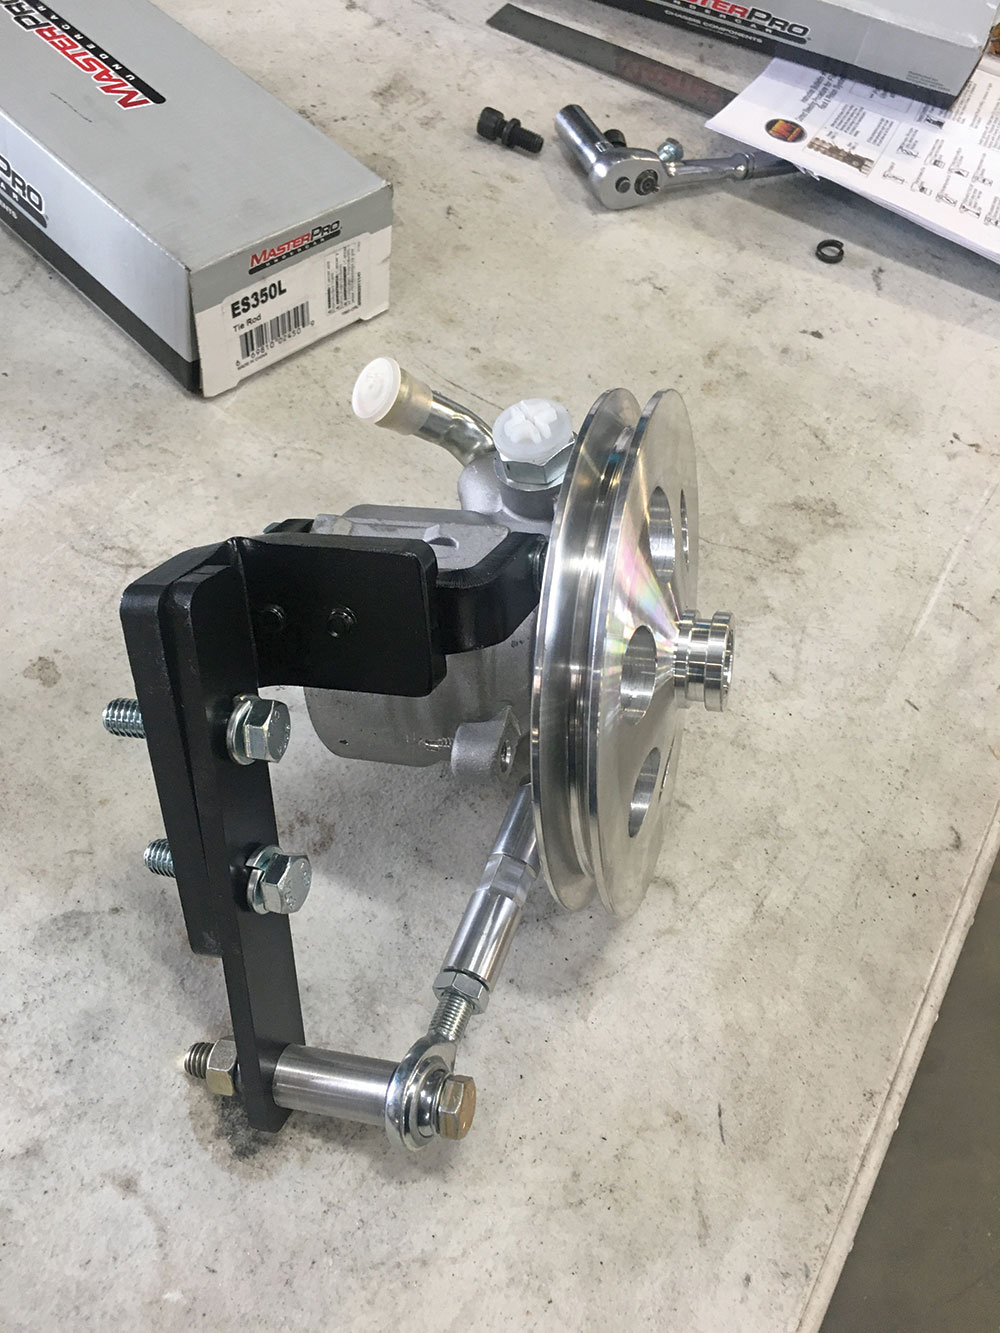
For the engine compartment portion, the conversion kit comes complete with Flaming River’s billet power steering rack, the aforementioned bolt-in cradle, GM Type II power steering pump with mounting bracket and V-belt pulley (installed), aluminum power steering fluid reservoir, U-joints and 3/4-DD shaft, support bearing (for the two-piece intermediate shaft configuration), and all necessary hardware. (At the time I was writing this, Flaming River was also including a free power steeringstainless steel braided hose kit—PN FR1610—with the purchase of any complete cradle kit!)
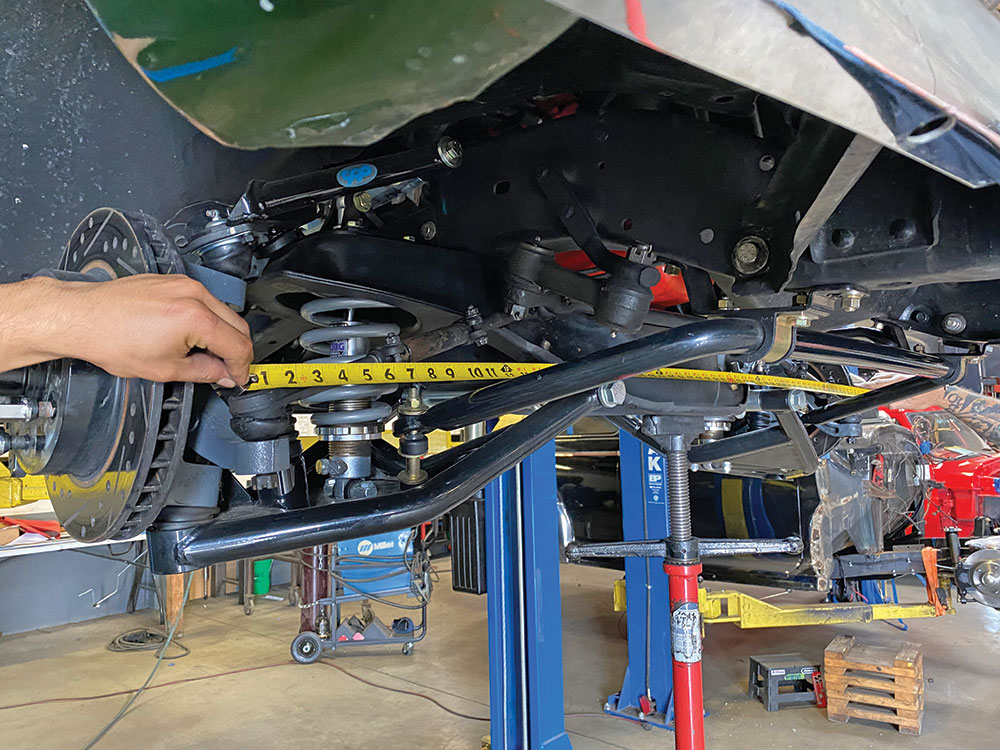
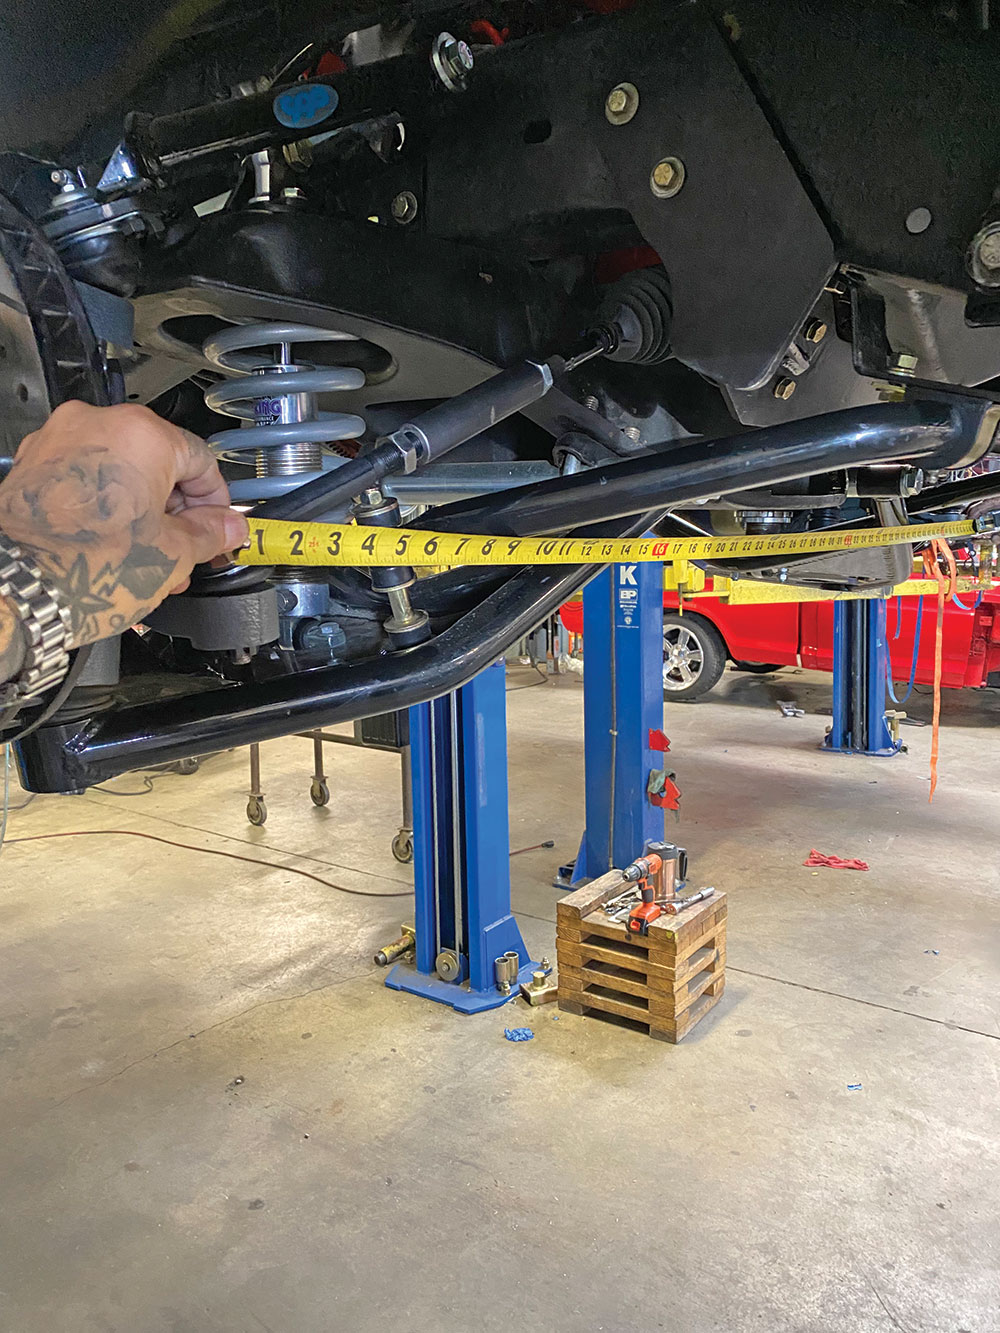
Before any stock/existing components were removed, Flaming River recommends taking a measurement from the center of each outer tie rod end (to use when assembling the new steering linkage).
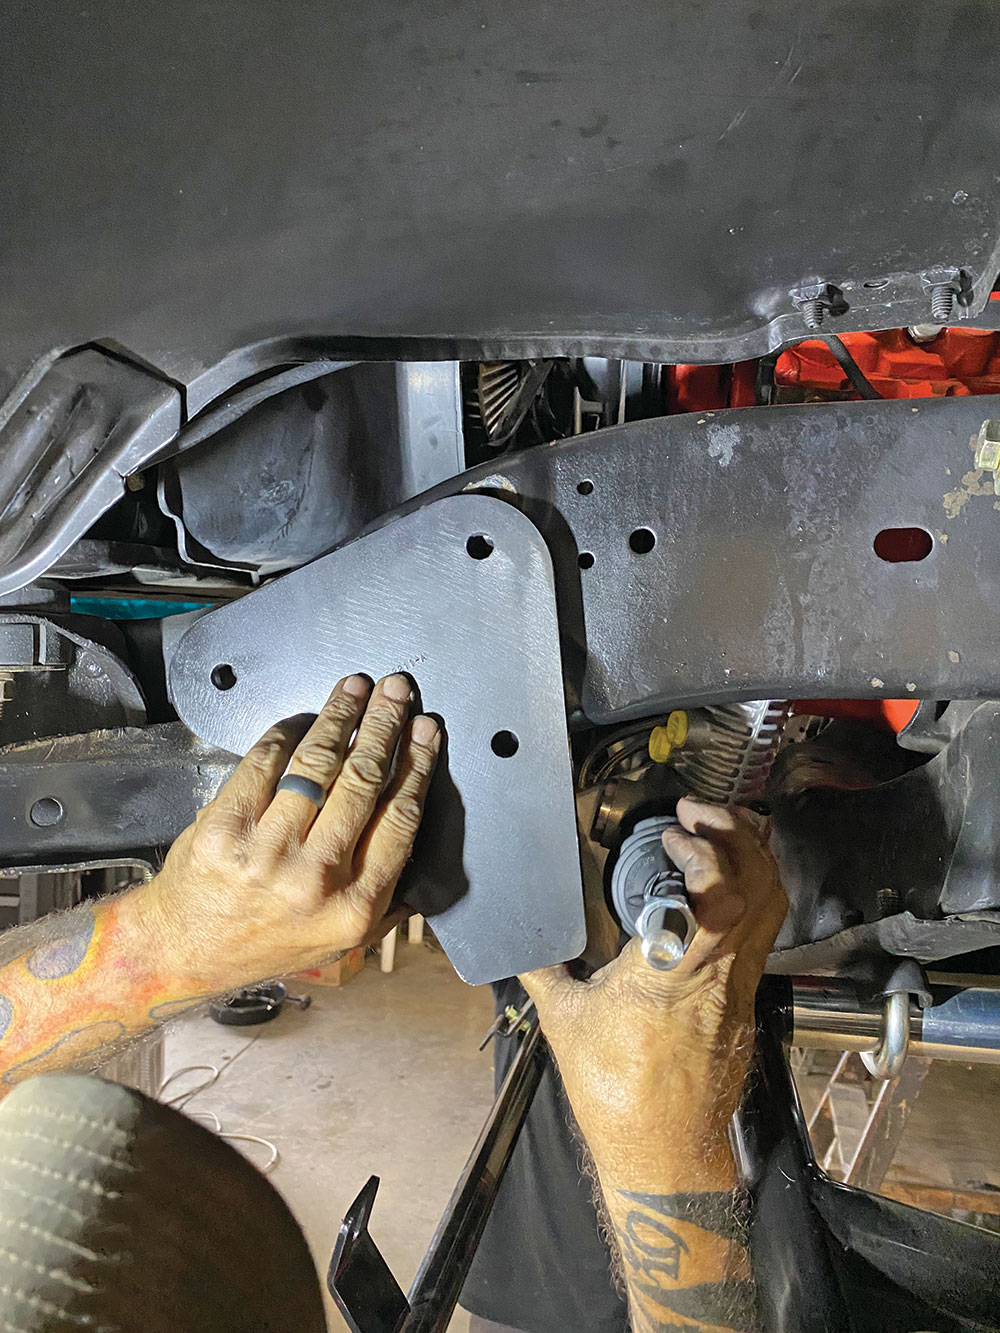
As Flaming River states, this is a “direct bolt in” for the ’67-72 Chevy/GMC 1/2-ton C10s—and as we quickly found out … it is! No modifications to the frame are necessary to attach the cradled rack assembly to the frame rails—and with the new tie-rod ends will attach directly to the stock (or aftermarket dropped) C10 spindles. However, if you’re running a small- or big-block engine without a serpentine accessory drive, depending on your particular front drive components, the GM Type II power steering pump mount may require slight modification. (LS engines do not apply to this situation, obviously.)
Without going into a lot of detail, here’s what you’ll be removing: everything! All existing steering components—including the column/rag joint, and so on, if applicable—will come out. And we strongly suggest draining the power steering fluid “beforehand”!
The end result? Smooth, super-responsive sports car–like steering—in a 50-year-old truck!
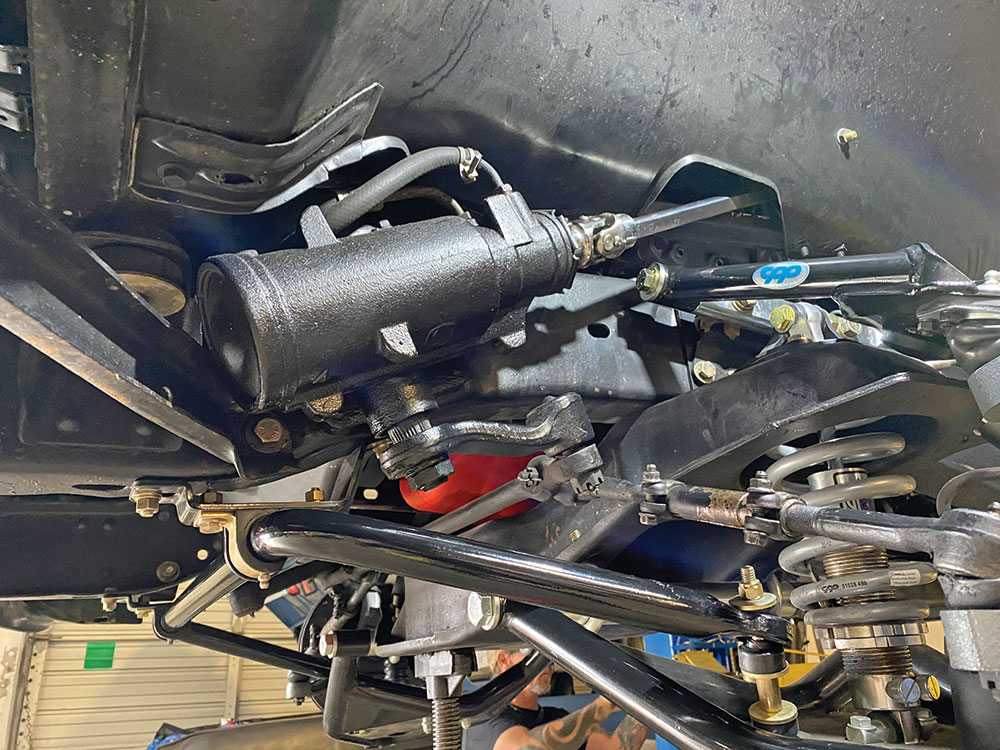
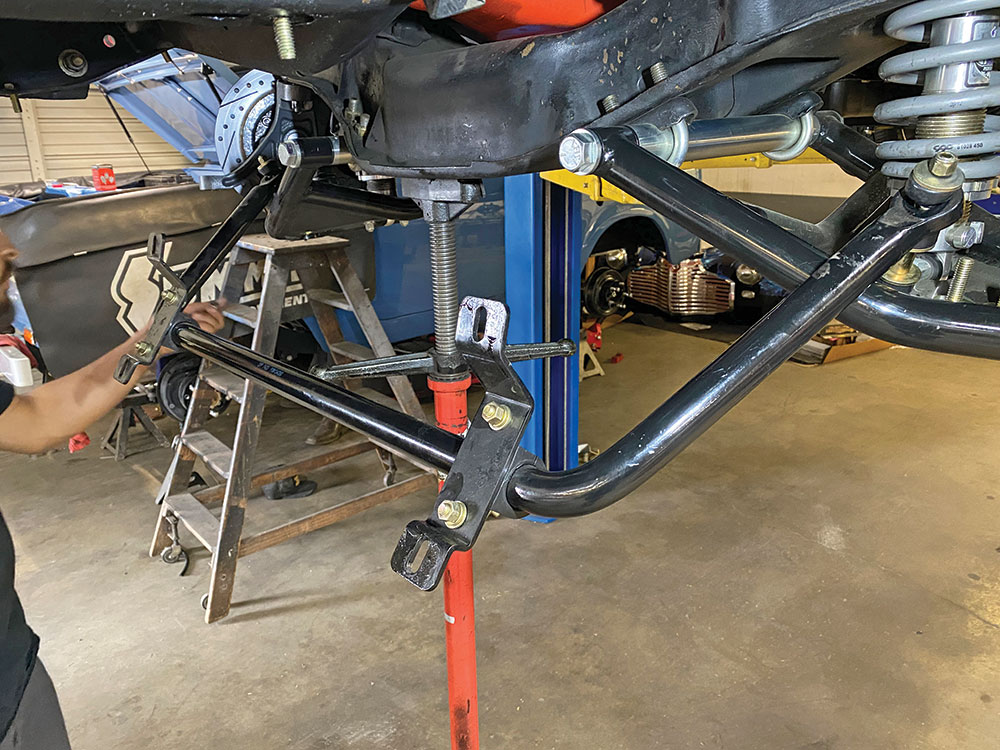
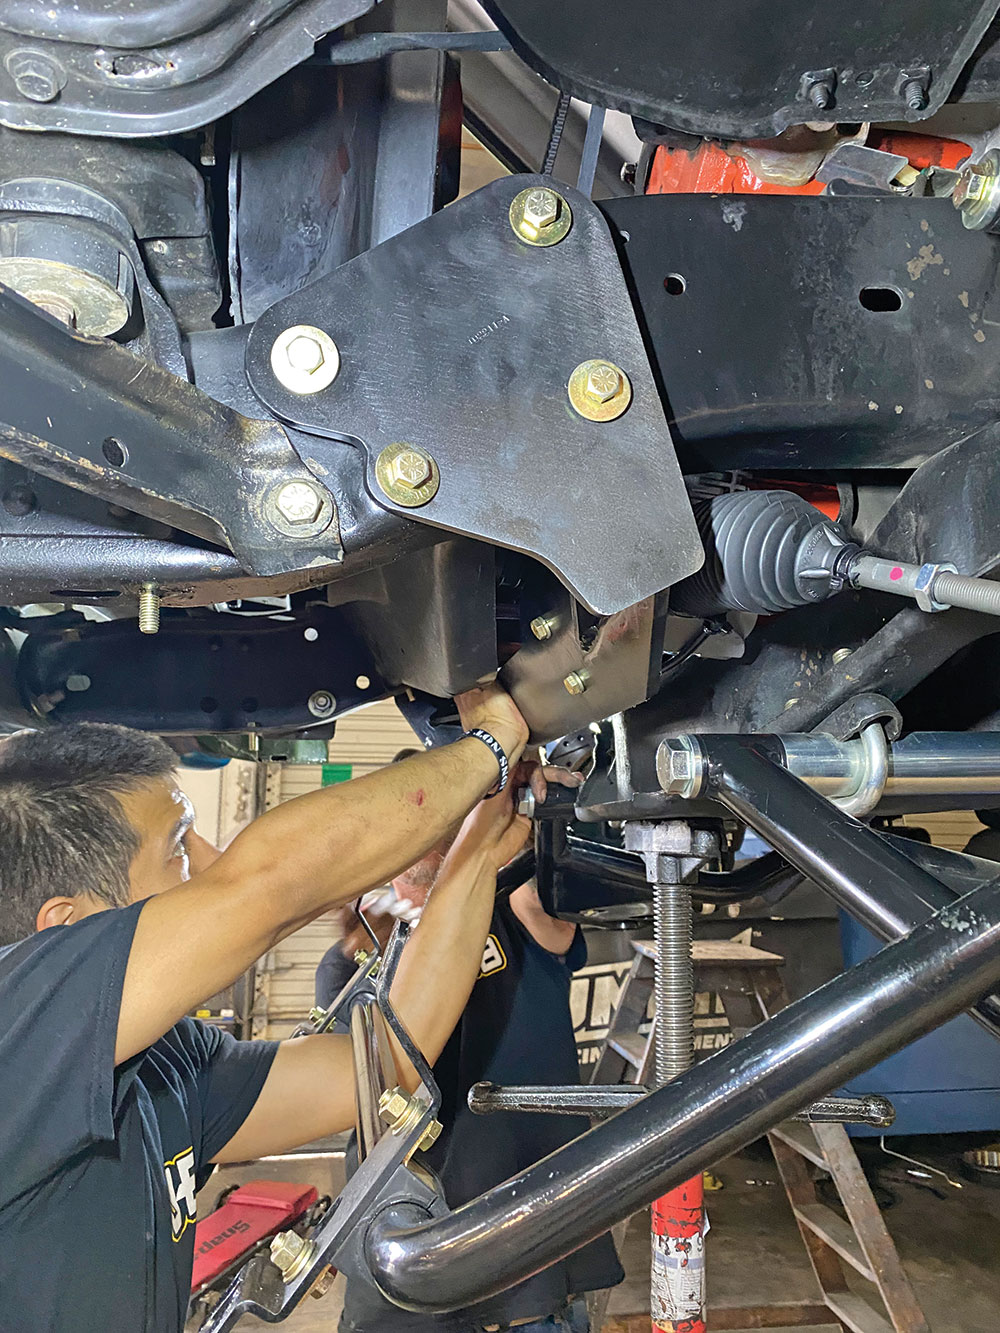
Flaming River designed their ’67-72 C10 cradle to bolt directly onto the unmodified frame using the remaining power steering box mounting holes on the driver side and the idler arm mount holes on the passenger side.Before bolting the cradle in place the sway bar needs to be at least dropped down if not removed entirely (we got away with just dropping the Classic Performance Products D-bushing brackets).Having an extra set of hands is extremely helpful—if not, a support or jack stand will go a long way toward assisting the installation of the cradled rack-and-pinion unit, as it requires some articulation in order to snuggle in exactly where it needs to be!Pretty much like that: three Grade 8 bolts/nuts on the right, four on the left—and the cradle’s ready to rock … without the roll.
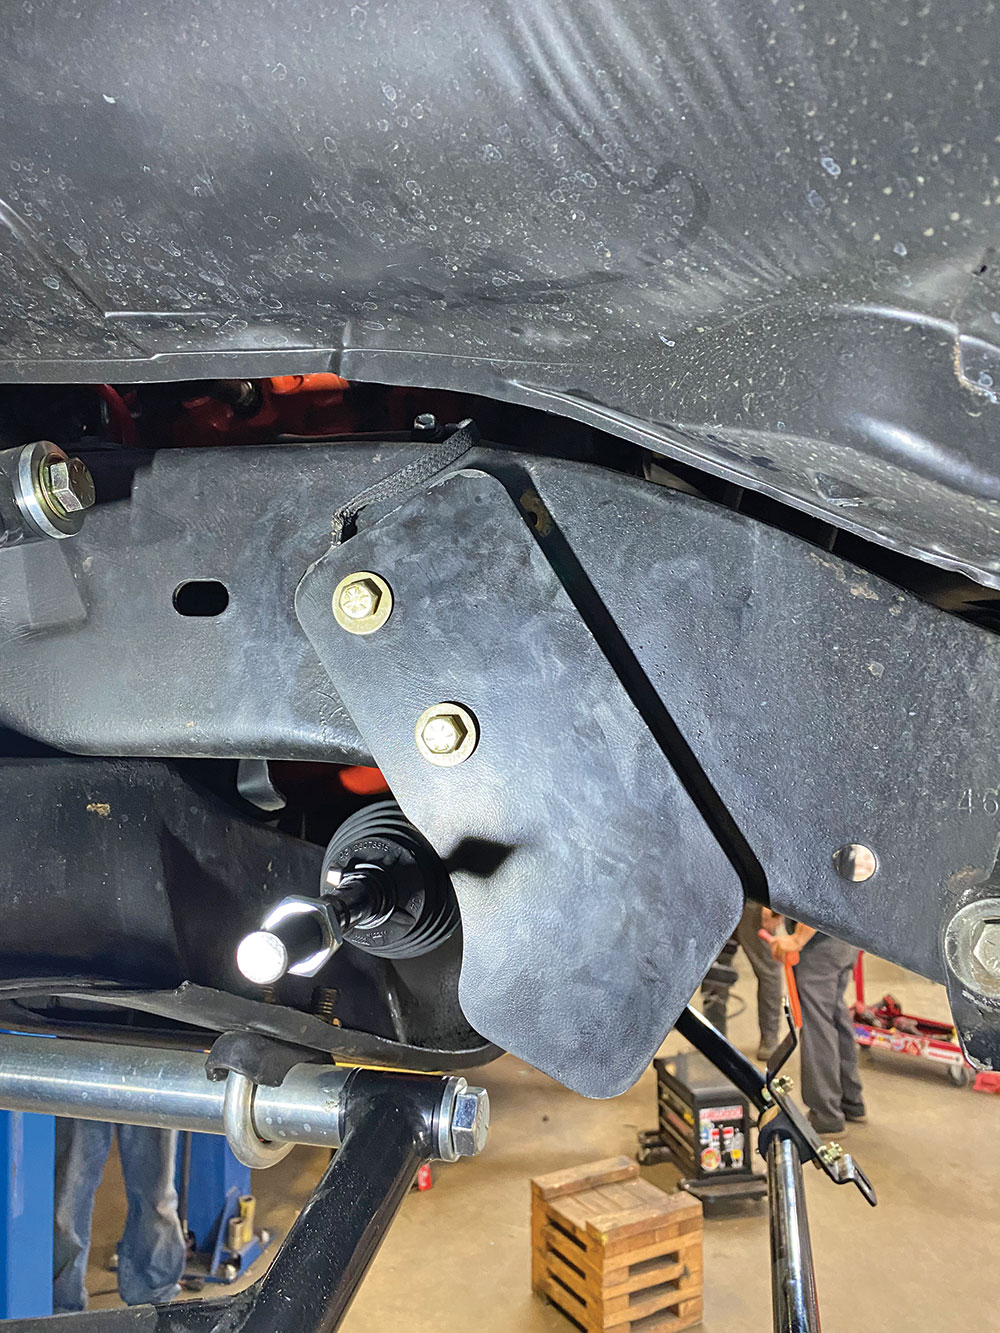
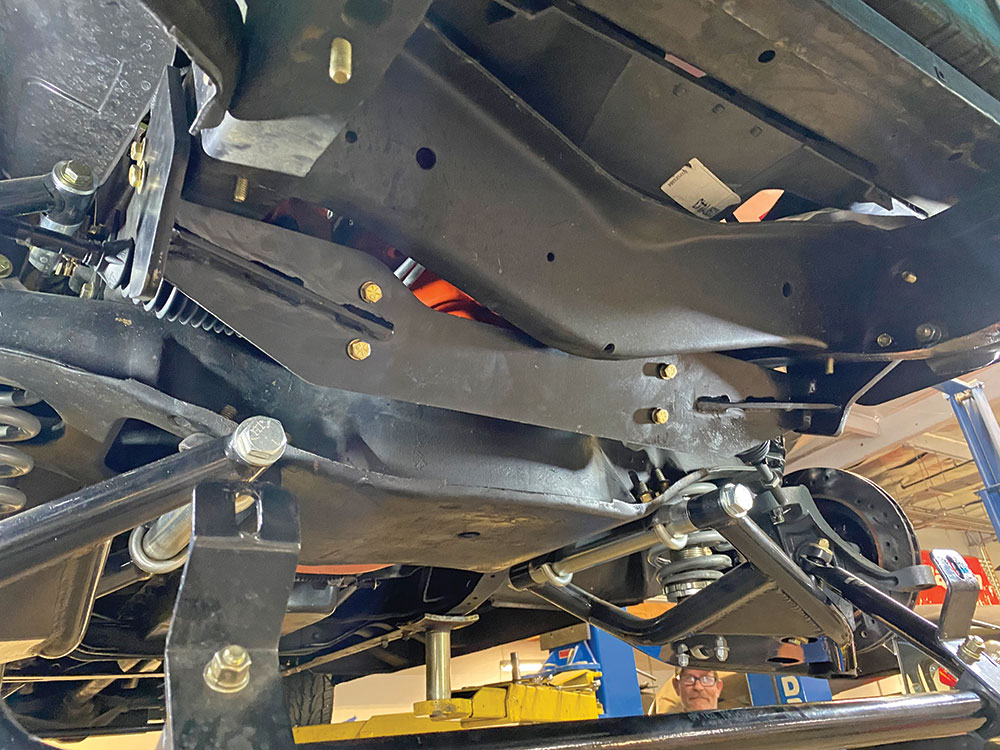
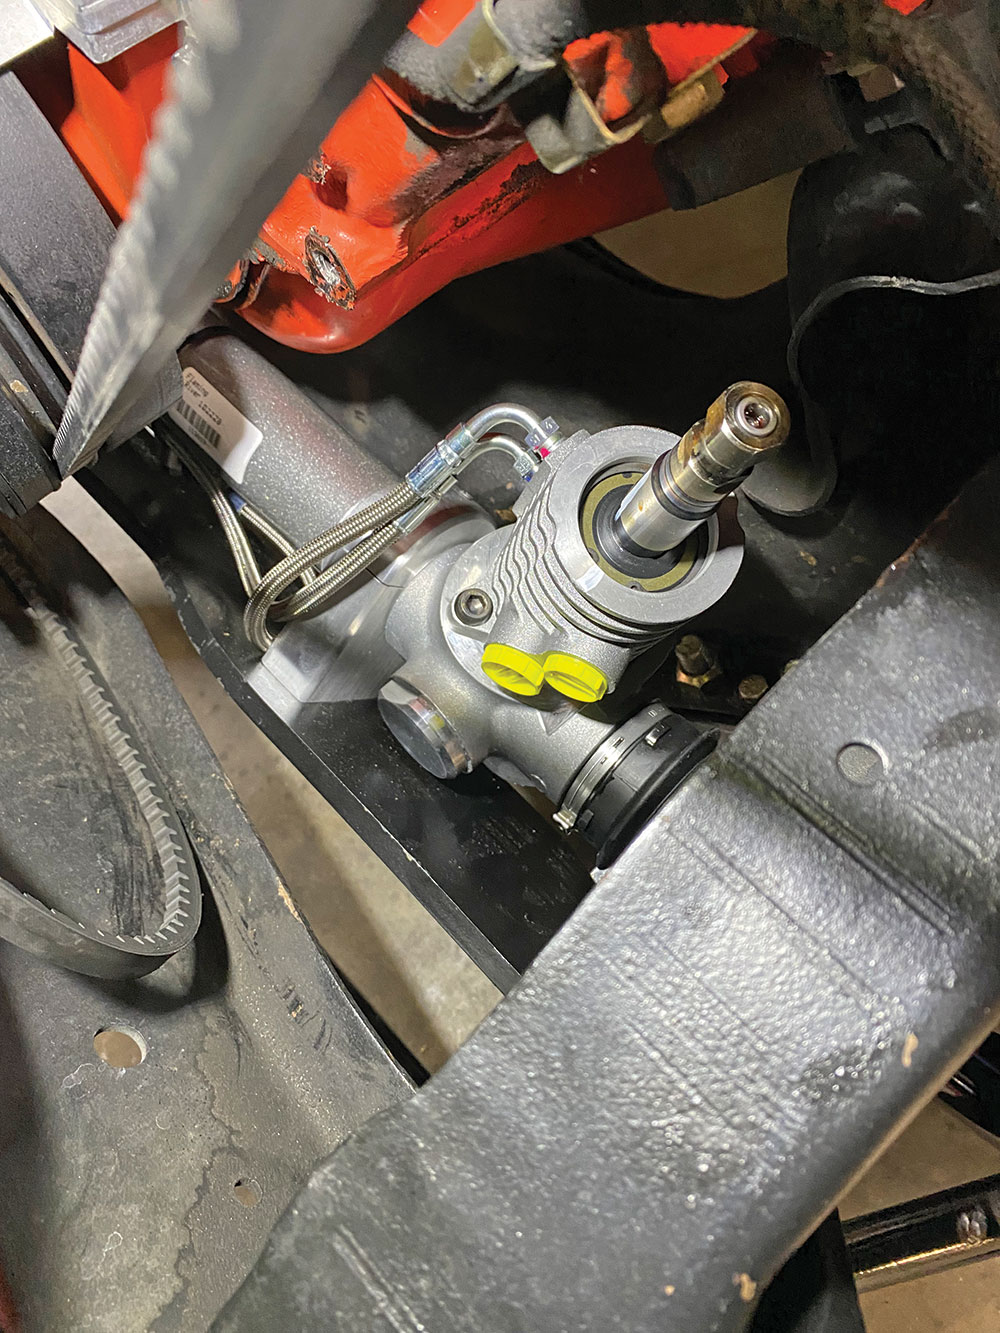
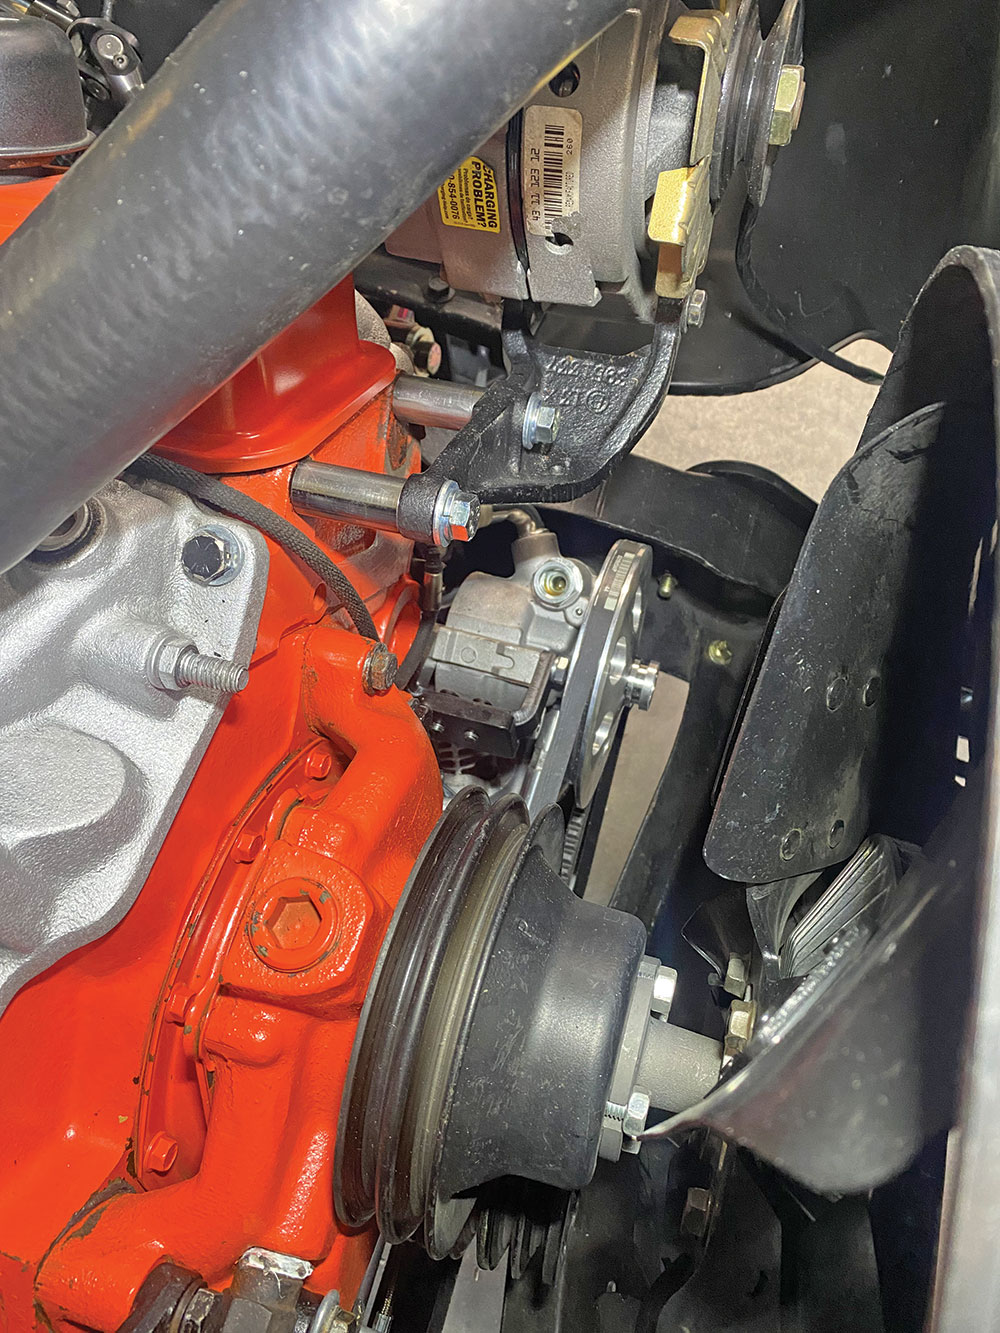
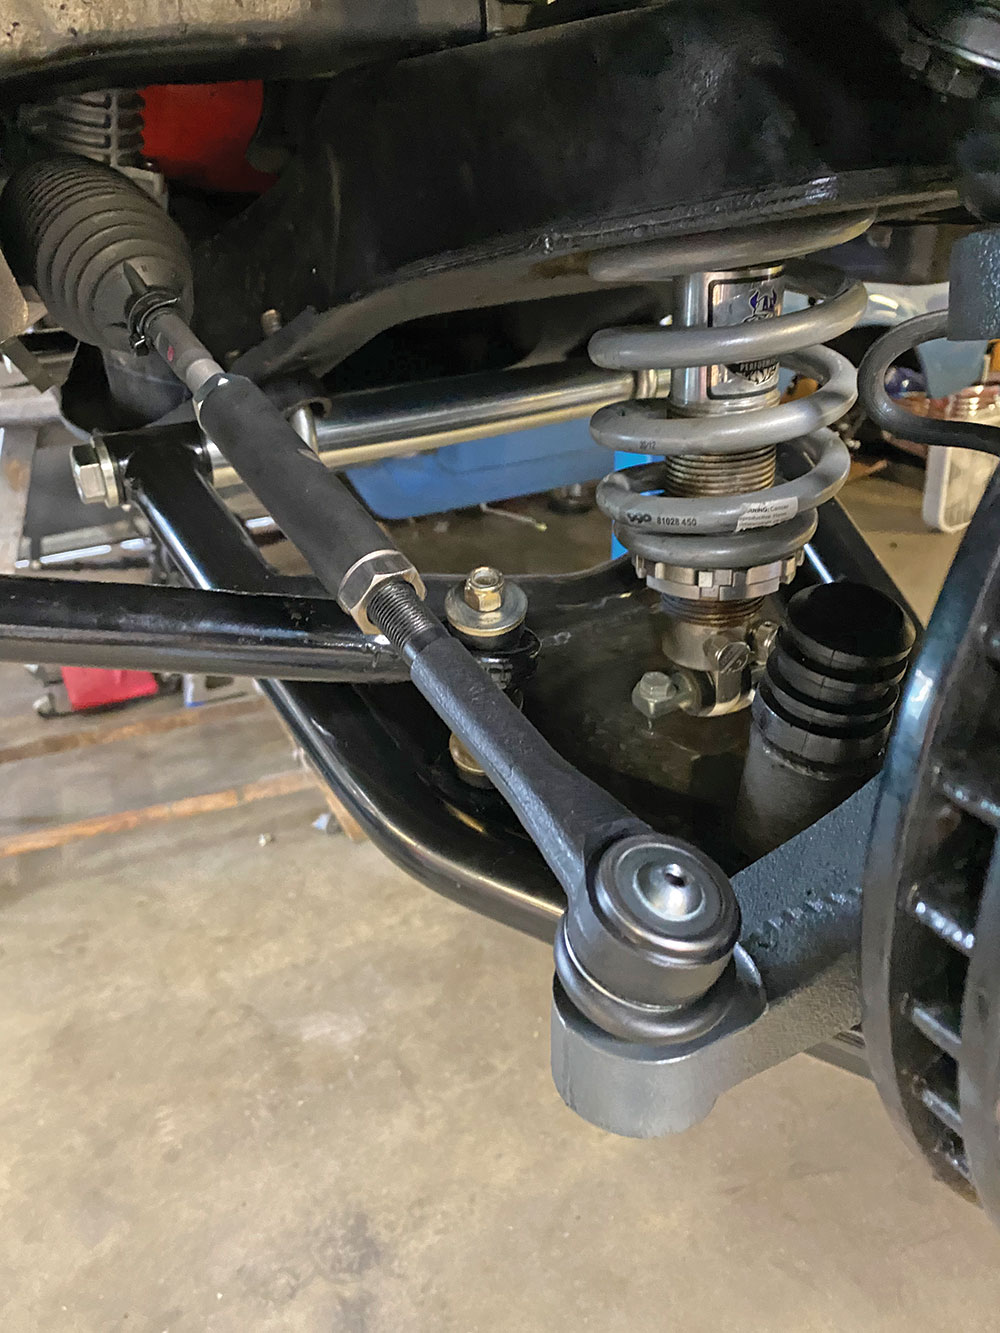
On some rack-and-pinion conversions, the assembly is very visible from the front of the vehicle. Not with the ’67-72 C10 conversion kit—not only does the power rack sit well above the lower control arms, the beefy cradle itself hides (as well as protects) the power rack from view.Where the old leaky/worn-out Saginaw input shaft once protruded, now resides that of the billet servo Flaming River power rack. Though the power rack comes pre-installed in the cradle, according to Flaming River, the rack can be rotated if need-be for steering linkage/pump clearance.Before we address the intermediate shaft assembly, we’ll go ahead and install the new GM Type II power steering pump with the adjustable bracket supplied in the kit. The unique bracket allows for up/down as well as forward/backward adjustment.
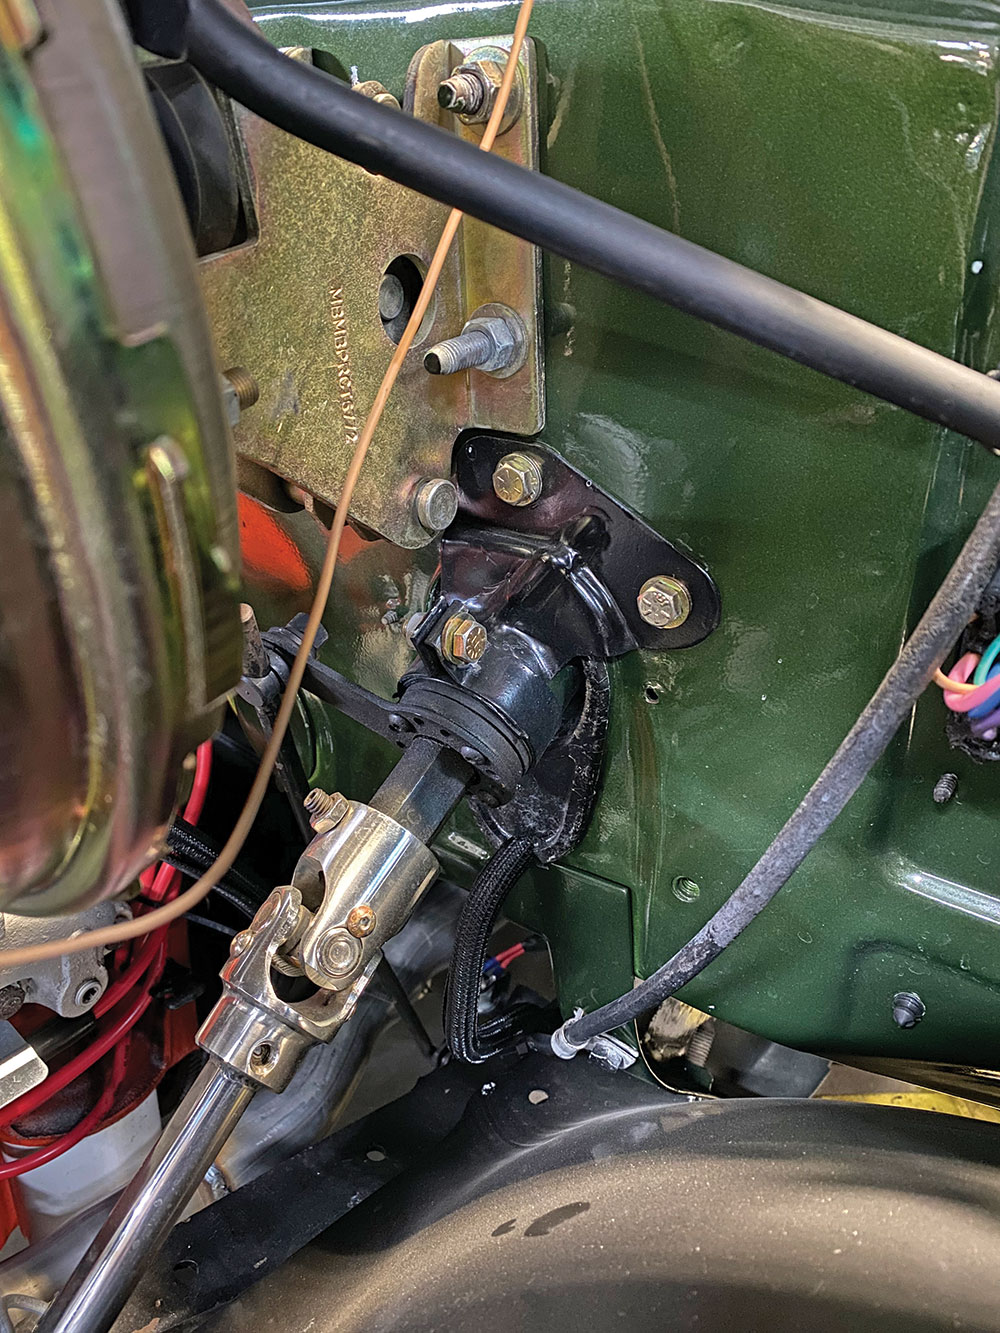
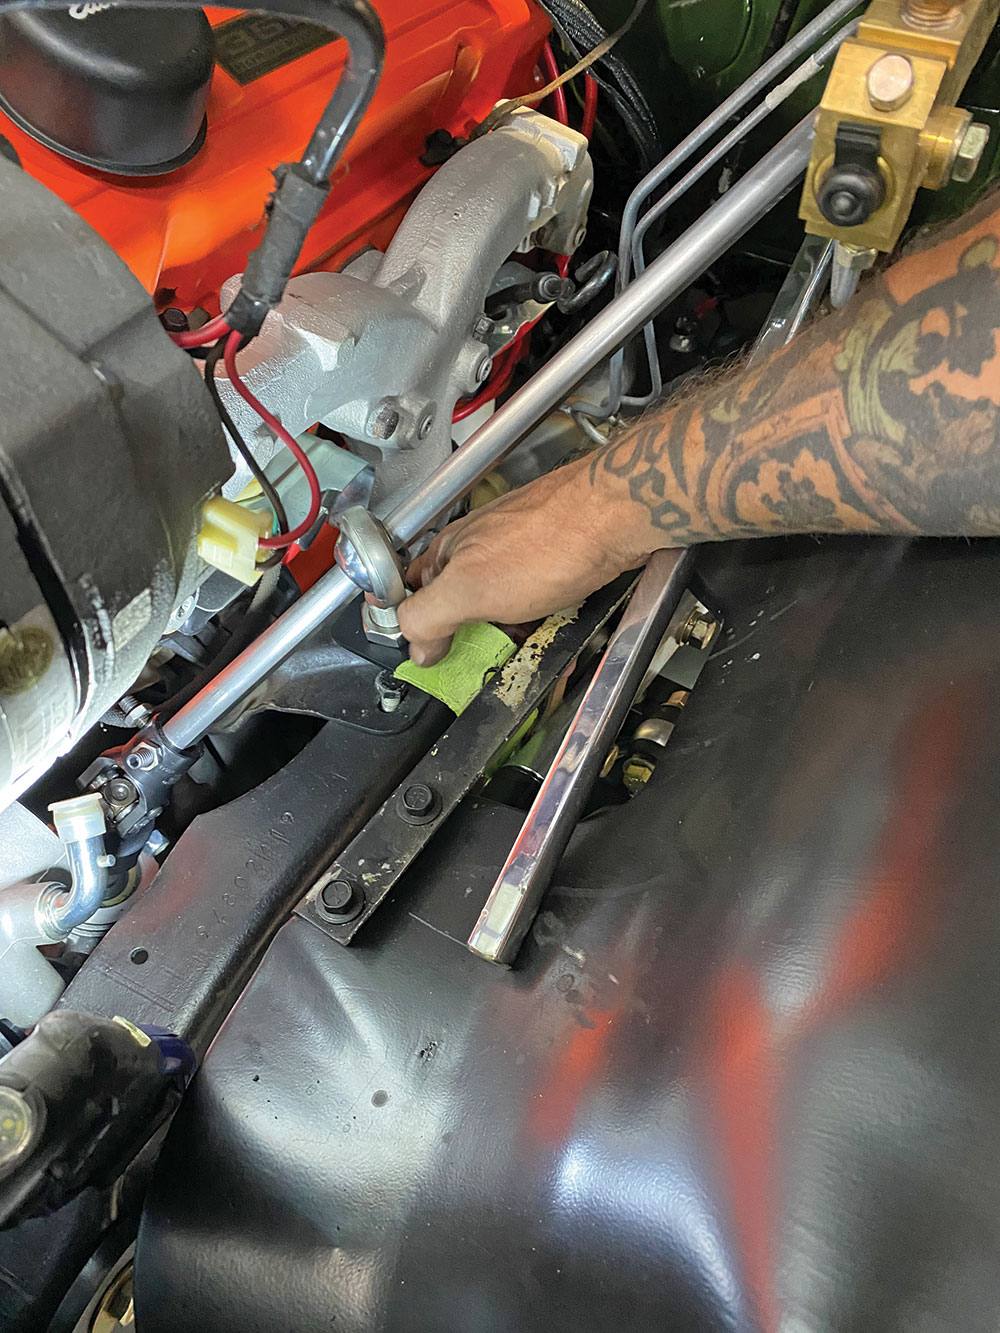
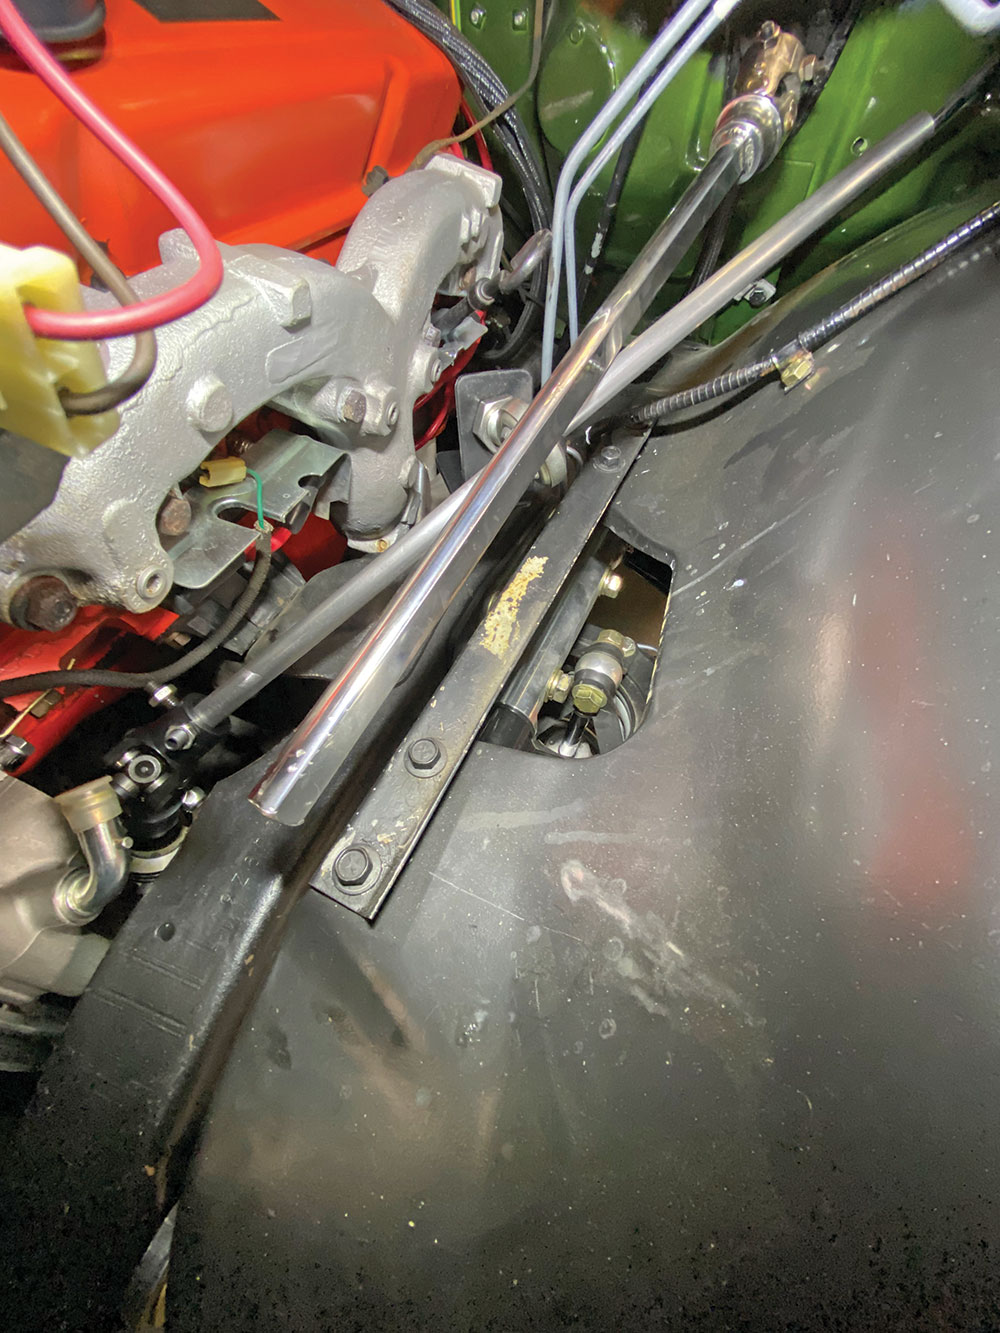
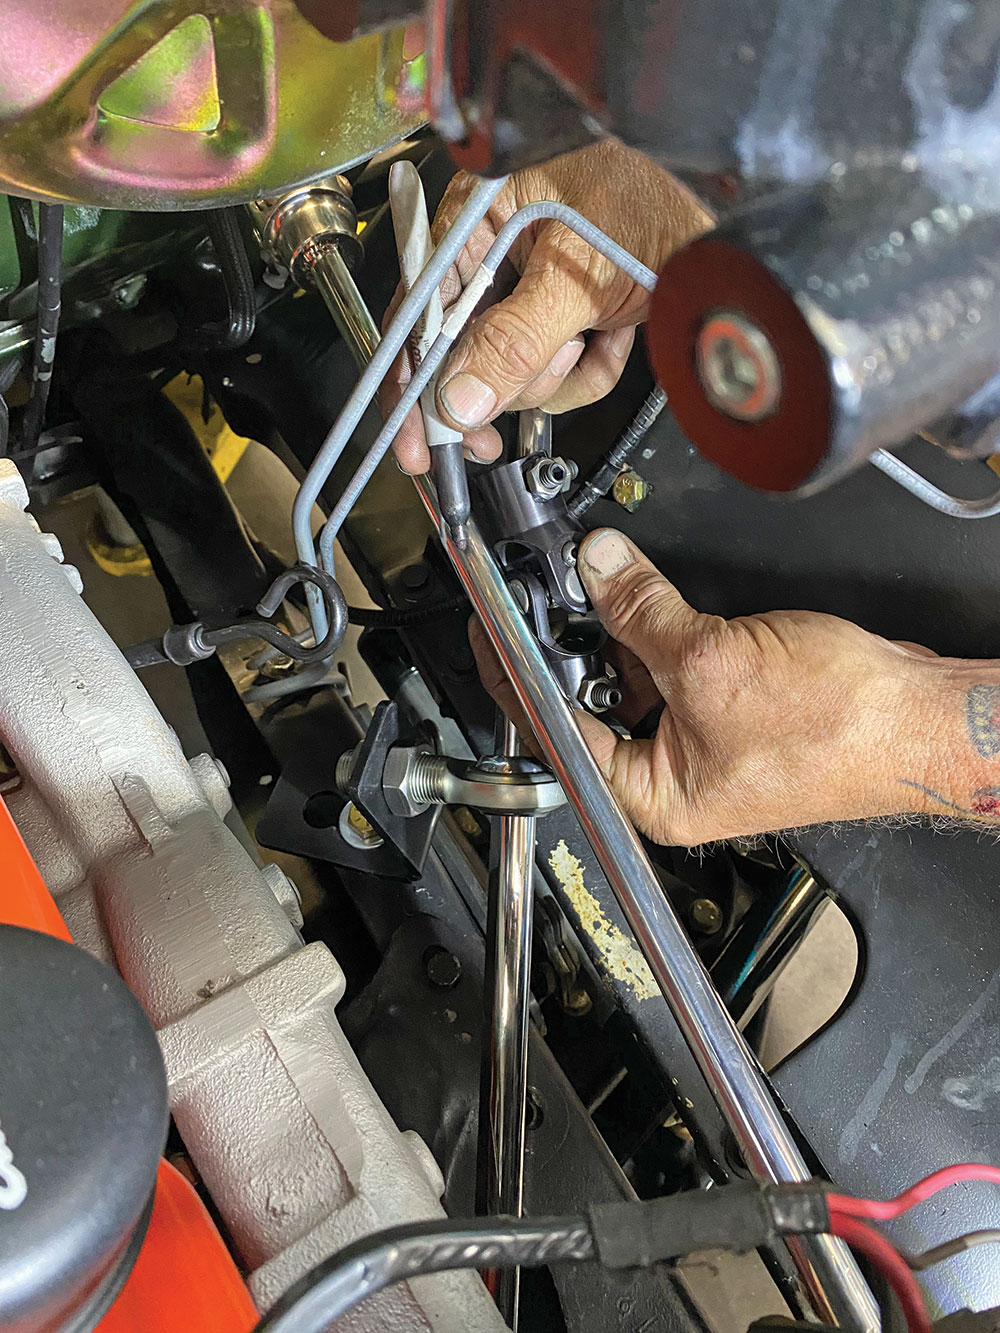
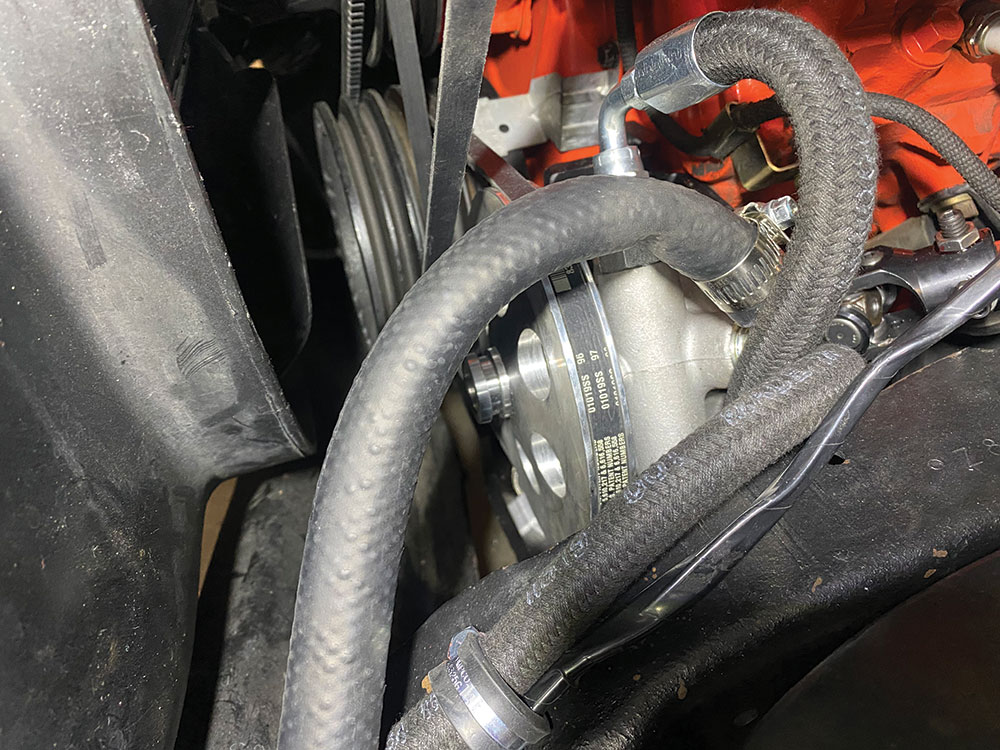
With the GM Type II power steering pump positioned tight against the block of the 350 Small Block Chevy, due to the truck’s factory AC system and V-belt orientation, the alternator had to be reconfigured to run off the front pulley groove (both the power steering and AC have their own dedicated belt now).While the old linkage assembly was a single shot from the column to the box, our new linkage will be a two-piece assembly using a provided heim-joint support.With the existing upper shaft/joint still attached to the column, the lower U-joint and new DD shaft were installed onto the rack so we could configure our lengths and where to cut.
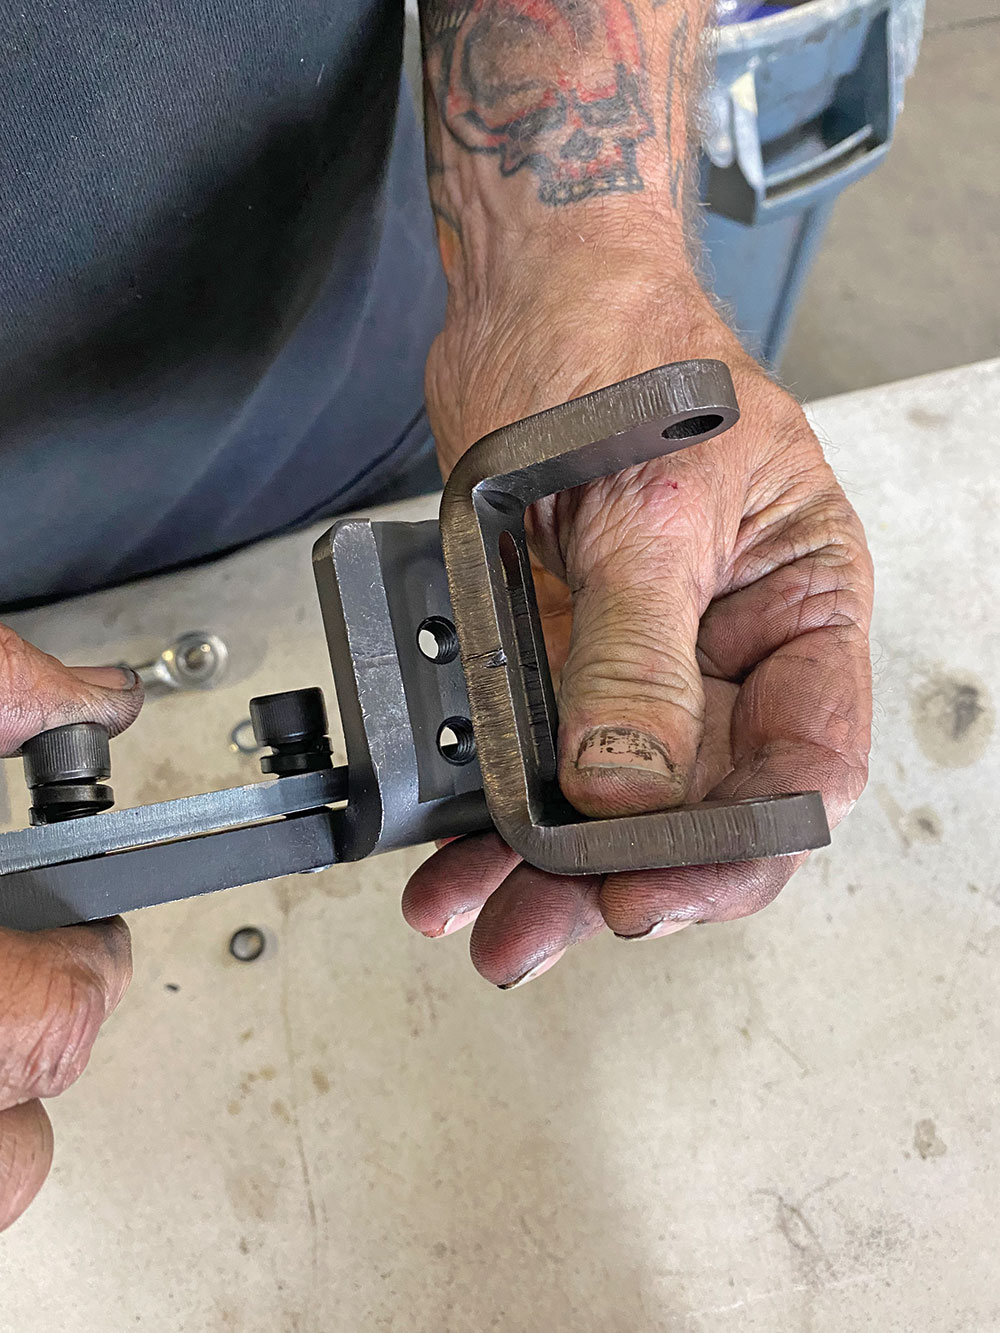
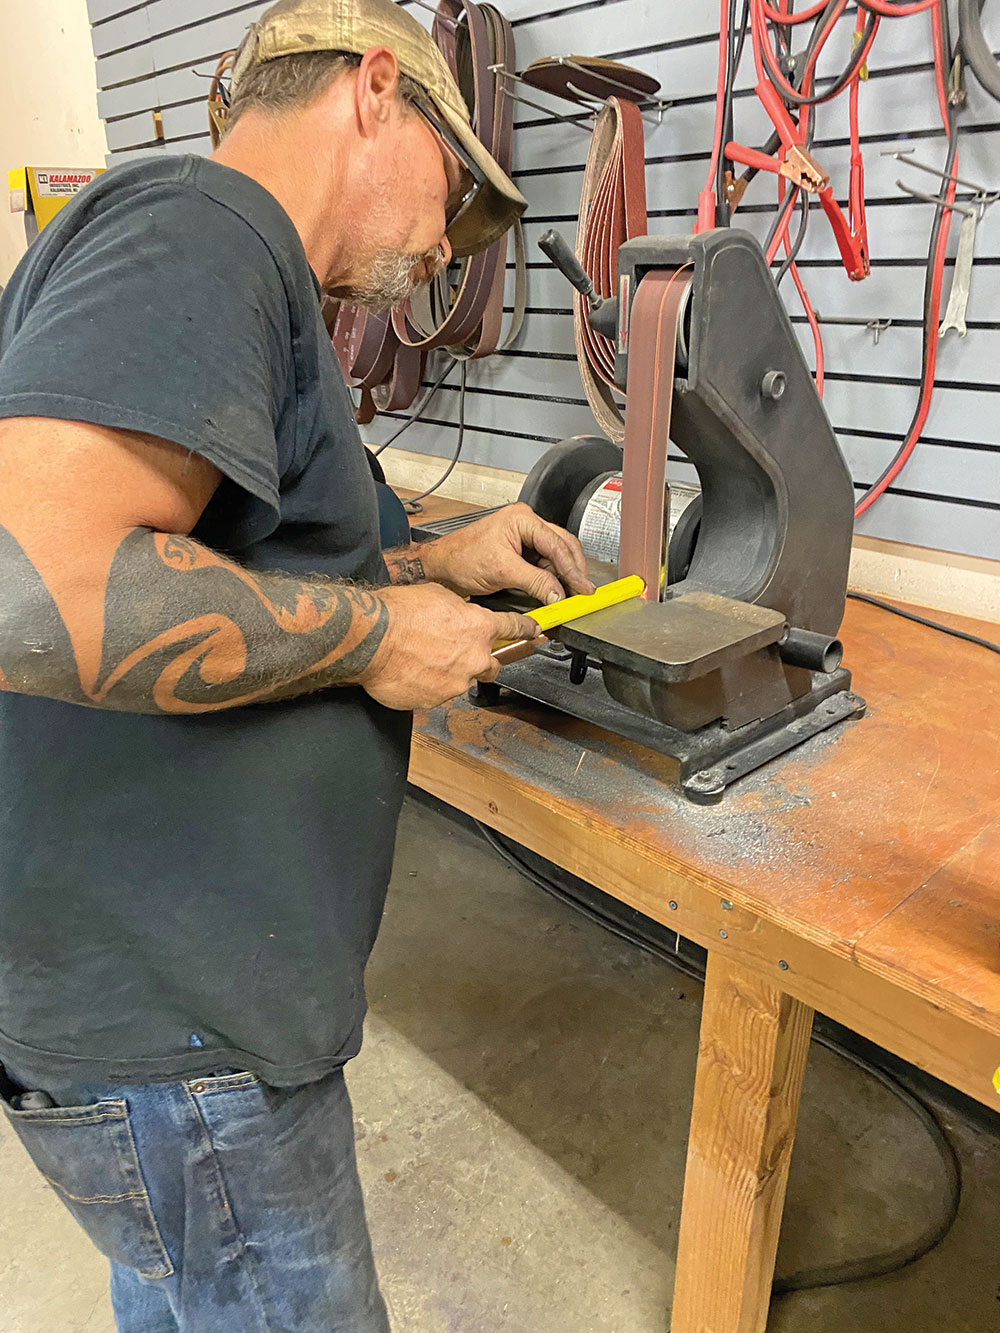
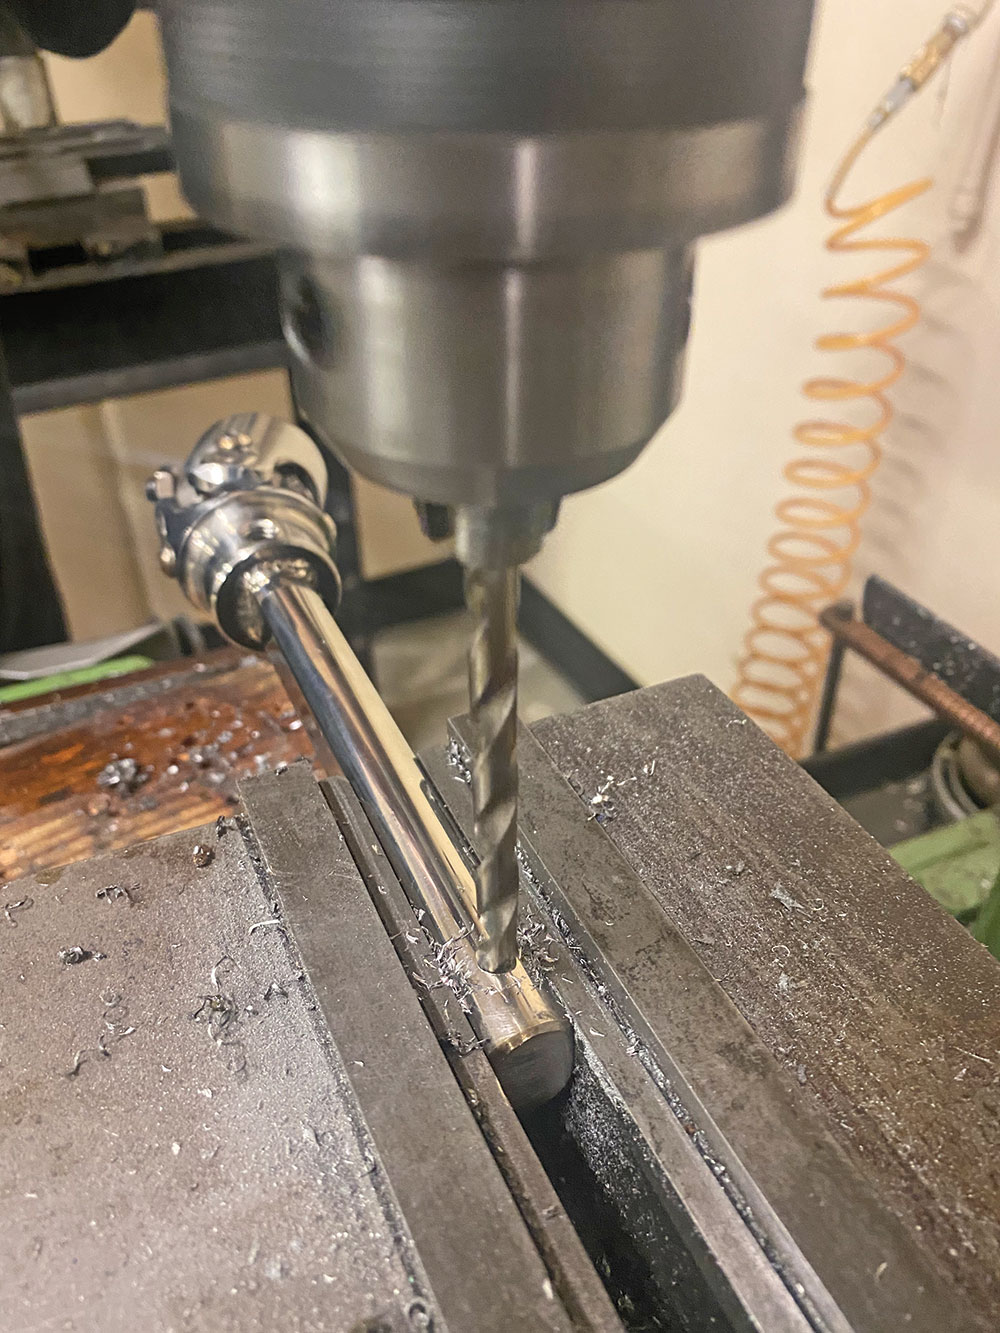
Two things to keep in mind when setting up the intermediate steering shafts: always chamfer your cut edges, and always remember to drill “divots’ ‘ for your U-joints locking set screws!
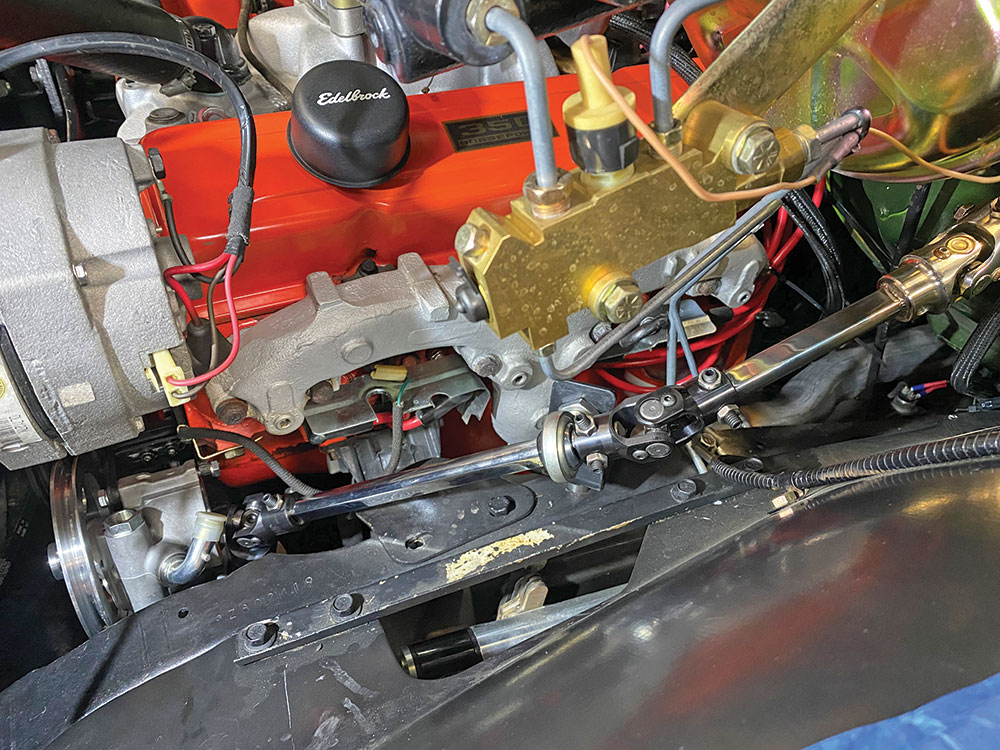
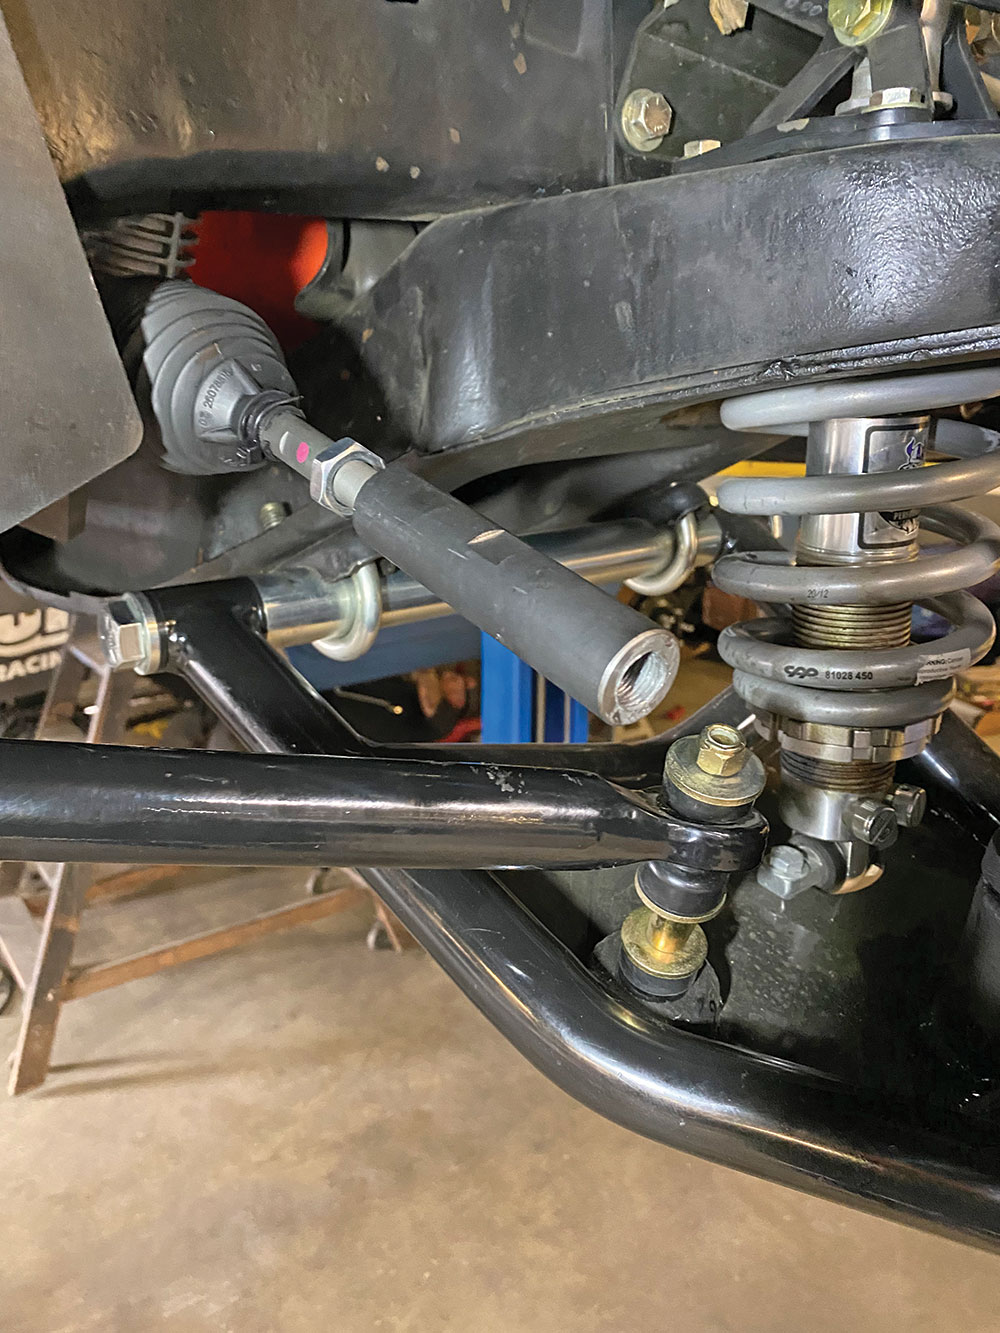
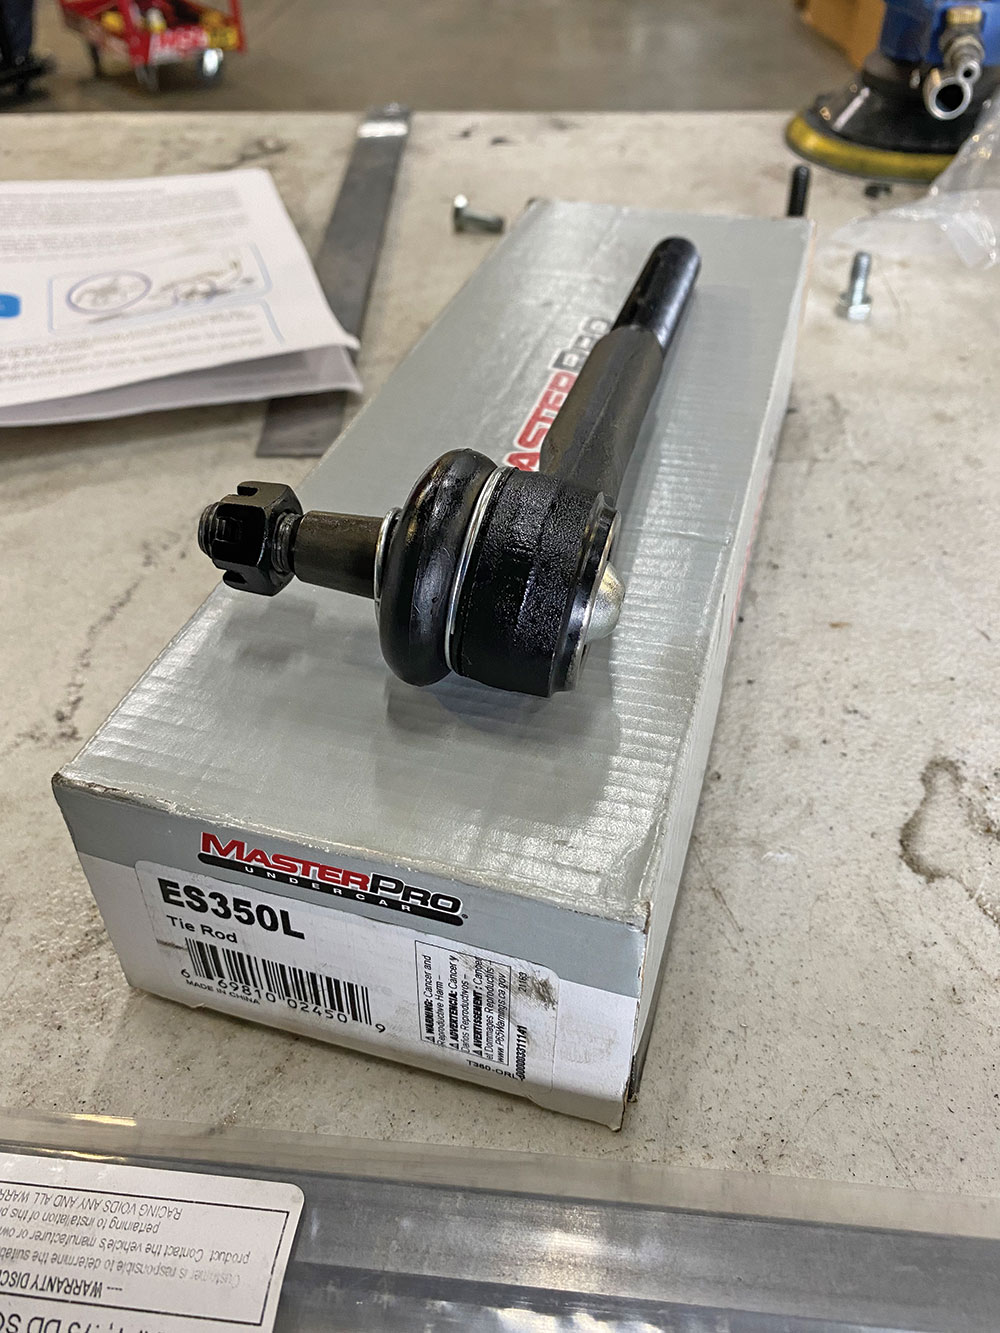
Column-to-rack steering linkage complete! On top of providing the divots for the U-joint set screws, don’t forget to use red Loctite when tightening them down. Also, run the steering lock to lock a number of times to ensure there’s no binding or interference.As mentioned, Flaming River’s power rack works with the stock or dropped aftermarket C10 spindles using the supplied aluminum adjuster sleeves.However, you will need to purchase the appropriate tie-rod ends as indicated in the instructions. (These were obtained from the local O’Reilly’s.)
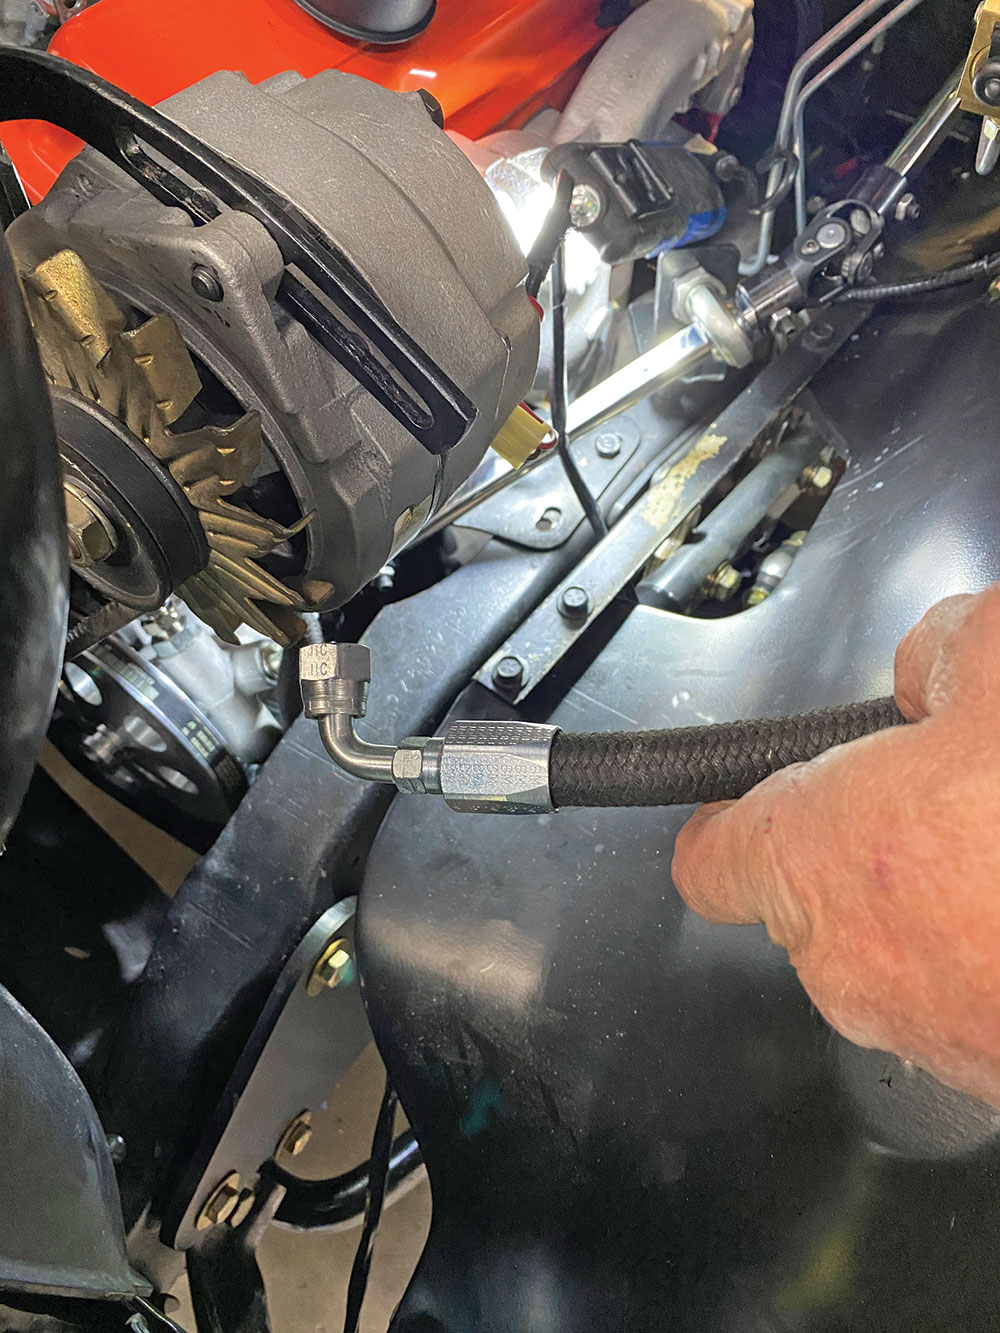
Using our earlier measurement, we initially set the toe-in with the new rack.If you took advantage of Flaming River’s “free” hose kit offer, you won’t have to go through the effort of measuring and building (or ordering) power steering hoses! No matter, ensure ALL fittings are tight, as well as make sure your return line will not kink (as ours eventually did, causing a brief fluid starve until we rotated the return barb accordingly).
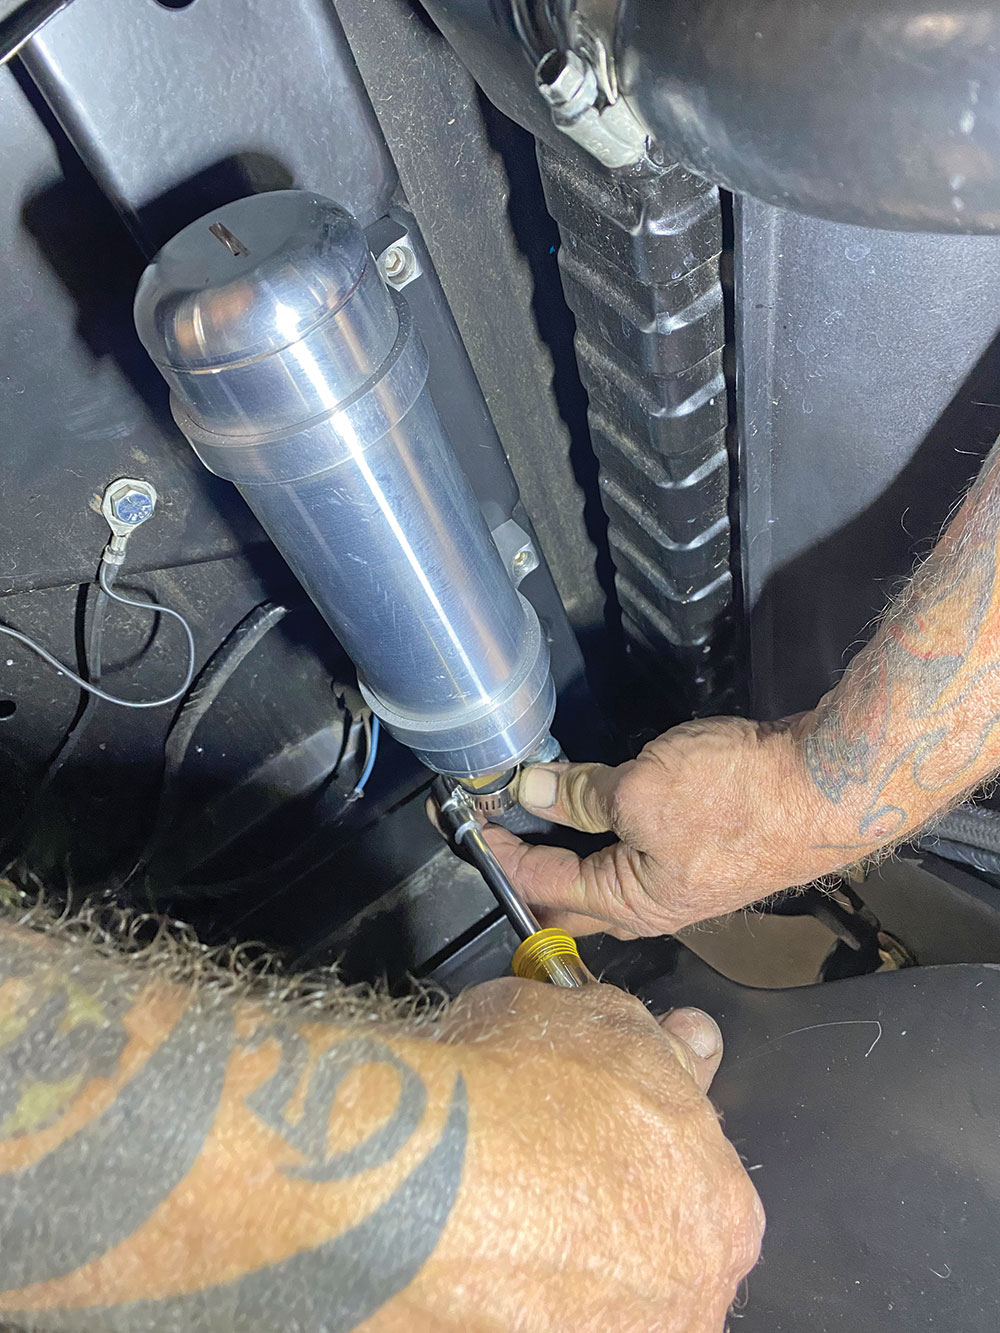
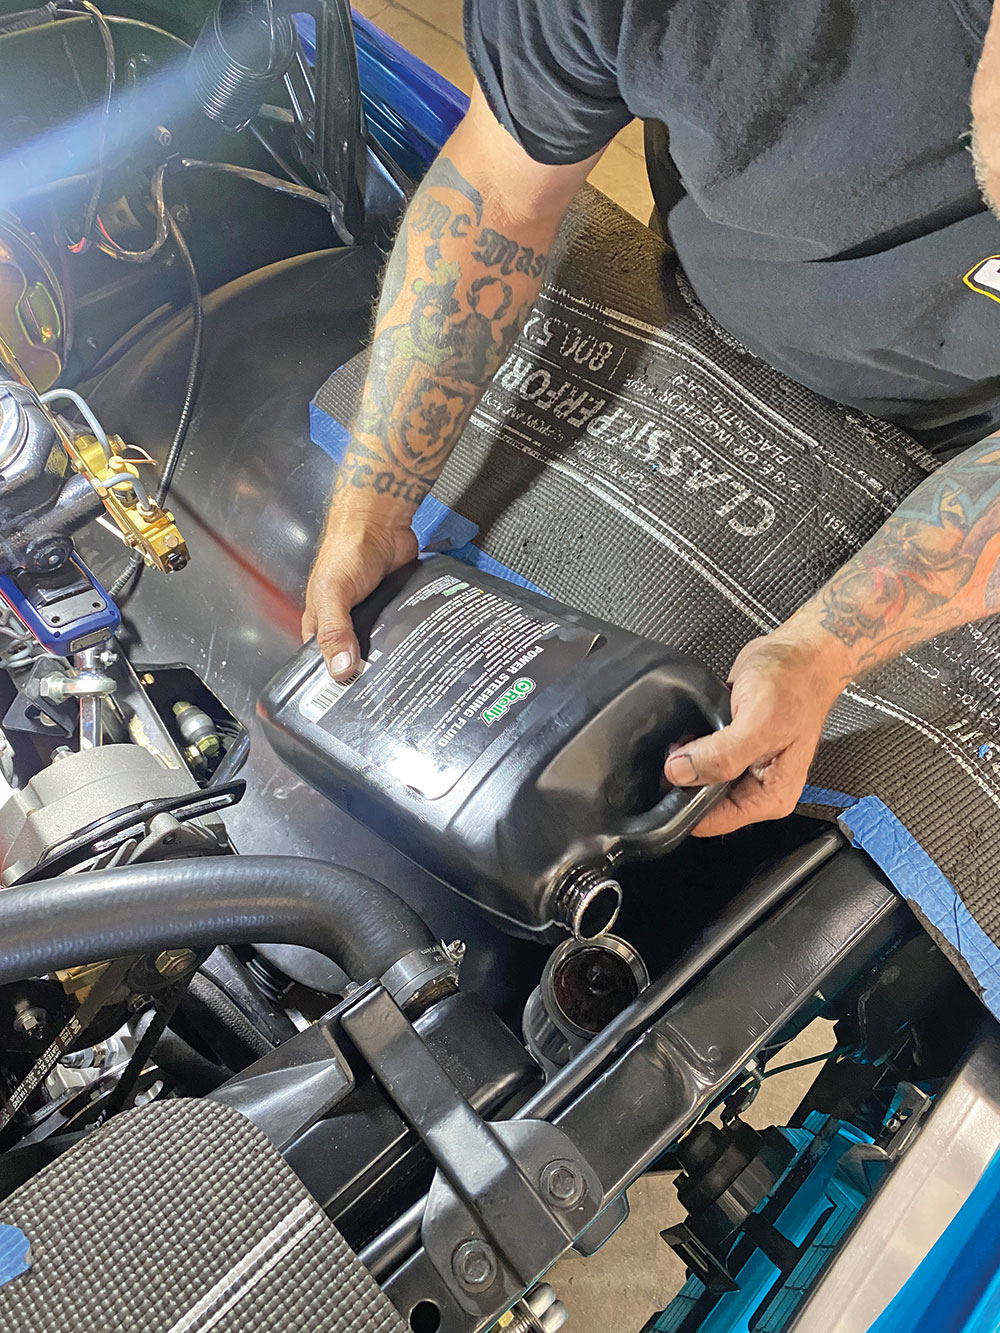
The aluminum power steering fluid reservoir was mounted alongside the radiator off the core support just below the top tank.With the plumbing complete, the system was filled with fluid, then with the engine running, the steering rack was once again cycled lock to lock until no more fluid was required (and the rack wasn’t yelling back at us!).Finally, before sending the C10 off for a proper alignment and subsequent test drive, with the suspension loaded, the sway bar was reconnected and the toe-in reset. Suffice it to say, the owner’s performance steering expectations were indeed met … and your editor is now a believer!
Sources
Flaming River Industries
(800) 648-8022 flamingriver.com
We use cookies to ensure that we give you the best experience on our website. If you continue to use this site we will assume that you are happy with it.