ITGMw
SUBSCRIPTIONtext
ProgressArrows
digital issues
ProgressArrows
online store
ProgressArrows
SUBSCRIPTIONtext
ITGMw
ACPnew header logo
CTP LOGOs
all cars

Independent Thinking

Part III: C4 Corvette IRS for Early Chevy Pickups

By Ron Ceridono   –   Photography by the Author

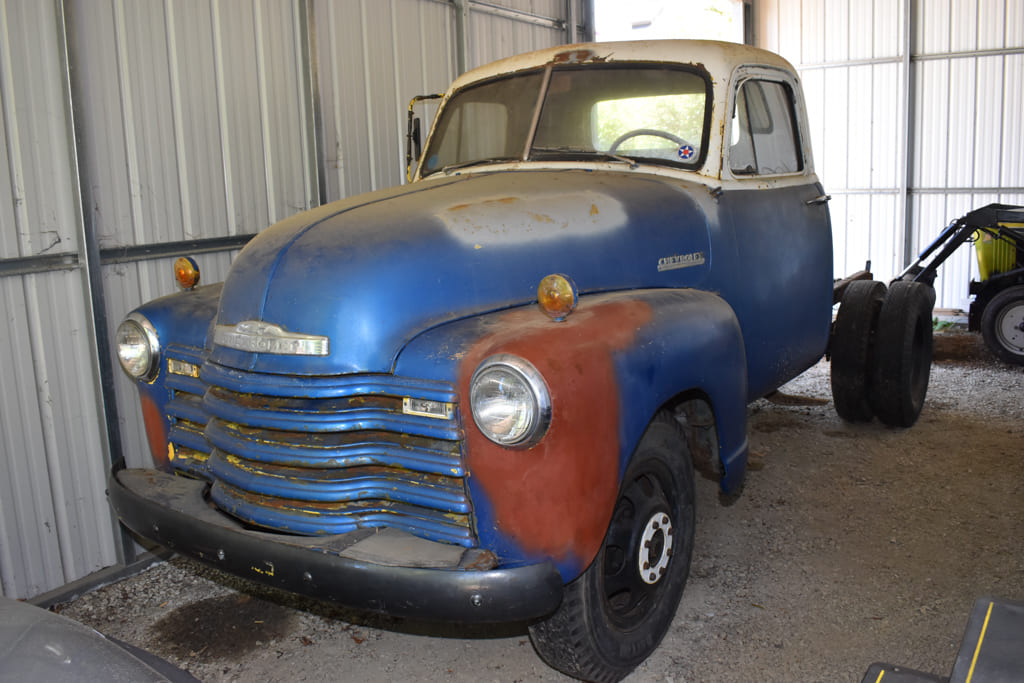
In the two previous issues of Classic Truck Performance, we documented installing C4 Corvette front suspension under an early Chevy pickup frame with a kit from Flat Out Engineering. Our intent was to build a ’52 Chevy 3100 series pickup that had the ride and handling qualities of a contemporary performance car, but like many projects there were complications to deal with—and in this case they were all of our own doing.

- Advertisement -
02 For this installation we used an ’84 to 87 style Corvette IRS
For this installation we used an ’84- to 87-style Corvette IRS. The ’88-96 rears are virtually the same only slightly wider, and the parking brakes are different.

Our piecemeal pickup actually started life in 1952 as a 3800-series 1-ton truck. But as the cab and front sheetmetal is the same as a 3100 ½-ton pickup, and it is completely rust-free and in near-perfect condition, we decided to use it. Now all we needed to begin was a frame. As luck would have it our friend Gary Dagel, of Dagel’s Street Rods, had a ’55 frame that he would donate to the cause.

03 ’52 Chevrolet 3800 truck with totally rust free and near perfect sheetmetal
Wilson found a ’52 Chevrolet 3800 (1-ton) truck with totally rust-free and near-perfect sheetmetal. As the cab is the same as the ½-ton trucks, a frame swap will turn it into a 3100 series pickup.

Don’t Miss Out on this Build: How To Square A ‘52 Chevy Truck Frame

From the outset the plan was to install Corvette C4 suspension under both ends of the truck using kits from Don McNeil at Flat Out Engineering. McNeil specializes in kits to install ’84-96 Corvette C4 front and rear suspension components under an array of Chevy and Ford cars and trucks. These suspension components provide excellent ride quality with cornering and handling traits that turns a utilitarian pickup into a corner-carving performance vehicle. All Flat Out Engineering kits maintain the correct factory geometry, are known to fit like they should, and are designed to be easy to install.

- Advertisement -
04 This frame is typical of ’54 first series ’55 Chevrolet pickups
This frame is typical of ’54 first series ’55 Chevrolet pickups—note the shallow arch over the rear axle, which would severely limit suspension travel.

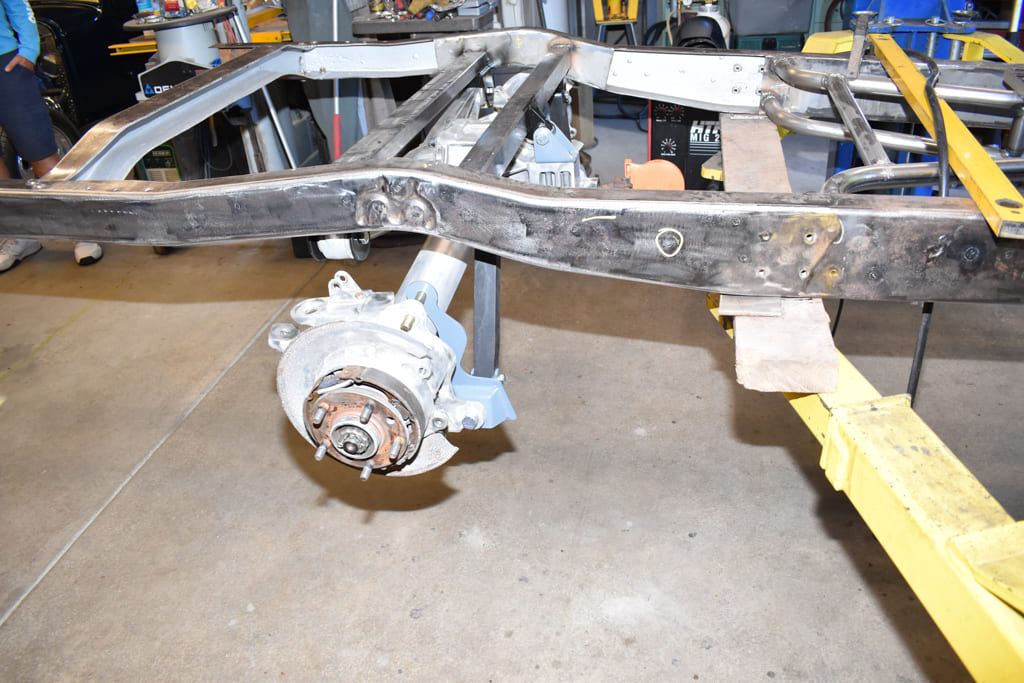
To recap hauler history, the Advance Design–series Chevy pickups were introduced in 1947 and continued with minor alterations through 1953. In 1954, noticeable changes in appearance took place that continued through the first part of 1955. Consequently, these trucks are usually referred to as the ’54 first series ’55 style while second series is used to describe the all-new ’55 design. What’s important to our saga is the front of the frames from 1947 through the first series 1955 are the same, however there is a noticeable difference in the rear portion that kicks up over the rear axle—the ’54 and first series ’55 is much flatter, something we would have to deal with.

05 Although the frame is upside down it’s obvious the arch over the rear axle is much larger
Although the frame is upside down, it’s obvious the arch over the rear axle on the ’53 and earlier frames (this is a ’52) is much larger—that’s what we needed but didn’t have.

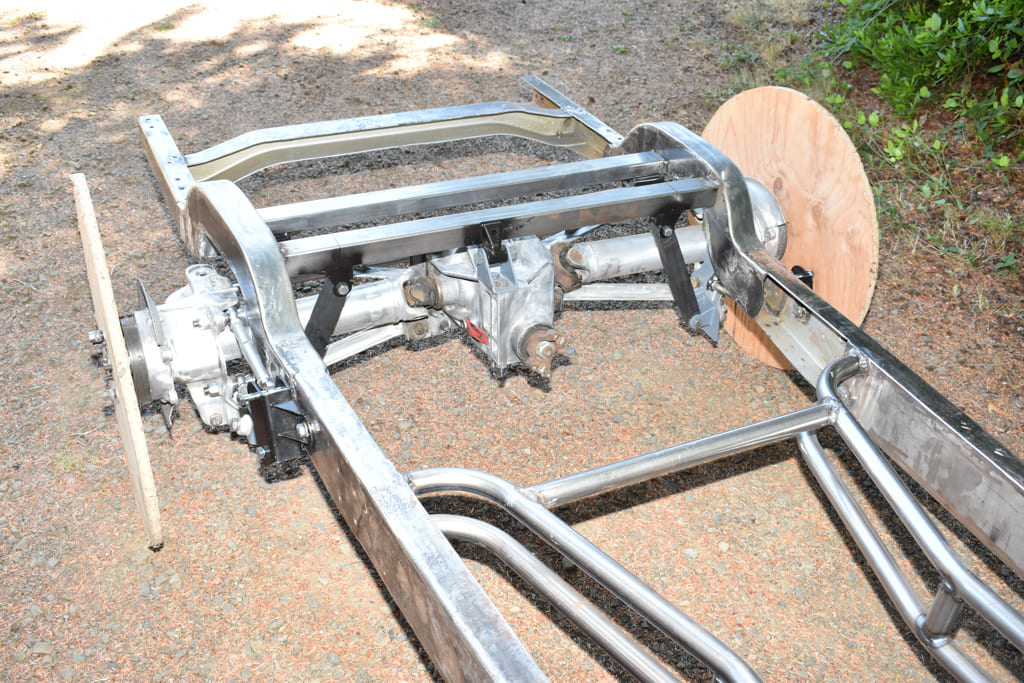
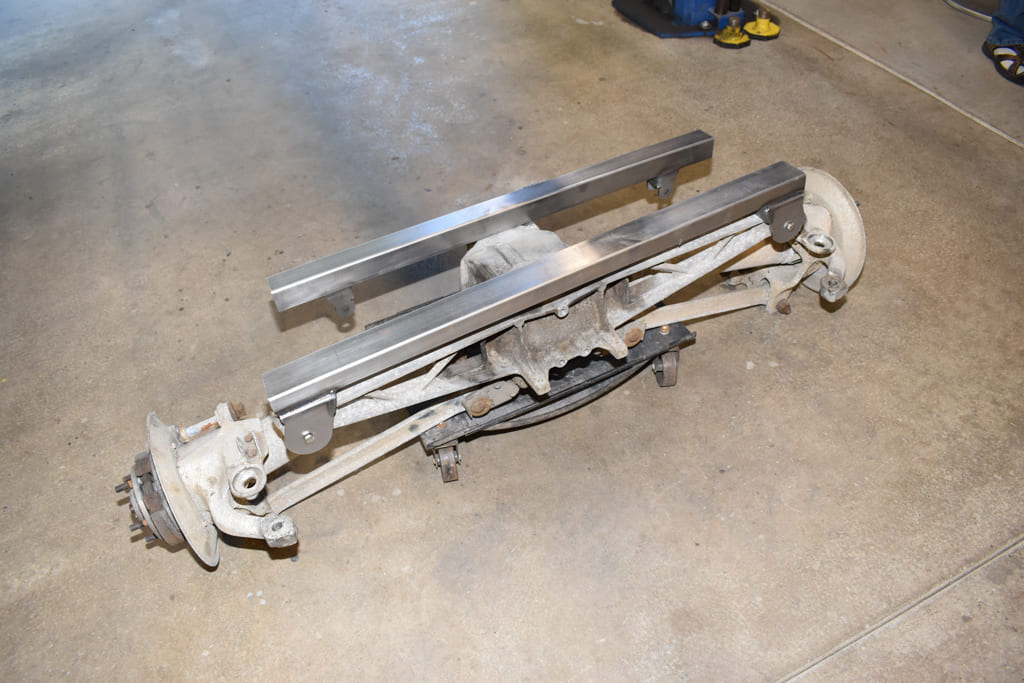
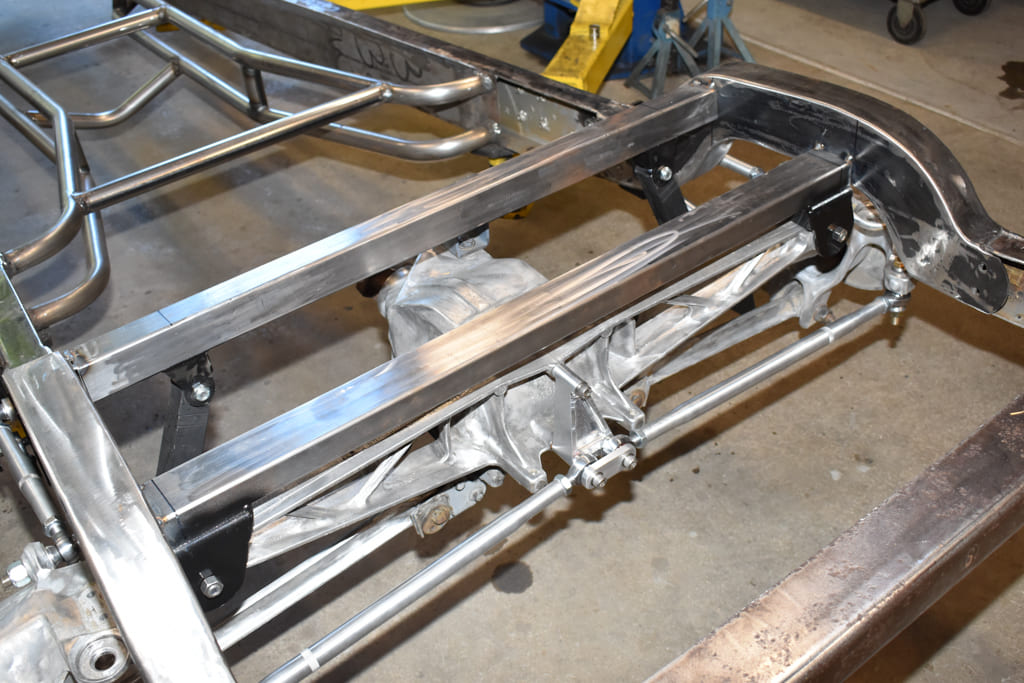
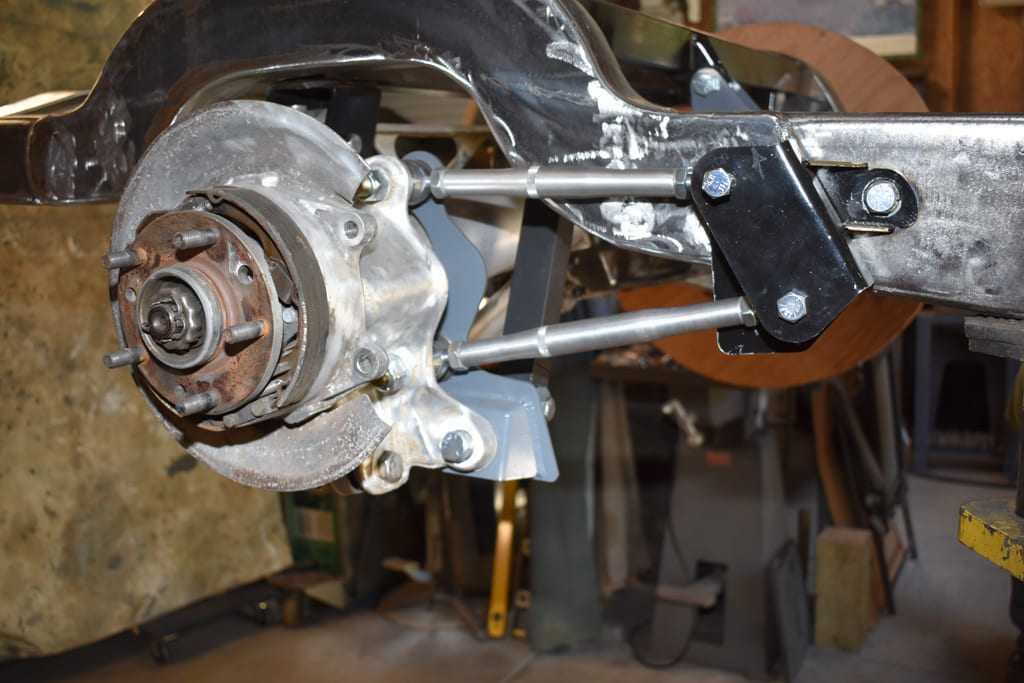
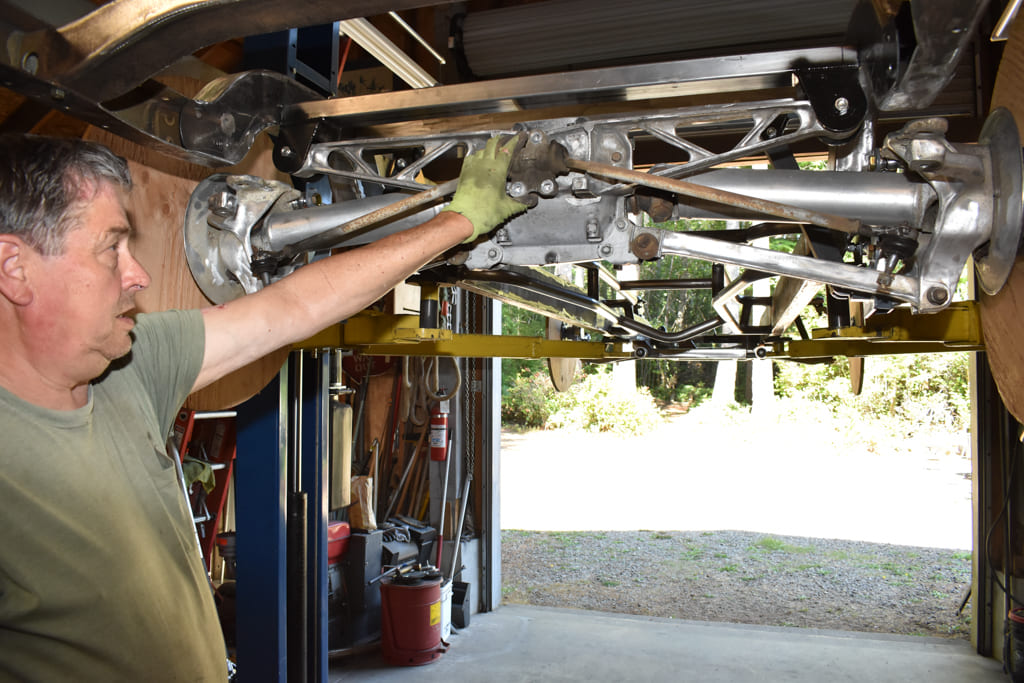
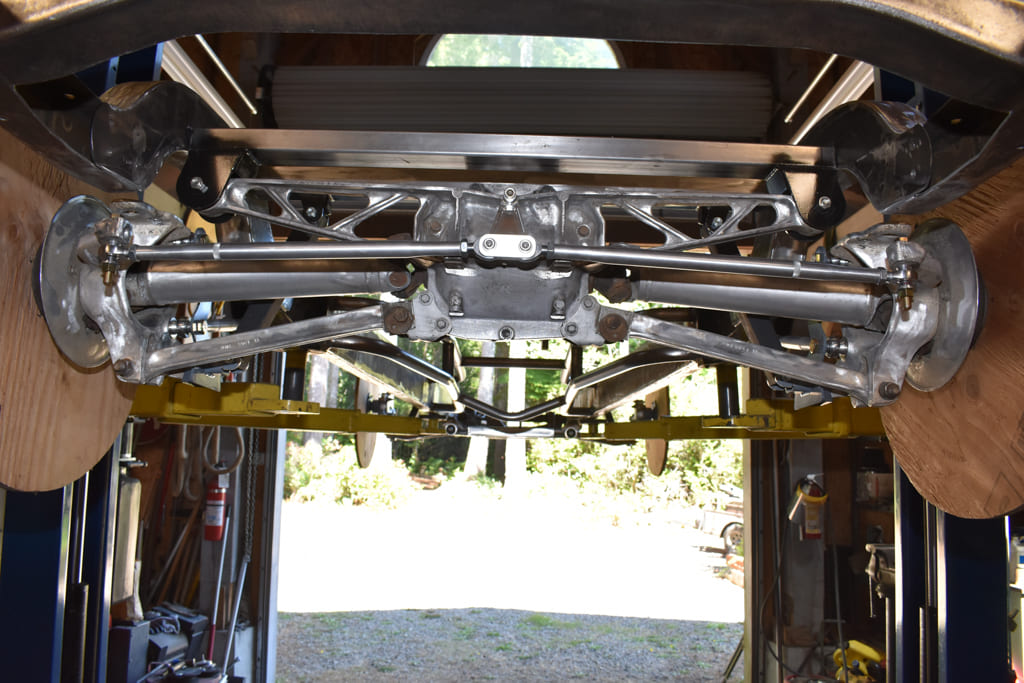
Once the front suspension was in place it was time to turn our attention to the rear of the chassis. There are two versions of the C4 rear suspension, ’84-87 and ’88-96. The early style is 61 ½ inches wide (measured from front brake face to brake face). The ’88-96 is approximately 1-inch wider. The early series uses internal expanding parking brakes inside the rotor hats while the later design uses brake calipers with parking brake mechanisms. All C4 rears use aluminum suspension components and half shafts that are extremely strong while their light weight provides a sprung to unsprung weight ratio that is unsurpassed.

06 a plastic template was made to determine the dimensions of the modifications
After deciding to notch the ’rails of our first series ’55 frame, a plastic template was made to determine the dimensions of the modifications.

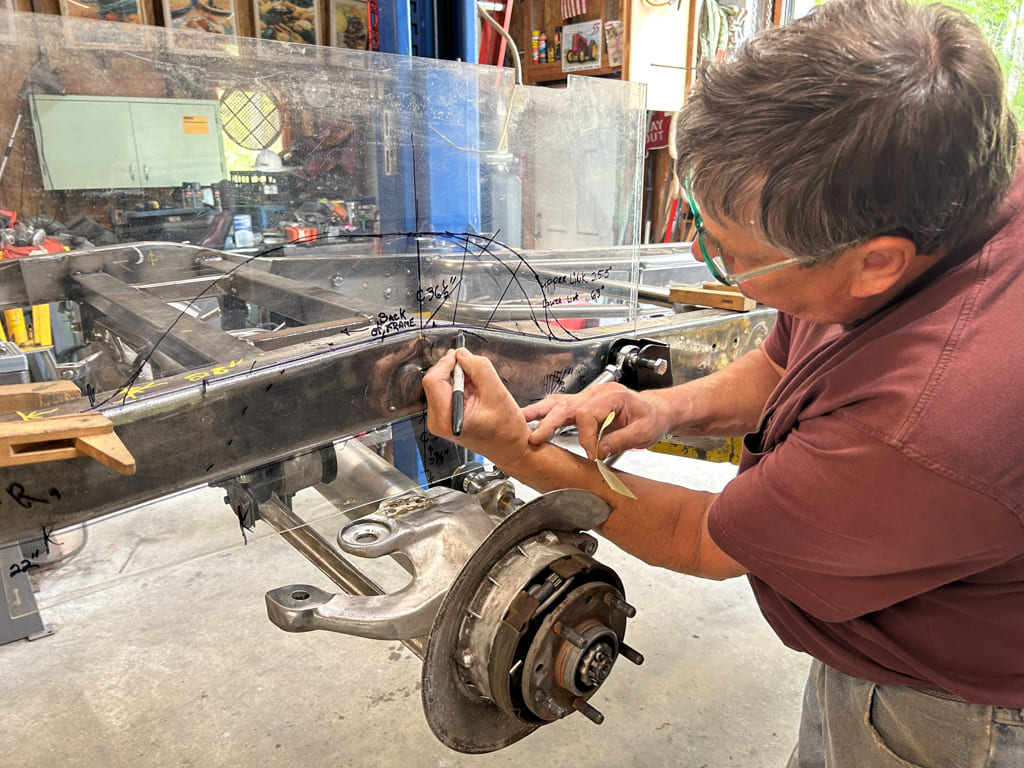
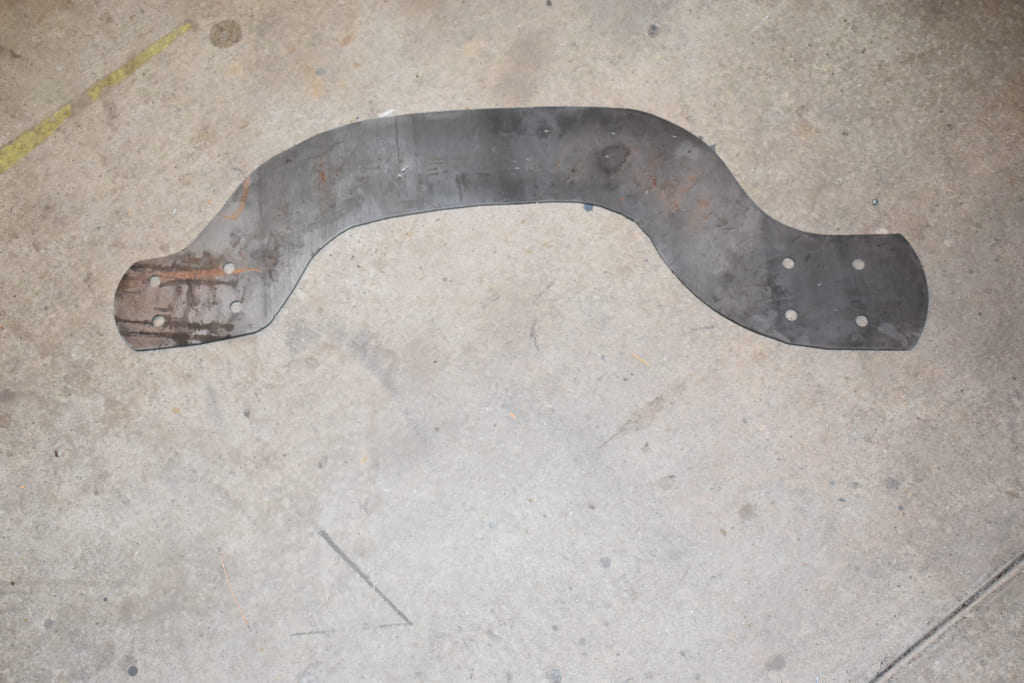
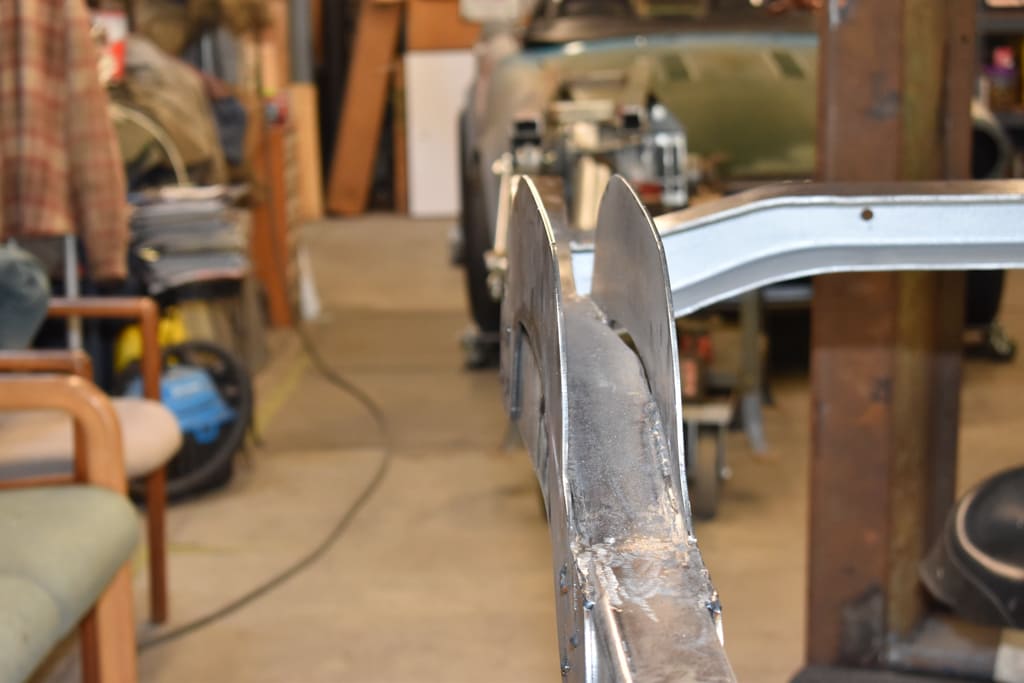
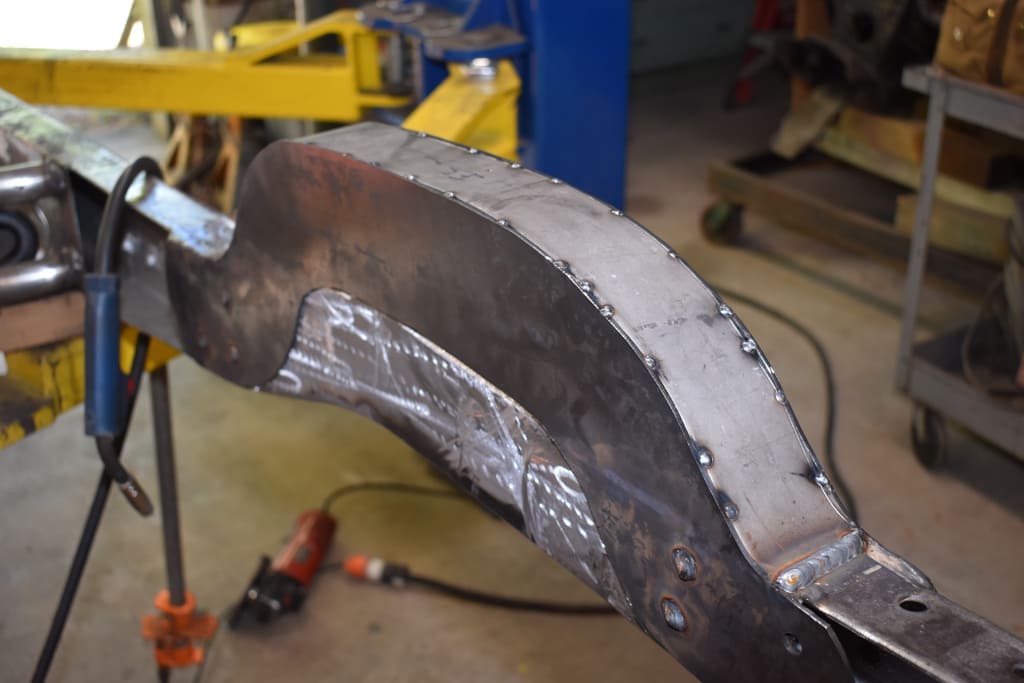
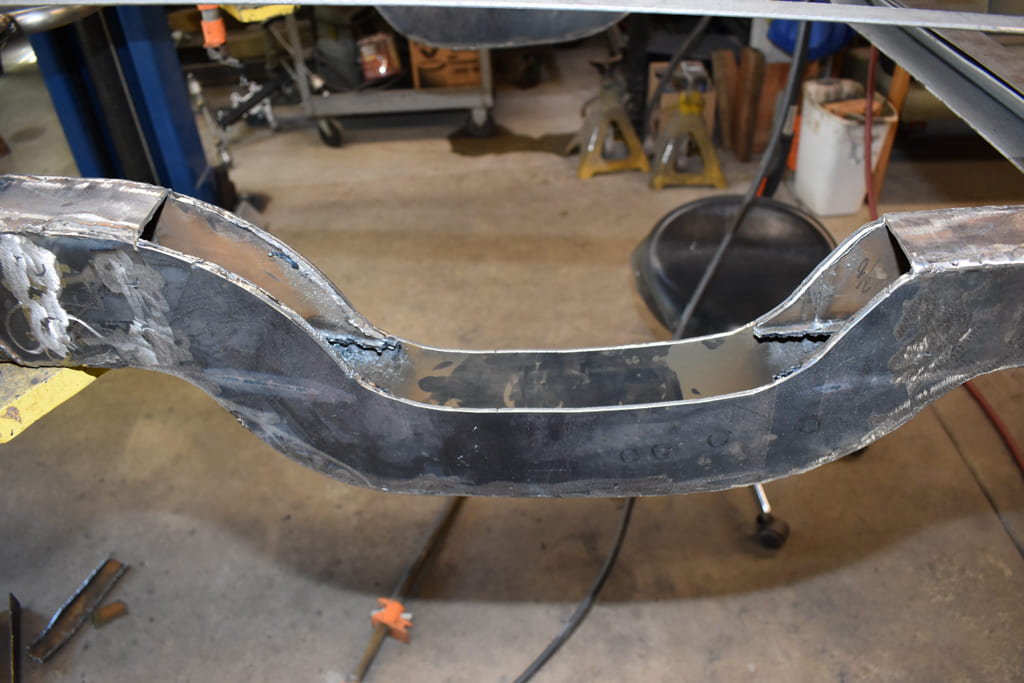
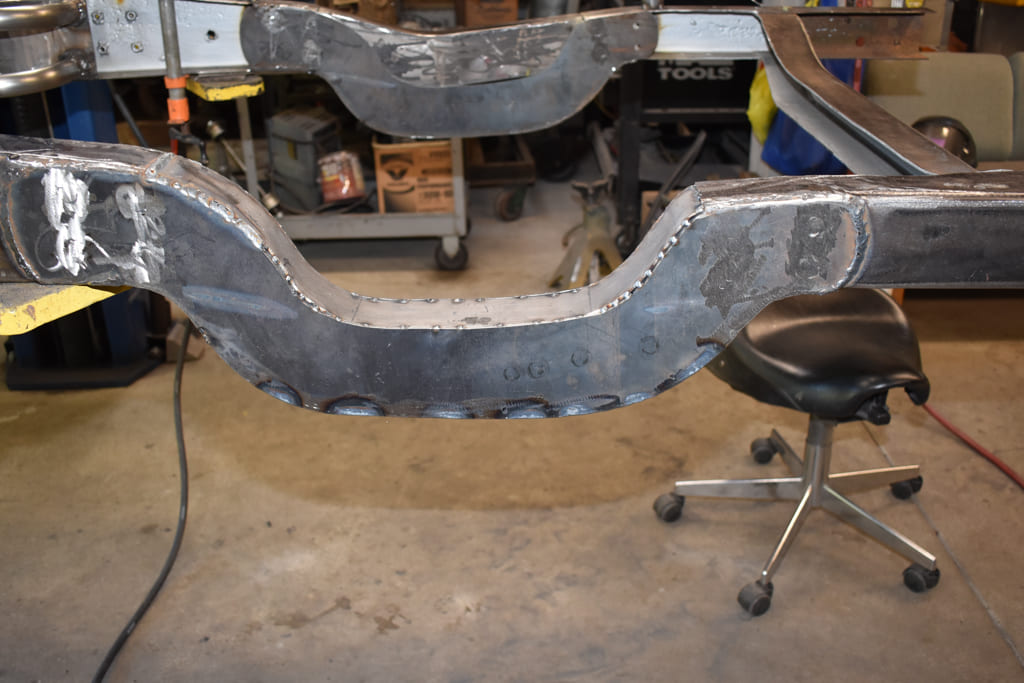
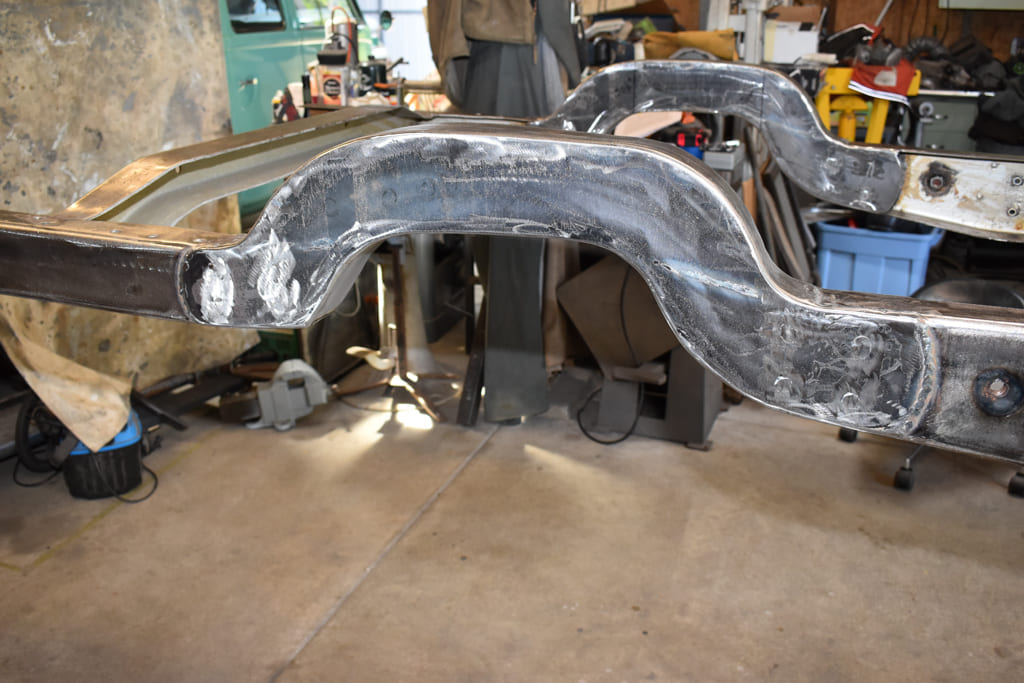
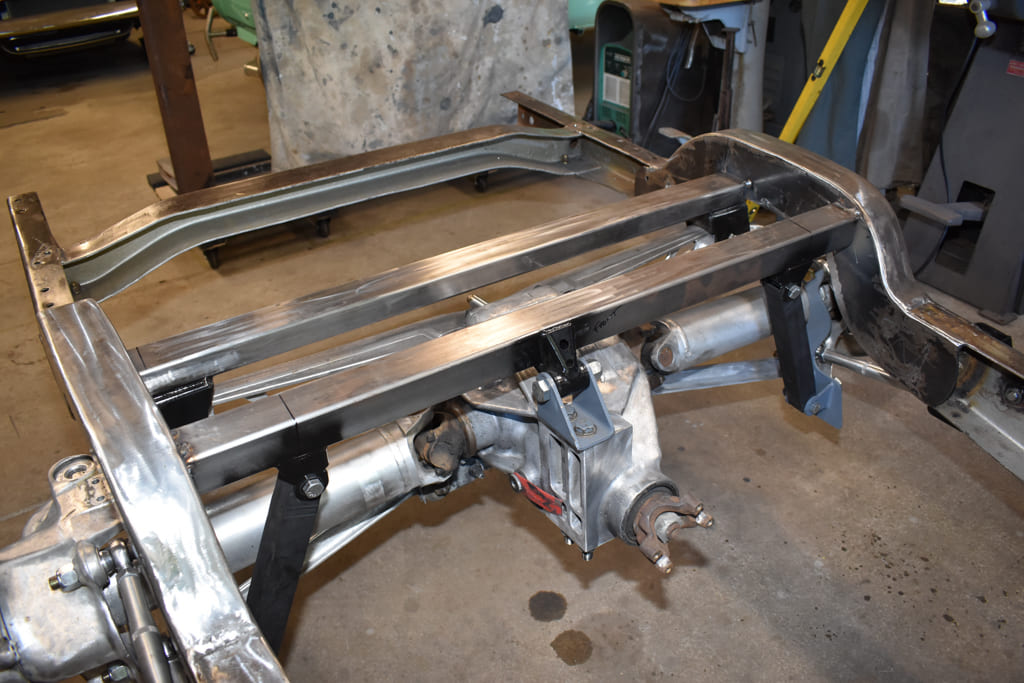
Installing Flat Out Engineering’s C4 rear suspension in ’36-53 Chevy pickups couldn’t be easier, as no major frame modifications are required other than adding boxing plates and welding the crossmembers in place. However, to get the ride height we were after and provide the suspension travel necessary our ’54 first series ’55 frame would have to be modified. After consulting with McNeil the decision was made to step the rear of the frame, thanks to Todd Hartman at Coyote Steel in Eugene, Oregon, who plasma cut four 10-gauge steel plates that were used to make the necessary modifications.

07 we had four plates laser cut from 10 gauge hot rolled steel by Coyote Steel
Satisfied with the fit of the plastic mockup, we had four plates laser cut from 10-gauge hot rolled steel by Coyote Steel.

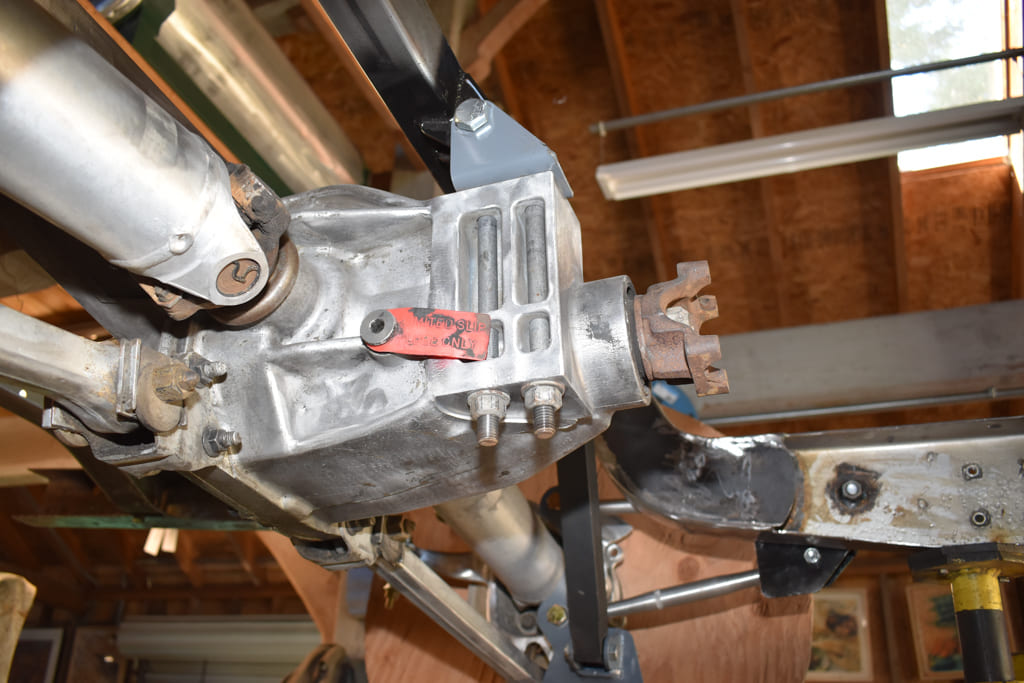
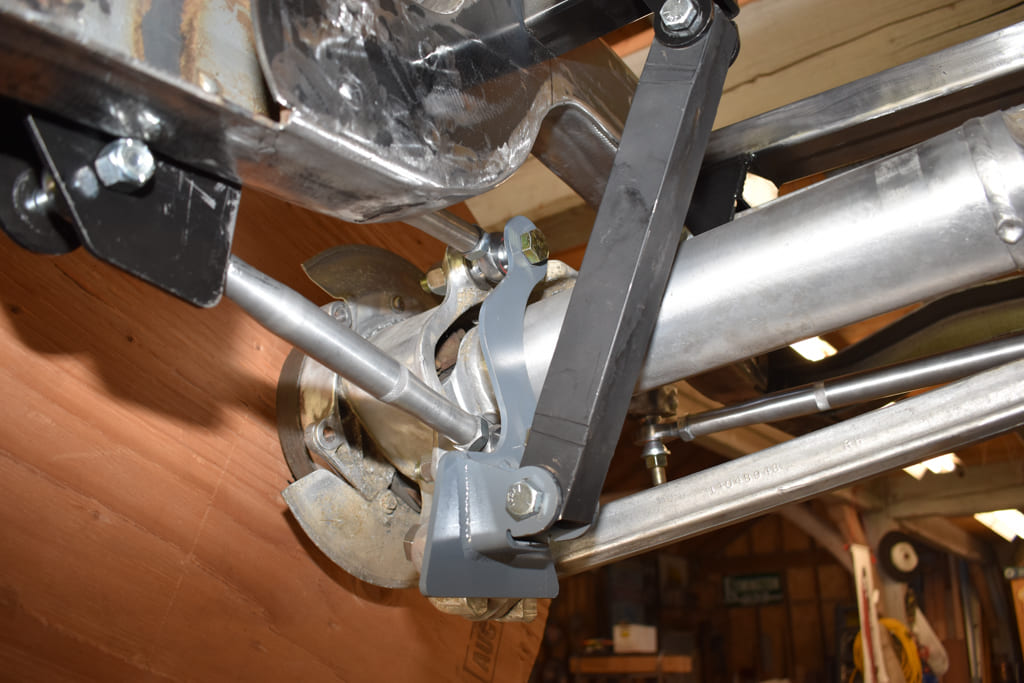
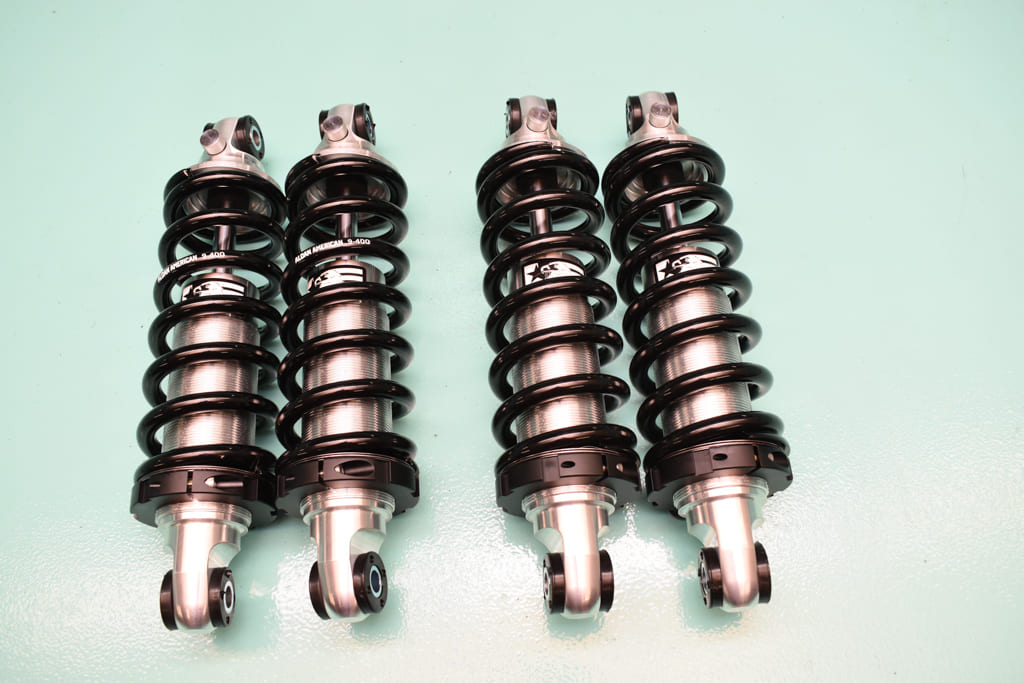
For a smooth ride McNeil has found that the Corvette carbon-fiber rear spring is too stiff for use under an early pickup, so his kits are designed to use coilover shocks. As McNeil recommends, we’re using Aldan coilovers. We also added Flat Out Engineering’s adjustable rear control arm kit rather than using the stock fixed Corvette components. In addition to adjustability the spherical rod ends in the Flat Out Engineering replacements eliminate the bind produced by the rubber or urethane bushings in the factory arms that inhibit suspension travel.

- Advertisement -

Another Suspension Upgrade: Affordable Independent Rear Suspension Upgrade For Your Classic Trucks

08 Here the first plate is clamped in position to check the fit
Here the first plate is clamped in position to check the fit. Note the holes for rosette welds to secure the plates to the factory frame.

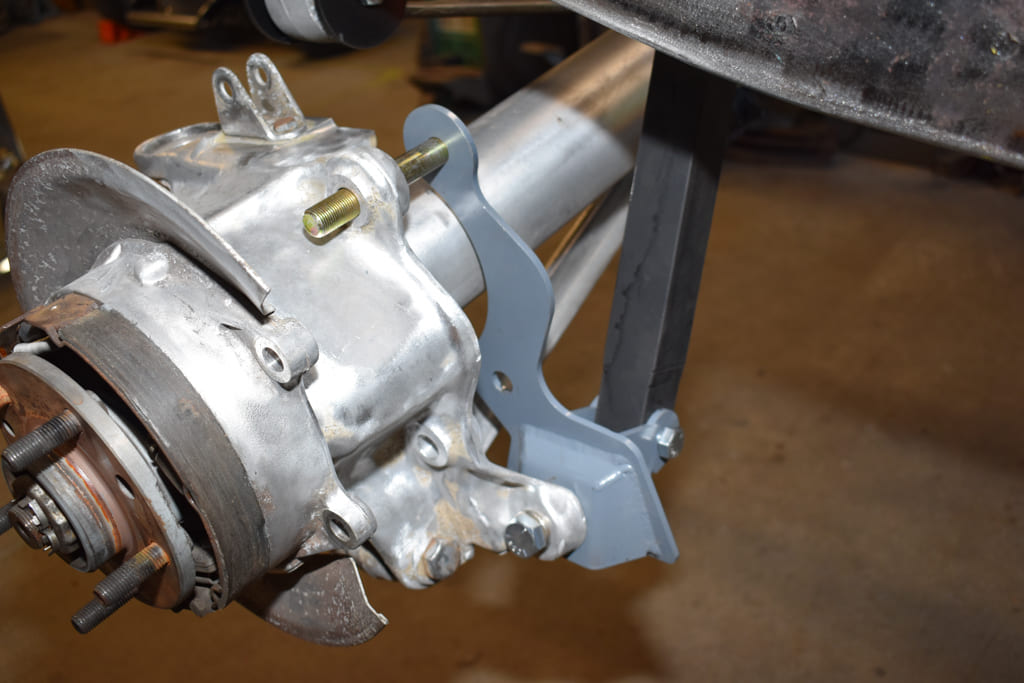
Another option we chose was Flat Out Engineering’s tubular rear toe bar kit to replace the stock Corvette assembly. The new toe bar links mount on the bottom of the rear hub assembly rather than the top as the originals did, thus providing additional frame clearance, which is needed with many lowered ride height applications.

09 A second plate was attached to the inside of each framerail
A second plate was attached to the inside of each framerail. Both were welded to the factory ’rails on their inside surfaces and to framerails at both ends.

We couldn’t be happier with the completed chassis or Flat Out Engineering’s installation kits. The decision to use a ’55 frame didn’t make any difference installing the front suspension. However, it did make the rear suspension slightly more challenging, but the finished product was definitely worth the effort.  We’d have to say in this case the results definitely justified the means.

10 With the notch plates secured the tops were “boxed” with 10 gauge flat strap
With the notch plates secured the tops were “boxed” with 10-gauge flat strap. To prevent any distortion the stock frame was left intact until the top and side plates were completely welded.
11 Once the side and top plates were secured the bottoms of the framerails were removed with a plasma cutter
Once the side and top plates were secured the bottoms of the framerails were removed with a plasma cutter.
12 the bottoms of the notches were enclosed with flat stock formed to fit
As it was done on the top, the bottoms of the notches were enclosed with flat stock formed to fit.
13 The finished notches will allow the low ride height we’re after and provide all the suspension travel needed
The finished notches will allow the low ride height we’re after and provide all the suspension travel needed.
14 Flat Out Engineering’s IRS kit includes two crossmembers
Flat Out Engineering’s IRS kit includes two crossmembers—one locates the front of the differential housing and provides attachment points for the coilovers, the other is for the differential carrier, or batwing, that mounts the centersection.
15 Both crossmembers were tack welded in place then all installation measurements were triple checked
Both crossmembers were tack welded in place then all installation measurements were triple checked to ensure the rearend was centered and the wheelbase was correct.
16 The forward crossmember determines the pinion angle
The forward crossmember determines the pinion angle. Note that fixed-length struts were used to position the suspension at ride height during assembly.
17 the pinion support bracket attaches to the centersection with the factory bolts
Flat Out Engineering’s pinion support bracket attaches to the centersection with the factory bolts that secured the Corvette’s torque arm.
18 Flat Out Engineering provides brackets that bolt to the C4 hubs to mount coilovers
Rather than the stock transverse spring, Flat Out Engineering provides brackets that bolt to the C4 hubs to mount coilovers.
19 the coilover brackets also mount the upper and lower control arms that located the hubs fore and af
The coilover brackets serve double duty; they also mount the upper and lower control arms that located the hubs fore and aft.
20 we opted for Flat Out Engineering’s adjustable rear control arm kit
Rather than the fixed, rubber-bushed Corvette components, we opted for Flat Out Engineering’s adjustable rear control arm kit.
21 The camber on the C4 IRS is adjustable with eccentrics on the lower supports
The camber on the C4 IRS is adjustable with eccentrics on the lower supports that run from the centersection to each hub.
22 elected to remove the stock C4 toe bar assembly that bolts to the centersection
Wilson elected to remove the stock C4 toe bar assembly that bolts to the centersection and attaches to each hub and replace it with Flat Out Engineering’s tubular toe bar kit.
23 The replacement toe bar kit is easy to adjust and looks really cool to boot
The replacement toe bar kit is easy to adjust and looks really cool to boot.
24 Suspension on both ends will be supplied by Aldan single adjustable coilovers
Suspension on both ends will be supplied by Aldan single-adjustable coilovers. Front springs are 450 pounds, rears are 400.
25 Prior to assembly the bearings are lubricated with wheel bearing grease
To make adjusting the coilover springs preload easy we opted for Aldan’s thrust bearing kits. Prior to assembly the bearings are lubricated with wheel bearing grease.
26 using copper antiseize lubricant on the threads of the shock bodies to prevent galling
Aldan suggests using copper antiseize lubricant on the threads of the shock bodies to prevent galling.

Sources

Aldan American
(310) 384-7478
aldanamerican.com

Coyote Steel
(541) 461-2060
coyotesteel.com

Flat Out Engineering
(714) 639-2623
flatout-engineering.com

Click on this issue’s cover to see the enhanced digital version of Independent Thinking.

ctp october 2023

- Advertisement -

Related Articles

Search Our Site

More Classic Truck Performance

The Speedway Motors 1968 C10 Part 5: The Interior

By Joe McCollough   -   Images by Jessica Coleman &...

The John Lamb/Tin Man’s Garage Triton V10-Powered 1961 Ford Unibody

By Brian Limberg (Excerpts from his Build Book)    -  ...

Mike Schott’s 1992 Chevy Silverado

By Tim King   -   Images by the Author 1988 welcomed...

Bob Ford’s 1957 Chevy Task Force-Series Truck Turns up the Heat

By Chuck Vranas   -   Images by the Author Somewhere on...

Updating a 1971 Suburban With a Lokar Floor Shifter and Ididit Tilt Column

By Todd Ryden   -   Images by the Author After upgrading...

The Evolution of Pat Floyd’s 1969 Chevy C10

By Chuck Vranas   -   Images by the Author The alluring...
More Classic Truck Performance

A New Approach to Building an Old 1971 Chevy Truck

By Fuelish Media You hear the term “back in the...

Speedway Motors’ 1968 C10 Build Part 2: Chassis & Suspension

By Joe McCollough   -   Images by the Author In the...

Paul Close’s Y-Block Powered 1956 F100 is Layered with Custom Cool

By Chuck Vranas   -   Images by the Author As the...

Old Anvil Speed Shop Increases Our 1948 Chevy’s Voltage With XS Power

By Rob Fortier   -   Photography by Taylor Kempkes For as...

Josh Bentley’s Vini’s Hot Rods 1983 Chevy Squarebody C10 With a Roadster Shop SPEC Chassis

By Rob Fortier   -   Images by NotStock Photography Back in...

The GM Tailgate Tour is a Five-Day Road Trip for Trucks

By Tommy Lee Byrd   -   Images by the Author Road...