Daniel Hurtado of Bell Auto Upholstery installed his first headliner at age 15 with his father’s guidance; he’s lost track of how many he’s installed since.
Bell Auto Upholstery is remarkable for a variety of reasons; they not only handle projects from high-end show cars but also daily drivers with the same level of care and quality. Started by Manny Hurtado Sr. and his three brothers, Bell Auto Upholstery has been in business for over 60 years. Today, Daniel Hurtado and his brother Manny Hurtado Jr. carry on the family tradition.
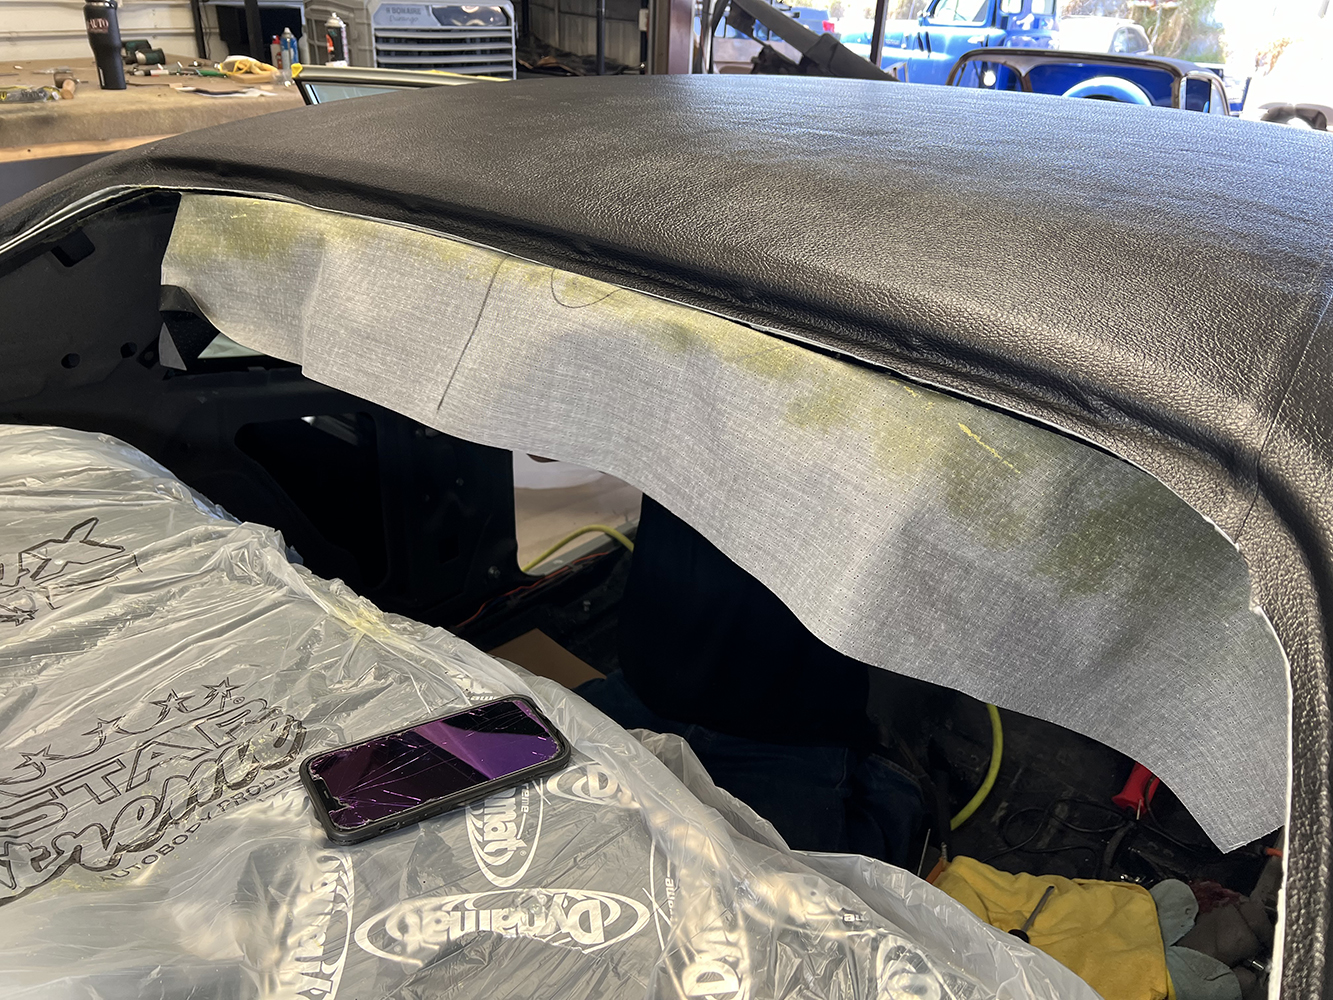
Although the Bell crew often installs custom headliners, this 1970 Nova used a factory-style vinyl replacement. It was set out in the sun to reduce wrinkles and make it more pliable.
Recently, our cub reporter, Brian Brennan, stopped by and found Daniel installing a headliner in a 1970 Chevy Nova. With his trusty box camera in hand, Brennan followed along, only occasionally getting in Daniel’s way.
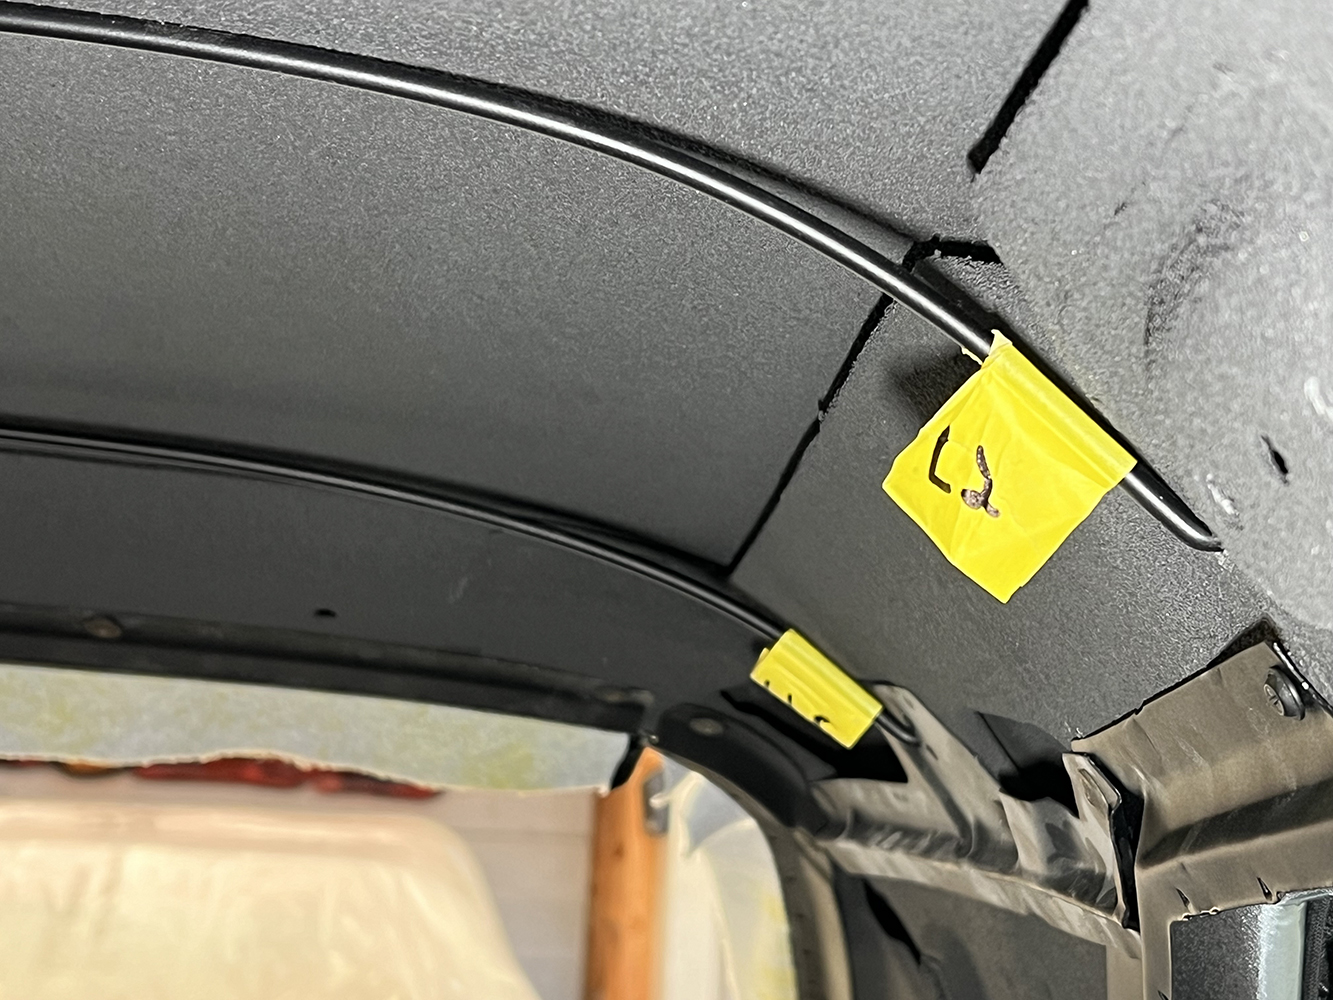
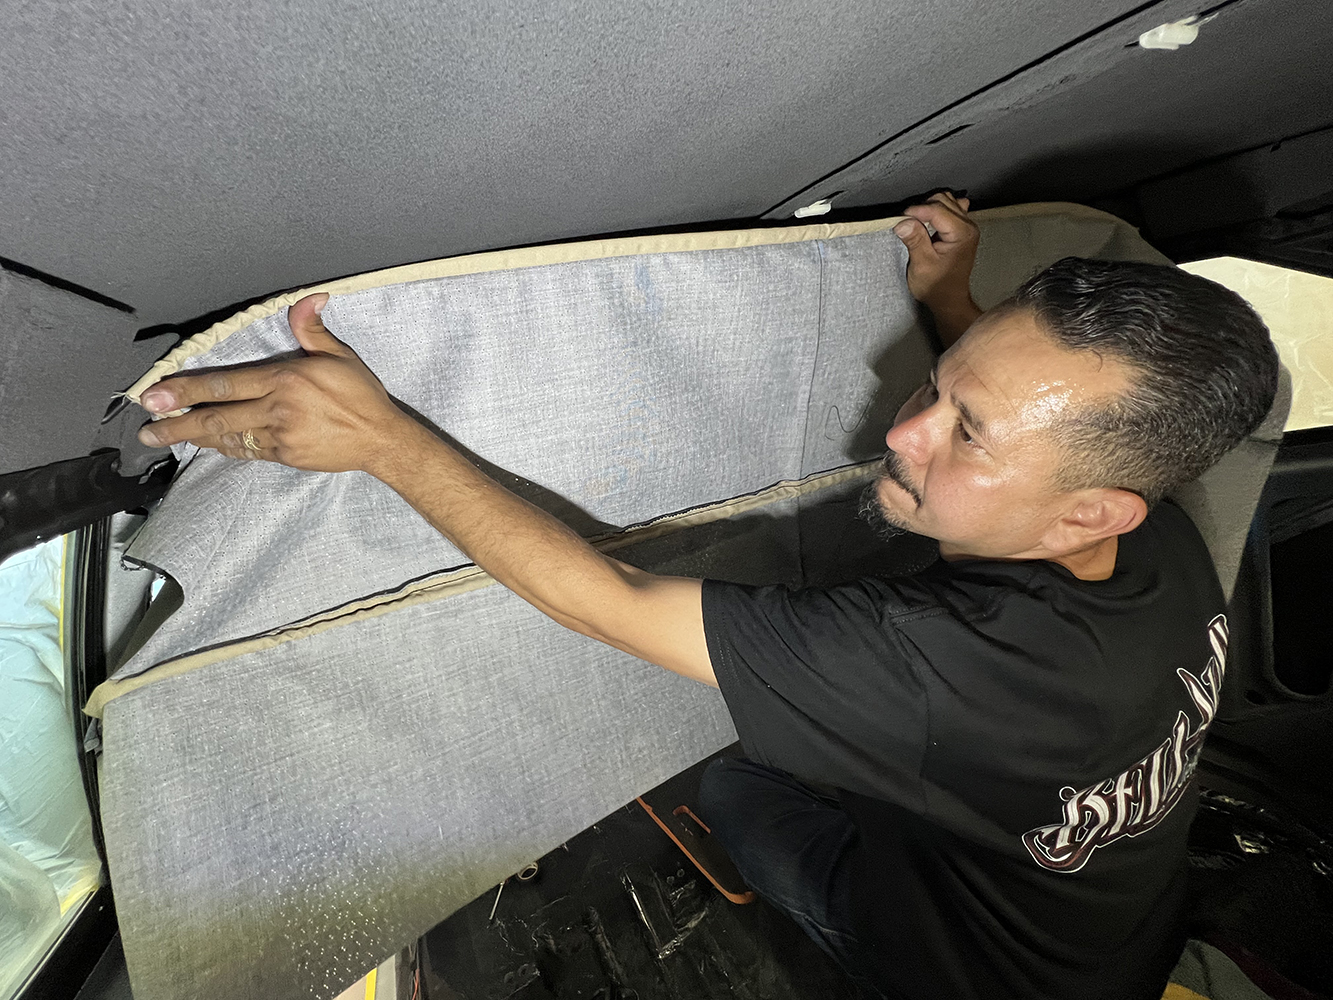
Typically, headliners are shaped by metal rods, or bows, that extend from one side of the passenger compartment to the other. Note the roof of this car had been sprayed with an acoustic/thermal insulator.
Typically, headliners are given their shape with metal bows inserted into channels sewn into the material with the edges secured with some sort of trim. In that regard, the Nova shown here isn’t unusual as it uses curved steel rods for bows and a combination of metal trim at the front and rear glass and plastic trim for a finished look and to secure the material. Of course, contact adhesive is also used to hold the headliner in place. A replacement vinyl headliner was installed for this application as it duplicated the pattern found in the original material.
Stitched into the headliner material are sleeves, called listing, that the headliner bows slip into.
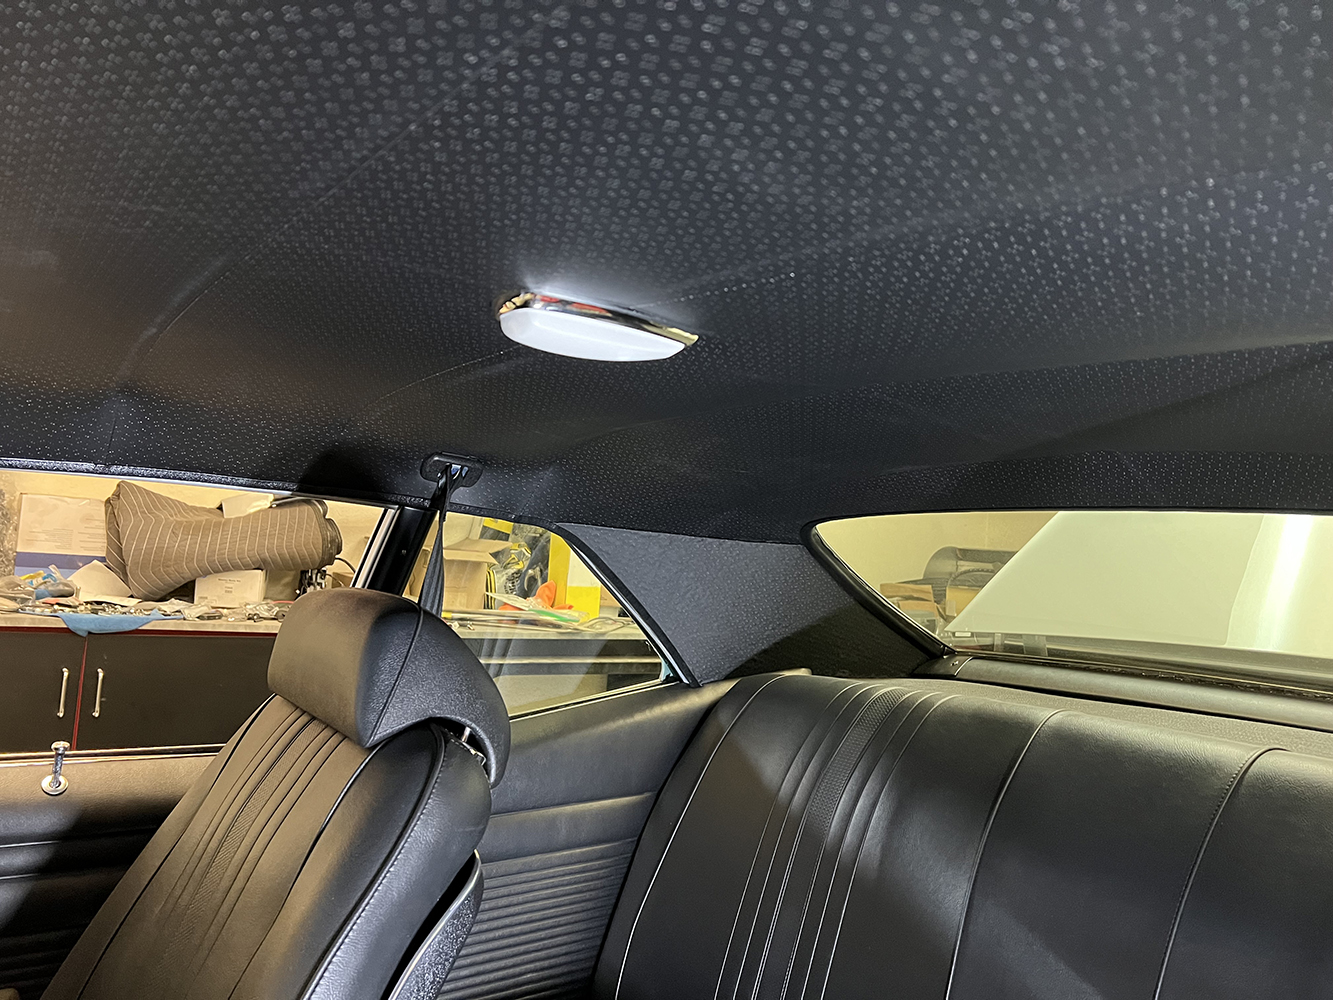
To the casual observer, installing a headliner may look like someone trying to erect a tent from the inside, but with Daniel’s experience, the steps involved look easy and make sense. The end result was a smooth, wrinkle-free installation—this is interior decorating at its best.
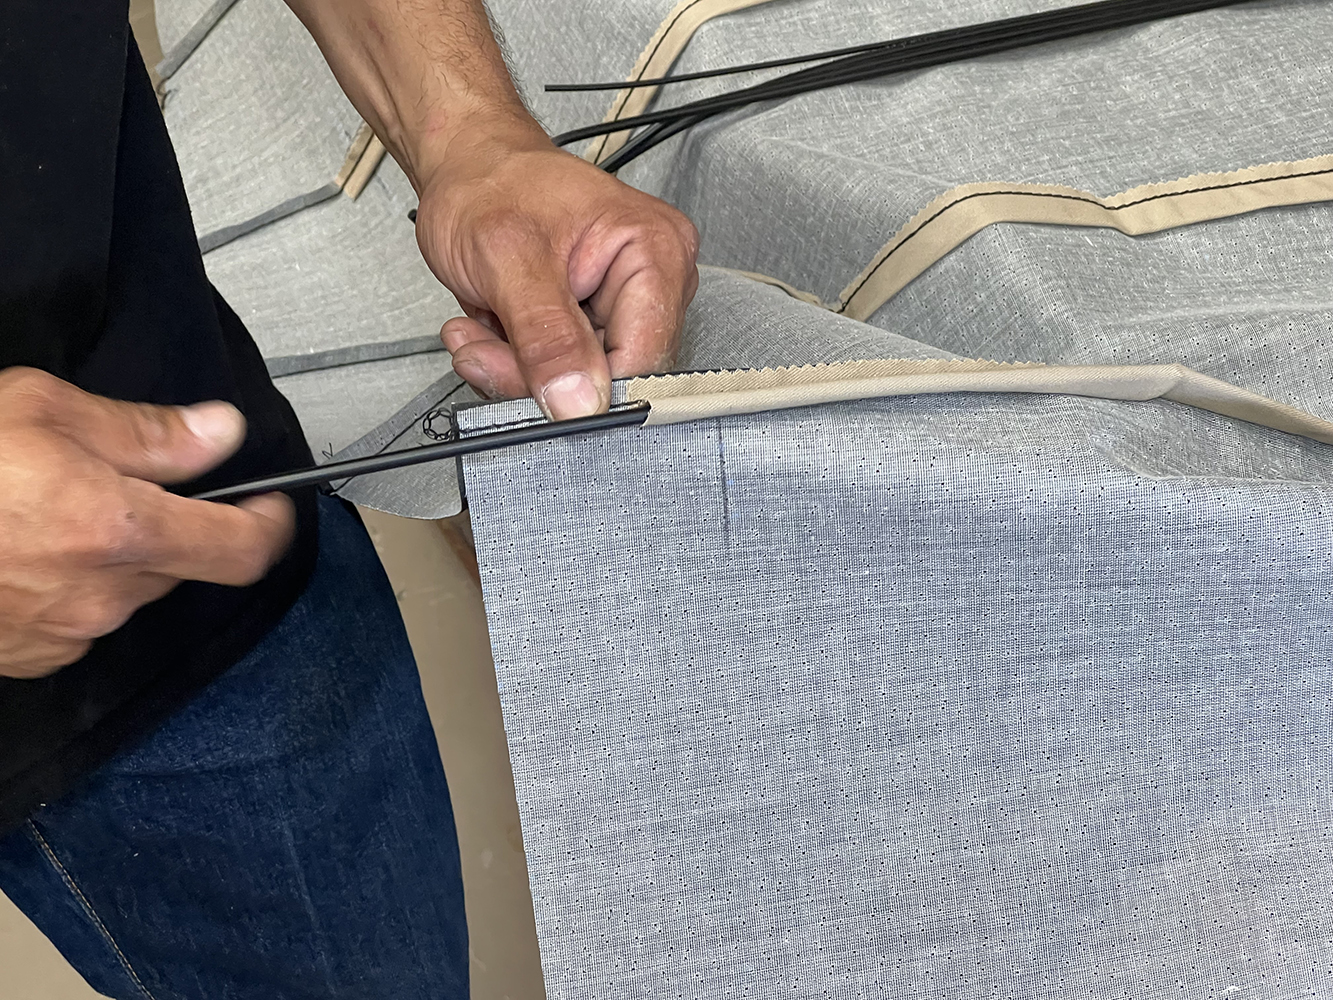
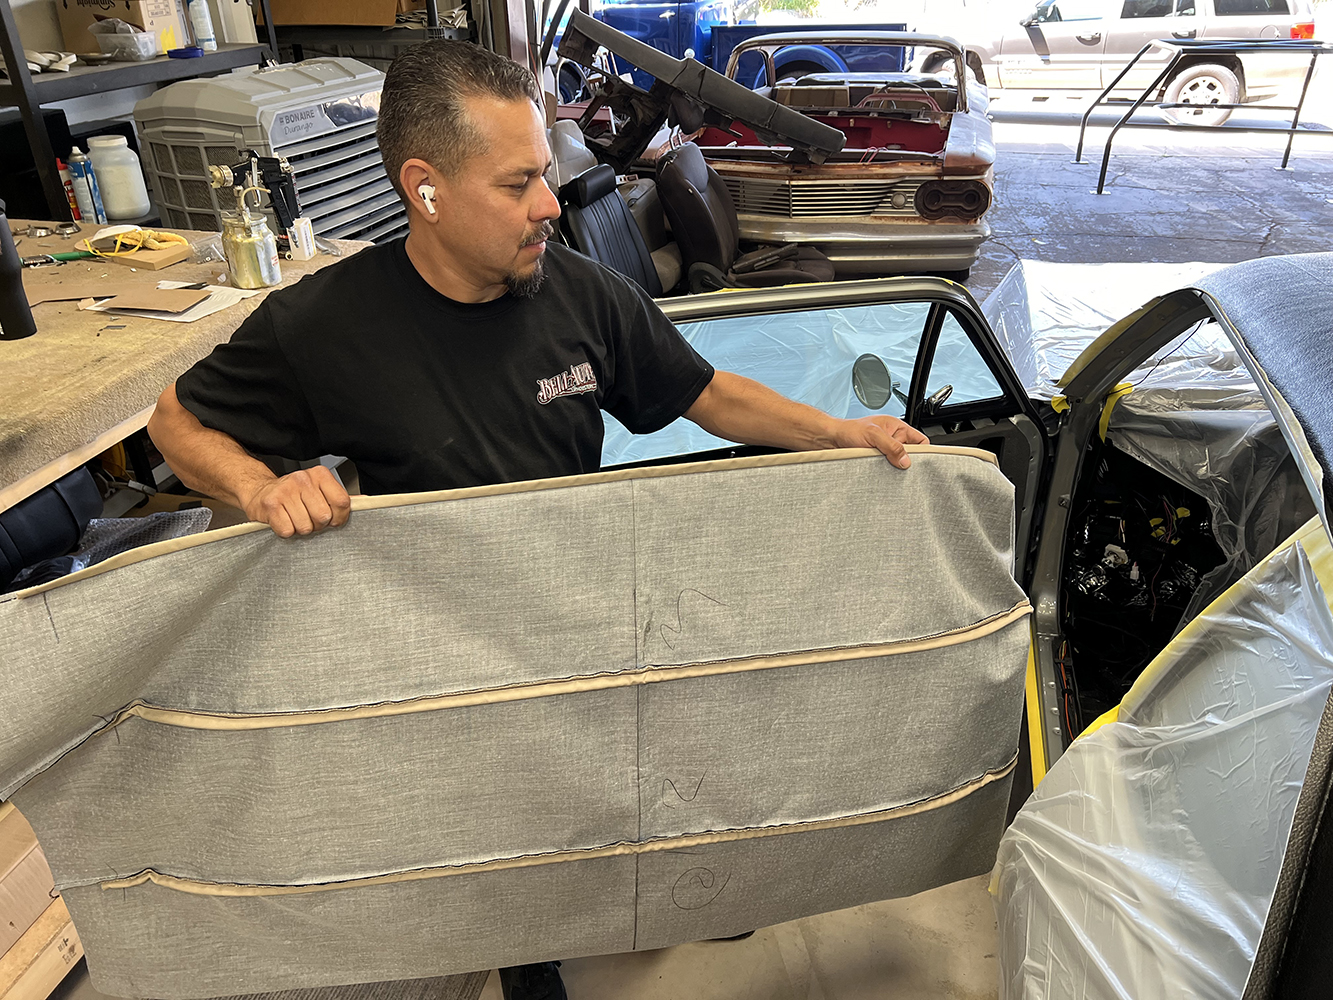
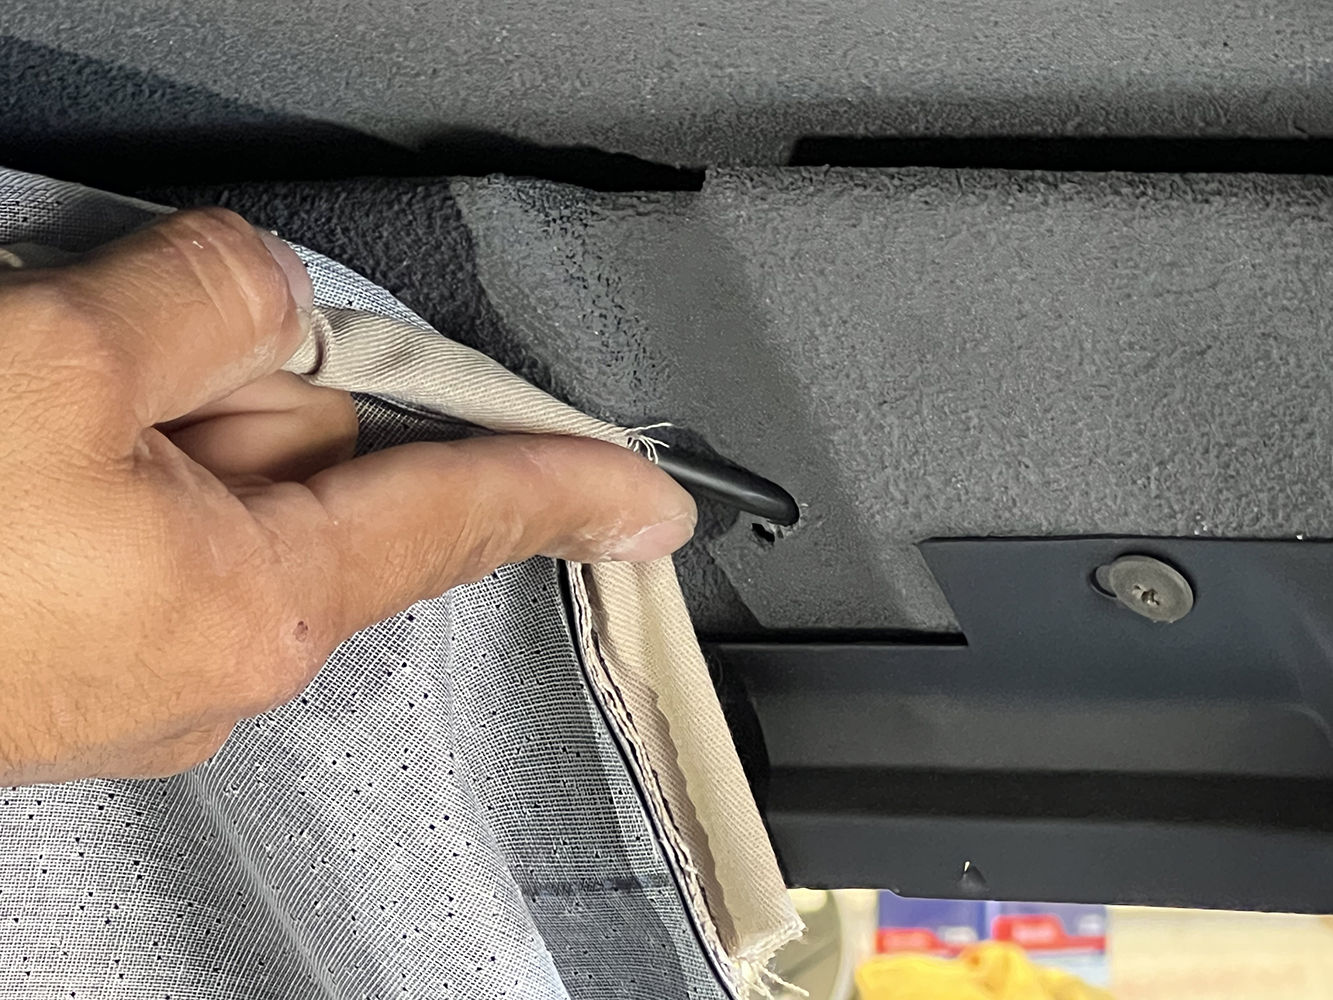
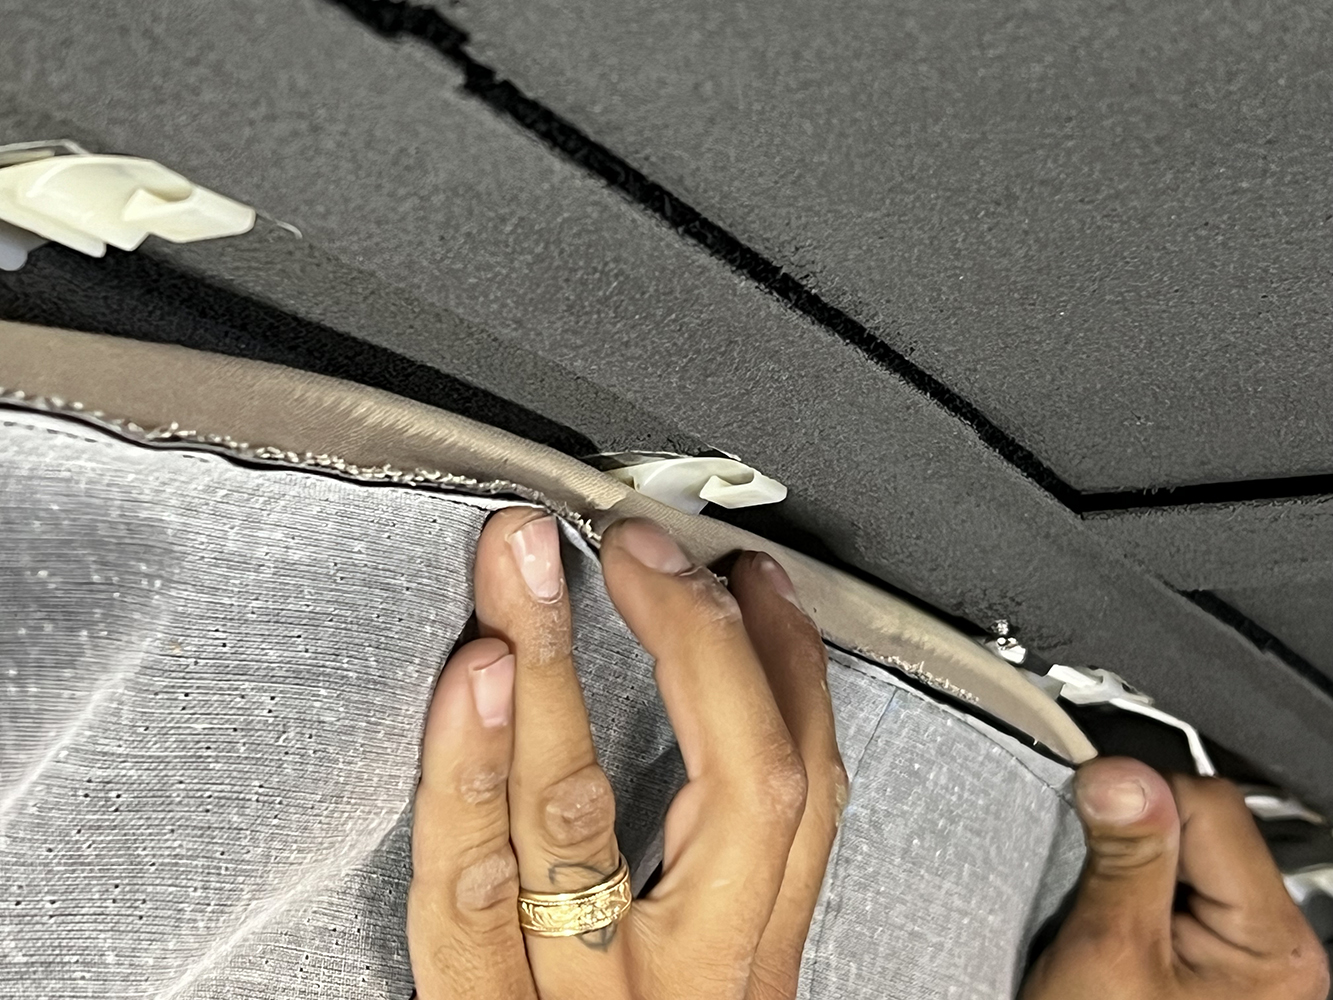
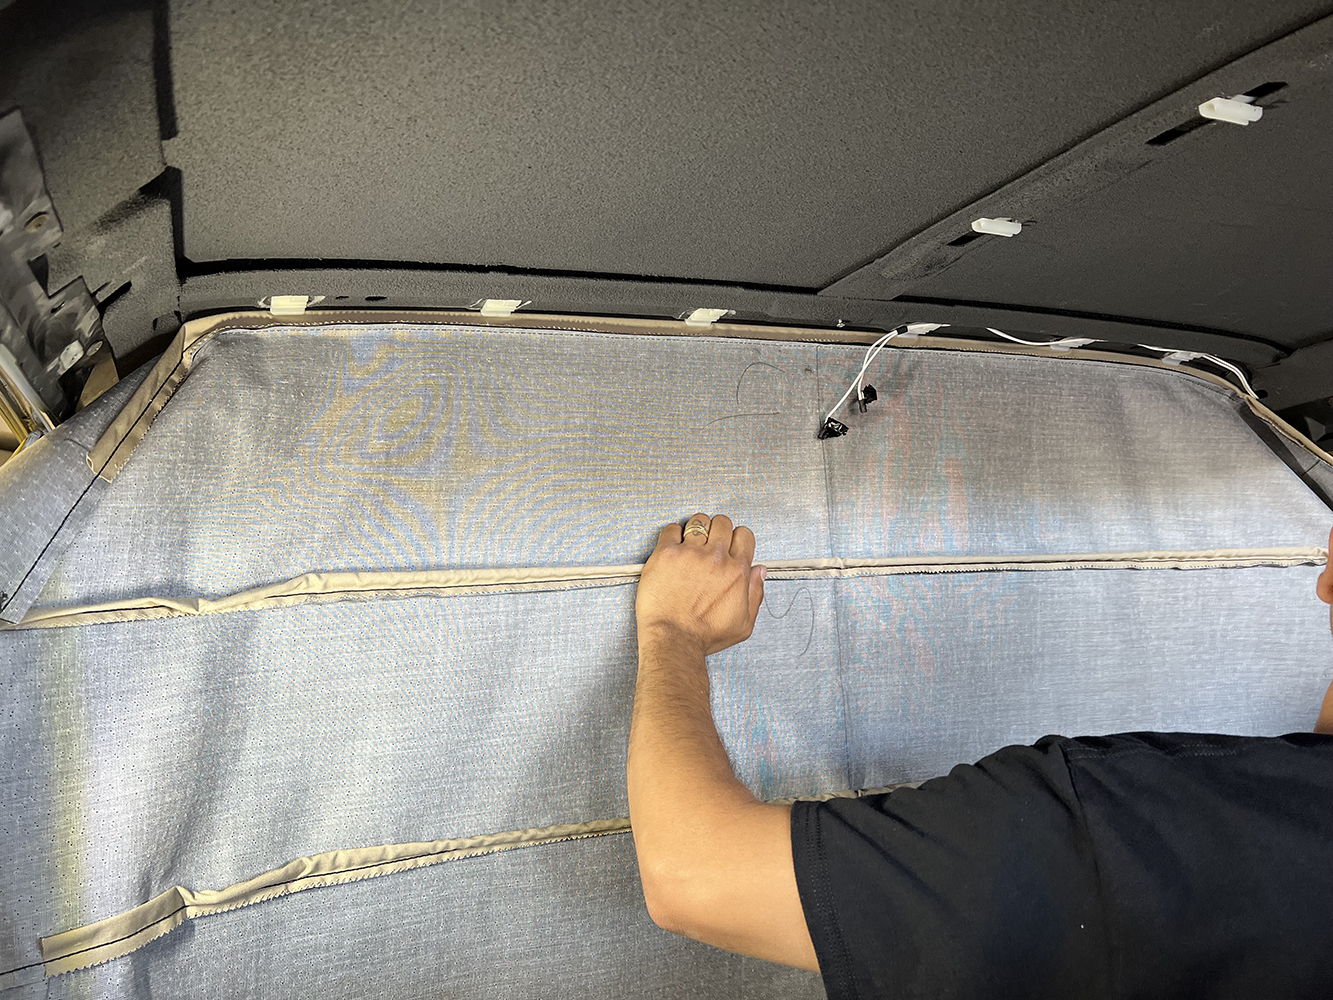
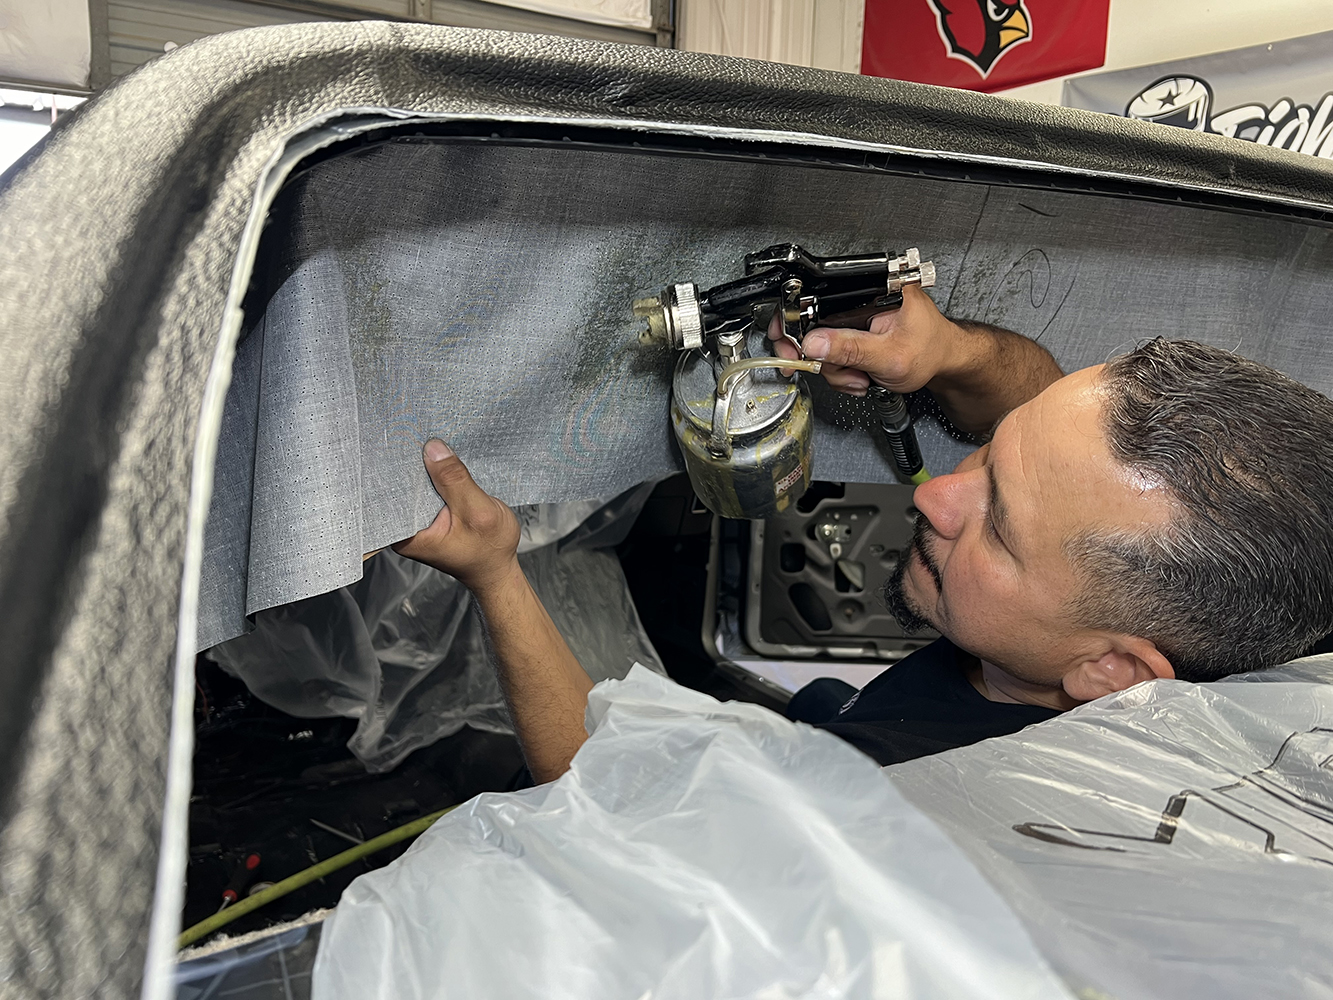
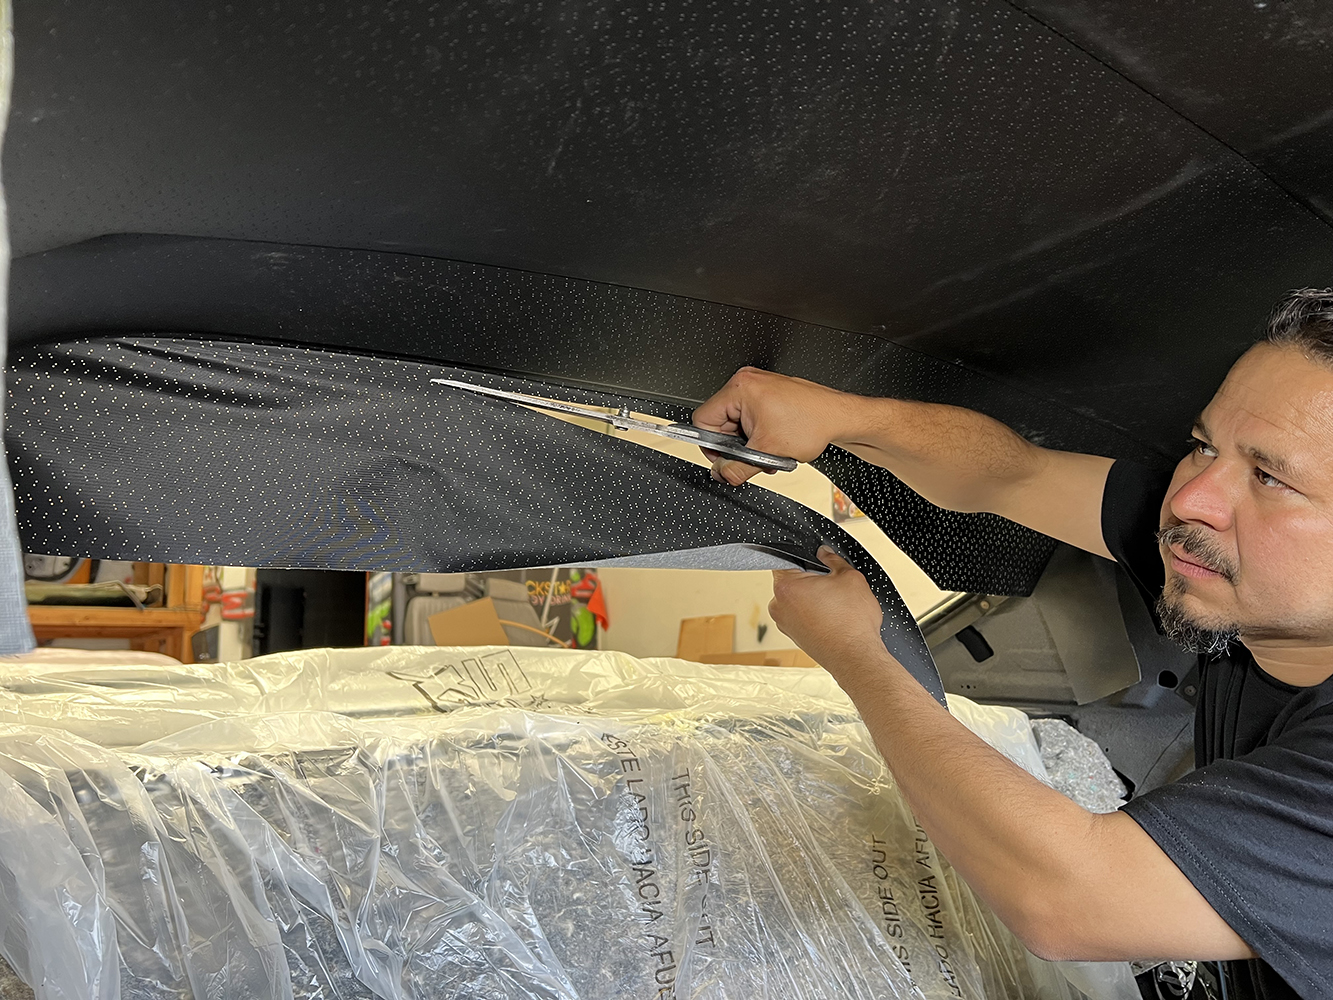
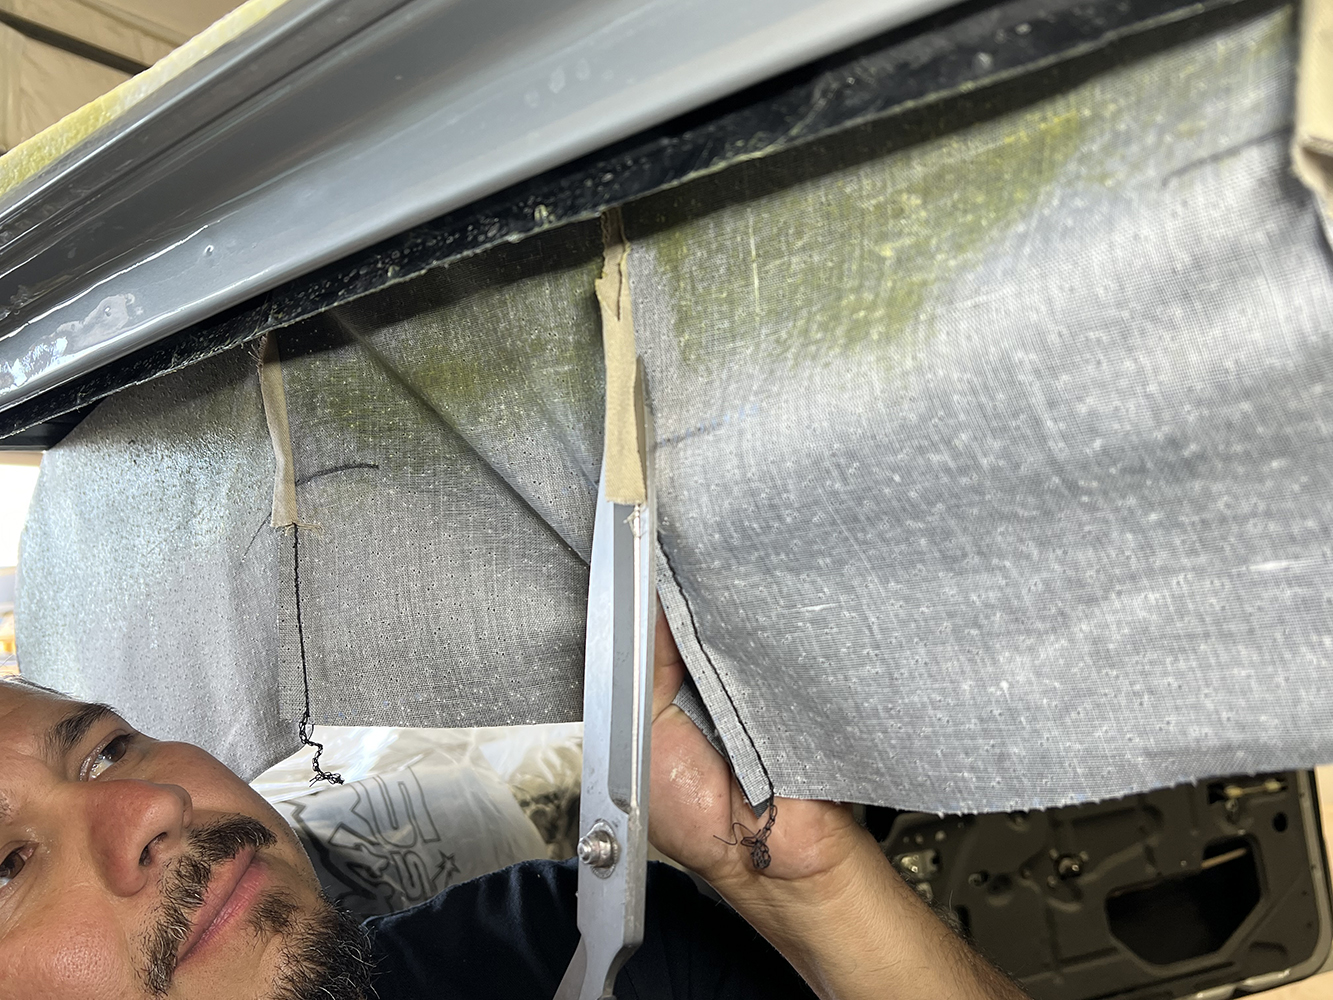
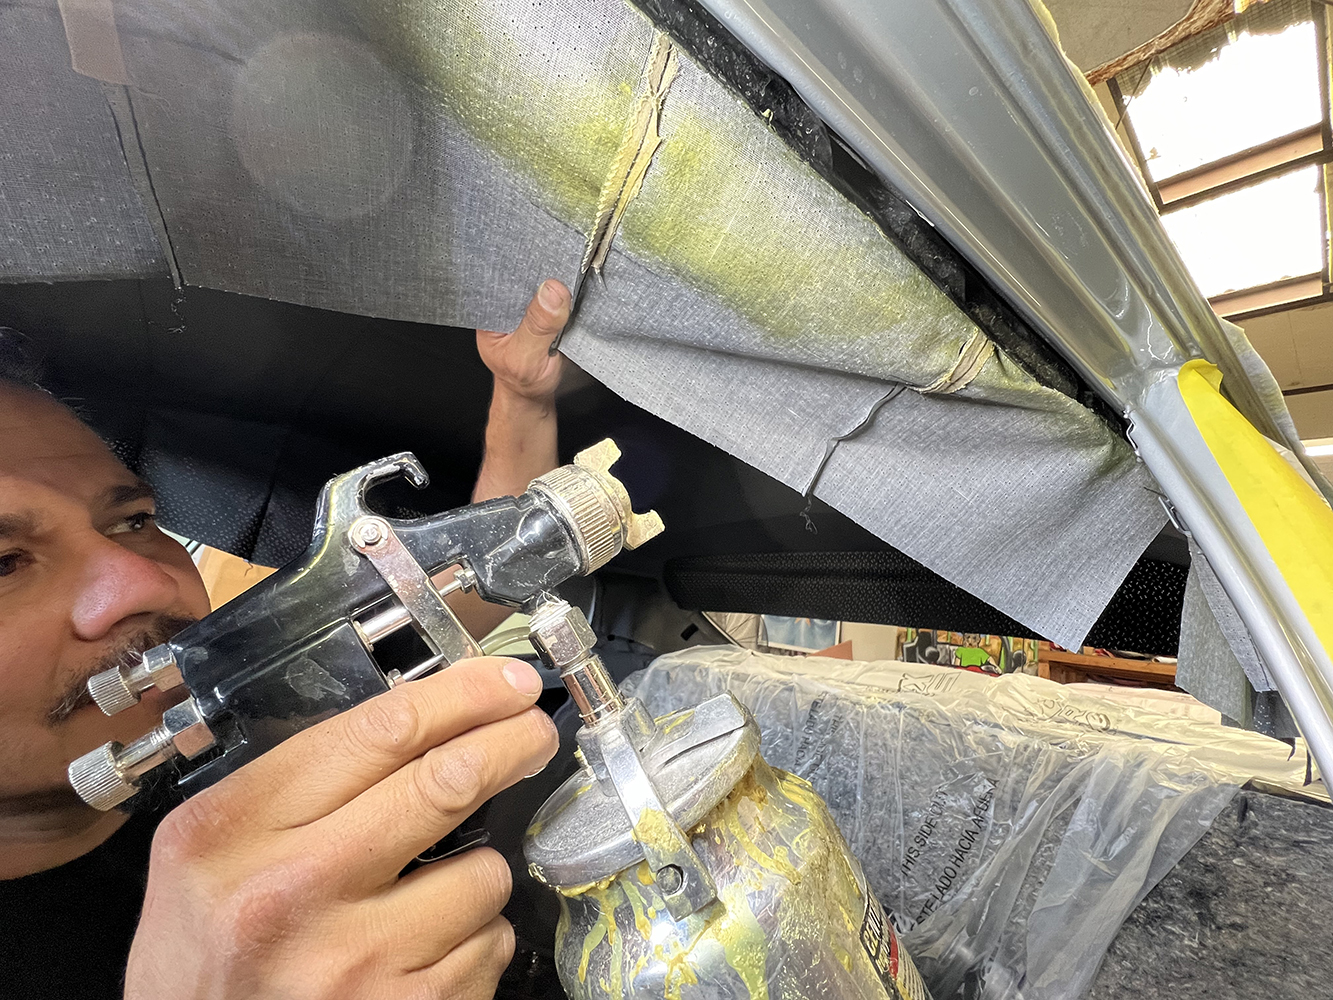
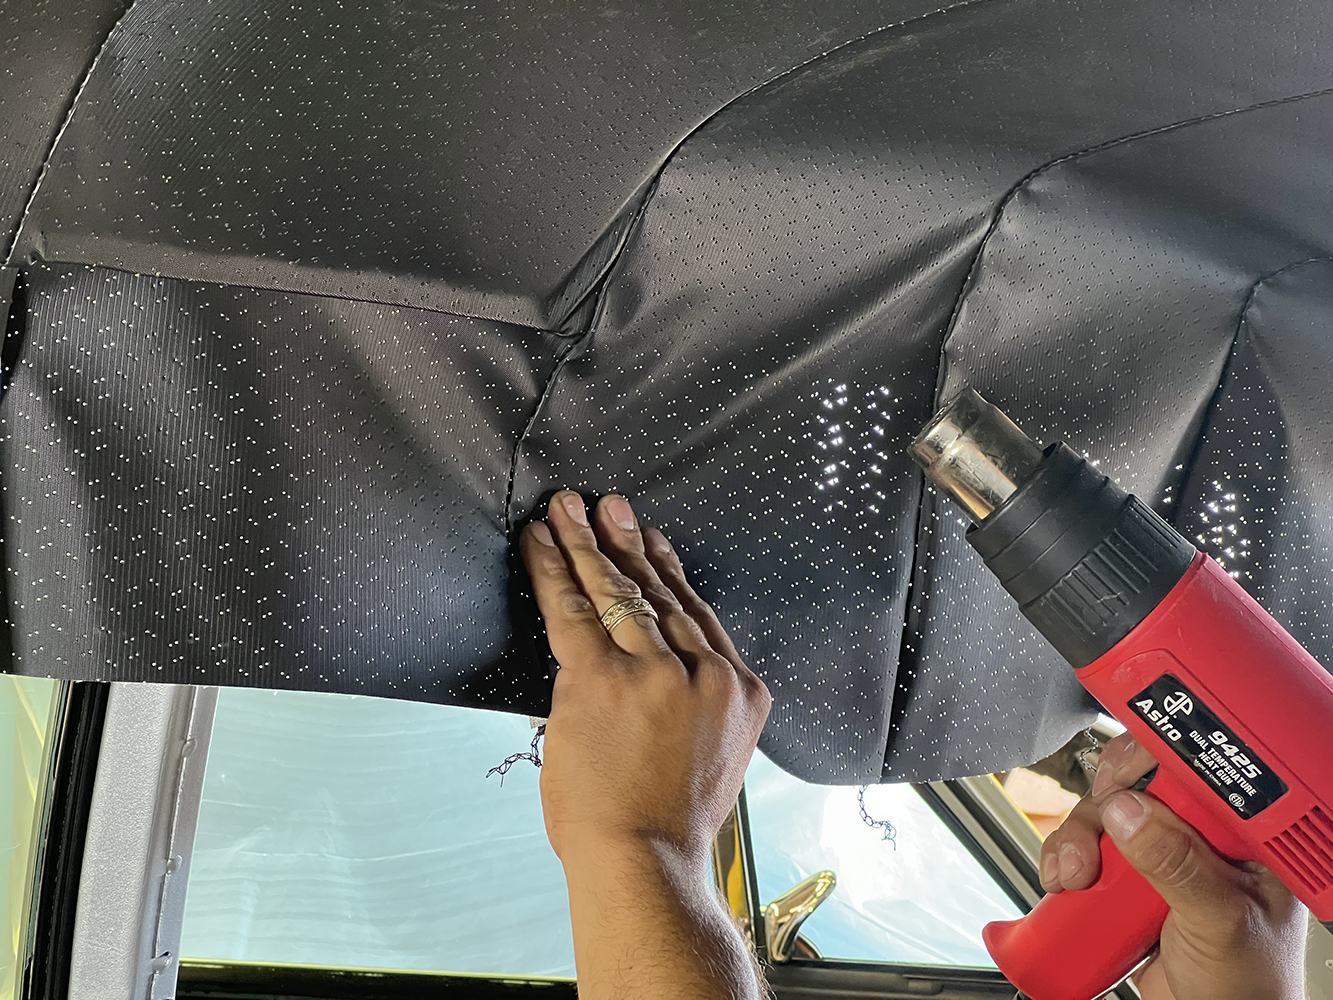
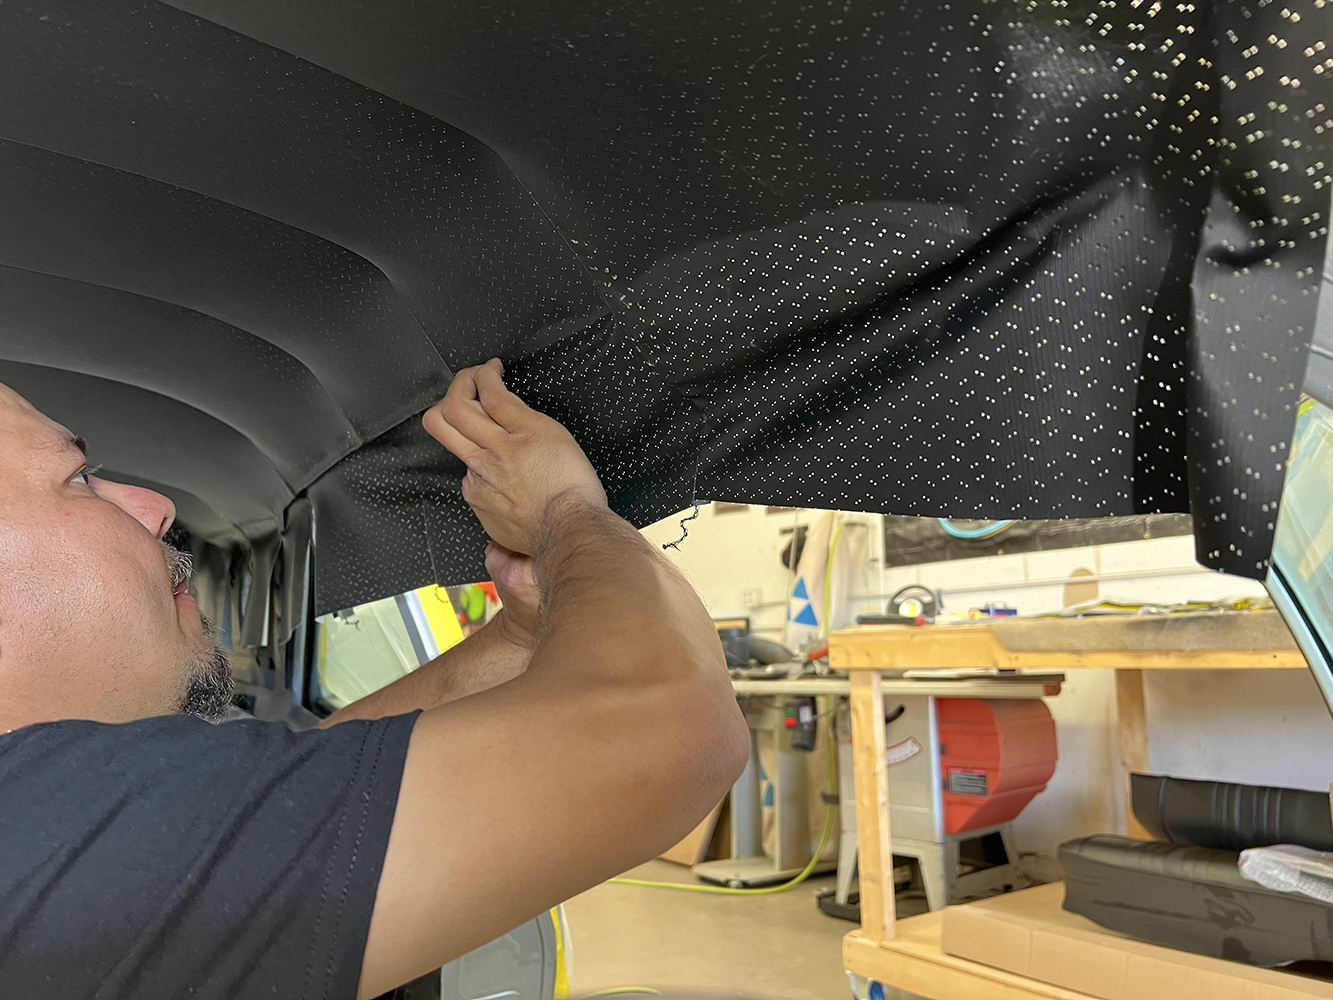
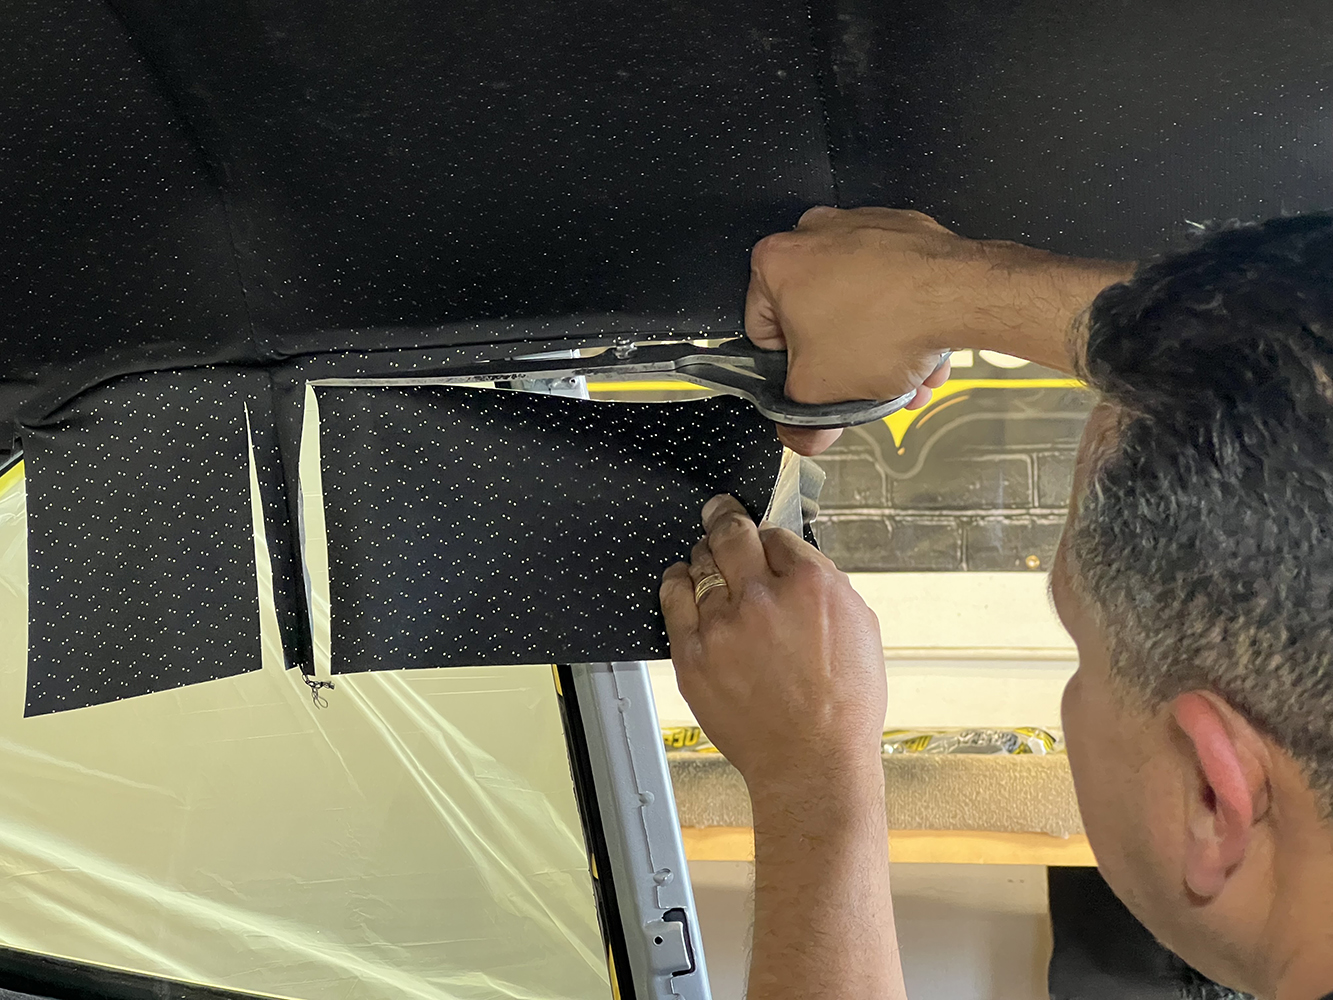
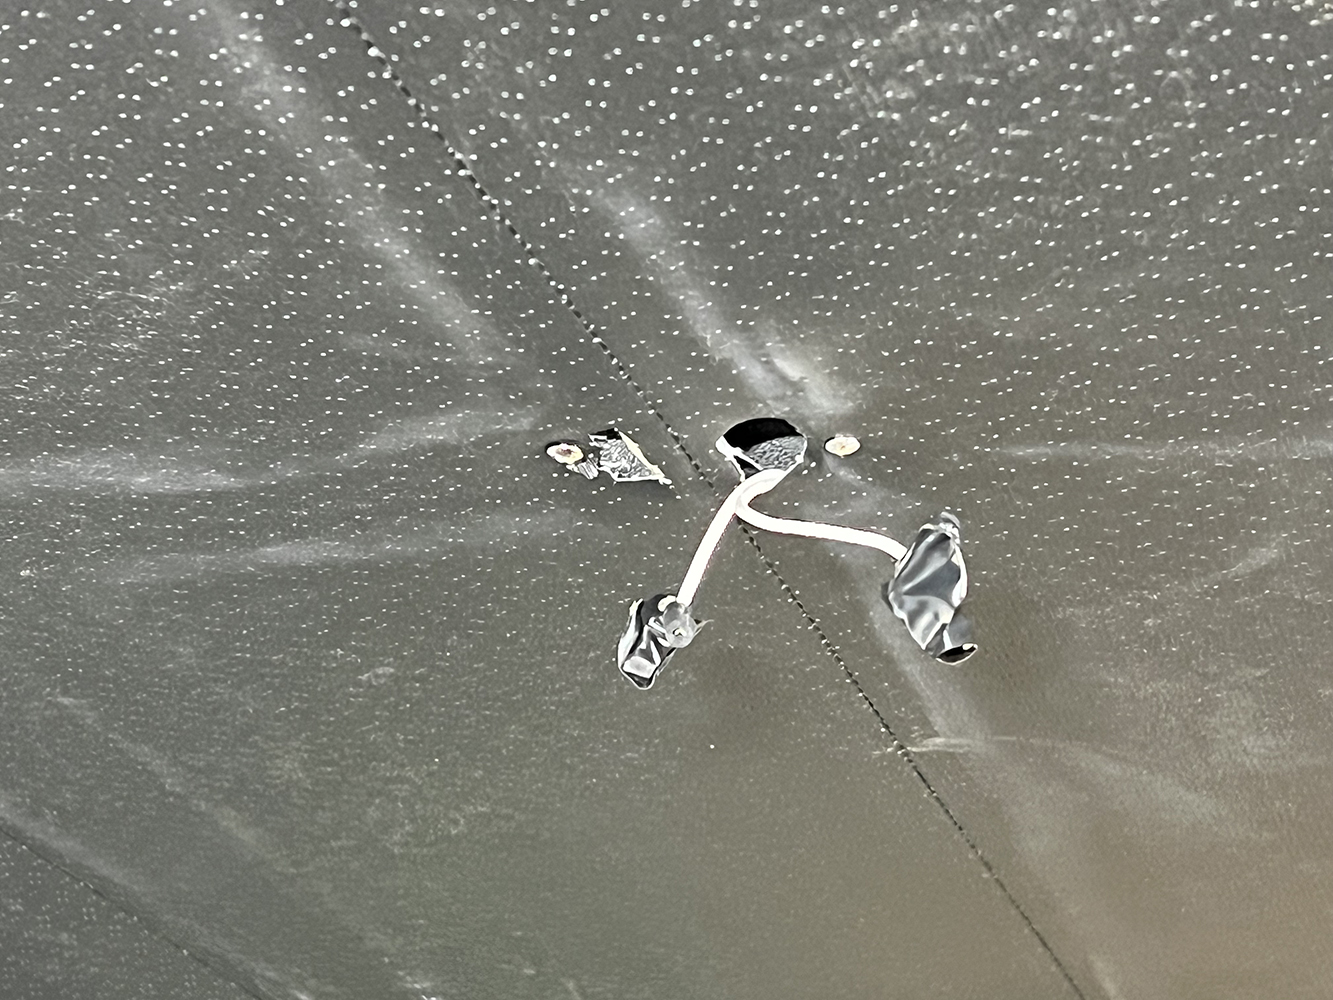
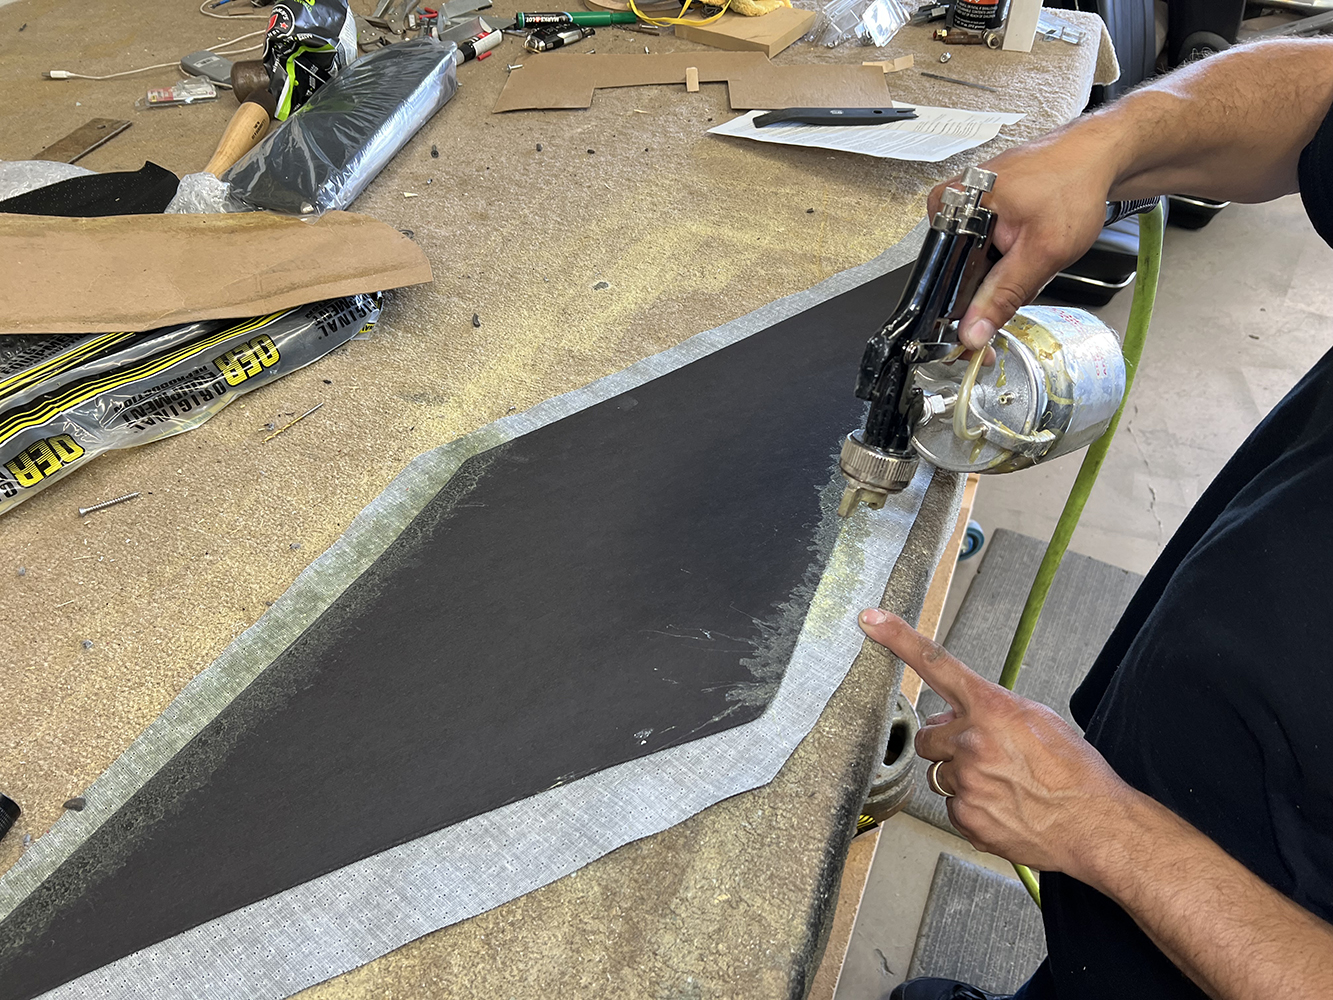
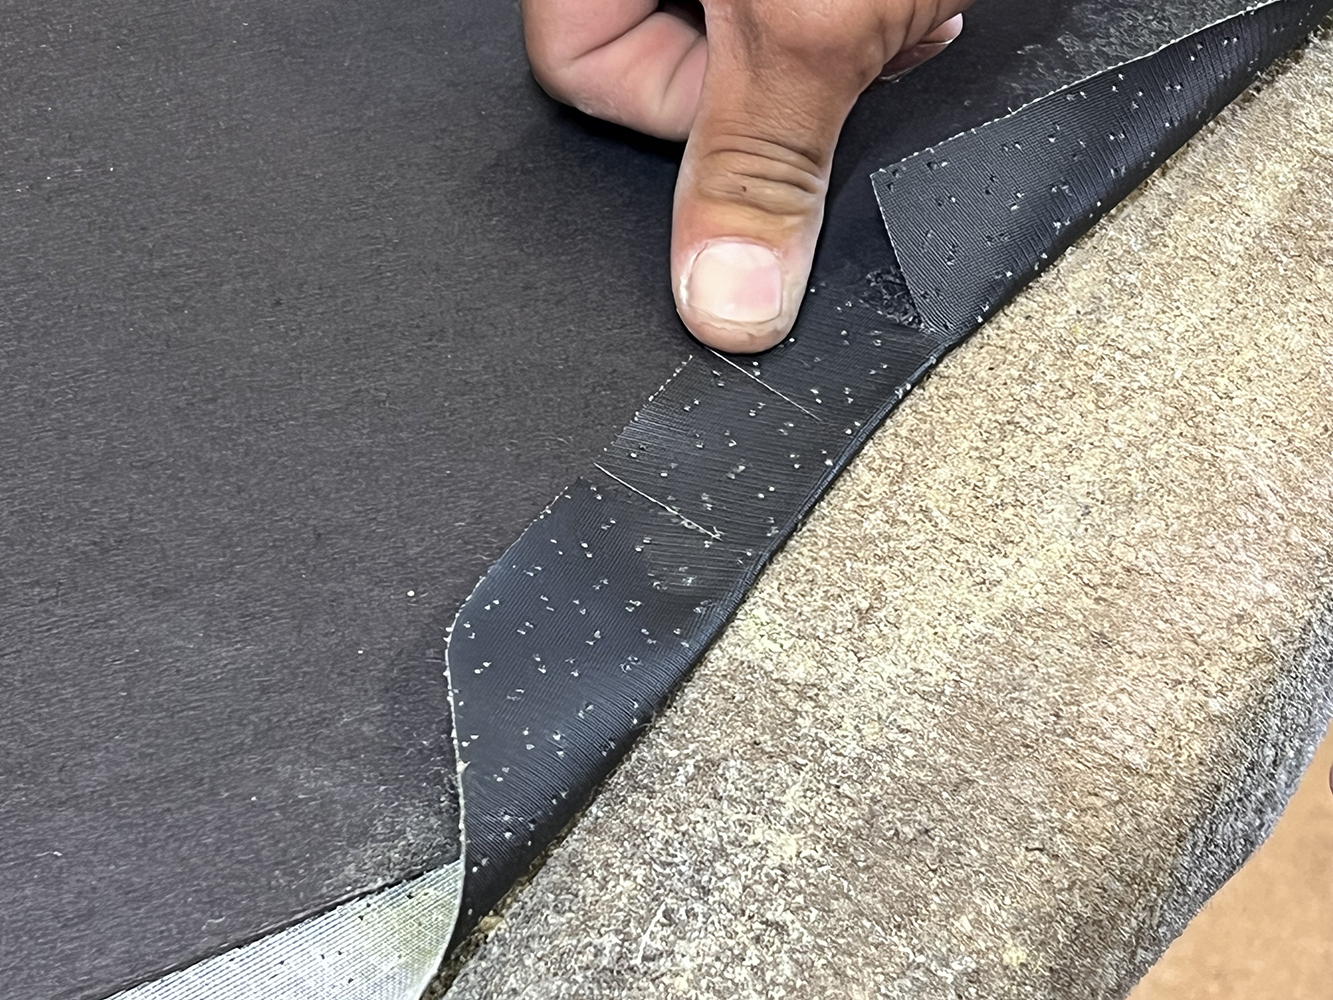
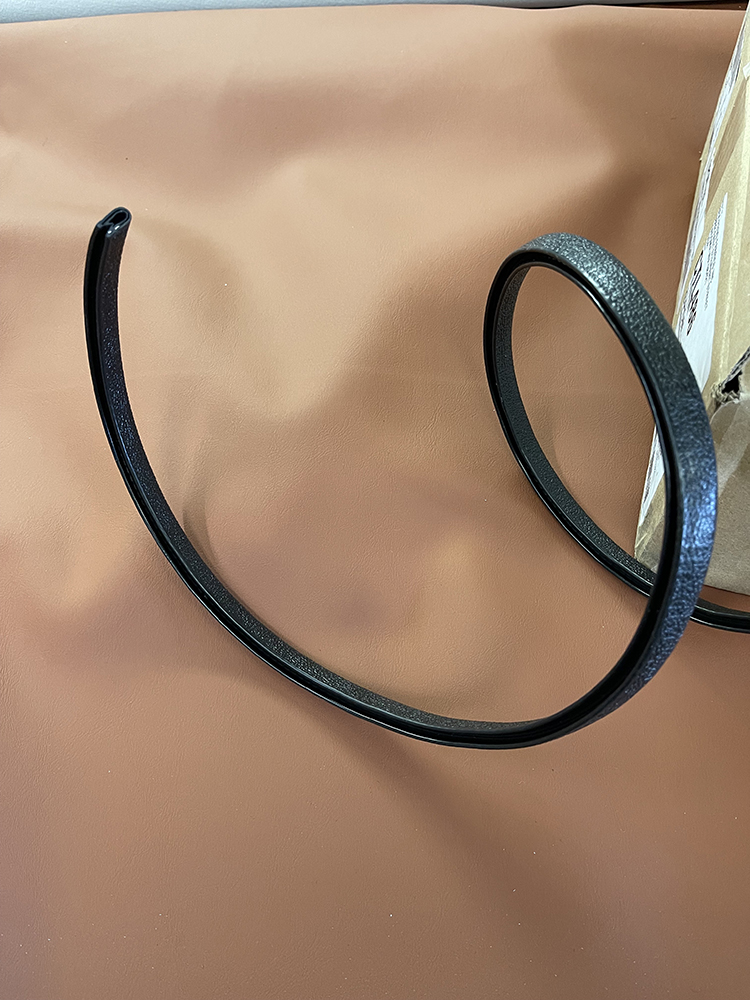
Here, all the bows are in place, and the curve at the ends of the bows follows the contour of the roof. Look closely and you’ll see a line indicating the center of the headliner.Each headliner bow fits into a factory hole in the roof. It’s not unusual for the listing (and the headliner) to be wider than necessary, and that’s why the bow sticks out of the sleeve.Daniel starts the headliner installation with the center bow; with the headliner centered on the support in the roof, the bow is hooked to the body on both ends.To support the headliner, there are factory clips in the roof the bows snap into; each bow has a specific location.Here, the center bow has been completely installed. The wires for the dome light also clip into place.With the remaining bows in place, Daniel tacks the front of the headliner in place with adhesive, then stretches the vinyl to the rear and tacks it in place.The trick of installing a headliner is getting it tight after pulling the vinyl tight to remove wrinkles.The excess material is cut off with the headliner pulled tight to the rear.With the front and rear of the headliner secured, Daniel turns his attention to the sides. First, he trims away the excess listing for the bows to prevent wrinkles.Once again, adhesive is applied and the headliner is pulled to one side.To make the material more pliable while pulling out any wrinkles, heat is carefully applied.The sides of the headliner are wrapped around the edge of the body to determine how much material must be removed.Once the vinyl is pulled tight and wrinkle-free, the excess material is cut off.After trimming the edges of the headliner are carefully wrapped around the edges of the top; the adhesive will hold them in place.With the headliner properly located and secured, the holes for the dome light wires and screws are carefully located—this means no time to make a mistake.The replacement sail panels (they fit between the rear and quarter windows) were covered with the same material used for the headliner—it is glued in place.Relief cuts were made in the vinyl so it would wrap smoothly around the edges of the hardboard panel.This readily available U-shaped trim is used on both sides of the headliner to give the edges a finished appearance.The trim’s design allows it to push into place easily and follow curves, but it grips the material to stay in place.The finished headliner, with the sail panel and trim in place, is smooth—and wrinkle-free—a testament to Daniel’s skill.
We use cookies to ensure that we give you the best experience on our website. If you continue to use this site we will assume that you are happy with it.