How To Replace a Ford Model A Rear Quarter Panel

Raising the Bar, Reshaping the Wheel Wells on a Model A

By Ron Covell – Photography By E.J. Talik

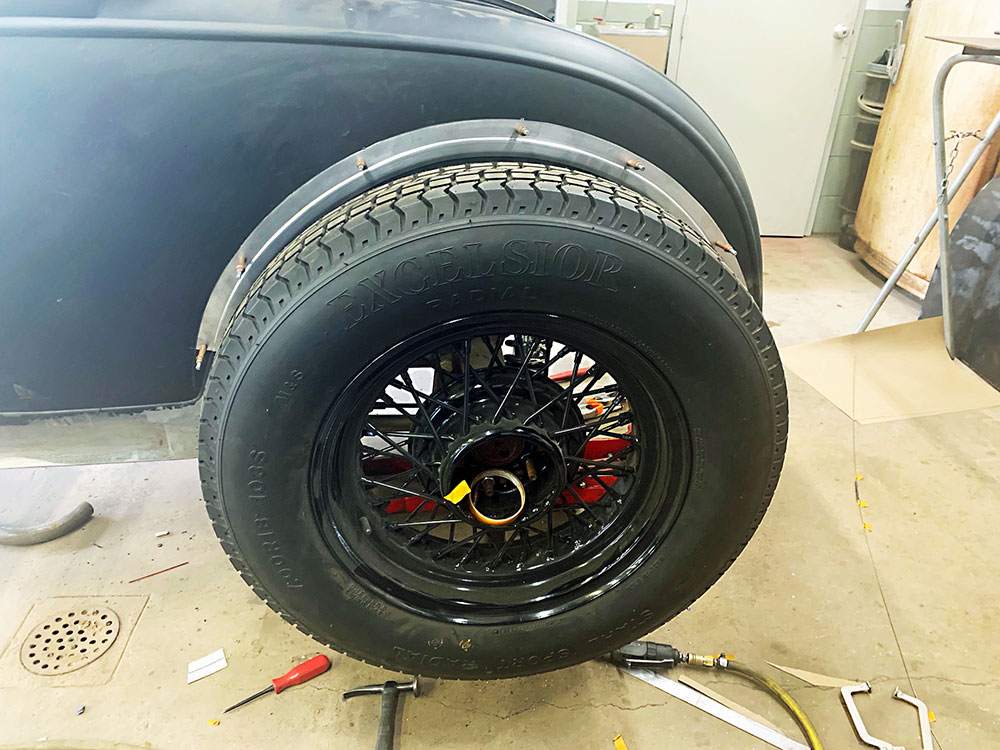
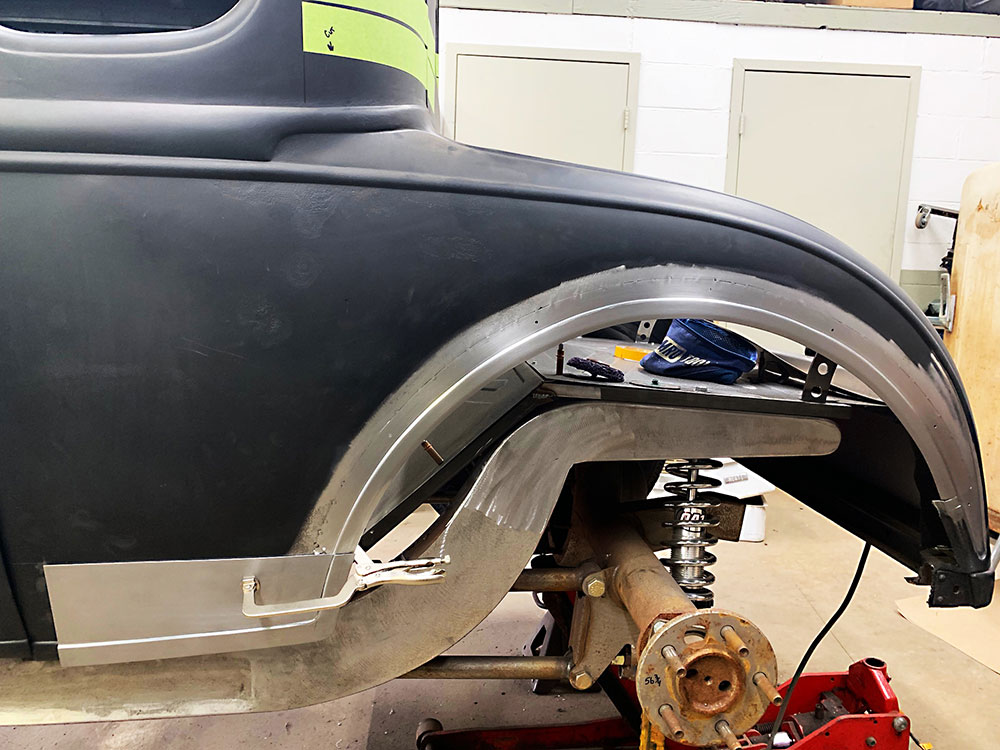
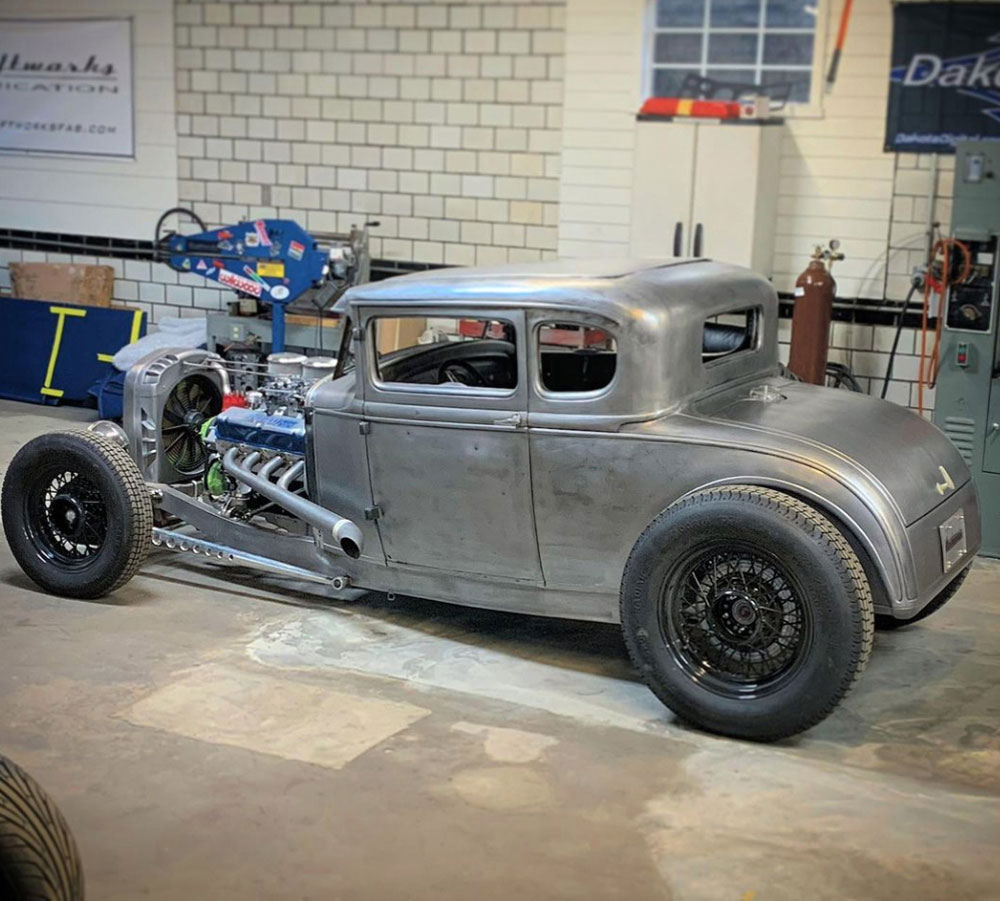
When building a hot rod, selecting the right wheels and tires and achieving the proper stance are crucial. Most often these cars are lowered considerably over stock, and larger-than-stock tires are usually fitted. This often leads to a mismatch between the tire and the fender recess in the body. Many builders simply live with this, but a few take on the considerable task of reshaping the fender recess.

- Advertisement -
02 With the final ride height established and the correct wheels and tires fitted, masking tape is used
With the final ride height established and the correct wheels and tires fitted, masking tape is used to lay out a line consistent with the curvature of the tire.

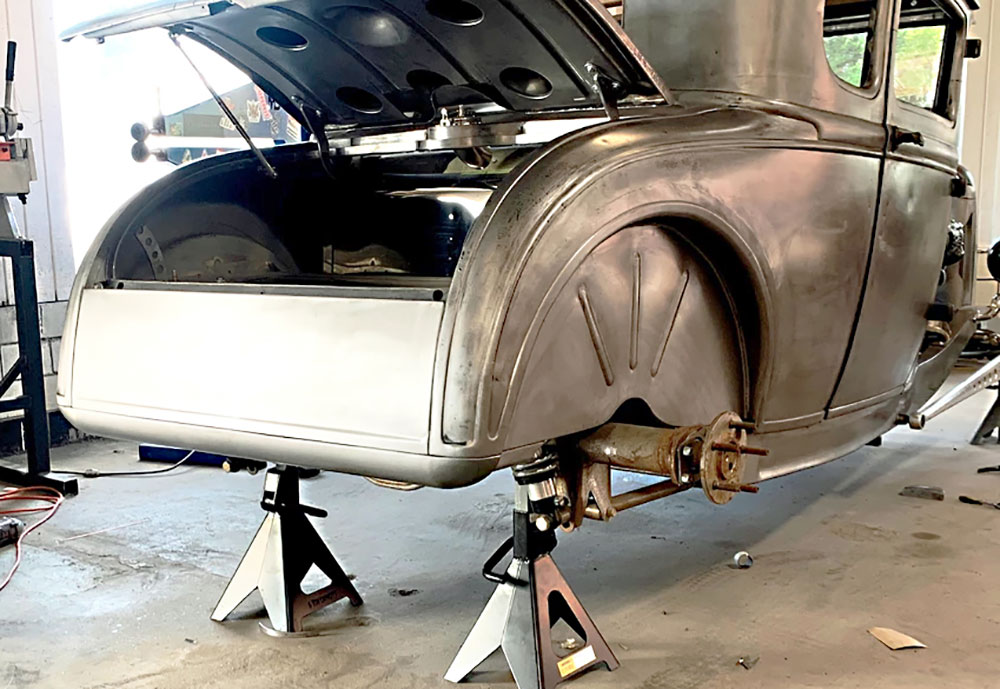
When Craftworks Fabrication took on Natalie Bolea’s Model A coupe (Modern Rodding, Mar. ’22) project, they agreed that this would be a no-holds-barred effort. One of the earliest tasks was to establish the ride height, then do whatever it took to get the rear fender recess to match the curvature of the tire.

03 A beading machine is used to shape the new reveal and Clecos are used to hold the panel in place
Using the tape layout as a guide, new metal is cut to the desired contour. A beading machine is used to shape the new reveal and Clecos are used to hold the panel in place.

Read More: How To Update The Front Suspension On Your Ford Model A

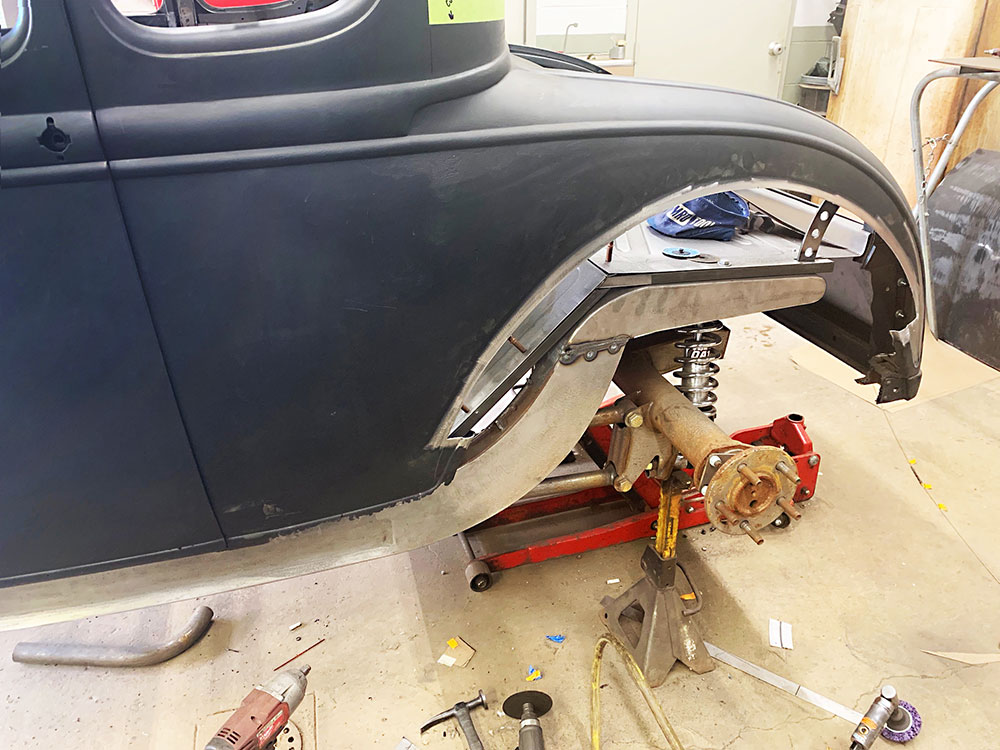
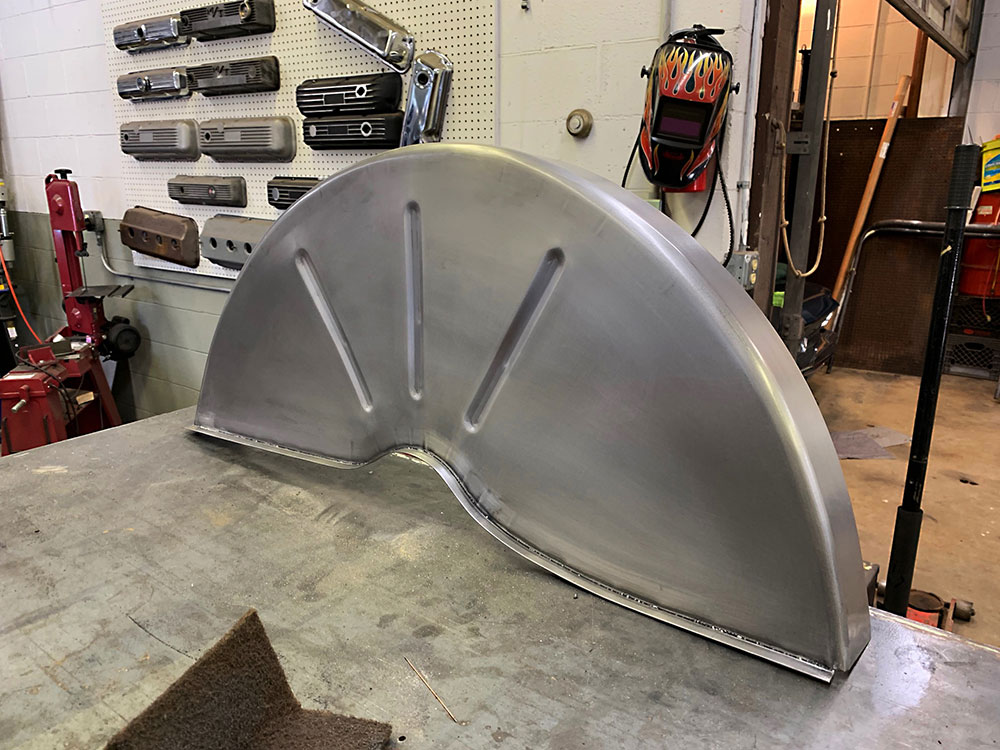
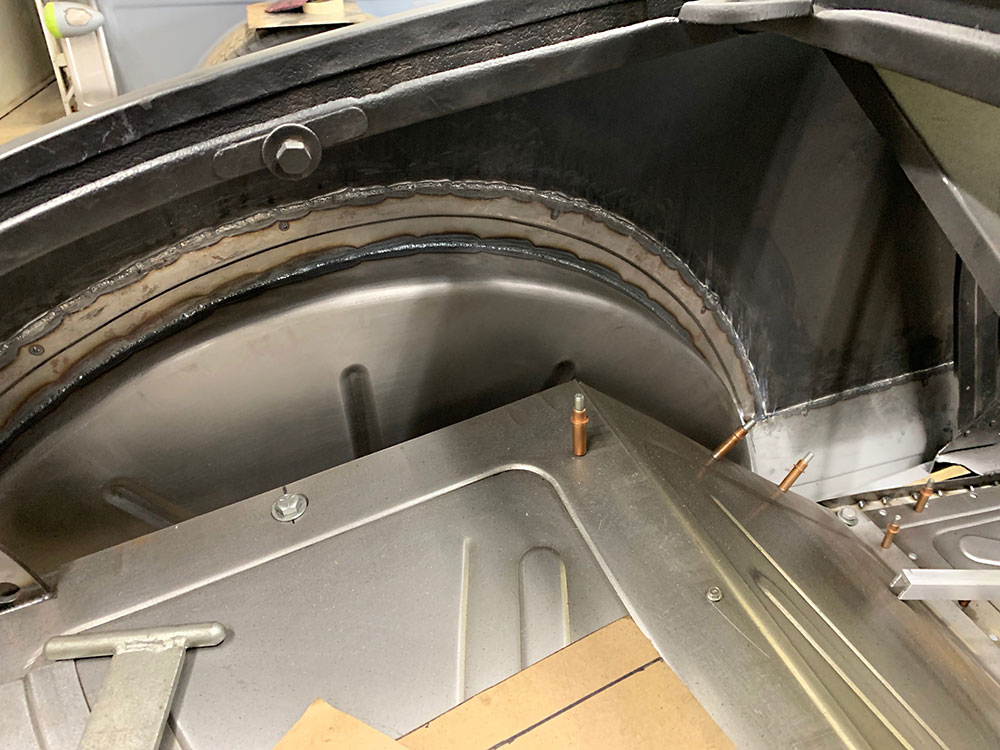
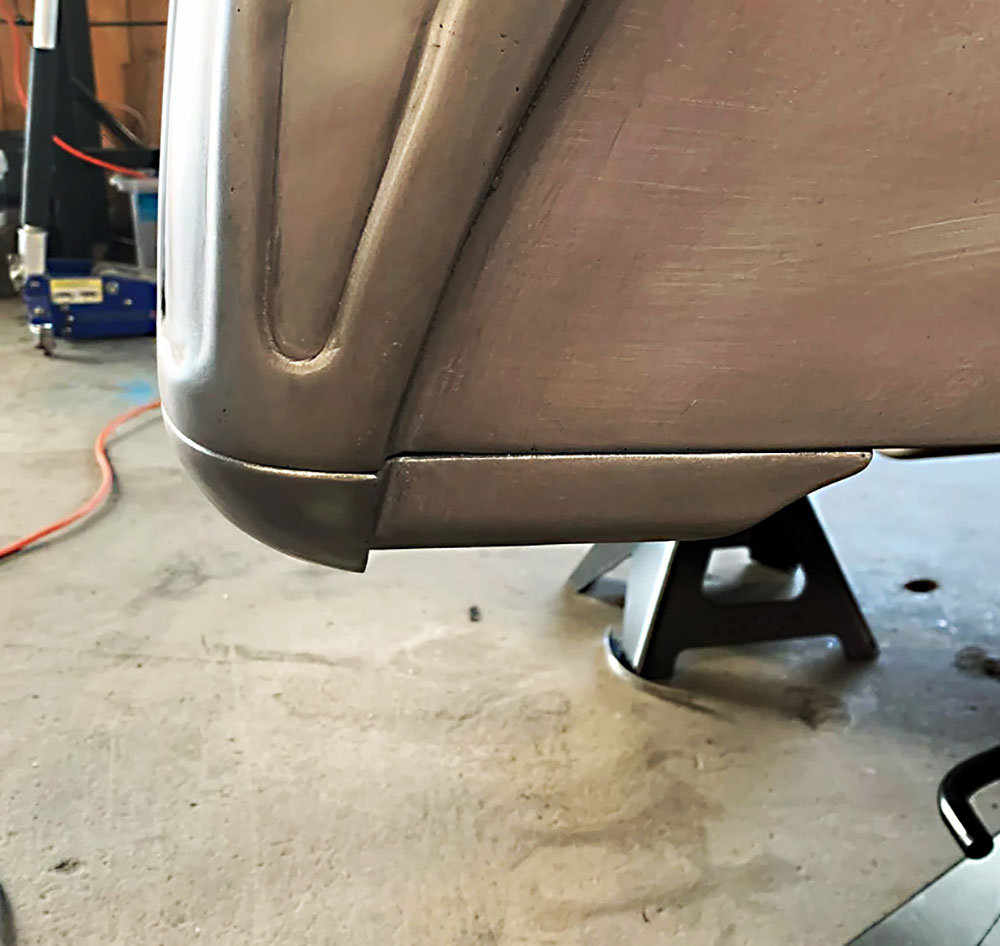
As it turns out, it took a lot. The desired location of the reveal was laid out with tape, then new metal was shaped on a bead roller to match the contour. The old reveal was cut out and the new metal was fitted in place. Of course, the recessed area below the reveal had to be made from scratch, and there was rust damage in the quarter-panels that required repair, too.

- Advertisement -
04 It’s crucial that the new panel look good from all angles
It’s crucial that the new panel look good from all angles, so it’s important to inspect the placement from all viewpoints before the panel location is finalized.

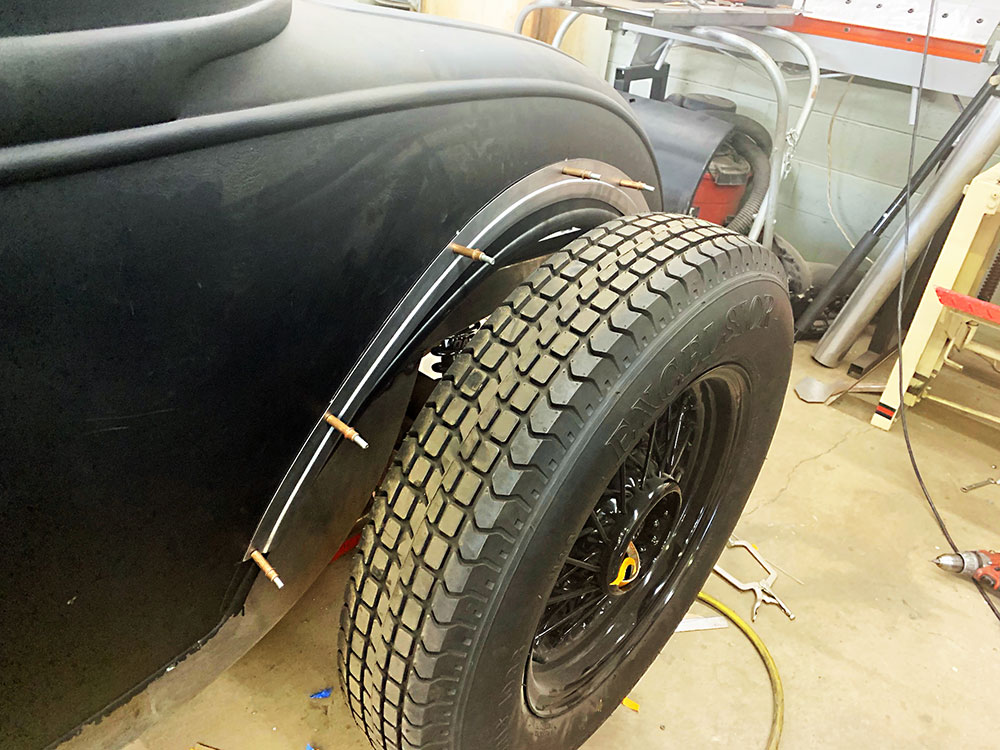
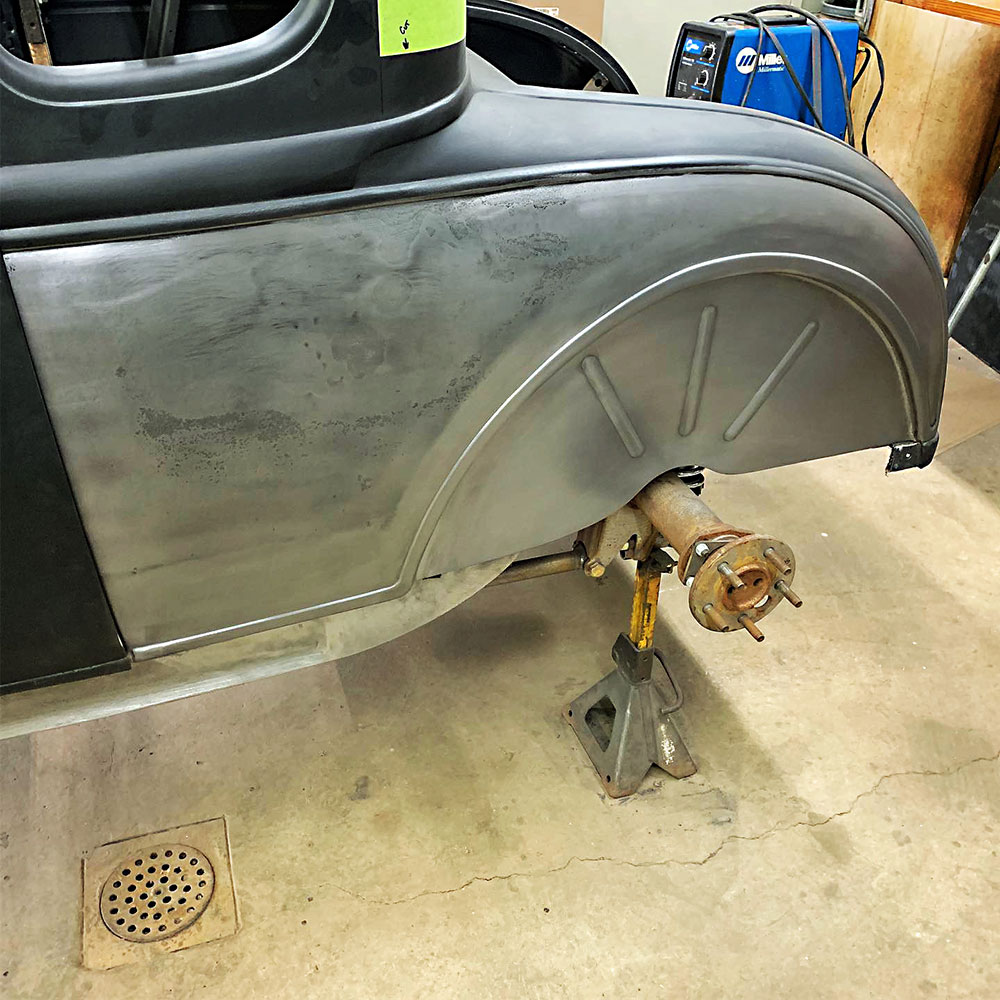
In the end, nearly half of the quarter-panel was remade in new metal, and the bottom edge of the quarter-panel just behind the door was given a subtle curve to match the Deuce-style frame rails.

05 Once everything seems correct, the quarter-panel is cut away in preparation for butt-welding the new panel into place
Once everything seems correct, the quarter-panel is cut away in preparation for butt-welding the new panel into place. TIG welding was used exclusively for this job.

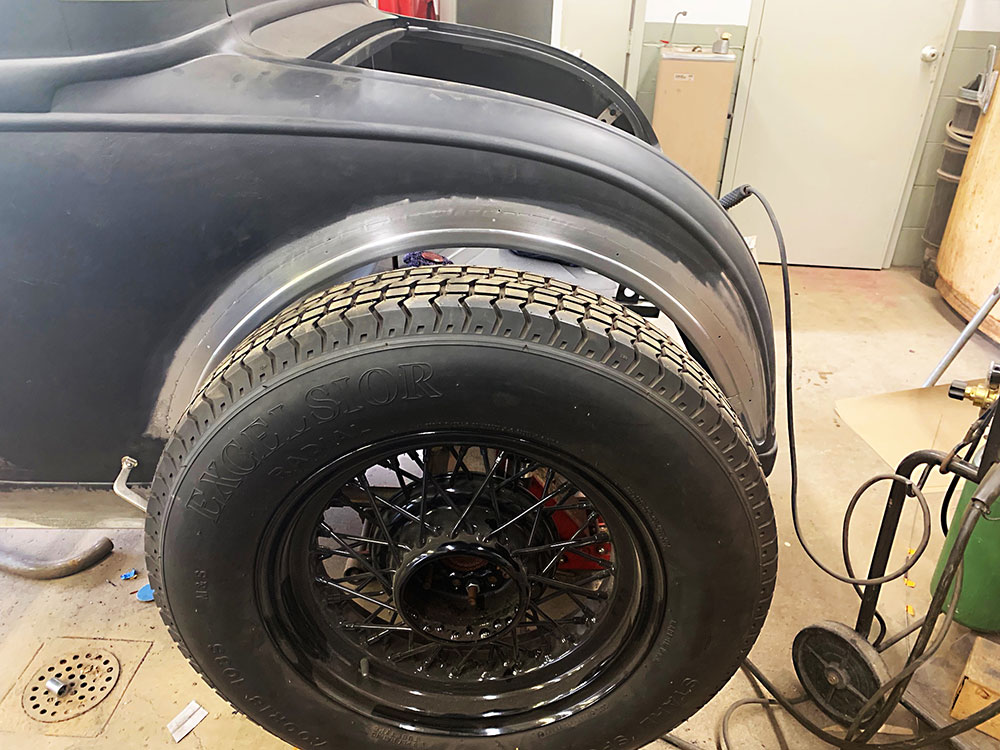
All of this took a huge amount of work, but looking at the finished car, you can see that all the elements fit together perfectly–so much so that many people may not realize that major modifications were made in this area.

06 The new reveal is tack-welded, and the wheel and tire are fitted once again to be sure that everything is headed in the right direction
The new reveal is tack-welded, and the wheel and tire are fitted once again to be sure that everything is headed in the right direction.

Read More: Classic Car Restoration: 1931 Model A Ford

The photos show the key steps in the reconstruction process, and we’re hopeful that this may inspire you to go to the next level in your project. MR

- Advertisement -
07 The lower quarter-panel needs to be replaced, too, and the reveal on the bottom of the patch panel
The lower quarter-panel needs to be replaced, too, and the reveal on the bottom of the patch panel is given a subtle curve to follow the contour of the frame.
08 Here is the beautifully formed wheel well recess, with the finish work taken to a very high level
Here is the beautifully formed wheel well recess, with the finish work taken to a very high level.
09 From the inside you can see how perfectly all the components are fitted together
From the inside you can see how perfectly all the components are fitted together. The more care you take with fitting, the easier the finished work will be.
10 Here’s how it looks after all the welds are metal finished
Here’s how it looks after all the welds are metal finished. It’s looking superb!
11 The squarish lower panel was removed from the rear of the body and a very tasteful rolled pan was fabricated to fit snugly into place
The squarish lower panel was removed from the rear of the body and a very tasteful rolled pan was fabricated to fit snugly into place.
12 Here you can see how beautifully all the metalwork flows together
Here you can see how beautifully all the metalwork flows together.
13 The new wheel recess follows the curvature of the tire
In this photo you can appreciate how well the new wheel recess follows the curvature of the tire. That’s the payoff of a job well done.

Source
Craftworks Fabrication
(412) 922-7062
craftworksfab.com

- Advertisement -

Related Articles

Search Our Site

More Modern Rodding

2024 Detroit Autorama Ridler Winning ’53 Corvette

Owned by Dave & Tracey Maxwell & Built By...

First Look 2024 Detroit Autorama Great 8

The 71st Annual Detroit Autorama & The Competition For...

A New Suspension on Jason Scudellari’s Brookville Model A

By Ron Ceridono   -   Photography By Jason Scudellari Over the...

Classic East Coast Styled 1934 Channeled Ford Coupe Personifies Kool

By Chuck Vranas   -   Photography by the Author With regard...

1955 Thunderbird With Shocking Looks & Performance

Coral Orange Ragtop Ford Thunderbird By Brian Brennan   -   Photography...

Dual Master Cylinder Conversion For Your Classic Car

Improving Braking Performance on a 1963 Impala With Classic...
More Modern Rodding

How To Fix Quarter Panel Rust

Patch Panel Install For Rust Repair on Your Vintage...

Hemi Swapped 1932 Ford Roadster

Dave Gray’s Deuce Roadster Built In only 5 Months By...

Under The 1965 Buick Riviera Detroit Speed Chassis

Unmatched Street Performance & Sixties Style By Gerry Burger   -  ...

Rodding Around

Goodguys 2023 Chevrolet Performance Builder of the Year Awards By...

Parting Shot

Gene Winfield Moves From His Longtime Home and Shop By...

MR’s Featured New Products For Your Hot Rod – 2024

Easy Passage This wire pass through kit (billet cover, custom...