Does your classic truck mark its territory? Those that retain their traditional motors and drivetrain components certainly tend to. A little dribble of motor oil or gear lube on someone’s clean driveway is embarrassing enough, but shame on us if it’s antifreeze. Yummy to pets, that’s powerful poison and today there’s just no excuse for letting it go to the ground.
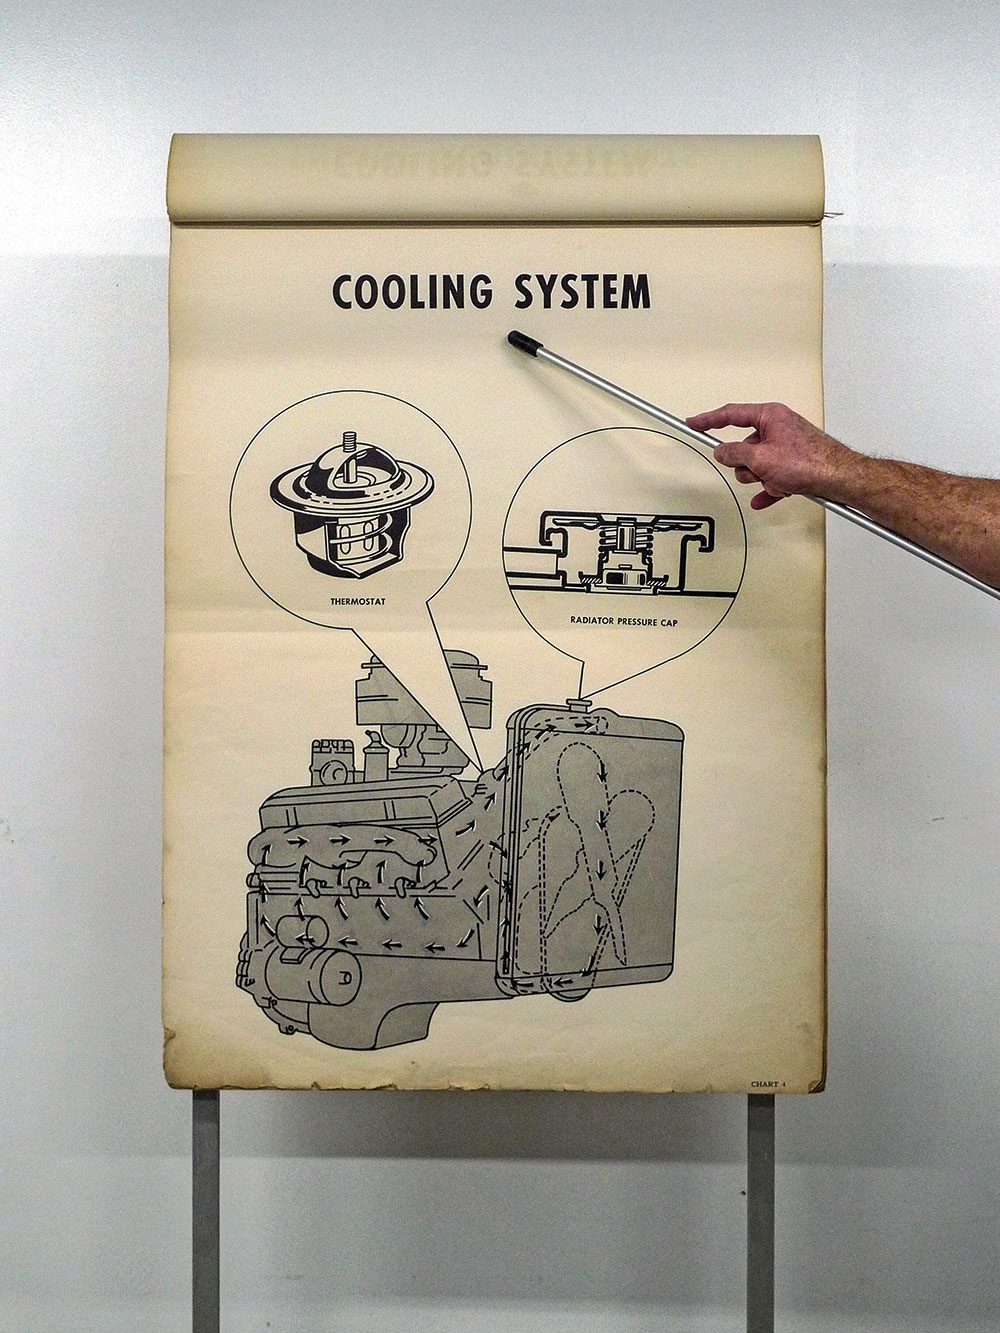
From John W. North High Auto Shop chart 4 is lacking a coolant recovery system. Of course it was published in the ’50s before the whole concept caught on.
If memory serves, coolant recovery systems weren’t common features ’til the late ’60s or so. Here at our shop, since the majority of our builds do incorporate pressurized engine cooling systems, containing our coolant is a no-brainer must.
A coolant recovery system is easy to come by. Auto parts stores carry plastic add-on assemblies. The street rod stainless variety works just as well. They look better, too, but since their early ’80s introduction we’ve seen a bunch of those. This time we want something different—and it’s got to fit the build.
Like chart 4, this ’55 Chevy never had a coolant recovery system. This time it will—if we come up with some kind of can that wouldn’t clash with its surroundings.
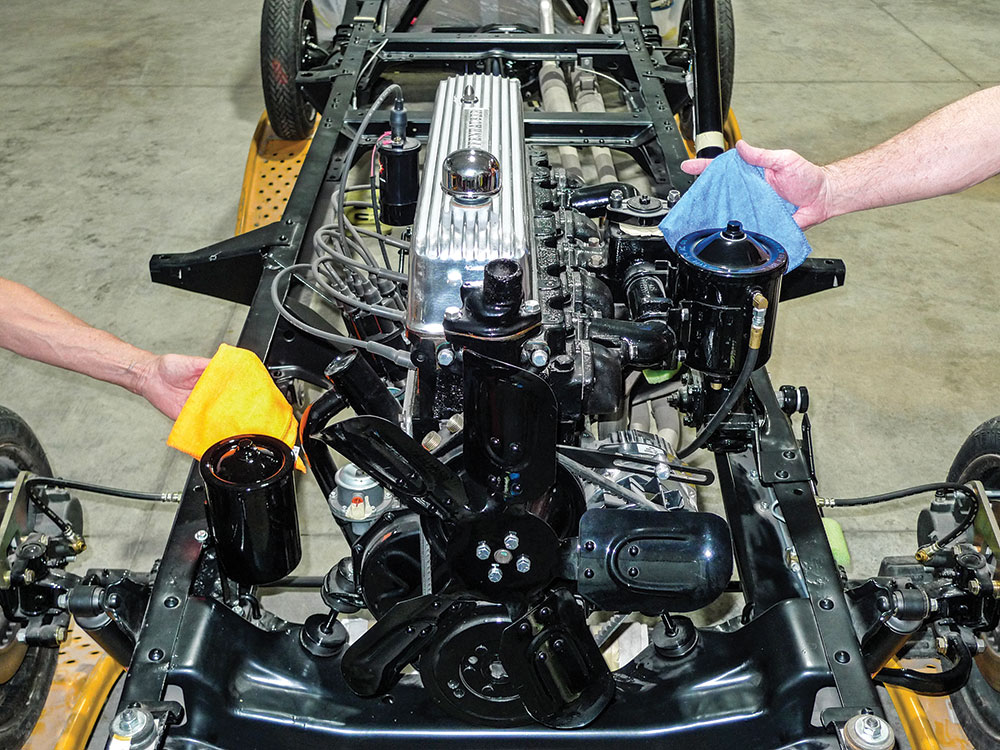
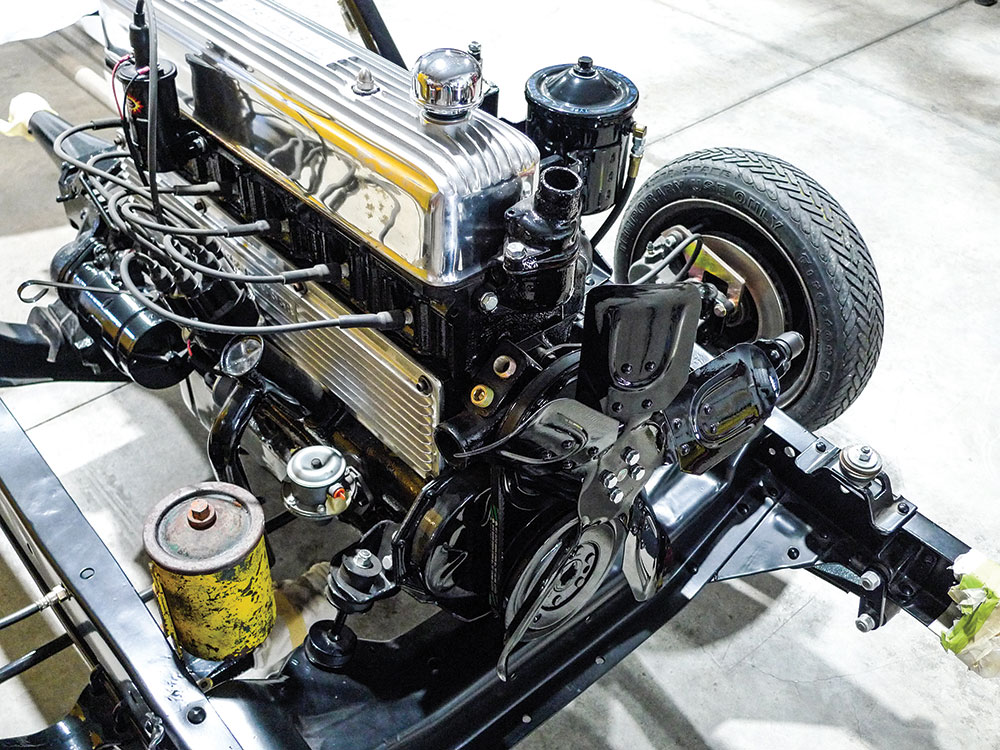
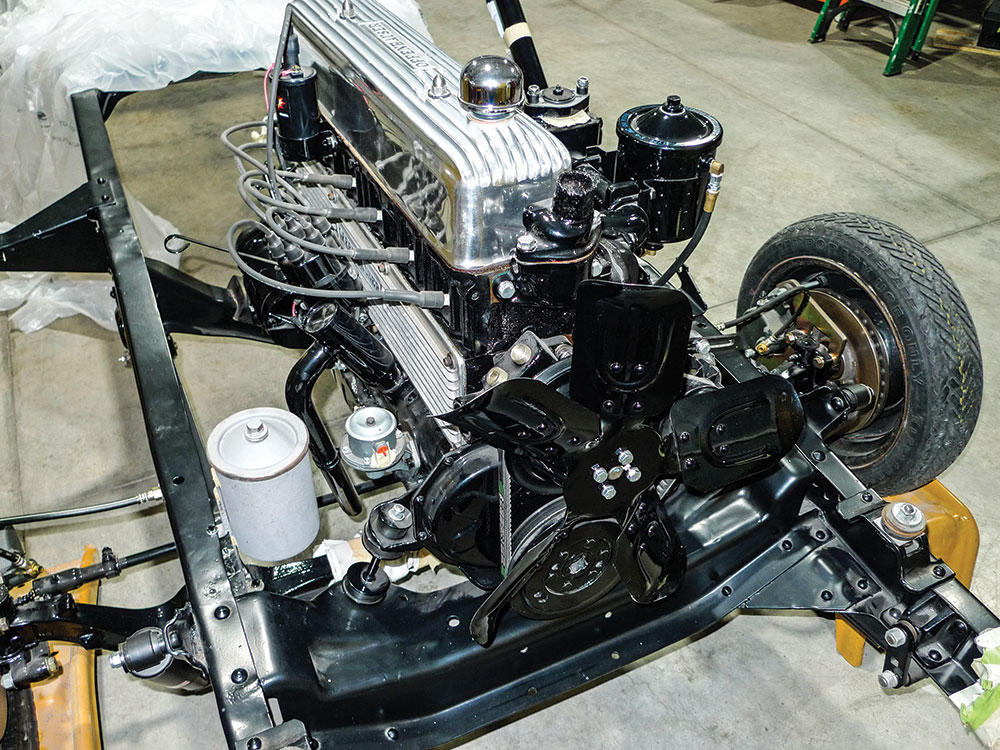
Our ongoing ’55 Chevy second-series project has made CTP appearances before. It won’t be heavily modified but to suit the tastes of its owner a lower-than-stock stance tops the list of requests. There’ll be a few lowkey custom touches and a number of safety upgrades already built in. At this stage of the build the old truck’s personality is established. The centerpiece is a well-dressed 235ci Chevy inline 6 engine with twice-pipes by muffler man Joe St. Louis (rest his soul).
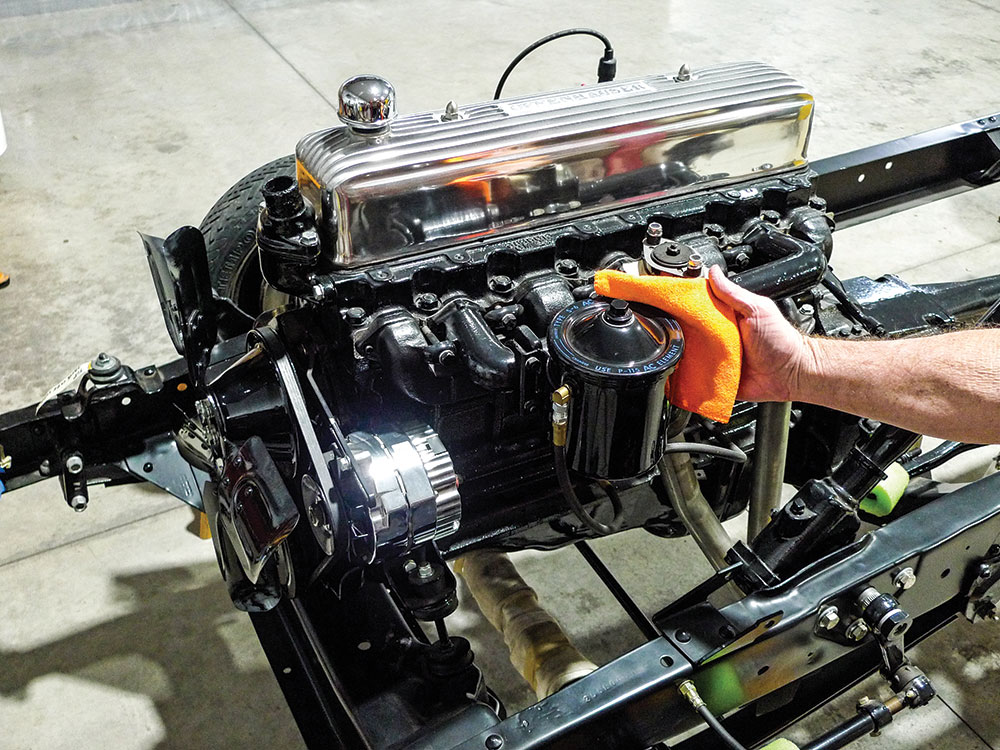
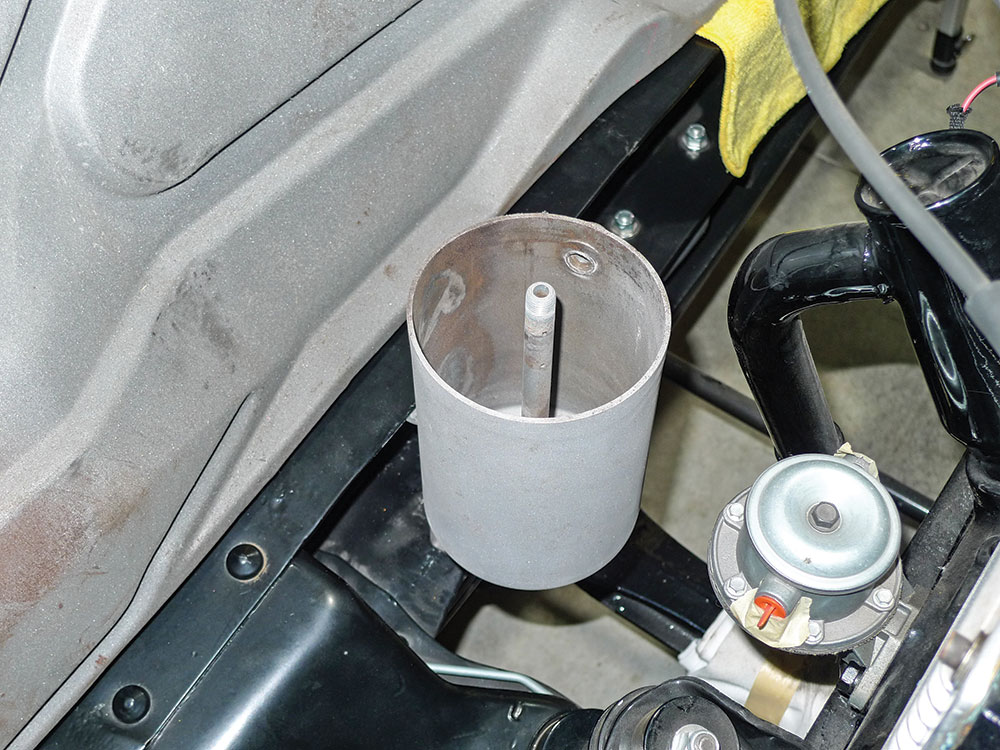
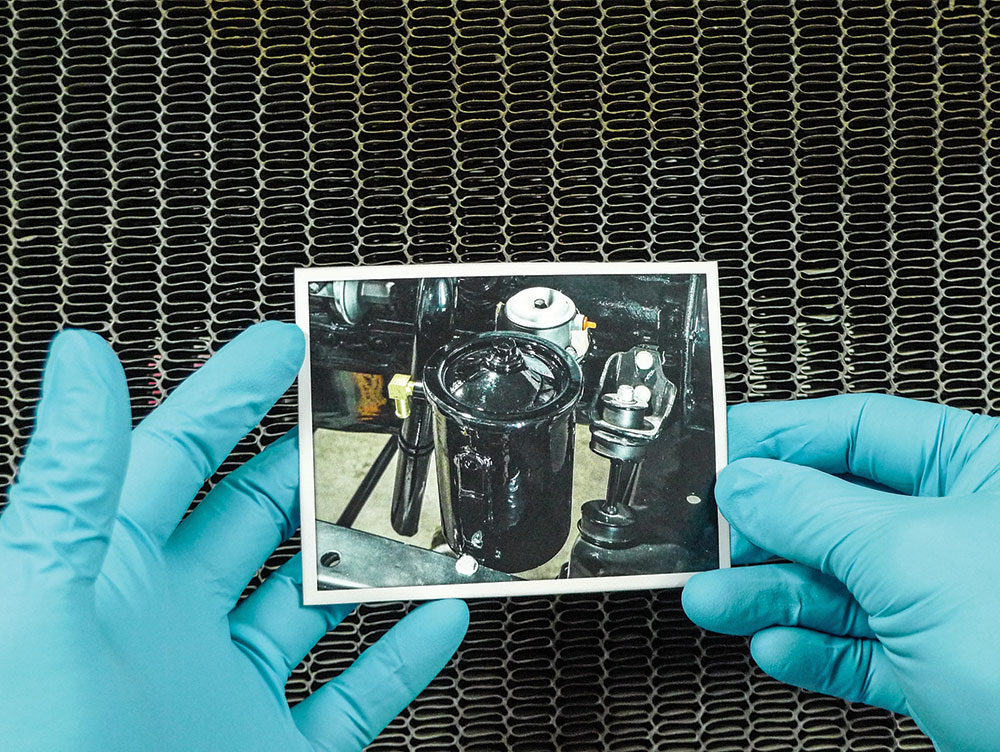
Clamped-on factory style to the unaltered intake manifold is an OE remote oil filter assembly. It, of course, looks like it belongs there—because it does. With high and low ports, both vertically inline, such a canister could be converted to an undercover coolant recovery tank. Just as a notion we kept that on the back burner, in the backs of our brains for quite some time—’til the just-right hunk of hardware emerged from out of nowhere (one of our own plastic totes) at a swap meet.
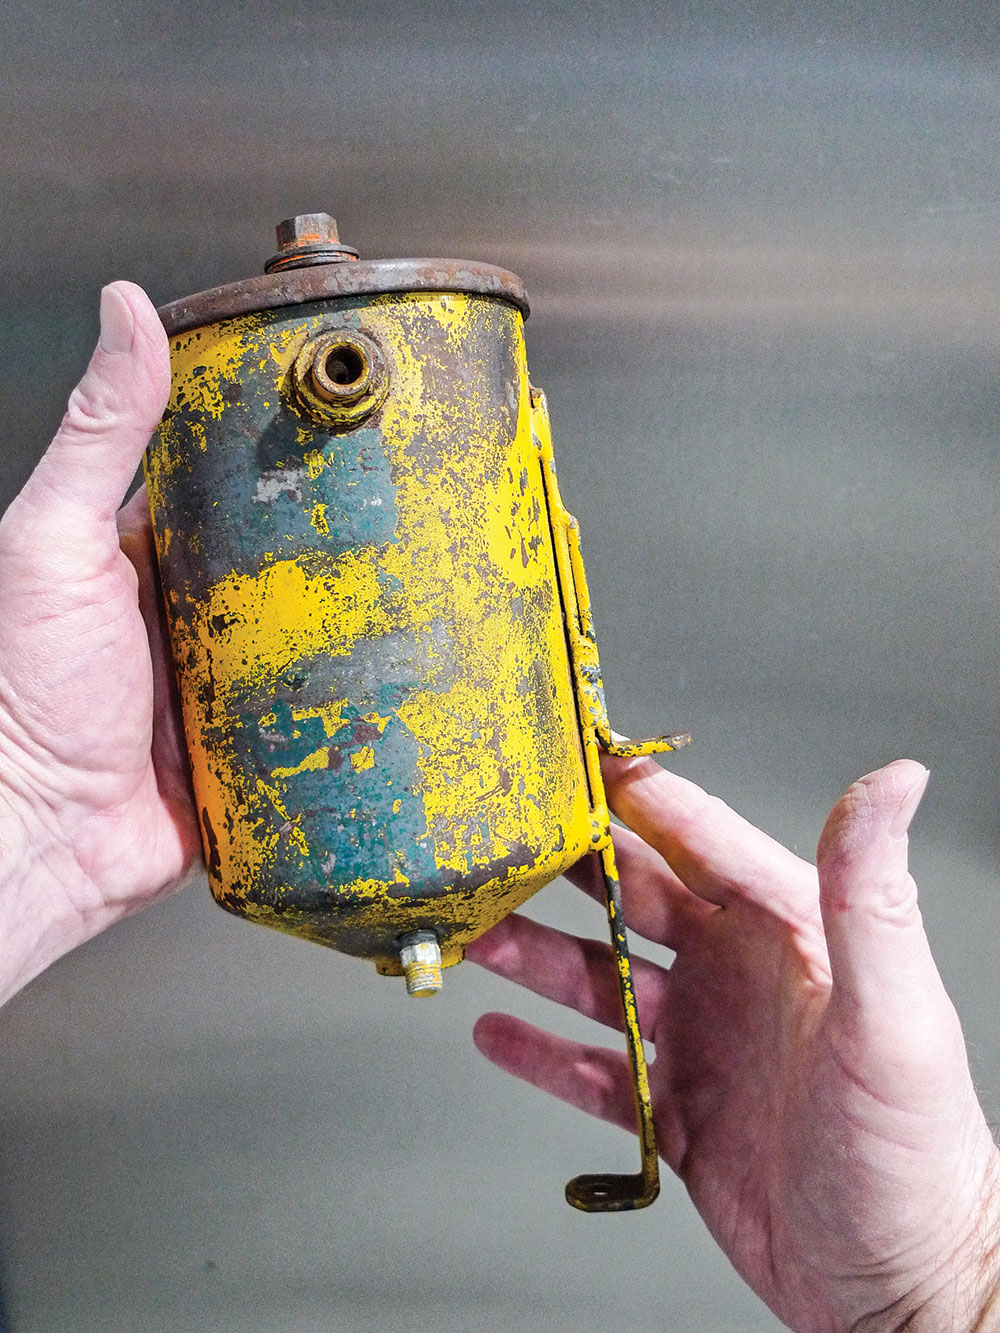
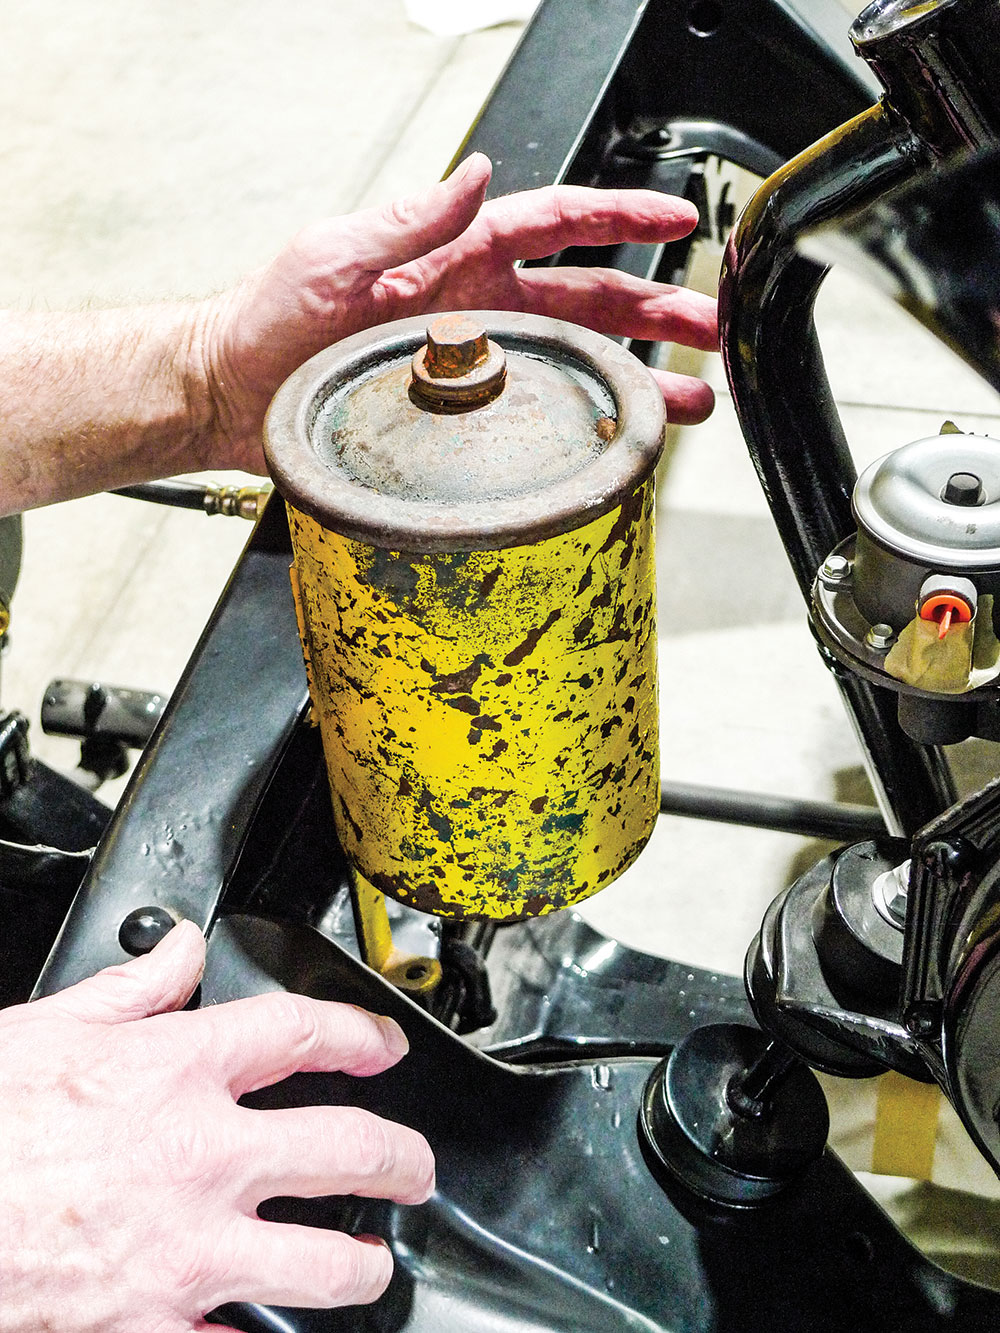
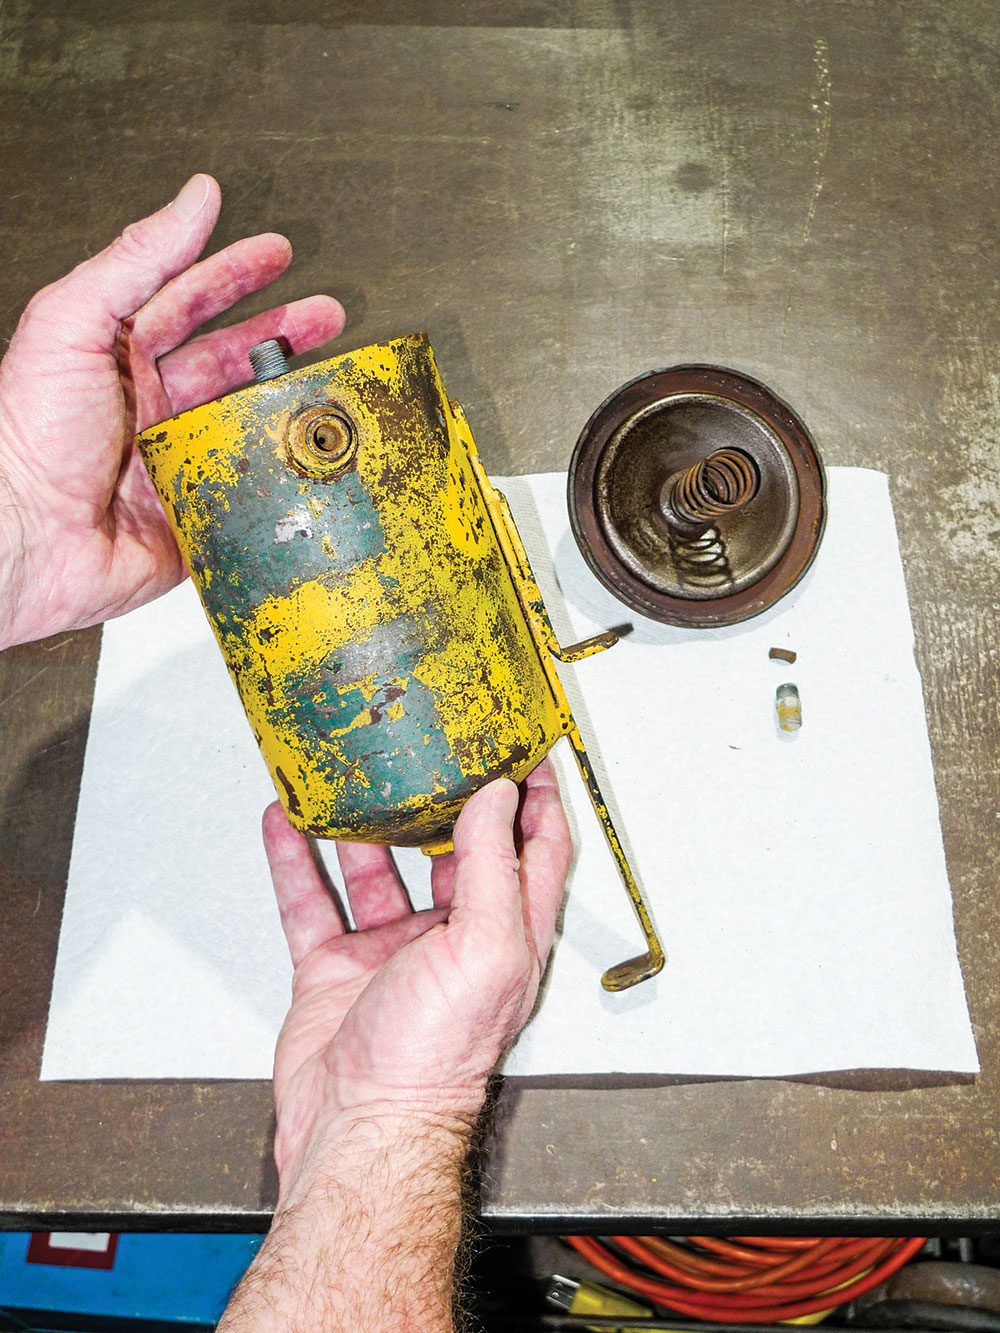
So, here’s what we found hiding among our own items at the swap meet. Back at the shop we’re thinking this will blend in discretely enough.
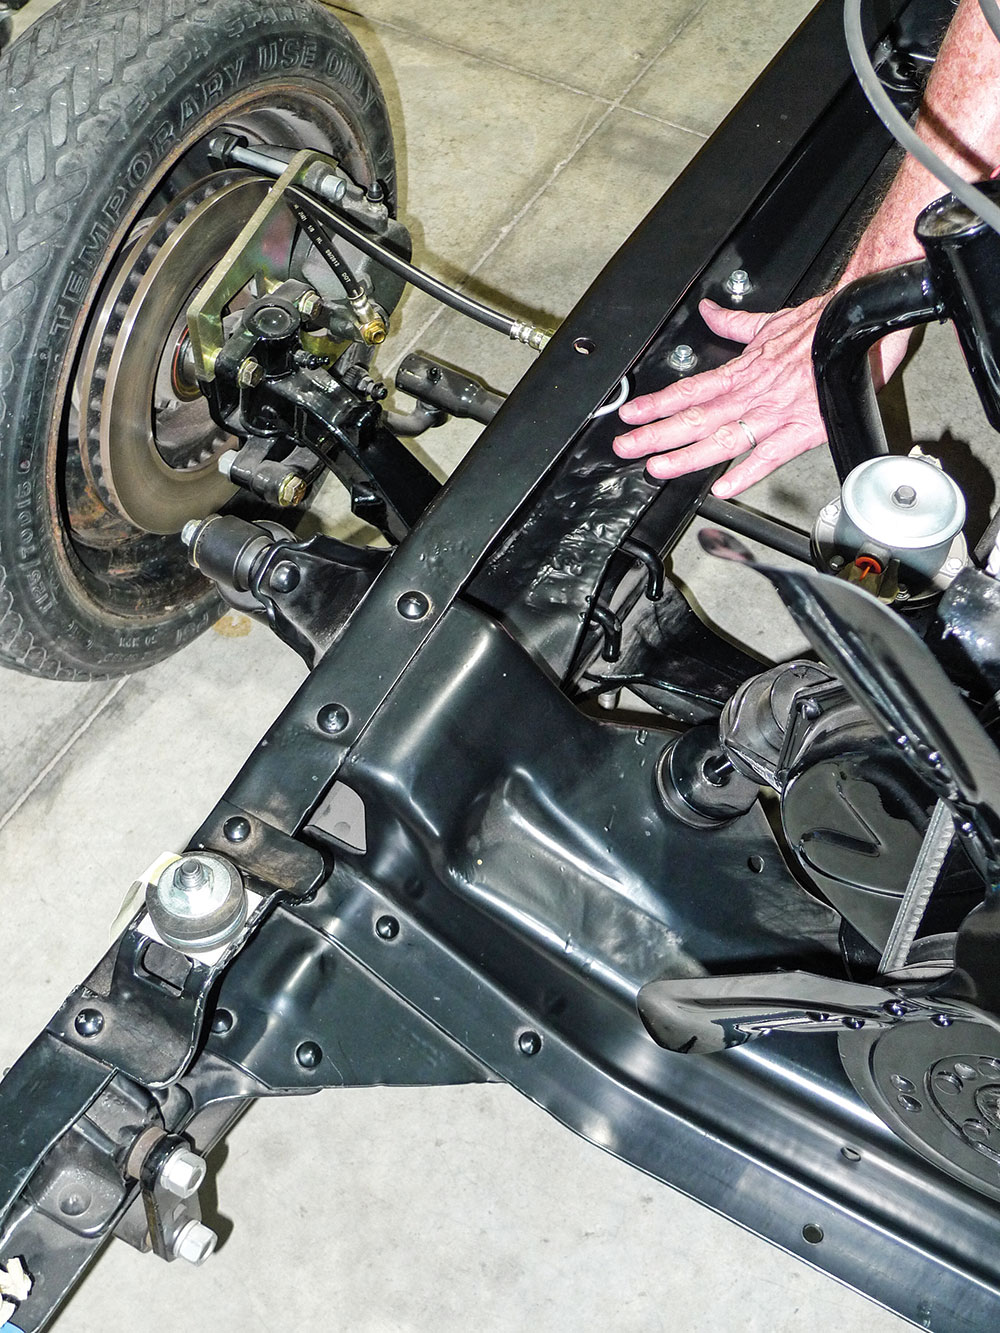
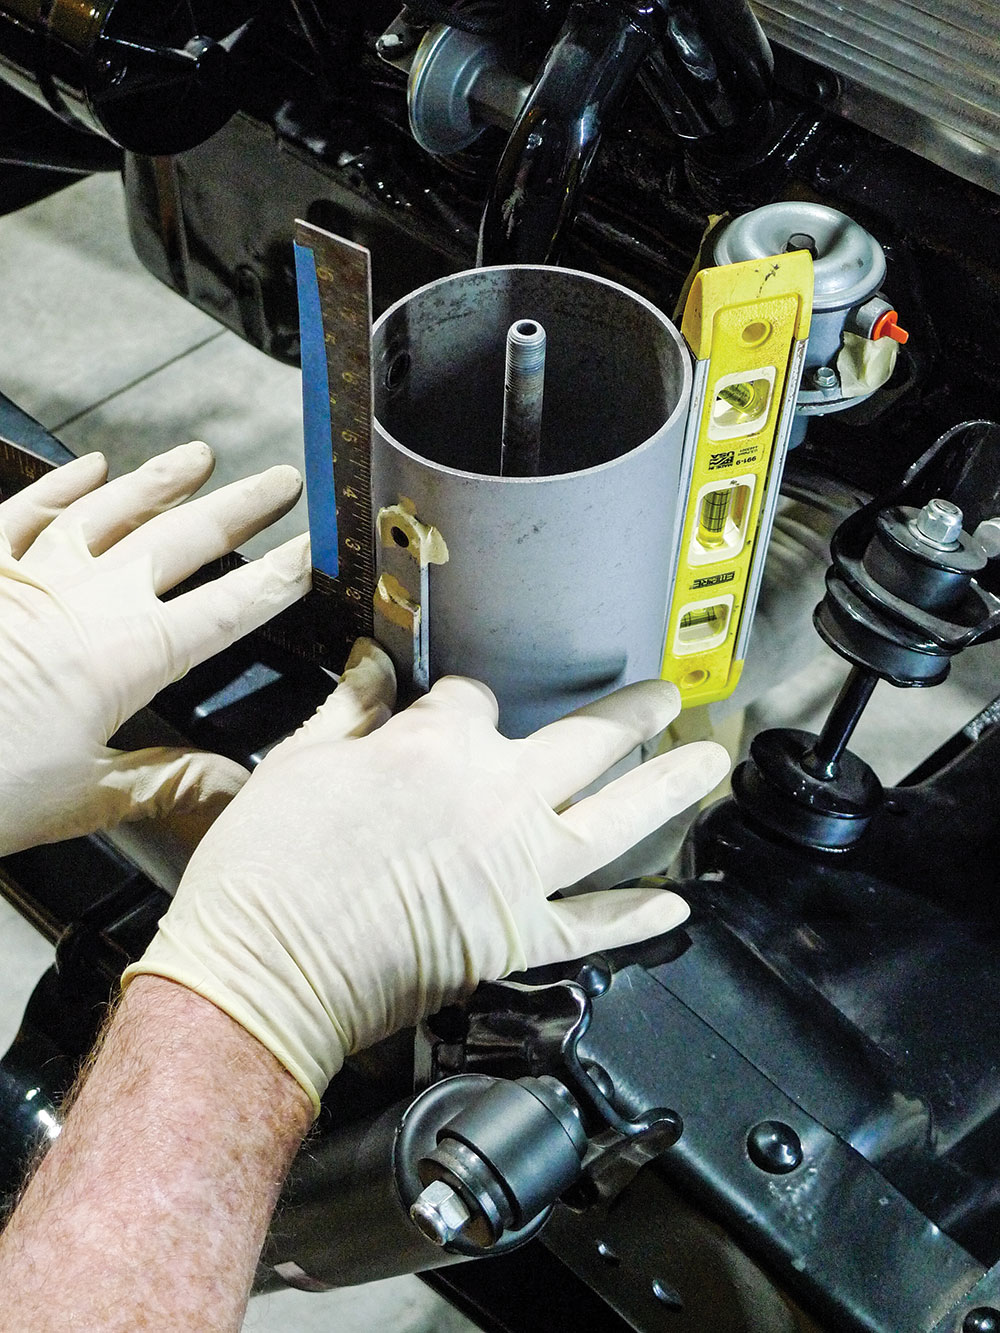
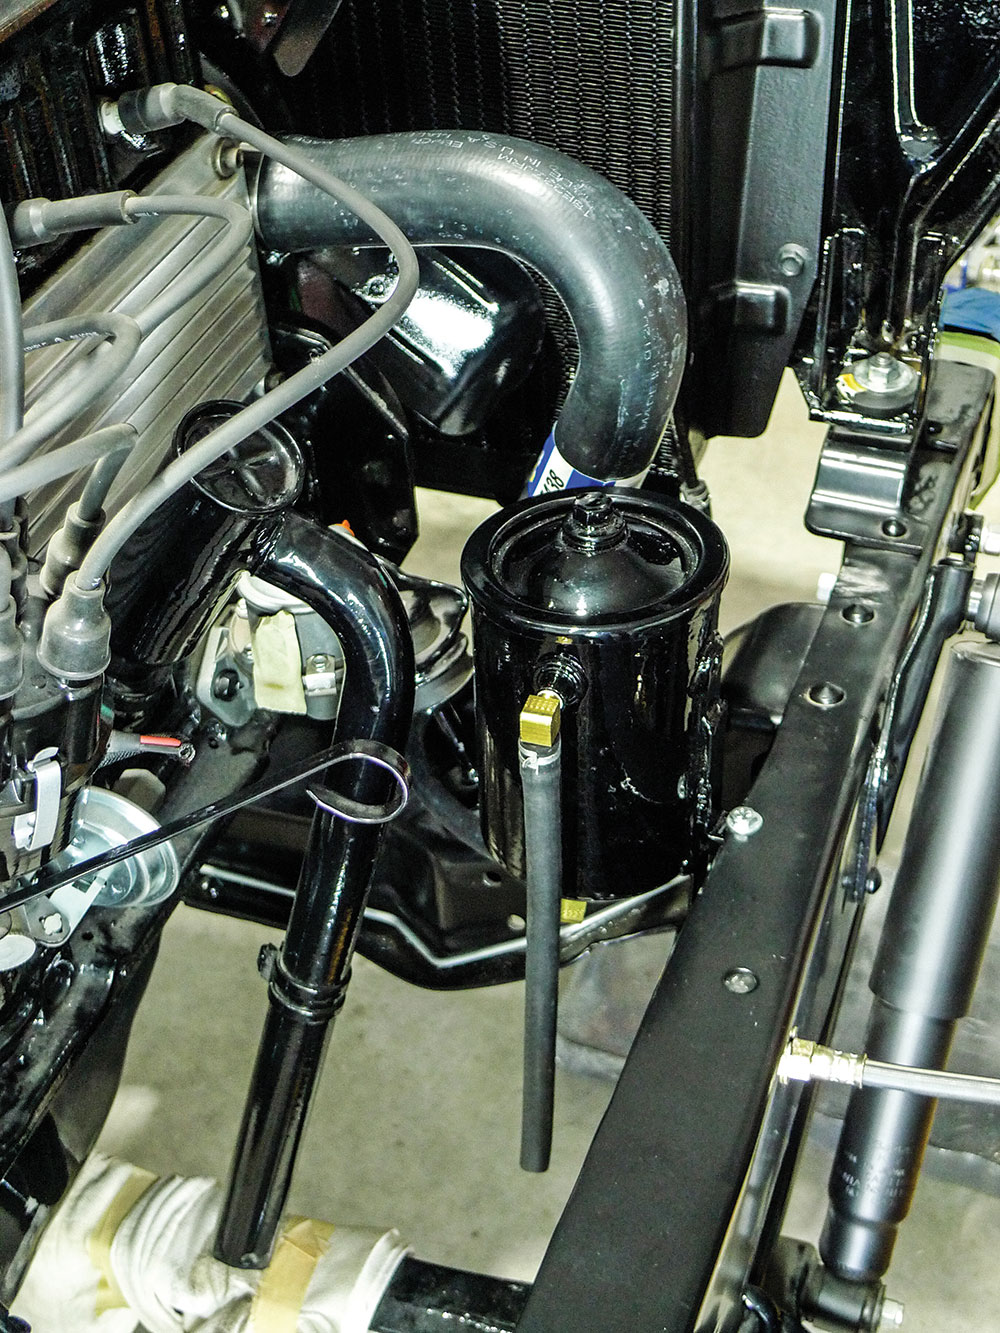
Now back at the shop, an eyeball engineering session is underway. To create a visual distraction we might mount our little can at the frame’s sore spot where previous repair remains evident. There, along the passenger-side ’rail, it just might align with our OE radiator’s overflow tube. If so, hose connections should be a natural breeze to boot.
We may never know the true origin of our little swap meet discovery, but the look of its brazed-on bracket suggests that it may have been repurposed once before. As the key component of a coolant recovery system, this old oil filter canister should do its new job without lookin’ too-terribly out of place.
This old truck has been crash-tested. Its frame has been straightened, and in this spot it shows. By mounting our coolant recovery tank here we might also create a distraction.
Is your project truck lacking a coolant recovery system? By thinking outside of the obvious options, you’ll likely find the parts to build your own. Contain your coolant in a way that fits your build.
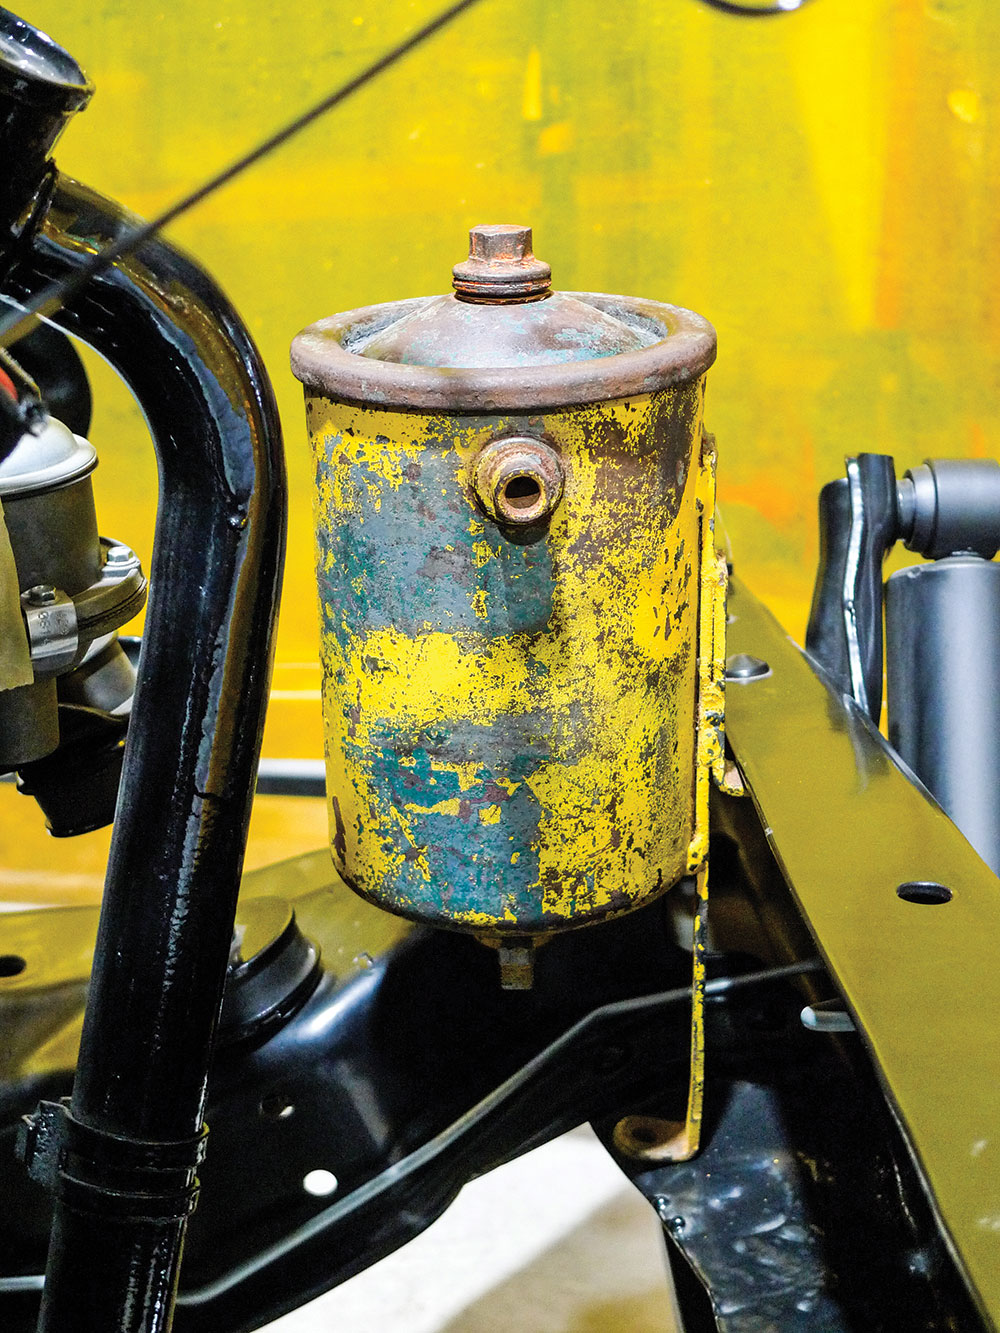
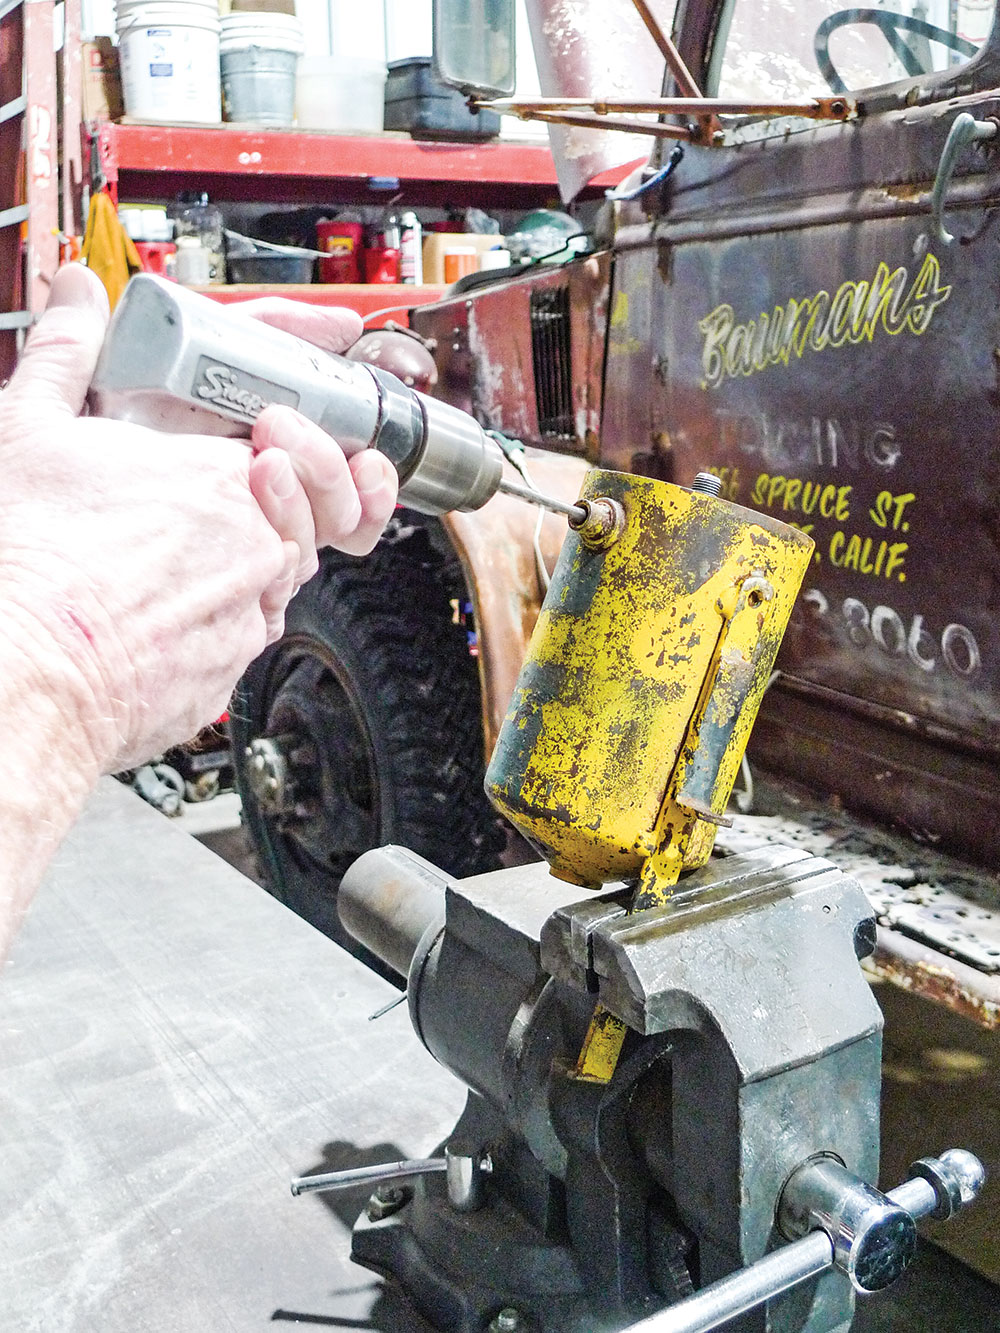
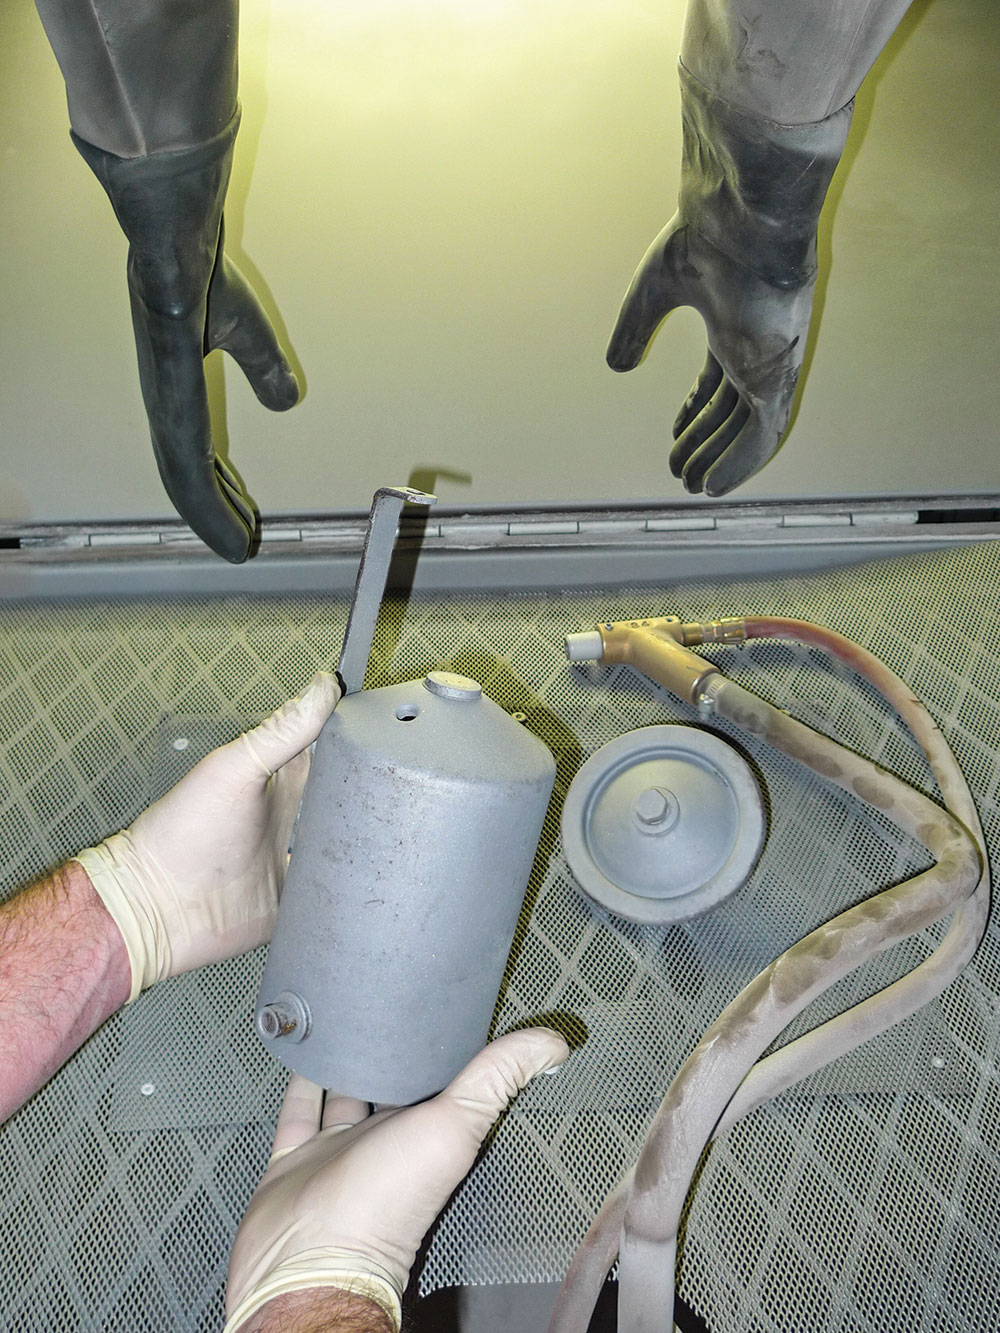
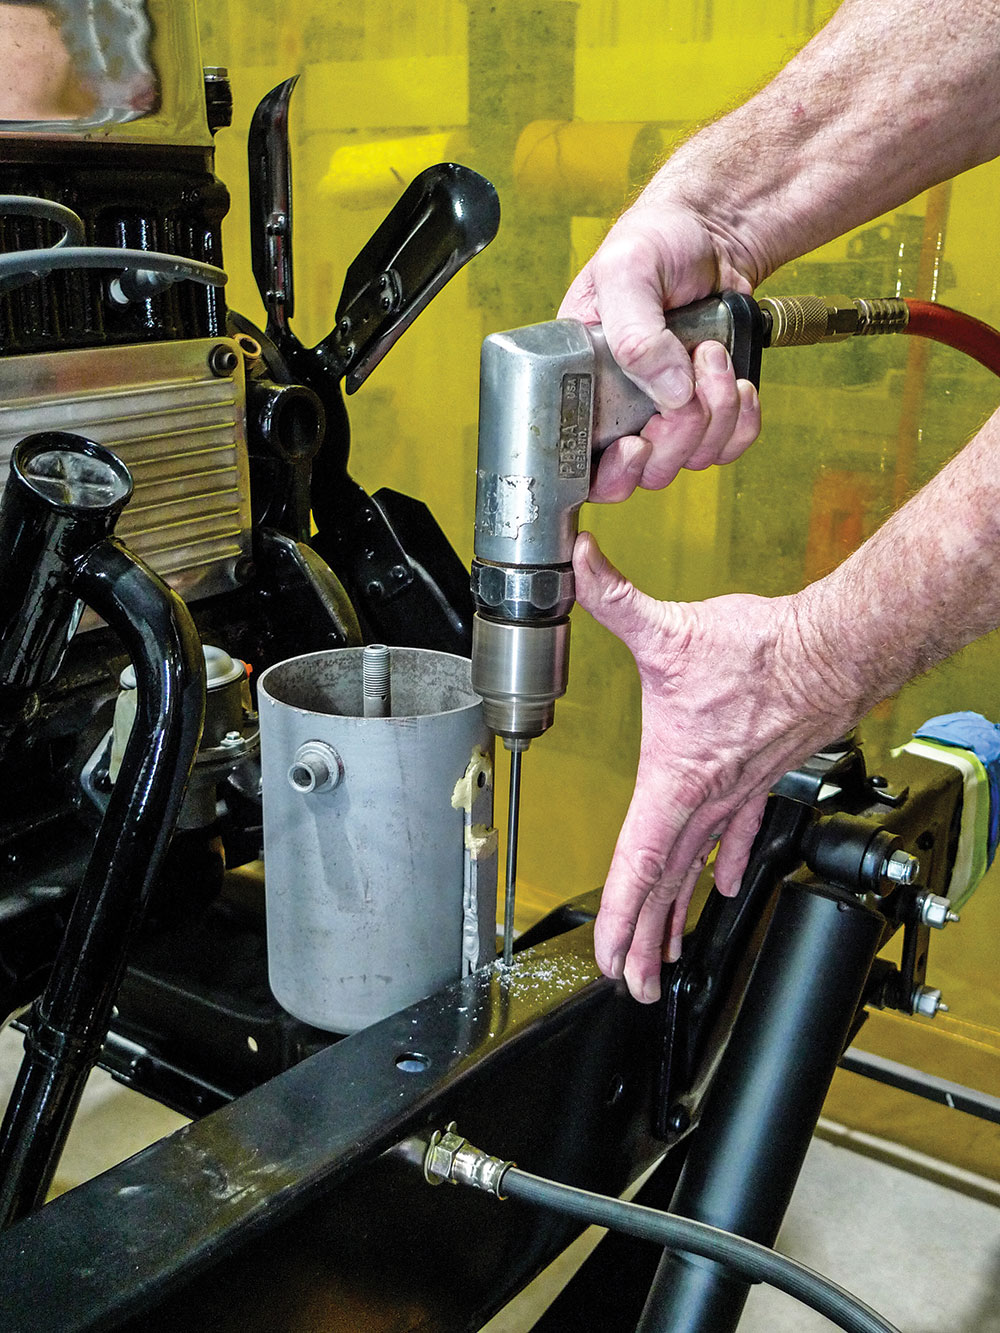
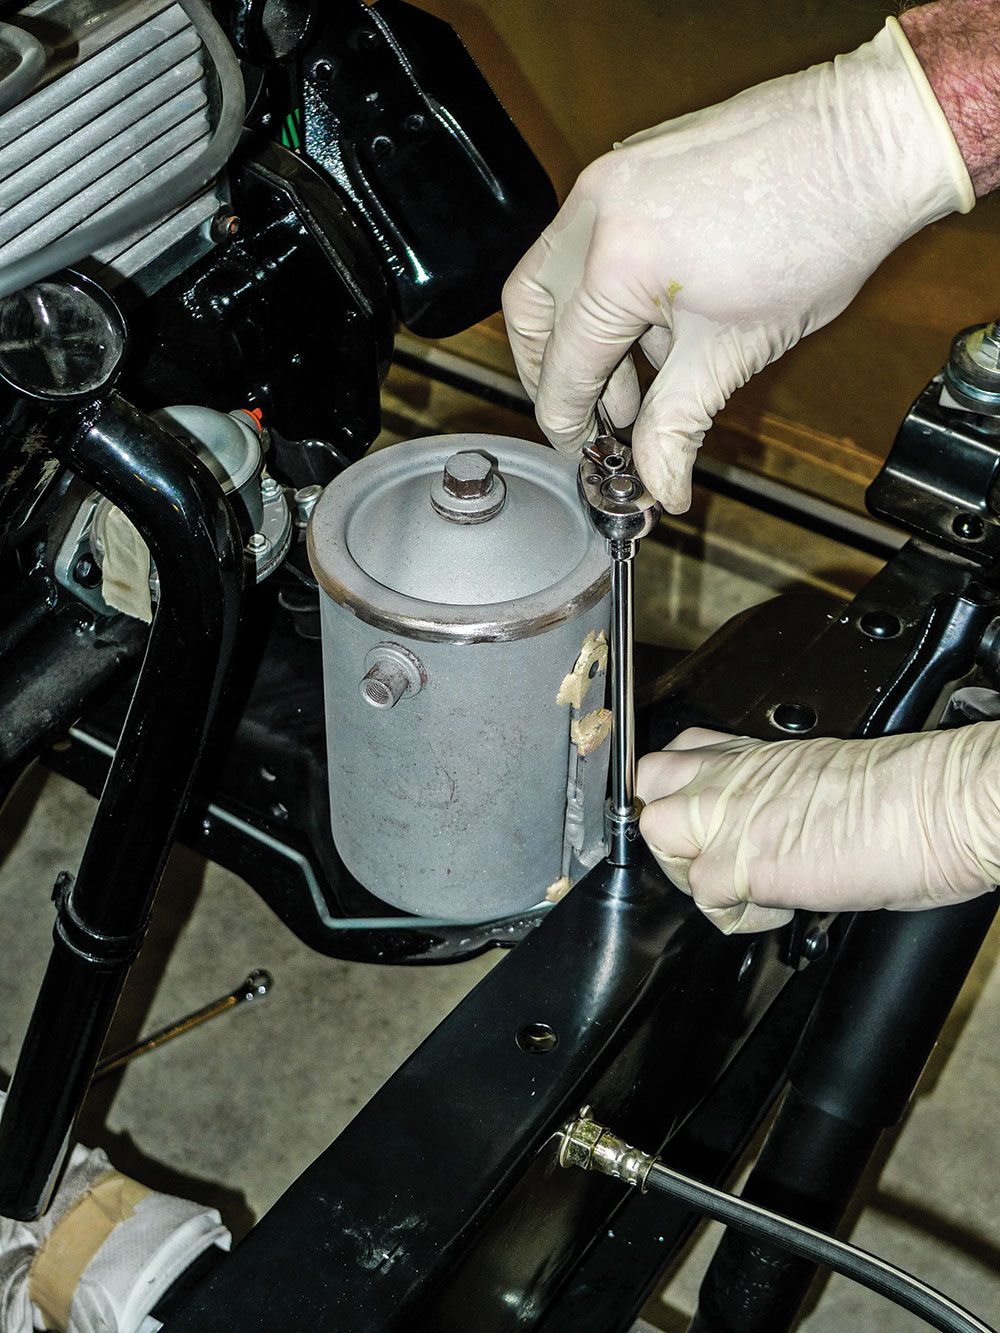
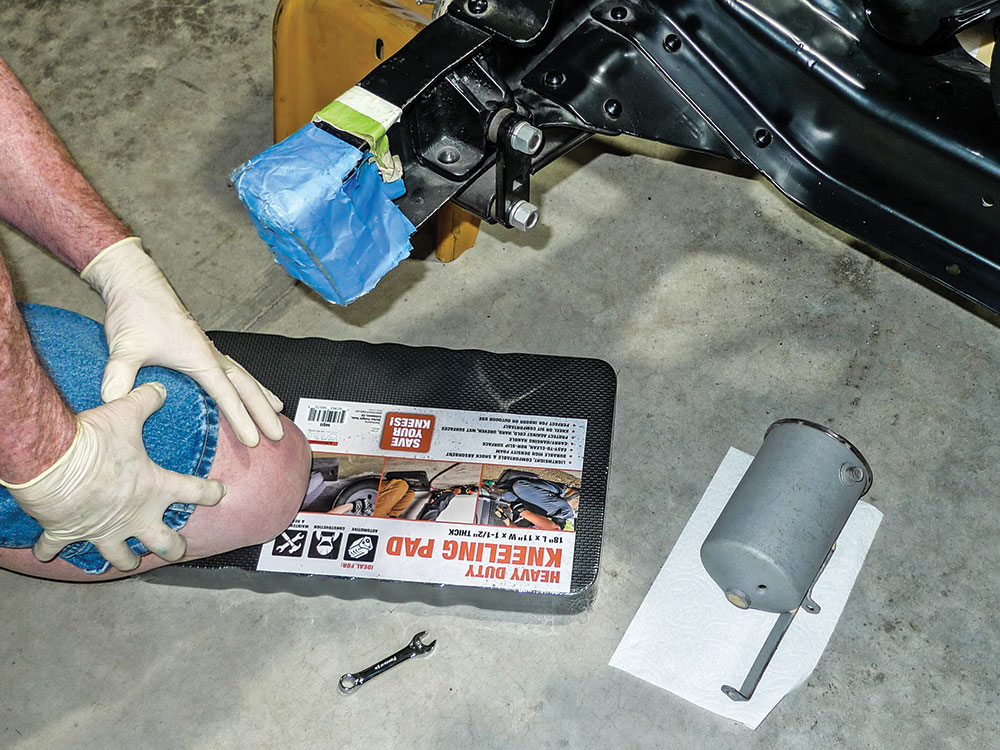
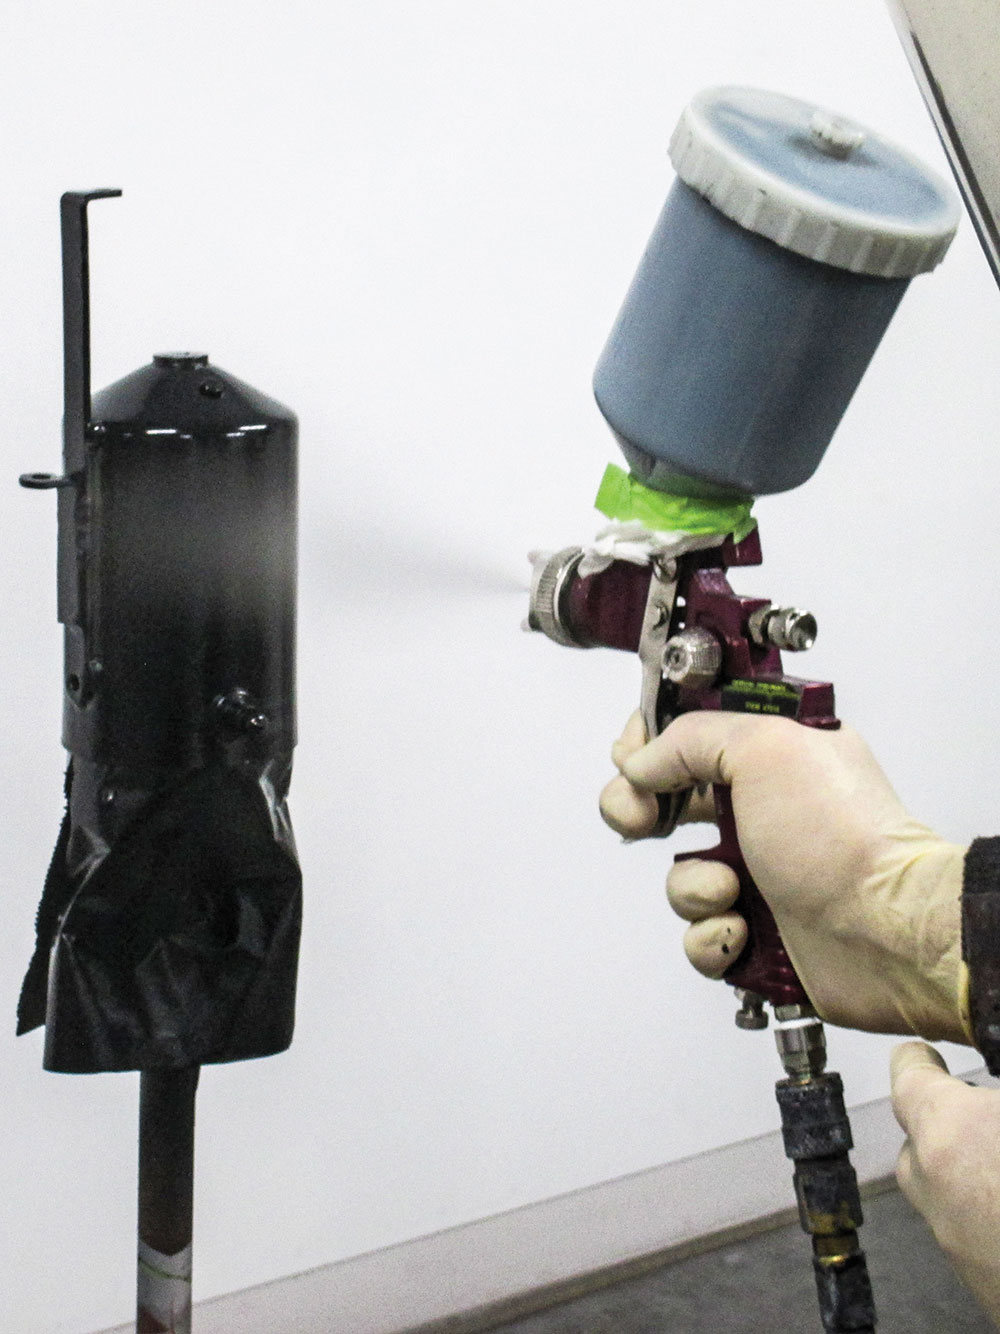
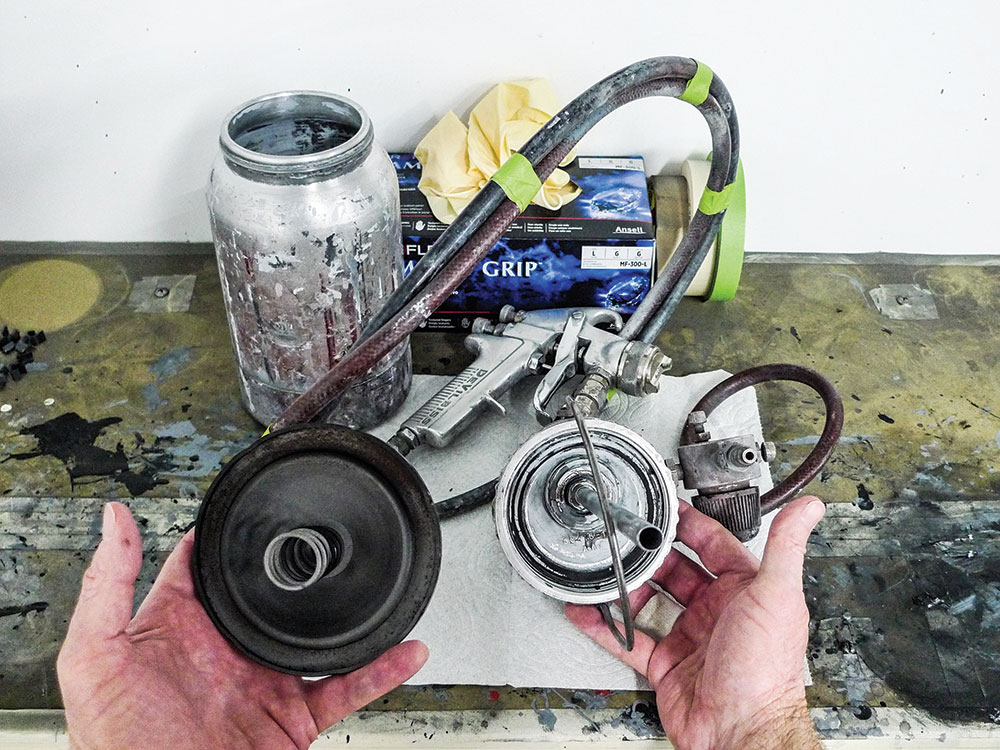
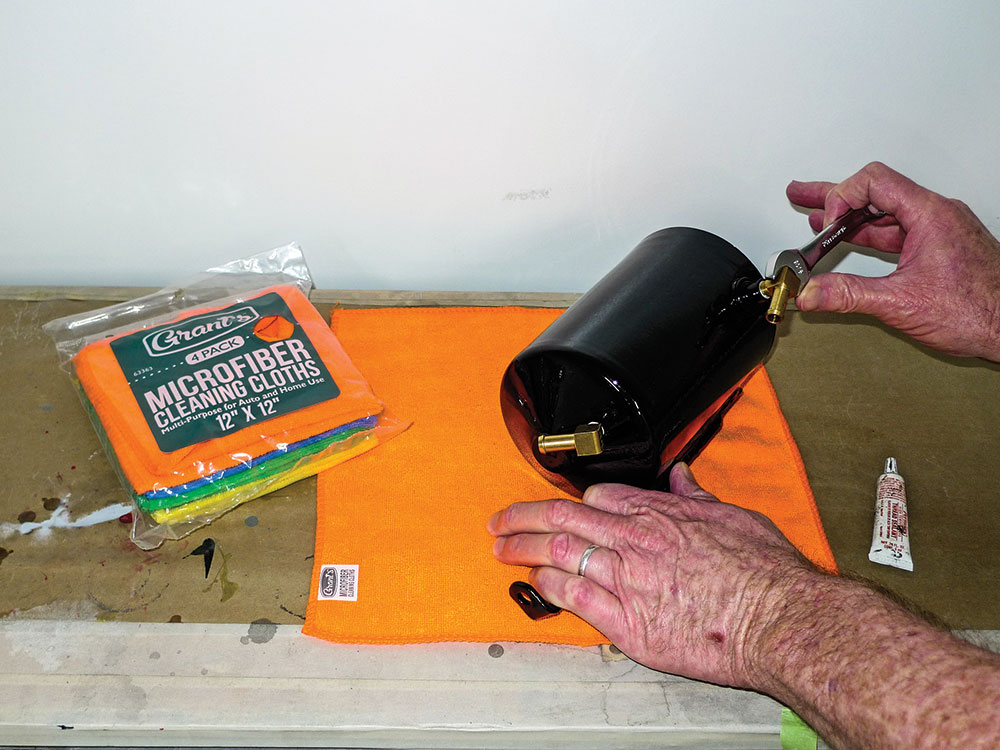
By the time it’s shiny-black this will resemble and blend with the old truck’s original oil filter canister. Notice how the frame looks better already?From this angle we see how the existing bracket fits the channel of the frame rail. Sure, we can make a better-looking mounting bracket, but this already fits. Let’s give it a chance.Although we have no clue what make and/or model vehicle our little can came from, we suspect that it had a small engine.Here we see that the upper port has a very small hole. We’d imagine that and the broken-out pieces to the right were originally designed for oil restriction.In order for this to function as a coolant recovery tank, coolant should be free to flow as necessary. By drilling through this threaded bung we’ll enlarge the existing orifice.With our only minor modification now made we’re tending to cosmetics. Fresh 80-grit glass beads speed this process. We get ours from Harbor Freight.Prior to painting, let’s establish our canister’s final location. As we fumble with a level and square it comes down to what pleases the eye anyway.Here our core support and OE radiator are mocked in place. The radiator’s overflow tube is right where we’d want it, too.Before drilling holes in the frame, we ought to double-check fitment of the fender inner panel as well. We see no interference.At this point we’re committed. We’ll use 1/4-inch fasteners. Knowing the track, we’re drilling 17/64 holes—for a little fine-adjustment advantage.The slightly oversize holes are indeed helpful, and, yes, we know the brazed-on bracket is still ugly. Later in the paint department a bead of 3M Drip-Chek sealer will compensate.Anyway, it’s time to pull and paint our undercover coolant recovery tank. Before these knees contact concrete again, however, Mrs. Rotten insists on running to Harbor Freight.“Save your knees!” says the packaging, but I’ve already missed and kneeled on a wrench. With practice and perhaps better coordination this new pad could be my little buddy.Here in action is an older Harbor Freight score. Now, don’t get the wrong idea. We do have a fleet of higher-end guns. For only $9.99, this one has its place among them.After painting, this gasket-mating surface could use a little cleanup. We still need a new gasket. We can surely make one, but these dimensions seem familiar.From our gun safe, this gasket looks about right. This old primer rig hasn’t been used in years. Even so, let’s keep it race-ready. We’ll just make the needed gasket.Taking care to clock them correctly, we’re installing new brass hose barbs. Ever-present microfiber cloth is the economical Grant’s brand from Harbor Freight.Although our newly applied finish flowed flawlessly, we were actually hoping to illustrate a clever fix for minor imperfections. Perhaps that’s another story.
Now Let’s Ask an Expert
When the project truck came to us, it came with a functioning used radiator. It might actually be good but we wouldn’t just paint it up and run it without a proper checkup.
For as long as we’ve been in northwestern Montana, we’ve had no radiator shop. Recently, however, Reynolds Radiator (a long-established Missoula-based business) has opened a second location in nearby Kalispell. Now that we’re aware of them, we’ll no-doubt be regulars.
After flushing, our used radiator passed the pressure test. On that note we asked expert radiator man Howard Lilly to critique our coolant recovery system. It’s approved!Back at our own shop we’re installing hoses and on Lilly’s recommendation, a 4-pound pressure cap. When fresh coolant stays within the system, we’ll consider this a win.
We use cookies to ensure that we give you the best experience on our website. If you continue to use this site we will assume that you are happy with it.