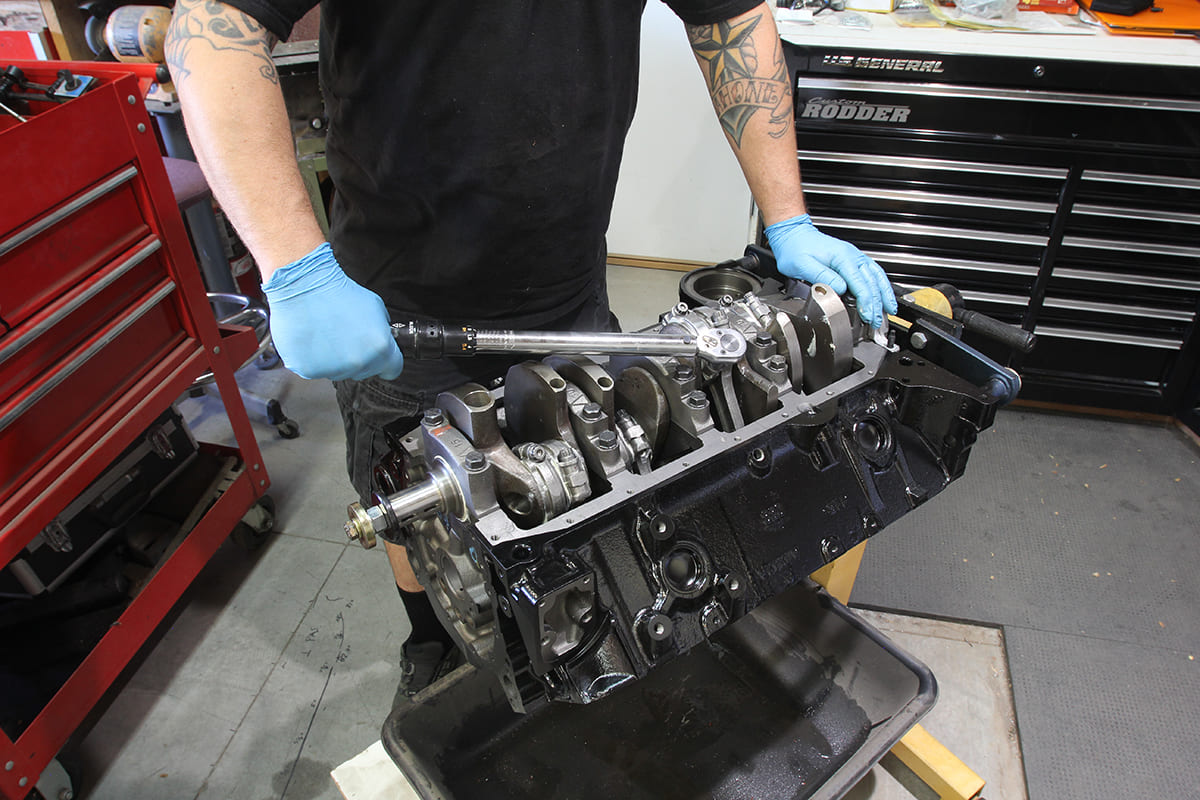
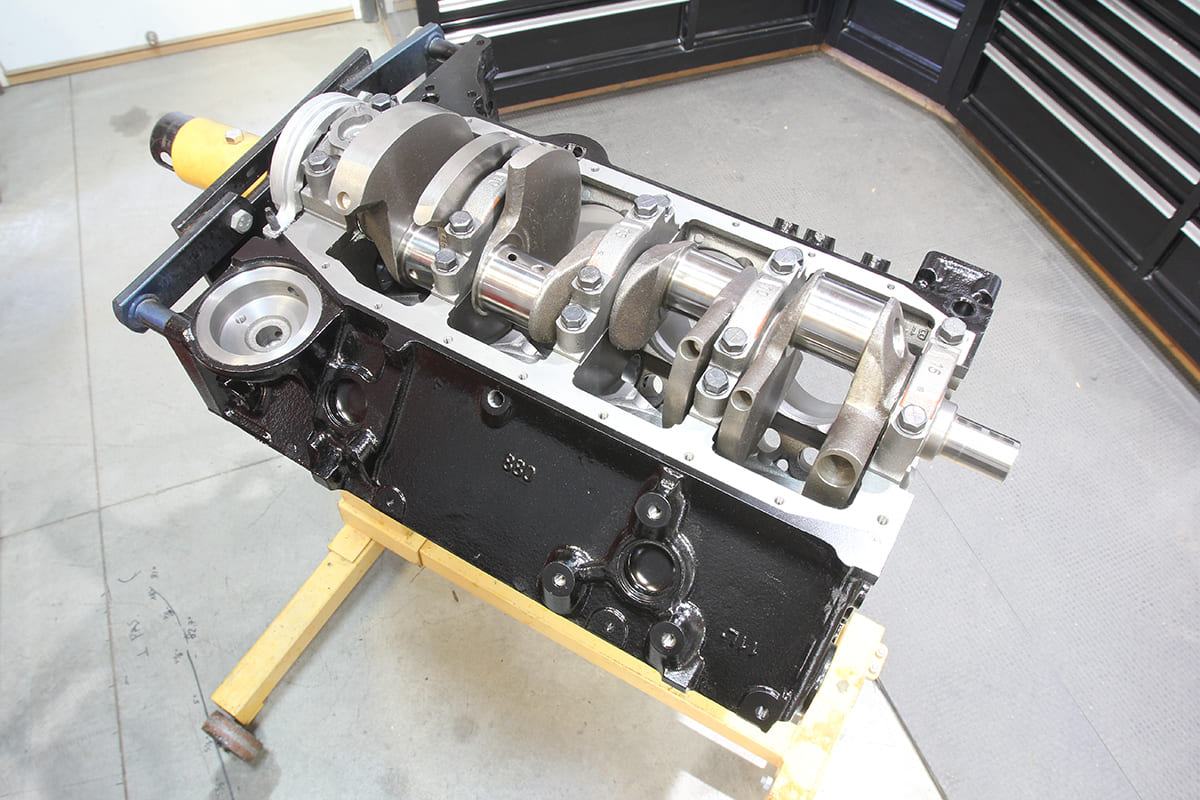
With the crankshaft installed in our Summit Racing small-block Chevy short-block, we’ve hit the first of many milestones when it comes to building an engine. The crankshaft is the backbone of any engine, tasked with handling the stress of the internal combustion process and expected to survive every suck, bang, blow cycle. So, it’s no small feat to have the crank in its cradle with all the specs checking out. It also means we get to advance to an even bigger milestone: installing the rotating assembly.
With the 3.75-inch Summit Racing stroker crank installed in the short-block, it’s time to turn our attention to the rotating assembly.
Like the crankshaft installation, there are a number of things that need to check out before the piston and rod assemblies can be slid into their respective cylinders. Piston diameter to cylinder bore clearance, piston ring endgaps, connecting rod bearing to crank journal clearance, and connecting rod side clearance are but a few of the things that need to be checked carefully. We’ll be using similar tools and techniques that were used when we checked and installed the crankshaft, pointing out a few tips on the way. Once everything checks out, we should have a bulletproof bottom end, ready for many miles of reliable service.
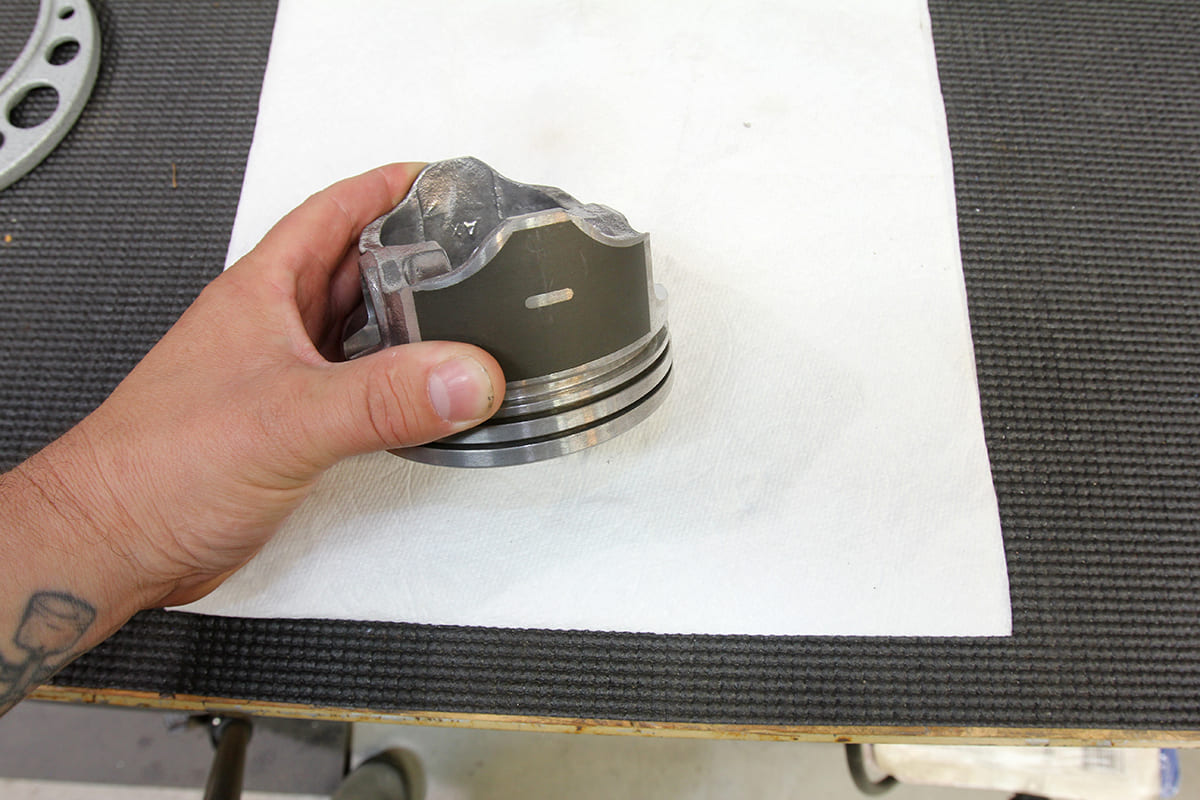
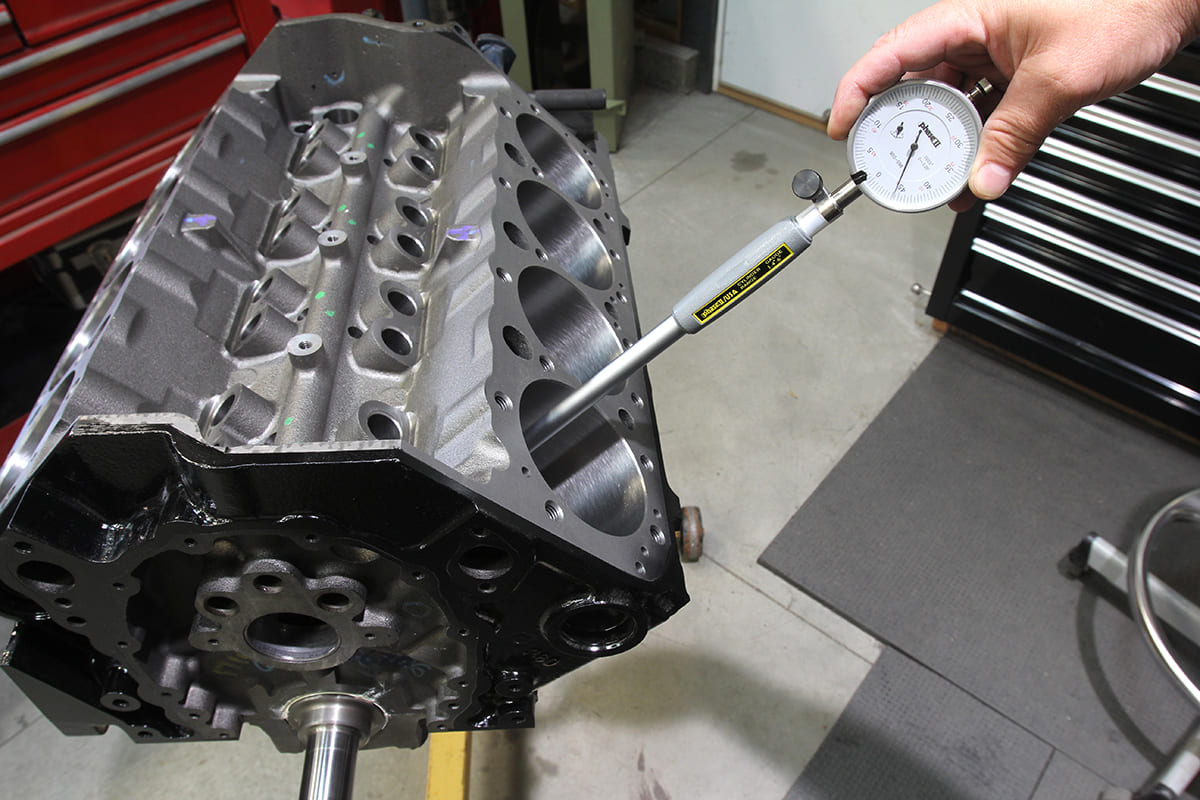
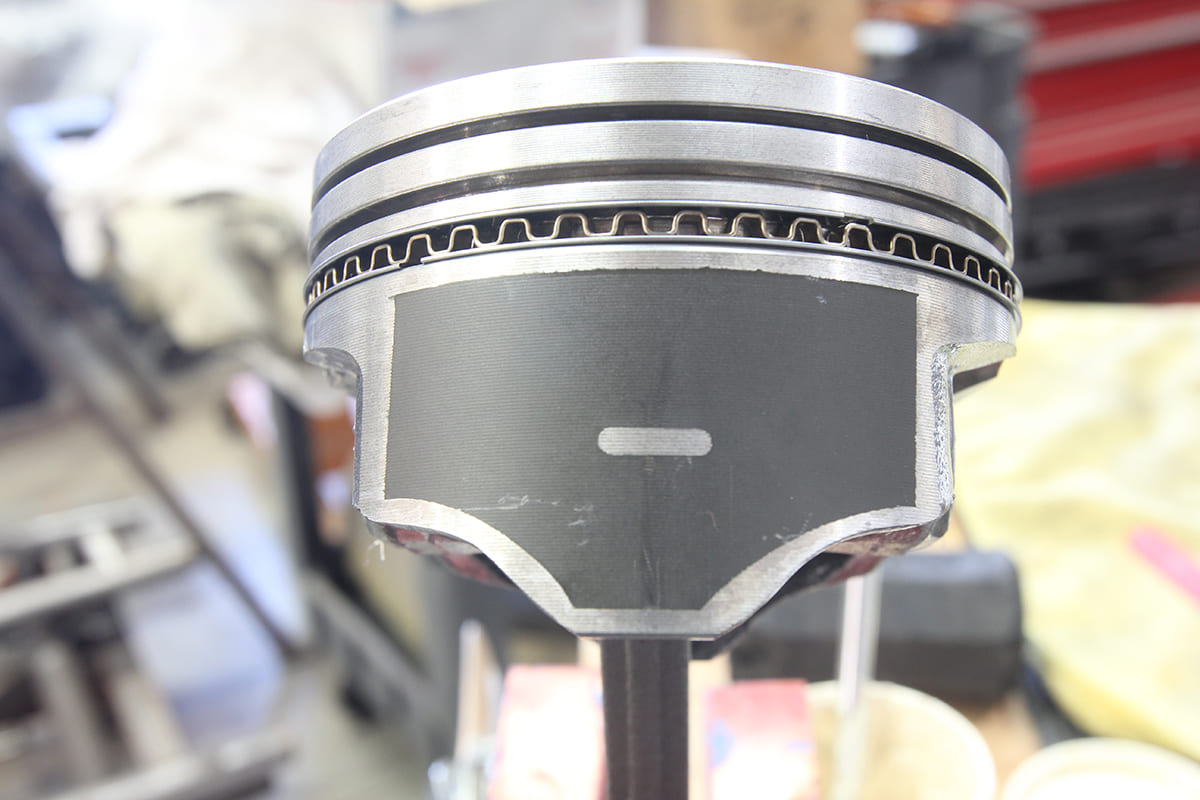
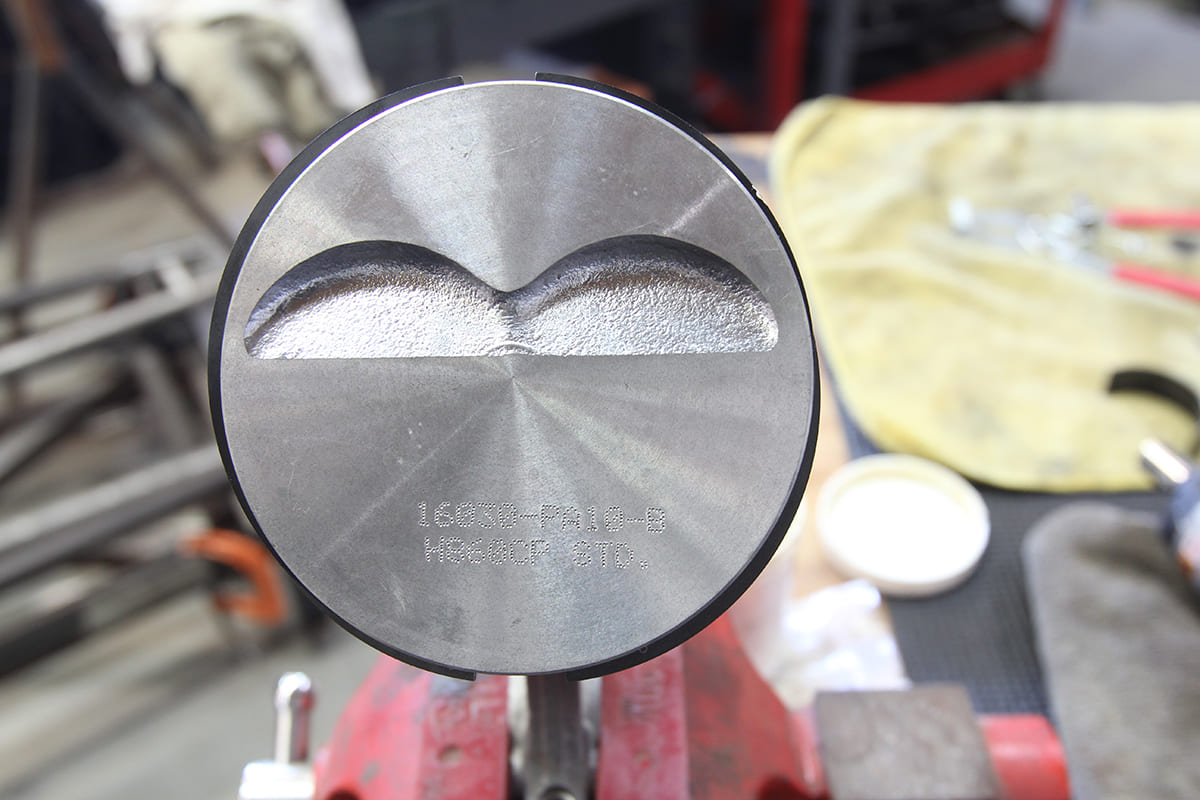
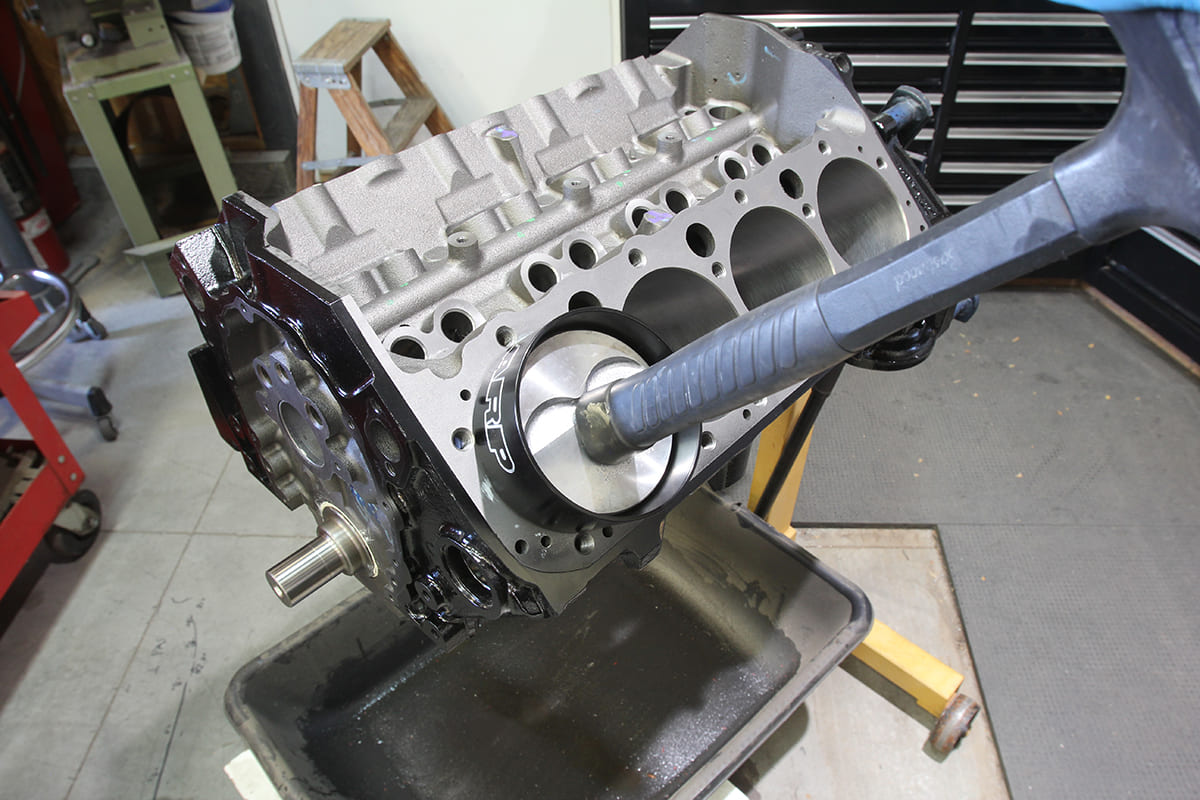
We’re using a set of Speed Pro hypereutectic pistons, available from Summit Racing (PN SLP-H860CP), for our 377ci build. Like the crank, we need to check out a few things before any parts can be installed in the engine block. The most important item on the to-do list is to verify the proper piston-to-cylinder wall clearance. Piston manufacturers have a specific area in which to measure the diameter of the piston, with some including a feature on the piston skirt, such as this bare aluminum spot on our Speed Pro pistons. If your pistons aren’t marked, 0.700-inch above the bottom of the piston skirt and 90 degrees from the piston pin should yield an accurate measurement.
In addition to the rotating assembly, we’re also going to address the oiling system by installing a Summit oil pump, pan, and spin-on filter adapter. That will put us in a good spot to continue next month with the valvetrain installation.
ACP
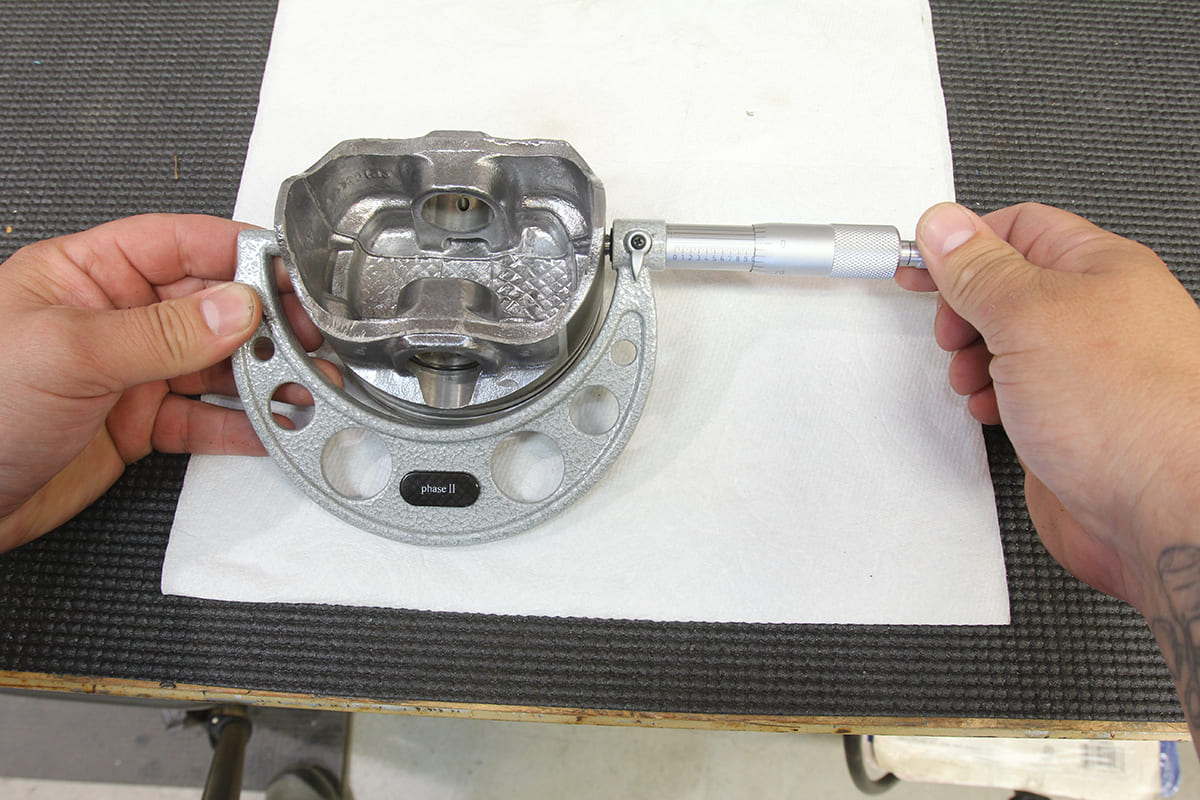
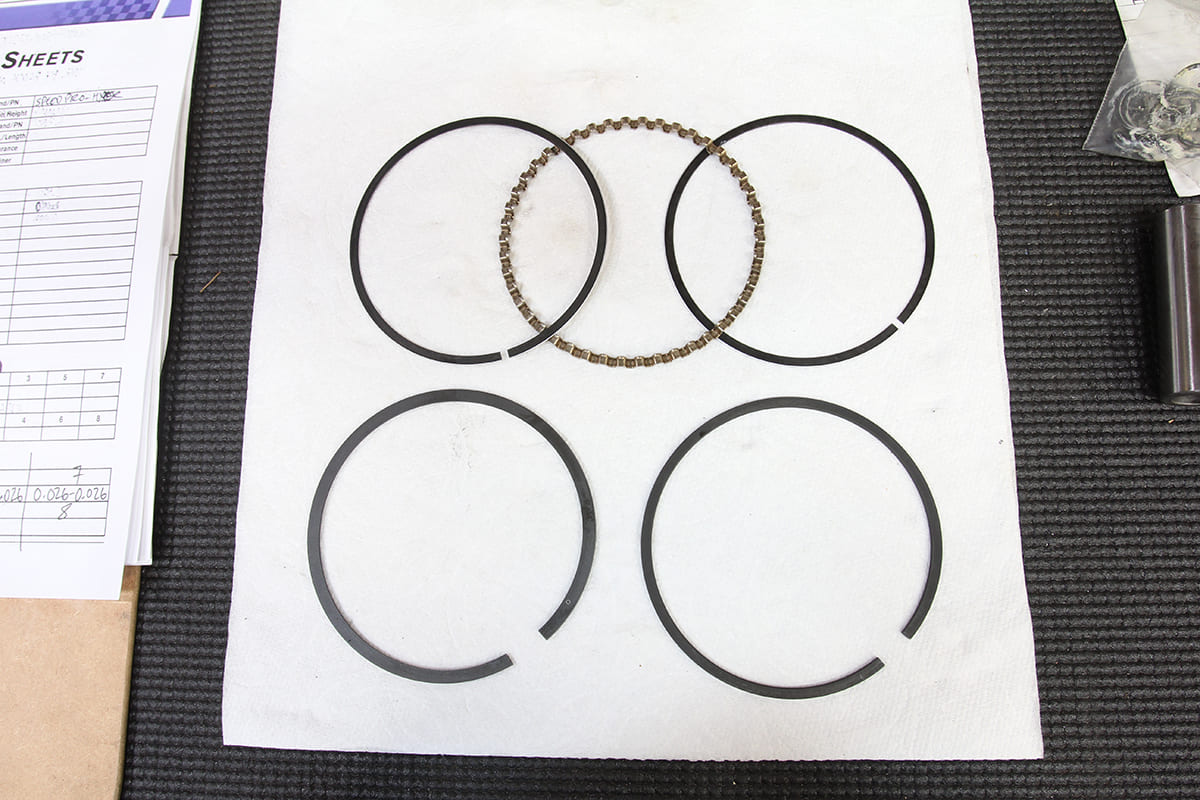
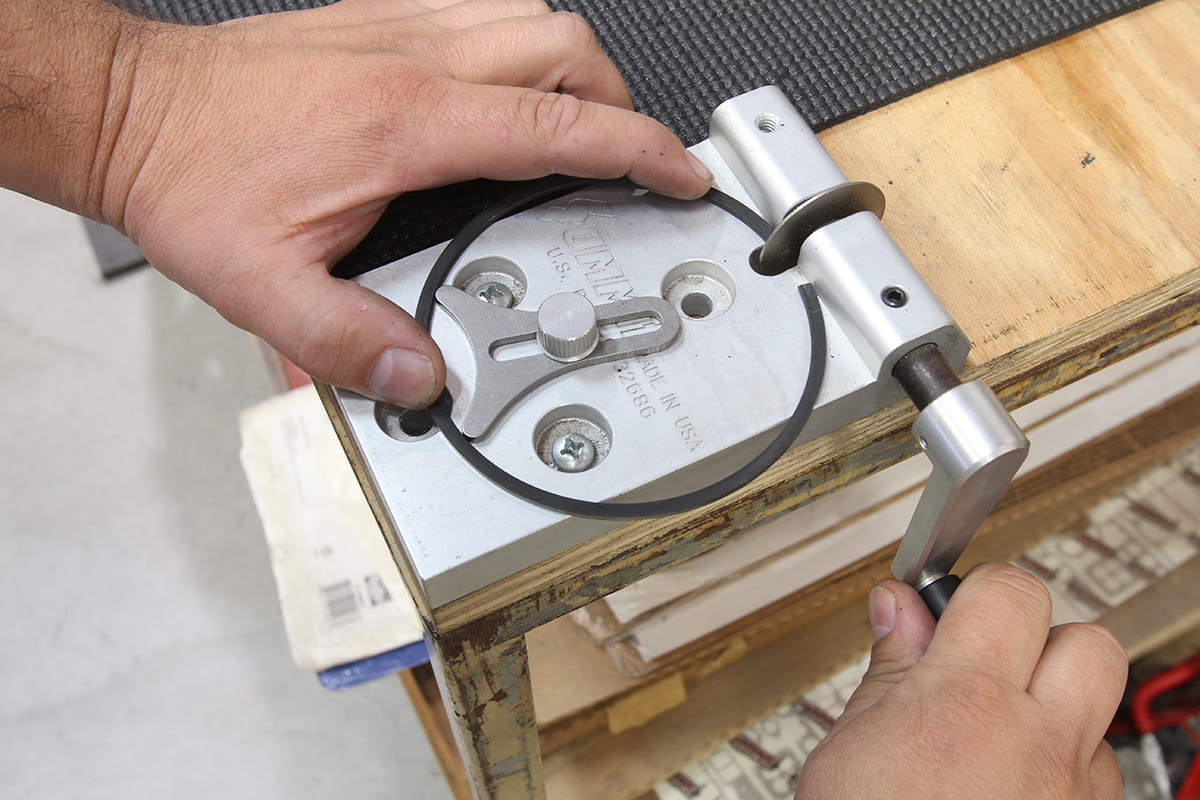
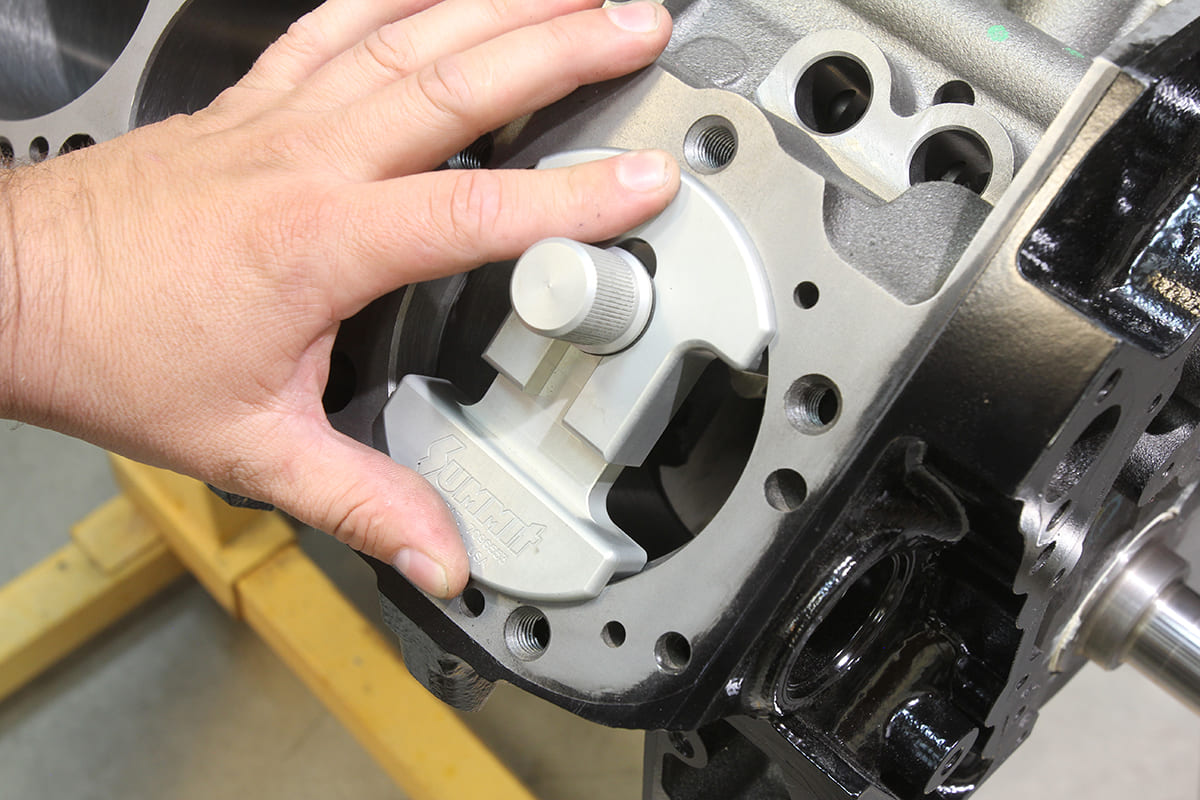
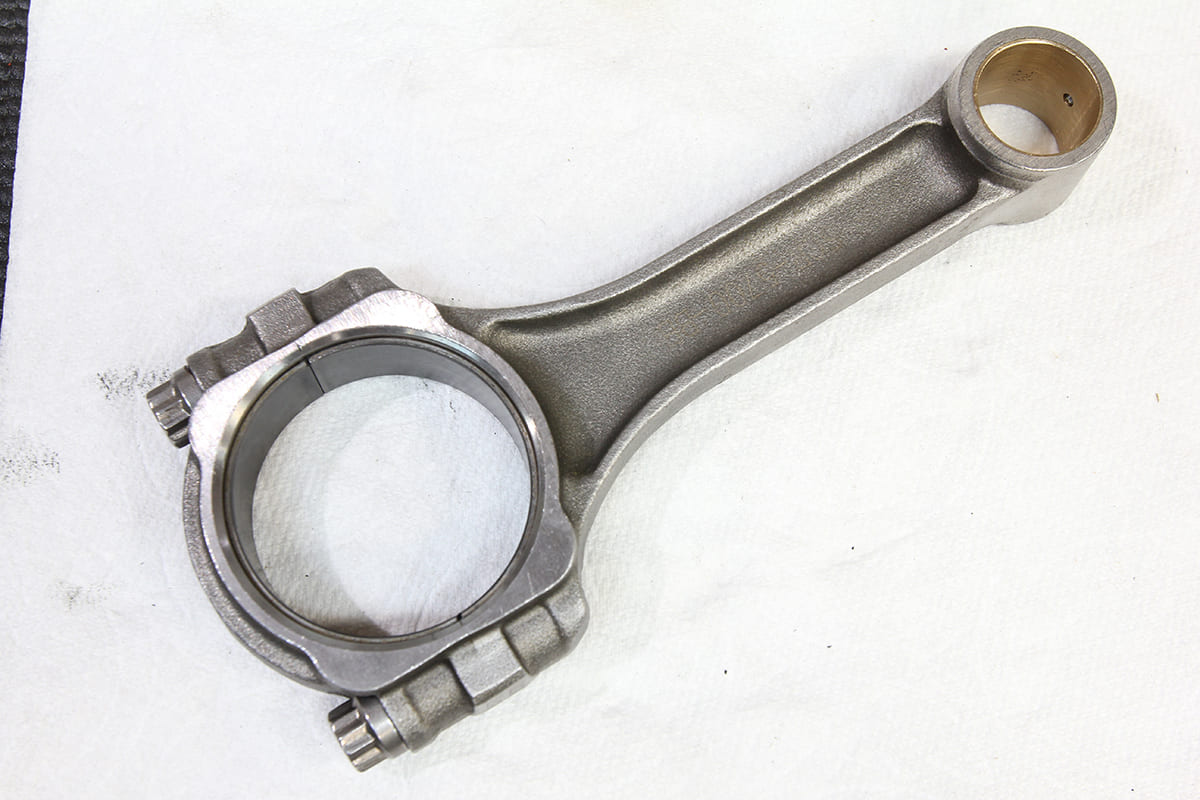
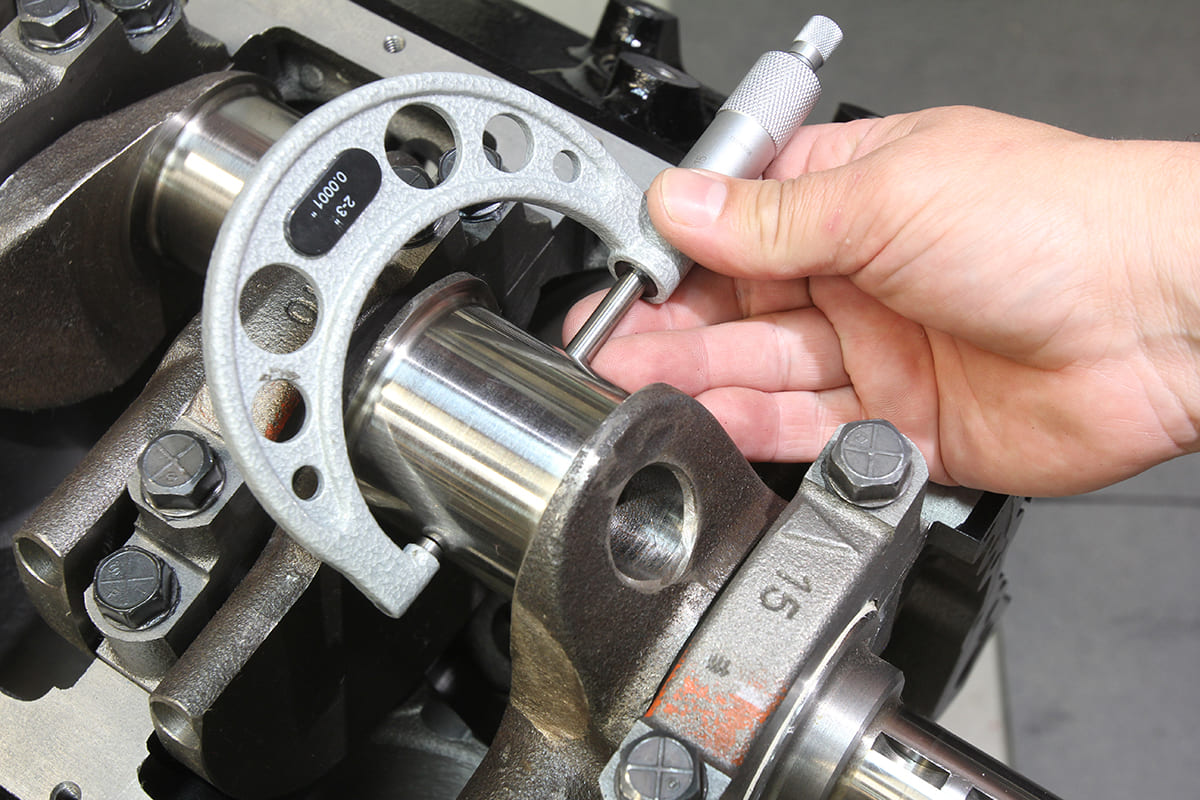
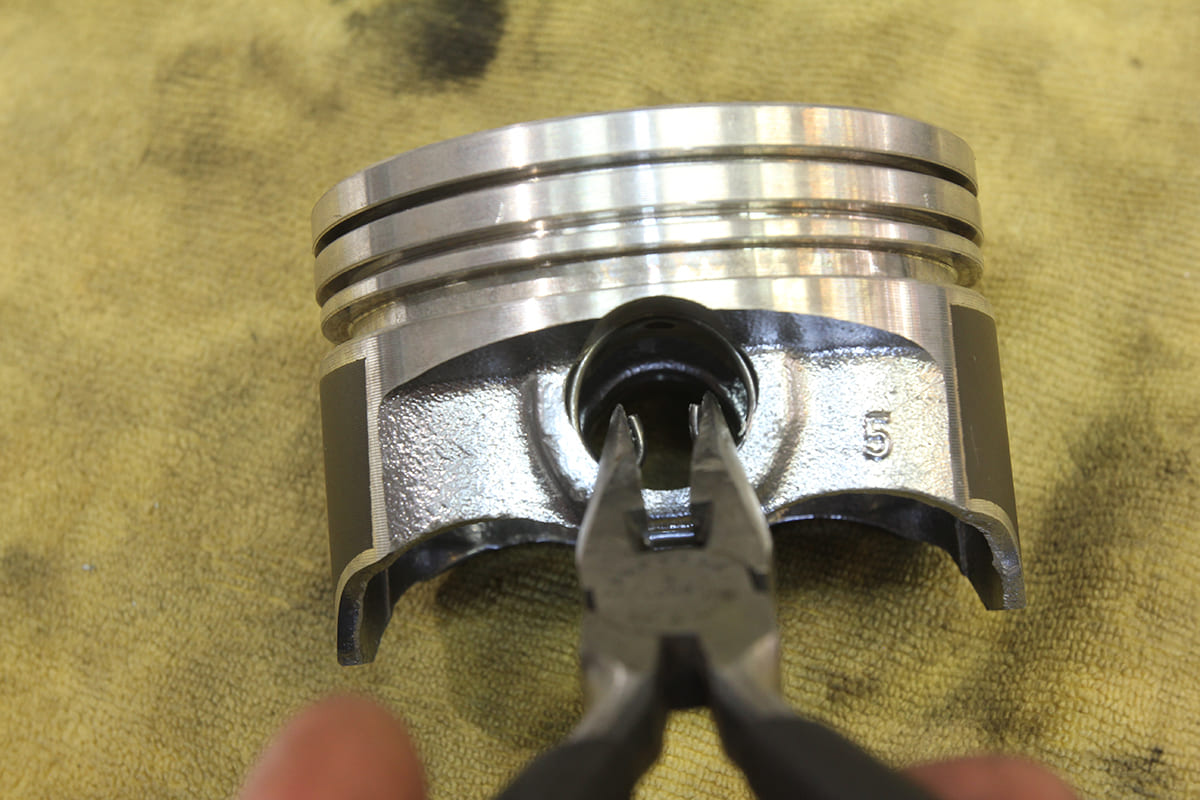
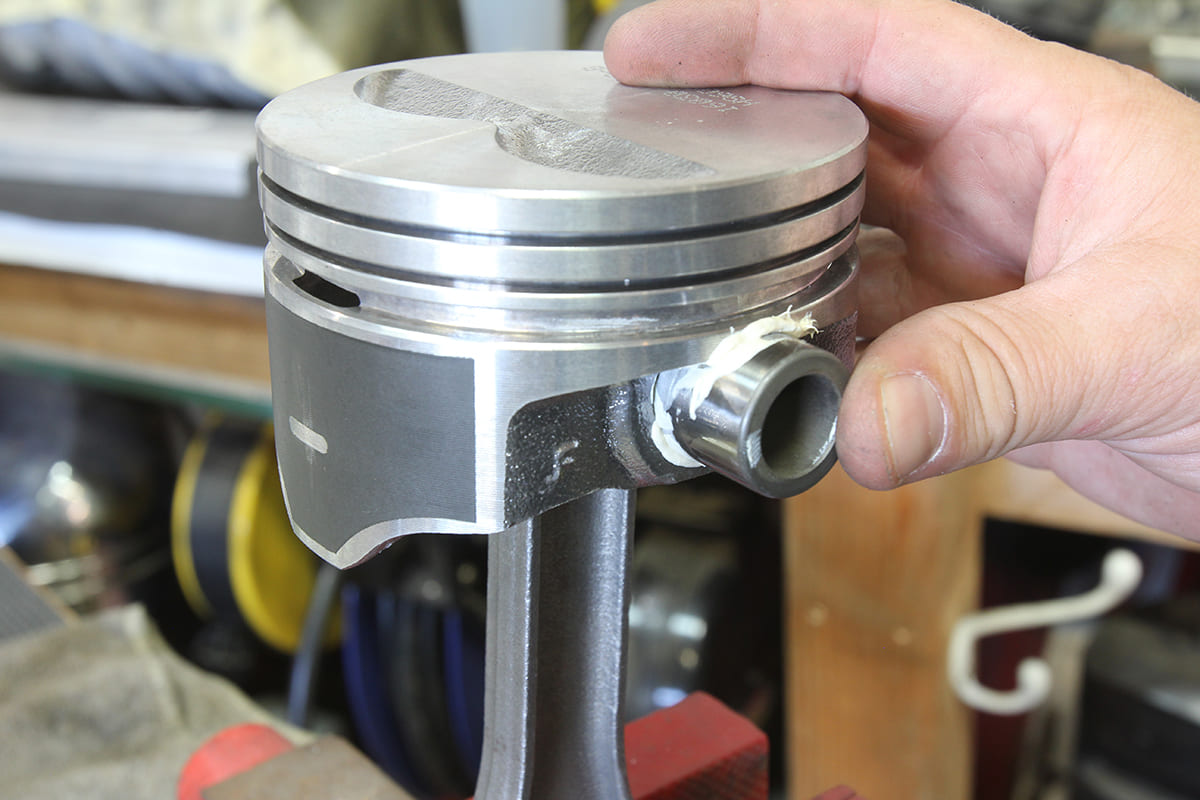
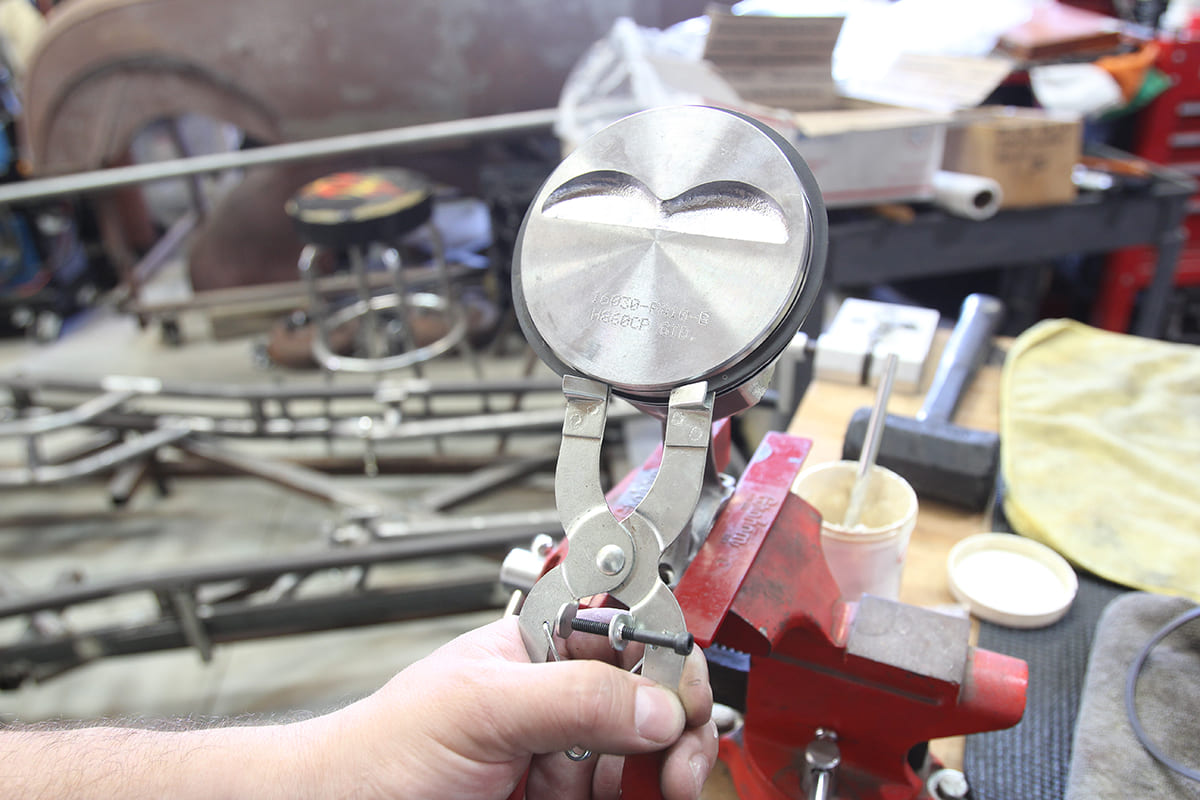
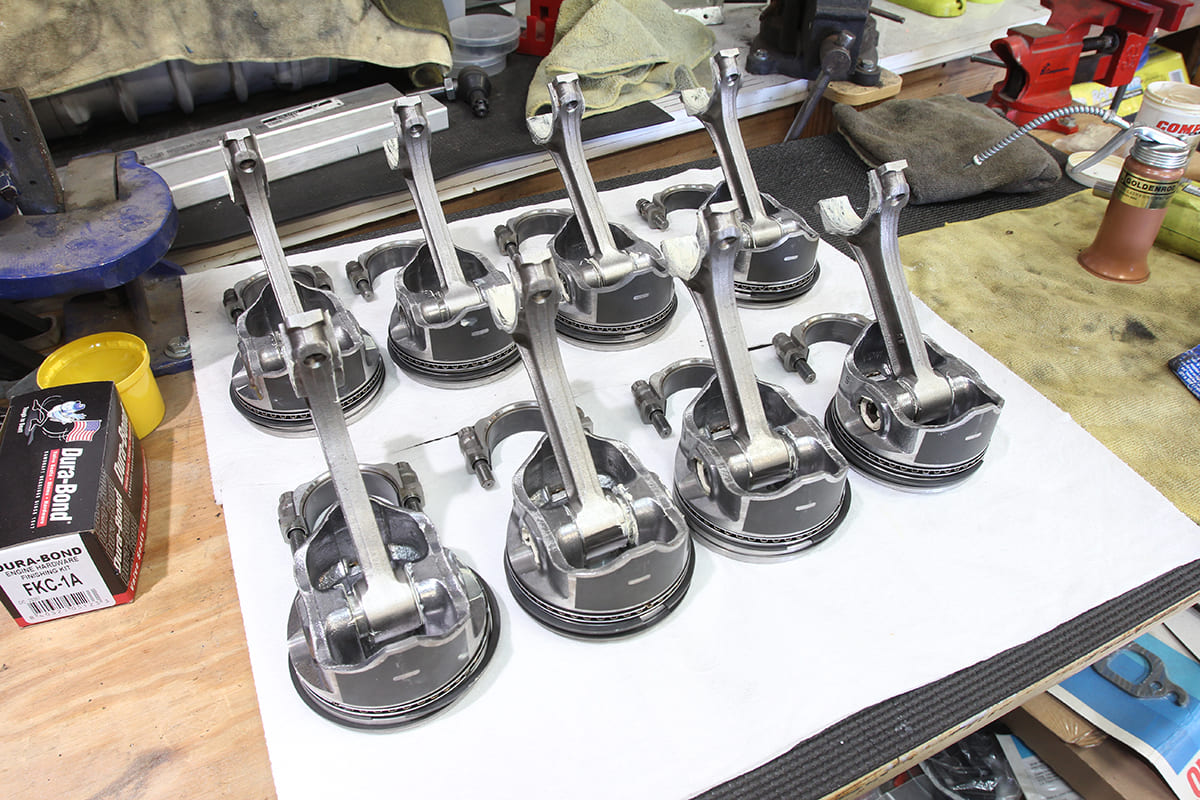
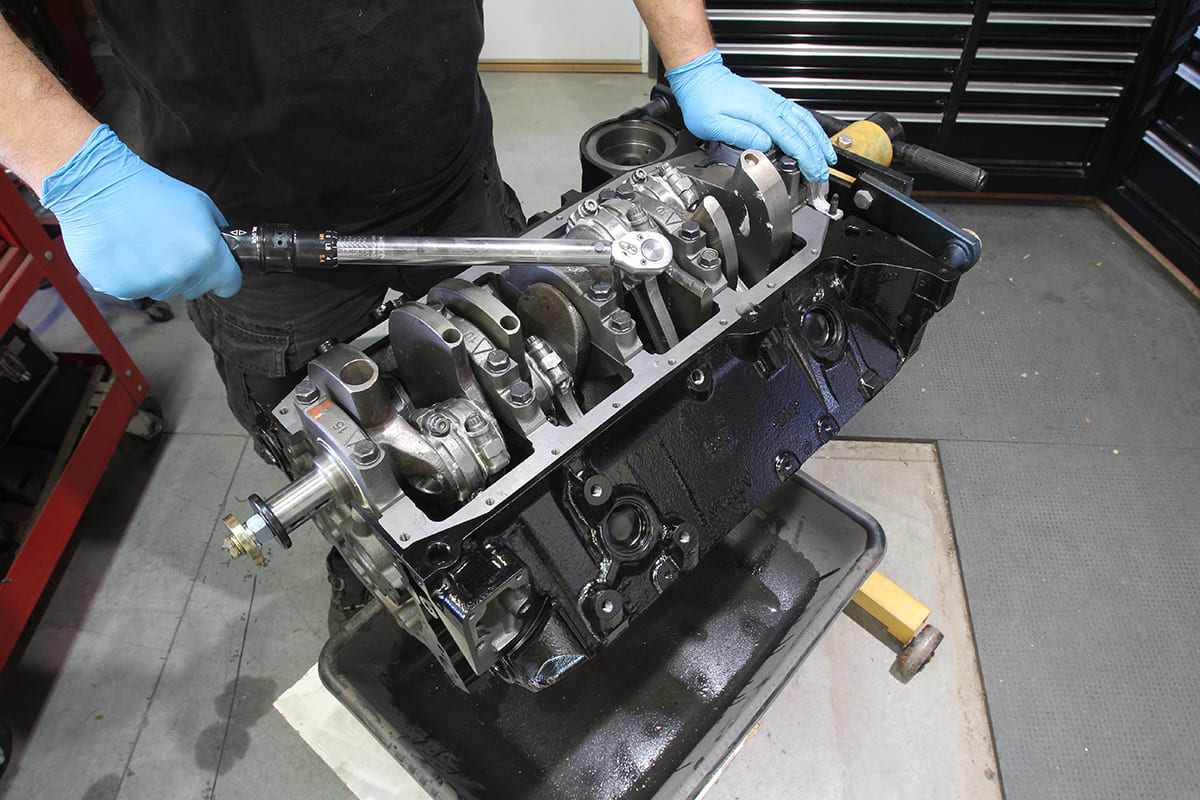
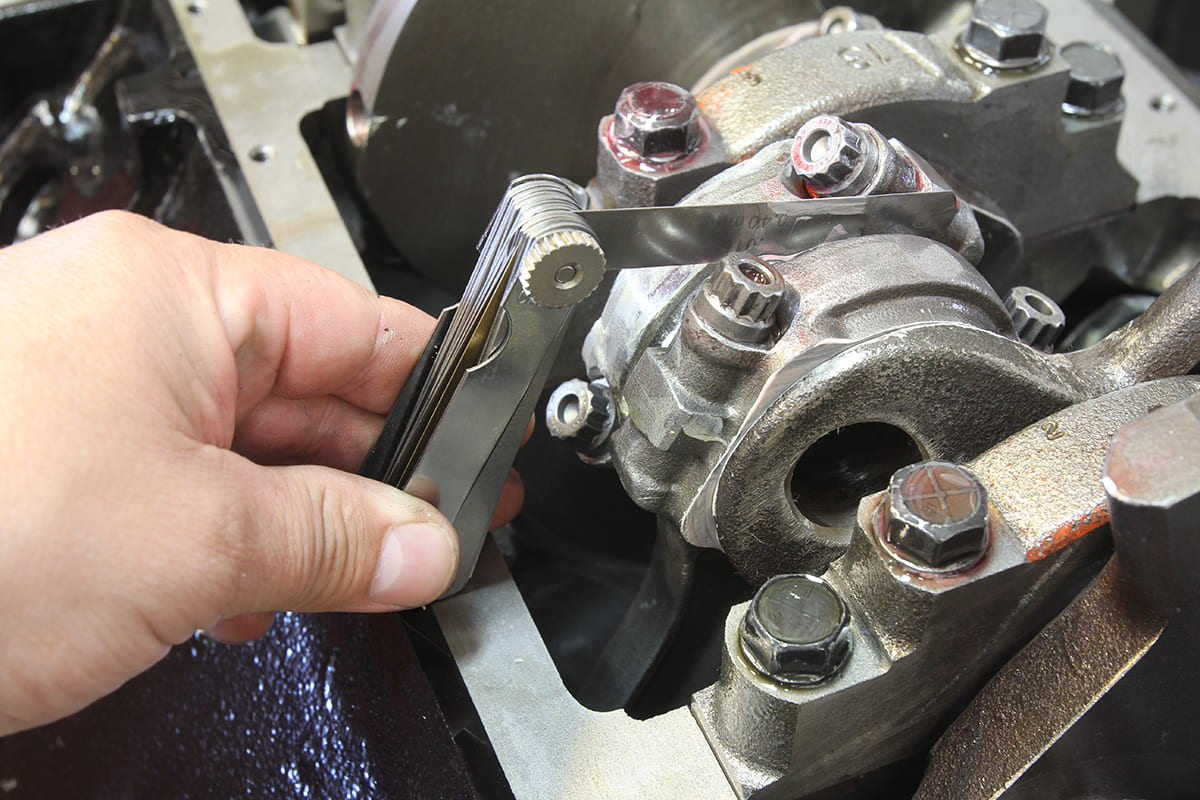
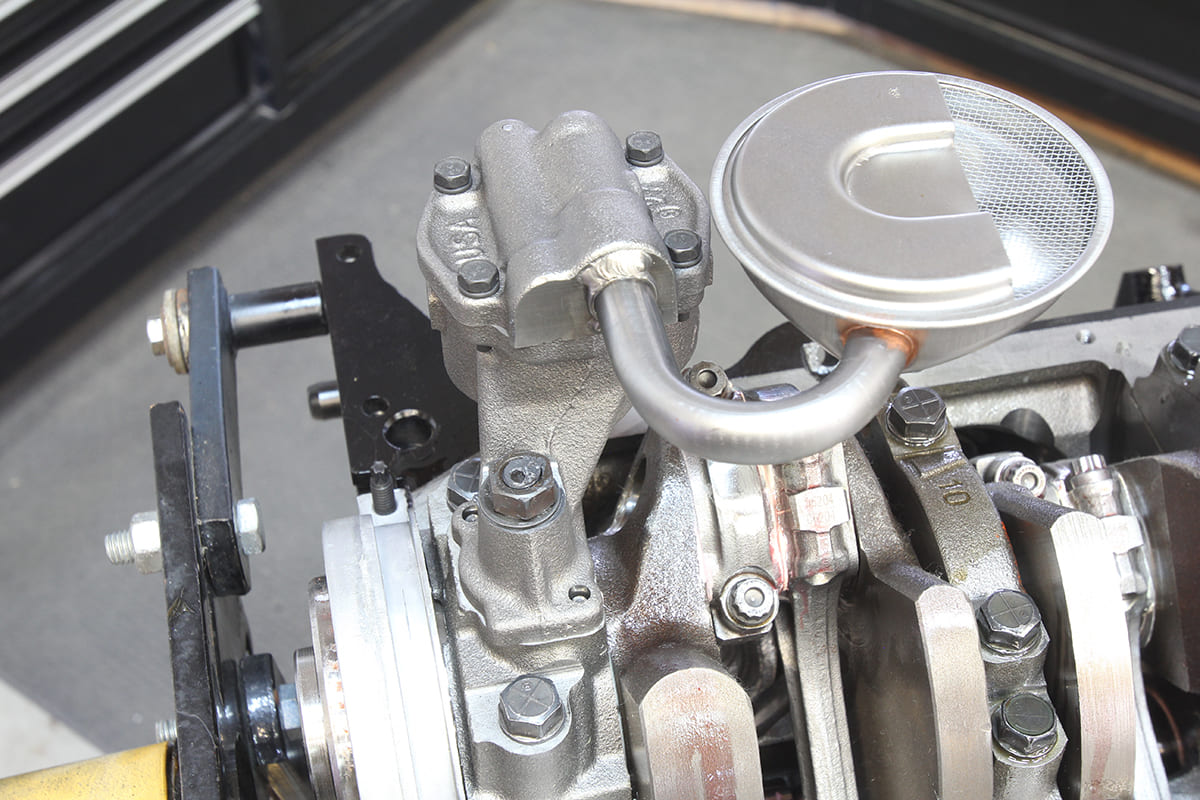
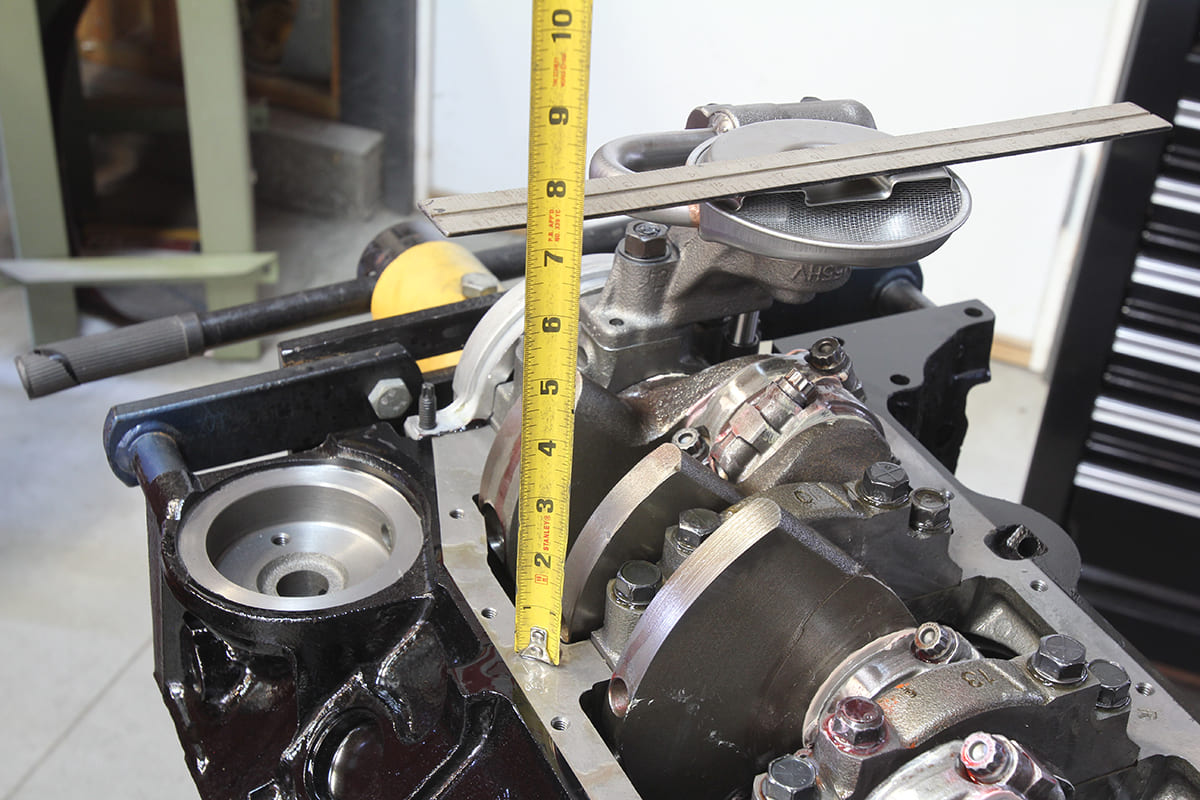
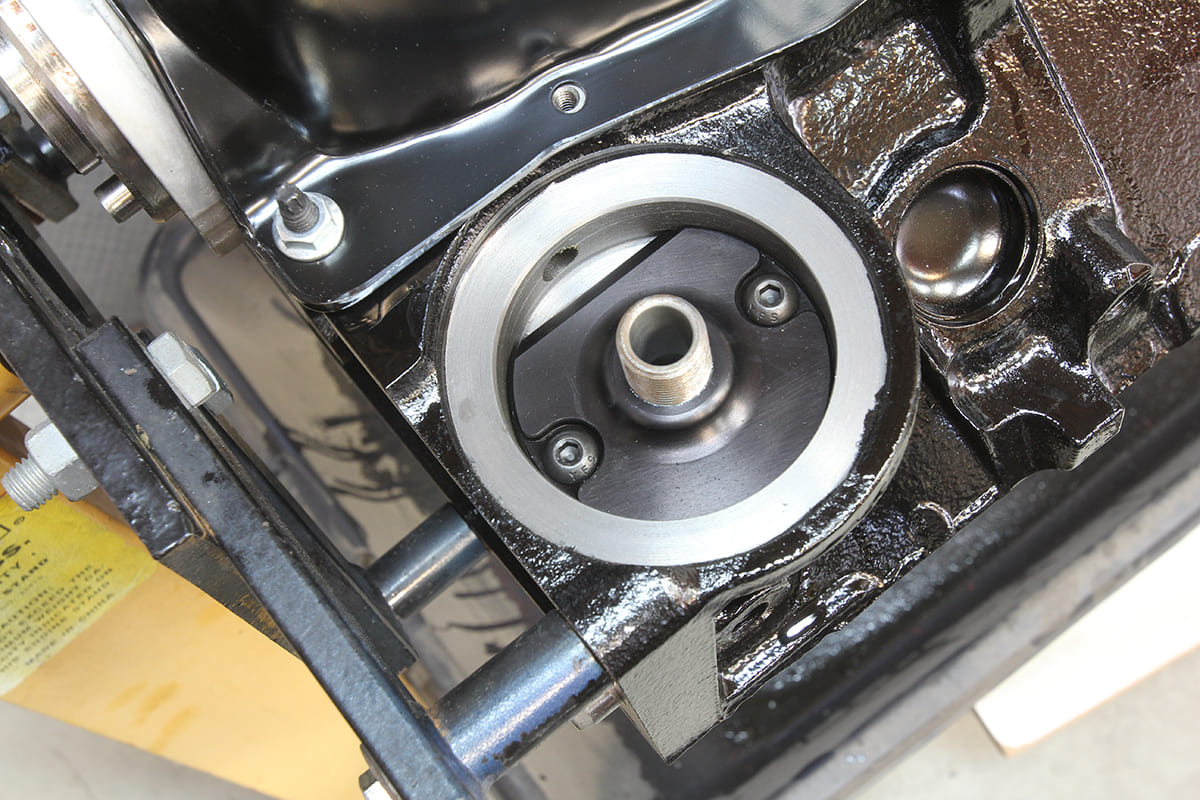
Using a set of outside micrometers (Summit PN POW-POW152006) once again, the piston is measured, our dial bore gauge zero’d to this measurement …… and the cylinder bore measured using said dial bore gauge (Summit PN CCA-5605). Using the same technique that we used to check the crank, this gives us a difference of 0.00375-0.00425 inch, depending on the cylinder. Using the fast and loose rule of 0.001 inch clearance per inch of bore, we’re right where we want to be.With the block and pistons a match, it’s time to turn our attention to the ring pack, as we need to file the top two compression rings for each cylinder.Filing piston rings can be done using a variety of techniques, from a simple file to a powered ring filer. I like to use this manual ring filer from Summit Racing. It’s a little slow but allows one to “sneak up” on the proper endgap without going over. The first ring takes the longest, as there’s no way to tell how much material needs to be removed. I like to count the rotations of the filing handle, stopping periodically to check the endgap in the cylinder. Once the proper endgap is achieved, I have a rough number of turns it took to get there and can use that as a baseline for the rest of the rings.This ring squaring tool came as part of Summit’s kit (PN SUM-CSUM2505), which included the manual ring filer. It’s used to consistently install the ring a predetermined depth in the cylinder bore so the endgap can be measured accurately.The ring gap is then measured using a set of feeler gauges. The ring manufacturer should provide the specs for each compression ring. All the second rings are filed and placed in their respective cylinder before the top rings are filed. Since cylinder diameters can vary, it’s important to keep the filed rings with their respective cylinder throughout the assembly process.Eagle 5.7-inch forged 5140 steel H-beam rods from Summit Racing (PN ESP-5700BBLW) will be used to support the pistons. Their lightweight design helps reduce stress on the rotating assembly and come assembled with bushed pin ends and ARP Wave-Lok rod bolts.Like the rest of the assembled components, the crank rod journals are measured and compared to the big end of the connecting rods (with bearings installed and rod bolts torqued to spec) to ensure proper clearance.With the components checking out, it’s time to start assembling the rods and pistons, starting with one pin circlip. Note the orientation of the circlip, with the opening at the bottom. This prevents the clip from being “squeezed” during the piston’s travel and inadvertently coming loose.With the connecting rod in place between the piston’s skirt, the pin is inserted, followed by another circlip.Mounting the rod and piston assembly in a vise makes easy work out of installing the piston rings, starting with the oil control rings. Note the location of the endgaps on the upper and lower oil rails.To avoid damaging the two compression rings, an Adjustable Piston Ring Expander Plier, such as this item from Summit Racing (PN OTC-4839), is used to expand each ring just enough to clear the piston.Many rings are designed with a top and bottom and need to be installed as such. They’ll typically be marked to signify the top.The piston rings are installed on this piston and it’s ready to be dropped into the cylinder. Note the location of the two compression ring endgaps in relation to each other and the piston.Our eight piston assemblies are now ready for installation. It should be noted that the entire rotating assembly was balanced before assembly began by Revco Precision to ensure that the guts don’t vibrate themselves to death!The fillet on the connecting rods need to match the fillet on the crankshaft or you’re going to be looking at trouble. It’s important to get this oriented properly before installing the piston assemblies. The connecting rod bearings have tangs that line up with the connecting rod upper and lower halves and need to be installed accordingly.An ARP piston ring compressor is the best way to get those pistons slid into the cylinder without nicking the piston rings. A liberal amount of break-in oil is applied to the cylinder walls as well as the piston rings to ensure everything slides gently into place.As each assembly is installed in the block, the rod bolts are torqued to 40 lb-ft and the crank spun to check for any issues.Clearance between the rods as well as the rod and crank journals is measured and compared to manufacturer recommendations to ensure clearance is within spec.While we’ve got the bottom of the engine in the air, we’ll install the Summit Racing Oil Pump and Pickup Kit (PN SES-3-60-08-001) that will be used to ensure our stroker is properly lubed at all times.The Summit Oil Pump features a welded pickup tube and comes with a mounting stud for ease of installation.We’ll be using a 5-quart Summit Stock Replacement Oil Pan (PN SUM-G3505B) in black. With a depth of 7 1/2 inches, we need to double-check that it jives with the oil pump’s pickup location.The total depth of the oil pan’s sump is 7 5/8 inches …… while the pump is 7 3/8 inches from the rail to the bottom of the oil pump’s pickup, well within the recommended 1/4- to 3/8-inch spec.With our attention directed at the oil system, we also took the time to install a Summit Spin-On Oil Filter Adapter (PN SME-2015). These adapters don’t have the high-pressure bypass valve found on stock filter mounts, ensuring that all oil travels through the filter before it enters the engine.Next month, we’ll return to install the camshaft, heads, and valvetrain, and cover what goes into determining compression ratio.
Sources:
Automotive Racing Products (ARP)
(800) 826-3045
arp-bolts.com
We use cookies to ensure that we give you the best experience on our website. If you continue to use this site we will assume that you are happy with it.