Back in the day when GM unveiled the third-generation Camaro, they did so with plenty of gusto showcasing their updated F-body platform packed with enough performance goodness to make every owner the envy of their neighborhood. The updates, including fuel injection, bigger brakes, and edgy contemporary styling still hold their own on the streets today, however with the increase in engineering design and driveline upgrades, today’s hot rodder wants to infuse even more capabilities into the platform.
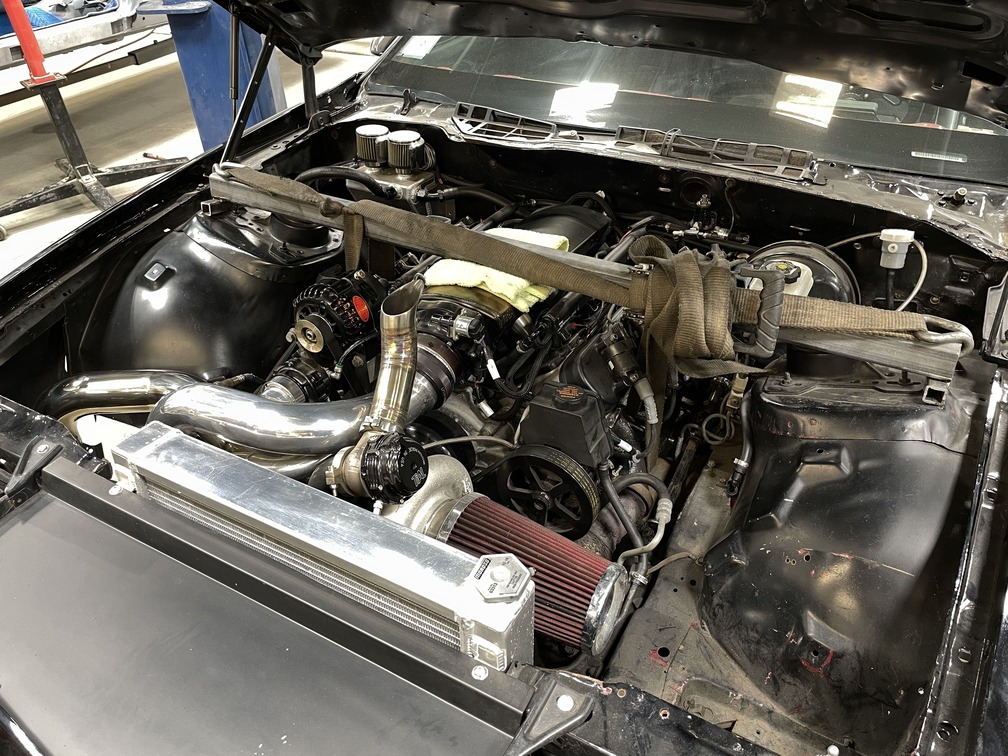
Regardless of whether you want to update your F-body for boulevard cruising or carving cones on the autocross, there’s now a stream of choices you can easily make to up the ante on increasing performance. On a recent visit to Chris Cerce Customs in Taunton, Massachusetts, we met with shop owner Chris Cerce to discuss revisions to his personal ’91 Camaro Z28. Having already hopped it up with a Don Hardy Race Cars–built 850hp LS V-8 sporting a BorgWarner 76mm turbo linked to a GM T56 trans, it was time to focus on harnessing all the power with revisions to the handling and braking to dial it all in. It was a great opportunity for All Chevy Performance to follow along, commencing with a complete rebuild of the front suspension and brakes to bring the car to the next level.
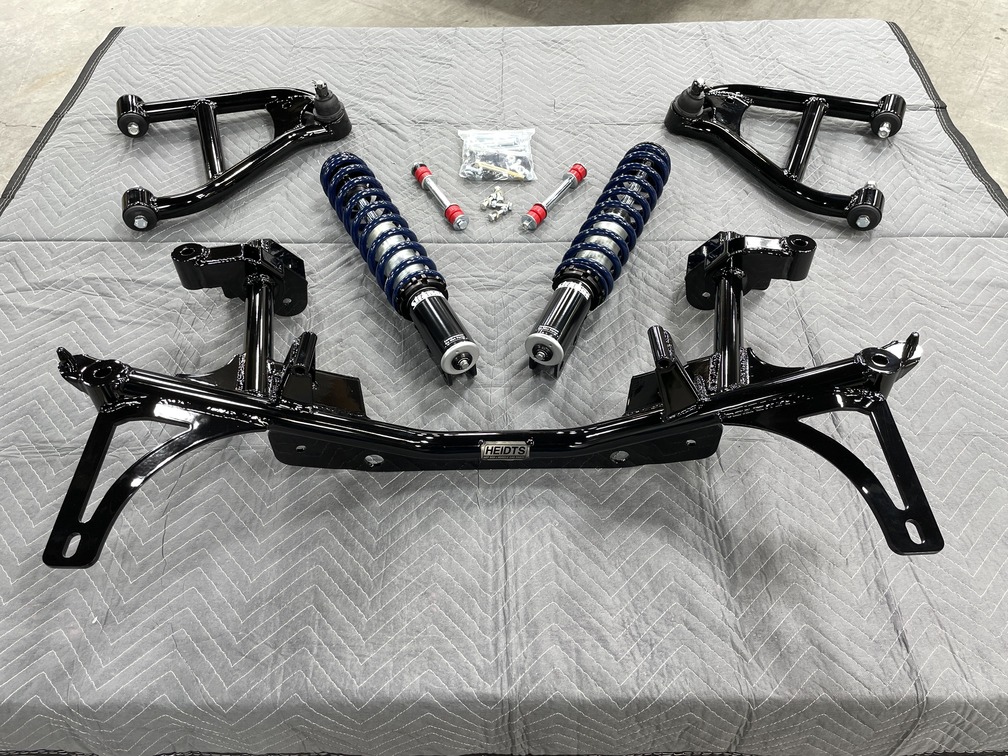
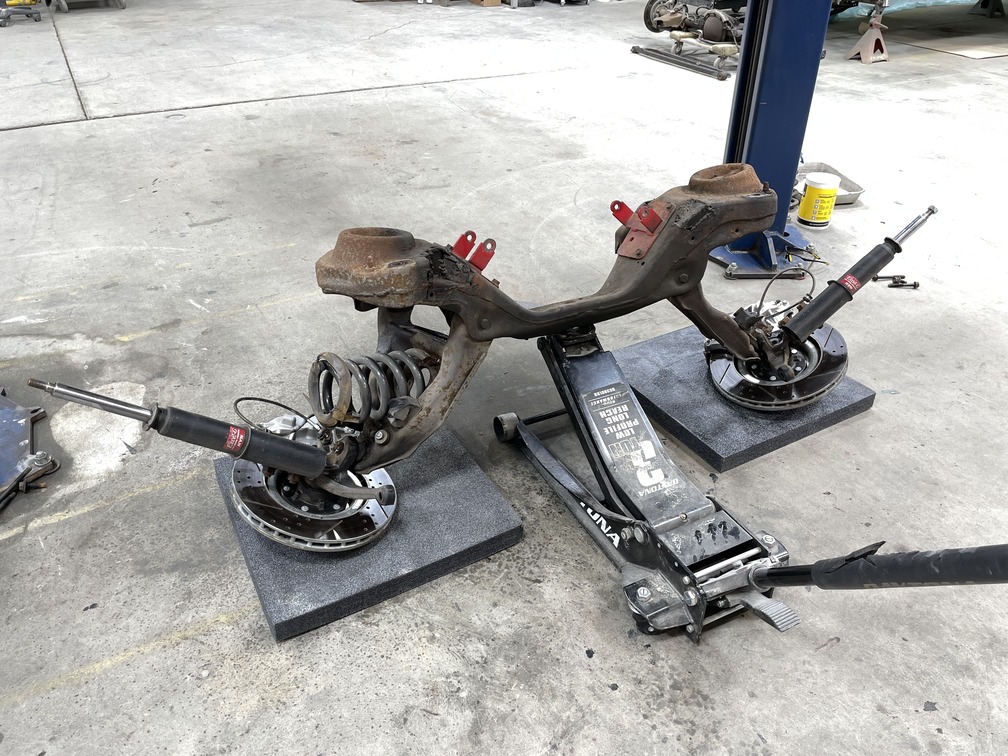
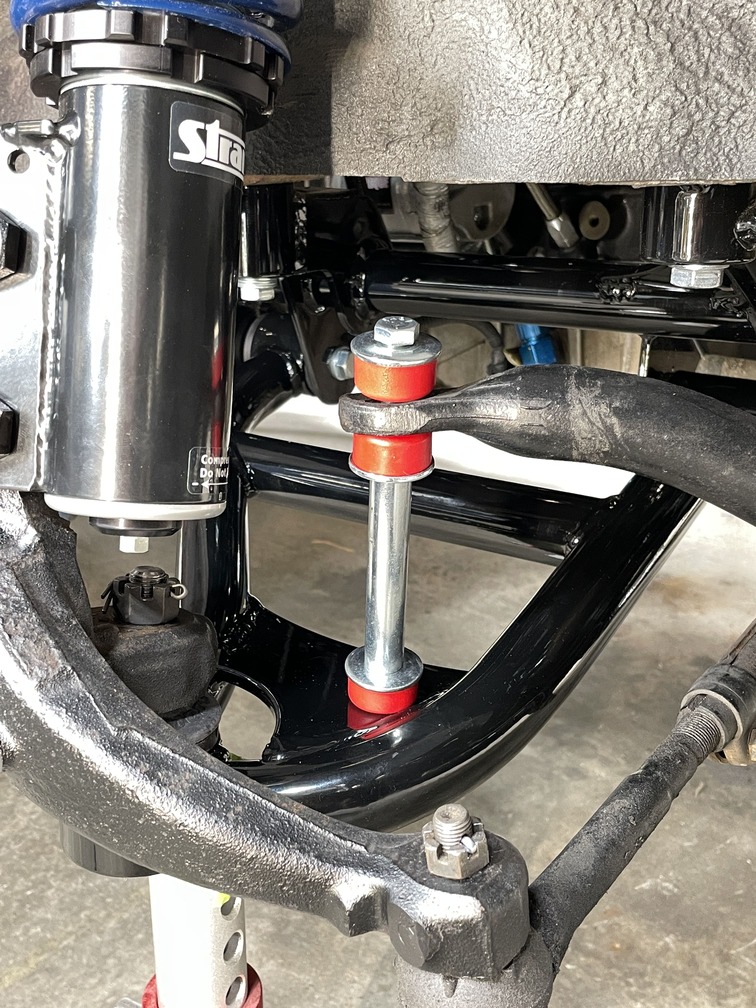
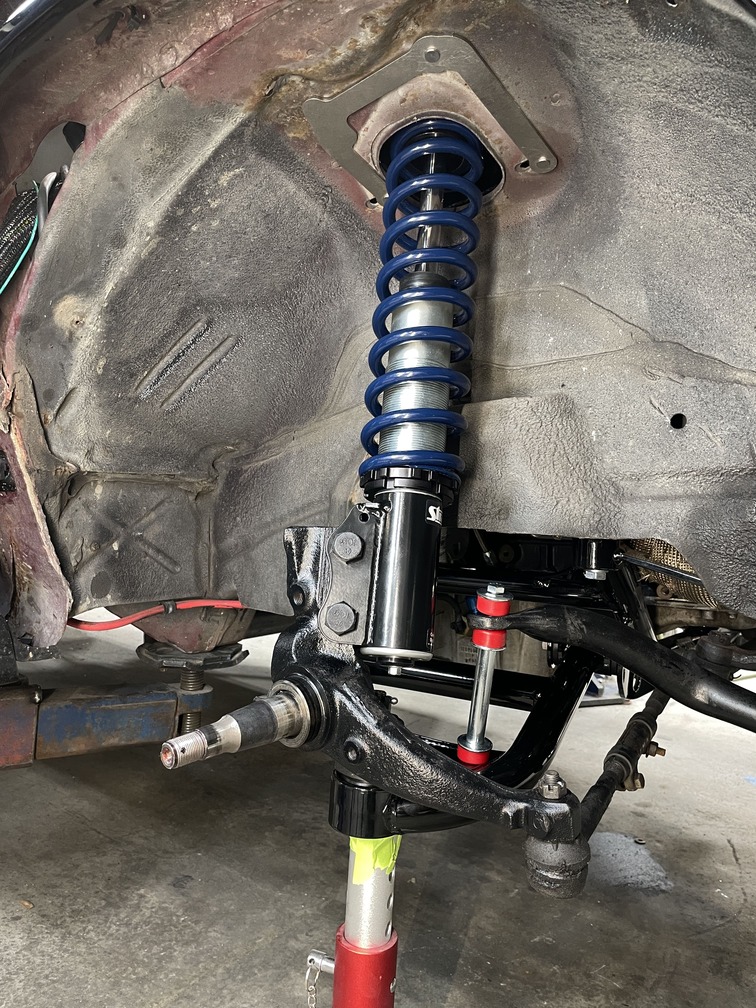
To infuse plenty of newfound performance handling to the third-gen Camaro, Chris Cerce of Chris Cerce Customs (CCC) assembled a perfect combination of parts, including a new tubular K-member with matching lower control arms and sway bar links from Heidts, along with a pair of Strange Engineering double-adjustable coilover struts with Hyperco springs.
To get started, a call was made to Heidts to check into their suspension offerings for the third-gen. With the original small-block long gone it was a perfect opportunity to ditch the bulky factory front crossmember in favor of Heidts’ new tubular K-member. Designed with a dramatic weight savings augmented by increased clearance for the oil pan and headers, it’s also engineered with 3 degrees of antidive for superior handling at the racetrack. To complement the K-member, Heidts also offers beefy tubular lower control arms as well as fresh sway bar links with Polyurethane bushings. Strange Engineering double-adjustable coilover struts with Hyperco springs anchored by RaceCraft Inc. adjustable steel camber plates complete the system to give the F-body platform a substantial increase in the handling department.
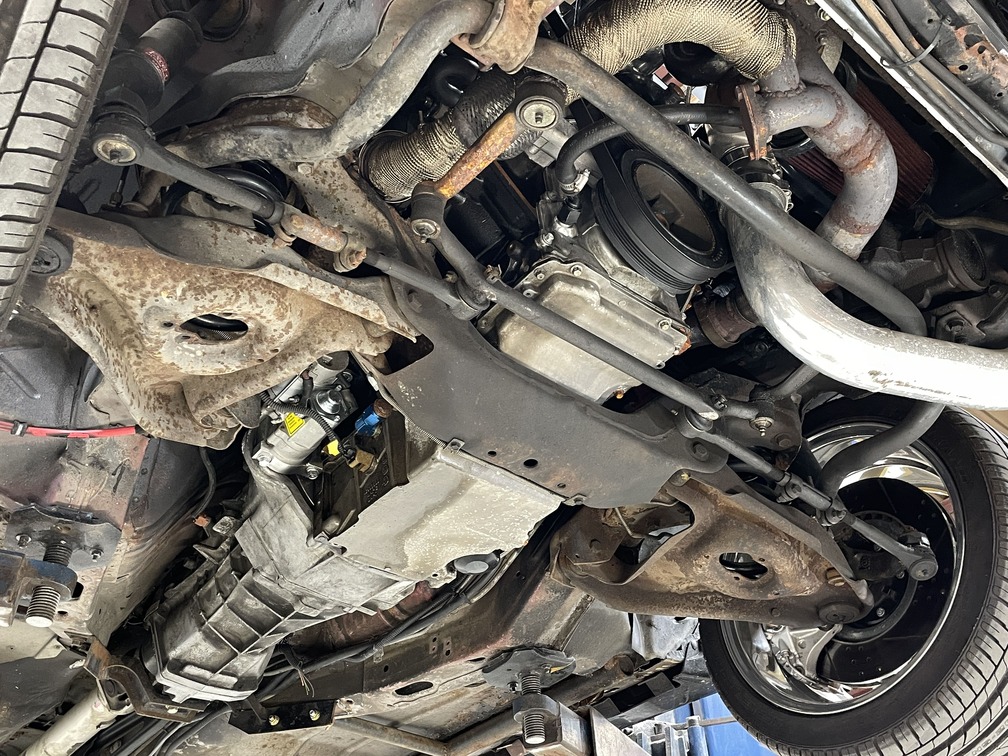
From here you can see the factory crossmember and lower control arms in place as well as steering components and sway bar prior to being prepared for updates.
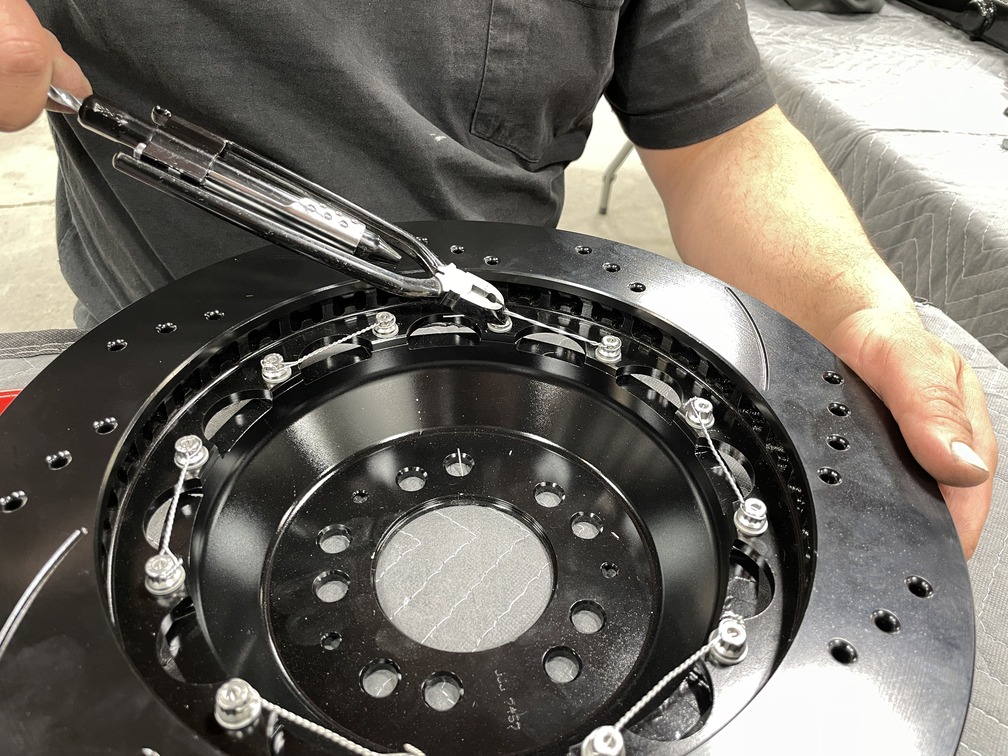
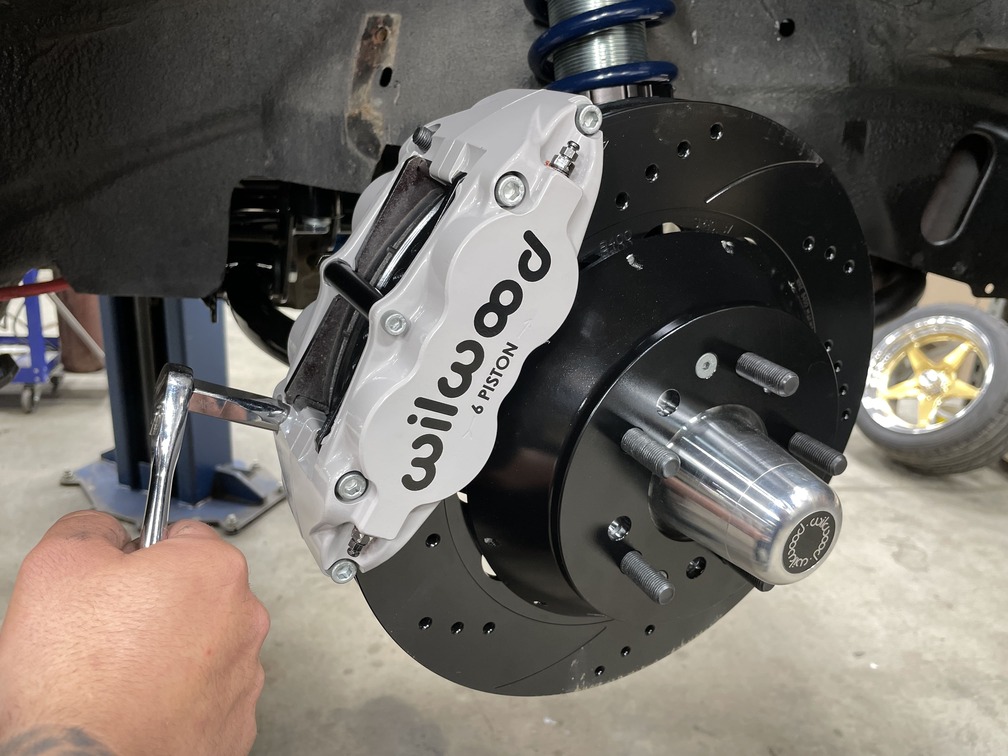
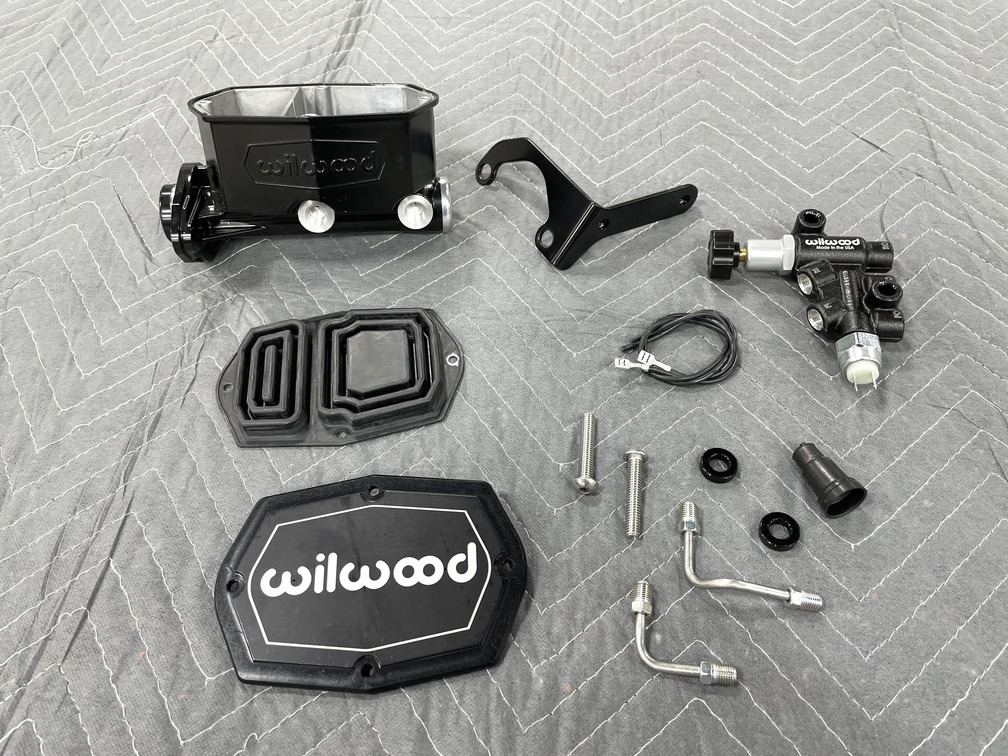
If you want to go fast, nothing brings the ultimate in stopping power like a Wilwood Disc Brakes Forged Narrow Superlite 6R Big Brake Front kit. Packed with everything needed to get the job done, it includes their exclusive two-piece, SRP 14-inch drilled-and-slotted rotors deftly matched to Forged Narrow Superlite 6R Radial-Mount six-piston calipers. Complete the package with their compact tandem master cylinder along with combination proportioning valve being a perfect match to the new setup.
Let’s follow along as team member Marco Martins brings plenty of dynamic handling and braking to the front end of this Camaro.
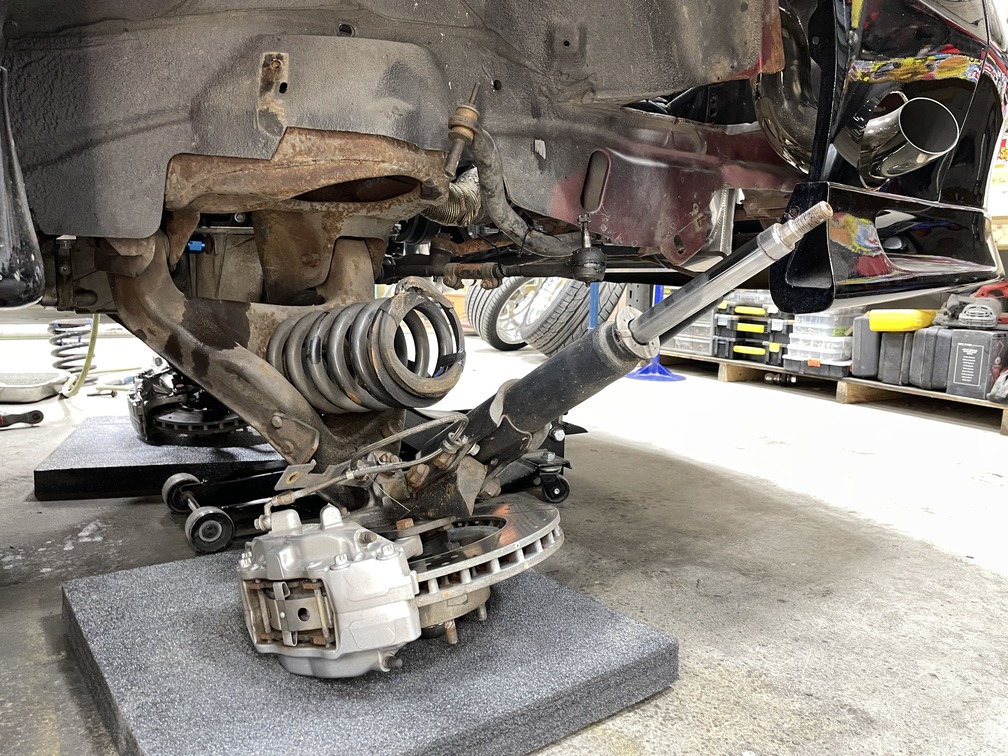
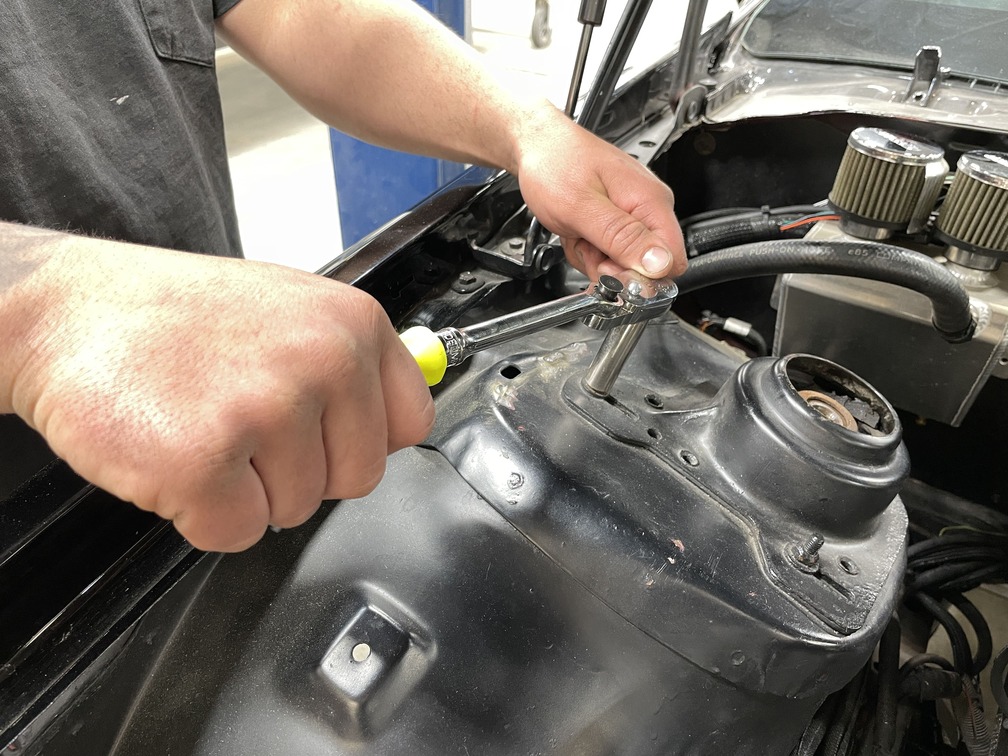
Preparation for removal of the stock crossmember starts by disconnecting (and capping) the front brake lines, sway bar links, and tie-rod ends while also using a spring compressor to safely remove the front springs. Next, properly brace and support the engine across the strut towers with straps or chains and follow by disconnecting the engine mounts.
In the next issue we’ll attack the rear of this Camaro and upgrade the brakes, suspension, and rearend, which will bring this Camaro to the next level of performance.
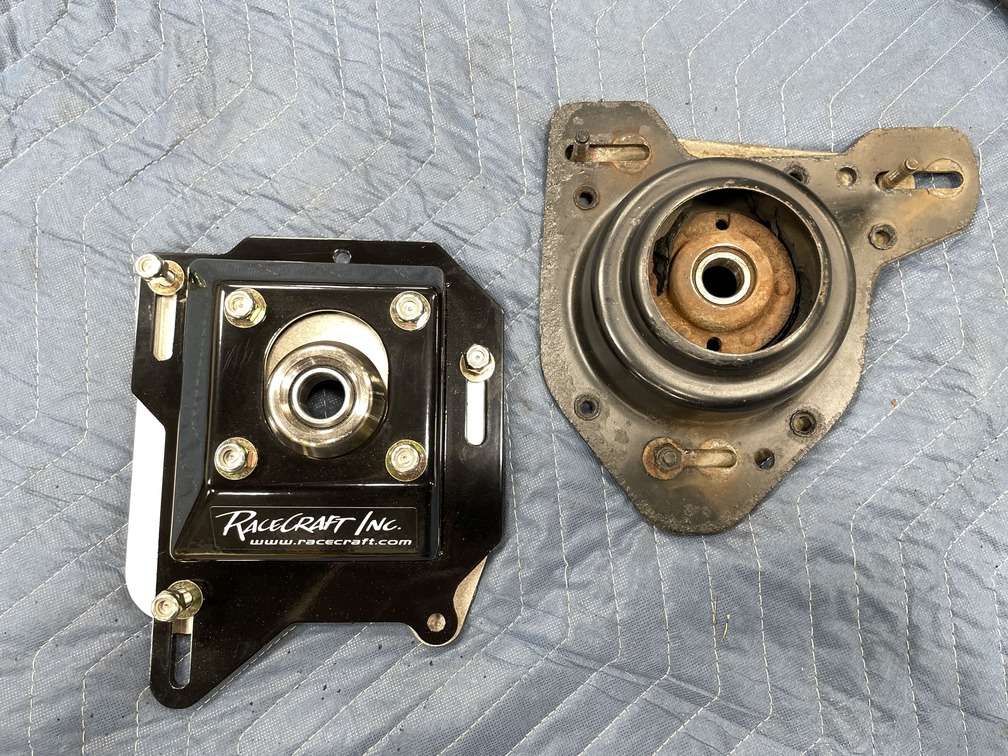
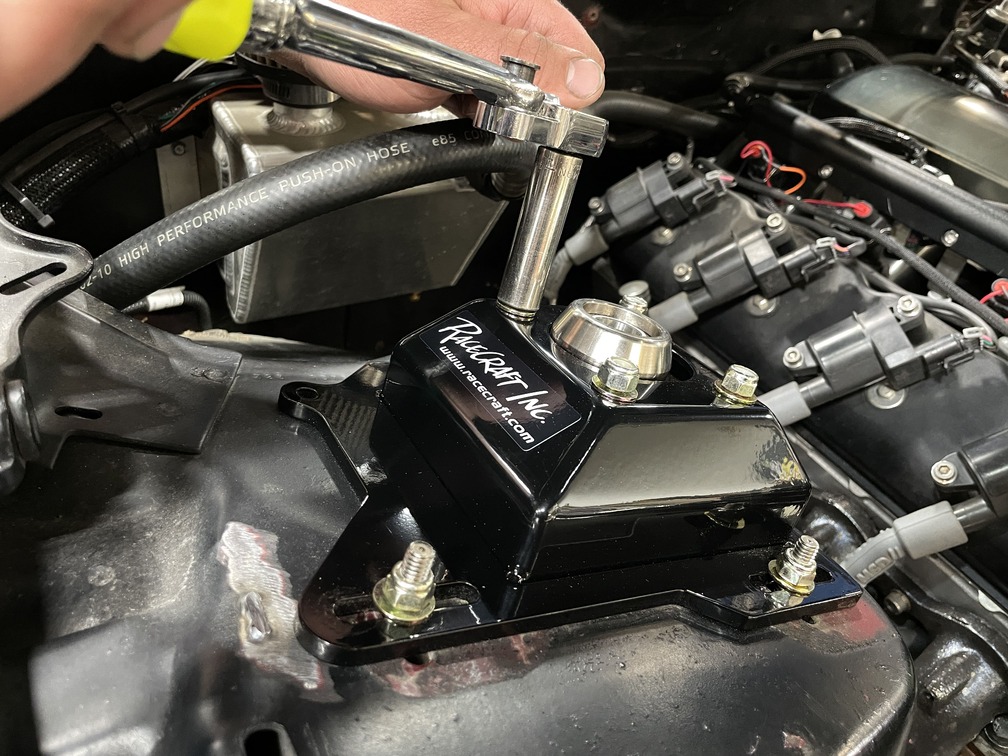
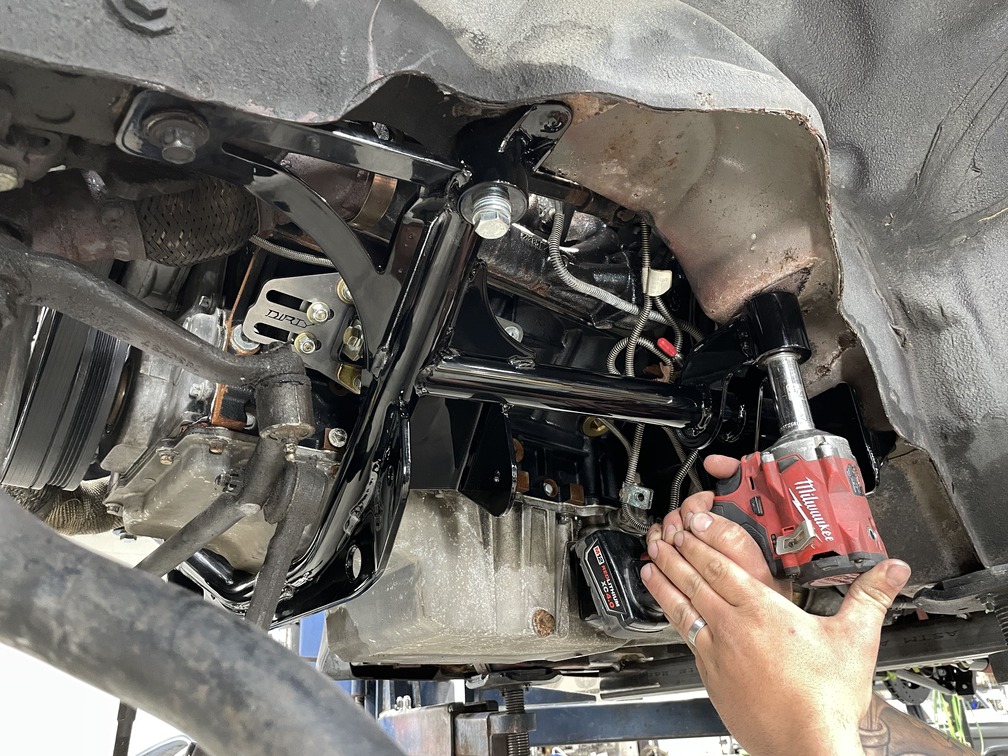
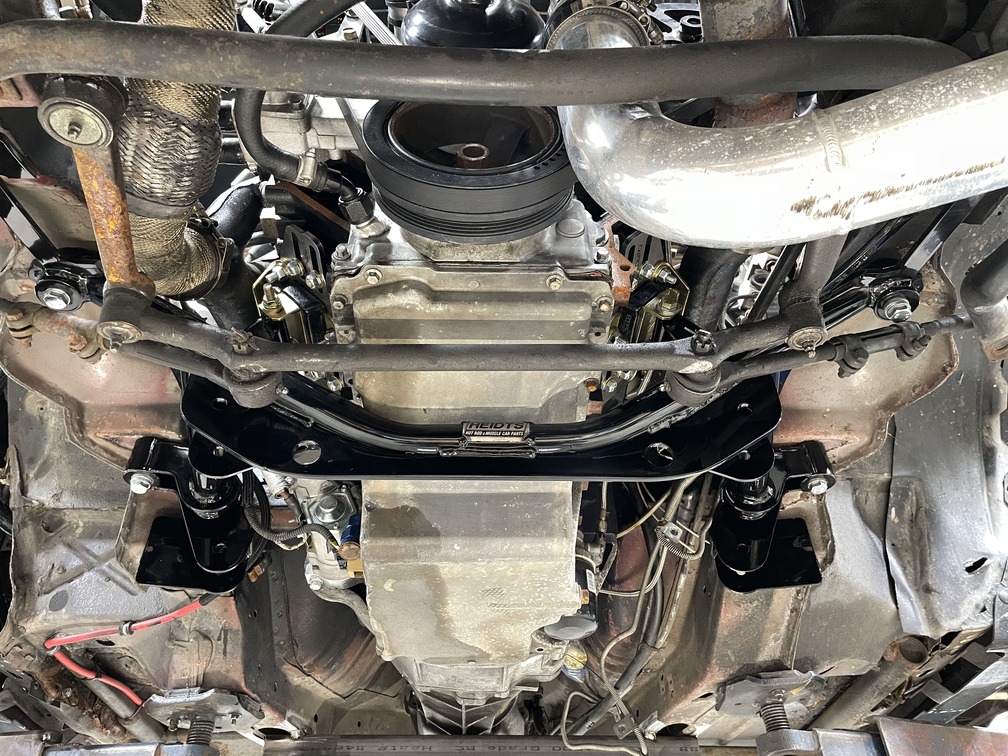
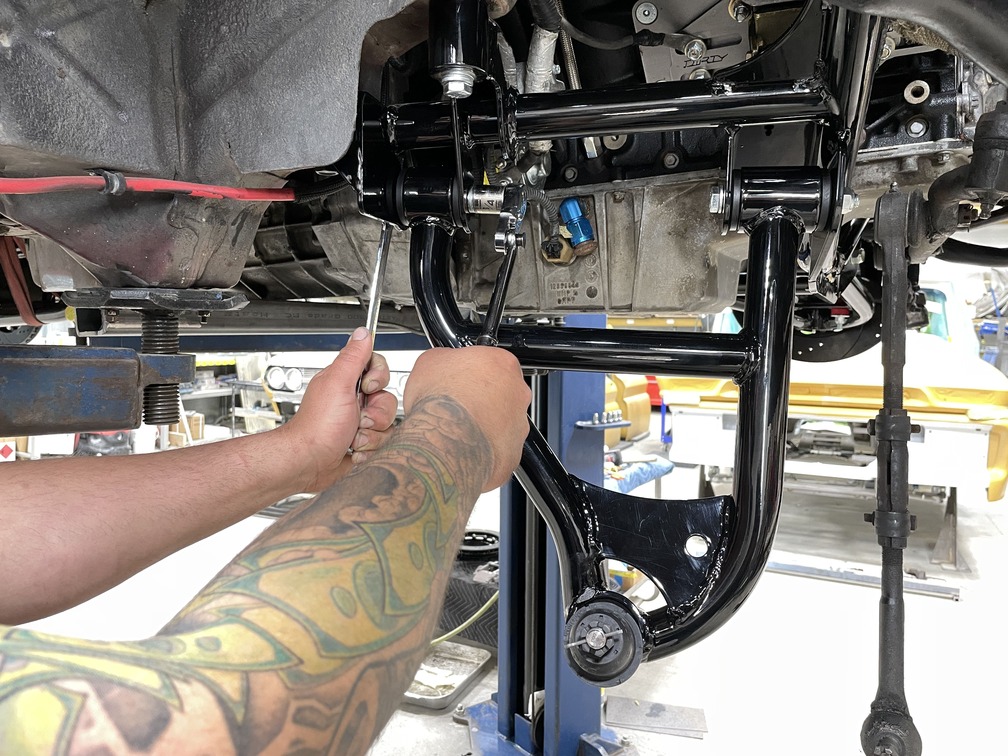
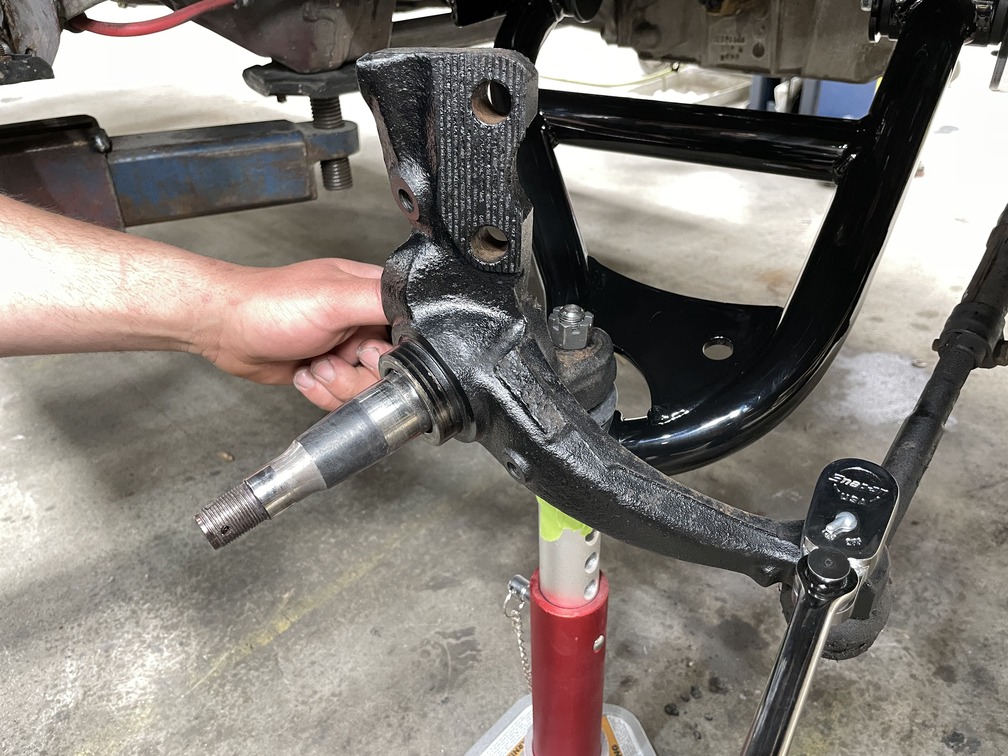
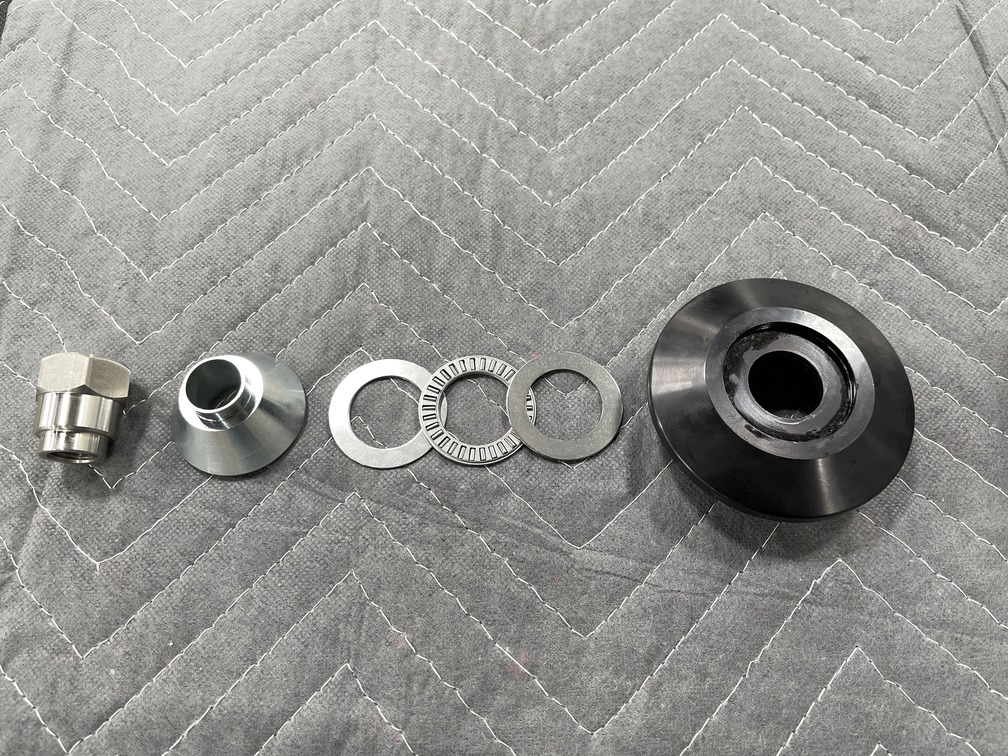
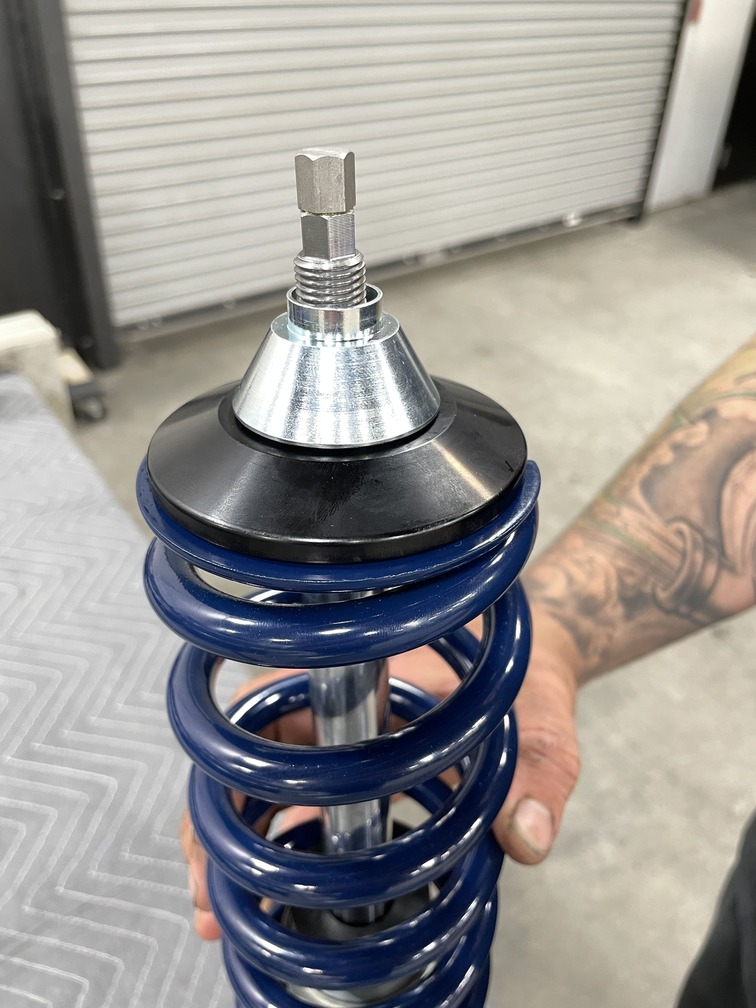
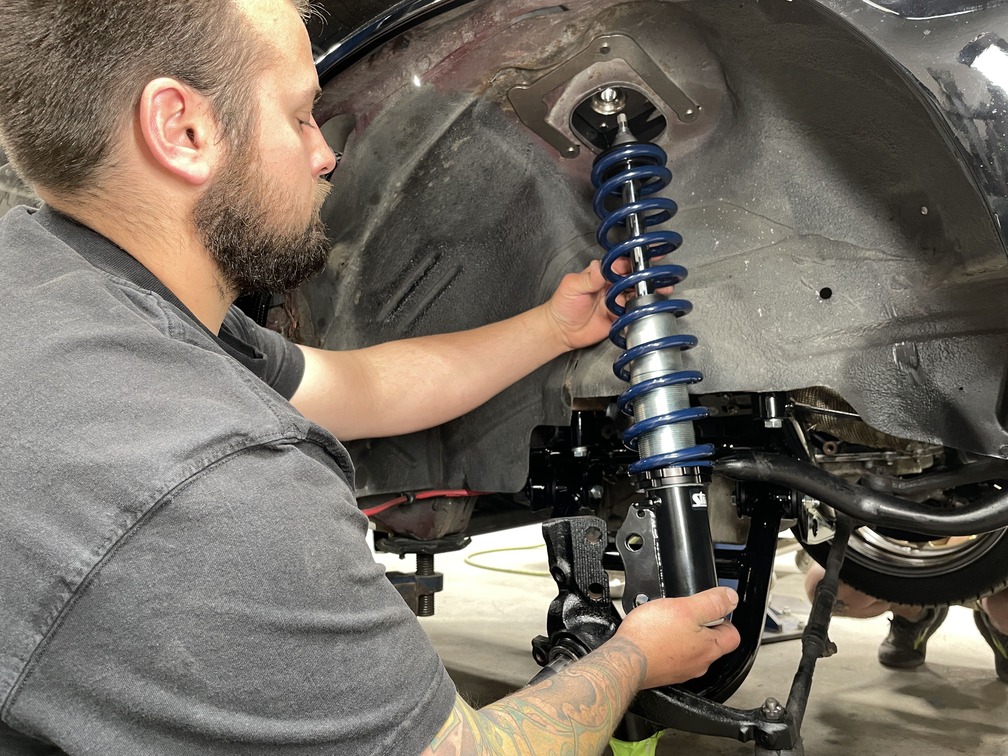
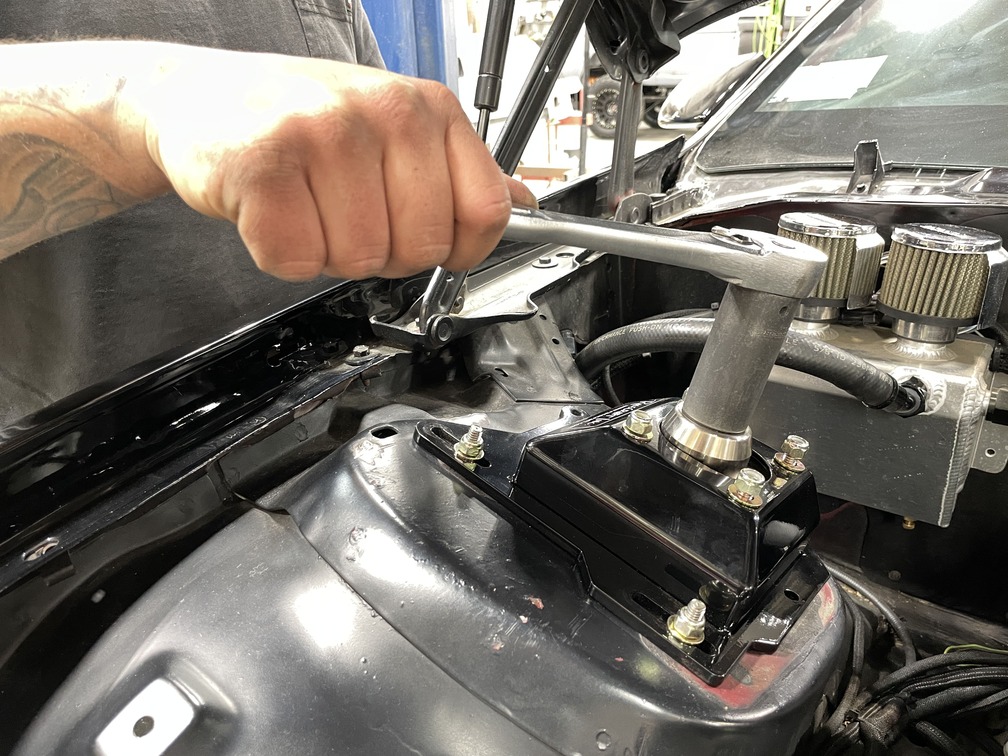
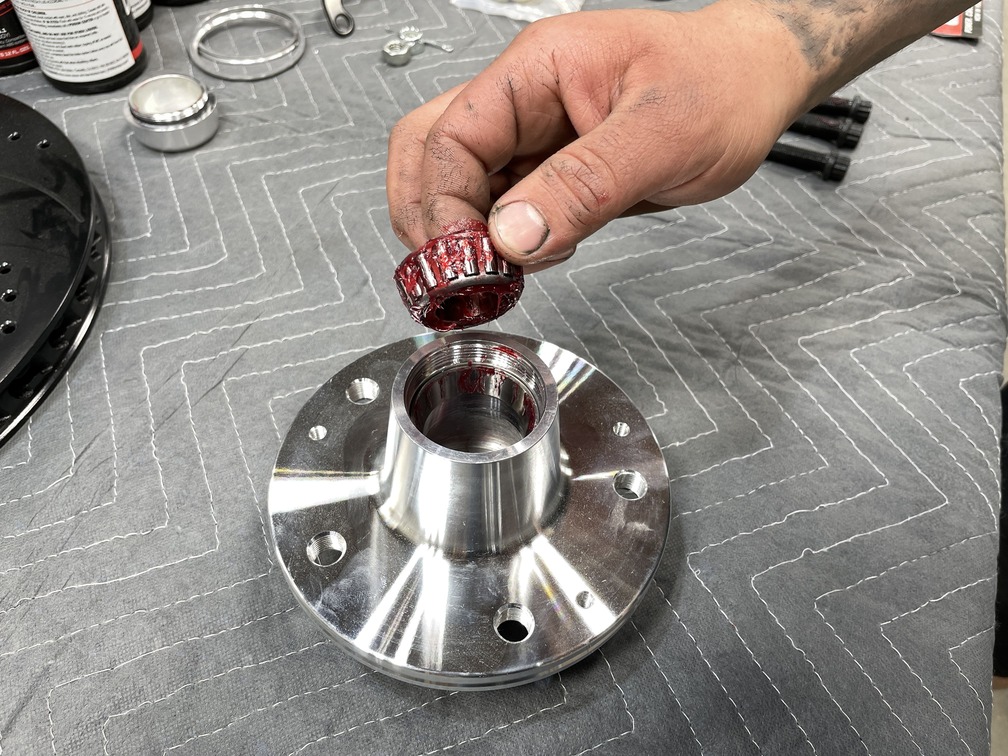
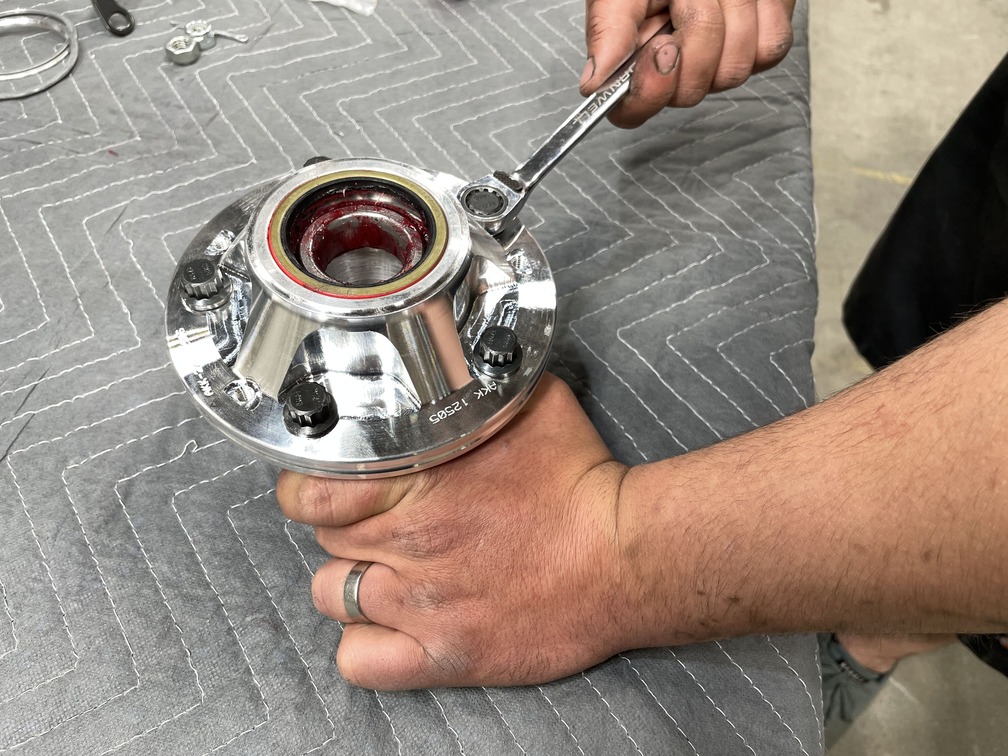
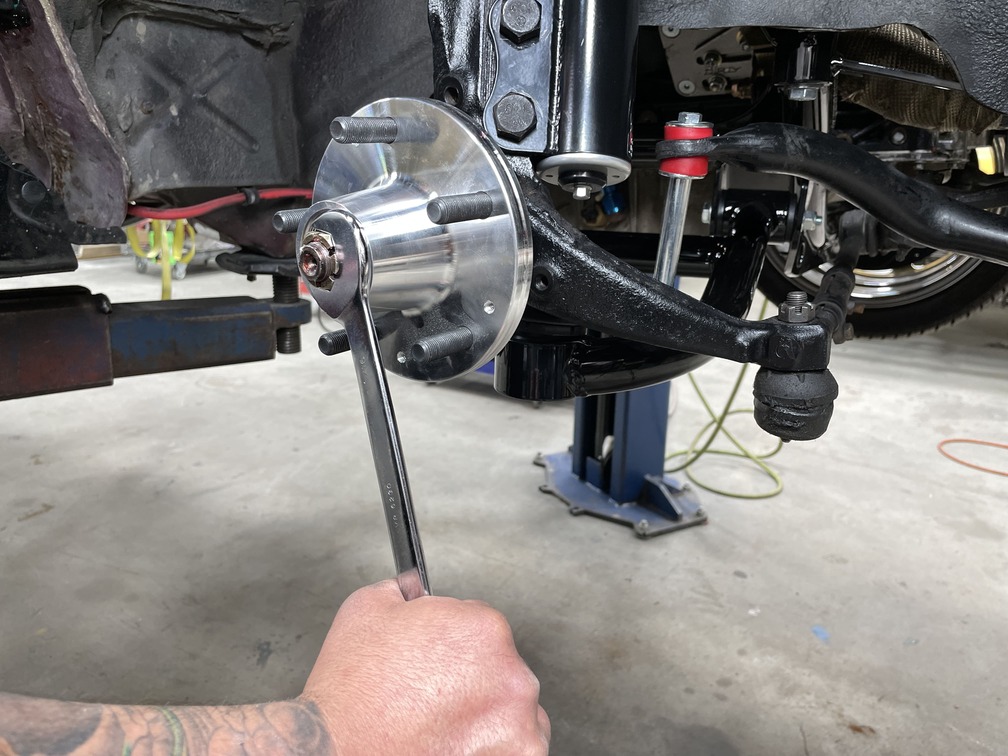
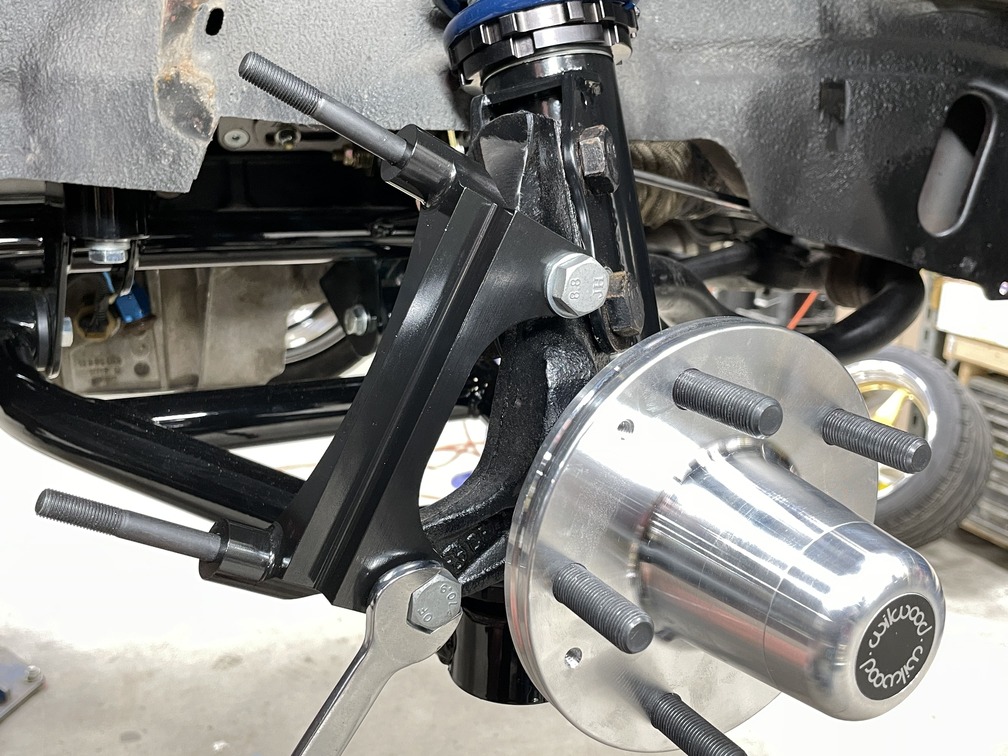
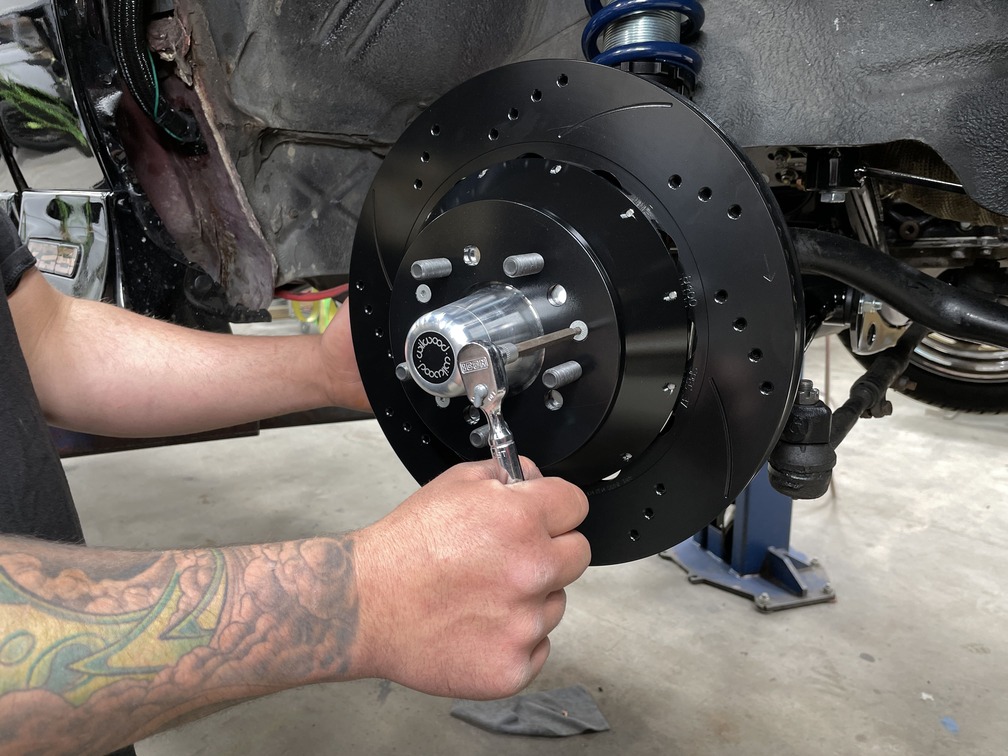
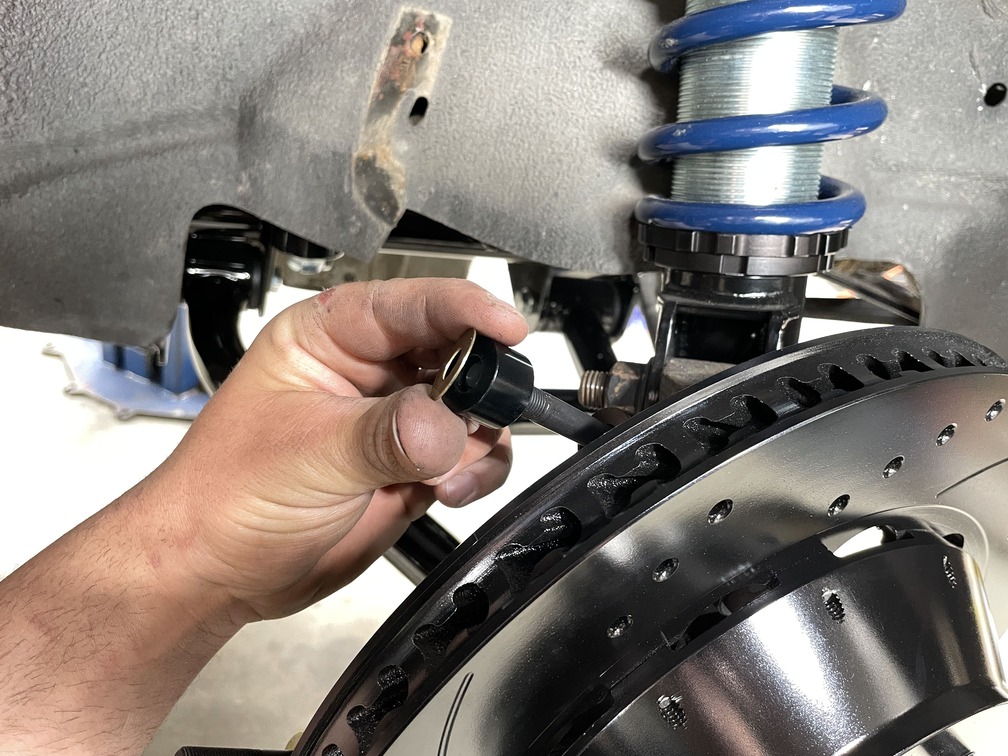
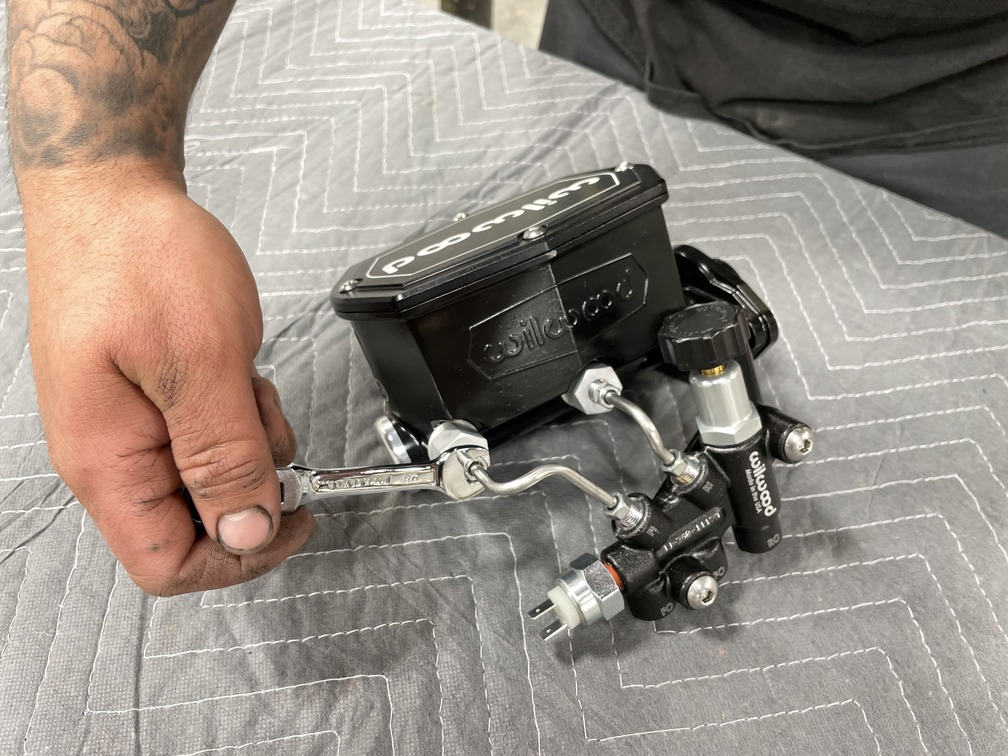
Lower the car down and support the factory crossmember and suspension with a floor jack. Proceed to then remove the factory crossmember bolts while also removing the top strut bolts. Slowly lift the car up as the front suspension and brakes will remain with the crossmember as they are separated from the car.Since we were upgrading all of the suspension and brake components at the same time it was far easier to remove them as a unit, as seen here.The adjustable factory strut mount plate was removed using a ratchet with a ½-inch socket.It’s easy to see the difference between the tired factory strut mount plate (right) when compared to the new steel camber plate from RaceCraft Inc. (left), which updates the factory rubber bushing with a spherical bearing, allowing for advanced control of suspension geometry.Installing the new RaceCraft Inc. unit was a snap utilizing the supplied Grade 8 hardware.Next, we loosely installed a fresh set of Dirty Dingo adjustable engine mounts (LS V-8 in our application). When preparing to install the Heidts tubular K-member, be sure to test-fit first for any needed adjustments and utilize their tapered pins to assist with alignment. Once in place, secure with the supplied hardware and torque all bolts to 90 lb-ft. Complete by final aligning and tightening all engine mount bolts to the block and then the engine to the new K-member mounts.The completed installation of the new tubular Heidts K-member not only looks awesome, it offers a great weight savings as well as a perfect platform for additional performance suspension upgrades they offer.For increased handling capabilities we went with a set of Heidts tubular lower control arms built with antidive, which are canted 3 degrees and located slightly different to allow for more caster adjustment—a perfect match to their K-member. All installed with the included hardware.CCC team member Marco Martins worked his way through the installation, making sure the control arms were able to swing through the full range of travel without any binding.The stock spindles were cleaned up and set back in place to the lower control arm and tie-rod end with fresh hardware. Note that the upper and lower ears and OEM holes used for the factory caliper mounting bracket of the spindle were modified for the upcoming addition of big brakes and new caliper mounting brackets. As pictured, a jackstand is supporting the lower control arm and spindle.Preparing the Strange Engineering double-adjustable coilover strut for installation you can see in the first image (right to left) the upper strut assembly with the top spring seat, thrust washer, thrust bearing, thrust washer, thrust bearing cover/strut spacer, and strut top nut.Here is the complete assembly ready for installation, less top nut.With the spindle and lower control arm supported by a jackstand, the upper strut is slid into the top caster camber plate while the base is bolted to the spindle with factory hardware.The strut top nut was then tightened using a 1-inch socket and 7/16 wrench (not pictured) to keep the strut piston rod from spinning along with the new camber plate from RaceCraft Inc. being finally secured in place.Next, we added a pair of new Heidts sway bar links with Polyurethane bushings to the factory sway bar using the supplied hardware and a 9/16 socket.Talk about an awesome upgrade, the freshly installed Strange Engineering struts and Heidts lower control arms are now in place and ready for a serious update with big brakes.For maximum stopping power, the Wilwood Forged Narrow Superlite 6R Big Brake Front kit was packed with everything needed to get the job done. Here, the two-piece, 14-inch drilled-and-slotted rotor and hat were assembled with the provided bolts and washers. Be sure to apply a coating of Loctite 271 (red) to all the threads and then hand-thread the bolts in place. Follow by tightening and torque to 155 in-lb in a crisscross pattern. The bolts were then safety wired using standard stainless steel wire for added security.To begin assembly of the Wilwood aluminum hub, first pack the inner bearing cone with high-temperature disc brake bearing grease and install to the backside of the hub followed by pressing the grease seal into the backside, flush with the hub. Next, pack the small outer bearing cone with high-temperature disc brake bearing grease and install to the front of the hub (as pictured).Install the wheel studs (5) into the hub, coating the threads with Loctite 271 (red) and tightening to 77 lb-ft.Slide the hub assembly onto the spindle and secure in place using the provided spindle washer and OEM spindle nut. Follow by tightening till snug then spin hub left to right to seat bearing. Complete with a new cotter pin and then screw the dust cap (with O-ring installed) into place.Install the caliper mounting bracket to the spindle with the provided bolts and washers and tighten with a ¾-inch wrench.Then slide the completed rotor assembly onto the hub, making sure to align the small countersunk holes in the hat to the small threaded holes in the hub. Install the provided flathead screws (3) to join the two and torque to 85 in-lb.At first, place one spacer and two shims onto each caliper mounting bracket stud. Note that the same number of shims should be used on each stud for proper balance.Secure the caliper to the bracket using the provided lock nuts and washers, noting that the kit contains distinct left and right calipers that must be mounted in a specific direction. Temporarily tighten the lock nuts to confirm alignment of the rotor to the center of the caliper. Adjust alignment by adding or subtracting shims if needed and final tighten to 30 lb-ft. Once the caliper alignment is confirmed, remove the bracket mounting bolts one at a time, apply red Loctite 271 to the threads and torque to 60 lb-ft.To complete the braking system, Wilwood supplied their latest compact tandem-chamber master cylinder along with their combination proportioning valve, L/H mounting bracket, fluid tubes, and mounting hardware in one easy-to-order kit (PN 261-14963).Assembly on the bench was a snap, making it ready for final installation in minutes.
We use cookies to ensure that we give you the best experience on our website. If you continue to use this site we will assume that you are happy with it.