Braking systems changed a lot during the ’60s. It was common to see drum brakes and single-pot master cylinders well into the muscle car era, but dual master cylinders were made mandatory by 1967. It can be argued that these early systems were adequate for the time, but we can all agree that trusting your life with a single-reservoir master cylinder is not advised on today’s highways. Drum brakes aren’t quite as dangerous, but they’re not nearly as capable as disc brakes, which weren’t standardized until several years later.
Our starting point for this project is the crusty underpinnings of an all-original 1966 Chevy II. In this condition, the car drives and stops, but it’s in need of a safety and performance upgrade in the form of a CPP Power Disc Brake conversion.
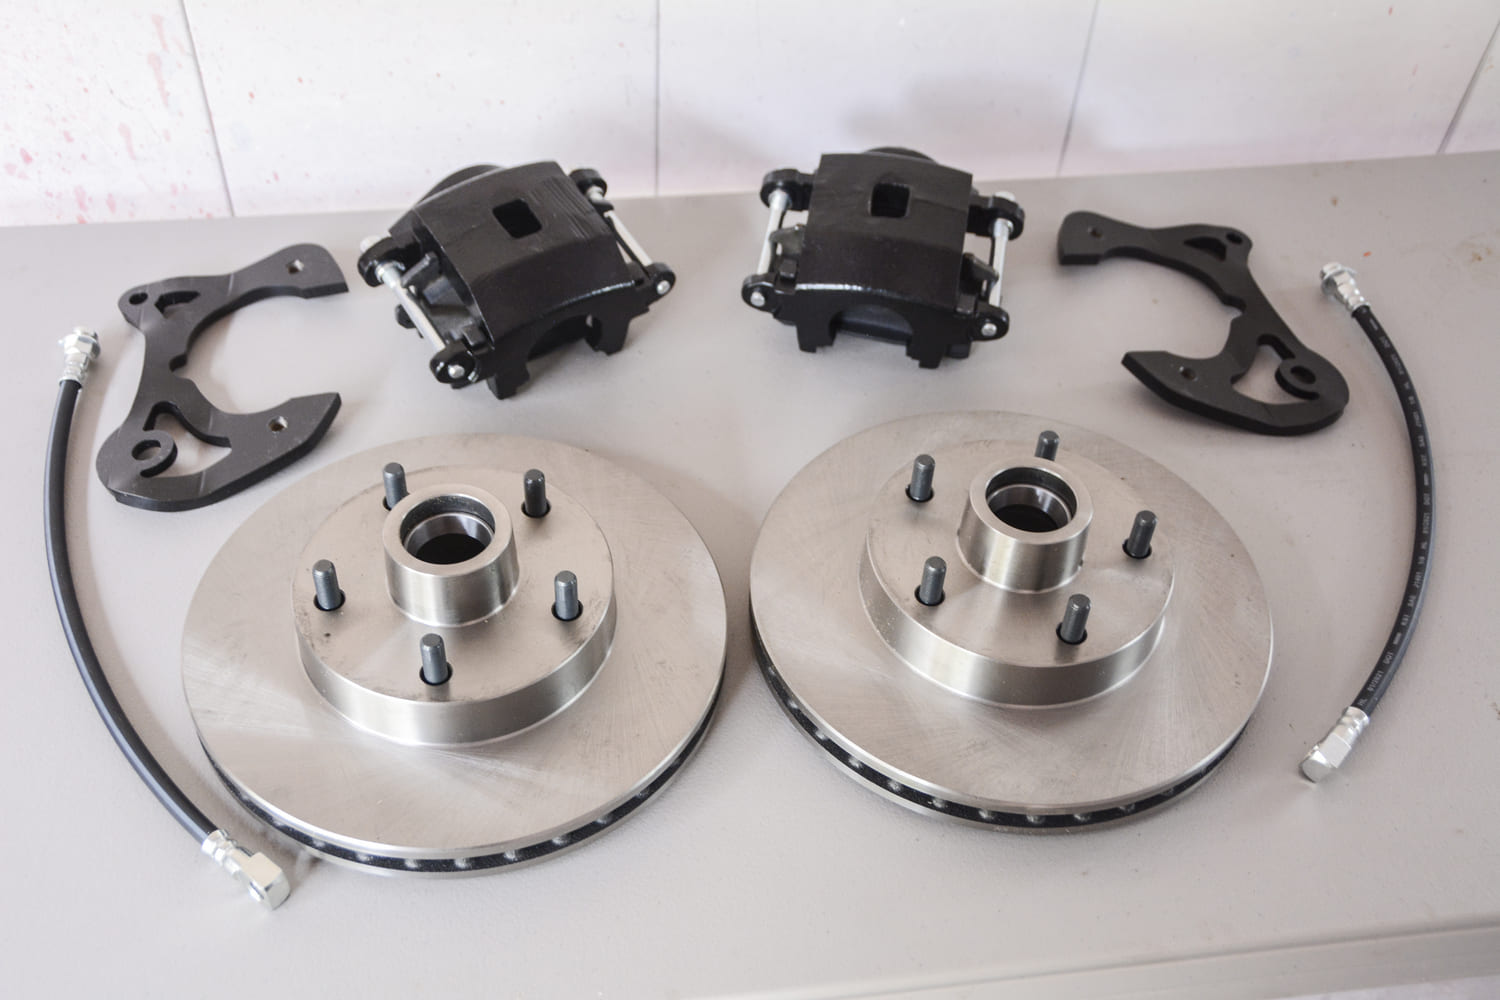
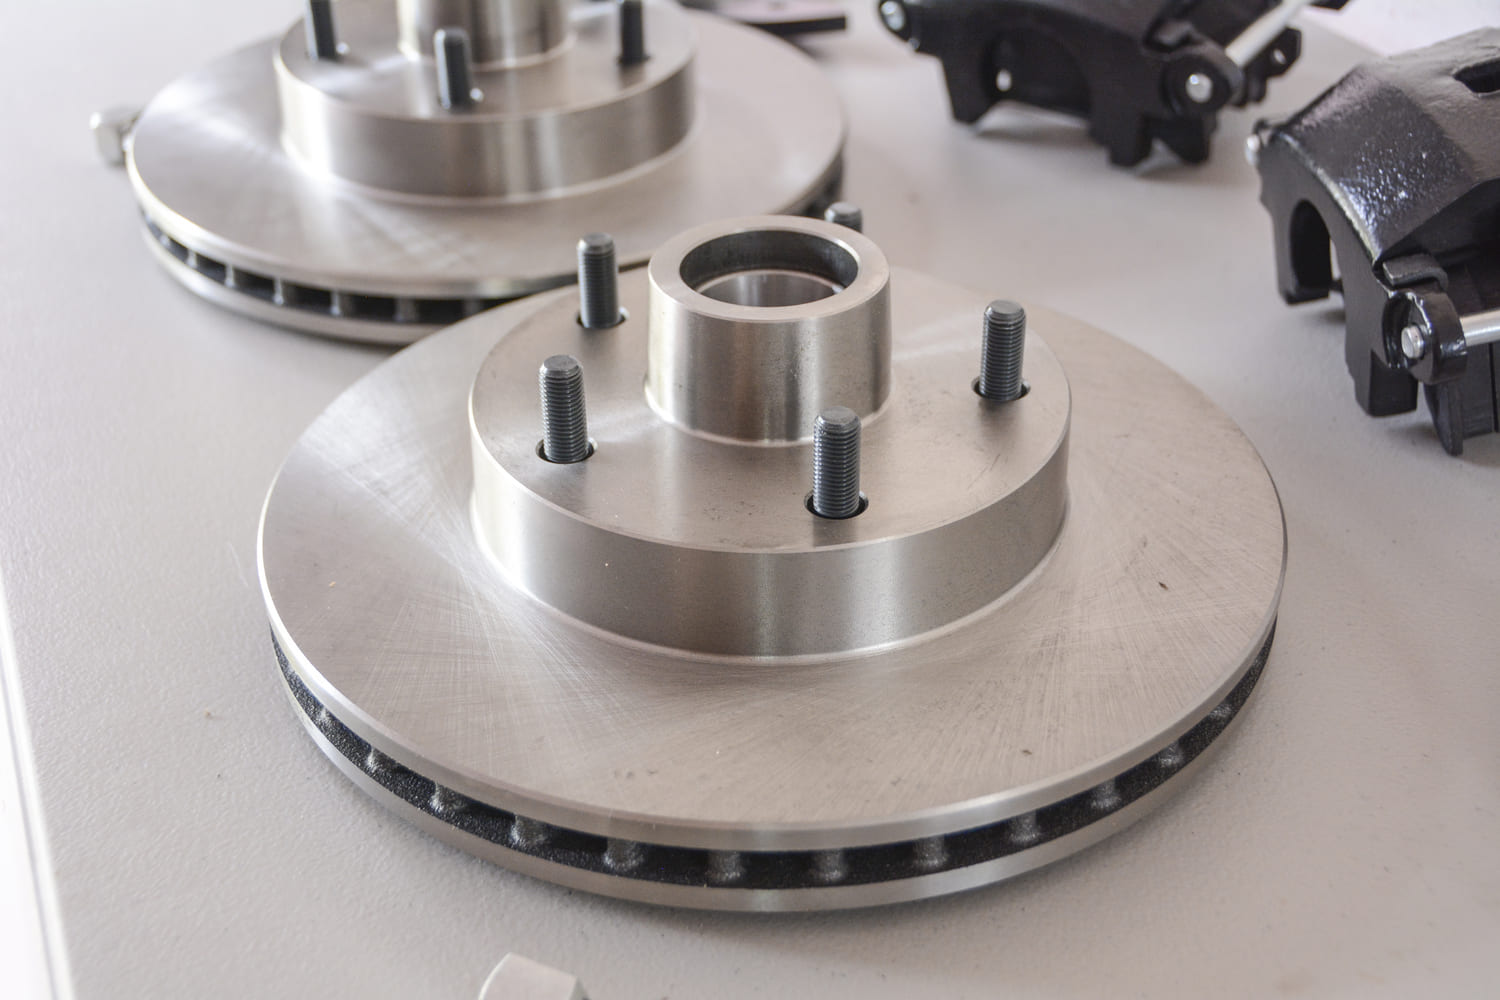
For our 1966 Chevy II it was right on the cusp of the dual master cylinder mandate. Even after all these years, it was still using its original single-pot master cylinder and drum brakes. We knew an upgrade was needed to accommodate our plans to drive this car on a regular basis, so we called up Classic Performance Products (CPP) and ordered the 6566CBK-SN kit, which includes rotors, calipers, brackets, master cylinder, brake booster, and all the associated hardware, lines, and materials to make the switch while retaining the stock spindles. CPP offers several kits, including large-diameter disc brakes, but we wanted to retain our 15-inch Americans so we stayed with the traditional kit. We decided to also tackle a front suspension rebuild at the same time, but even considering the extra work, we accomplished the brake and suspension install over the course of a weekend. Once the car was back on the ground, we bled the system and hit the road for a testdrive.
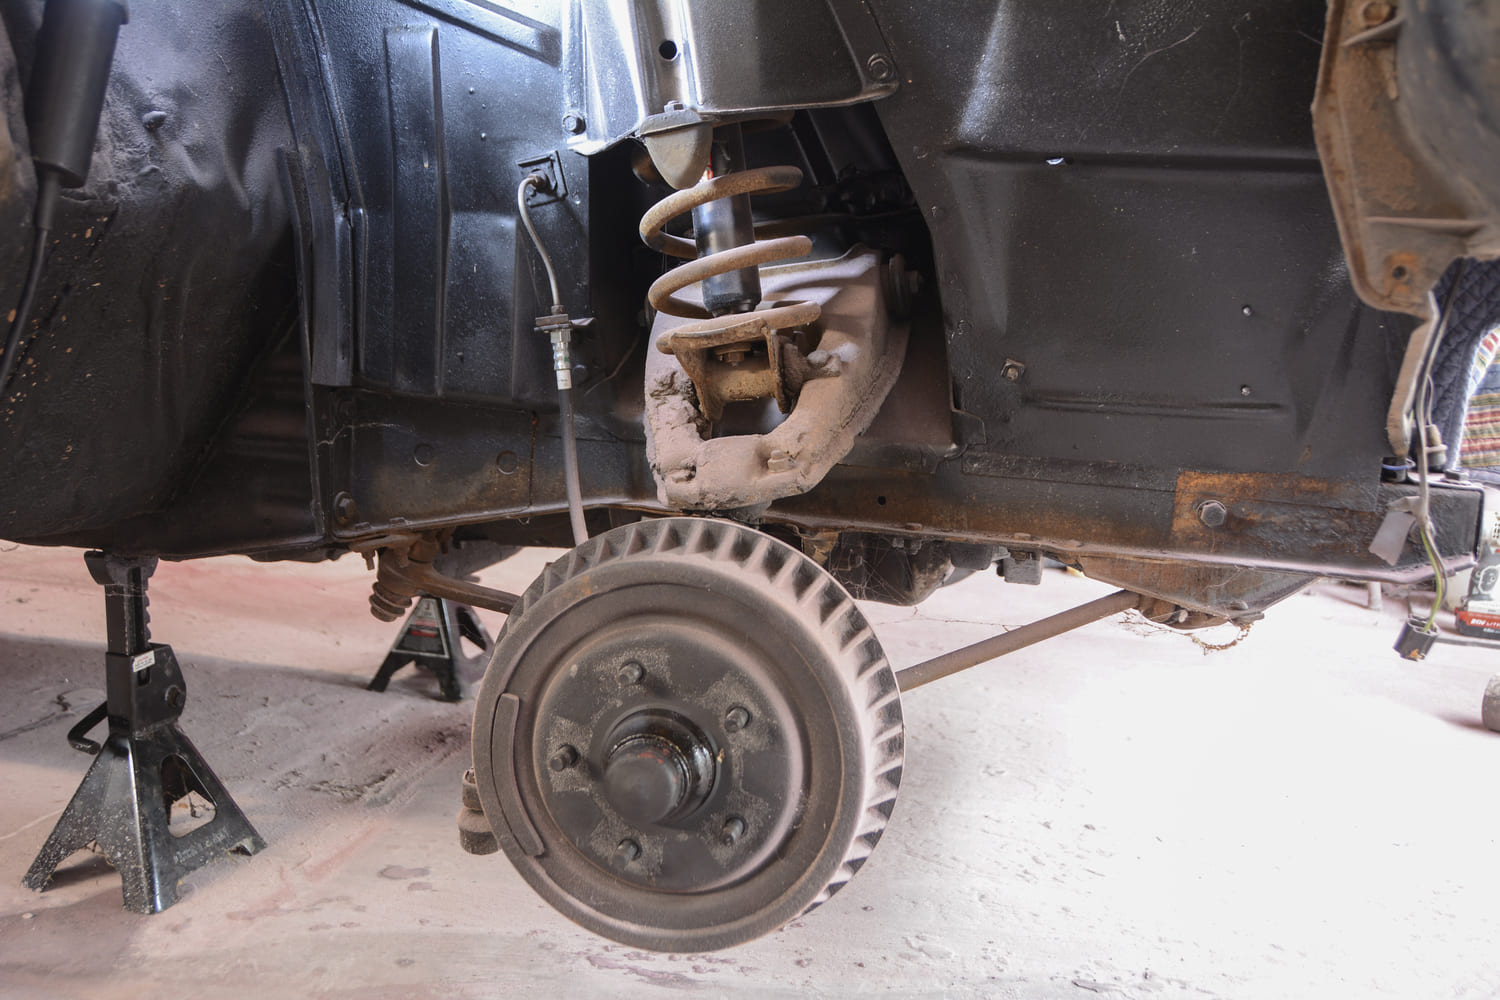
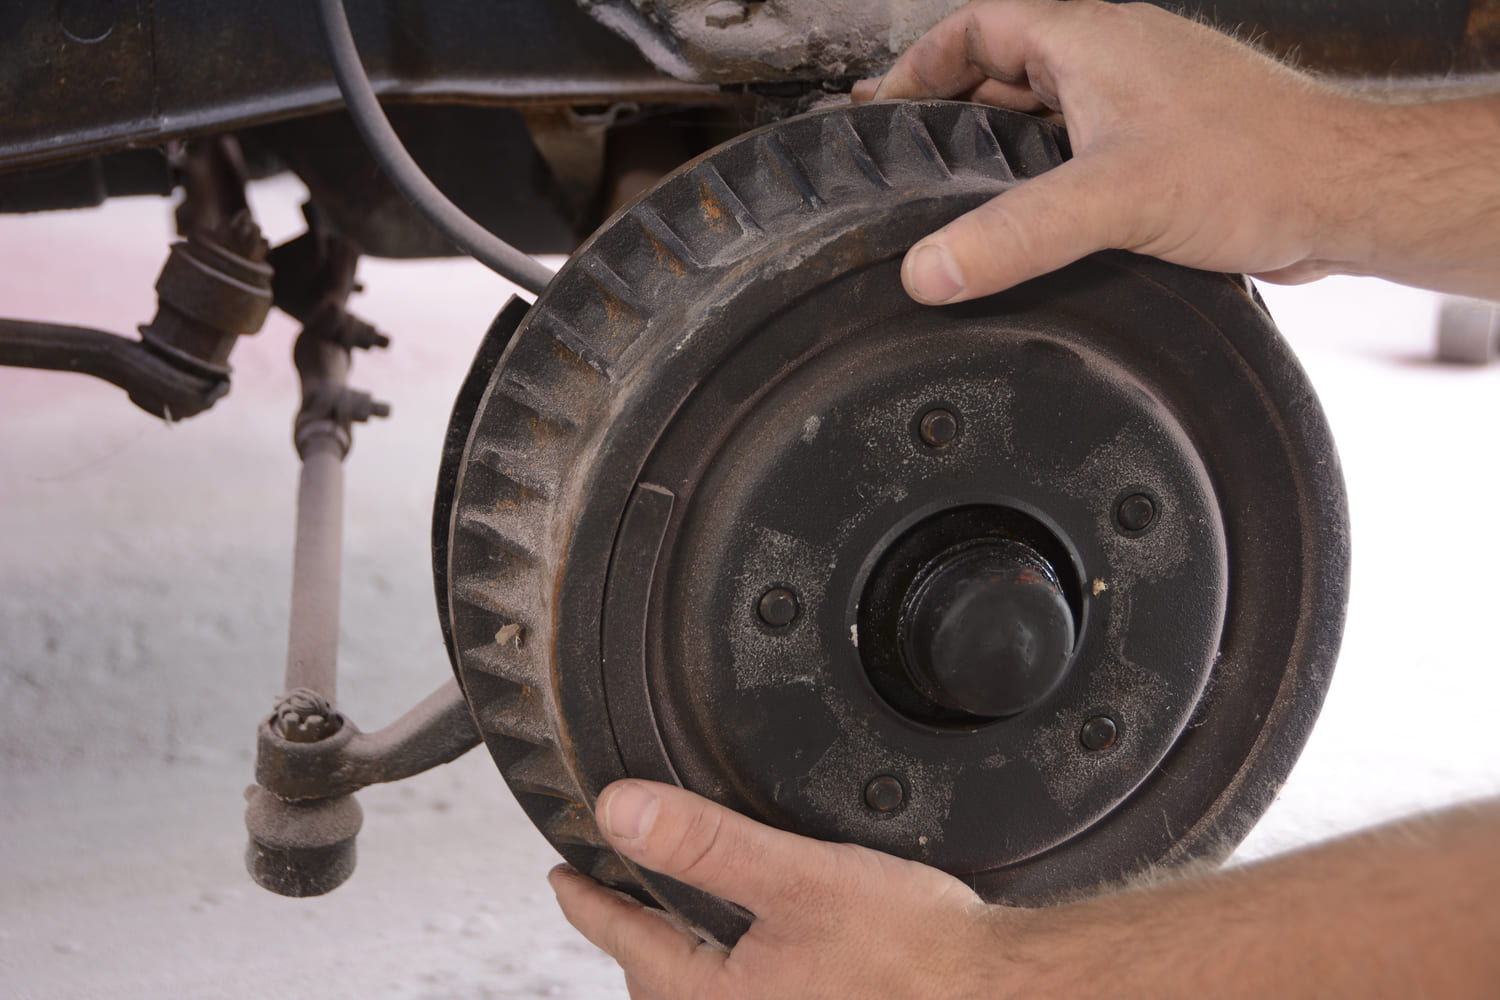
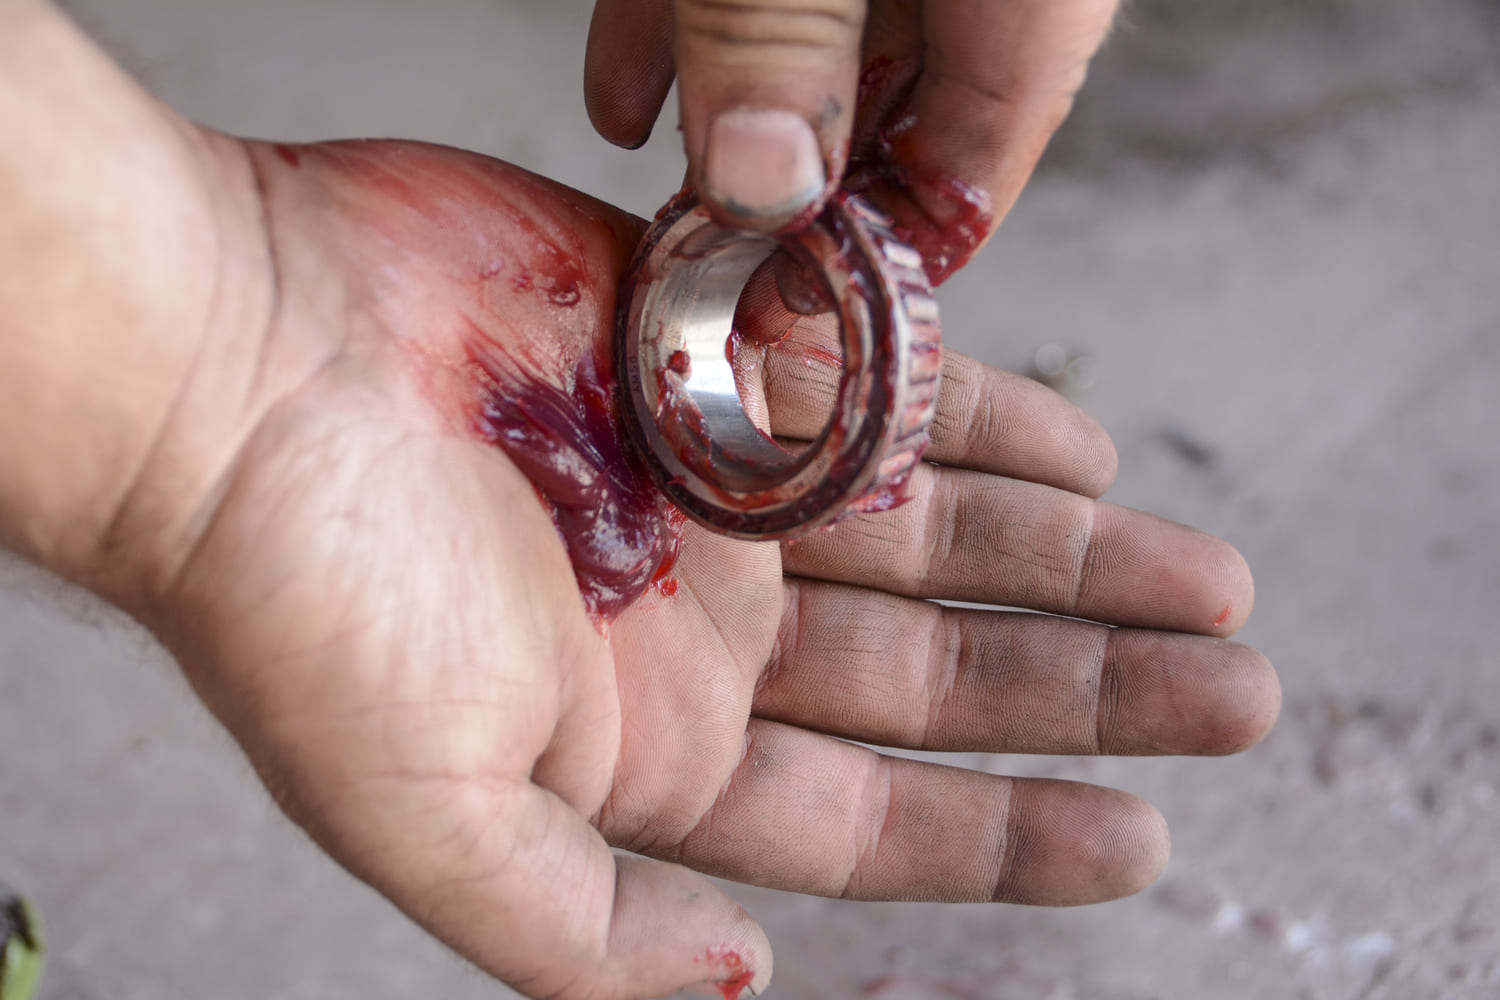
Drum brakes are known for “sticking” when they sit for a long time. Luckily, this one rolled freely, so the brake drum slid off the studs easily. Once the drum is in the scrap pile we disassemble the brake components.
It’s always important to bed the rotors on the first drive, and we tested for leaks before setting out on our testdrive. In order to break in the pads and bed the rotors, we must get up to about 35 mph and then apply moderate brake pressure down to 5 mph. We repeated this two or three more times, then increased the speed to 50 mph and strongly pressed the brake pedal, nearly bringing the car to a stop. We applied strong braking four to five more times, and then drove a few miles to allow the brakes to cool off. Be sure to do this in an open area where you won’t be encountering any traffic.
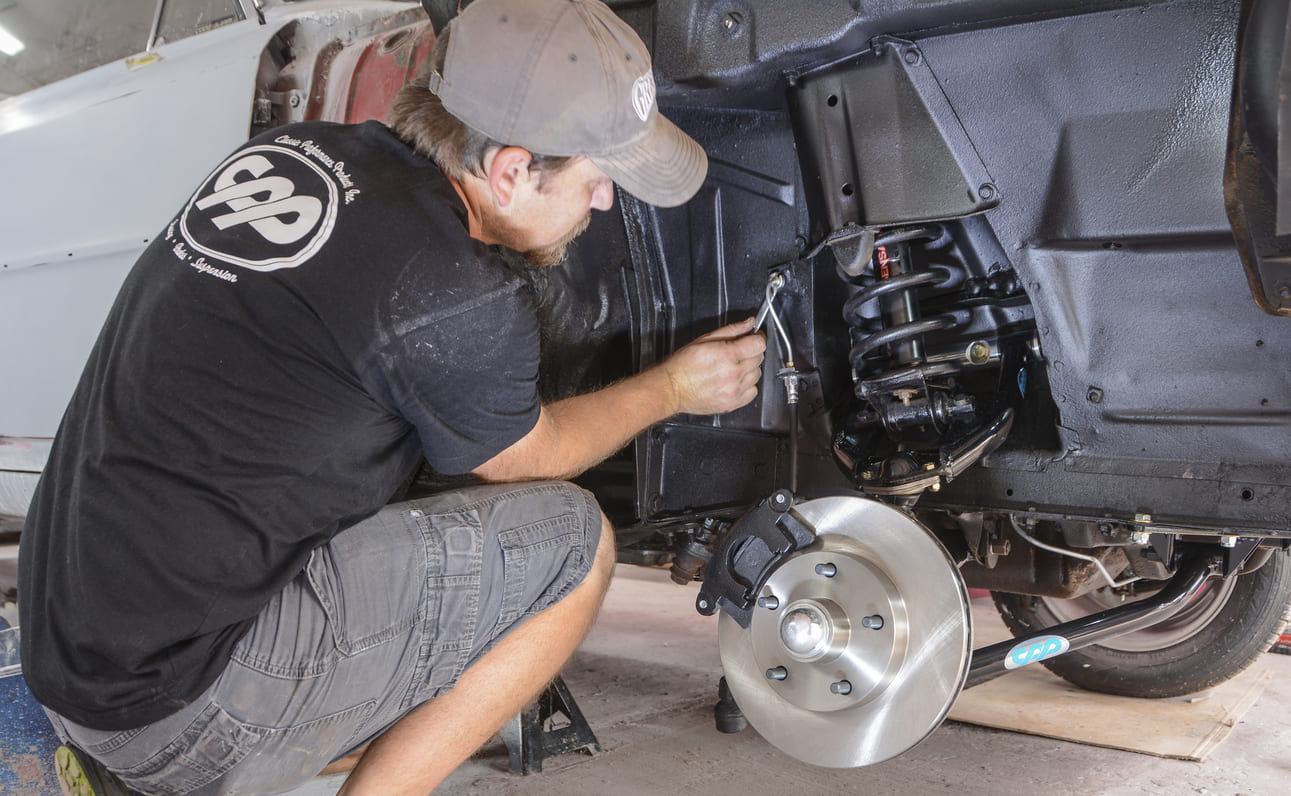
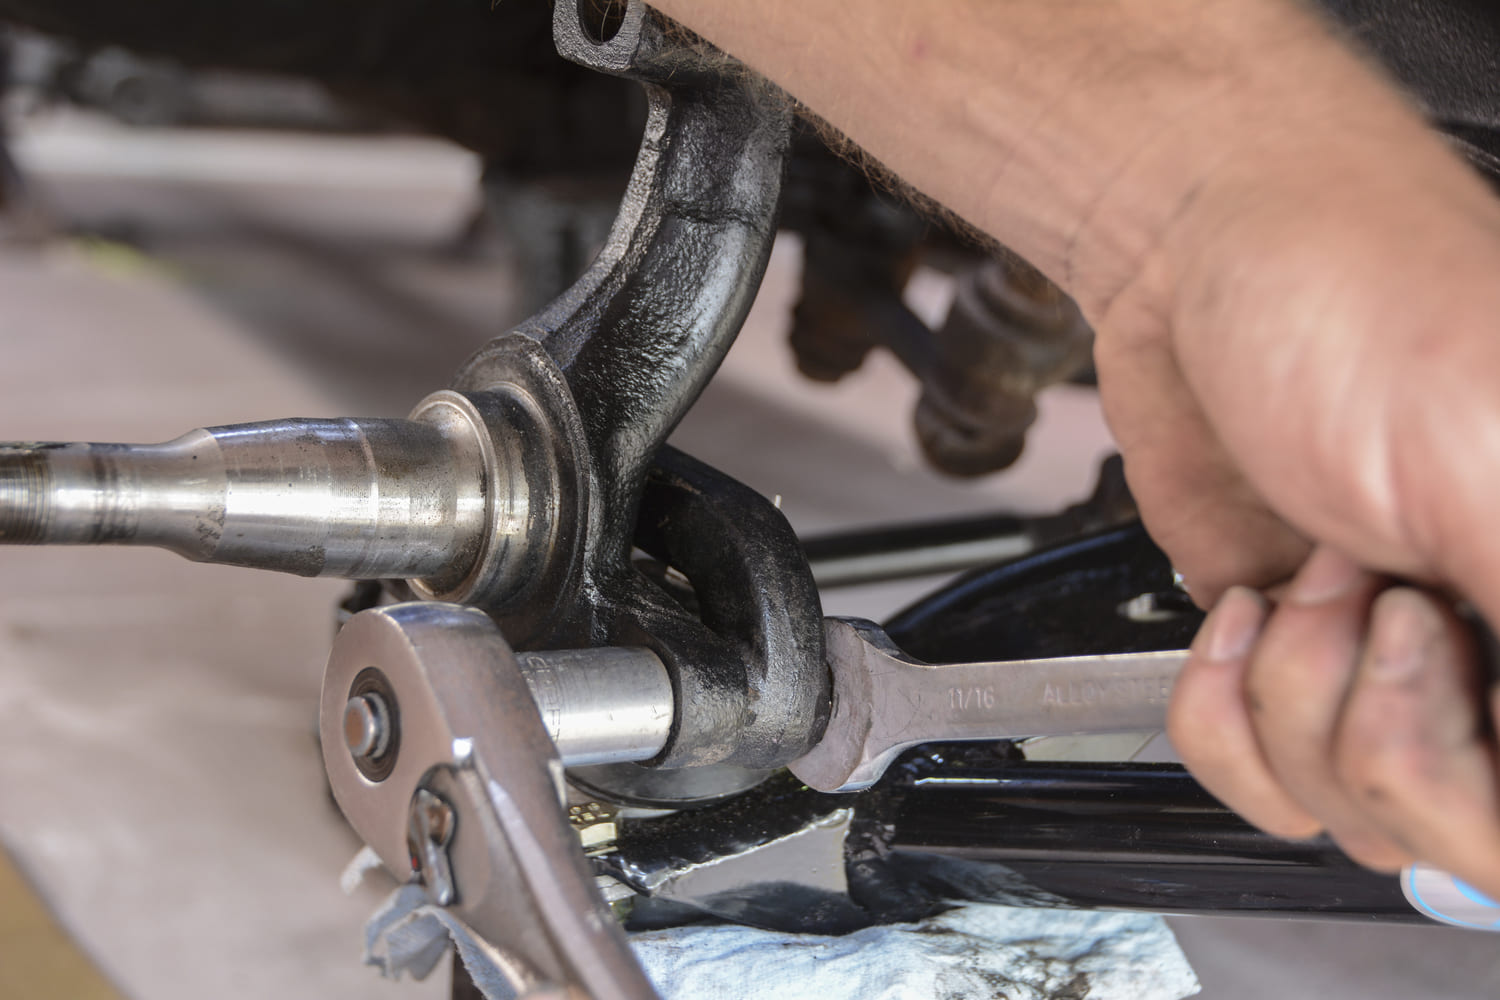
The backing plate is held onto the spindle with three bolts. There are two on the bottom, which also connect the steering arm, and a large one on top. The top one is captured by folding tabs that must be bent out of the way for socket access.
After getting back home and double-checking for leaks, we gave the reservoir one more look to make sure fluid levels are in spec. Now it’s time to enjoy our new braking performance and hit the road with our old-school Chevy II.
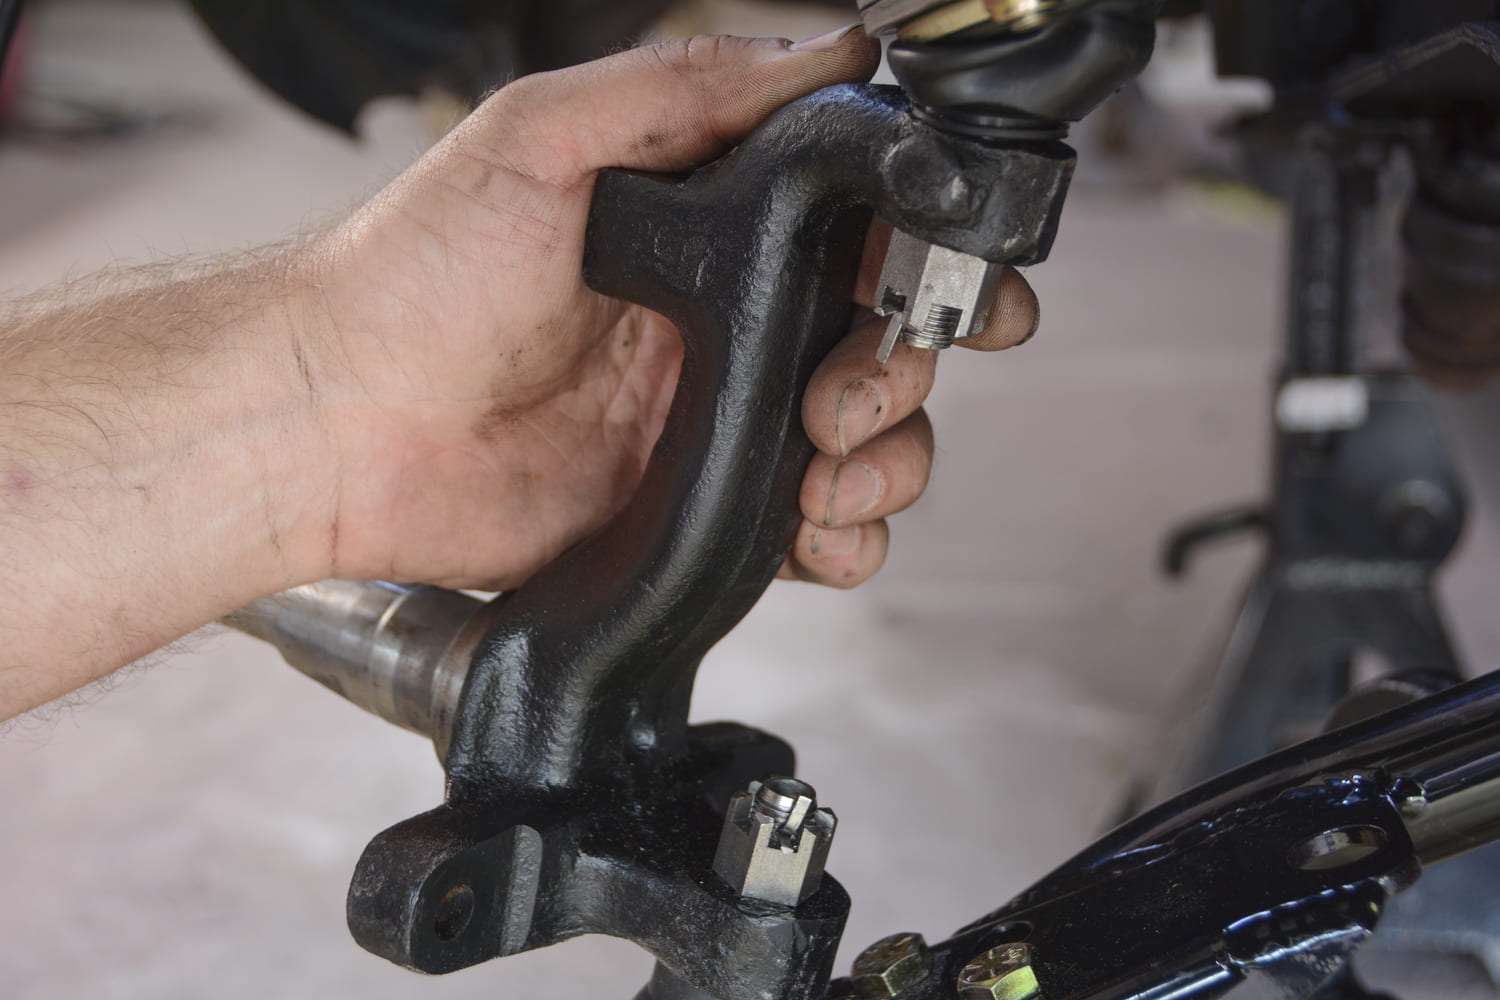
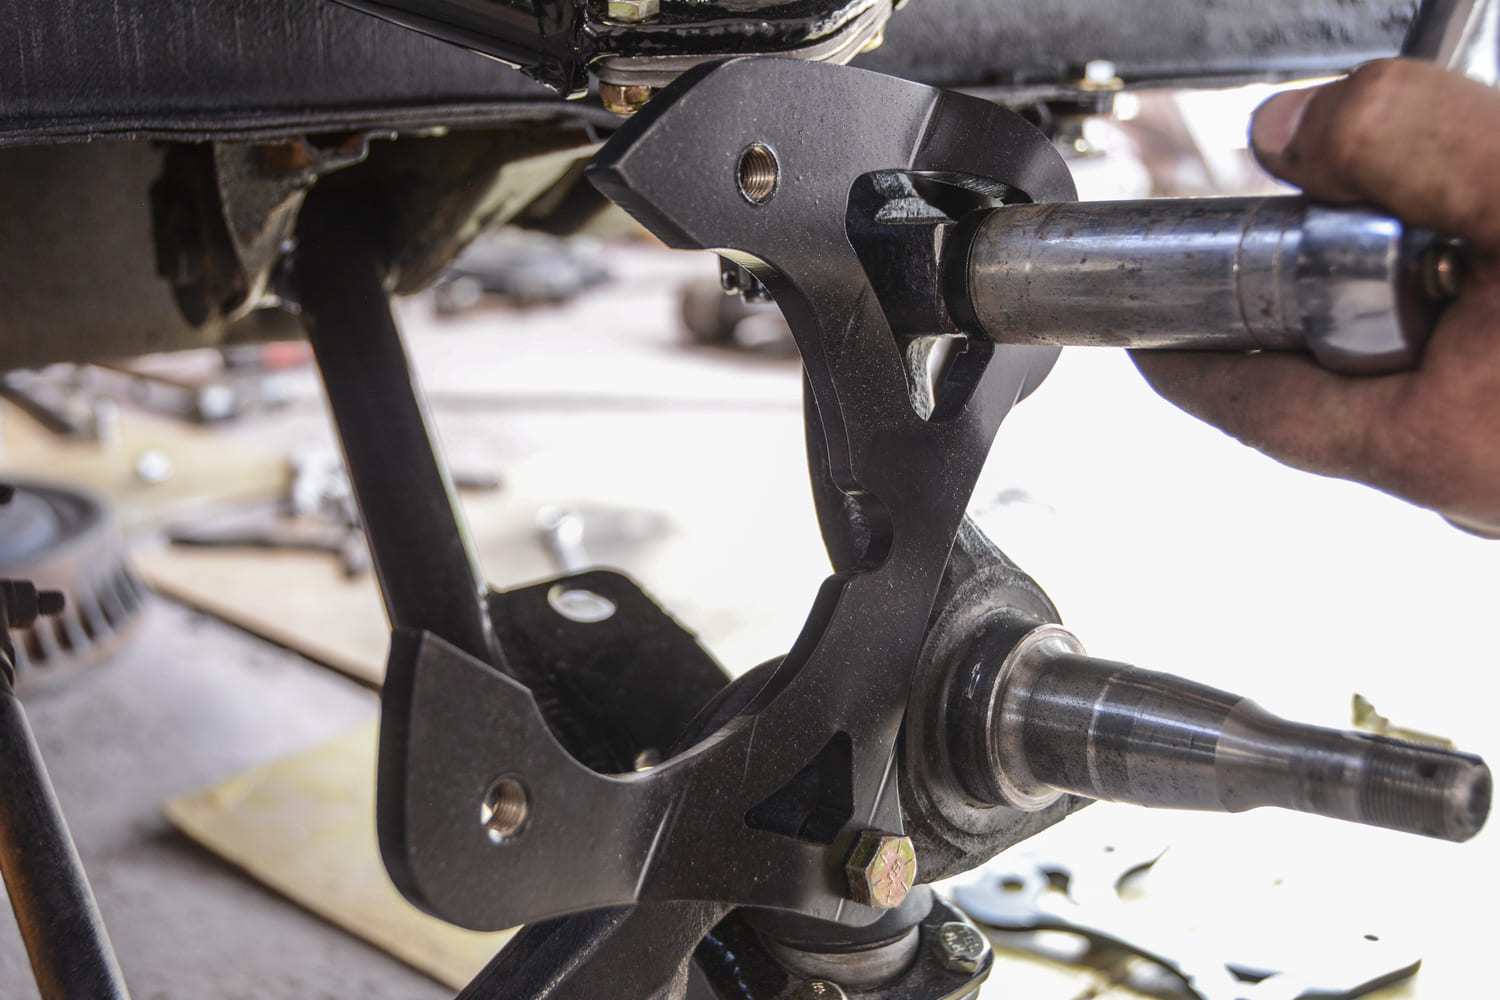
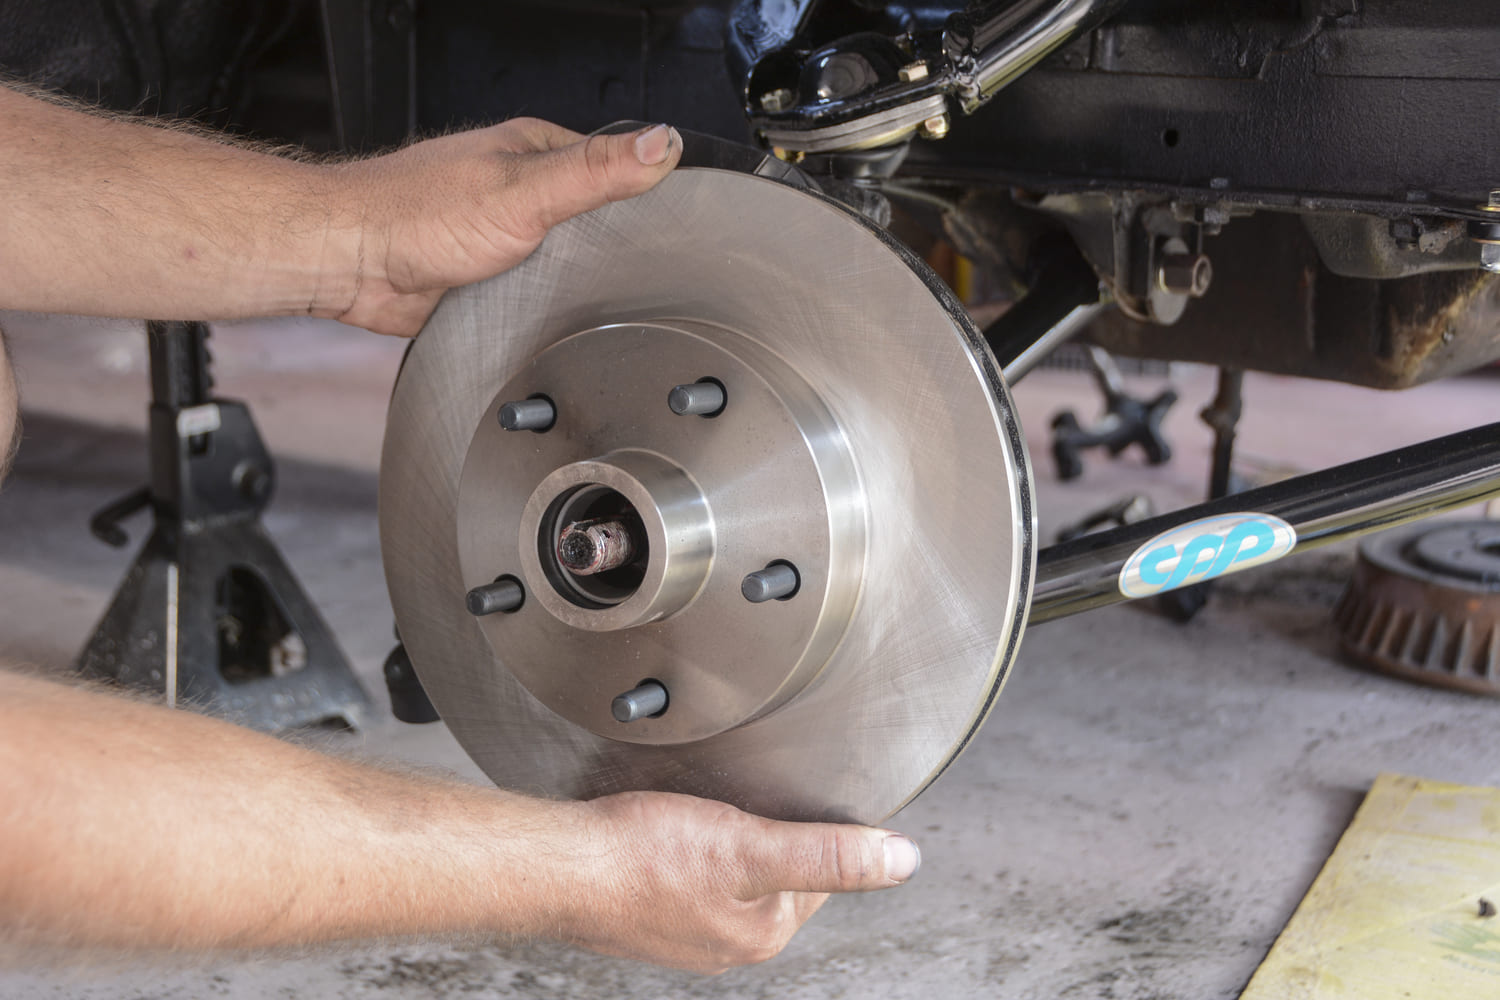
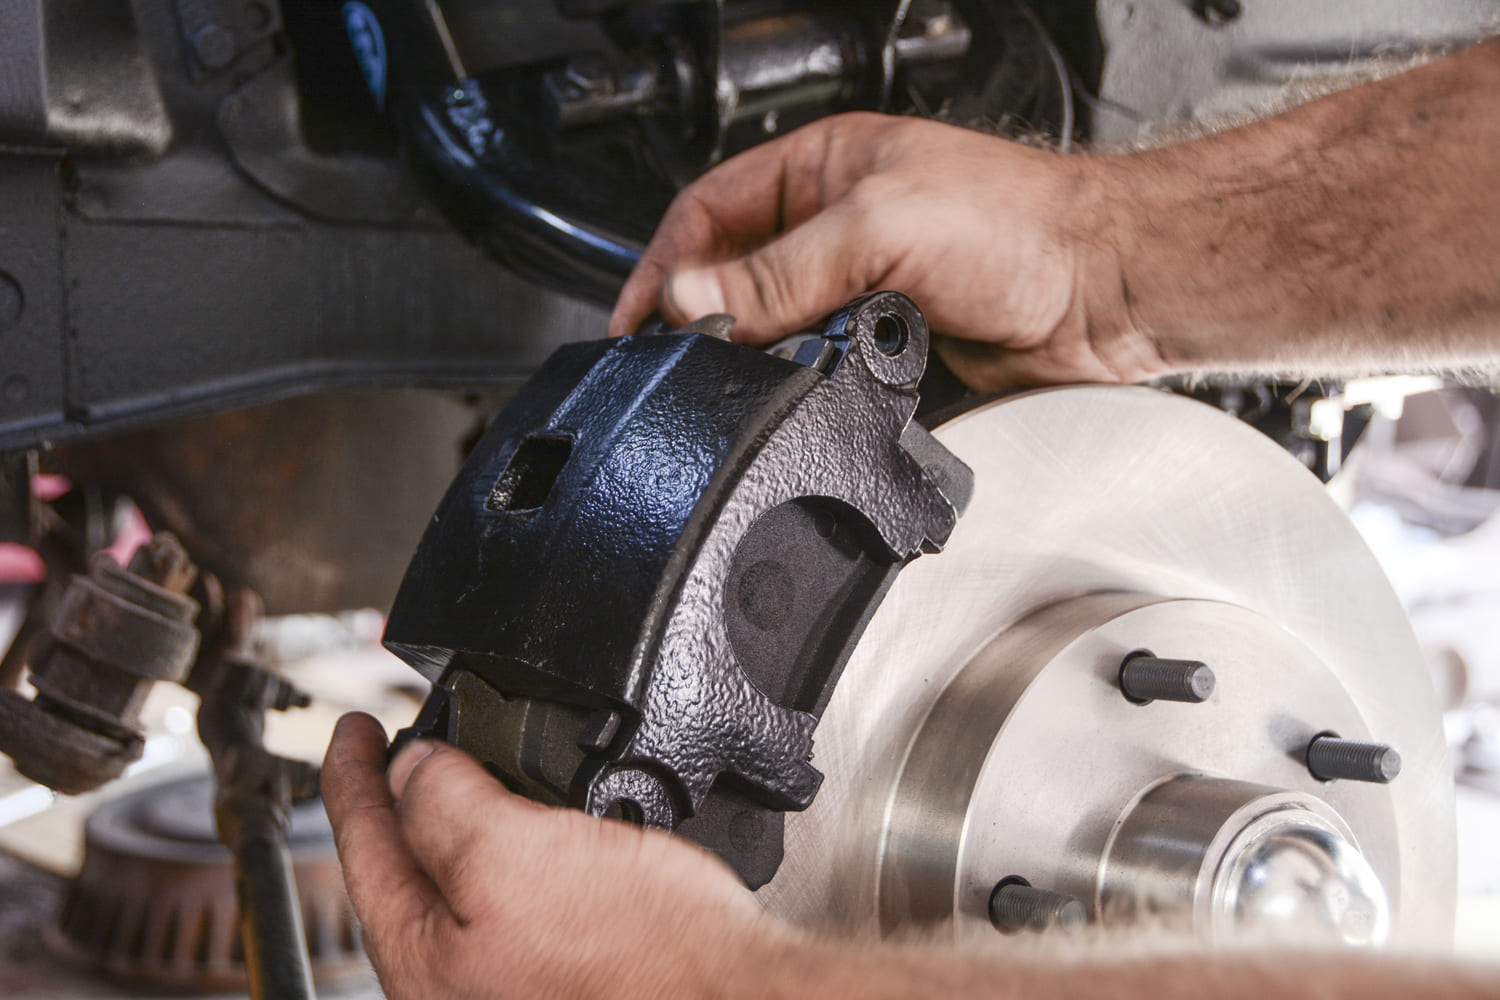
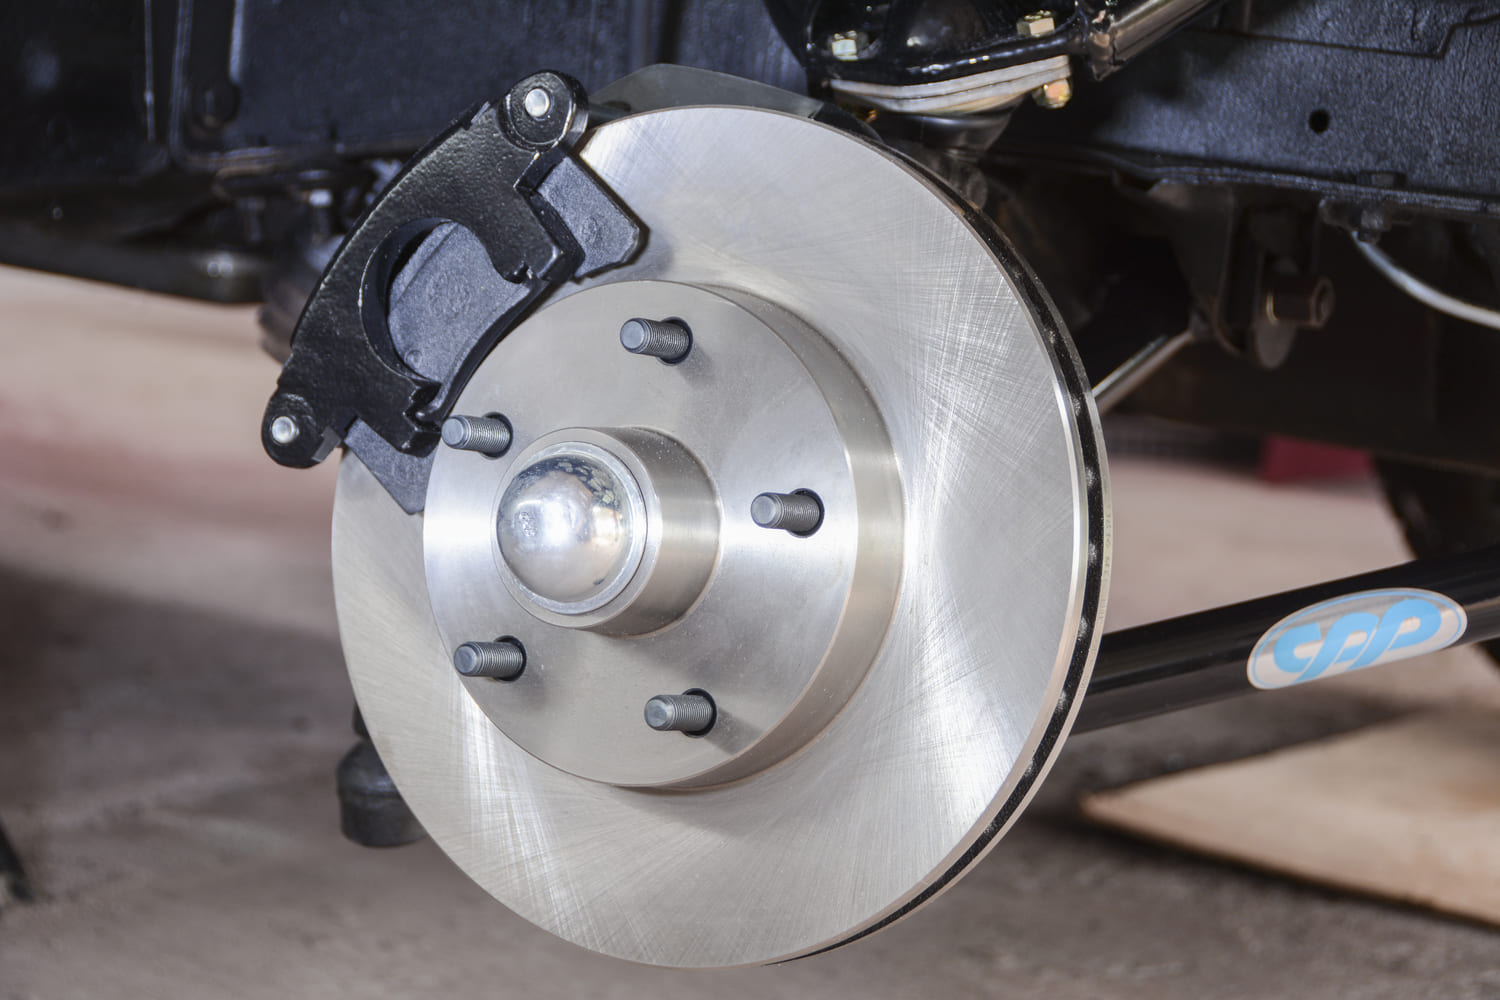
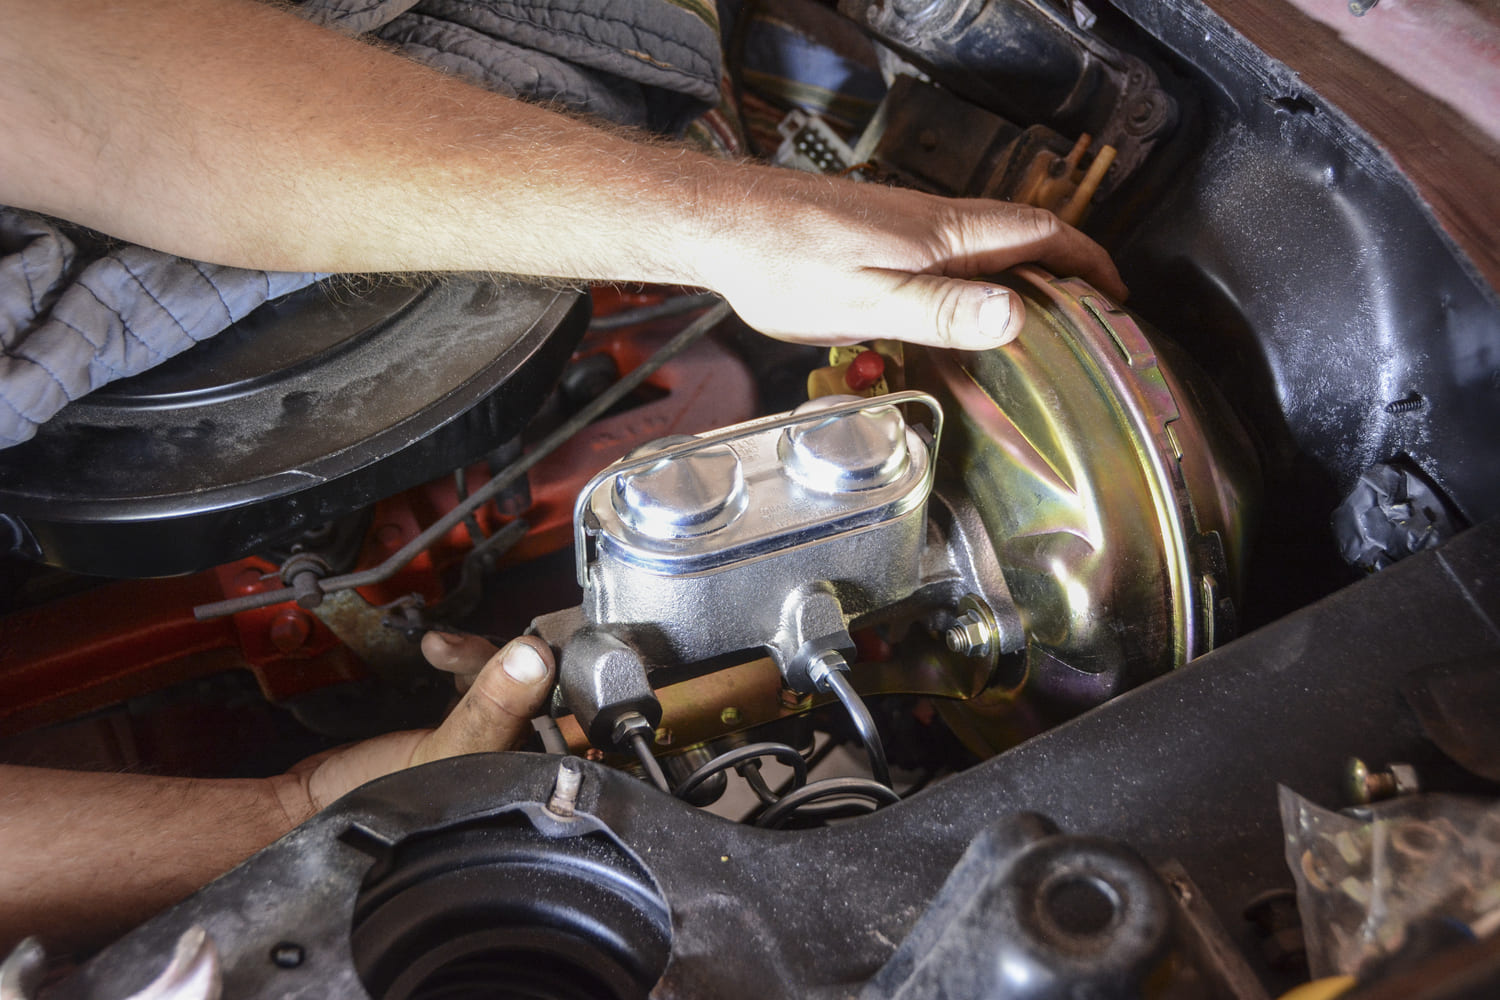
We’re using a CPP stock spindle disc brake conversion kit (PN 6566CBK-SN). It includes brake rotors, calipers, brake booster, dual master cylinder, and everything needed get our Chevy II back on the road.It’s important to note that CPP’s early Chevy II kit includes special “drum offset” rotors that retain the original track width. This is especially important on lowered cars, as typical disc brake conversions push the wheels outward.While the car was apart, we took the opportunity to upgrade the suspension with CPP’s MINI Sub-Frame kit and tubular control arms. We also painted the spindles and reinstalled them with all-new hardware.The CPP disc brake kit does not require the use of a backing plate, so we can start the reassembly process by installing the new Grade 8 hardware to attach the front of the steering arm to the spindle.The steel caliper bracket bolts to the original spindle, using the supplied Grade 8 bolts. The upper bolt is a large-diameter bolt with a thin head for rotor clearance. The lower bracket bolt passes through the spindle and steering arm and uses a locking nut on the back side.Inner and outer wheel bearings, as well as seals, washers, and nuts, are included in the CPP kit. We use the tried-and-true packing technique when adding grease to the bearings. Start with a blob of grease in your palm and rake the bearing through it to make sure plenty of grease makes its way into the bearing.We gave the rotor a quick shower of brake cleaner to remove any oil residue from shipping. After installing the inner bearing and then pecking the seal into place, we can slide the new brake rotor onto the stock spindle.After installing the outer wheel bearing and washer, we snug the castle nut to make sure everything is seated properly. Then, we spin the rotor a few times to displace some of the grease and back off the nut enough to install the cotter pin. The grease cap finishes off the rotor install.Next is the brake caliper, which is complete with pads. We slide the brake caliper assembly over the rotor, until the boltholes align.After ensuring proper alignment, we tighten the two supplied caliper bolts using a 3/8-inch Allen wrench socket.The lower side of the CPP power disc brake conversion is mostly complete. Now we’ll move up top to upgrade the master cylinder and then work our way back down with brake lines and hoses.Dual reservoir master cylinders came out soon after this 1966 Chevy II was manufactured—and for good reason. This single-pot design is dangerous because if any braking component encounters a leak, it will evacuate all the fluid from the master cylinder.
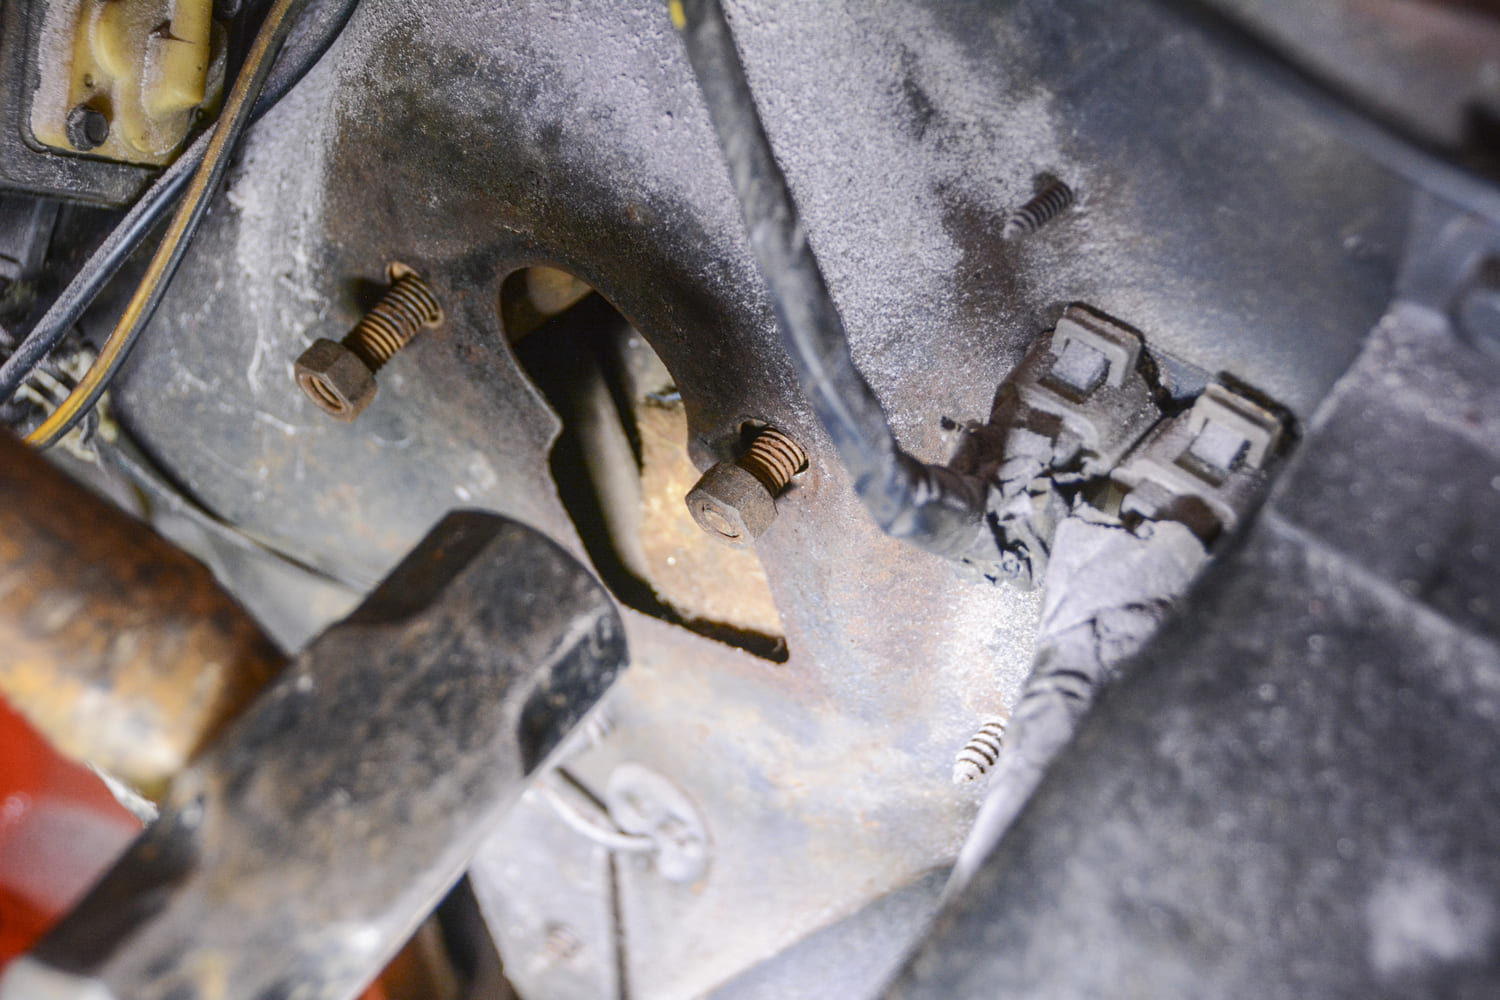
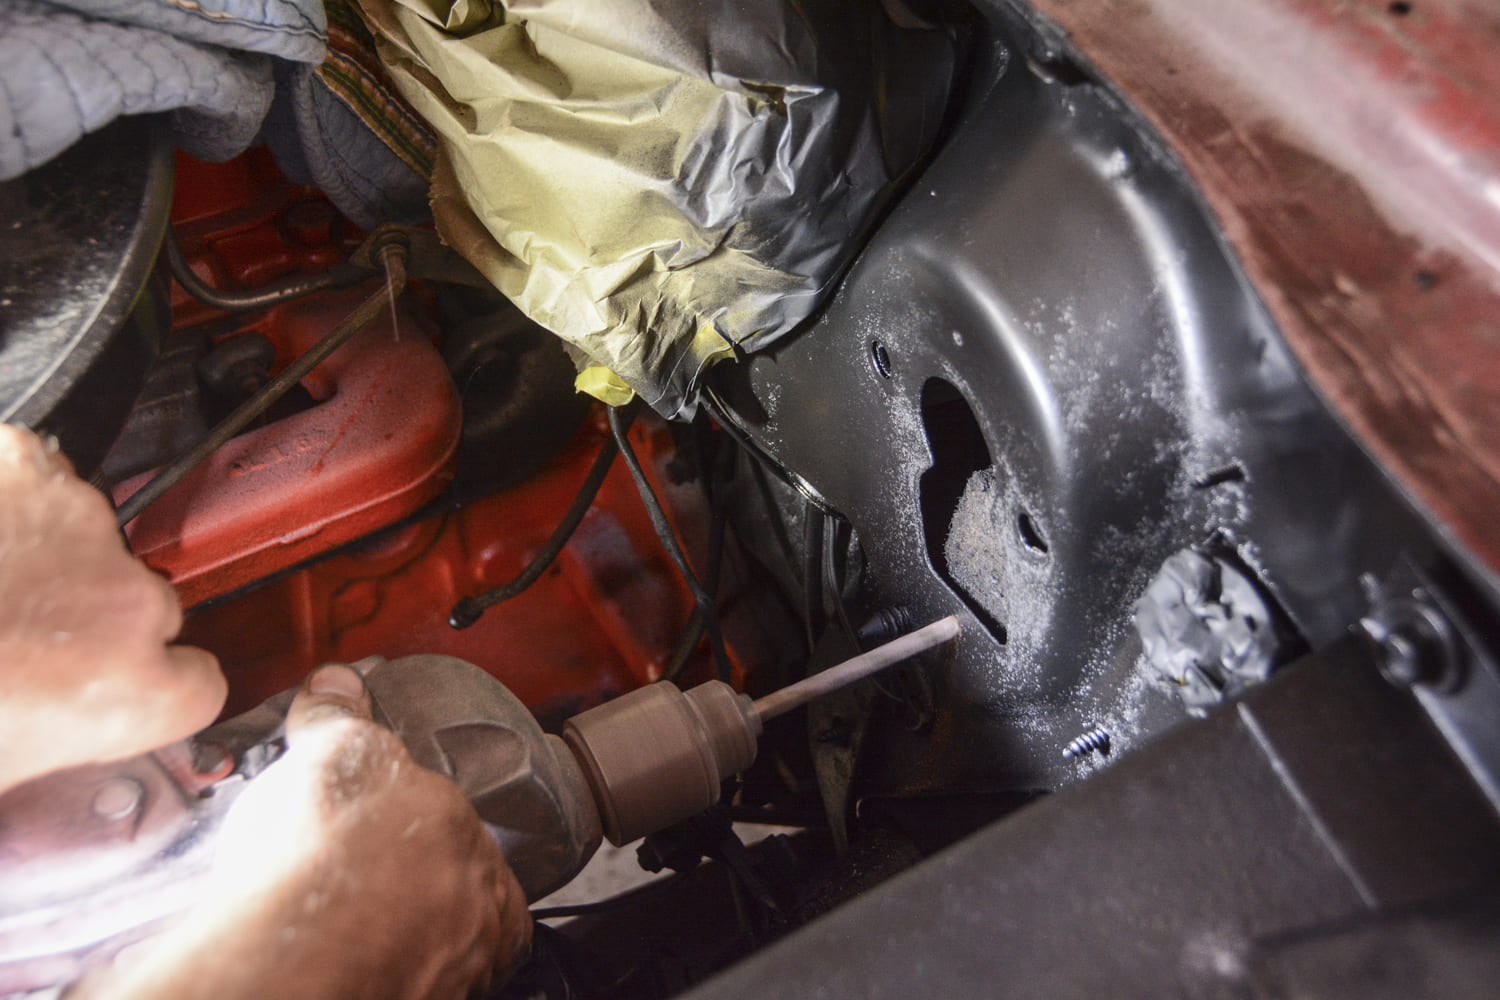
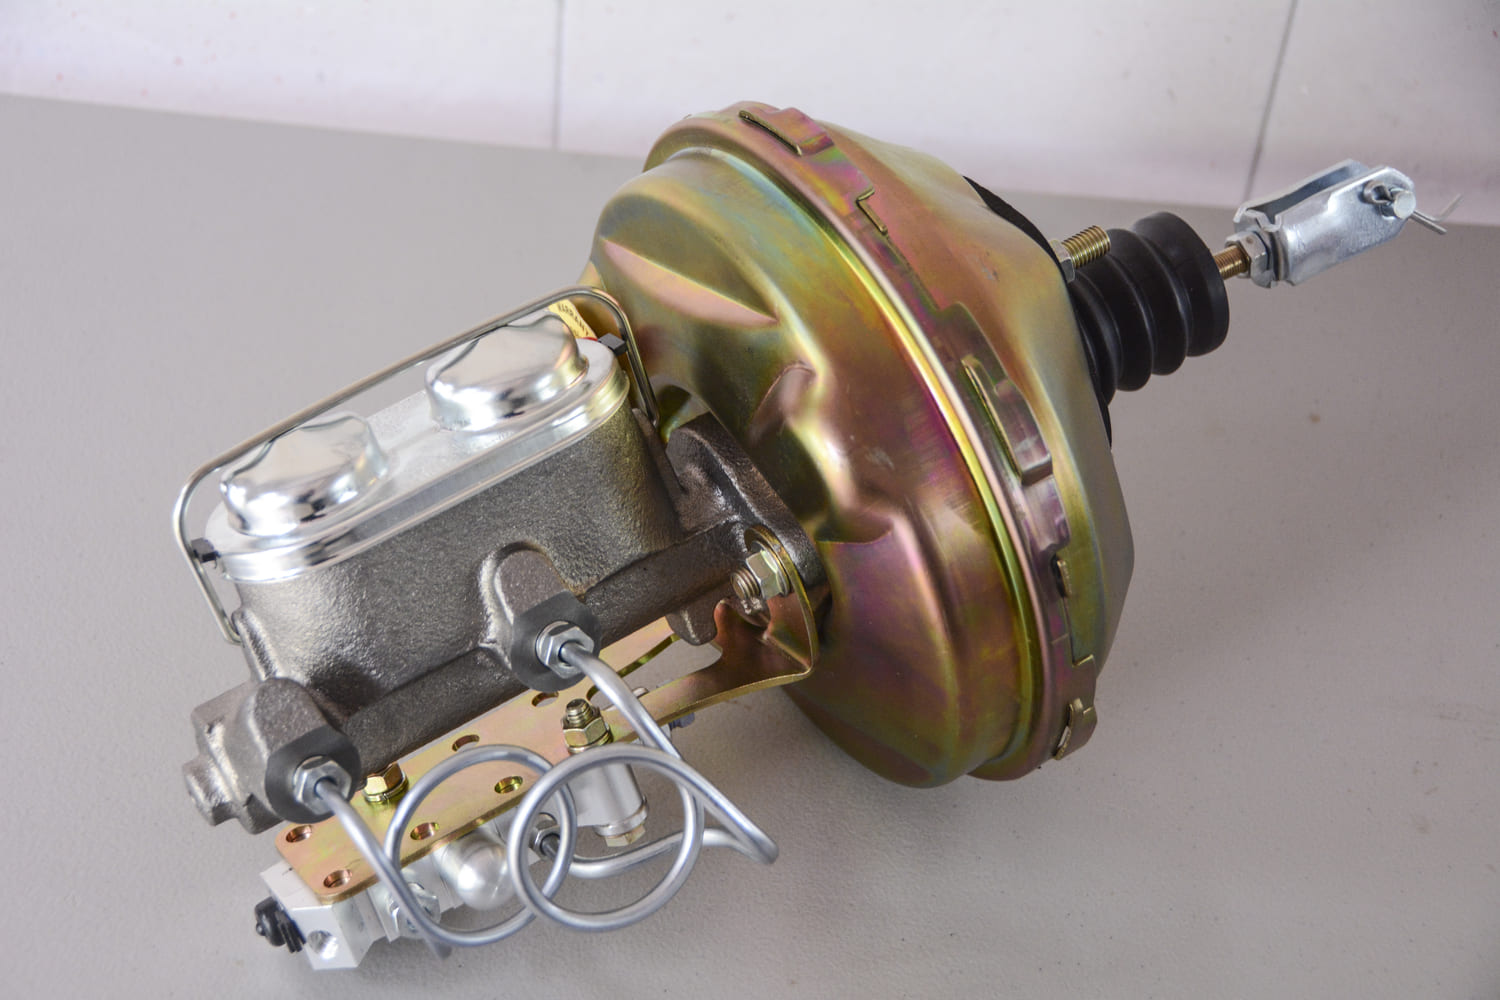
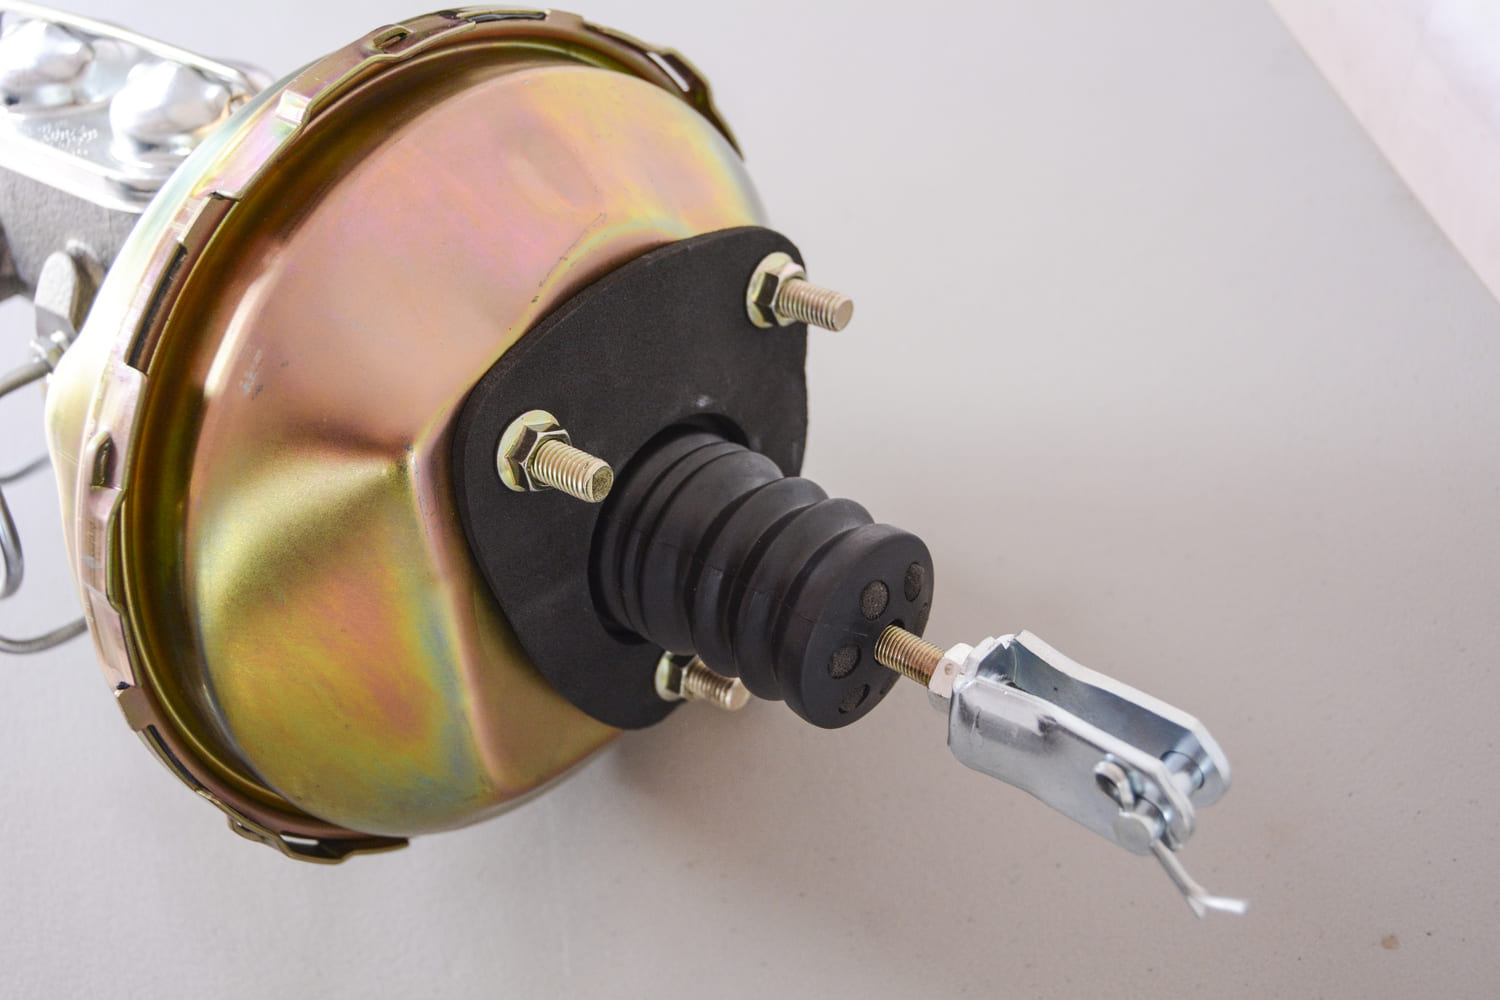
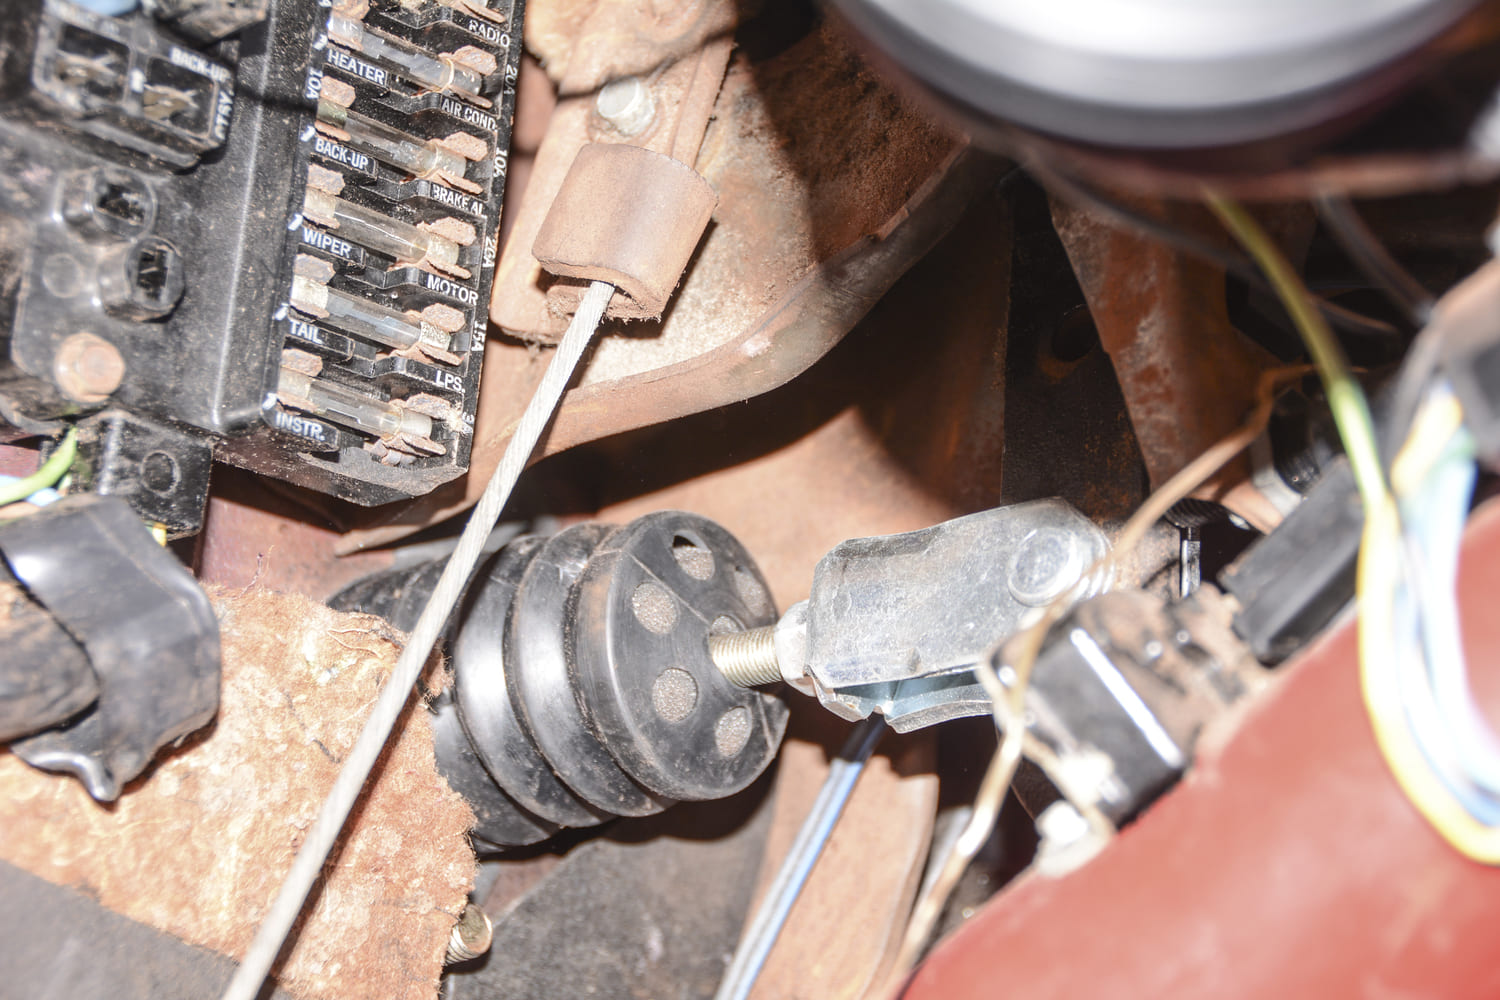
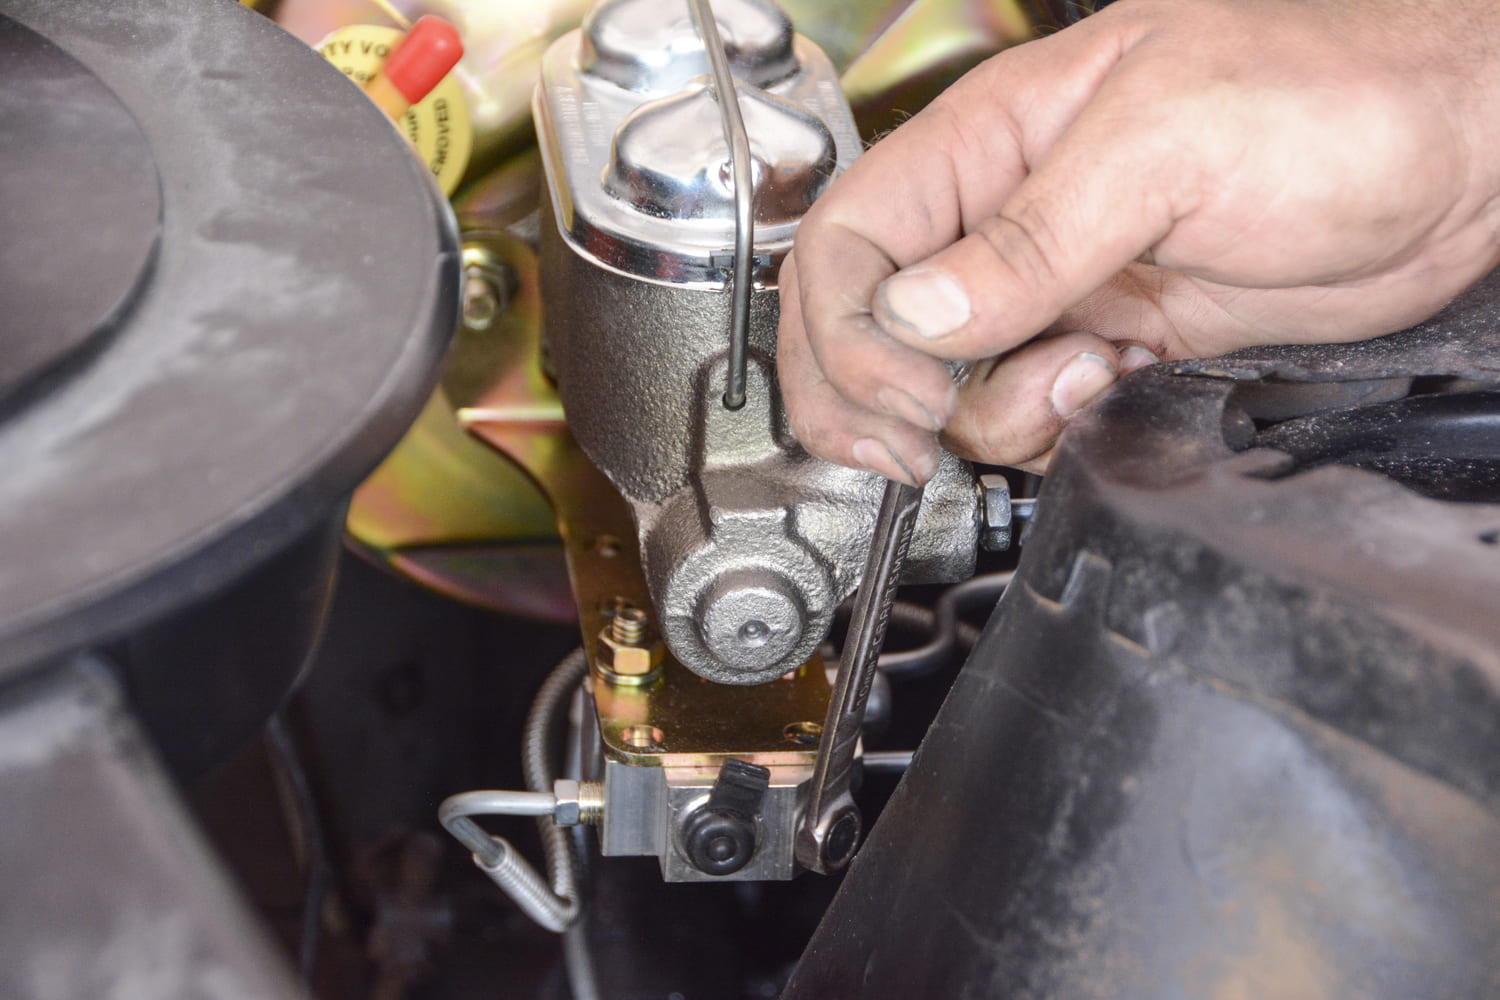
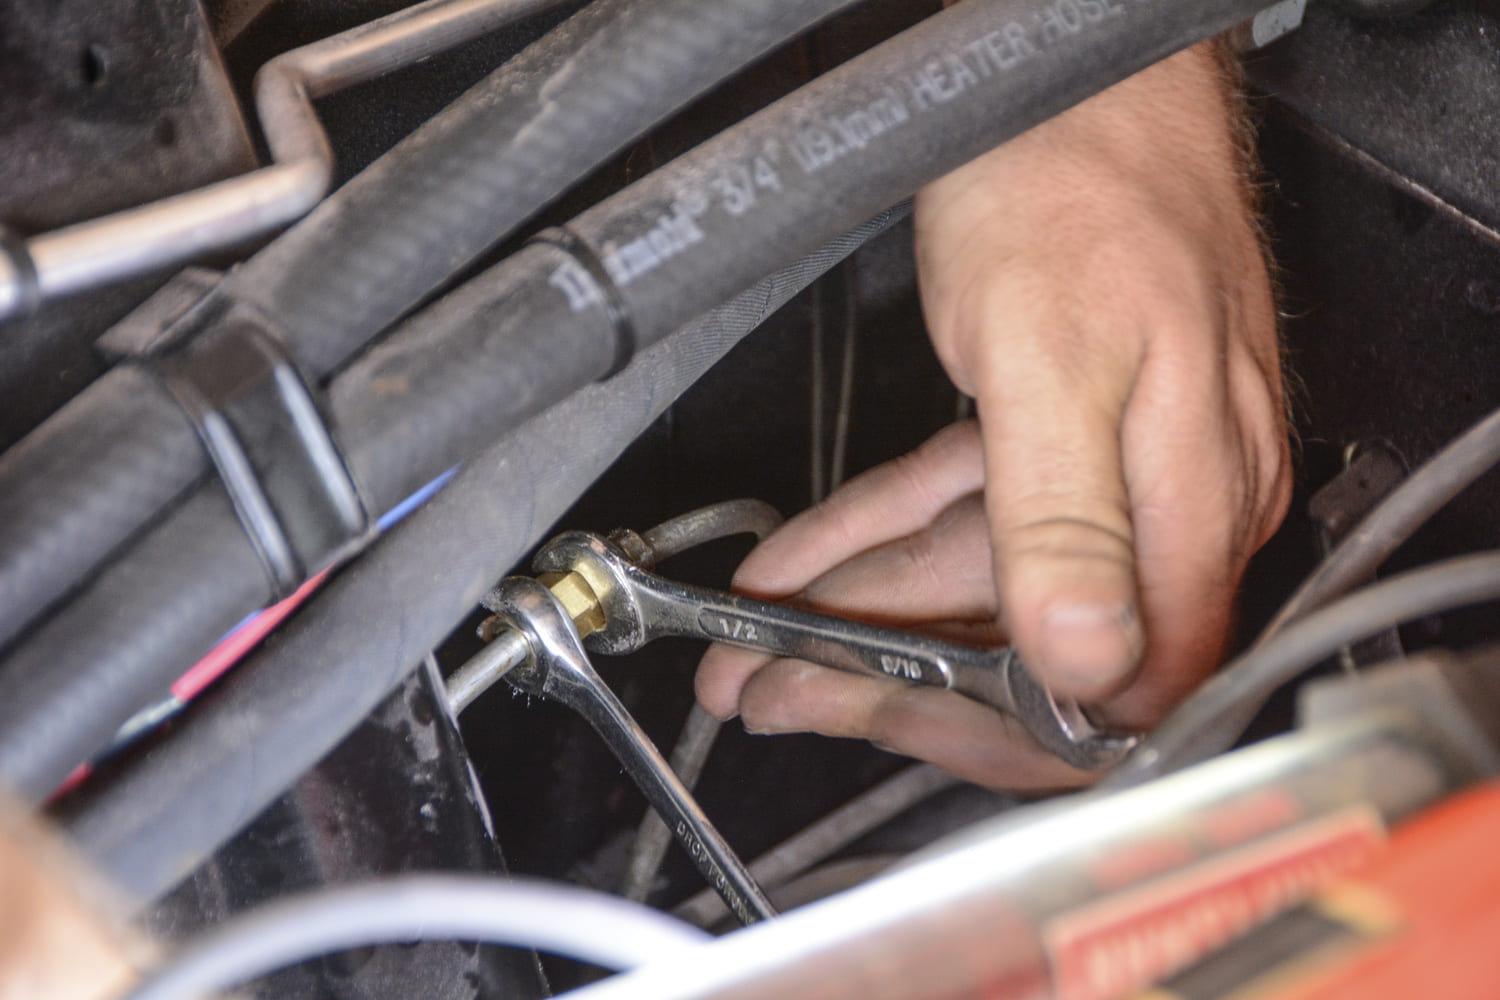
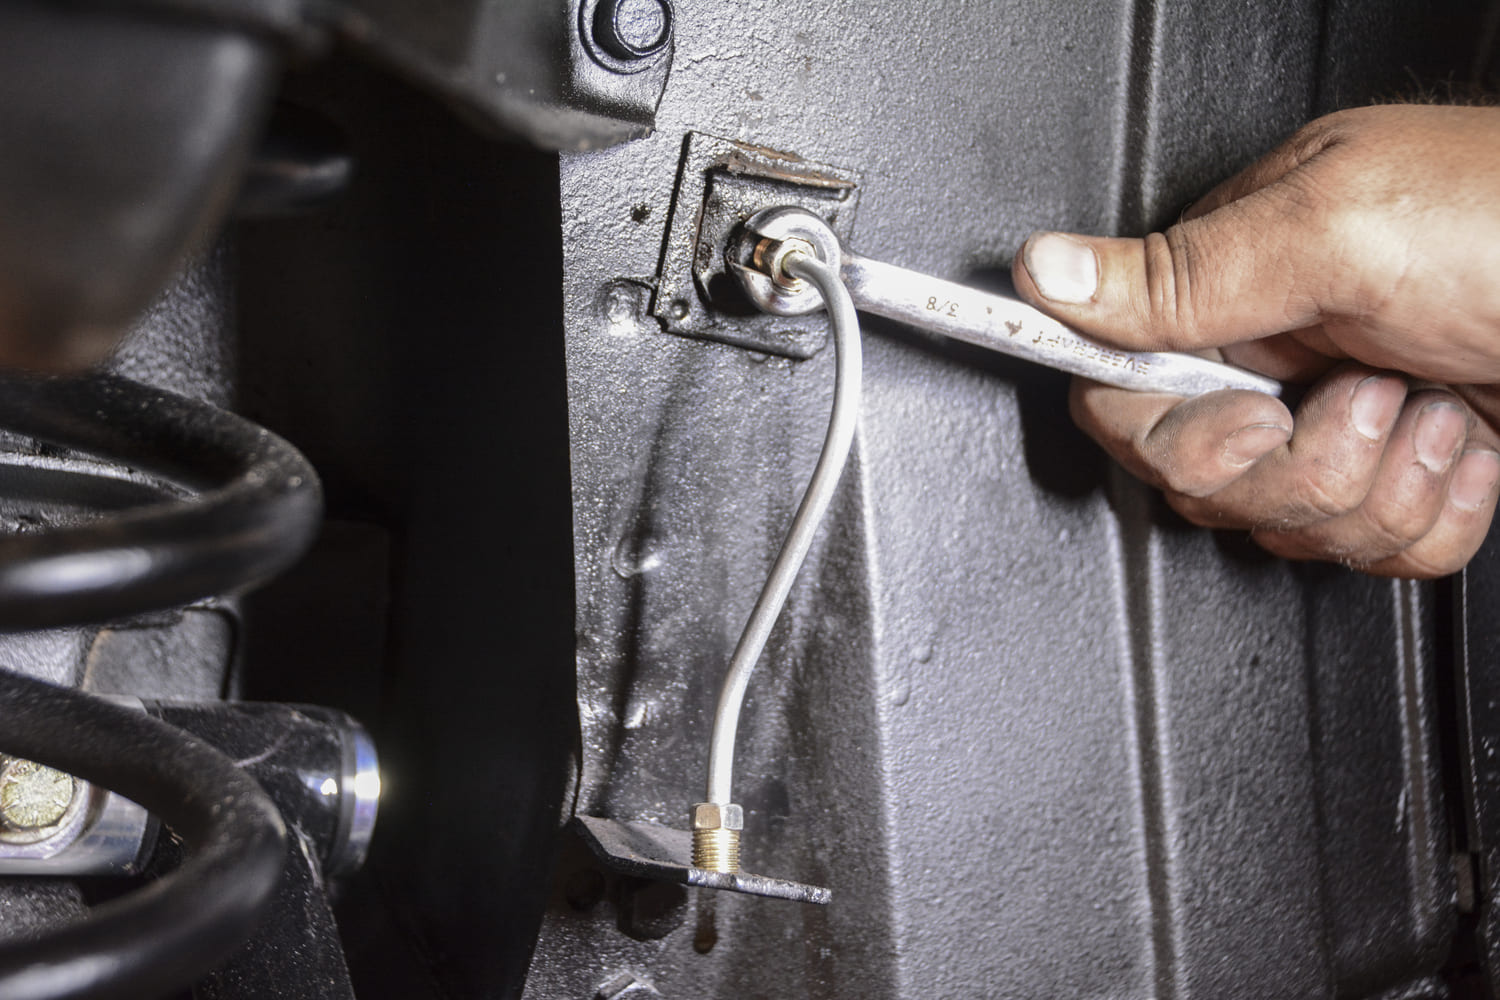
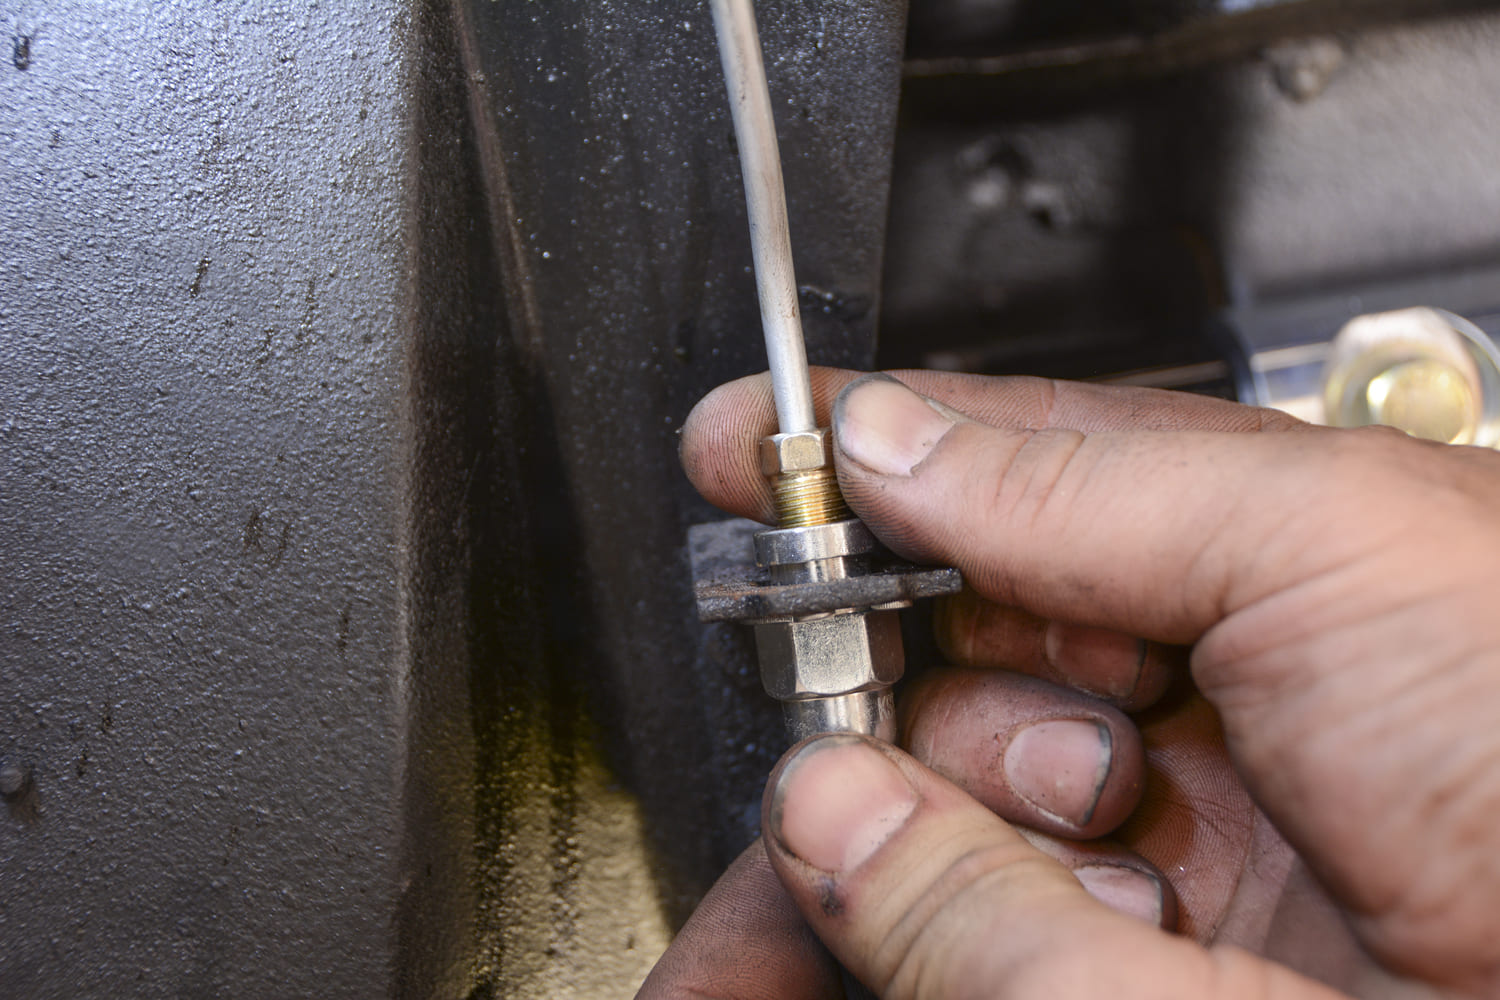
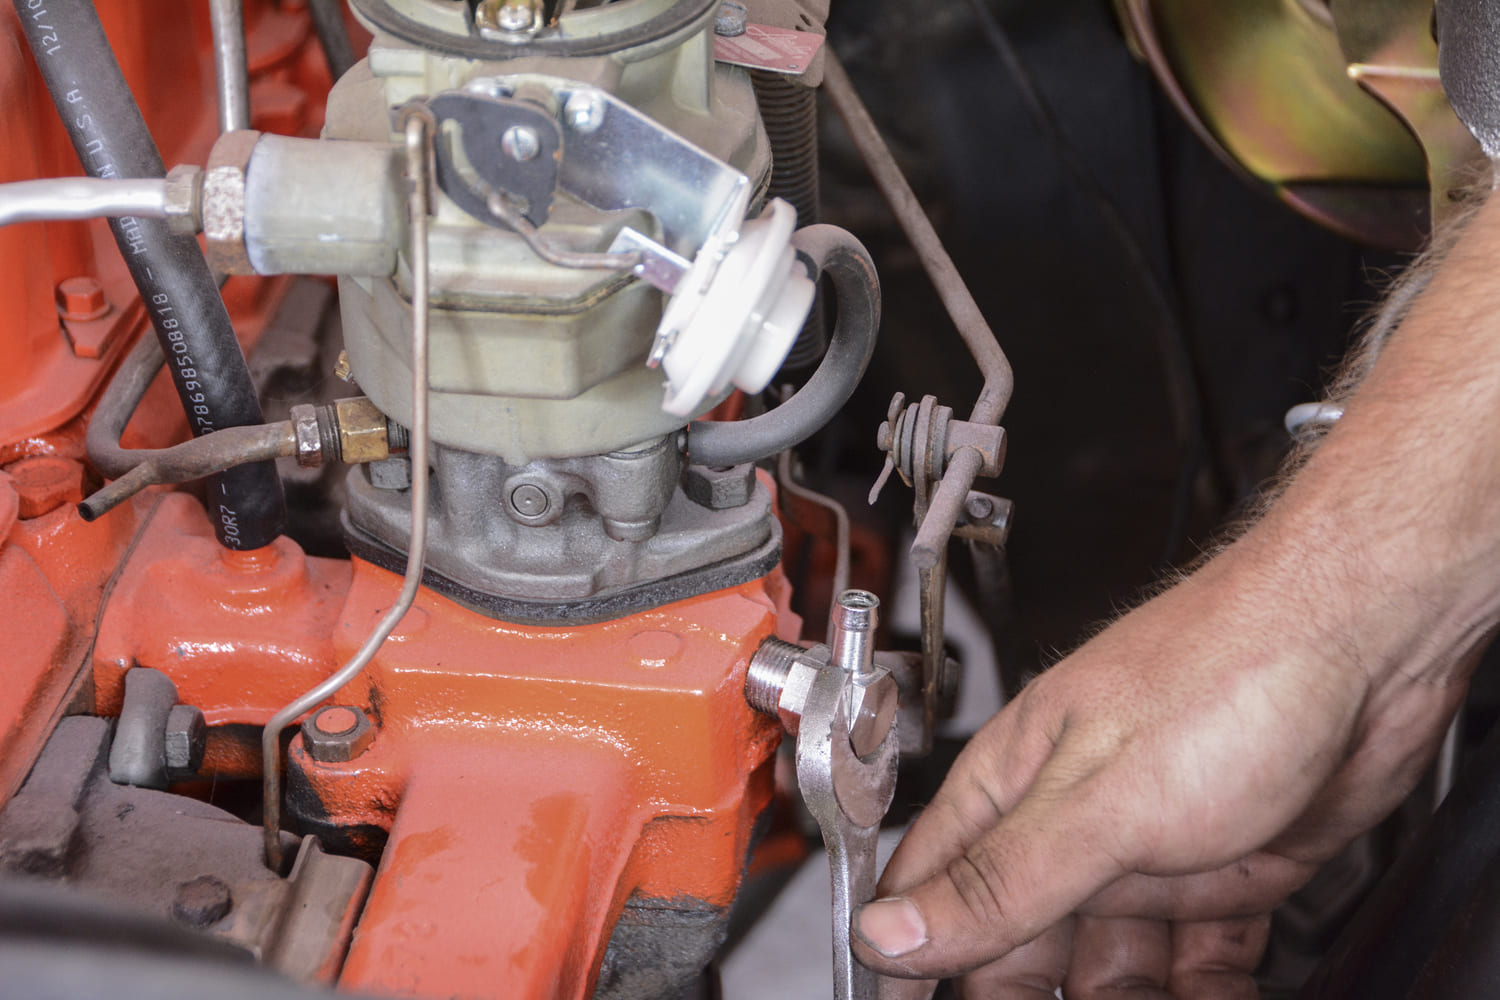
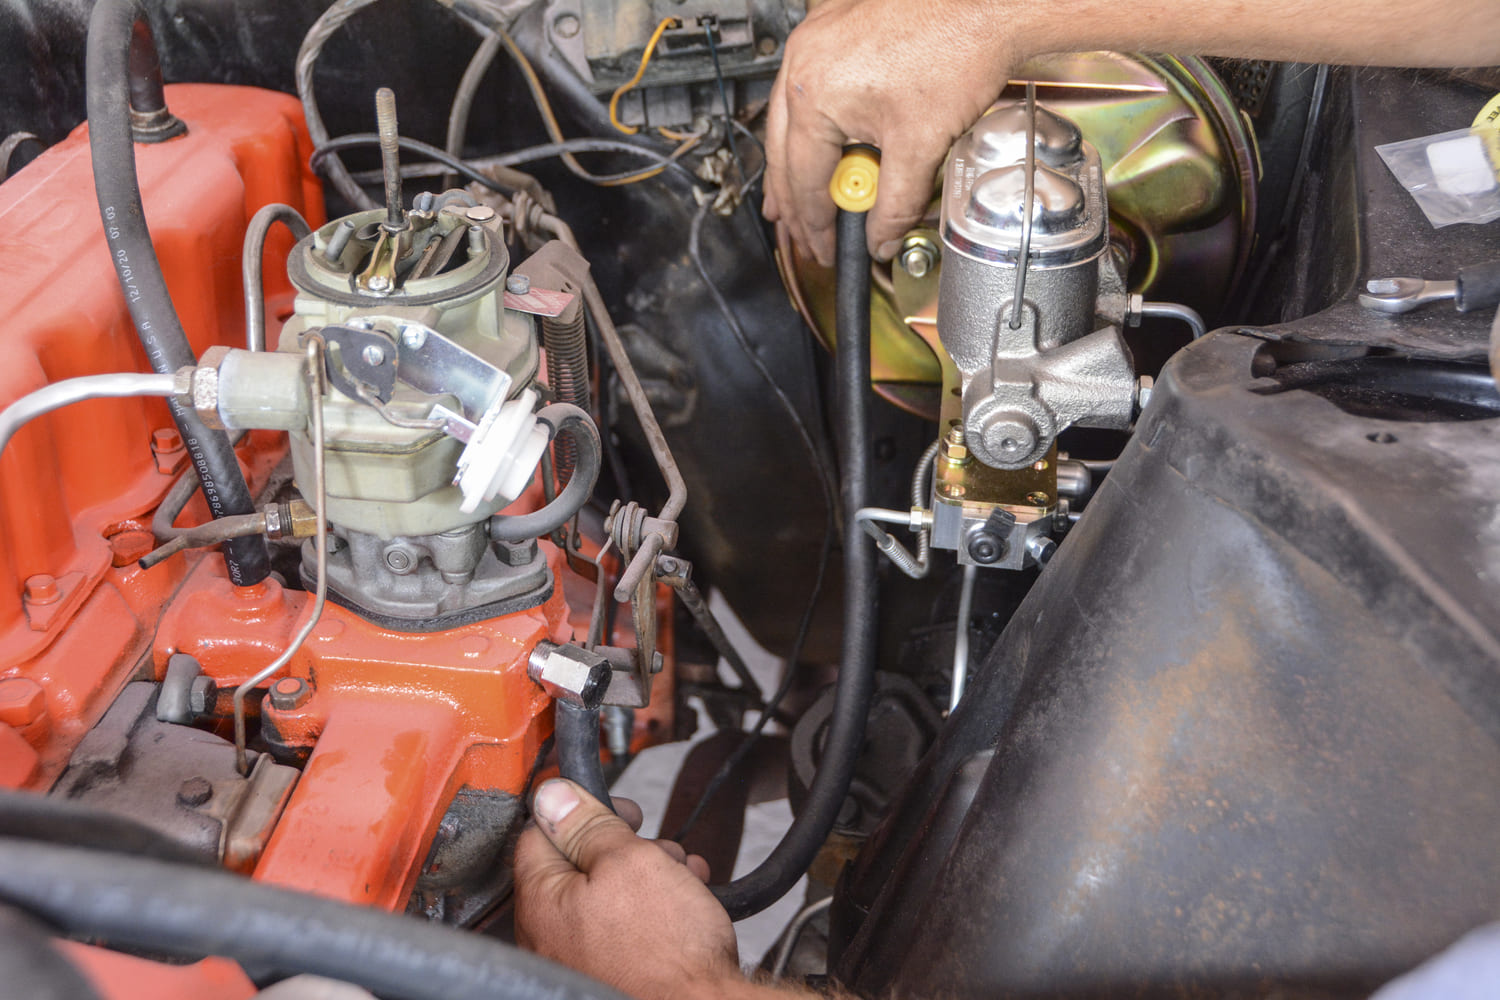
Before we can slide the new CPP booster and master into place, we must first knock the two studs out of the firewall. This is accomplished by threading the nut onto the stud and giving it a firm blow with a hammer.The brake booster features a three-bolt design, which requires us to drill a hole in the firewall. Luckily, the factory left a dimple in the exact location of that hole, giving us a good starting point with the drill and 3/8-inch bit.CPP ships the booster assembly as shown, making it a very simple install. The early Chevy II conversion kit includes a 9-inch booster for direct fitment. The dual reservoir master cylinder, proportioning valve, and hard lines are already installed.The back side of the brake booster features a new gasket, seal, and pushrod. We remove the three nuts and the pin from the clevis before attempting to slide the unit into place.Space is tight between the firewall and shock towers, but there is just enough room to slide the booster and master cylinder into place. After getting the studs started through the firewall, we then move inside to ensure the clevis is aligned with the brake pedal.Space is even tighter under the dash, but we were able to attach the clevis to the pedal with the supplied pin. While we’re under the dash, we can tighten the three nuts using a series of extensions and swivels.Back to the top side, we can start plumbing the system. We start by installing the supplied block-off plug on the proportioning valve. Then, we can install the hard lines. One of the lines goes to the driver side inner fender, while two hard lines travel across to the passenger side.The new hard line that feeds the rear brakes threads into the rear port of the proportioning valve and then runs to the other side of the engine bay. It connects to the existing rear brake line with this junction fitting. We first removed the rear brake line from the original distribution block and then threaded it into the junction.The hard lines exit the engine bay through a bulkhead in the inner fender. From there, a short piece of hard line extends down to a flange where it meets with the rubber flex hose. These short pre-bent lines are included in the CPP kit.We thread the hard line into the flex hose and apply a little bit of force to align the hose so the retaining clip can slide into place easily. Then we can tighten the fitting.The CPP brake caliper features a banjo-style fitting, and the supplied brake hose and hardware are complete with everything we need to seal it off properly. Two washers are included and seal against both sides of the hose end.Since our Chevy II was originally equipped with manual brakes, it did not have vacuum source for the booster. Luckily, CPP offers a simple 90-degree fitting that threads into our intake manifold.After a little trimming, the rubber hose is installed on the new vacuum port fitting and routed to the brake booster fitting.Now, it’s time to pour in some brake fluid and bleed the system. It’s important to first bleed the master cylinder. Since it has a level mounting configuration this can be done in the car. Other applications require removing the master cylinder and clamping it in a vise.
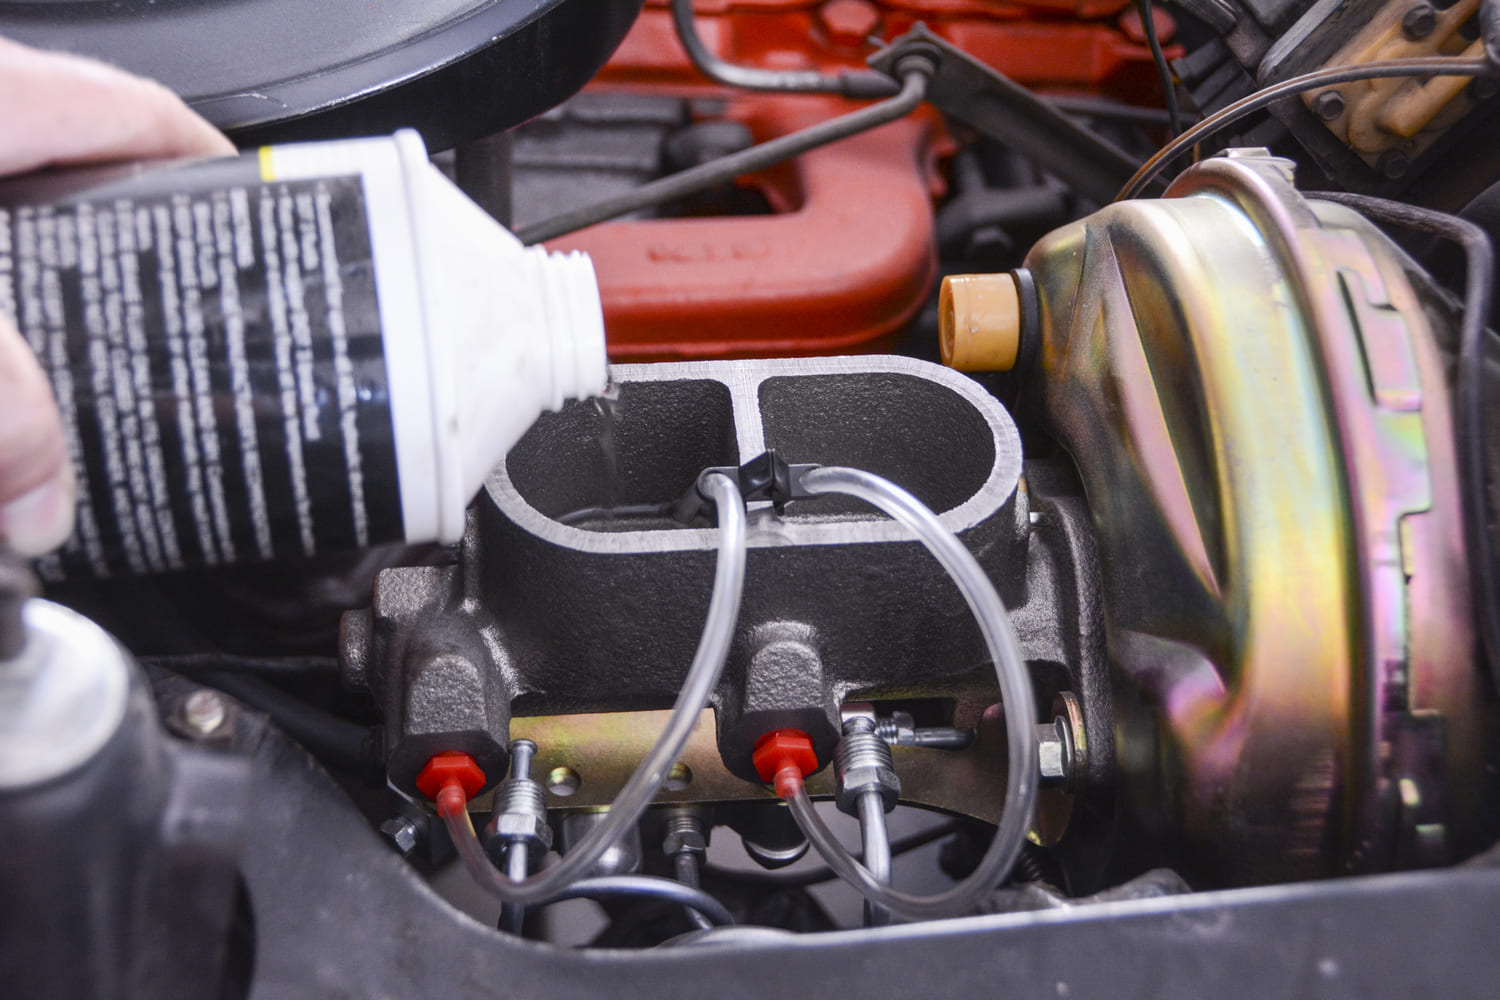
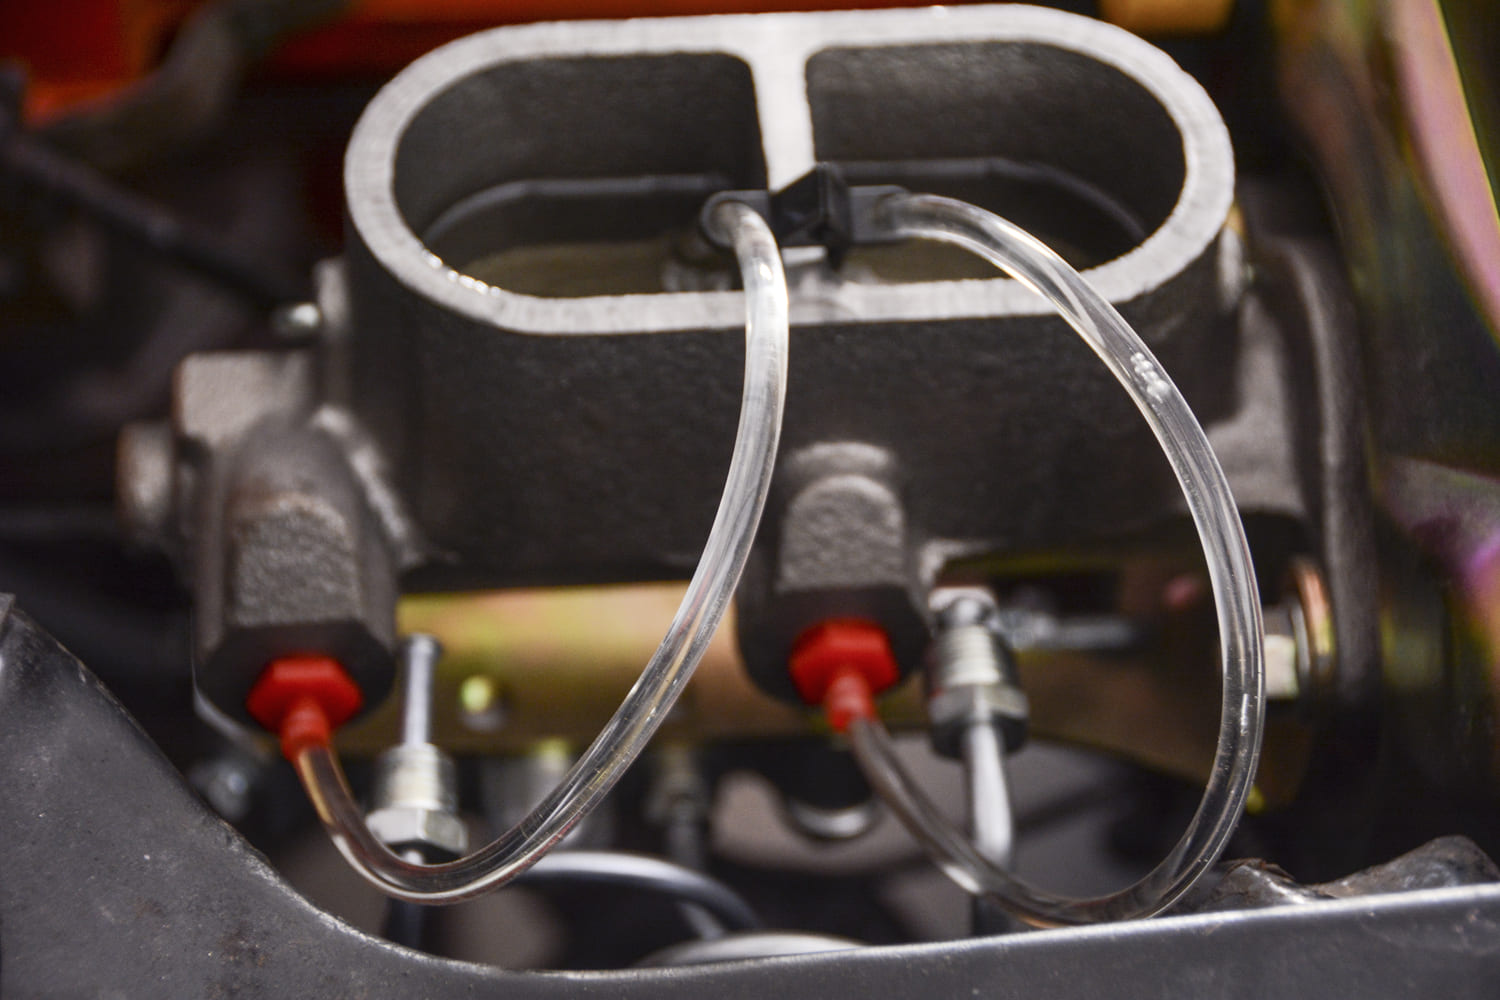
CPP’s bench bleeding kit consists of plastic fittings, clear lines, and a small clamp. After filling the reservoirs, we slowly press the brake pedal until no bubbles are visible in the clear lines.Finally, we bleed the entire brake system. We started with the passenger side rear corner and work our way toward the front where we find new 10mm bleeder screws. After we get all the air out of the system, we can take a testdrive and enjoy the performance and safety of the new CPP power disc brake system.
We use cookies to ensure that we give you the best experience on our website. If you continue to use this site we will assume that you are happy with it.