Our 1964 Ford Galaxie (named “Project Lara Lor-Van”) belongs to Eddy Cebreco and has a great deal of sheet metal work that is needed. We have already begun by replacing the firewall, now comes the upper and lower cowl areas. This is going to give us all fresh metal underhood at the firewall/windshield area. It should be noted that Auto Metal Direct makes a great number of sheet metal pieces for not only our ’64 Ford Galaxie but any number of other buildable material from the ’60s.
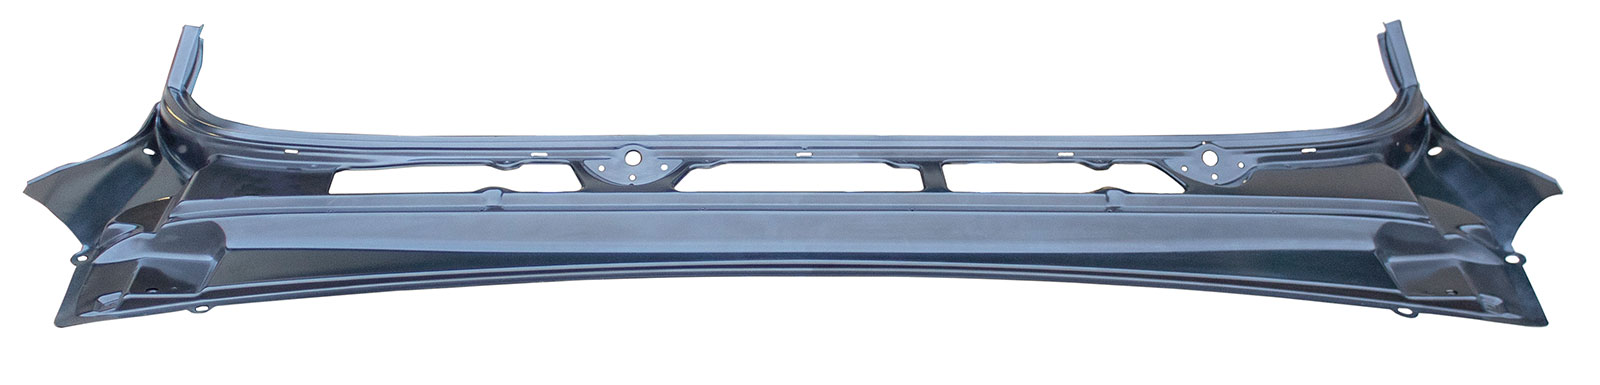
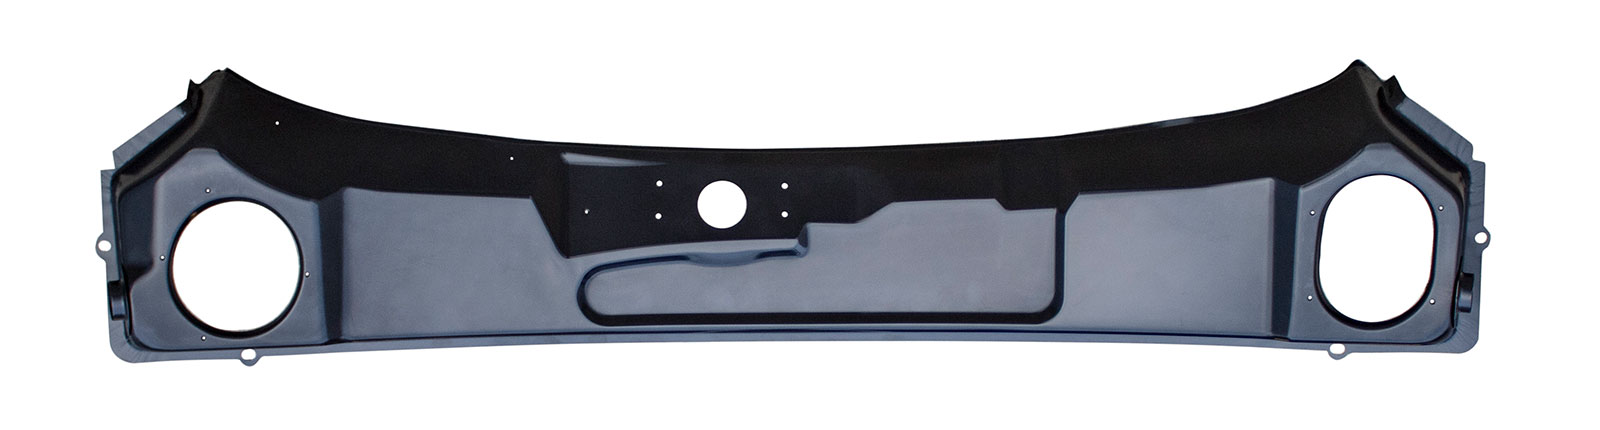
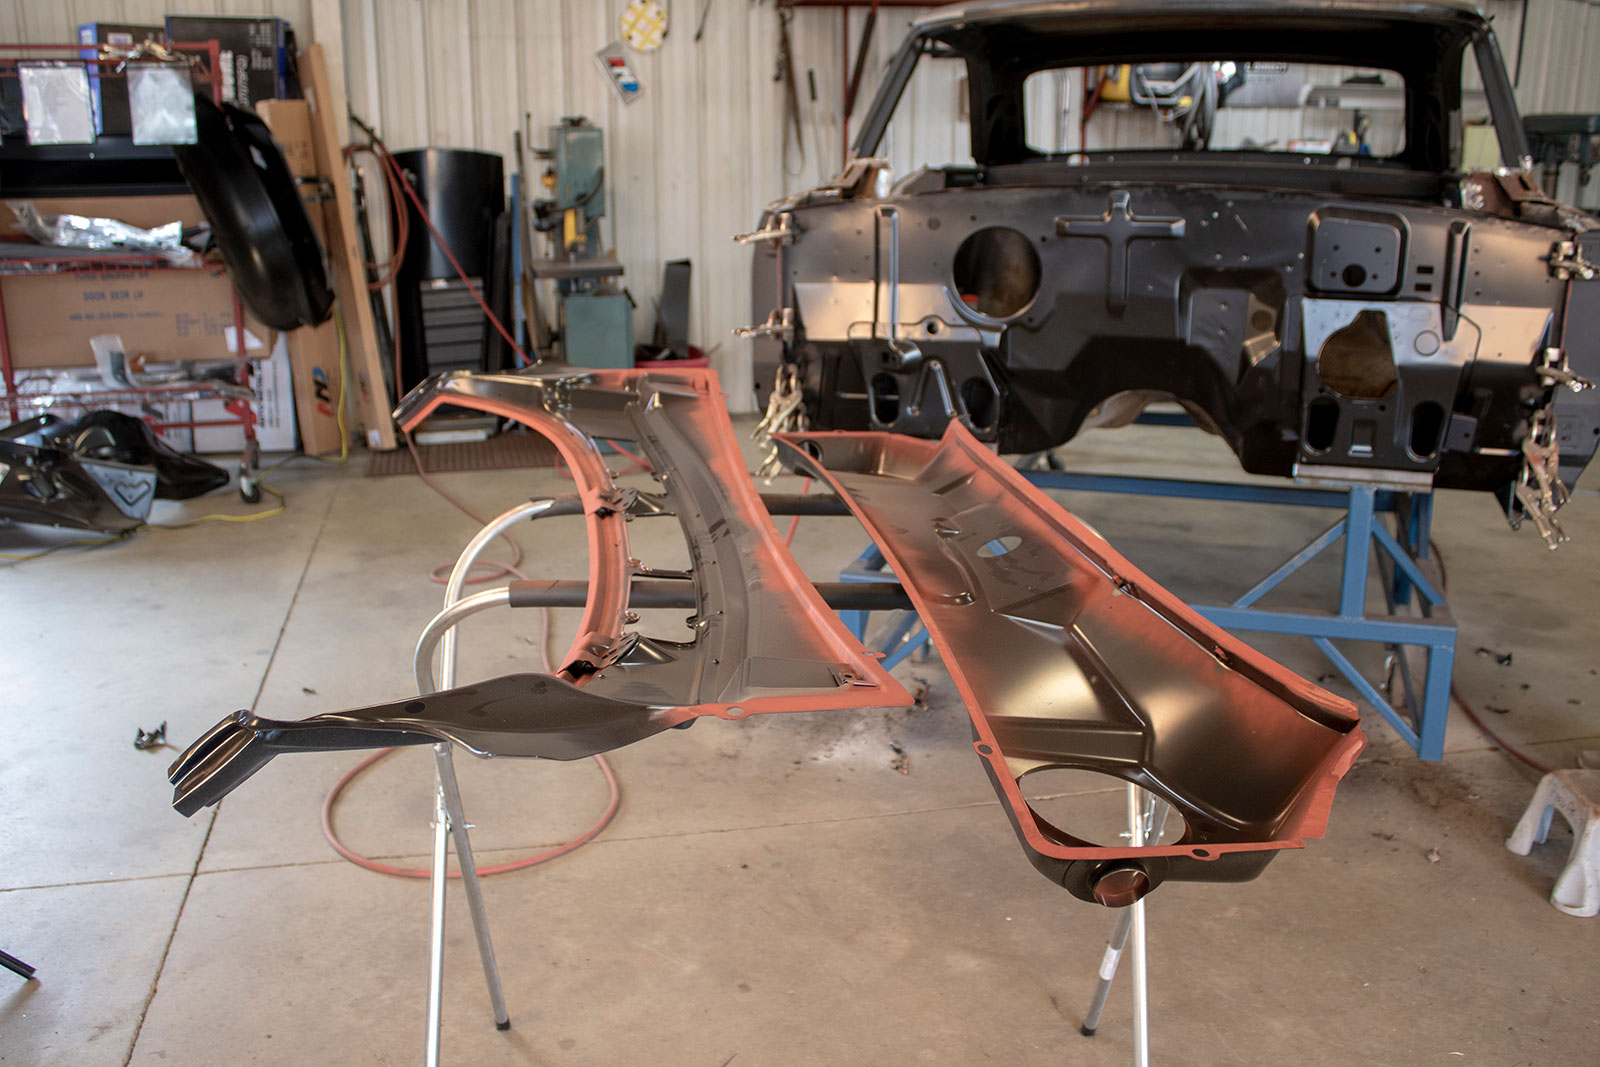
Auto Metal Direct offers a huge selection for the ’63-64 Ford Galaxie. These new upper and lower cowls are the perfect solution for project Lara Lor-Van (upper cowl PN 360-8963, lower cowl PN 360-8963-1).
The project continues with Auto Metal Direct freshly stamped sheetmetal. These upper and lower cowl pieces will fit both the ’63 and ’64 Ford Galaxie. The upper cowl carries PN 360-8963 while the lower cowl carries PN 360-8963-1. To achieve our efforts, we relied on AMD for the sheet metal and then Craig Hopkins of The Installation Center to perform the work along with Jubee Mays of aMAYSing Metal Works.
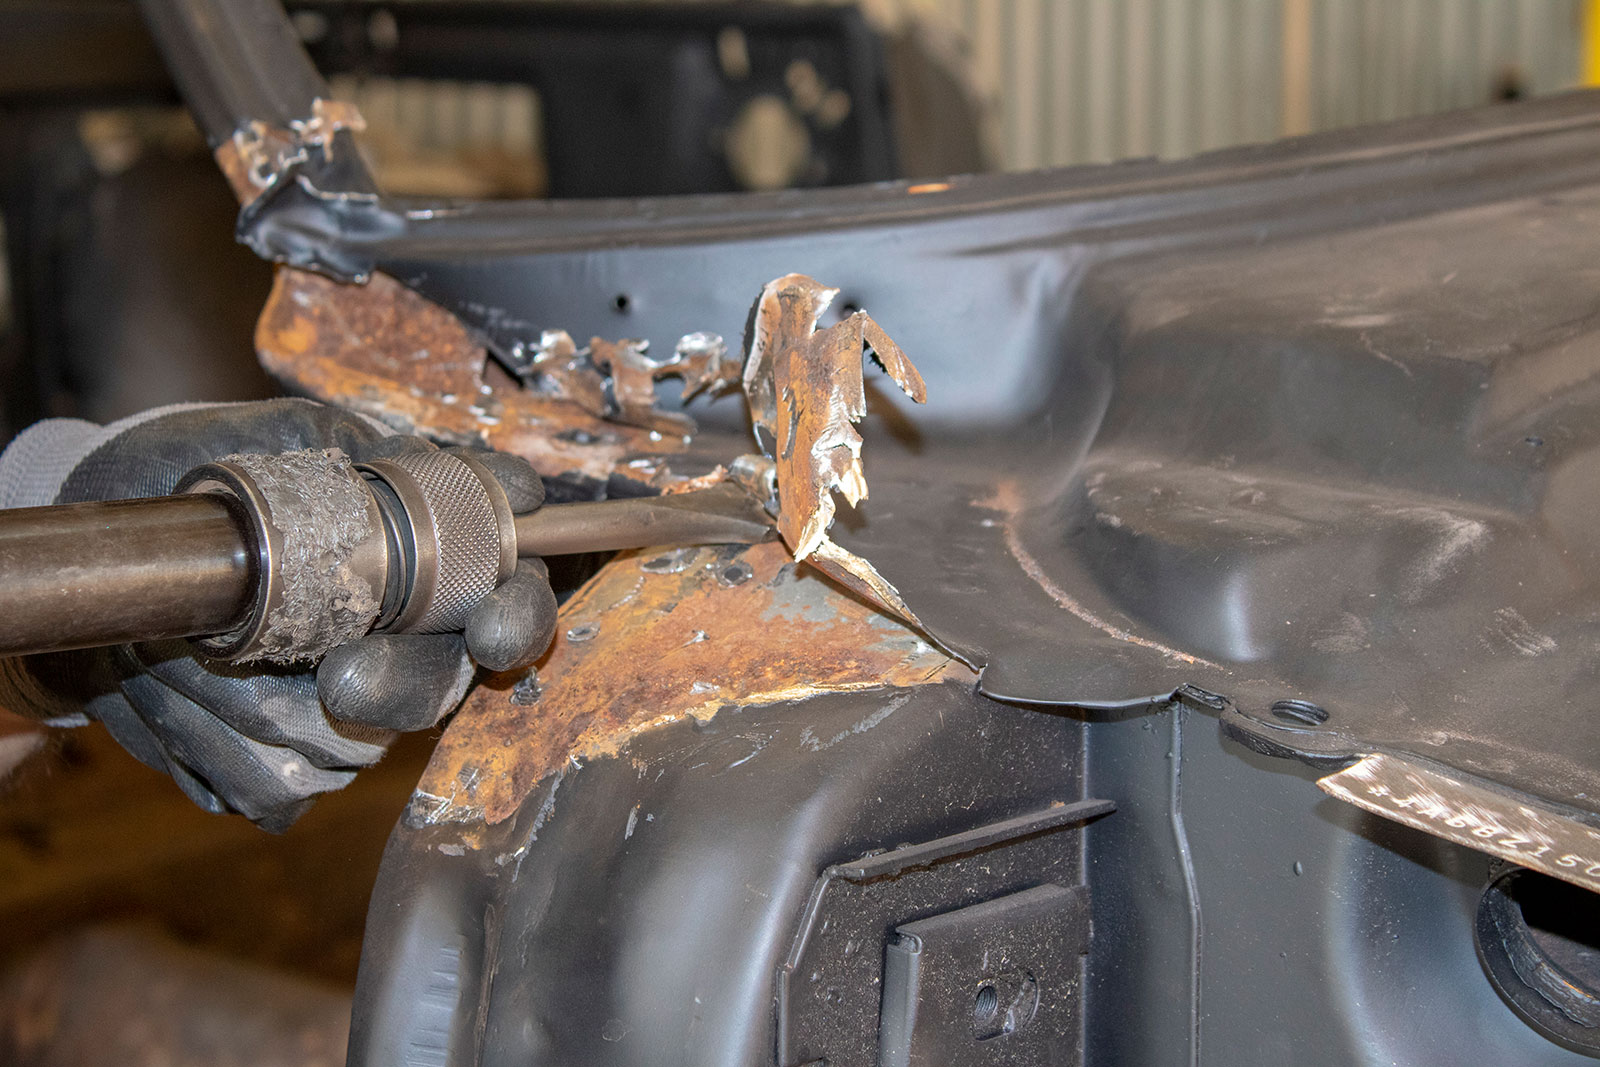
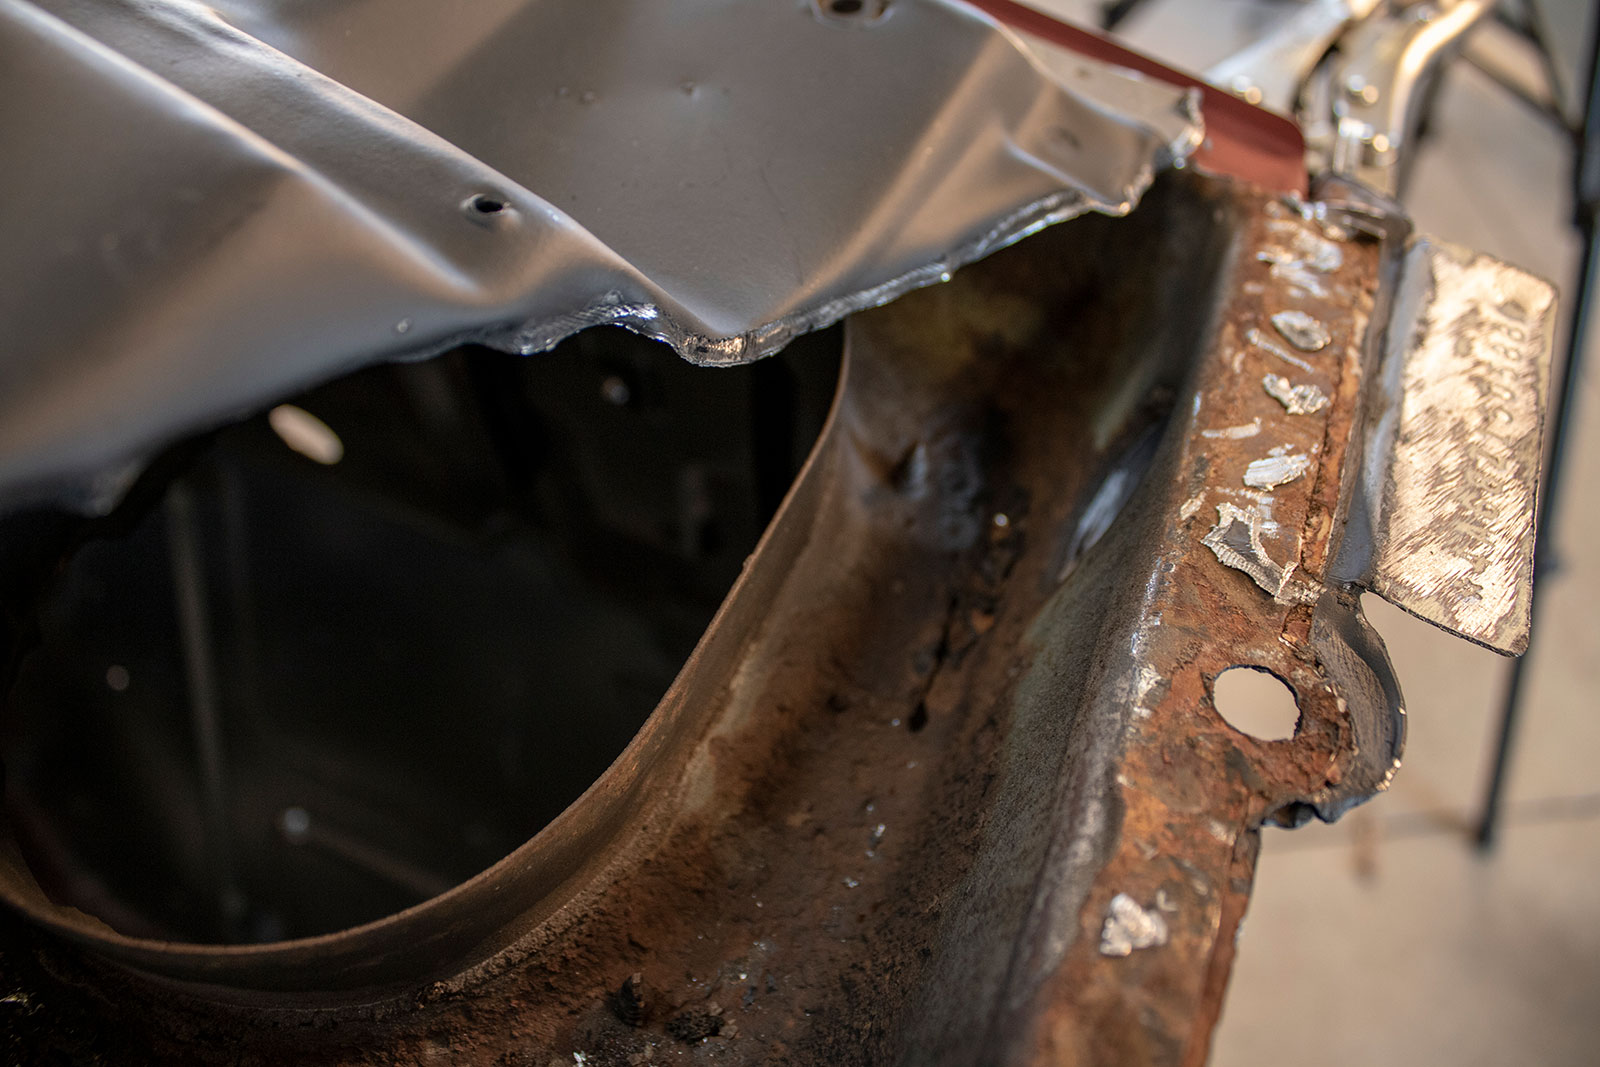
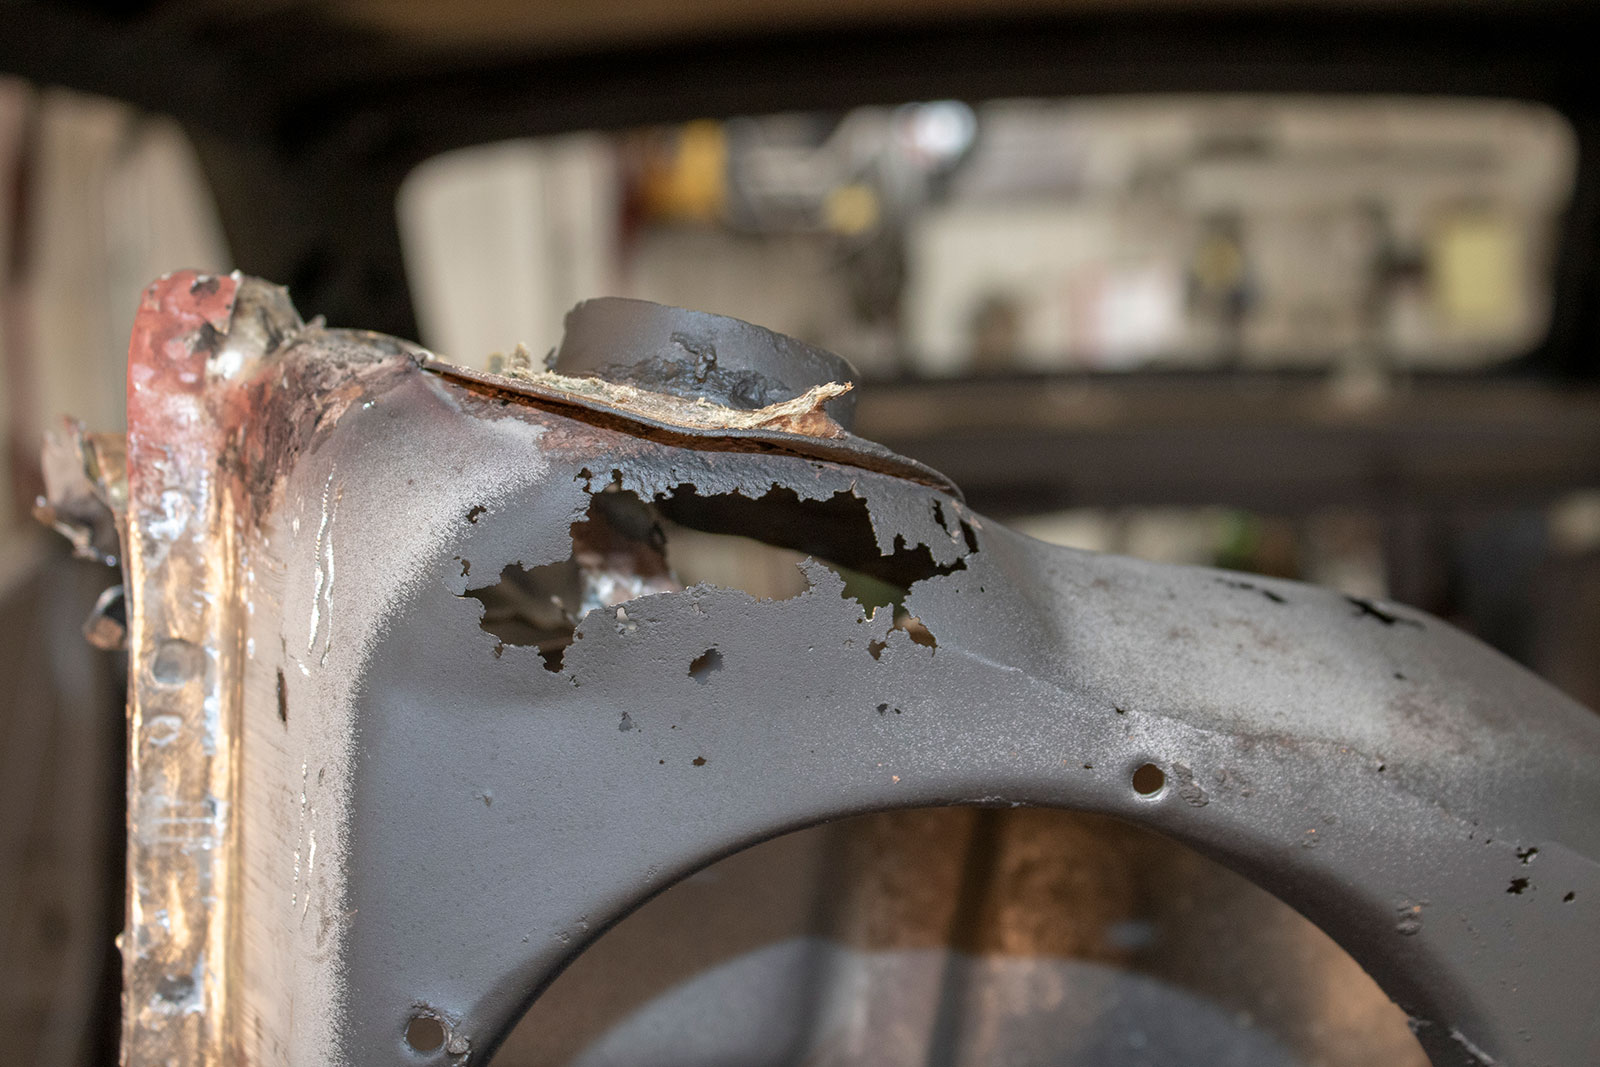
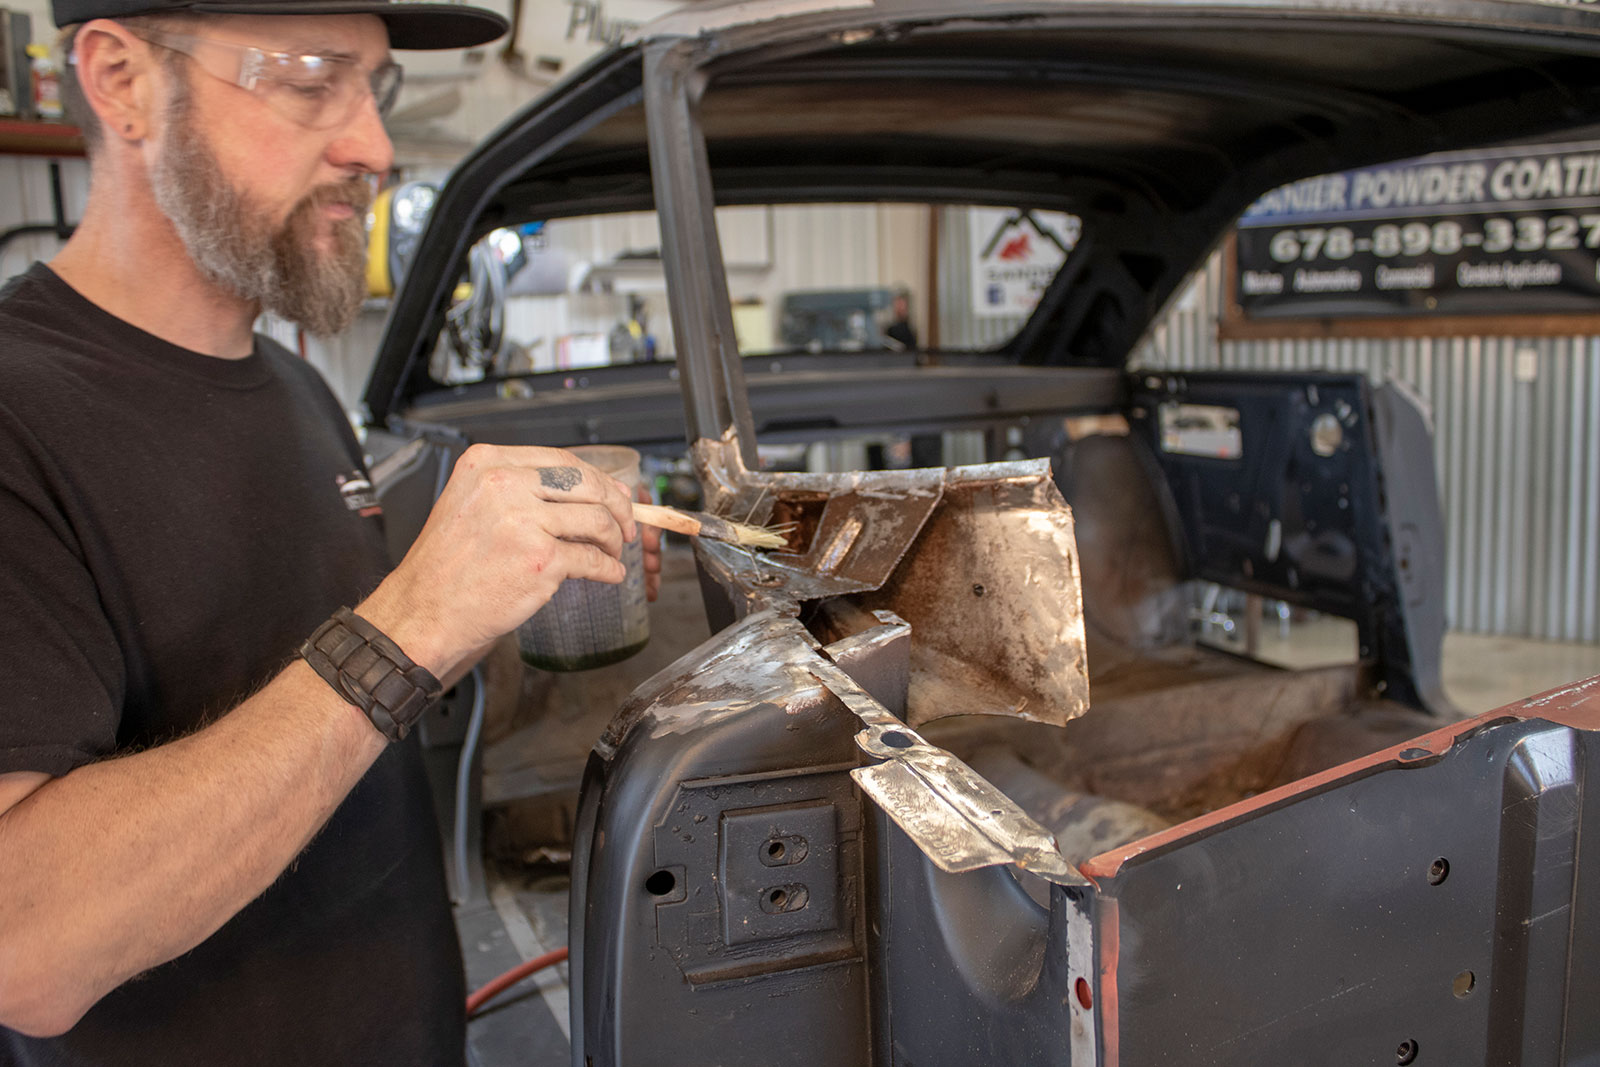
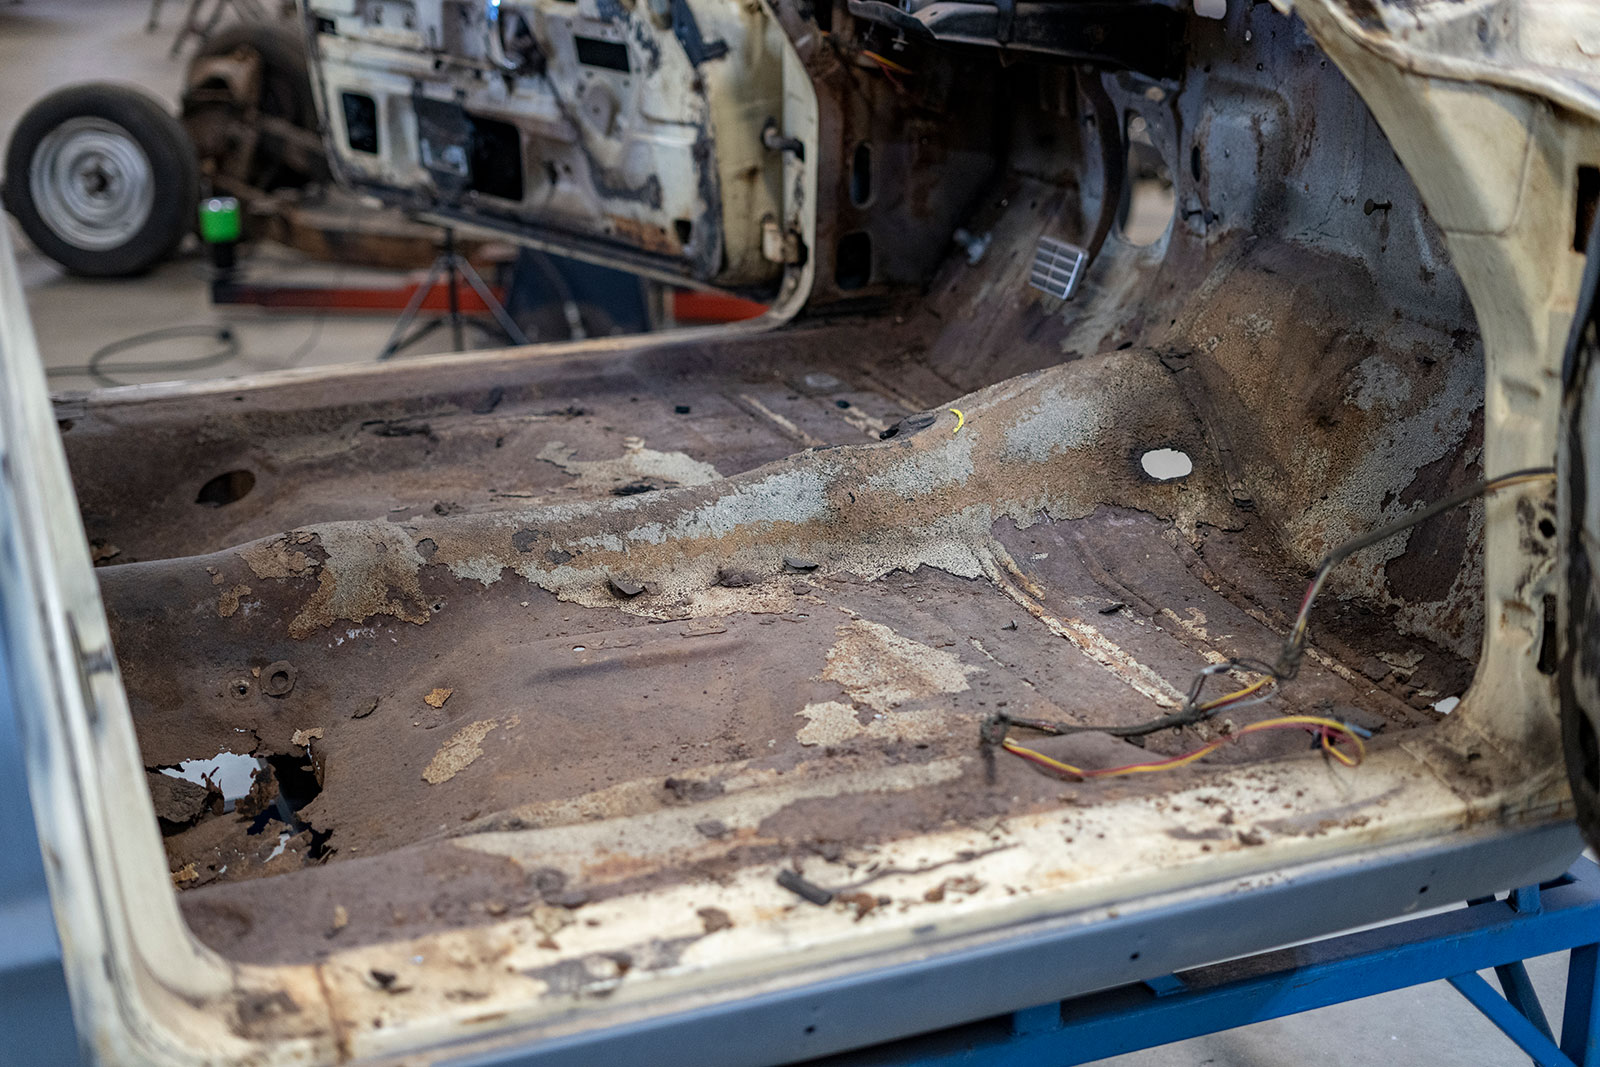
While we may be working on a ’64 Ford Galaxie, the fact remains that the firewall and the upper and lower cowl area are subject to rust. Cars of this period trap water that runs off from the roof down the windshield and is captured through the cowl plenum area (directly beneath the windshield). It’s not only water but how about all manner of dirt, leaves, and other debris that clogs the drain points. Water is then trapped and the rust process begins.
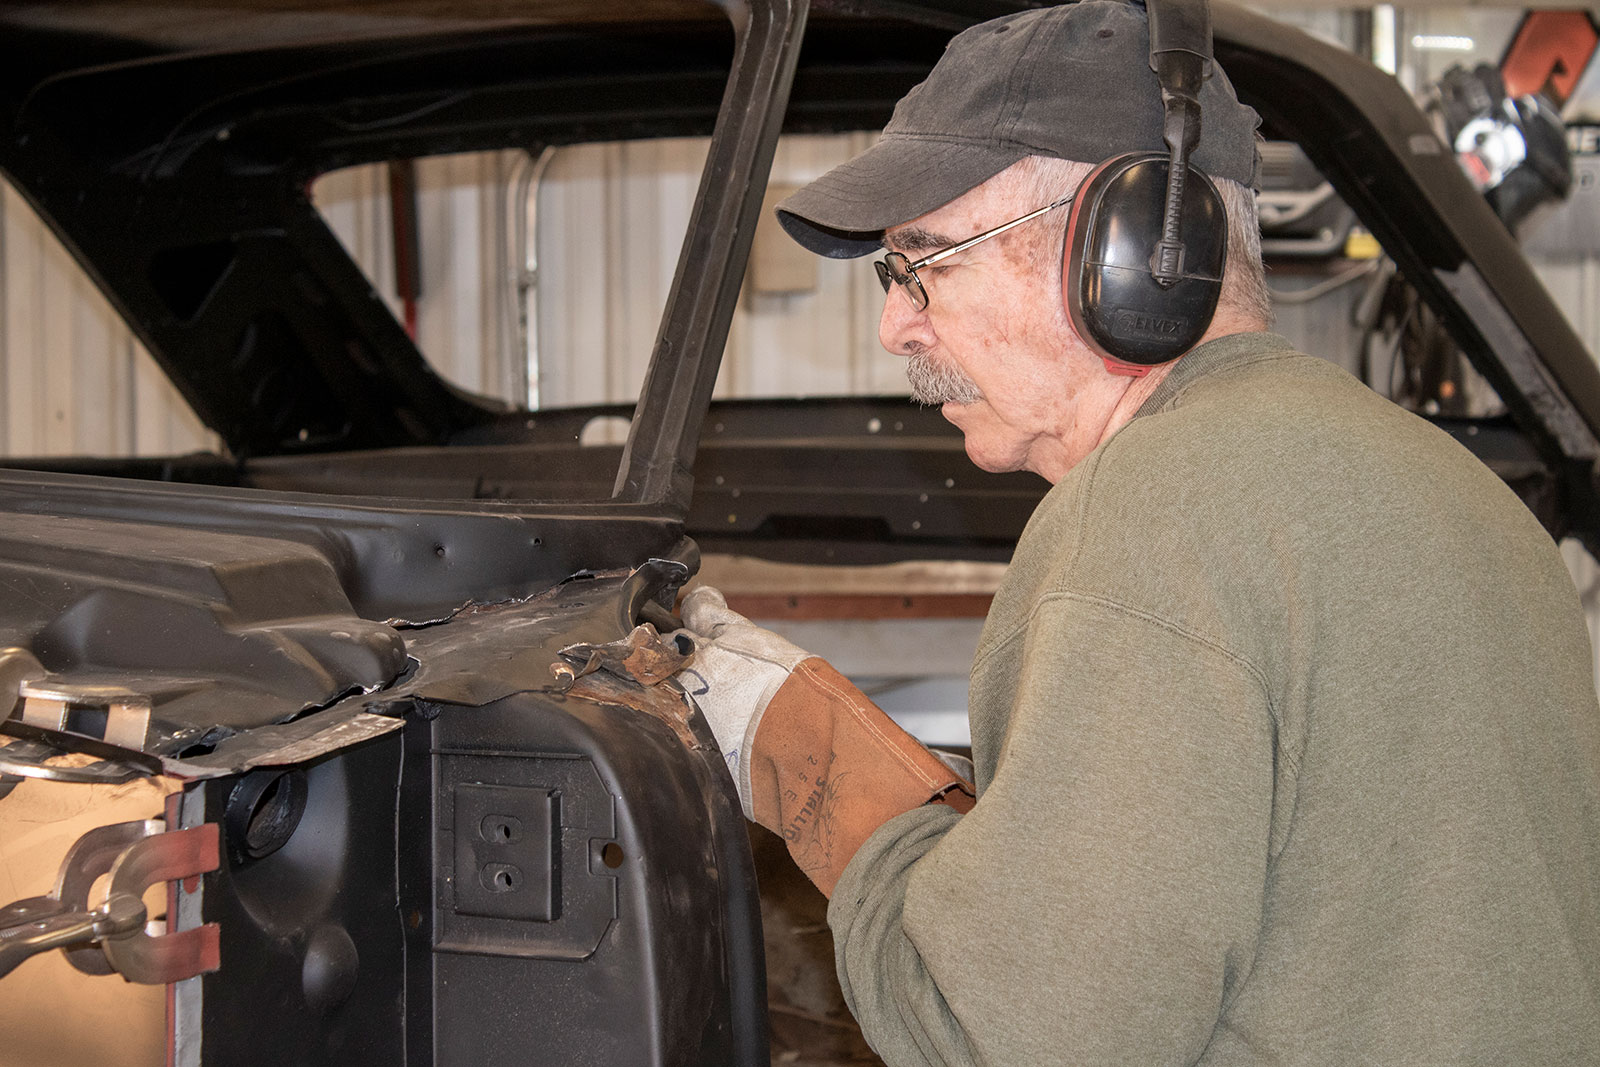
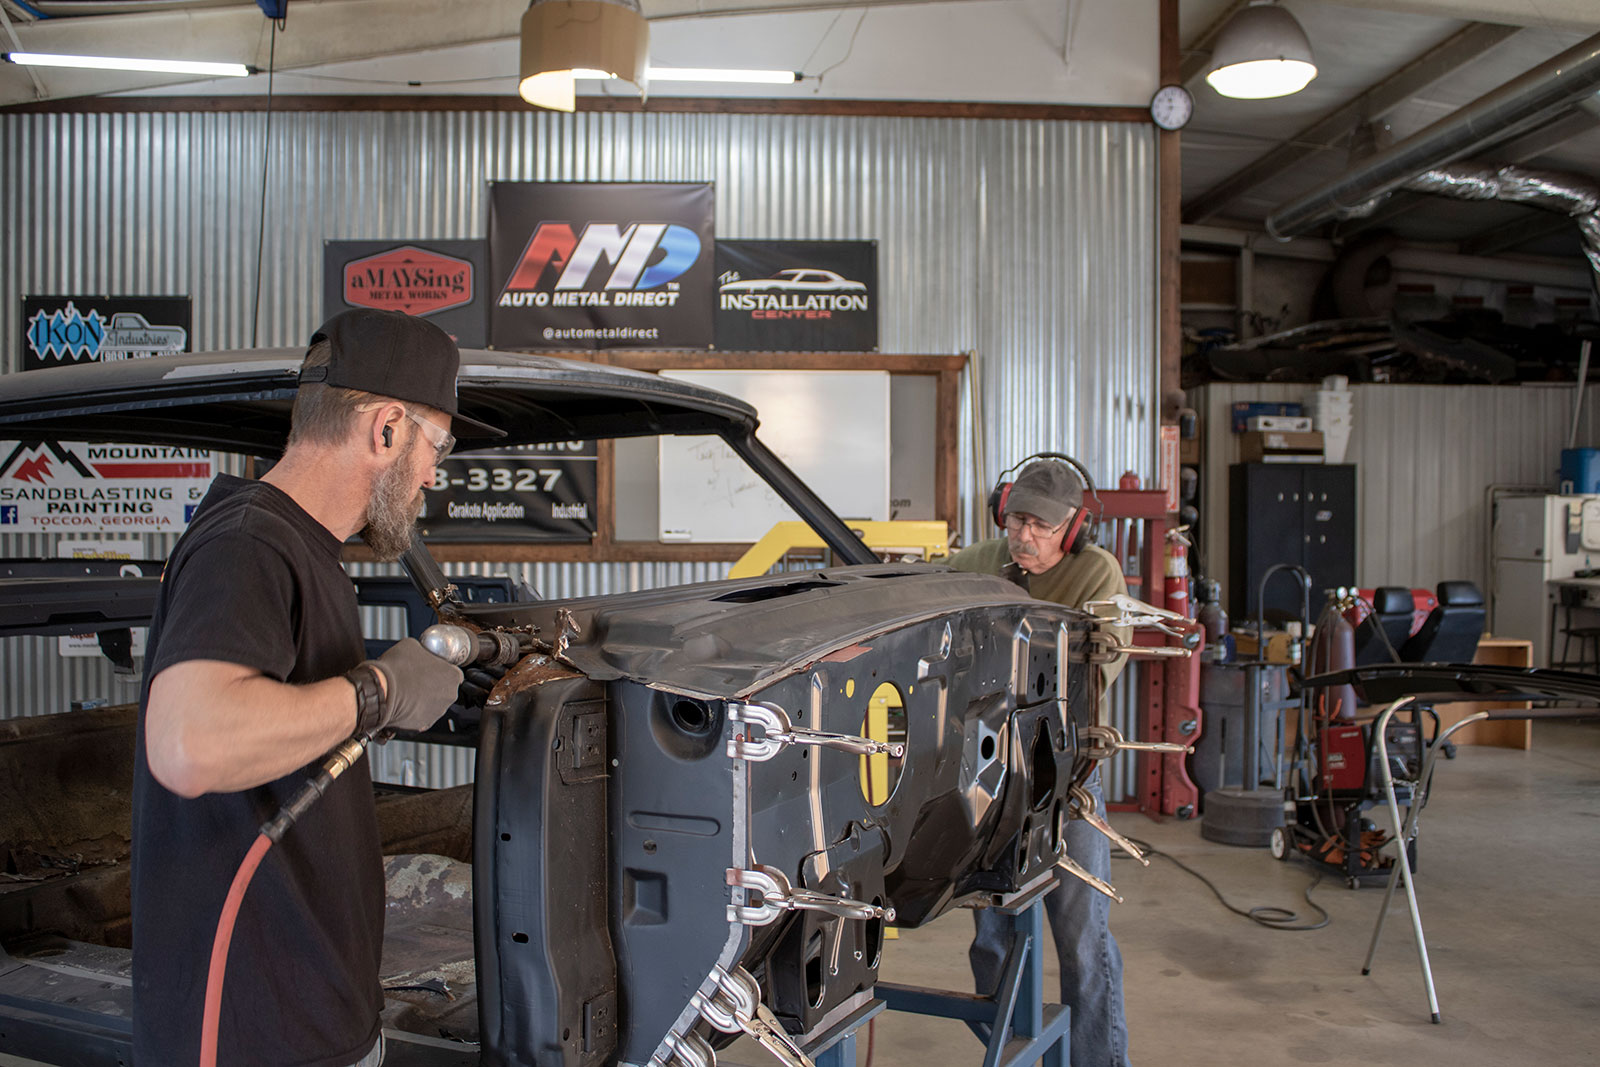
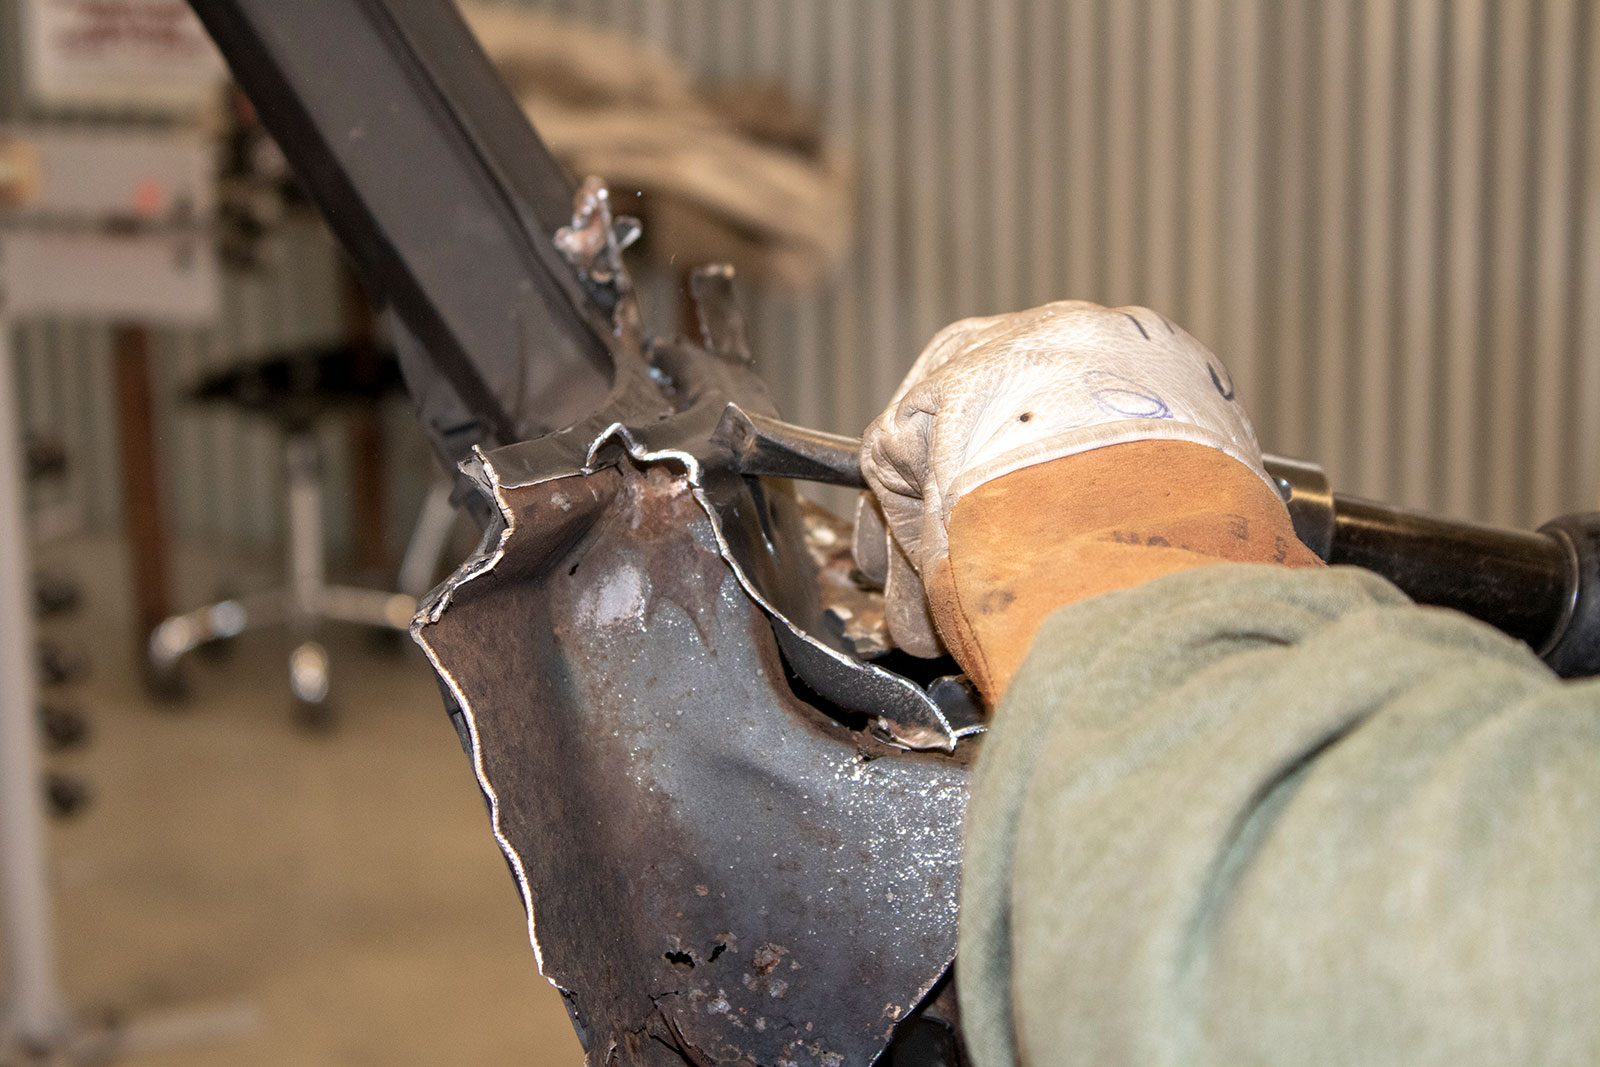
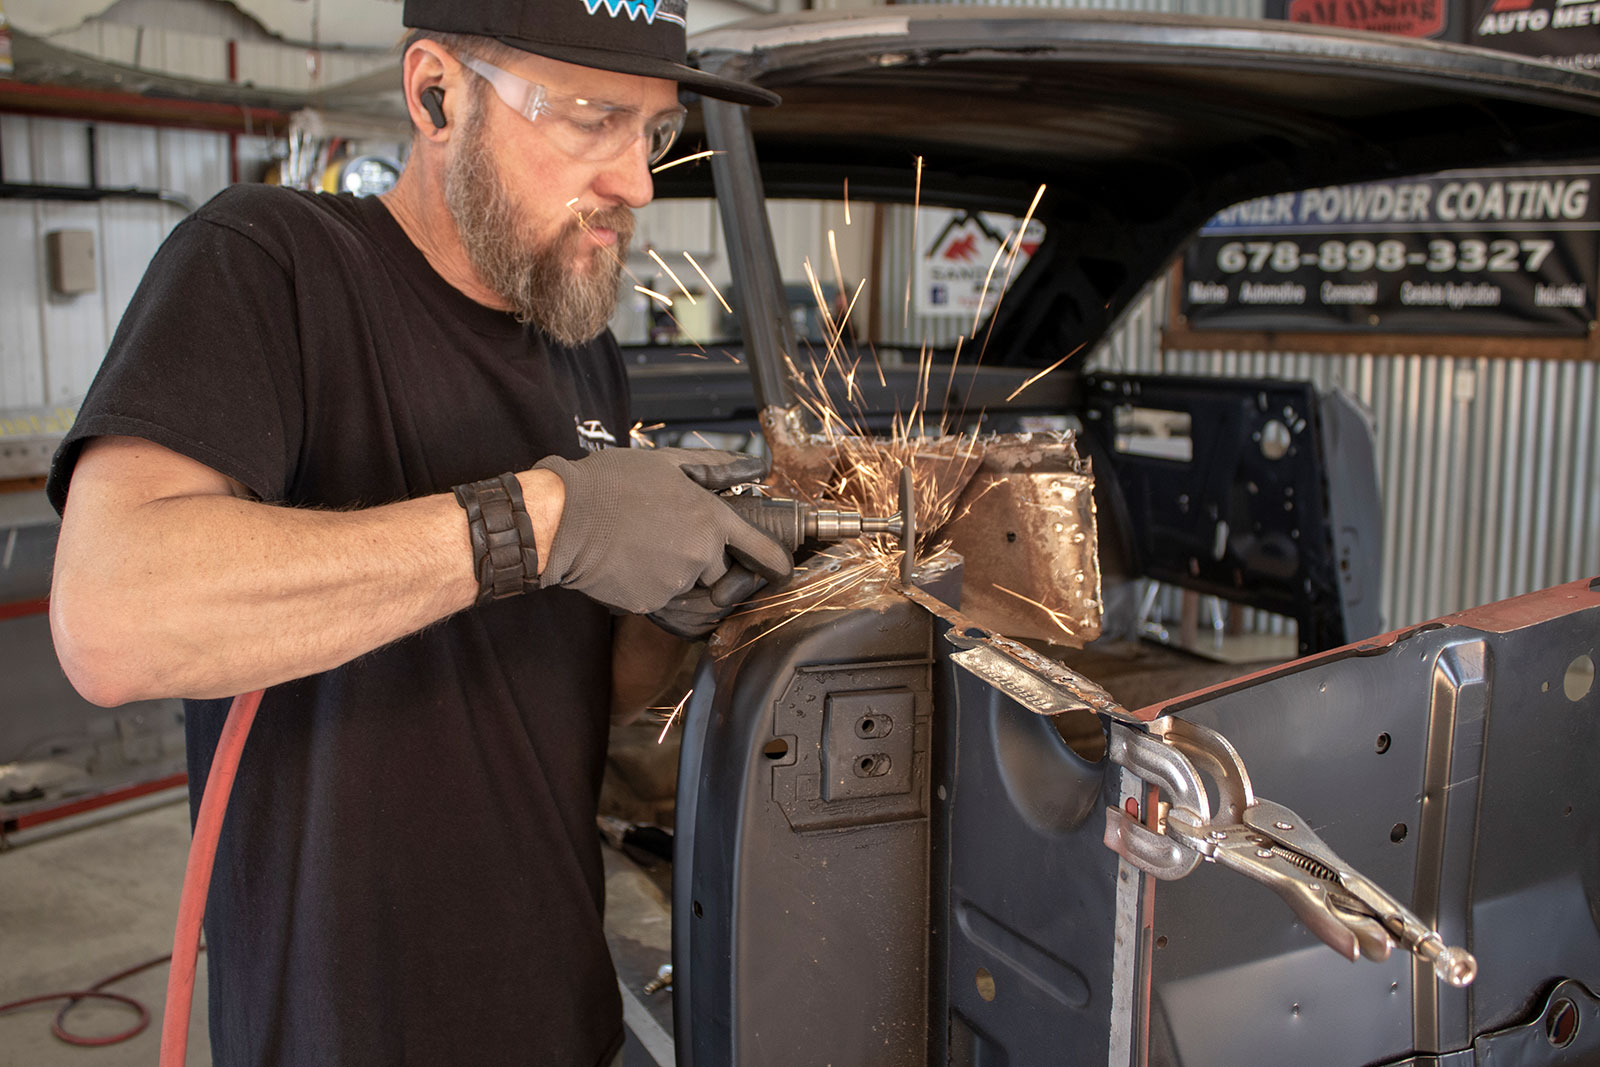
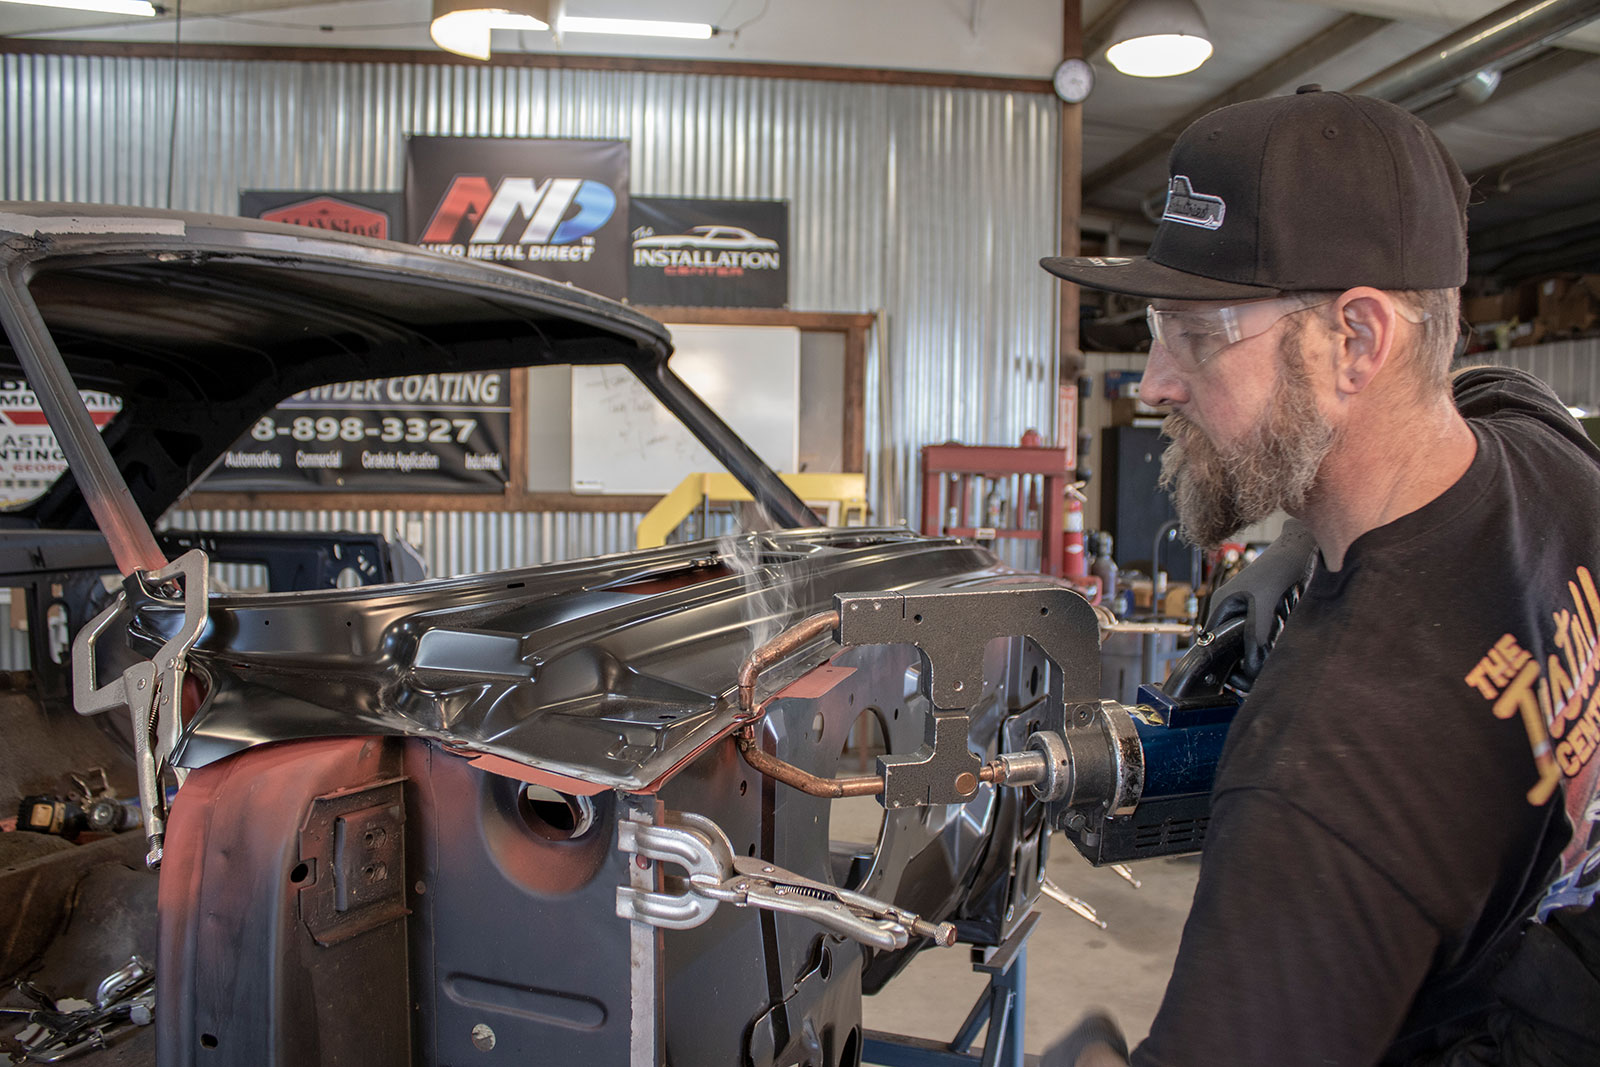
Craig Hopkins of The Installation Center will be helping Jubee Mays get these panels ripped out. The air chisel is the tool of choice here. A decent-quality air hammer allows for the control you need to remove the panels.
Sit back and take in the photos that show you how Hopkins and Mays begin the project and work their way until it is out with the old and in with the new. Keep an eye out as there will be more sheet metal projects coming in later months on Cebreco’s ’64 Ford Galaxie. MR
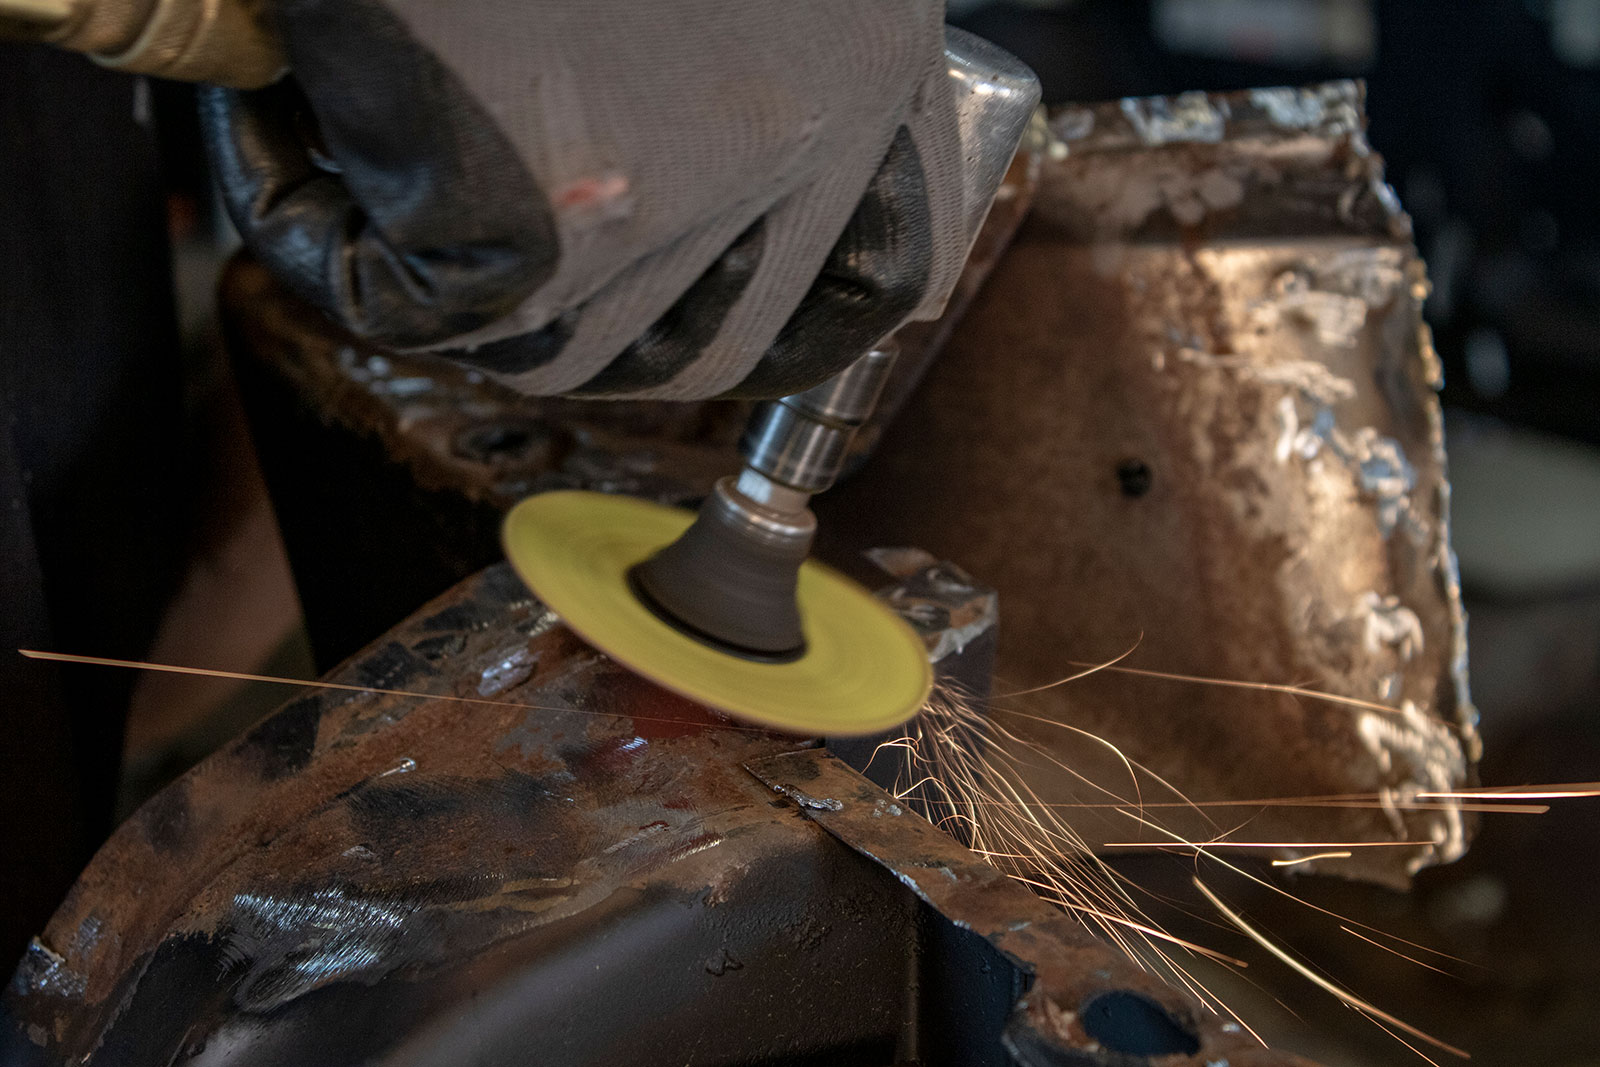
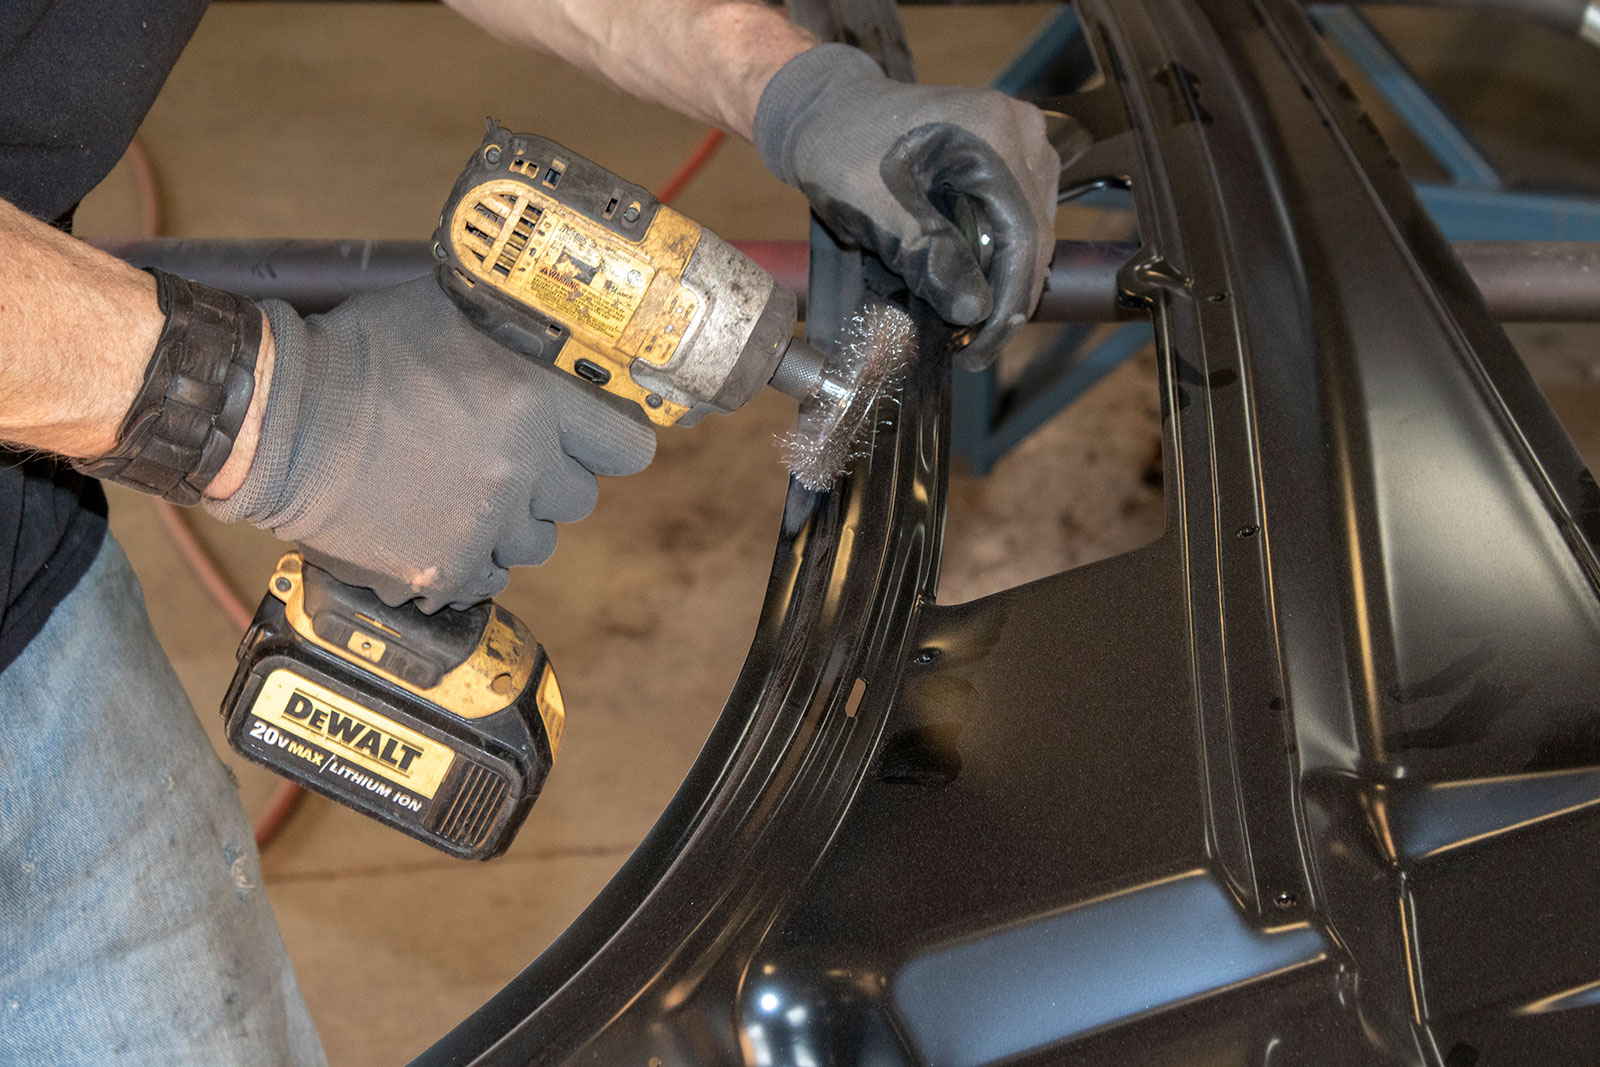
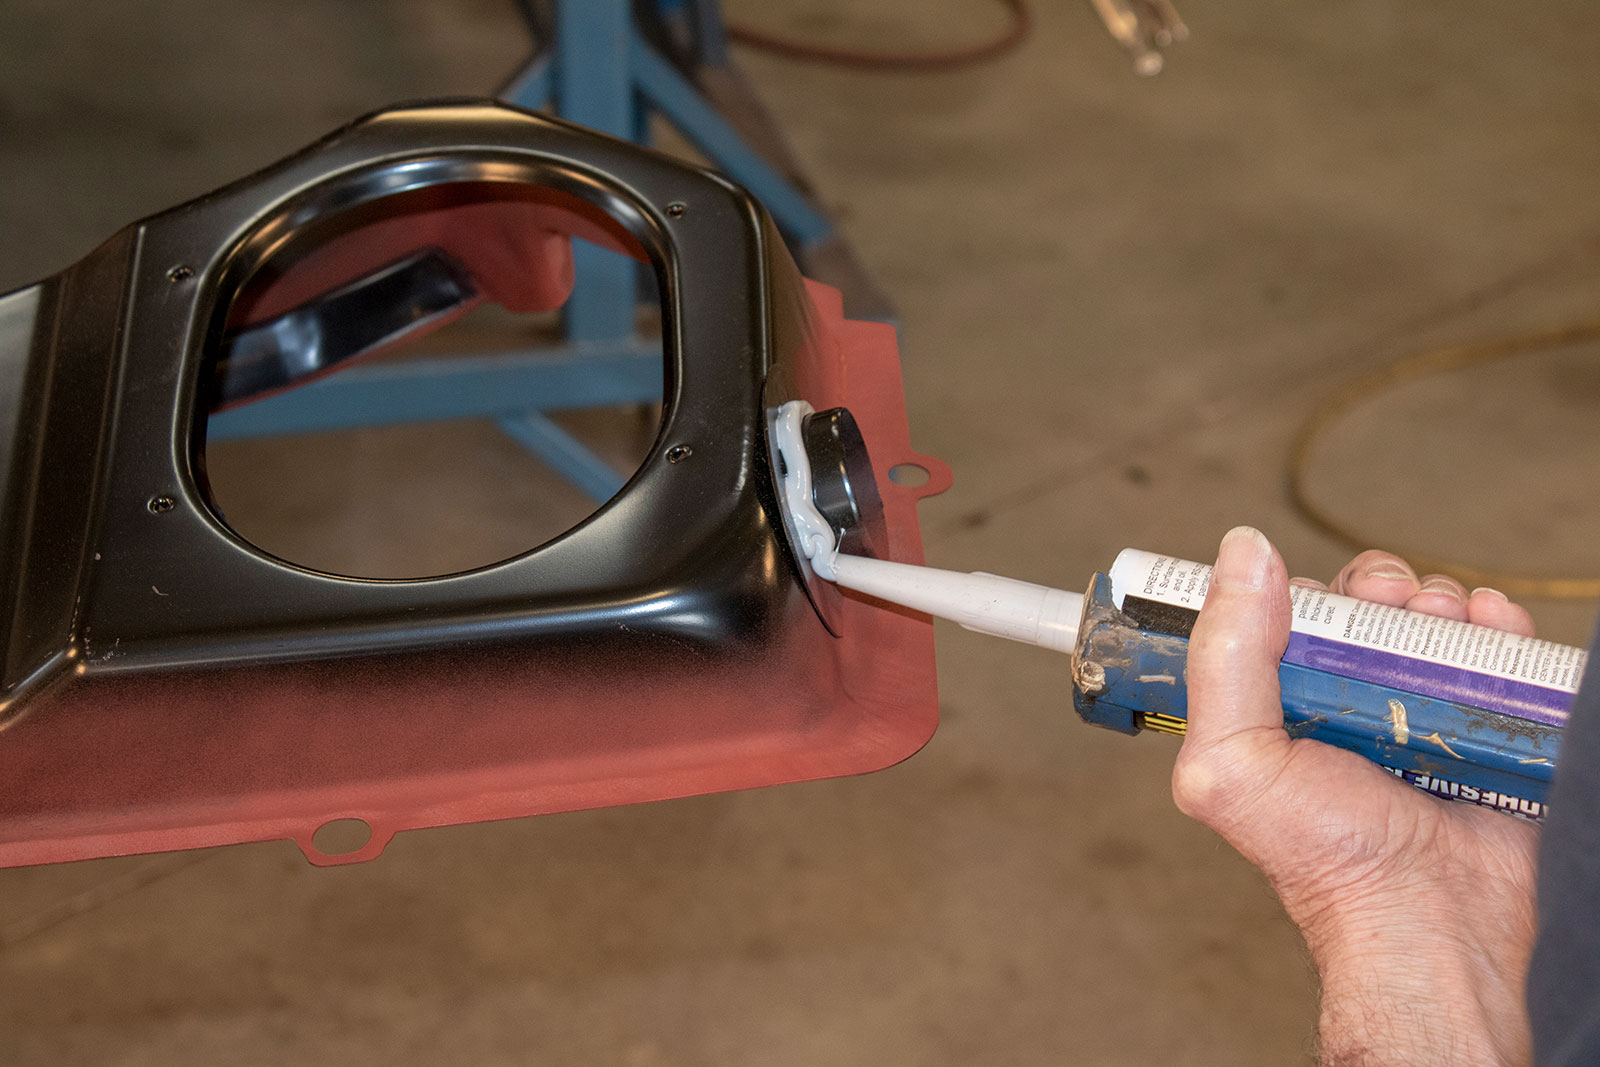
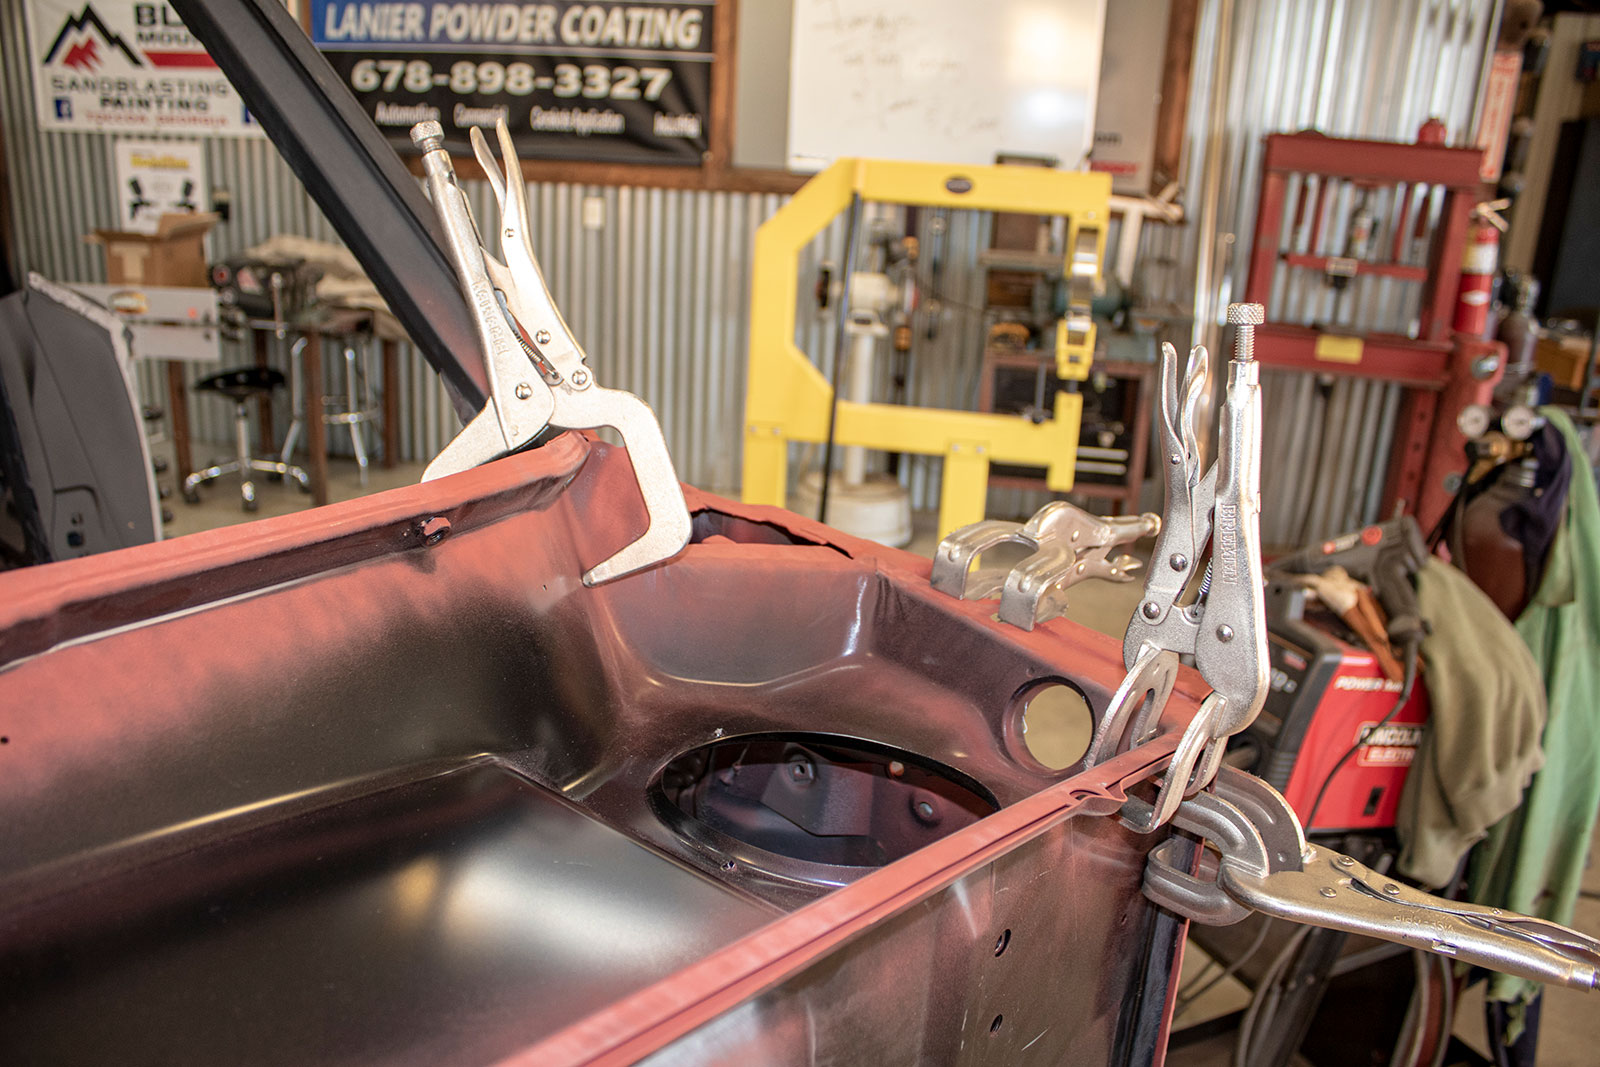
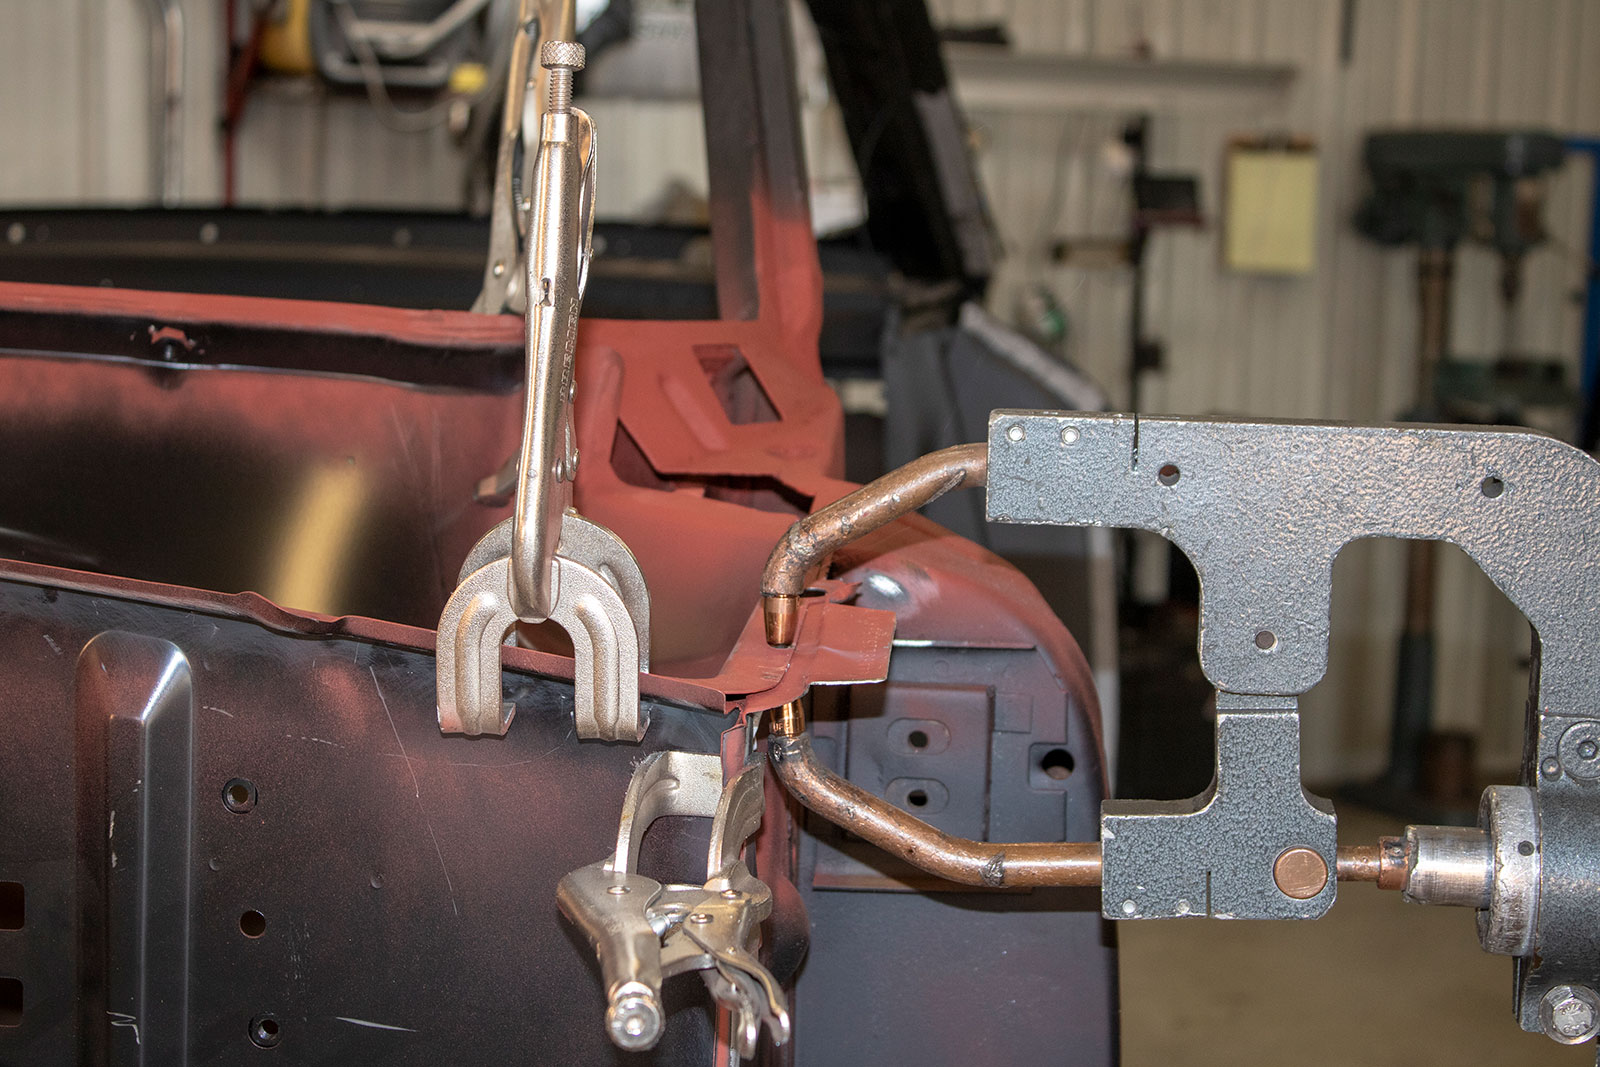
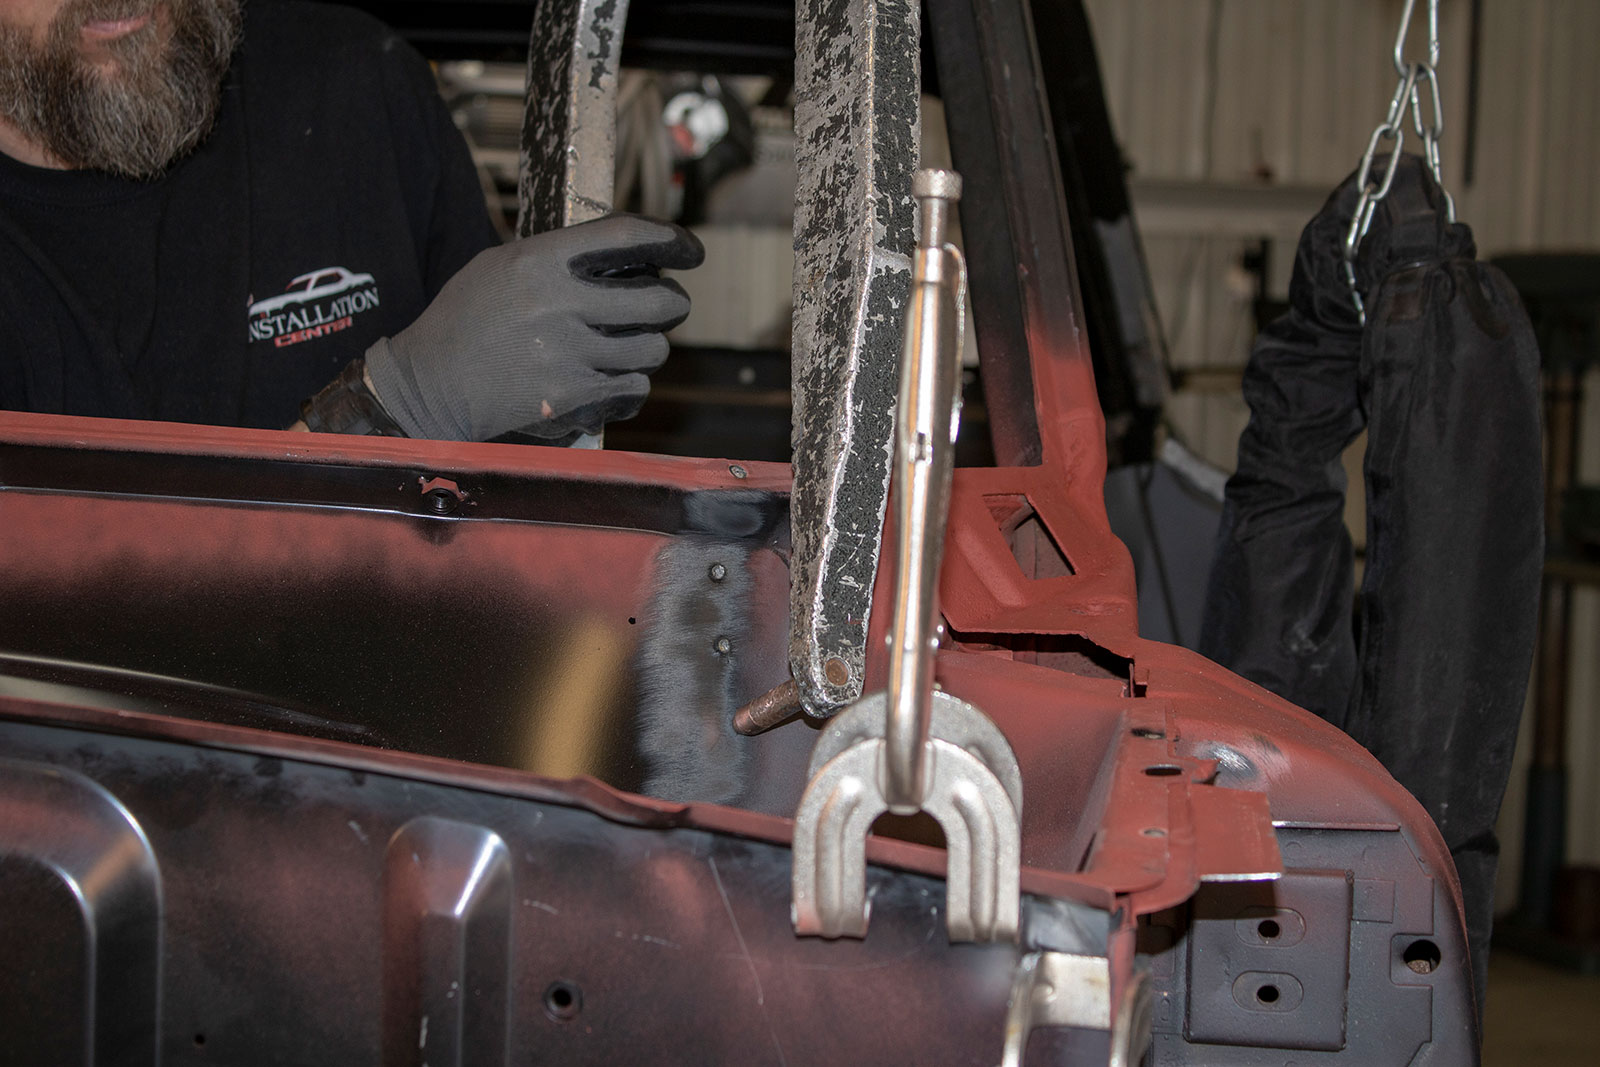
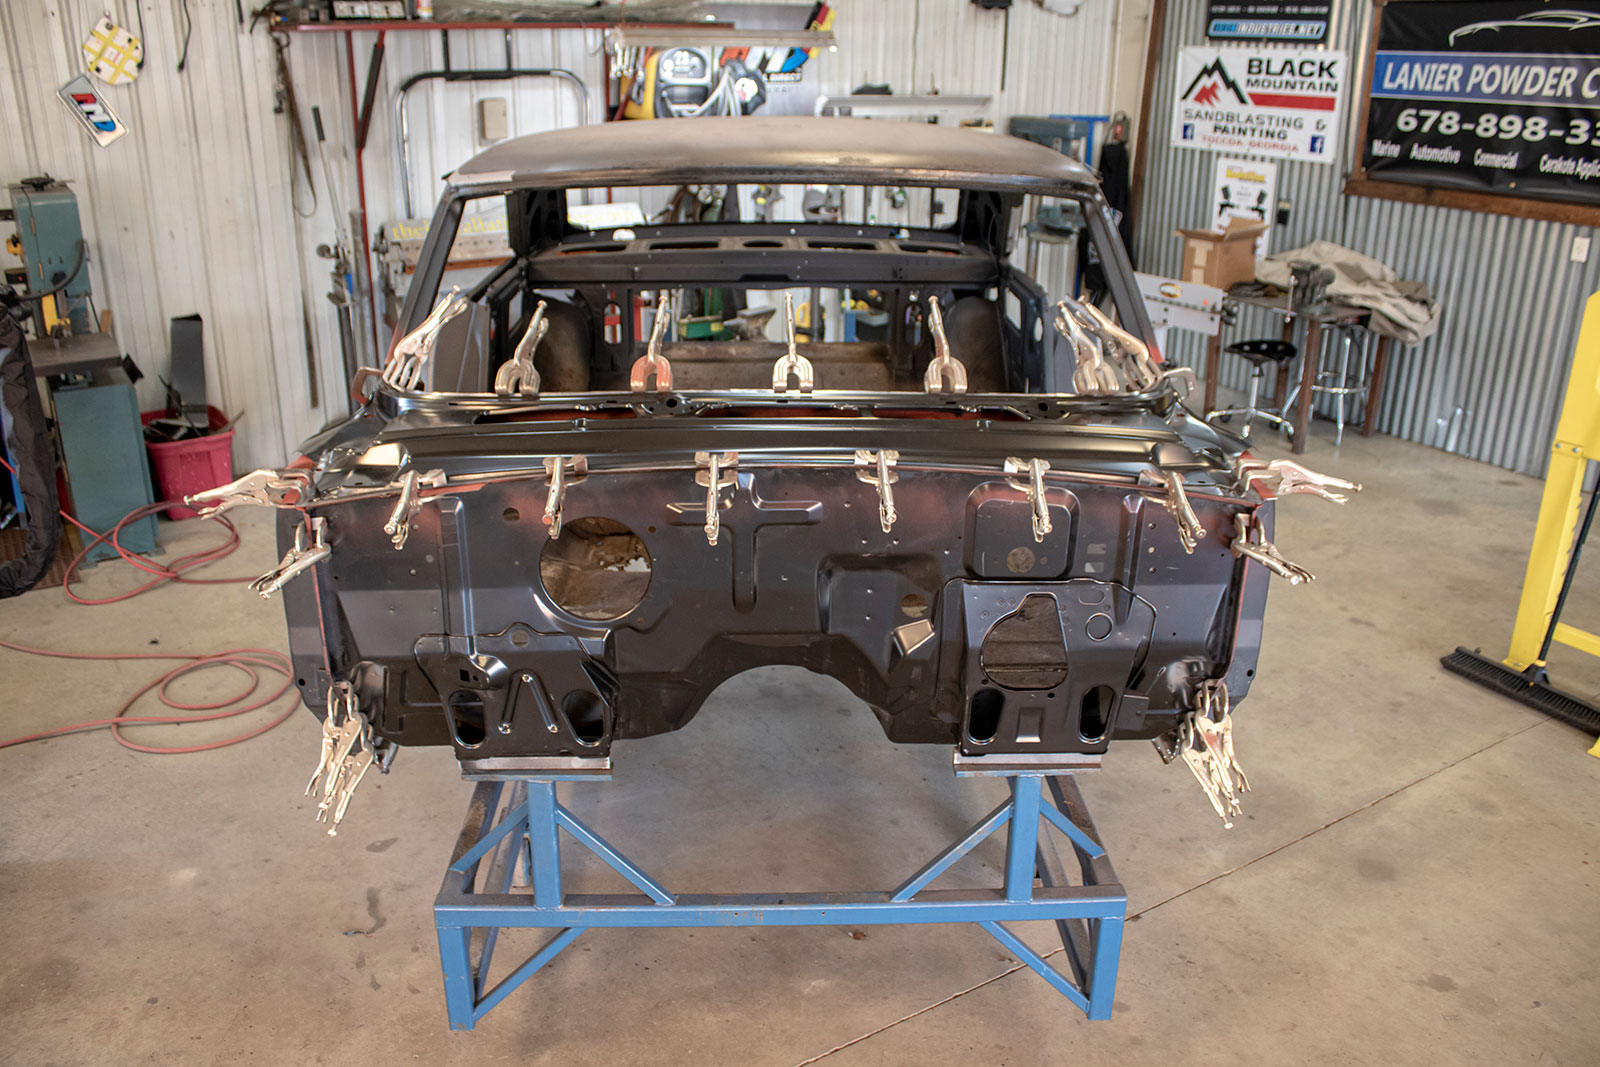
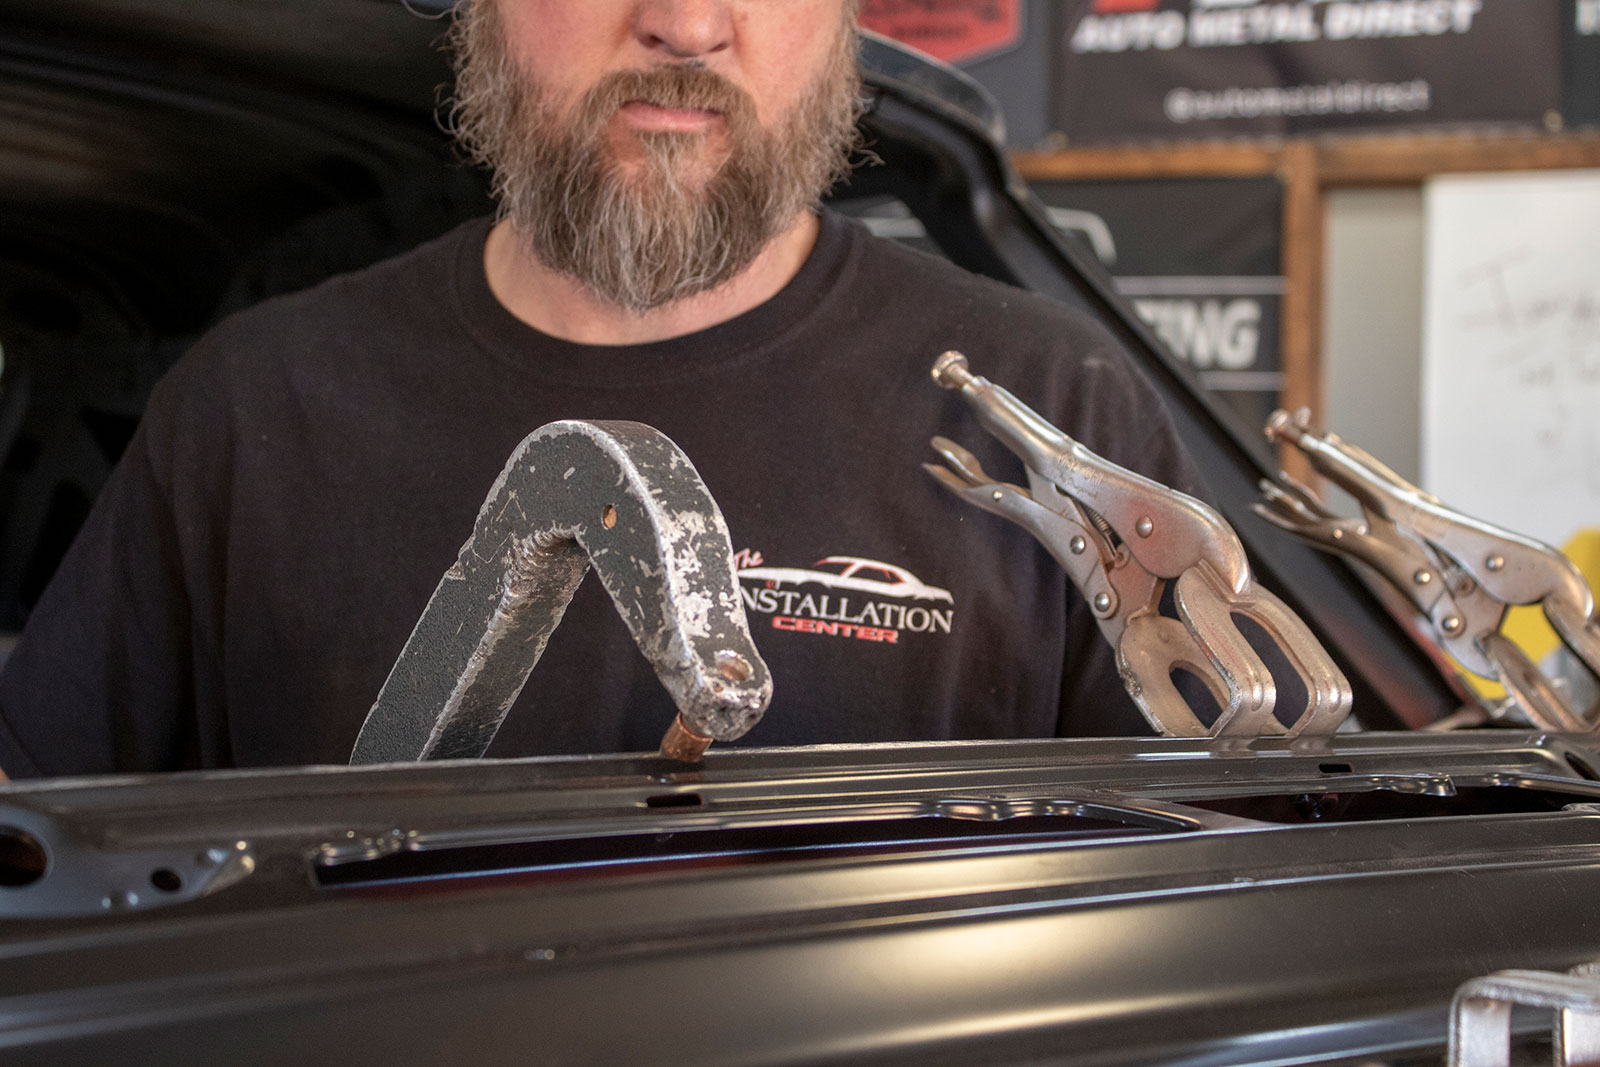
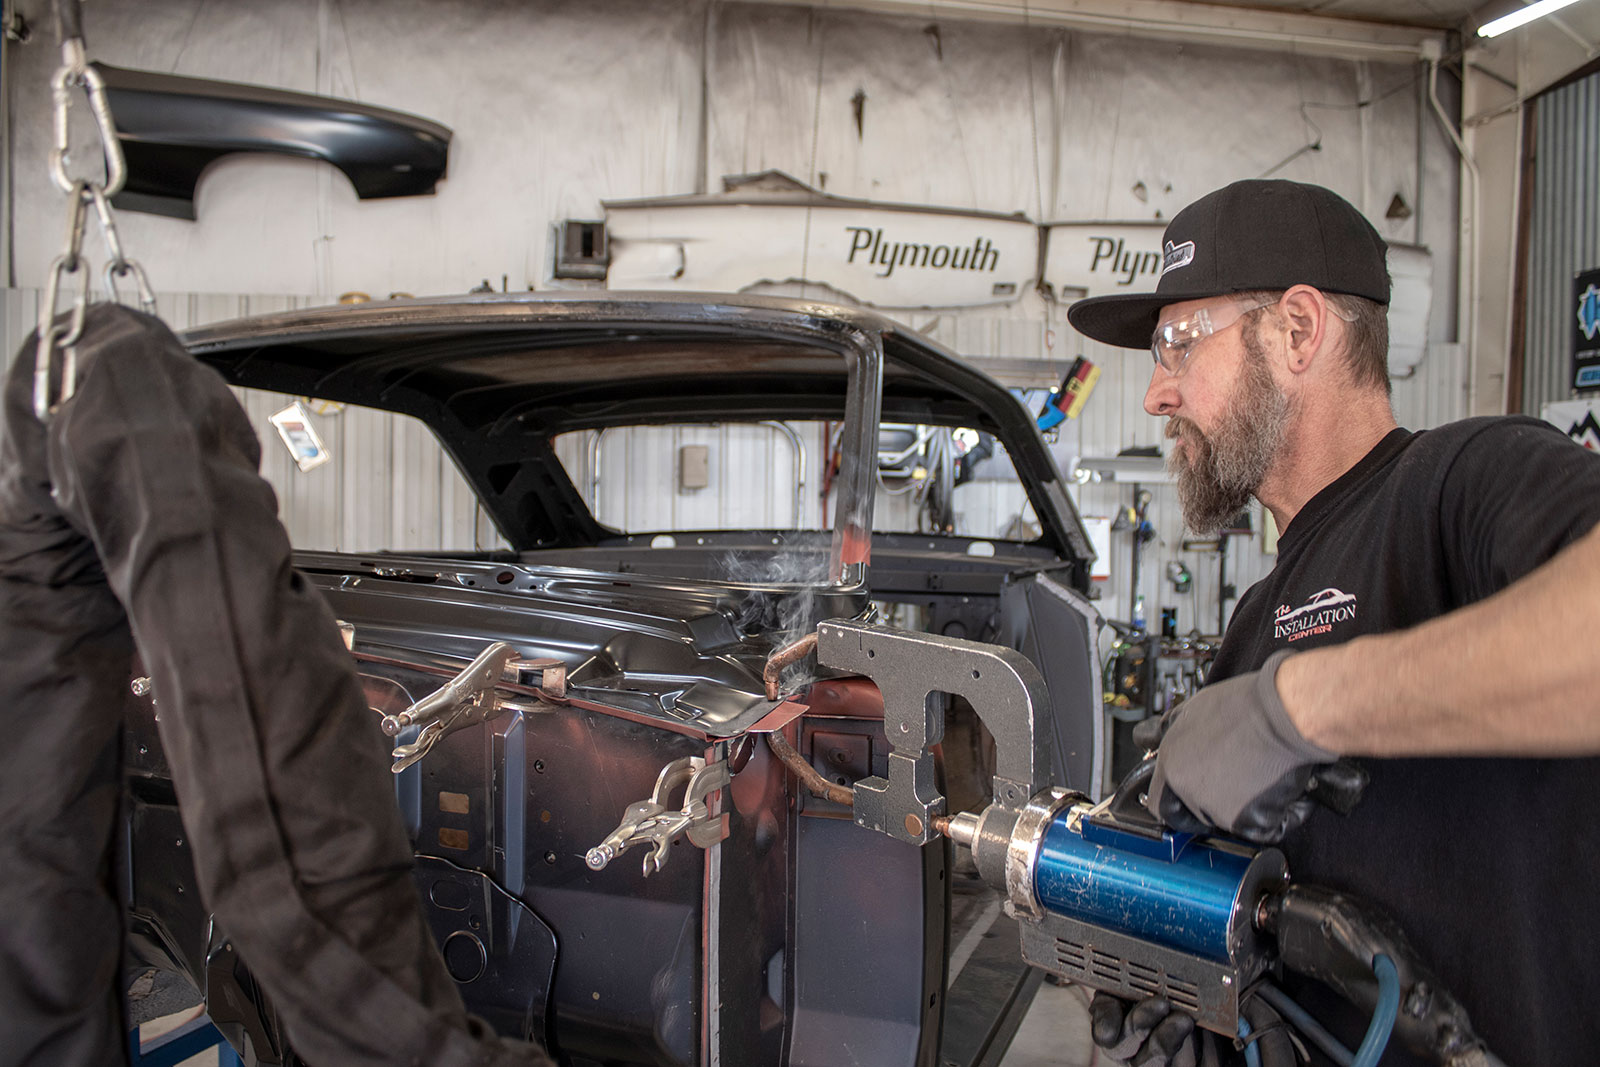
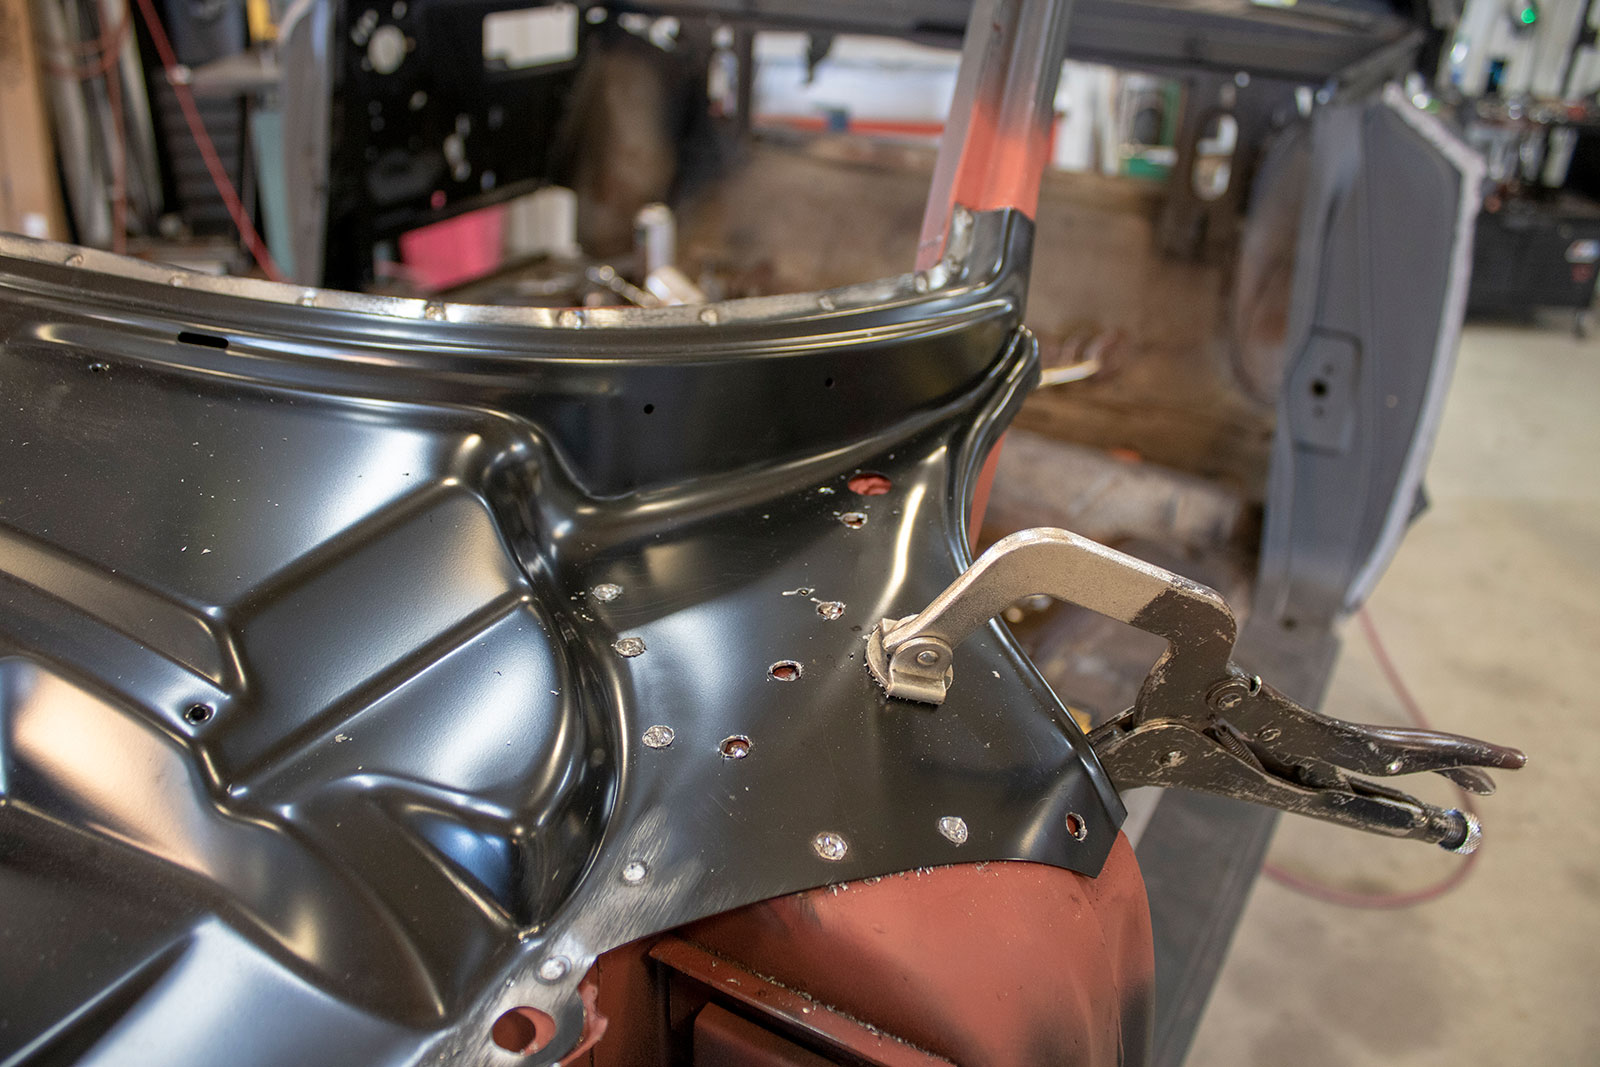
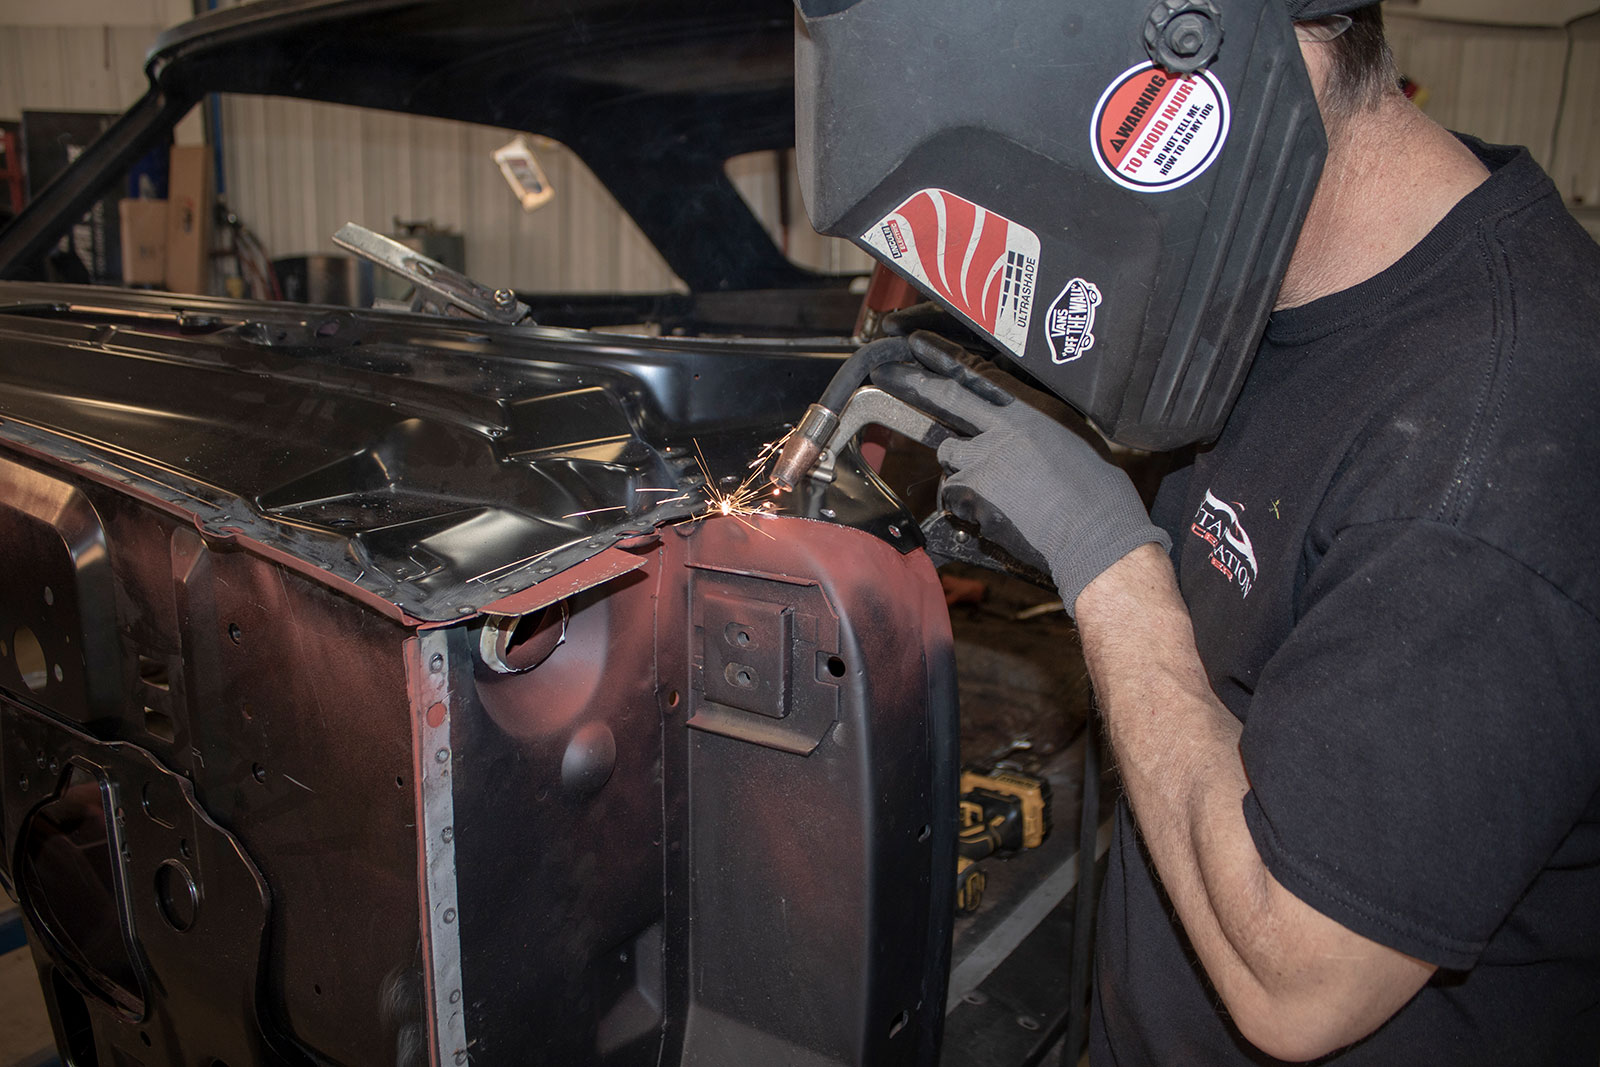
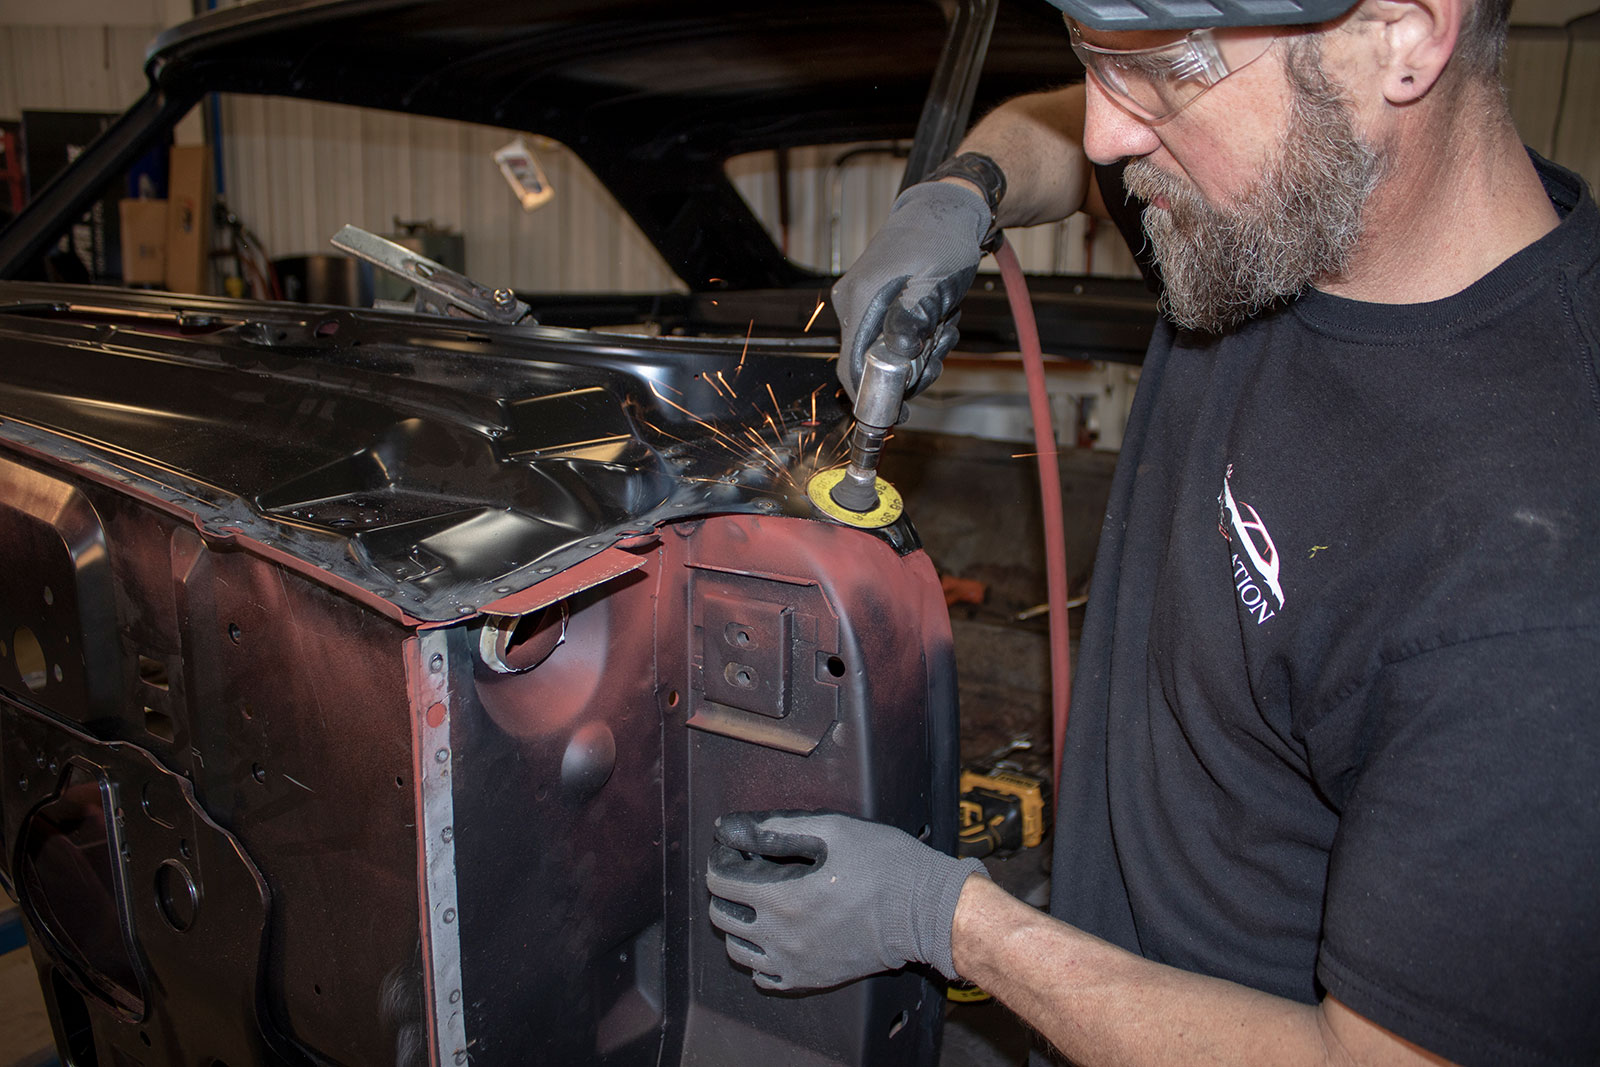
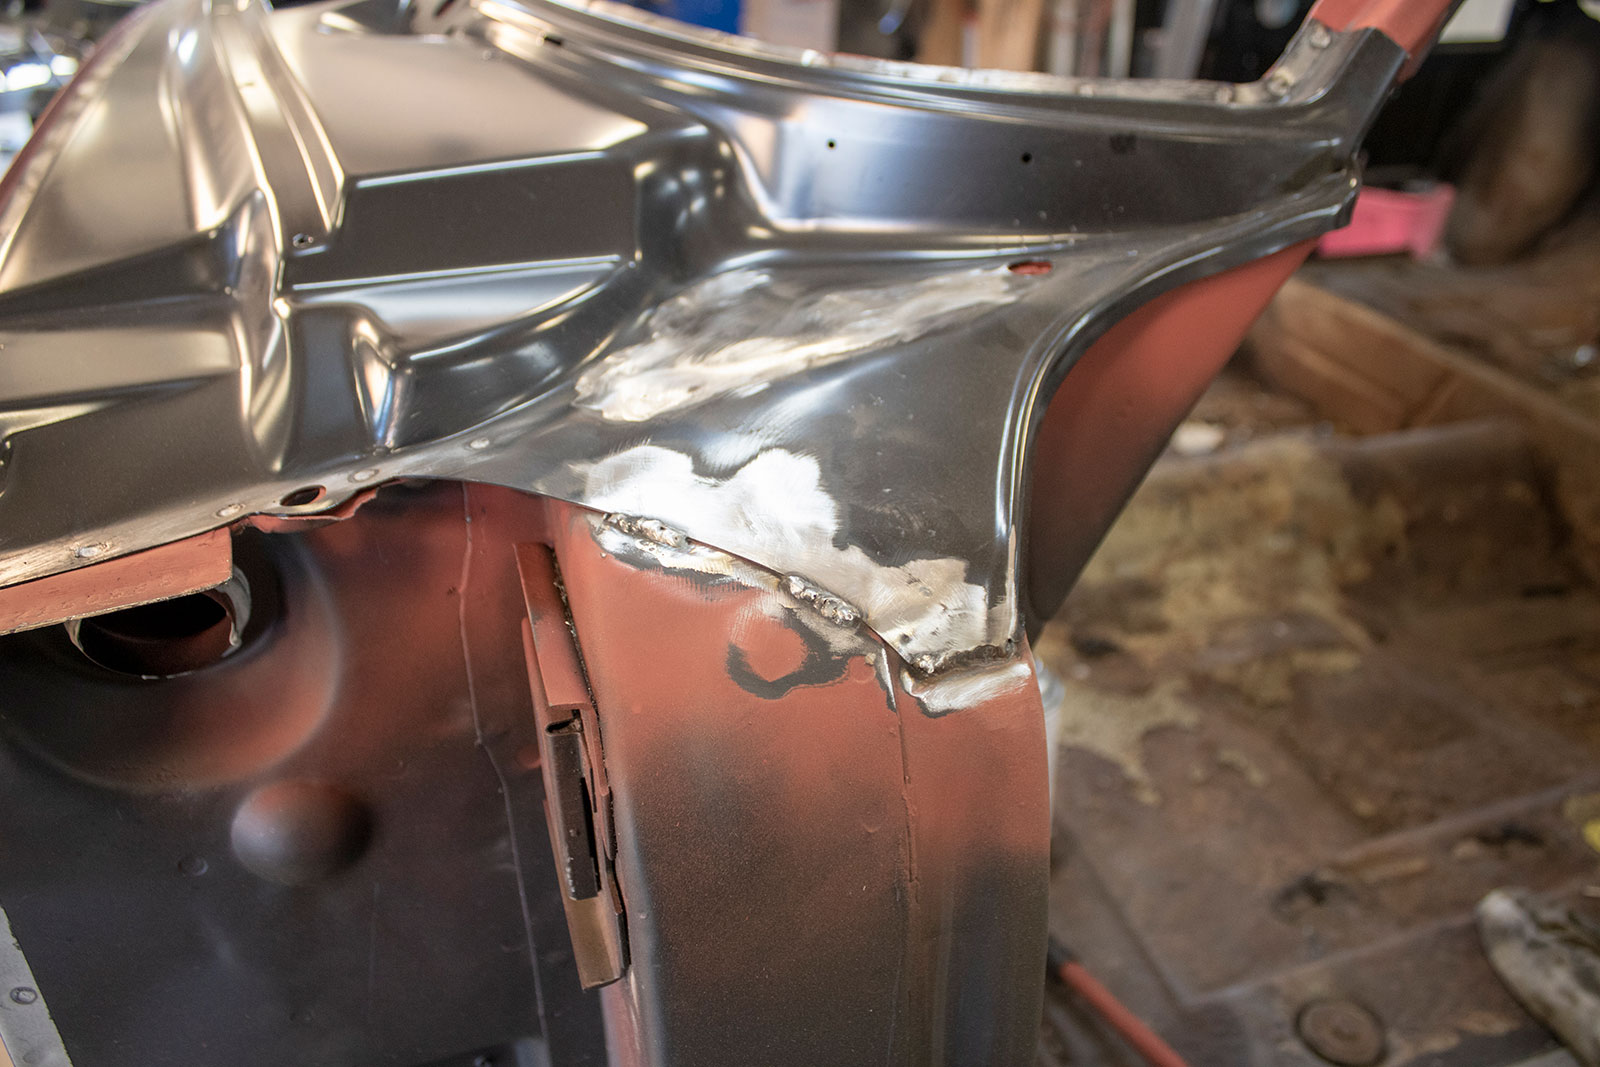
Mays takes on the passenger side, showing how the angle on the chisel removes the old metal without damaging the panels you want to preserve.In a previous issue, the front of the cowl was loosened to install the new Auto Metal Direct firewall. Hopkins and Mays tag team either side to get the rest of the upper and lower cowl out in bulk, all while preserving the VIN tags on either side.As you can see, the rot on these panels is showing through. These panels are notorious for rust.Removing the bulk of the panel is the preferred method at The Installation Center. By doing so, you are left with smaller pieces that are more manageable to maneuver.With the panels out of the way, you can see just how bad these hold water and rust out over the years. Auto Metal Direct has made it a breeze by offering the full OE-style replacements.Mays uses his grinding wheel to knock down the rest of the old metal left behind at the original spot welds.Following the grinding wheel, Mays uses his 36-grit sanding disc to smooth out the panel we are going to be installing it to. This will ensure a tight fit between the old panels and the new Auto Metal Direct cowls.A little prep goes a long way. Mays removes the EDP coating from the new panels at all the mating surfaces and welding sites using a wire wheel and drill.A quick coat of weld-through primer is used at all the mating services where the new cowls will meet with each other and with the remaining panels on the car. This will ensure years of rust protection between everything.A coat of OSPHO is used on the Ford Galaxie to stop any rust on the original panels. This is a perfect time to treat the car in the areas that are usually inaccessible.With assembly just about ready, we need to add some sealer to the lower cowl drain holes on either side. Medallion RS-229 Urethane Sealant is their preferred product here. It allows the same product to be used in sealing and bonding, therefore eliminating the need for several products.Apply sealant to both sides of the lower cowl. It will seal to the cowl side panel. Let’s get this installed.Mays drops in the new Auto Metal Direct lower cowl panel and starts clamping everything up. This is where that prep comes in big time. The secret to a good weld is a tight fit.With the lower cowl just right, Mays uses the spot welder to begin installation.The A-pillar is spot-welded to the lower cowl just like the original.Mays moves onto the upper cowl panel.Lots of clamps ensure that the rest of the weld-up process is tight and exactly where it needs to be.With everything lined up, Mays spot-welds the upper cowl to the lower working from the center out. When you get to a clamp, weld on one side, then the other. Then remove your clamp and weld in the center where the clamp was.With the windshield channel complete, finish welding the sides.The front along the firewall is the same welding procedure as the windshield channel. Start in the center and move your way outward, removing clamps as you go along.There is some plug welding that needs to be done where the spot welder can’t reach. Mays drills out the panel just enough to gain clearance to the door hinge pillar using a smaller drill bit to start then a larger bit to ensure good penetration. Don’t go too deep here; just enough to reach the panel below.Fill in the holes with your MIG welder. Mays sets his machine according to the sheet metal thickness and uses a 0.023 wire. The edge of the panel is stitch welded just like factory.Clean up your welds starting with a 36-grit sanding disc and moving on to the buffing disc.With the panel cleaned up, Mays adds a coat of Medallion OE Coat to prevent the new installation from rusting before it heads to bodywork.Next up, replacing the floorpan. Continuing our tech series on project Lara Lor-Van, we show just how to remove and replace the factory floorpan. You will see it here in Modern Rodding.
We use cookies to ensure that we give you the best experience on our website. If you continue to use this site we will assume that you are happy with it.