I remember, back in the day, Volare clips were all the rage for the early F-100s. Matter of fact, there were quite a few “specialists” within a 50-mile radius of where I lived. Today, however, with the advancement of the aftermarket Independent Front Suspension kits, not to mention the wide variety of available aftermarket chassis, it doesn’t make a whole lot of sense resorting to the older torsion bar clips.
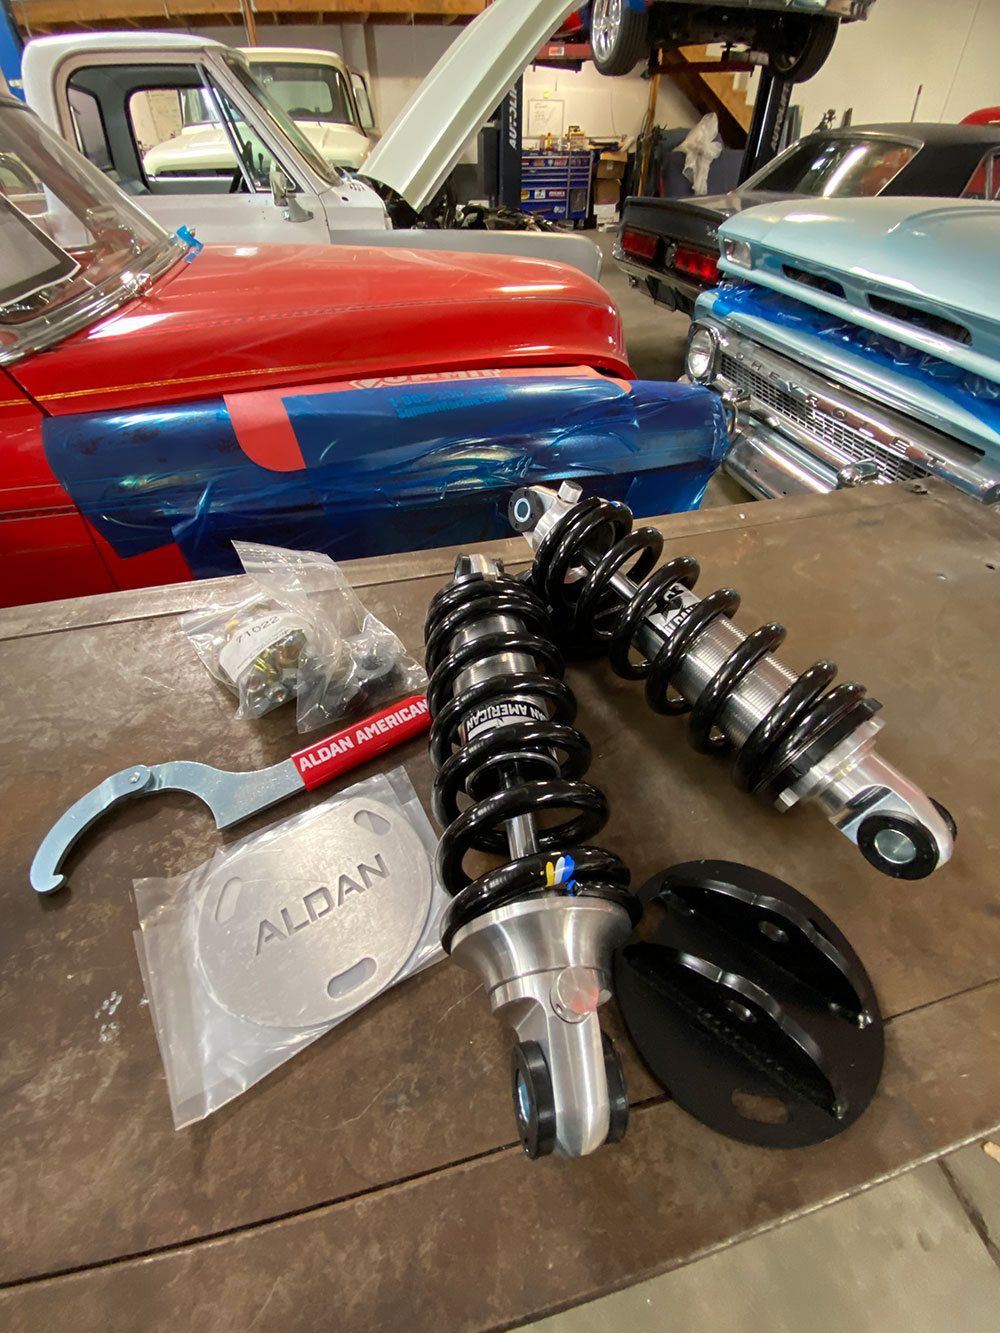
What you see is what you get—and literally all you need to update that Crown Vic–clipped ’67-up F-100 with the performance suspension it needs! Aldan American’s 300184 (650-pound) coilover kit is a direct bolt-in for ’03-11 Ford Crown Vic front ends, and, as we’re about to show, it’s the simplest and most affordable suspension upgrade you could ever dream of for your Bumpside/Dentside pickup.
That said, there is somewhat of a current trend in clip borrowing for the ’76-up F-100s: the ’03-11 Crown Victoria bolt-in front suspension crossmember. Occasionally, you can spot these a mile away without having to peer under the truck, as the increased track width puts the front wheels at the fender’s edge if the right negative-offset wheel isn’t used. For the most part, however, the cast-aluminum cradle is an easy way to update that old split I-beam front suspension.
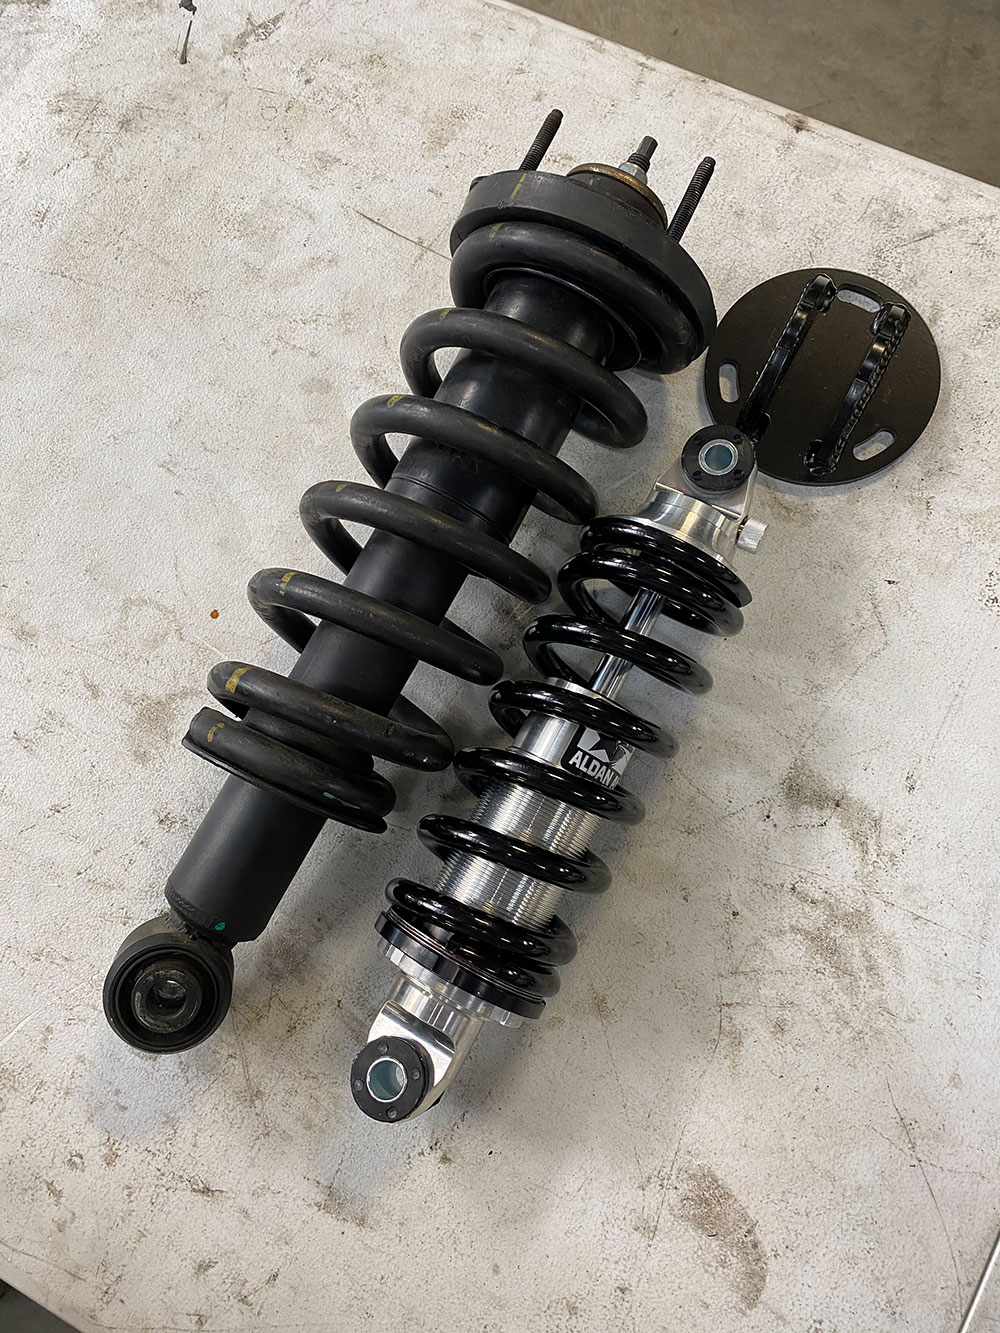
Here’s what we’ll be swapping out: the stok Crown Vic coil-over-shocks setup with Aldan’s pre-assembled, 12-point single adjustable coilover with the aforementioned 650-pound spring to accommodate the truck’s Coyote engine (550- and 750-pound spring rates are also available). When installed, the Aldan coilovers will offer up to a 2-inch lowered ride height compared to the stock Crown Vic setup.
With the late-model clip you get a decent package deal: disc brakes, rack-and-pinion steering, the ability to install a modern engine/trans (including the Coyote) with ease. The only slight drawback other than the track width (which our friends at Fatman Fabrications offer an improved geometry control arm kit for!) is the standard coil-over-shocks configuration. But there is a cure for that as well—and it’s without a doubt one of the most affordable and easy-to-accomplish upgrades you can do to your Crown Vic–equipped F-100 … and get amazing performance results.
If you’re not too familiar with the Crown Vic front clip and why it’s popular with later F-100s, now you can see it’s a complete cast-aluminum cradle-style front suspension that, while a bit wider in track width than the stock F-100 front suspension, will bolt right onto the ’67-up frame with no fabrication.
Aldan American now offers that simple solution with their bolt-in coilover kits for the ’03-11 Independent Front Suspension assembly. They’re available in three spring rate options depending on your particular engine/trans (550/650/750 pounds) and offer up to a 2-inch lowered ride height (from stock with the OE coils) with a 12-position single adjustable shock absorber. For well under a grand, you can add that high-performance ride and handling your Bumpside/Dentside deserves—and we’re going to show you just how easy they are to install.
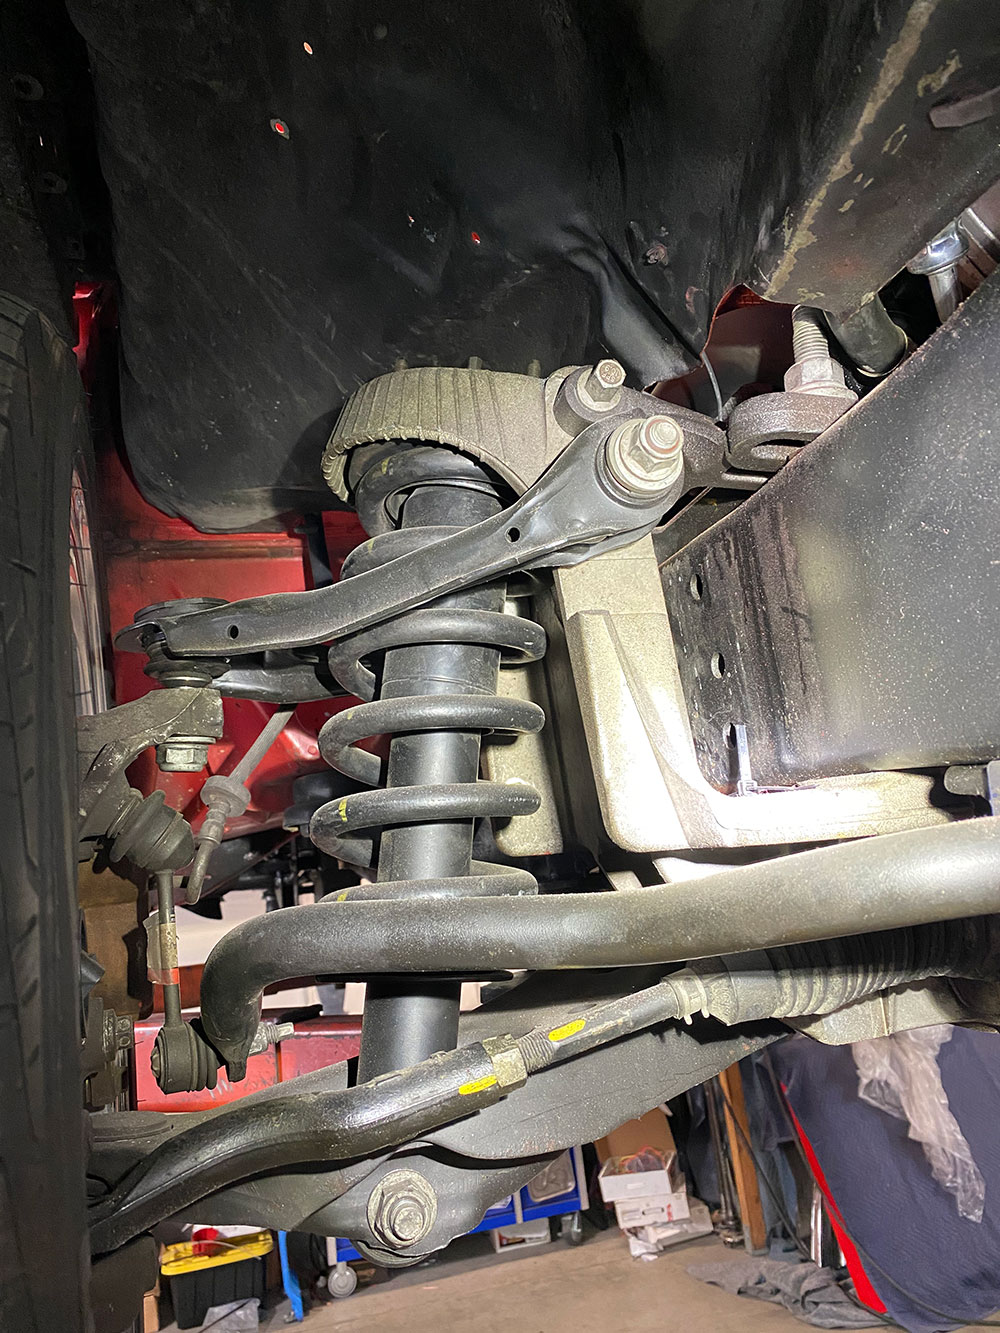
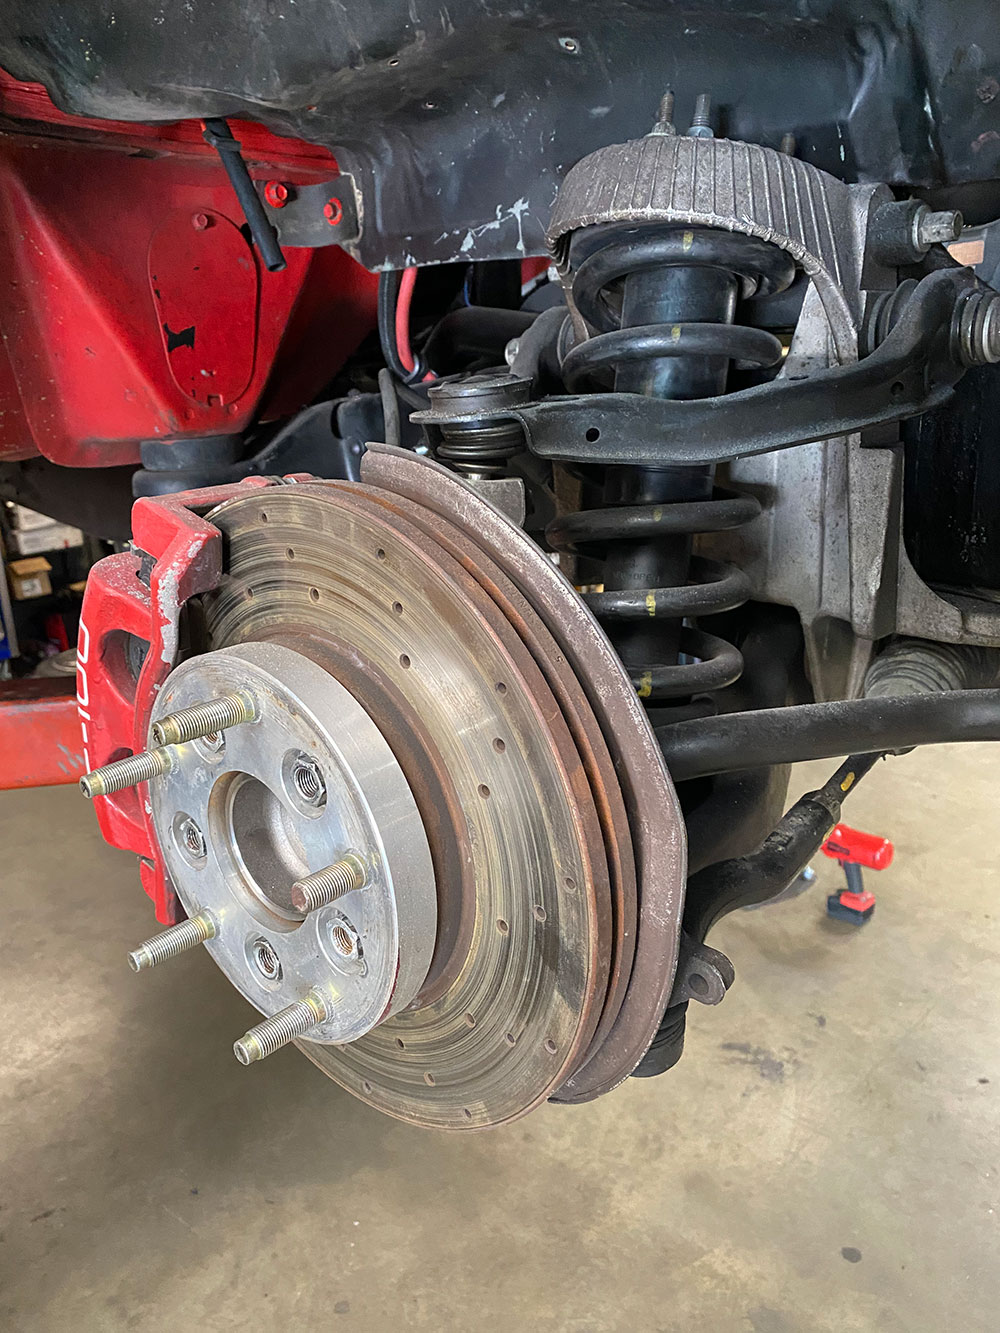
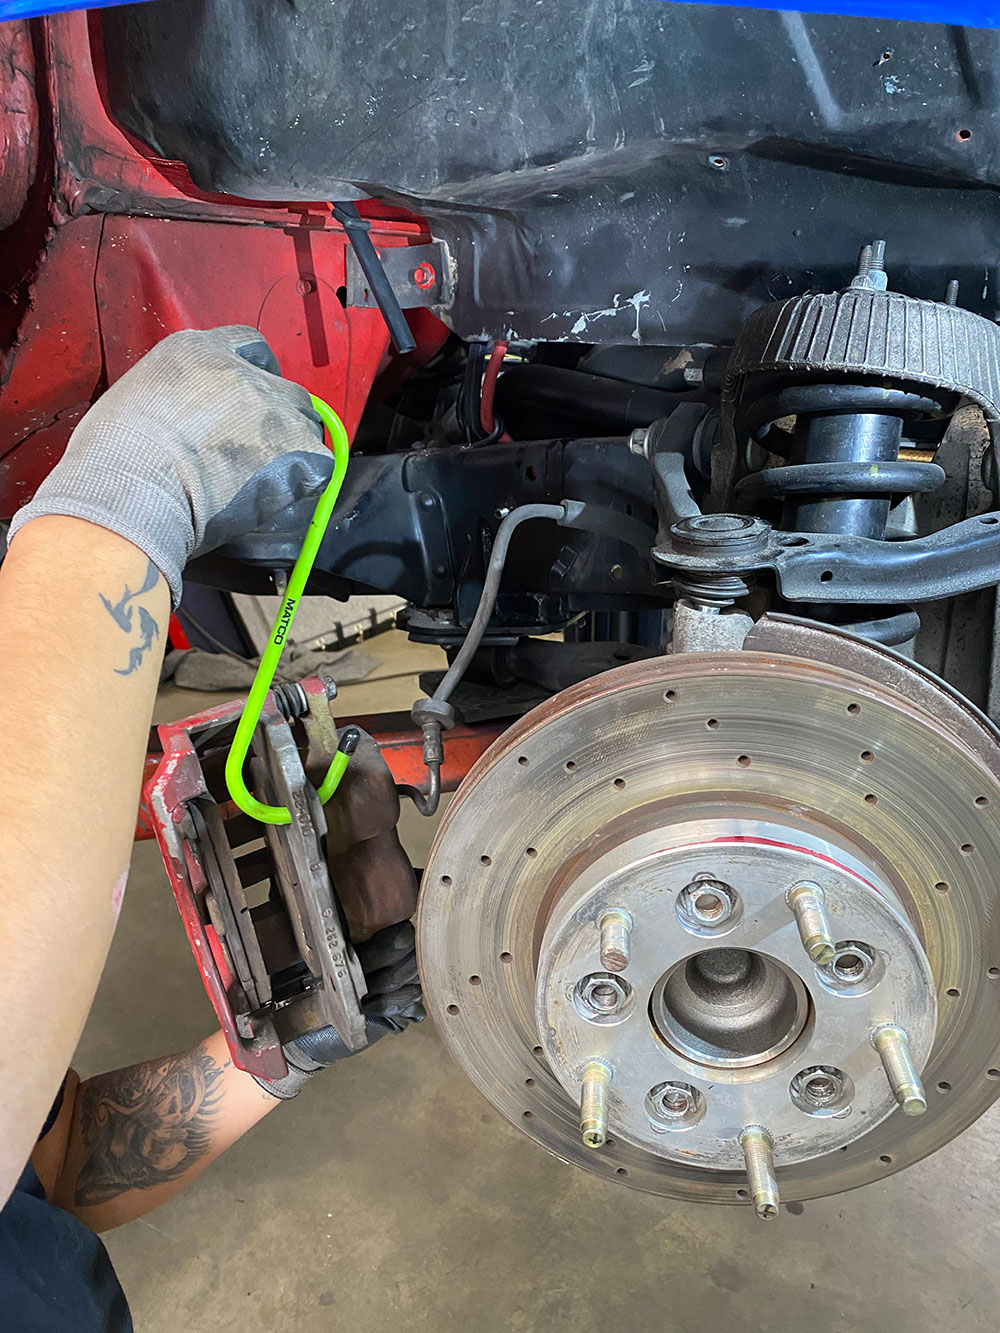
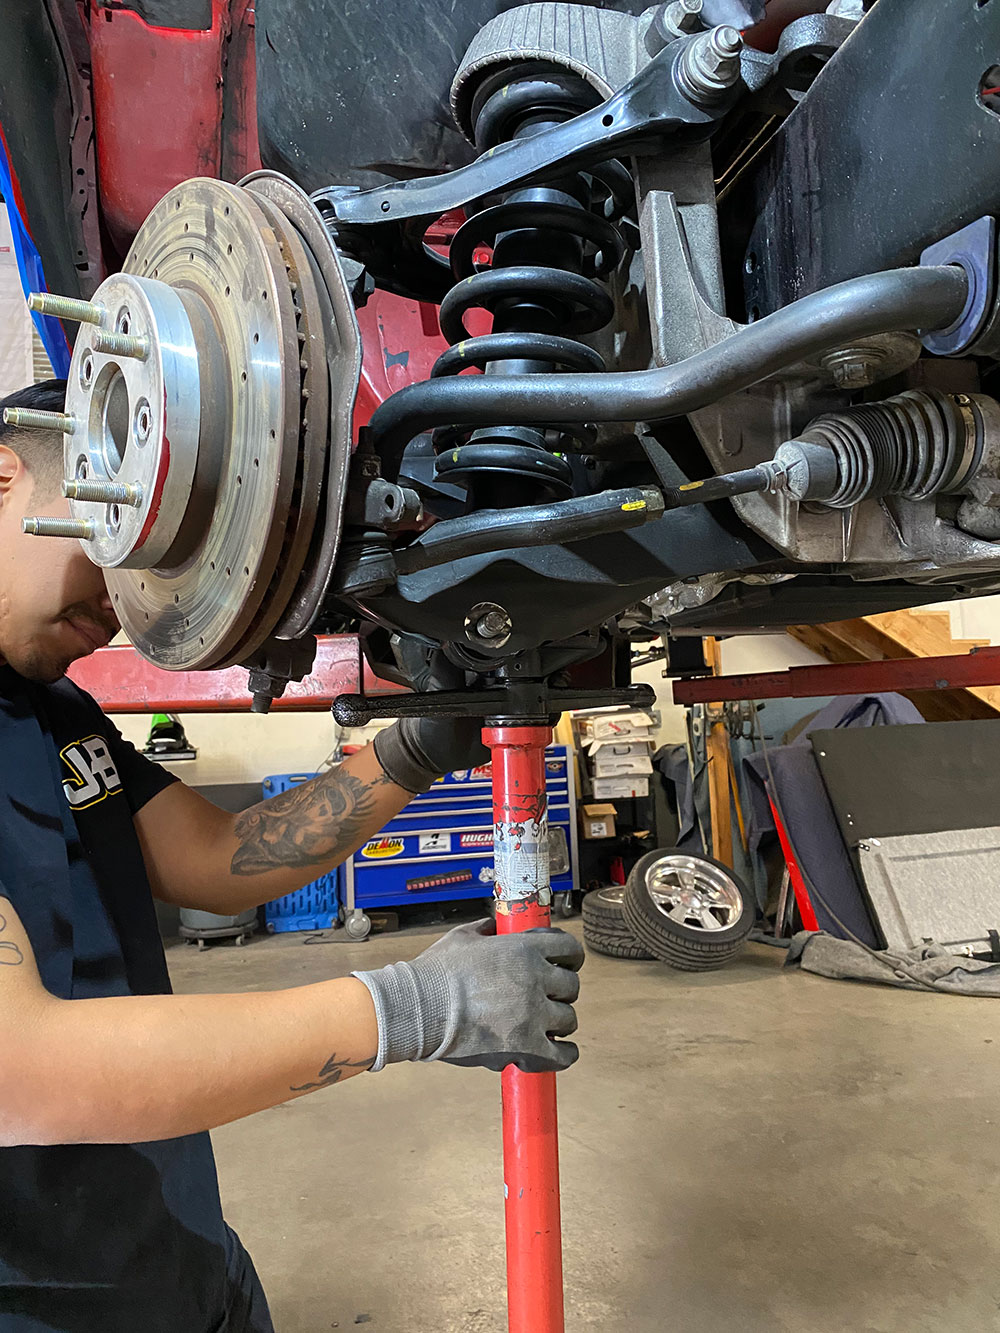
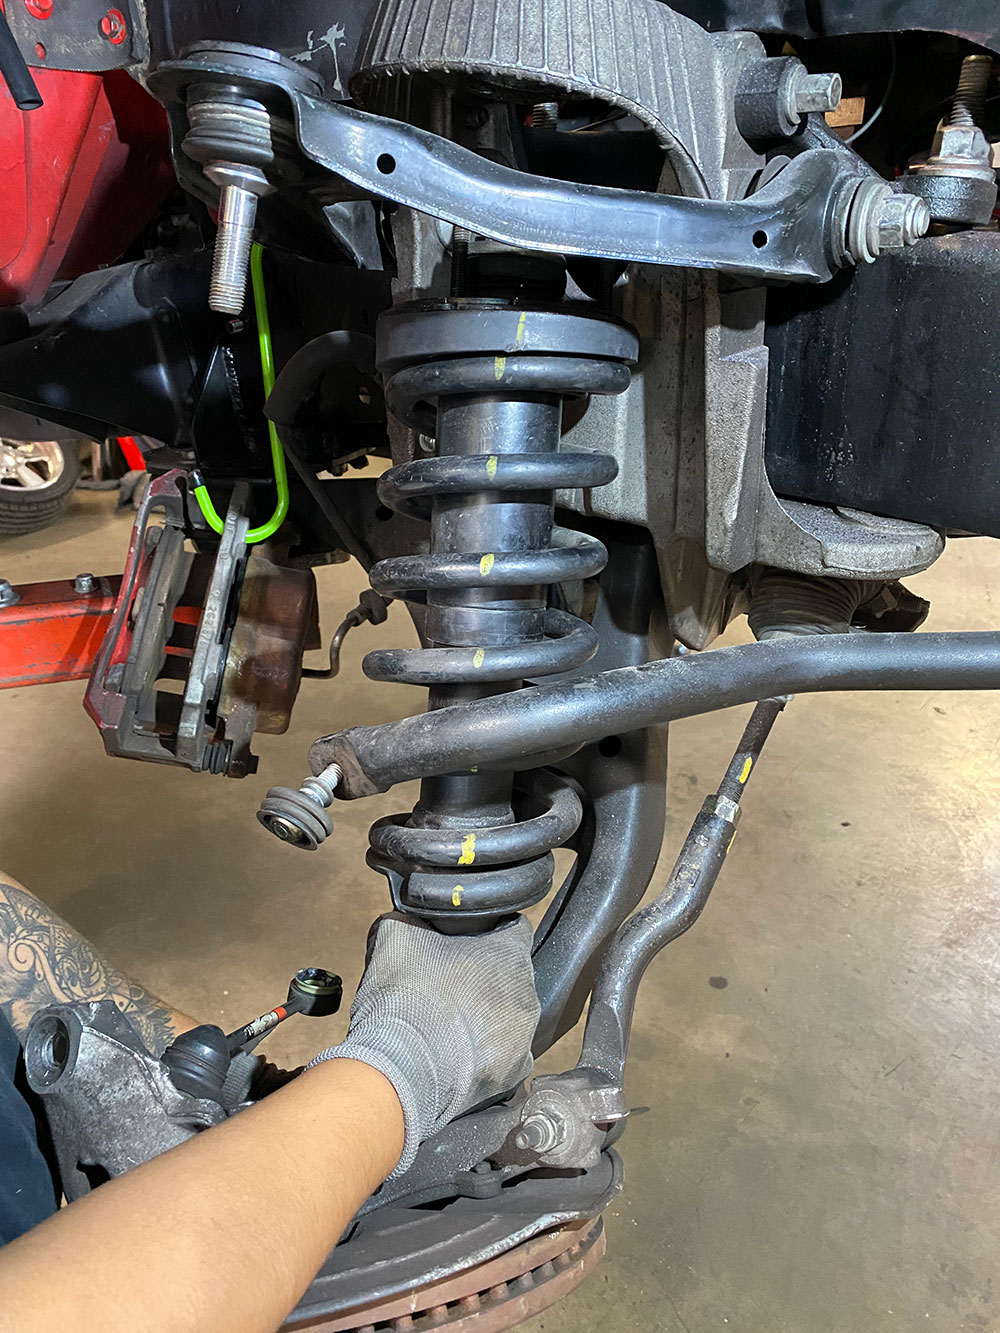
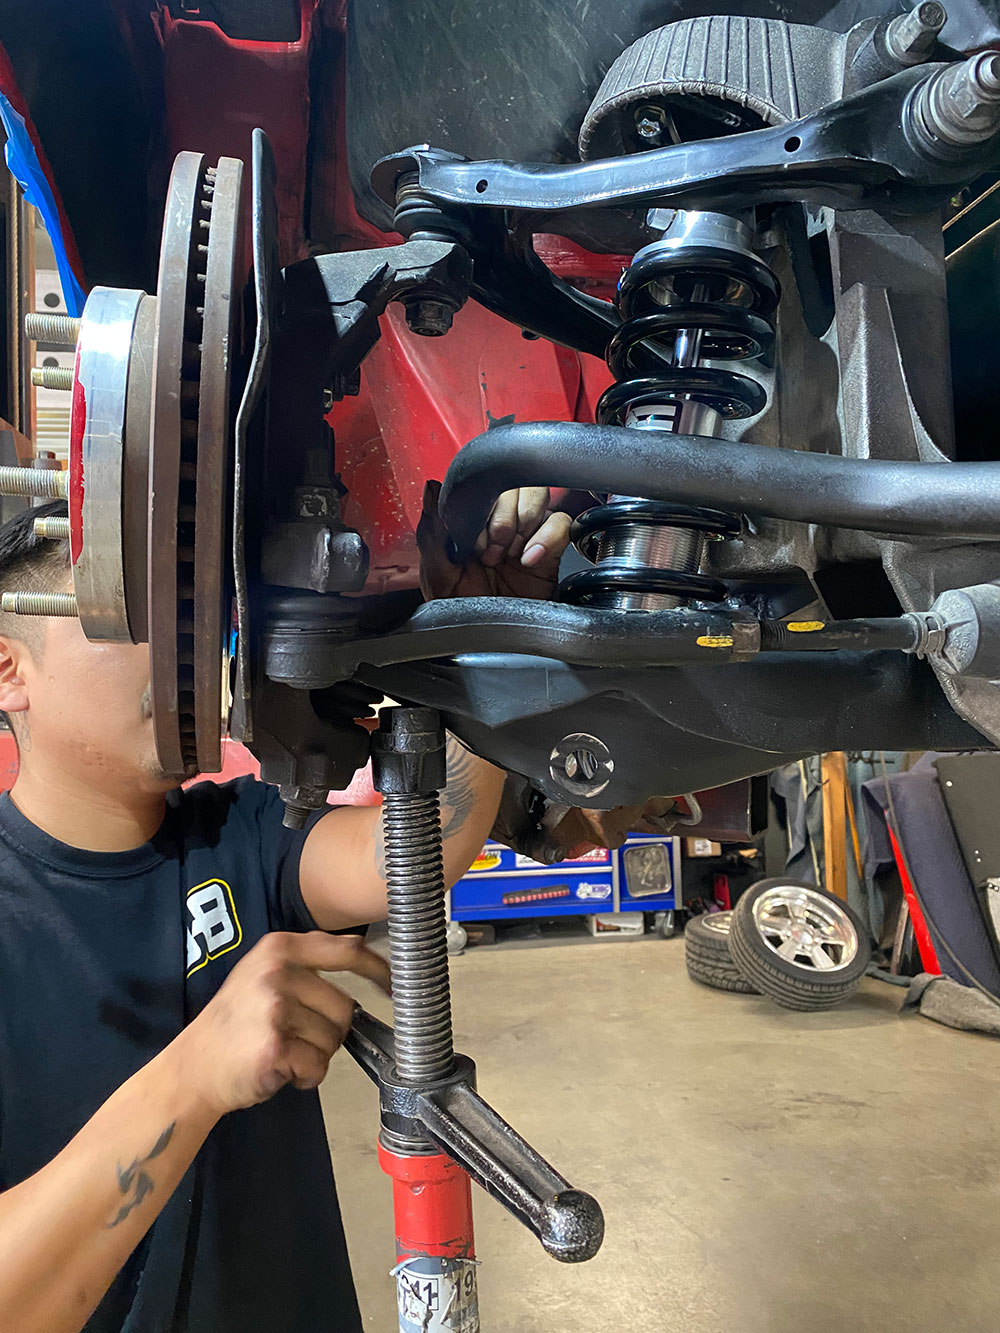
In preparation for the coilover swap, the disc brake calipers were unbolted and safely hung from the frame out of the way; the caliper will remain attached to the spindle for the procedure.With the truck “secured” on the lift, the lower control arm is slightly preloaded with an adjustable post stand to take some pressure off the suspension while the upper ball joint, lower shock mount, and sway bar endlinks are undone.
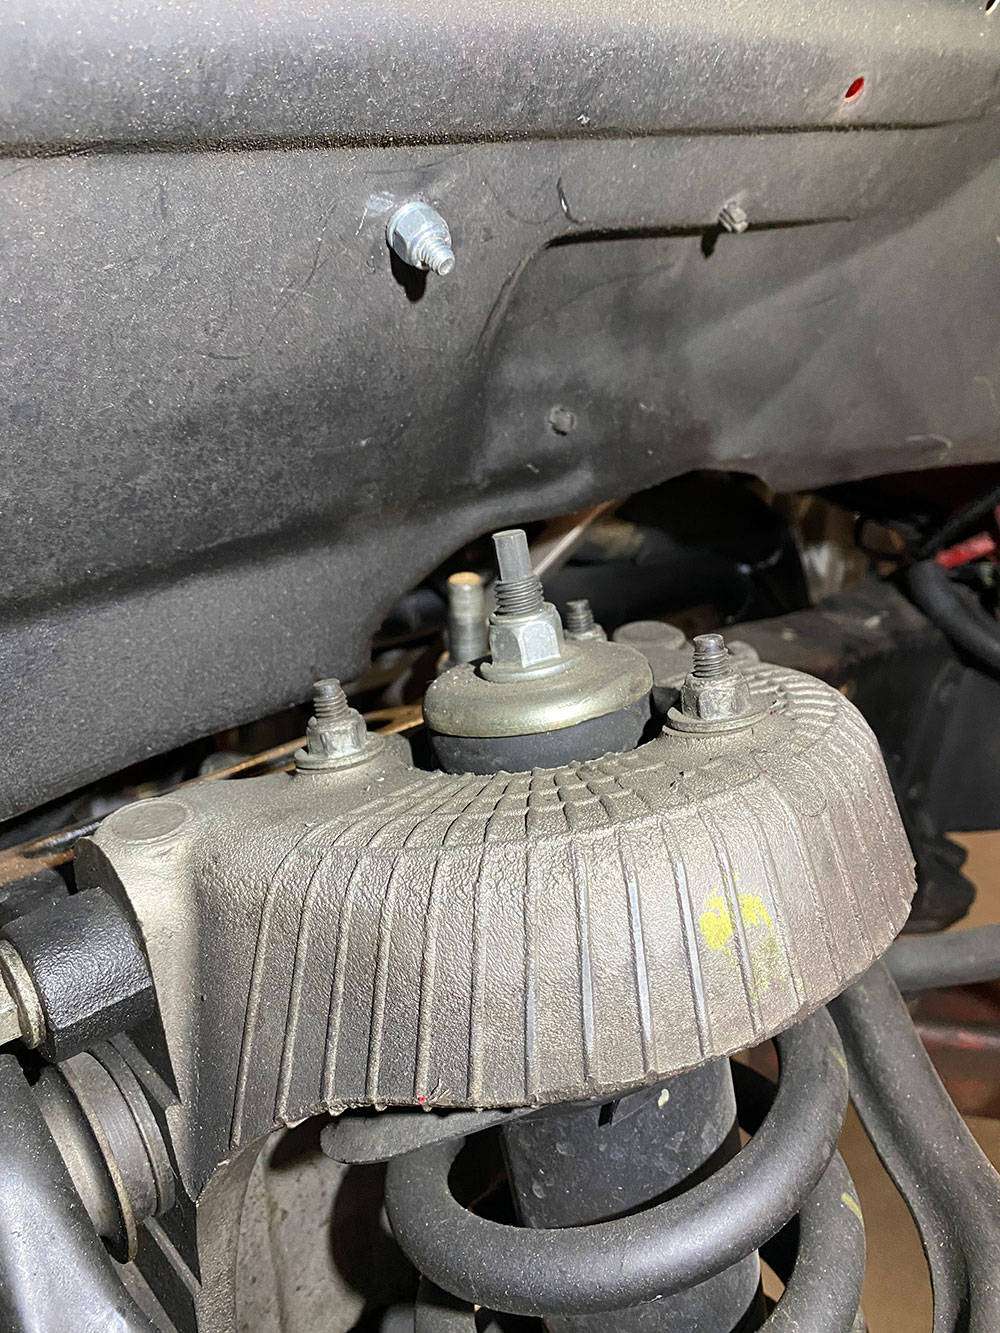
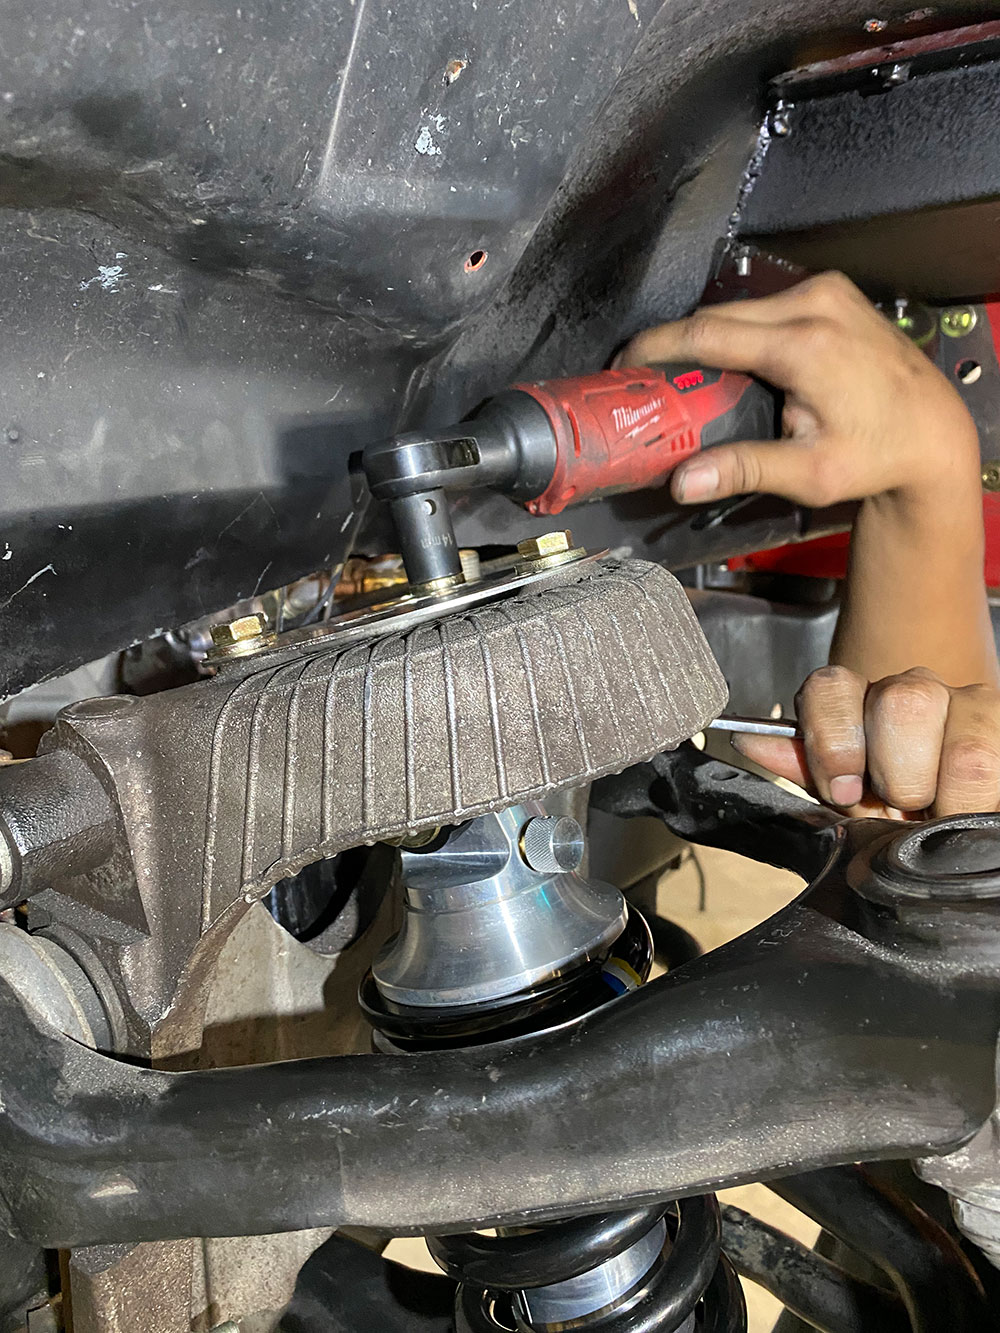
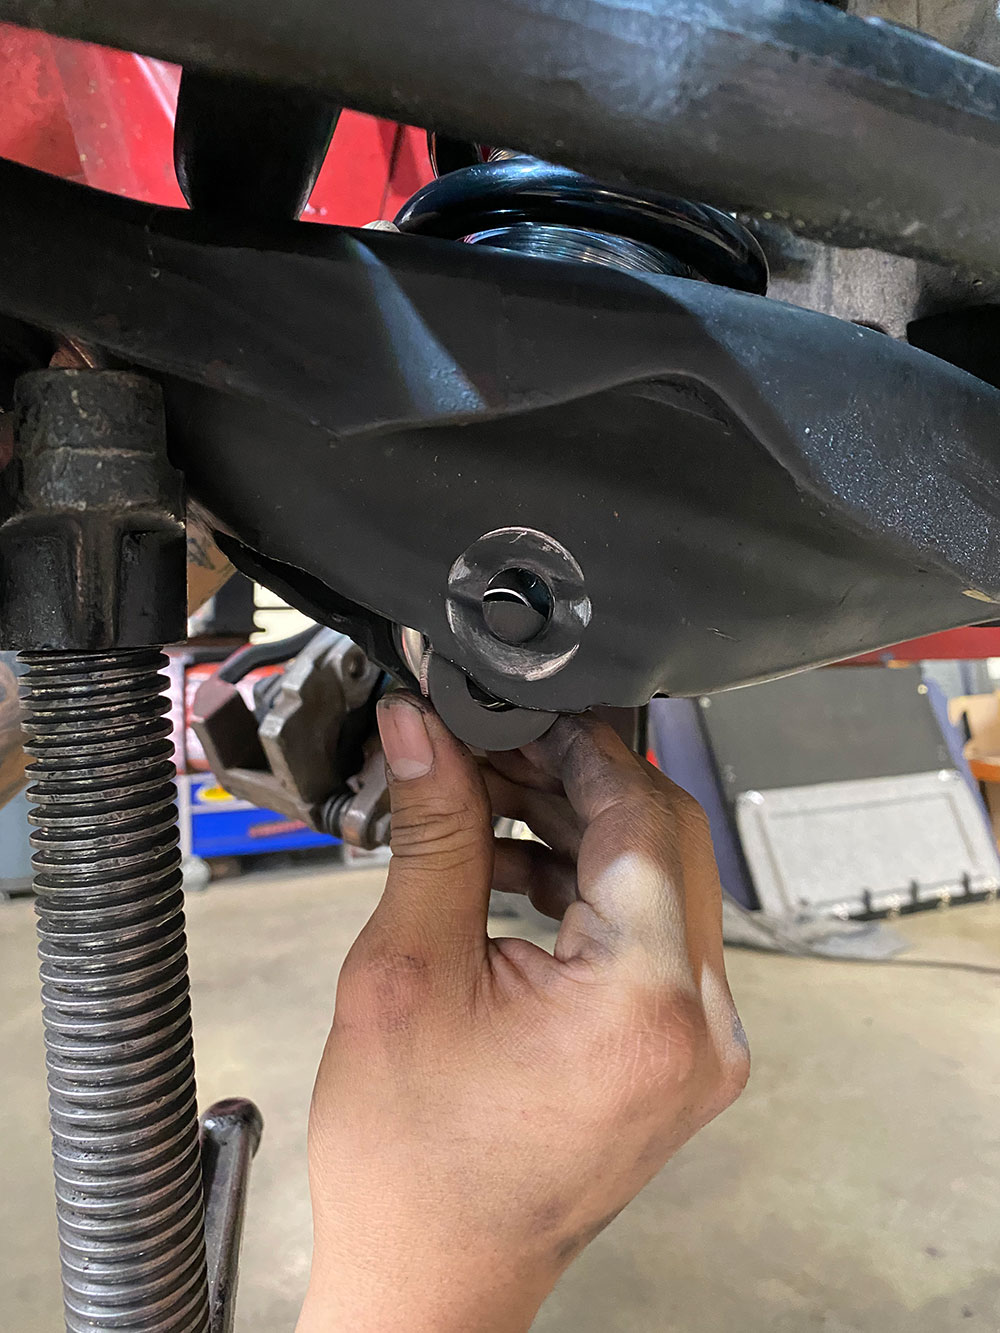
The OE coil-over-shocks assembly will come out just as a coilover would—as a unit. There are three studs on top of the Crown Vic’s integrated “hat;” the Aldan coilover conversion kit will reuse these holes with all new hardware, however, you will need to retain the lower shock mounting bolt/nut.
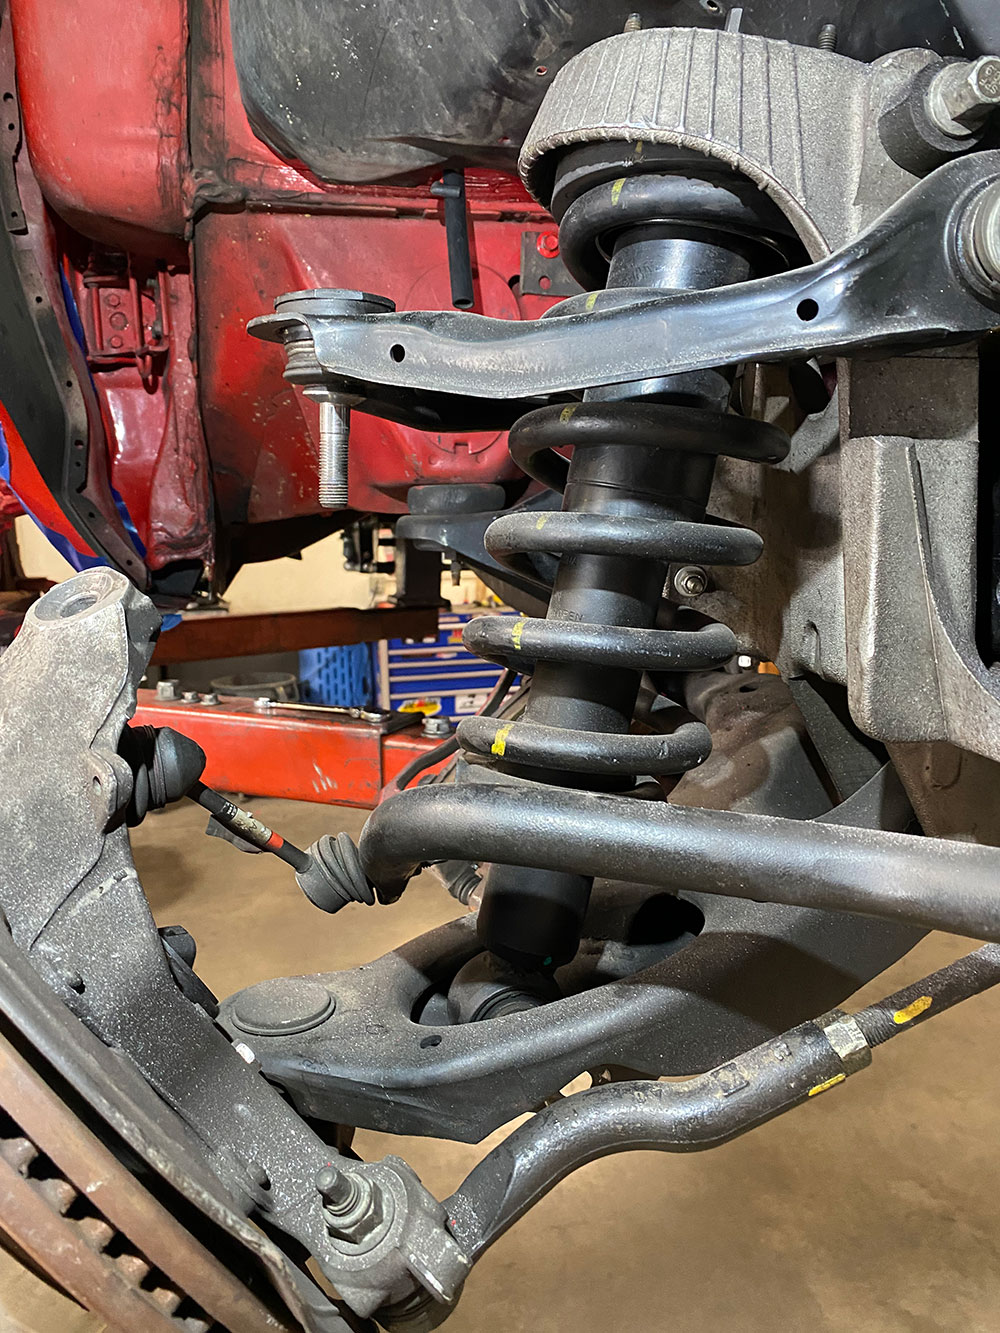
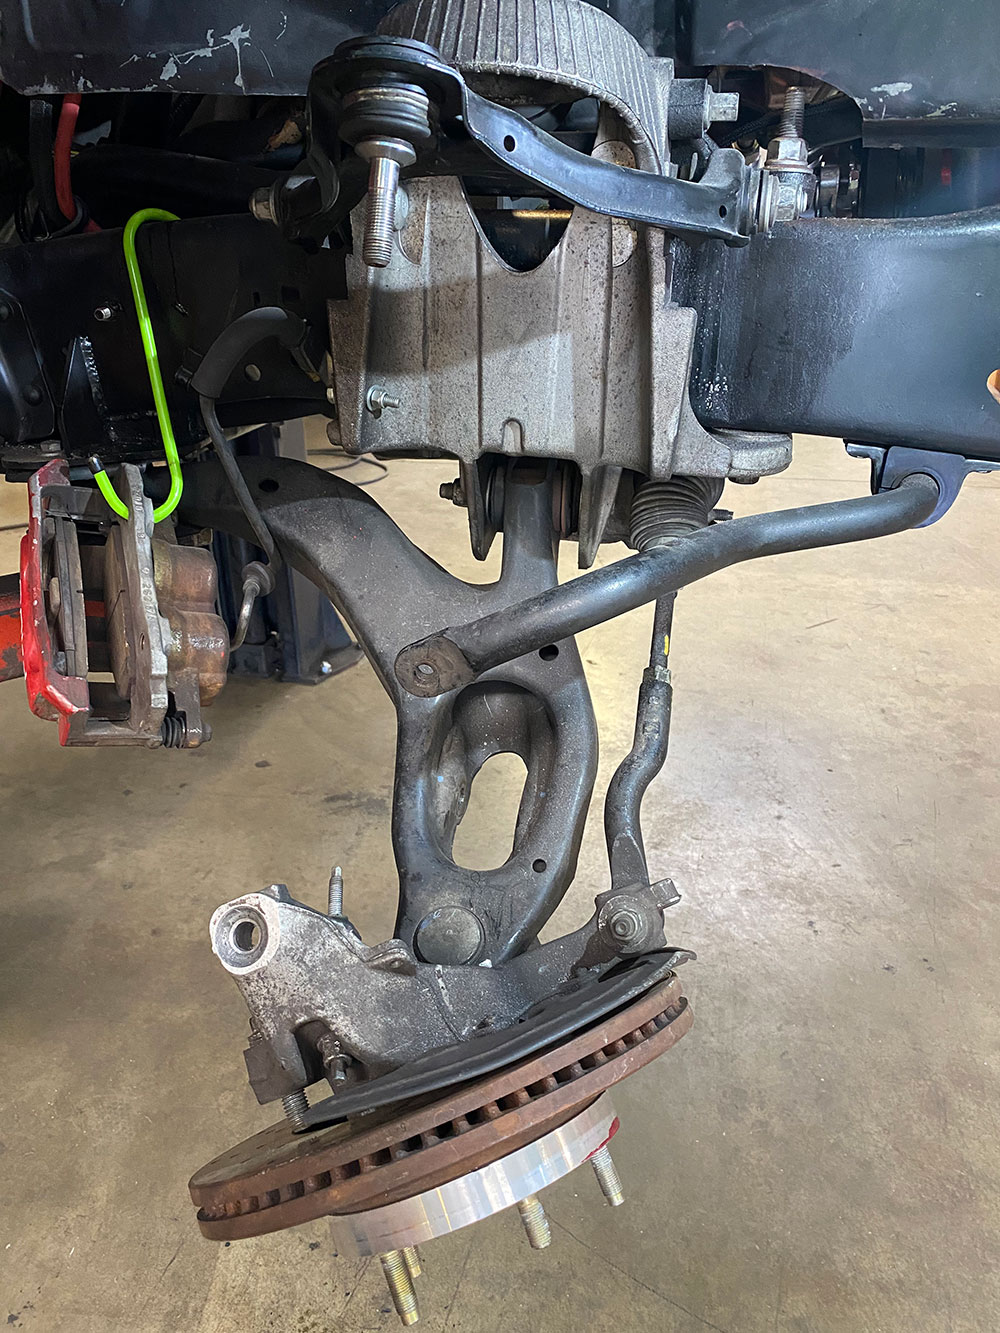
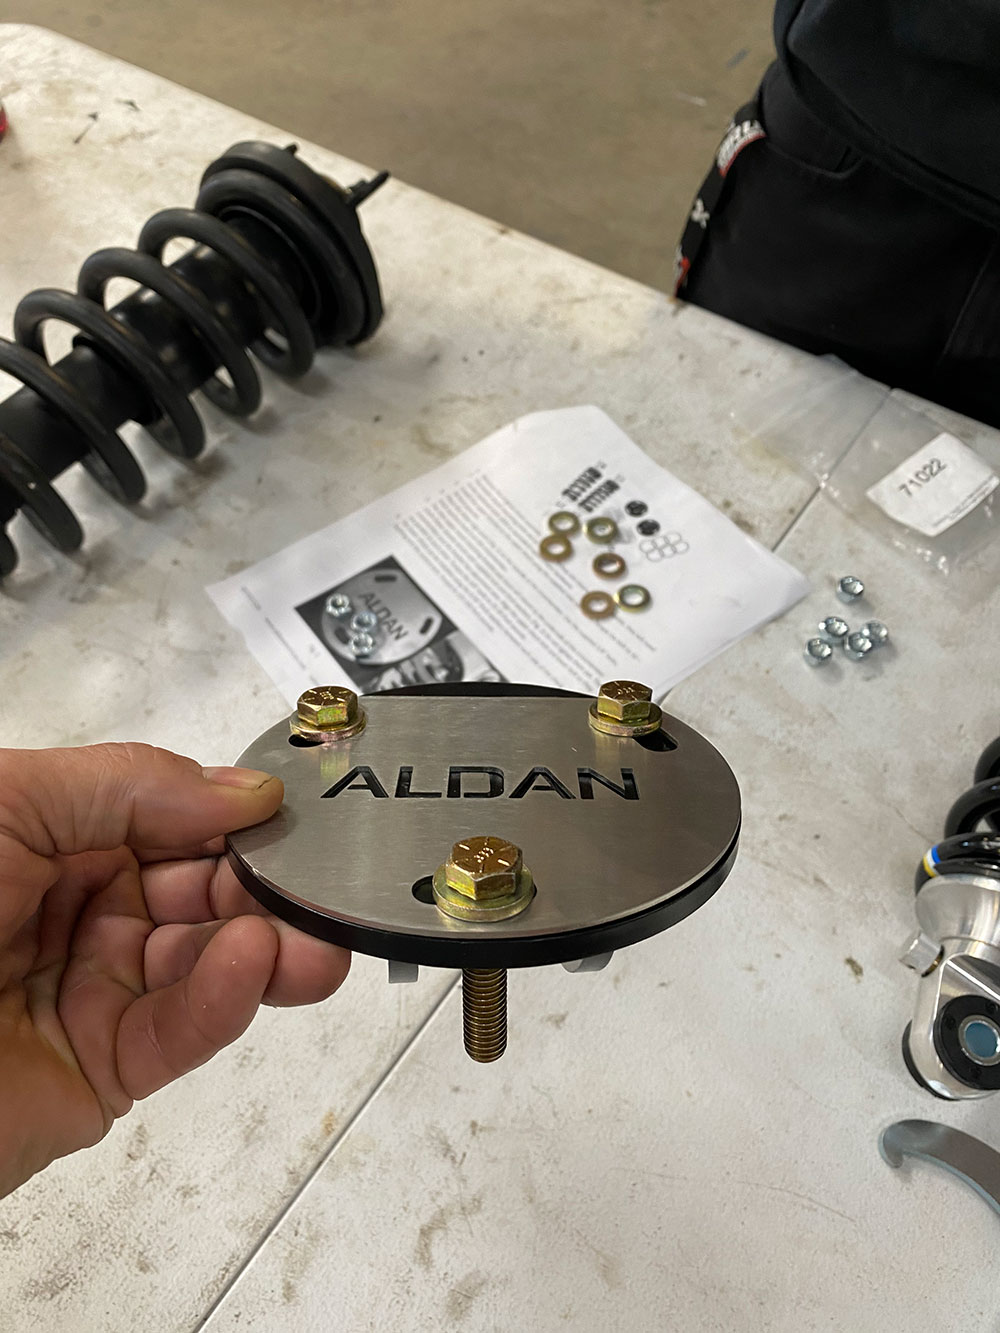
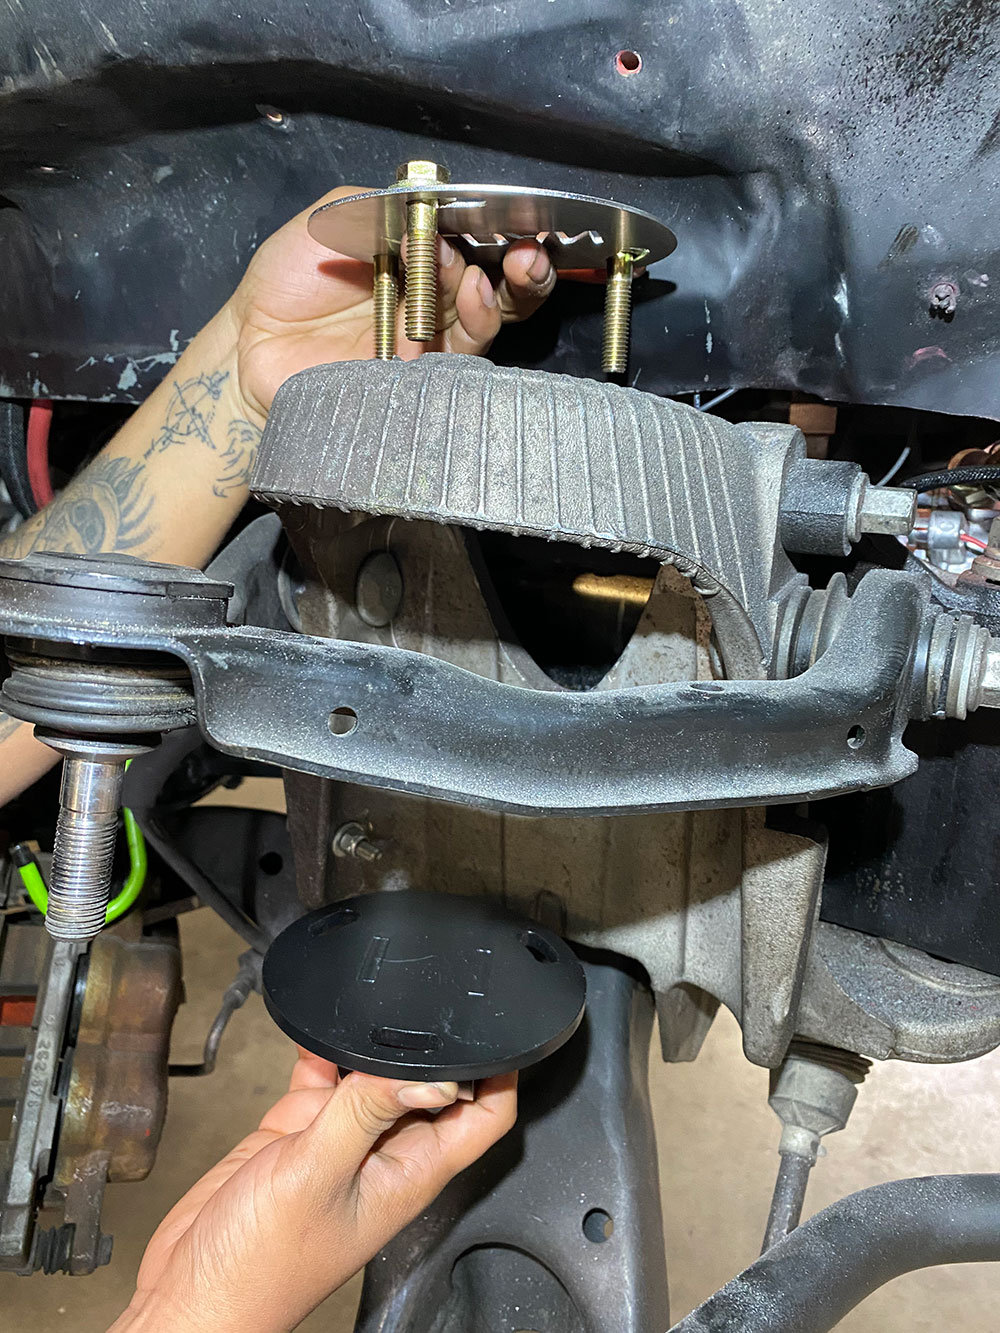
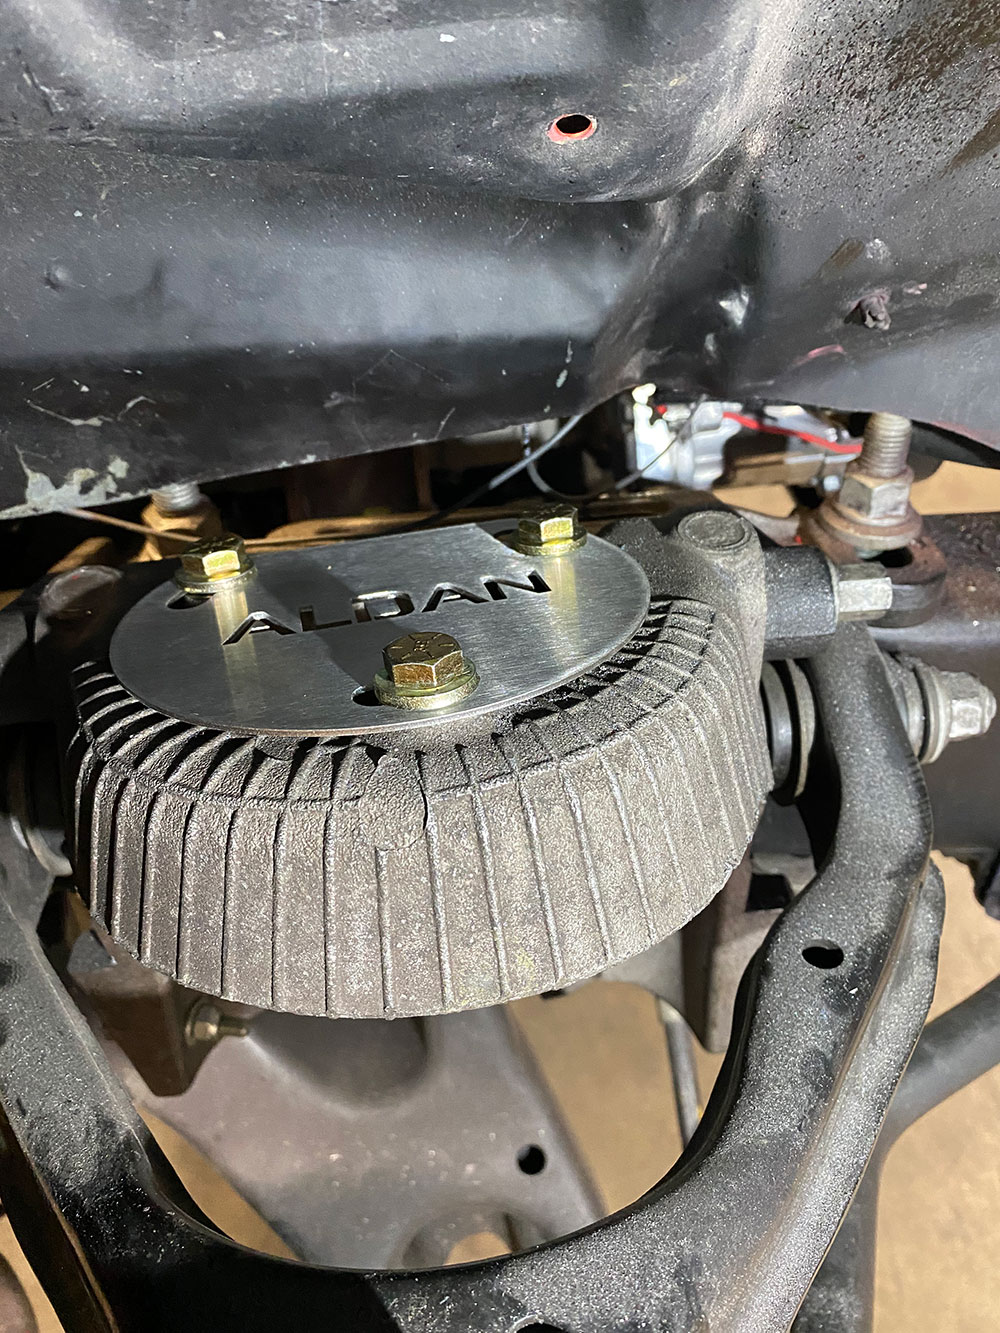
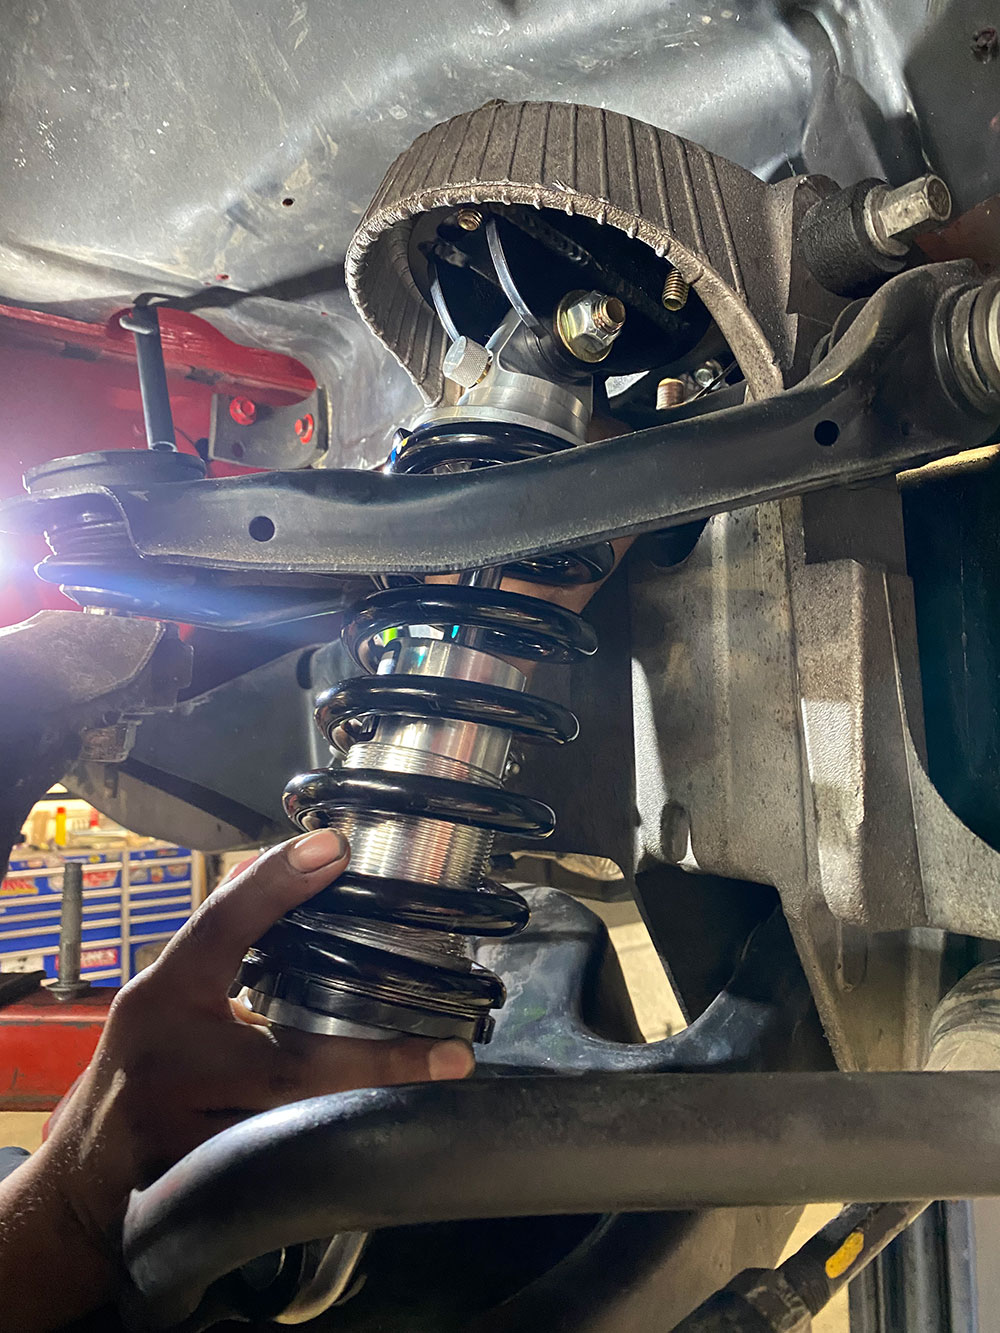
Our tie rod/tie rod end remained attached to the spindle, so we’ll leave things hanging for just a bit while we tend to setting up the new coilover assembly.As mentioned, the Aldan coilover conversion kit is supplied with all new hardware for the upper coilover mount (shown here mated with the actual upper bracket for reference only)—it’s also supplied with a laser-cut decorative top cover to spruce up the Crown Vic crossmember.The top hat plate and accompanying Grade 8 hardware are installed on top of the spring hat as shown and will sandwich the upper coilover bracket (after we install it onto the coilover shock, as there’s no room to install the upper shock bolt inside the hat).
We begin the coilover setup by doing exactly that—installing the upper bracket first with supplied hardware.
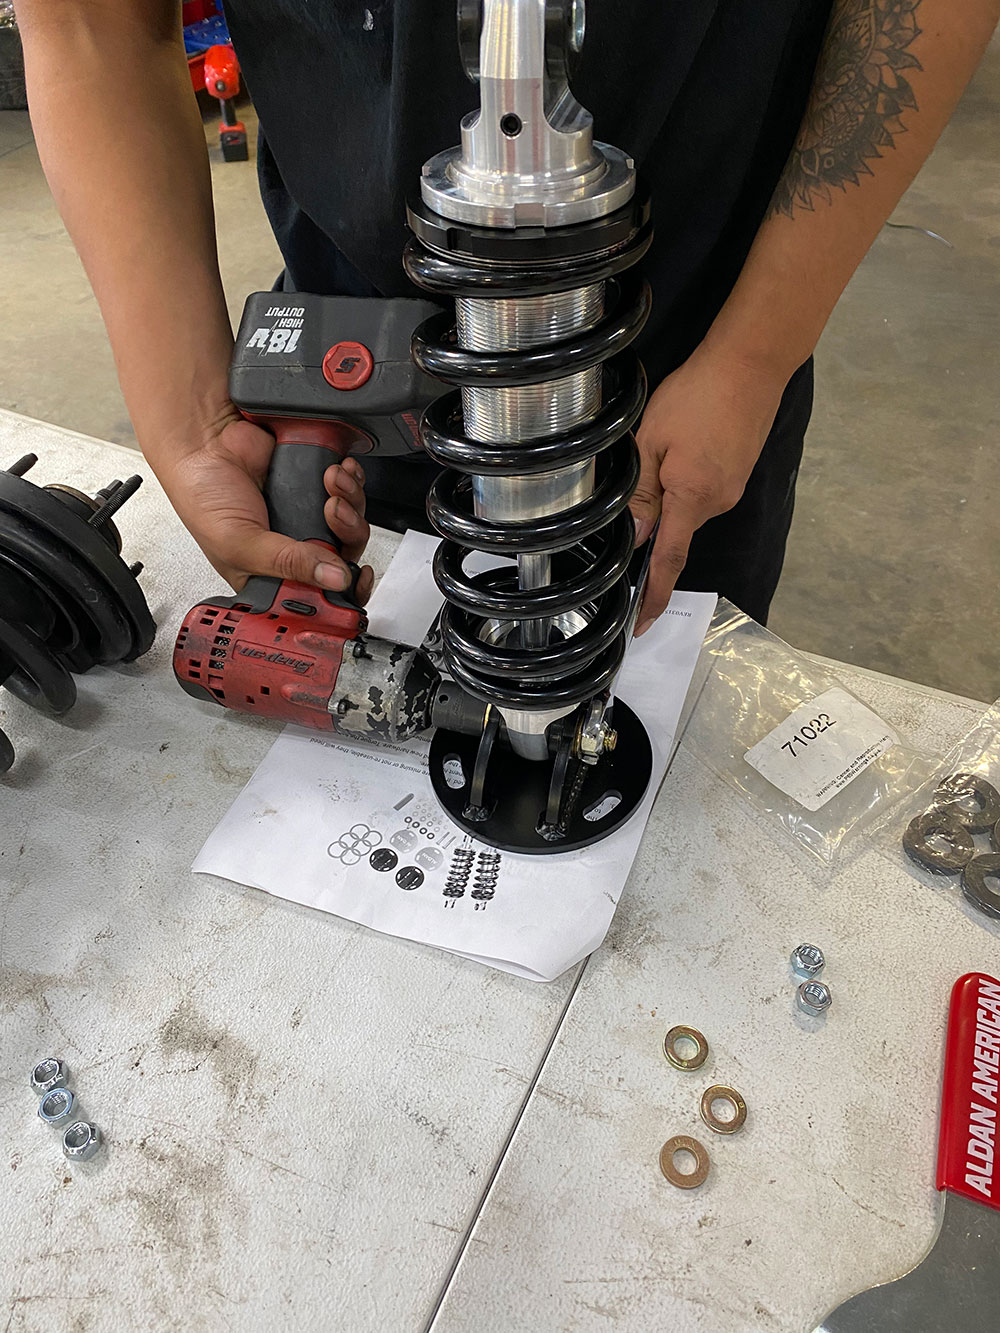
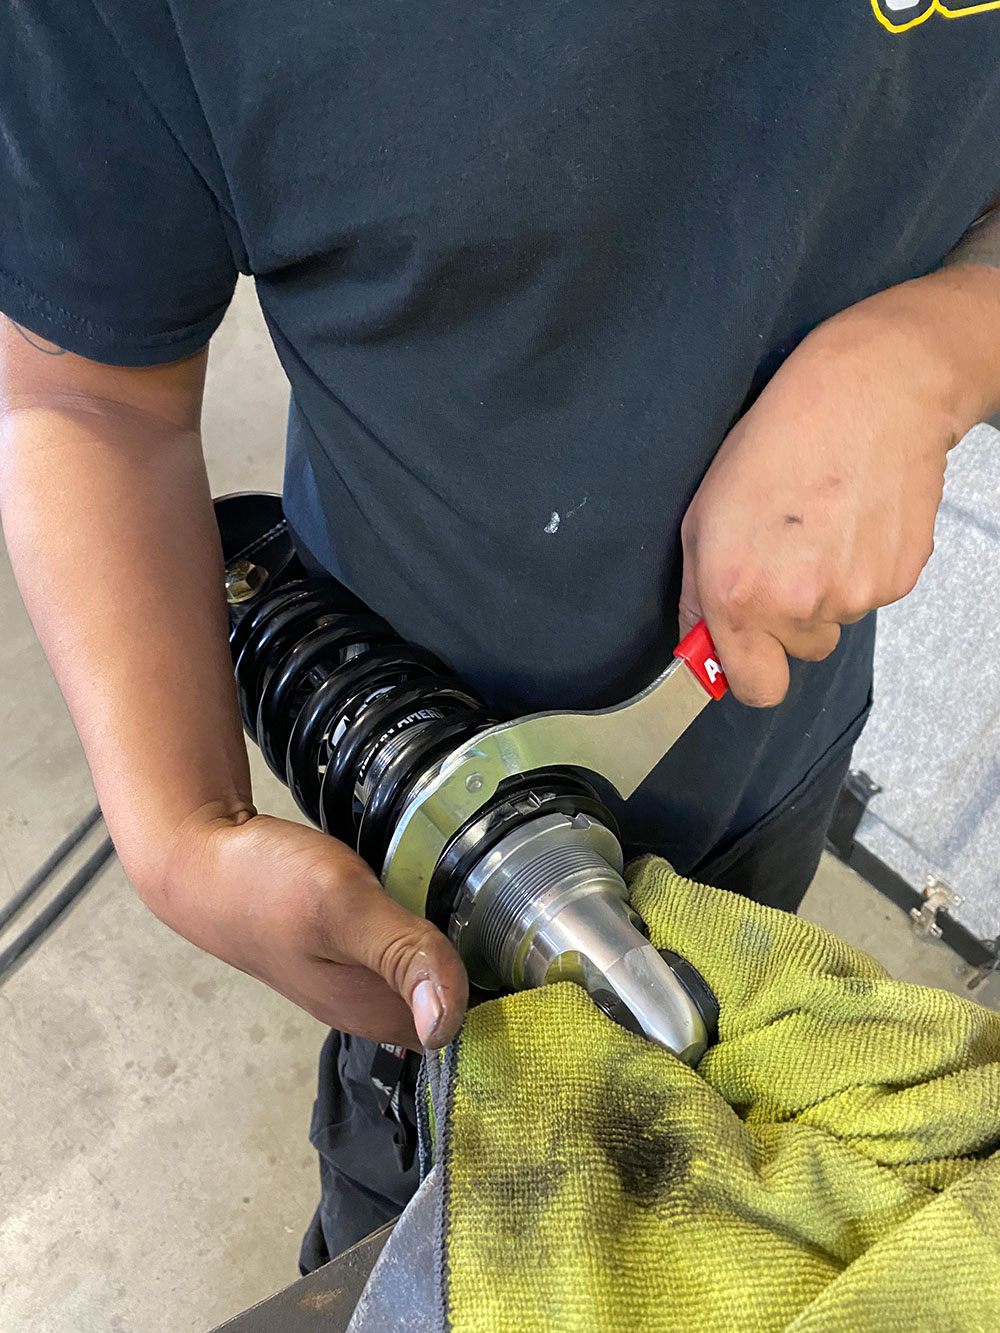
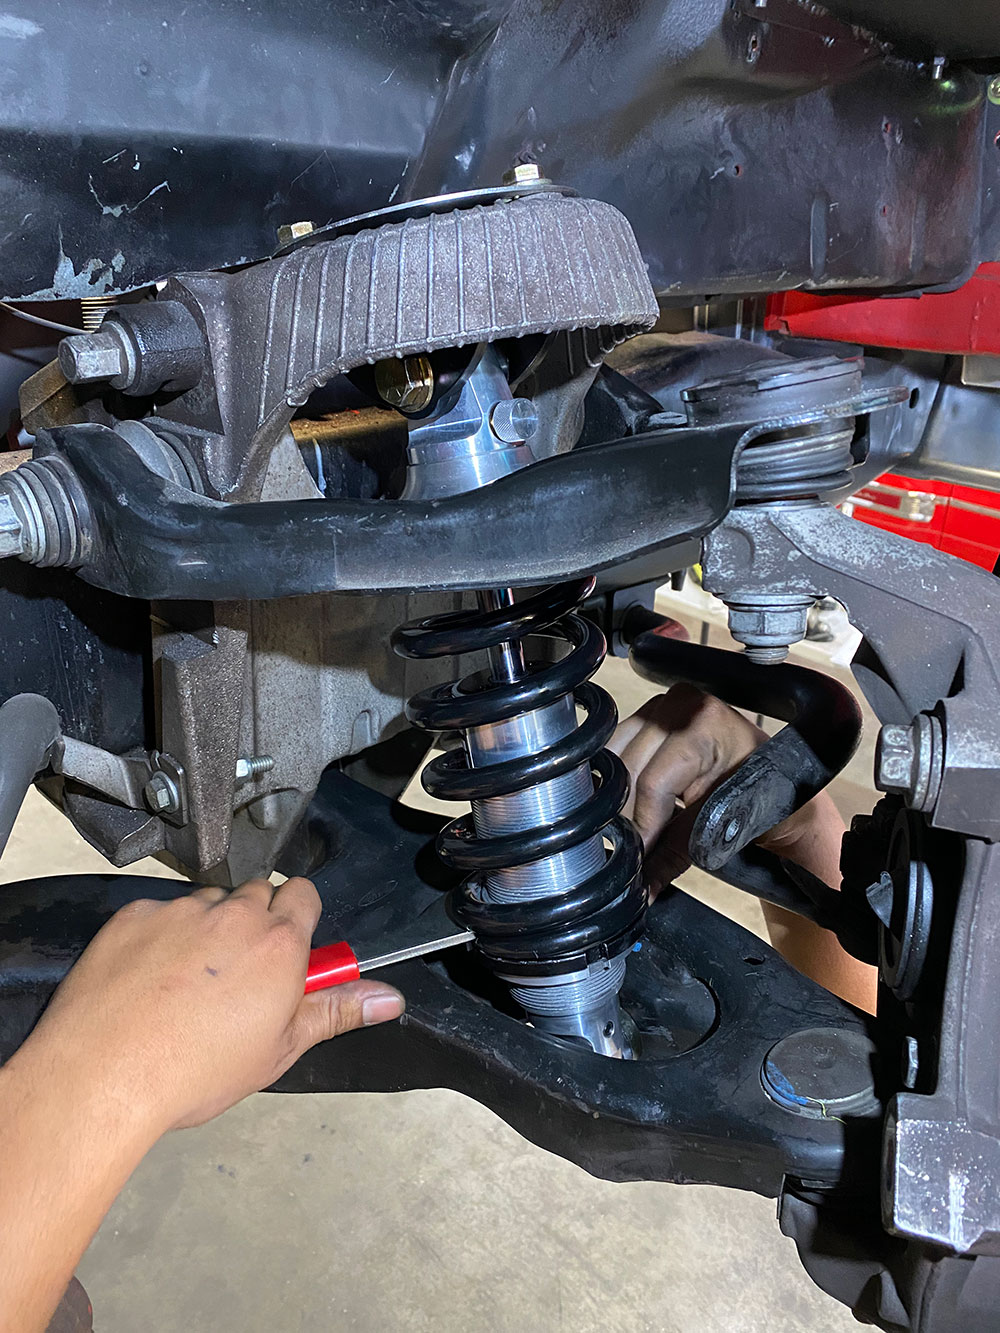
The coilover isn’t quite ready to be installed—as you can see by the limited space in the lower mounting area on the Crown Vic’s narrow lower control arm, the coil spring height will need to be raised so that the adjusting collars are at least top surface of the arm, otherwise you’ll never be able to get the spanner wrench in there.With the bottom mount of the shock secured (safely) in a vise, we set the coil height approximately an inch and a half above the first thread. Fine-tuning will be done once the coilover is installed and the frontend fully weighted.Now, our new coilover assembly is ready to be installed. With the lower control arm still hanging, the upper bracket is mated with the hat hardware that’s been patiently waiting. Then …
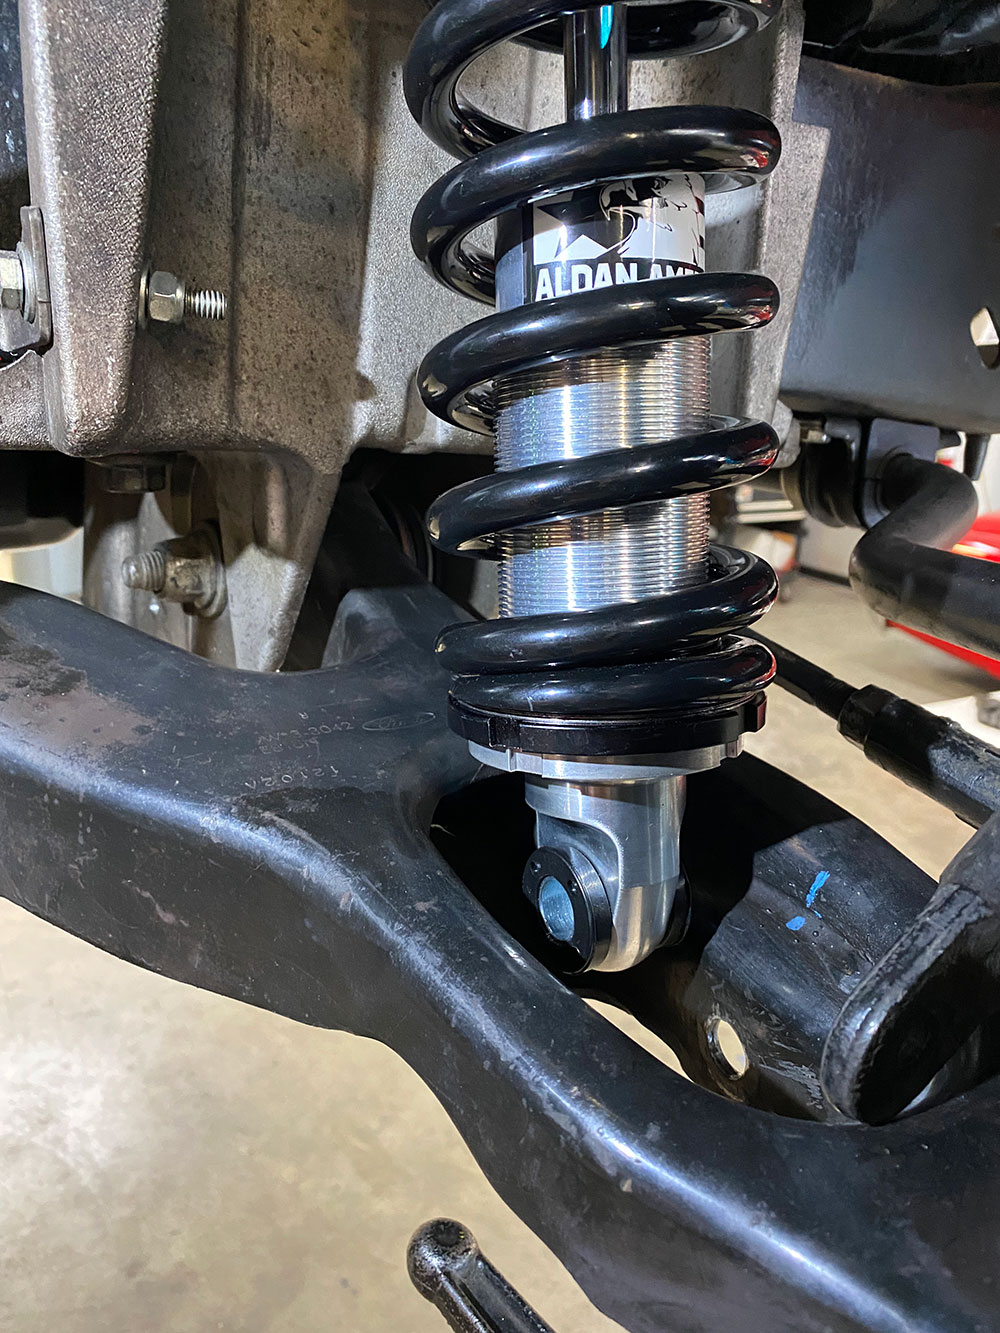
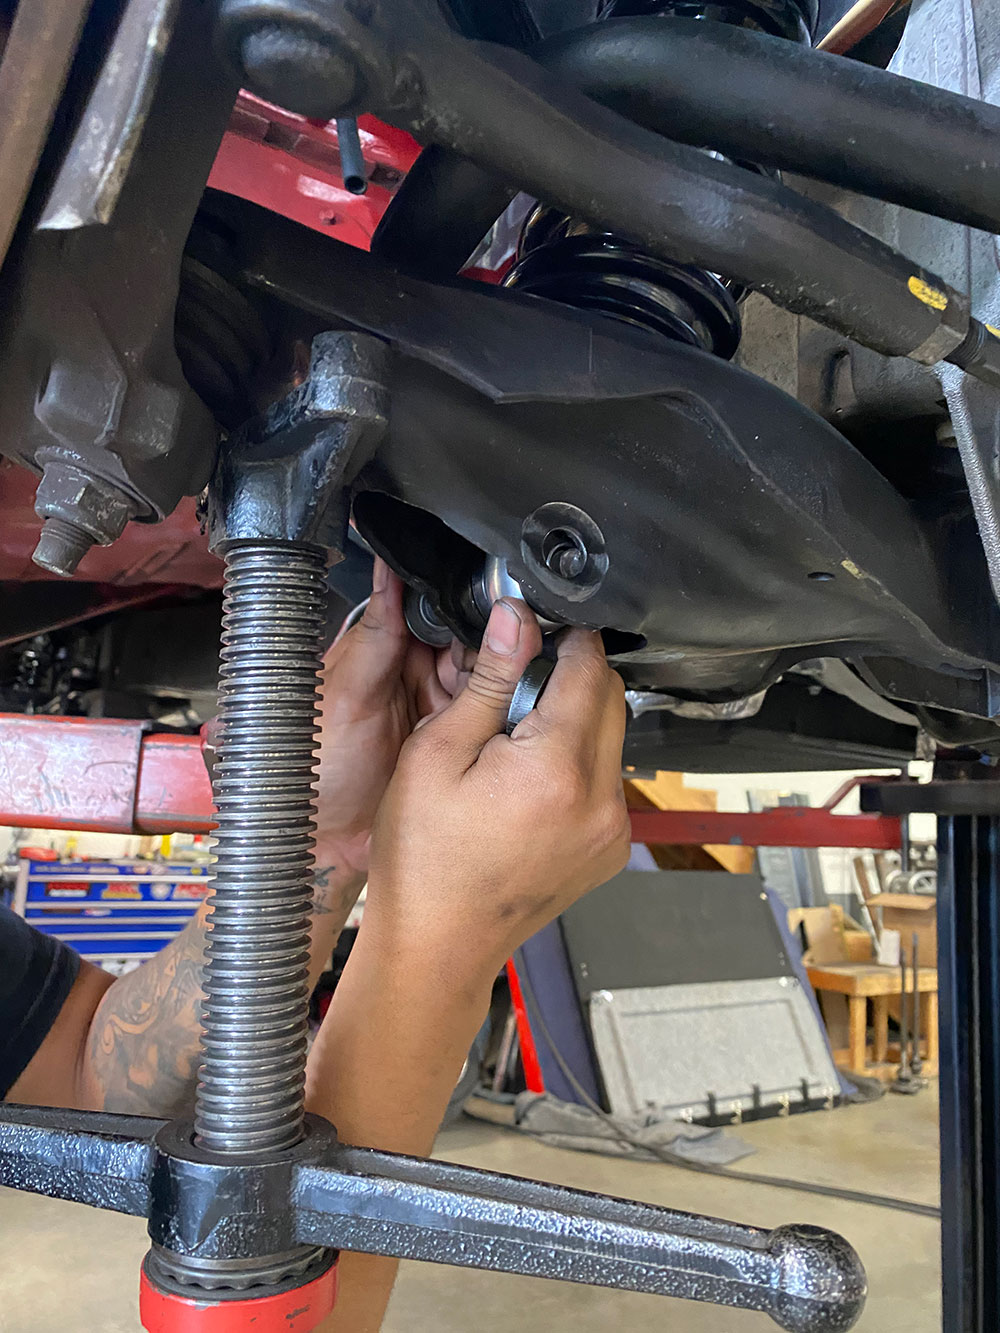
… using our adjustable jack stand, the lower control arm is carefully raised up to allow the upper ball joint to be reinstalled into the spindle. (Note: this would be the most opportune time to service and/or replace any OE Crown Vic components, such as the ball joints, bushings, and tie rod ends!)Again, with the truck secured on the lift, the lower control arm is raised again in order to install the OE lower shock bolt you saved along with the supplied spacers.
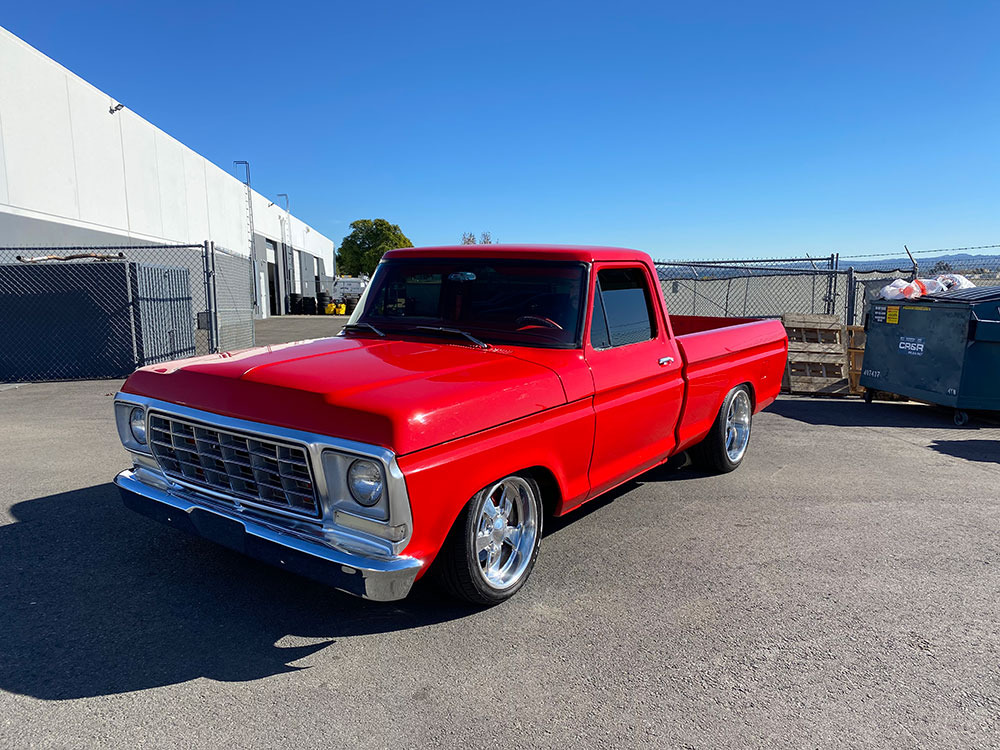
Now the sway bar can be reconnected and the brake caliper reinstalled.With the frontend all back together, we finish setting up the ride height. Not wanting to remove the truck from the lift quite yet, we simply weighted the suspension down using a giant-sized Jenga block!Measuring from the top of the wheel lip to the bottom of the fender edge, we determined the amount of coil adjustment needed.Ultimately, we ended up netting the full 2-inch drop over the stock Crown Vic coils—but more importantly, we significantly improved the ride and handling characteristics of the F-100 … significantly … with 12 points of shock absorber adjustability to boot! For a half-day’s labor and less than a grand invested, you can’t beat Aldan’s performance upgrade.
We use cookies to ensure that we give you the best experience on our website. If you continue to use this site we will assume that you are happy with it.