A flat, deep, mirror-like finish in a fresh paint job draws respect like few other attributes in a build, but it doesn’t come from the spray gun. Color sanding and polishing are the key.
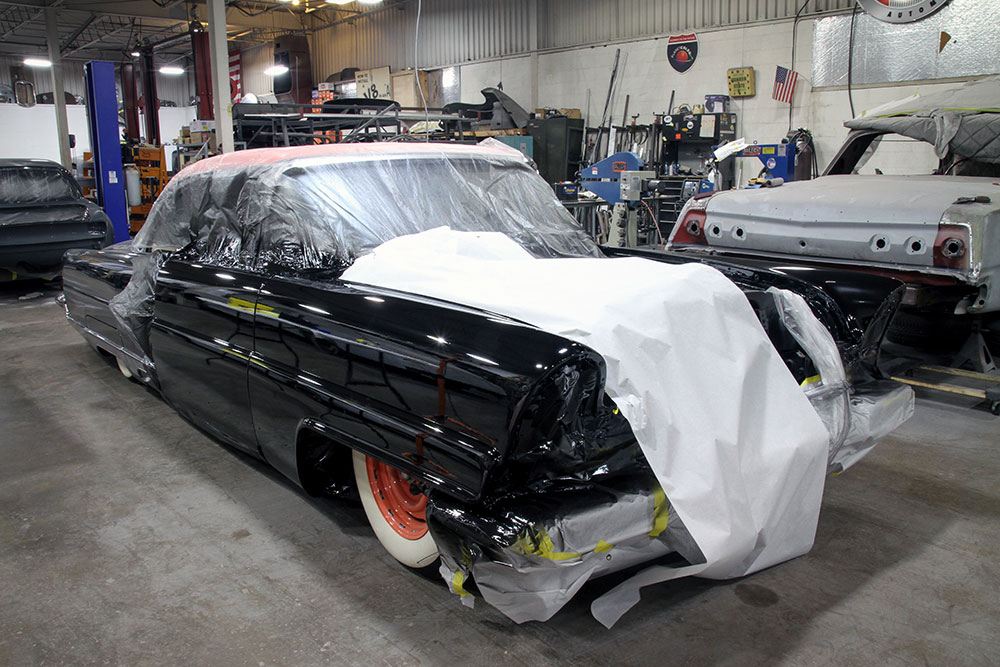
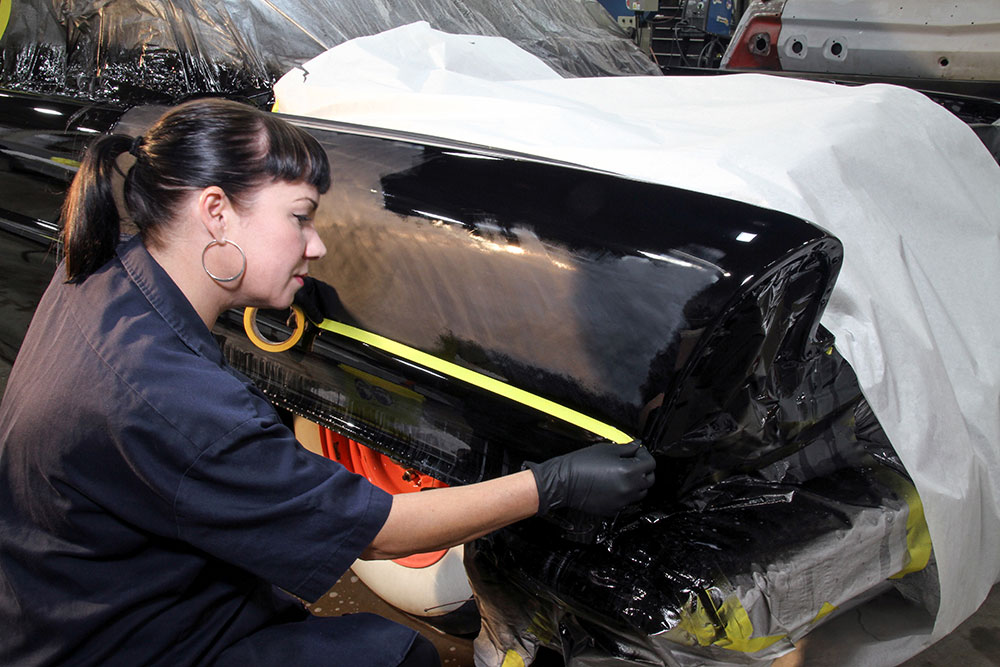
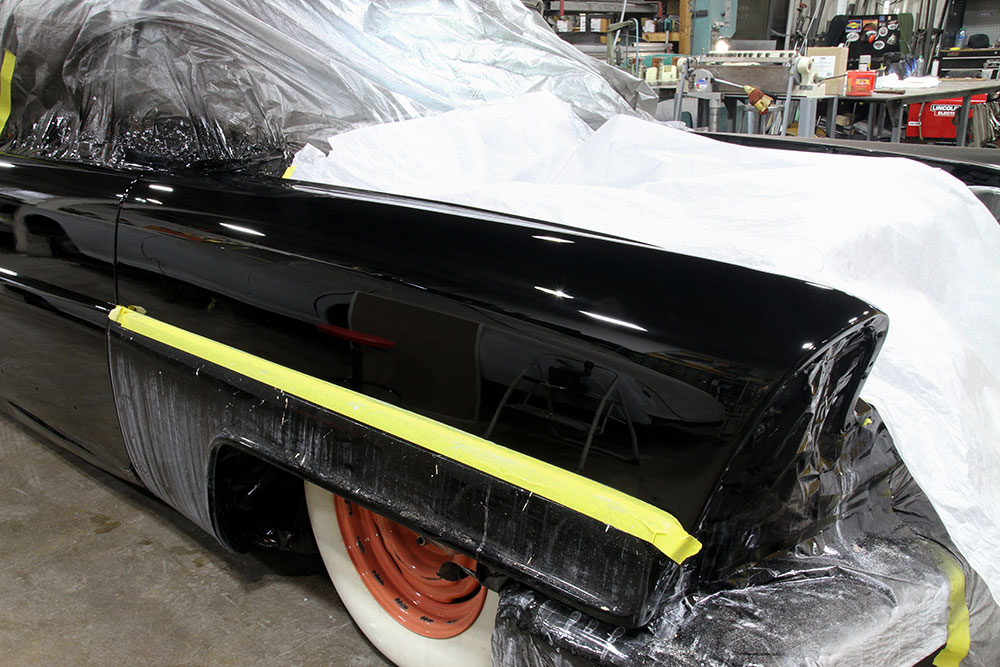
The subject of our color sanding tutorial is Bill Jagenow’s 1956 Lincoln Premiere, which was fresh out of the spray booth after receiving four layers of PPG Vibrance urethane-based black basecoat and five layers of urethane clear. Urethane is generally a tougher, more chip-resistant paint, which is great for vehicles intended as drivers.
The surface must be cut and polished to flatten the inevitable “orange peel” texture on the painted surface. Several factors, from the ambient temperature, air pressure for the gun, the paint materials, even the number of coats, will affect the degree of orange peel, but the bottom line is color sanding and polishing are mandatory for a truly flat finish.
Speaking of the bottom line, it’s also true the process is very time-consuming, requiring perhaps days of work to get it right. The auto paint shop or resto shop will do the work, but it could add dozens of labor hours to the tab. At least.
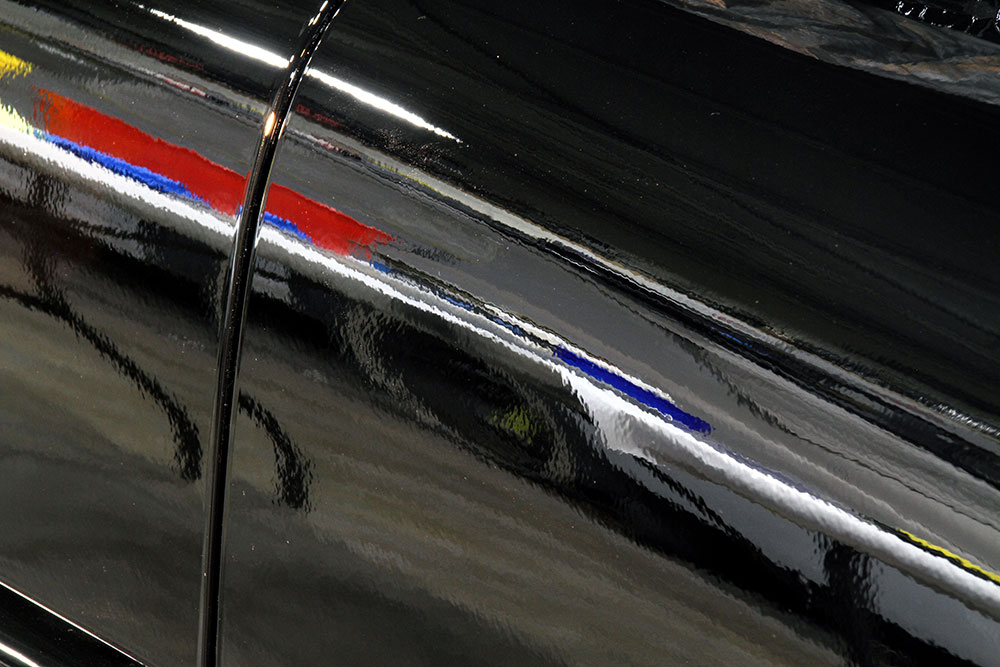
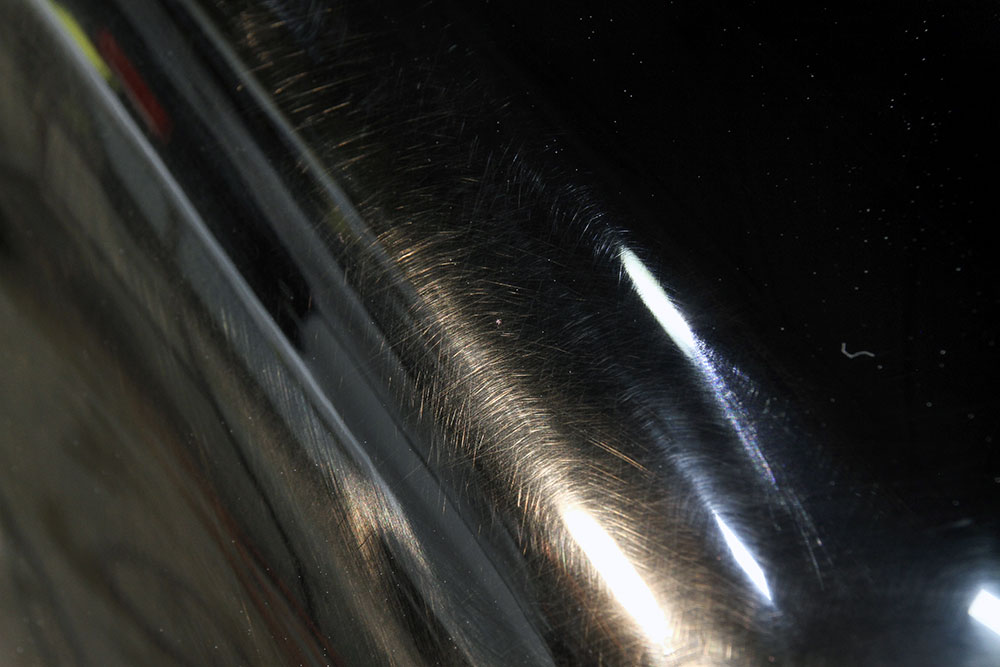
Although the fresh paint work looked great from a distance, a close-up view reveals the orange peel that comes with it. The visible texture must be knocked down and flattened with sanding and polishing to deliver a flat appearance and deep, crisp luster.
Color sanding and finish polishing are tasks, however, the do-it-yourself enthusiast can tackle at home and deliver excellent results. Yes, it’s a time commitment, but with the proper painting tools and materials, it largely boils down to patience and an eye for detail—and the courage to take sandpaper to a new paint job.
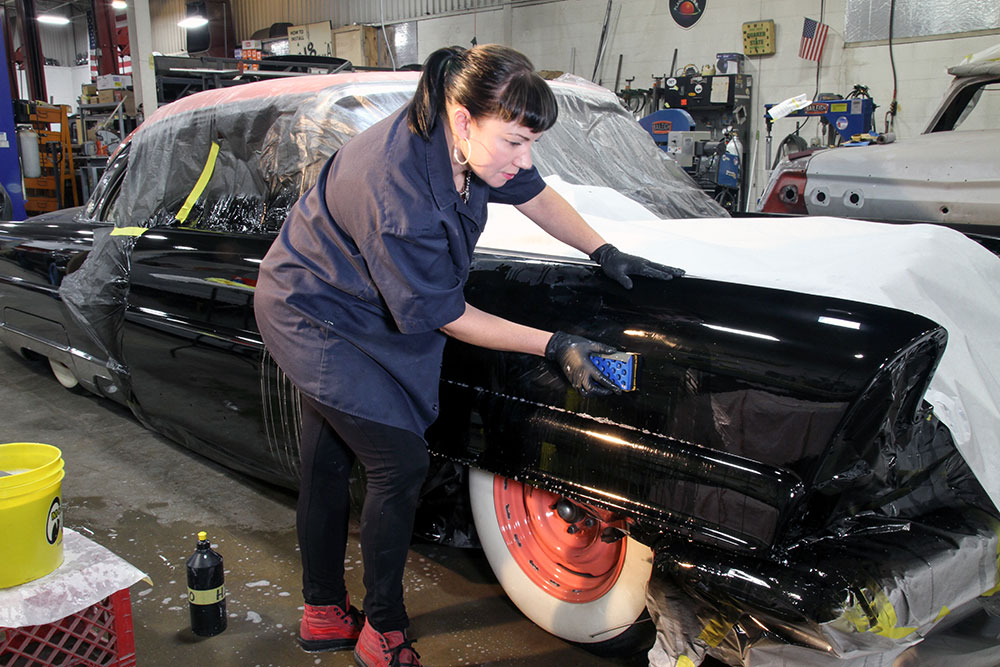
We enlisted the help of Autumn Riggle, at Brothers Custom Automotive, near Detroit, to demonstrate the process on shop owner Bill Jagenow’s black 1956 Lincoln Premiere. It had been involved in a minor fender bender and the consequential bodywork required a respray of the front end sheetmetal and doors with PPG Vibrance basecoat and clearcoat. As they readied the car for the Detroit Autorama, we looked over Riggle’s shoulder as she transformed the spray booth fresh paint work into a show-quality finish.
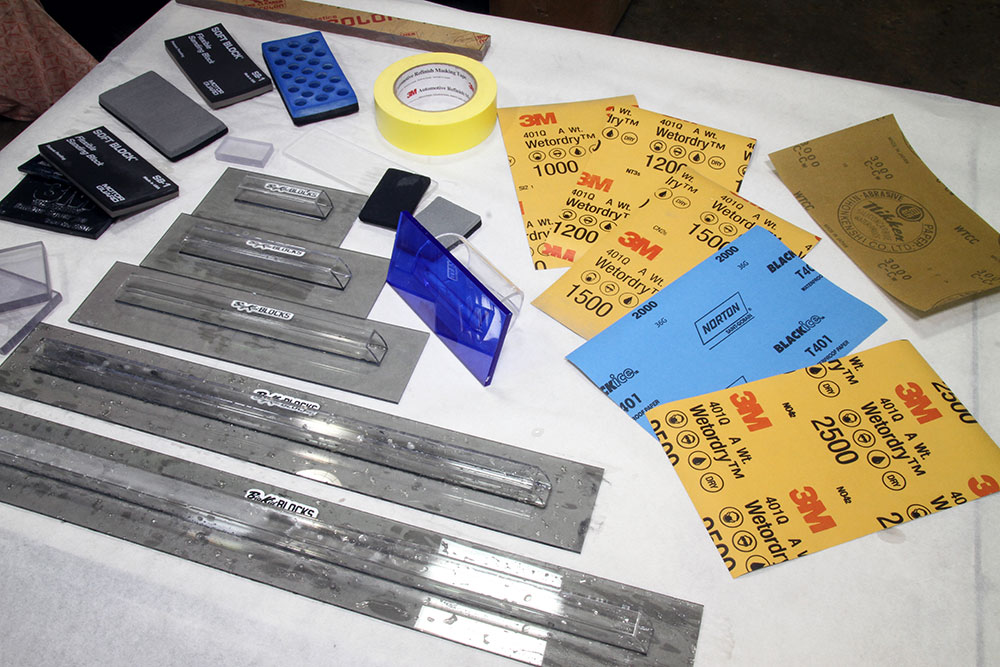
Before starting, the sanding materials are assembled, including the blocks and sandpaper. For hard blocks used on flat surfaces, Brothers Custom Automotive uses Big Kid Blocks for their lightweight rigidity. Soft blocks are also needed for convex and concave surfaces.
It was a challenging subject, too, as black is the most unforgiving color when it comes to exercising every sanding scratch or paint imperfection.
You’ll see things in black that wouldn’t even be noticeable in lighter colors,” she says. “The truth is, you may get to a point where, even after polishing, you’ll still see some sanding marks, which means you’ll have to start over with sanding and repeat the process.”
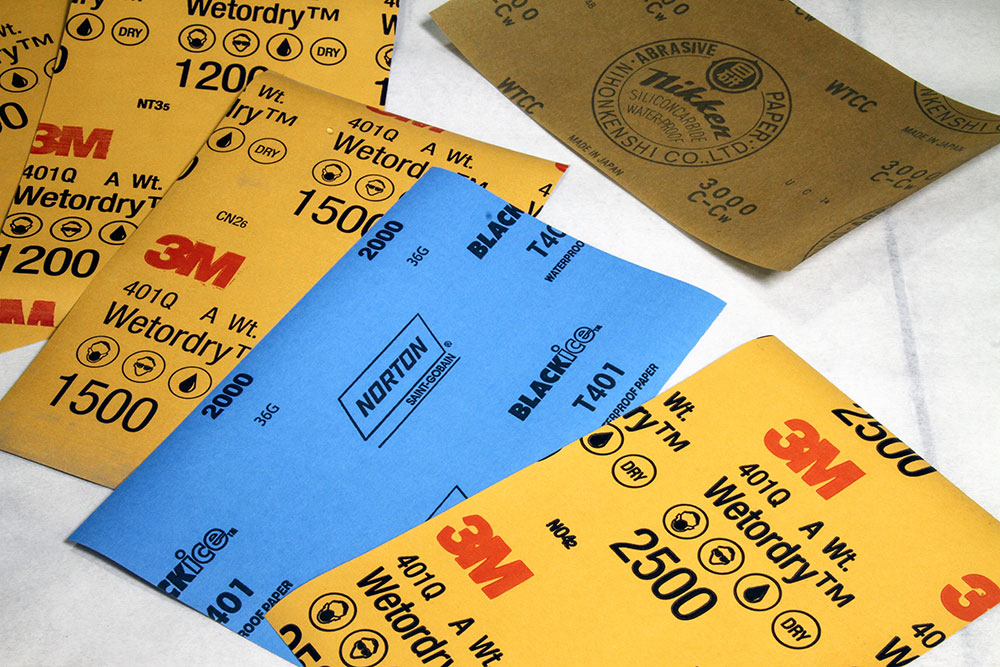
When it comes to sandpaper, a range of 1500-grit to 3000-grit wet/dry paper is required for most new paint jobs. When restoring older, oxidized paint work, the starting paint should usually be 1000-grit or 1200-grit.
Of course, there’s more to it than that, and that’s the aim of this story. We’ve depicted the basic steps in the process, but before hitting the first panel with sandpaper it’s imperative to assemble all the necessary materials.
What You Will Need:
Sandpaper suitable for wet sanding. Depending on the severity of the orange peel, this should be 1500-grit sandpaper or 2000-grit sandpaper and move up to 3000-grit sandpaper.
Sanding blocks of various sizes, including soft blocks.
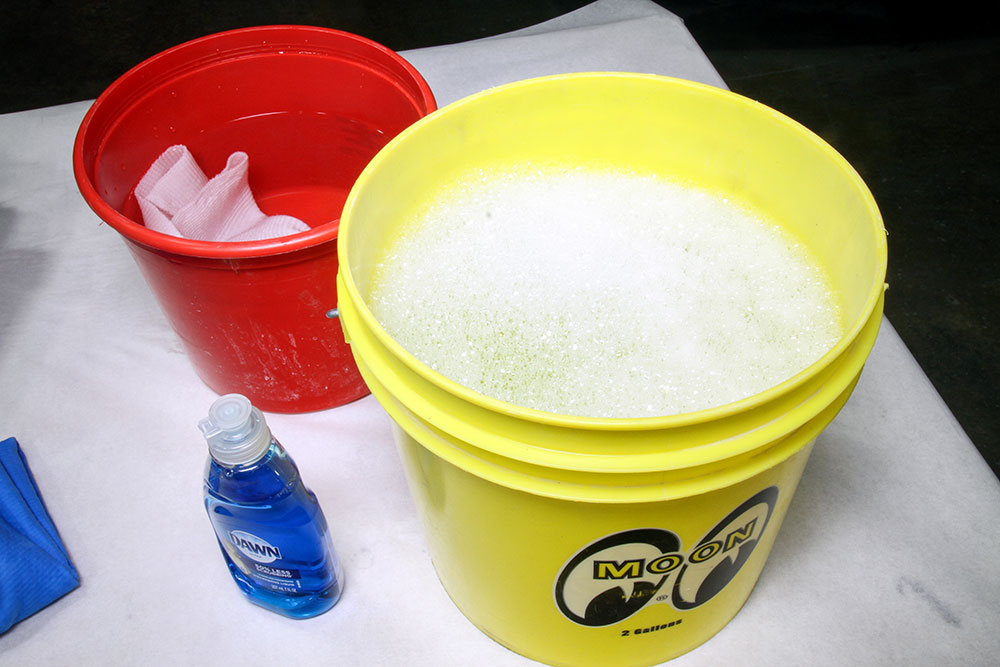
A bucket of water mixed with liquid soap.
A sponge or water bottle to keep the surface wet during sanding.
Microfiber car cloths.
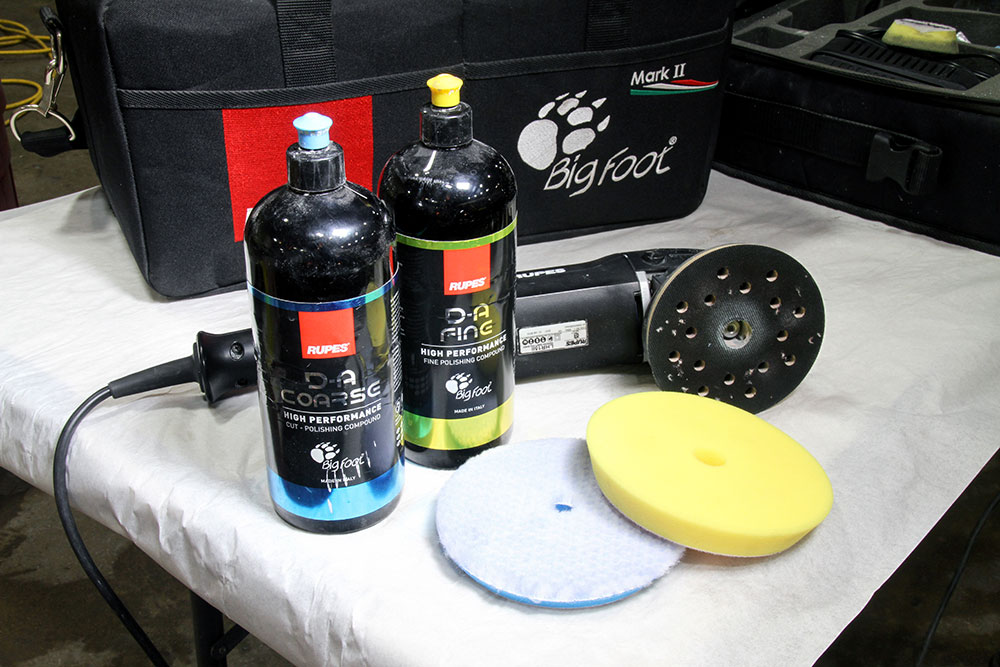
An electric polisher with coarse- and fine-grade pads.
Medium-grade rubbing compound.
Fine-grade polish.
A bucket of soapy water is also required for the sandpaper. A moderate amount of soap will help keep the sanding surface well lubricated. It’s also important to rinse and refill the bucket with new soapy water when moving up to the next stage of sanding, i.e., moving from 2000-grit to 3000-grit.
Corners can’t be cut here. All the materials are necessary to achieve the desired results, and while the accompanying photos show a greater variety of materials, from the sanding blocks to different electric polishers, the results can be achieved with only a single polisher and fewer sanding blocks.
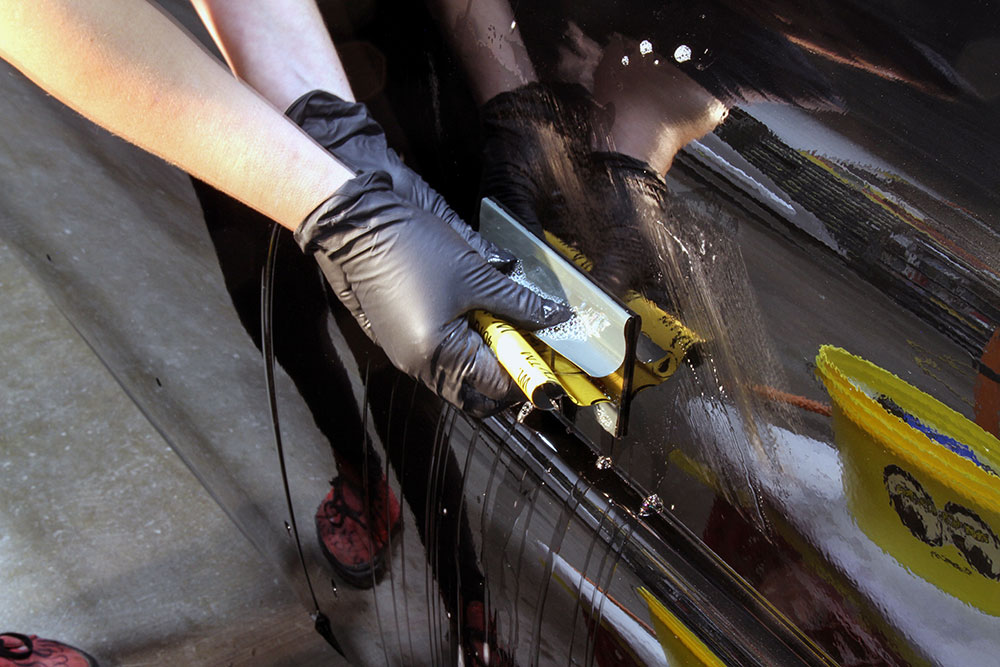
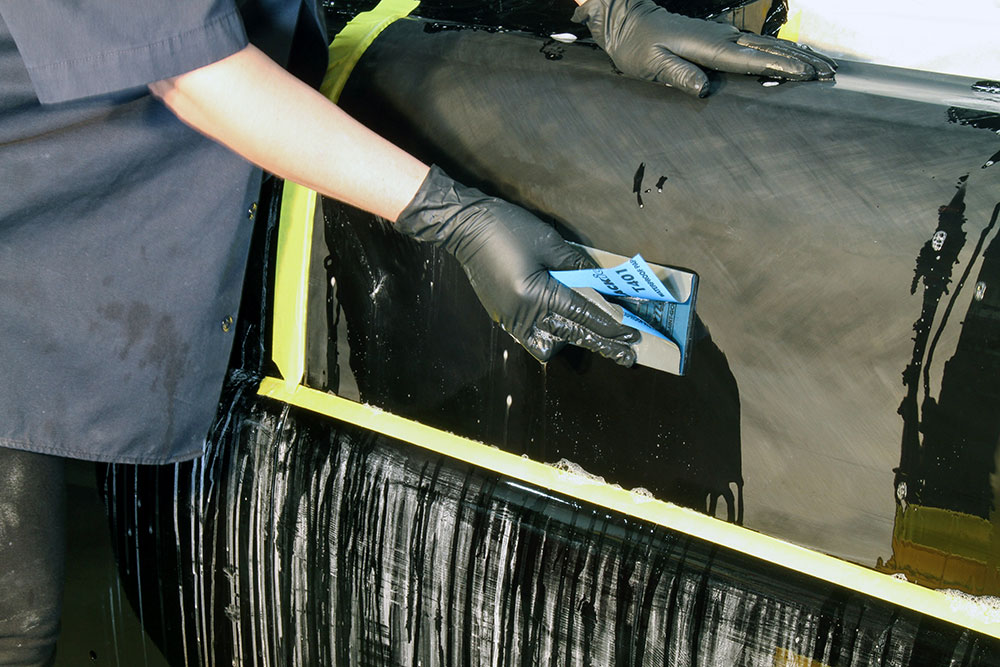
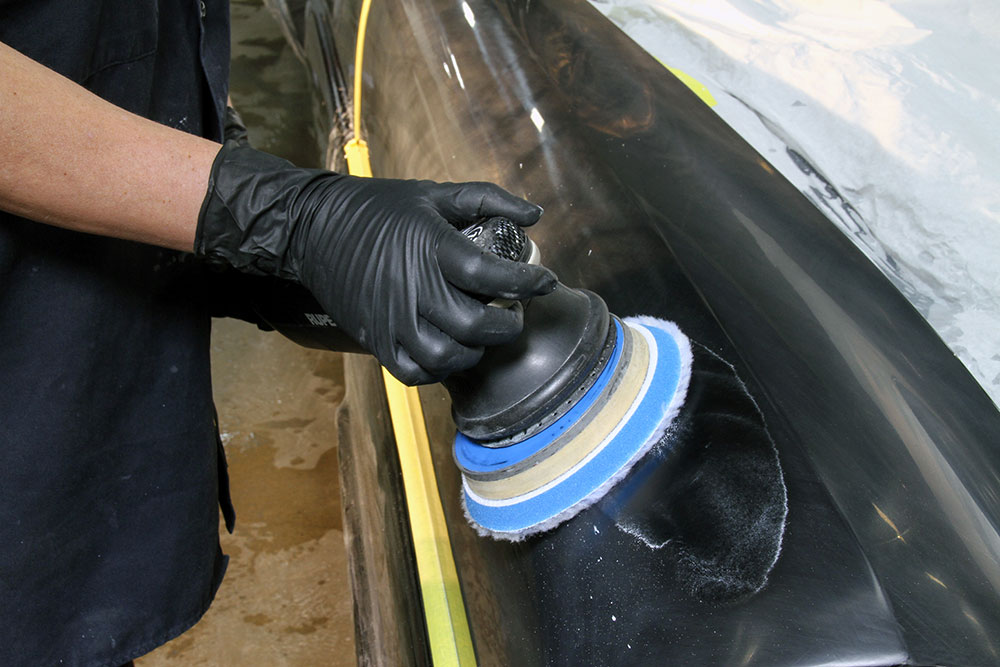
It’s finally time to put sandpaper to paint. On the flat, vertical portion of this front fender, a hard block with 1500-grit sandpaper was the starting point. With the sandpaper and the paint surface wet, the surface is sanded in a crosshatch pattern. Do not sand in a circular motion!
“You get out what you put into color sanding and polishing,” Riggle says. “The tasks themselves aren’t very difficult, but it takes time—and that may include sanding and re-sanding areas until they’re perfect. If you cut corners or skip steps, it will show.”
By the way: The steps outlined here also apply to restoring severely oxidized existing paint work, although you’ll typically start with 1000-grit sandpaper or 1200-grit sandpaper to cut down the texture. The caveat with this type of paint restoration, of course, is it is very difficult to determine the depth of the underlying paint, making it easy to burn through it altogether. That’s particularly true on factory paint jobs, which often used notoriously thin layers of lacquer.
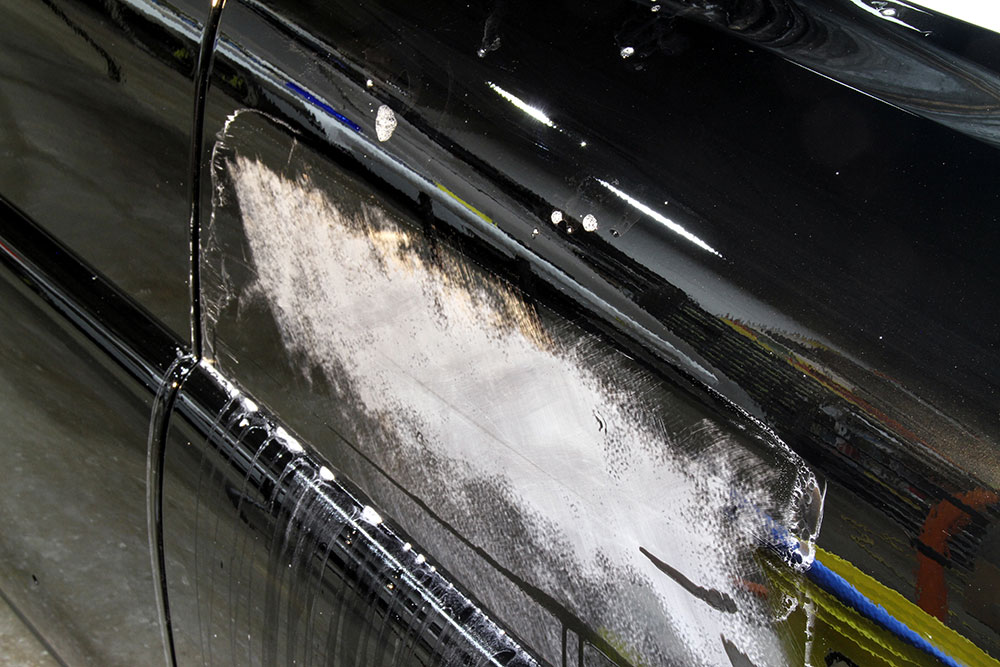
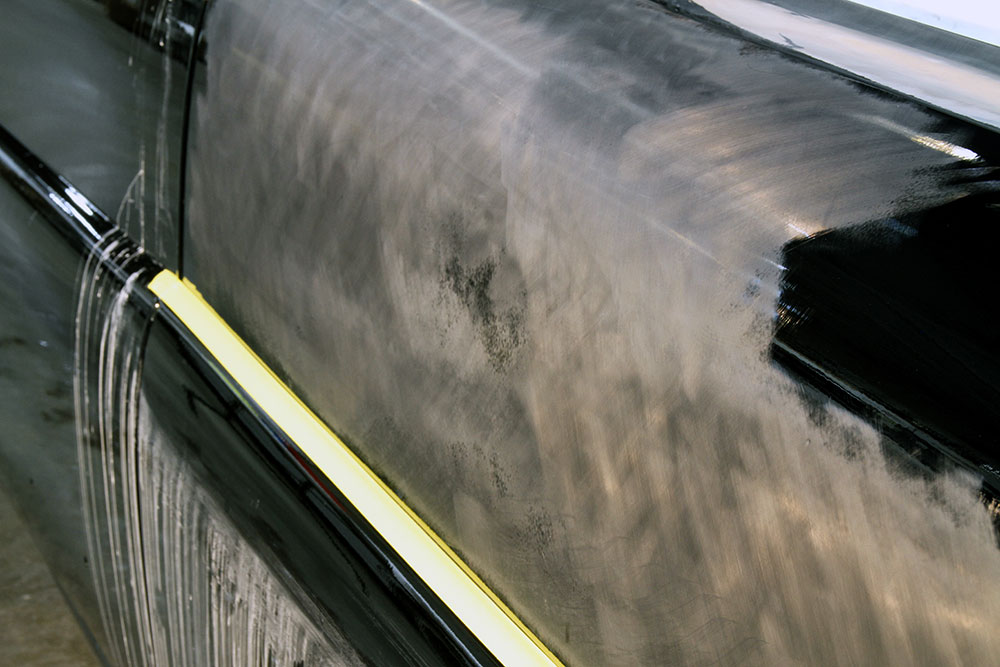
Here’s what the surface looks like after only a couple minutes of sanding. The crosshatch pattern is evident in the sanding, while the edges reveal the high and low spots of the orange peel texture. The goal with the sanding is to knock down those visible high spots to create a flat, smooth, and uniform surface.
A modern basecoat/clearcoat system, such as the process used with Jagenow’s ’56 Lincoln Premiere, provides more surface depth for sanding, but it’s no guarantee.
“No matter what, you have to be careful around edges, peaks, and corners where the paint depth is often not the same as the rest of the surrounding panel,” Riggle says. “You have to use different techniques and different sanding blocks to accommodate the variances.”
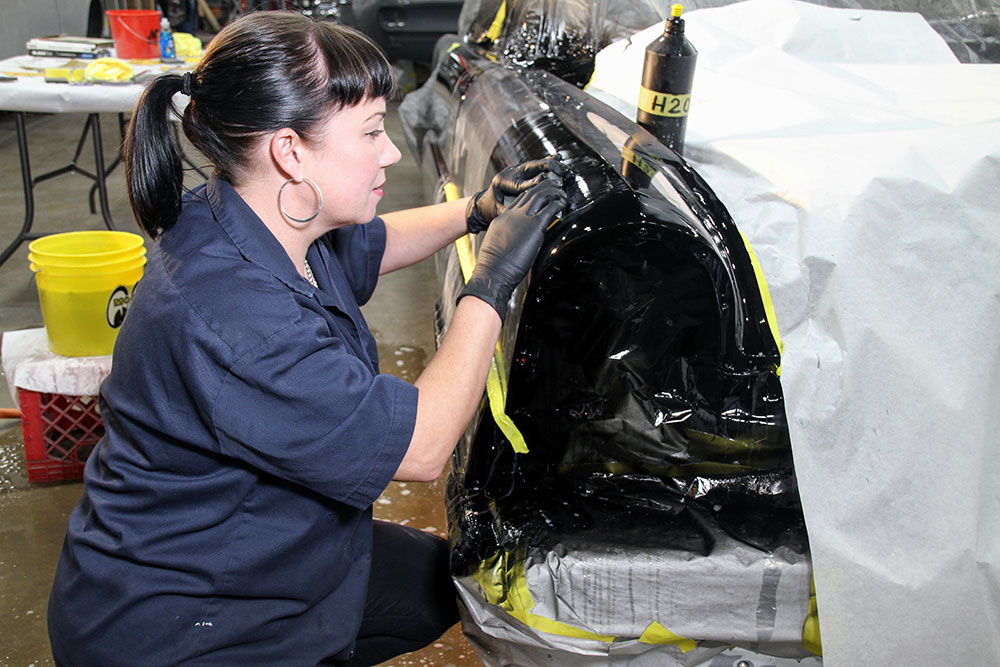
Riggle continues sanding the fender with a bottle of water in hand to keep the surface lubricated. She prefers to do it in a quiet environment, with no music playing in the shop, to listen for a telltale “squeaking” sound that indicates a piece of debris has gotten between the panel surface and the sandpaper. The only audible sound should be the scratching sound of the sandpaper.
Electric Polishers: Random Orbital vs Rotary Polisher
Along with the sanding techniques, there are preferred techniques for the polishers—random orbital style and conventional rotary polisher. Orbital polishers are generally lighter, easier to maneuver, and more forgiving, but they generally don’t deliver the tactile feel of a variable-speed rotary polisher. A rotary polisher can also be a little more dangerous to the finish if the user doesn’t keep the head moving continually or the speed of the head is too fast.
“It takes practice and caution, but you’ll get that flat surface and deep finish if you work at it,” Riggle says. “You take your time and work as slowly as necessary.”
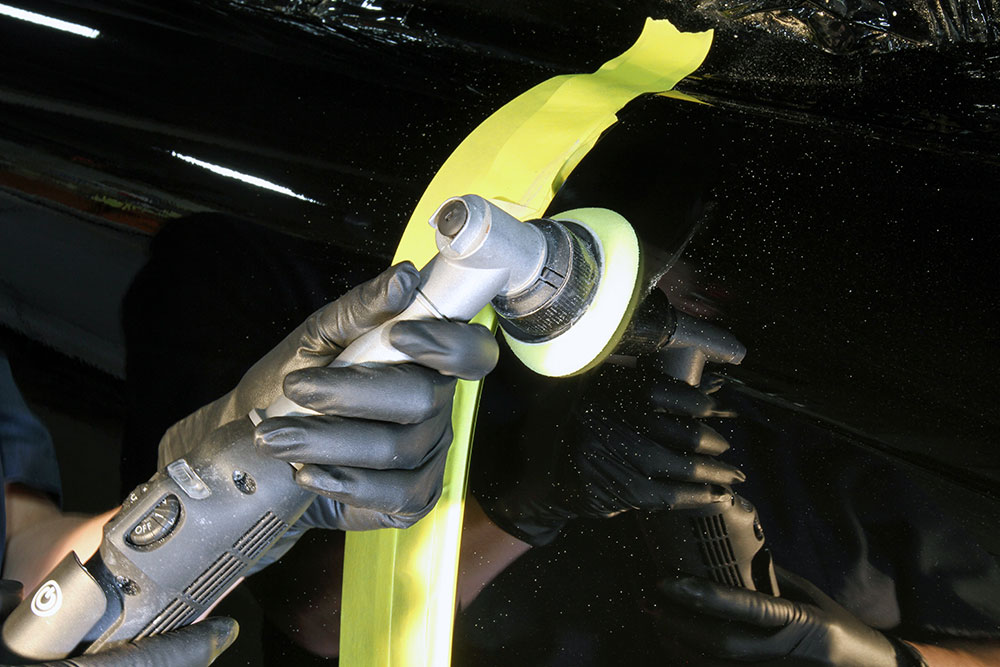
Peaks, corners, and edges are the most vulnerable areas of a paint job during wet-sanding, and as work moved lower, the “step” in the Lincoln’s front fender was taped off for protection. After the upper section is completed, the lower section will be tackled.
In other words, patience and an eye for detail will make all the difference in elevating the appearance of your ride. Grab that bucket of water and sandpaper and get going—you can do this. MR
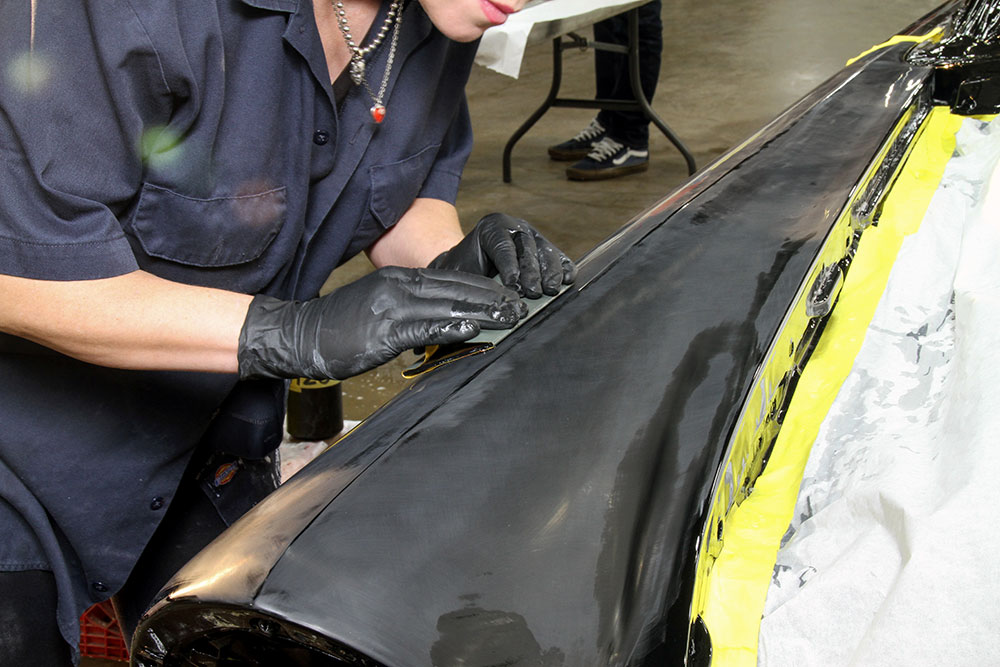
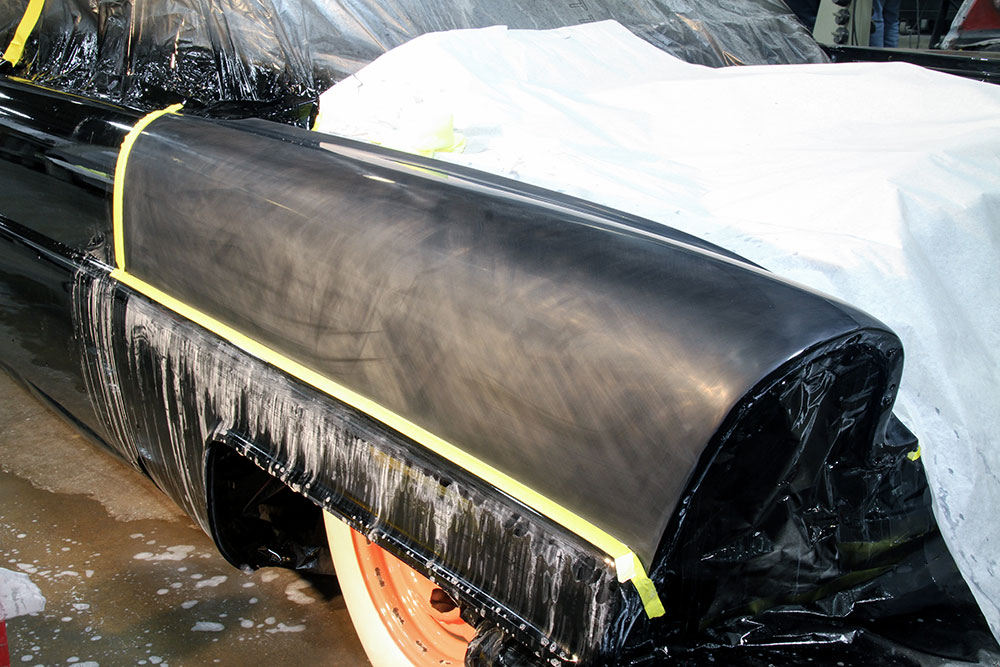
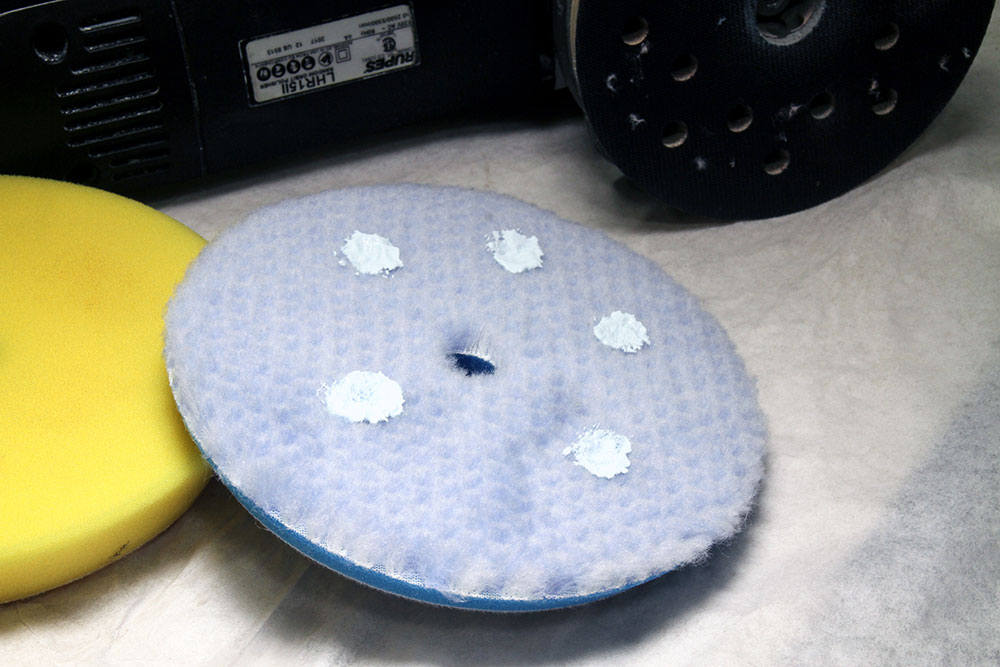
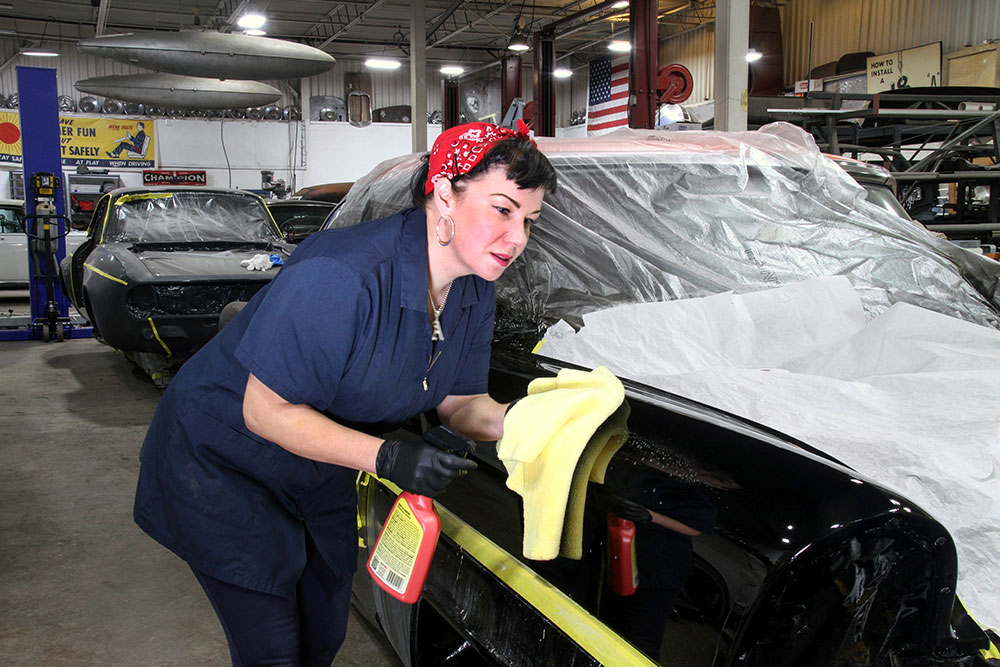
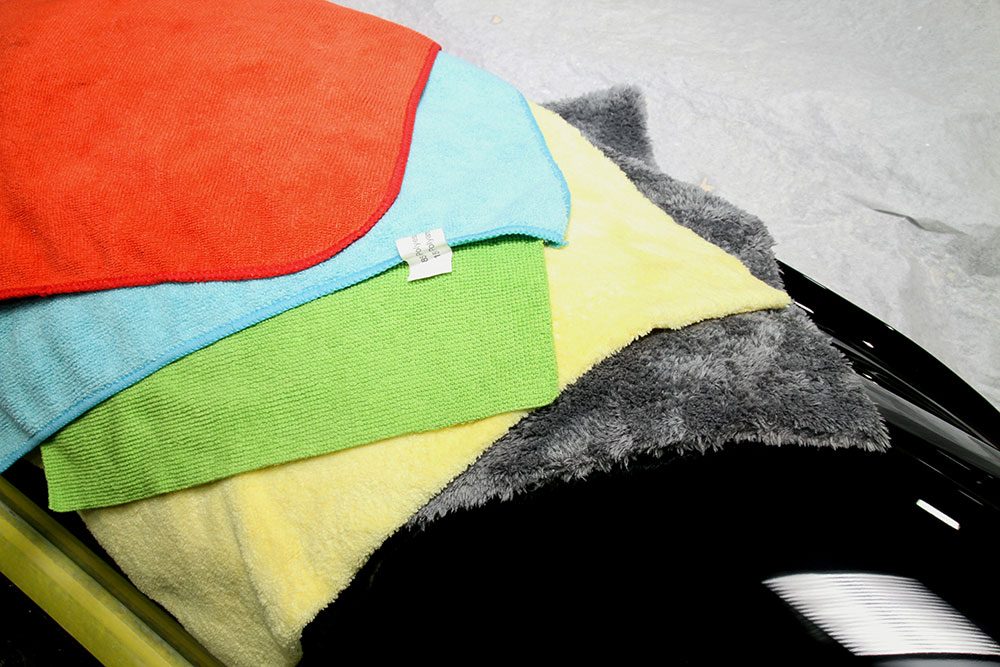
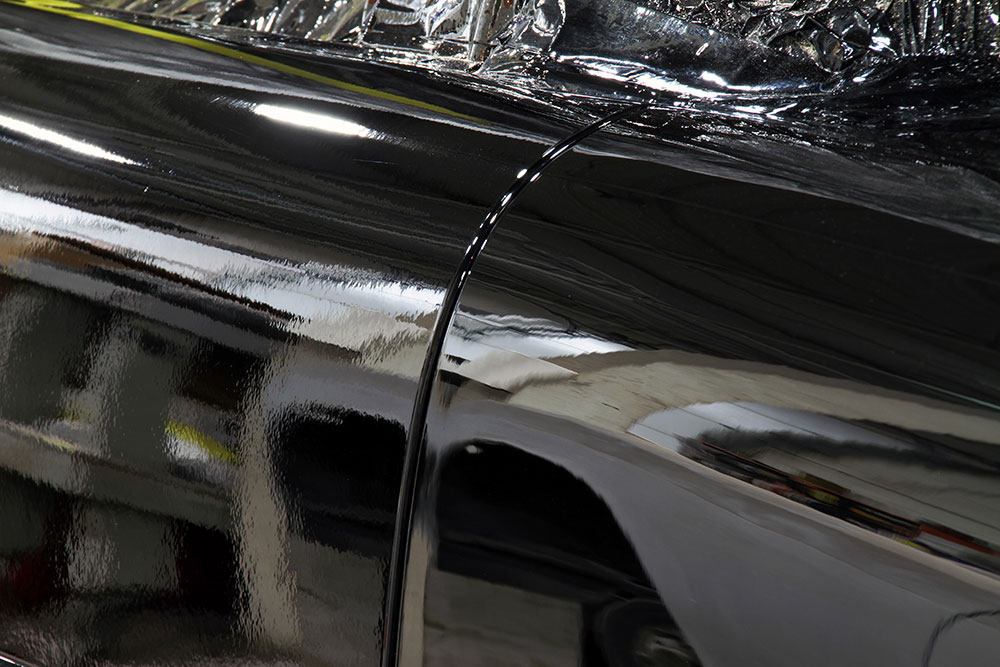
A soft block is used here to follow the curved contour of the upper fender. A hard block can be used, but it’s not recommended for novices attempting their first color-sanding project because it’s very easy to create flat spots in the finish.It’s important to stop periodically to wipe down and completely dry the surface to check the progress. Here, most of the sanded area looks great, apart from a small section in the middle where a high area of orange peel is still visible, meaning more sanding is required.As work continues, the distinct peak on the fender is left for the moment untouched. Areas such as this is where the paint is more susceptible to damage, so more care must be taken to prevent sanding through them.After the first stage of sanding, the soapy water is replaced and the finish is hit again with the next, higher-grit sandpaper. For this project, the stages included 1500-grit, 2000-grit and 3000-grit sandpaper. The water is changed for each stage. It’s cheap insurance.For that fender peak and other edge areas, such as between body panels, use a small block and sand lightly and carefully up to the edge. On panel edges, the paint tends to create a thicker ridge, which is evident in the high vertical line shown here below the sandpaper.Here’s the fender after three stages of sanding, ready for polishing. Typically, the entire car would be sanded prior to polishing, but Brothers Custom Automotive did only the front fender, initially, for our photo shoot, to show before and after results.Moving onto the polishing stage involves a compound stage and the polish itself. A medium-level compound and a fine-grade polish are needed, along with coarse and fine buffing pads—coarse for compounding and fine for polishing. A power buffer is also needed, unless you’re aiming for a month-long exercise in Karate Kid–style “wax on, wax off” hand buffing.Starting with the compound on a harder pad, only five comparatively small dots of the material are required. Too much of the product will gum up the pad and reduce the effectiveness of its cutting power.There are two types of power buffers/polishers: dual-action random orbital types or multi speed rotaries. The random orbital types are generally lighter and easier to maneuver, but their dual-action motion drastically reduces the tactile feel of pressure against the surface. Here, Riggle gets the compounding started with an orbital to spread it around.Black is unforgiving. After a few minutes of compounding, there were still visible sanding scratches—some of which might not have been visible with lighter-colored paint work. After a few passes with the compound, it was clear they weren’t going away, so the fender was re-sanded with 3000-grit to get rid of the scratches.Riggle uses a rotary polisher to restart the compounding and finishing with the polishing; the polisher’s set at low and moderate speeds. There’s more surface pressure feedback with a rotary polisher, but it’s crucial to keep the head moving to prevent “burning” the paintwork. A rotary polisher is also considerably heavier than most orbitals.As the compounding turned to polishing, the surface finish is nearing completion. Here, Riggle wipes down the surface with a cleaner and microfiber cloths to check for areas that still need more work.It’s worth noting that all microfiber cloths are not created equal, especially when it comes to wiping down a freshly polished surface. Cheaper cloths with stitched borders and tags, like the couple of examples on the top of this collection, are definitely not to be used with the polishing stage. Softer, borderless cloths, like the ones shown at the bottom of the collection, are the ones to use. They’re more expensive but necessary for this job. Don’t skimp here.Just as with the wet sanding, care must be taken when buffing and polishing edges and peaks in the paintwork. Here, a smaller, more specialized polisher is used, but hand-polishing the edges also works, if the user only has a larger polisher. In fact, the panel edges should be taped off during polishing, just like during sanding.With polishing nearly completed, a dramatic difference is shown between the un-touched door panel on the left and the color-sanded/polished front fender on the right. Admittedly, the inside of a busy shop is not the best venue to show off the work, but the reflections show the crispness of the flattened, polished paint work.It took the better part of two days to give this top section of this fender a show-worthy shine. Next up is the lower fender, the door, the hood, and the fender and door on the opposite side of the car. It’s a time-consuming process, but one that’s within the reach of the average DIY enthusiast who has the time, patience, and attention to detail.
We use cookies to ensure that we give you the best experience on our website. If you continue to use this site we will assume that you are happy with it.