ITGMw
SUBSCRIPTIONtext
ProgressArrows
digital issues
ProgressArrows
online store
ProgressArrows
SUBSCRIPTIONtext
ITGMw
ACPnew header logo
CTP LOGOs
all cars

How To Custom Build and Upholster Custom Seat Cushions

Budget Custom Interior Part 2: Tips & Tricks for DIY Upholstery Custom Seats

By Ron Ceridono   –   Photography By John Winter

Back in the Oct. ’22 issue of Modern Rodding we introduced John Winter. As we explained then, Winter was looking for a means of upholstering his 1932 Ford coupe that wouldn’t demolish his building budget. Not being afraid of a challenge, Winter bought an appropriate sewing machine, a good pair of shears, a few yards of material, and stitched the coupe’s interior himself. Since then, he has upholstered his 1936 Ford Tudor sedan and a variety of other vehicles for friends.

02 When cut out each pattern will be used to make two sections of a cushion
Here are the patterns Winter used to make cushions for Willys Jeepster seats. When cut out each pattern will be used to make two sections of a cushion.

Building A Template For The Custom Seat Cushions

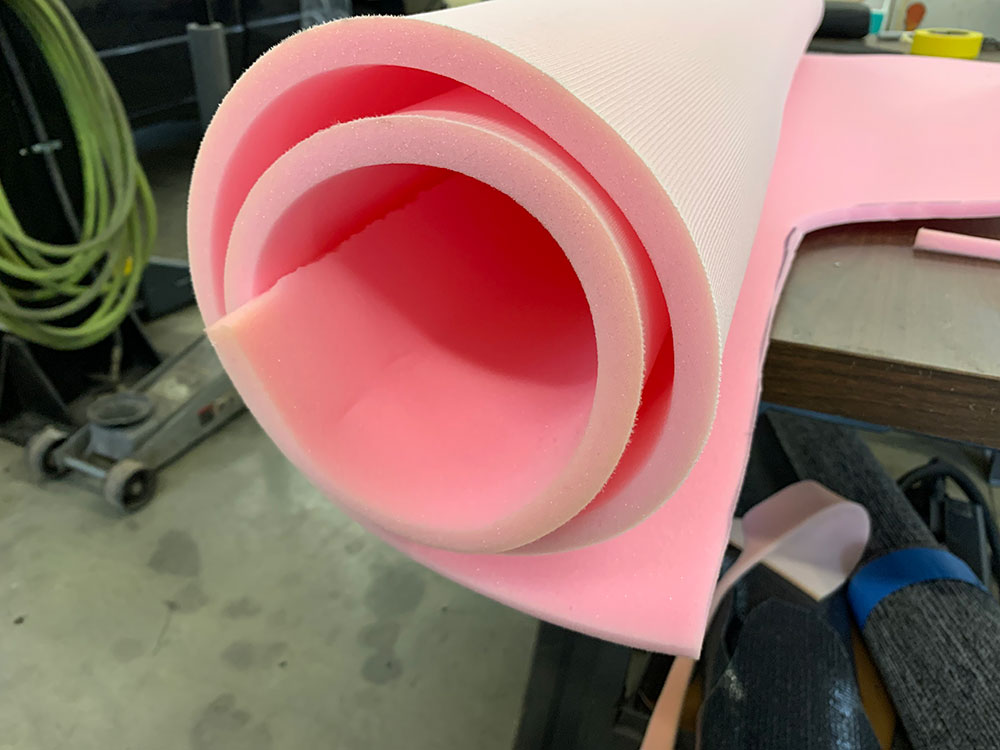
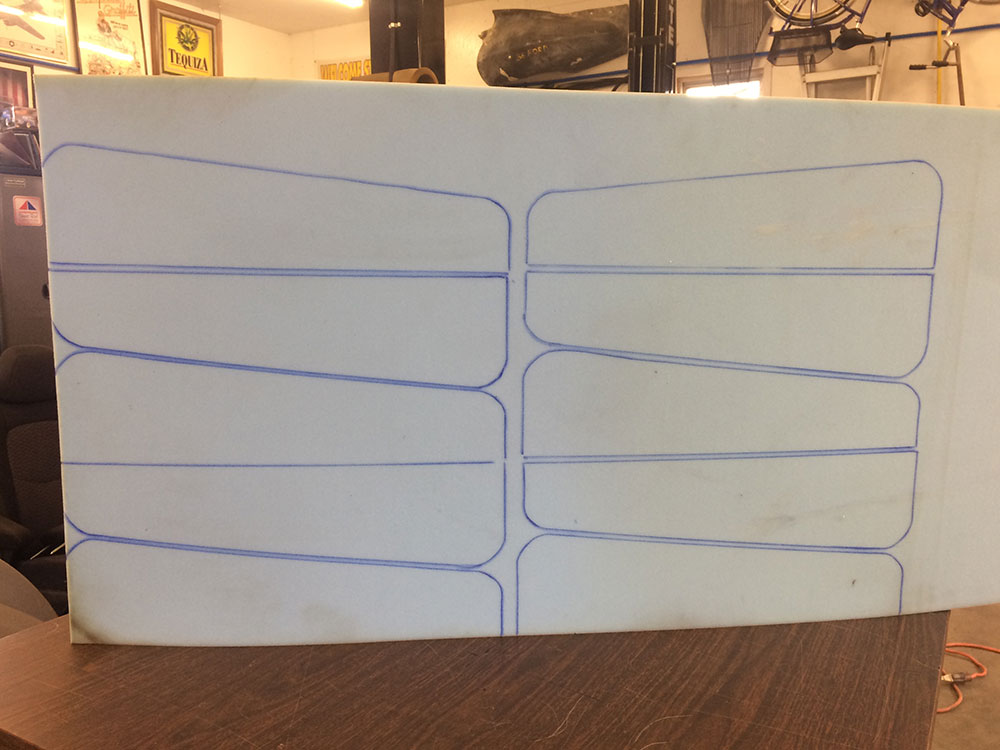
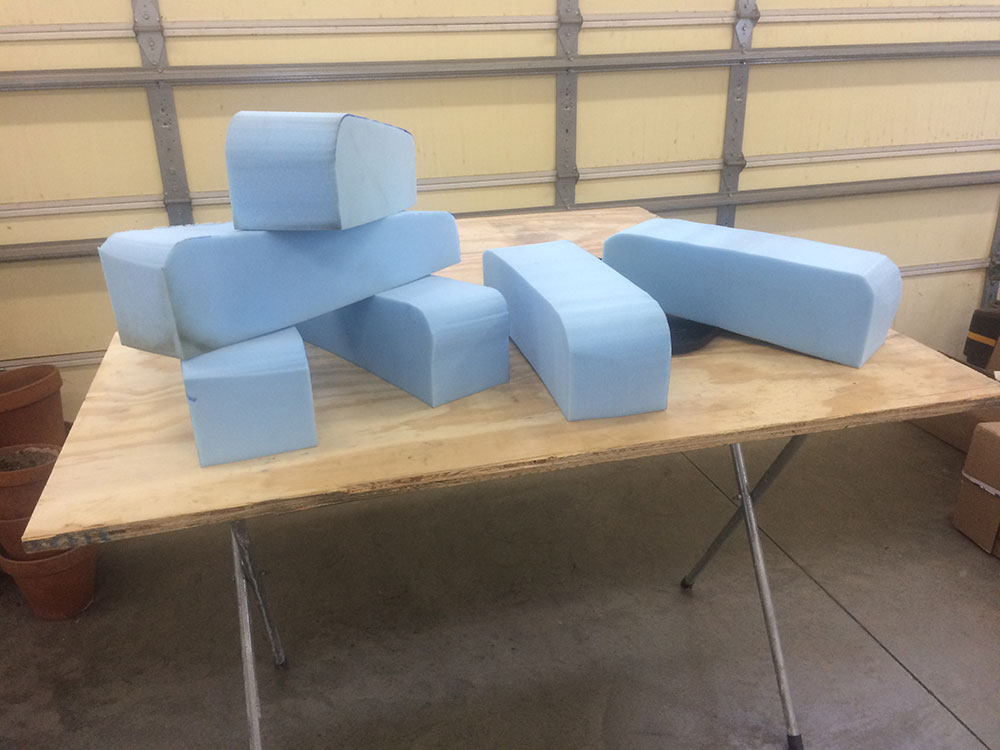
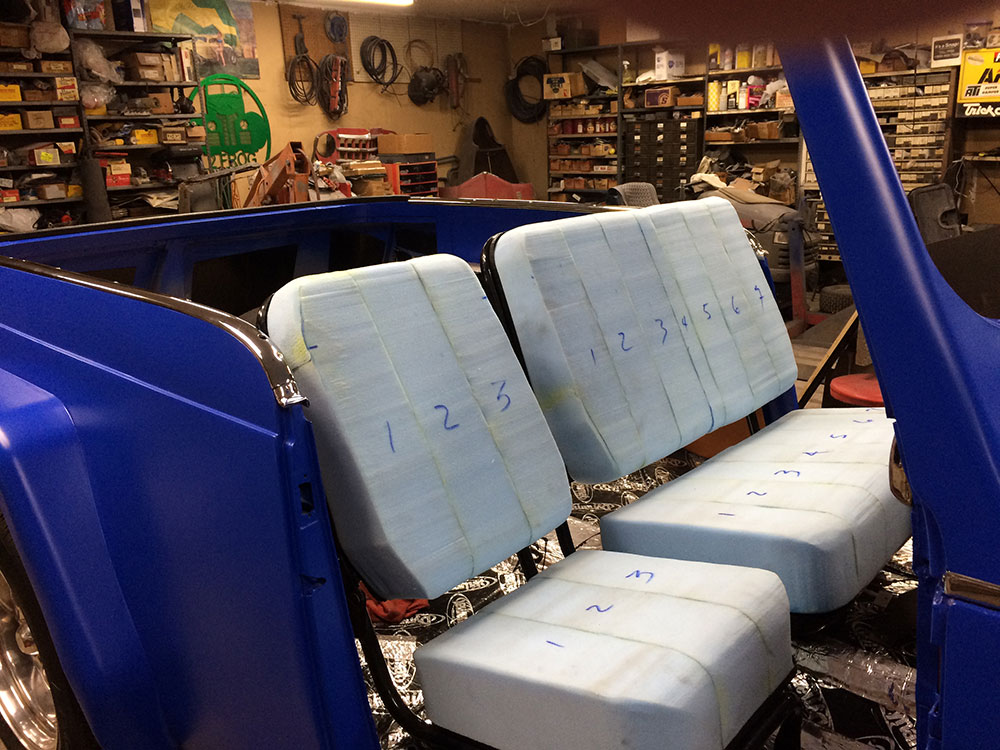
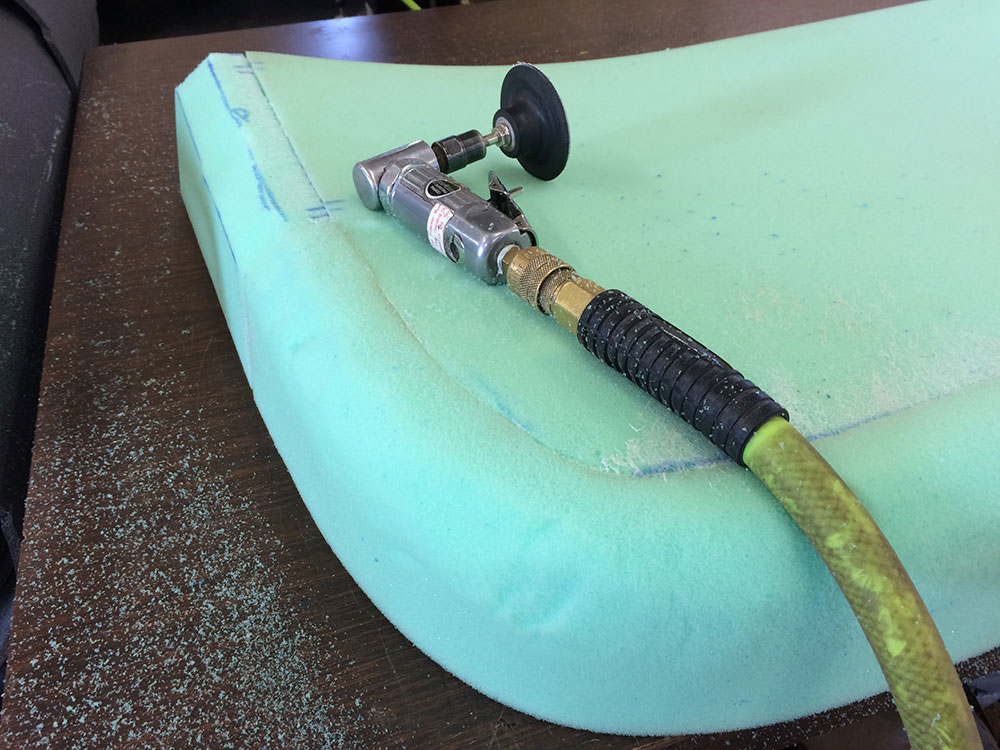
While talking to Winter he offered a few tips and tricks he’s picked up when it comes to seats in a hot rod. The first example we’ll show here is making a seat from scratch with blocks of polyurethane foam. Winter begins by making a pattern of how the cushions should be shaped. The foam rubber is then cut out on a bandsaw and then the individual blocks are glued together to make a cushion. Foam comes in a variety of densities, so the cushions may be soft or surprisingly hard—it’s not unusual to make the seat bottoms and the backrests out of different densities to suit individual preferences.

Read More: How To Upholster Panels On Your Hot Rod

03 Once cut to shape the individual pieces will be glued together to make one cushion
Once cut to shape the individual pieces will be glued together to make one cushion.

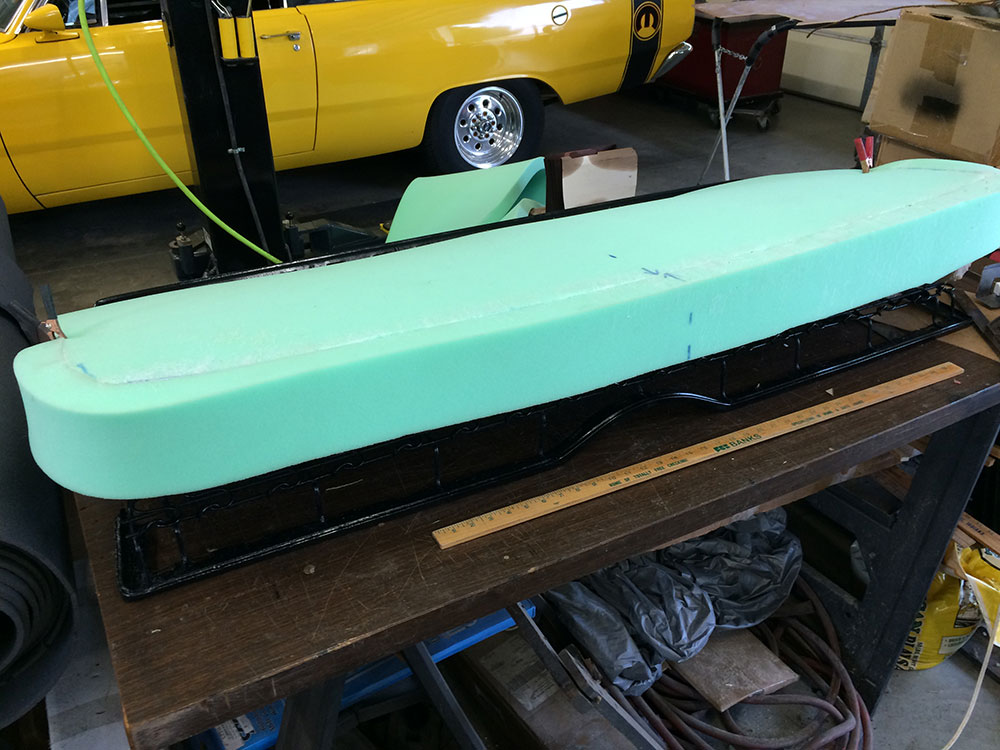
Another option is to make the seat cushions out of one large sheet of foam. In some cases, an extra “band” of foam is wrapped around the front and sides of the cushion to help the edges keep their shape. This extra material may be made from the same material as the seat cushion density or foam that is slightly “harder” to act as leg and side support bolsters.

04 Note the individual pieces are numbered
The Jeepster seat is a split two and one design. Note the individual pieces are numbered. There are three individual pieces in the single seat and seven in the dual seat.

Making Patterns For The Custom Upholstery

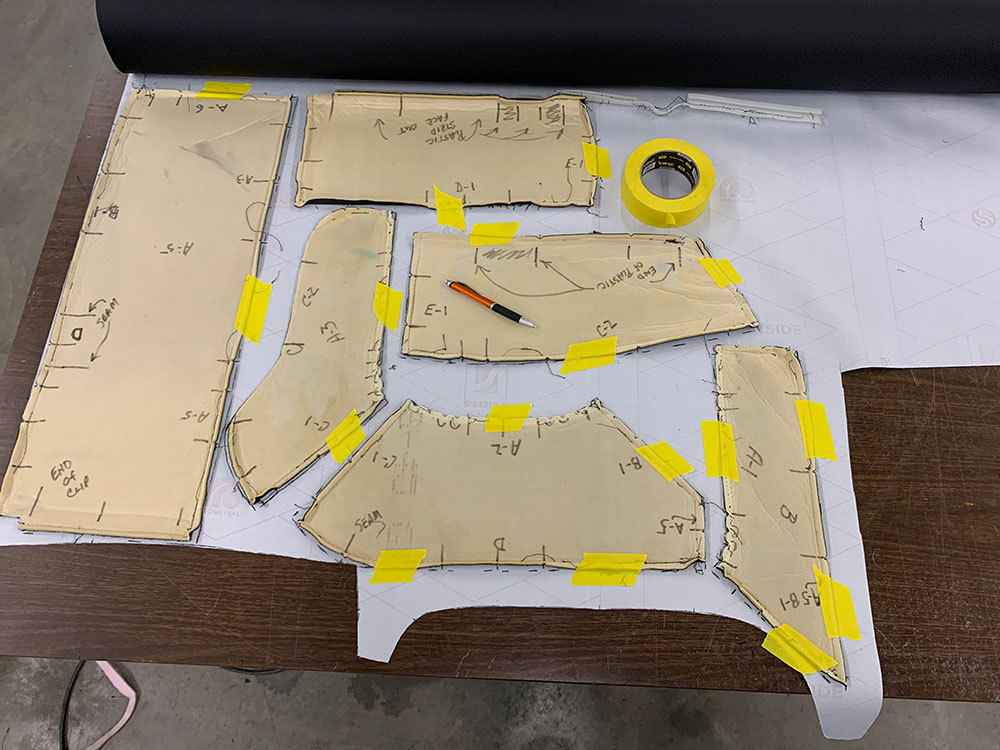
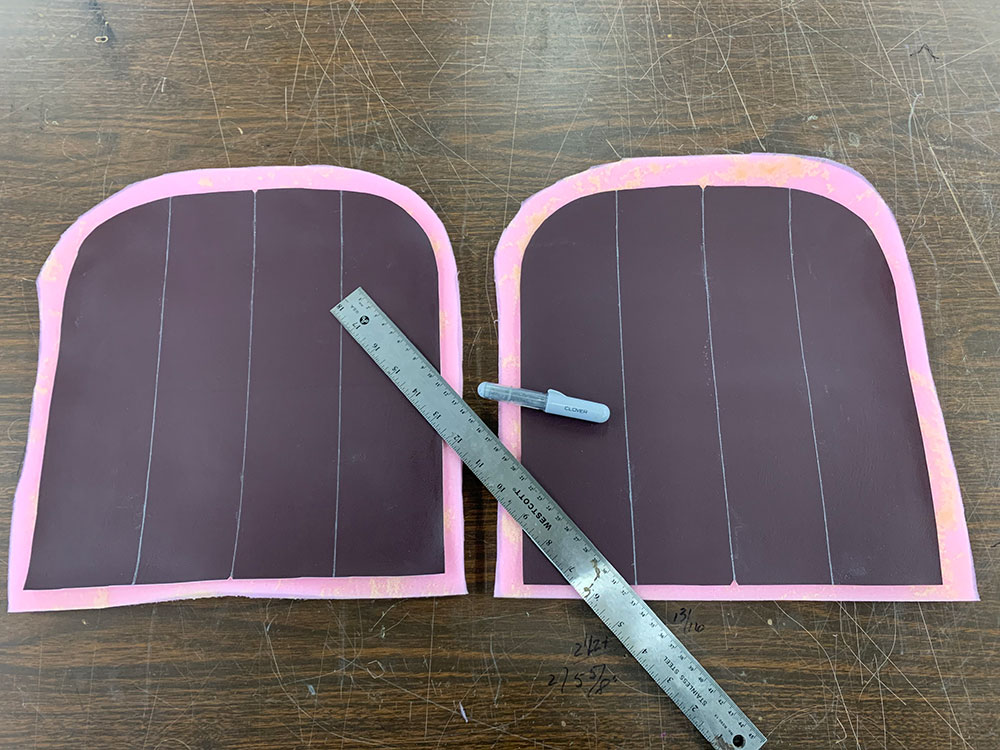
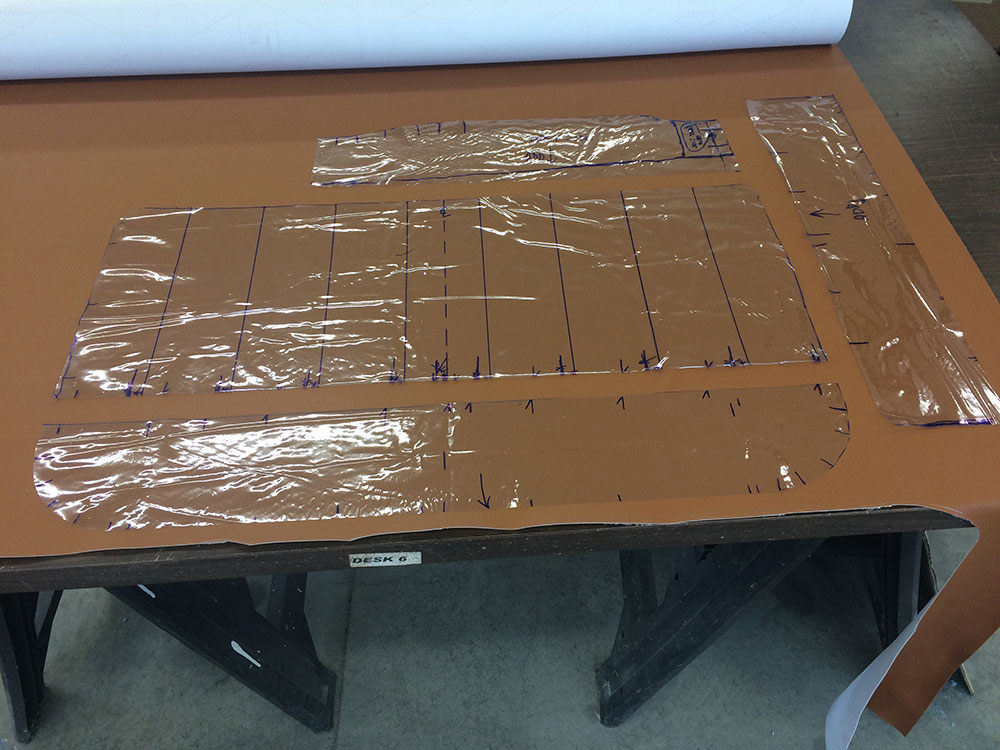
Once the cushions are made, patterns for the upholstery are next. Winter has several methods of making patterns. One is to make paper patterns then transfer those dimensions to individual pieces of plastic then onto the fabric being used. Another trick Winter has learned is to make patterns with the sticky transfer paper used to make vinyl signs.

05 This seat cushion is made from one piece of foam with an additional band of foam wrapped around the main section
This seat cushion is made from one piece of foam with an additional band of foam wrapped around the main section and glued in place.

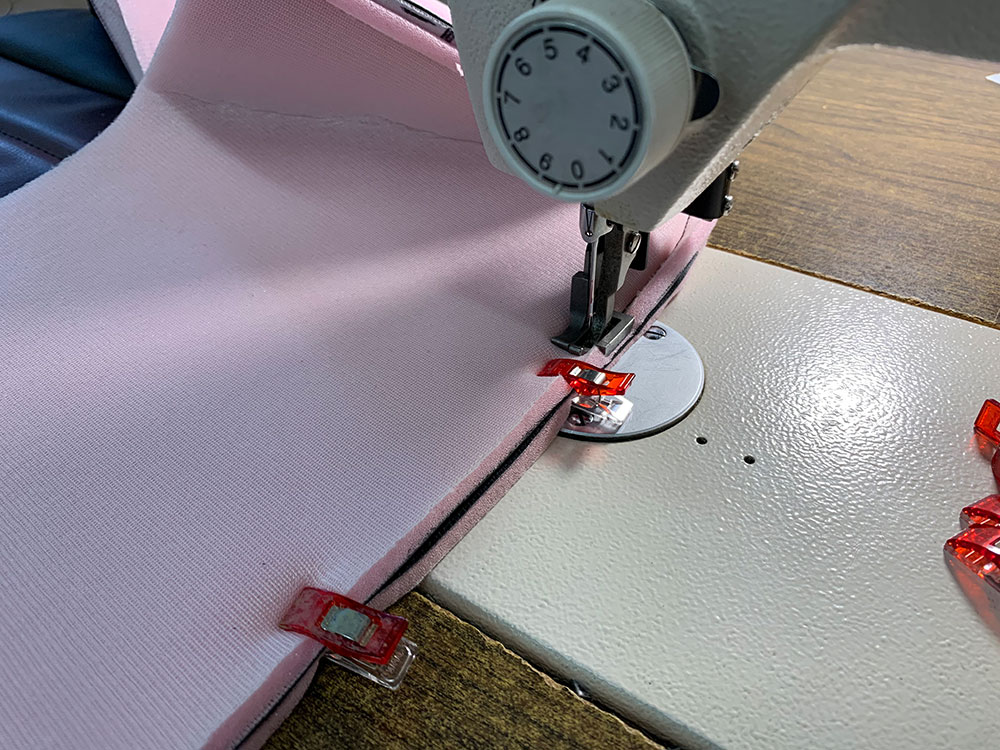
The Importance Of Seam Allowance

Regardless of the material used to make patterns, it’s important to allow what is called seam allowance. That is the area between the edge of the fabric and the line of stitches—in other words, the pattern must be made larger than the finished piece will be. Winter suggests allowing 3/8 to 1/2 inch seam allowance for all the individual pieces that will be sewn together.

06 Note the marks on the foam arrows that show the area to be trimmed
An easy way to trim foam is with an electric carving knife. Note the marks on the foam (arrows) that show the area to be trimmed.

Read More: How to Restore the Interior of Your ‘41-’46 Chevy Truck

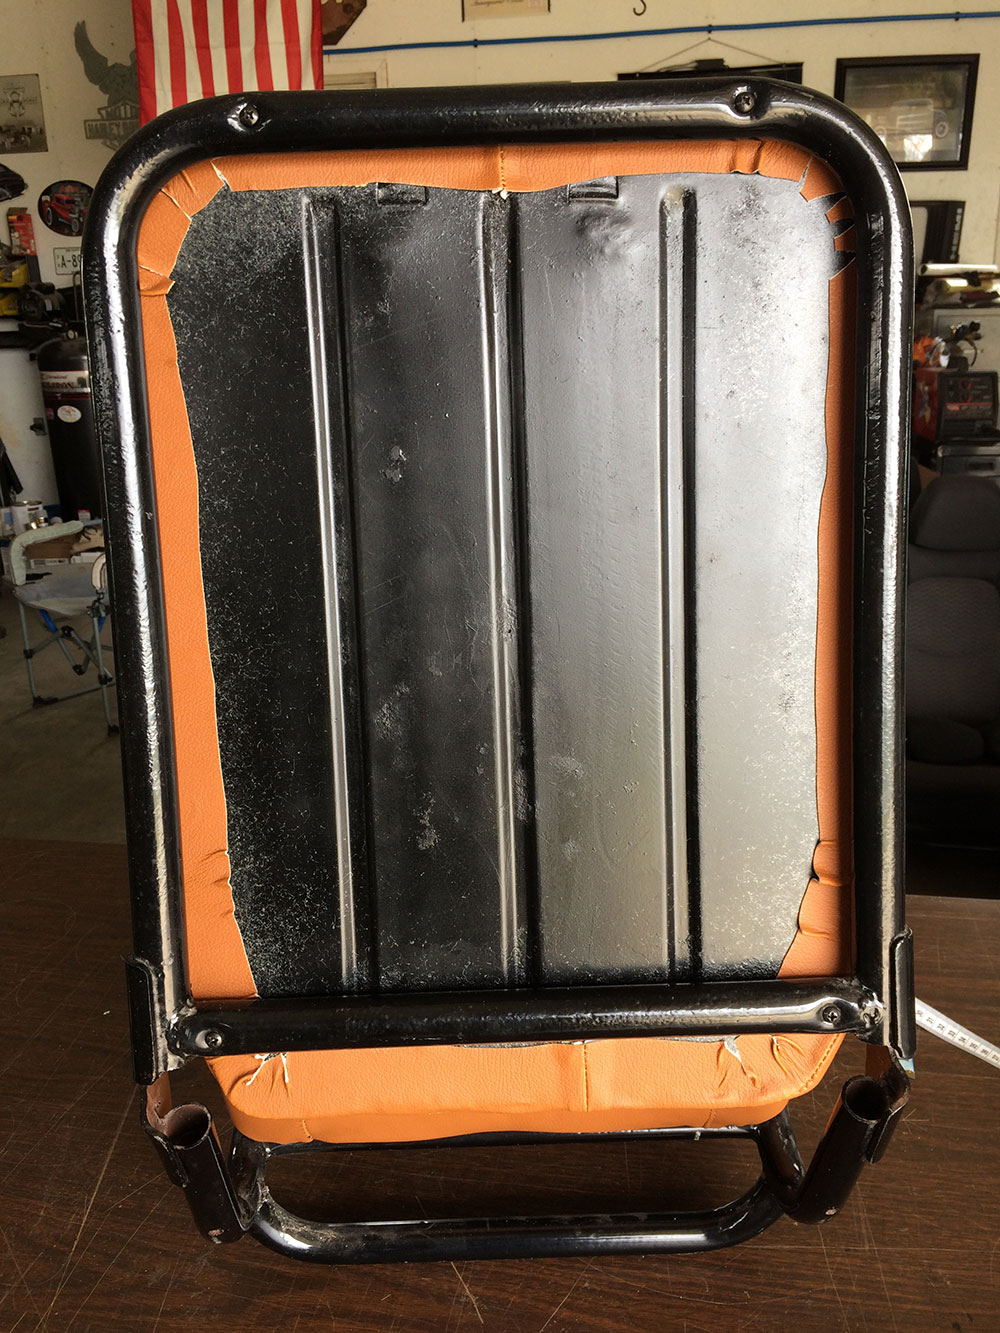
Utilizing Factory Seats

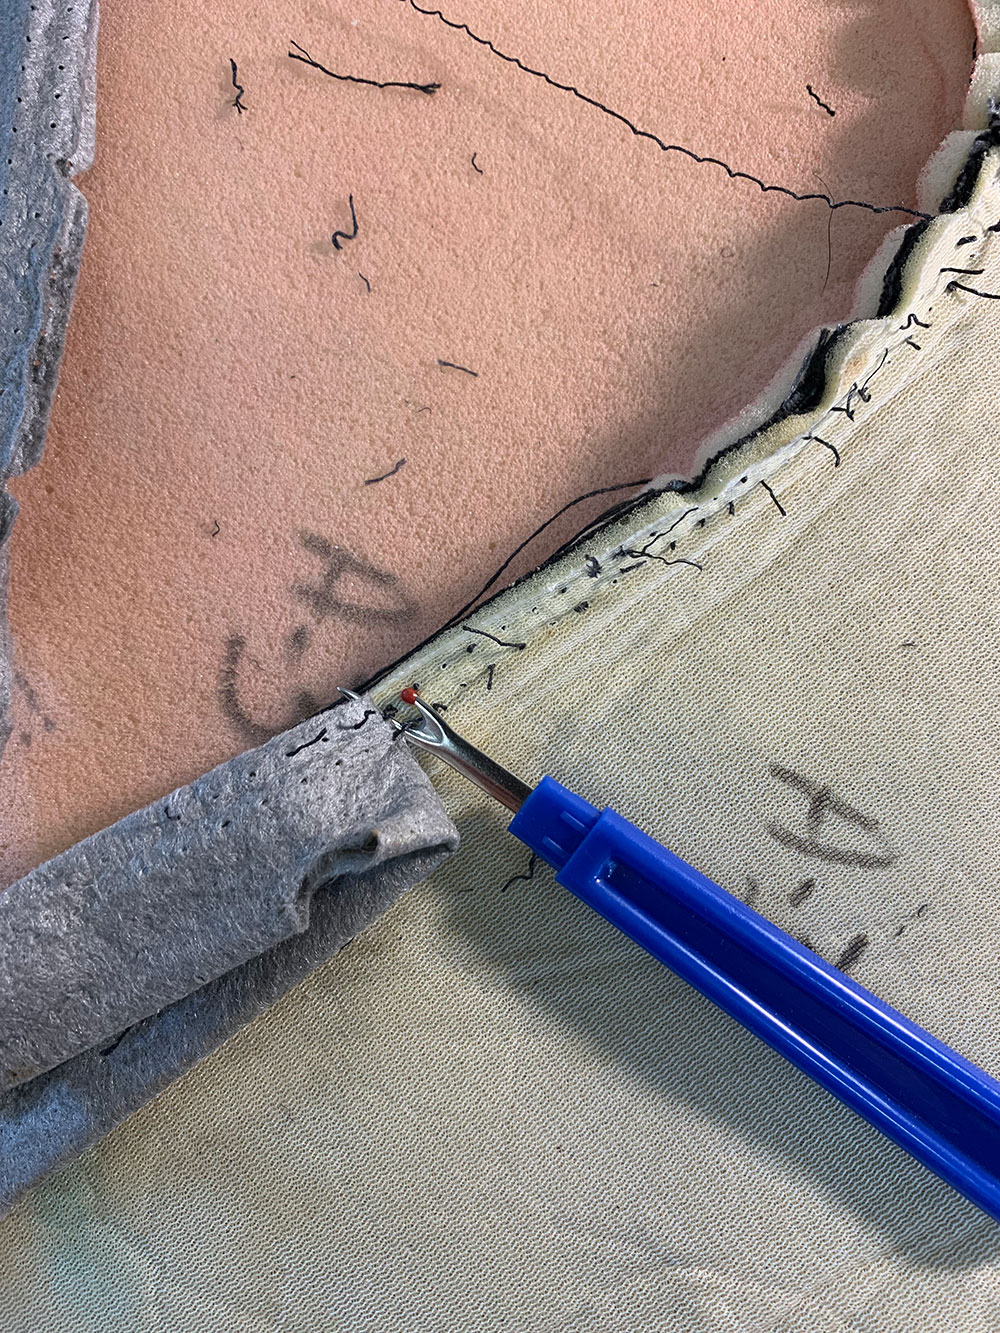
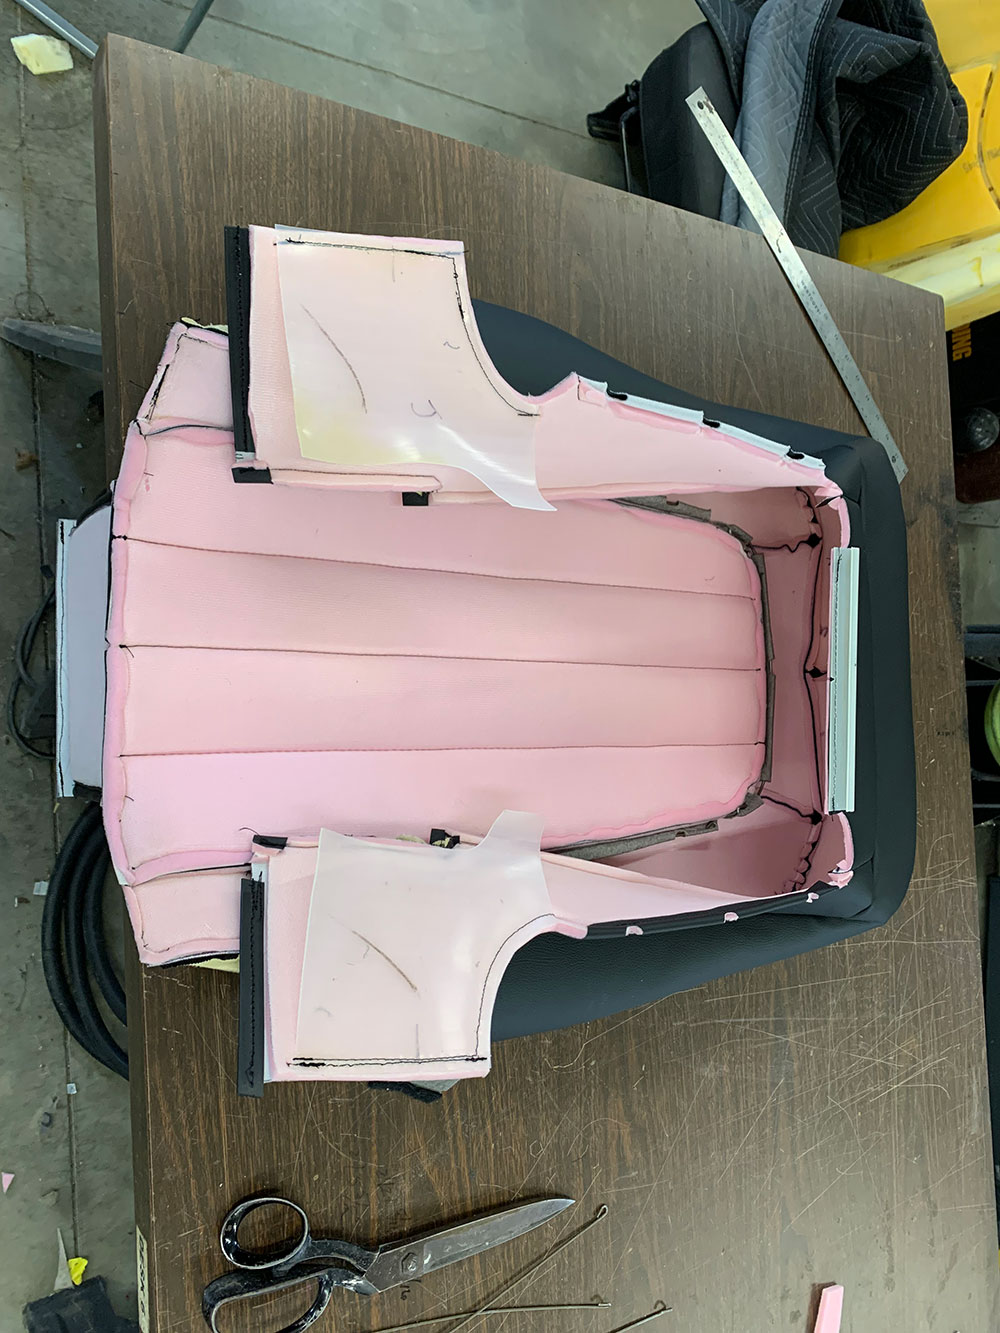
When Winter needed seats for his ’36 Ford sedan he came up with a unique solution. He used the front bucket seats and the rear bench from a Chevrolet HHR. But rather than just bolt them in place, he took the covers off the seat, took them apart at the seams, then used the individual pieces as patterns for new, custom covers.

07 Another way of shaping foam is by sanding
Another way of shaping foam is by sanding. Here the edges of the added foam have been carefully rounded with an air-powered angle grinder with an abrasive disc.

Like many modern factory seats, the HHR cushions were made from solid polyurethane foam. They are made by injecting a catalyzed foam mixture into a mold, the material expands, and to fill the contoured cavities of the mold, the foam solidifies and the result is a seat cushion.

08 For the Jeepster seats Winter made paper patterns then transferred them to plastic
For the Jeepster seats Winter made paper patterns then transferred them to plastic, adding material for the seam allowance.

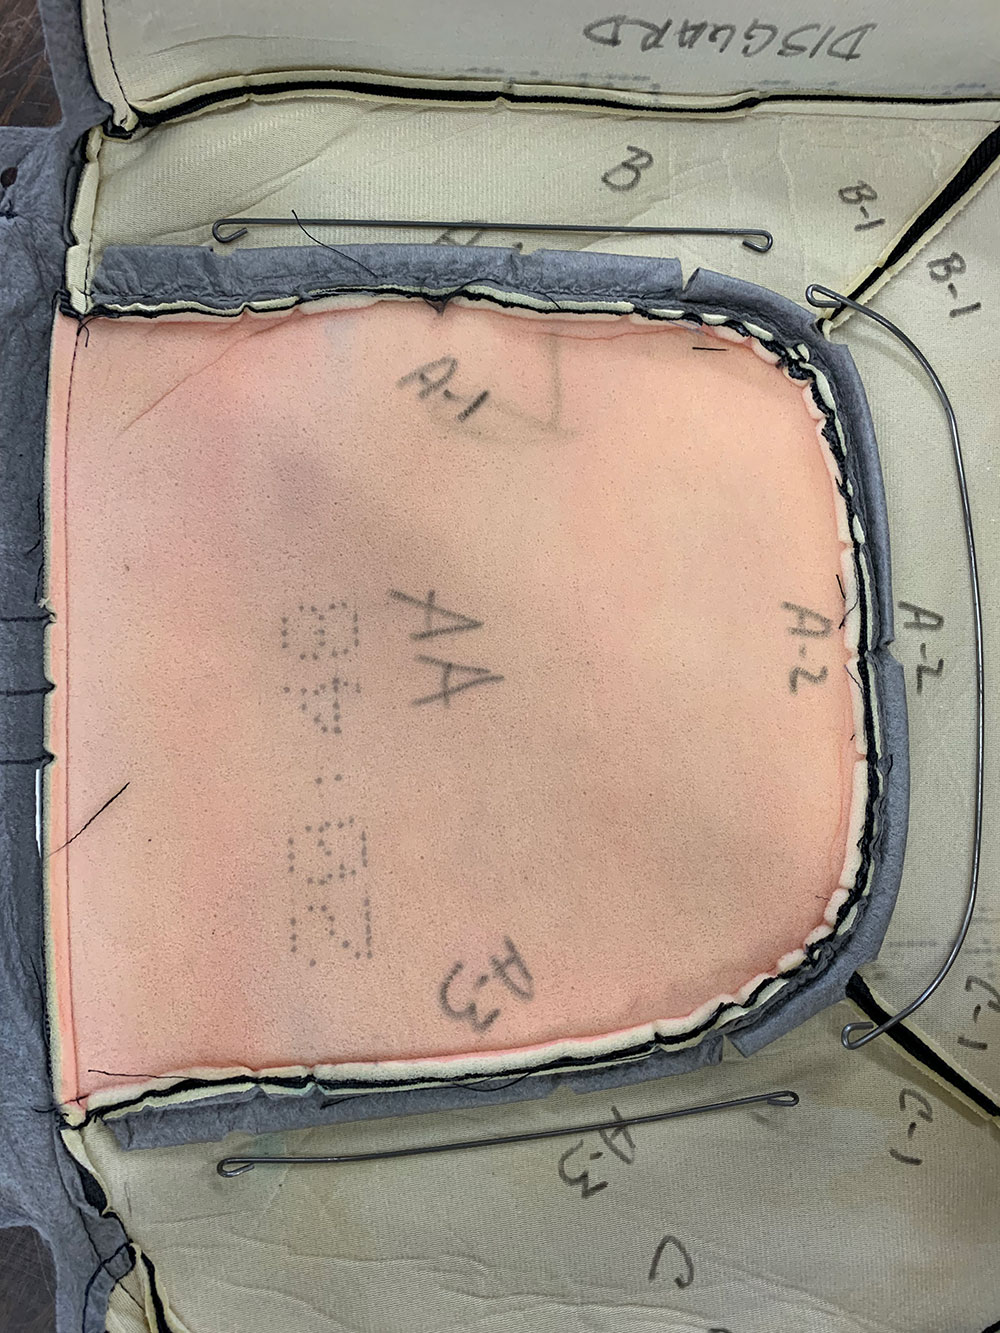
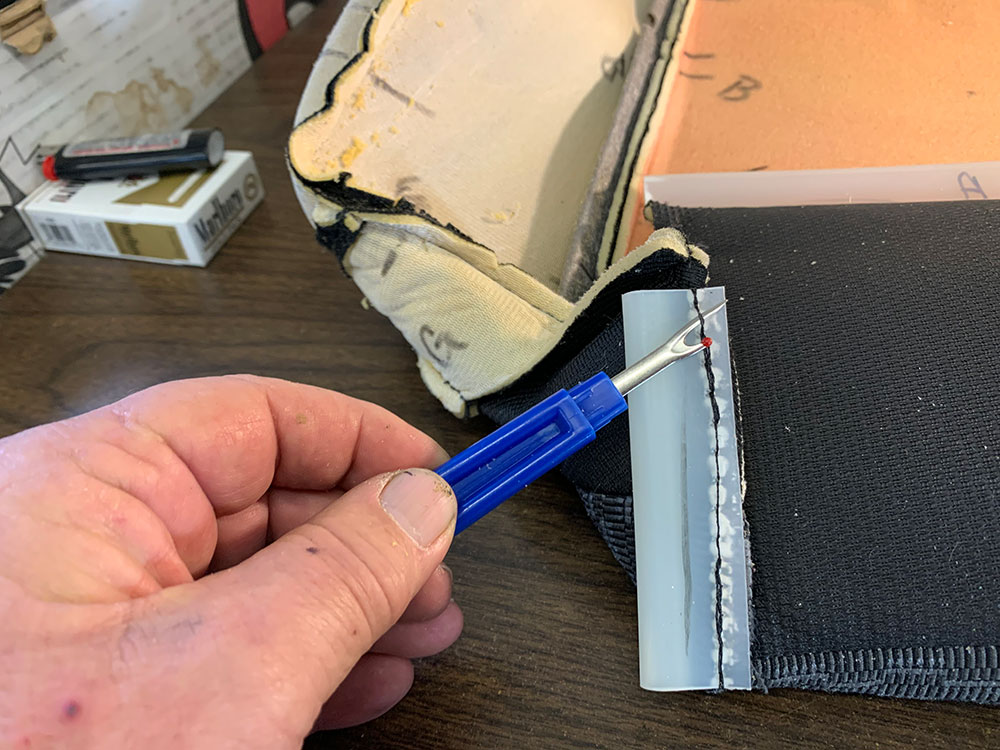
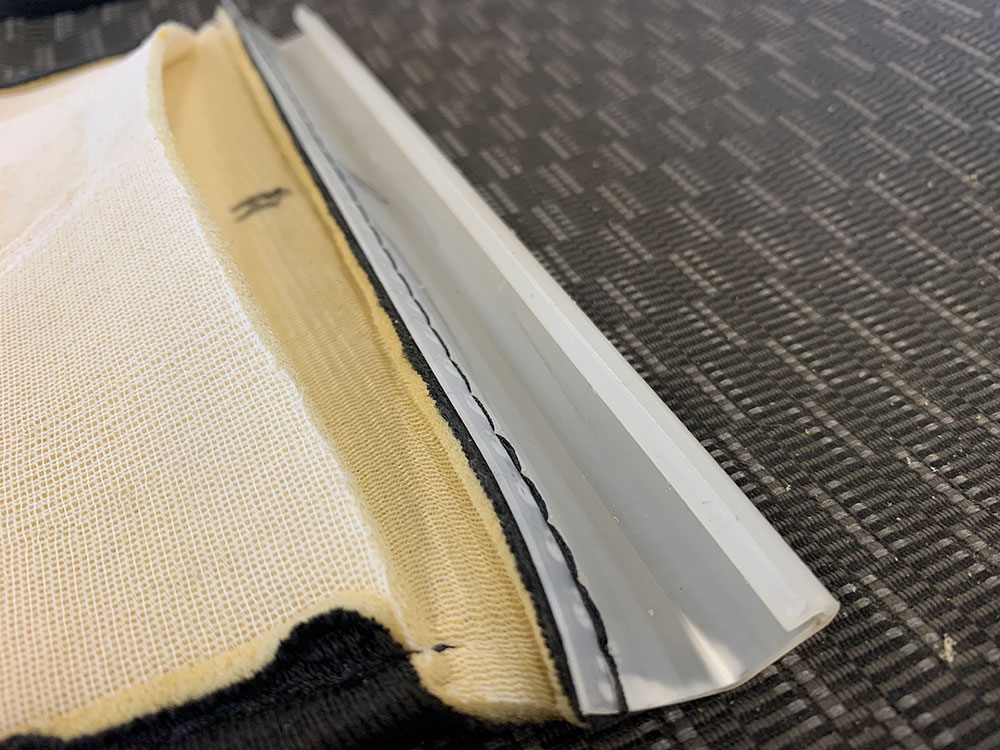
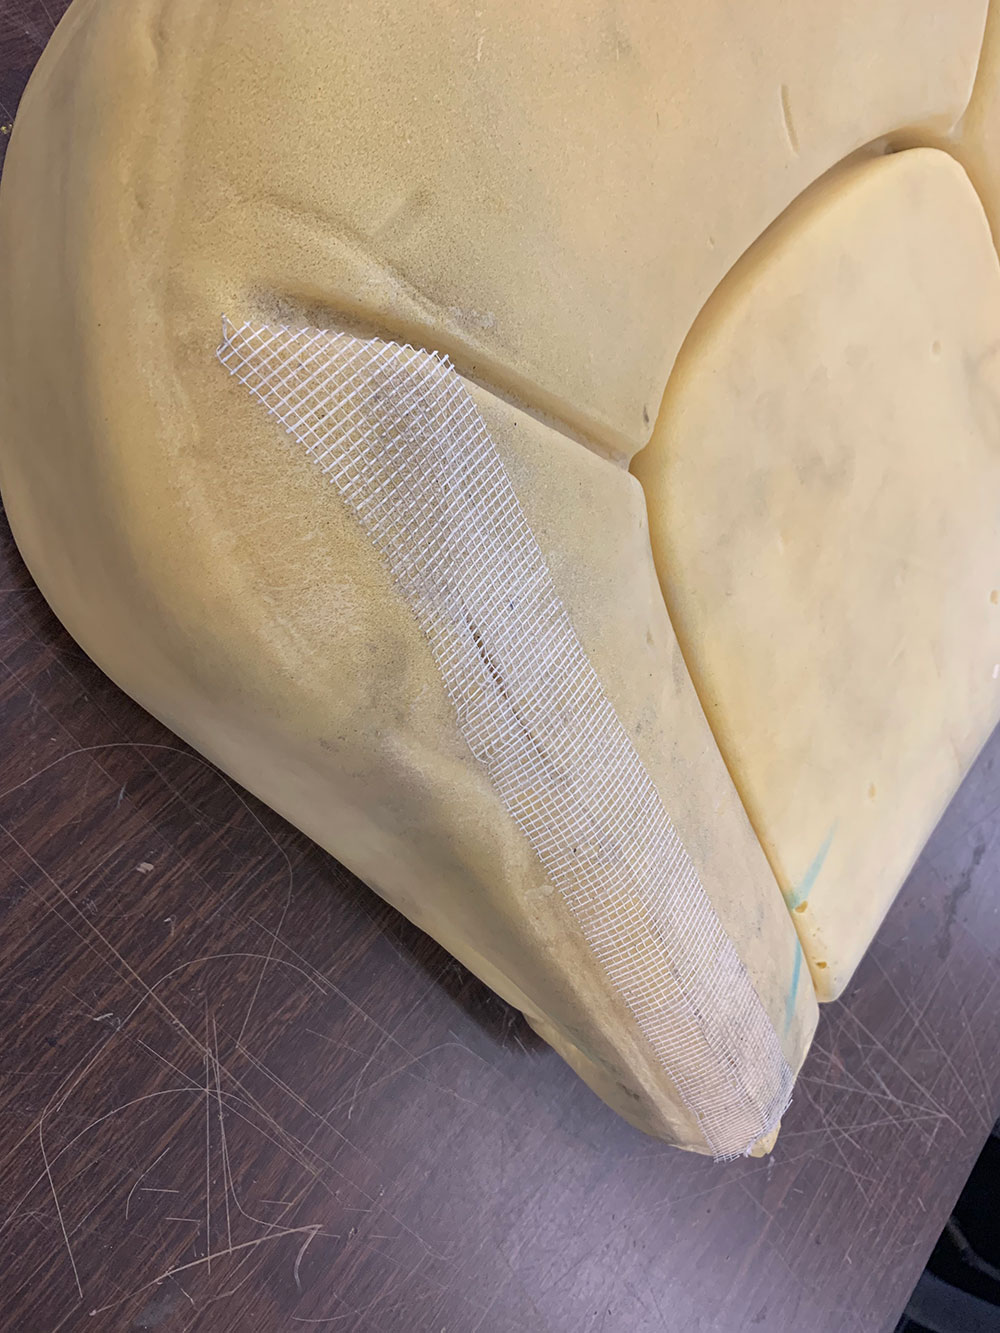
Repairing Split Seat Cushions

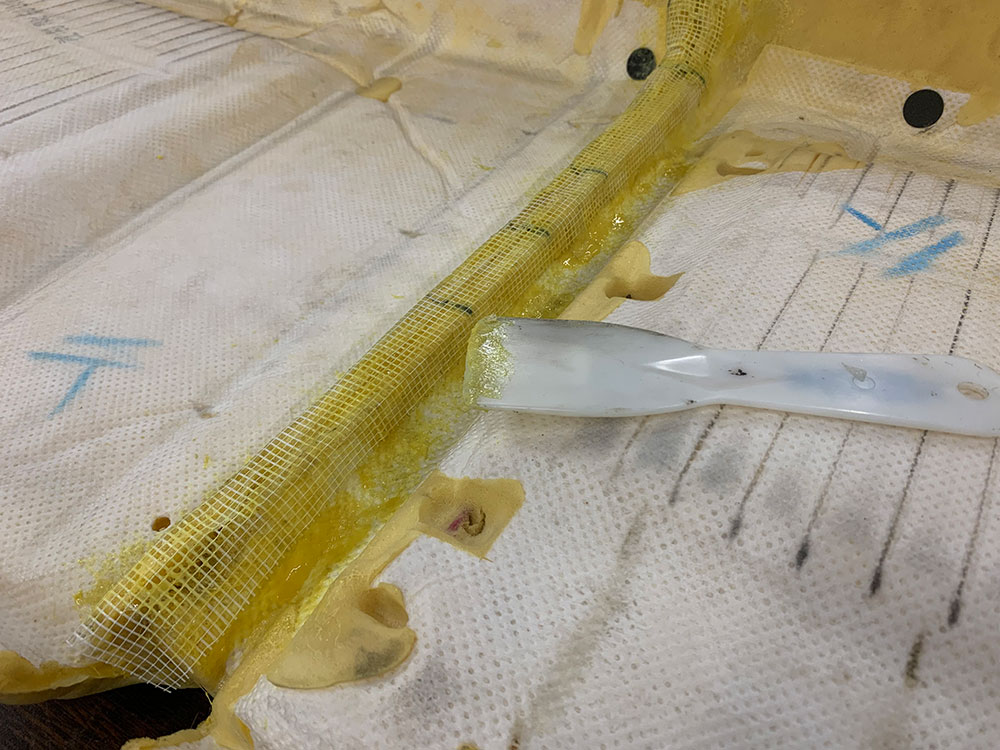
Although molded seat cushions are tough, the foam in used seats may have developed splits that require attention. But we’ve found Winter likes a challenge and he has come up with a unique method of repairing such problems. He uses a combination of drywall tape and vinyl top adhesive to repair damaged areas, and in some cases join sections of cushions together.

Read More: How to Eliminate Interior Rattle On Your Classic Truck

09 Another method of pattern making is with transfer paper
Another method of pattern making is with transfer paper. Notice the lines where the two patterns join. These are alignment marks to ensure the two pieces are sewn together properly.

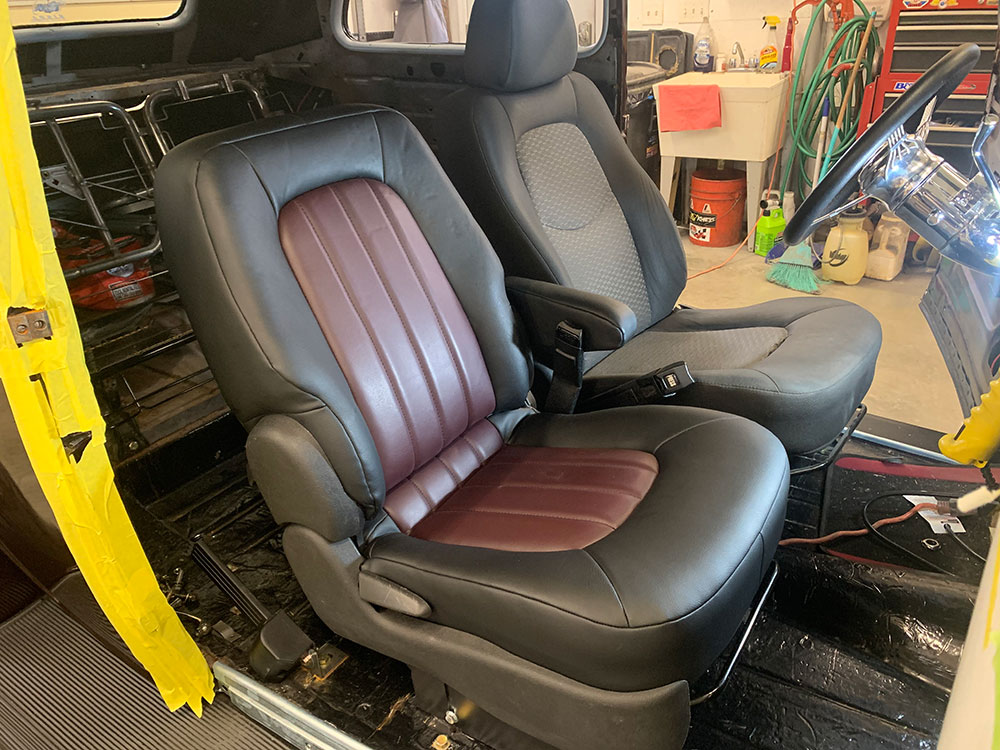
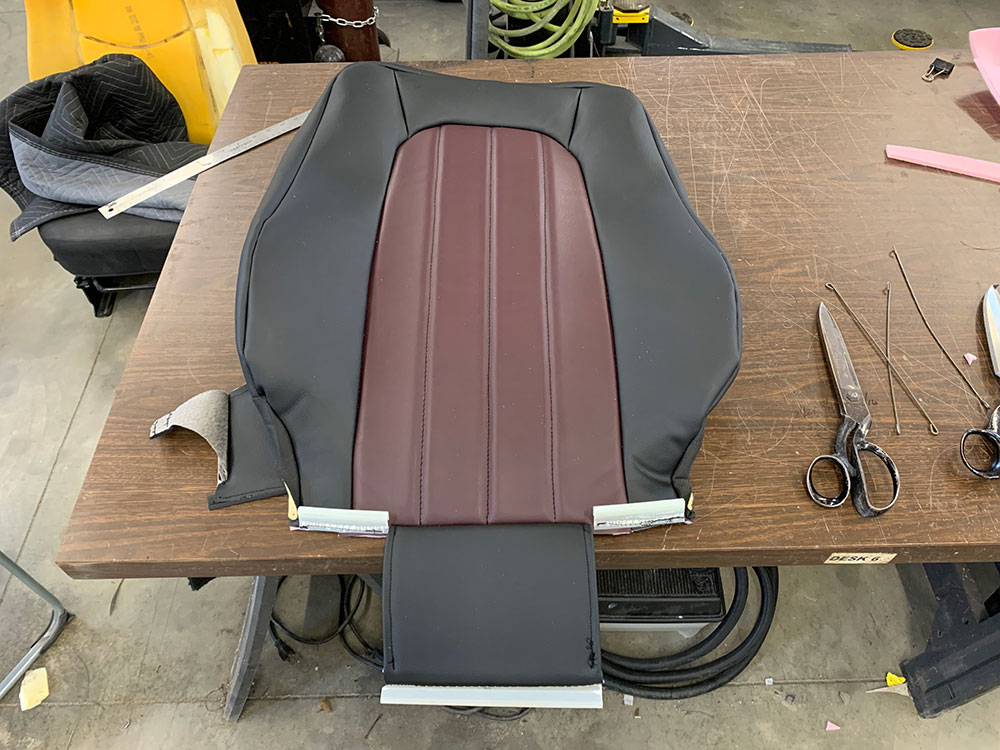
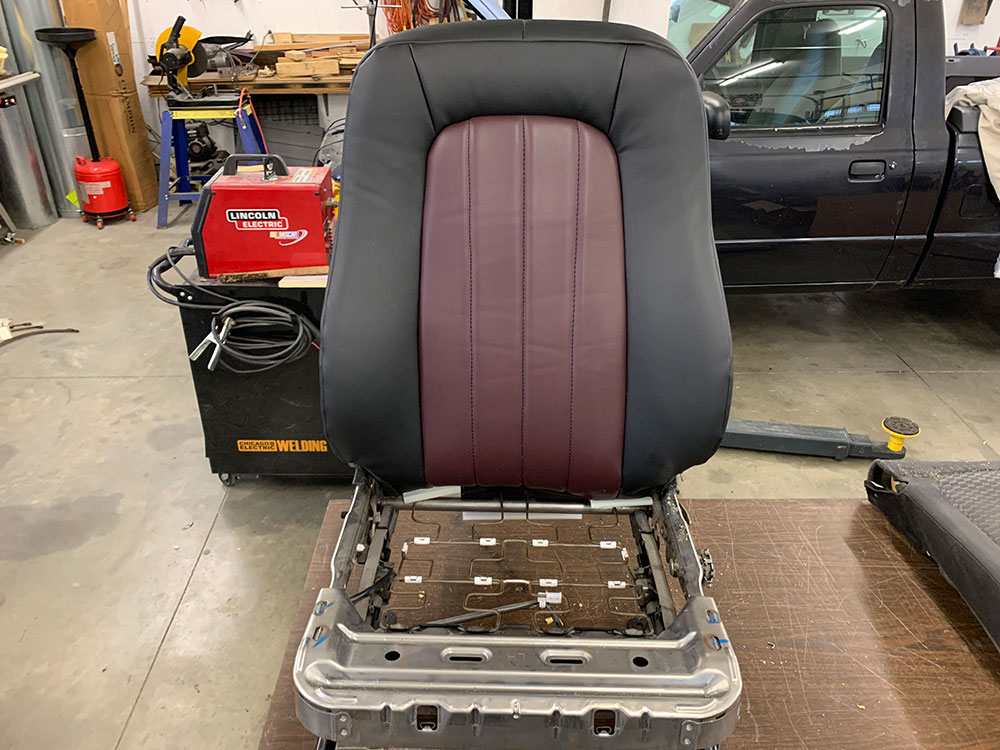
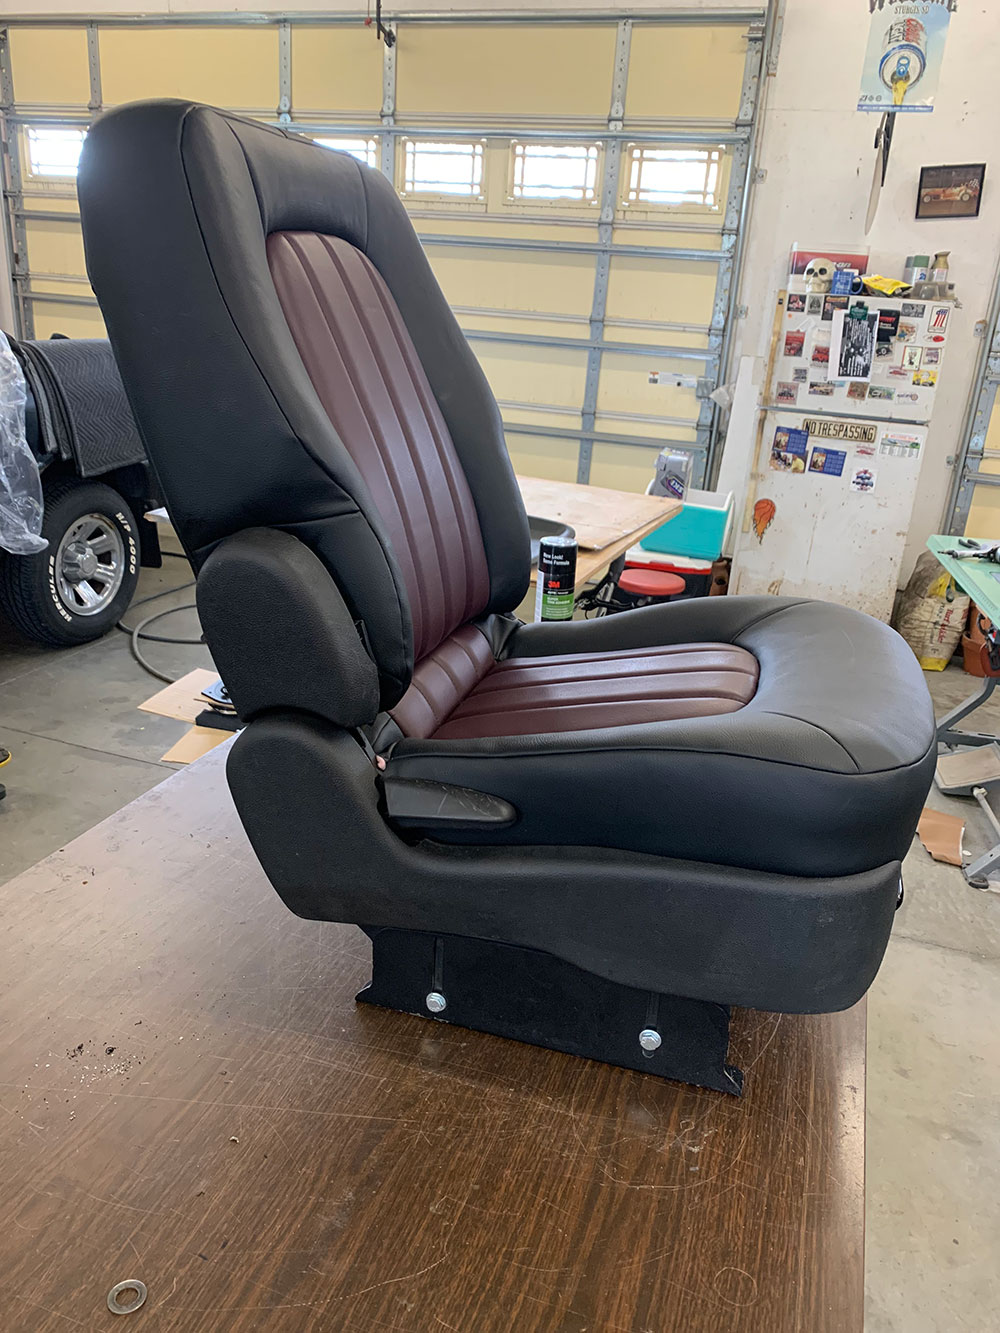
Final Touches On The Custom Seat Cushions

After making repairs to the foam from the front seats, adding foam to the sides of the HHR rear seat to fit around the wheel wells of his sedan, he also made the two-piece rear seat into one piece by gluing the molded foam cushions together. Once that was done Winter stitched new vinyl covers for the front and rear seats, adding pleated inserts in the center of the seating areas for a custom look.  Winter’s patience, persistence, and willingness to try something new paid off with a great looking, comfortable, affordable interior for his ’36 Ford. The best part is he can say he did it himself. MR

10 Here two of the pieces of the Jeepster seats are being sewn together
Here two of the pieces of the Jeepster seats are being sewn together. The difference between the stitch line and the edge of the material is the seam allowance.
11 This is the single seat for the Jeepster
This is the single seat for the Jeepster. The pleats were made by sewing thin foam to the material (see the first installment to see how this is done).
12 In the Jeepster example the seat covers were simply wrapped around the metal seat bottoms and backs
In the Jeepster example the seat covers were simply wrapped around the metal seat bottoms and backs and were glued in place.
13 A before and after shot of the seats in Winters 36 Ford
A before and after shot of the seats in Winter’s ’36 Ford. On the far side is an original HHR—compare it to the reupholstered version closer to the camera.
14 Winter began rejuvenating the HHR seats by removing the covers and labeling all the pieces
Winter began rejuvenating the HHR seats by removing the covers and labeling all the pieces.
15 A thread removing tool was used to cut the stitching holding the seat cover together
A thread-removing tool was used to cut the stitching holding the seat cover together.
16 the HHR seats used plastic retainers to secure the covers to the seat frames
Like many new cars, the HHR seats used plastic retainers to secure the covers to the seat frames. They were removed and sewn to the new covers.
17 These are the individual components of the HHR seat covers
These are the individual components of the HHR seat covers. They will be transferred to the new vinyl material.
18 For a plush feel all the new pieces of the seat covers will be sewn to foam backing material
For a plush feel, all the new pieces of the seat covers will be sewn to foam backing material.
19 To give the seats a custom look pleated panels will replace the centers of the original seats
To give the seats a custom look, pleated panels will replace the centers of the original seats. The lines indicate where the vinyl will be sewn to the foam to produce the pleats.
20 the individual pieces of the seat back have been placed face to face and sewn together
Viewed from the back, the individual pieces of the seat back have been placed face to face and sewn together.
21 The plastic retainers that secure the seat covers to the frames are sewn onto the new vinyl
The plastic retainers that secure the seat covers to the frames are sewn onto the new vinyl.
22 This is the seat back viewed from the front note the plastic retainers
This is the seat back viewed from the front; note the plastic retainers.
23 Here the sides of the seat cover have been folded back before being attached the molded foam cushion
Here the sides of the seat cover have been folded back before being attached the molded foam cushion.
24 Winter repaired a split in the molded foam HHR seat cushion with drywall tape and fabric top adhesiv
Winter repaired a split in the molded foam HHR seat cushion with drywall tape and fabric top adhesive.
25 Here he joined the two sections of the HHR split back seat foam into one
To force the adhesive into the mesh tape, Winter uses a plastic spatula. Here he joined the two sections of the HHR split back seat foam into one.
26 The seat back was slipped over the molded seat back foam
The seat back was slipped over the molded seat back foam—the plastic retainers can be seen at the bottom of the cushion.
27 Hard to believe this is one of the junkyard seats Winter started out with
Hard to believe this is one of the junkyard seats Winter started out with. The result is comfortable, good looking, and affordable.

Related Articles

Search Our Site