


It’s Time For a New Era: The Latest Bel Era III Gauges Will Set Your 1955-1956 Chevy Tri-Five Apart
By Brian Brennan – Photography & Videography by the Author
If there ever was a hot rod that rodders wanted to alter, yet at the same time they know it’s probably best to leave it alone, it’s any year of the Tri-Five Chevy. It seems the more hot rodders tinker with the Tri-Five the more they realize that Chevrolet designers got it right the first time. And the same goes for the inside of these cars with their beautiful dashes; sometimes it’s best to leave well enough alone.
If you want to start an epic argument with other Tri-Five lovers, just make the statement: “The 1955 Chevy is head and shoulders better looking than a 1956 or 1957.” Interestingly this desire to touch or not to touch applies both to inside as well as the outside styling. The Tri-Five instrument cluster in the 1955 and 1956 Chevy are unique and were well thought out. Yet, today’s hot rodder is just itching to make his 1955 or 1956 personalized and more to his (or her) own liking.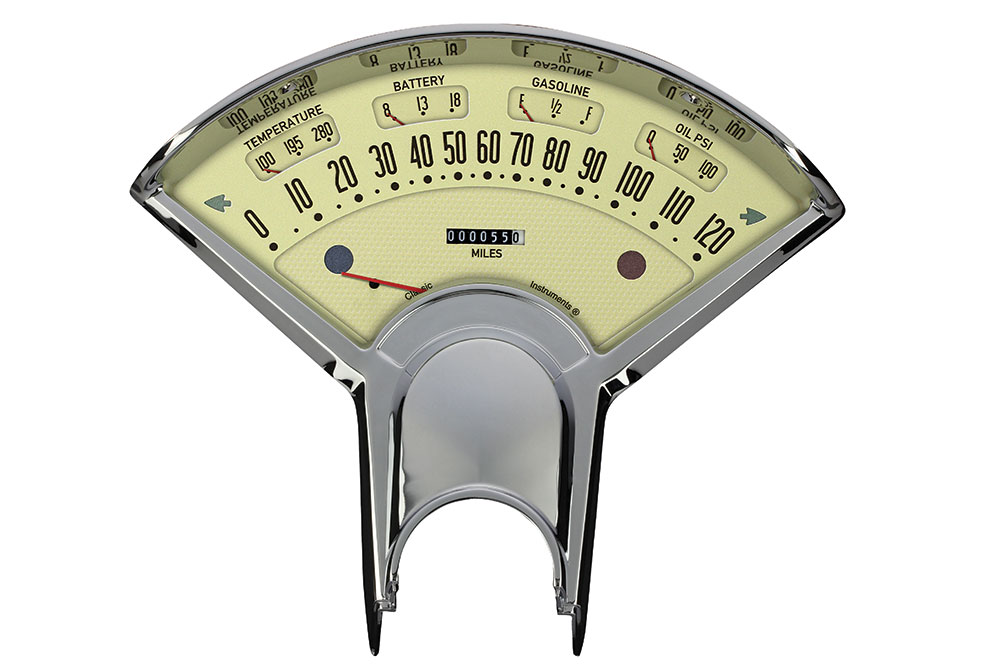

Read More: How To Make a Hot Rod Interior Road Trip Worthy
To help with this desire we have come across a way to give rodders what they want—the ability to tinker and at the same time not screw up a good thing. Enter Classic Instruments (CI) and their Bel Era III gauges that are designed specifically for the 1955 and 1956 Tri-Five Chevys. The cluster and glass lens arrives ready to install in your bezel. Should you need a bezel, a great place to source this would be Danchuk. (The Bel Era III gauge has already taken home the gold from the American Tri-Five Association with a Best New Product award.)
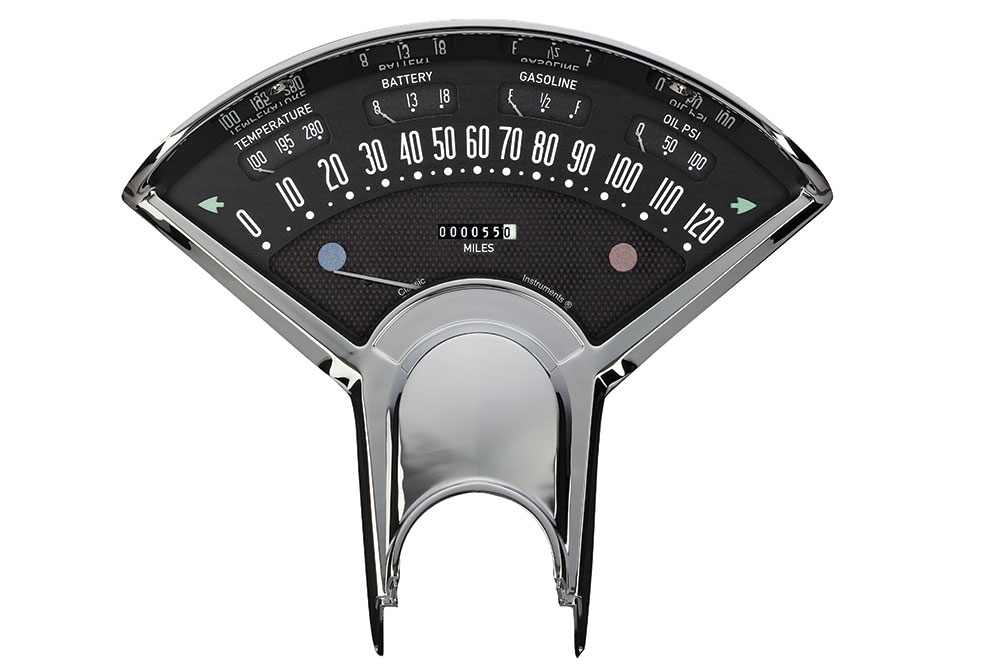
Bel Era III Gauge
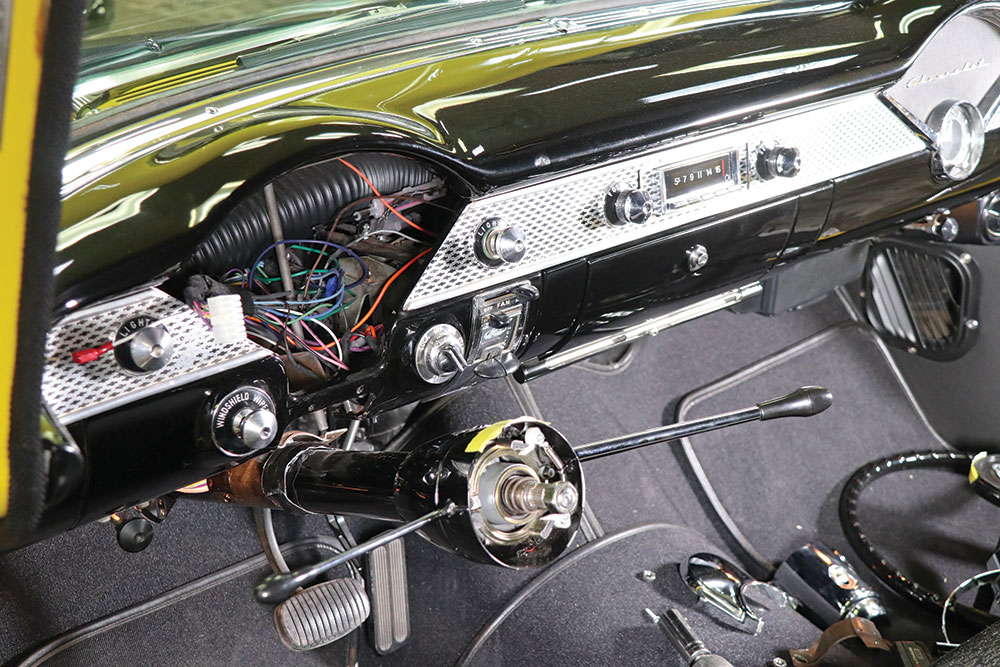
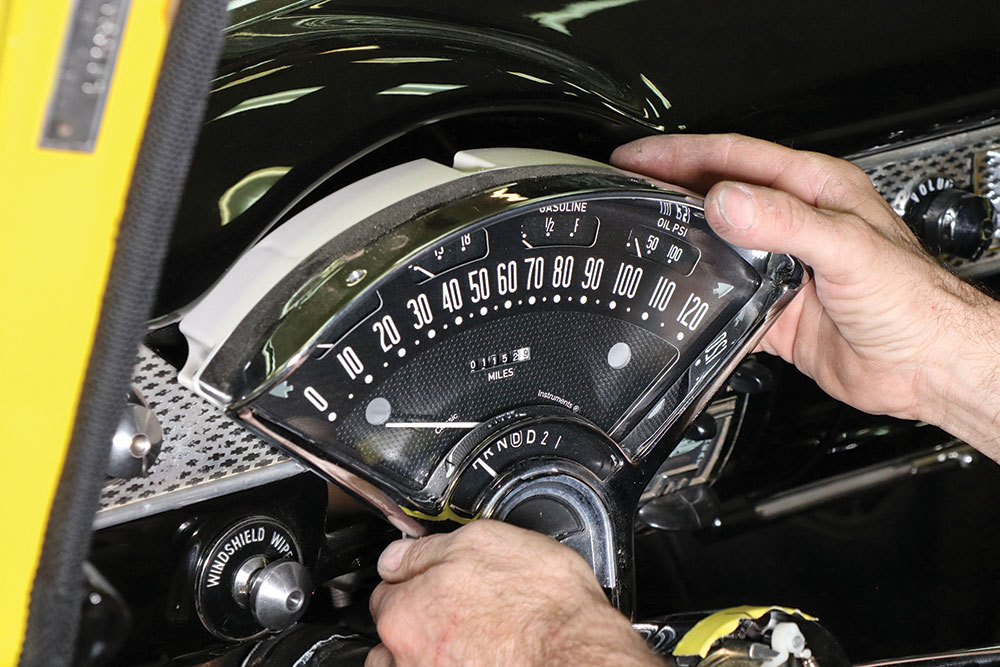
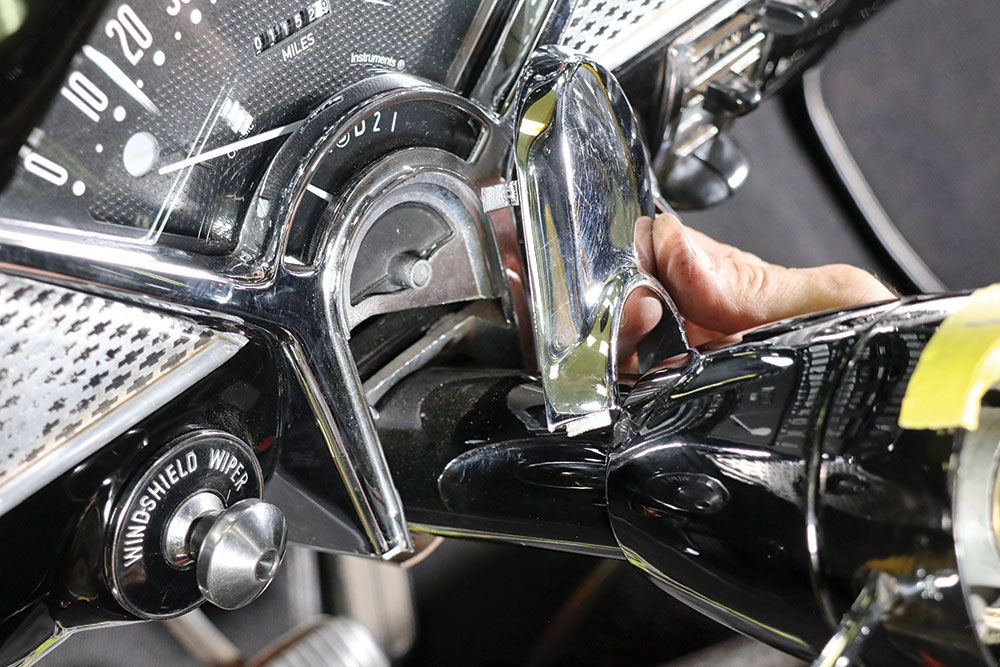
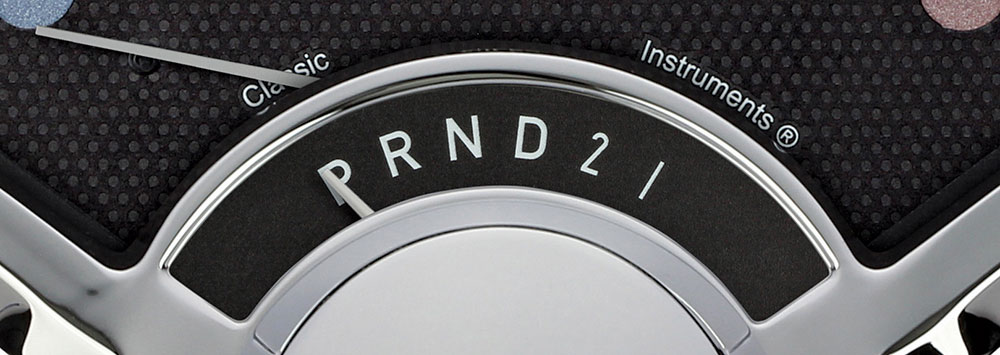
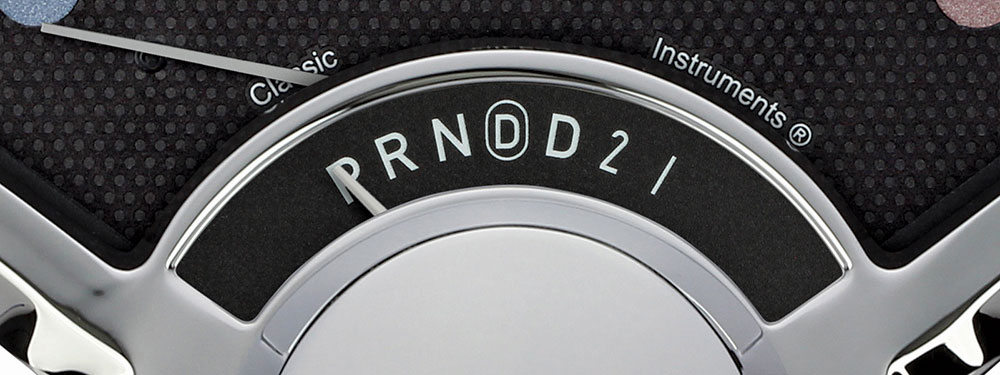
On a recent jaunt to Phoenix, we stopped by Hot Rods by Dean and found they were making an instrument cluster change to a 1955 Chevy. The objective was to remove the stock Tri-Five gauge panel and replace it with a Bel Era III kit from CI. The end result wasn’t to cause shock to one’s sensibilities but rather enhance what was there. The Bel Era III instrument package comes in several predetermined styles but can also be customized. In this particular installation the intent was to modernize the gauges with a numbered water temp, volt, and an oil pressure. It should also be noted that CI went to great lengths to recreate the grain (texture) of the dial faceplate to give you the OEM look and feel. To this the shift detent would need to be upgraded from the once Powerglide gear indicator placement to the modern 4L80E (or 700-R4, 4L60E, and so on) overdrive transmission that now resides behind a small block Chevy.

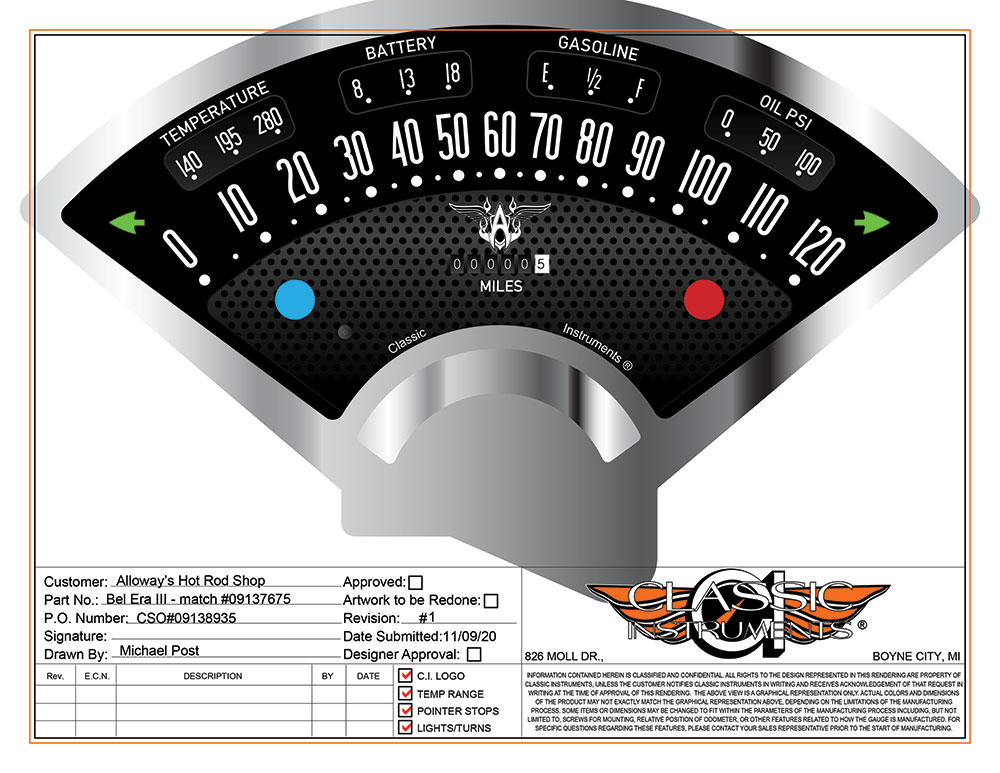
Keep in mind the intention of the Bel Era III direct-fit package as offered by CI is to keep the nostalgic 1955 and 1956 factory look while offering the ideal combination of all-electric technology and the nostalgic stock look. The dual-layer injected-molded housing is built with a speedometer, fuel gauge, oil, temp, and volt gauges all in one easy-to-install cluster. New to the Bel Era III is a fuel sender selector switch to easily choose the correct resistance range during installation. The original factory speedometer in a 1955 registered 110 mph but the Bel Era III now shows 120 mph; while the water temp rather than an “idiot” light is clearly marked with predetermined temperature readouts, the oil pressure also moves away from an idiot light and is now a readout showing 0-50-100 oil psi, and the new volt gauge has a readout ranging from 8-13-18 V.
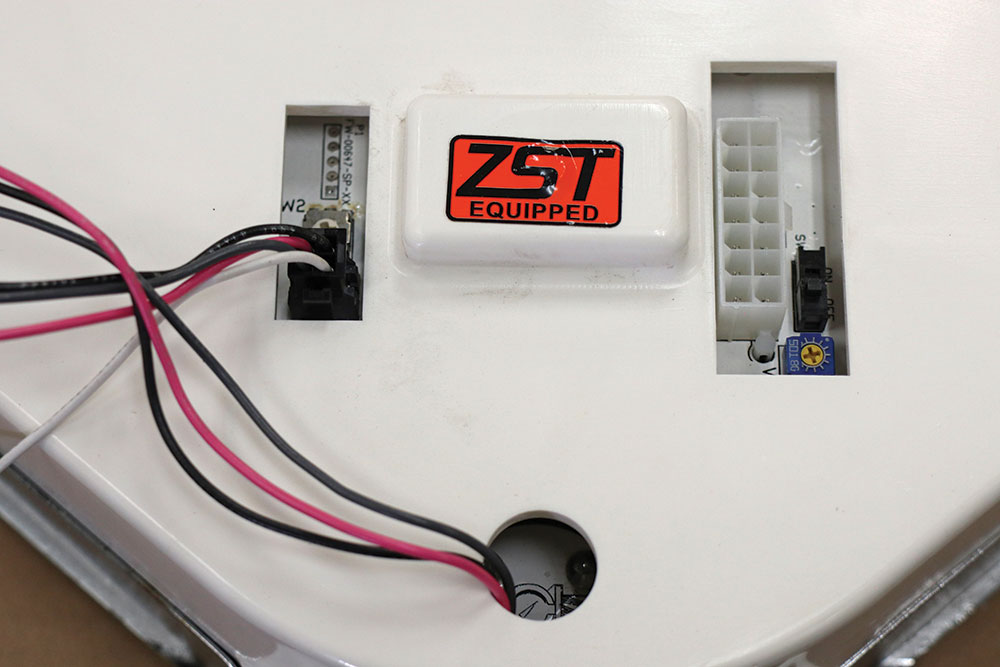
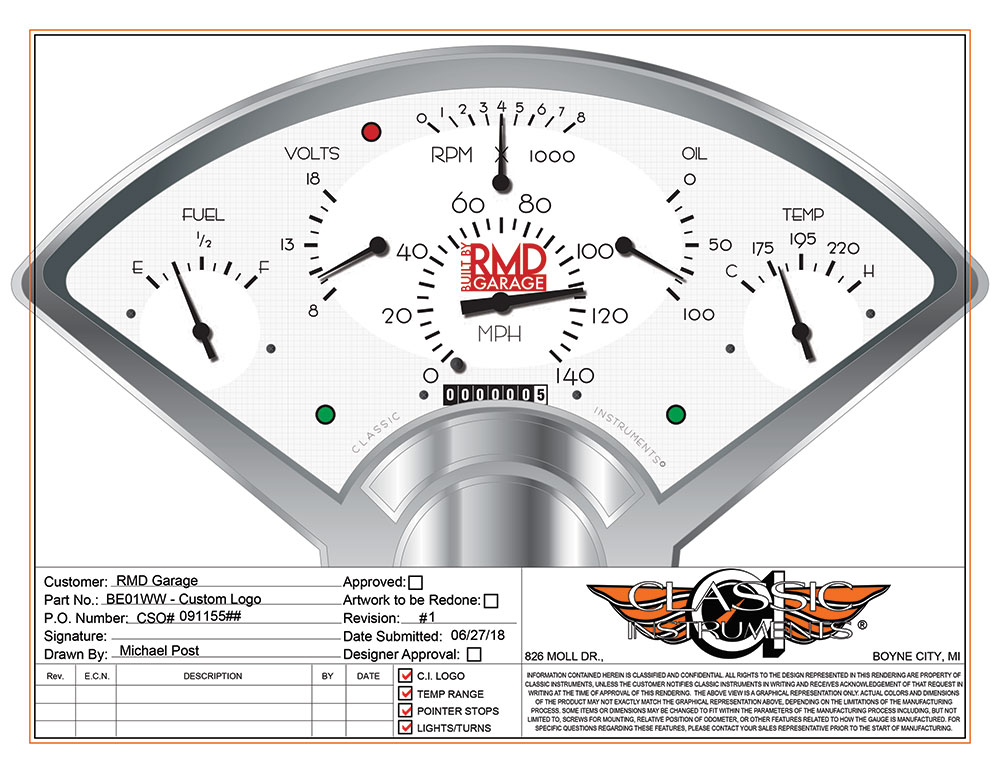
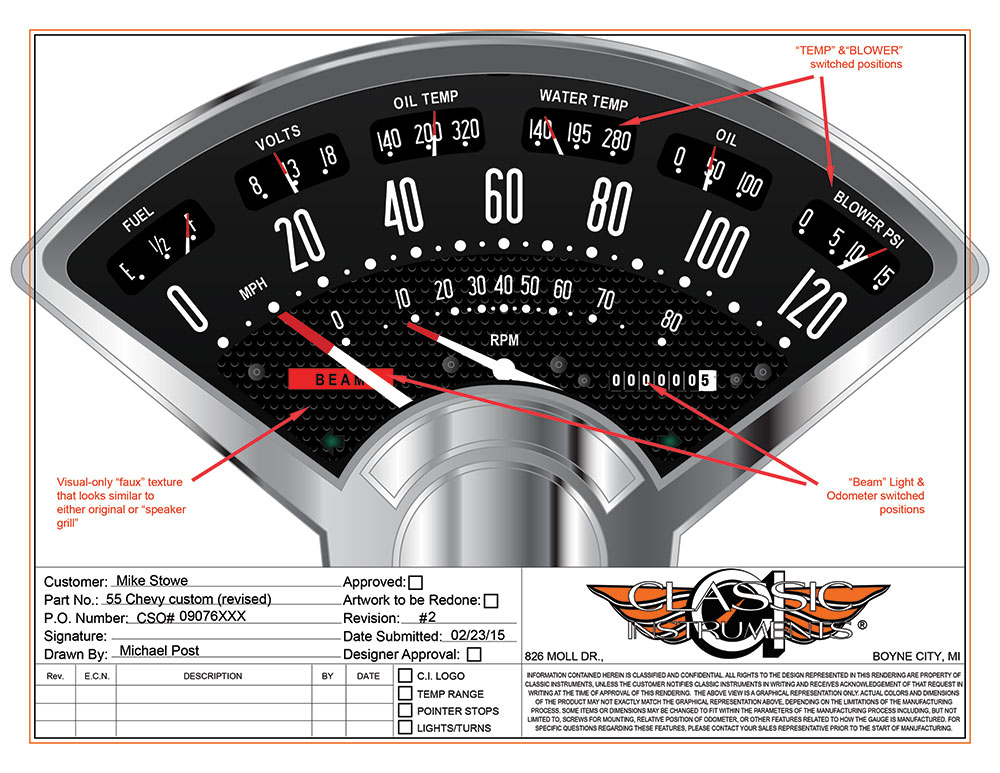
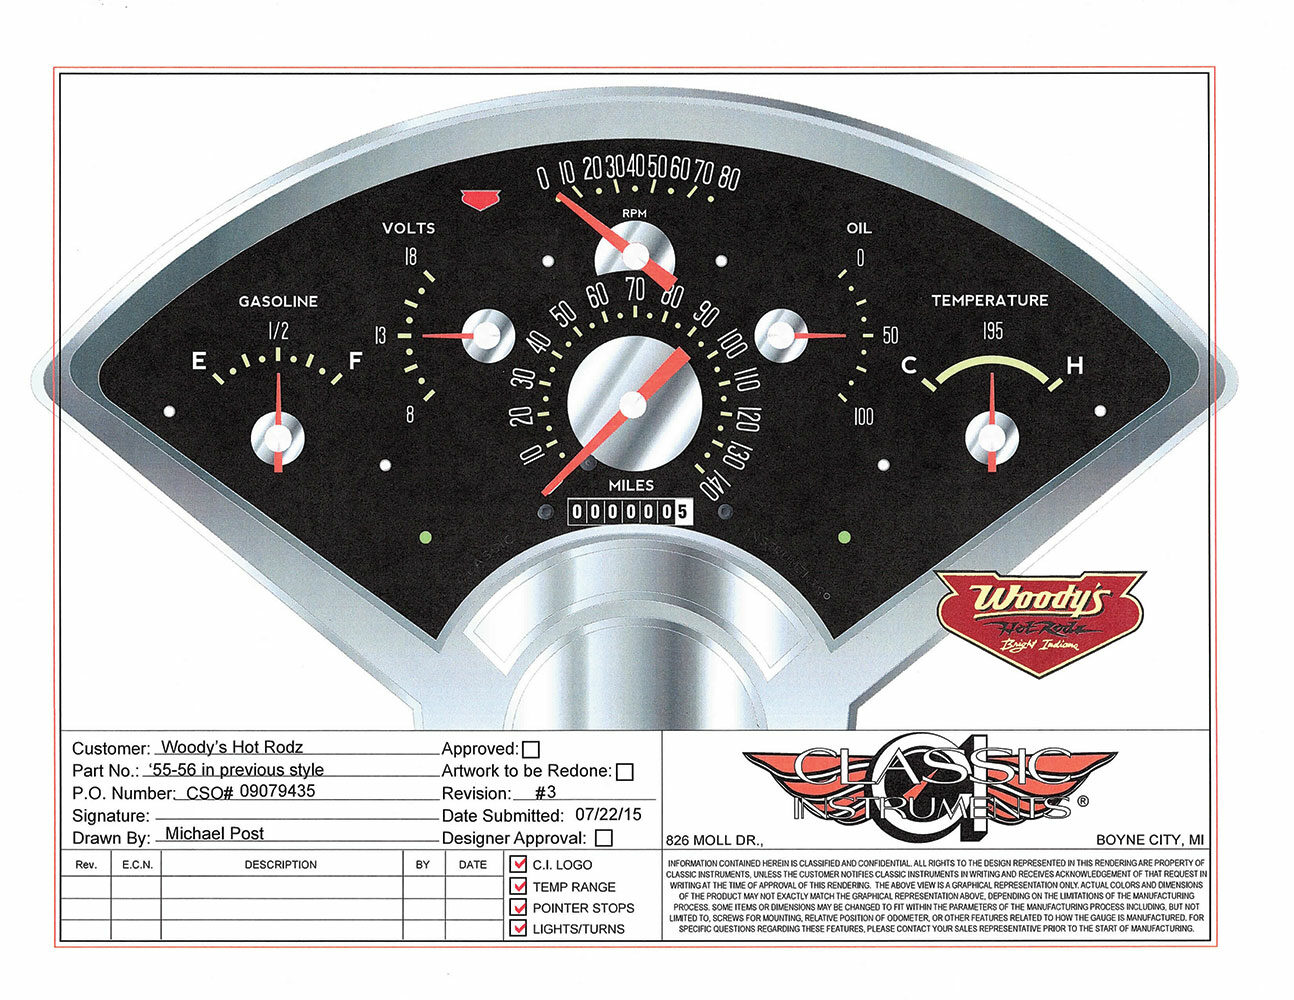
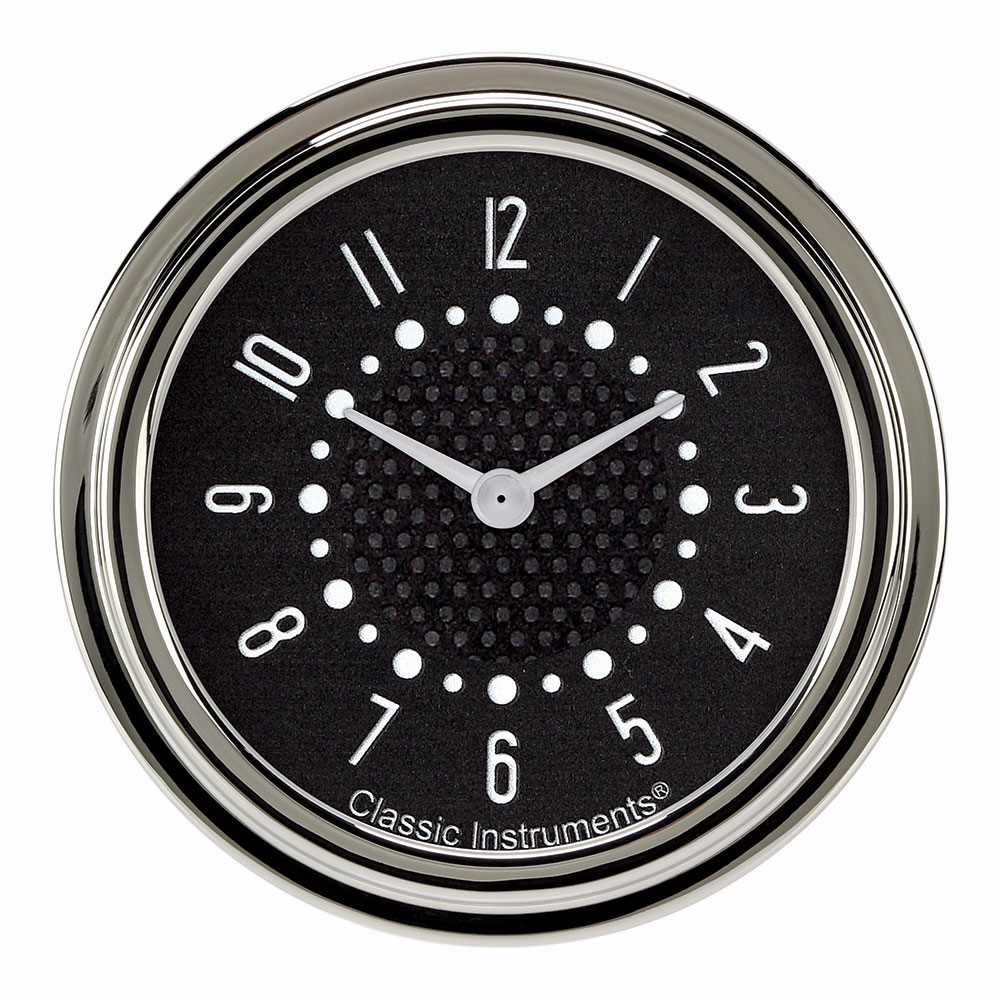
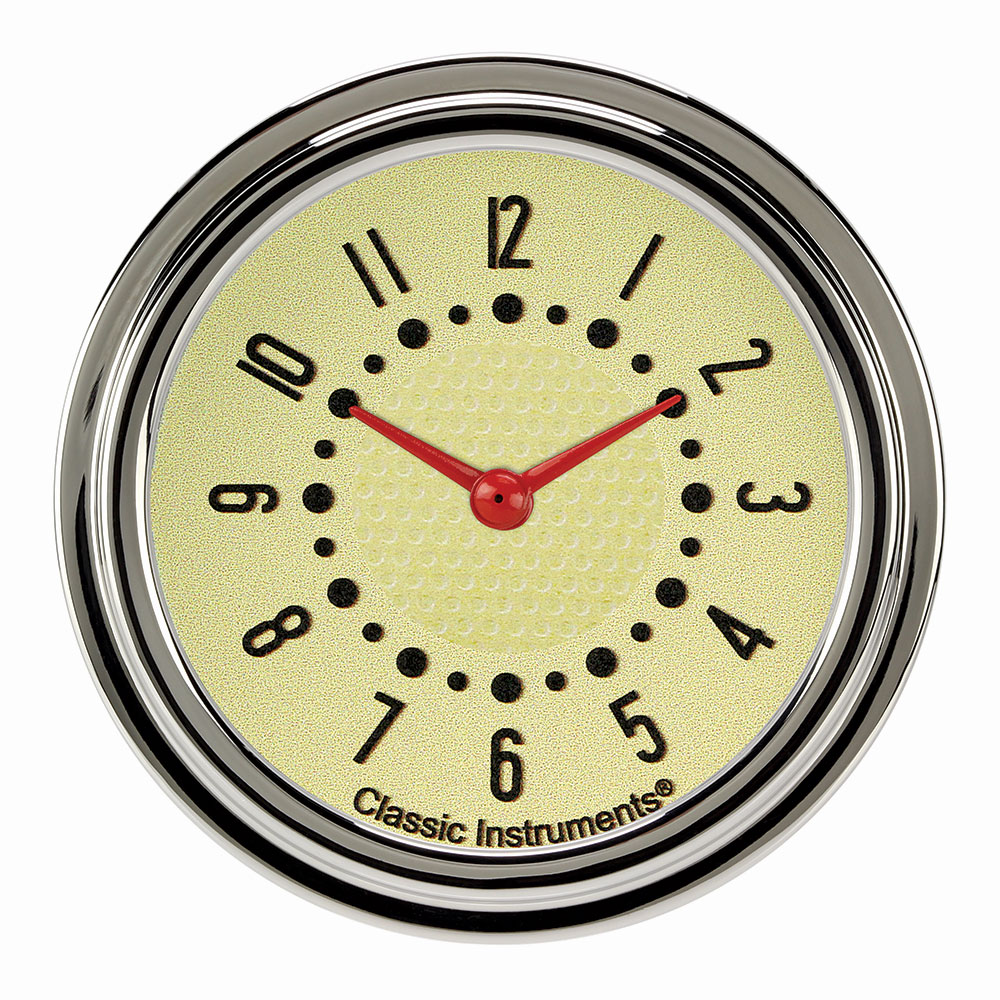
More features of the Bel Era III system are the built-in ECM signal switch with an onboard filter switch to allow direct connections to the ECM for speed signals with no additional control box required. Additionally, you will have the even and consistent lighting that’s associated with LED lighting plus a built-in dimmer, turn signals, high beam, and additional warning indicator. A glass lens is also included, along with a single-connector wiring harness for the ultimate in quick hookups. The system is available in four colors (black, white, gray, and tan) and arrives ready to install in your existing bezel. You can also request a customized face; be sure to look at the samples pictured within this story. For those who want a matching clock on the opposite side of the dash, CI offers this as well.
Read More: Coachbuilt 1932 Ford 3-window coupe is a Real Class Act
Quick Primer on ZST Technology

CI’s ZST (Zeus Speedometer Technology) is advanced instrument operating software that accepts any of the known speed signals (pulse generator, VSS-Vehicle Speed Sensor, ECM-Engine Control Module, or GPS-Global Positioning System) with no additional interface necessary between the sending unit and speedometer. We might also point out that this technology is also used on all CI tachometers. Yes, it has incredible accuracy and the resulting steady pointer is a plus, but the pièce de résistance has to be the ZST technology that allows you to calibrate your speedometer by simply driving a steady 30 mph and then pushing a button.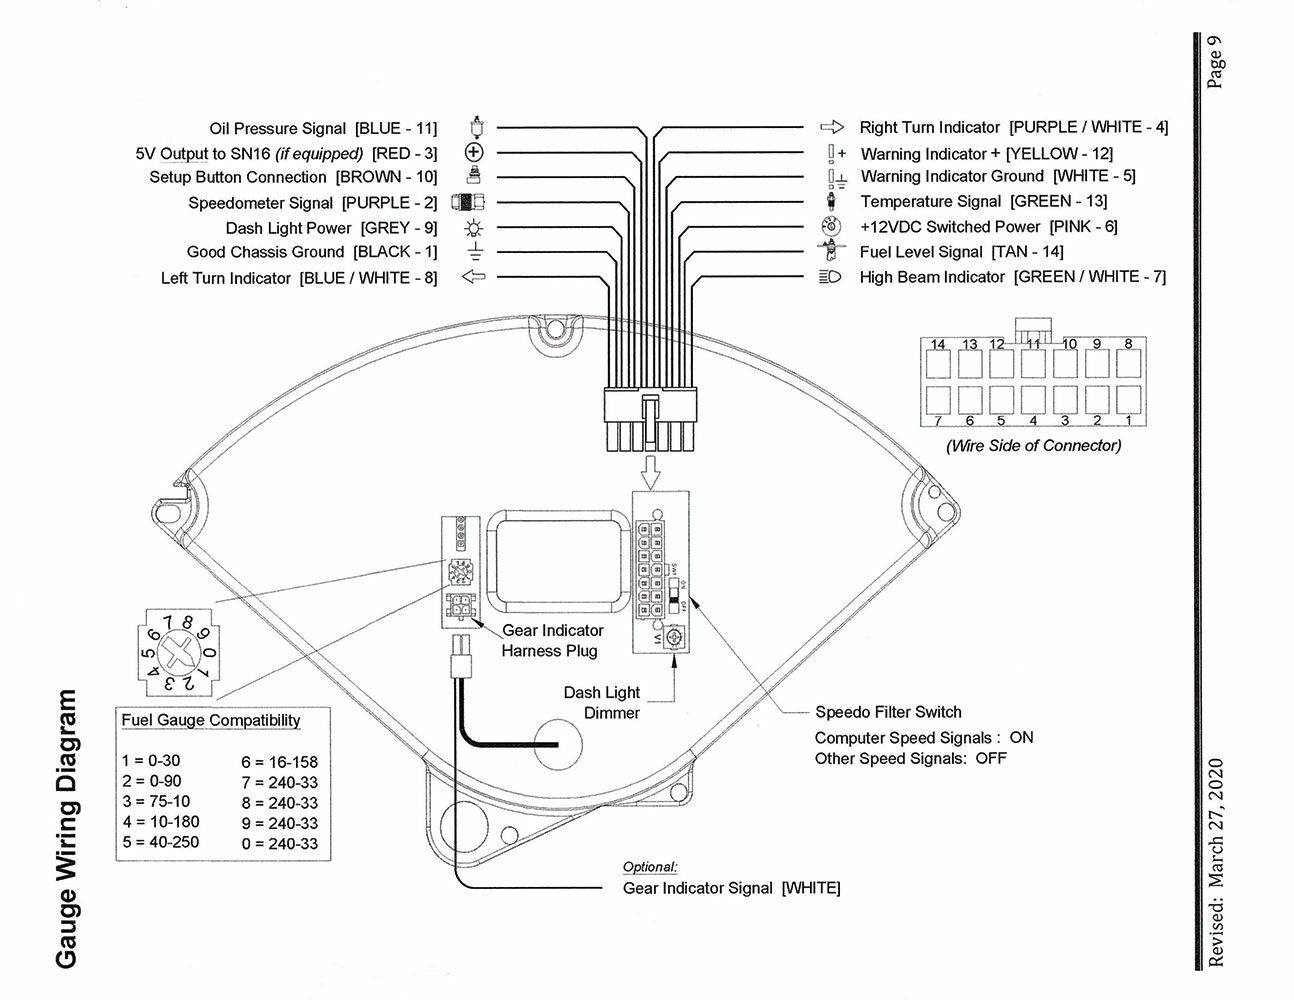
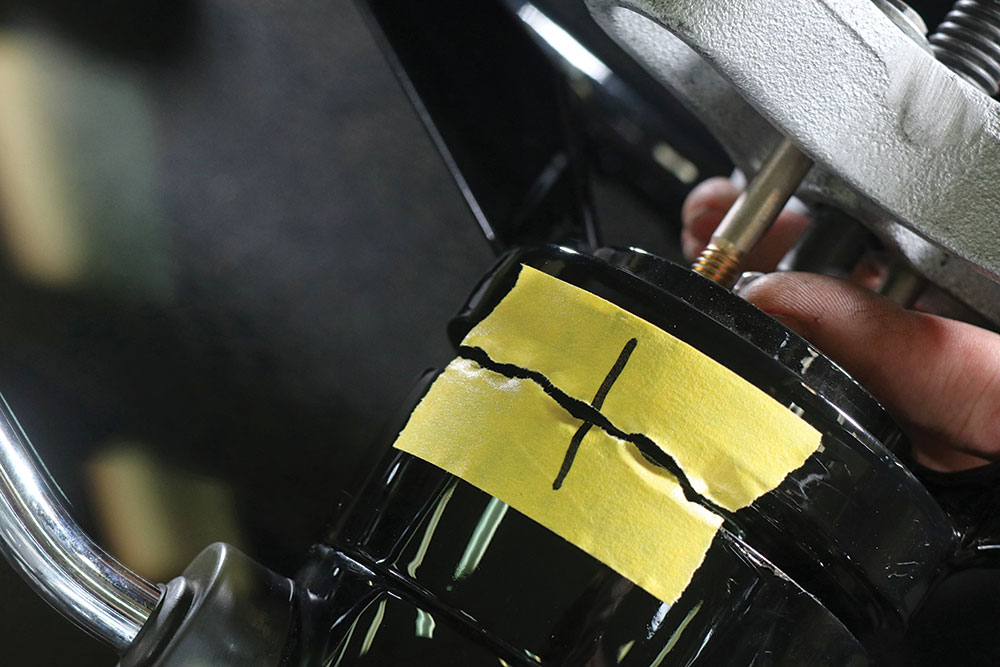
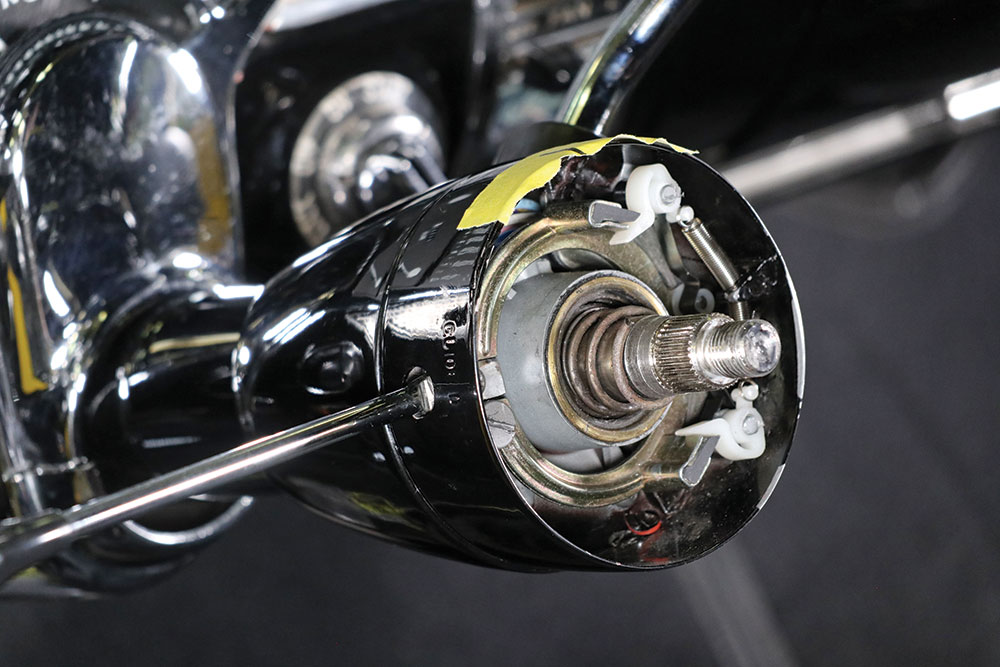
The Installation
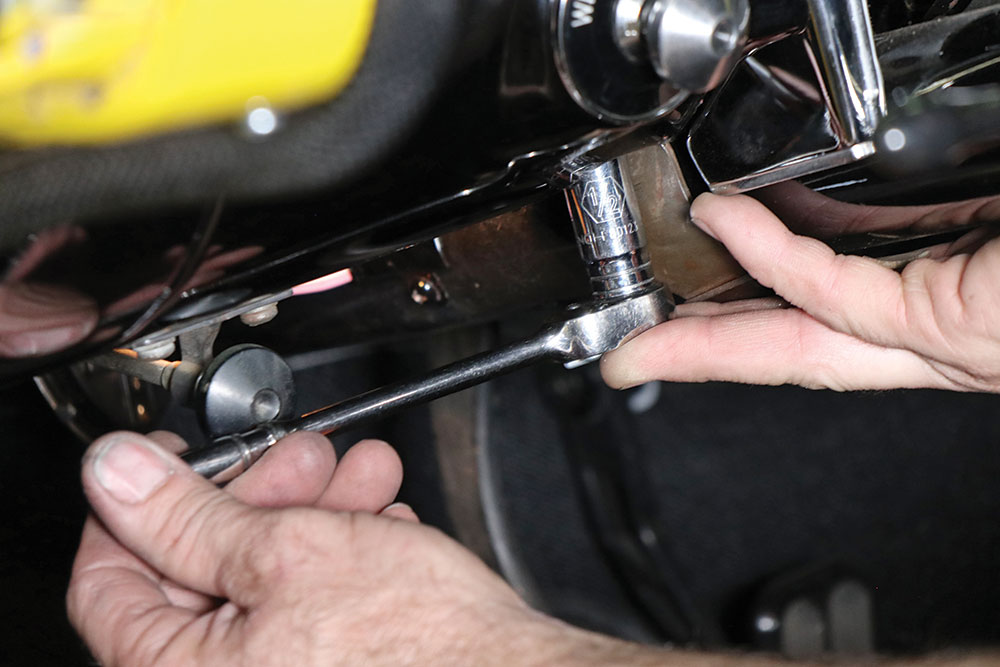
Installing our Bel Era III with a black face, white numbers, lettering, needles, and callouts really was a simple process—a true plug-and-play. We peeked over the shoulder of Free DesFosses and settled in to watch how he installed this package in Dean Livermore’s, of Hot Rods by Dean, 1955 Chevy. It’s a good thing we didn’t settle in too much as the removal of the stock Tri-Five instrument cluster was simple and the CI Bel Era III was just as easy going back.
Fuel Gauge Setup
The fuel gauge of the Bel Era III is designed to work with any number of aftermarket and OE fuel senders. There’s a 10-position selector switch on the back of the fuel gauge and you match it to the fuel sender you are using with any number of aftermarket and OEM fuel
senders. Set the 10-position selector switch on the back of the gauge to match the fuel sender you have mounted in your gas tank.
Selector Position Sender Resistance Range
1 0-30 (GM Type 1964 and earlier)
2 0-90 (GM Type 1966-1988)
3 75-10 (Ford Type 1987 and earlier)
4 10-180 (VDO)
5 40-250 (GM Type 1998 and later)
6 16-158 (Ford Type 1987 and later)
7, 8, 9, 0 240-33 (Std Aftermarket)
Speedometer
There are a number of ways to set the speedometer so you will have to go over the instruction manual and select the way you would like to do it. Basically, you have five different methods: Entering Calibration Mode, Speedometer “Instant” Calibration, Speedometer “Real Time” Calibration, Speedometer “Measure Mile” Calibration, and a Reset Gauge to Factory Defaults.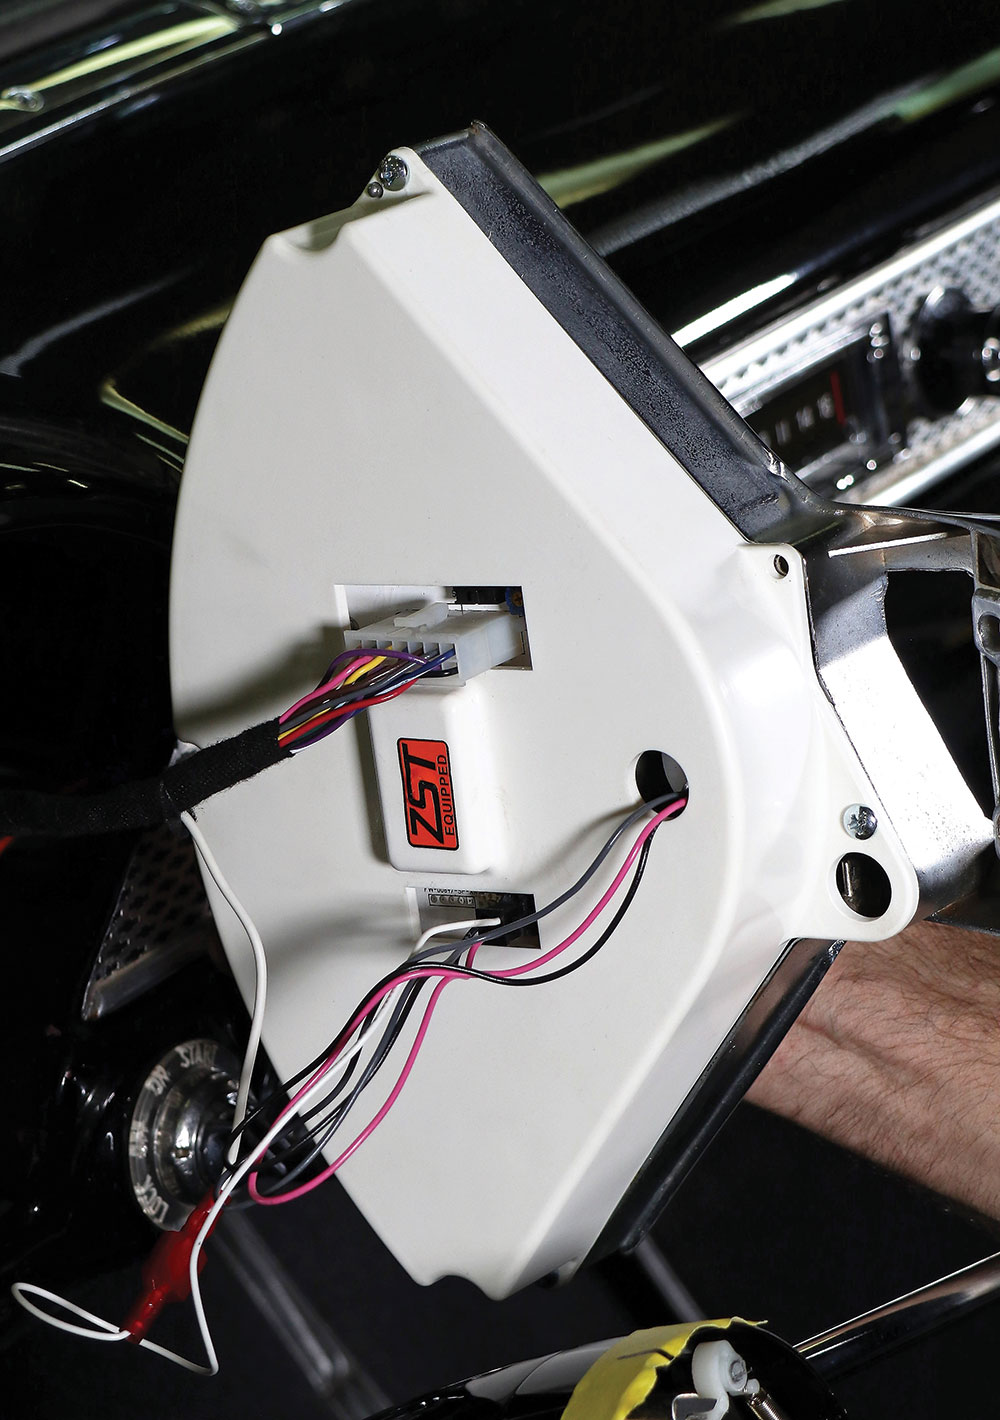
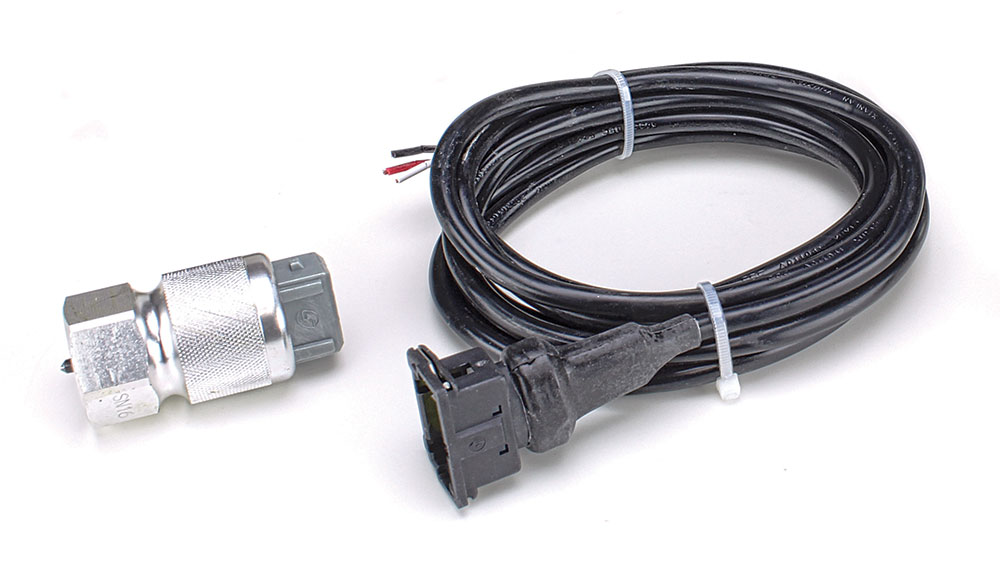
Sending Units
There’s an extensive instruction manual on the installation of the Bel Era III but we thought it a good idea to go over a few items worth paying attention to.
Always install CI sending units when the engine is cold.
Don’t use a thread sealing tape, such as Teflon, on the threads. The threads as they come from CI have a slight taper to them and are designed to be self-sealing. Additionally, the threads form the ground connection and any sealant/tape may cause a poor ground, causing the gauge readings to be inaccurate.
If a sealant is necessary CI recommends using Loctite C5-A antiseize, which is copper based and allows for a good electrical ground.
Read More: Farm Fresh Chevy 3100
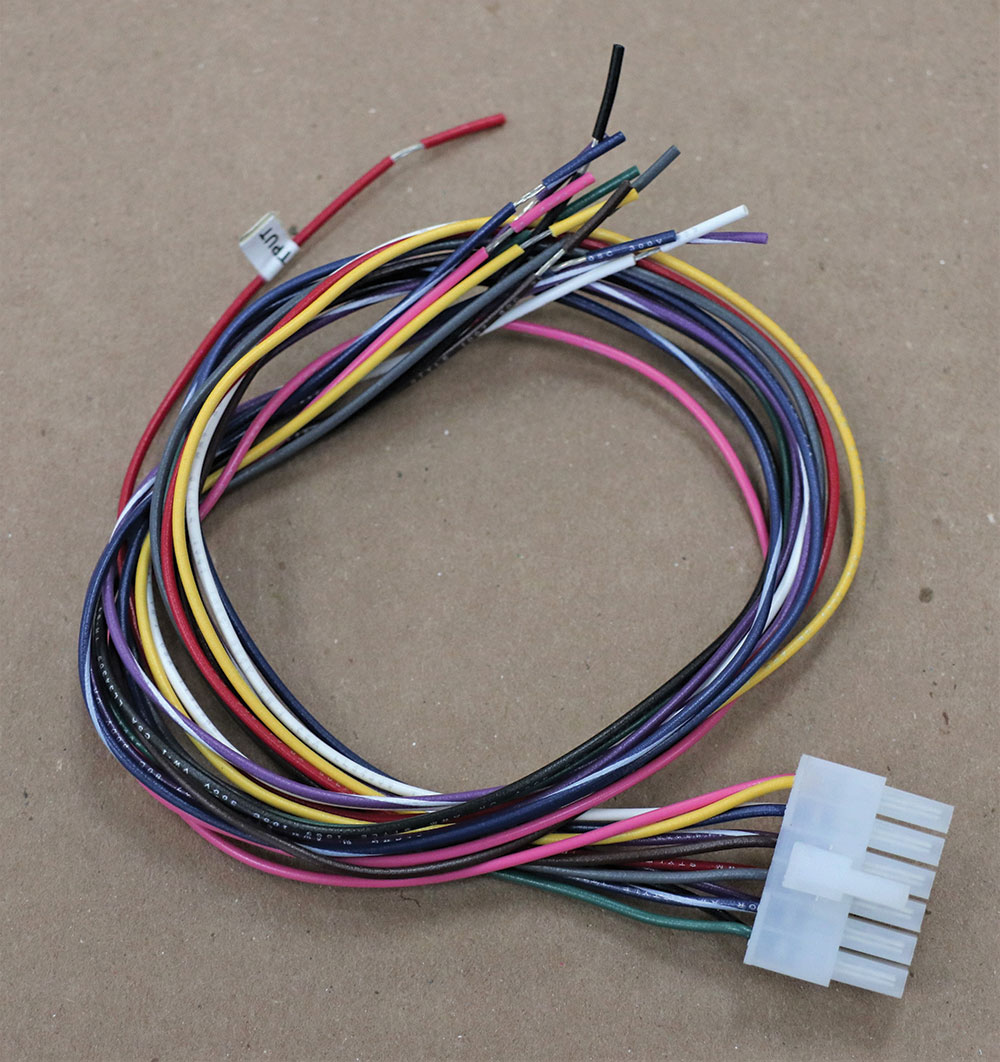
Gauge Cluster Wiring
The wiring is straightforward. Follow along with the diagram provided and you will have it wired in a matter of a few hours.
A couple of points to keep in mind:
- Disconnect the battery
- Take 12V power to the pink wire in the harness. CI recommends using a dedicated power source to keep the signal “clean.”
- The black wire from the harness will be connected to a good chassis ground; its own ground and not stacked with other wires.
- Purple wire from harness goes to the white wire from the SN16 pulse signal generator
- Red power wire from the SN16 to the Red 5V wire in the harness.
- Black ground wire from the SN16 to a chassis ground. (There’s an alternative to this so check the instruction manual to see your options.)
- Fuel level signal wire to tan wire of harness.
- Temperature signal wire to green wire of the harness.
- Oil Pressure signal wire to the blue wire of the harness.
- Dash light power wire to the gray wire of the harness.
- High-beam indicator power wire to the green/white wire of the harness.
- Right turn indicator power to the purple/white wire of the harness.
- Left turn indicator power to the blue/white wire of the harness.
- Brown wire of the harness to one wire of the momentary push button.
- Connecting the second wire you have an option, so check your installation manual.
Custom Faces
CI has its own Instrument Customization Unit, better known as the ICU. (We just call it the Custom Shop so when you contact CI they will know what you are referring to regardless of how you ask for it.) 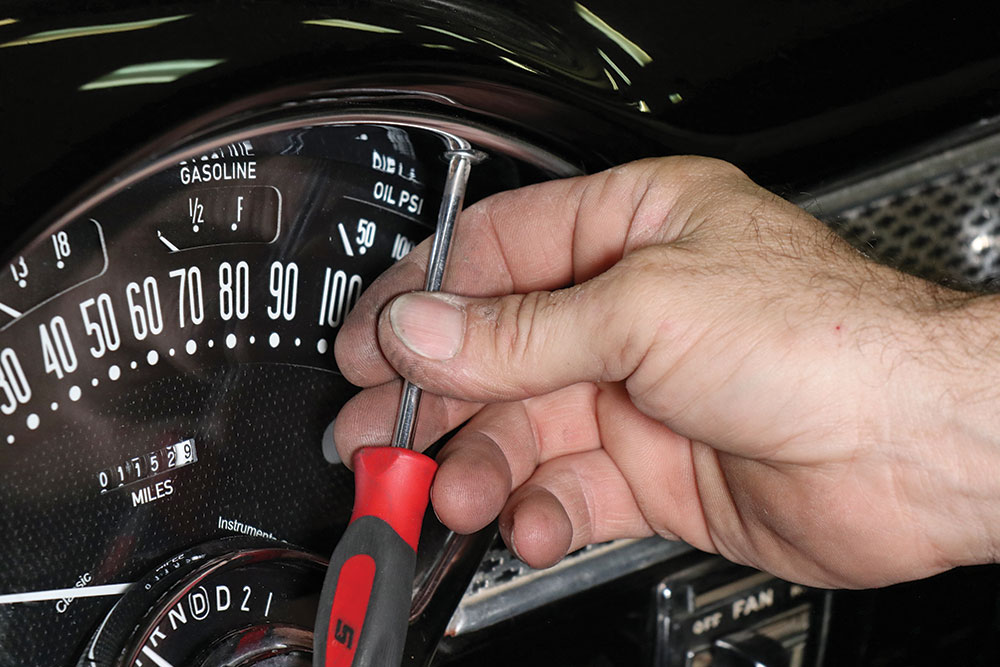
We have included in this story a series of pictures of custom-face Bel Era III gauges that, while barely scratching the surface, gives you an idea of what can be done. You can see from these few samples that the instrument cluster can be a series of gauges or it can mimic the factory face with a modern touch.

Sources
Classic Instruments
(844) 342-8437
classicinstruments.com
Danchuk
(800) 648-9554
danchuk.com
Hot Rods by Dean
(800) 362-9709
hotrodsbydean.com


