ITGMetal
SUBSCRIPTIONtext
ProgressArrows
digital issues
ProgressArrows
online store
ITGMetal
ACPnew header logo
CTP LOGOs
all cars

How To Chop A Top With Minimal Effort and Maximum Accuracy Part 2

Hot Rods by Dean’s Easier Method For Chopping On 1933 Ford DeLuxe coupe

By Chris Shelton    –   Photography By Brian Brennan

Missed Part 1? Check it out here: How To Chop A Top With Minimal Effort and Maximum Accuracy Part 1

- Advertisement -

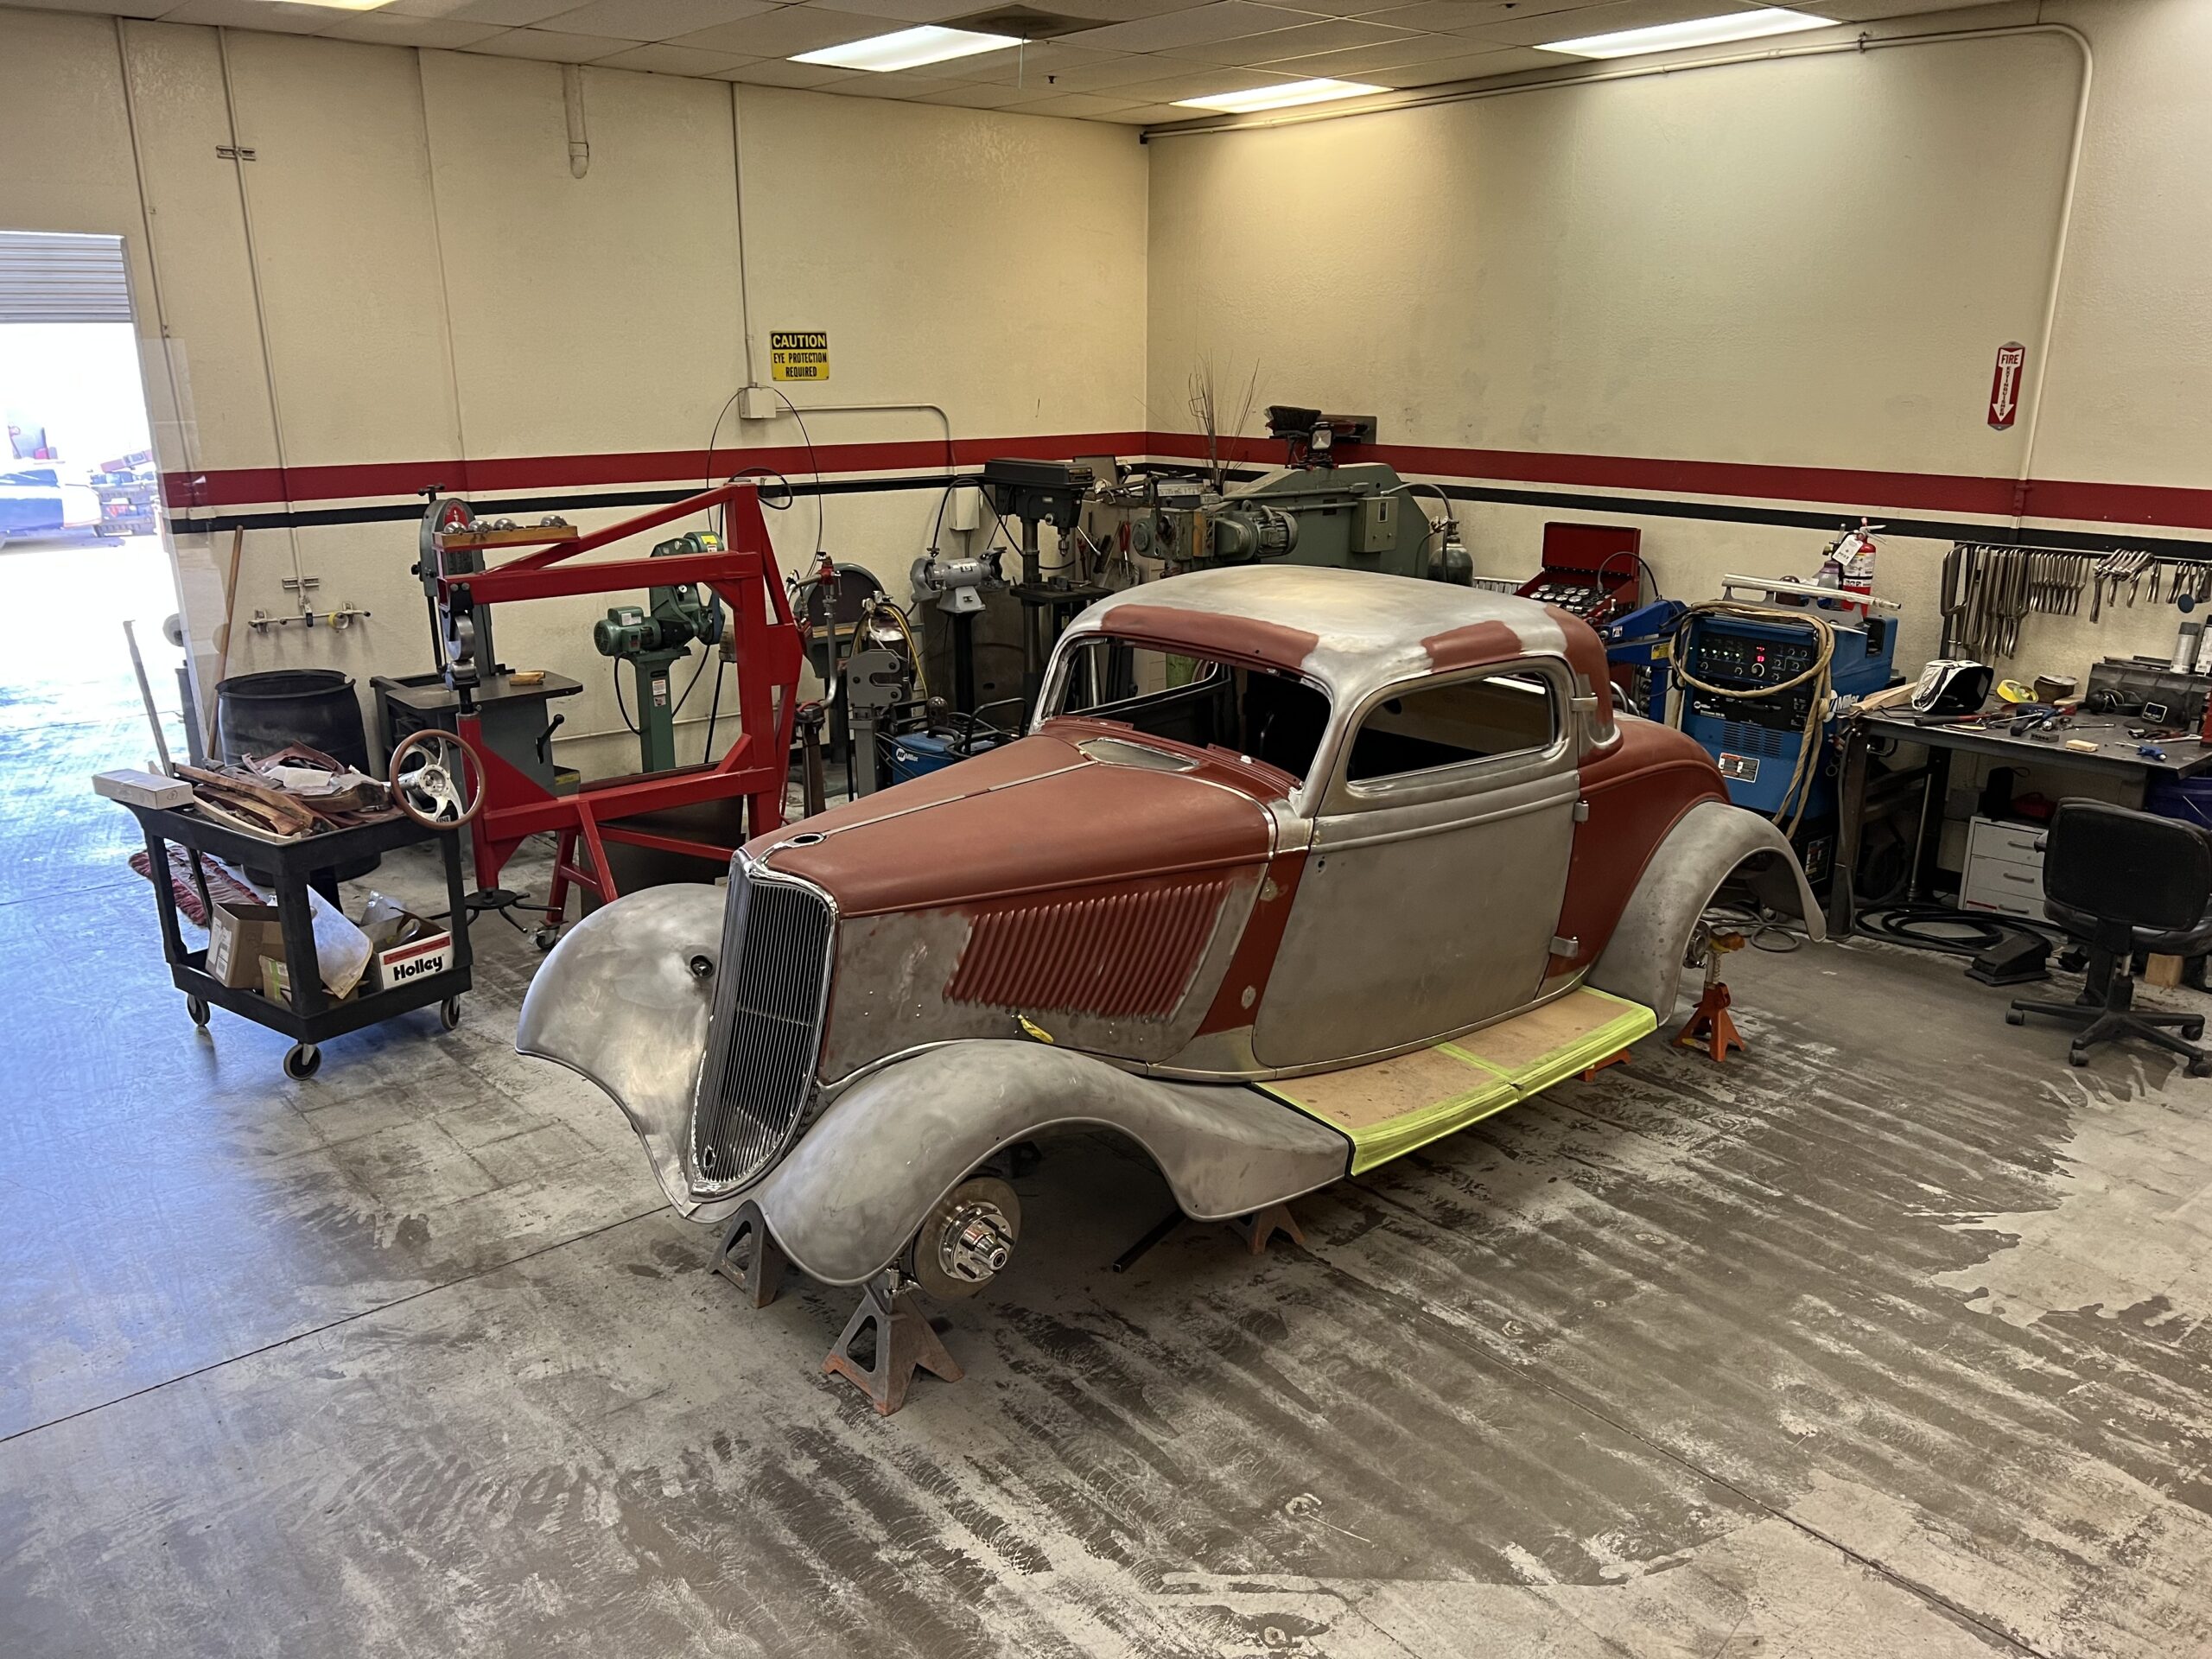
Let’s take a look at the rest of the story on Editor Brian Brennan’s visit to Dean Livermore at Hot Rods by Dean and the chopping of a ’33 Ford DeLuxe coupe.

Welding Gap

To chop a top, most of us cut a band of metal from the entire top perimeter then tune the parallel edges to make a tight, consistent welding gap. And the welding gap is everything in a top chop.
- Advertisement -
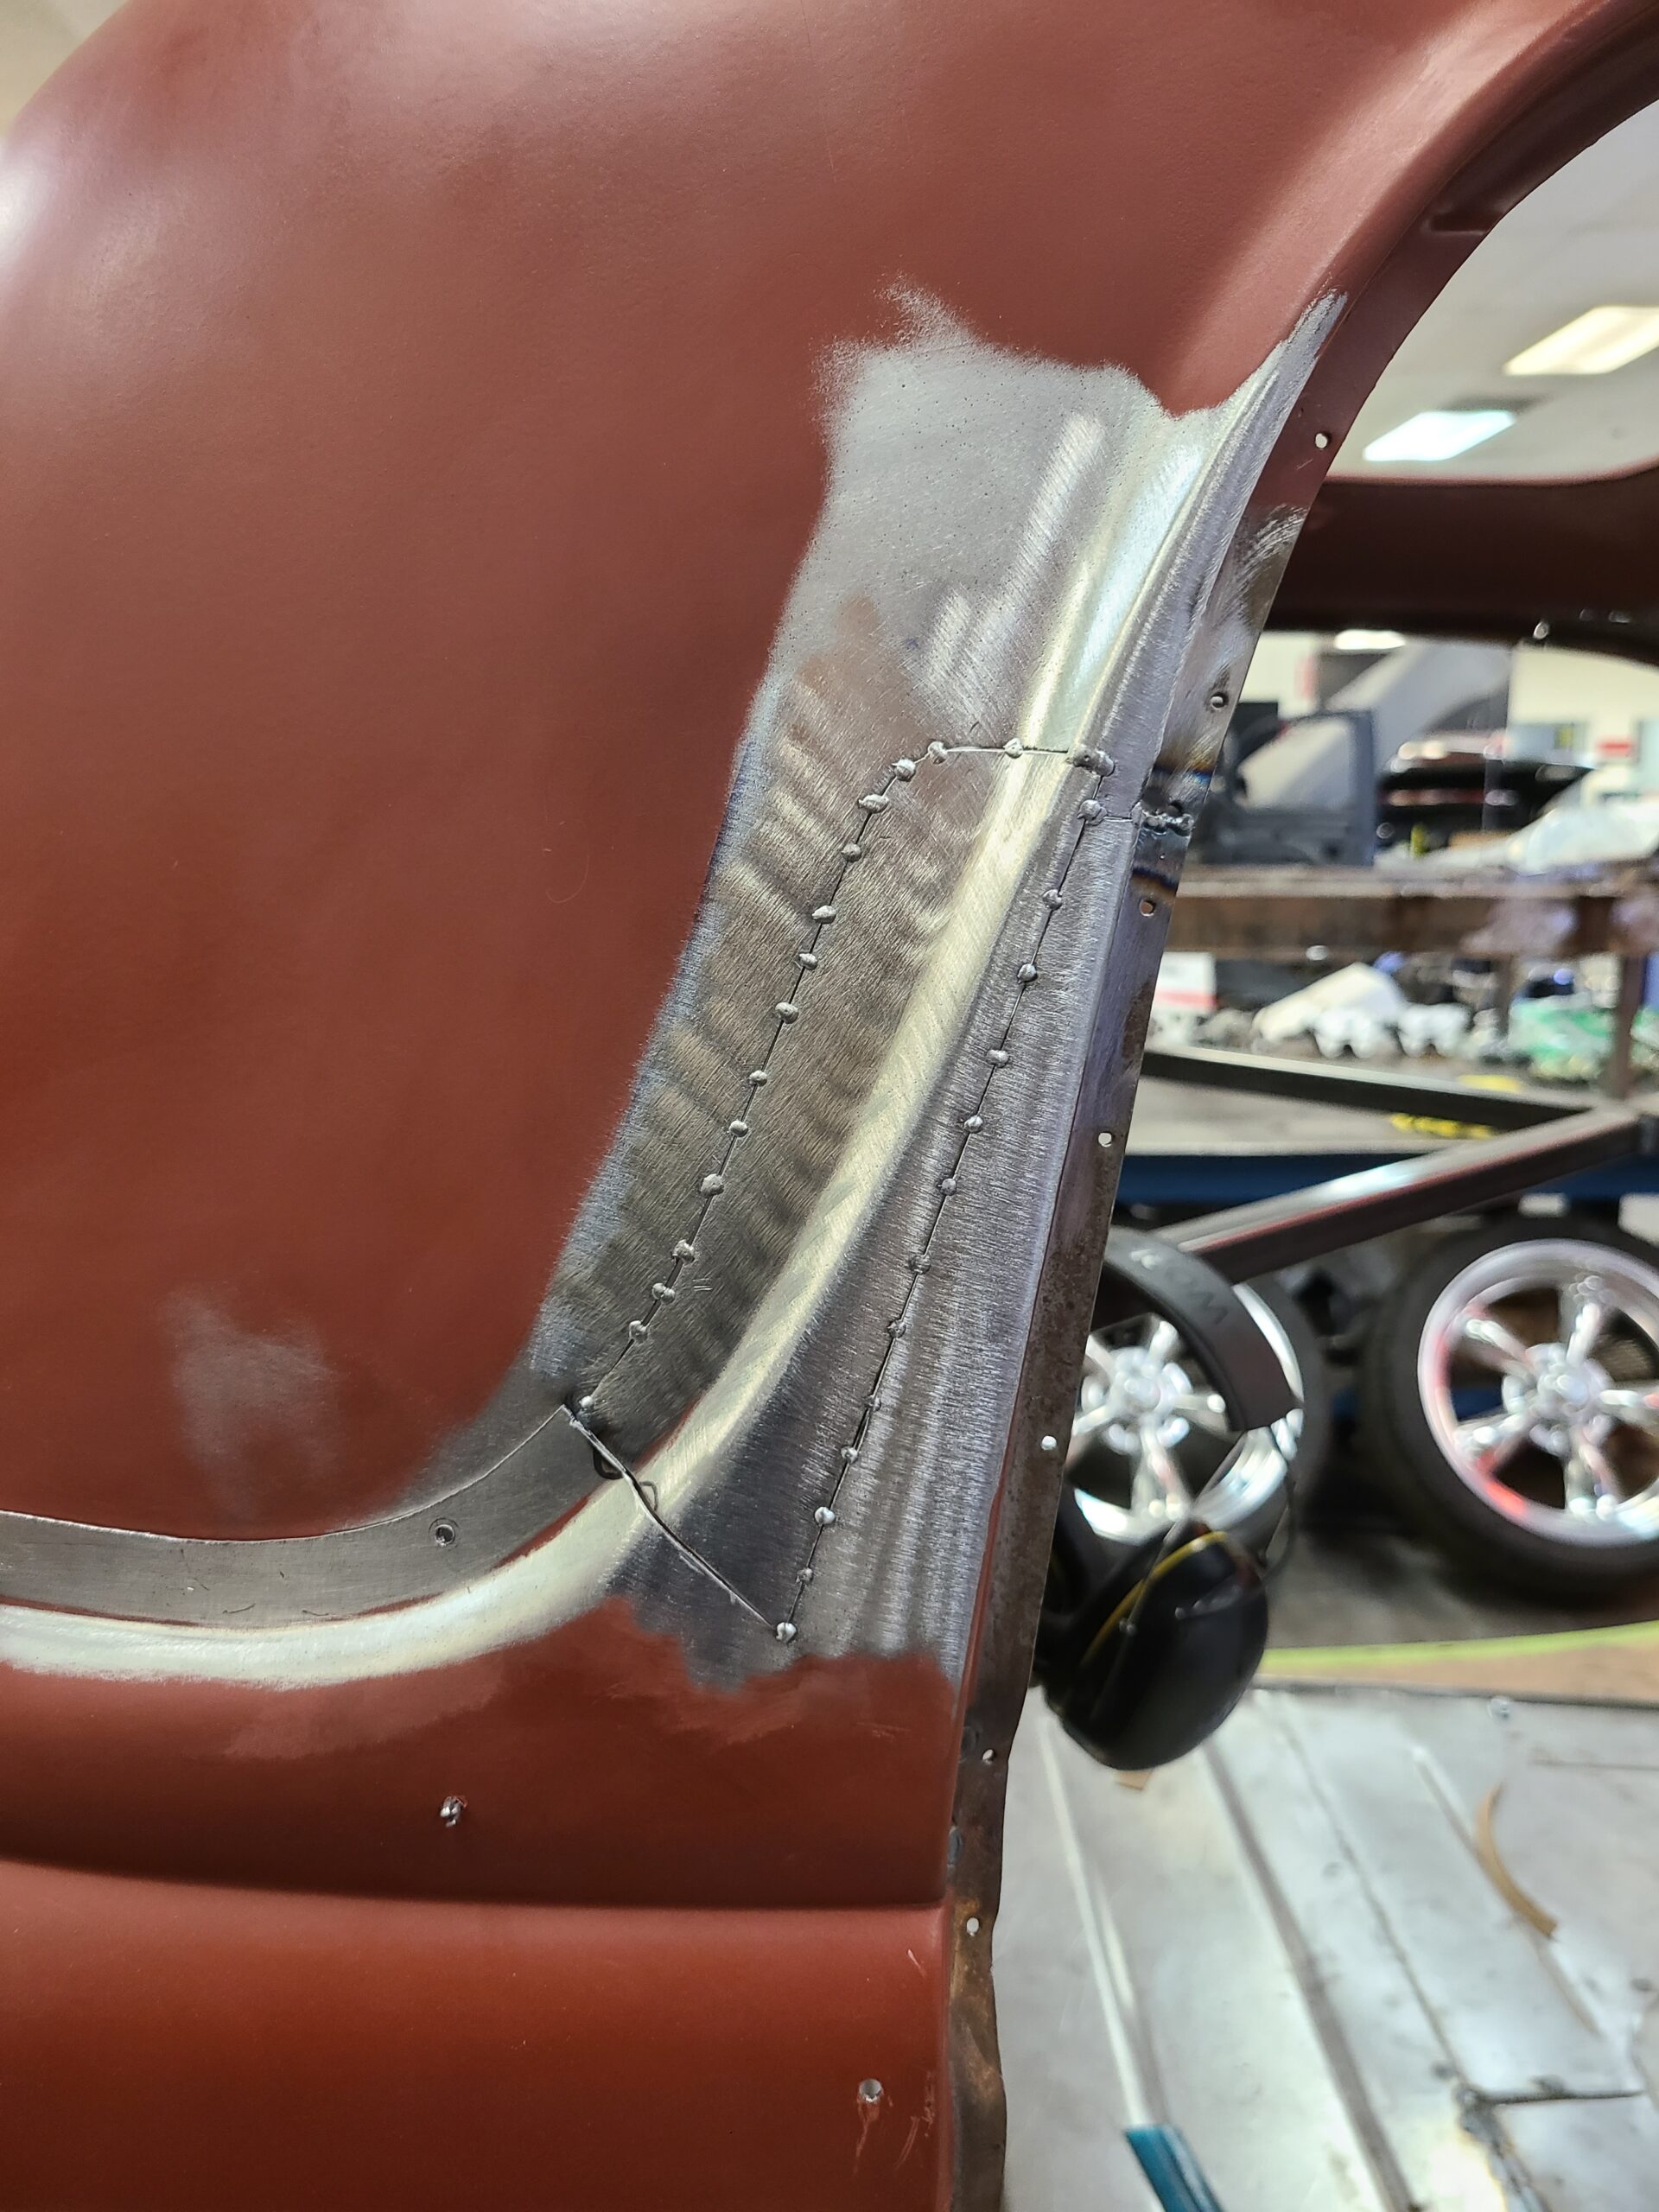
02 Nick Sinioris then rotated the area forward at the top trimmed it and welded it back in place
Nick Sinioris then rotated the area forward at the top, trimmed it, and welded it back in place. Then he used the rear edge of the repositioned piece to scribe and cut the top where the edges met.

Read More: Hot Rod Restoration: 1932 Ford Panel Truck

While time-honored and effective, the technique takes time. Nobody has a perfect hand, so the cut lines never line up perfectly for a tight weld gap. Tuning those parallel edges takes a long time.

Overlapping The Panels

Nick Sinioris chopped the windshield posts, door jambs, and rear window with parallel cuts. But he made only one cut around the rest of the top. Then he slid the top section down into the body. The panels overlap, so drilling and pinning them turns the body into its own fixture.

- Advertisement -

And that’s only one advantage. The other comes when making that second cut to remove the overlapped area. Cutting tightly against that overlapped edge ensures almost perfectly parallel cut lines. If you really want those cut lines to match nicely, cut through both panels at the same time. This month he shows us how he did it.

He’ll also sort out all the other details, like fitting the doors. He has a few tricks up his sleeve for that, too.
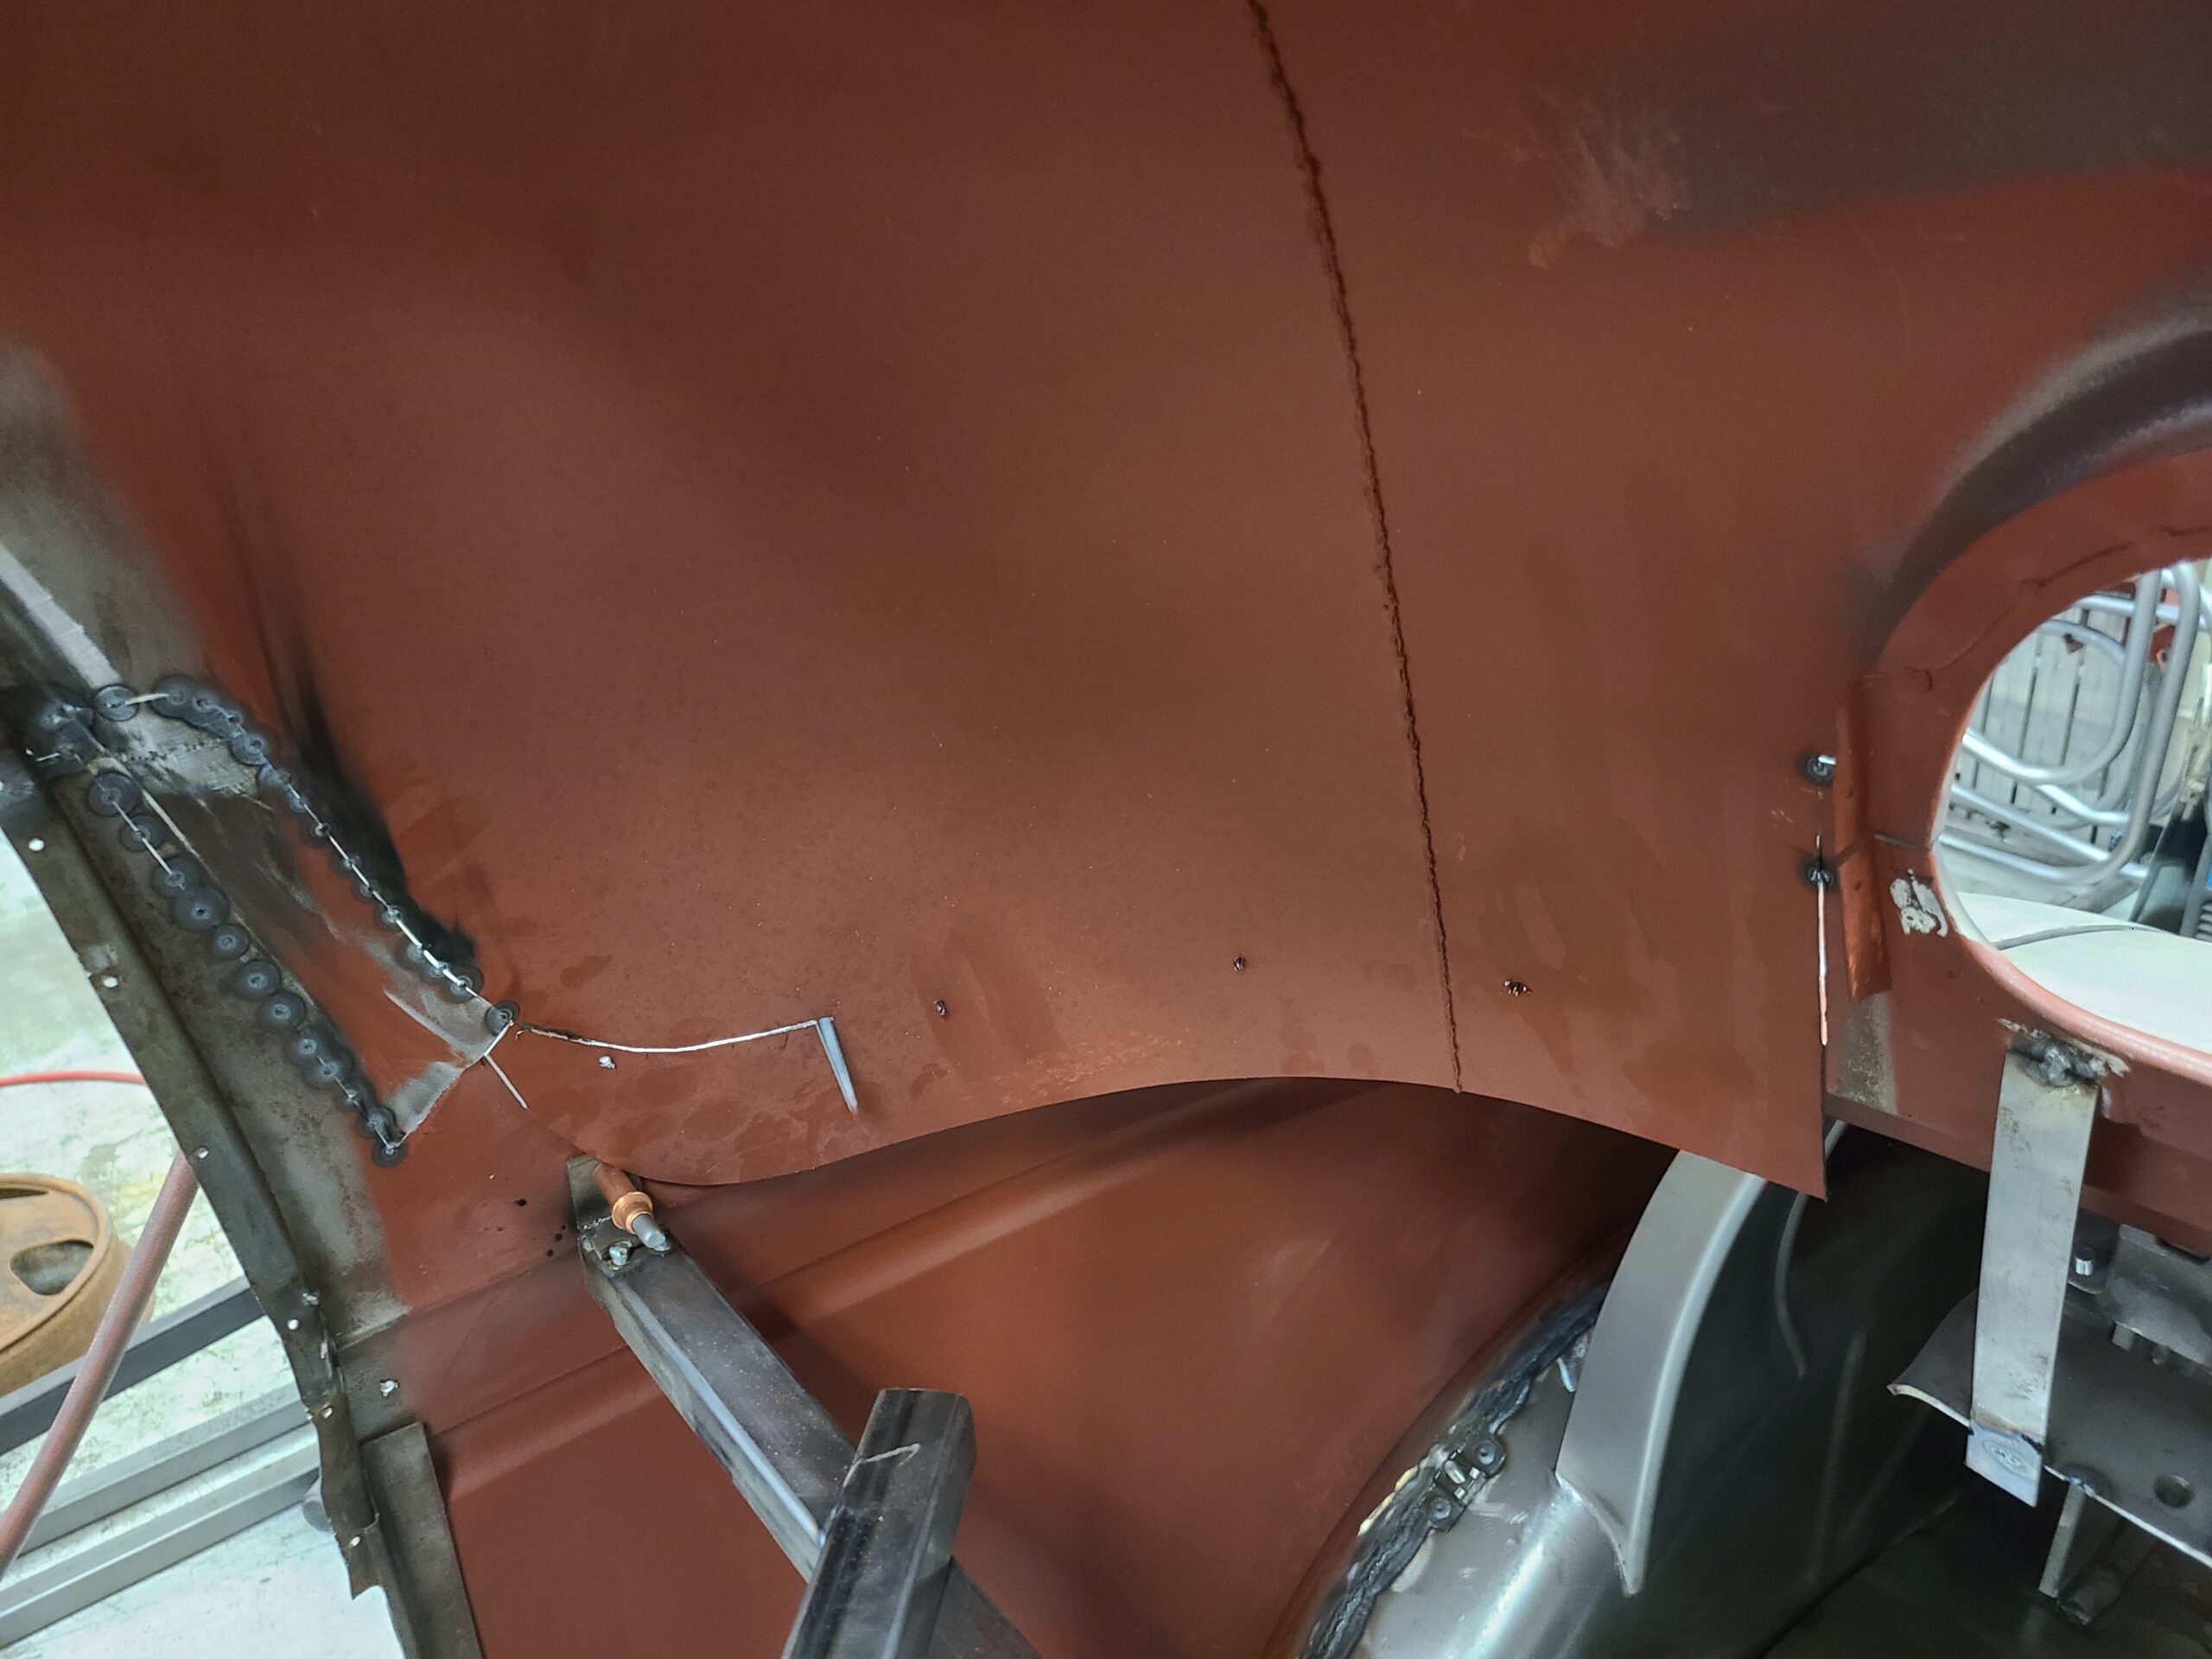
03 Remember when we described how Sinioris cut the whole top lid loose and shoved it back down into the body
Remember when we described how Sinioris cut the whole top lid loose and shoved it back down into the body? He cut along the edge made by removing the top.

Fitting The Doors

Starting in 1932, Ford added a third hinge to Deuce DeLuxe coupes and all Model 40s. It better supports the longer and heavier doors, but that third hinge adds another kink to the process.

Read More: How To Install A Custom Chassis On A ‘47 Ford Convertible

There are no guarantees that hinges will realign after a top chop, even on a two-hinge door. DeLuxe Deuce coupes add another variable: because the back of the door jamb angles forward, the hinge moves back as the top comes down.

That requires cutting and welding the hinge to realign its pin with the others. We’ve seen people use a long section of rod stock through the hinge pinholes as an alignment fixture, but stock that thin bends easily, and that, too, can make the hinges bind.
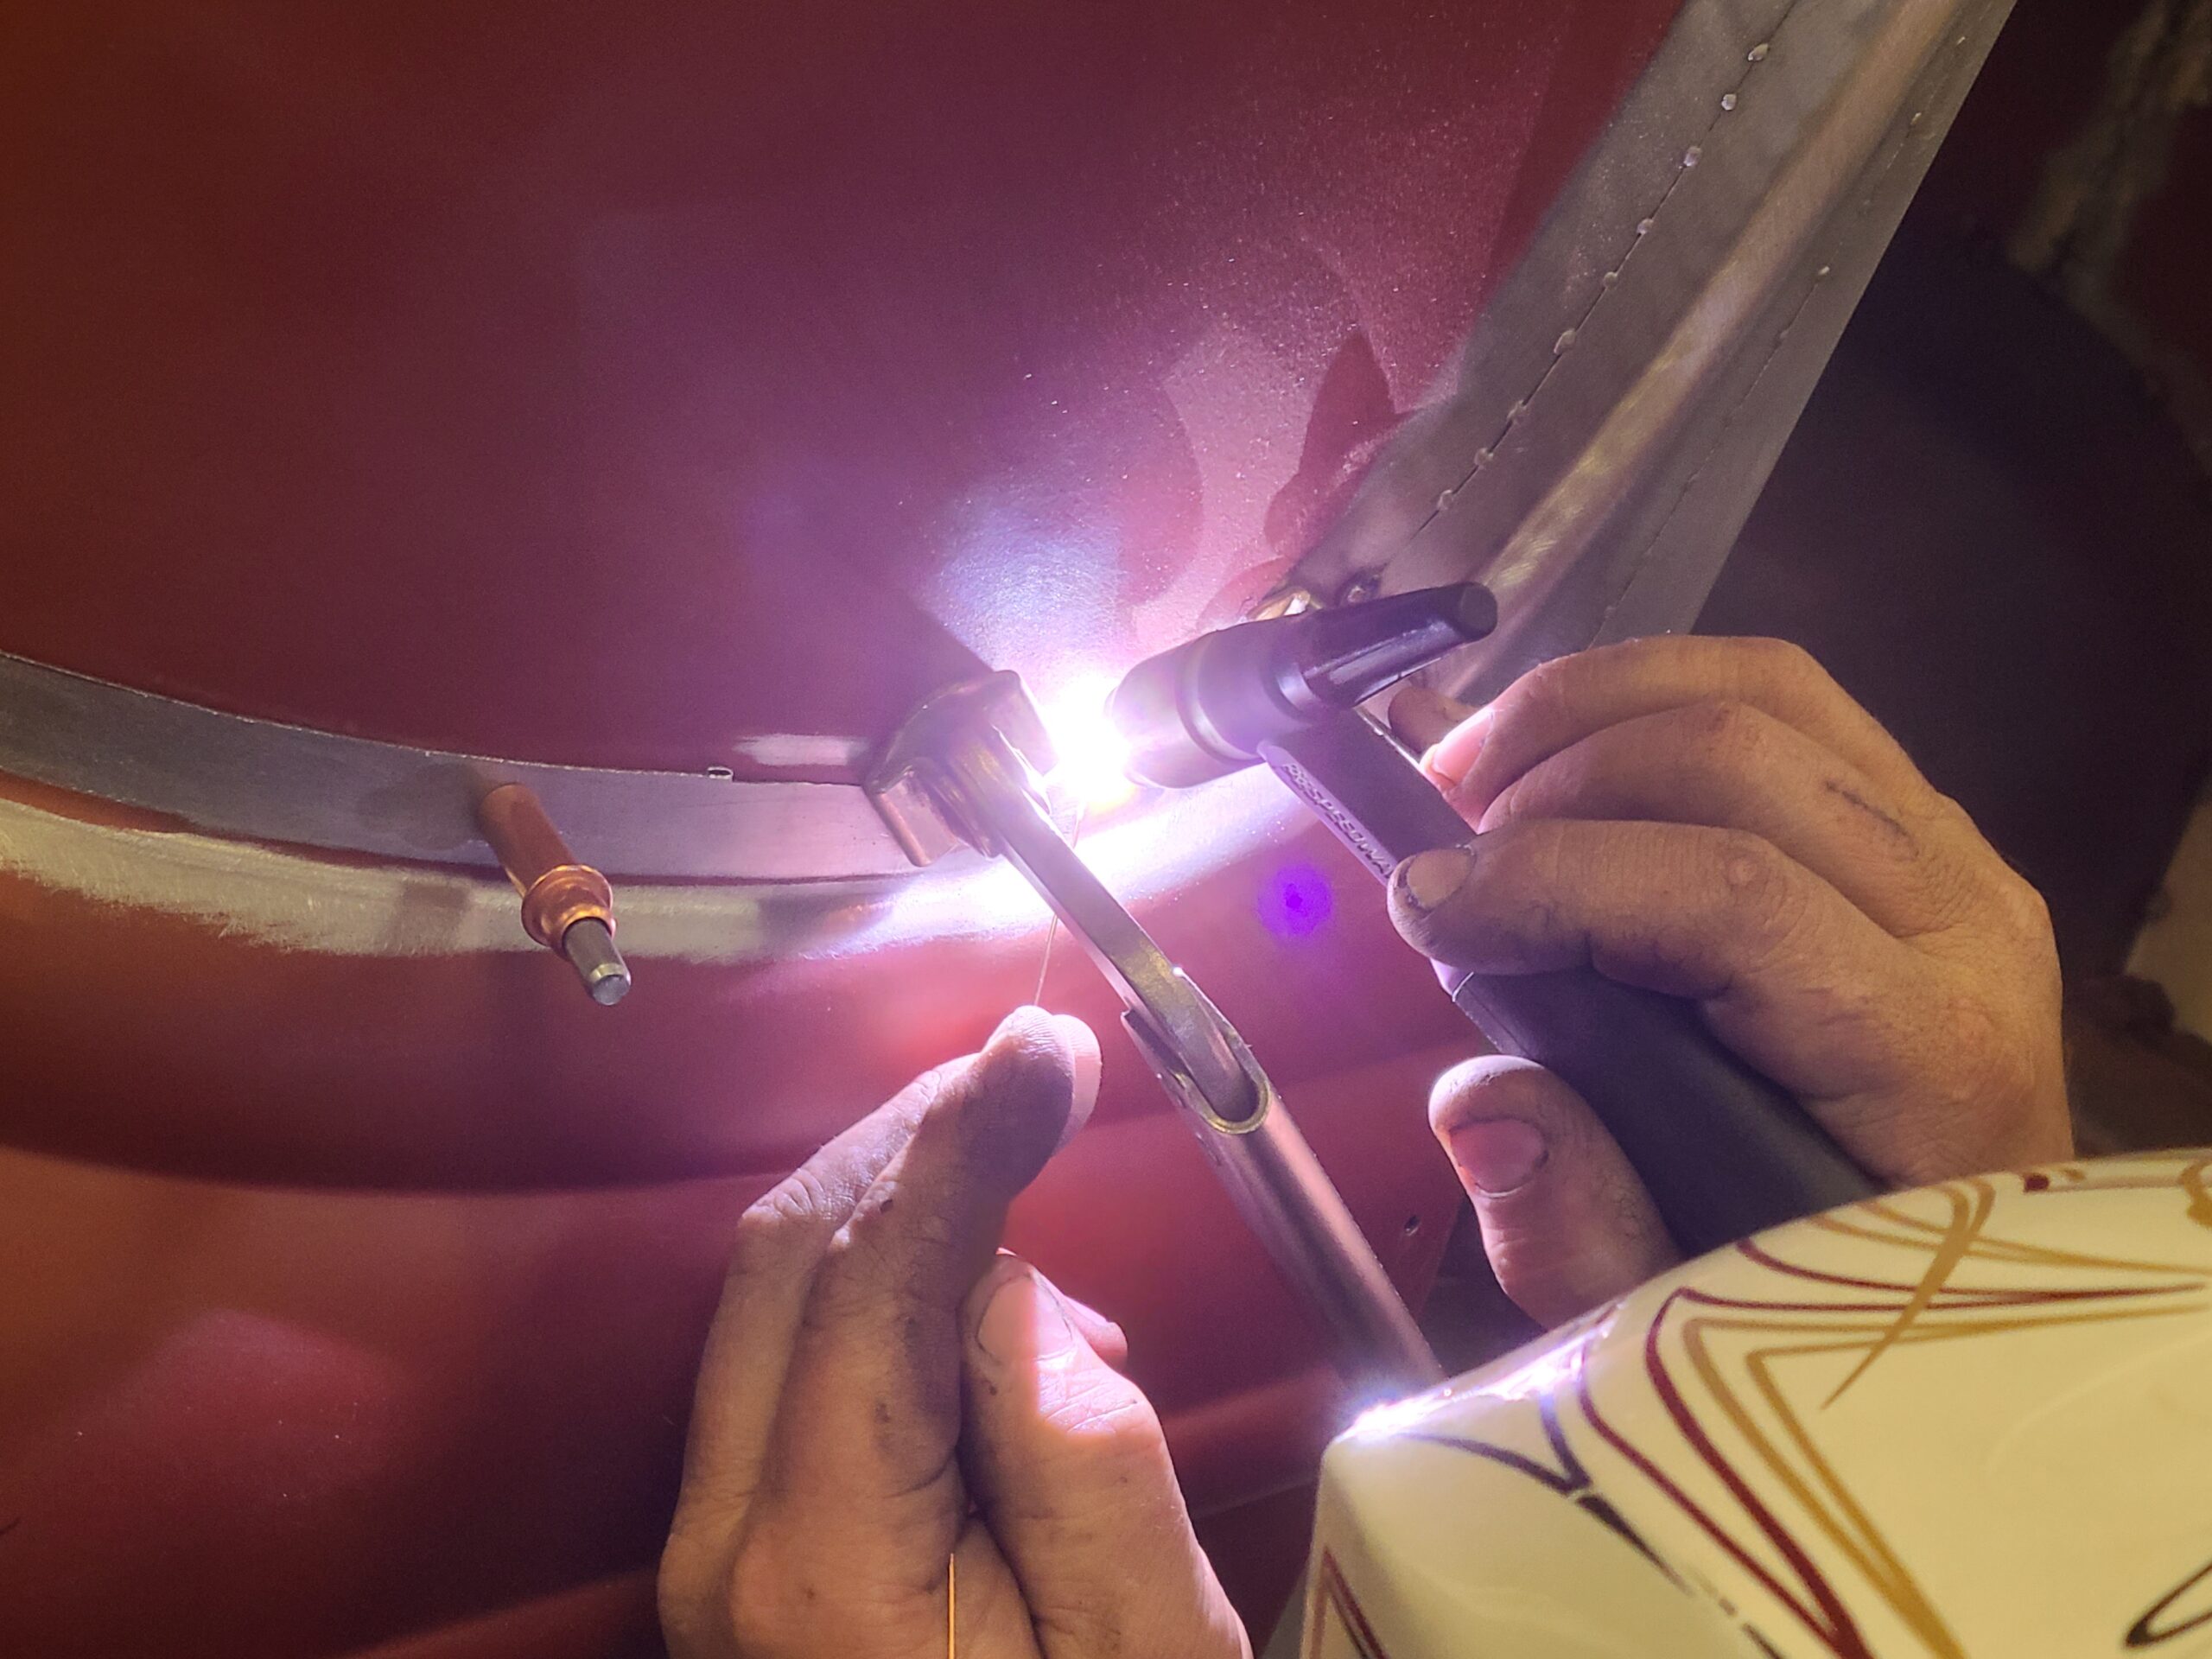
04 Cutting along that line leaves a very tight and consistent gap between the panels
Cutting along that line leaves a very tight and consistent gap between the panels. After every few inches of cutting, Sinioris lined up the panels and tacked them every 1/2 inch or so.

Hinge-O-Liner Solution

Instead, Sinioris used a Hinge-O-Liner, a tool made by Leading Edge Machine and Design. It consists of an extruded fixture with billet brackets machined to take hinge pins. The company offers it in two flavors: short for open cars and long for open and closed cars. While a bit of a splurge, it costs a hell of a lot less than fixing a binding hinge. When used properly, this tool guarantees doors that open and close effortlessly.

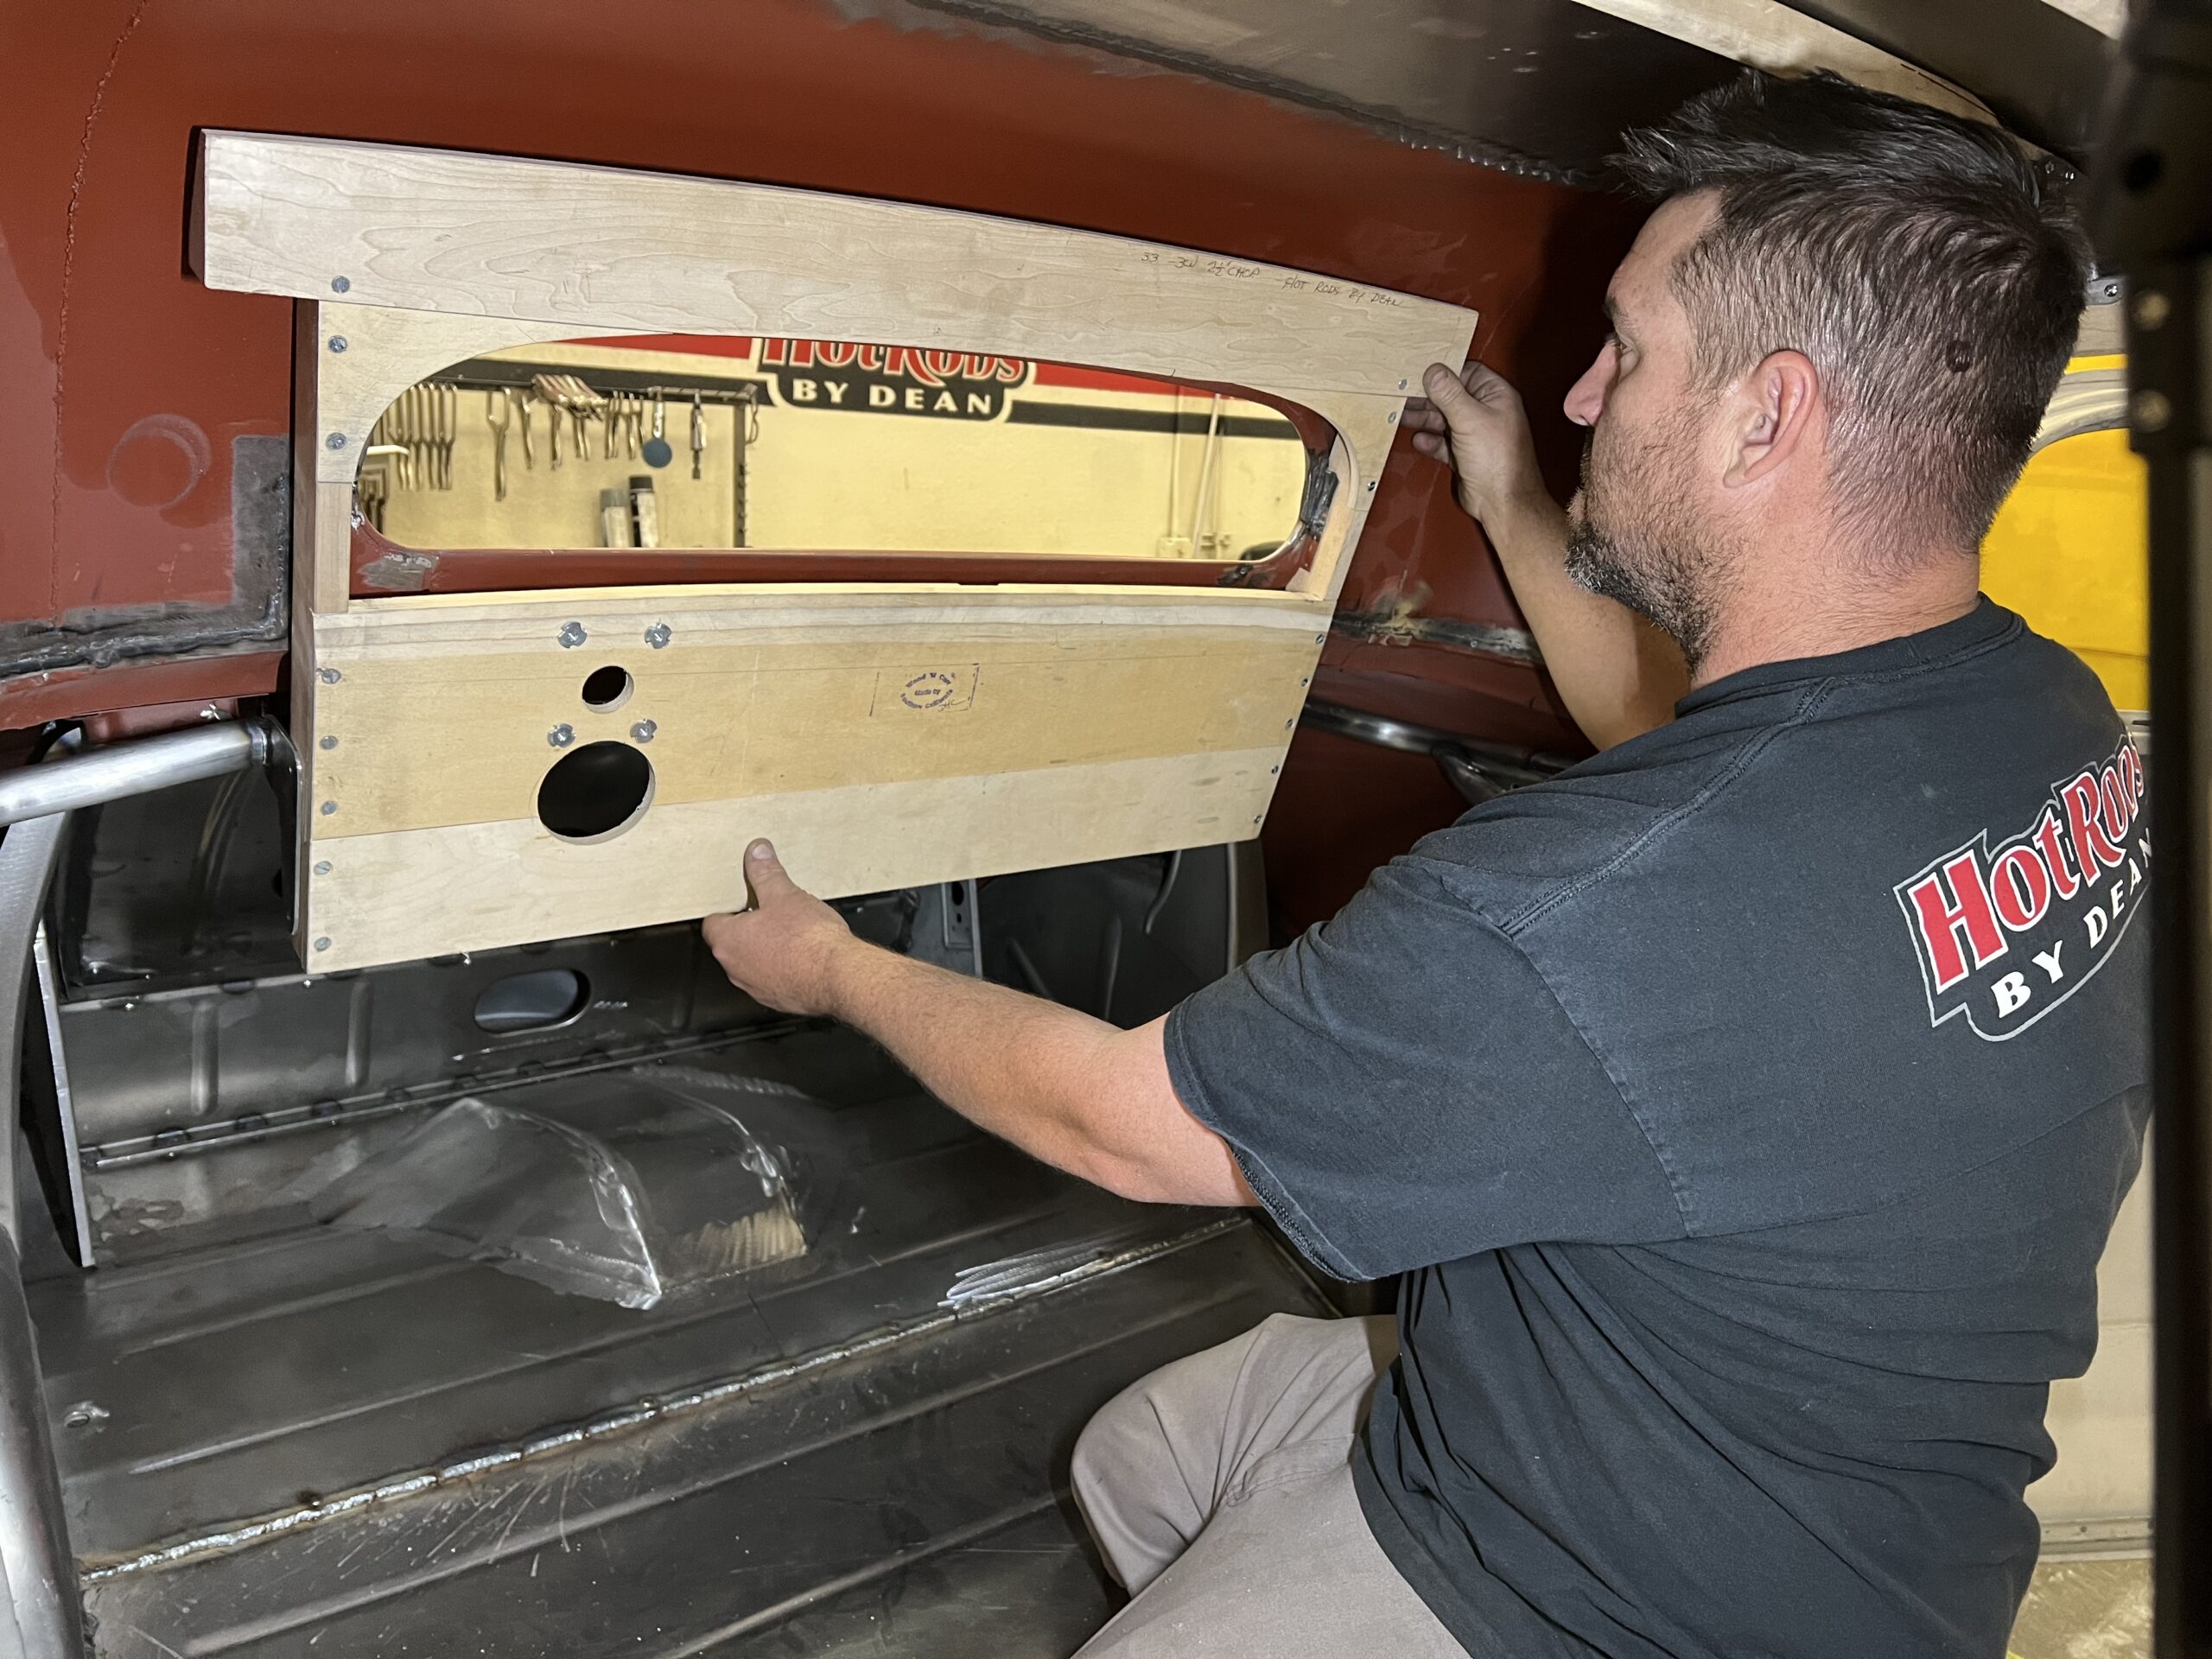
Sinioris also restored the body’s structural integrity with a wood kit from Woodn’ Carr. Though intended for stock bodies, the kits lend themselves to modification. Sinioris went one further by making a tubular-steel structure that ties the door jambs to the wheel tubs and mounts the trunk lid hinges. As the owner of a Deuce Coupe with a similar structure, I can testify to the effectiveness. The doors always open and close correctly, and it eliminates many of the jiggles, squeaks, and rattles consistent with older bodies, especially ones that use wood in a structural capacity.
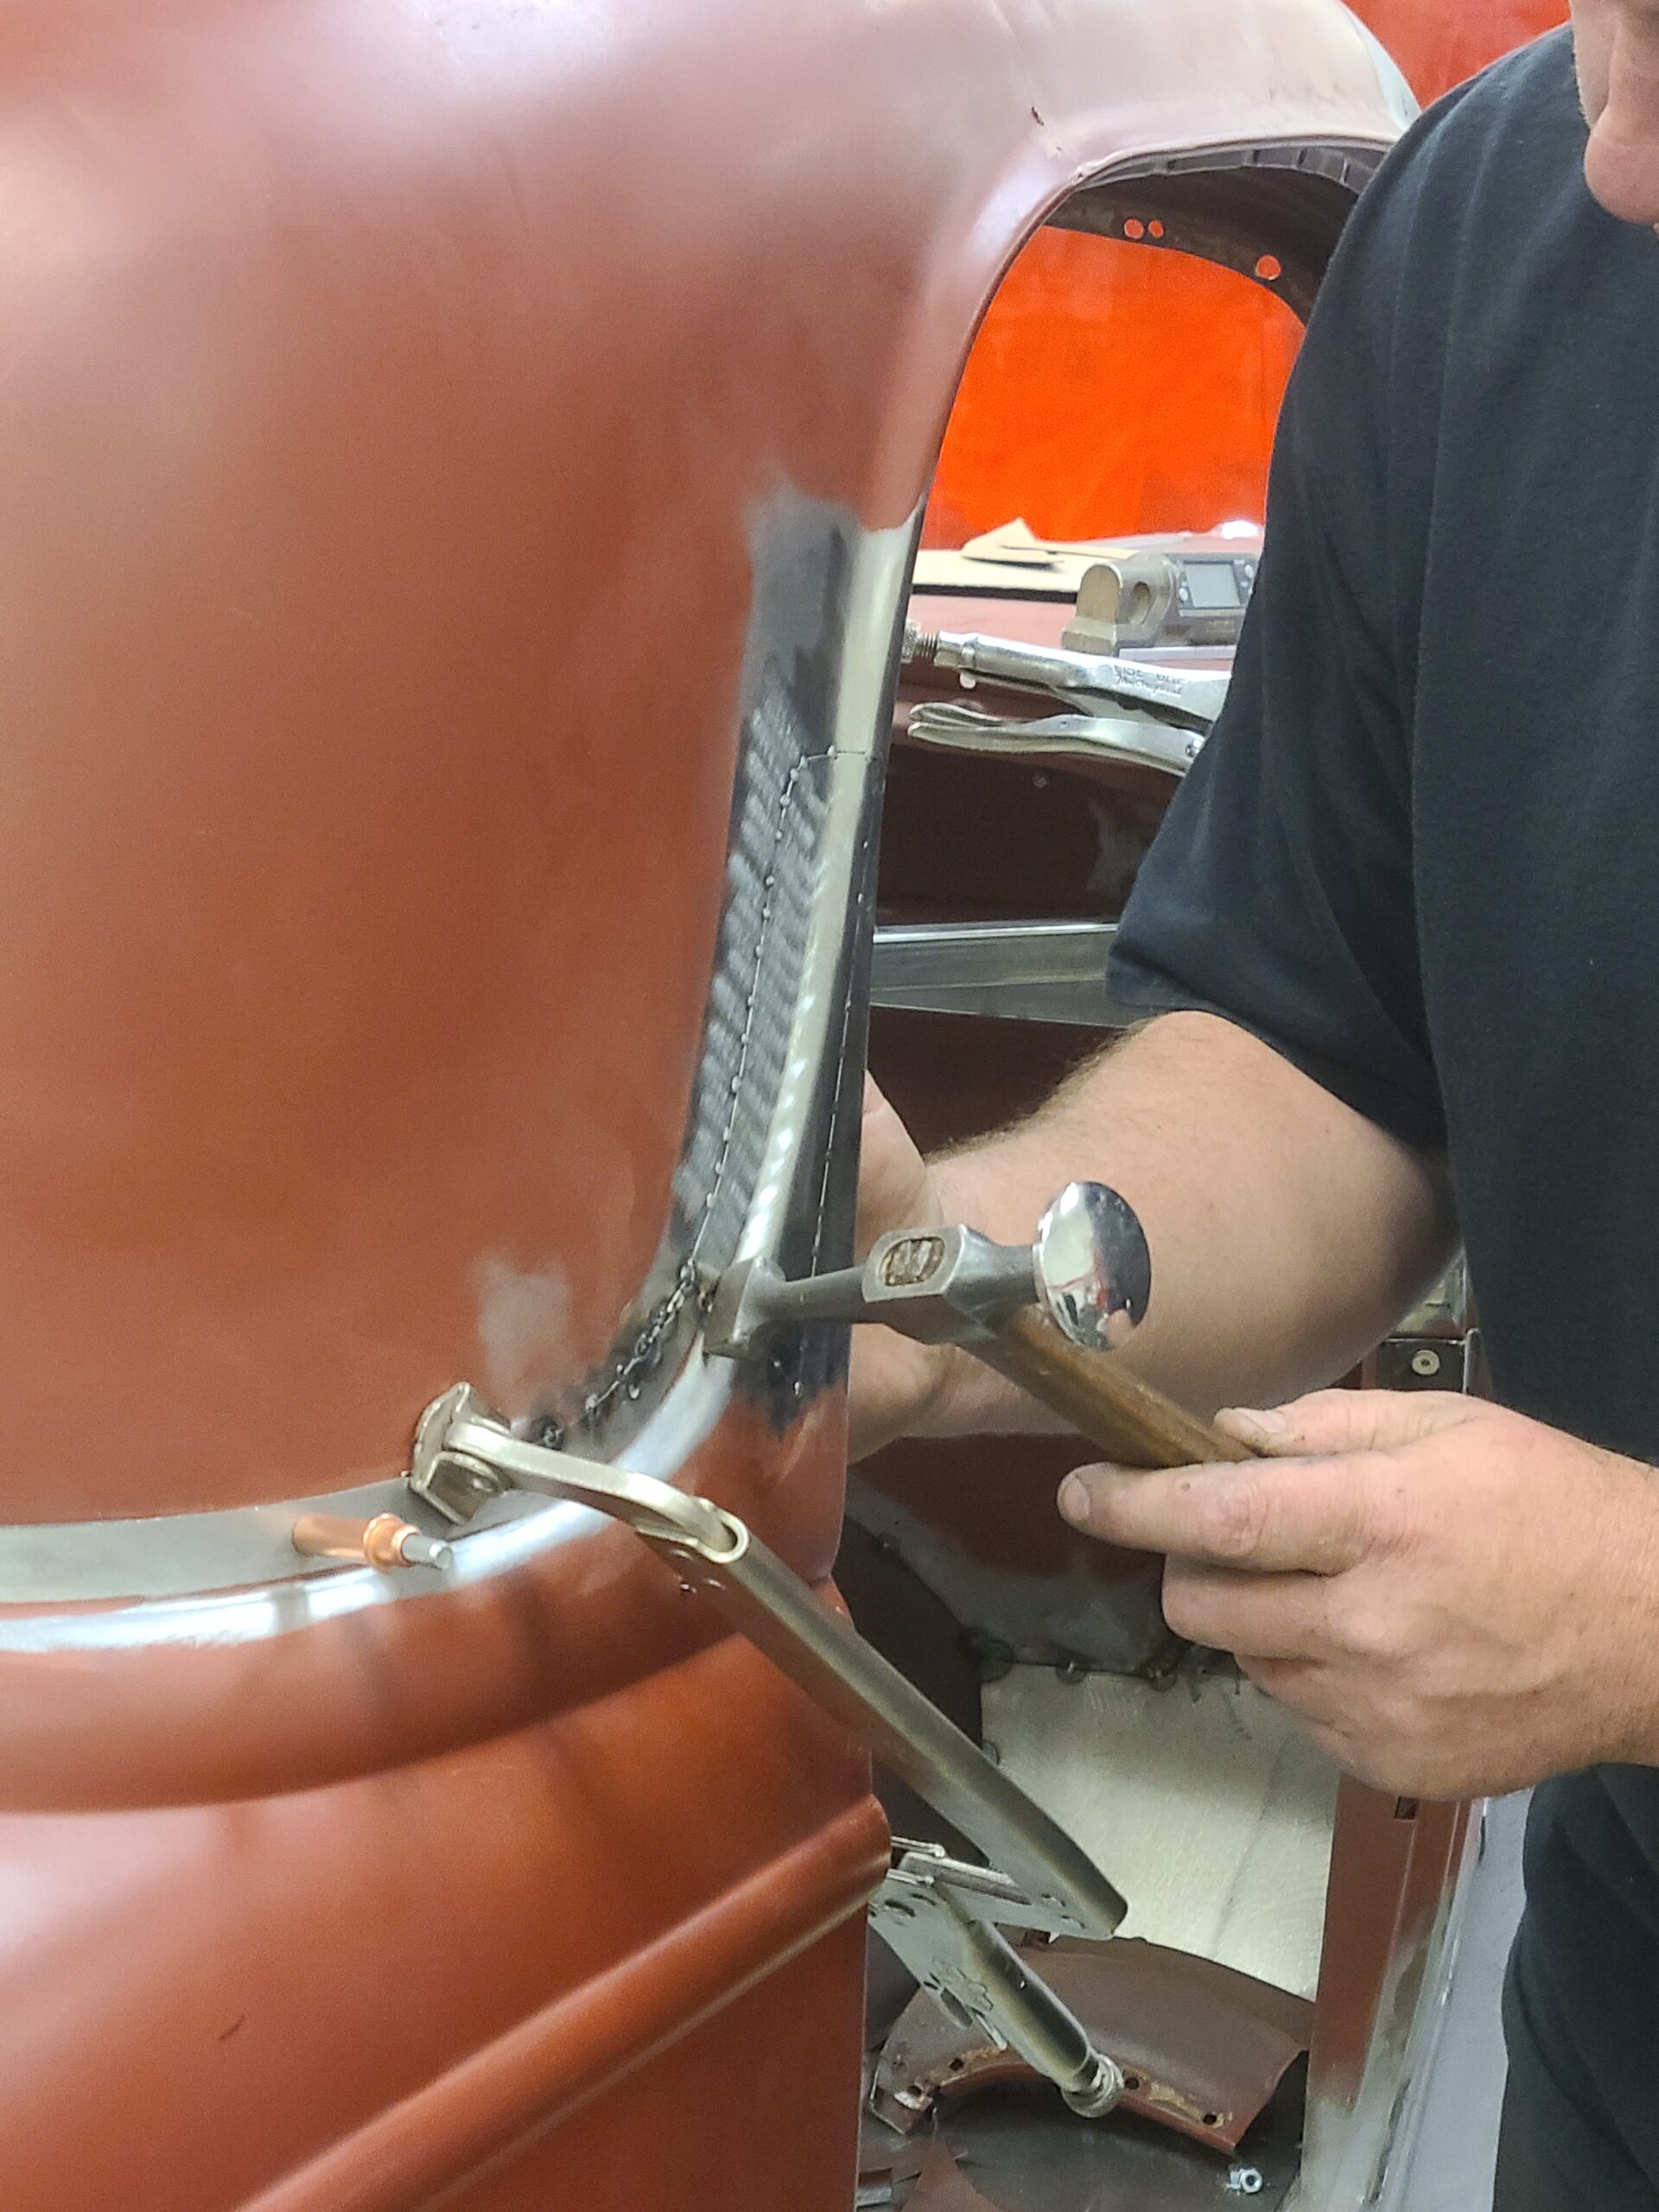
05 He tuned up the line with a dolly and hammer as he went ensuring the straightest possible shape
He tuned up the line with a dolly and hammer as he went, ensuring the straightest possible shape.

Beyond that, the rest of the job is straightforward. Don’t get us wrong, top chopping is still a lot of work no matter how you slice it; however, this way eliminates a lot of trial fitting and tedious trimming and filing. And I don’t know about you, but I’ll do anything to avoid real work.
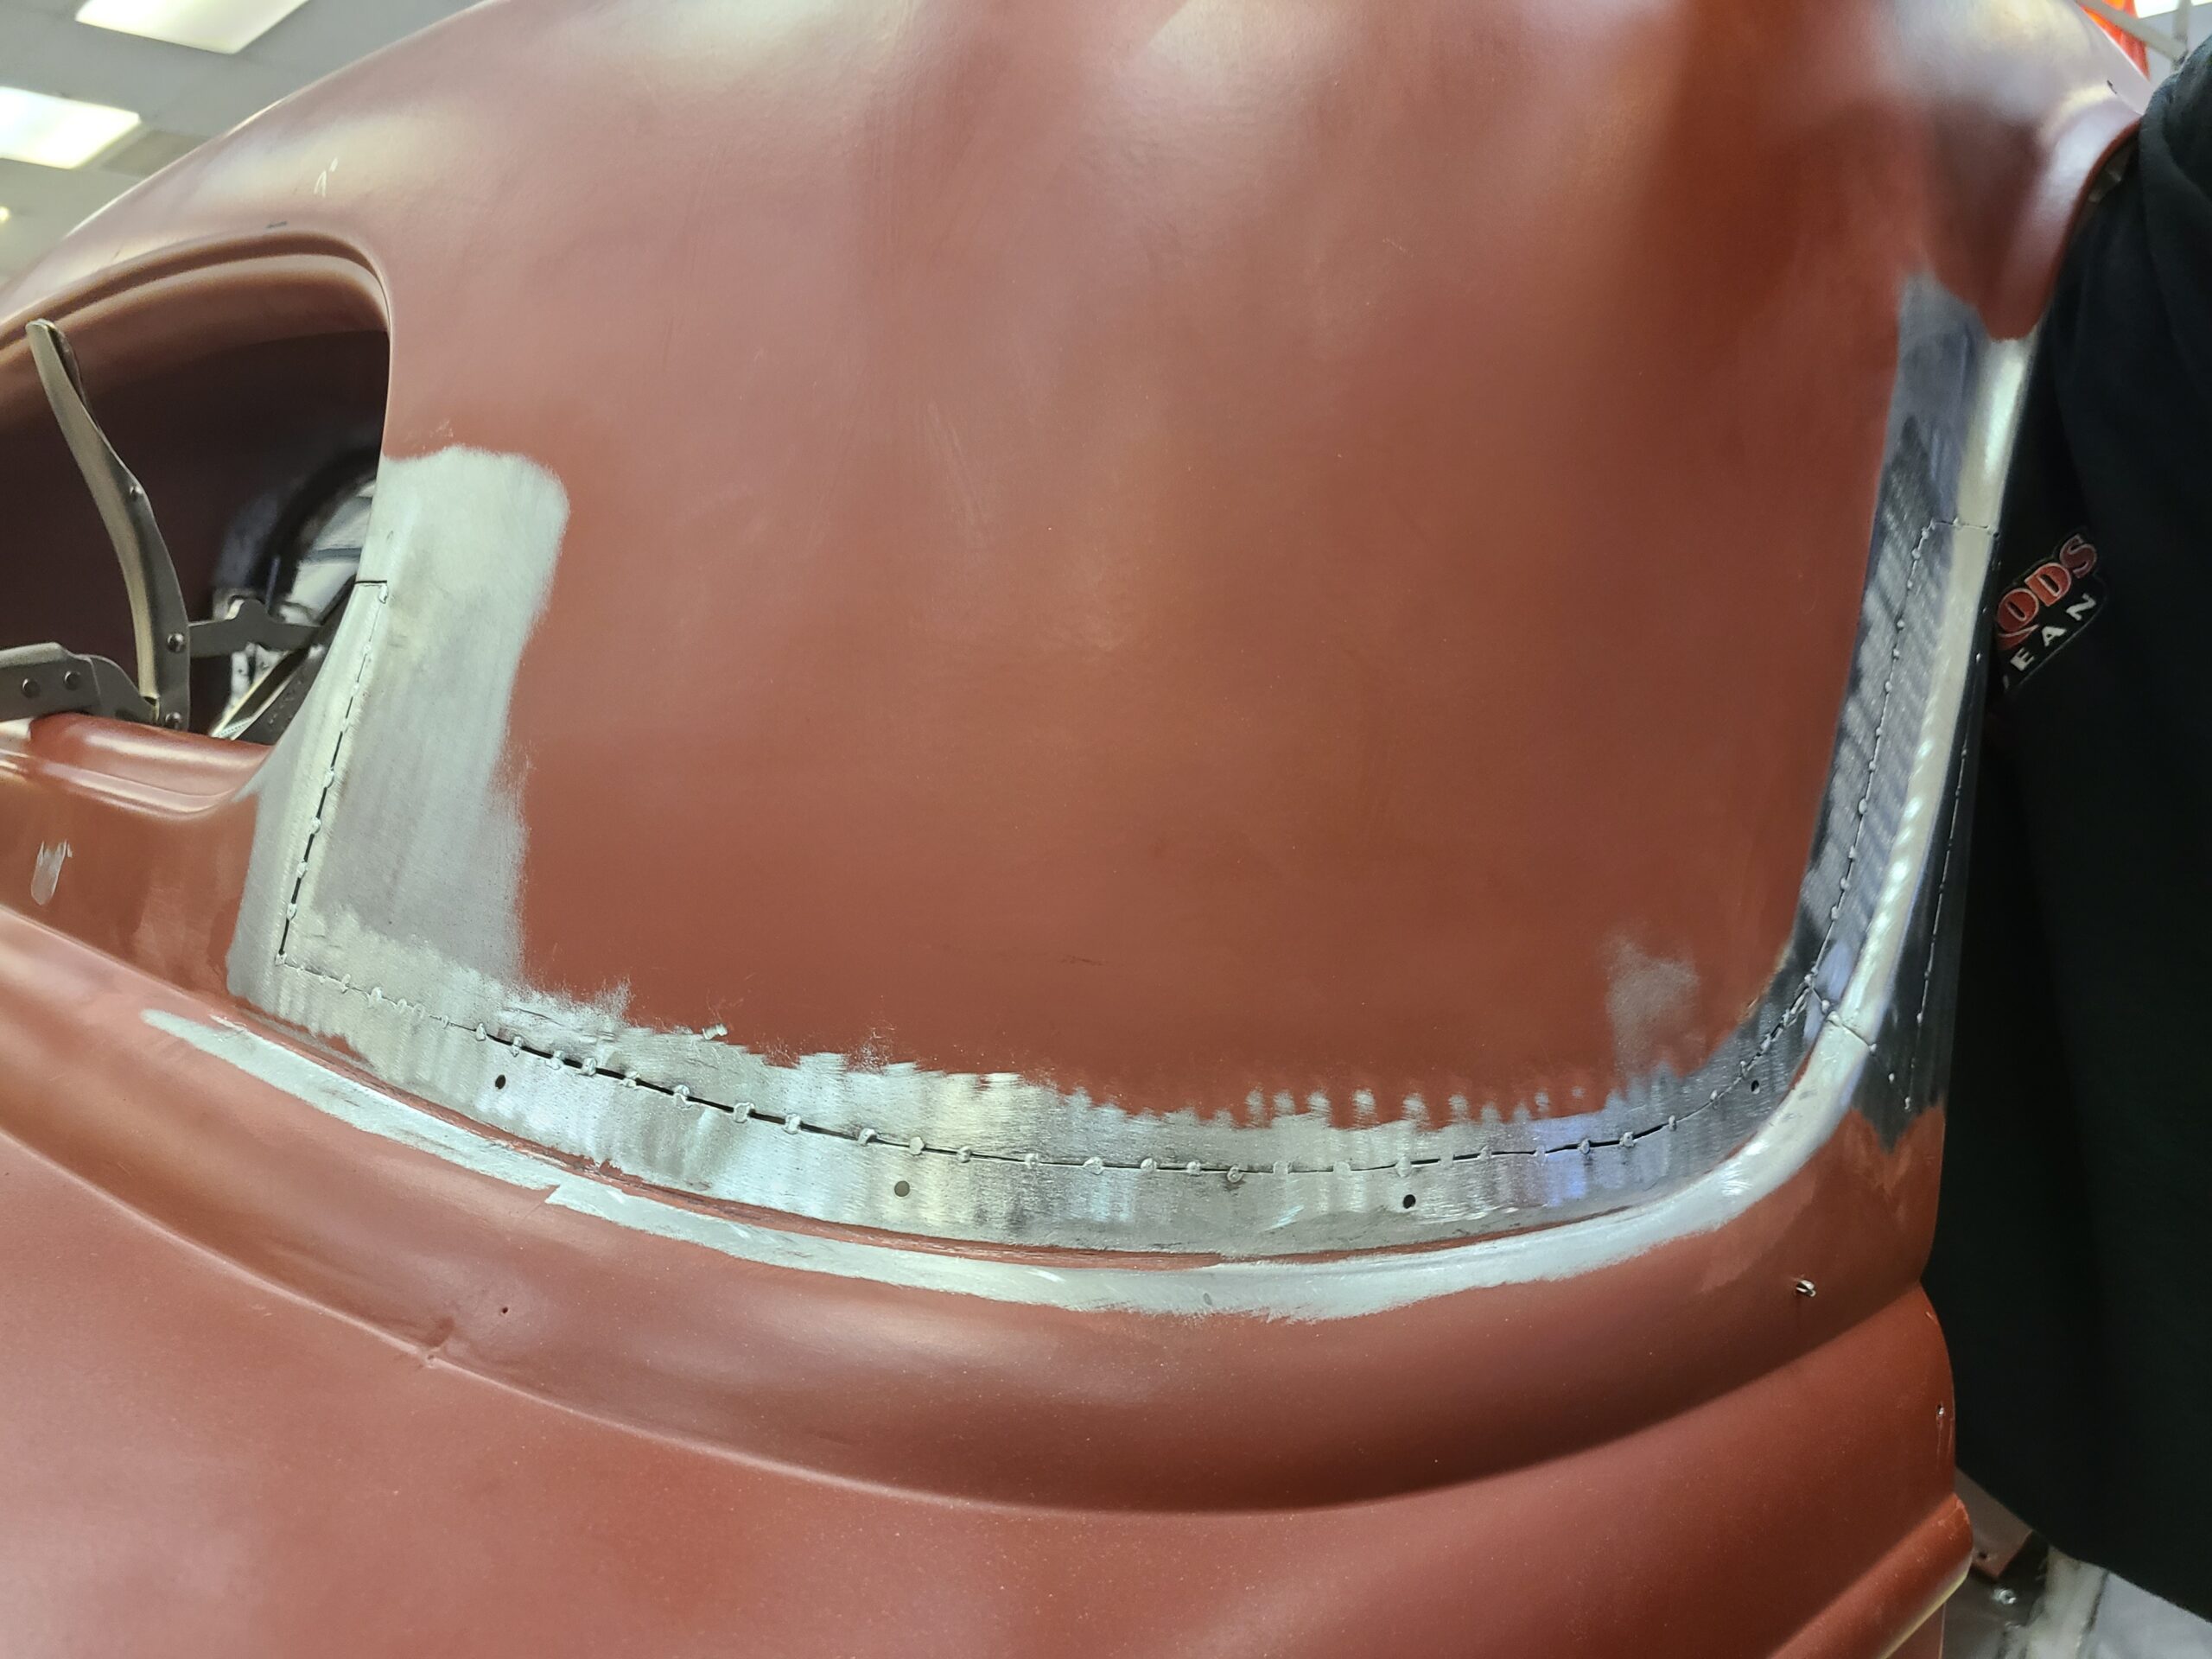
06 The fit between the panels is tight and consistent enough to require minimal filler rod and resultant heat
The fit between the panels is tight and consistent enough to require minimal filler rod and resultant heat. He proceeded to work his way around the top.
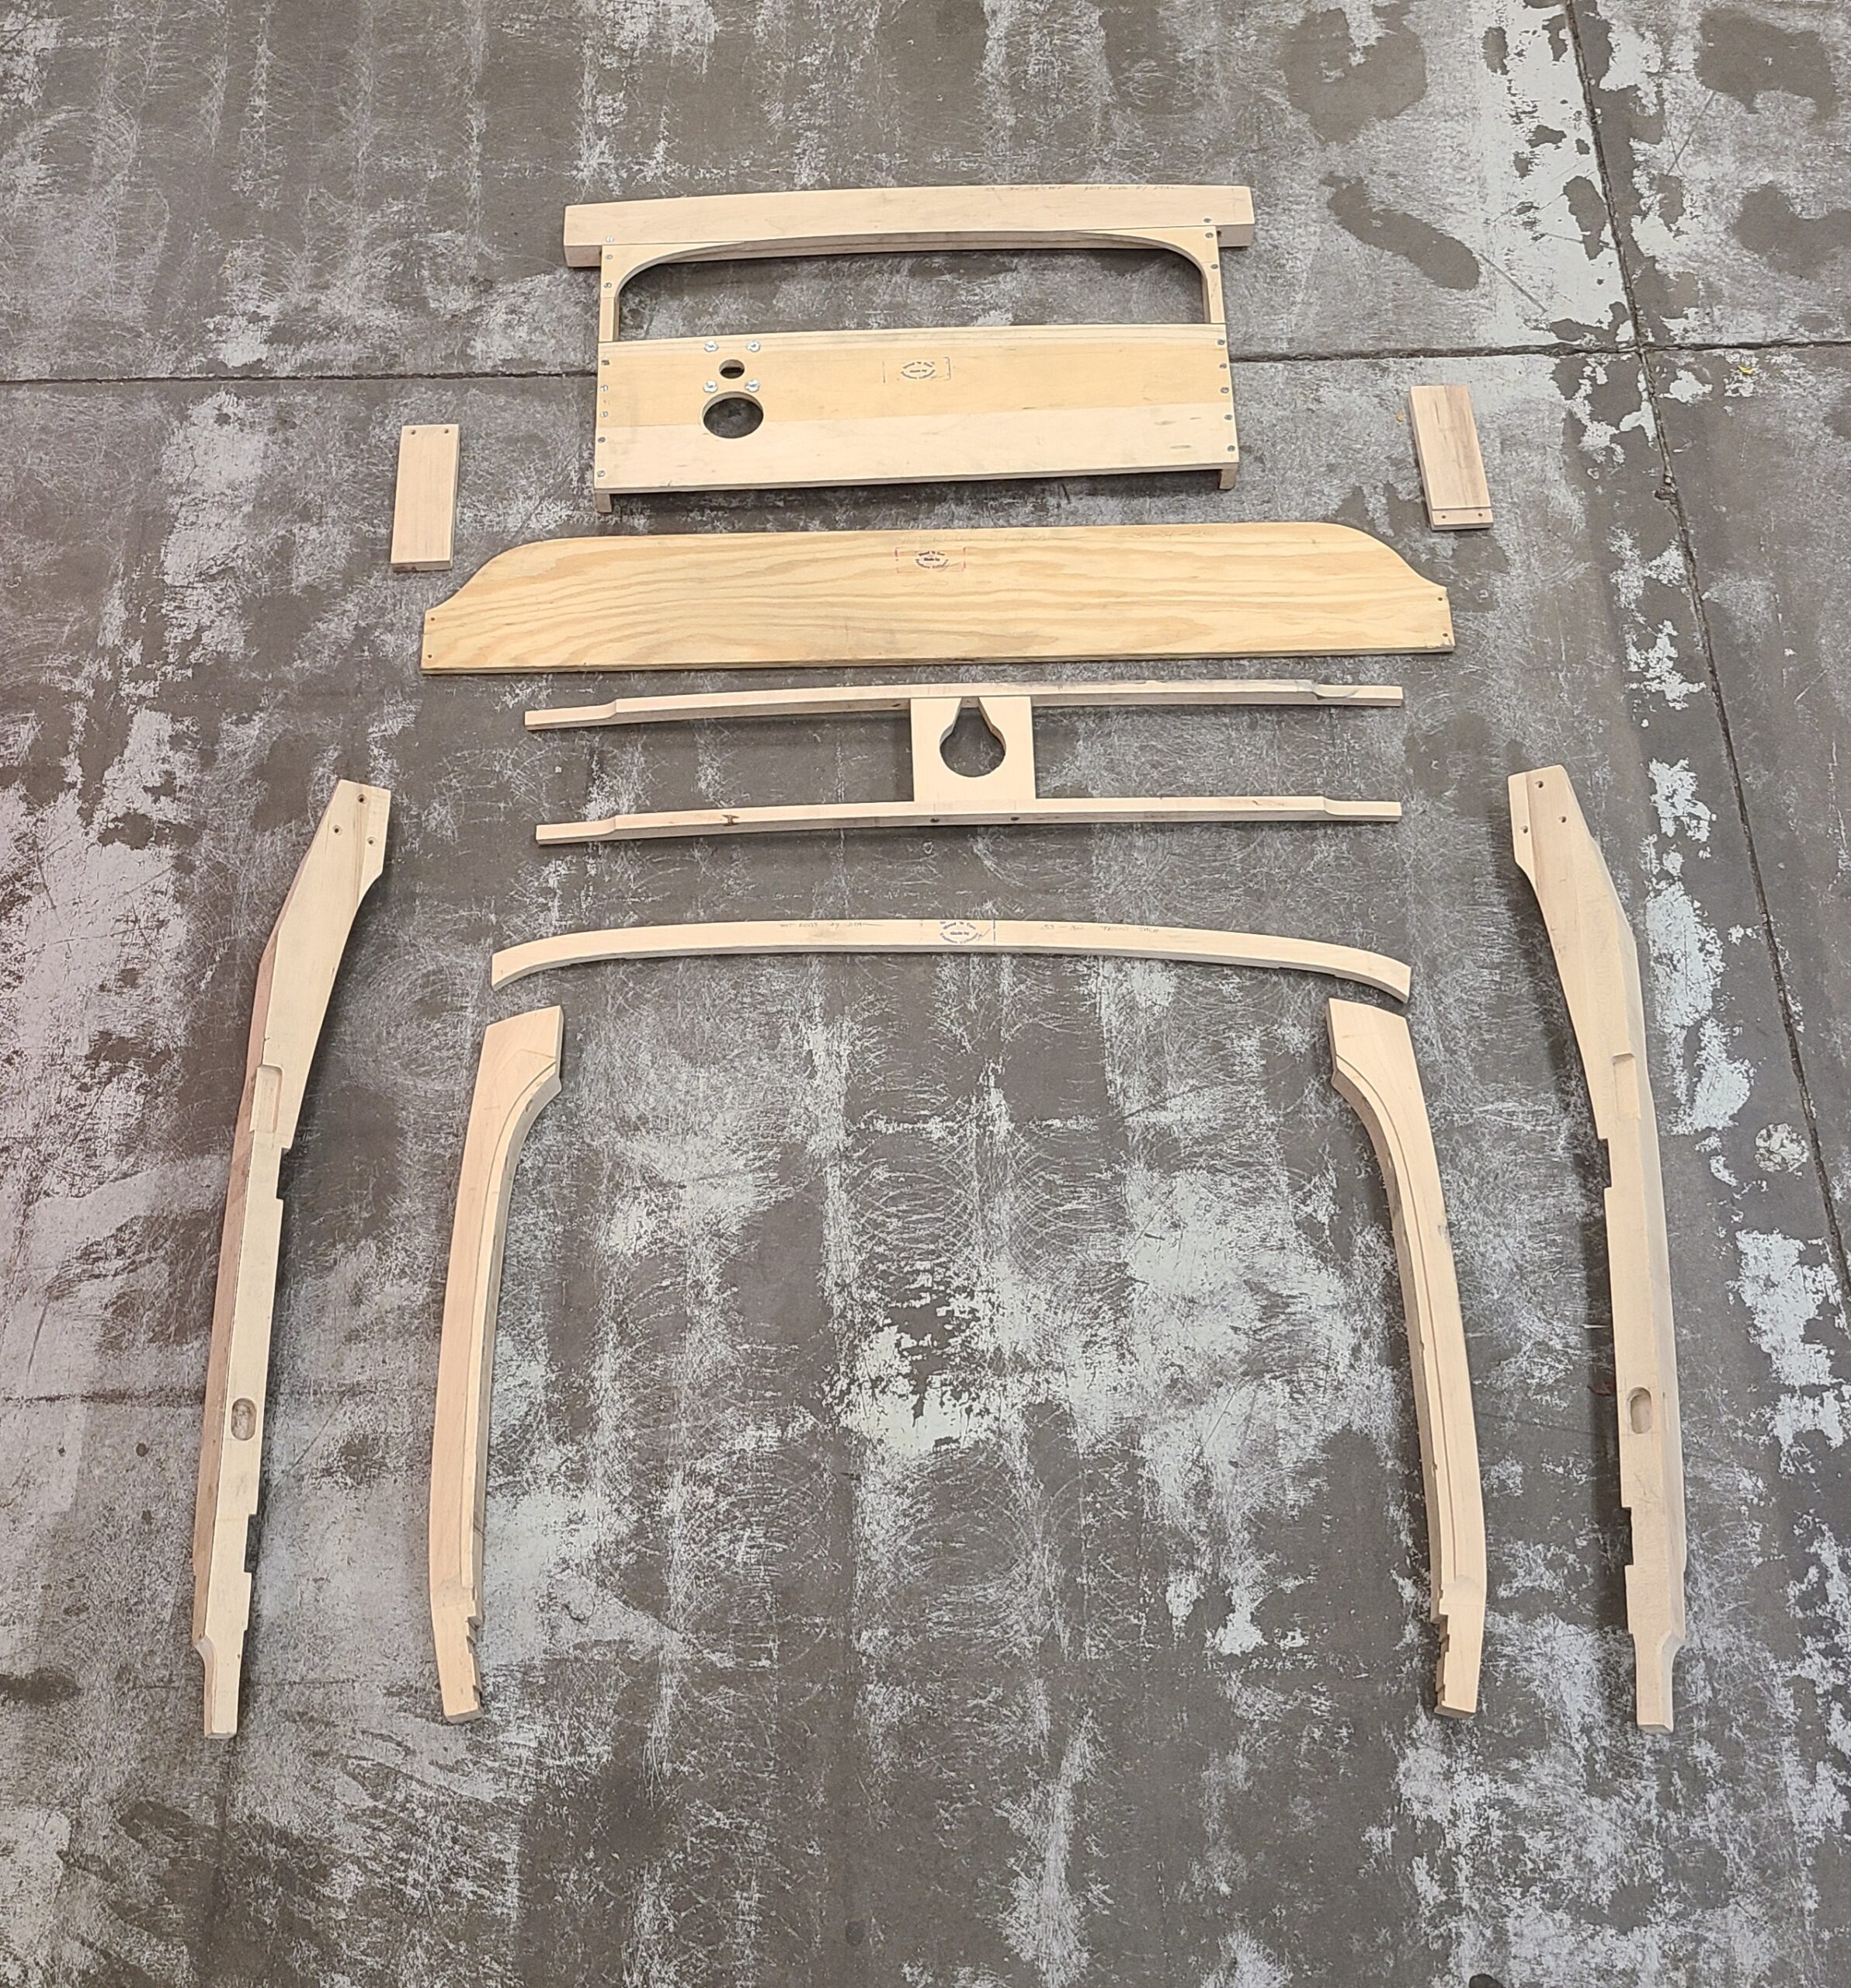
07 Woodn Carr reproduces the wood kits for 32 34 Fords
Woodn’ Carr reproduces the wood kits for ’32-34 Fords. The kits come shaped to fit with a little excess required to accommodate for tolerance variations. Sinioris also specified no top-hinge pocket, which we’ll explain in the following steps.
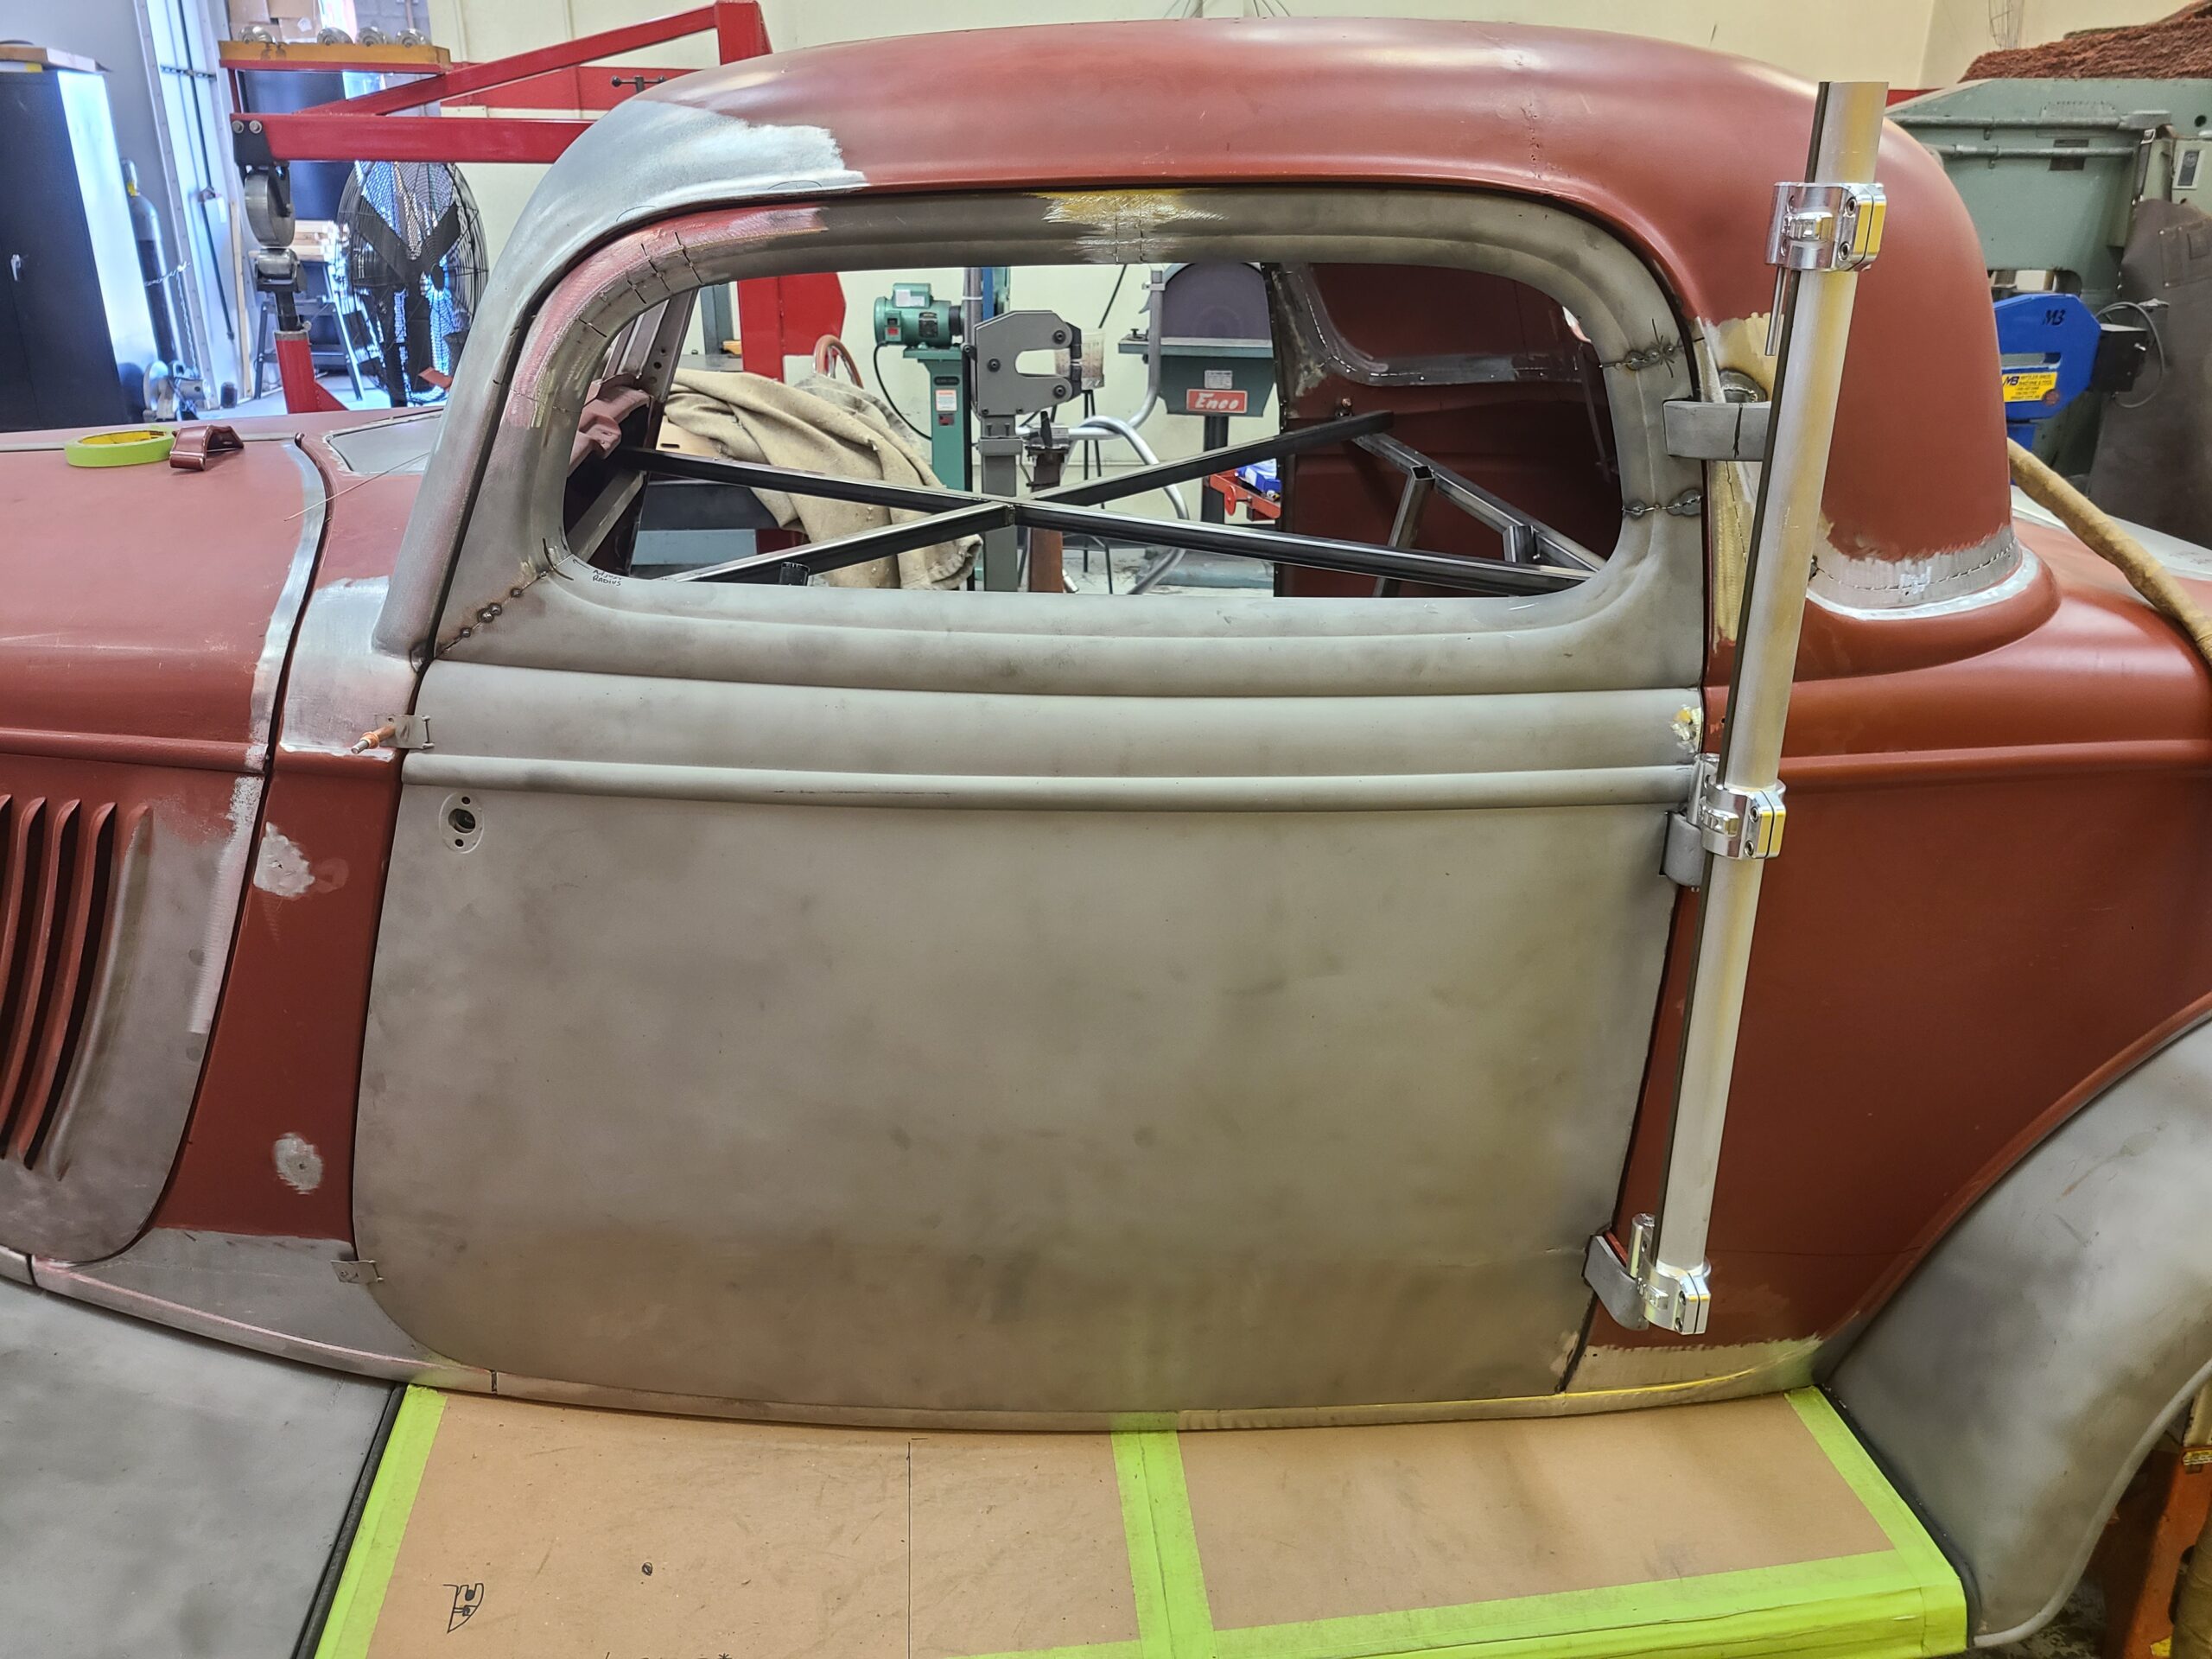
08 He mounted the door to the two lower hinges then proceeded to chop the door frames
He mounted the door to the two lower hinges then proceeded to chop the door frames.
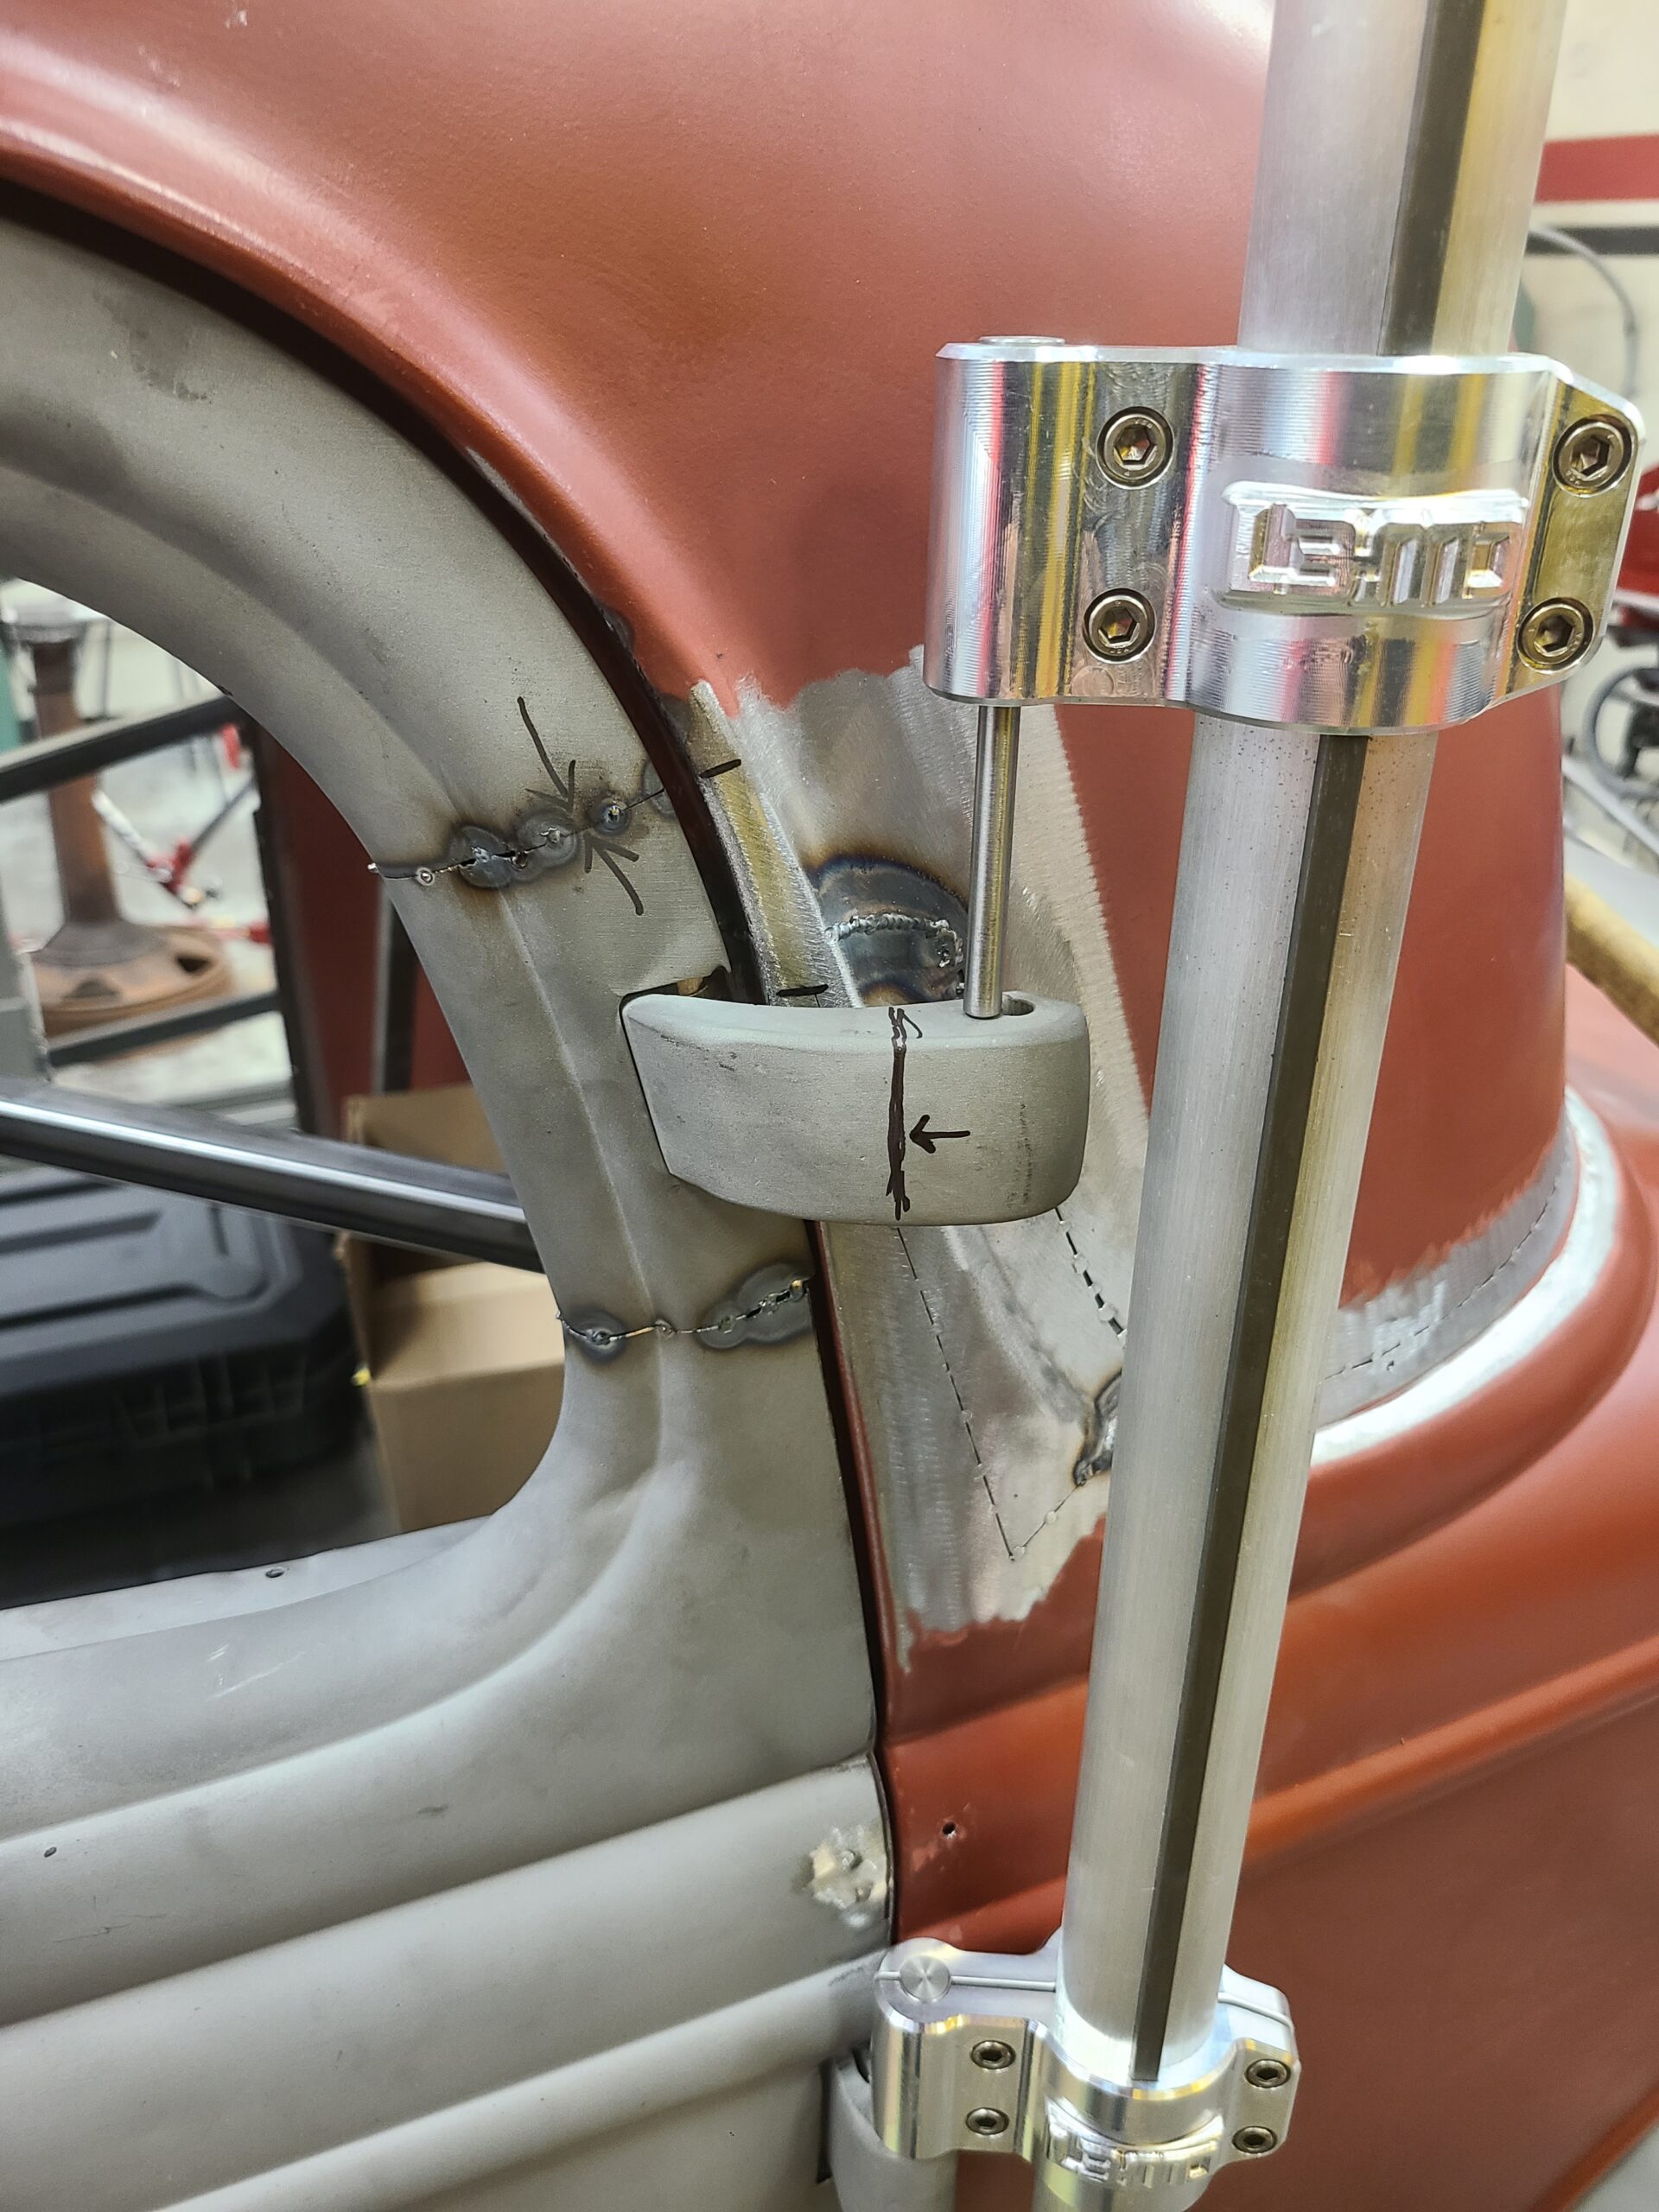
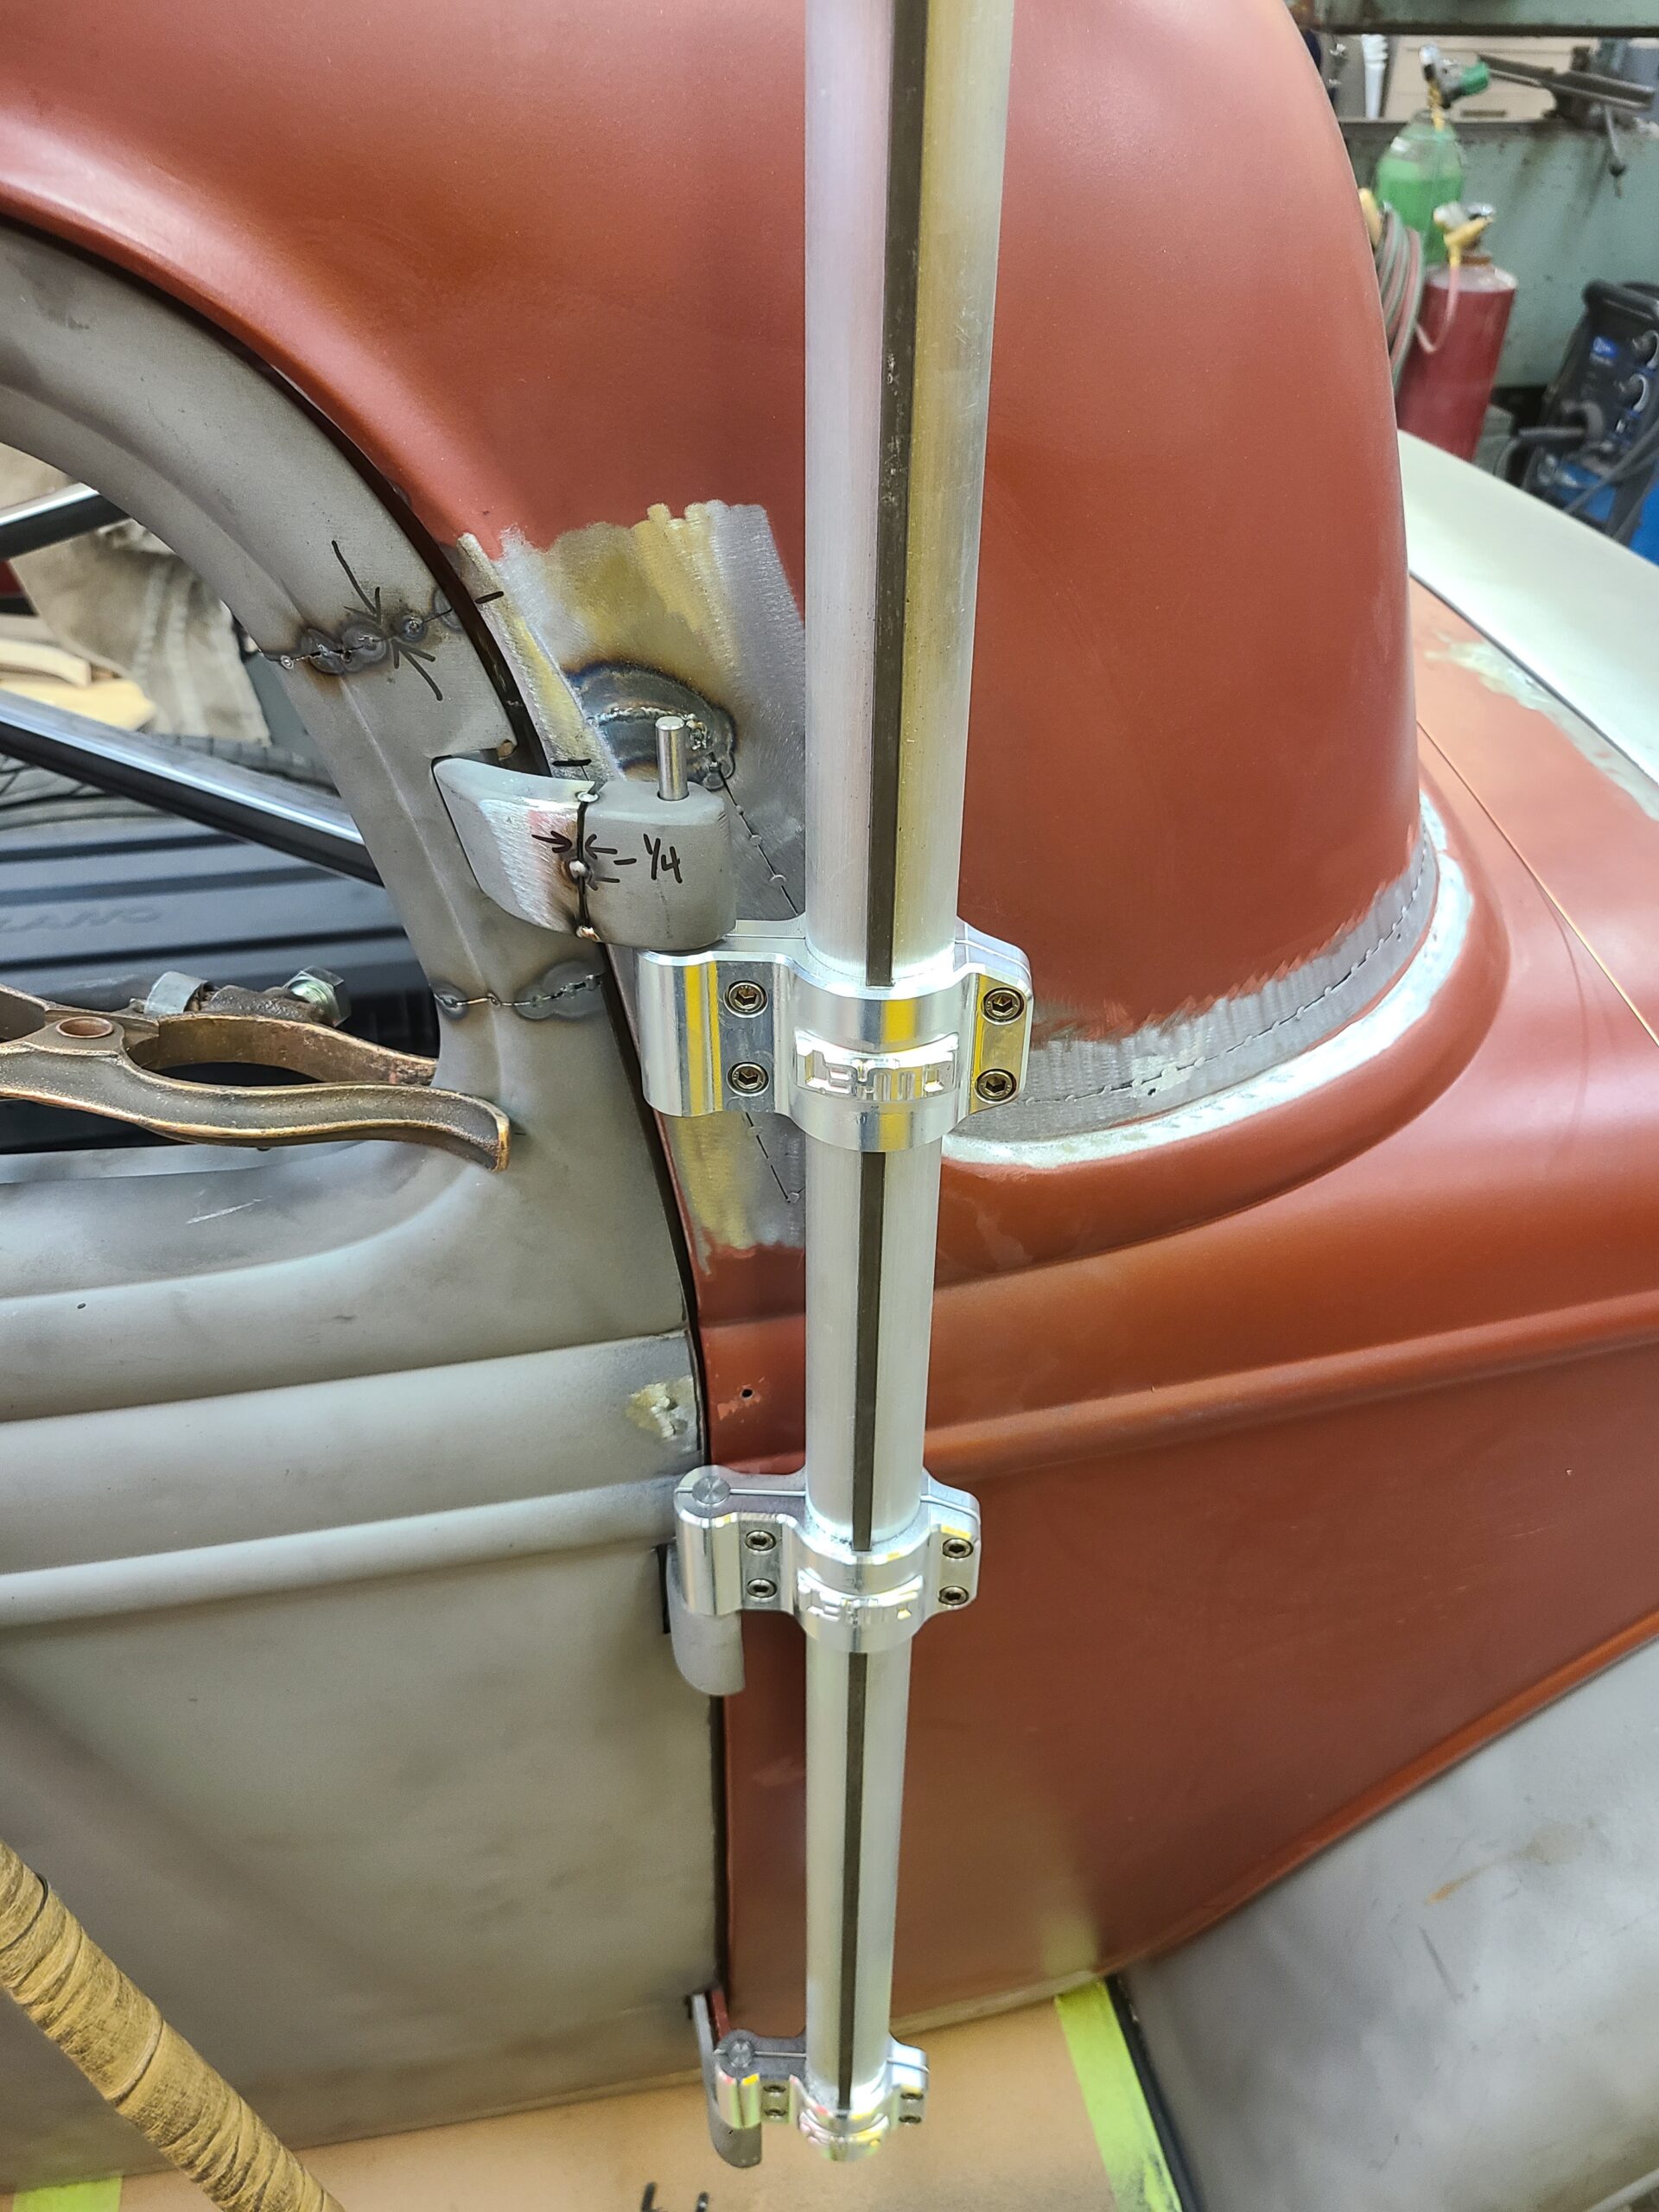
09 See how the fixture and hinge misaligned by about a 1 4 inch
Because of the body shape, the hinge moves back as it goes down. See how the fixture and hinge misaligned by about a 1/4 inch? That would make the door bind when opened—if it was possible to even open it at all.
10 So Sinioris shortened the outer hinge bracket until it aligned with the other two
So, Sinioris shortened the outer hinge bracket until it aligned with the other two. This eliminates bind.
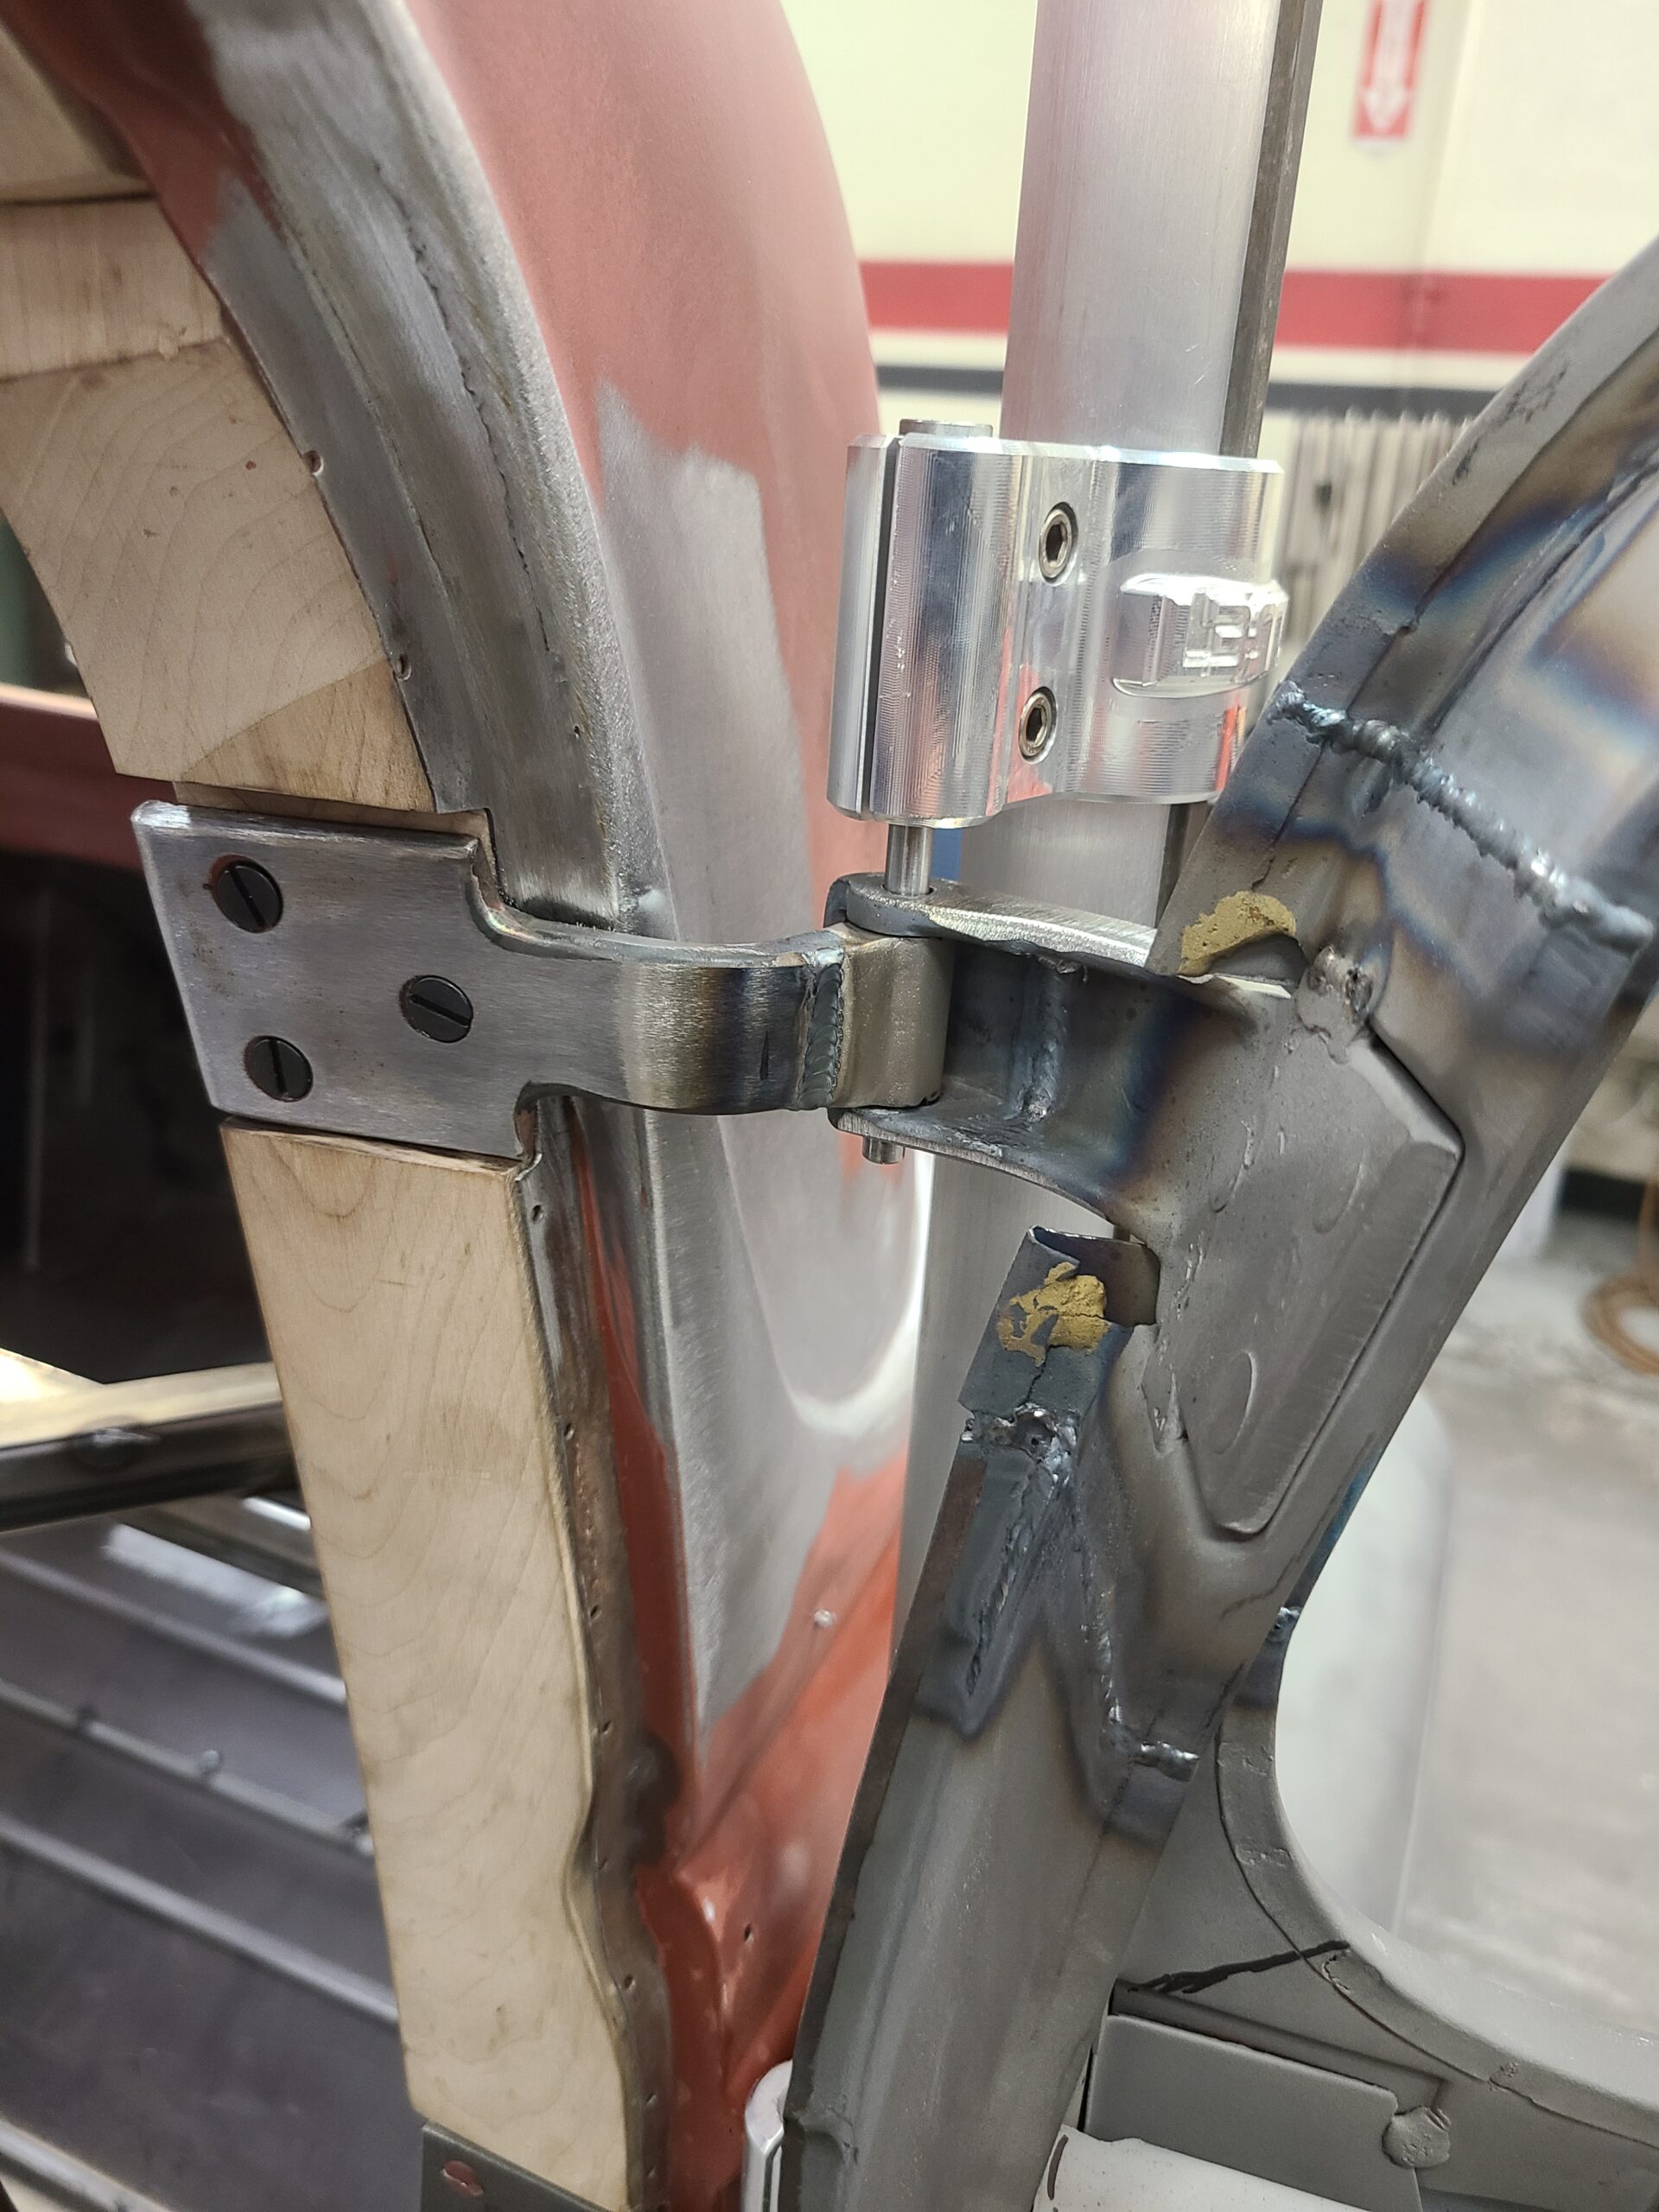
11 He then shortened the inner bracket to align with the outer bracket
He then shortened the inner bracket to align with the outer bracket. He finished the hinge installation by cutting the hinge pocket to correspond with the hinge’s new location. The finished product operates just as Ford intended, just in a cooler looking way.
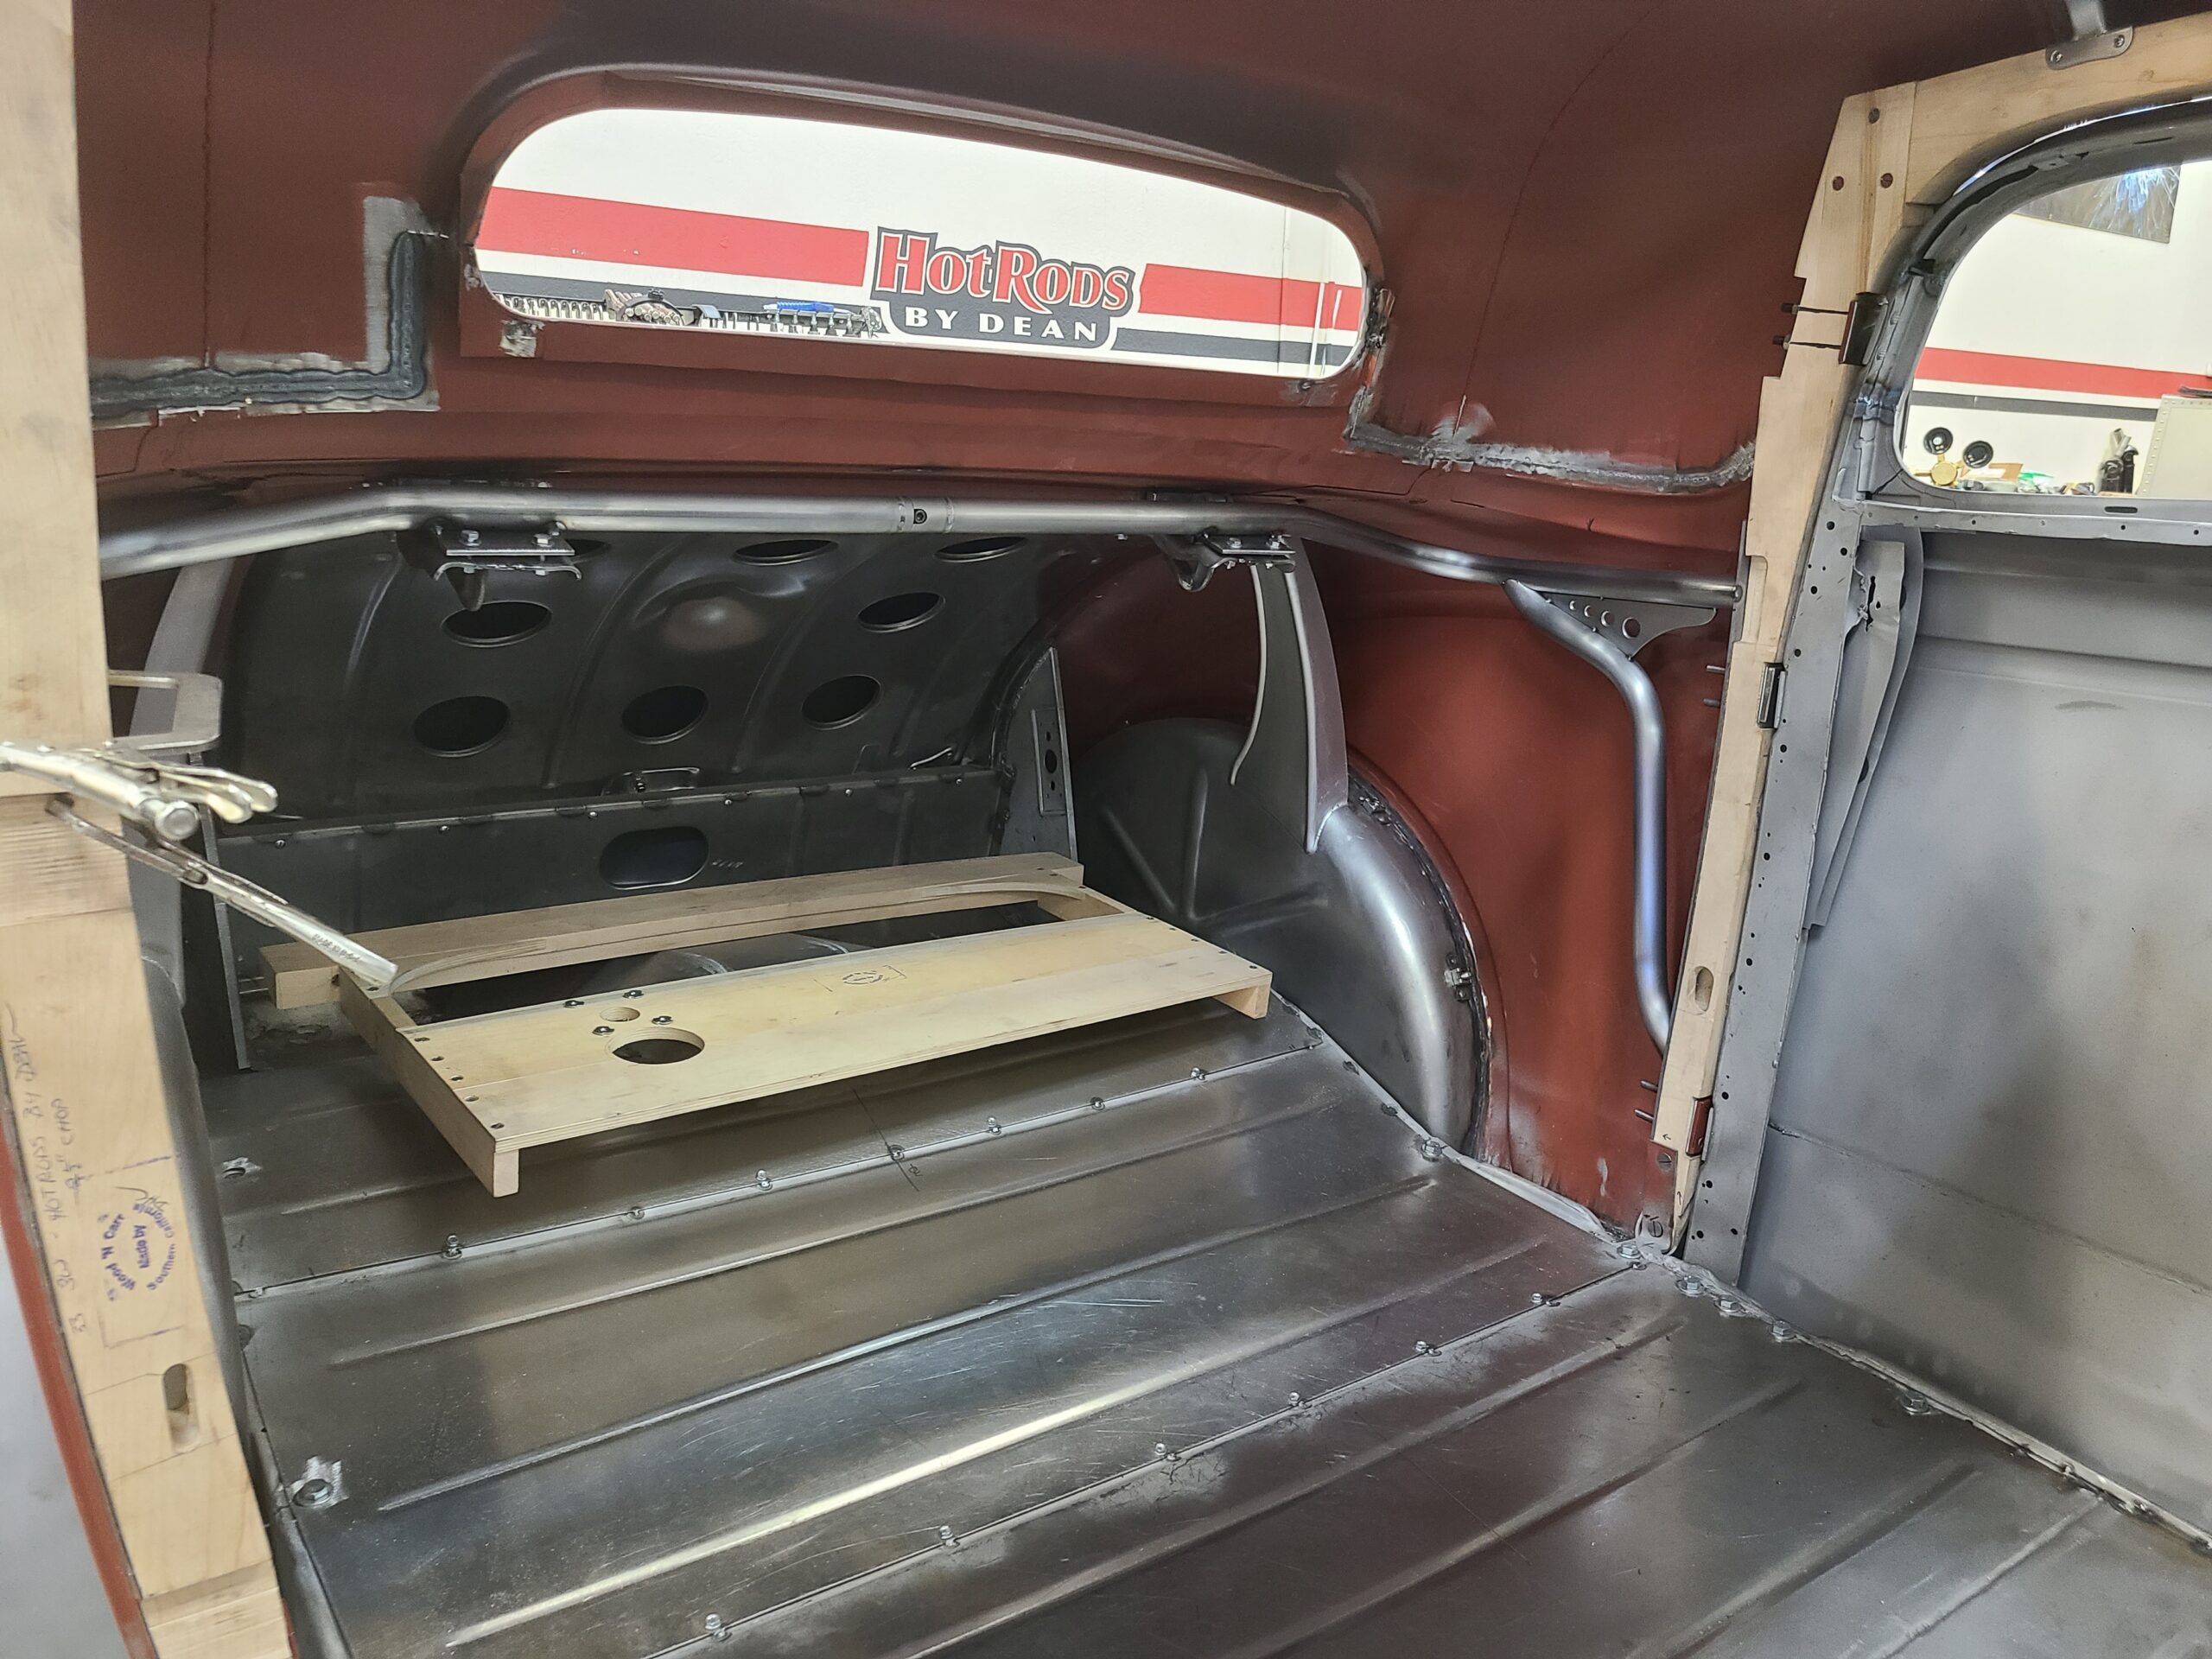
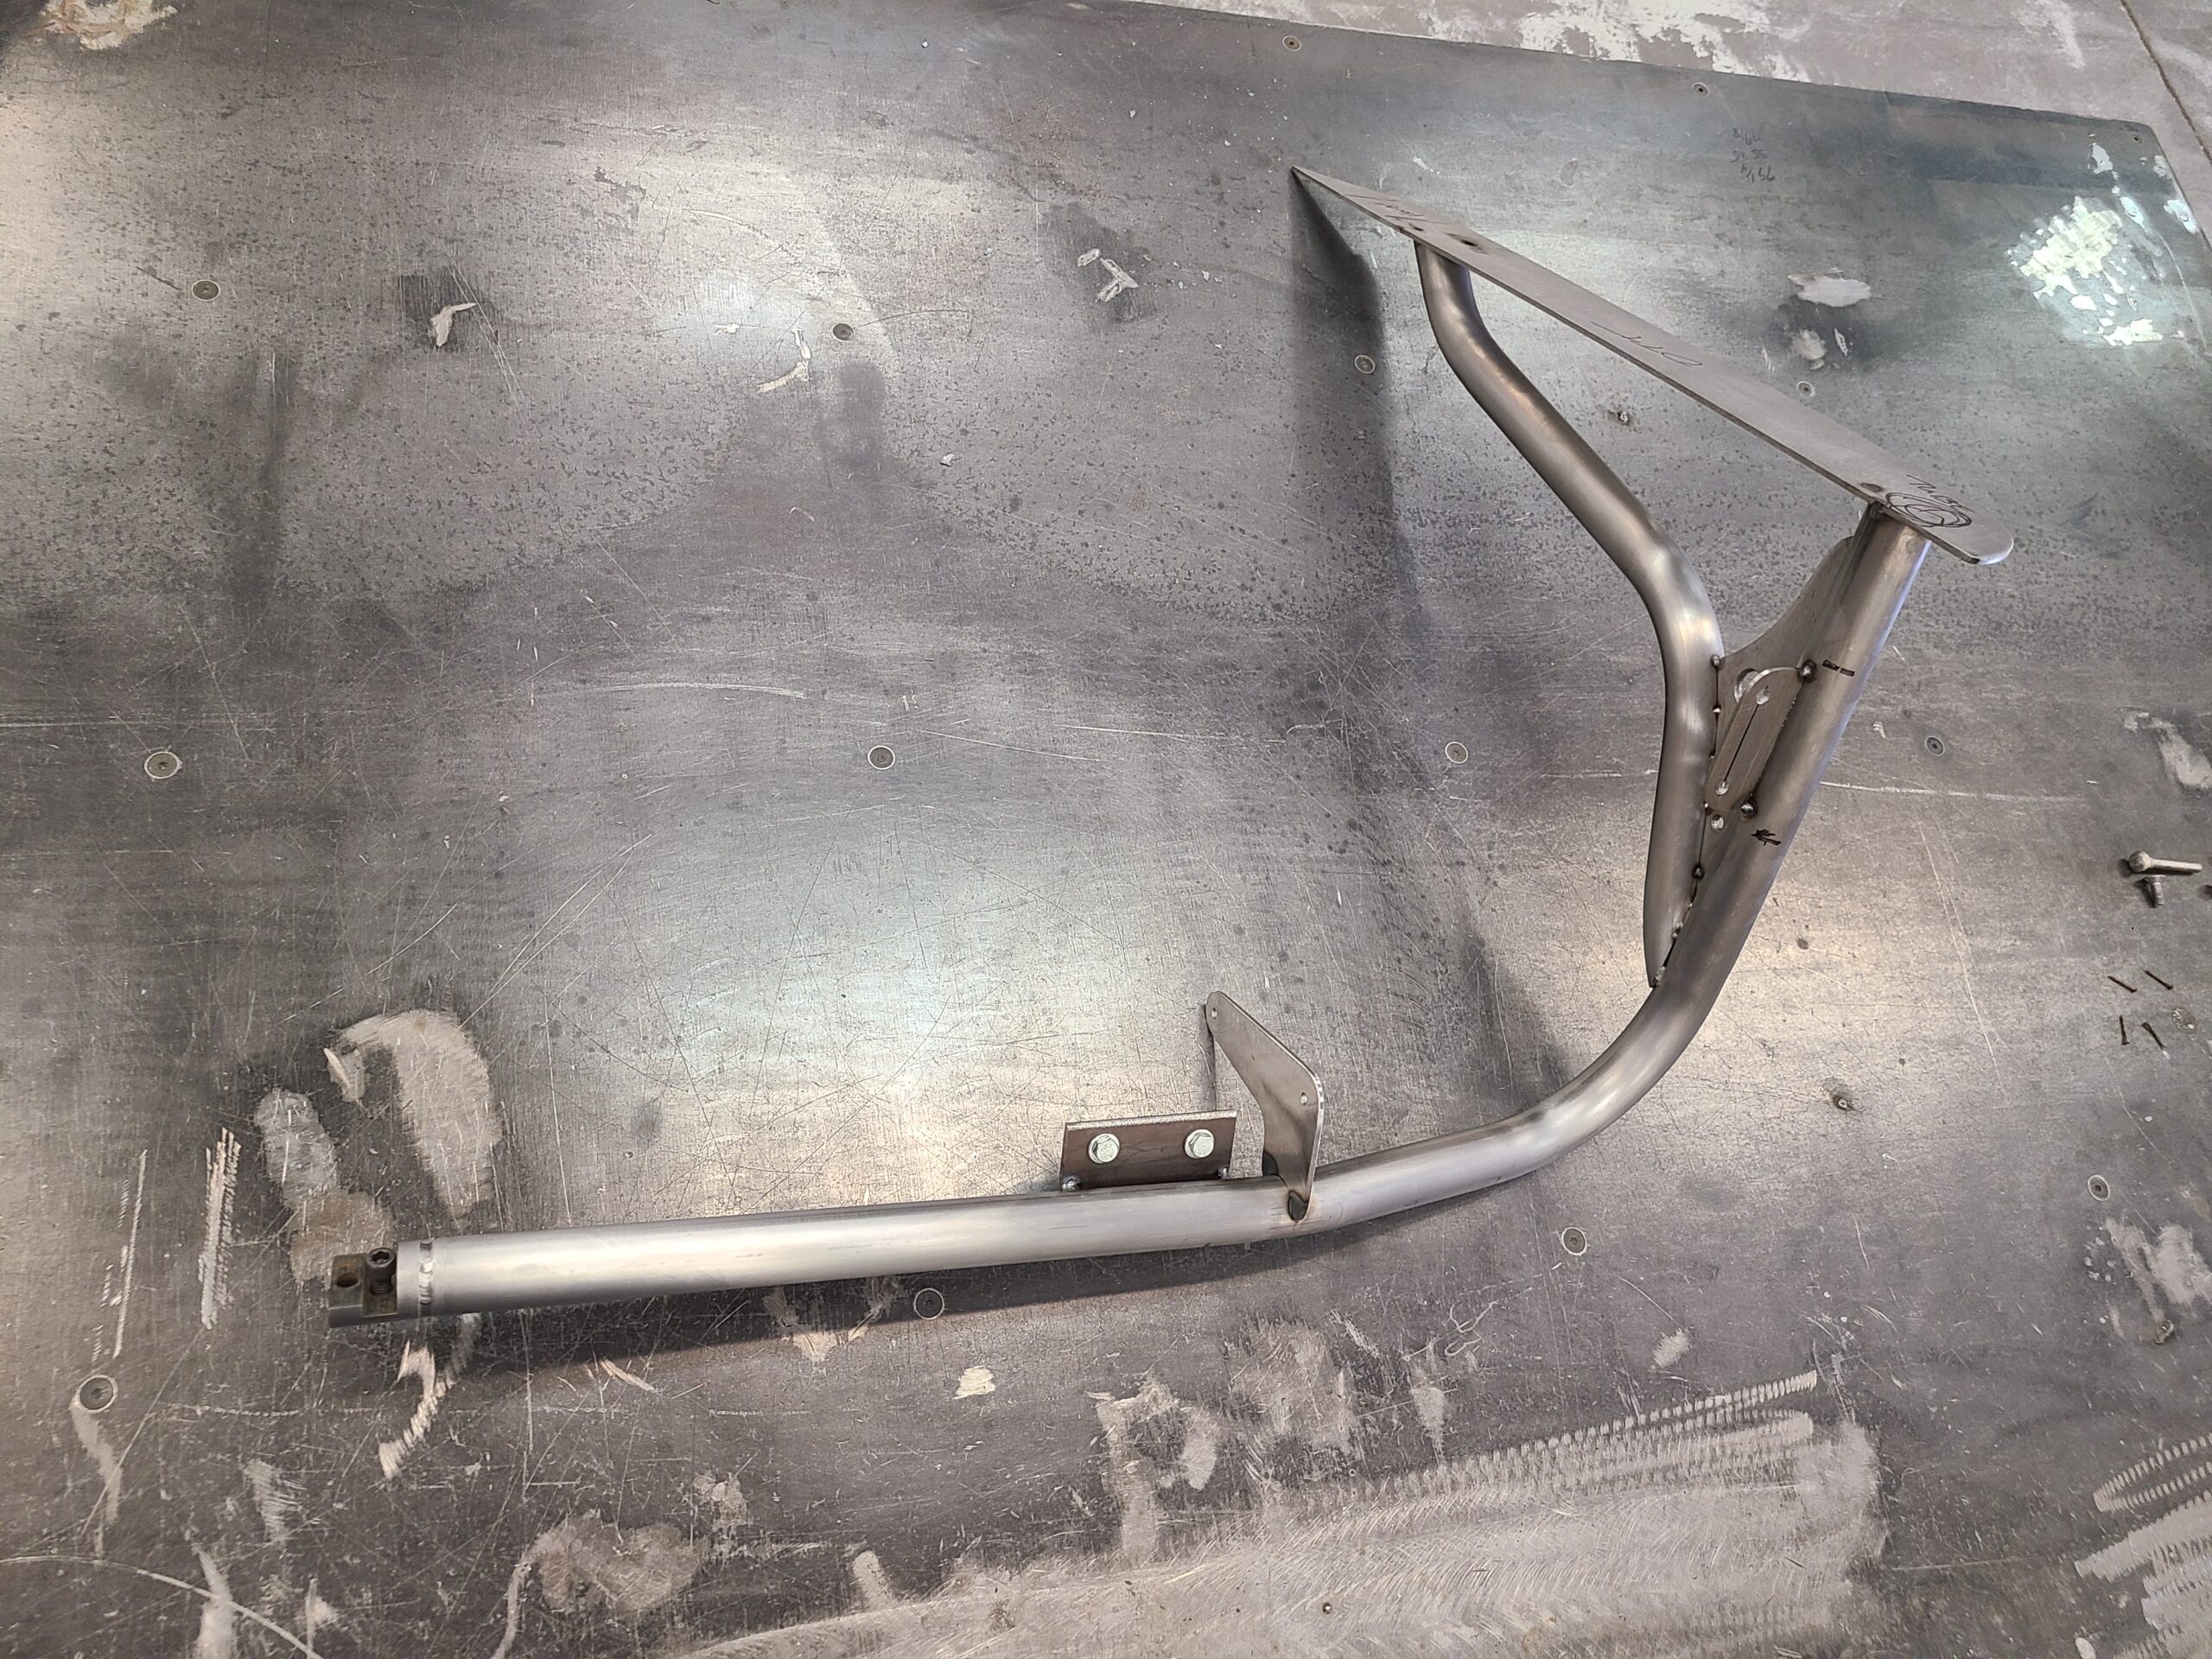
12 Sinioris made a tubular inner structure that ties the door jambs to each other
Sinioris made a tubular inner structure that ties the door jambs to each other. That triangulates the middle of the body, which makes it much stronger. He also tied the trunk hinges to that solid framework.
13 The tubular inner structure comes out of the cabin thanks to an interlocking tube clamp in the middle
The tubular inner structure comes out of the cabin thanks to an interlocking tube clamp in the middle.
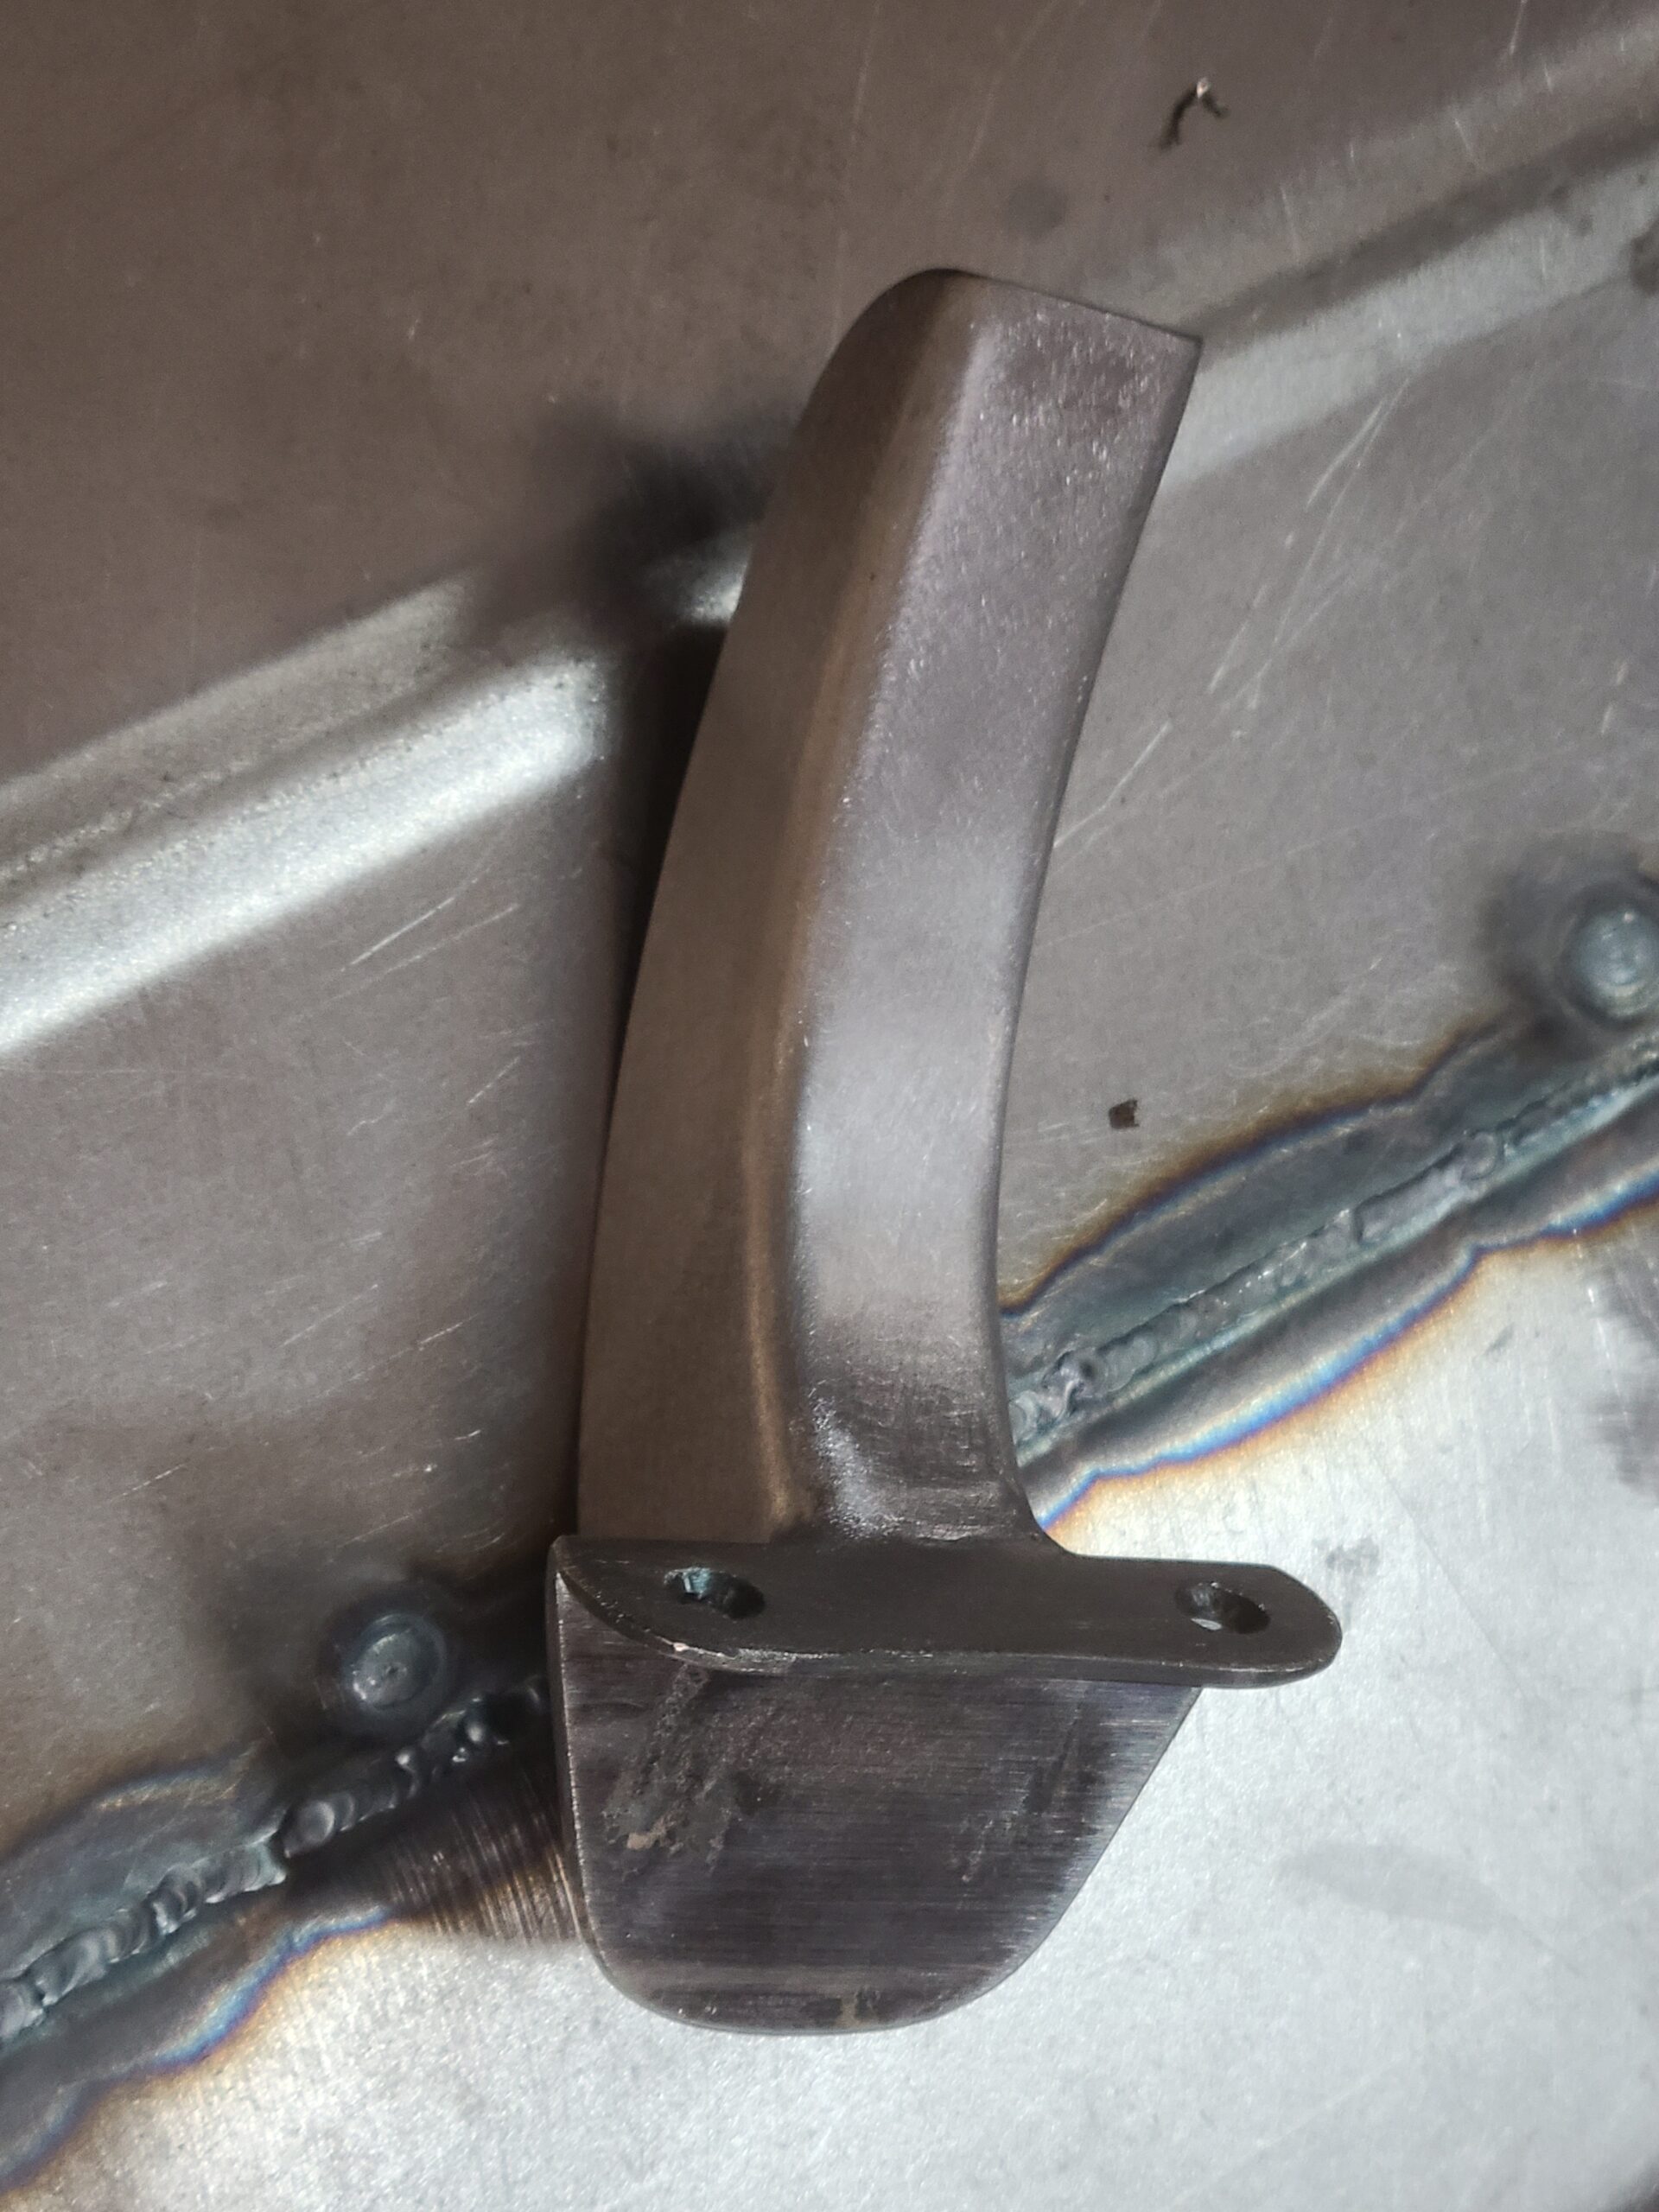
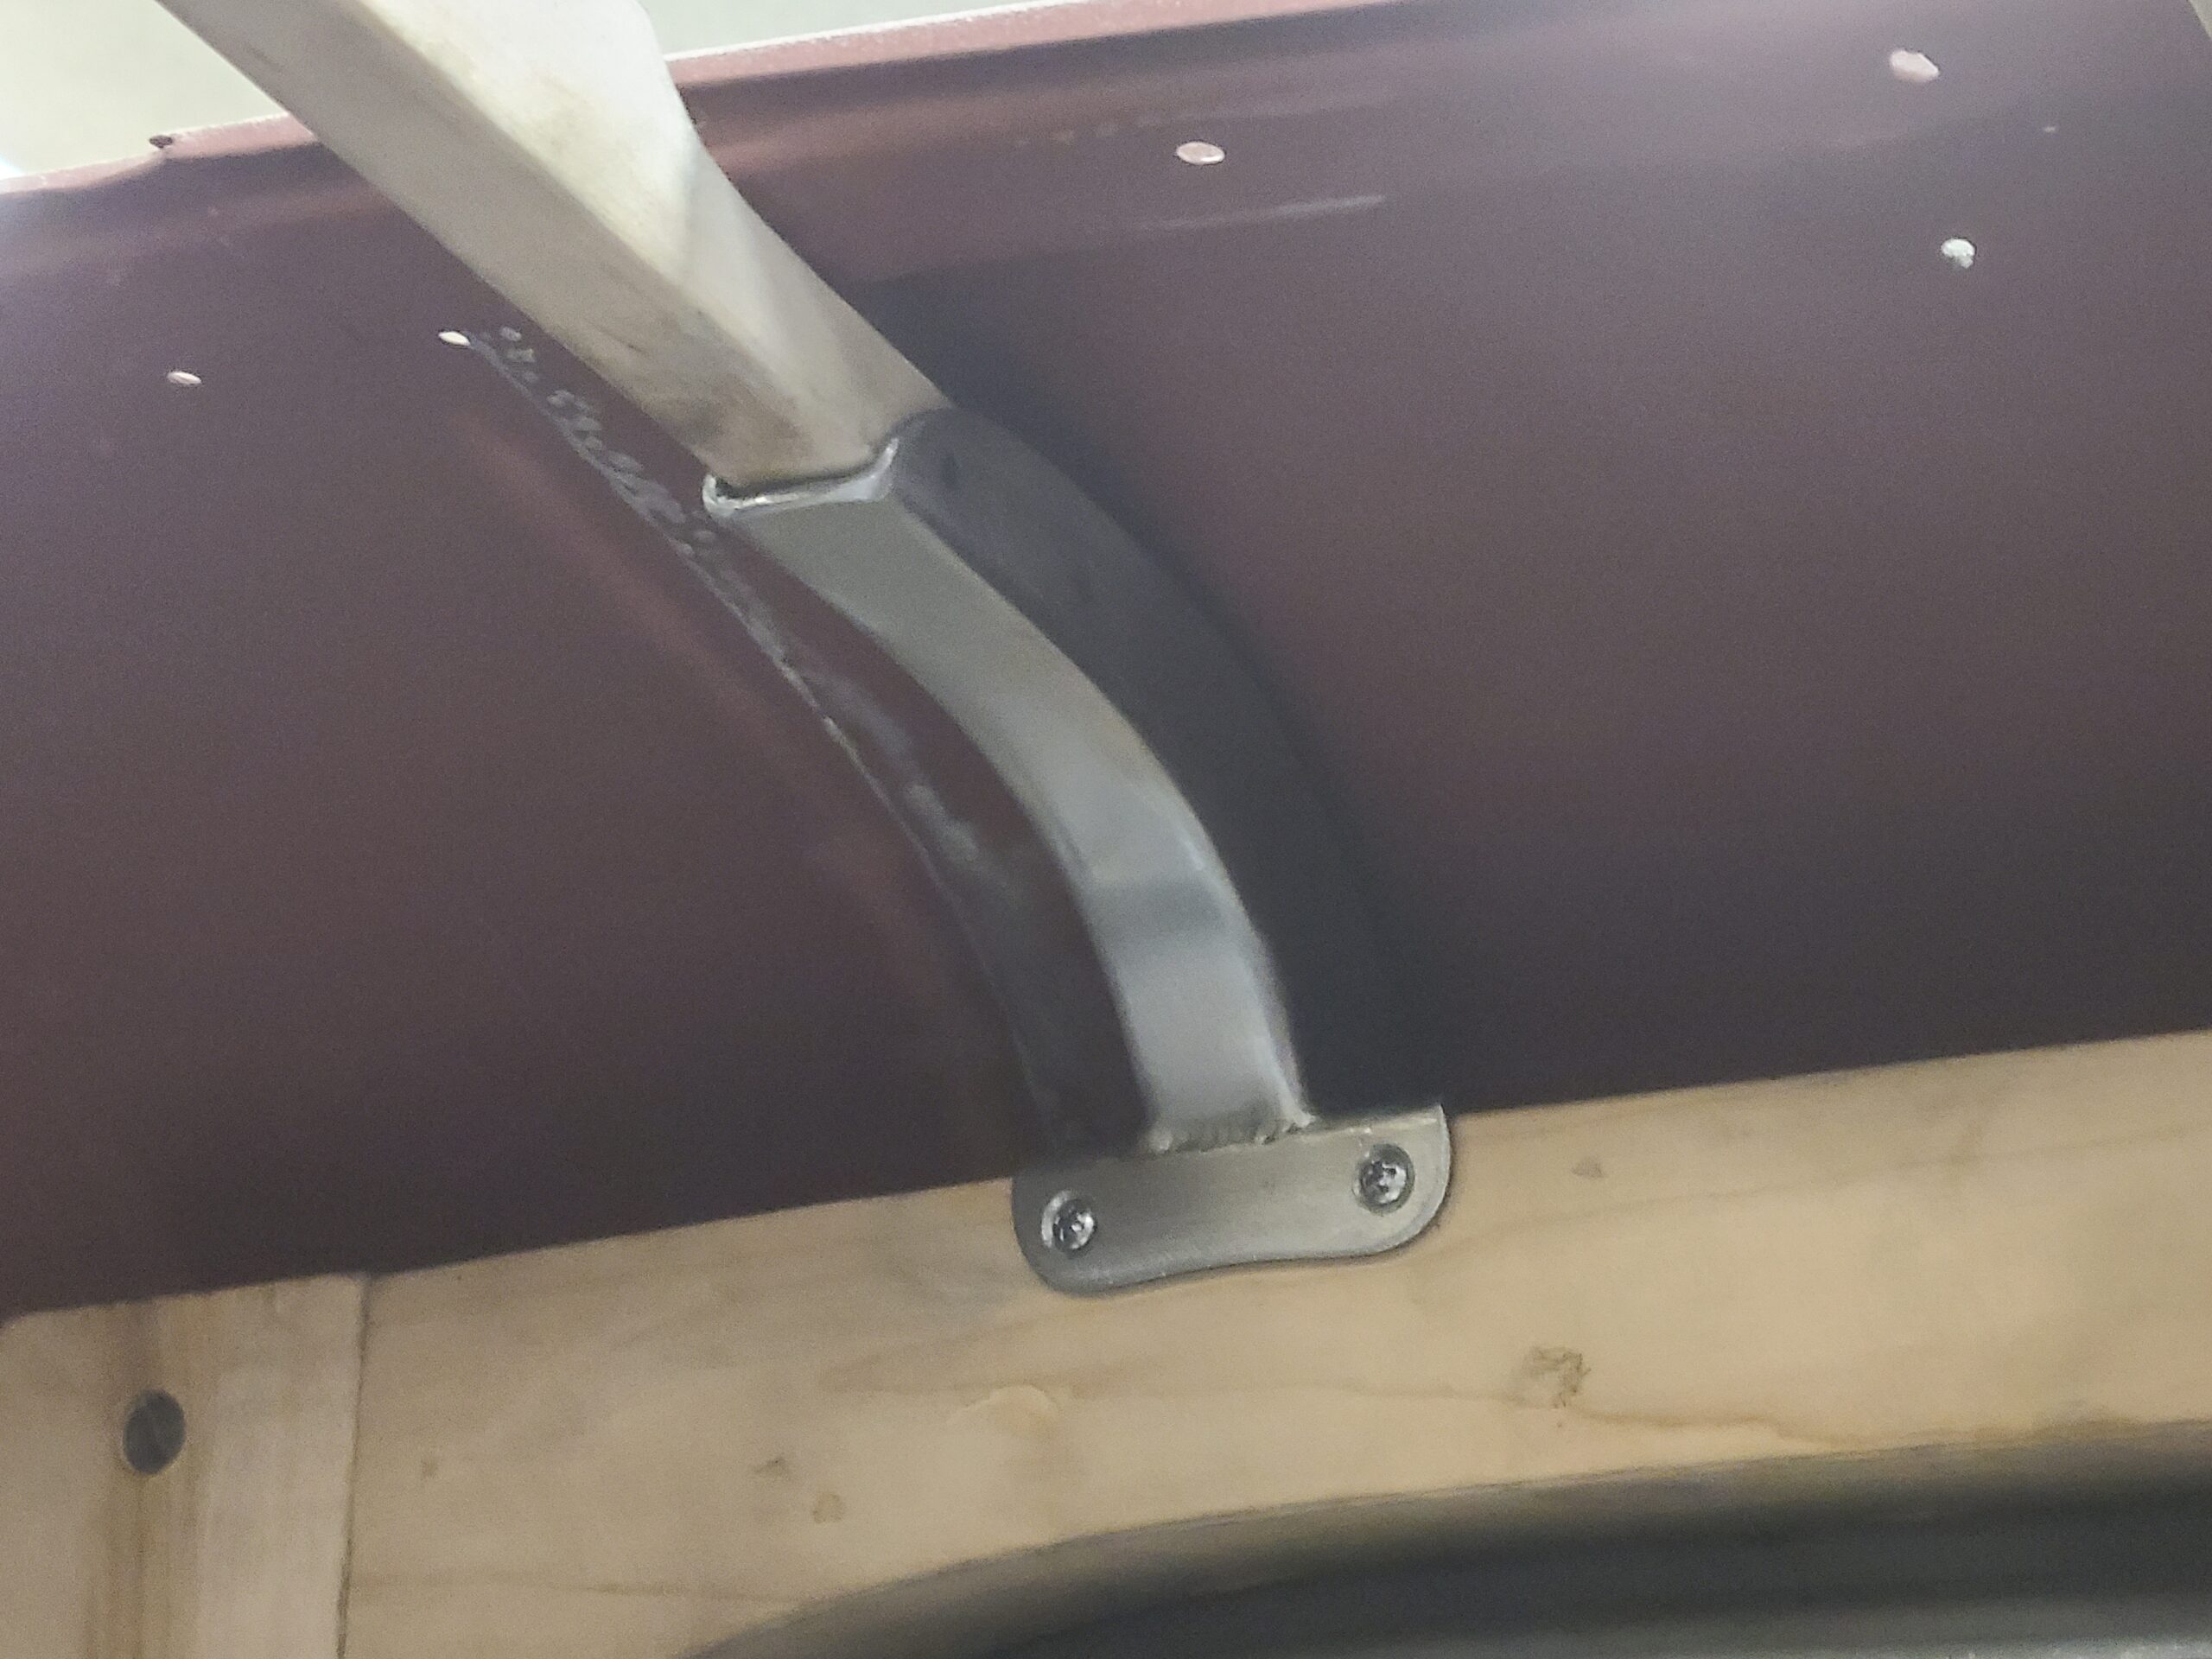
14 Originally plain old wood screws tied the roof ribs to the door headers
Originally plain old wood screws tied the roof ribs to the door headers. Sinioris fabricated these brackets that significantly increased the structure’s integrity.
15 Structural integrity matters here because they eliminated the top insert structure that the roof ribs once tied into
Structural integrity matters here because they eliminated the top-insert structure that the roof ribs once tied into. Filling the roof also gave them the opportunity to increase headroom by raising the headliner.
16 Eliminating the parcel tray increases legroom but sacrifices the foundation for the rear window frame
Eliminating the parcel tray increases legroom but sacrifices the foundation for the rear-window frame. Sinioris chopped this down to fit the window’s smaller opening and mounted it to the wing brackets seen in the inner structure.
17 Filling and chopping the top gives this 34 a much more sophisticated presence
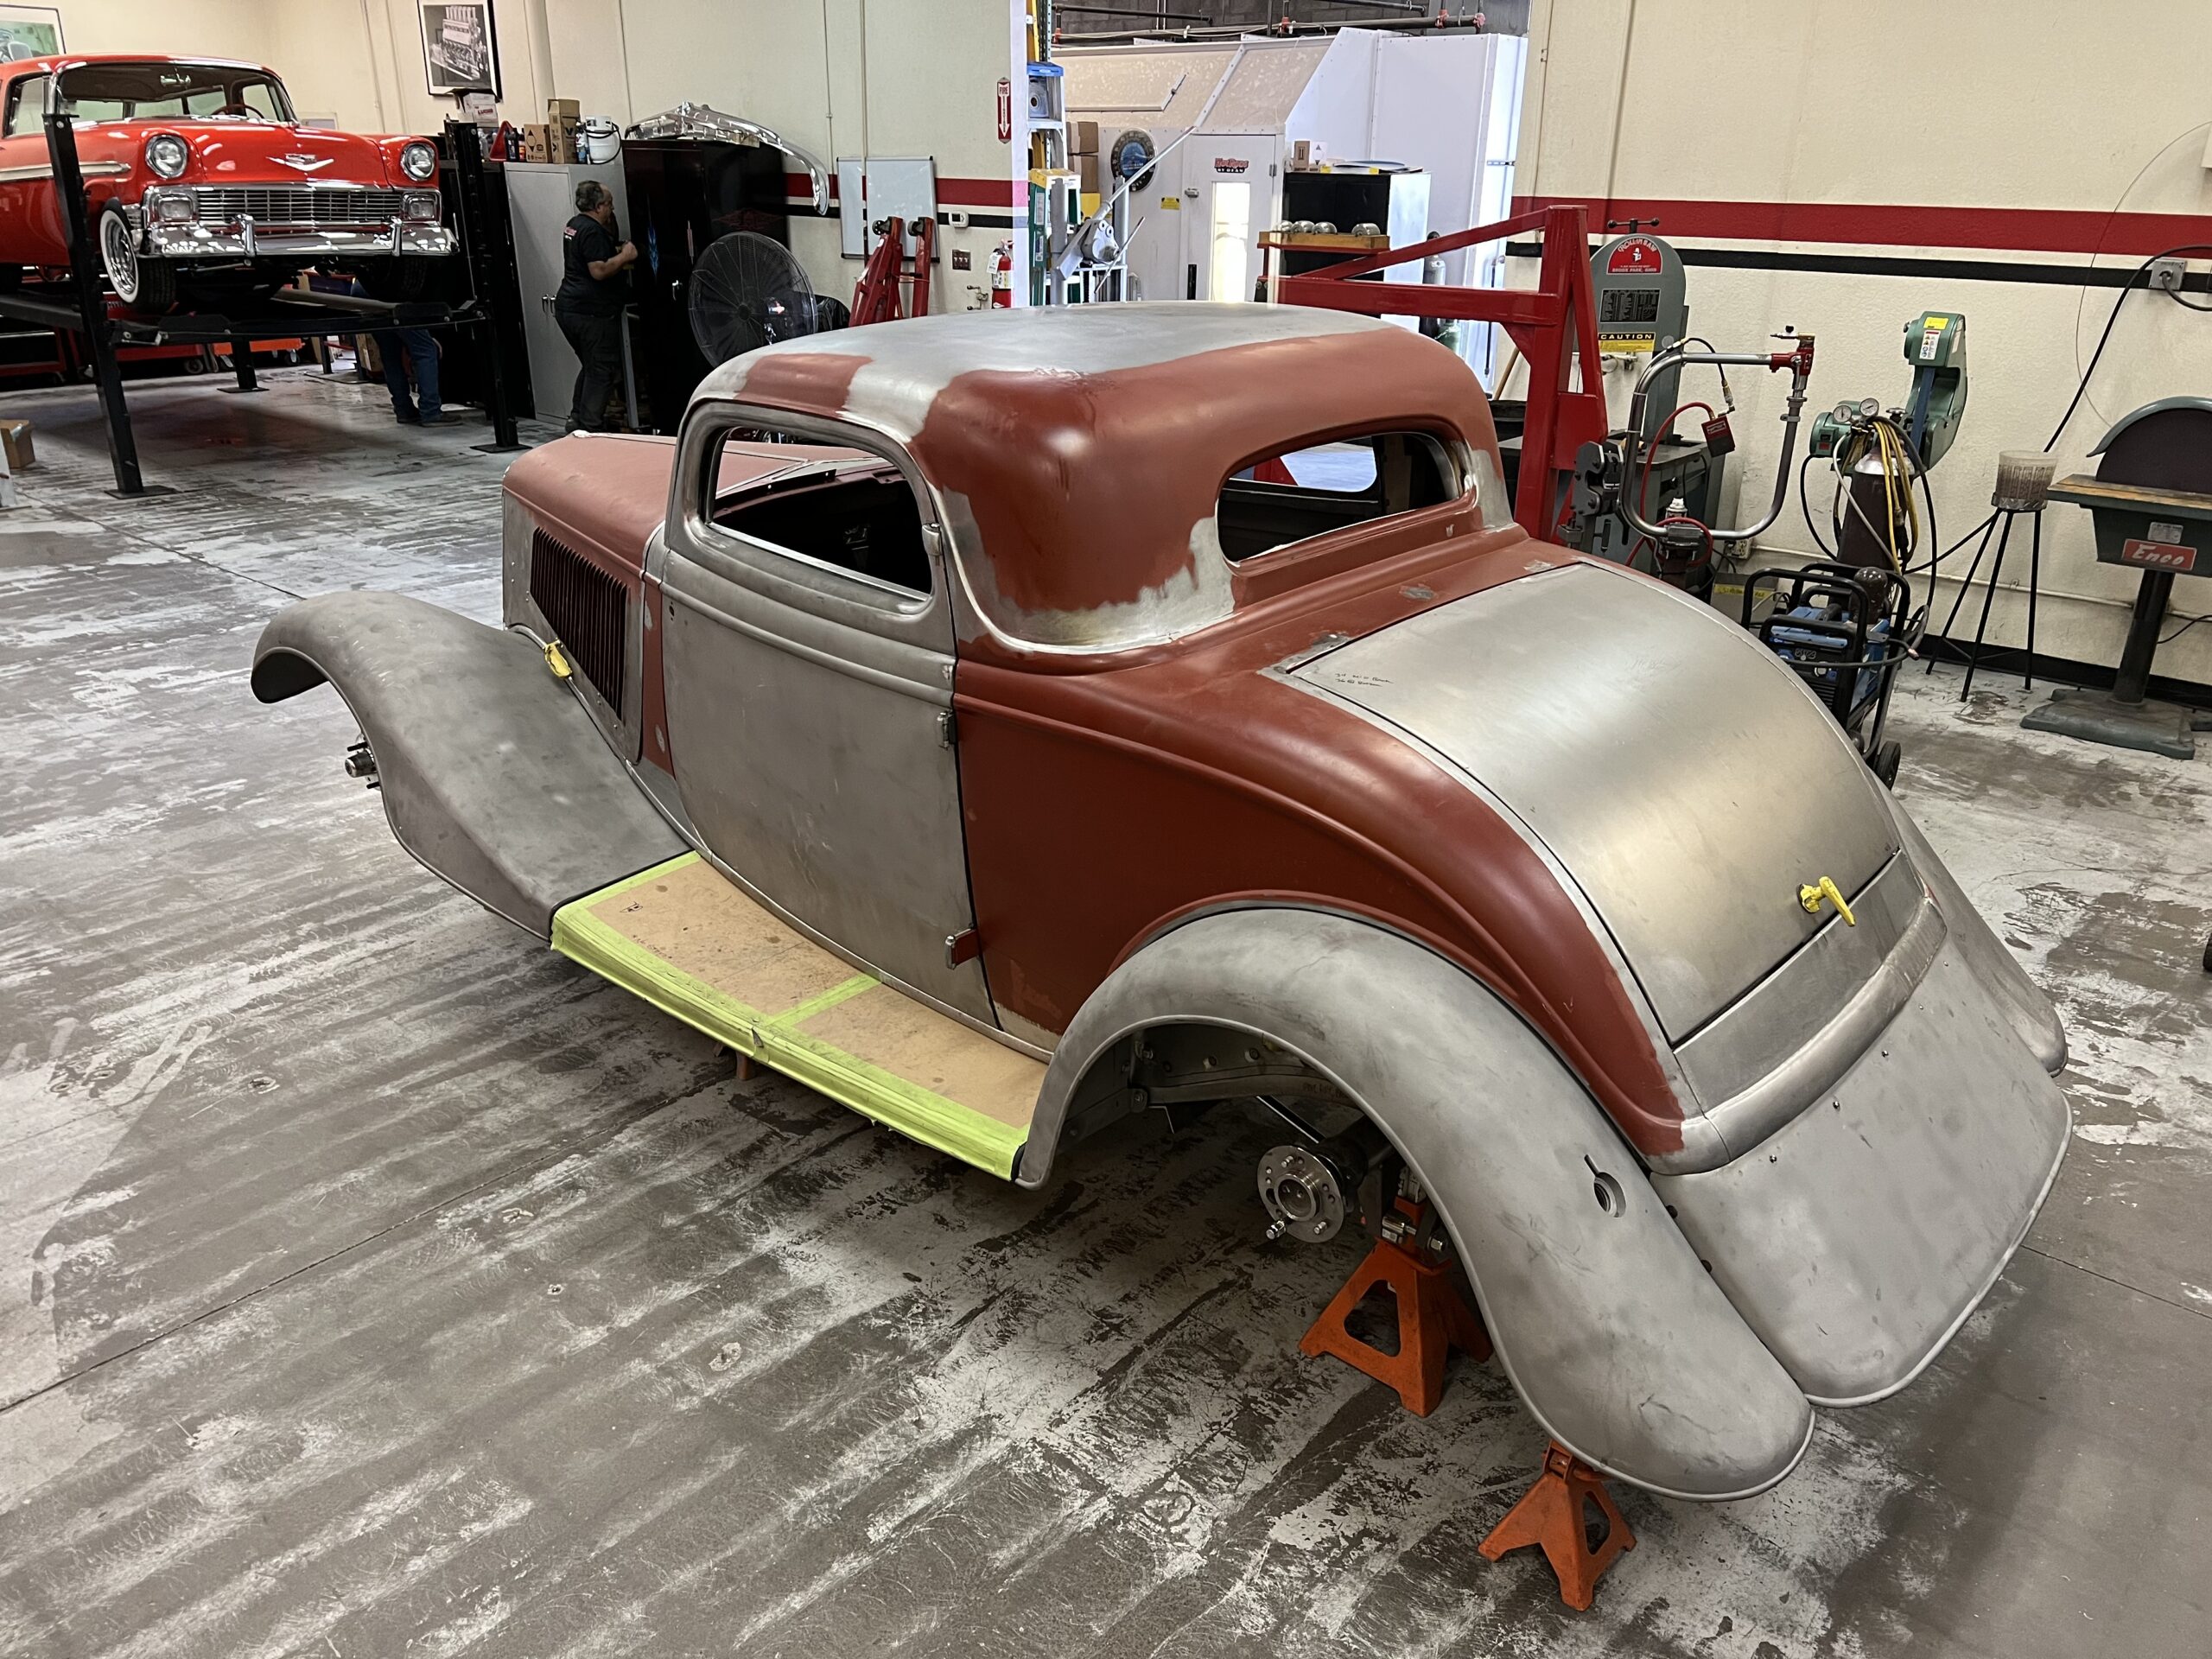
Filling and chopping the top gives this ’34 a much more sophisticated presence. However, due to the attention to detail, you’d have to know the original to recognize what Sinioris and crew did. Thanks to the self-aligning technique, it’s a chop that a well-heeled enthusiast can pull off.

18 Thanks to the self aligning technique its a chop that a well heeled enthusiast can pull off

Sources

Hot Rods by Dean
(623) 581-1932
hotrodsbydean.com 

Woodn’ Carr
(562) 498-8730
woodncarr.net

Leading Edge Machine and Design
(402) 660-8289
leadingedgemad.com

- Advertisement -

Related Articles

Search Our Site

More Modern Rodding

1959 Chevy Impala in Sheetmetal Clothing

By Brian Brennan   -   Photography By NotStock Photography Troy Gudgel...

2025 Classic Bus Tour

Barrett-Jackson Scottsdale to the 75th Grand National Roadster Show By...

Understanding Drum Brakes for Your Hot Rod

By Ron Ceridono   -   Photography By the Author and...

Detroit Speed & Engineering QuadraLink Settles in Under Our 1969 Camaro

By Barry Kluczyk   -   Photography By Brian Brennan Our 1969...

1939 Buick Special Complete with 6.0L LS Hits The Road … At Last

By Brian Brennan   -  Photography By Josh Mishler This 1939...

All the Right Connections

The Del Rio Gets a Much-Needed Wiring & Instrument...
More Modern Rodding

Modern & Mildly Channeled Ford Model A

Part 1: Custom Chassis & Flooring For The Model...

Rodding Around – Ed Pink’s Book, GearFX’s New Home, and Jeff Lutz’s New 1957 Chevy

By Brian Brennan Ed Pink: The Old Master Ed Pink, colloquially...

55th Annual NSRA Street Rod Nats

It’s August So Its Nats Time By Brian Brennan   -  ...

The Khrome Shoppe Special

Look What We Find At The 55th NSRA Nats By...

Parting Shot: The Ultimate Tri-Five

1955 Chevy Biscayne GM Motorama Concept Car By Brian Brennan  ...

Hellcat Swapped 1968 Dodge Charger

Hollywood Hot Rods Built, Modern Hemi Power, and Vintage...