Cleaning Up The Engine Bay On The Souza F100

Souza F100 Build Part 4: Custom Fabricating Fender Inner Panels

 By Ron Covell   –   Photography by the Author

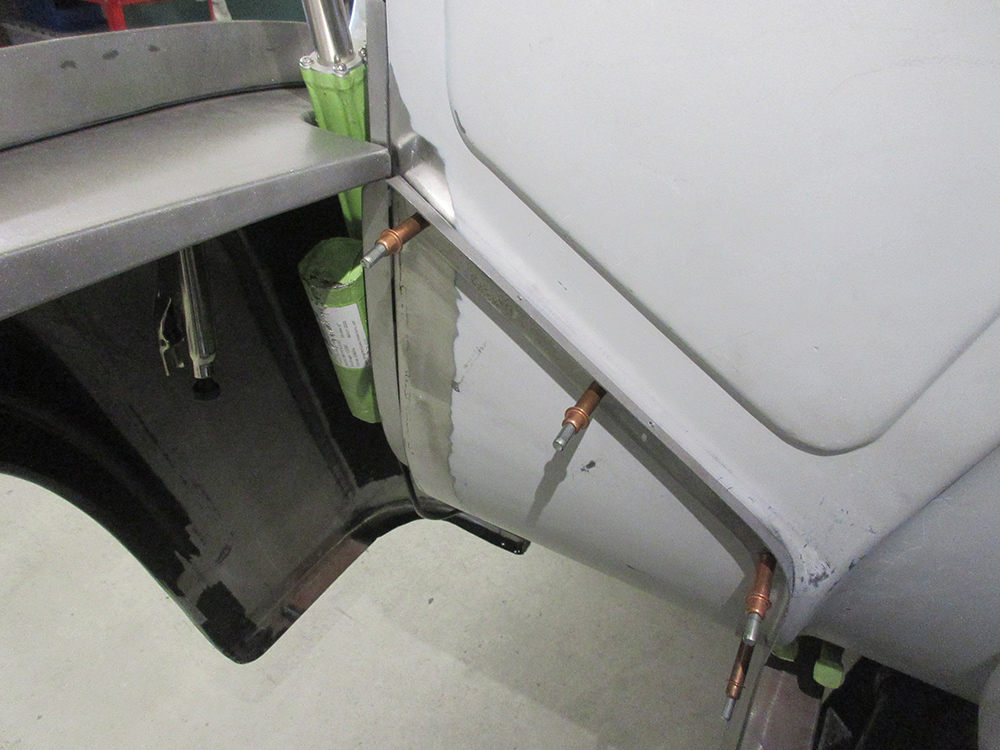
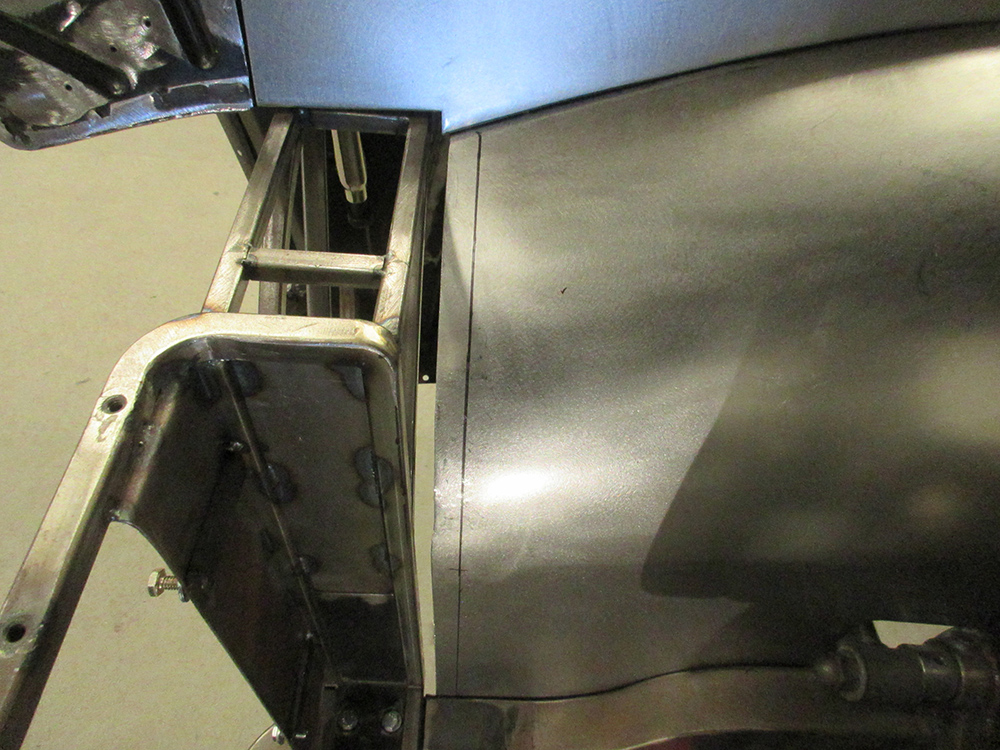
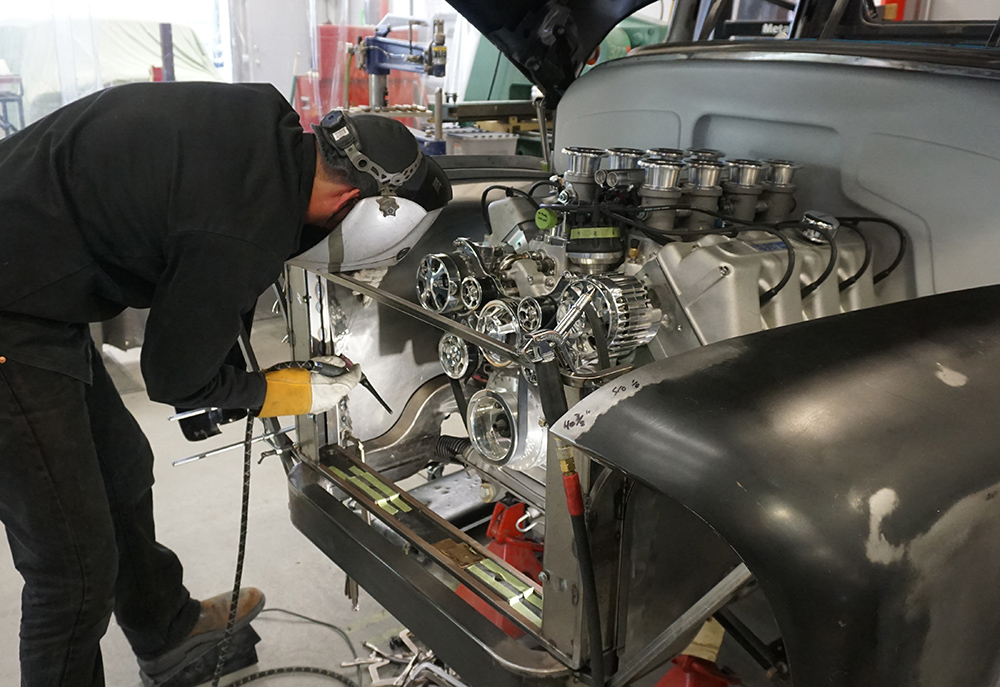
Work is continuing on the Souza F100 at Gary’s Rods and Restorations. The most recent areas to be completed are the inner fender panels. The goal was to dramatically clean up the look of the underhood area and to use hidden fasteners to hold all the panels together. It certainly takes a lot of extra planning and work to make panels that fit perfectly when you don’t want the screws to show, but this level of detail has come to be expected for high-end builds like this one, and everyone involved is delighted with the outcome.

- Advertisement -

Souza F100 Build Part One: The TCI chassis, Cab Floor & Firewall

02 The fender inner panels were made in two pieces on each side
The fender inner panels were made in two pieces on each side. The paper pattern for the upper piece is shown here, along with the first piece of metal made from the pattern.

The Plan For The 1956 F100

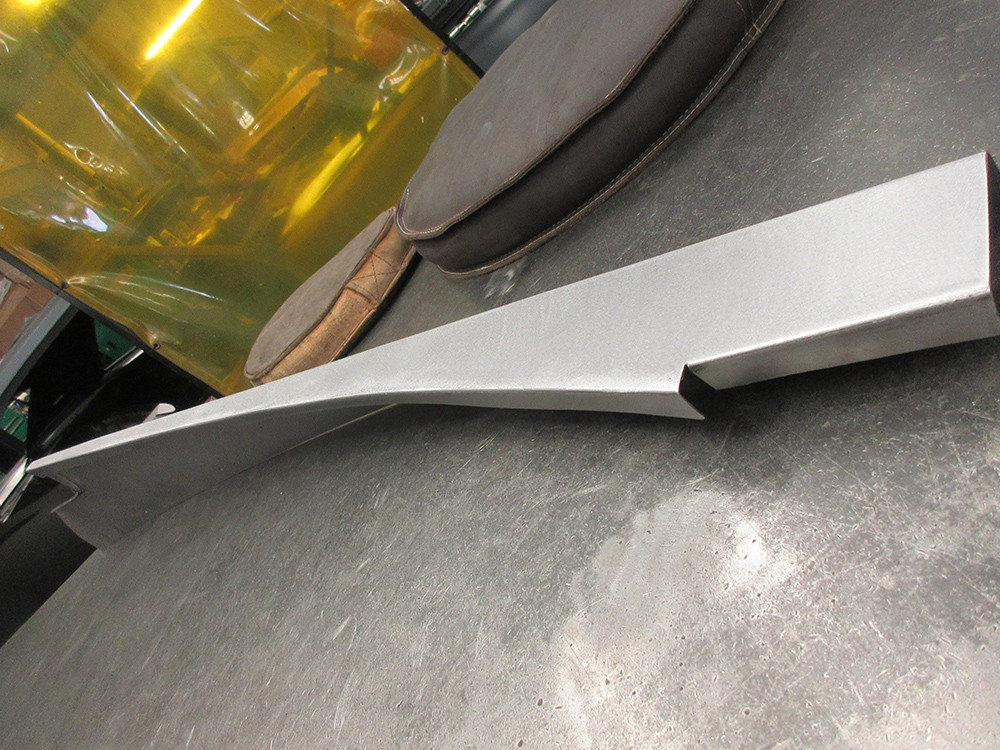
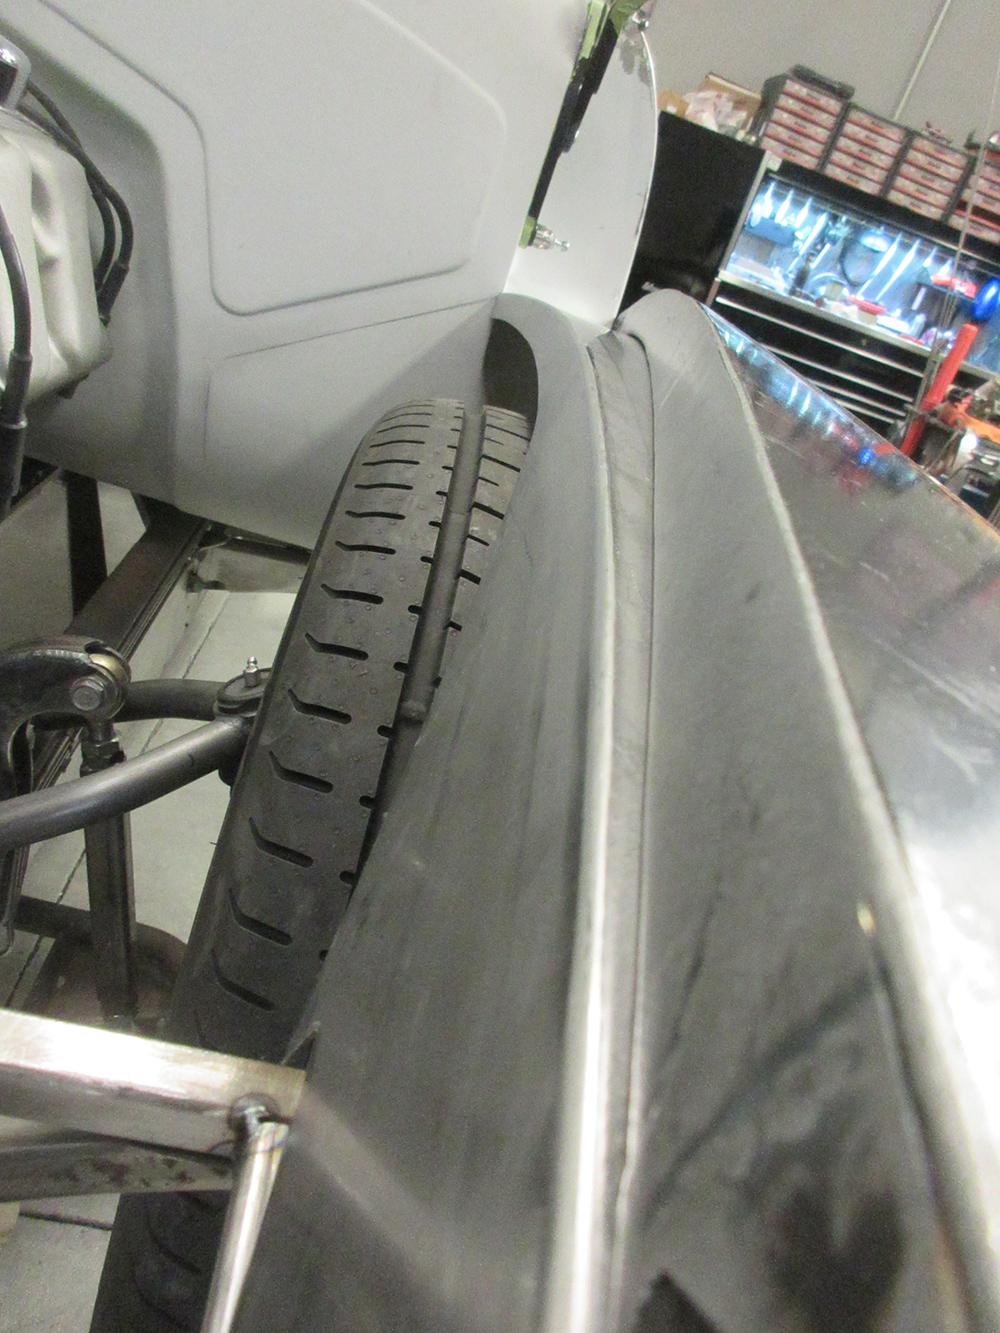
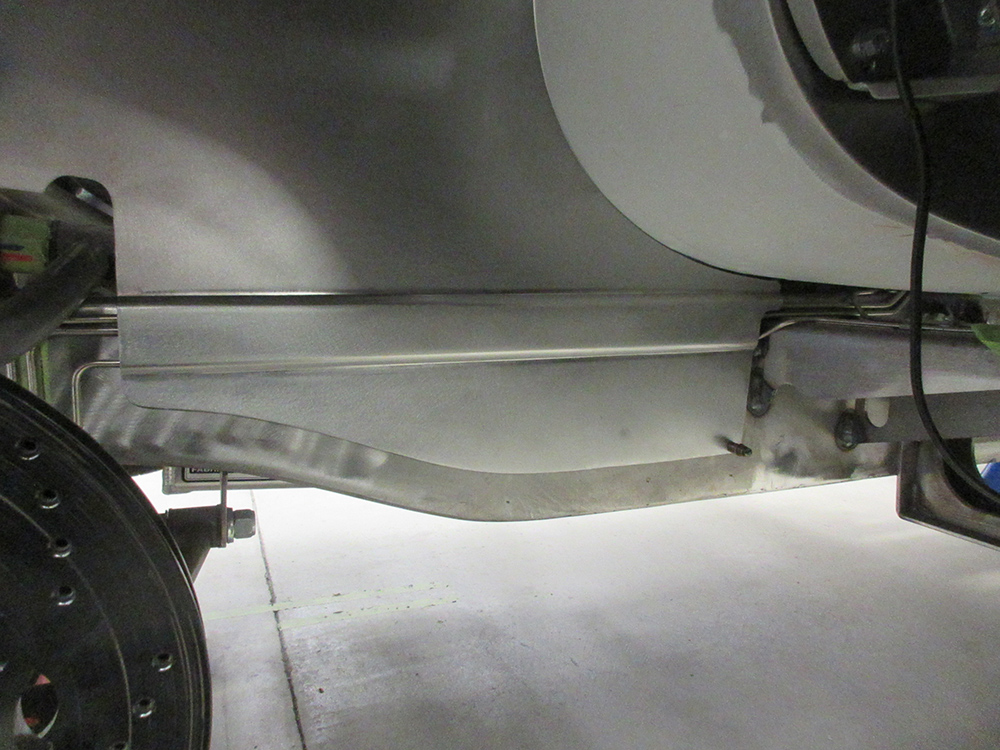
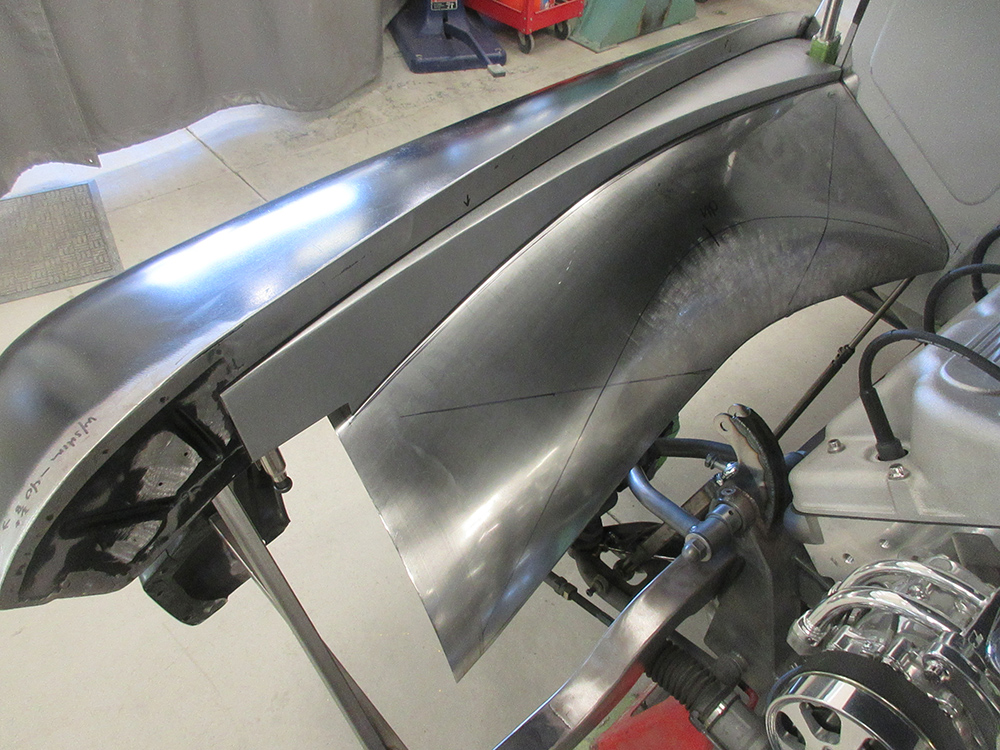
The original front fenders were joined to the inner fender panels with a long row of bolts, and the bolt heads make the joints look pretty “busy.” It took a lot of creativity to devise a system to hold all the panels snugly together while positioning the fasteners where they can be accessed from the back side but be hidden from view when looking under hood. The basic strategy is to put flanges on the edges of all the sheet metal panels and locate the fasteners on these flanges. With a carefully configured design this allows all the joints to be pulled together snugly, but it does require a high degree of precision with the metal shaping. Gary’s relies on Emilio Belmonte to do the majority of this work; his craftsmanship is a delight to see.

- Advertisement -
03 A strip of metal is bent in a brake to form a small flange then contoured to match the first panel
A strip of metal is bent in a brake to form a small flange, then contoured to match the first panel. This ensures the corner radius will be uniform.

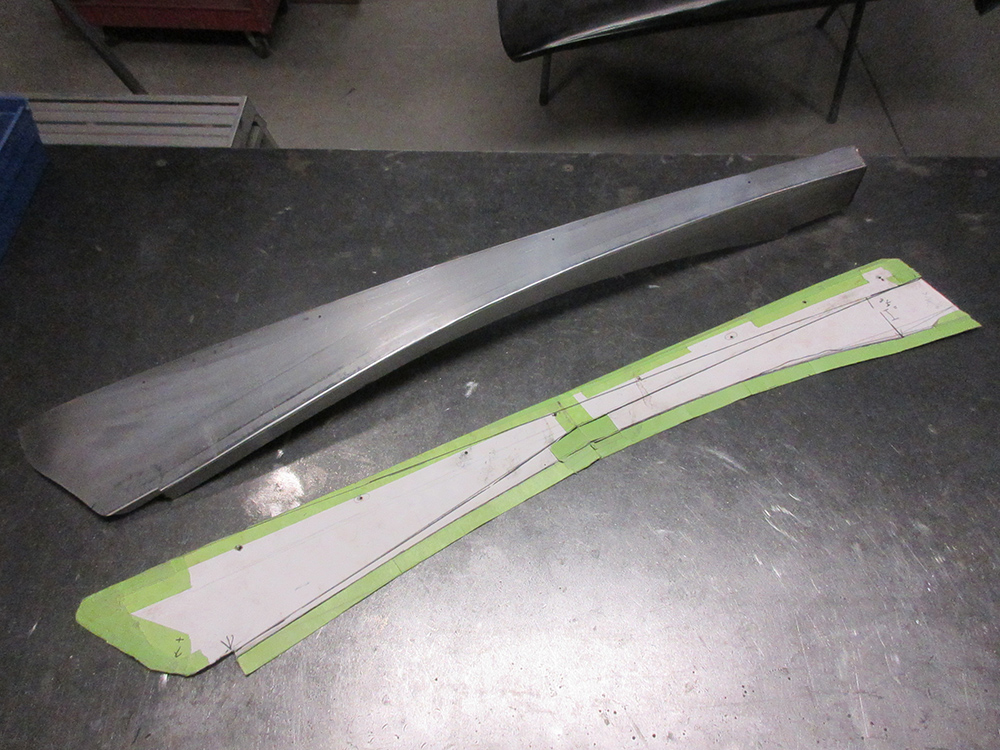
Creating The Right Pattern

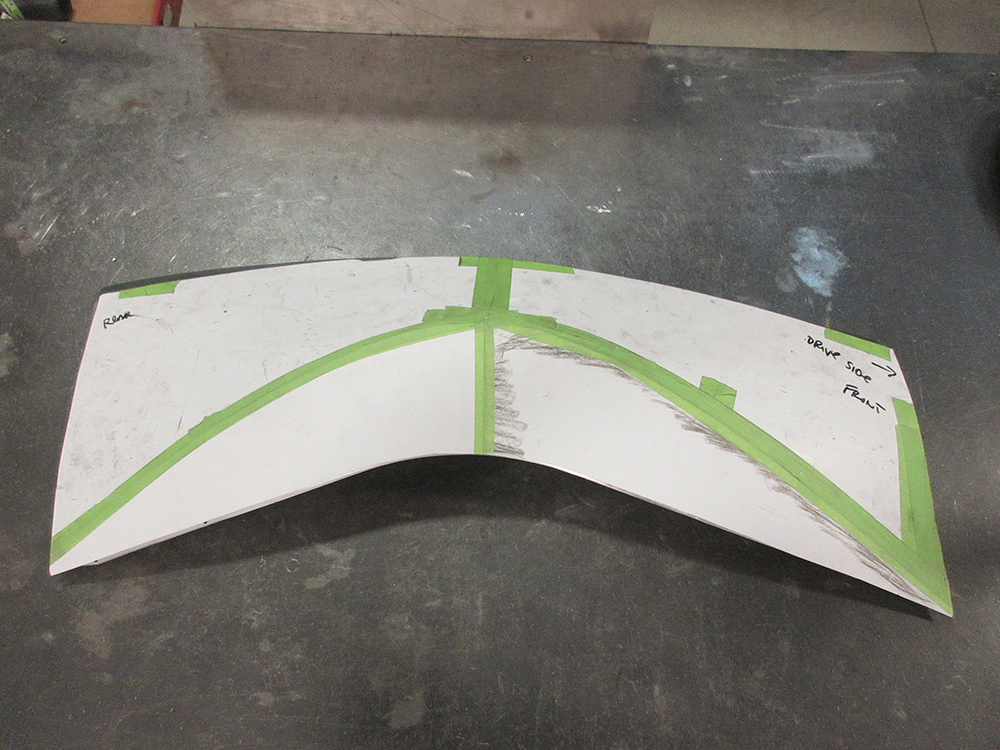
As with most projects like this, making paper patterns is a good way to get started since it’s quite easy to cut, trim, and even discard a lot of paper as the design develops, but once the patterns are finalized, often one pattern can be used to cut the blanks for both sides of the vehicle. Also, it’s very likely that after building one side you will find lots of ways to streamline the construction of the other side.

Souza F100 Build Part 2: Subtle Modifications On A 1956 Ford F100

04 The custom flange is clamped in place here
The custom flange is clamped in place here. The welds are positioned so the distortion from welding can be easily worked out.

Ensuring The F100 Fenders Have Clearance

- Advertisement -

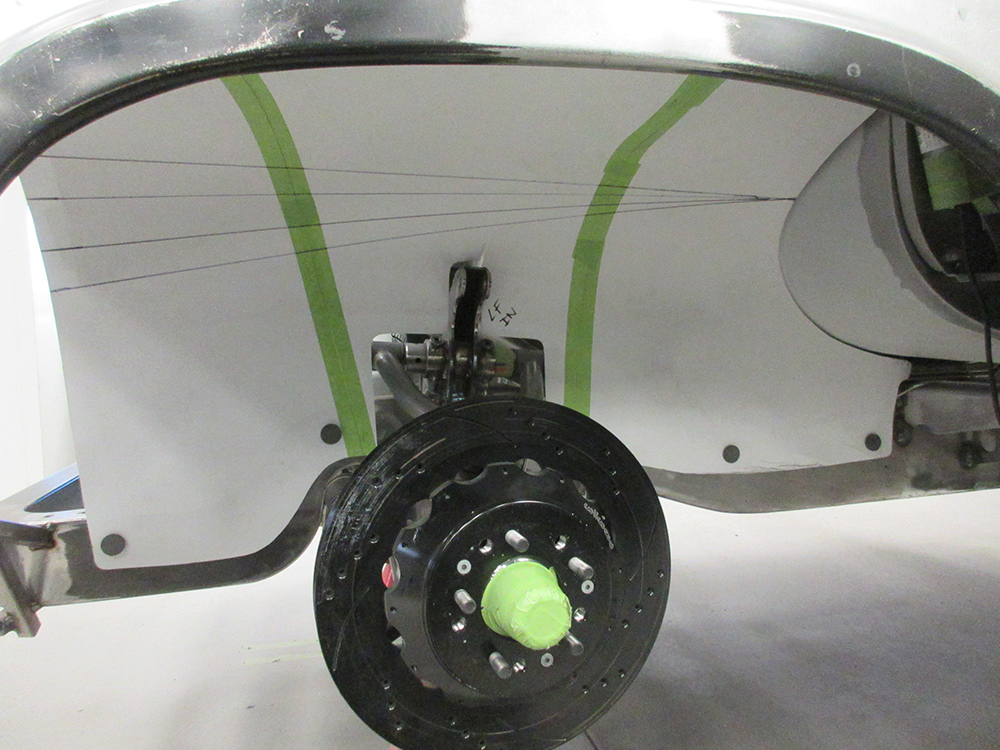
Great care was taken to ensure that the new fender inner panels provided adequate clearance for the large wheels and tires for all possible movements of the steering and suspension components. The front wheels go through a wide range of movement, going from full right to full left steering lock, in the full bump and full droop condition. You don’t want to find out too late that there isn’t quite as much clearance as you would like!

05 the clamps can be removed to facilitate finish welding the joint using the TIG process
After a number of closely spaced tacks are made, the clamps can be removed to facilitate finish welding the joint, using the TIG process.

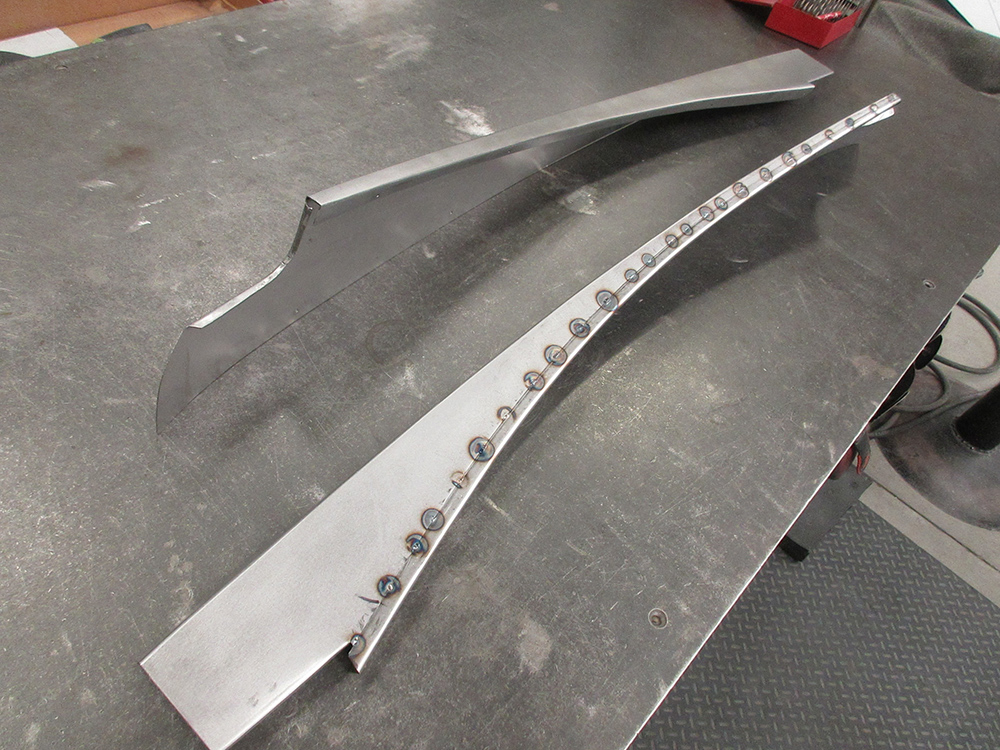
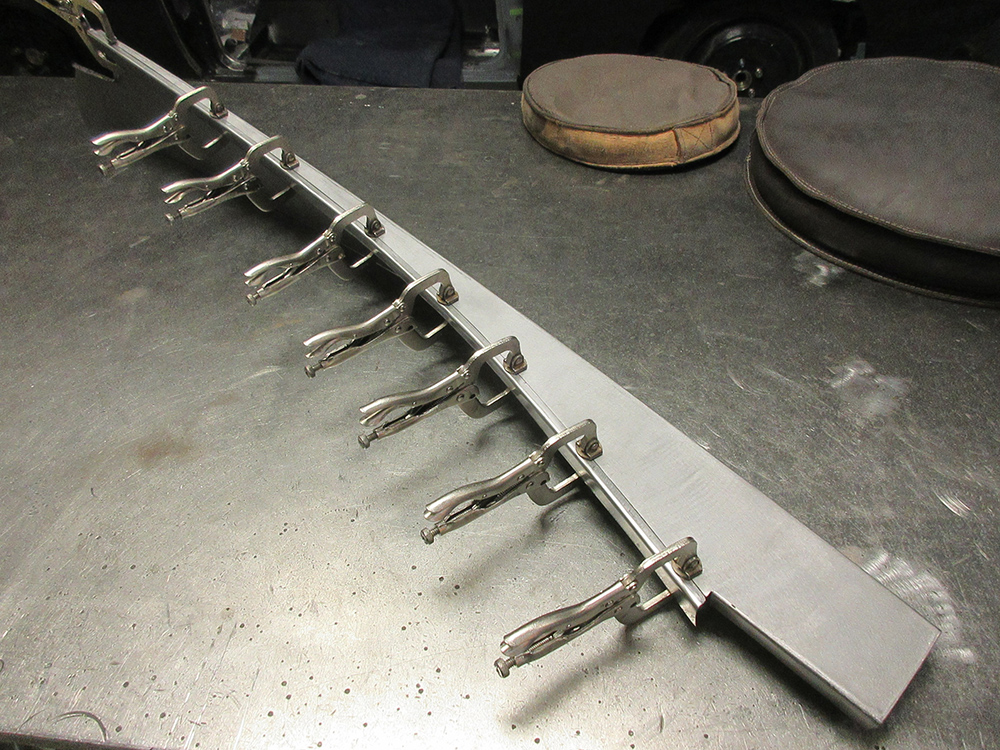
Creating The F100 Fender Flanges

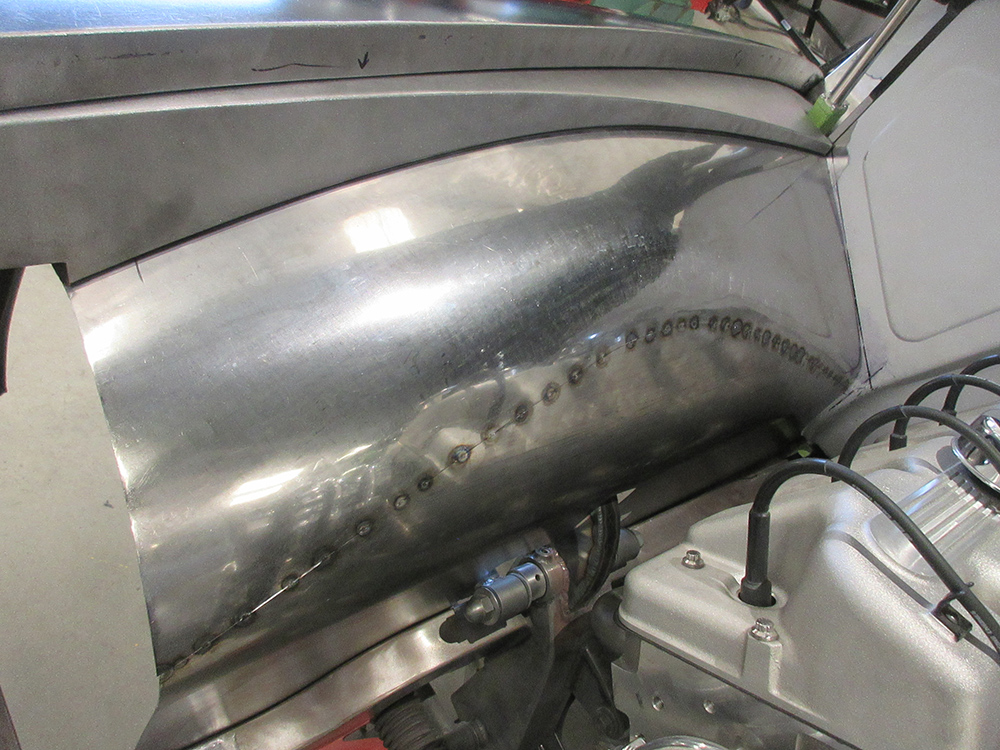
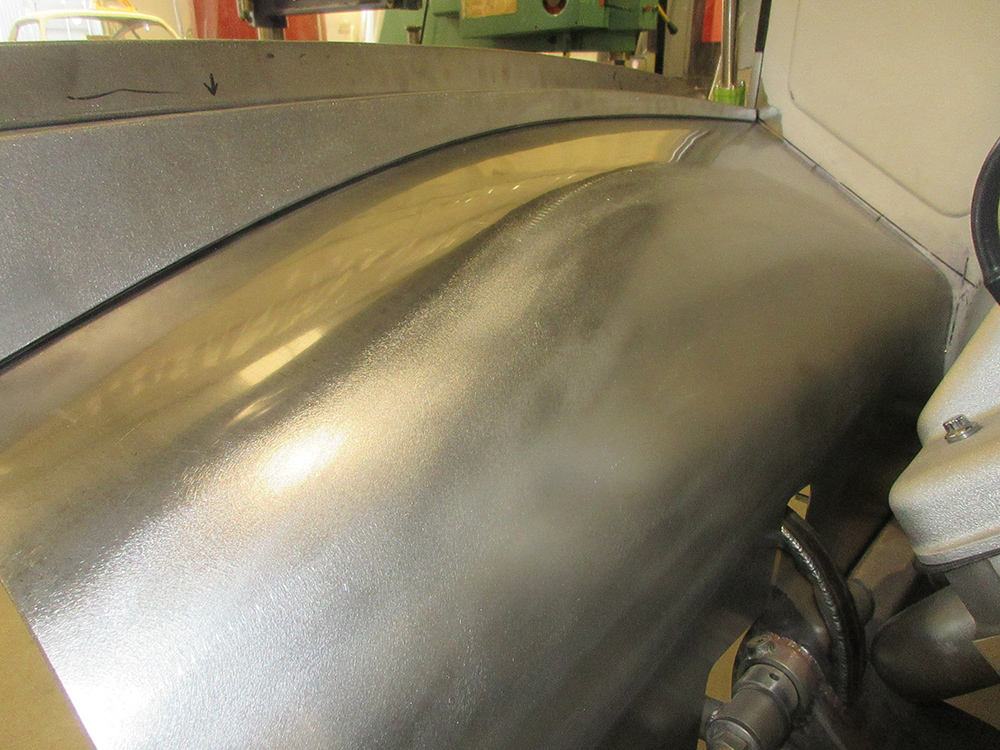
When panels require flanges on the edges there are a variety of techniques that can be used. Long straight flanges are usually made on a sheetmetal brake, but if the flanges need to be curved other strategies may be employed. In some cases, flanges can be shaped over a hammer form, or with a tipping die on a beading machine, but for most of the long flanges on the inner fender panels, the flange was formed as a separate part and then welded to the main panels. When using this type of construction, it’s generally a good idea to avoid welding on the corners of a panel, so a good strategy is to bend an angle from sheet metal, then contour it as needed by working the flanges with a shrinker and stretcher. When this angle is welded to the larger panel it positions the weld in a place where it’s much easier to work out the distortion, and the brake-formed corner will be very smooth and consistent. This is one of the hallmarks of high-quality metalwork.

06 Heres how the upper panel looks with the welds cleaned up
Here’s how the upper panel looks with the welds cleaned up.

Souza F100 Build Part 3: Fixing Ford’s Mistake; Reshaping ‘56 F100 Fenders

There are many other tricks of the trade that the photos will display, so follow along as we show you how this complex assembly of panels was designed, fabricated, and finished. There’s a lot going on here that could be useful for your own projects!

07 With the panel in place you can see how well it fits and appreciate the lack of any visible fasteners
With the panel in place, you can see how well it fits and appreciate the lack of any visible fasteners.
08 With the top panel positioned a paper pattern is made for the lower panel This complex part will be made in two pieces
With the top panel positioned, a paper pattern is made for the lower panel. This complex part will be made in two pieces.
09 One obstacle the inner panel needs to clear are the brake lines
One obstacle the inner panel needs to clear are the brake lines.
10 Heres the lower panel formed in metal
Here’s the lower panel formed in metal. Note how a channel was formed to clear the brake lines, ensuring a very clean look from inside the wheel well.
11 you can see how the channel neatly encloses the brake lines
With the panel mounted, you can see how the channel neatly encloses the brake lines, protecting them from damage and presenting a smooth look.
12 This is the paper pattern for the upper portion of the new panel
This is the paper pattern for the upper portion of the new panel. This will be a tricky part to form.
13 The panel is rough shaped primarily by using a deep throat shrinker and an English wheel
The panel is rough-shaped, primarily by using a deep-throat shrinker and an English wheel, and here it’s being test-fitted into place.
14 Once the panels are shaped and trimmed to fit neatly together they are tack welded together
Once the panels are shaped and trimmed to fit neatly together they are tack welded together.
15 After welding the welded area is smoothed with a pneumatic planishing hammer
After welding, the welded area is smoothed with a pneumatic planishing hammer.
16 This is a flange being shaped to weld to the inner fender panel allowing it to be bolted to the firewall
This is a flange being shaped to weld to the inner fender panel, allowing it to be bolted to the firewall.
17 A small angle will be added to the front portion of the panel
A small angle will be added to the front portion of the panel, ensuring a snug fit against the core support and allowing the fasteners to be hidden from sight.
18 The angle is fitted here and is being tack welded into place
The angle is fitted here and is being tack welded into place.
19 With both panels installed you can see how beautifully they fill in the side of the engine bay
With both panels installed, you can see how beautifully they fill in the side of the engine bay.
20 t takes special care to get metal panels to be fitted and smoothed to this level
Take a close look at the quality of the surface finish. It takes special care to get metal panels to be fitted and smoothed to this level, but that’s the sign of a top-level job.

Source
Gary’s Rods & Restorations
(831) 728-7025
garysrods.com

- Advertisement -

Related Articles

Search Our Site

More Classic Truck Performance

Jack Fillers’ 1971 GMC Stepside has the Perfect Mix of Patina and Practicality

By Tommy Lee Byrd   -    Photography by the Author When...

2024 Grand National Roadster Show: The Classic Truck Perspective

By Rob Fortier   -   Photography by the Author Still reeling...

Our Chevy Pickup Gets a New Firewall, Engine & Transmission

By Ron Ceridono   -   Photography By the Author We’ve been...

Gary & Cindy Giovanni’s ’56 Chevy Modern Pro Street … South City Style

By Rob Fortier   -   Photography by Tim Sutton If you’ve...

Part 6: Custom Header Fab on the Scott’s Hotrods ’N Customs 1951 Chevy

By Kenneth “Stress Ball” DeKissere   -   Photography by Camren...

Greg Tidwell’s World’s Most Beautiful Truck Award Winning 1940 Ford Pickup

By Rob Fortier   -   Photography by Tim Sutton When the...
More Classic Truck Performance

The Harrison’s Rod & Custom ’71 GMC, Part 1

By Bryan Harrison   -   Photography by the Author This is...

THE GOLDMAN TOUCH

Gary Brown’s Full-Attitude ’57 Chevy By Rob Fortier   -   Photography...

Independent Thinking

Part III: C4 Corvette IRS for Early Chevy Pickups By...

Brad Bolves’ ’75 Ford SuperCab

By Eric Geisert   -   Photography by the Author For some...

OBS Steering Box Upgrade with Borgeson Universal Company

By Todd Ryden   -   Photography by the Author  Considering how...

Dino’s Git Down 2023

This Bowtie Bonanza Continues to Blow Us Away By Fuelish...