Fixing Ford’s Mistake; Reshaping ‘56 F100 Fenders

Center the Wheel Wells On Souza’s 1956 Ford F100.

By Ron Covell – Photography by the Author, Michael Christensen, and Gary George

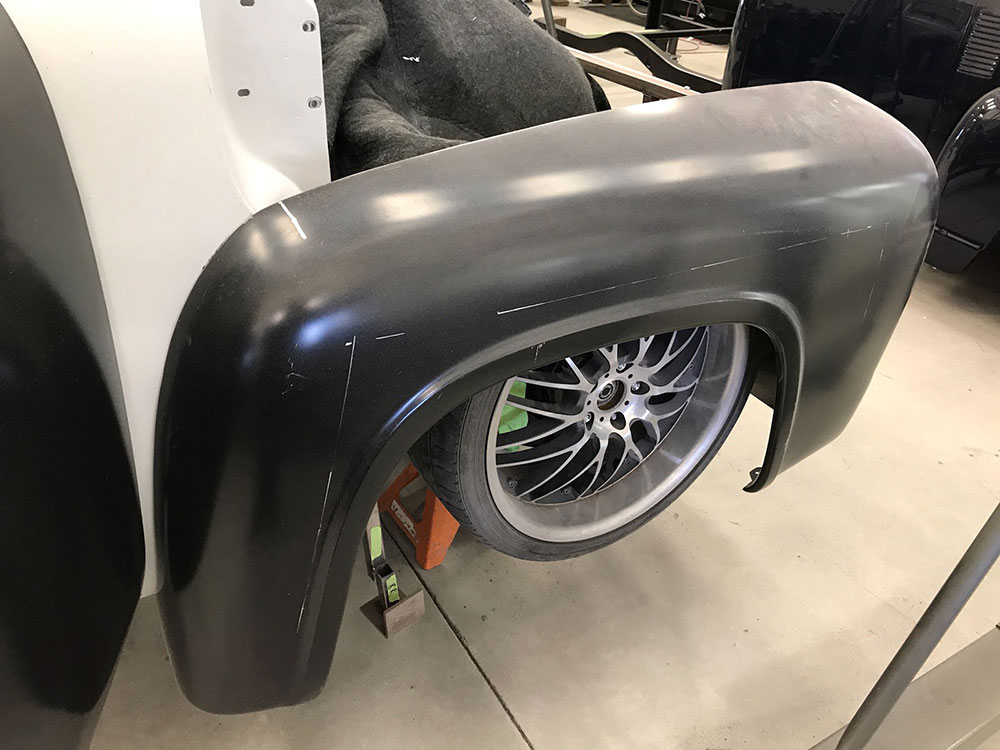
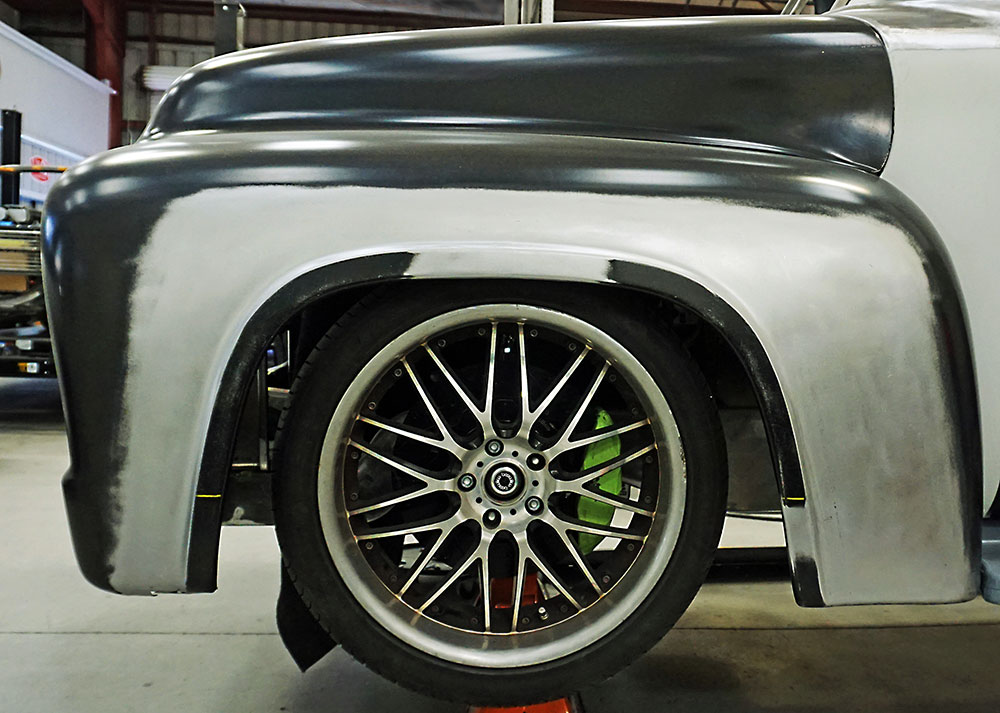
The crew at Gary’s Rods and Restorations has been working diligently on Jason Souza’s 1956 Ford F100. The most recent work has been on the front fenders. For reasons that are unclear, these trucks were designed with the wheel well opening far off the center of the fender, pushed back close to the back edge.

- Advertisement -
02 custom bodywork cuts laid out to center wheel well Souza 1956 Ford F100
A layout was done for the cuts needed to move the 1956 Ford F-100 wheel well forward.

More On This Build: No-Holds-Barred 1956 F100

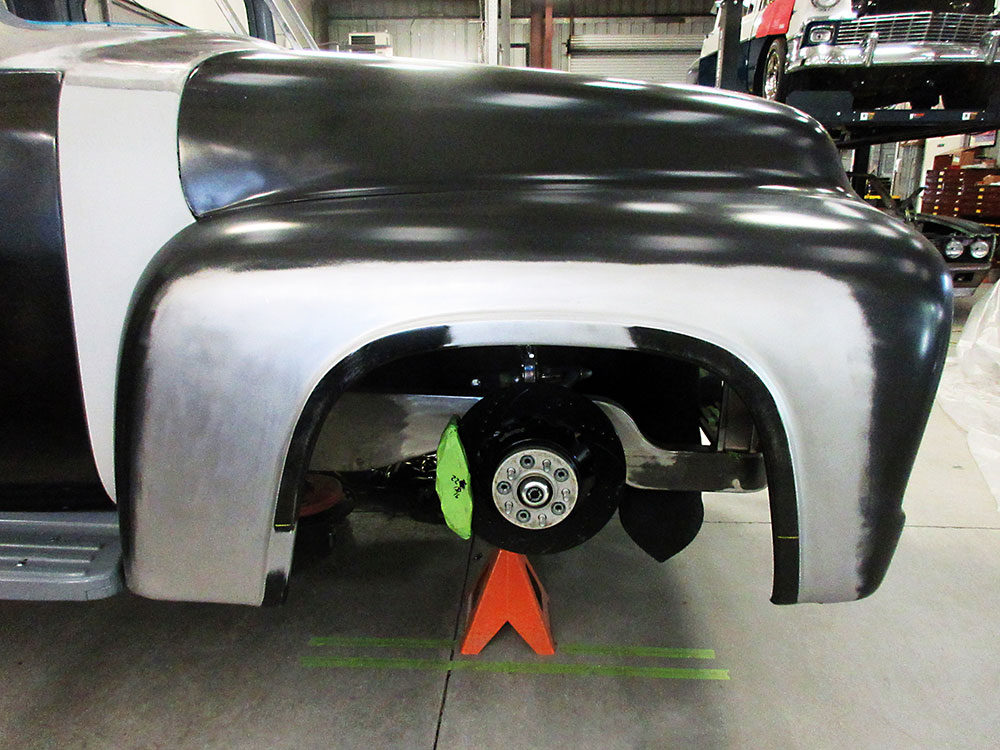
It’s a fair amount of custom bodywork to move a wheel well, but Jason thought the work would be justified, and we think you will agree when you see the finished product. Knowing this change was coming, the new front suspension was located on the truck’s frame so the wheels could be centered in the fenders.

03 cut out wheel well temporarily laid out to check fit Souza 1956 Ford F100
The wheel well was cut out, then fastened temporarily to the fender to check the new position.

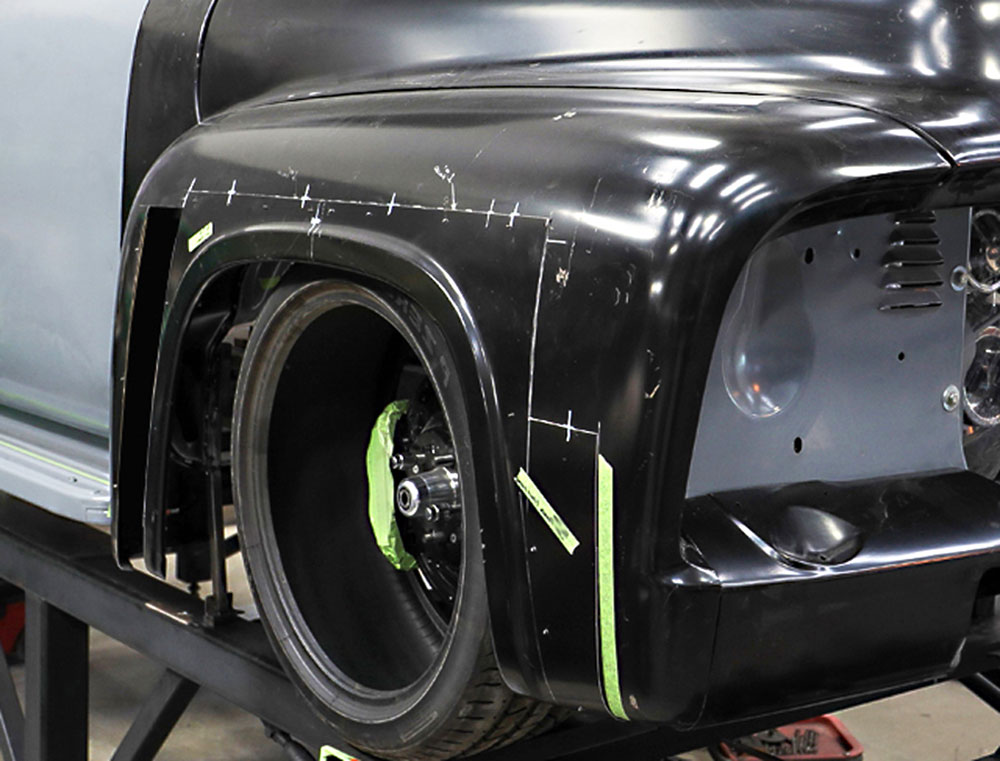
One of the first steps in modifying the fenders was laying out the cuts for the original wheel well, with the goal of placing the joints in places where the edges would fit together reasonably well in their new location. With the original wheel well cut out, it was centered on the wheel and checked visually to make sure it looked good from all angles. It was raised about an inch and a couple of “nips and tucks” were required to get the proportions just right.

- Advertisement -
04 temporary filler piece held in place with Clecos for alingment Souza 1956 Ford F100
Once the alignment was verified, a temporary filler piece was cut and the parts were held in place with Clecos.

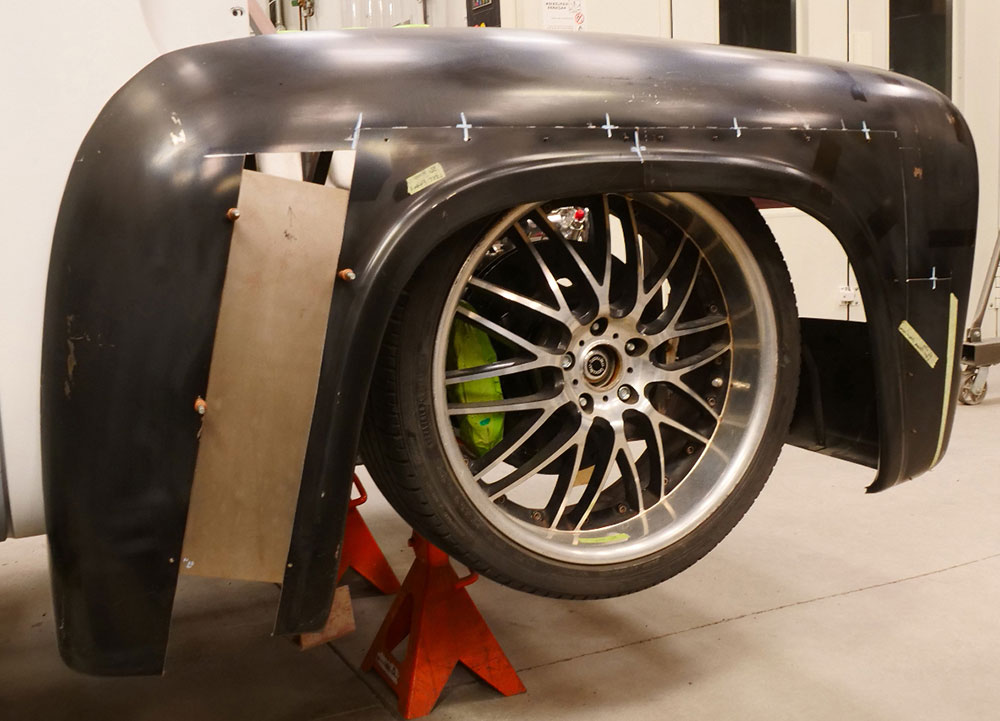
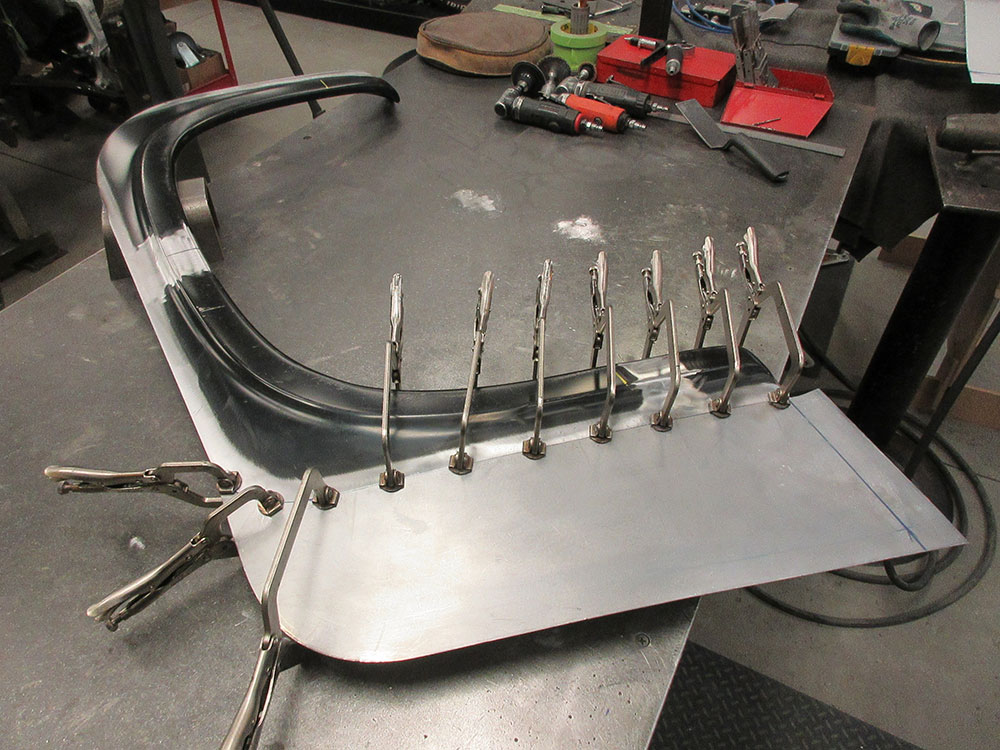
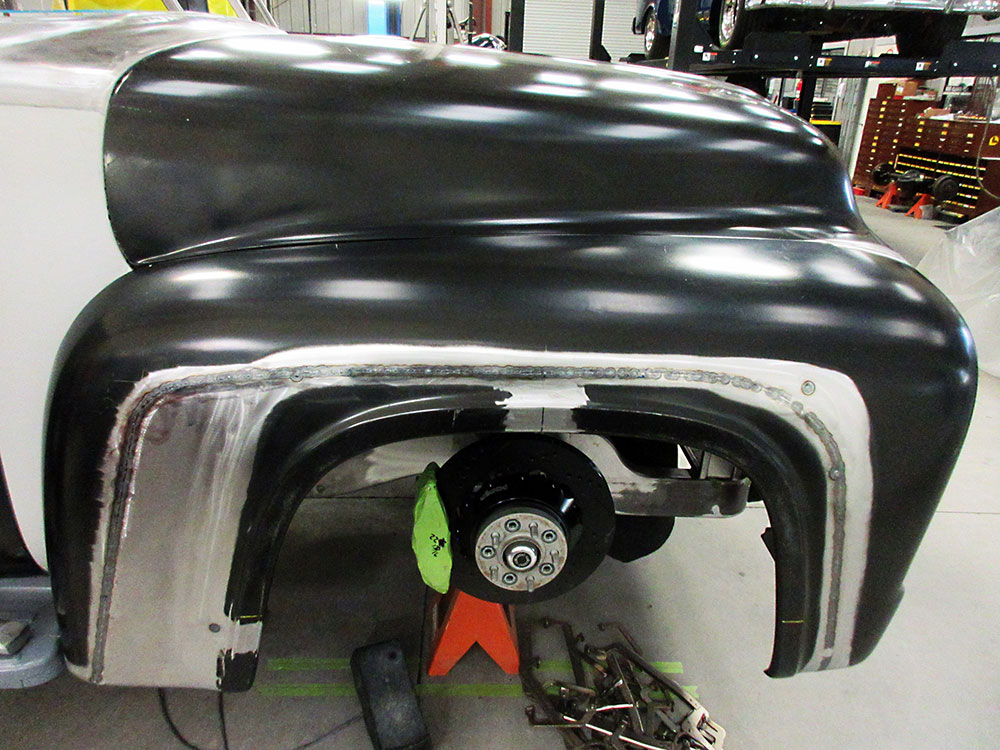
Once all the fitting and adjusting was completed, a filler piece was welded to the back edge of the wheel well and metalfinished. Then the assembly was positioned on the fender and the edge of each joint was scribed and trimmed. The joints were then tack welded together, using a butted joint. After working the joints lightly with a hammer and dolly, the joints were TIG welded and metalfinished.

05 MDF fixture made to locate wheel well to make custom body work symetrical Souza 1956 Ford F100
It’s quite challenging to transfer the size, shape, height, angle, and curvature of the wheel well opening from one side to the other, so Gary’s crew made this clever MDF form to ensure symmetry.

More On This Build: Subtle Modifications On A 1956 Ford F100

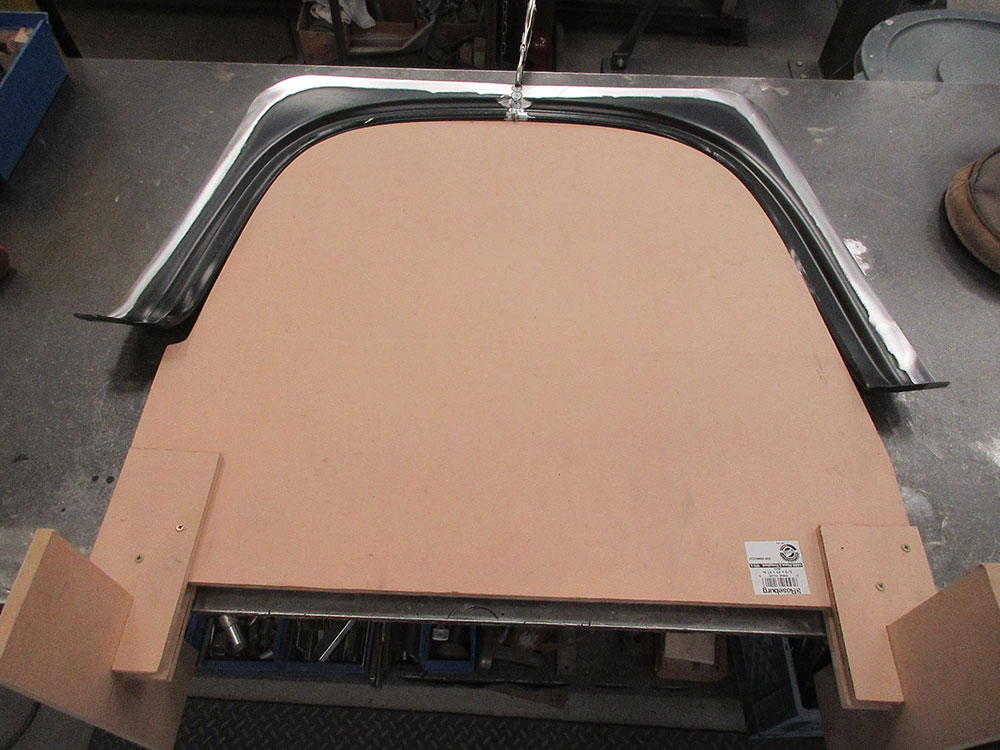
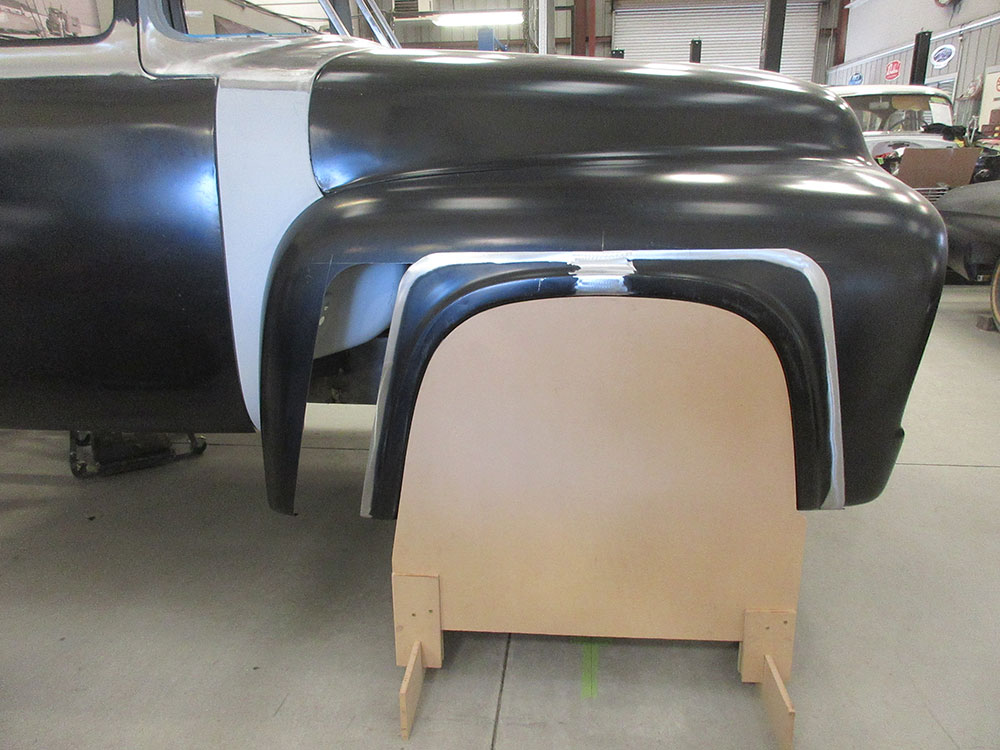
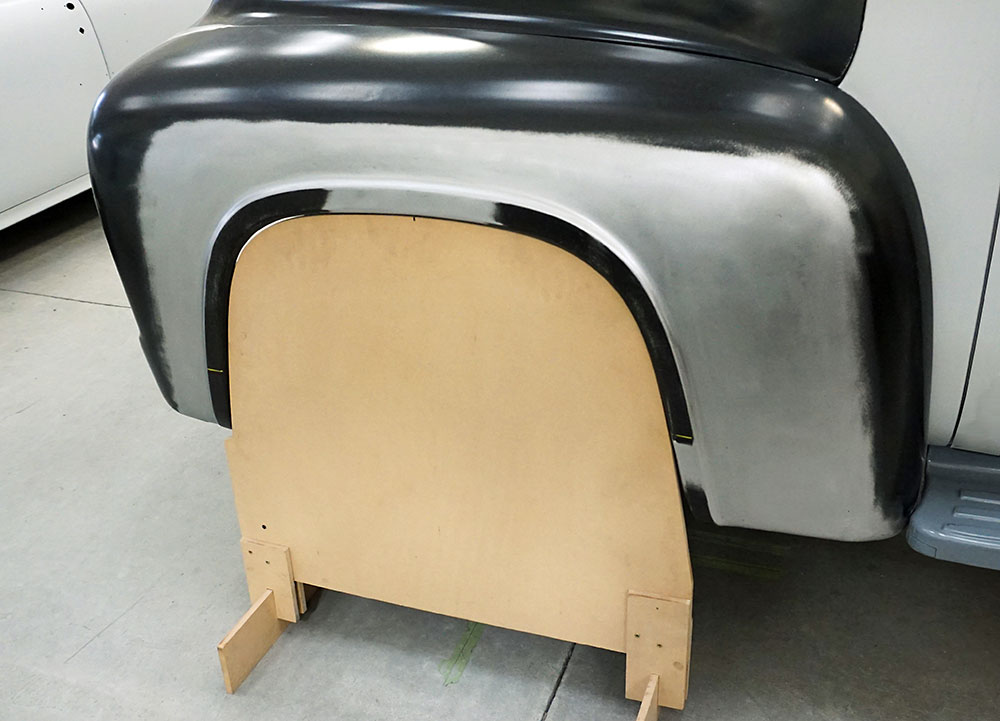
One of the challenges with custom bodywork like this is getting both sides to match—you just can’t get sufficient accuracy with a tape measure. Emilio Belmonte, Gary’s chief sheet metal technician, devised an MDF fixture that ensured symmetry with both wheel wells and then precisely located them at the correct height on both sides of the truck. It’s little details like this that really help to maintain a high level of consistency with custom bodywork of this nature.

06 wheel well on fixture is attached to fender Souza 1956 Ford F100
The wheel well opening, resting on its fixture, was tied into place on the fender. Note that it has been moved up about 1 inch.

The photos show each step in detail. Look forward to many more articles on this exciting 1956 Ford F-100 project.

- Advertisement -
07 custom sheet metal filler piece fitted to pack of wheel well Souza 1956 Ford F100
A piece of metal was cut and fitted to the back side of the wheel well opening.
08 filler is welded and metalfinished to wheel well, it is fitted and welded to fender Souza 1956 Ford F100
After welding and metalfinishing the filler piece, the assembly was fitted into place and then tacked and finish welded.
09 passenger side custom bodywork metalfinished Souza 1956 Ford F100
Here is the passenger side custom bodywork is completely metalfinished.
10 MDF fixture moved to driver side to center and match the wheel well Souza 1956 Ford F100
Moving the form to the other side of the truck made it relatively easy to get both sides exactly the same. The repositioned wheel well looks so natural that you may wonder why Ford moved the wheel so far back originally.
11 metalfinished custom body work centered wheel and wheel well in fender Souza 1956 Ford F100
Finally, here’s how the custom bodywork looks with the wheel and tire fitted into place. The level of finish of the metalwork is superb!

Source
Gary’s Rods & Restorations
(831) 728-7025
garysrods.com

- Advertisement -

Related Articles

Search Our Site

More Classic Truck Performance

A Clean Serpentine Package for any LS Motor

By Ryan Manson   -   Photography by the Author One of...

Jack Fillers’ 1971 GMC Stepside has the Perfect Mix of Patina and Practicality

By Tommy Lee Byrd   -    Photography by the Author When...

2024 Grand National Roadster Show: The Classic Truck Perspective

By Rob Fortier   -   Photography by the Author Still reeling...

Our Chevy Pickup Gets a New Firewall, Engine & Transmission

By Ron Ceridono   -   Photography By the Author We’ve been...

Gary & Cindy Giovanni’s ’56 Chevy Modern Pro Street … South City Style

By Rob Fortier   -   Photography by Tim Sutton If you’ve...

Part 6: Custom Header Fab on the Scott’s Hotrods ’N Customs 1951 Chevy

By Kenneth “Stress Ball” DeKissere   -   Photography by Camren...
More Classic Truck Performance

The Arbor Camp Timber Company 1968 Chevy C10

Pete and Leslie Richmond's Tribute to Nostalgia By Ryan Manson  ...

The Harrison’s Rod & Custom ’71 GMC, Part 1

By Bryan Harrison   -   Photography by the Author This is...

THE GOLDMAN TOUCH

Gary Brown’s Full-Attitude ’57 Chevy By Rob Fortier   -   Photography...

Independent Thinking

Part III: C4 Corvette IRS for Early Chevy Pickups By...

Brad Bolves’ ’75 Ford SuperCab

By Eric Geisert   -   Photography by the Author For some...

OBS Steering Box Upgrade with Borgeson Universal Company

By Todd Ryden   -   Photography by the Author  Considering how...