ITGMw
SUBSCRIPTIONtext
ProgressArrows
digital issues
ProgressArrows
online store
ProgressArrows
SUBSCRIPTIONtext
ITGMw
ACPnew header logo
CTP LOGOs
all cars

Subtle Modifications On A 1956 Ford F100

Part 2: Sectioning the Cowl with Gary’s Rods and Restorations

By Ron Covell – Photography by the Author, Michael Christensen & Gary George 

While we often enjoy seeing adventurous experimentations with truck styling, this is something that is easily overdone. Sometimes the more subtle modifications produce a better result.

- Advertisement -
02 Lots of care was used to plot where the cuts would be made on the 1956 F100 cowl
Lots of care was used to plot where the cuts would be made on the 1956 F100 cowl. A curved slice was removed that was 1 1/4-inch high at the front, and 1 inch at the rear.

Last month we introduced Jason Souza’s ‘56 F100 project being built at Gary’s Rods and Restorations in Northern California and showed the work done on the floor and firewall. This time we’re going to look at a subtle modification being done to lower the roof—not by chopping but by sectioning the cowl.

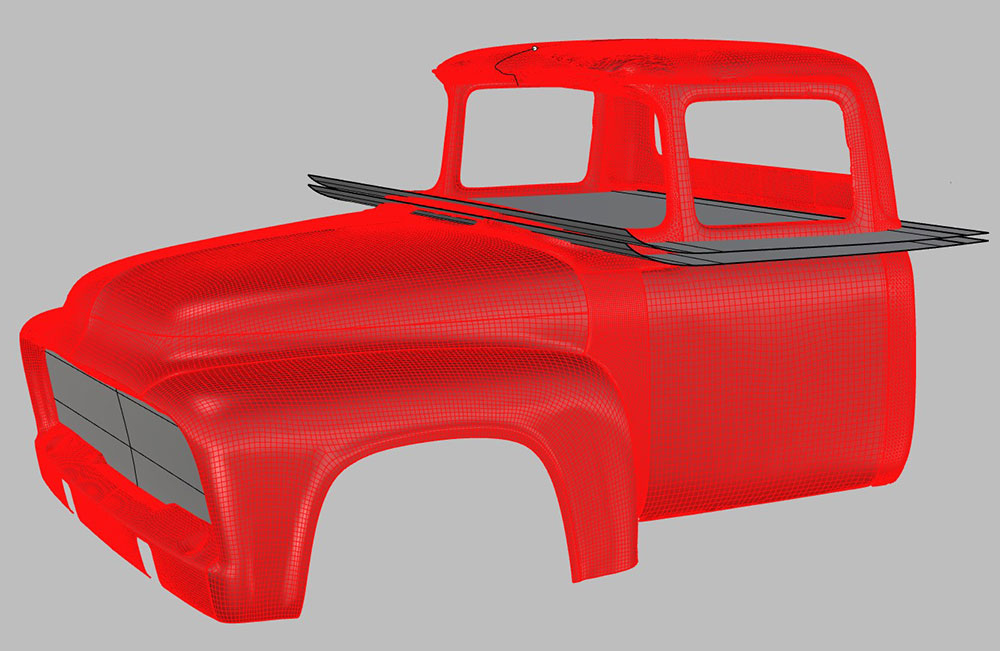
In preparation for the extensive body modifications being planned, Gary had the entire truck digitally scanned. This resulted in a complete surface model, so the body modifications could be tried out, tweaked, and visualized on a computer from all angles before any metal was cut. Gary’s neighbor, Sean Sinnott of DG Collective, was called on to do the scanning and computer modeling.

03 Note the height of the lip below the ‘56 F100 windshield here and compare it with the end result
Note the height of the lip below the ‘56 F100 windshield here and compare it with the end result.

Part 1: No-Holds-Barred 1956 F100

- Advertisement -

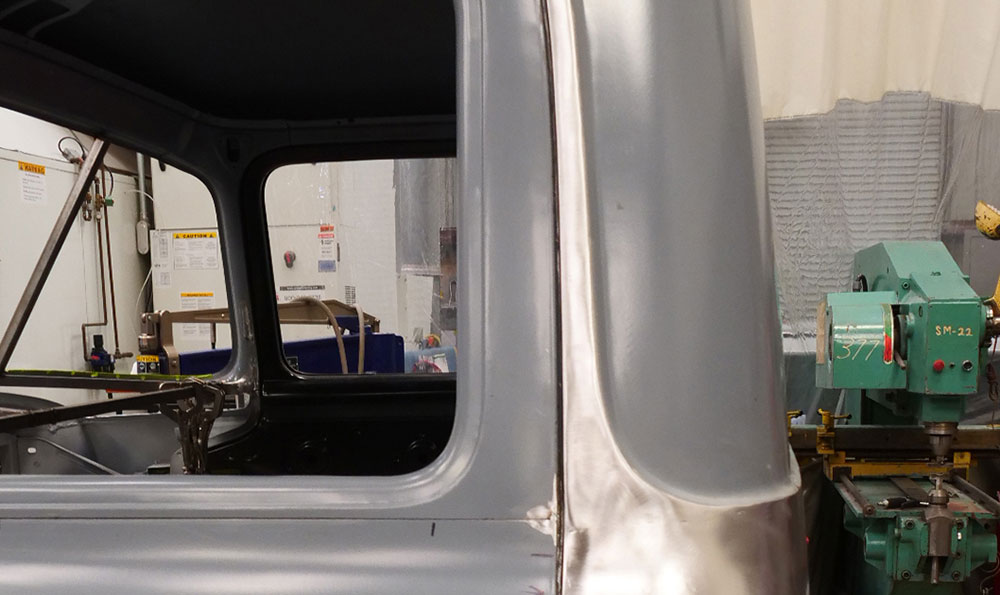
One of the first major body modifications was sectioning the cowl. While it’s common to chop the top on a custom truck, Souza, the truck’s owner, was very impressed with Chip Foose’s personal project truck where the greenhouse area of the cab was left intact and the roof was lowered by sectioning the cowl. This is a “sneaky” way to lower the profile of the old truck, but the modification doesn’t call a lot of attention to itself. Most people appreciate the improved look without recognizing exactly how it was accomplished. Souza knew from the start that he wanted to incorporate this feature on his project truck, and Gary and his crew were eager to work out the details required for the execution.

04 The ‘56 F100 cowl is cut here and the roof has been dropped down 1 1_4 inches
The ‘56 F100 cowl is cut here and the roof has been dropped down 1 1/4 inches. Note how everything is braced with tubing to keep it from changing shape.

One of the beauties of working with a surface model on a computer is being able to quickly make changes to shapes and view them from any angle. After a lot of experimentation, Gary decided that sectioning the cowl 1 1/4 inches in front and 1 inch in back would produce the desired effect.

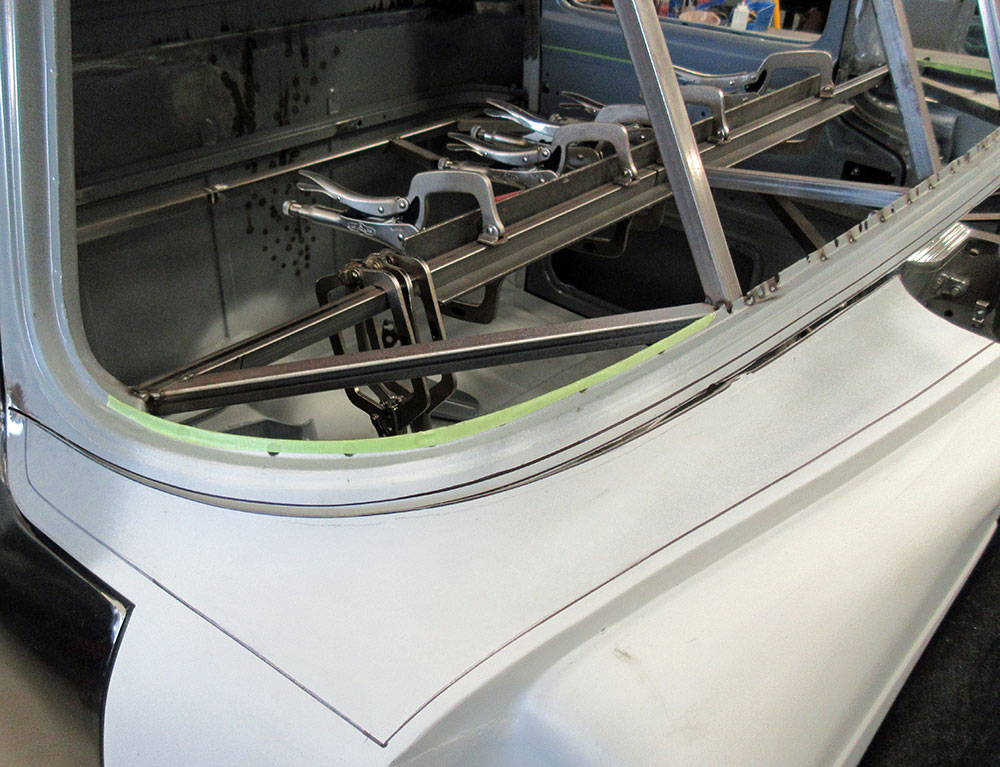
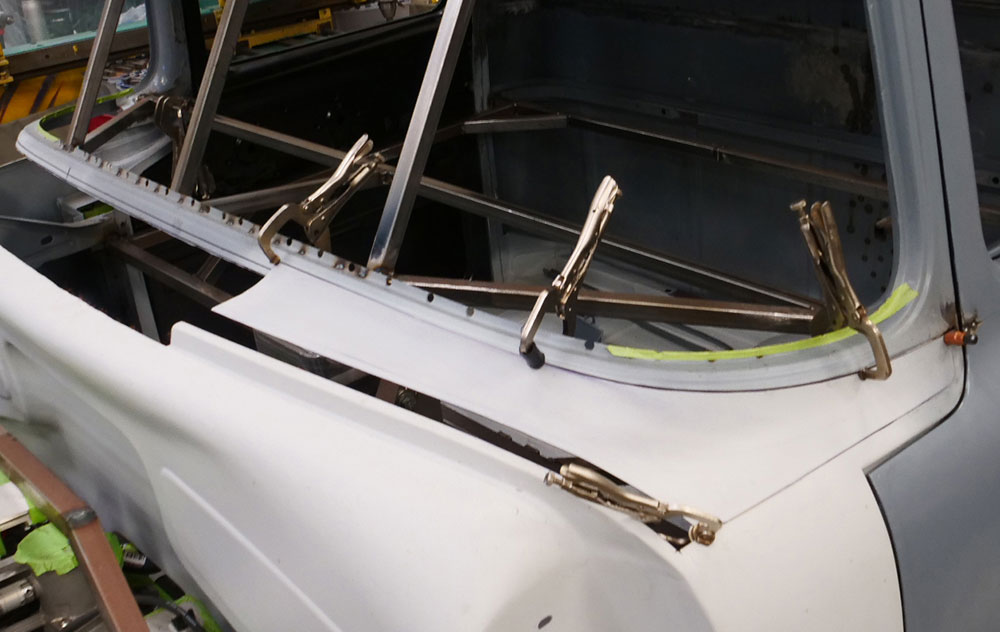
The first step was bracing the cab with tubing so it would retain its shape when the roof was removed. The windshield area on the roof was reinforced, too. The location of the cuts was carefully plotted, striving to provide access to the back side of the welded joints so they could be worked to perfection. The cowl was split from the roof just below the channel for the windshield weatherstrip.

05 The rear of the roof is dropped down 1 inch inside the flat cab back and stout plug welds are made
The rear of the roof is dropped down 1 inch inside the flat cab back and stout plug welds are made to the inner structure, maintaining the strength in the ’jamb area.

Read More: Alluring Sterling Silver 1956 Ford F100

- Advertisement -

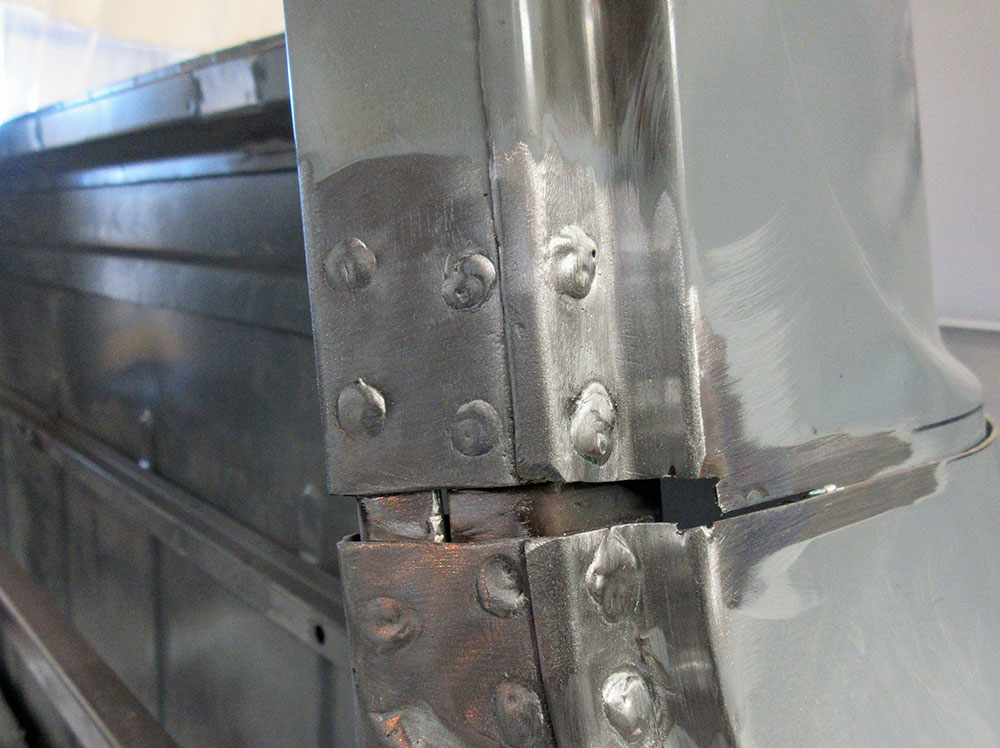
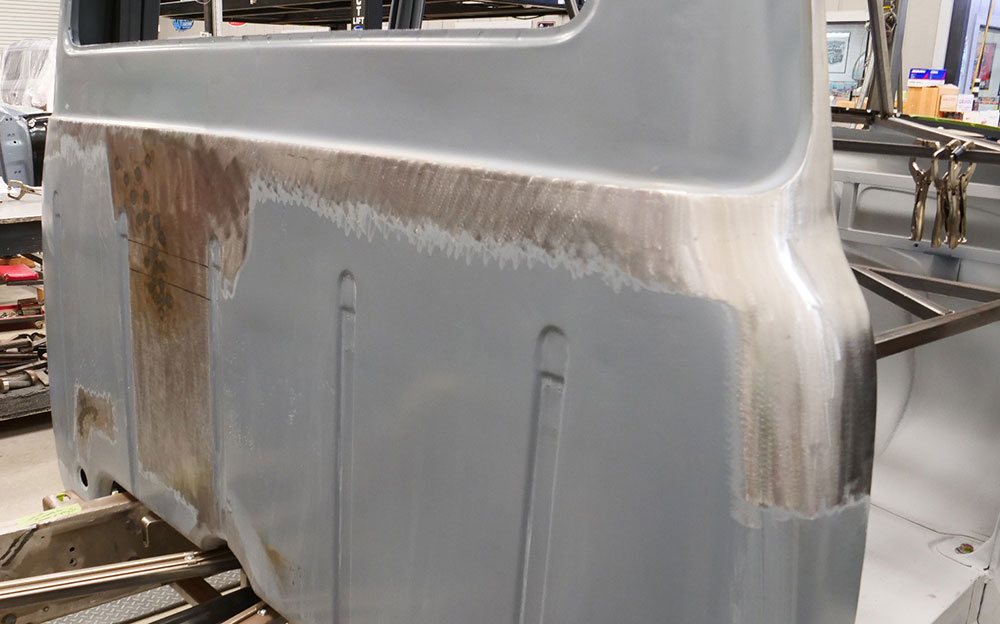
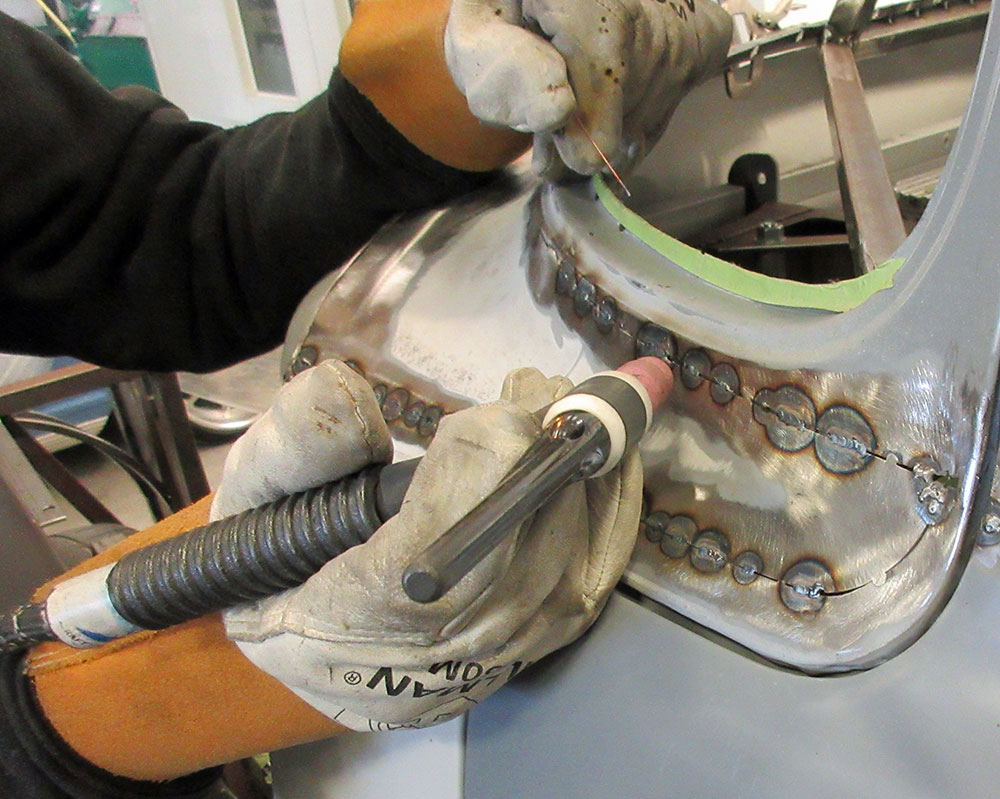
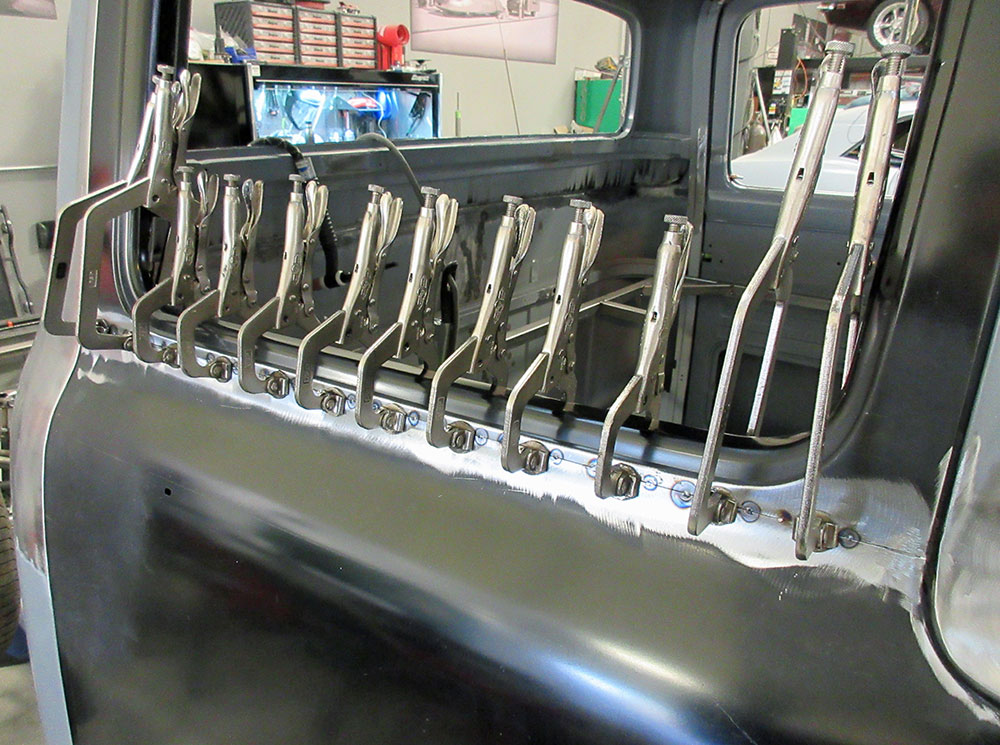
The roof was removed from the cab and a 1-inch strip was cut from the rear cab panel. This portion of the cab is essentially flat, so very little reshaping was required, but welding and smoothing flat panels is a tricky operation. Emilio Belmonte, Gary’s metalworking expert, did a beautiful job with these custom modifications. A section was removed from the door jambs; these were a little more challenging to align because of their taper.

06 The A-pillars are reinforced in the ’jamb area, too
The A-pillars are reinforced in the ’jamb area, too.

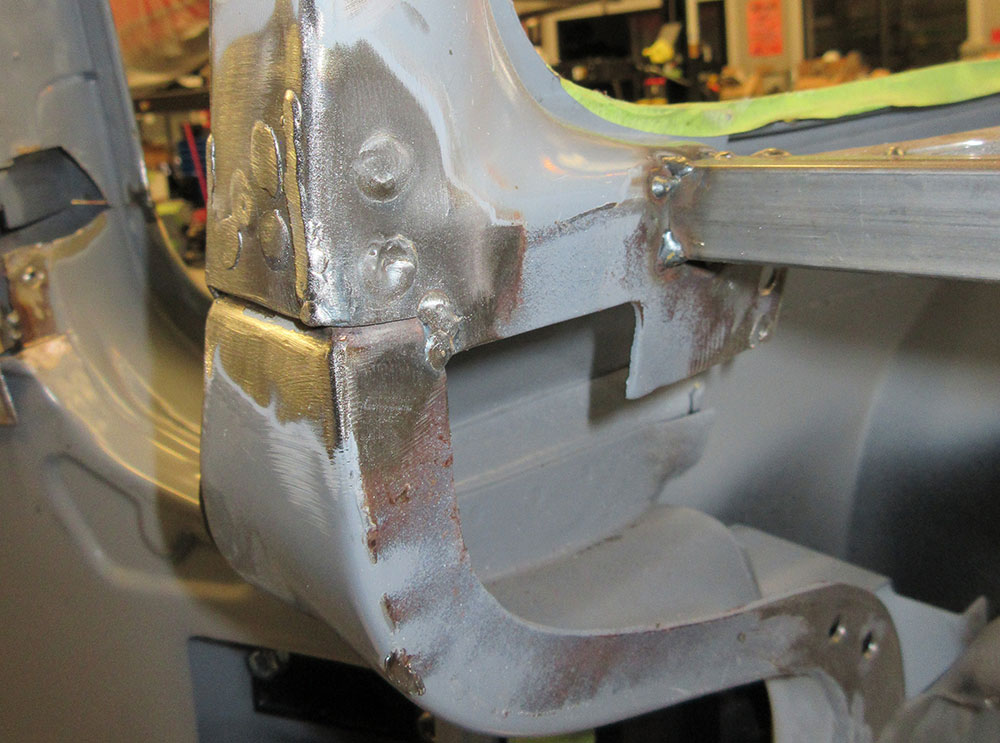
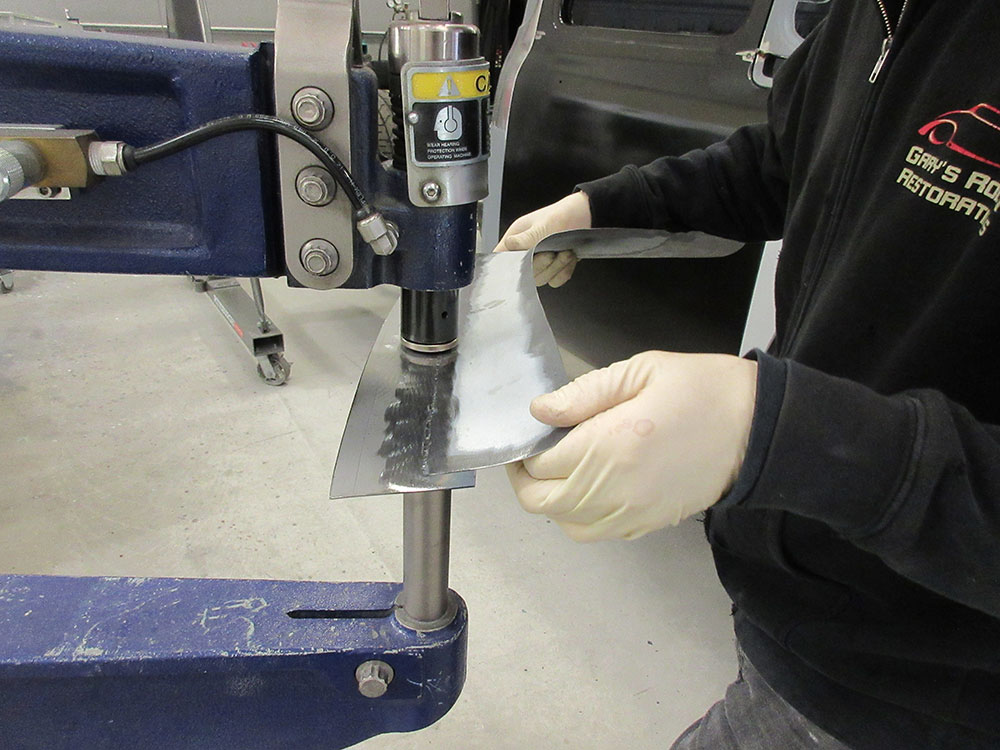
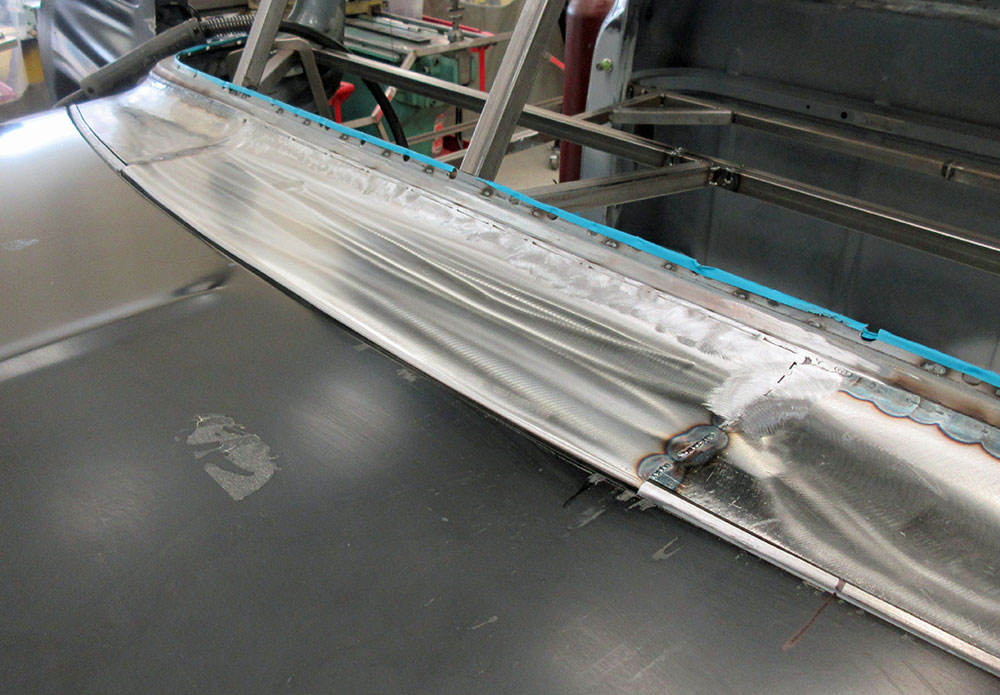
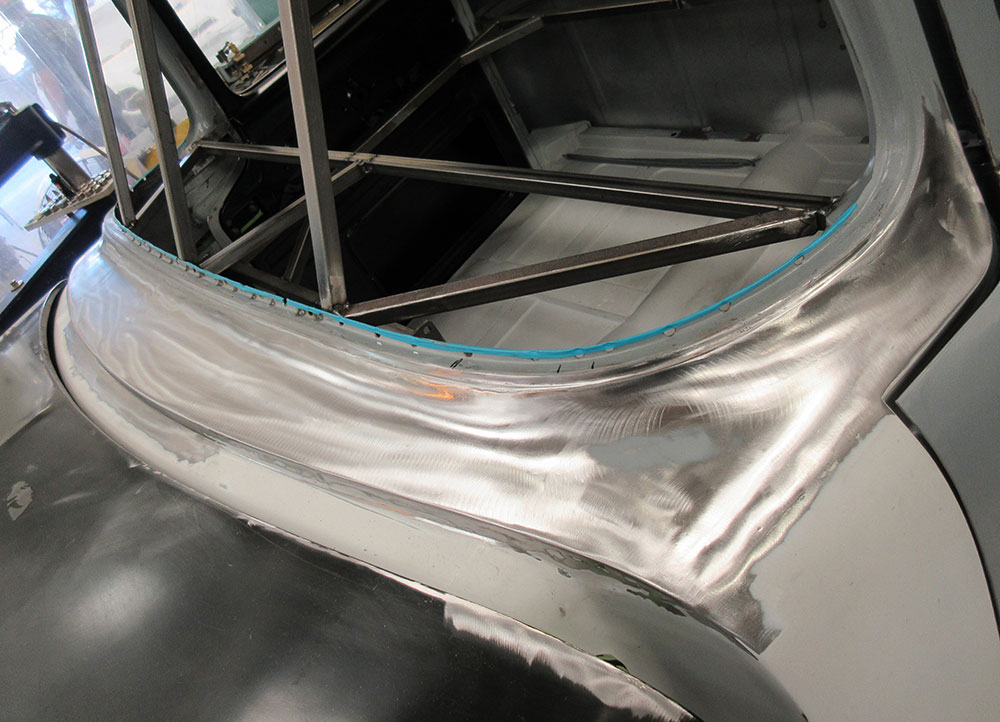
The roof was repositioned in its new location with the front edge lowered 1 1/4 inch. Everything was checked and adjusted as necessary and the joints were carefully tack welded together. The cowl required the most extensive modifications. The sides of the cowl were removed, then the front edges were extended and the back edges were trimmed. The cowl vent was removed and new metal was shaped to fill the void.

The door frame tops were removed, then re-fitted in their new, lower position, ensuring the gaps were uniform. A section of the inner door frame was removed to provide access to the weld on the outer skin, allowing the joint to be worked with a hammer and dolly and metal finish.

07 The ‘56 F100 roof is carefully welded to the back of the cab
After trimming the overlapped panels to achieve a tight butt joint, the ‘56 F100 roof is carefully welded to the back of the cab.

Once all the joints were adjusted and the fits were verified, the panels were tacked, finished welded, and metal finished.

Read More: 1960 Ford F100 With Plenty Of Chevy Performance

The accompanying photos show the work in detail, and you can look forward to a series of articles covering the extensive body modifications in store for this outstanding custom truck, including a completely scratch-built bed!

08 A vertical cut was required at the edge of the ’jamb to maintain the fit of the panels
A vertical cut was required at the edge of the ’jamb to maintain the fit of the panels.
09 A filler piece was carefully fitted and tacked, then welded and metal finished
A filler piece was carefully fitted and tacked, then welded and metal finished.
10 The long welded joint on the back of the cab required special attention to keep everything straight
The long welded joint on the back of the cab required special attention to keep everything straight.
11 The corners of the cowl were removed then slid back and re-fitted to the lower windshield channel
The corners of the cowl were removed then slid back and re-fitted to the lower windshield channel.
12 Next, a strip of metal was added to the front of the cowl corners
Next, a strip of metal was added to the front of the cowl corners.
13 A planishing hammer was used to smooth the weld on this joint
A planishing hammer was used to smooth the weld on this joint.
14 The lengthened cowl corners were then welded back into place
The lengthened cowl corners were then welded back into place.
15 New metal was shaped to fill the gap left when the cowl vent was removed
New metal was shaped to fill the gap left when the cowl vent was removed.
16 Here is the re-shaped cowl, completely welded and metal finished
Here is the re-shaped cowl, completely welded and metal finished.
17 The door tops were realigned in the lowered roof, the bottom edges were trimmed, and they were tack welded into place
The door tops were realigned in the lowered roof, the bottom edges were trimmed, and they were tack welded into place.
18 A section of the inner door frame was removed to provide access for metal finishing the weld on the outer door skin
A section of the inner door frame was removed to provide access for metal finishing the weld on the outer door skin.
19 Here’s the door after the weld has been smoothed
Here’s the door after the weld has been smoothed.
20 And this is how the cab looks with the sectioned cowl
And this is how the cab looks with the sectioned cowl. It’s a subtle change, but it certainly improves the look of the truck.

Sources
Gary’s Rods & Restorations
(831) 728-7025
garysrods.com

Sean Sinnott
DG Collective
(831) 464-8088
designergrains.com

- Advertisement -

Related Articles

Search Our Site

More Classic Truck Performance

THE 41st ANNUAL F-100 WESTERN NATIONALS

By the CTP Staff   -   Images by Fuelish Media Since...

Custom Autosound 1967-1972 Slidebar Radio Install

By Rob Fortier   -   Images by the Author Retro-looking sounds...

Rick Clutter’s Premier Street Rods Built 1961 Ford Unibody Custom

By Fuelish Media There’s a high road, a low road,...

The Speedway Motors 1968 C10 Part 5: The Interior

By Joe McCollough   -   Images by Jessica Coleman &...

The John Lamb/Tin Man’s Garage Triton V10-Powered 1961 Ford Unibody

By Brian Limberg (Excerpts from his Build Book)    -  ...

Mike Schott’s 1992 Chevy Silverado

By Tim King   -   Images by the Author 1988 welcomed...
More Classic Truck Performance

Our LS-Powered C10 Goes Into Overdrive With Gearstar’s Bulletproof 4L60E

By Ron Ceridono When overdrive automatics came on the scene...

Walker Zeigler’s First-Gen 1965 Chevy C10

By Rob Fortier   -   Images by NotStock Photography Up until...

Steele Rubber 1955-1959 Chevy Task Force Master Cylinder Access Holes

By “Rotten” Rodney Bauman   -   Images by the Author When...

A New Approach to Building an Old 1971 Chevy Truck

By Fuelish Media You hear the term “back in the...

Speedway Motors’ 1968 C10 Build Part 2: Chassis & Suspension

By Joe McCollough   -   Images by the Author In the...

Paul Close’s Y-Block Powered 1956 F100 is Layered with Custom Cool

By Chuck Vranas   -   Images by the Author As the...