How To Build An LS Engine: Short Block Assembly Part 3
We are almost there! Our Summit Racing– and American Heritage Performance–built potent street LS is ready for our ’55 Chevy wagon that it will be dropped into.
Bare Block Performance Package – Part 3: Big Power From a Conservative Package
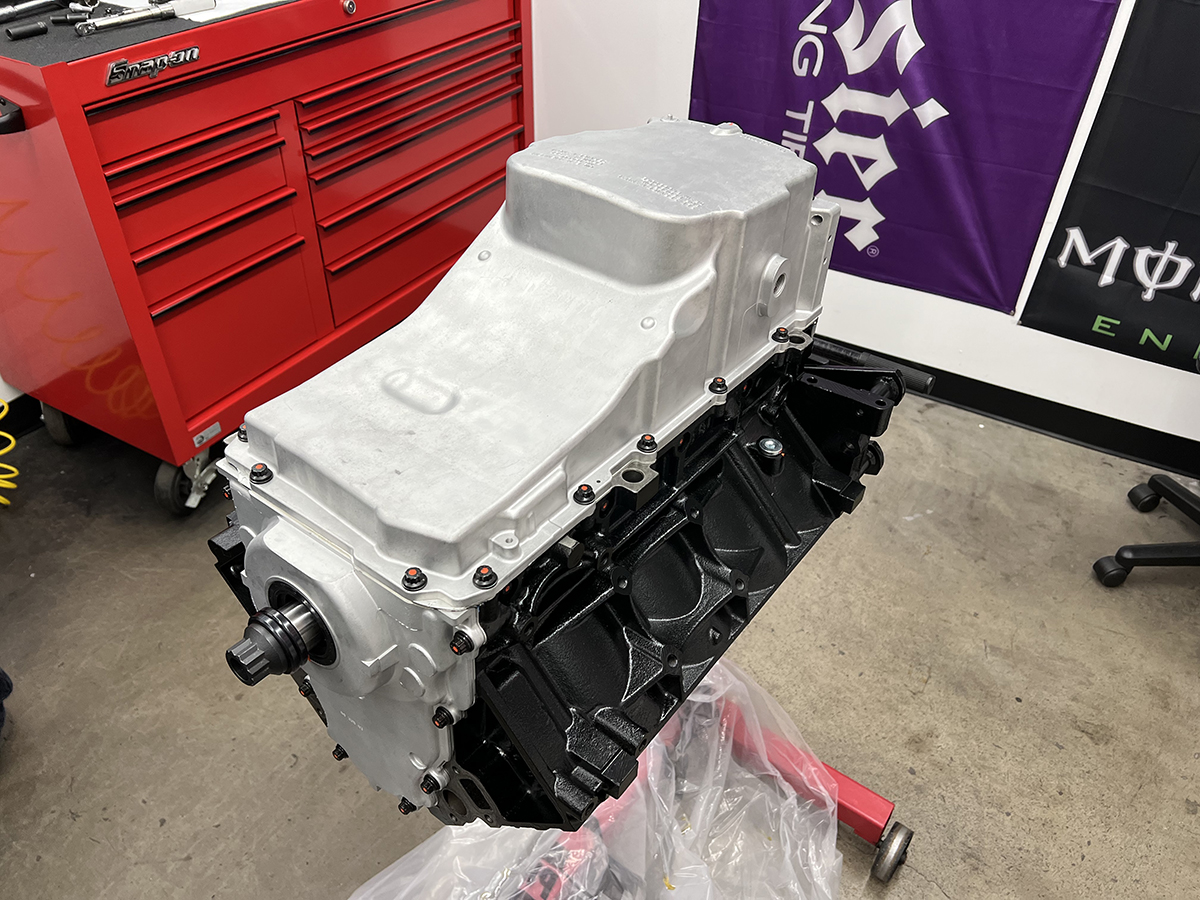
When we wrapped up last time, Kyle Martelli had our long-block LS330 completely assembled and ready to accept the top end.
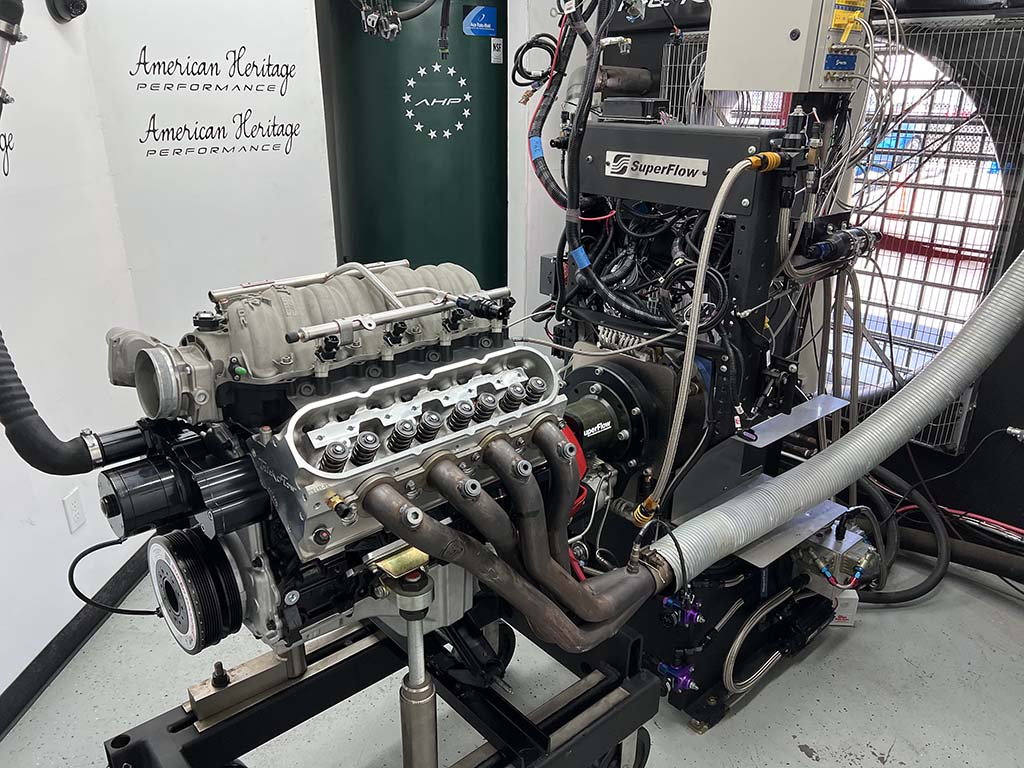
Wrapping up an engine build and strapping it onto a dyno can be an anxiety-ridden experience. Between the quality of parts we’ve used from Summit Racing and the experience and expertise from the guys at American Heritage Performance (AHP), we had no worries when it came time to start spinning the motor up and putting some numbers down. But first, AHP’s engine builder-in-chief, Kyle Martelli, still has a couple items to install before Kohle Heimlich can slide into the dyno operator’s chair.
Before the heads are installed, however, Martelli needs to install the GM lifter trays (PN SUM-150132-4) and LS7 roller lifters (PN NAL-12499225), both available from Summit Racing.When we wrapped up last time, Kyle Martelli had our long-block LS330 completely assembled and ready to accept the top end.
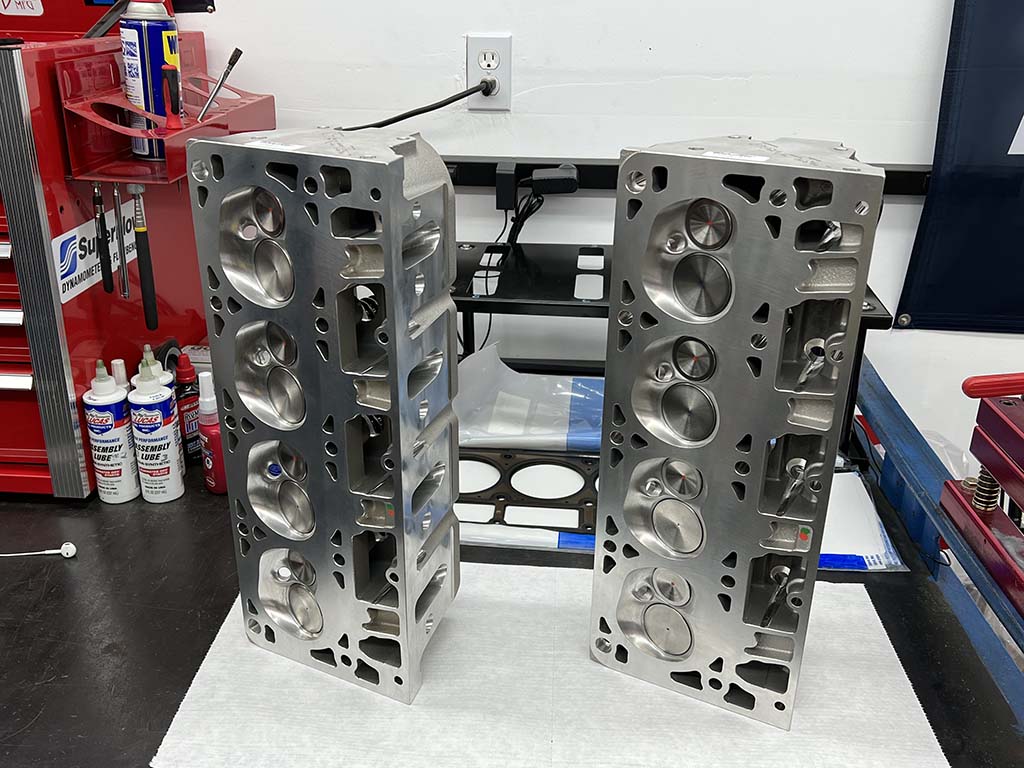
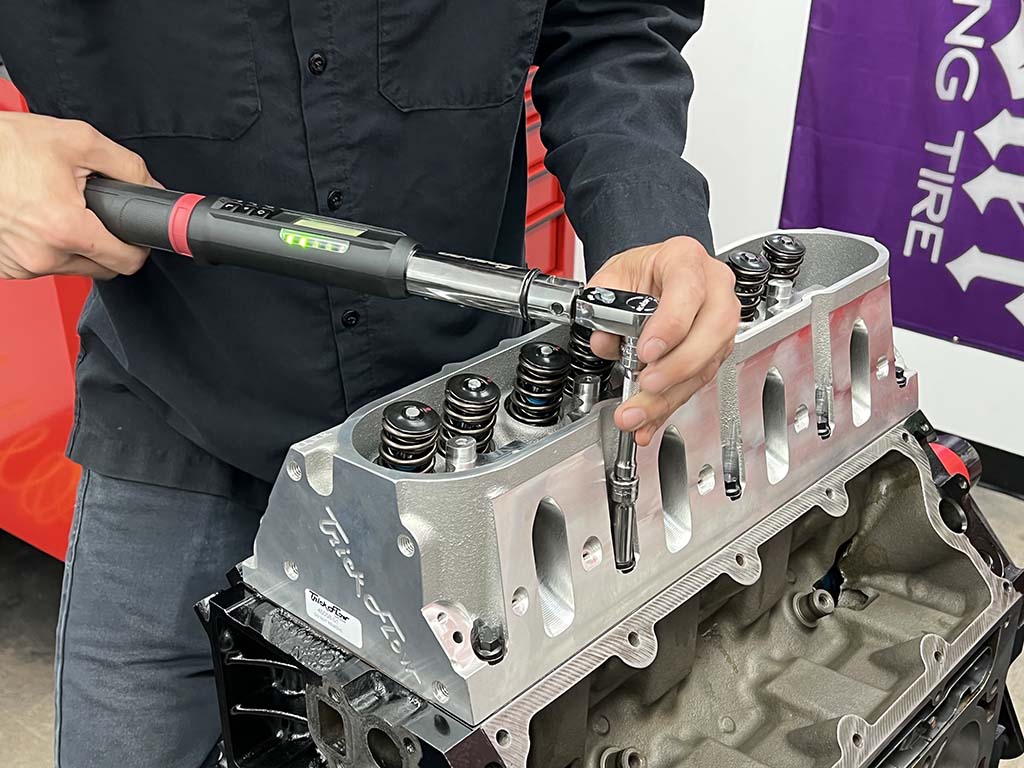
The first task is to get the AHP-inspected Trick Flow cylinder heads assembled and installed. Once the cylinder heads were in place, Martelli measured for pushrod length before finalizing the valvetrain assembly. New sensors, spark plugs, AHP’s base dyno induction setup, along with the necessary wiring harness completes the preparation phase, and the engine is ready to be tested.
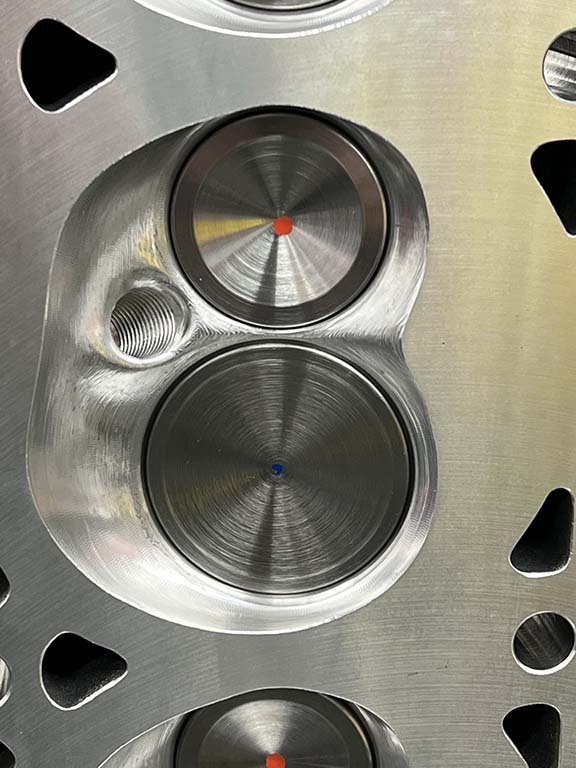
A pair of aluminum Trick Flow heads (PN TFS-30510001-C00) feature 58cc combustion chambers which, when combined with our piston selection, results in a 10:1 compression ratio, a perfect naturally aspirated number for the street.
Before that, however, Heimlich uses the dyno to control the engine’s rpm and load to properly break in the engine. This helps seat the rings against the cylinder walls and ensure the valvetrain components are receiving oil as needed. After the break-in procedure, the fun can begin, starting with a few low-rpm runs, slowly increasing engine speed and adding a little bit of timing as required until the final dyno pass has been made. The resulting dyno numbers speak for themselves and leave us impressed. For a relatively mild LS build, we’re happy with the results and it should scoot our project down the road nicely.
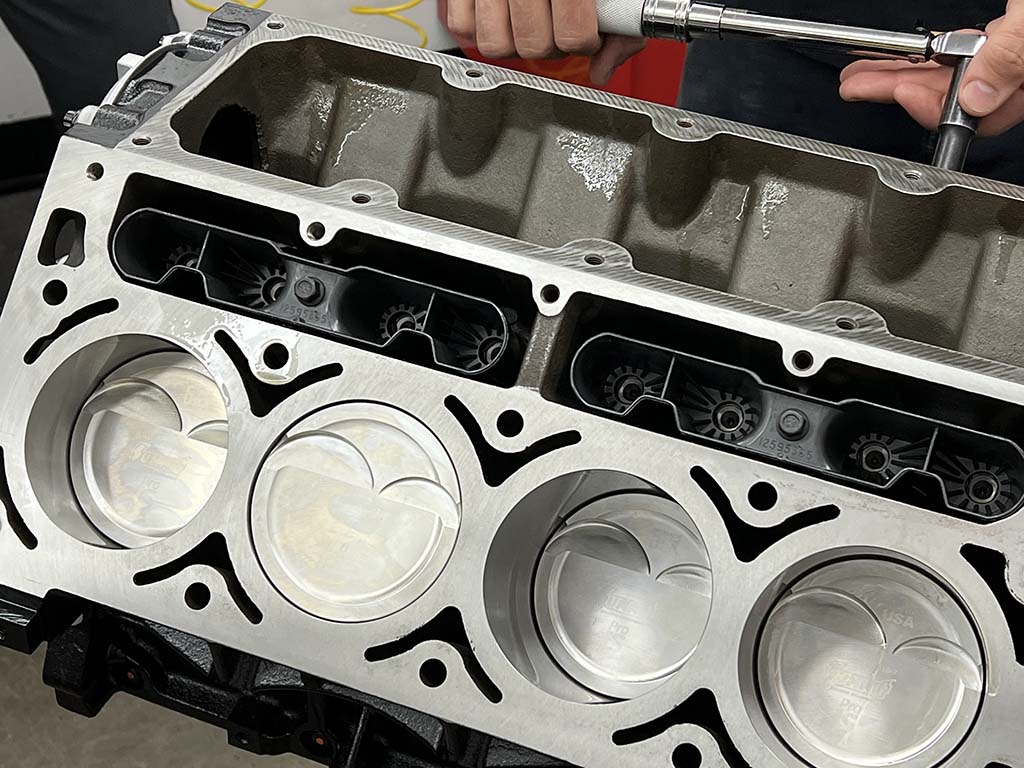
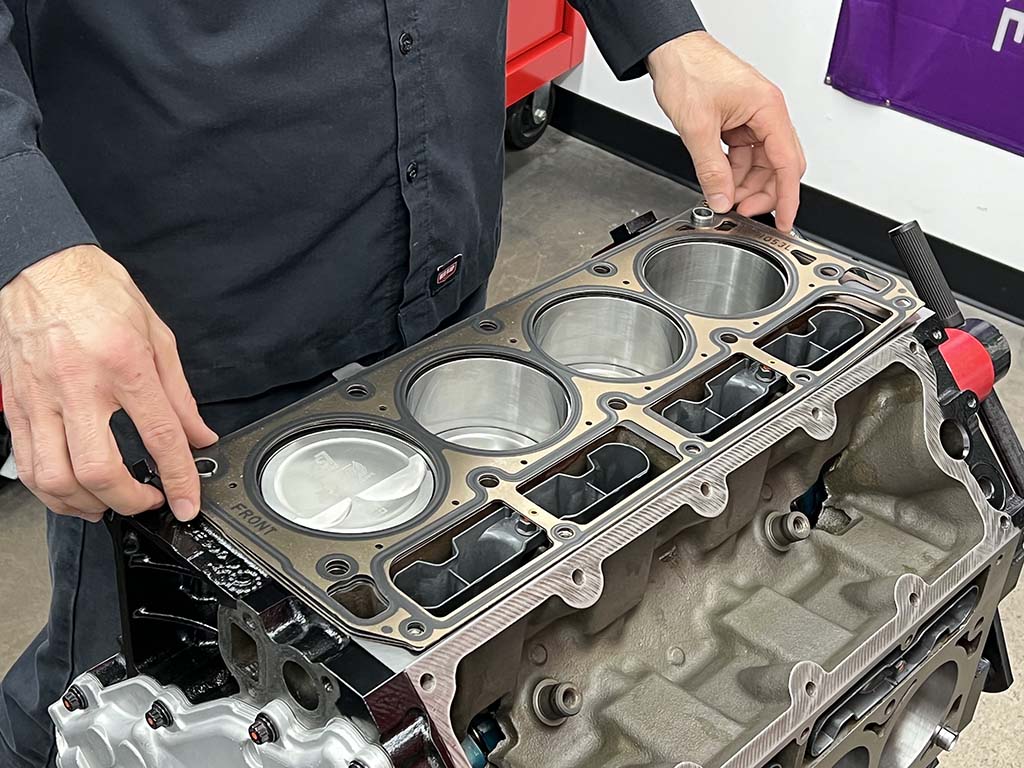
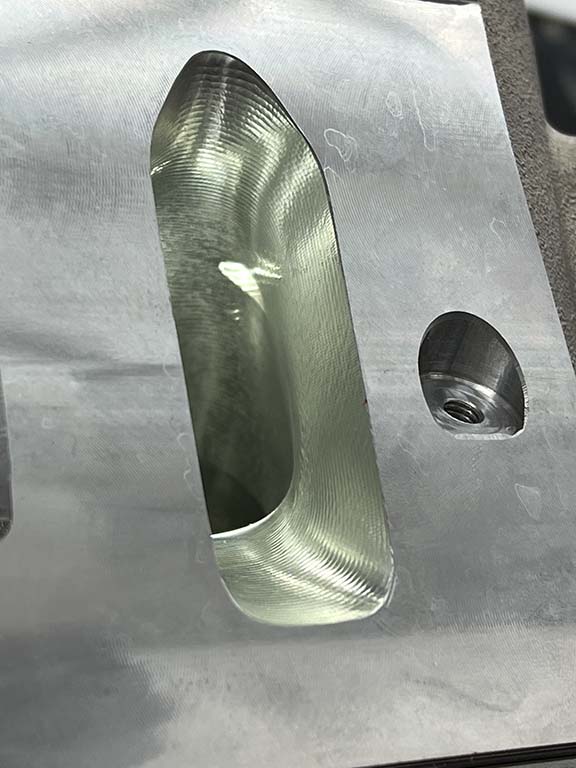
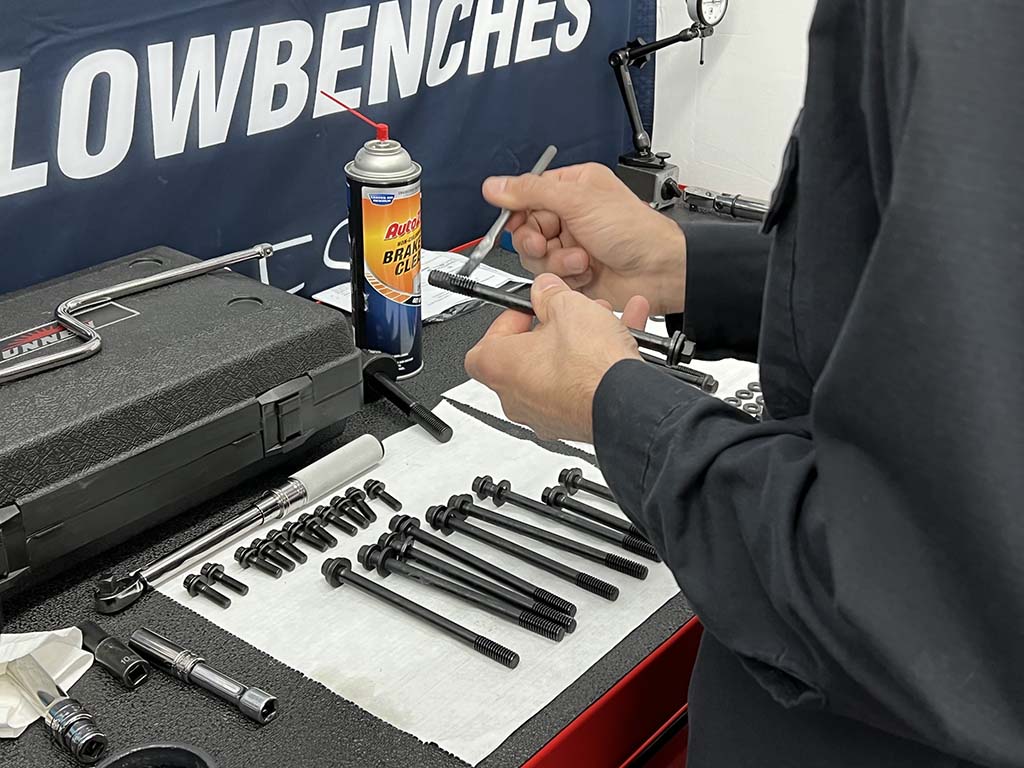
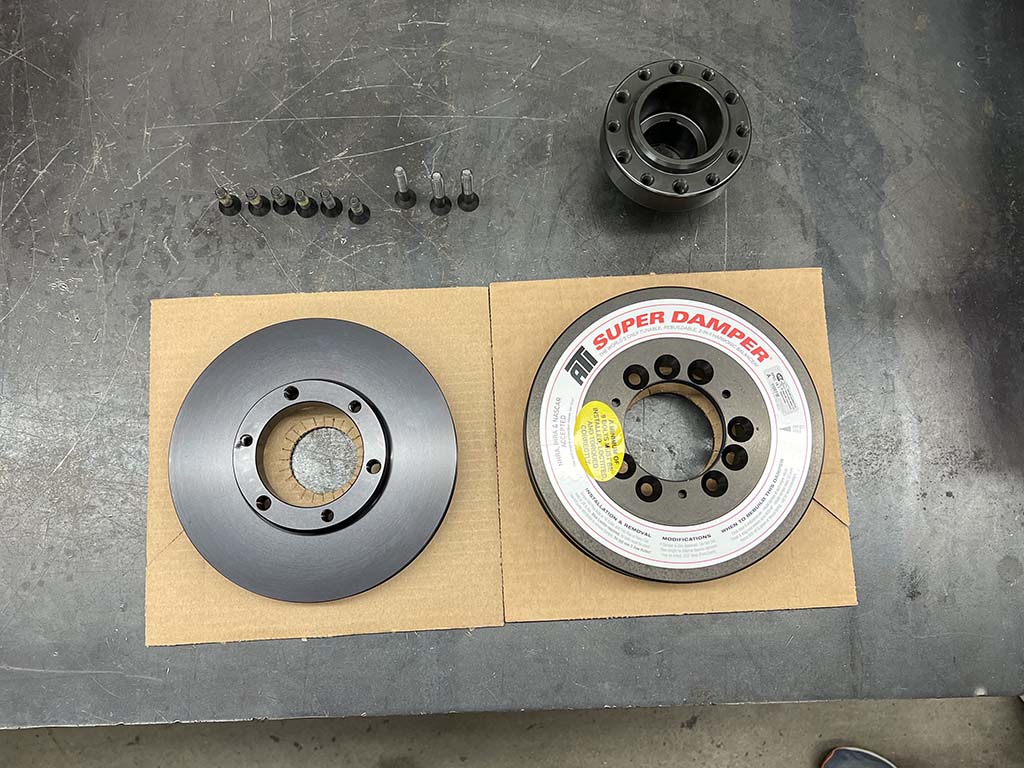
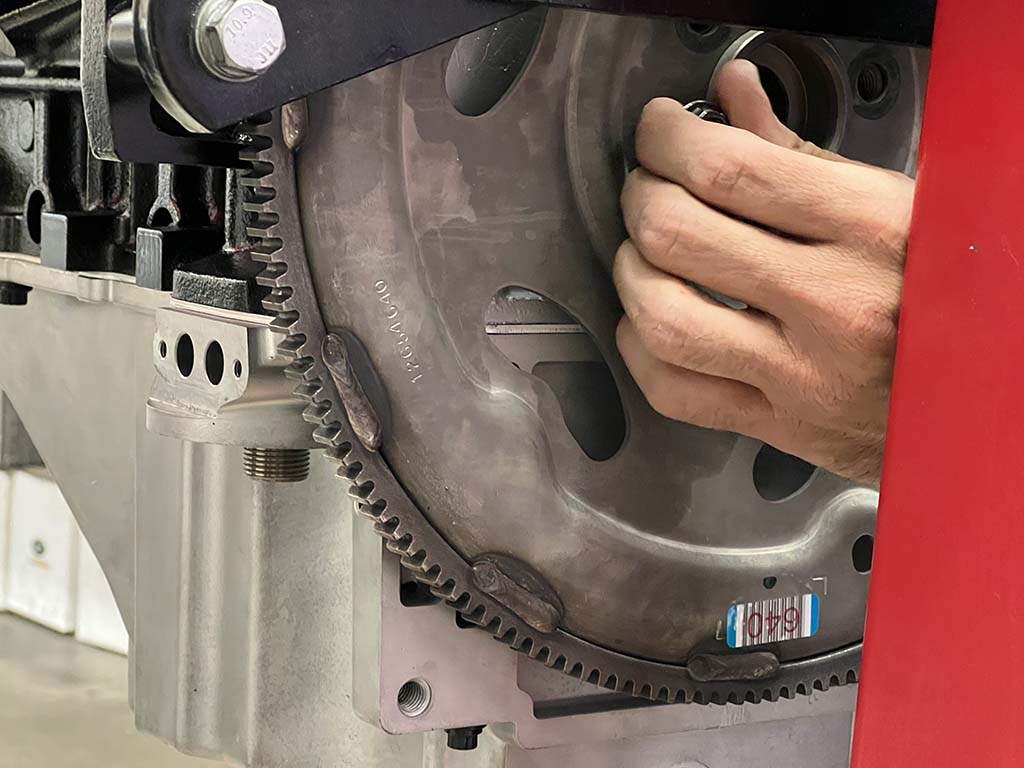
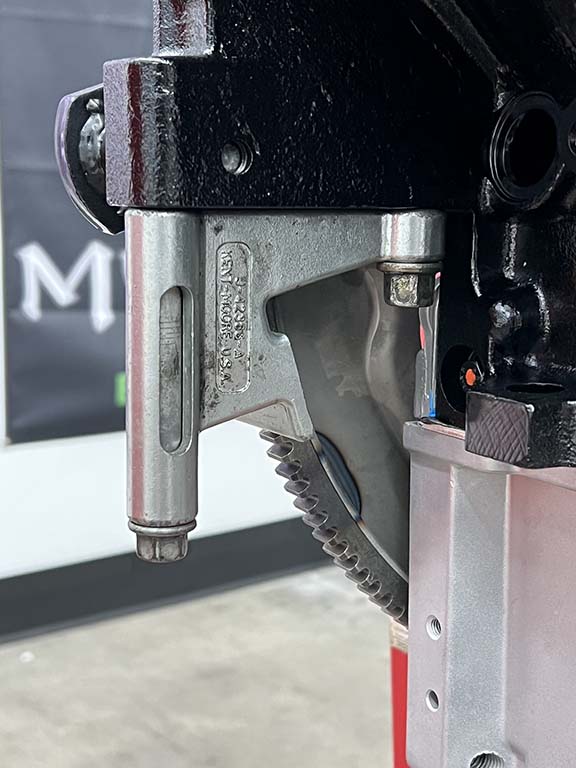
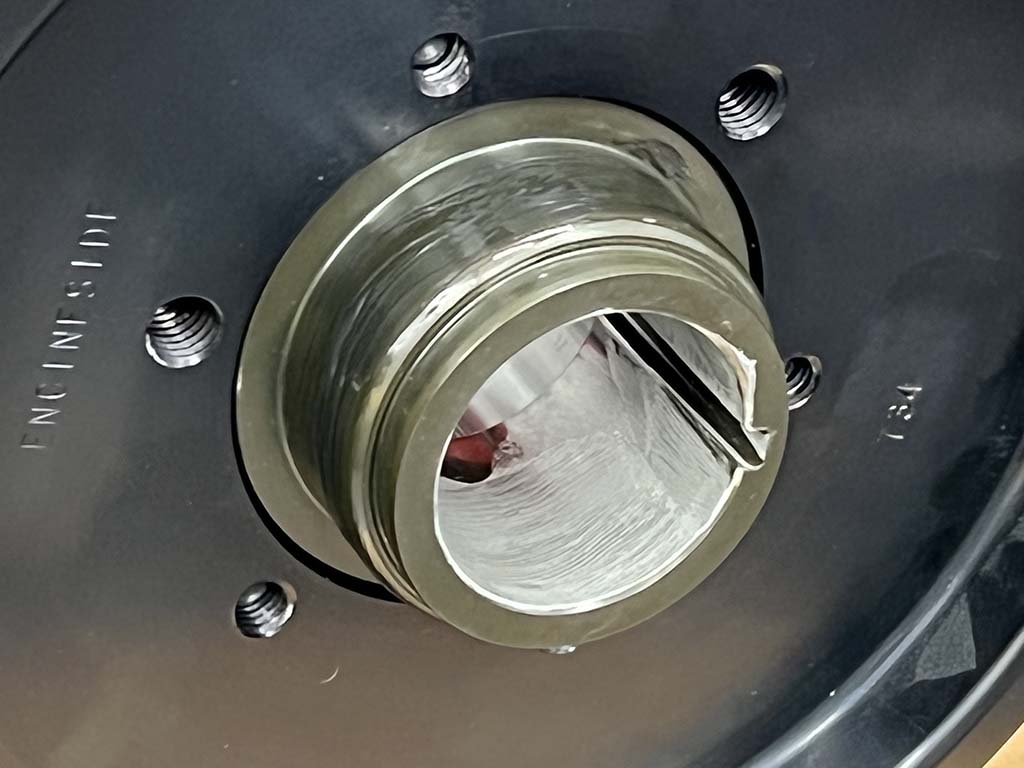
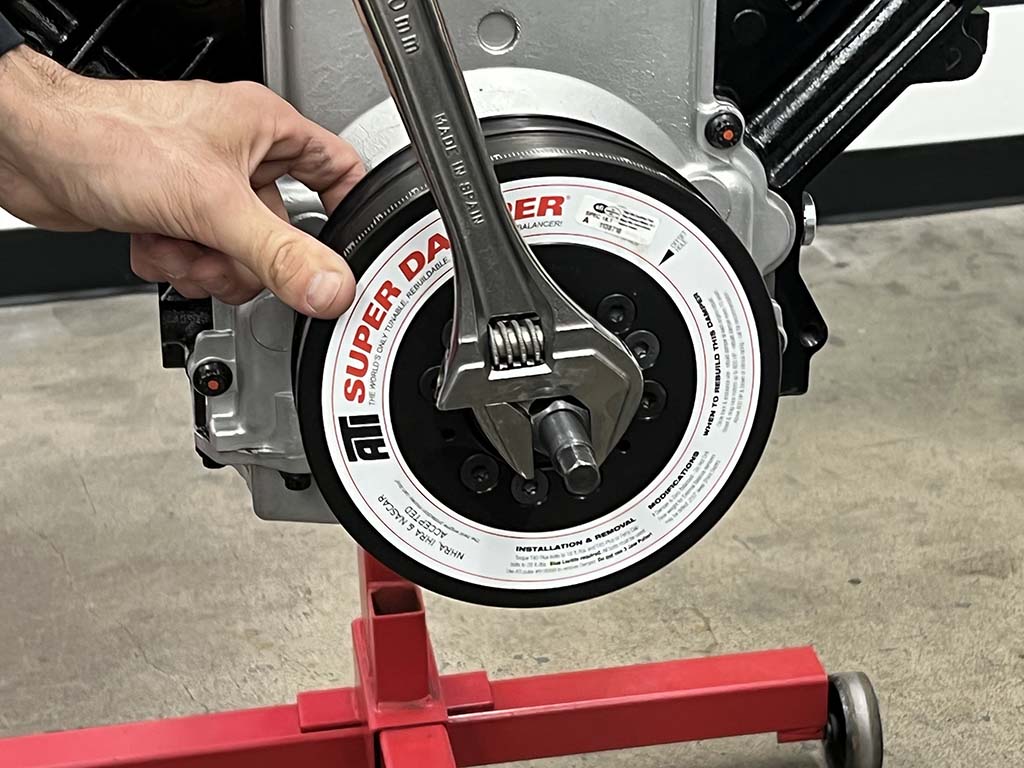
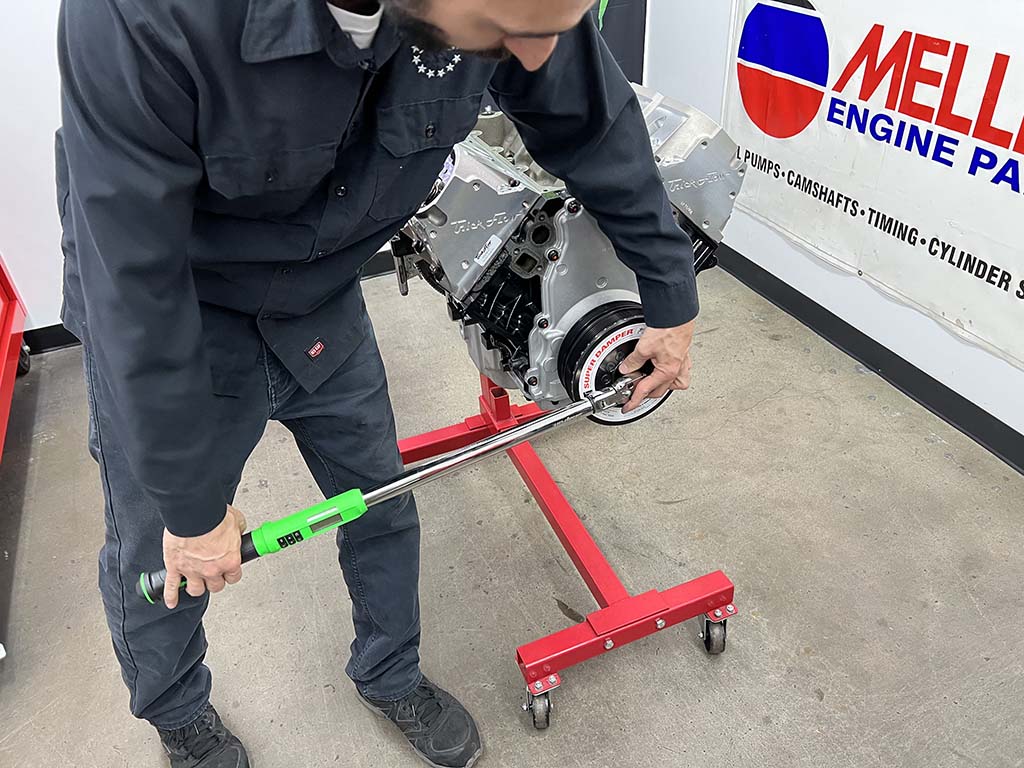
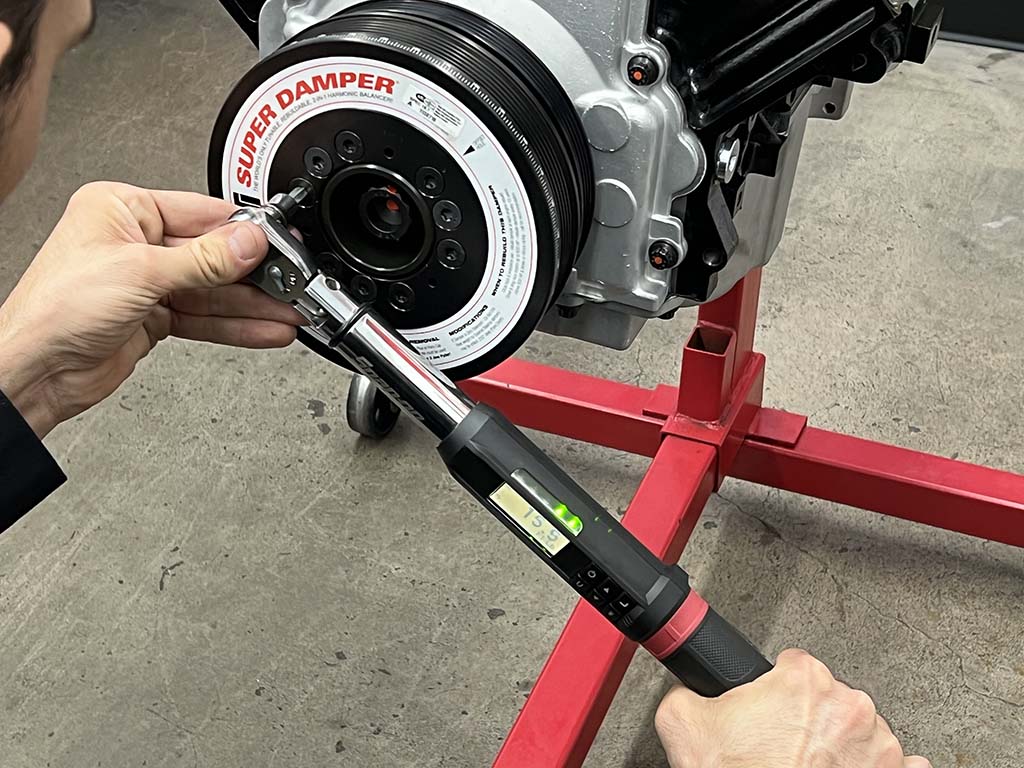
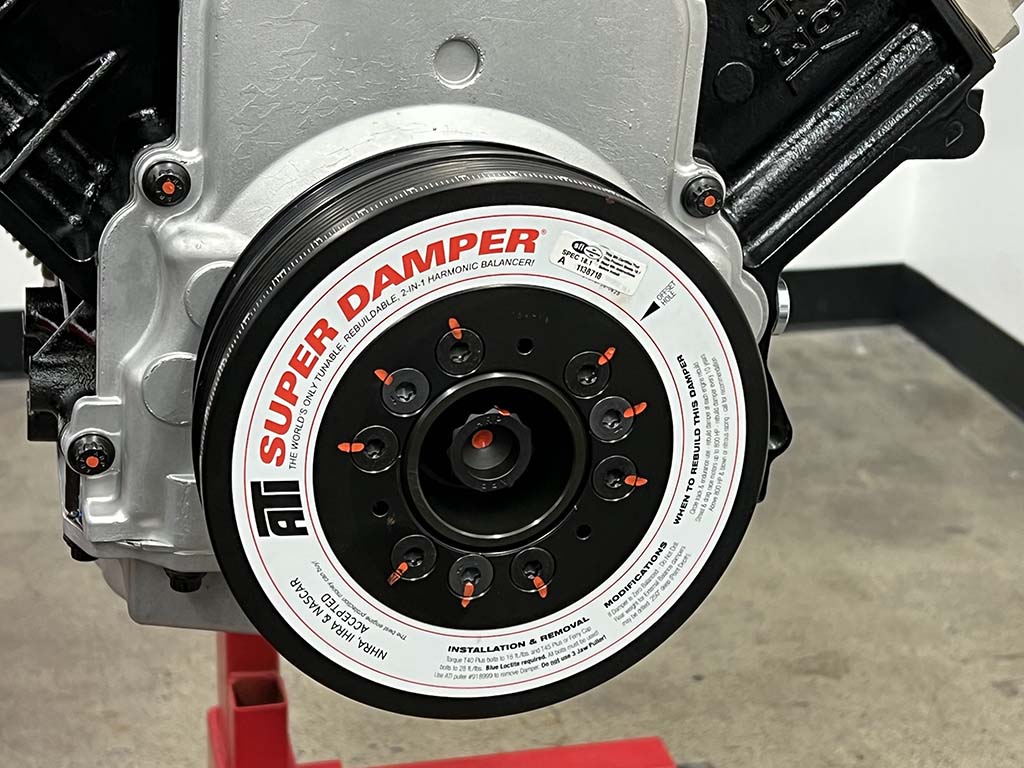
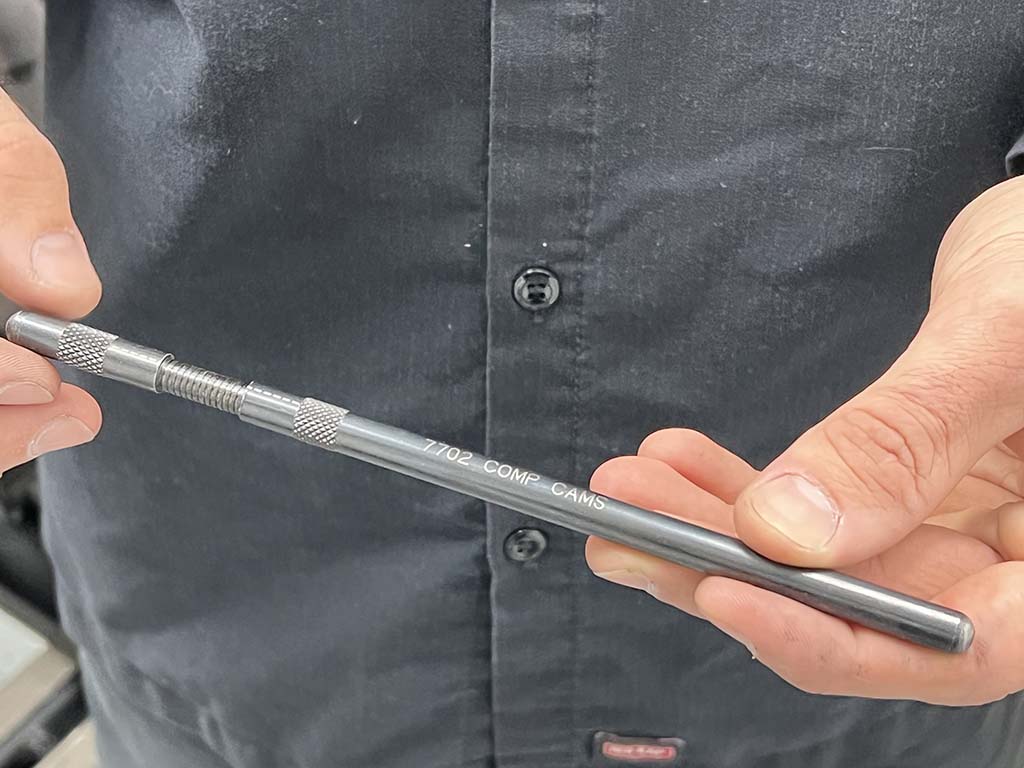
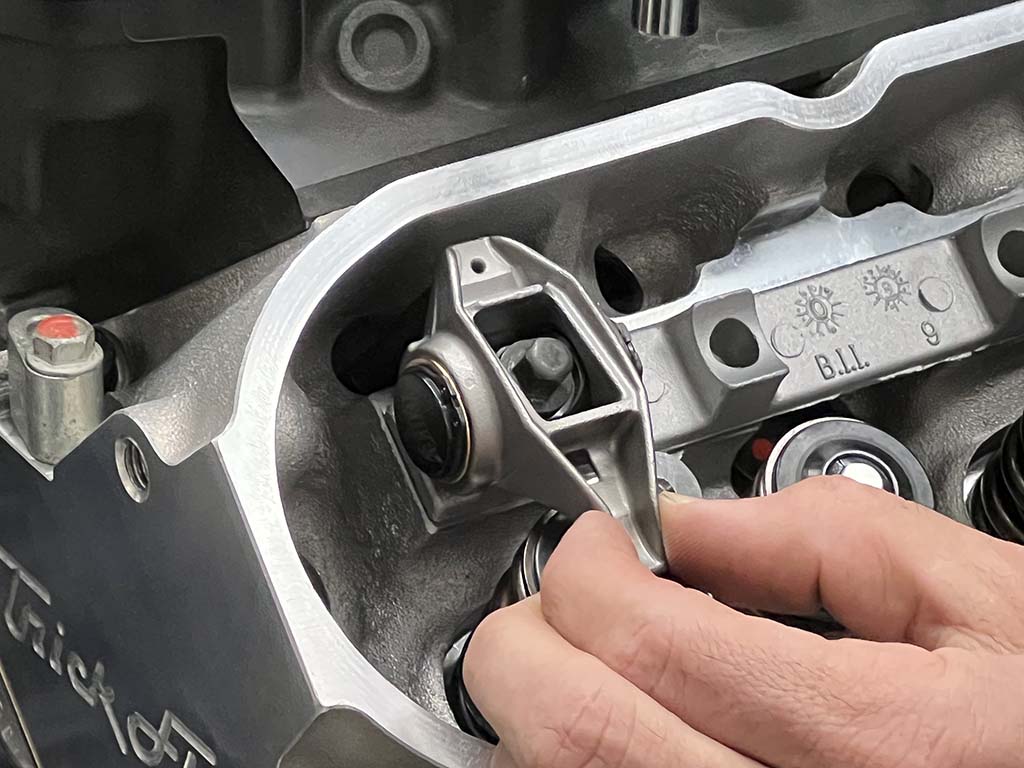
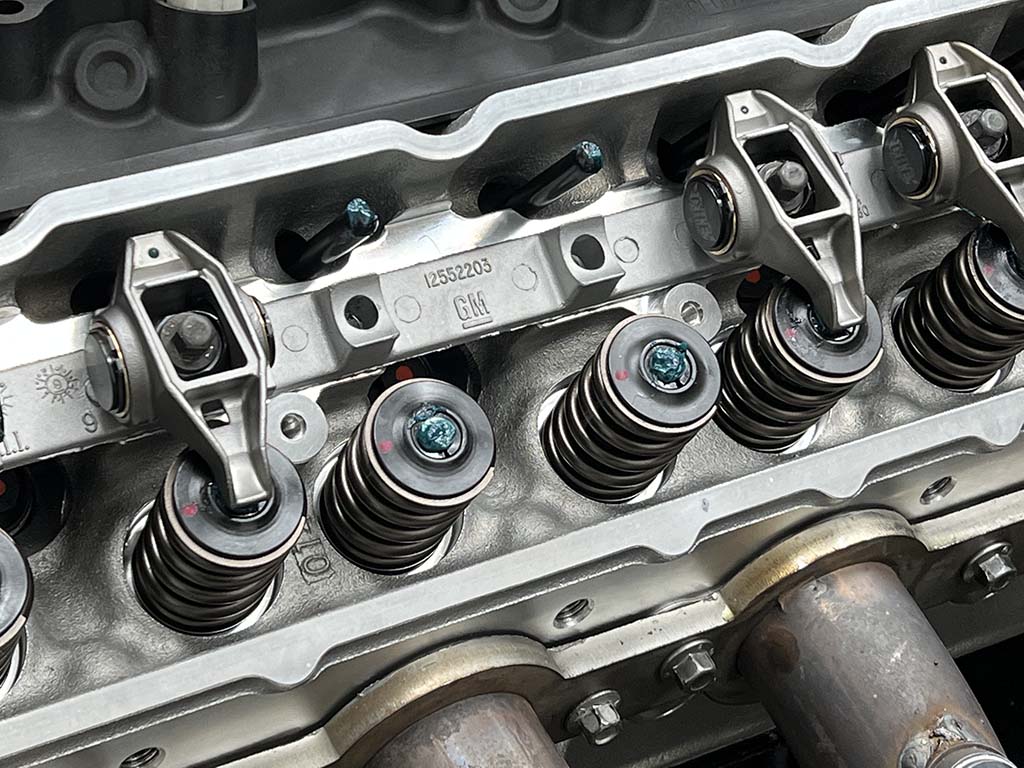
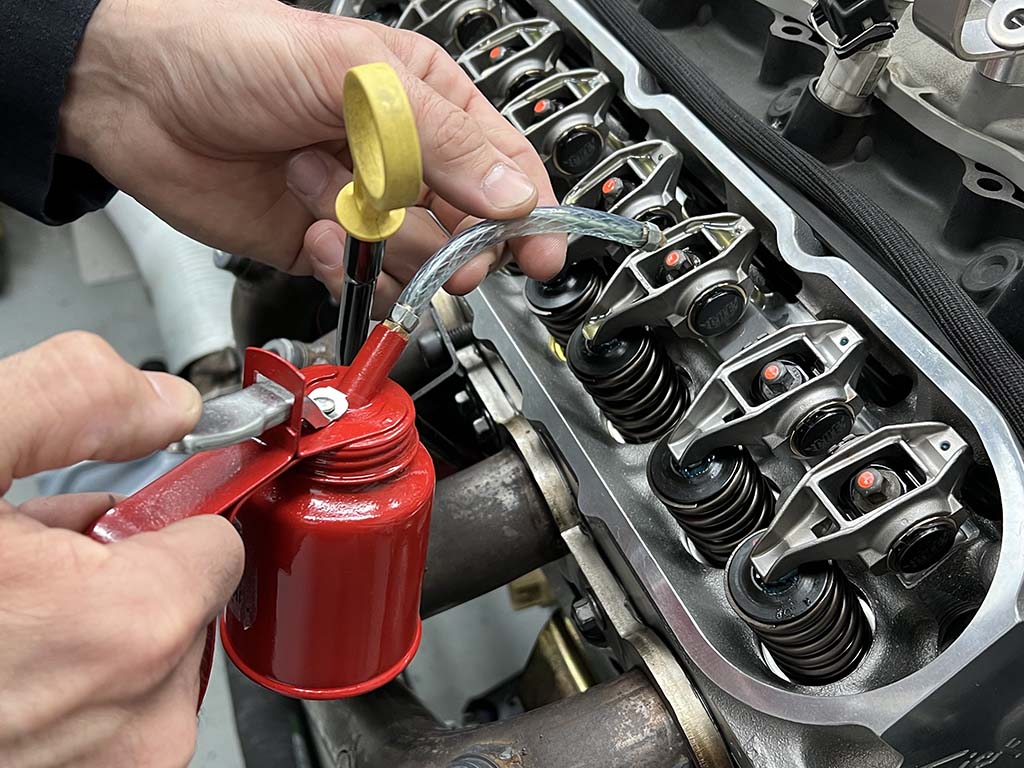
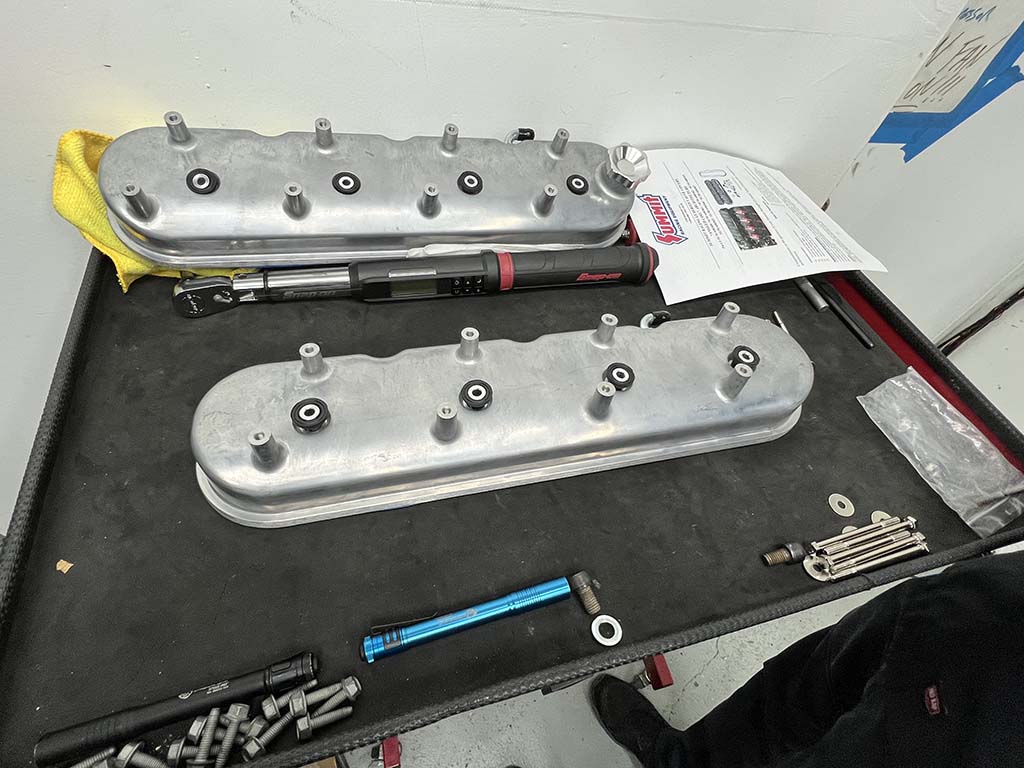
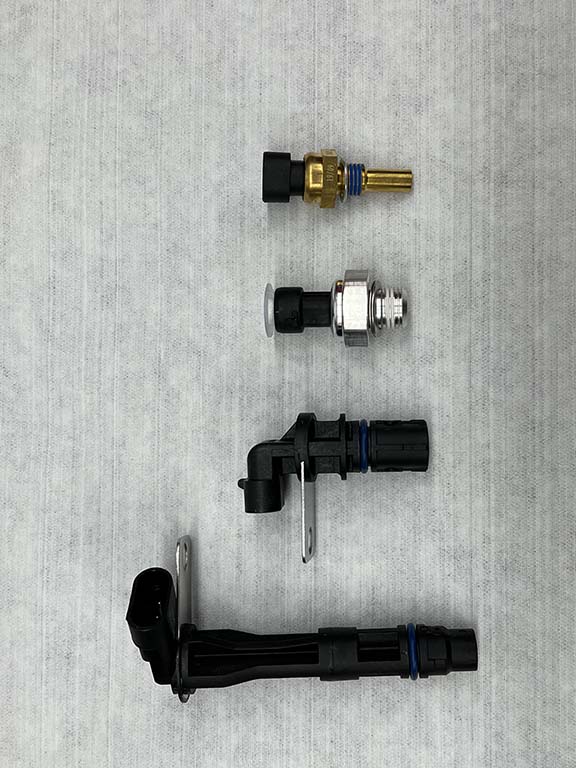
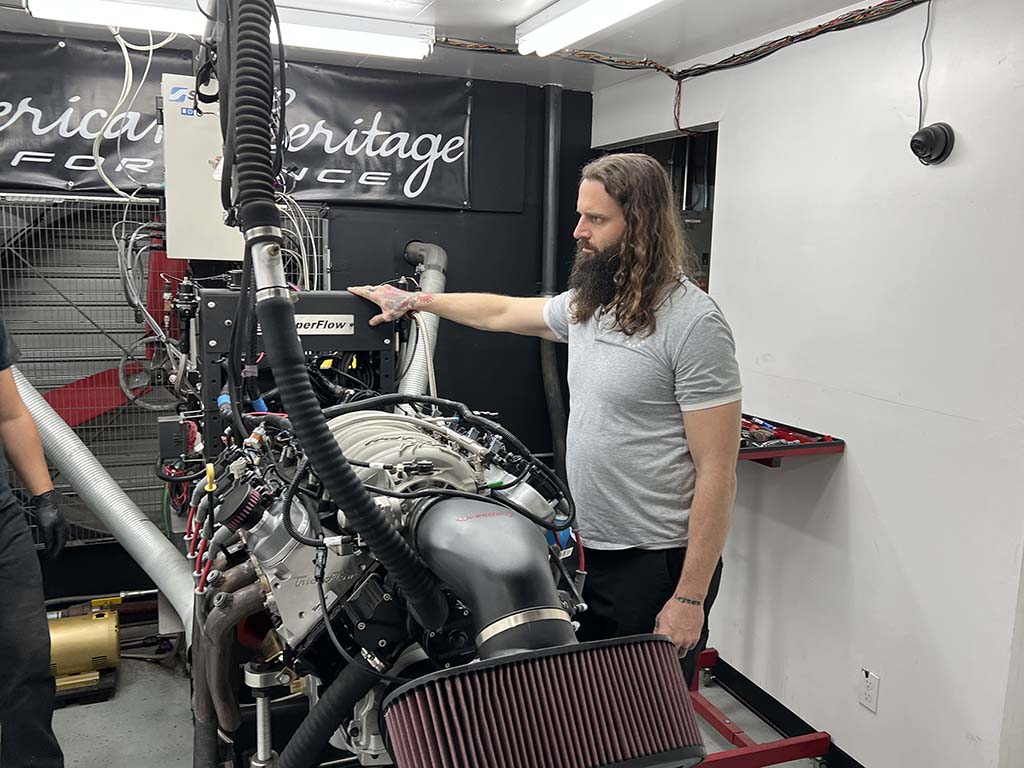
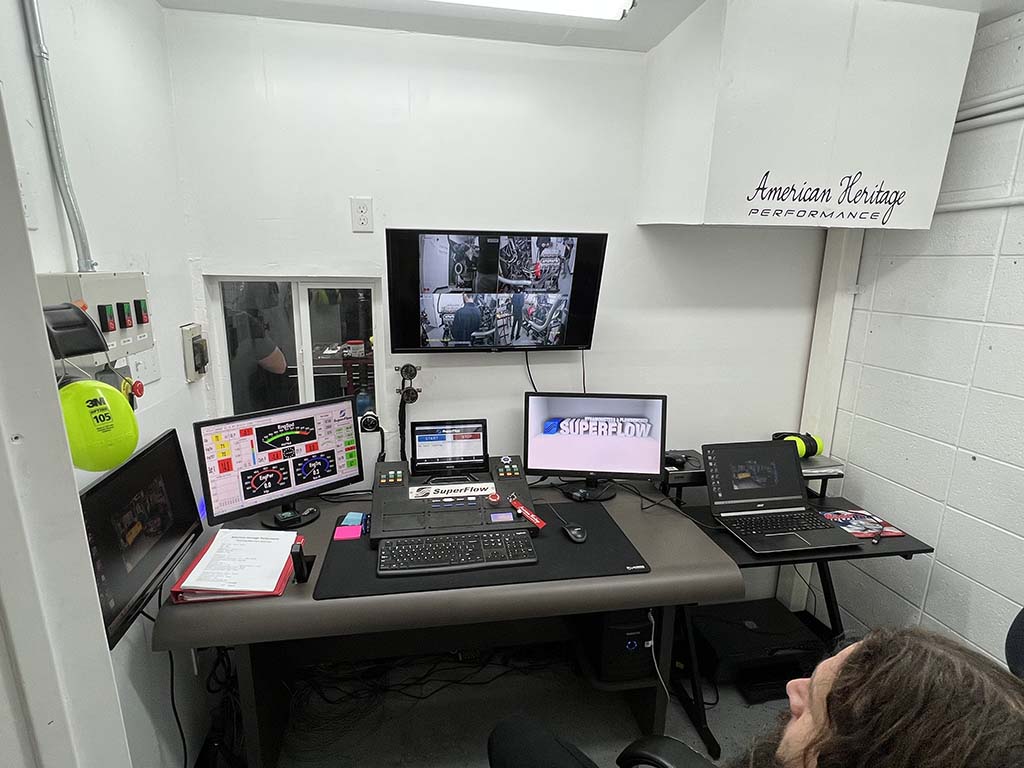
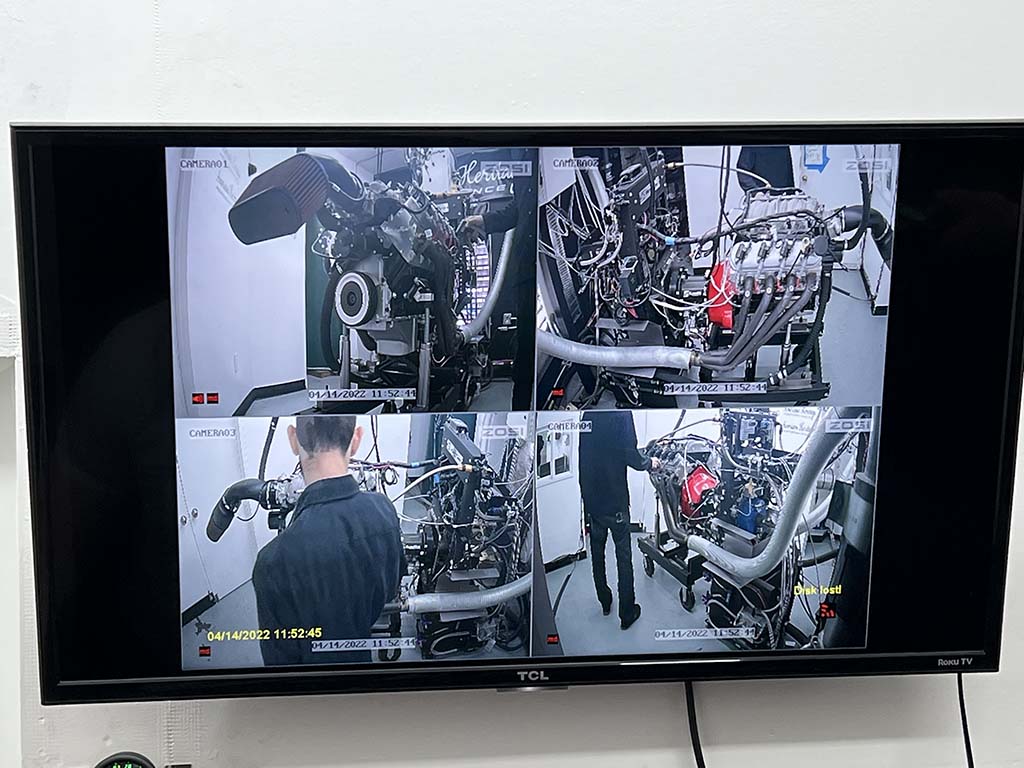
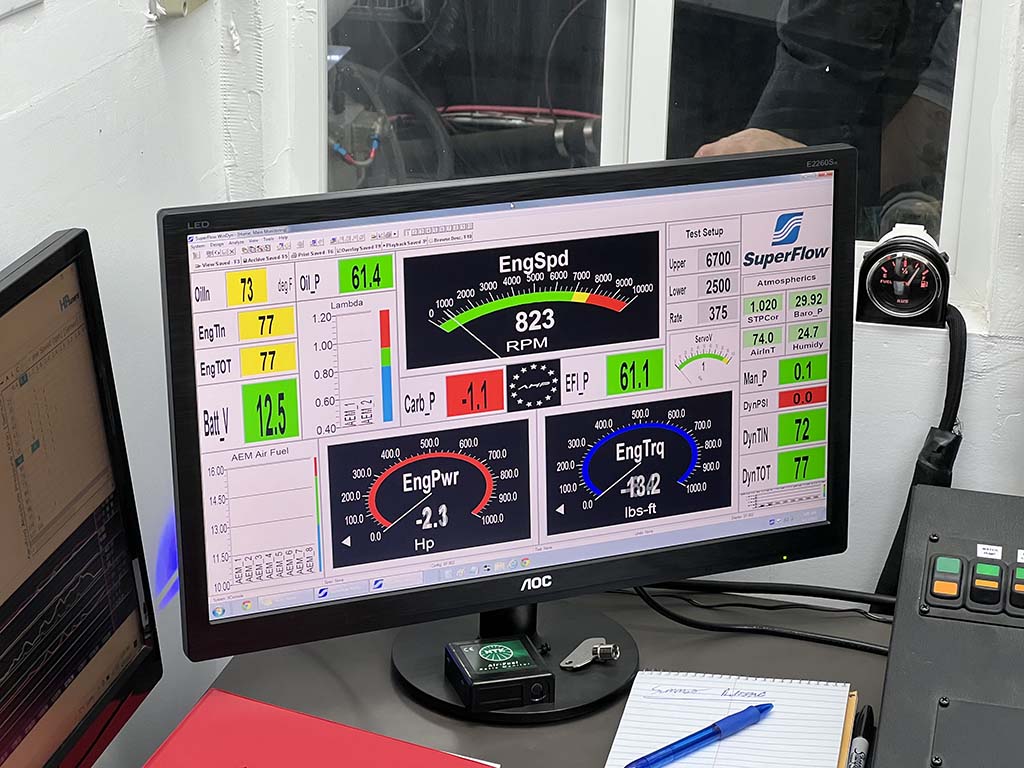
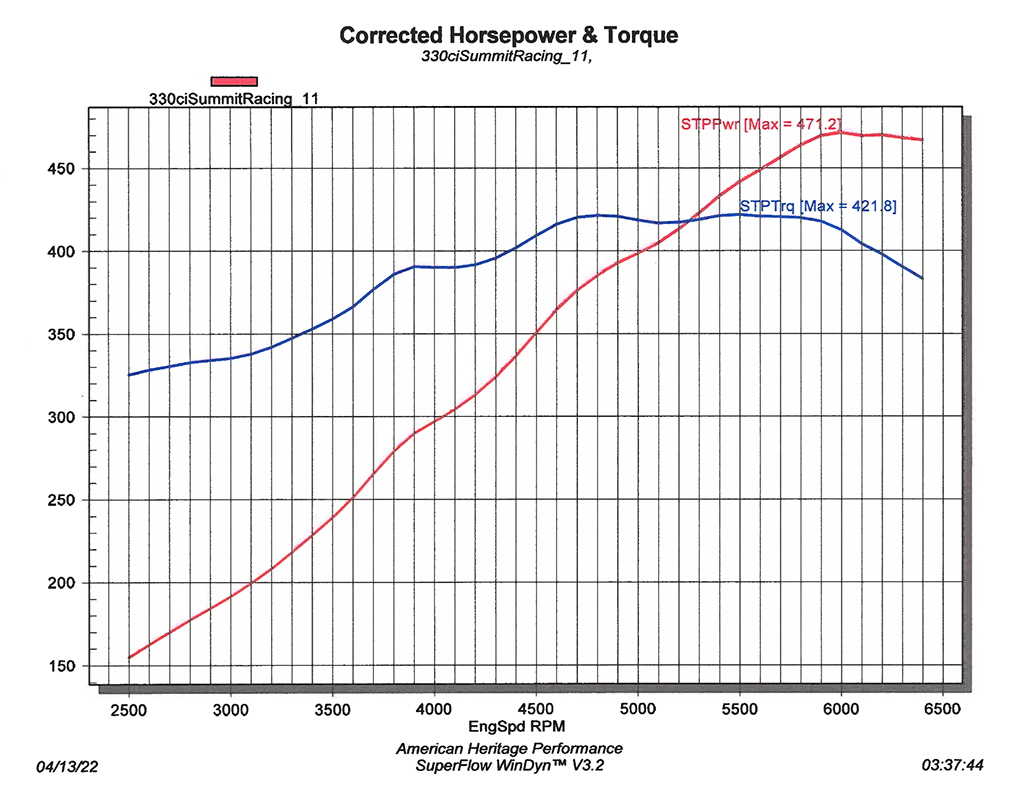
CNC ported cathedral intake and exhaust ports are designed to significantly increase performance …… while the 13.5-degree valve angle (altered from 15 degrees) helps to decrease valve shrouding, increase mid-lift airflow, and improve rocker arm-to-valve cover clearance. Sizing for the valves comes in at 2 inches on the intake side and 1.575 on the exhaust. Another unique feature of the Trick Flow heads is the relocated spark plug locations to further enhance mid-lift airflow and increase the rigidity of the casting in extreme horsepower applications.Martelli preps the ARP cylinder head hardware by applying lube to the underside of the bolt heads, washers, and threads.Next, each cylinder is set in place and the fasteners torqued to spec in the proper sequence.With the heads in place, Martelli turns his attention to the front of the block, assembling the three components that make up the assembly of the ATI LS7 Super Damper (PN ATI-917266).To install the damper, Martelli needs a method to prevent the crankshaft from spinning. The easiest way to do this is to first install the flexplate …… so that a flexplate holding tool can be temporarily installed to keep things from rotating. A similar tool is available from Summit Racing (PN SUM-900332-1).A thin coat of assembly lube is applied to both surfaces of the damper’s hub, both to aid in smooth installation and to prevent tearing of the crankshaft/timing cover seal.Proper installation of an LS harmonic damper requires using an installation tool (PN PWB-647774) to draw the damper evenly and smoothly onto the crank’s snout.Once fully seated, Martelli breaks out the torque wrench to set the ARP crank bolt to spec …… as well as the additional hub/damper hardware.Once again, torque stripping tells the tale without question.Moving into the dyno cell, Martelli and the AHP crew already have the engine mounted and the exhaust attached as well as their baseline dyno induction setup.The valvetrain has yet to be installed and that’s because Martelli first had to measure the pushrod lengths using a Comp Cams push rod length check tool (PN CCA-7702-1) before ordering the appropriate-length pushrods from Summit Racing.Measuring the necessary pushrod length is accomplished by installing the check tool, followed by a rocker arm assembly torqued to spec. The length tool is then adjusted until the proper lash is achieved (0.090 inch for our application). The length checker tool is then removed and the measurement noted. Martelli checked the length of both the intake and exhaust, resulting in a length of 7.500 inches.With a set of pushrods on hand, Martelli proceeds to drop each rod in its place with a dab of assembly lube on either end, followed by each respective rocker arm assembly.Motor oil is then applied to ensure the valvetrain assembly doesn’t have a chance to run dry when the time comes to break the engine in.Topping off the cylinder heads is a pair of Summit Racing tall aluminum valve covers (PN SUM-440360).New sensors will be installed as well to ensure the ECU gets correct information on the status of our LS. From the top is a coolant temp sensor, oil pressure sensor, crankshaft position sensor, and the camshaft position sensor.A new set of spark plugs (PN NGK TR5GP) will also be installed.Dyno operator and AHP main man Kohle Heimlich takes a last-minute look before putting our LS330 through its paces on the dyno.Inside the AHP dyno control room, Heimlich has developed an impressive setup to view and control every aspect of the dyno tuning procedure …… from multiple video cameras mounted inside the dyno cell, displayed directly above the dyno operator …… to the SuperFlow data acquisition and control console.Heimlich begins the dyno session by breaking our engine in before slowly putting the screws to our engine build as Martelli, confident in his work, casually stands by. Each progressive run following the break-in procedure sees an increase in both rpm and, hopefully, torque and horsepower. Everything looked great so Heimlich pushed the 5.3L iron block engine just past 6,000 rpm, resulting in 471 hp and 422 lb-ft torque. Not bad for a relatively small cubic inch, naturally aspirated engine!
We use cookies to ensure that we give you the best experience on our website. If you continue to use this site we will assume that you are happy with it.