


By Gerry Burger – Photography By the Author
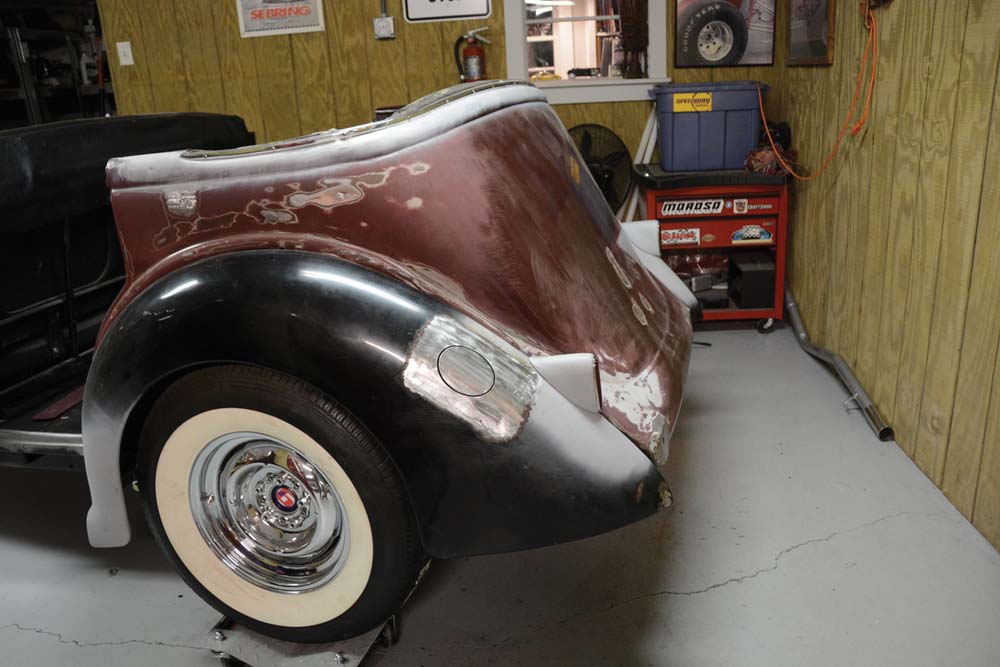
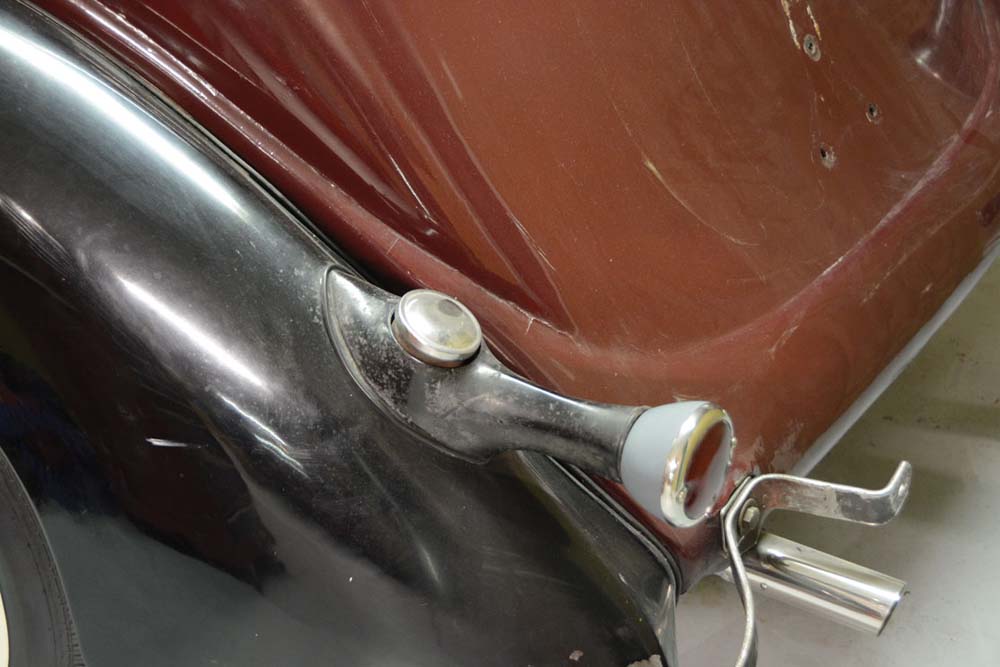
Recently we set about removing the old fuel tank and installing a new Tanks Inc. fuel tank sourced through Summit Racing. The removal of the old fuel tank and installation of the new unit went as expected. When we last left you, we had a new fuel tank and no way to get gasoline into said tank. All of this is part of our postwar custom approach to the car with no spare tire, custom split bumpers, no top (Carson Top may come later), and 1940 Packard taillights. The original 1936 Ford gas cap extends up through the driver side taillight. Clever in its day, but when the taillights left so did the fill cap.
Read Part 1 Here: Installing a Universal Fuel Sending Unit and Fuel Tank – 1936 Ford Project
We figured there were two basic choices: a simple stock-style gas cap and grommet protruding through the fender or we weld in a gas filler door. After working this hard to slick the rear of the car, the last thing we wanted was a gas cap sticking out of the fender.
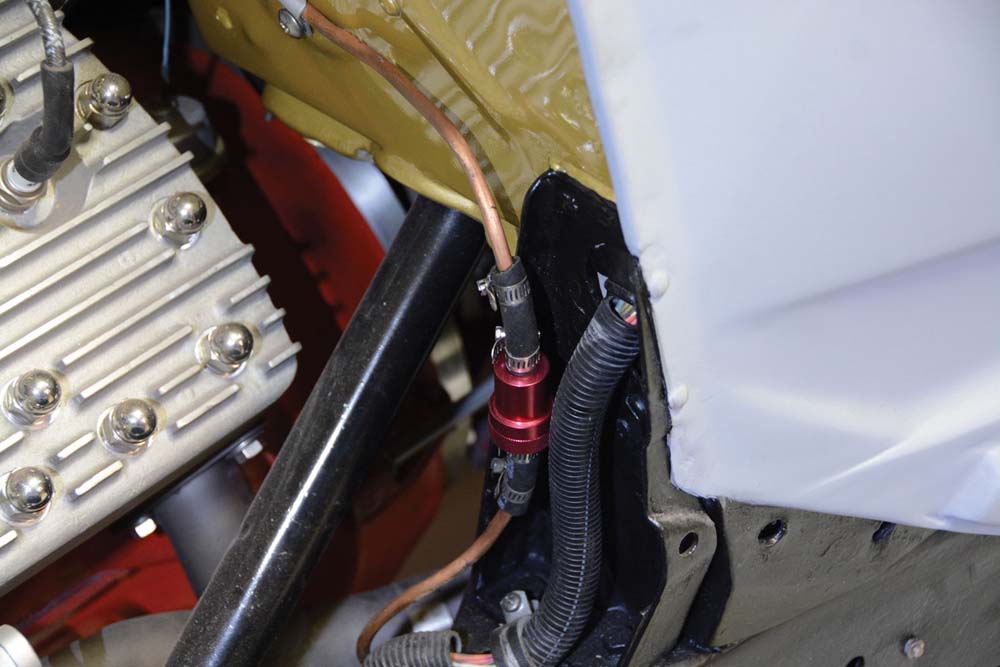
After installing a Classic Instruments fuel gauge sending unit, the tank bolted in as a direct replacement with a simple piece of rubber fuel line connecting to our existing fuel line on the car. Before we go any further, we want to remind you, if you are working around any fuel tank, please exercise the utmost caution. Grinding and welding can ignite fumes.

Check Out: How To Build Exhaust For Your Classic Ford
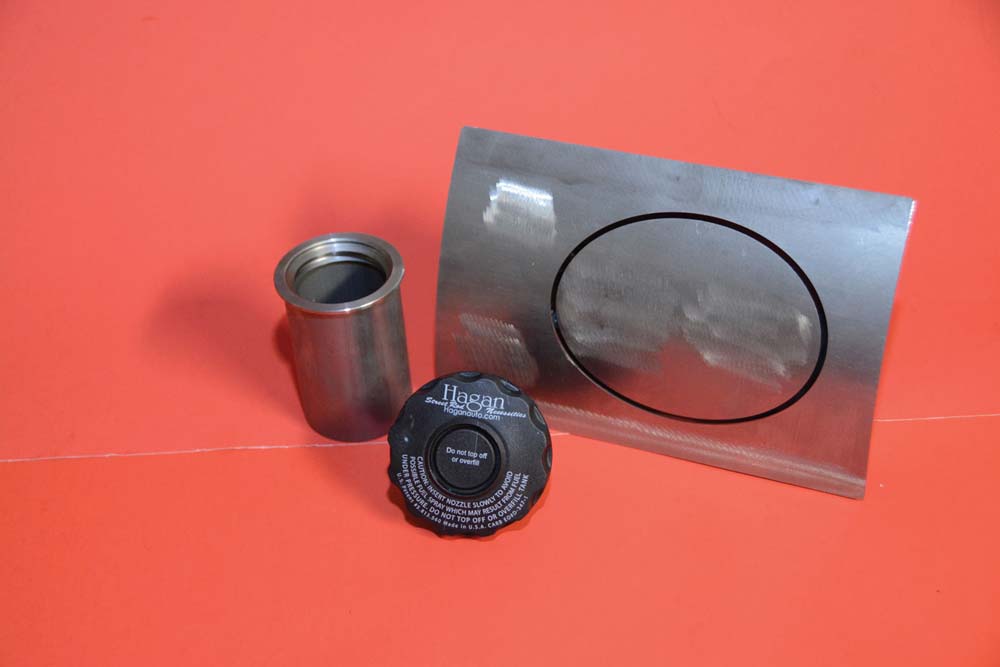
We spent a little time perusing the Speedway Motors website and discovered their full assortment of Hagan gas filler doors. Different shapes and fill angles made the choice a bit involved, but there is ample information on the Speedway Motors website to get it right. There were three basic shapes of gas filler doors: square, round, and oval. Square was definitely not right on our round fender, round would be OK but in the end we opted for the oval-shaped door as we felt it most-resembled a gas door found on a ’50s car, much like an early customizer may have used. Decision one complete. Oval door.
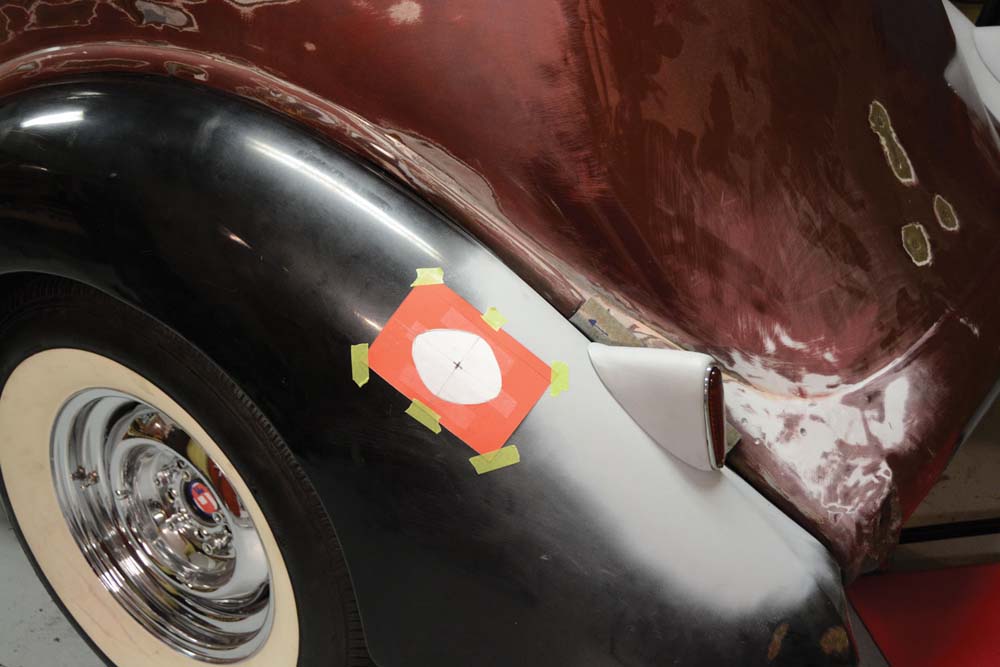
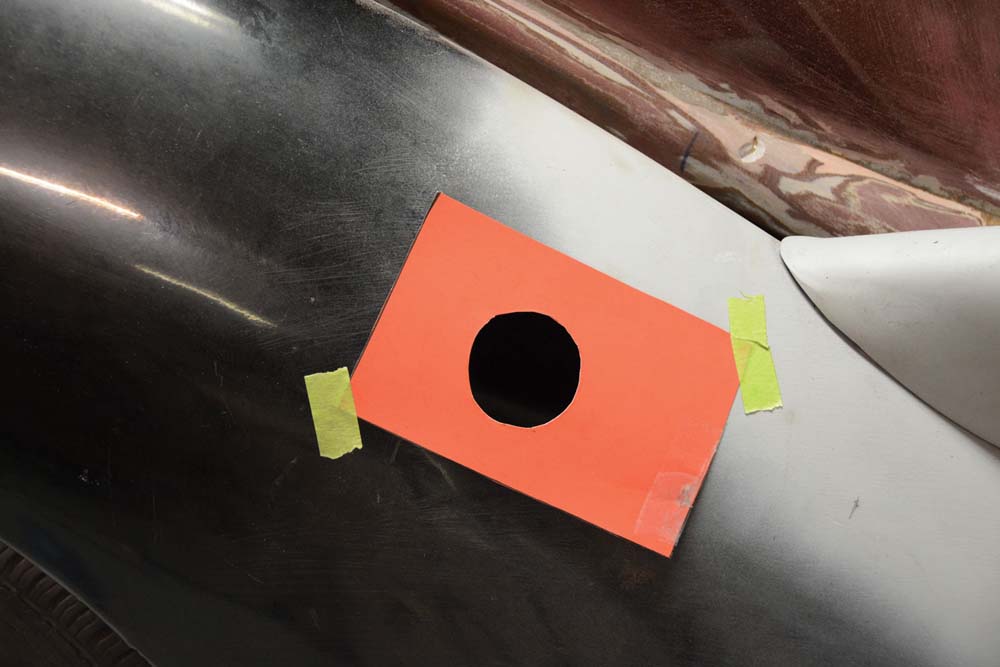
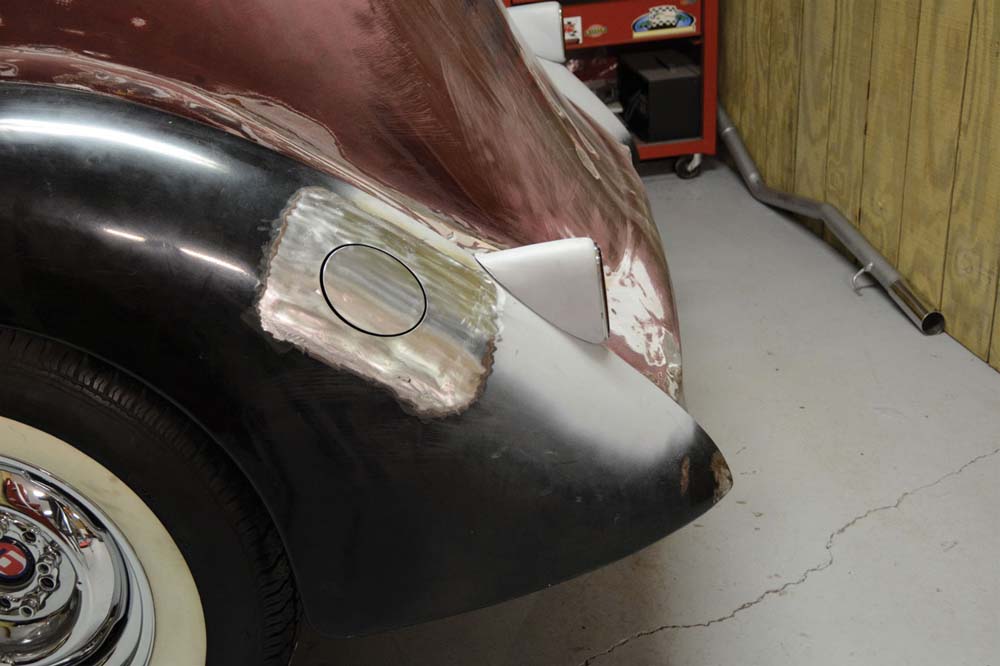
Next, we had to locate the gas filler doors on the fender. We did this before we ordered the part. With a simple posterboard template we taped the shape to the fender, finding a location where it would be well above the fuel tank and also look “factory” in the fender. Satisfied with our location we drilled an 1/8-inch pilot hole in the center of our hand-drawn oval. We passed a welding rod through the hole to give us an idea of what would be required to connect the custom fill neck to the tank.


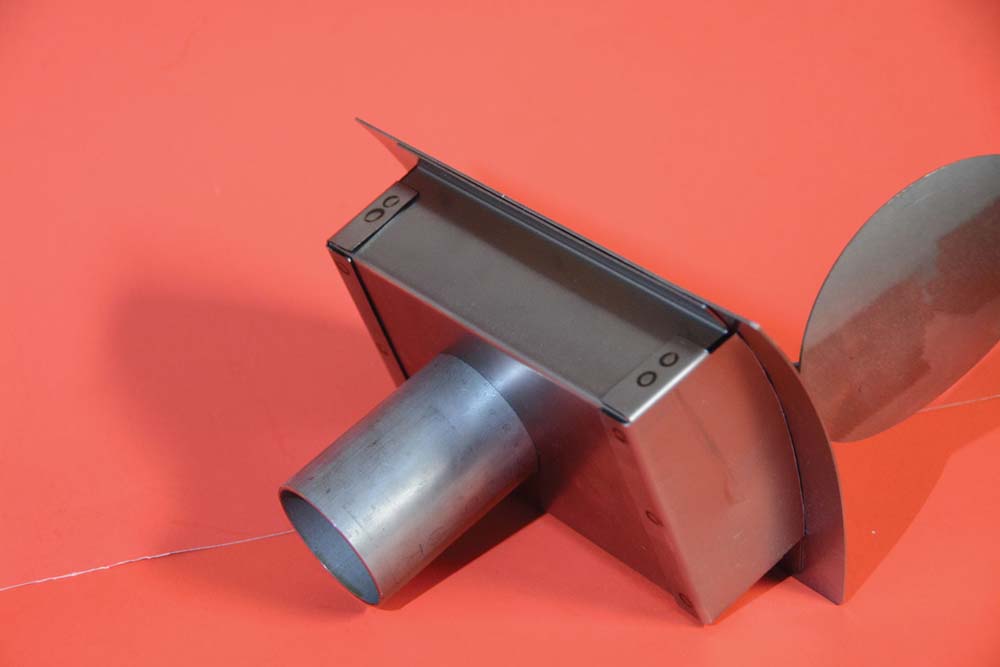
There are two different fill boxes, one has the fill neck going straight out the back, while the other points the fill neck down on a 45-degree angle. Our welding rod indicated we should be able to fabricate a smooth-flowing filler using a straight box. That will keep everything rolling downhill for a smooth fill.

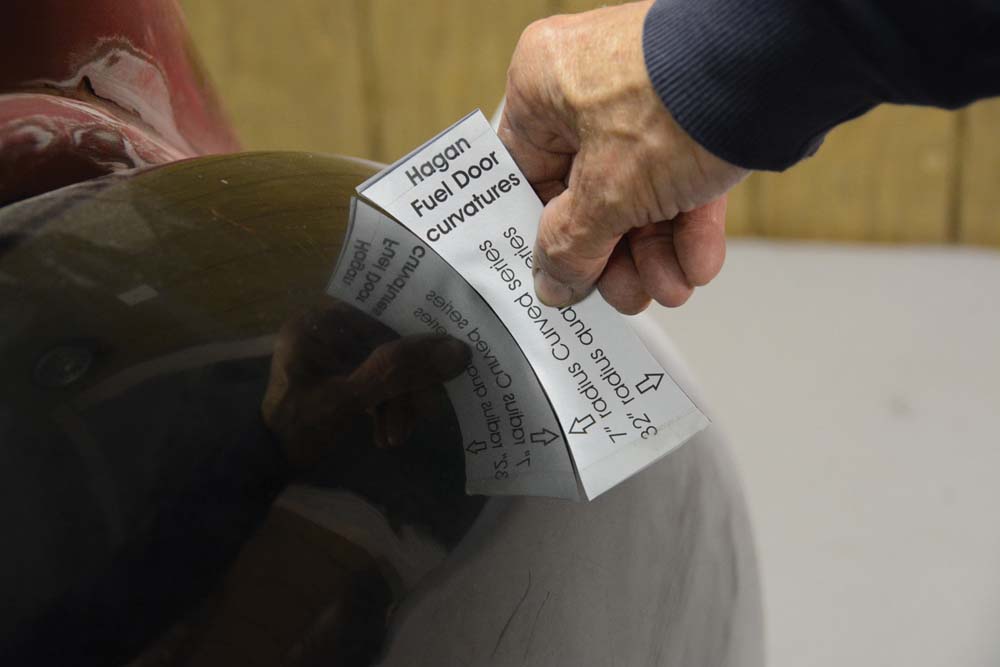
The final decision was choosing the proper contour of the gas filler door to best fit our fender. There are two different contours offered, one is a 7-inch radius and the other is a 32-inch radius. A template was printed out from the Speedway Motors website and carefully cut out on poster board. This contour template was then held in place where the gas door was to be located. In our case the 7-inch radius was a perfect fit. The order was placed for an oval door, 7-inch radius, straight gas filler door.
Check Out: 1956 Ford F100 Brought Back to Life

The gas filler door kit comes with the actual filler neck separate from the gas door. This worked out well. Using our 1/8-hole for center we determined where the fill neck would pass through the fender. A 2-inch hole saw provided the opening for the filler neck. With the fill neck passing through the fender, we were able to check the connection routing from the filler neck to the fuel tank. Satisfied this connection could be made we made a template, marked the fender, and cut the opening, allowing the fuel fill box to protrude through the fender. Now it was time to weld the filler tube into the fill box.

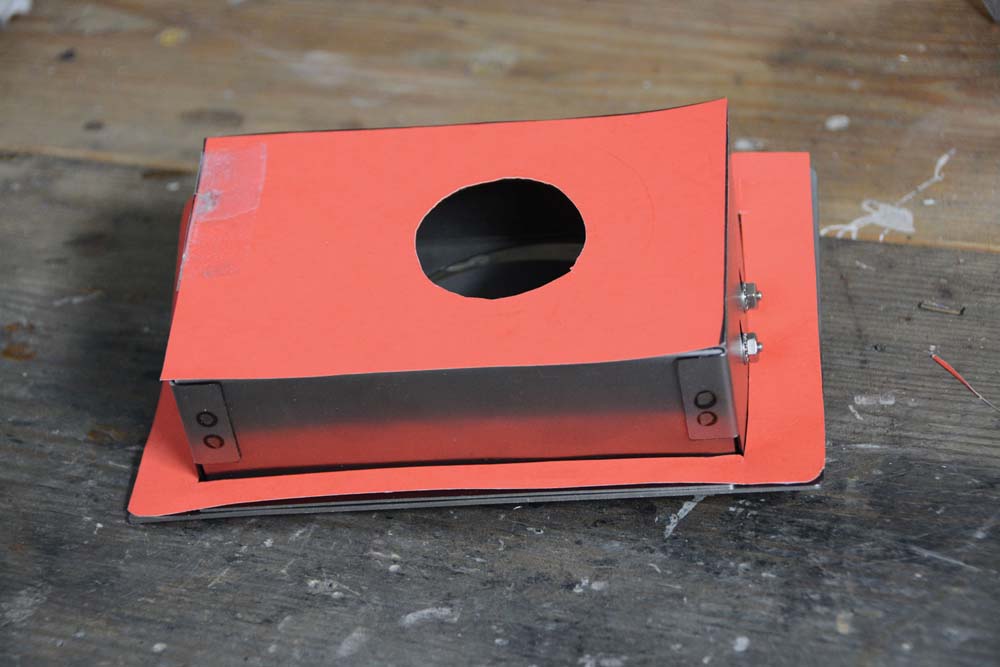
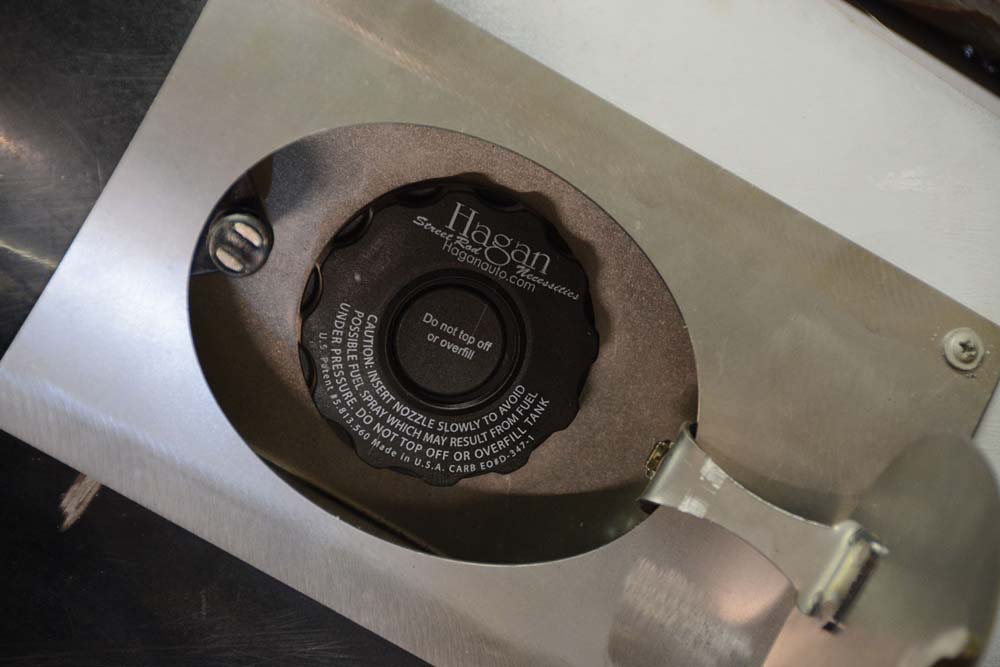
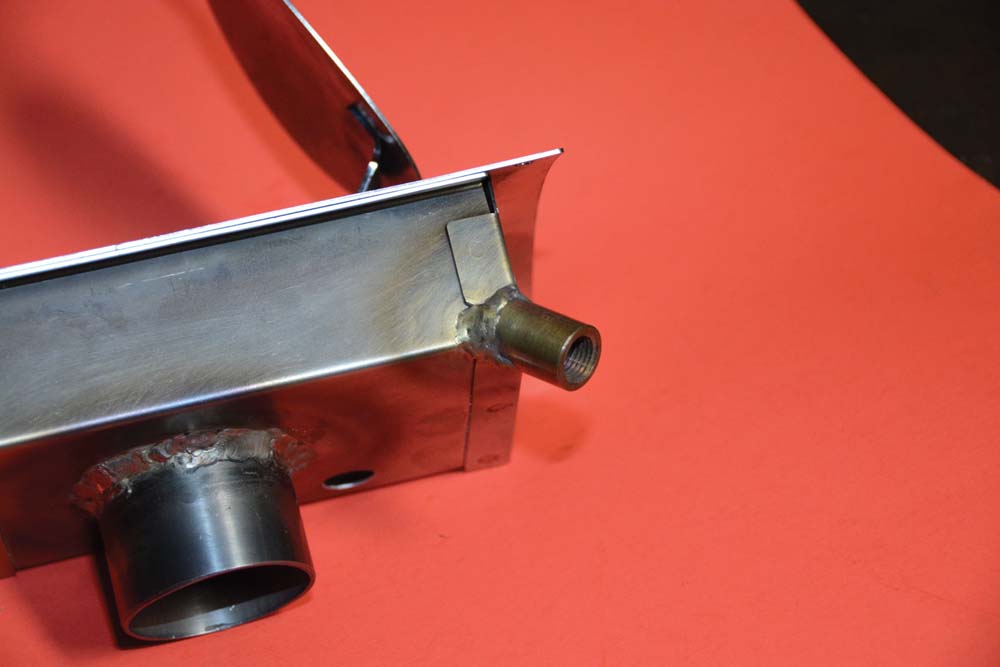
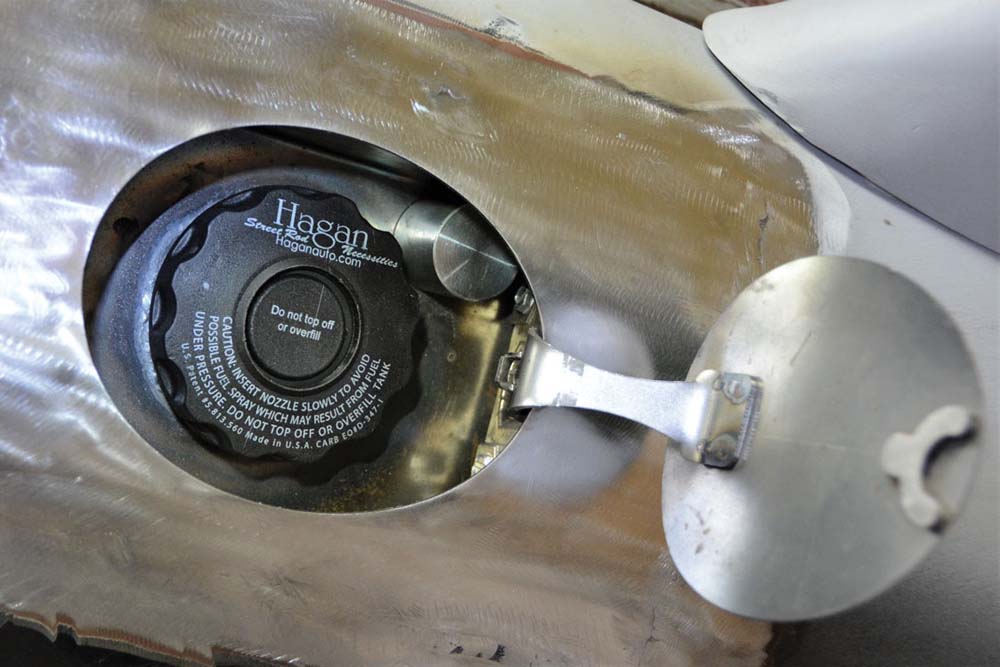
Being a bit on the OCD side, we wanted the writing on the gas cap to be straight when you opened the fill door. Since it is a “fill-through” cap it would not be removed. We installed the cap in the fill neck and marked the neck and the fill box to properly orientate the writing on the cap. We then removed the plastic cap and welded the filler neck into the box. Be certain to remove the magnetic latch in the fill door prior to any welding. We also drilled a hole in the back of the box for our fuel tank vent fitting, you may not need this in your application. Finally, we cut a hole in the lowest corner of the fuel fill box and welded a ¼-inch pipe coupling in place to act as a drain for the box.
In an abundance of caution, we did not fit the face of the gas filler door flush with the fender just yet. Rather, we held the fill box to the fender with sheetmetal screws and set about forming the filler connection from fill box to fuel tank. By doing it this way we could have still moved the fuel filler forward and back and up and down should a minor adjustment be helpful.

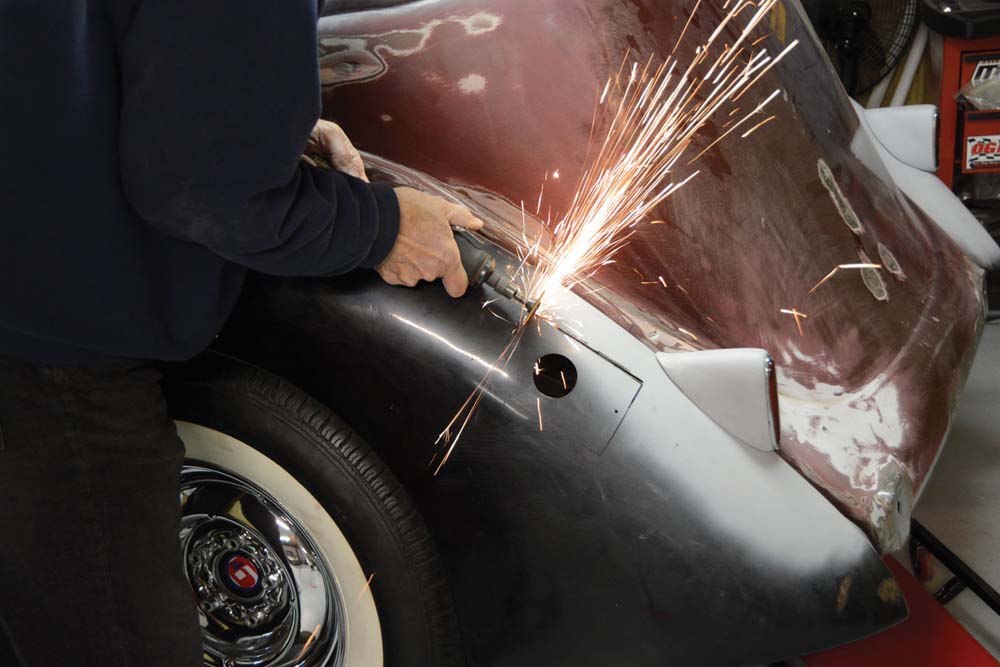
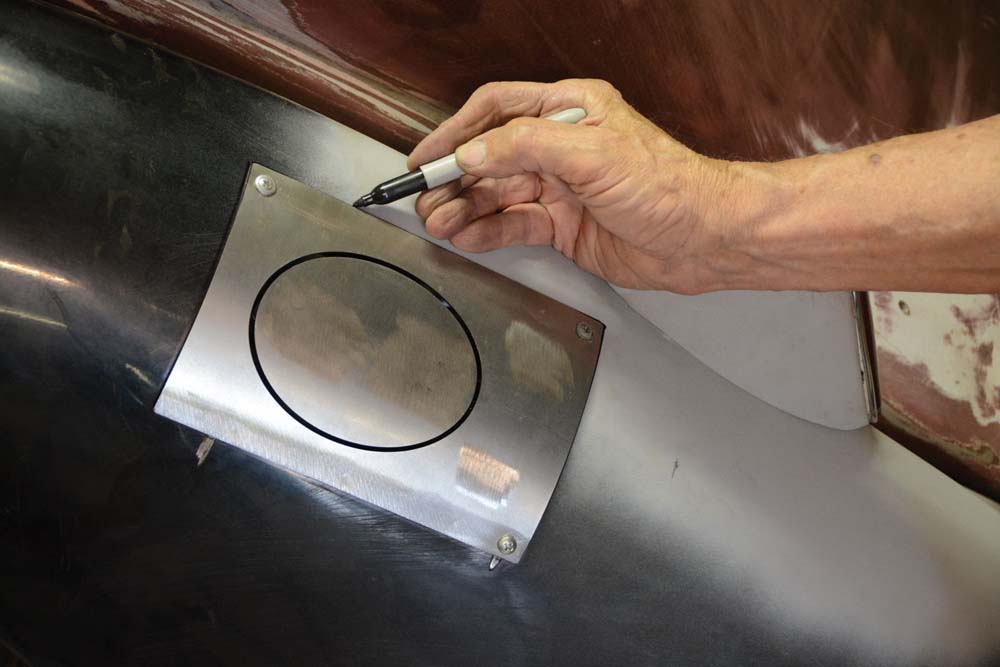
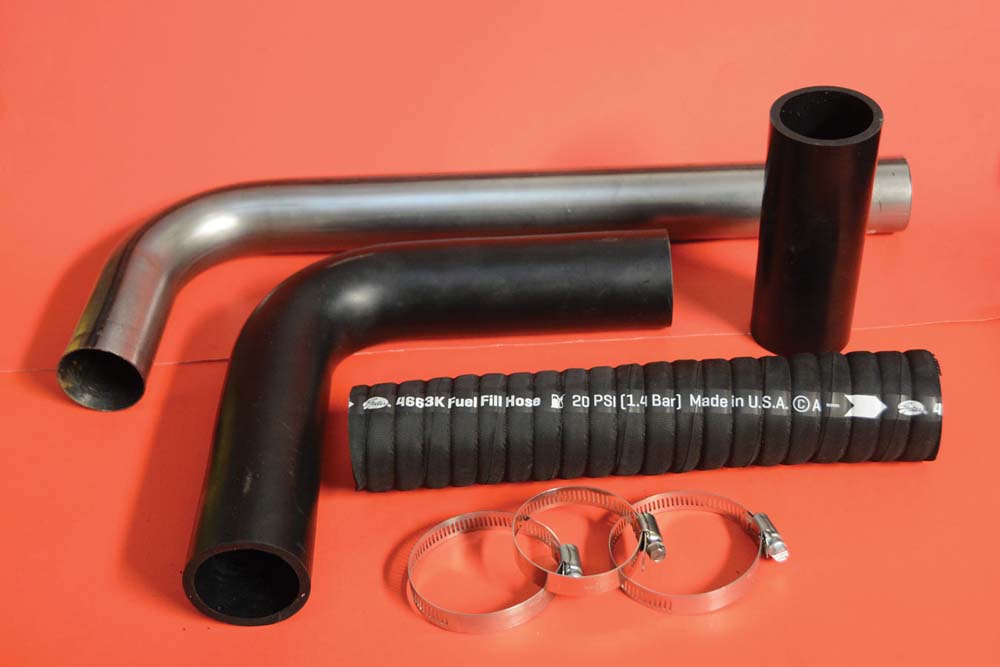
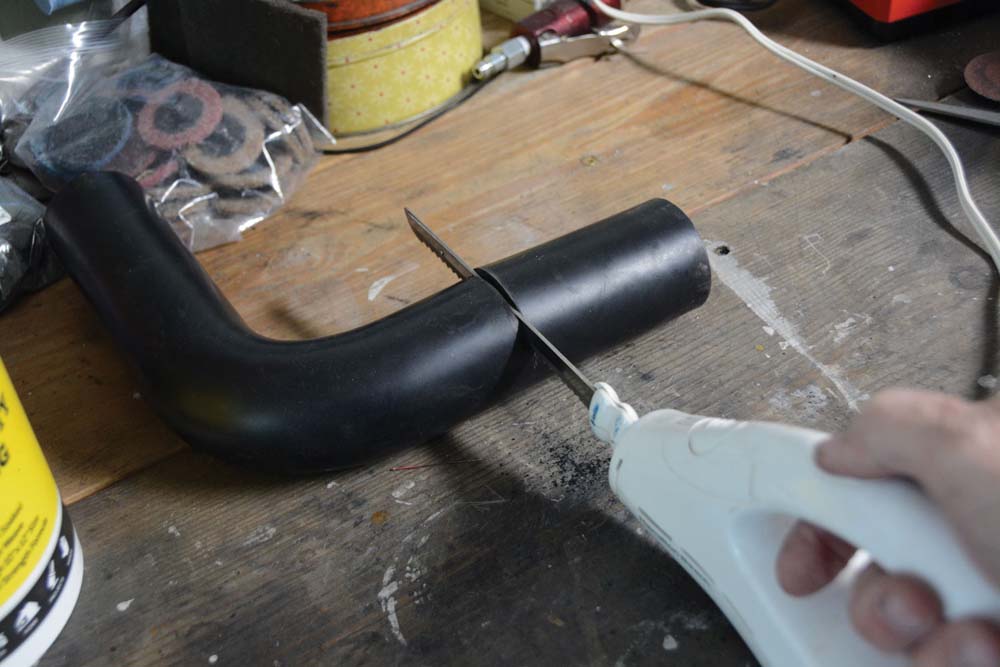
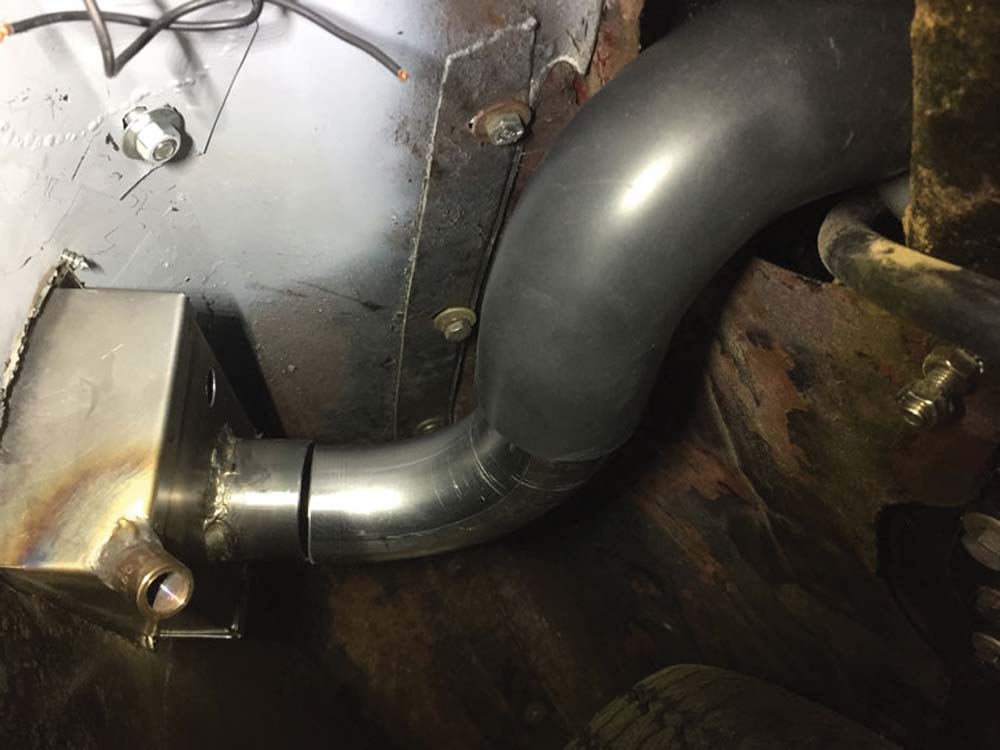
We routed the filler using one piece of 90-degree, 2-inch steel tubing and one 2-inch, 90-degree rubber fuel hose, both sourced from Summit Racing. A short piece of 2-inch hose was used at the fill neck in the fender and the rubber 90 clamped to the fuel tank. By using rubber hose at each end, we were able to make the final connection. Satisfied with the location we traced the outline of the fill box with a Sharpie and cut the hole (just inside the line) using a die grinder and cut-off disc.

Check Out: Reimagined 1932 Ford Roadster Pickup
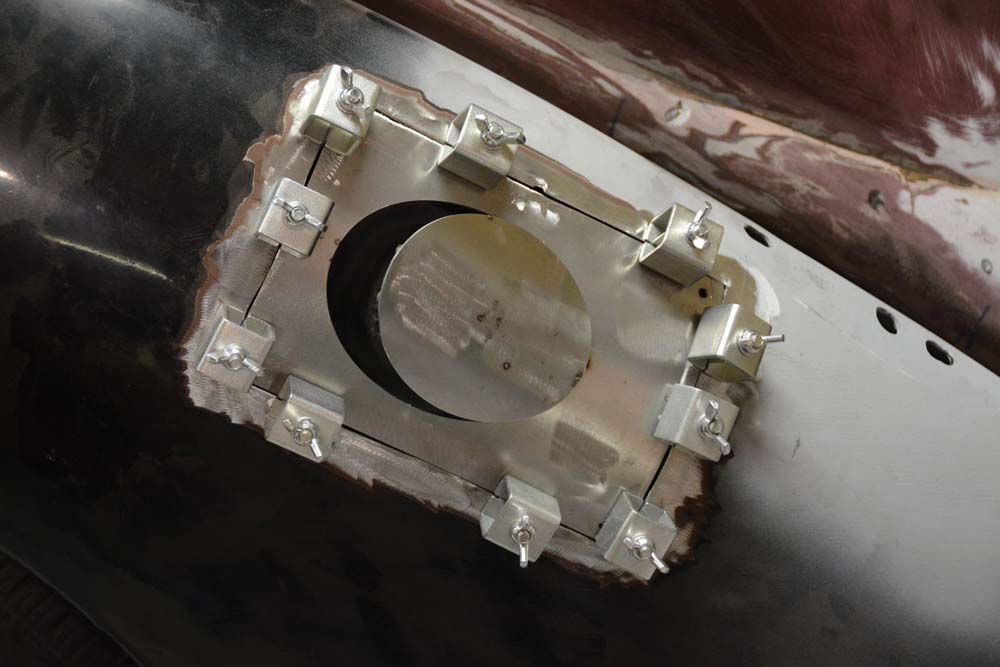
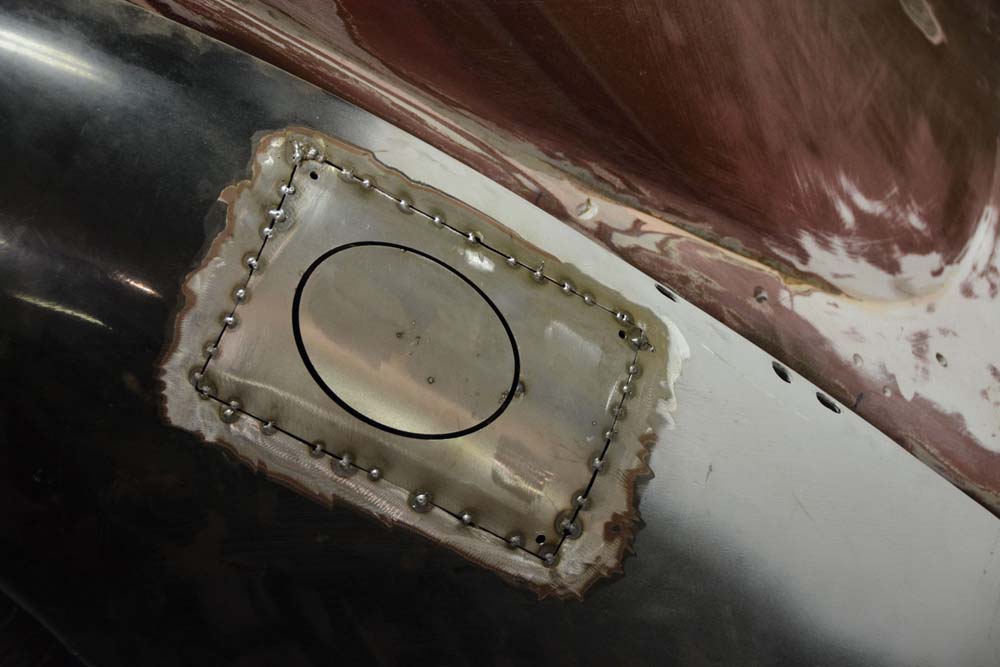
A little careful grinding and filing and we had a perfect opening for the gas door. We were pleasantly surprised to see to the 7-inch radius on the gas filler door was nearly a perfect match to our fender. We used nine Harbor Freight butt welding clamps to hold the fuel box to the fender. The clamps pulled the two panels together perfectly. Tack welding between the clamps held the two panels together and then we simply welded between the tacks, alternating from side to side top to bottom to prevent warping. With the welding complete we dressed the welds with a grinder. In the end we had a perfect fit with metalwork that would require a very minimal skim coat to finish the bodywork.
With careful work we finished the gas filler door installation, completing the modifications to the rear of the car. And just think, it all started with eliminating the spare tire. MR
Read Installment #1: How to Install a Universal Sending Unit and New Fuel Tank


Classic Instruments
(844) 342-8437
classicinstruments.com
Harbor Freight
(800) 444-3353
harborfreight.com
Speedway Motors
(800) 979-0122
speedwaymotors.com
Summit Racing
(800) 230-3030
summitracing.com


