ITGMw
SUBSCRIPTIONtext
ProgressArrows
digital issues
ProgressArrows
online store
ProgressArrows
SUBSCRIPTIONtext
ITGMw
ACPnew header logo
CTP LOGOs
all cars

Installing Disc Brakes on a 1940 Ford Deluxe Coupe

By Ryan Manson – Photography by the Author

Some of you need to hear this: you must drive your hot rod to truly enjoy it. But traditional hot rods can be lacking in the safety department. We install modern Wilwood brakes and a Fatman Fabrications Mustang-II kit to bring our 1940 Ford Deluxe Coupe to daily-driver status. Building a hot rod for us to enjoy.

- Advertisement -
02-fatman-fabrication-mustang-ii-kit
Our Fatman Fabrications chassis came equipped with the very common 1974-1978 Ford Pinto/Mustang II–style disc brake spindles, which dictates what Wilwood kit we’ll be using.

When it comes to the immediate pre war Ford passenger cars, it could be argued that they have more in common with the later, full size passenger cars from the ’50s and beyond than the preceding models that came out earlier in the decade.

03-installing-wilwood-dynalite
To mate up to our Mustang II spindle, we’ll be using Wilwood’s Dynalite Brake Kit (PN 140-11017), which consists of Wilwood Dynalite forged caliper, billet aluminum caliper bracket, and Wilwood brake pads. The stock hubs for this kit are dual-drilled for either 5×4.5 (Ford) or 5×4.75 (Chevy) bolt patterns. As aforementioned, we wanted to use our existing wheel/tire combo from Coker Tire, which were dual drilled to 5×5 and 5×5.5. Wilwood doesn’t offer a 5×5.5 hub, so we’ll be using their 5×5 hub (PN 270-14515) to make everything work.

Comparing a 1930 Ford Model A coupe and a 1940 Ford DeLuxe coupe, aside from their similar suspension design, the two bear almost no similarities. Like comparing a Neanderthal to a modern Homo sapien, the Model A was rudimentary in design and simple in sophistication while the 1940 Ford was a more refined design, showcasing the evolution that happened within a single decade while the nation was knee-deep in the greatest depression in the history of the industrial world.

04-wilwood-drilled-11in-rotors
An 11-inch drilled, slotted, and vented rotor and billet aluminum rotor adapter round out the front brake components.

Read More: How To Recess A Firewall On A 1934 Ford Five Window Coupe

- Advertisement -

Upgrades were continually made to the Ford line throughout the ’30s, beginning with the introduction of the V-8 engine in 1932. Safety not always being a subject at the forefront of the Henry Ford engineering department, the Blue Oval held out introducing hydraulic drum brakes until 1939. An oft-upgraded item for early cars, today these drum brake systems are lacking in both a safety and performance standpoint when it comes to the later, early Ford cars.

05-wilwood-brakes-for-hot-rod
Out back, Fatman Fabrication provided a 9-inch rearend, compatible with Wilwood’s Dynalite Brake Kit (PN 140-7140) for the new-style, big-bearing Ford axle housing ends. Like the front brake kit, out back a matching Dynalite forged caliper will grasp a drilled, slotted, and vented 12.19-inch rotor.

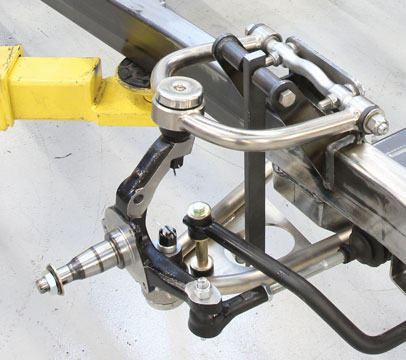
So, when it came time to start assembling the suspension components for our 1940 Ford DeLuxe here at Clampdown Competition we knew we were going to go with four-wheel disc brakes. It was also decided we’d be better off starting with a new chassis from Fatman Fabrications with its modern, Mustang II–style IFS up front, rack-and-pinion steering, and a 9-inch Ford rearend located by a triangulated four-link.

06-classic-car-parking-brakes
The parking brake assembly and caliper brackets are an integrated unit and package nicely inside the rotor, attaching directly to the rearend housing. The parking brake assembly acts as a mini drum brake, ingeniously using the rotor as the drum.

Four-corner coilovers will also be used along with sway bars, front and rear, with the intention of getting our old Ford to perform and ride like a more modern vehicle than Henry originally designed. We’ll be using stock-style 1940 Ford wheels from Coker Tire, so our DeLuxe will still look the part, but with the blown Chrysler pumping out double what the original Flathead was capable of we’ll be in need of some serious stopping power.

07-wilwood-parking-brake-bracket
A rear view of the parking brake assembly shows the caliper and parking brake cable brackets.

Also Read: Cruisin’… On A Sunday Morning

- Advertisement -

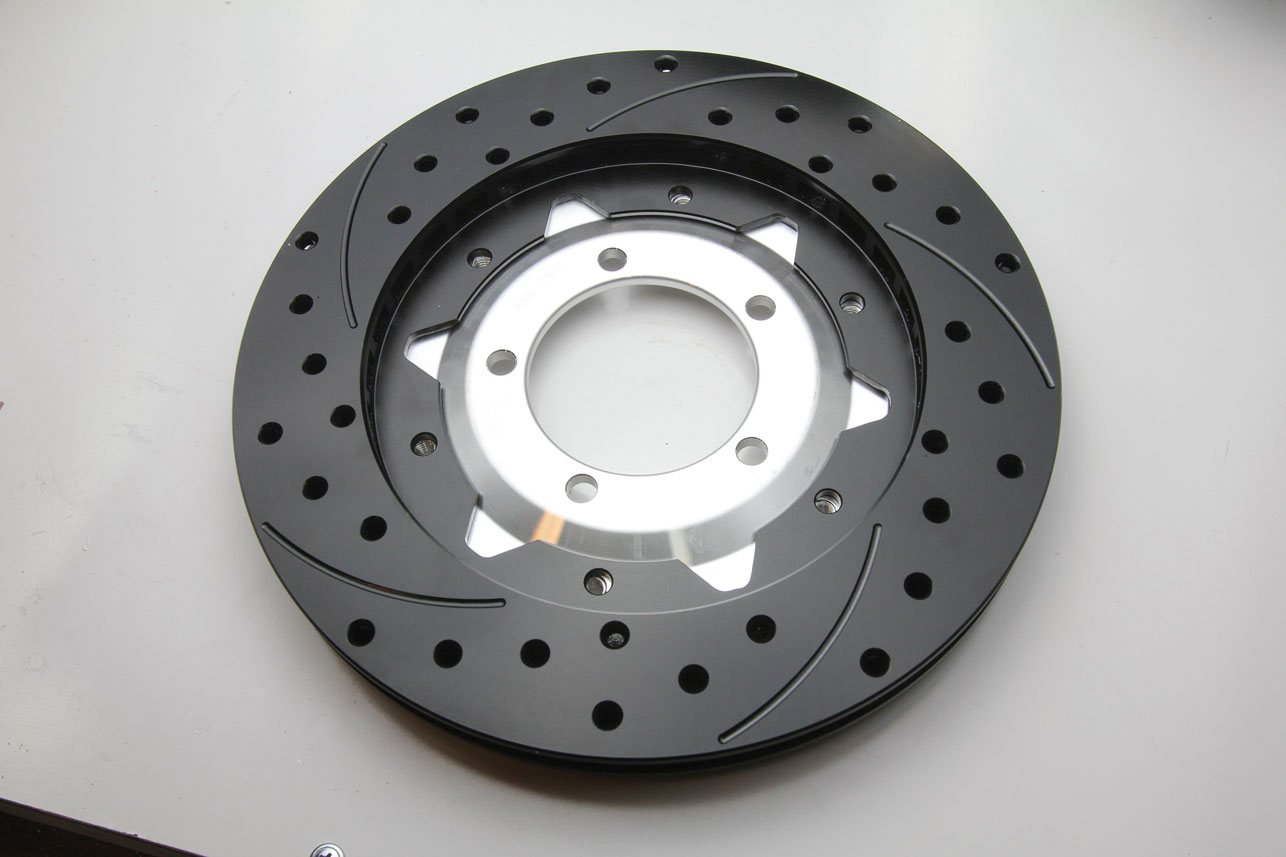
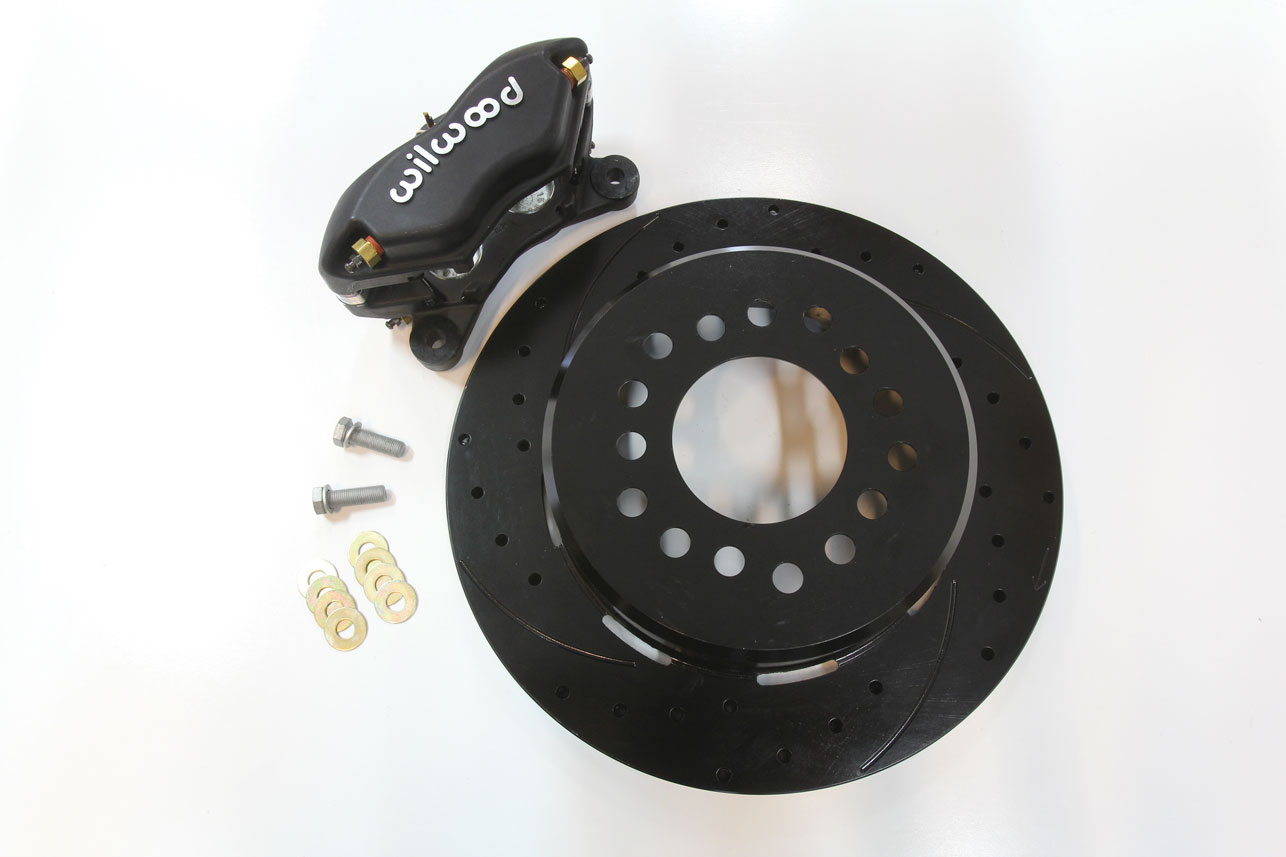
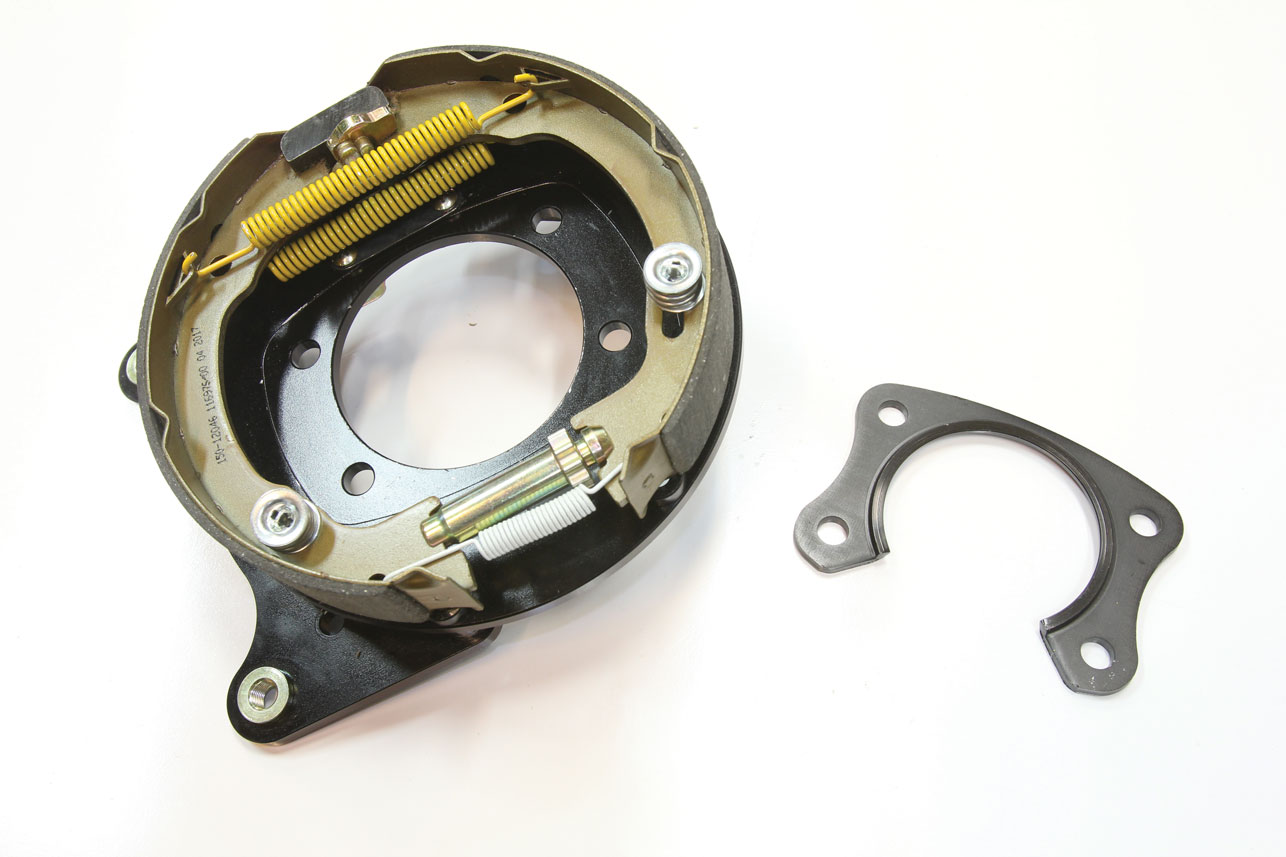
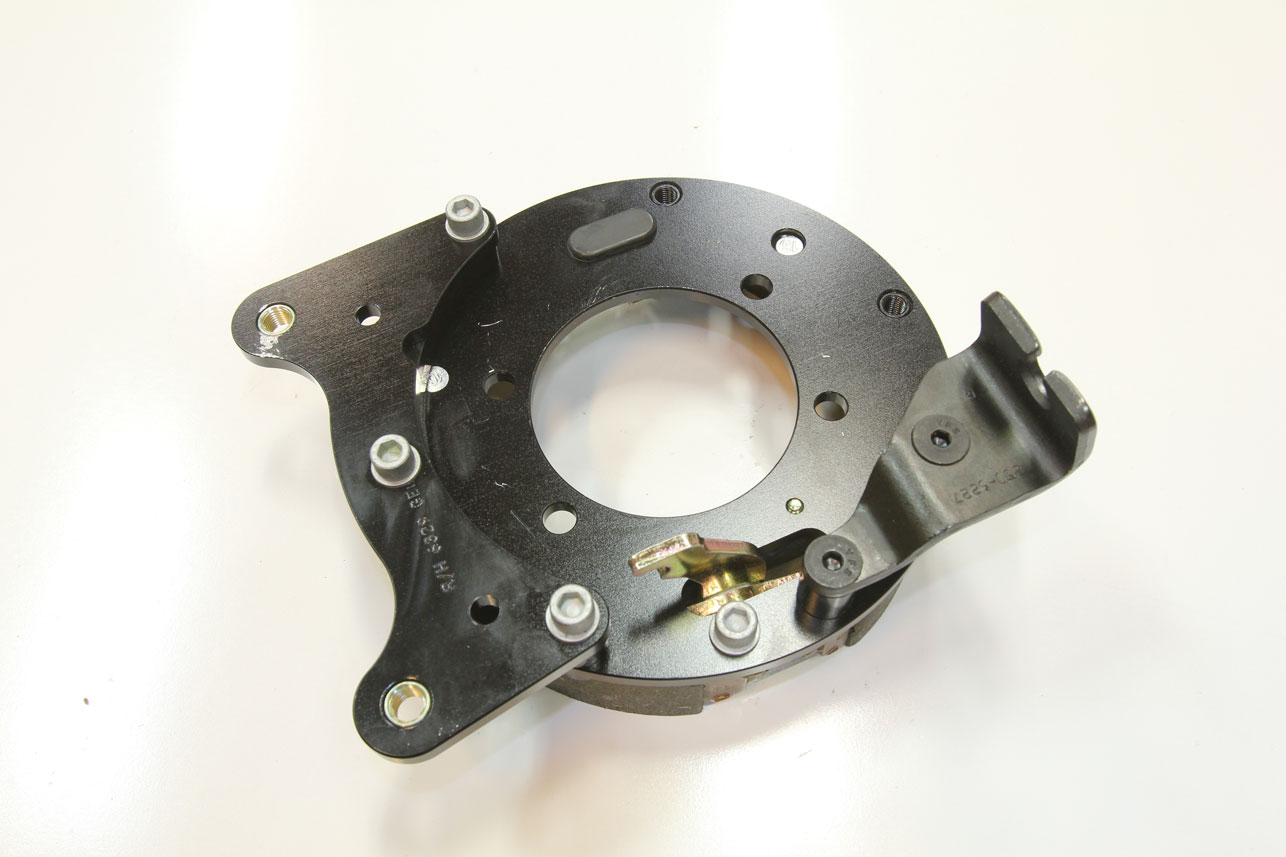
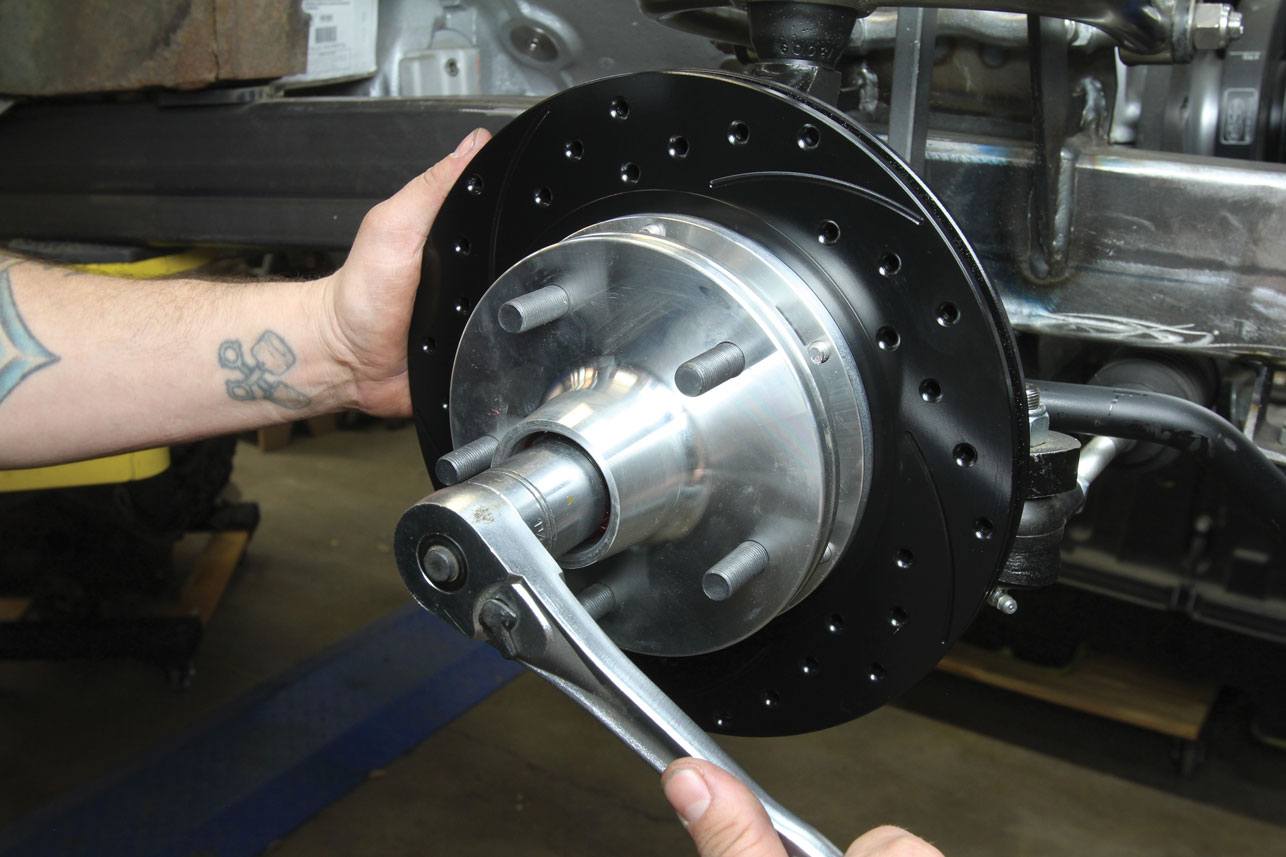
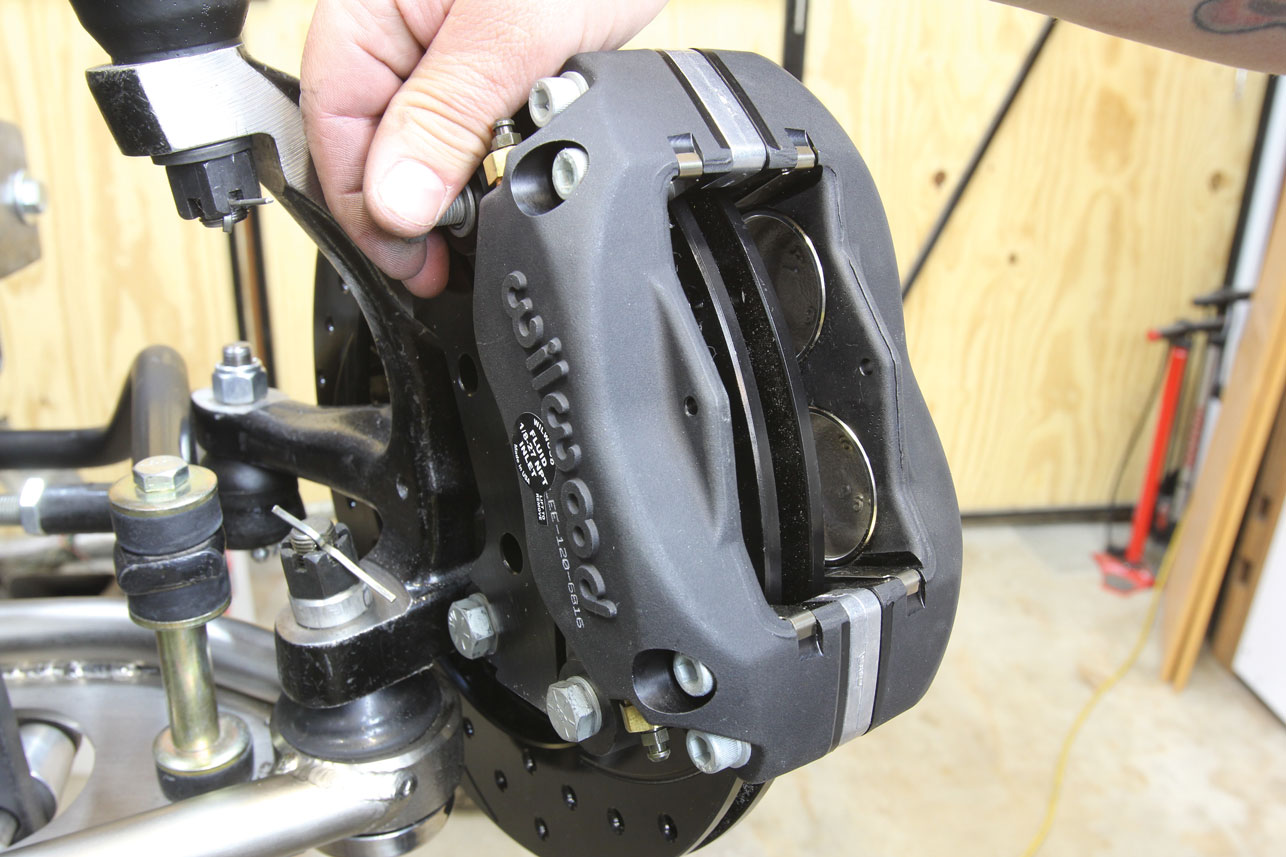
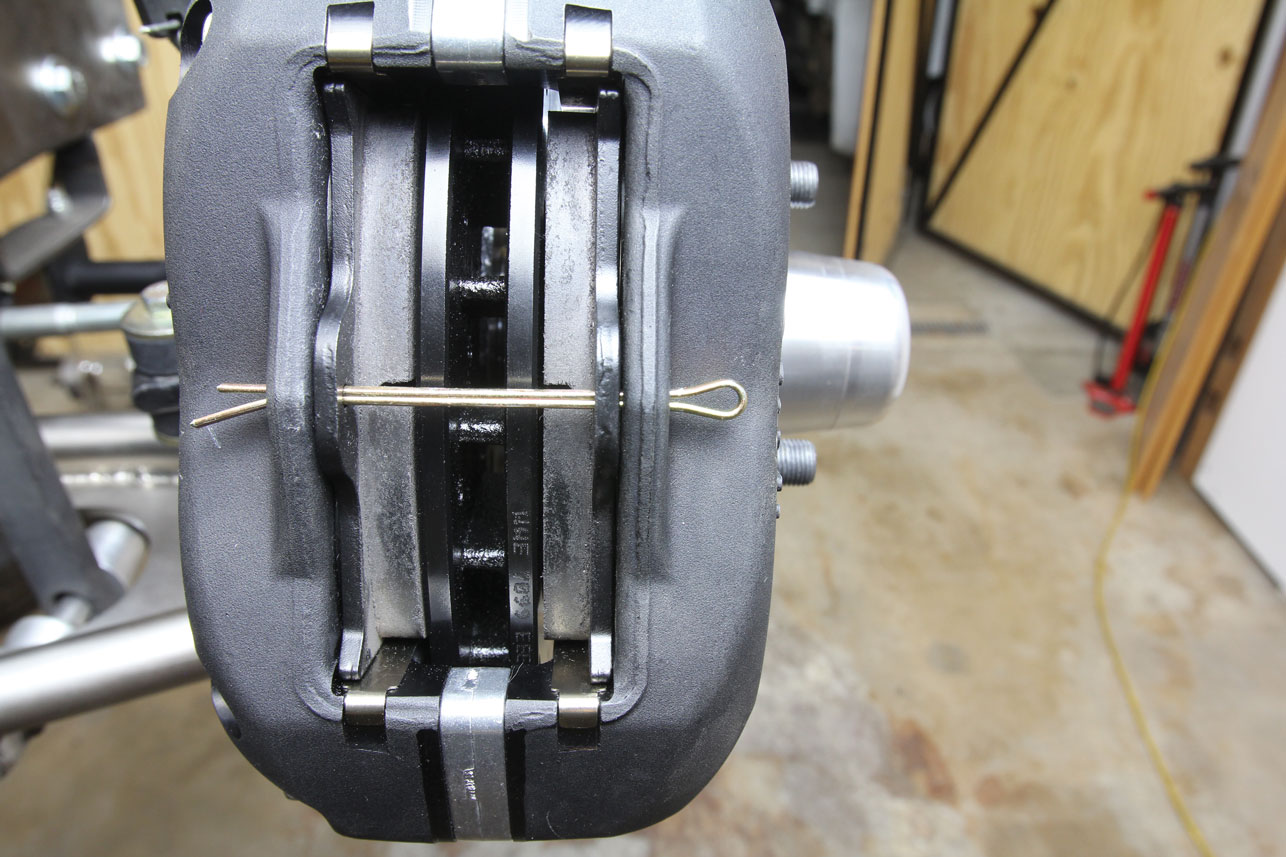
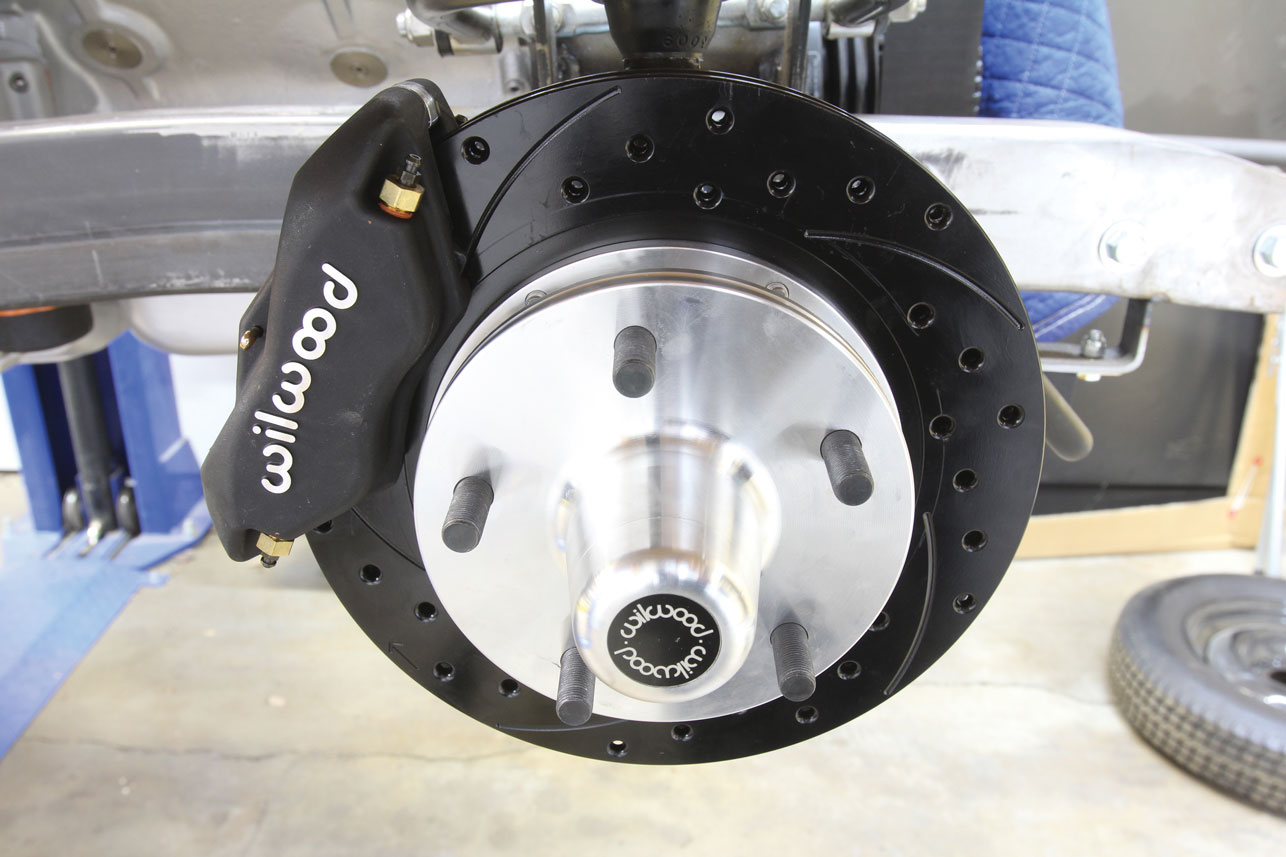
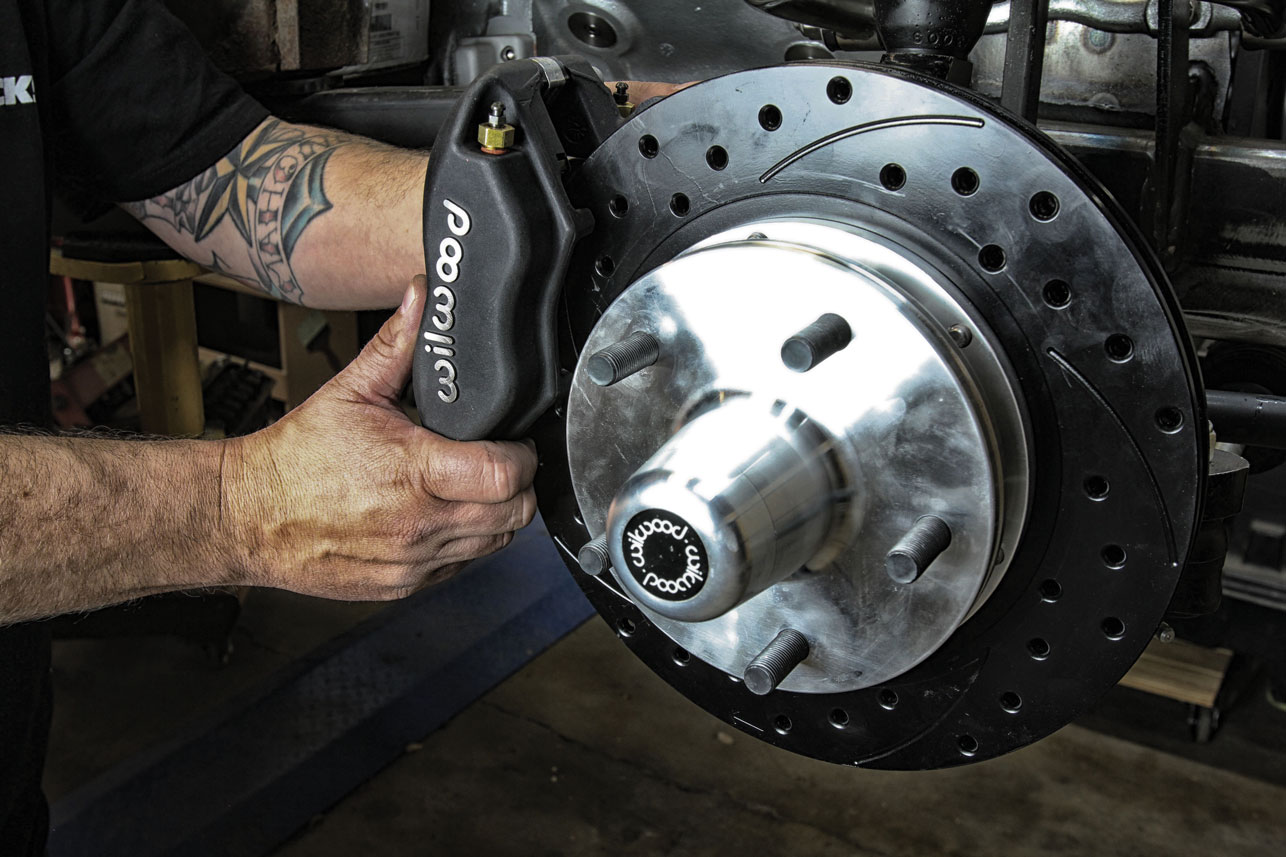
Wilwood Engineering is a name that’s become synonymous with high-performance disc brake systems since its inception in 1977. Today, they’re one of the most installed stopping systems in a number of aftermarket applications. The Wilwood Dynalite line of forged four-piston calipers serve as the baseline for a number of Wilwood’s brake kits and when used with their large, vented rotors will make for the perfect fit for our 1940. Their internal rear parking brake design will allow us to use a traditional floor-mounted Lokar handle, mated using a set of their cables.

08-fatman-fabrication-wilwood-spindle
We’ll be installing the front brakes first, starting with the installation of the Wilwood caliper mounting bracket. Both mounting fasteners are temporarily tightened and the bracket checked for square in relation to the spindle’s face to ensure no casting irregularities, machining ridges, burrs, and so on cause misalignment. Note the flanged heads of the clinch nuts on the caliper bracket are facing outward, preventing them from being pulled through the bracket when the caliper is installed. A drop of Red Loctite 271 is applied to both fasteners before being torqued to 47 lb-ft.

While our Fatman Fabrications chassis was being built, we ordered a set of wheels and tires from Coker Tire, opting to use their powdercoating and mounting/balancing services so that our rollers arrived ready to install.

09-red-lock-tight
Next, we’re going to assemble the rotor to the rotor adapter using the provided 5/16-18×0.75-inch Torx Button Head fasteners. A dab of Red Loctite 271 thread locker is applied to each bolt as it’s installed …

A slight oversight on our part, we ordered the wheels with the early Ford bolt pattern of 5×5.5 while our chassis was assembled with parts for a 5×4.5 pattern. What seemed at first to only be a slight hiccup, it was soon made clear the severity of our mistake; Wilwood does not offer a rotor or front hub in the larger 5.5 bolt pattern. We were coming to the conclusion that ordering another set of wheels with the correct bolt pattern might be our only option.

10-installing-wilwood-rotors
… before the assembly is torqued to a final setting of 25 lb-ft using an alternating sequence.

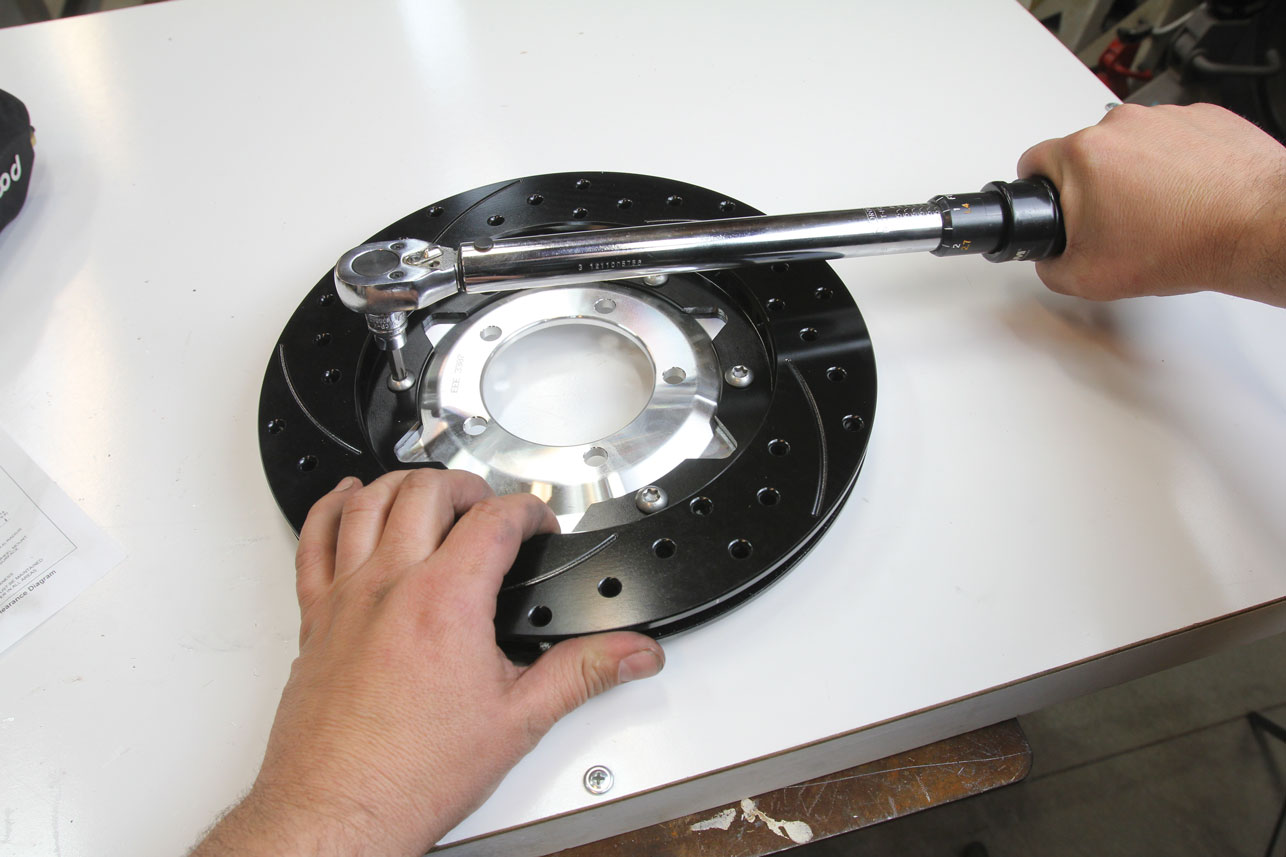
At the eleventh hour, it was realized that our Coker Steelies were drilled with two bolt patterns, the other being 5×5. A quick perusal of Wilwood’s website and we found a front hub that would allow us to use the same brake components we had already acquired, using the 5×5 bolt pattern.

11-1940-ford-brakes-upgrade
The hub assembly has been assembled, the bearings packed with high-temp disc brake bearing grease, and the grease seal installed before the brake rotor assembly is attached using the provided 3/8-16×1-inch Torx Button Head fasteners. Like the rotor/adapter assembly, these fasteners also receive a drop of Red Loctite before installation. Final torque spec for these fasteners is 45 lb-ft.

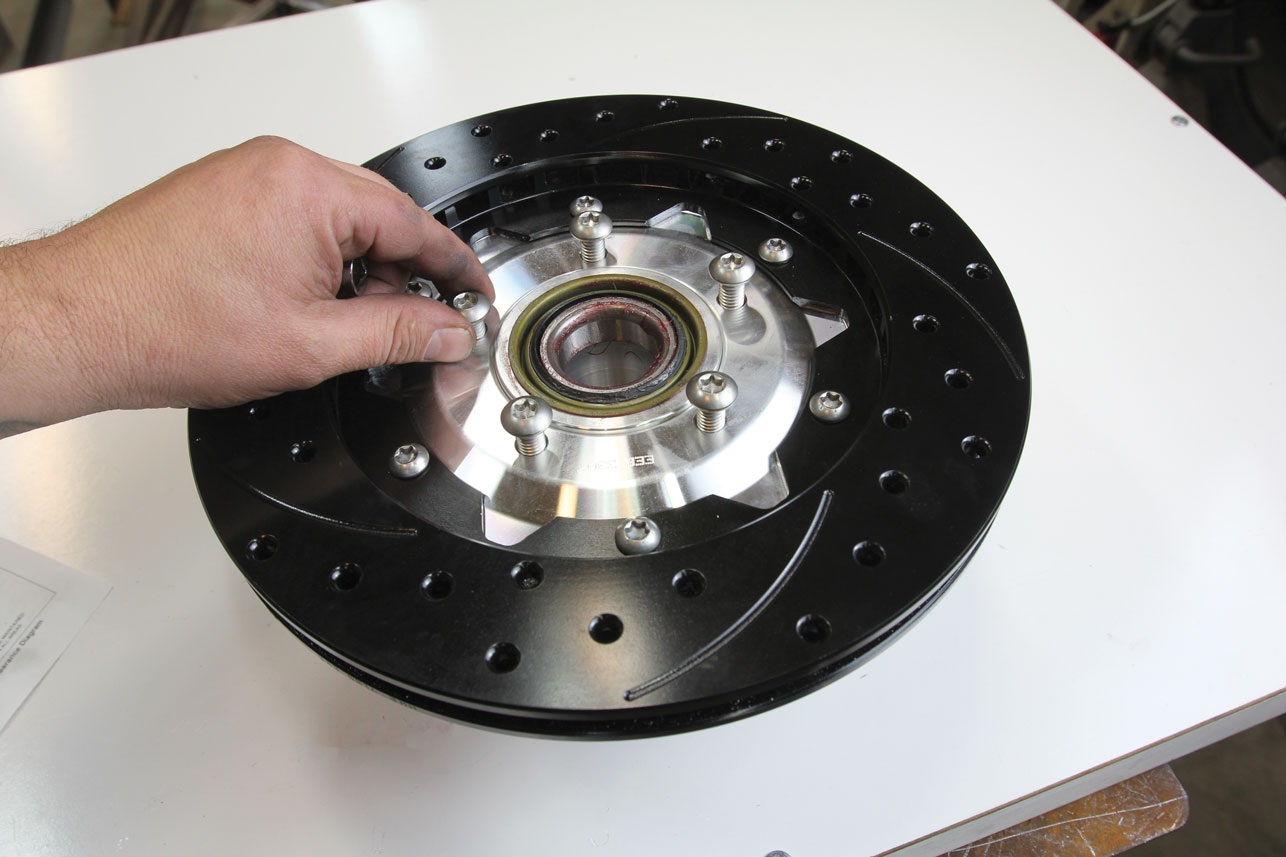
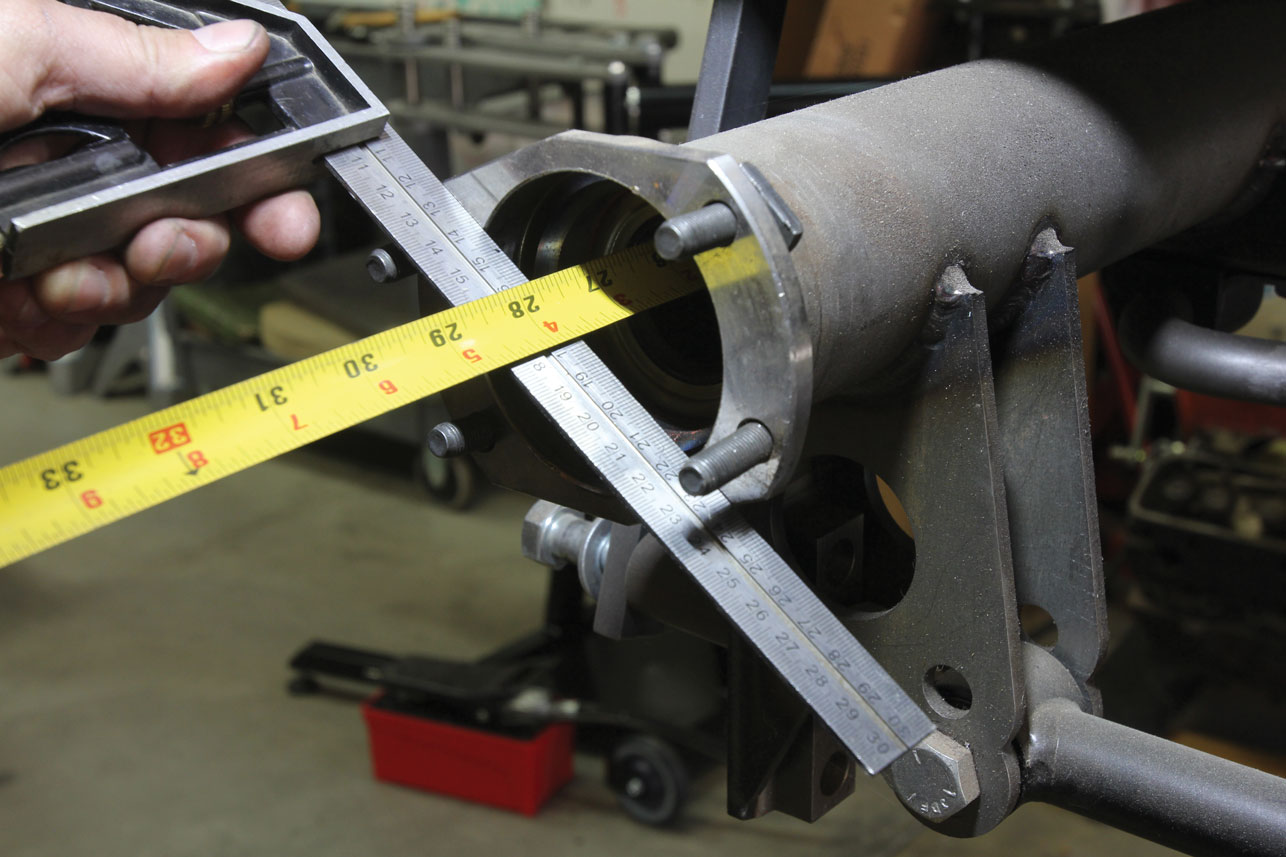
Out back, the biggest pill to swallow was the fact that our existing axles couldn’t simply be drilled with the additional bolt pattern, as the flange didn’t have the space for an additional five holes due to the bearing retainer bolt access hole. The rear rotors, however, were set up with all three of the popular bolt patterns, so once again, our brake components would be good to go.

12-installing-brake-conversion-wilwood-fatman-fabrications
The hub/rotor assembly is now ready to be installed on the spindle, followed by a grease-packed small outer bearing cone. A spindle washer and OEM spindle nut are then installed and the bearings adjusted per OEM specifications. A cotter pin is installed to keep everything tight, followed by Wilwood’s aluminum dust cap to keep the grease in and the dirt out.

Check Out: Installing a Universal Fuel Sending Unit and Fuel Tank – 1936 Ford Project

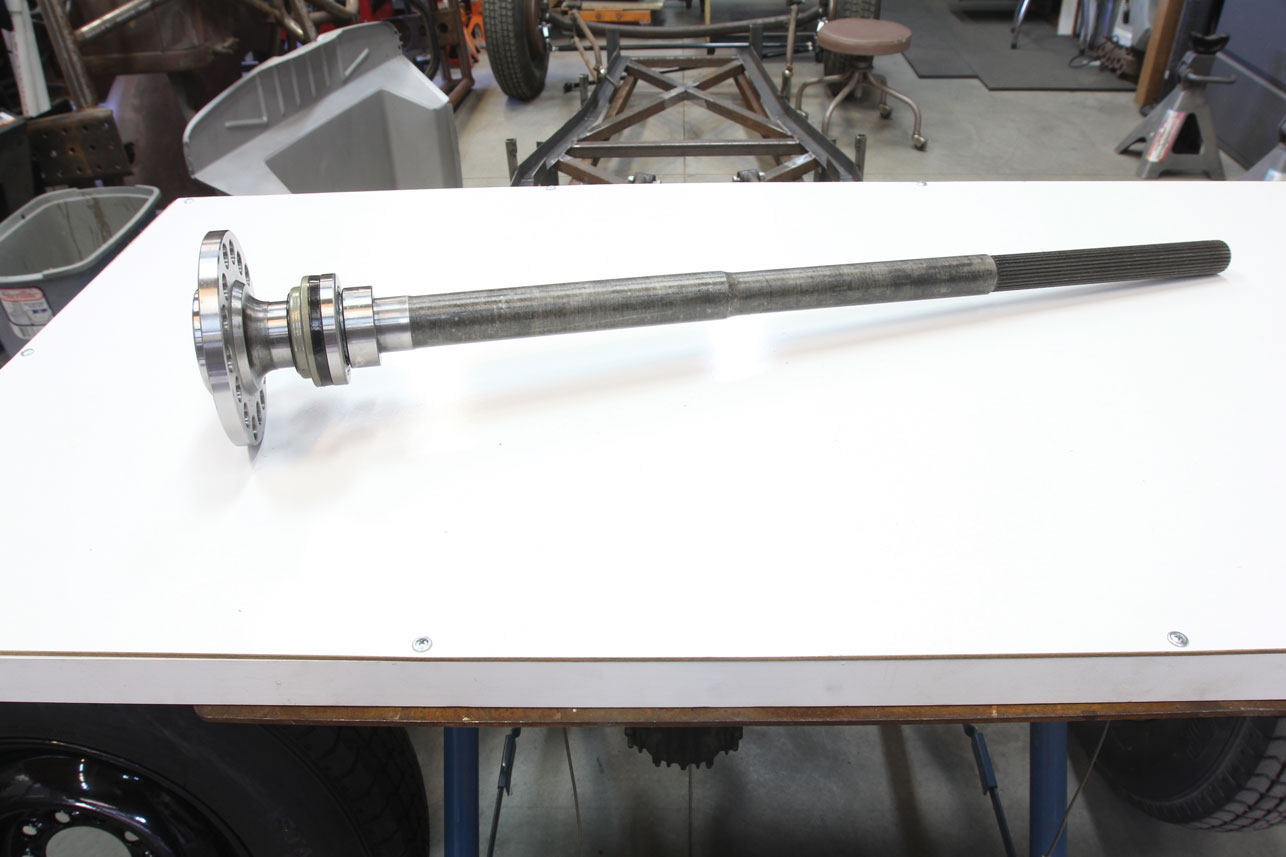
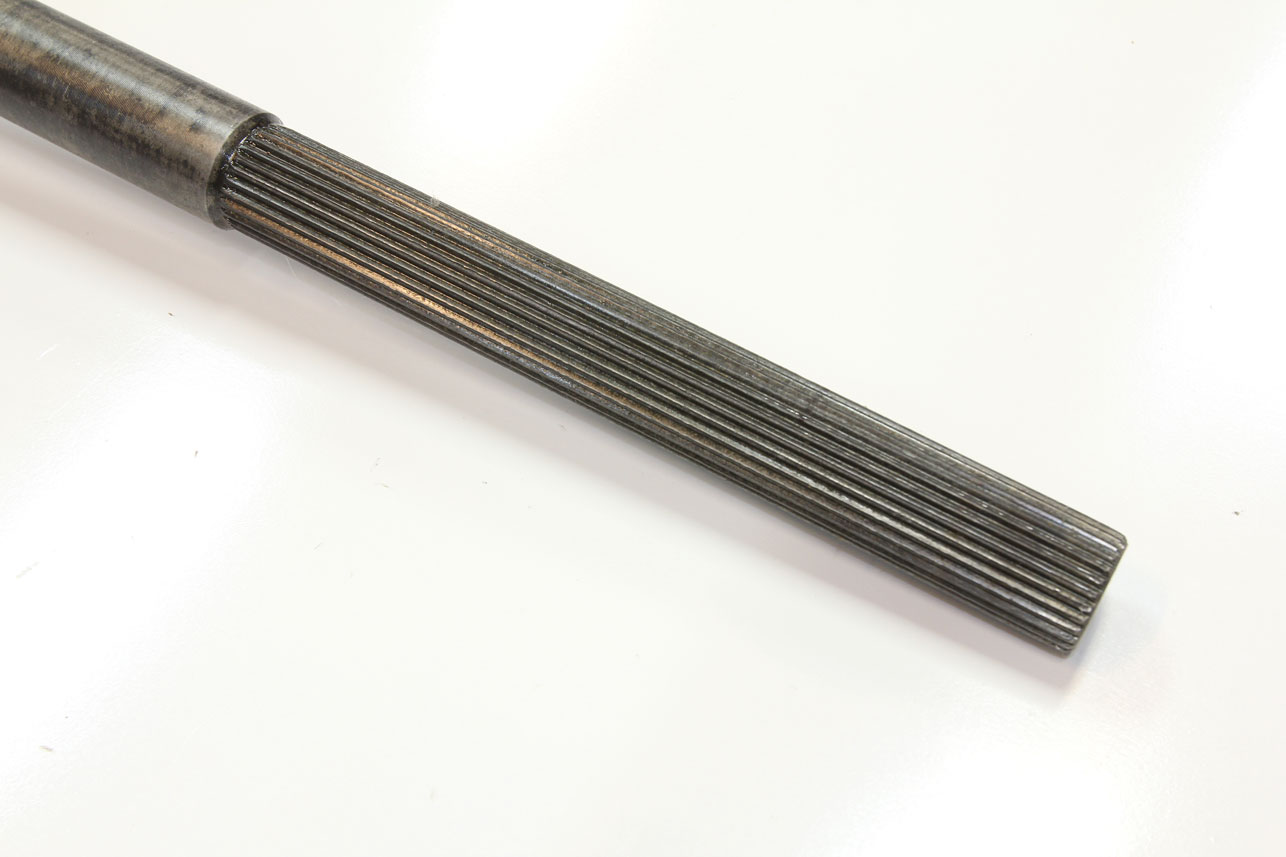
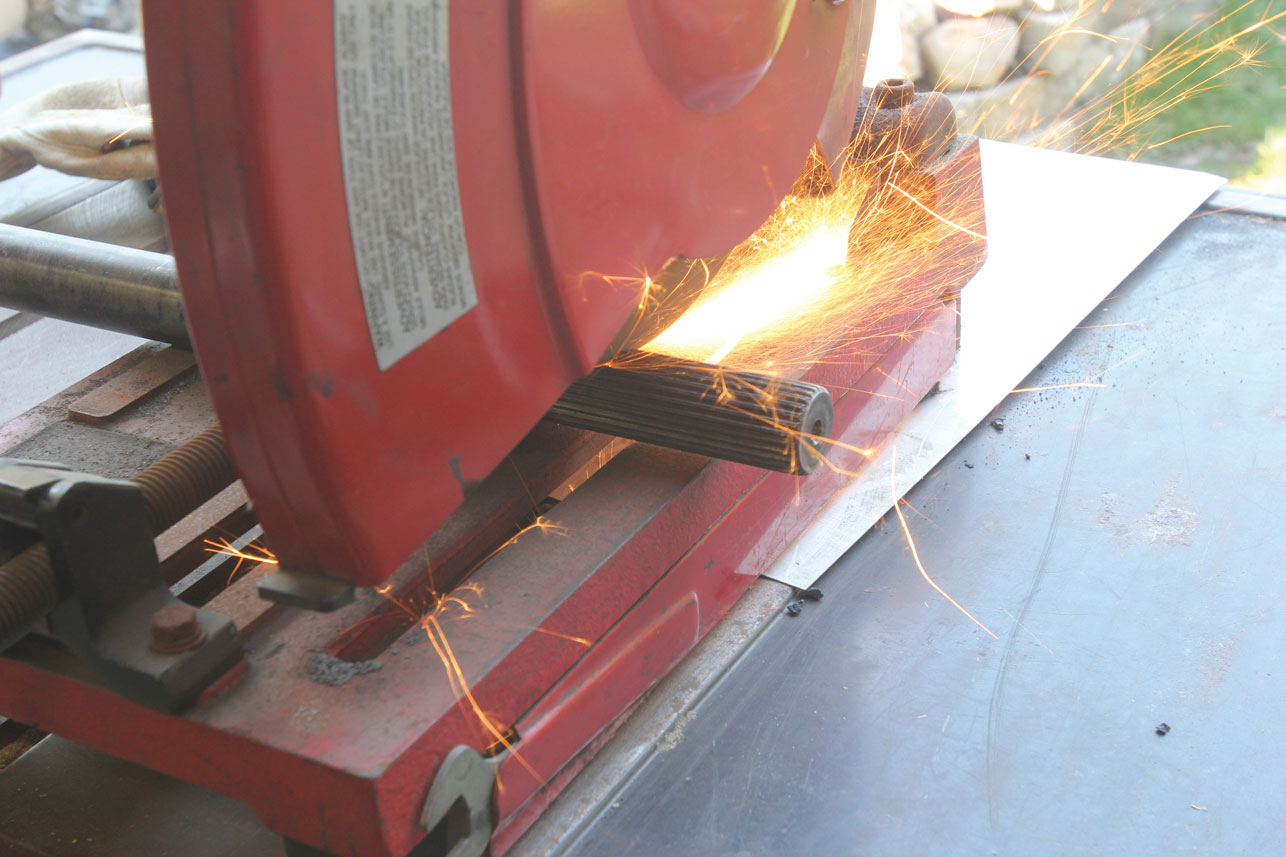
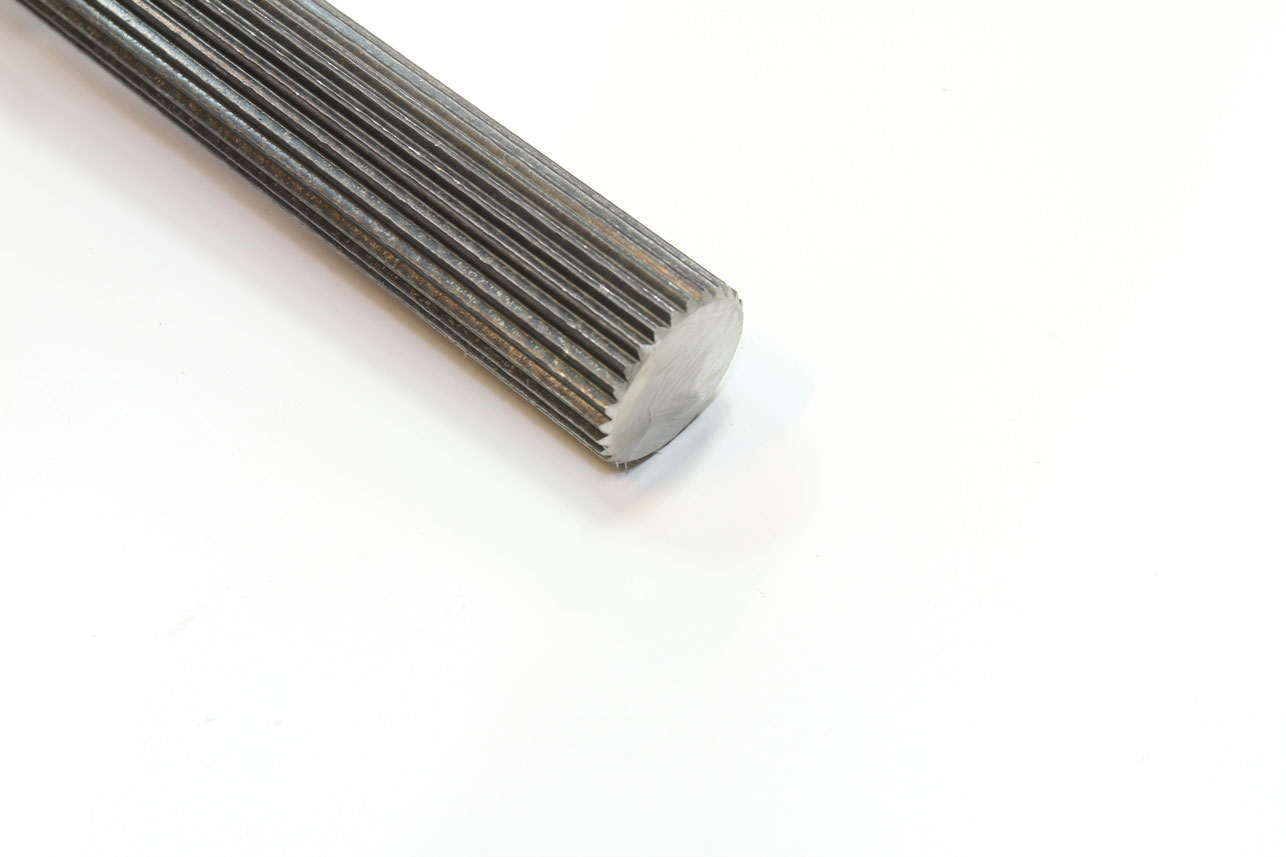
The solution to our axle obstacle was provided by Speedway Motors in the form of their Cut-To-Fit 9-Inch Ford Axle Kit. These 28-spline replacement axles are designed long with extra splines machined so the end user can easily cut them to fit their own housing. They also come drilled with the same three popular bolt patterns, which means our 5×5 bolt pattern can be used and all is not lost!

13-wilwood-dynalite-black-calipers
Next, the caliper is temporarily installed using the provided 3/8-24×1.25-inch fasteners and the caliper to rotor clearance is reviewed. Properly aligned, the rotor should be perfectly centered when viewed through the top of the opening in the caliper. If not, an assortment of 0.035-inch shims are provided to get things in line, placed between the caliper and the caliper bracket. Care must be exercised, however, to be sure the proper clinch nut engagement is achieved. The end of each bolt must be flush with, or slightly proud, from the head of the clinch nut. If necessary, shims can be installed between the caliper fastener and the caliper mounting ear to achieve proper clinch nut engagement. Regardless of the shims used and where, the same amount must be used at either location to keep the caliper perpendicular to the rotor. Once the caliper is found to be centered and clinch nut engagement correct, red Loctite 271 is applied to each bolt and torqued to 40 lb-ft.

While building an Early Ford with a 5×5 bolt pattern is indeed goofy, if it’s decided that we want to swap over to the more common Ford 5×4.5 bolt pattern in the future, all that’s required is a hub swap up front and moving the rear wheel studs to the proper pattern out back; the rest of the components don’t know nor care.

14-how-to-install-wilwood-calipers
Swapping pads in the Dynalite calipers is super easy, simply remove the cotter pin and pull them out. Installation is just as easy. With the pads installed in our caliper, it’s easy to see how the rotor is perfectly centered.

At the end of the day we were pleased that our little mistake only cost us a pair of axles and it turned out to be fairly painless, all told. While we could have overlooked this little “whoopsie” and our disc brake install would be all the same to you, our loyal readers, we thought it was only fair to be honest about the situation and to show that we make mistakes sometimes, too.

15-installed-wilwood-rotors
With our front Wilwood Dynalite kit installed, we’re ready to move onto the rear.

Also Check Out: 900hp N/A SUPER STOCK NOVA

At the end of the day, it allowed us to add a few more details to the install and provided some interesting information regarding the components used. If nothing else, we hope you learn from our mistake!

16-speedway-motors-9in-axle
Changing the bolt pattern on our rearend is slightly more complicated than a simple hub swap like the front. To get the 5×5 pattern necessary to allow us to use our existing wheels, we’re going to need to swap out the axles. A Speedway Motors Cut-To-Fit Axle Kit (PN 9107996) will get the job done.

Here we install new brakes and a Fatman Fabrications Mustang-II front suspension on our 1940 Ford. MR

Sources:
Clampdown Competition
clampdowncomp.com

Coker Tire
(877) 409-3757
cokertire.com

Fatman Fabrications
(805) 388-1188
fatmanfab.com

Lokar Performance Products
(877) 469-7440
lokar.com

Speedway Motors
(800) 979-0122
speedwaymotors.com

Wilwood Engineering
(805) 388-1188
wilwood.com

- Advertisement -

Related Articles

Search Our Site

More Modern Rodding

The Latest in Fuel Senders – Holley LiDAR Technology

By Ryan Manson   -   Photography By Brian Brennan Classic Instruments...

Installing a Vintage Air Front Runner on Your Big-Block Chevy

By Ron Ceridono - Photography By Brian Brennan Dean Livermore...

Bringing Back a 1987 Buick Grand National with LSA Power

By Brian Brennan   -   Photography By NotStock Photography The 1987...

Tommy Foster’s 1932 Ford roadster to be auctioned at Mecum Kissimmee event

By Brian Brennan   -   Photography Courtesy of Mecum Auctions If...

2024 L.A. Roadsters Father’s Day Swap Meet & Roadster Show

By Brian Brennan   -   Photography By the Author The L.A....

1966 Corvette is the Best of What a C2 Can be Made Into

By Brian Brennan   -   Photography By NotStock Photography The 1966...
More Modern Rodding

Detroit Speed & Engineering QuadraLink Settles in Under Our 1969 Camaro

By Barry Kluczyk   -   Photography By Brian Brennan Our 1969...

1939 Buick Special Complete with 6.0L LS Hits The Road … At Last

By Brian Brennan   -  Photography By Josh Mishler This 1939...

All the Right Connections

The Del Rio Gets a Much-Needed Wiring & Instrument...

Revving up for a Cause

The 2024 Triple Crown of Rodding Surges Ahead By Brian...

The Ultimate 1936 Ford Roadster … It’s Almost There

By Brian Brennan   -   Photography By NotStock Photography Handmade hot...

Part 3: Building a One-of-a-Kind Model A Sedan

By Ron Covell   -   Photography By Chris Gray The one-of-a-kind...

Our digital and print versions offer tons of exclusive content not offered here. Click here to subscribe >