Kugel Komponents’ New Bolt-In 1963-87 Chevy C10 Coilover Kit

Bolt-In Independent Front Suspension For Your Chevy C10/GMC ½-Ton

By Rob Fortier   –   Photography by the Author

For what it’s worth, all C10 trucks had pretty decent suspensions from the factory. From 1971 on up, their front brakes weren’t too shabby, either. But pretty decent and not too shabby after 50-odd years—coupled with how those once-workhorse haulers are now used—just doesn’t cut it … not even close.

- Advertisement -

Read More: Timeless Truck: LS Swapped 1968 Chevy C10

For your ’63-66 and ’67-72 C10s, the upgrade options are plentiful. In the past few years, options for the ’73-87s have multiplied as well. Today, however, all the rage is going with a full chassis swap—but for folks (like me) with a rather limited budget, that rage isn’t even an option to consider. Realistically, even some of the complete front suspension kits are up there in the price range as well.
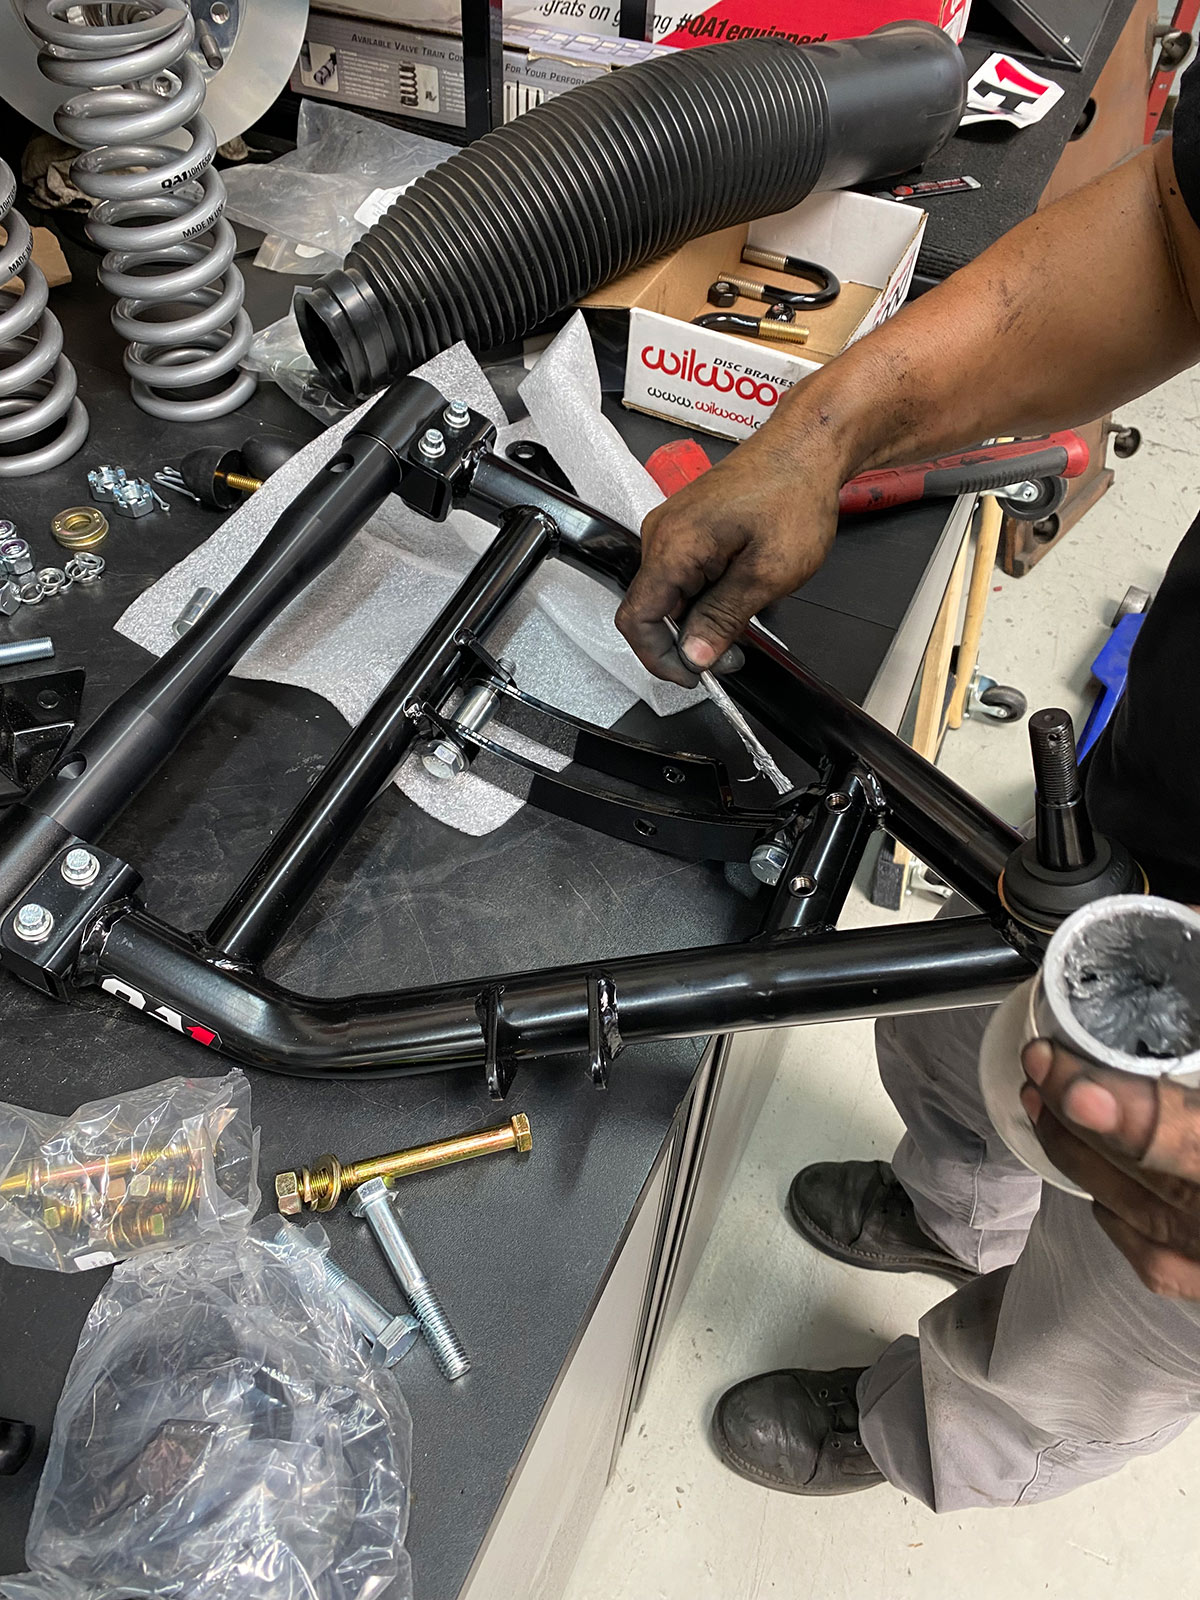
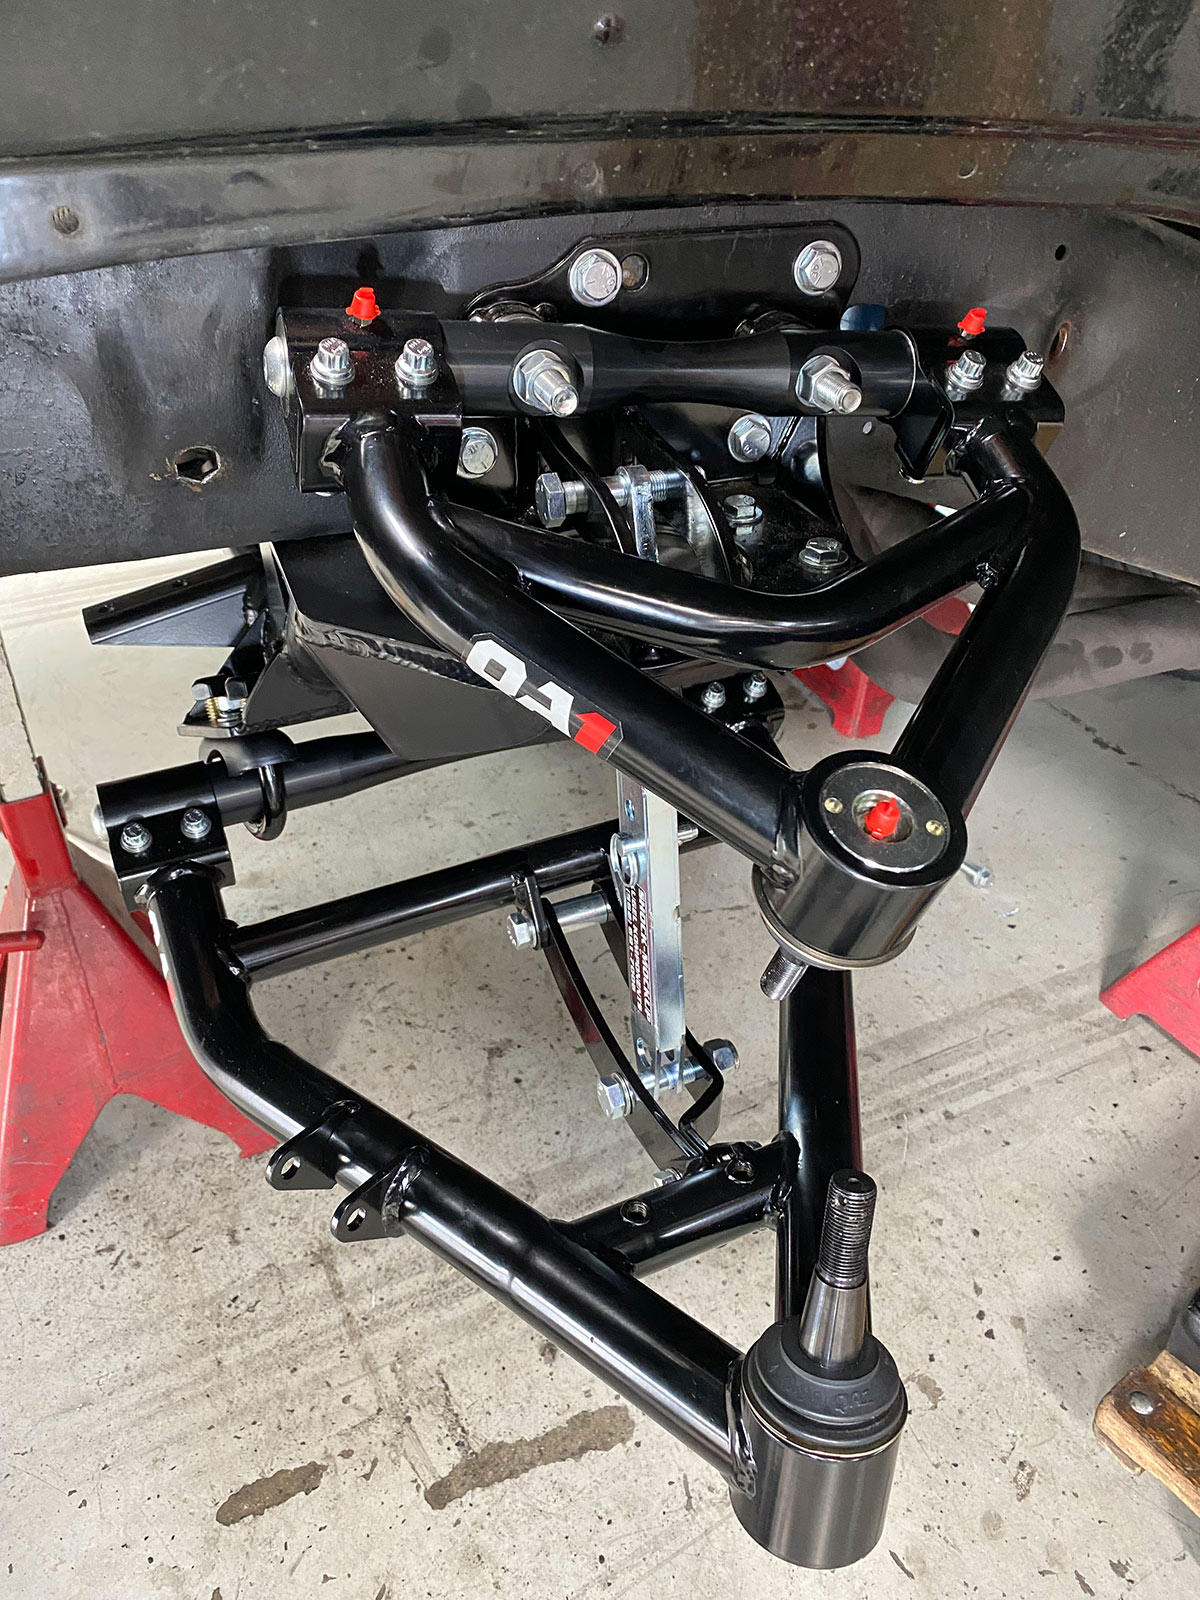
01 Kugel Komponents all new C10 Independent Front Suspension is without question a superbly performing suspension upgrades
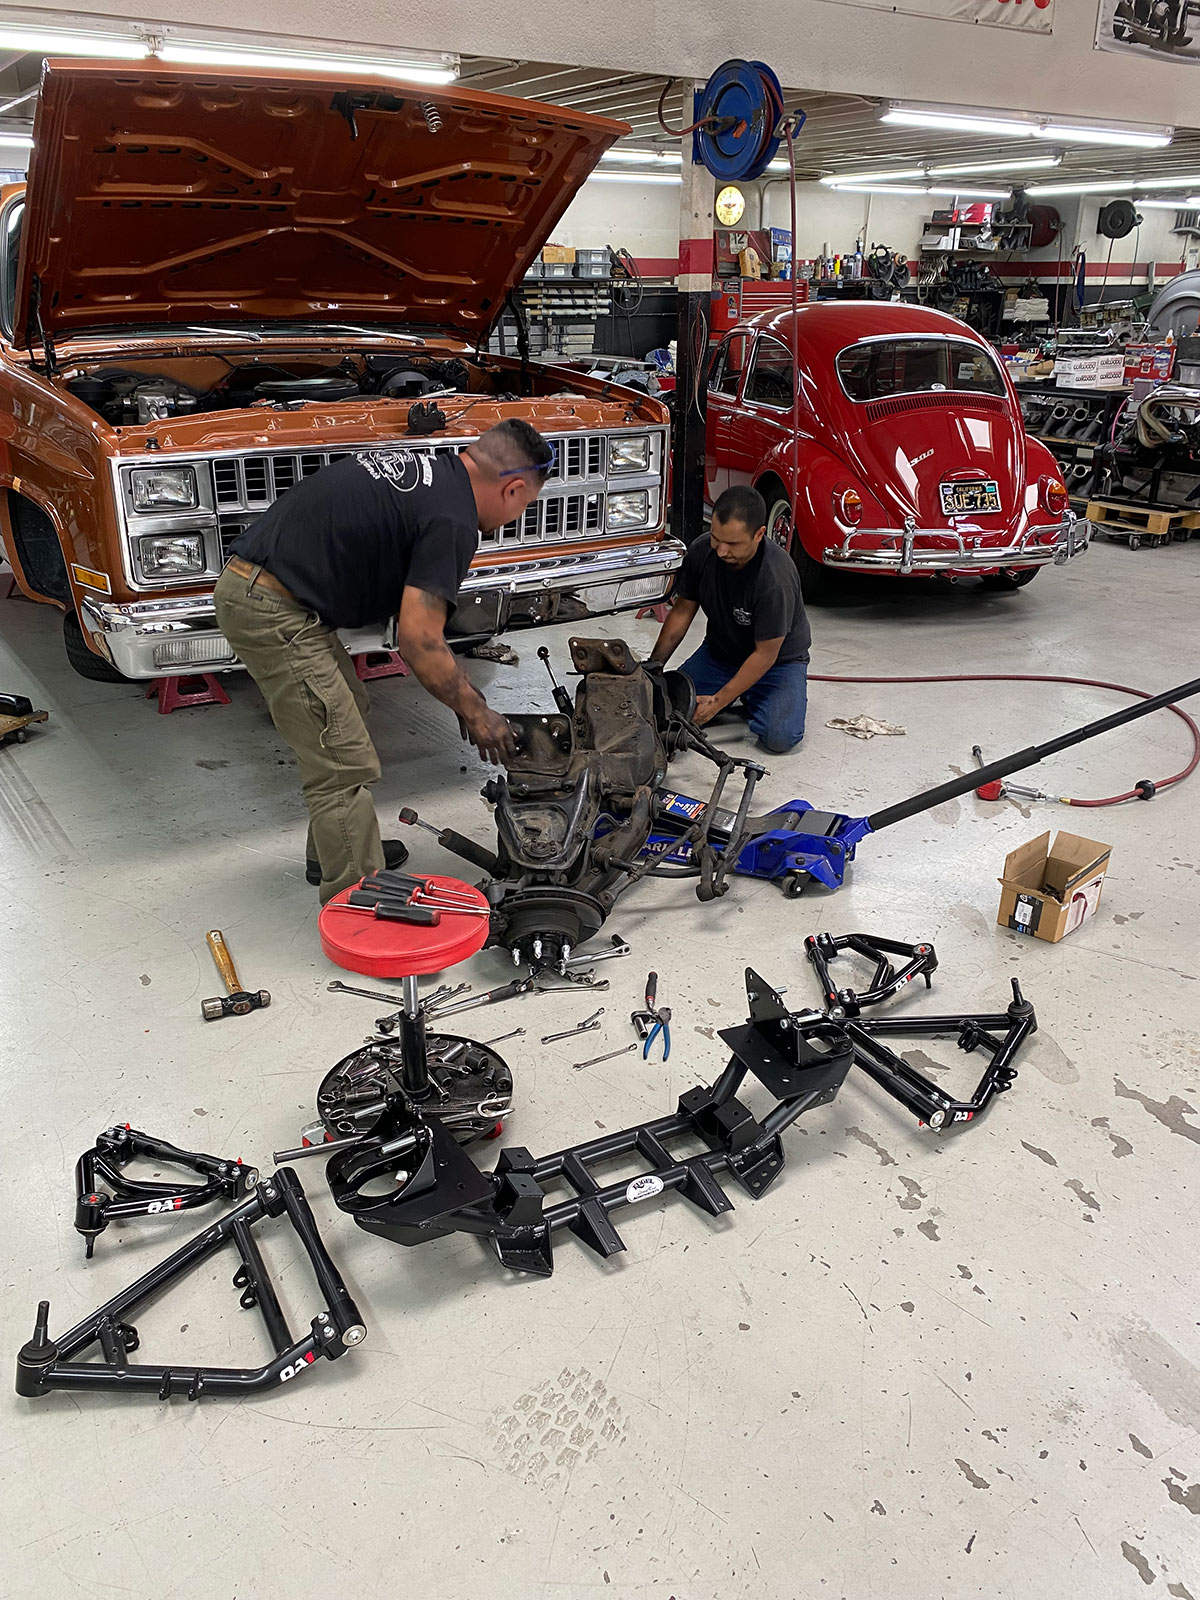
Kugel Komponents’ all-new C10 Independent Front Suspension is without question one of the most versatile, easy-to-install, superbly performing suspension upgrades you can possibly equip your ’63-87 Chevy/GMC C10 with. The complete kit includes everything pictured (Kugel-fabricated bolt-in crossmember with integrated motor mounts and QA1 upper hats and preassembled tubular control arms) as well as …

But one of the great things about the C10’s front suspension/steering/brakes is that it’s a complete bolt-in assembly and, thus forth, upgrading is just as easy as that: bolting in said new component system. While some question the precise fitment of anything that claims to be a direct bolt-in, we actually found a complete hub-to-hub kit that literally installed without the use of a drill, let alone any coercion-type tools! On top of precise fitment, said kit offers 2 inches additional ground clearance and is 20 pounds lighter (versus stock). But what’s even better about this new kit is the fact that it accepts all aftermarket C10 control arm/spindle options, so, in essence, you can build your C10’s performance front end in stages, ultimately saving you money or avoiding having to buy parts you already have!
- Advertisement -
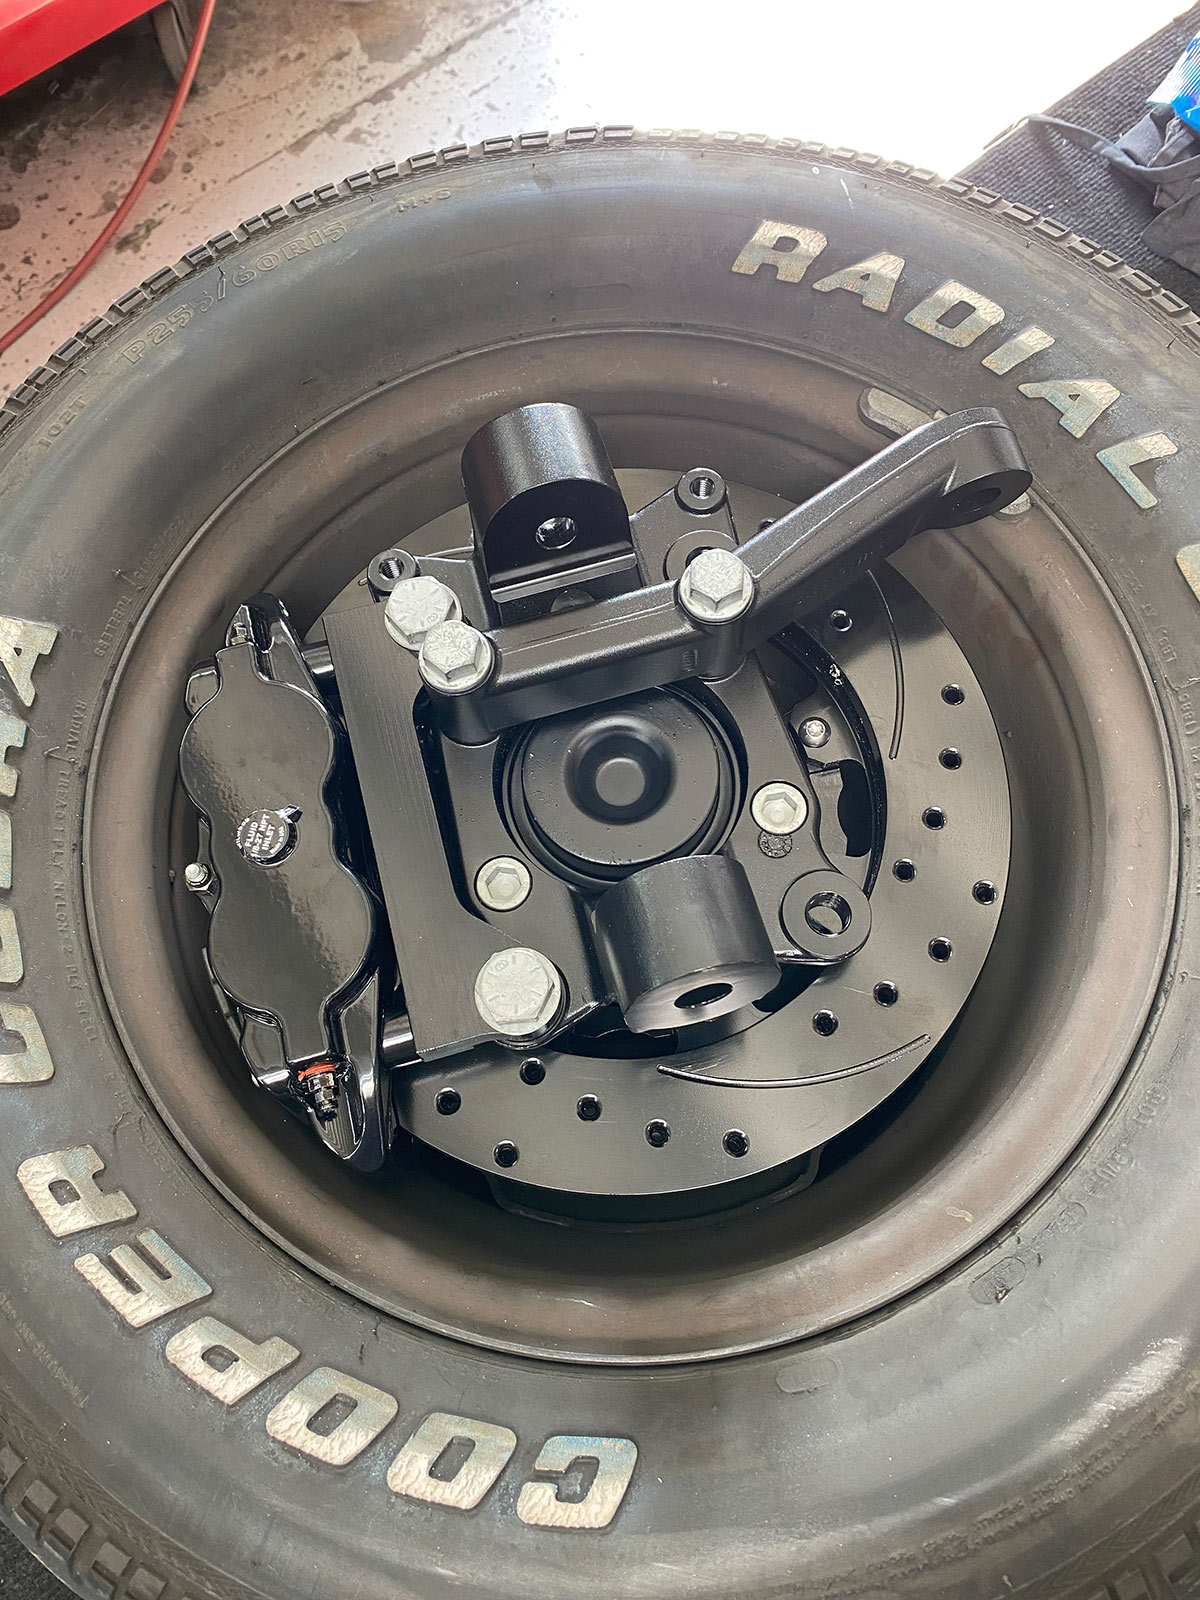
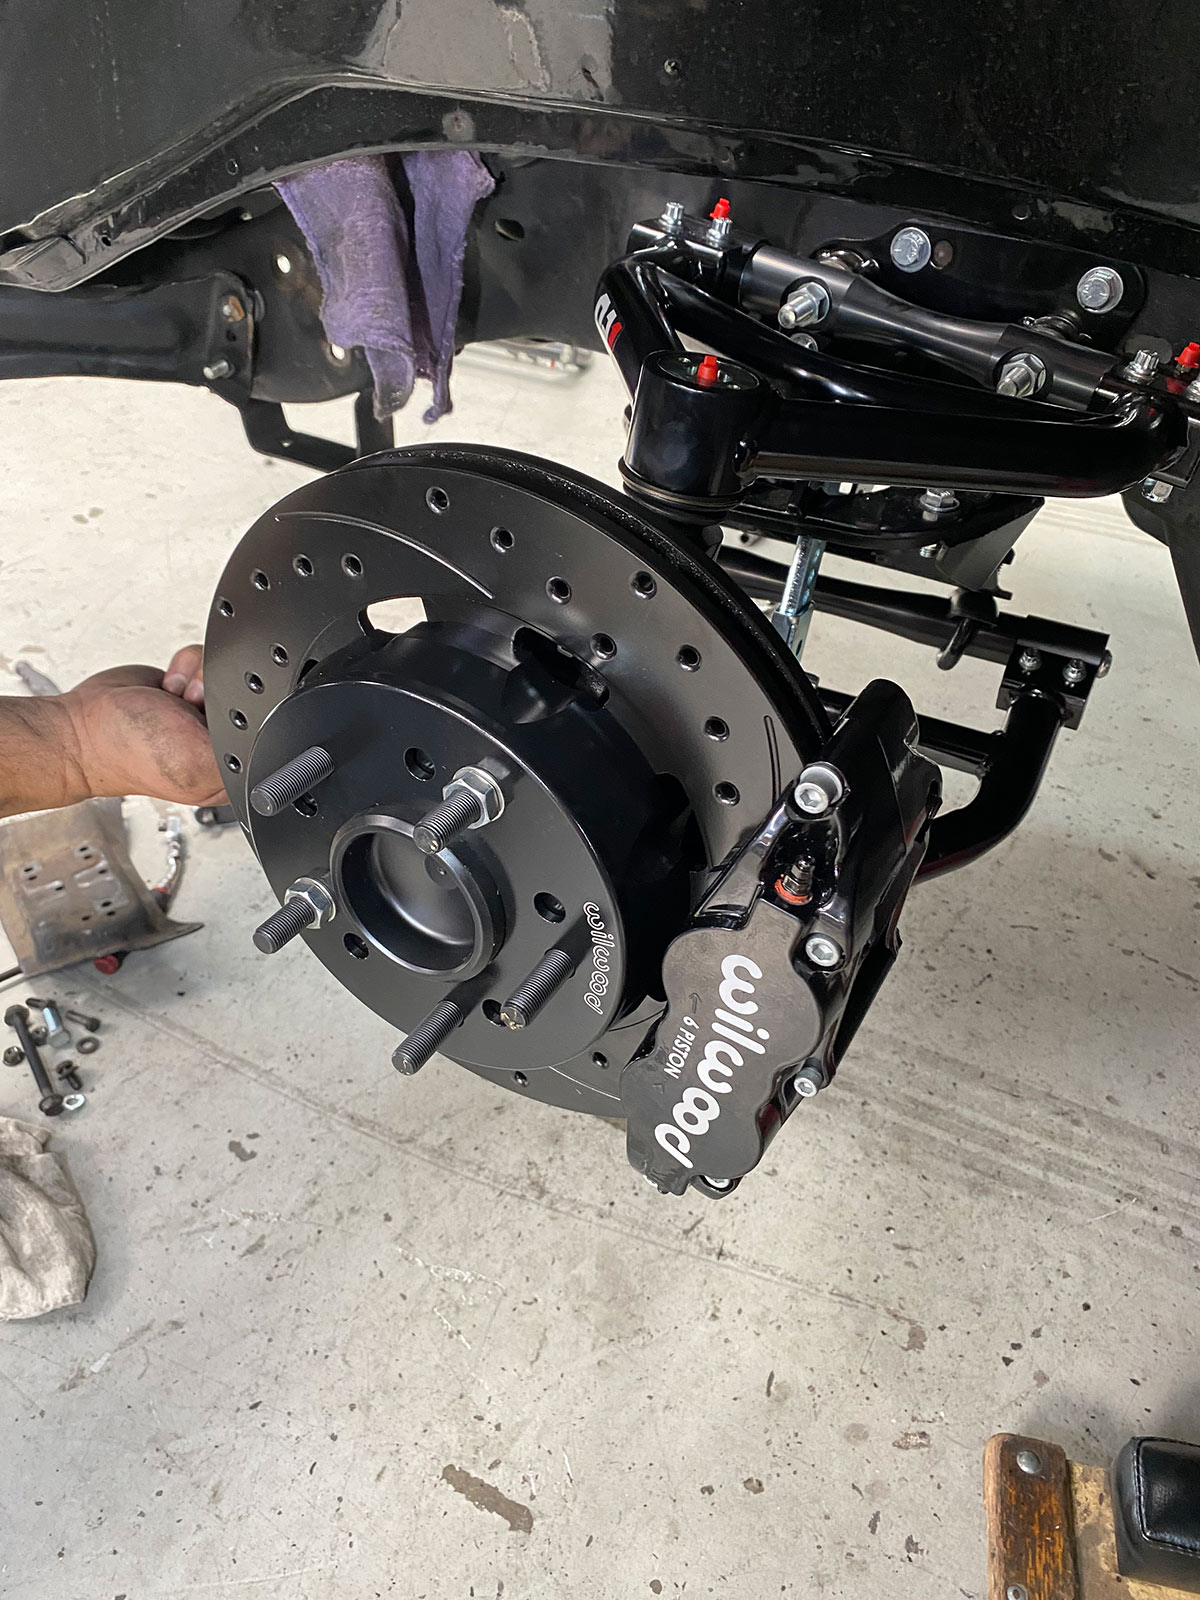
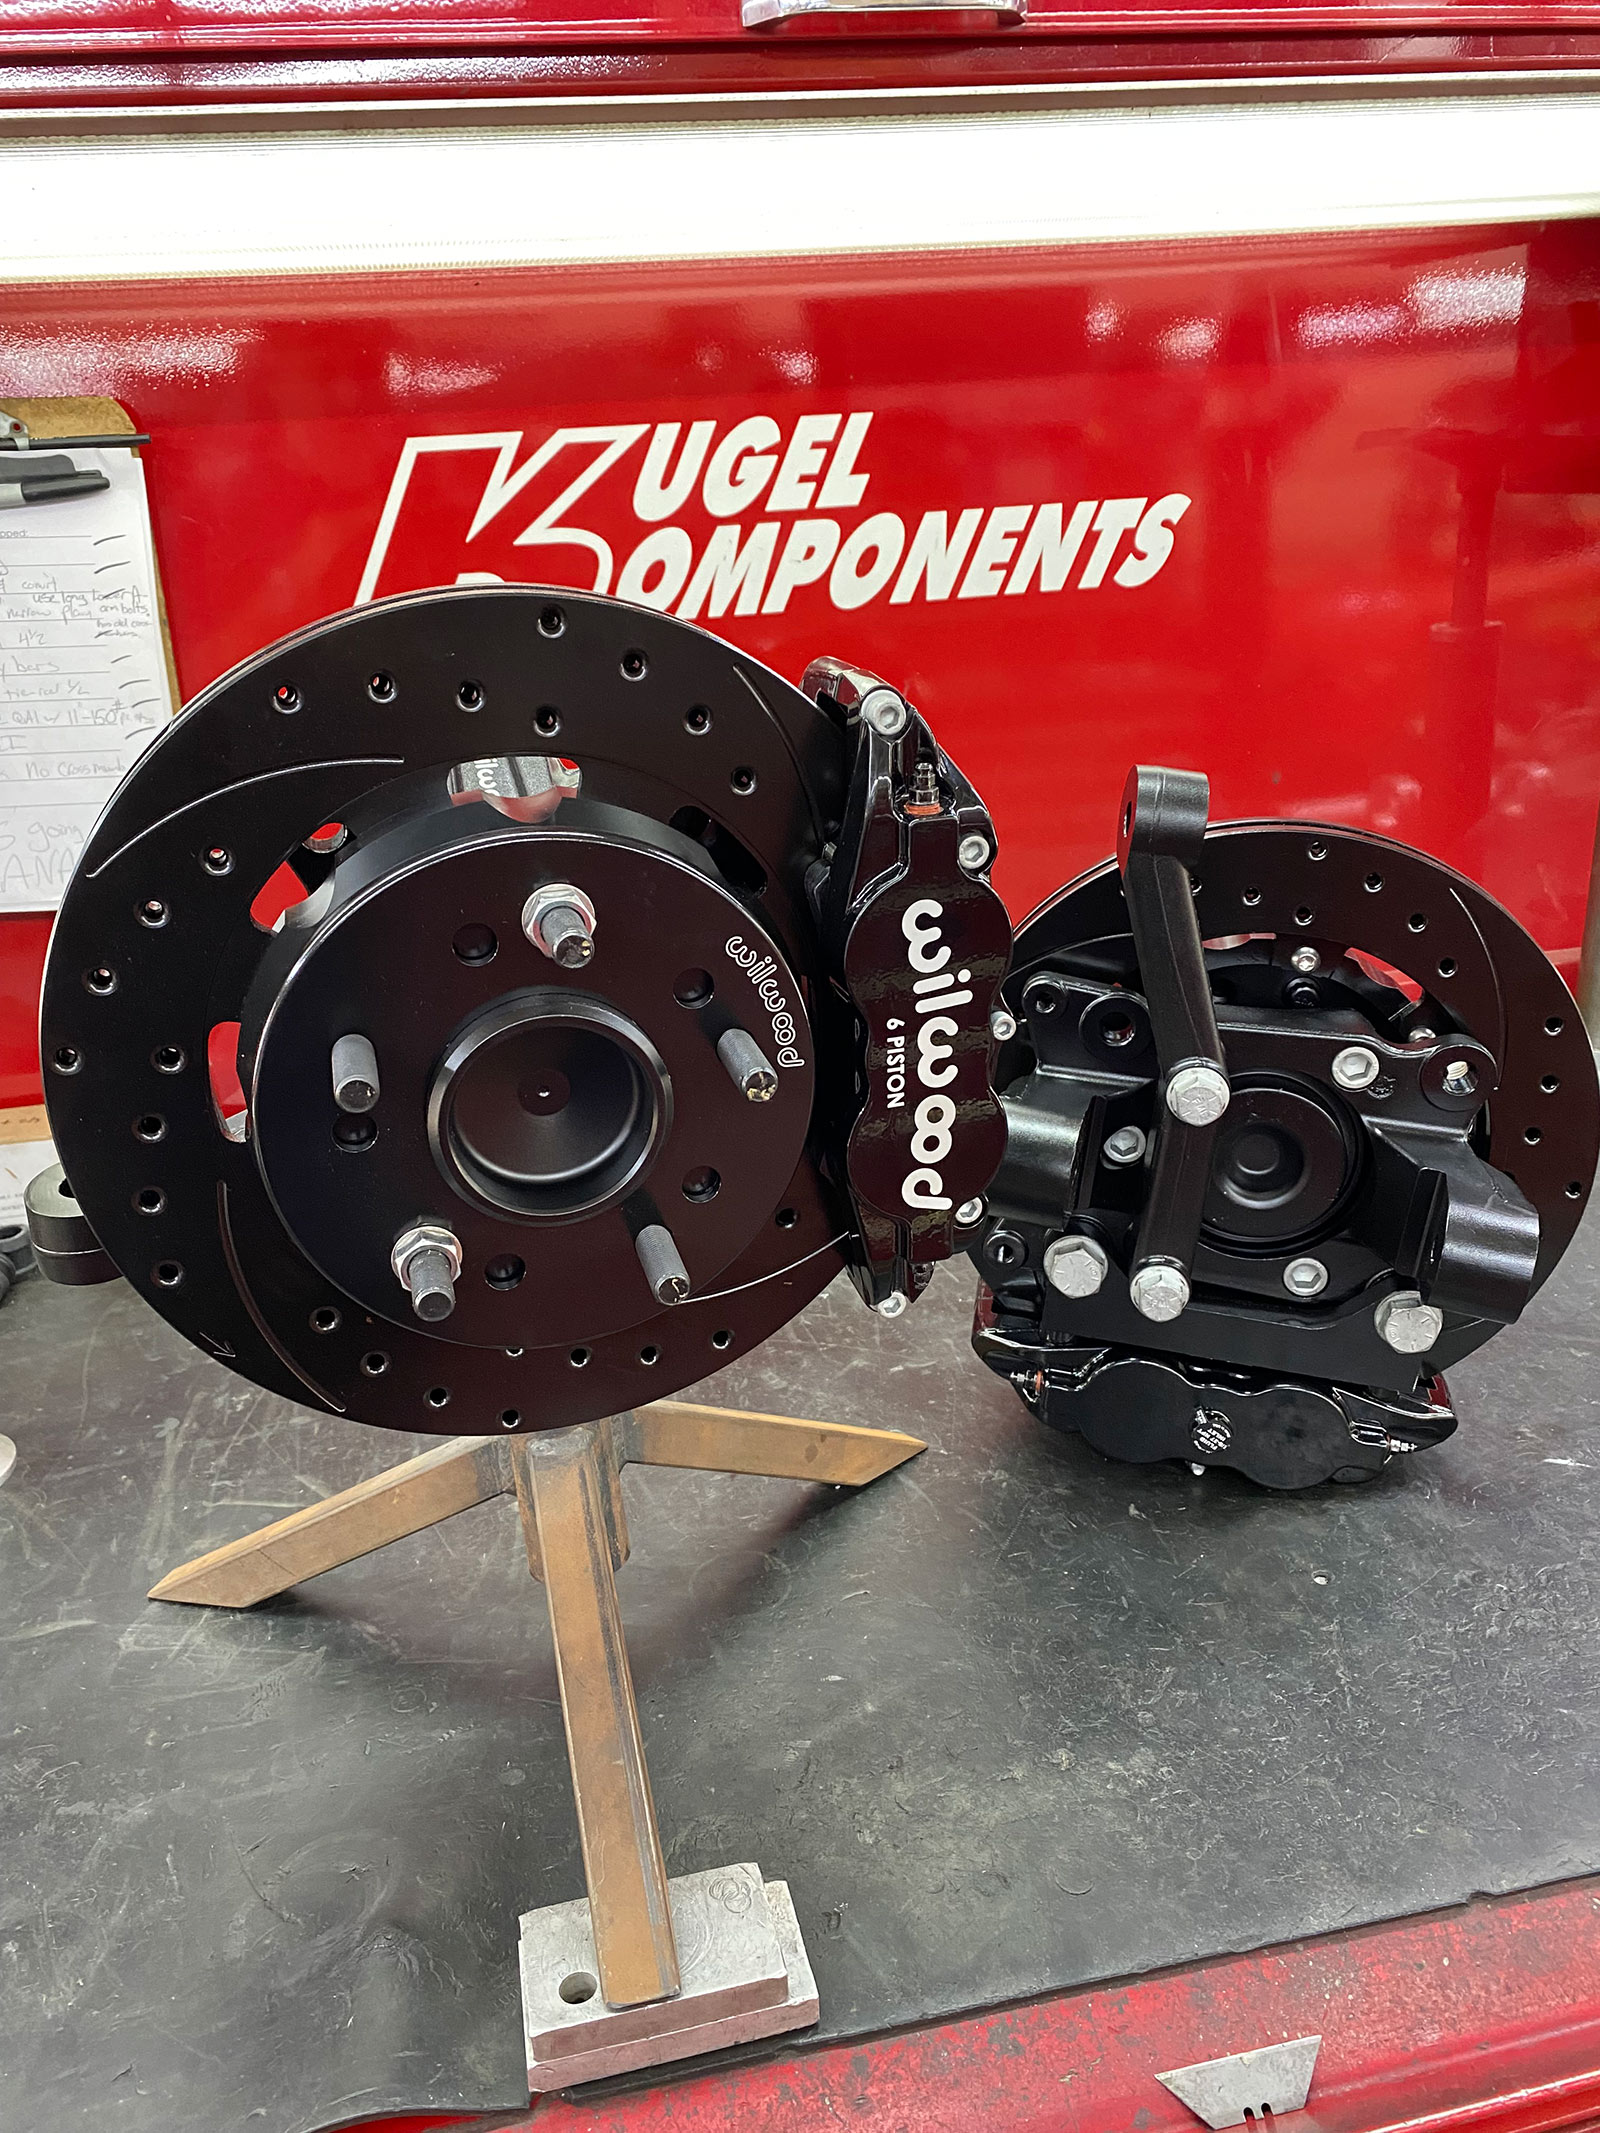
02 71 87 Wilwood Pro Spindles with Forged Narrow Superlite 6R disc brake kit
… ’71-87 Wilwood Pro Spindles with Forged Narrow Superlite 6R disc brake kit …

Read More: C10 SLO Down 2022 Truck Show

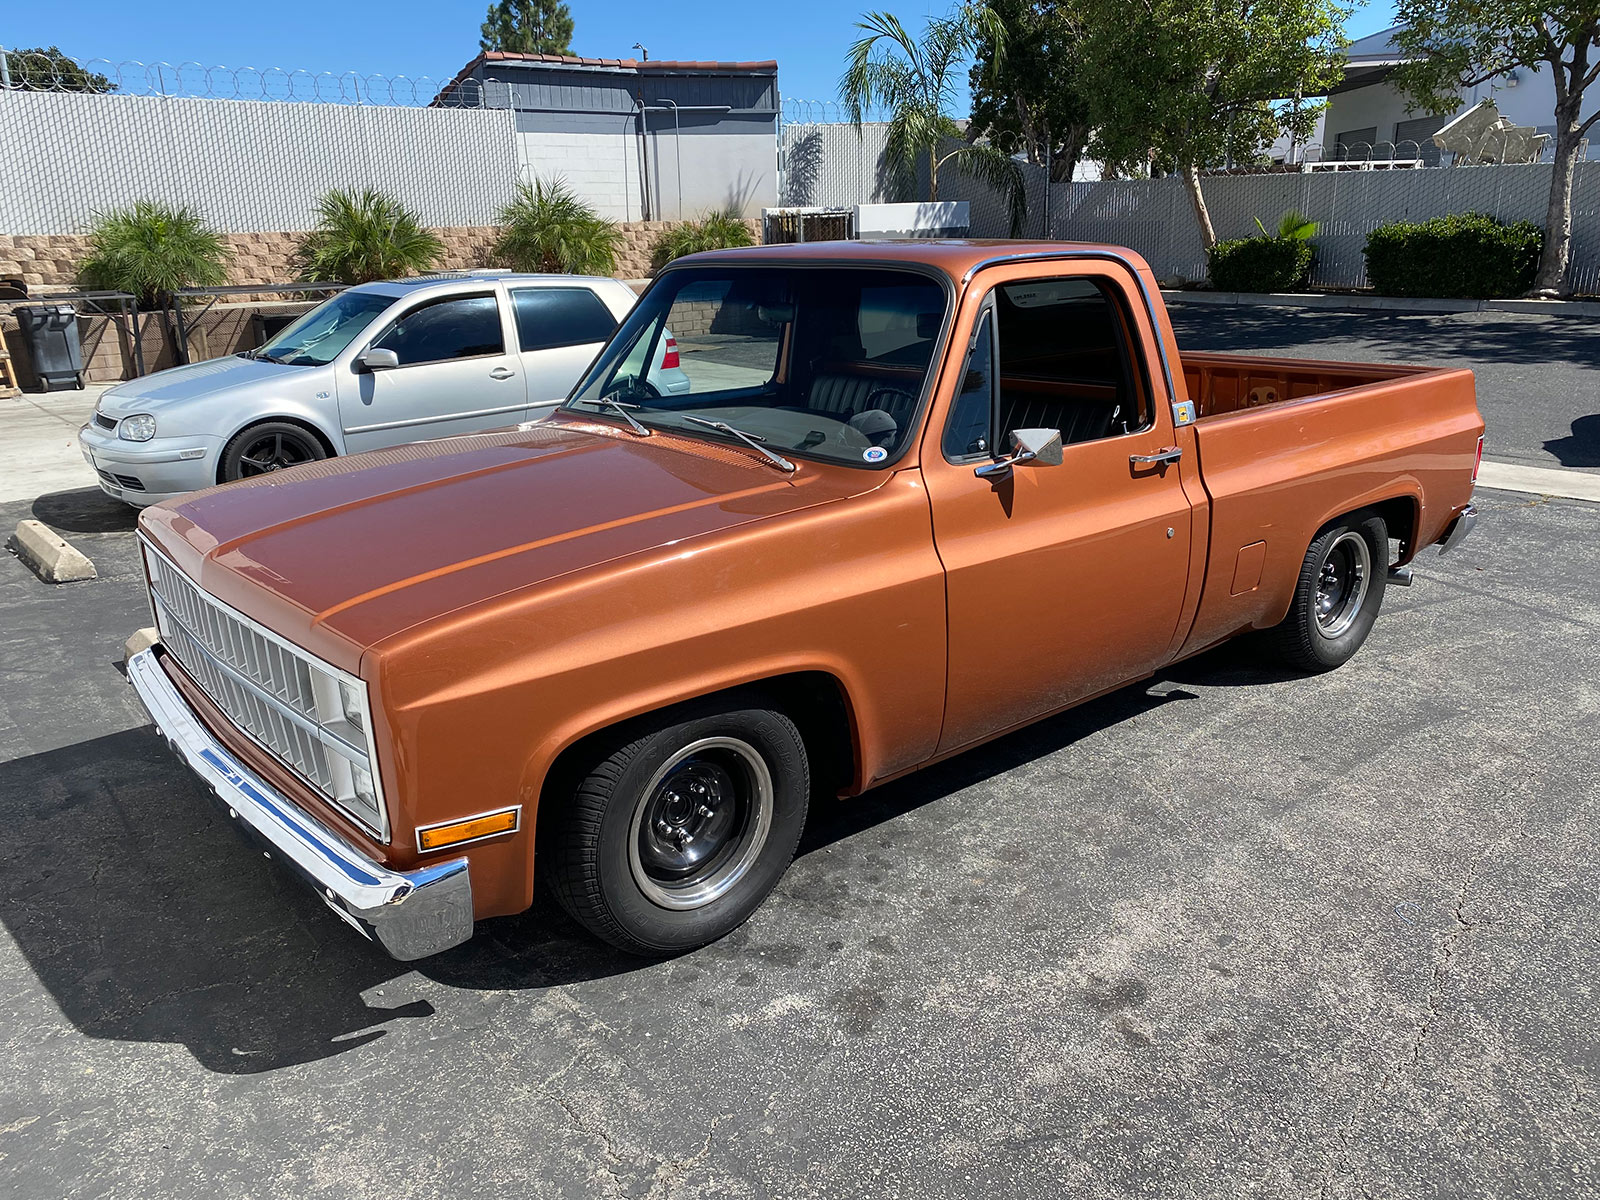
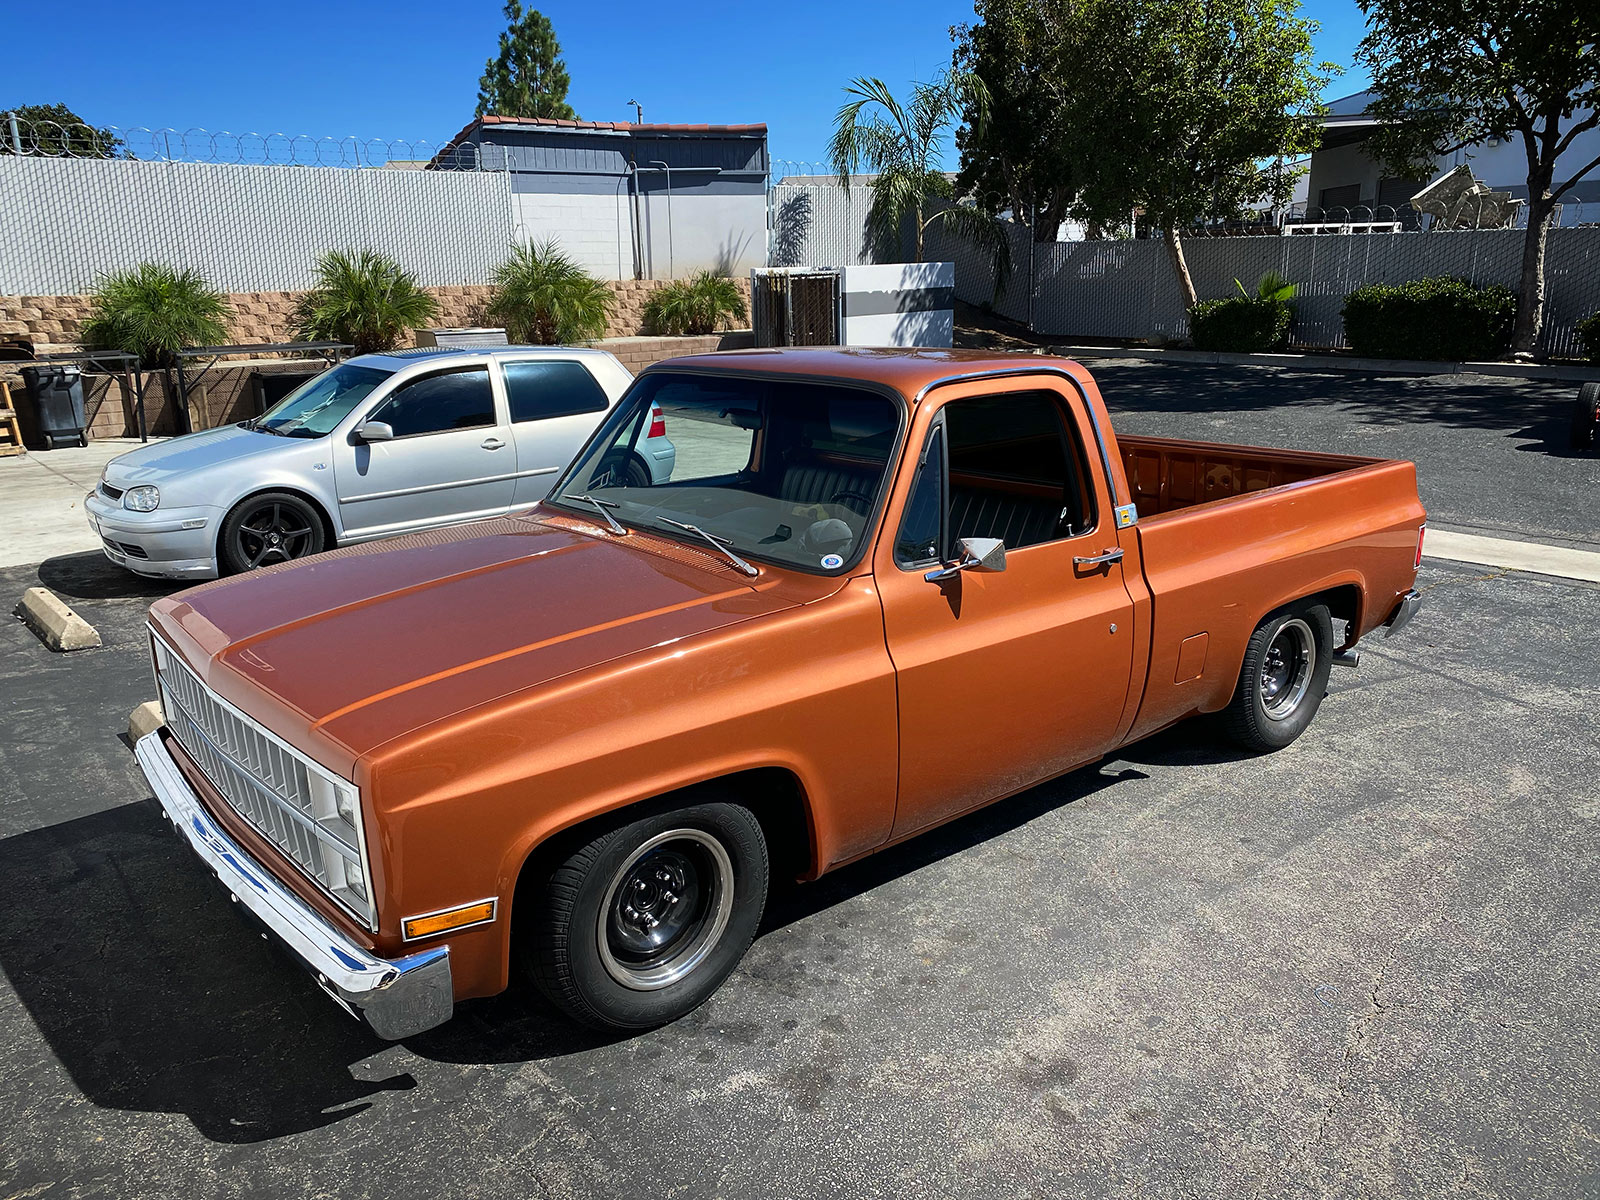
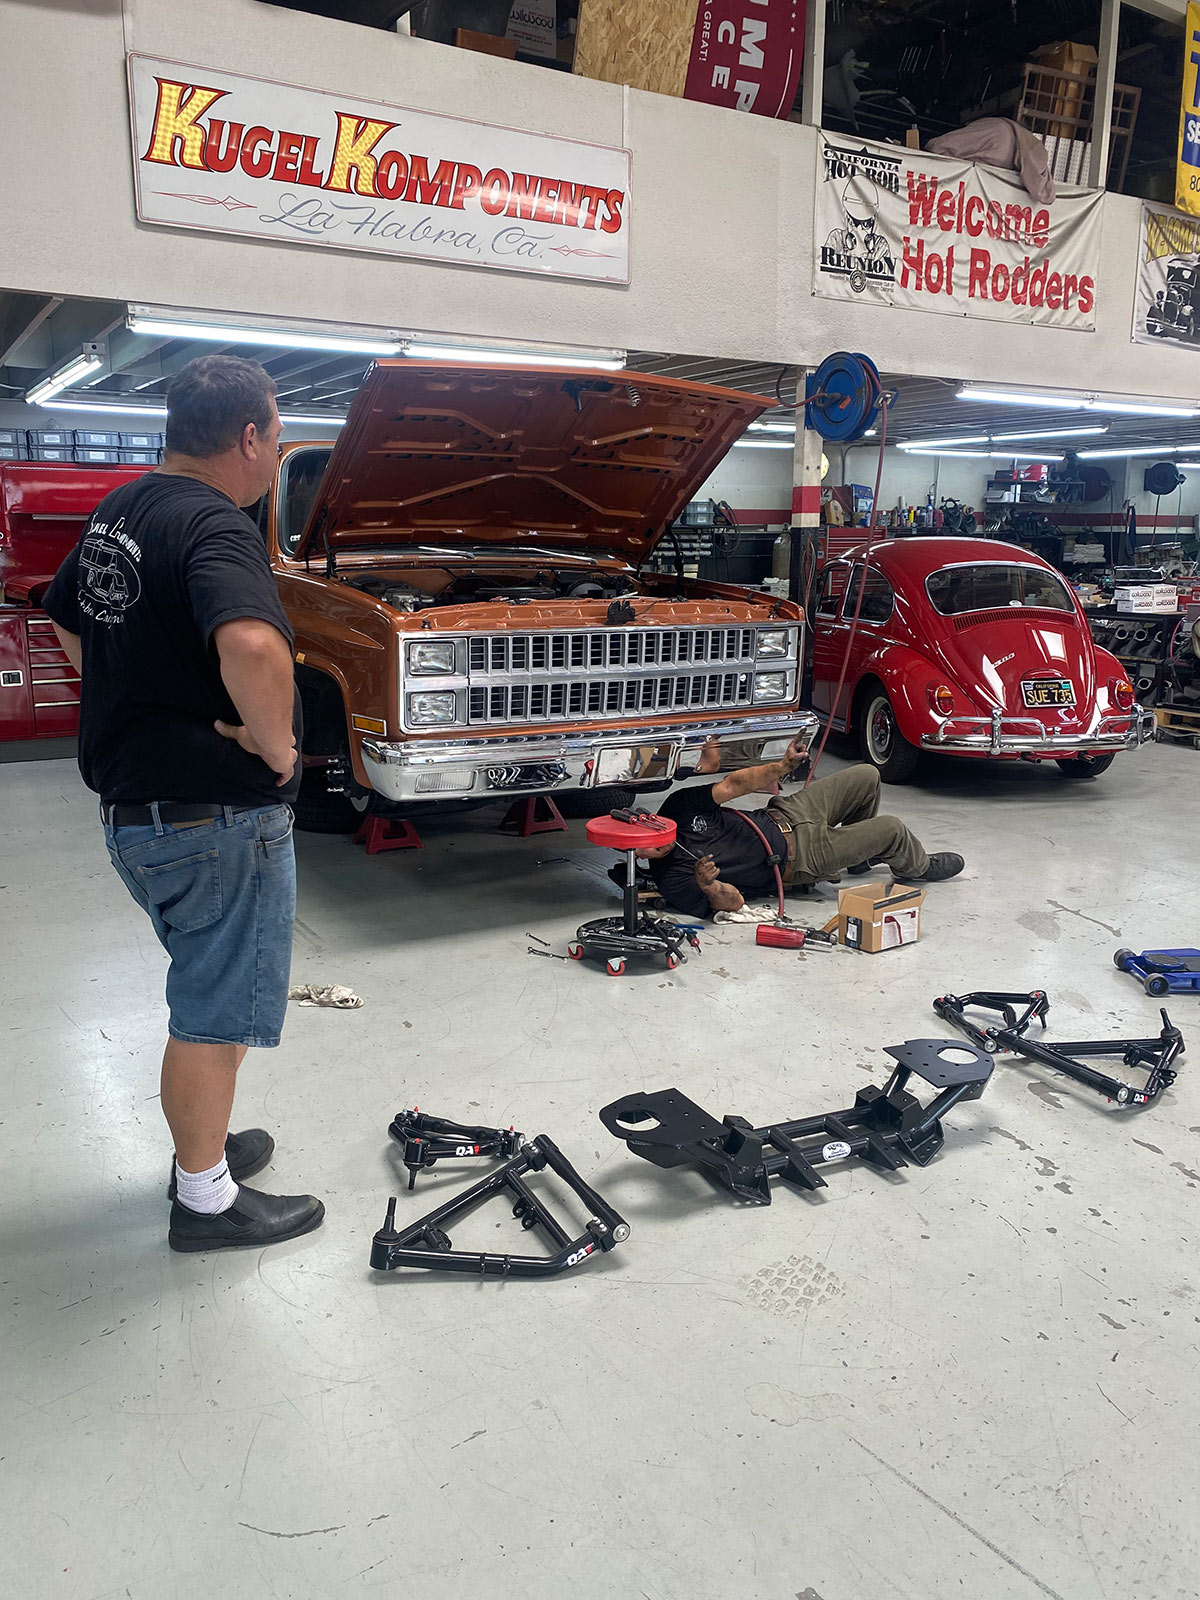
Just this past year, Kugel Komponents, in La Habra, California, finished up development of their all-new tubular crossmember/coilover Independent Front Suspension system for ’63-87 C10s, which we’ve been following along since they initially began R&D’ing on an LS swapped ’67-72. Once Jeff Kugel had things figured out, he subjected his own ’81 Silverado to the install process, and we were there to cover the entire procedure.
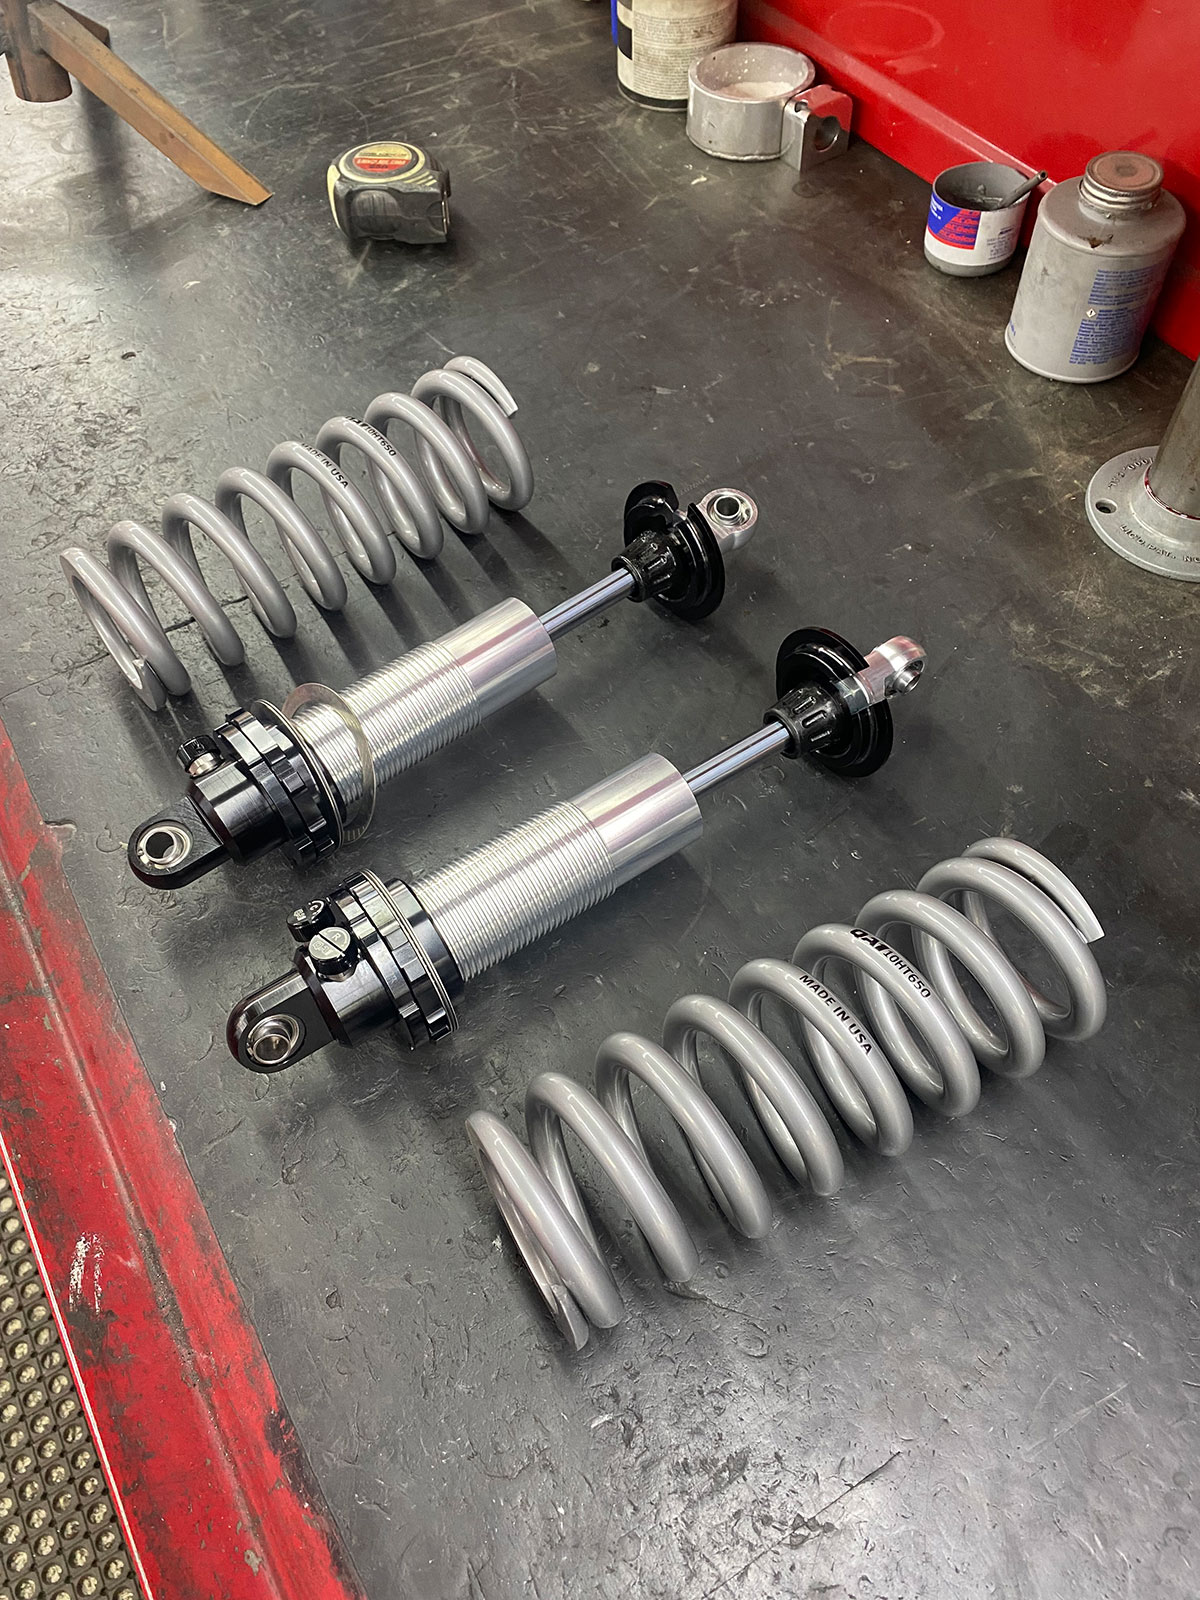
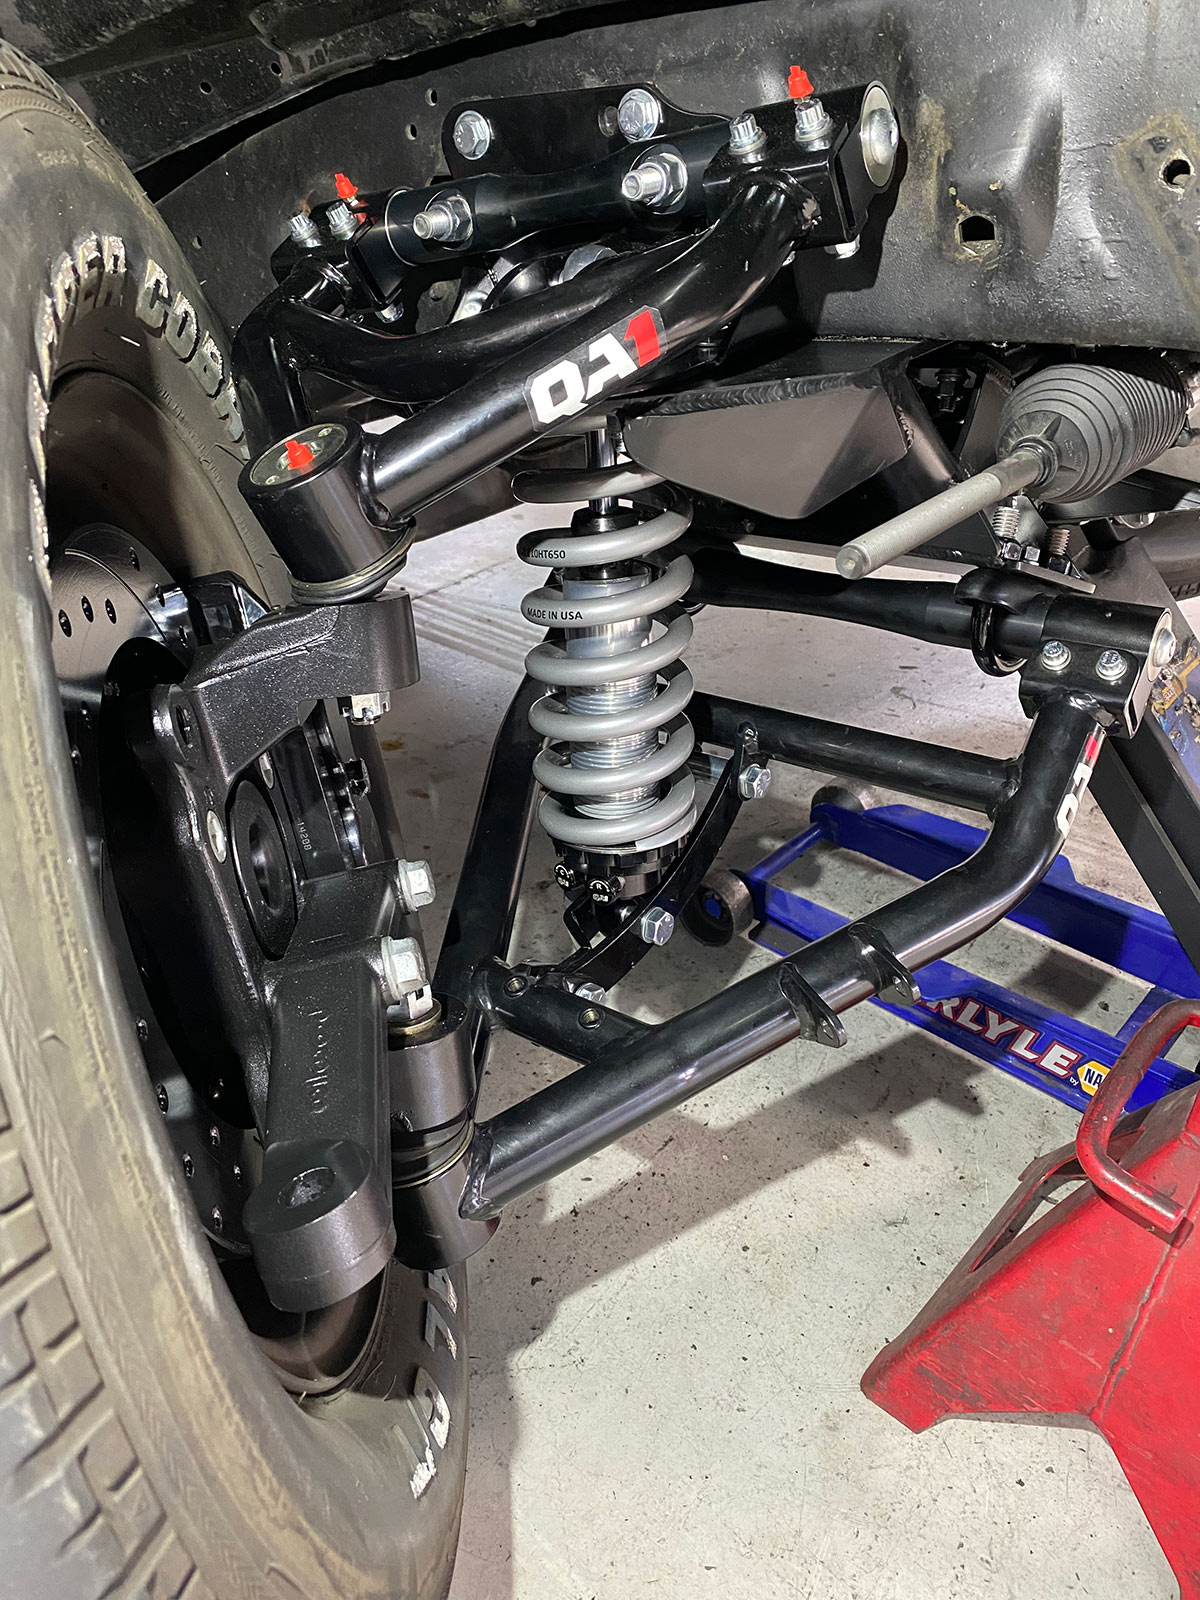
03 QA1 double adjustable shocks with 650 pound coilover springs
… QA1 double adjustable shocks with 650-pound coilover springs (lighter weight options available) …

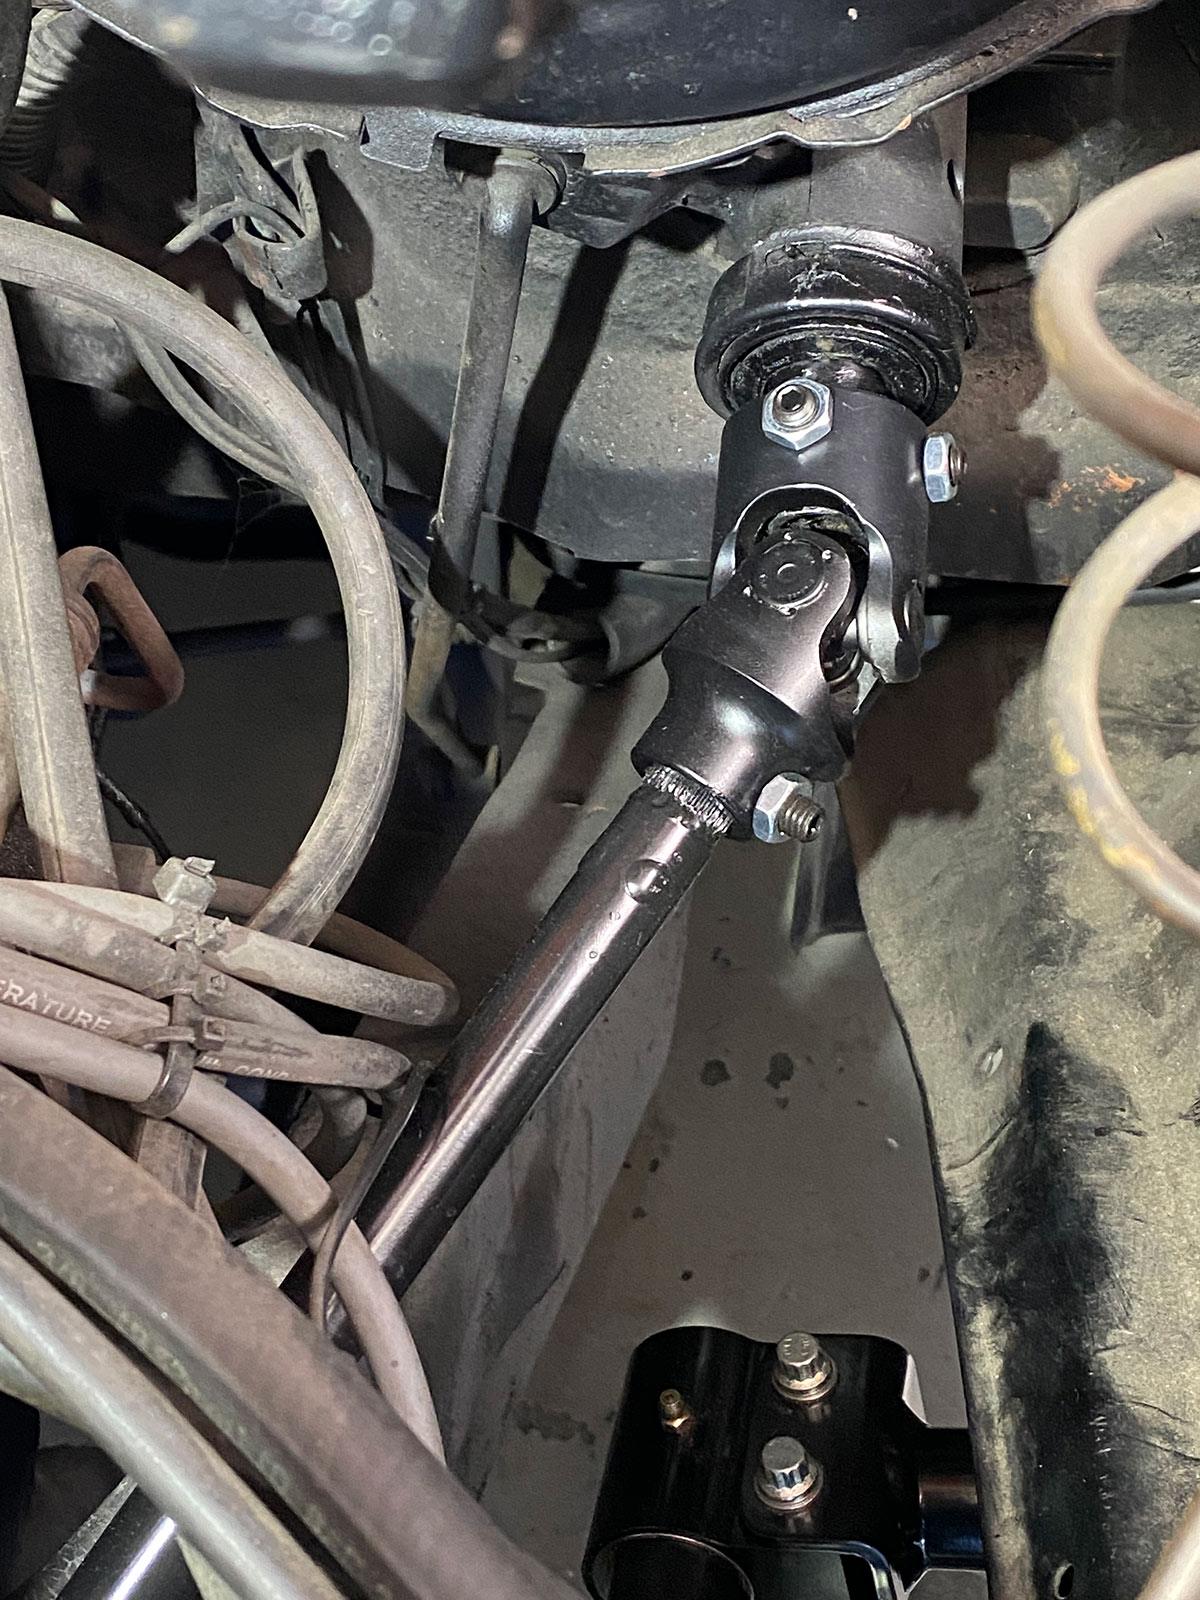
We mentioned that R&D was done on an LS swapped C10 because we’d like to point out the steering options you have with the Kugel Komponents Independent Front Suspension kit. For starters, the crossmember can be used without the Flaming River rack-and-pinion unit it’s designed for; the stock steering box and linkage can be retained. However, if the rack option is chosen, and your truck is equipped with an LS or a big-block, there may not be ample space to route a standard intermediate shaft with two U-joints from rack to column, and, as such, Kugel has adapted Flaming River’s VDOG variable angle gear unit to assist in steering linkage connectivity! (With a typical small-block, the VDOG is not necessary—the stock and/or aftermarket column can be connected with the rack easily by rotating the rack itself within the billet pillow blocks to obtain correct input shaft positioning.)
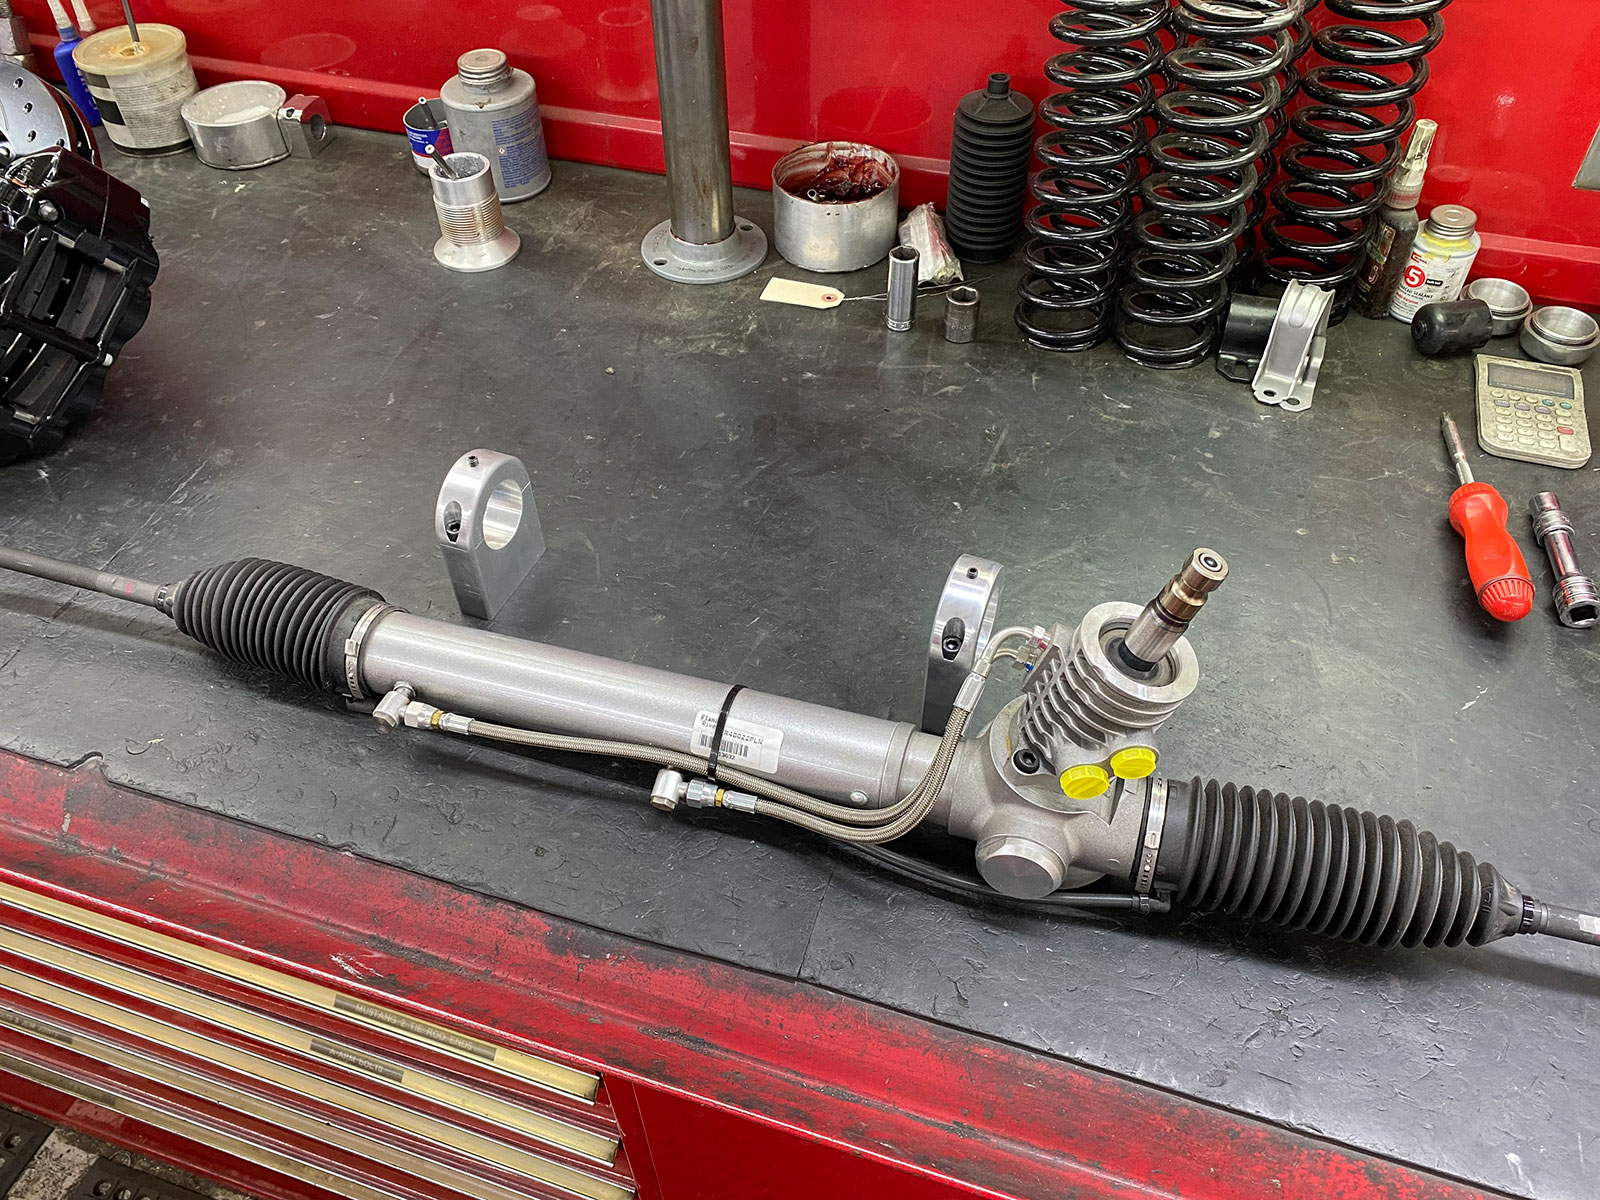
04 Flaming River power rack and pinion steering kit
… and Flaming River power rack-and-pinion steering kit (which also includes U-joints and intermediate shaft). Their new VDOG variable angle steering kit for tight steering linkage applications is also available for additional cost.

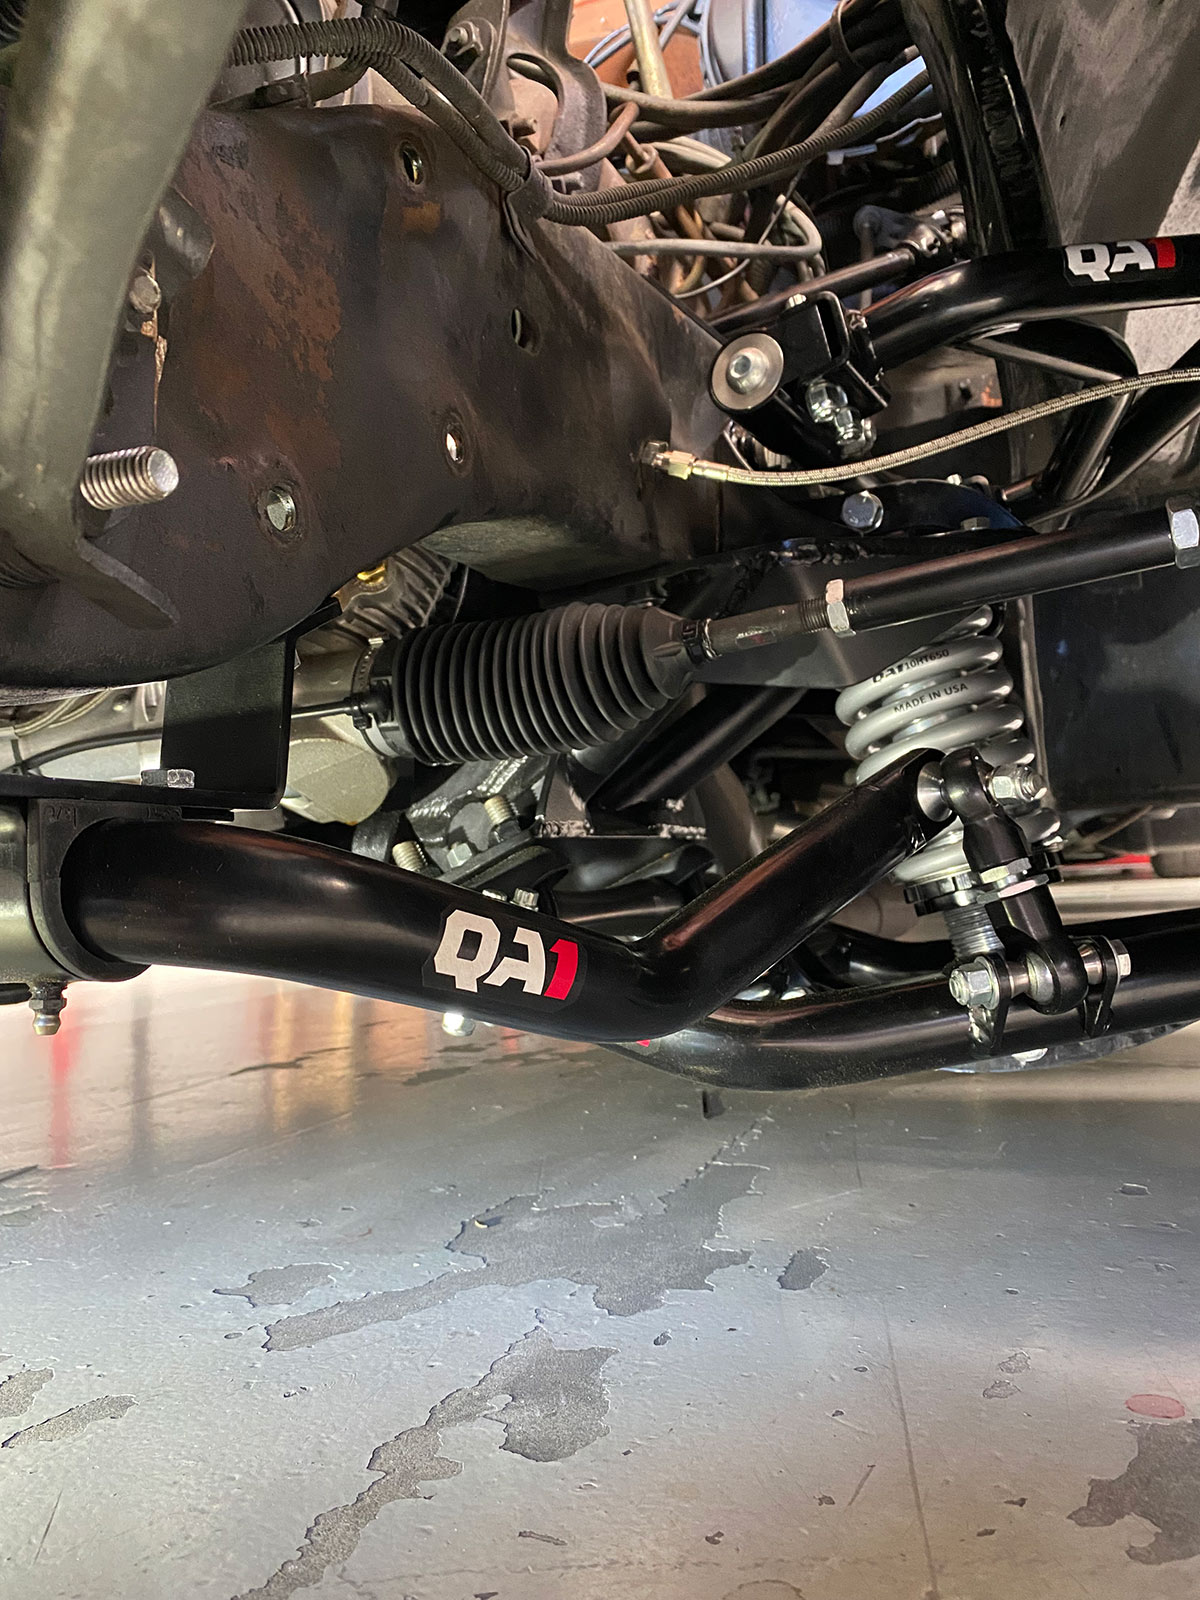
As installed, the Kugel Komponents C10 Independent Front Suspension is outfitted with QA1’s tubular control arms and double adjustable coilovers, QA1 C10 sway bar, ’71-87 Wilwood Pro Spindles with Forged Narrow Superlite 6R brake kit, Flaming River power rack kit, and Kugel-fabbed engine mount brackets. As mentioned, however, it can be ordered as just a crossmember and engine mounts alone for those who’ve already installed (or have) aftermarket C10 arms and would like to retain the OE steering box.

- Advertisement -
05 remove the ENTIRE front crossmember … steering brakes and suspension components and all
OK, first order of business, remove the ENTIRE front crossmember … steering, brakes, and suspension components and all! (The drivetrain can be left in place as long as the engine is supported properly.)

Read More: Goldilocks, Mid-’60s Custom C10

Again, this is a 100 percent “bolt-in” kit—no welding, no cutting, not even any clearance cutting or grinding is necessary (that is, unless you’ve had some previous non-stock modifications done). Above and beyond the ease of installation, you have the top-of-the-line performance upgrades Kugel is known for with their Independent Front Suspension systems. For more information on available options and prices, don’t hesitate to give them a call today!
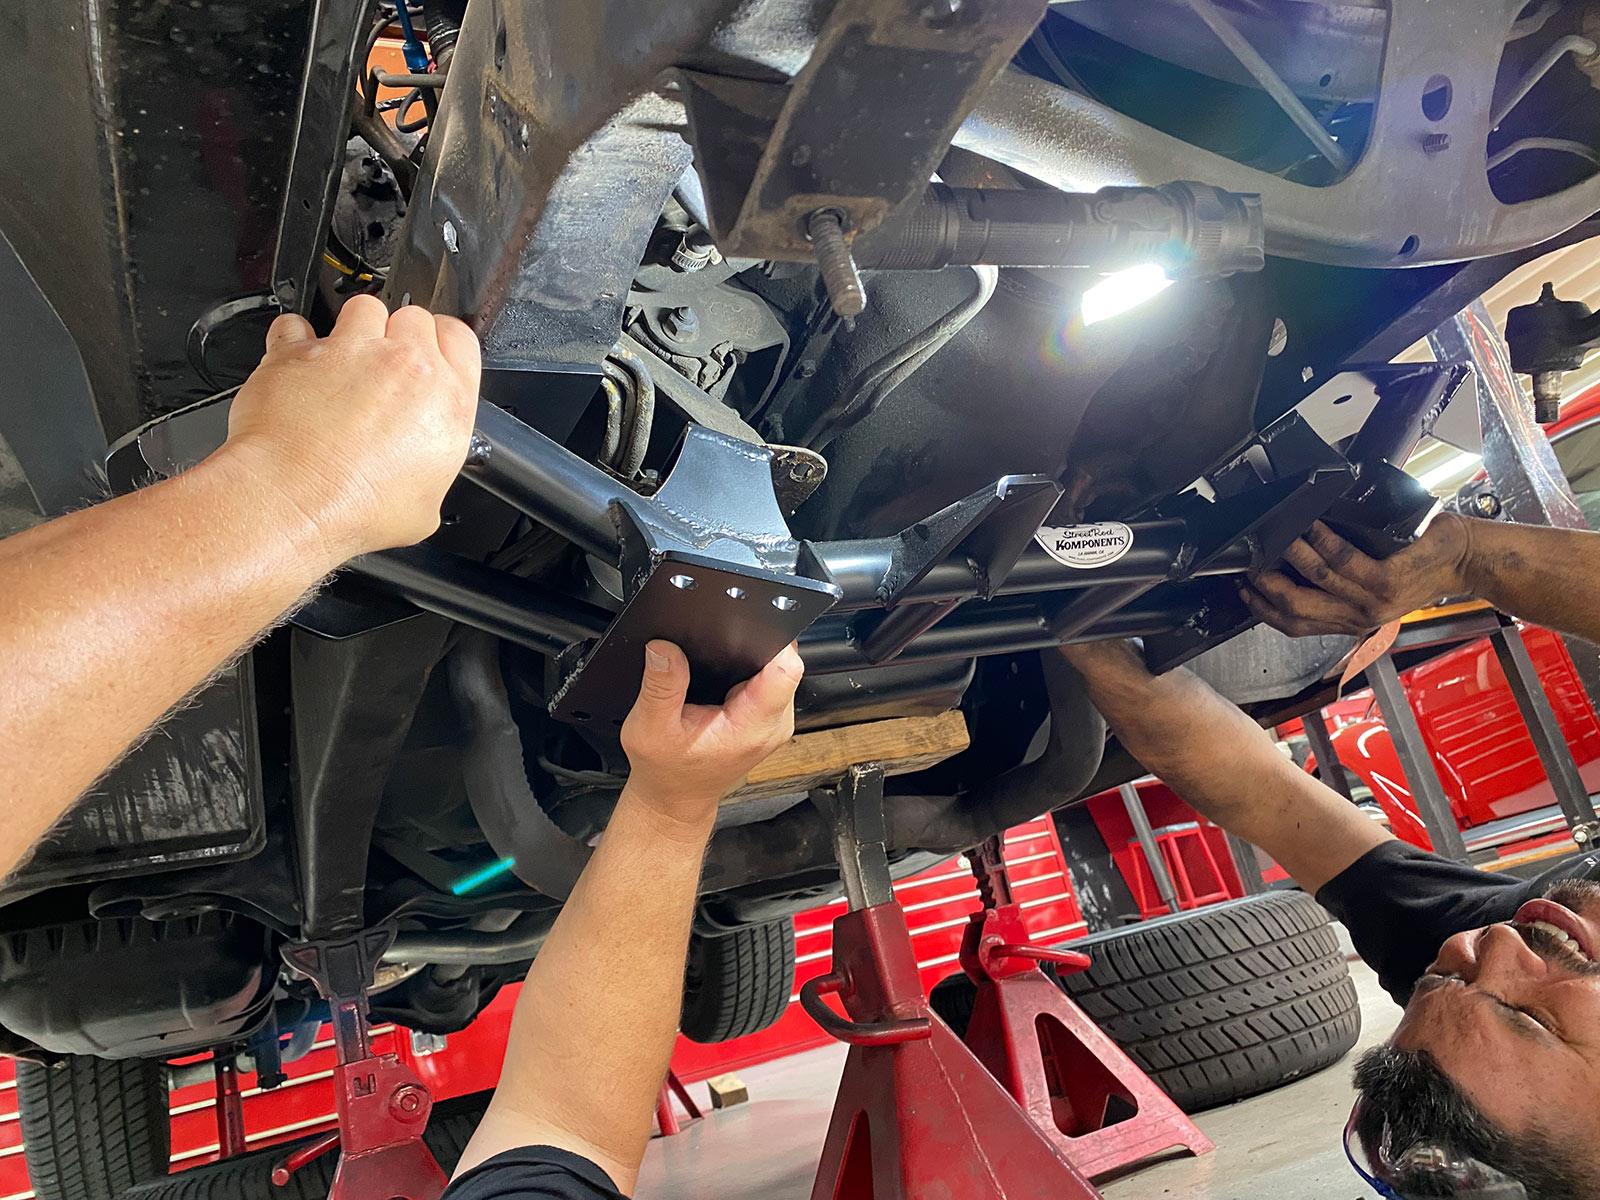
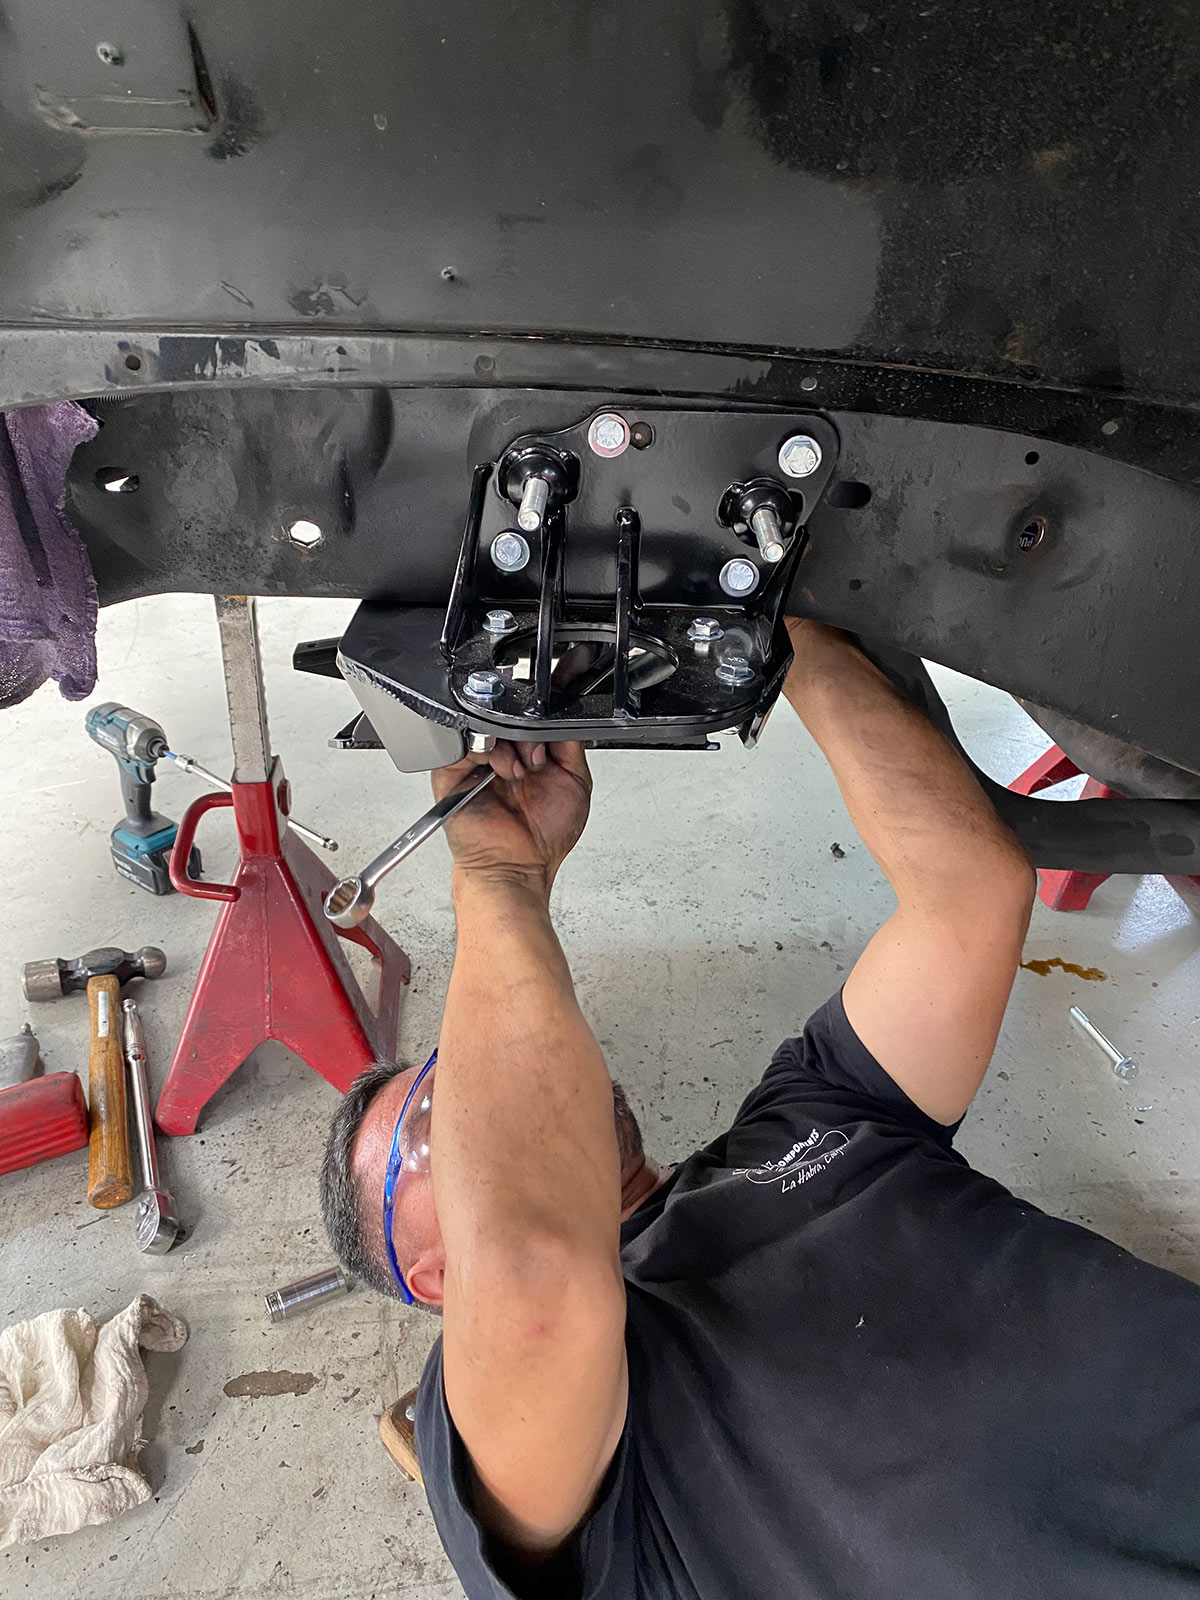
06 As a testament to the R D behind Kugels tubular front crossmember the one piece unit installed with no hole fudging whatsoever
As a testament to the R&D behind Kugel’s tubular front crossmember, the one-piece unit installed with no hole fudging whatsoever—and they don’t provide any oblong holes to accomplish that!

07 the one piece unit installed with no hole fudging whatsoever—and they dont provide any oblong holes to accomplish that

08 To complete the front crossmember assembly the QA1 coilover top hats are bolted in
To complete the front crossmember assembly, the QA1 coilover top hats are bolted in, followed by the stock lower control arm mounting cups (something Kugel says they’ll be reproducing soon!).

09 Followed by the stock lower control arm mounting cups

10 Speaking of the lower control arms before hanging them in place the lower coilover bracket must be installed
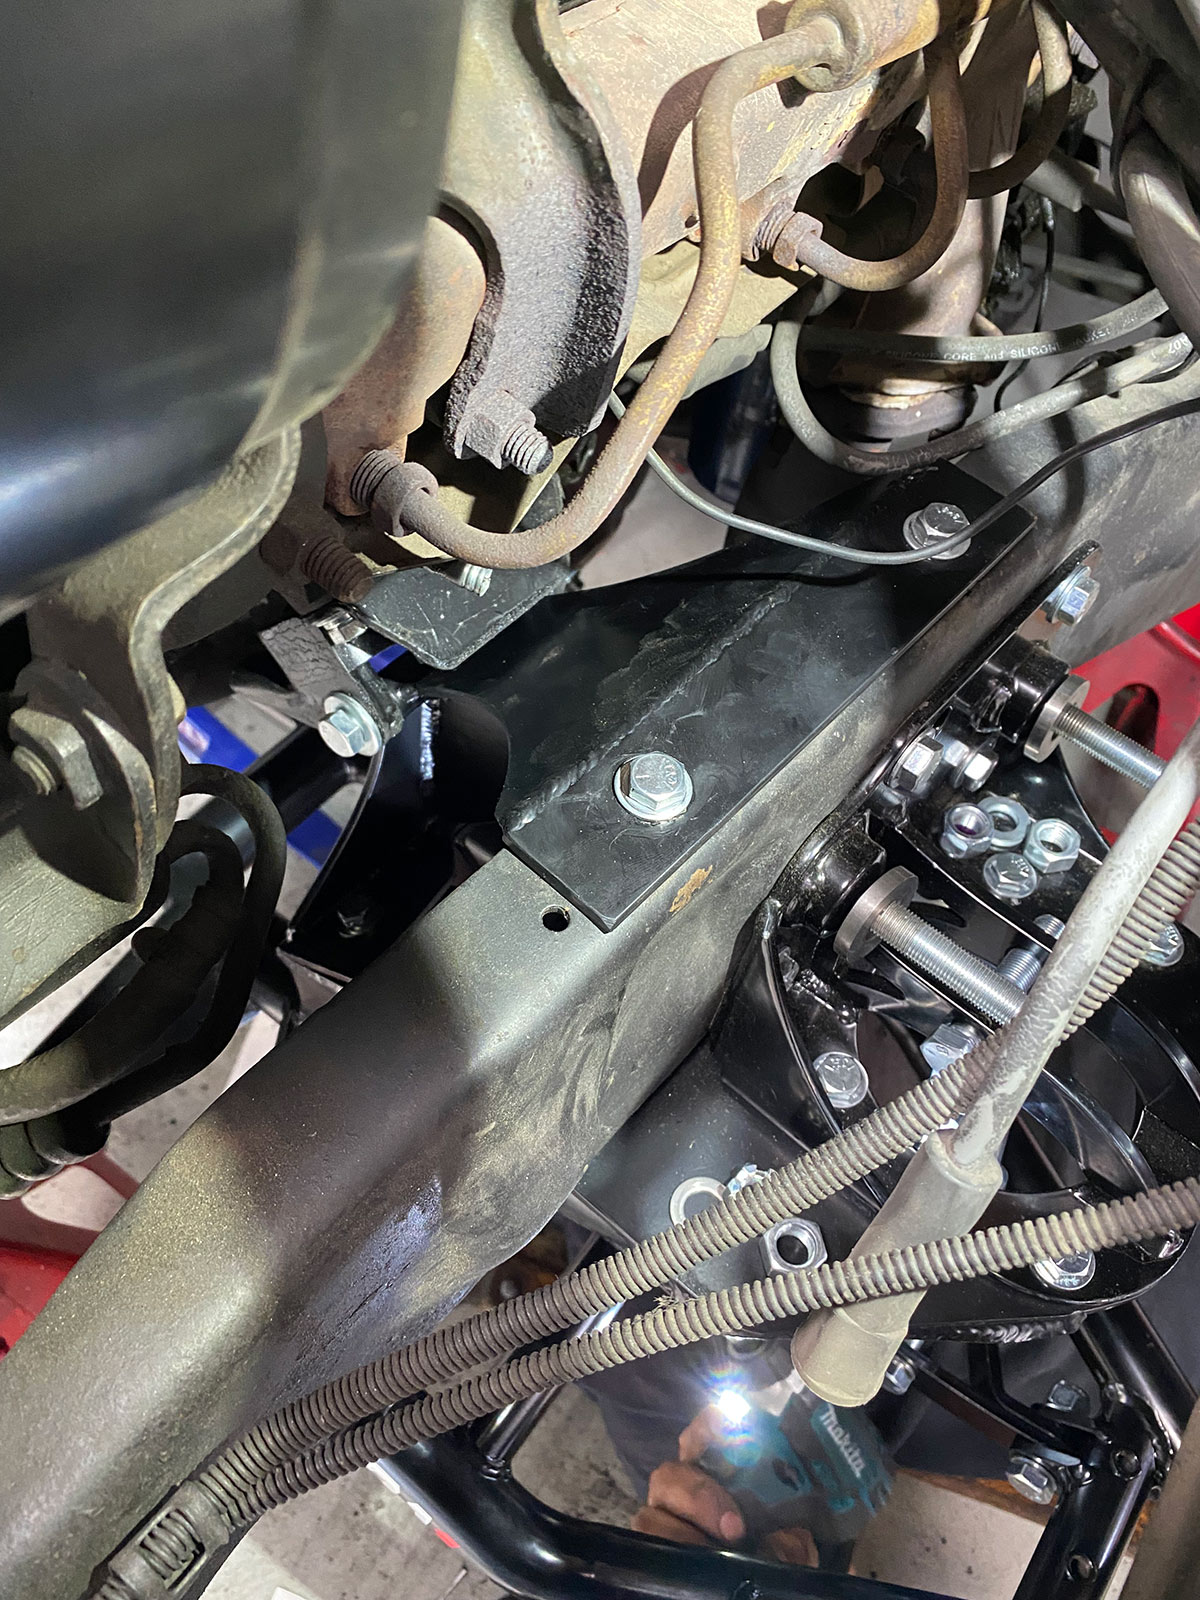
Speaking of the lower control arms, before hanging them in place, the lower coilover bracket must be installed—note the orientation of the stamped steel arms.
11 Using Kugels handy dandy Shock Mock ups shock absorber coilover mock up tool
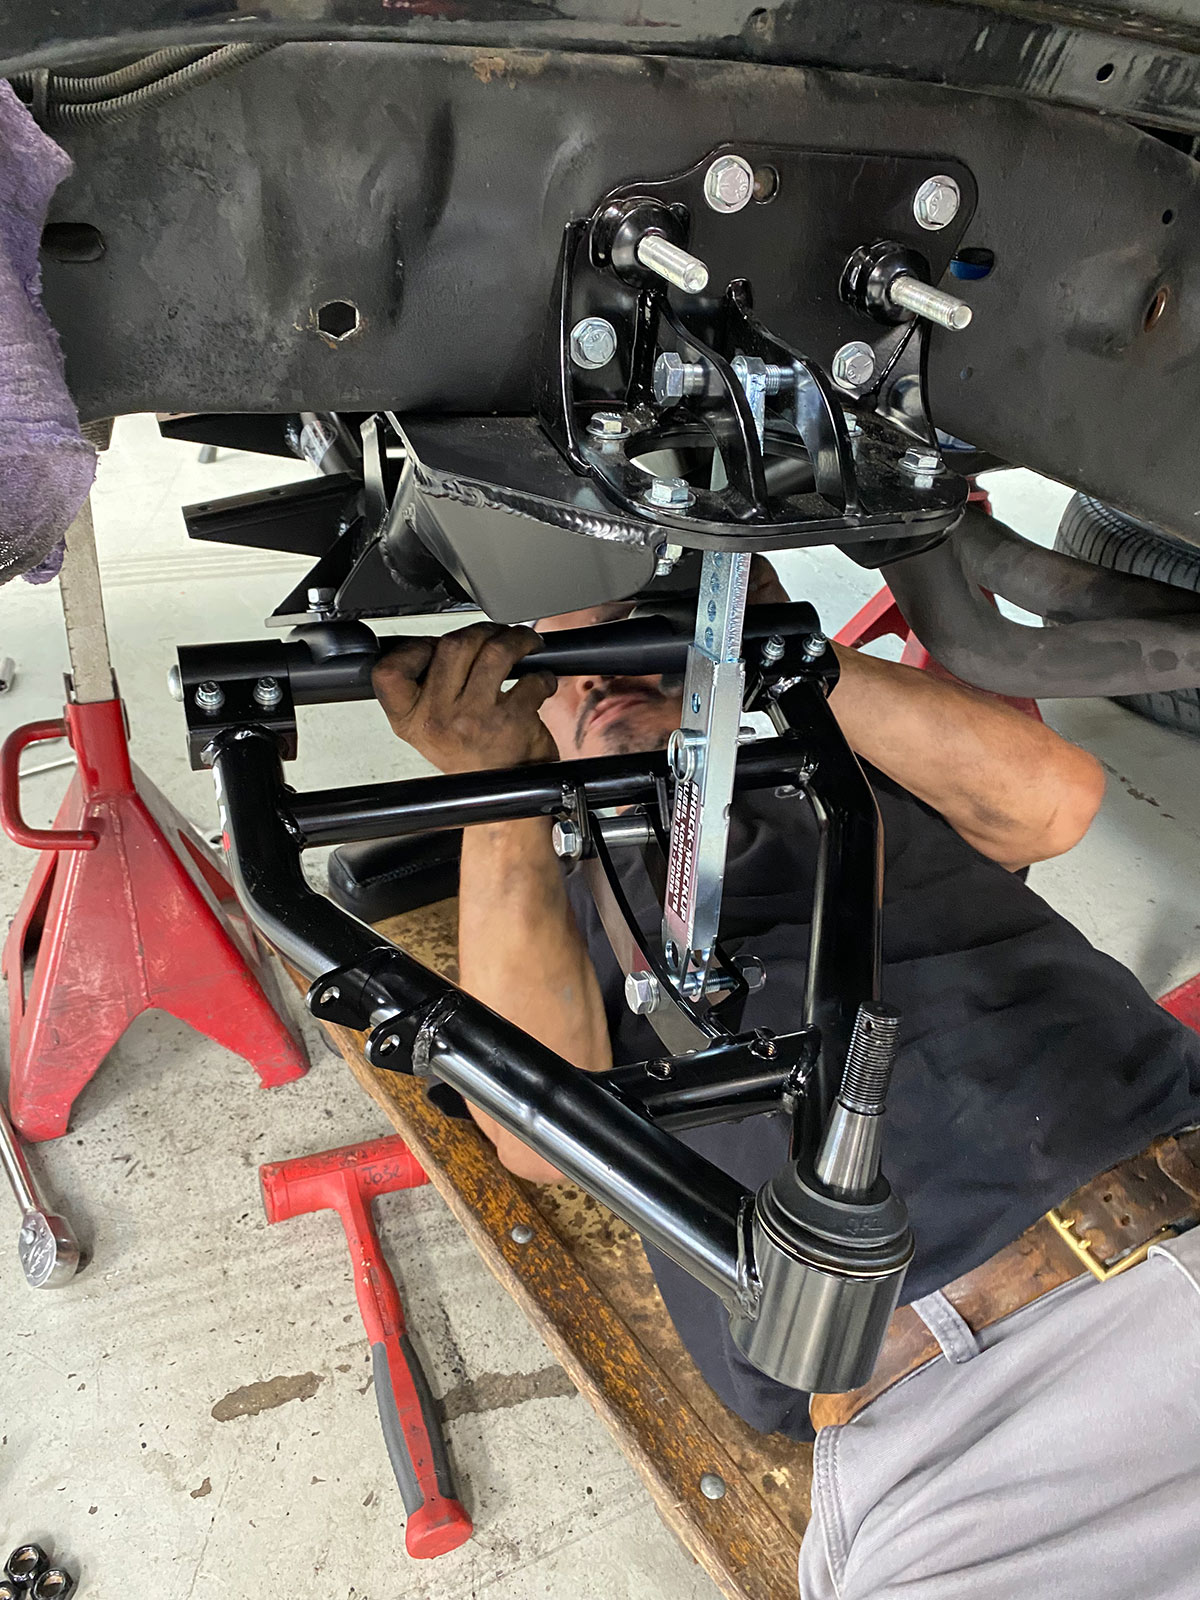
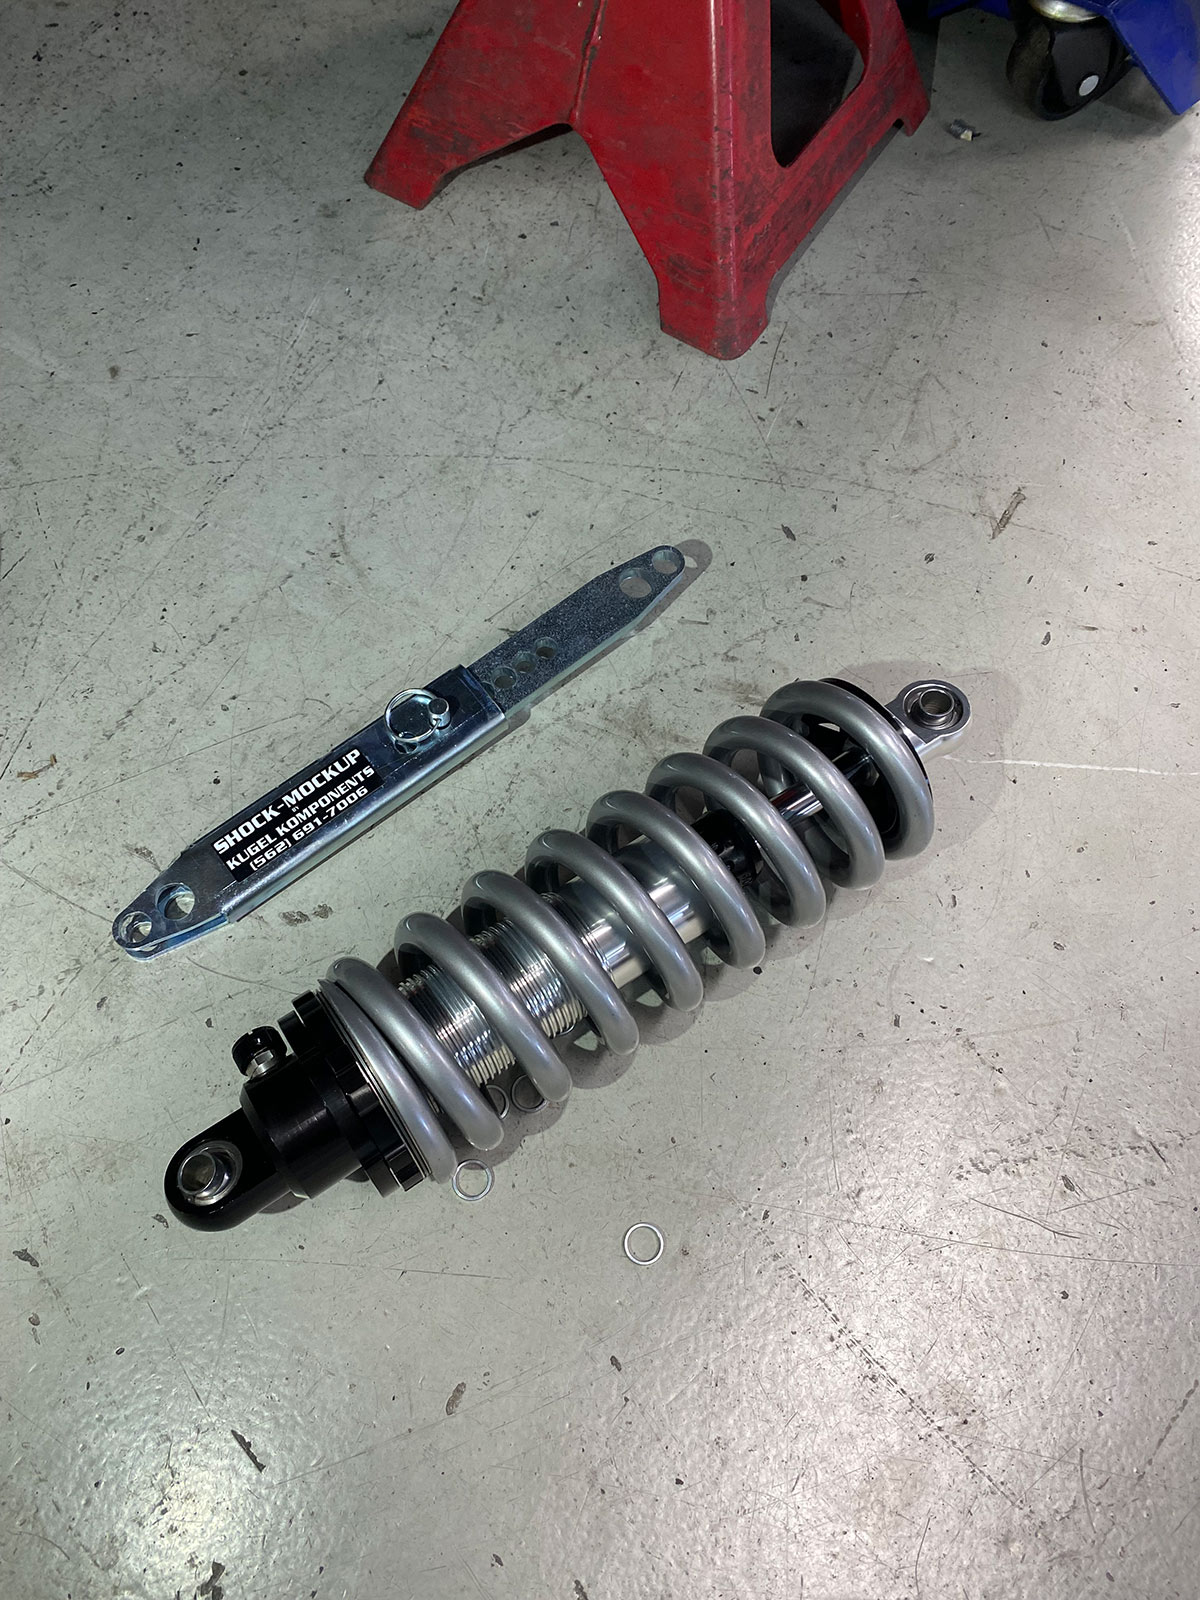
Using Kugel’s handy-dandy Shock Mock-ups shock absorber/coilover mock-up tool (set at the previous ride height of Jeff’s C10 with the lowered shocks and coil springs), the tubular control arms are installed on the crossmember.

12 The tubular control arms are installed on the crossmember

13 before installing the front brake spindle assembly do yourself a huge favor and verify wheel fitment
Unless you’re running a rather large-diameter wheel, before installing the front brake/spindle assembly, do yourself a huge favor and verify wheel fitment—especially if you’ve got “stock” 15-inchers like Jeff’s running!
14 No need to disassemble the brakes from the spindles
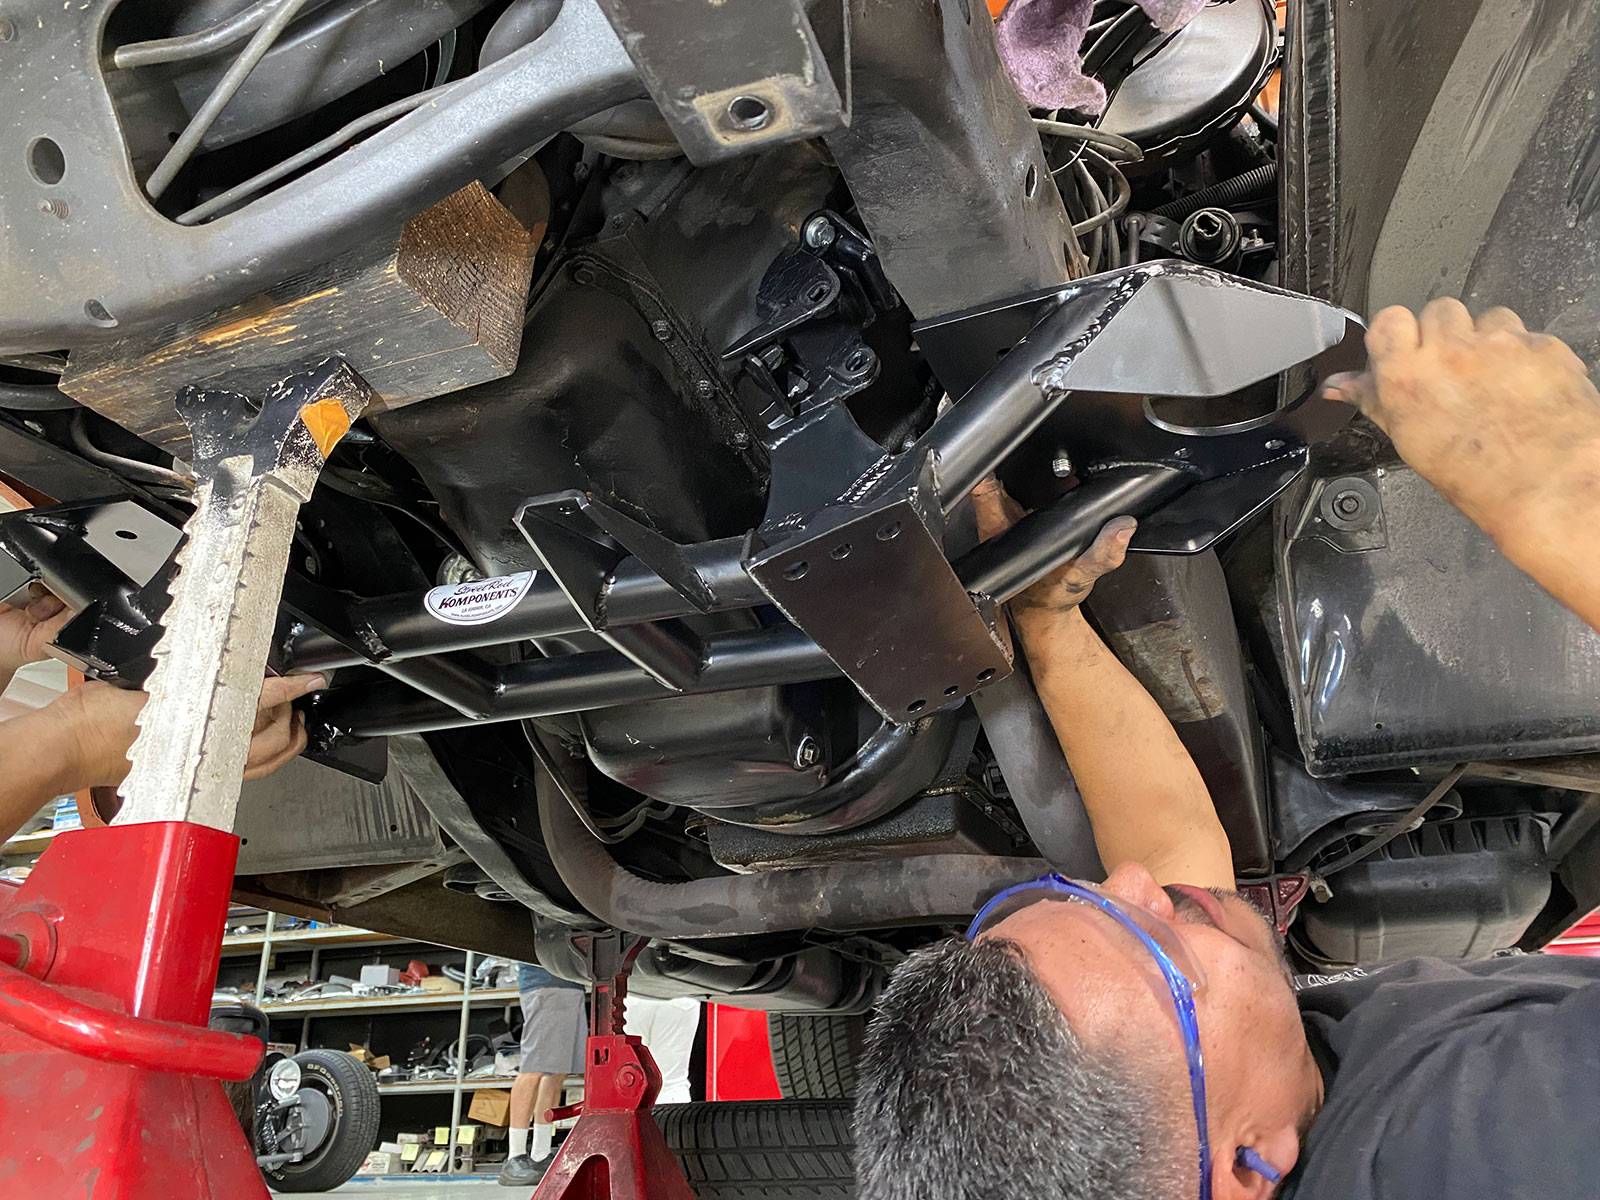
No need to disassemble the brakes from the spindles—unless it’s easier on you physically—just make sure your steering arms and rotors are oriented properly!

15 just make sure your steering arms and rotors are oriented properly

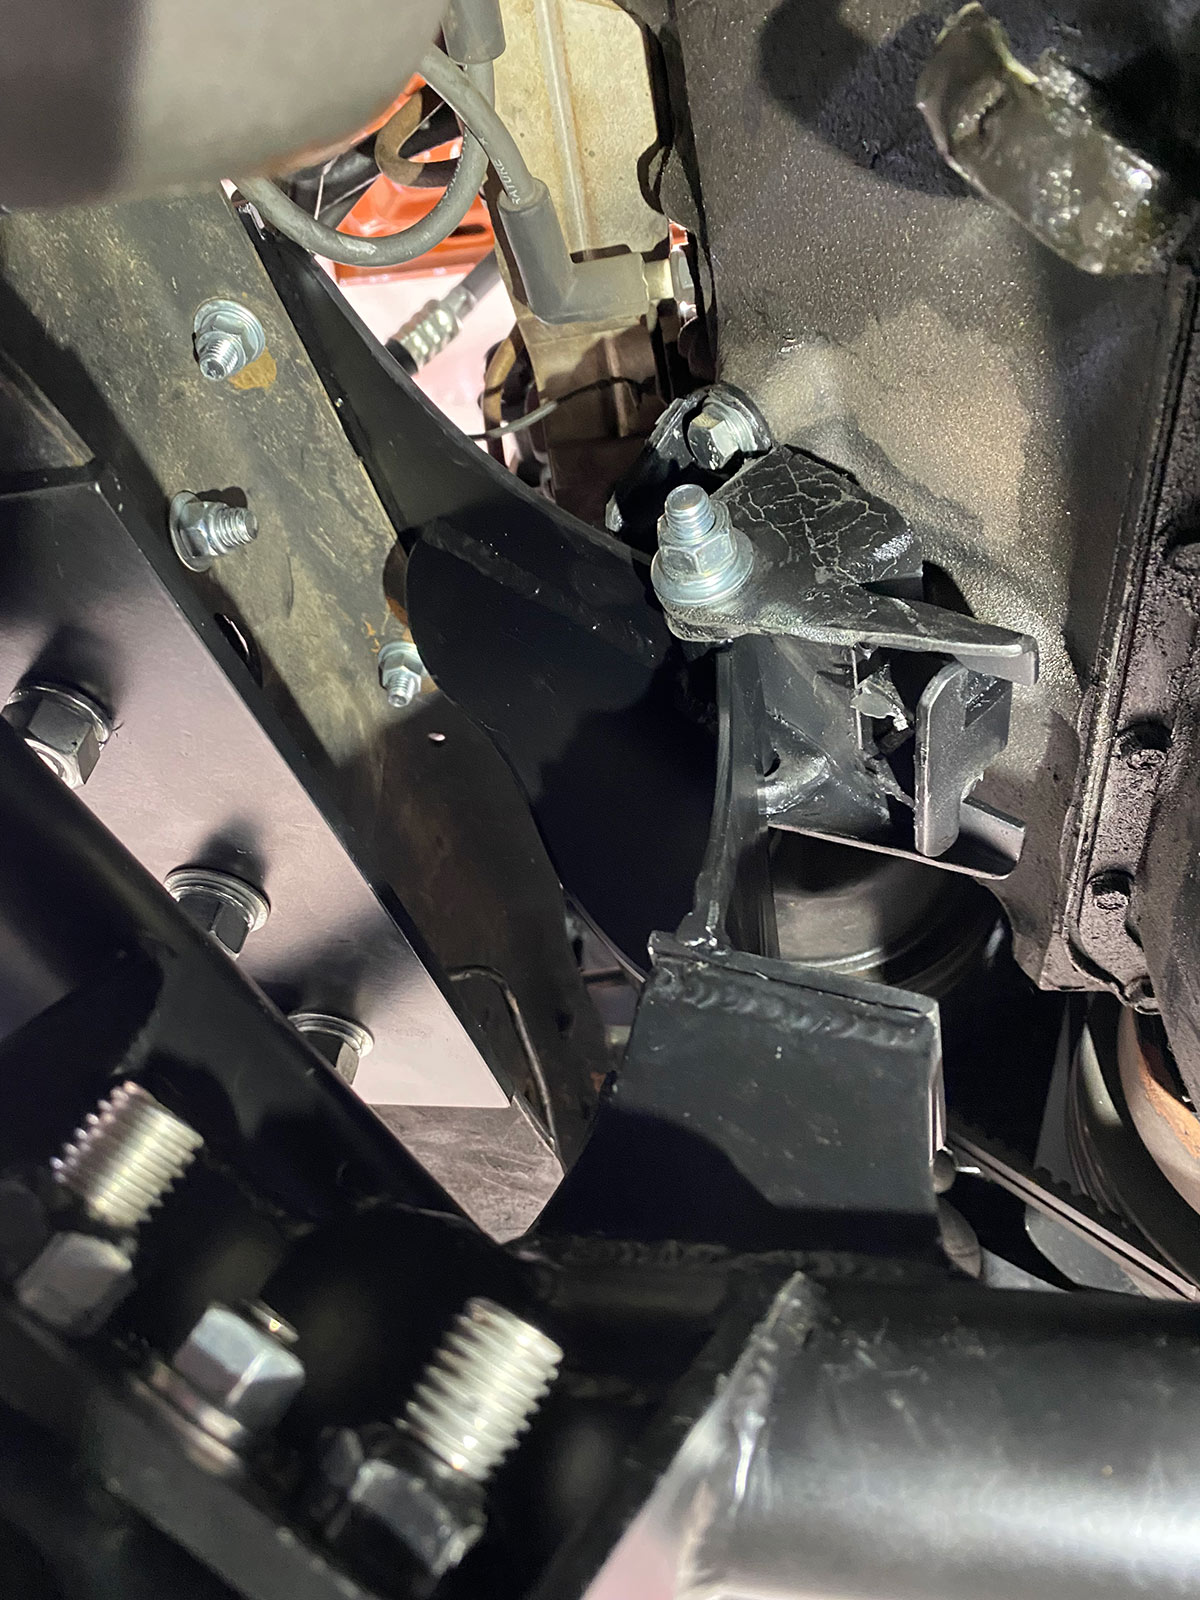
16 Also included with the kit are fabricated bolt on small block big block engine mount pedestals
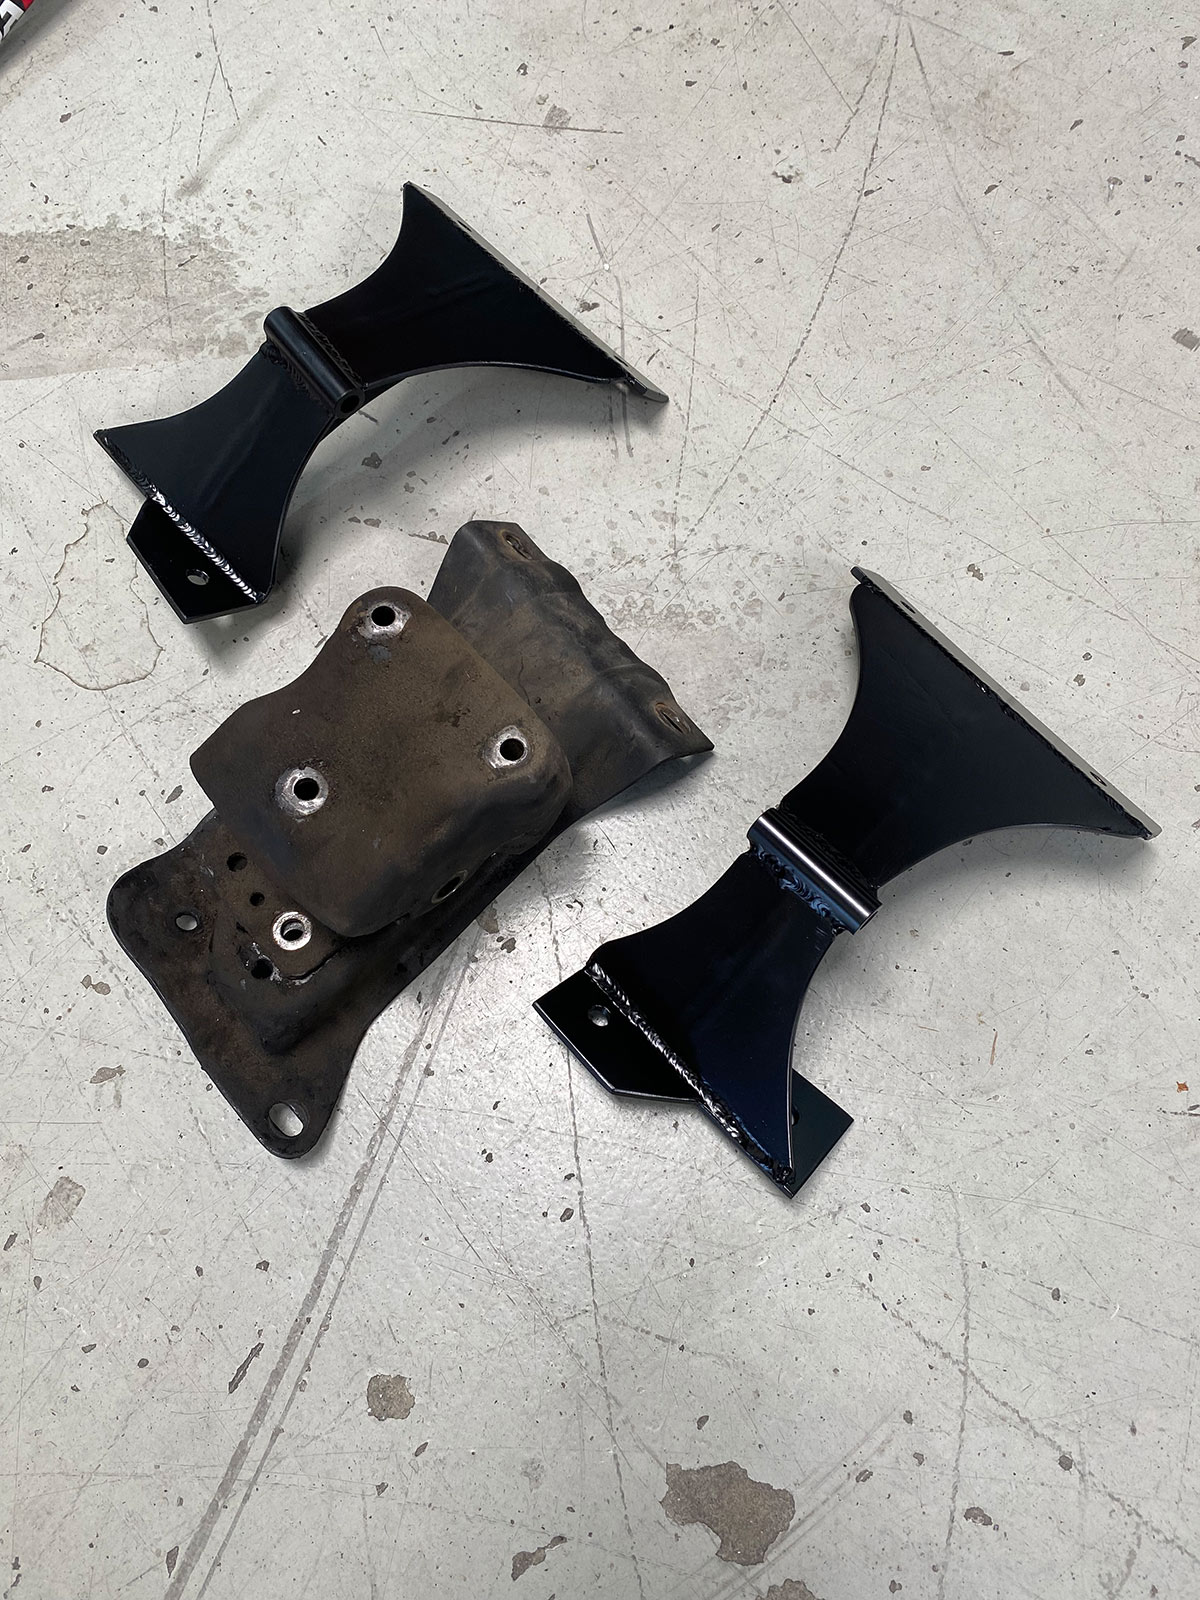
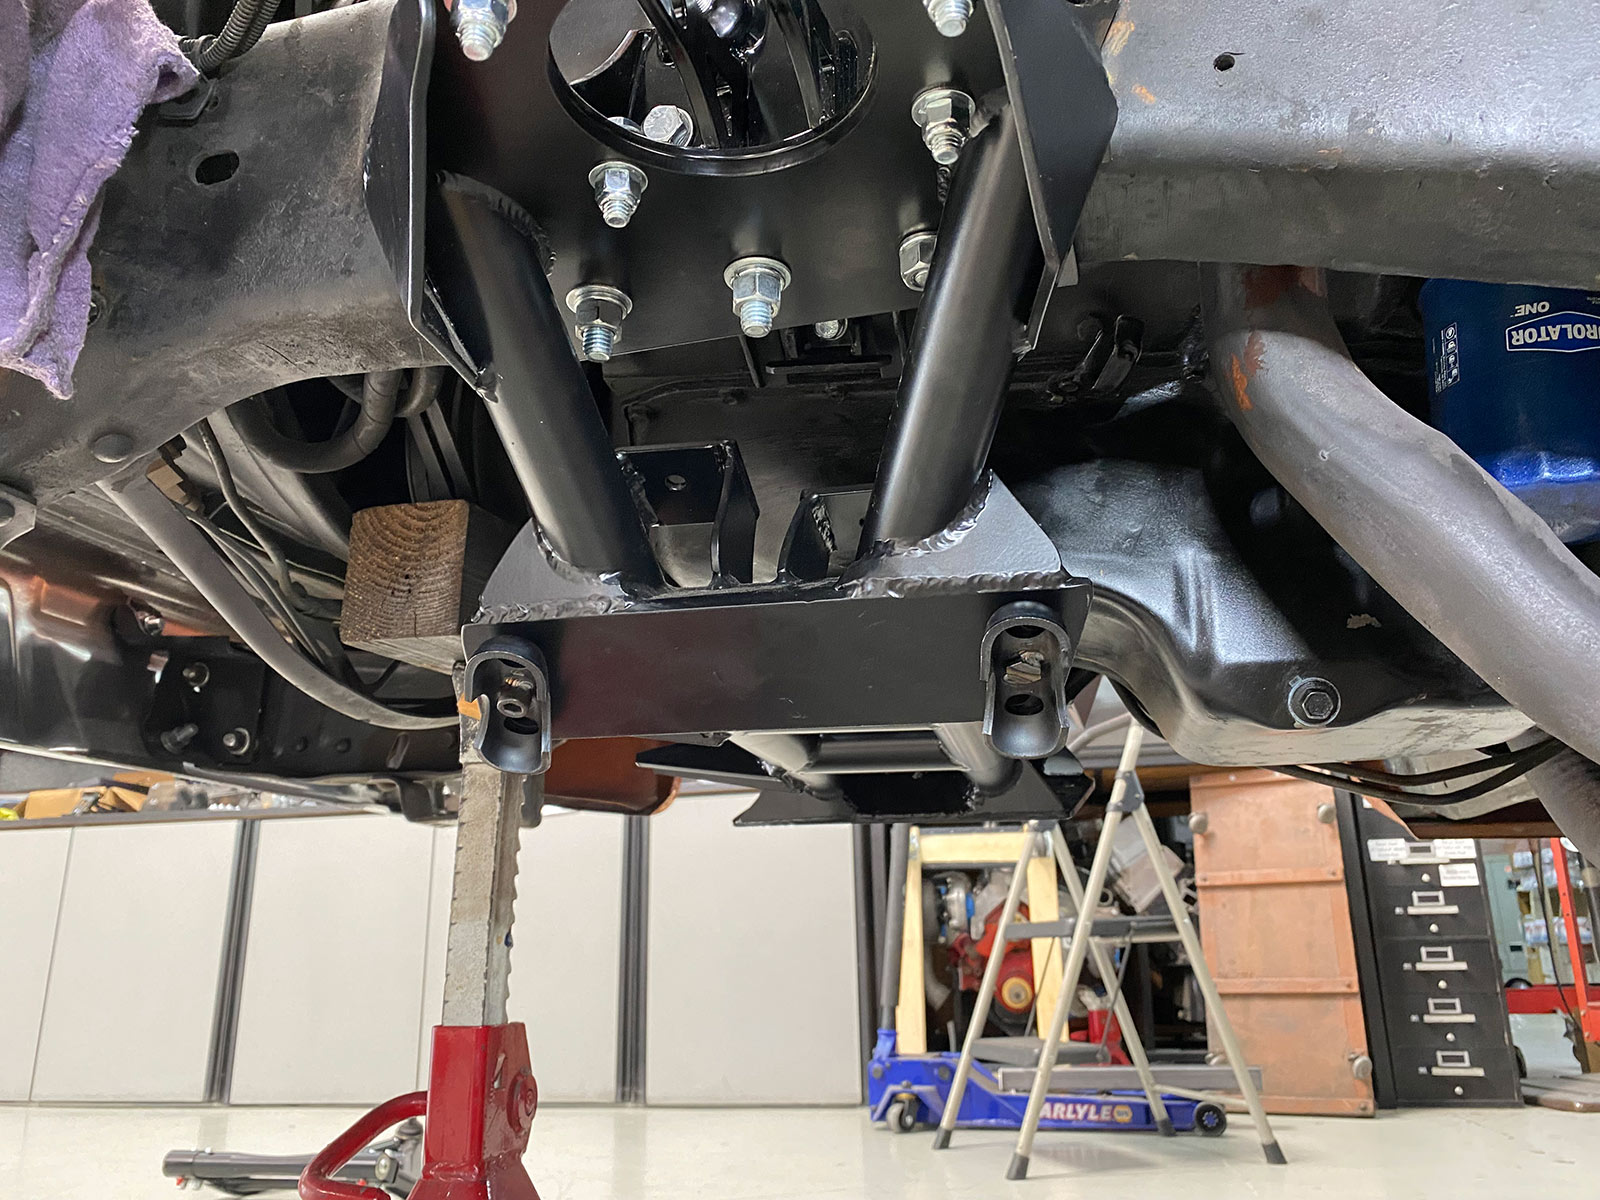
Also included with the kit are fabricated bolt-on small-block/big-block engine mount pedestals (which will accept the LS adapters just as the stock ones) to replace your old stamped-steel ones (which will not work with the Kugel crossmember).
17 The new pedestals are simple to install
The new pedestals are simple to install—even with the engine still in place!

18 even with the engine still in place

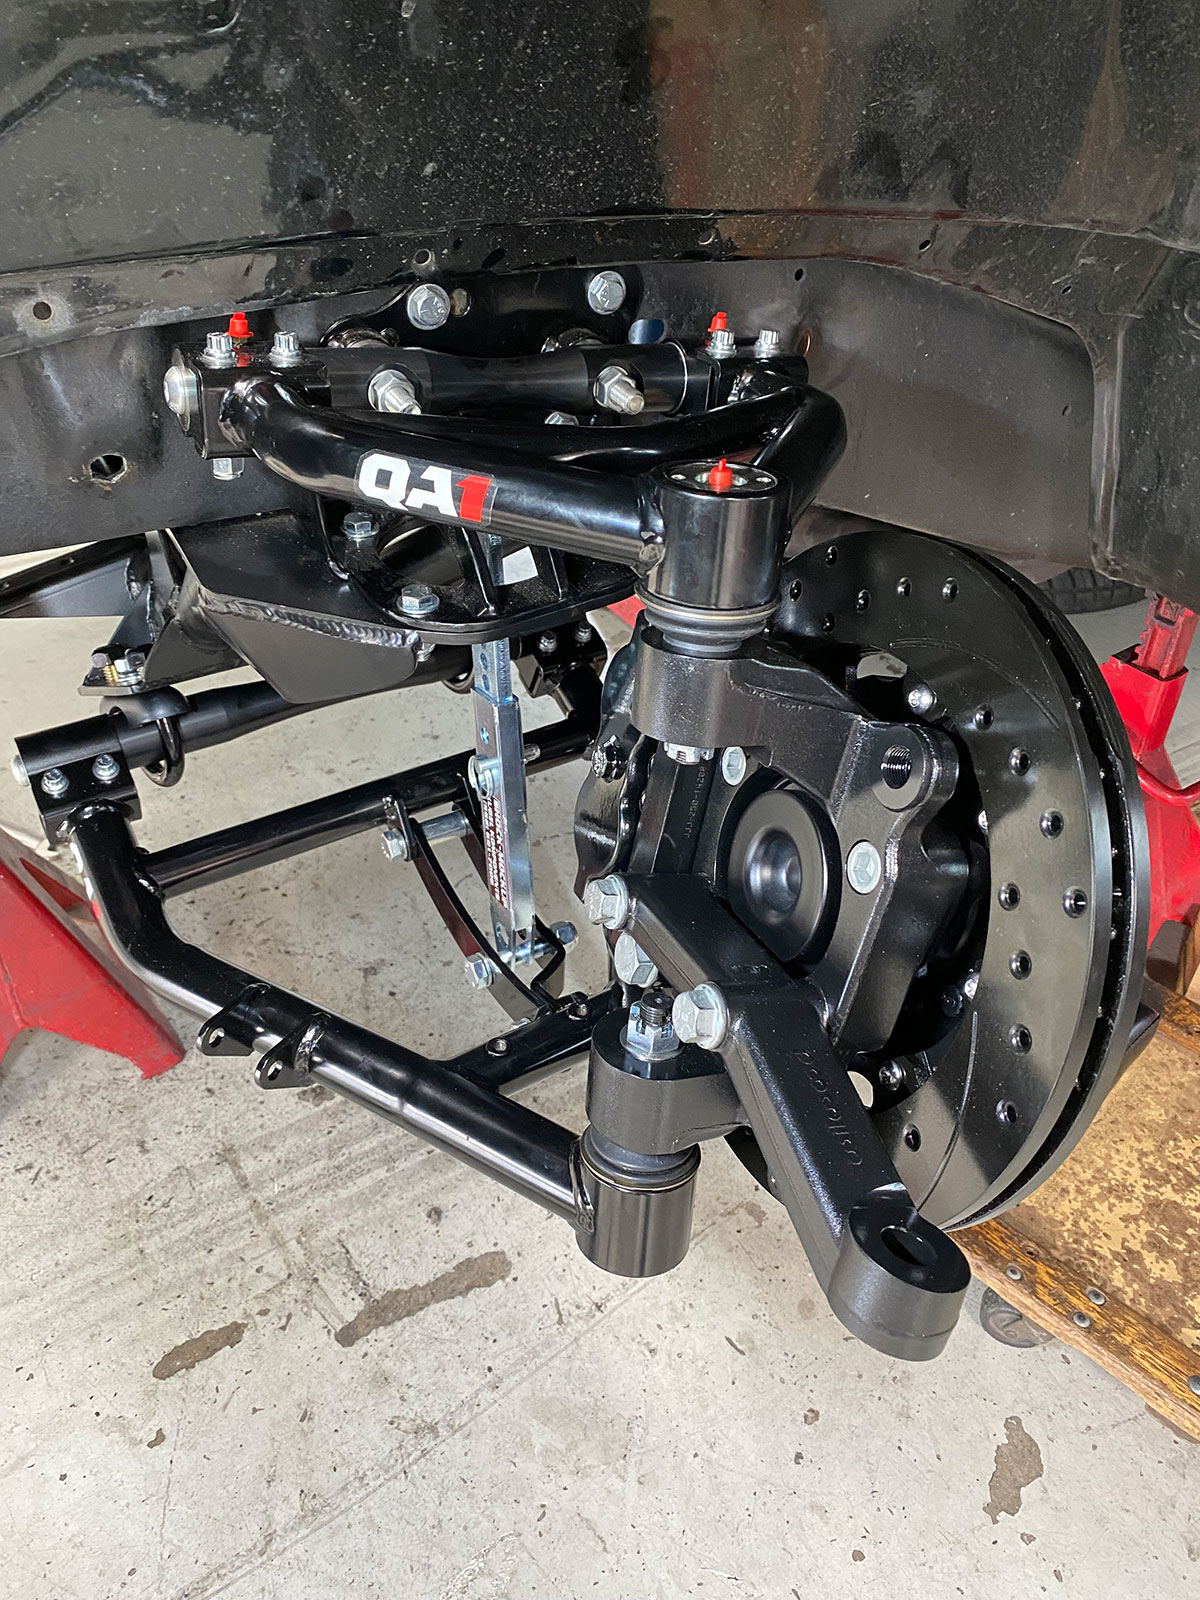
19 With the front suspension brakes installed wheels tires mounted and the engine weight reapplied
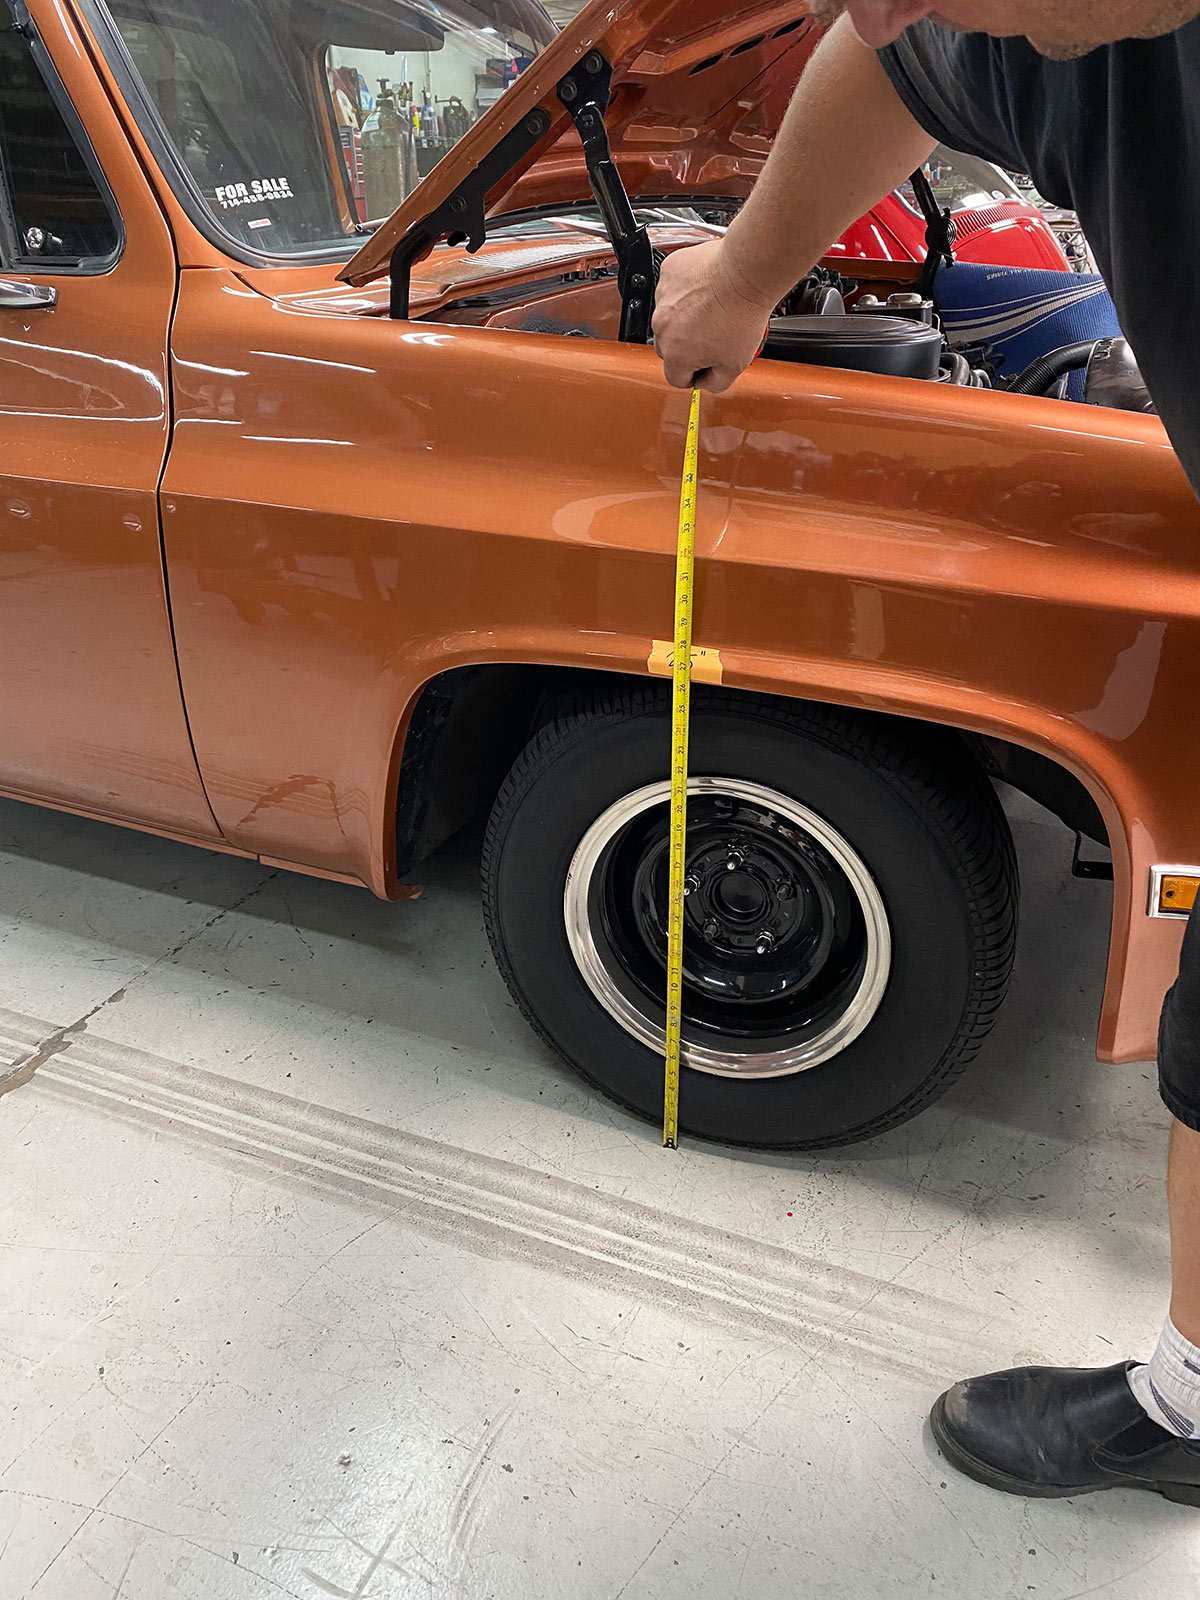
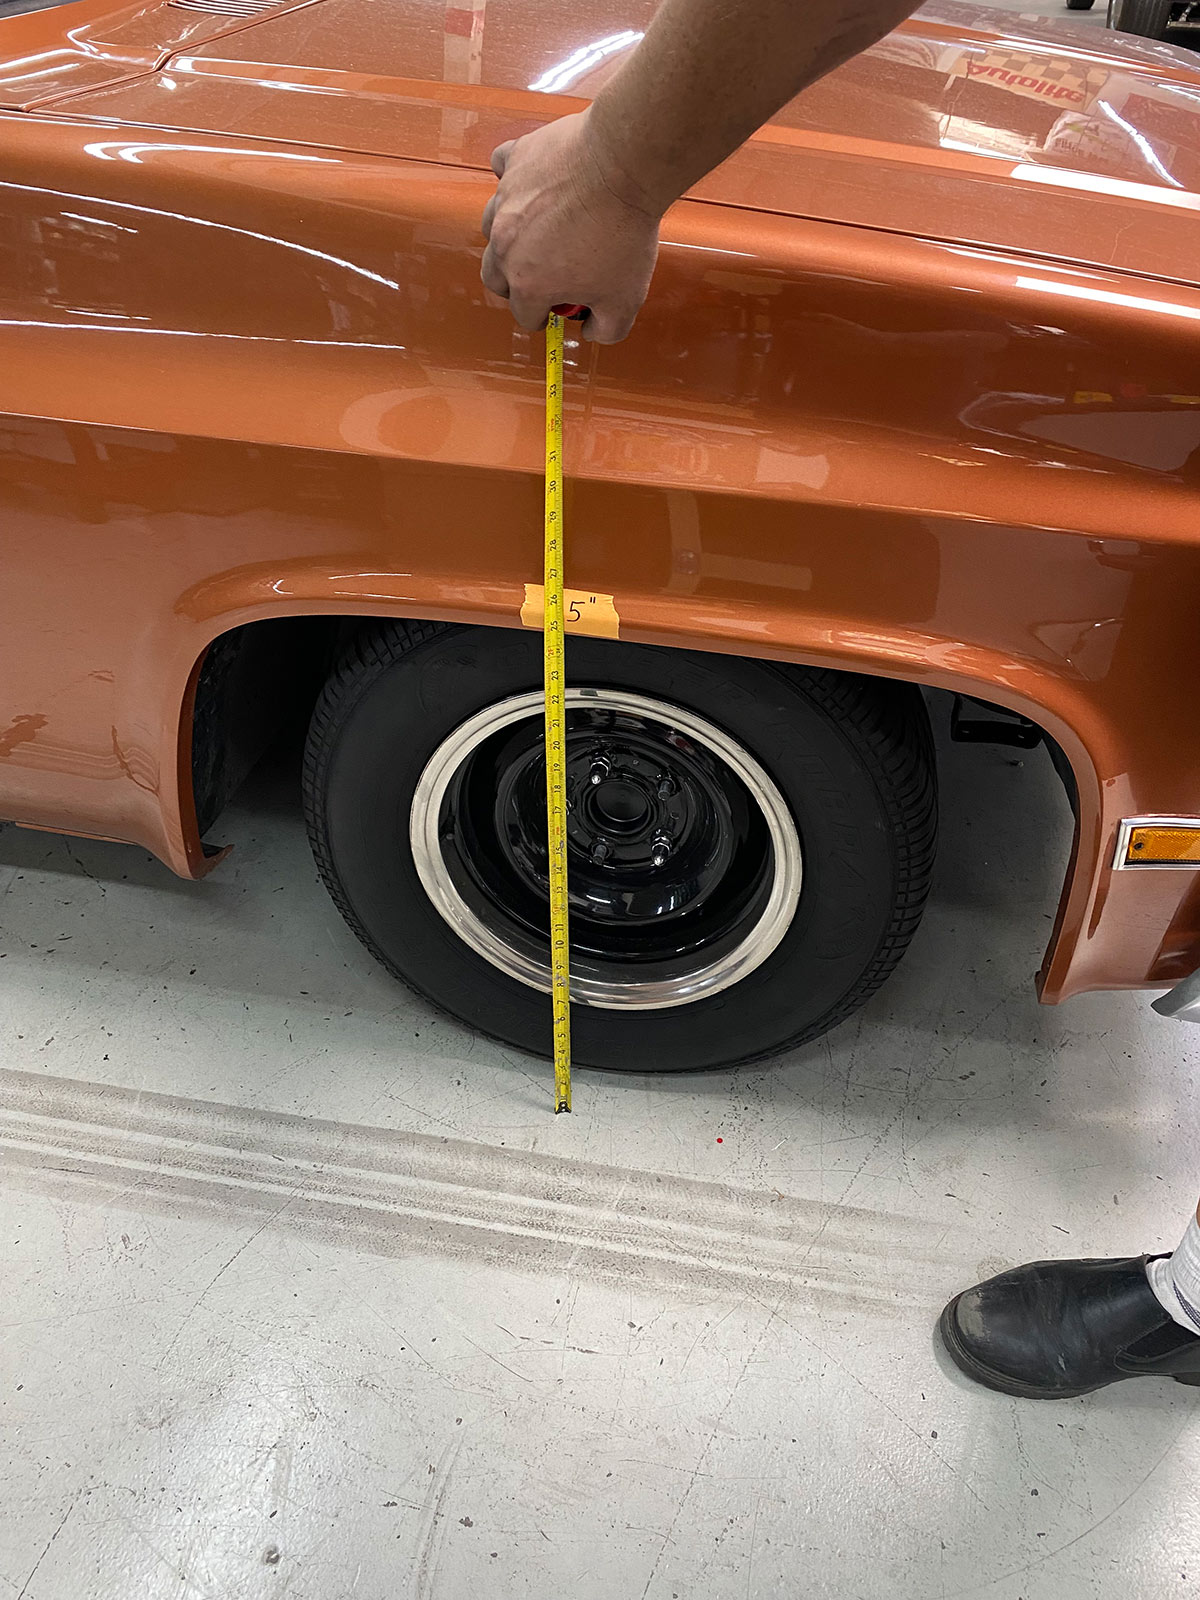
With the front suspension/brakes installed, wheels/tires mounted, and the engine weight reapplied, the C10 was set back on the ground to get an initial ride height reference. It’s a bit on the high side, so …
20 Jeff started out with the shocks zeroed out and the spring set at the lowest position on the shock
… Jeff started out with the shocks zeroed out and the spring set at the lowest position on the shock (which technically needs to be done in order to set the coilover in place to begin with space-wise).

21 which technically needs to be done in order to set the coilover in place to begin with space wise

22 Now were looking good with the tire closer to the inner fender well
Now we’re looking good with the tire closer to the inner fender well!
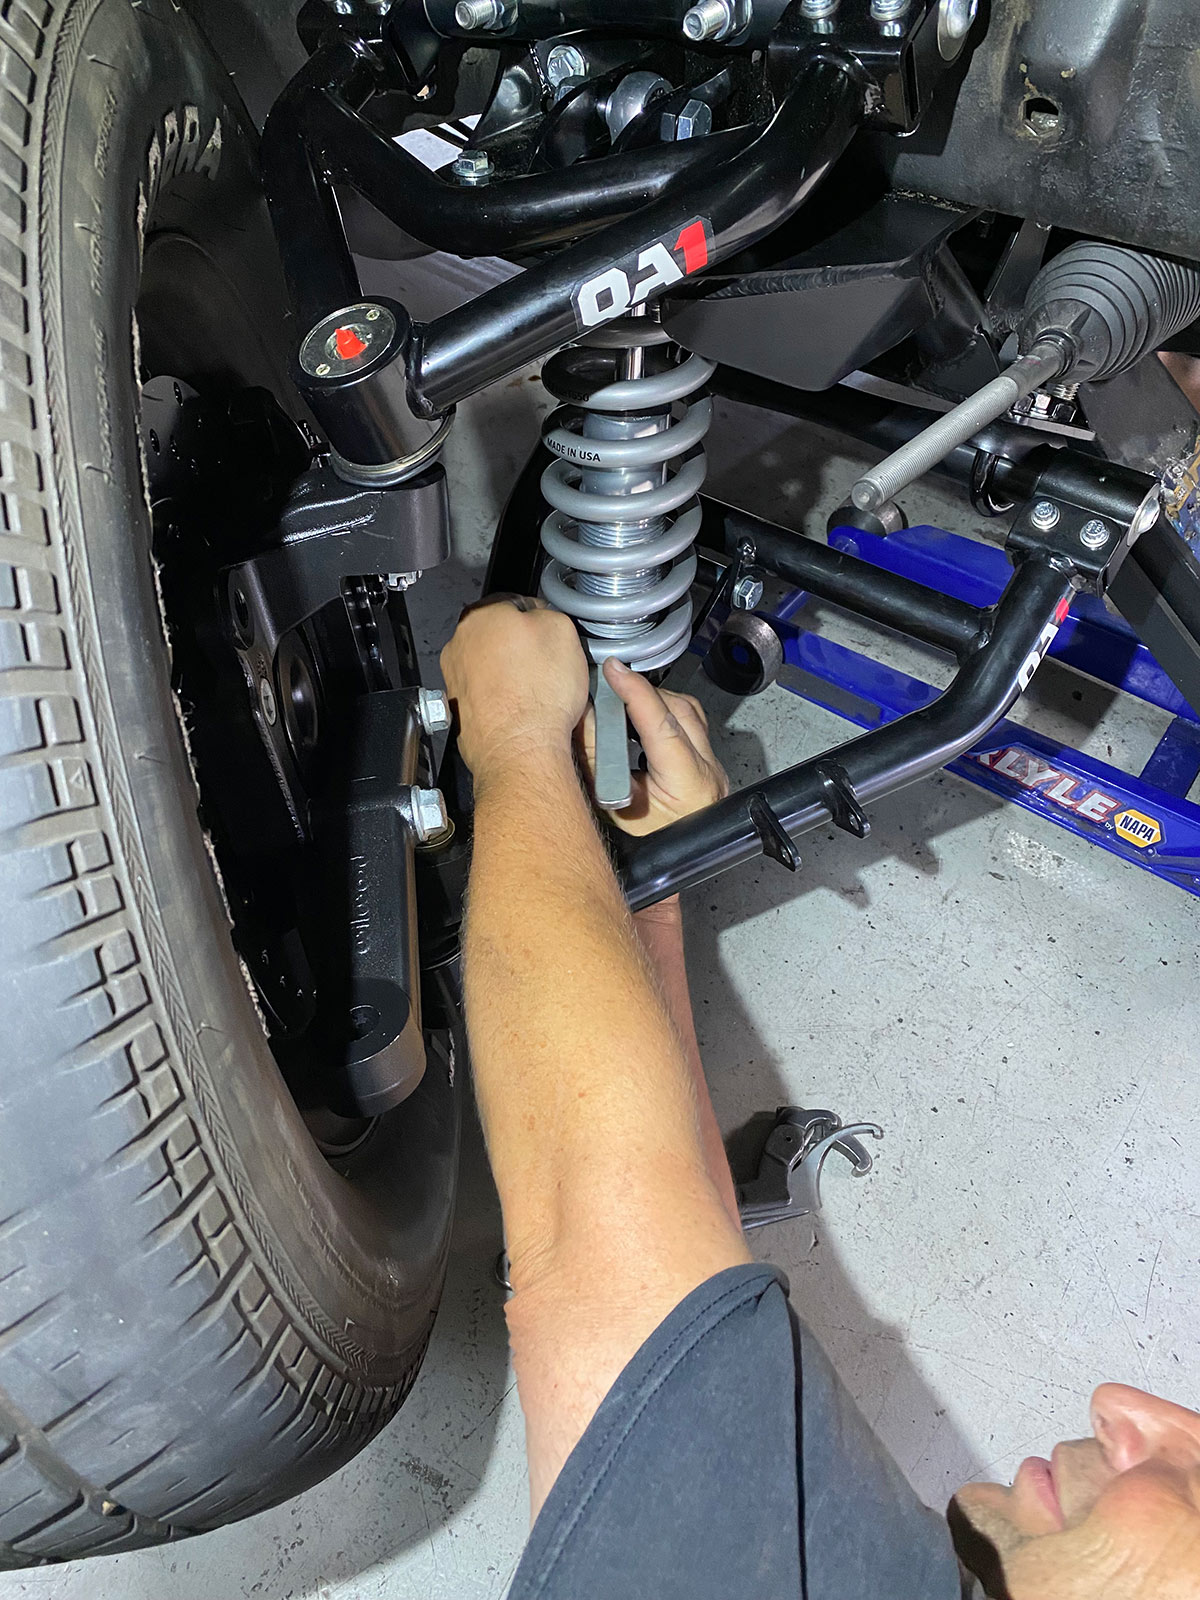
23 Shock and coil adjustments can be easily done with the coilover installed
Shock and coil adjustments can be easily done with the coilover installed. (For reference, Jeff went three full turns up on the coil, and three turns “positive” on compression/rebound adjusters.)
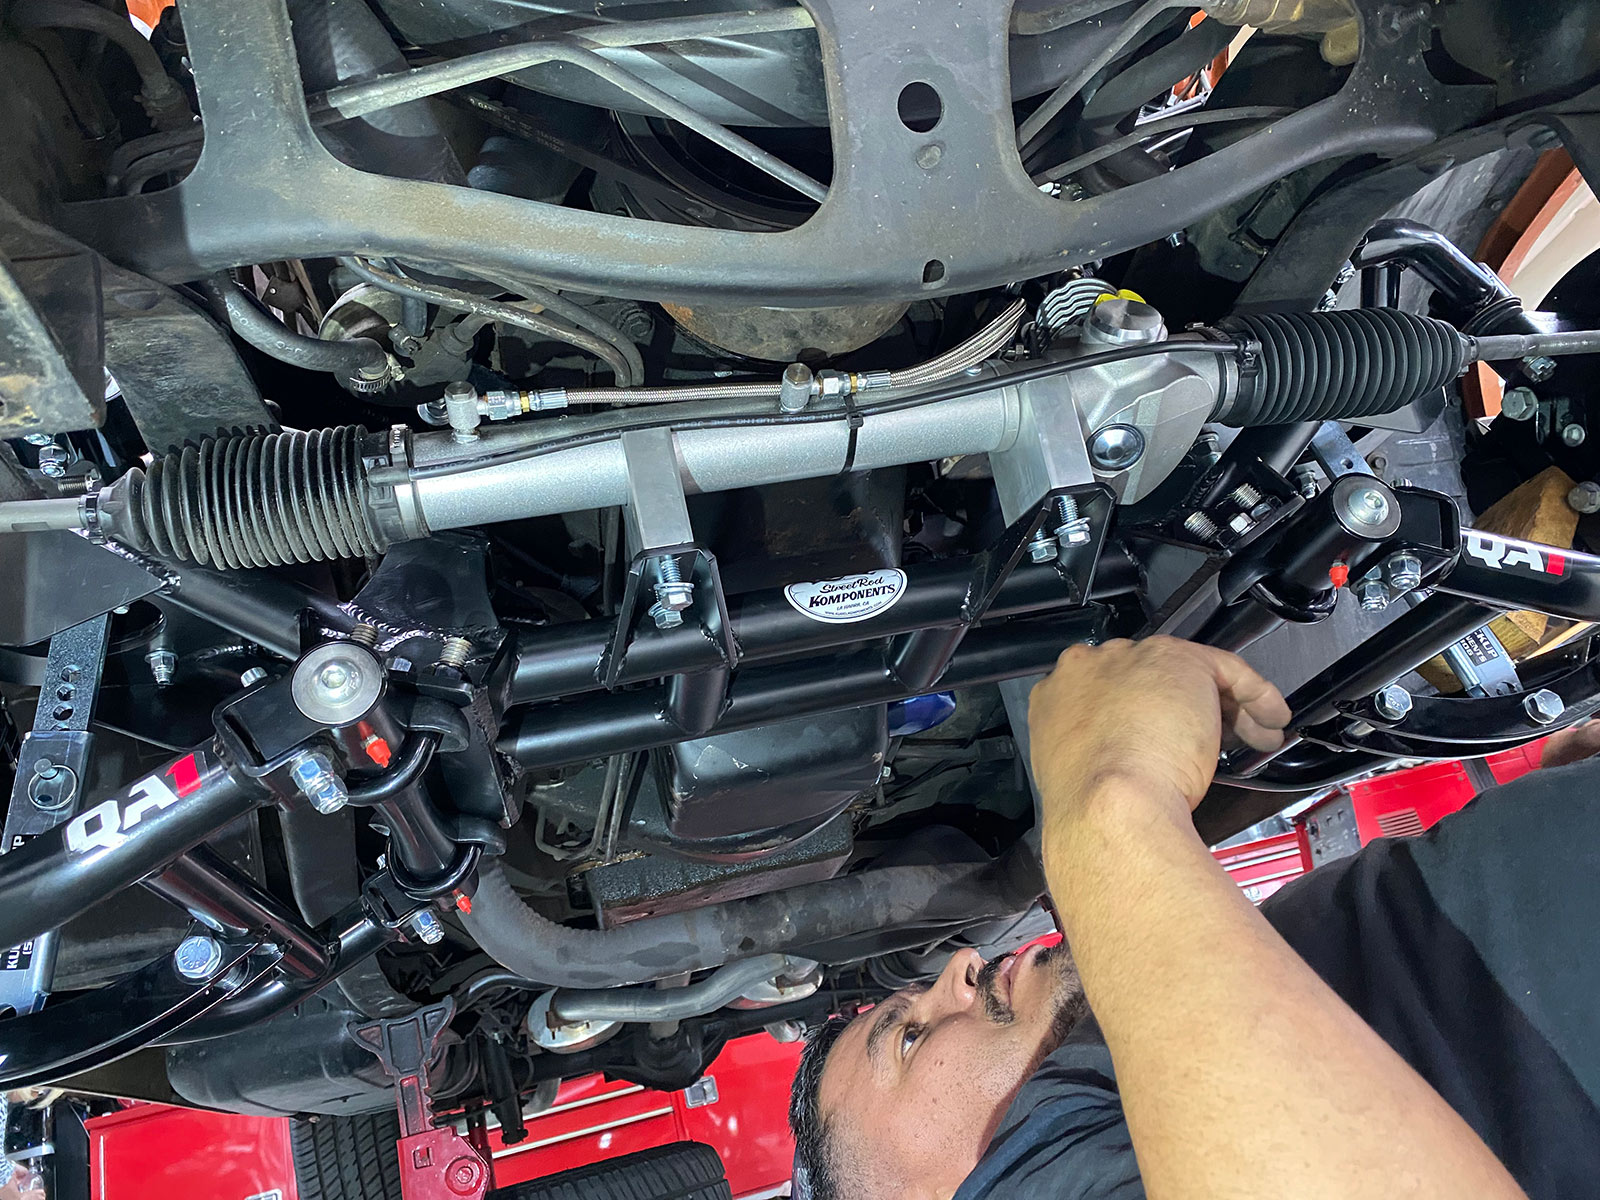
24 With the suspension ride height set the steering components can be installed
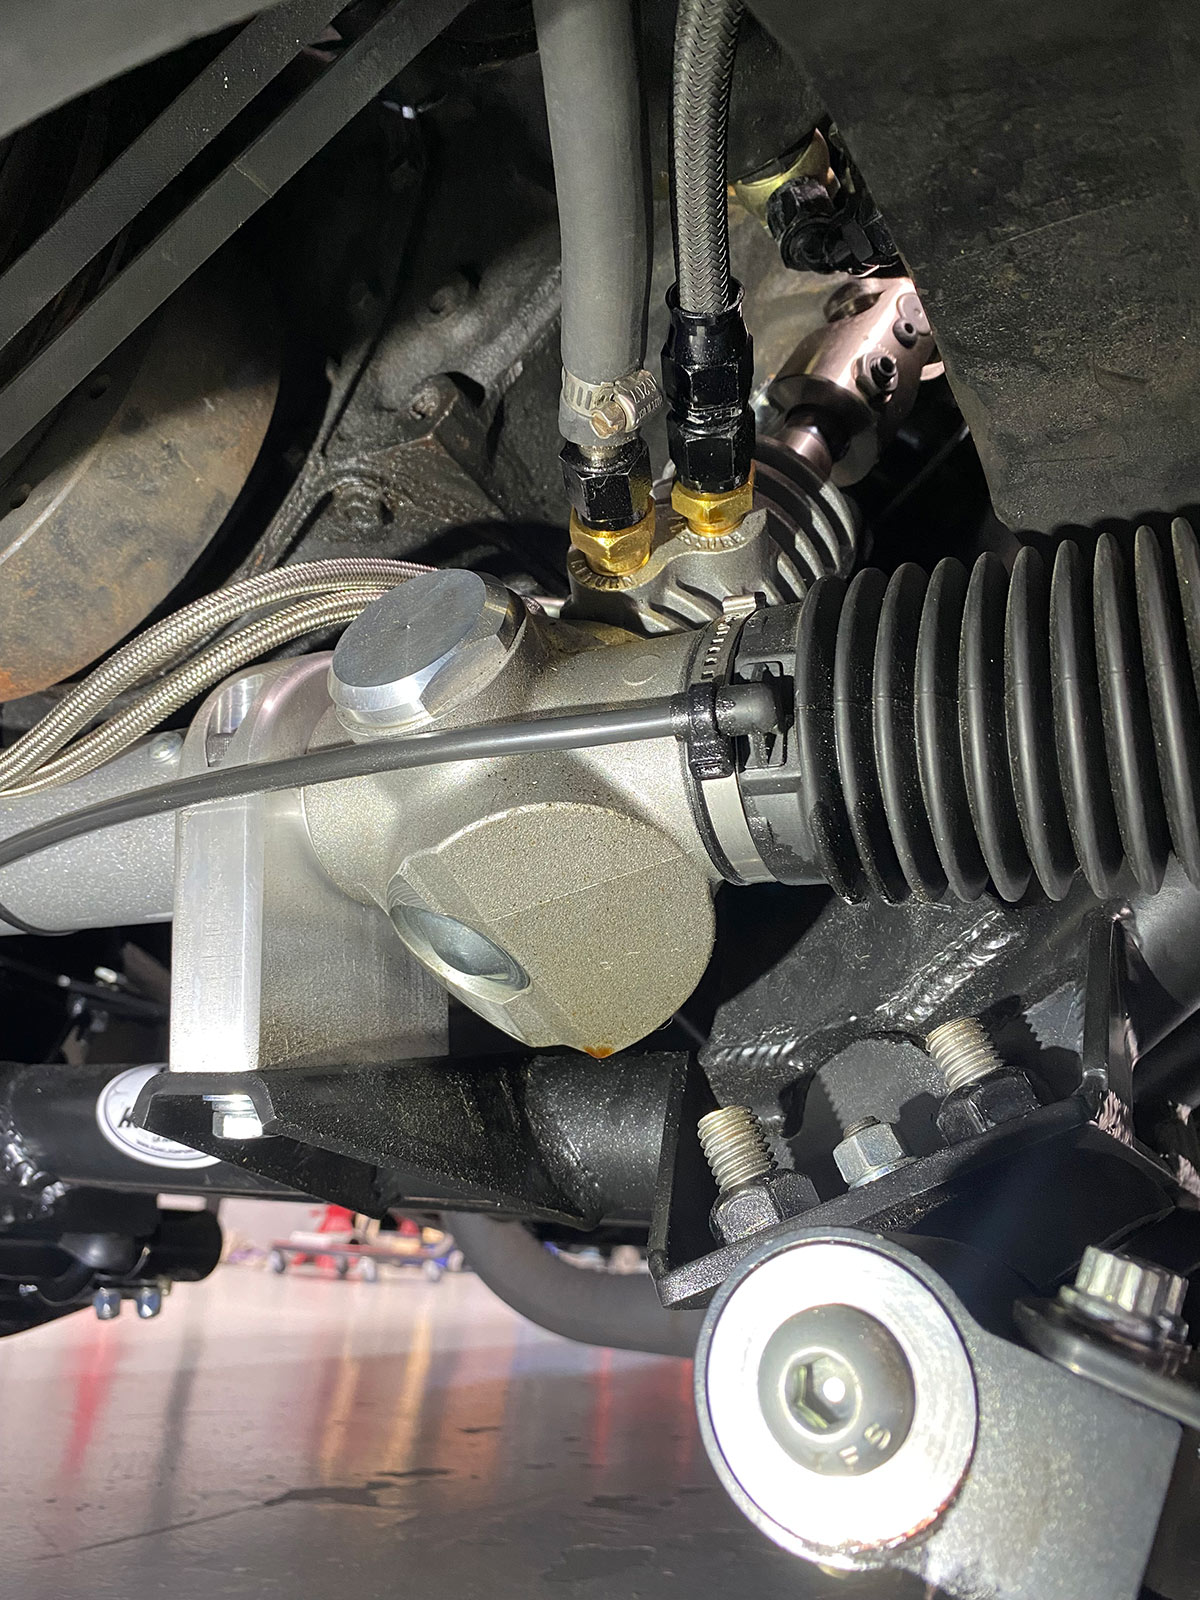
With the suspension ride height set, the steering components can be installed. One of the nice things about the supplied Flaming River rack are the adjustable pillow blocks. These will allow ample adjustment of the input shaft in relation to the linkage angles when used with the stock column.
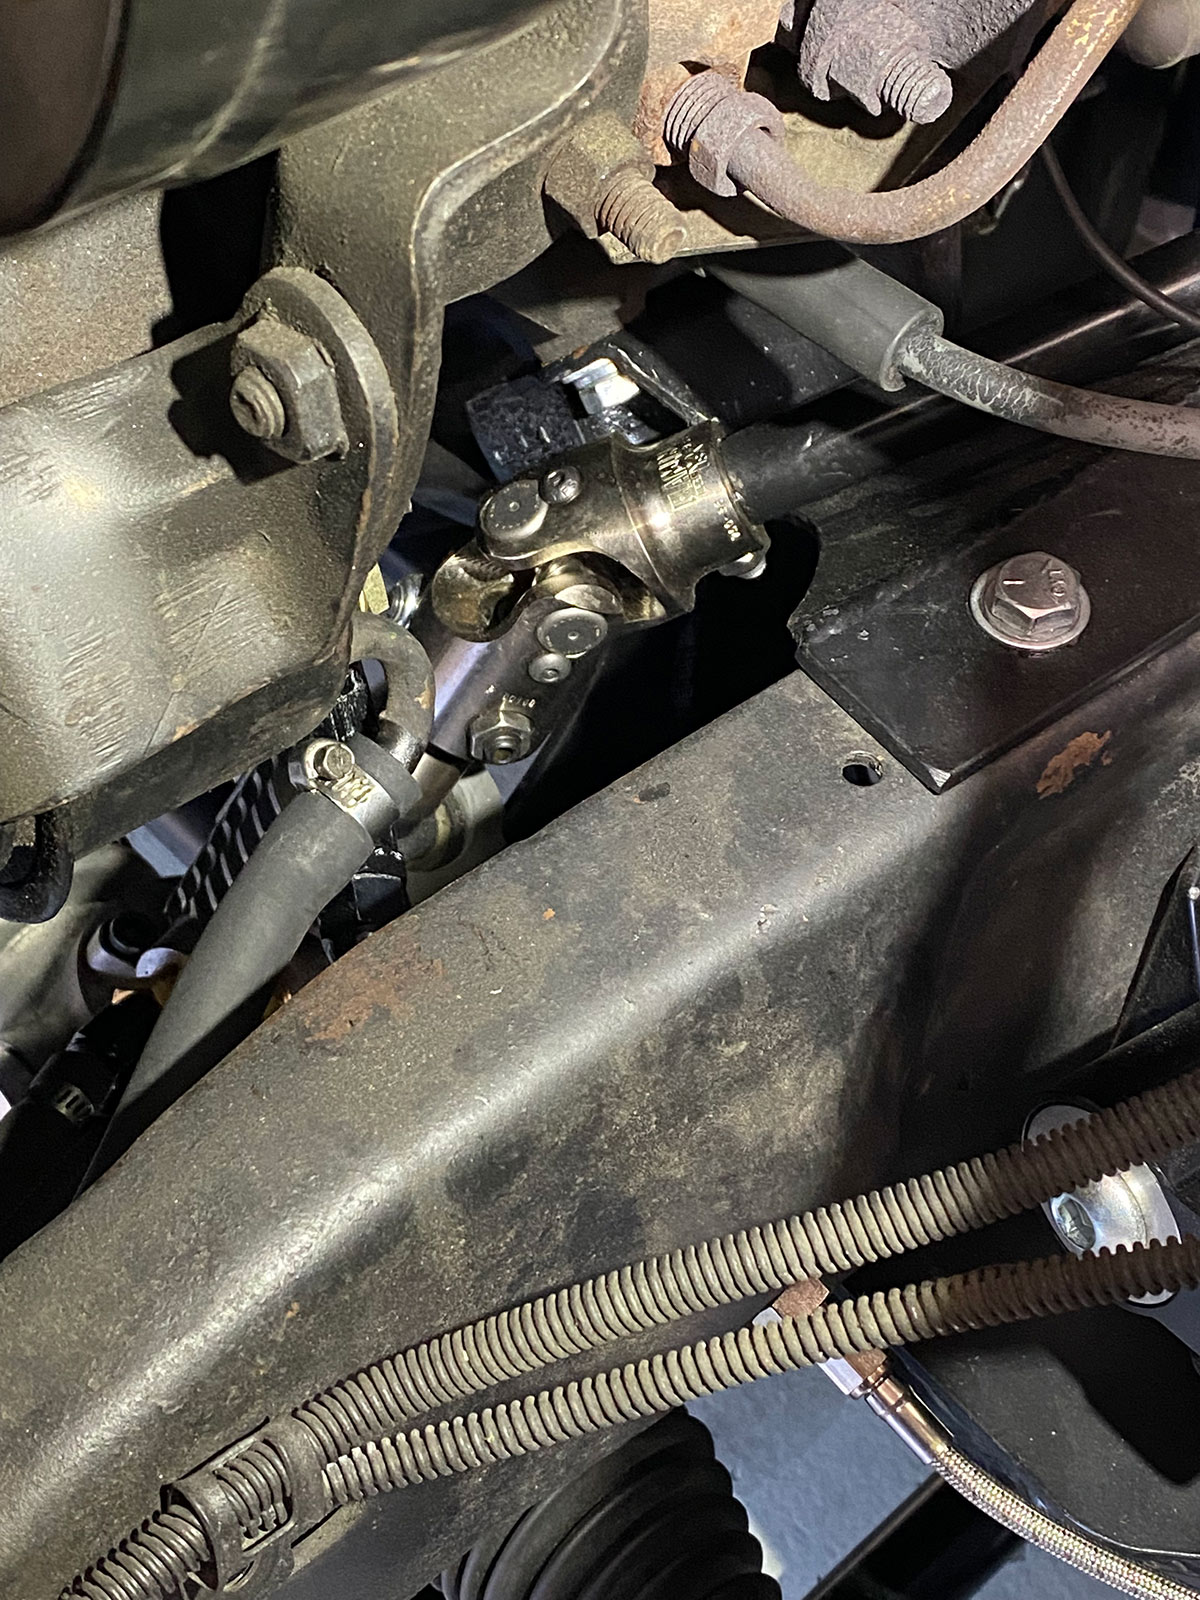
25 With the small block and cast iron exhaust manifolds theres plenty of room to route the steering linkage
With the small-block and cast-iron exhaust manifolds, there’s plenty of room to route the steering linkage without any interference or binding; with a big-block or an LS, you may run into space issues, in which case Flaming River’s VDOG system is the perfect solution.

26 big block or an LS you may run into space issues in which case Flaming Rivers VDOG system is the perfect solution

27 the plumbing into the stock Type 1 pump using Flaming Rivers universal hose kit
The steering was wrapped up with the plumbing (into the stock Type 1 pump) using Flaming River’s universal hose kit.
28 QA1s supplied adjustable sway bar was installed before the front end was aligned
Lastly, QA1’s supplied adjustable sway bar was installed before the front end was aligned and …
29 Jeff was back on the road with performance handling and ride quality akin to a new Chevy truck
… Jeff was back on the road with performance handling and ride quality akin to a new Chevy truck (or in his case, a new F150!).

30 Bolt In Independent Front Suspension For Your Chevy C10

Source

Kugel Komponents
(562) 691-7006
kugelkomponents.com

- Advertisement -

Related Articles

Search Our Site

More Classic Truck Performance

2024 71st Detroit Autorama Pickups

By Eric Geisert   -   Images by the Author One of...

1964 Chevy High School Hauler, Part 1: The Beginning

By Rob Fortier & Carson Reed   -   Images by...

Troy Alston’s 1959 Chevy Apache

By Rob Fortier   -   Images by Jason Matthew When asked...

Our Pick of Performance Parts For Your Classic Truck 2024

FiTech Versatile LS and OEM Replacement Oil Pans for...

Chris Cerce Customs Delivers Supercar Handling to a ’66 GMC

By Chuck Vranas   -   Images by the Author There’s nothing...

LEGACY SERIES: The Dale Hollenbeck Chevy Stepside

By Darryl Hollenbeck   -   Images by Tim Sutton CTP’s Legacy...
More Classic Truck Performance

Ricky Holly’s Square Unibody Triple Crown of Rodding Truck of the Year

By Rob Fortier   -   Photography by John Jackson In a...

Replacing Back Cab Molding on a Chevy Squarebody

By Jason Chandler   -   Photography by the Author The Chevy...

The Bigelow Family’s Patina ’68 C10

By the CTP Staff & Mike Bigelow   -   Photography...

Aldan American Coilover Suspension Upgrade

By Cam Benty   -   Photography by the Author Trucks are...

Big Bill Watson’s 1966 Chevy C10

By Rob Fortier   -   Photography by John Jackson Seven years...