Building an engine from scratch isn’t a relatively difficult thing to do, so long as one is fastidious and pays attention to all the details. It’s also very rewarding (albeit stressful) when that handbuilt engine is fired for the first time and put through its paces on the engine dyno. There’s a bit of a pucker factor to be sure, but the satisfaction of a job well done is much more gratifying than dropping that credit card on a crate engine. Building an engine from the ground up also gives one a better idea of what’s going on inside the engine, making diagnosis and repair easier. And for some of us, just getting our hands dirty and spending the time in the shop building something is better therapy than any fancy spa can provide!
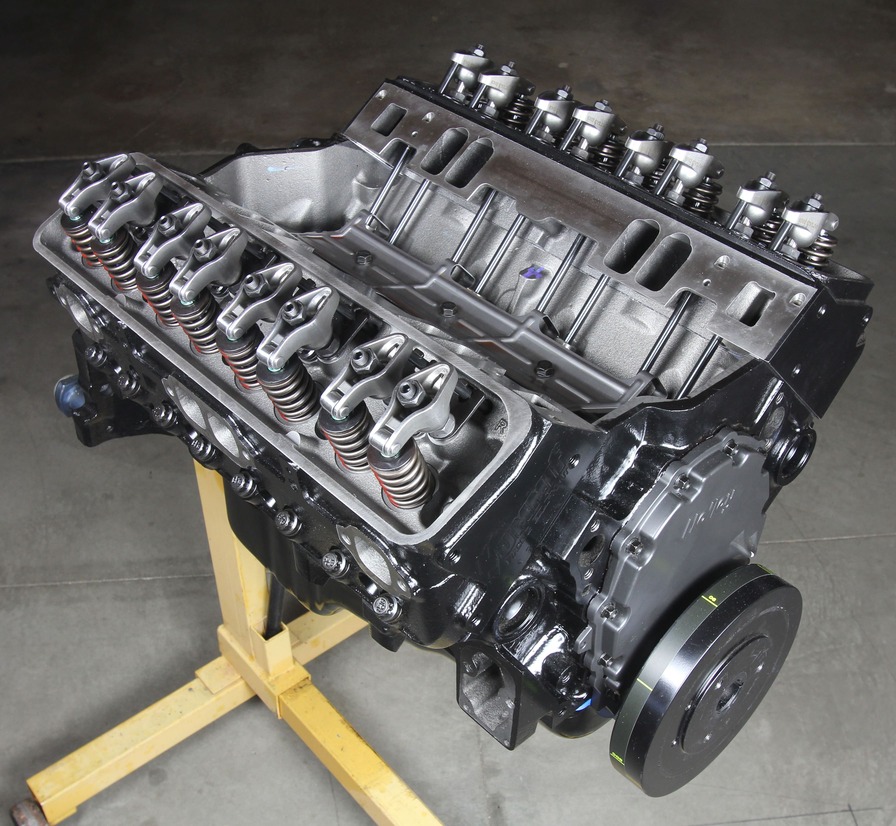
Here’s our long-block 377ci Chevy engine as we left it before booking our dyno time at Westech Performance Group. We need to add a few more parts before we’re ready to test and tune.
We wrapped up the build side of the engine in our previous story, but that doesn’t mean that things were complete. As it were, we still had to add the induction and ignition components before our date with the guys at Westech Performance Group in Mira Loma, California, arrived. Which brings us to the importance of utilizing an engine dyno when building custom engines. Installing an engine in a vehicle and getting things in running order is no small feat. There are a myriad of electrical and plumbing connections that need to be made, fluids added, exhaust built and installed, torque converters, bellhousings, and so on. Going through all that work just to find something in need of repair that requires the removal of that new engine can be frustrating, to say the least. But by running the engine beforehand on an engine dyno, any little finicky issue can be addressed beforehand and in a situation that makes doing so much easier. It also presents a convenient environment for initial break-in, saving your neighbor’s nerves to be tested another day.
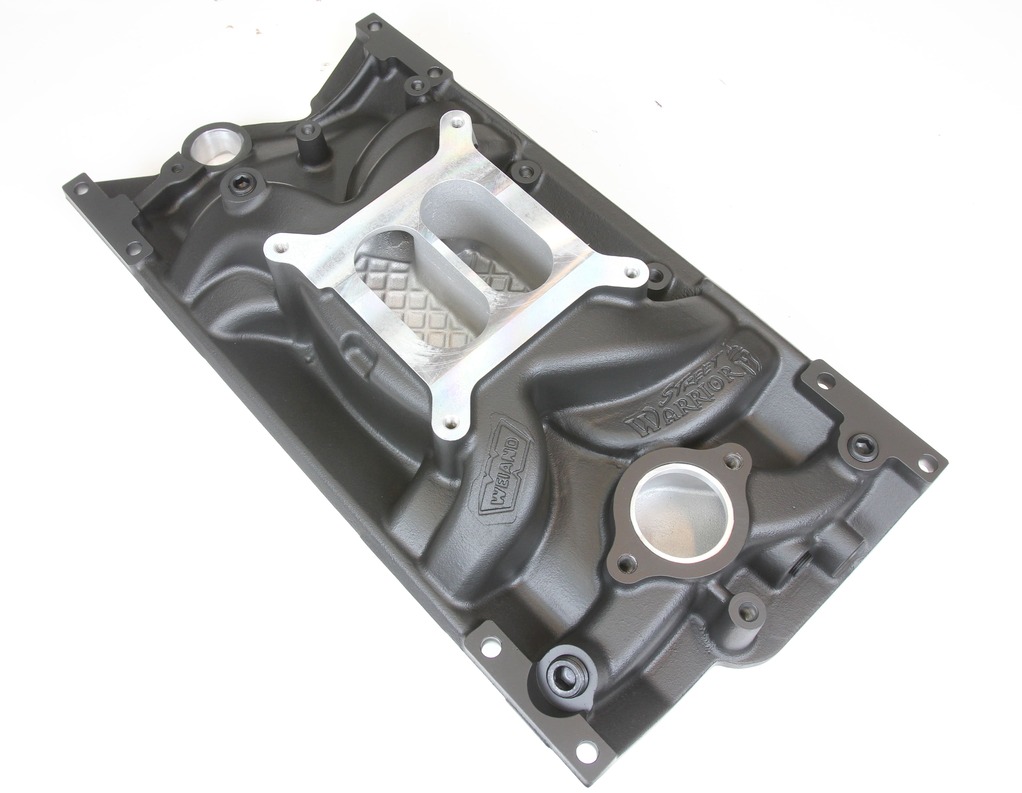
Our initial intention for our engine build was to produce a responsive motor down low in the rpm range, with plenty of torque. We weren’t concerned with max horsepower or revving the life out of the engine, we were simply after some decent torque without breaking the bank. For that end we opted to use cast-iron Vortec cylinder heads, which are known to make great torque. It only makes sense then to match those heads with an intake manifold, such as Weiand’s Street Warrior (PN WND-8121), that’s been designed using Computational Fluid Dynamics software to best wring out all the power and torque possible.
But in addition to the initial run-in and inspection period, spending a couple hours on the engine dyno provides a great opportunity to test and tune that engine for not only maximum power, but economy and efficiency as well. A good dyno shop should have technicians well-versed in both carbureted and fuel-injected systems, capable of tuning either setup to achieve these goals. At the end of the dyno session (provided nothing went “bang”), that engine should be as turnkey as possible, with a good fuel tune, proper ignition timing (and distributor curve if applicable), and initial break-in complete. Now, when the time comes to drop that stroker engine in your muscle car, you have the confidence that everything should perform as expected, with, hopefully, no surprises.
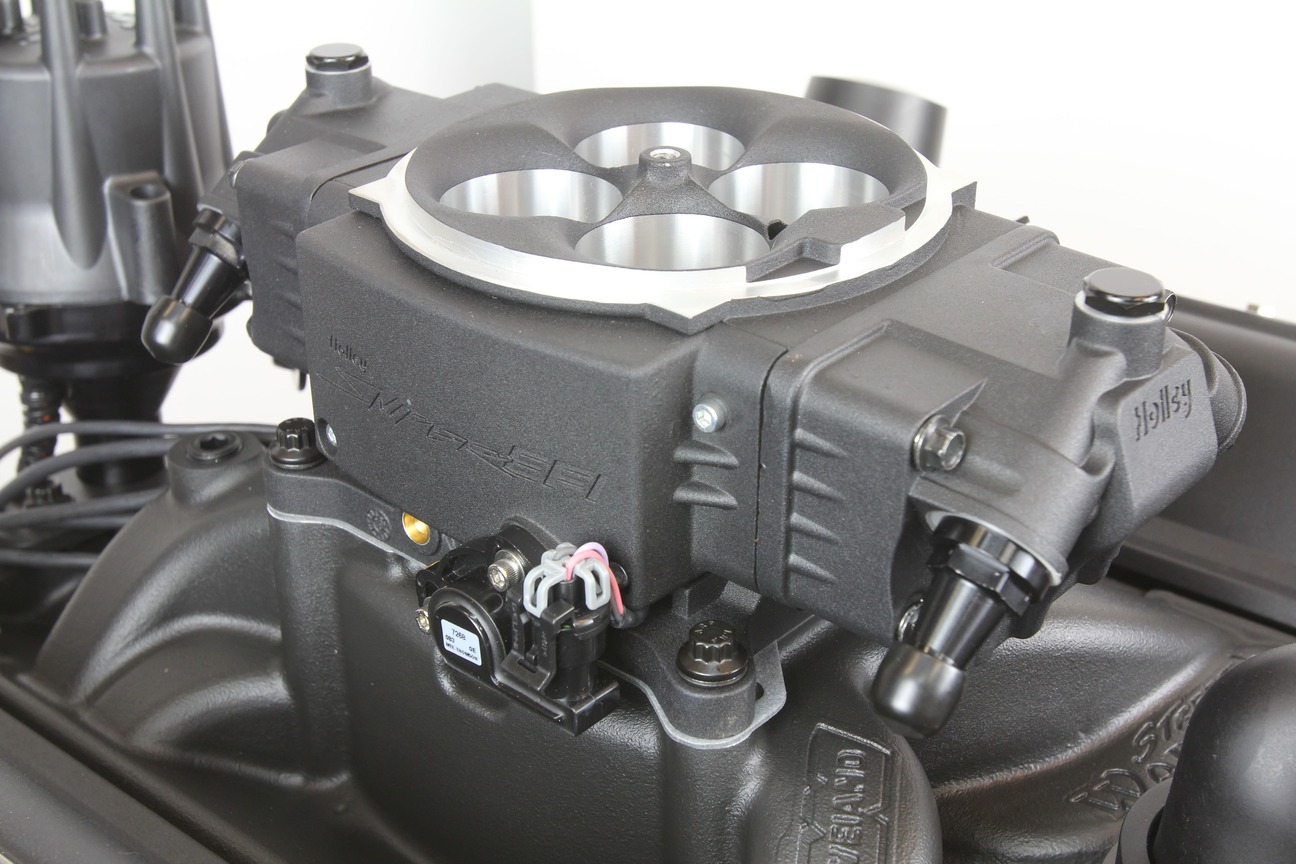
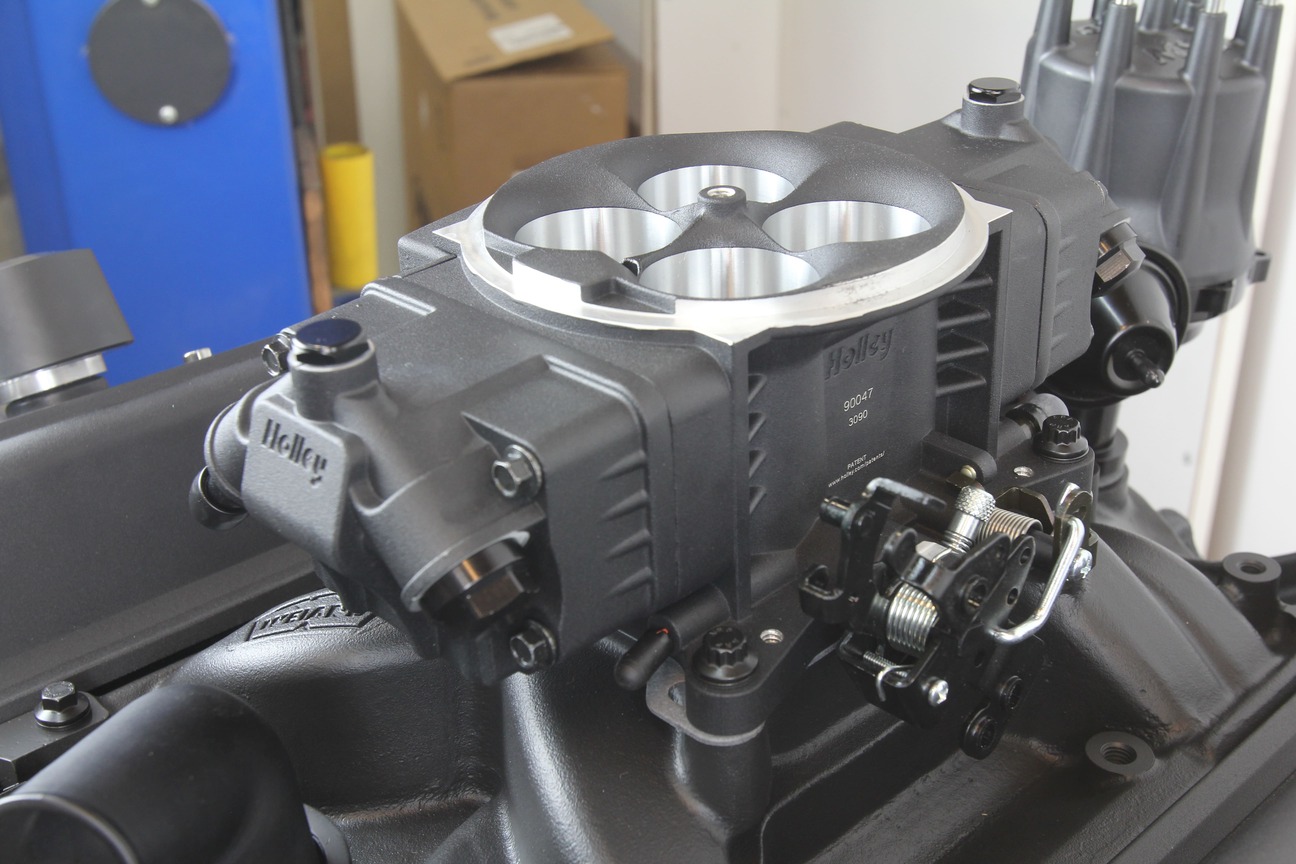
Topping off the intake and providing fuel delivery for our stroker is a Holley Sniper EFI Stealth 4150 throttle body in black (PN SNE-550-871). The 4150-flanged throttle body comes equipped with four 100 lb/hr fuel injectors, supporting up to 650 hp, and features integrated ignition control. The onboard ECU, MAP, and TPS sensors reduce the amount of wiring required, resulting in only four necessary connections (BAT +, BAT -, switched ignition, and tach).
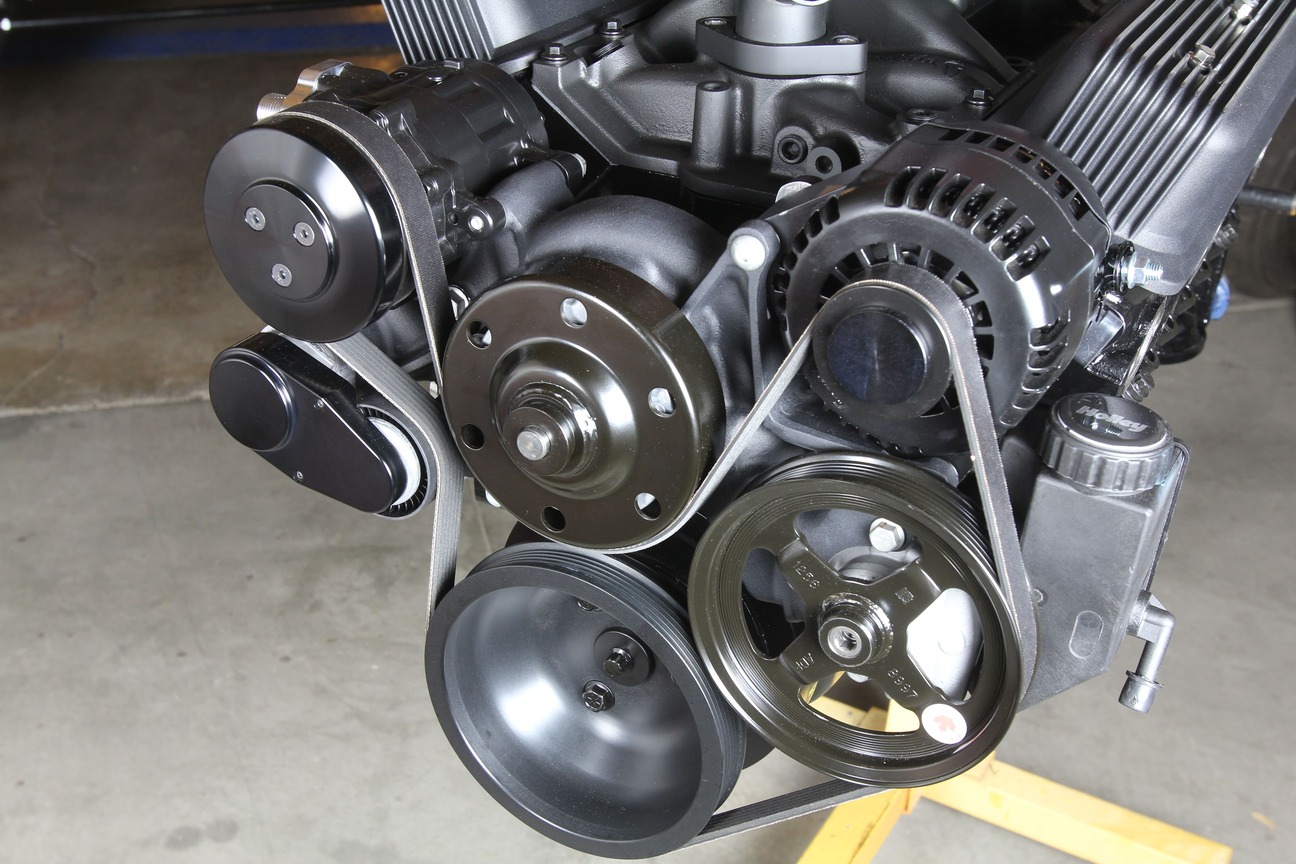
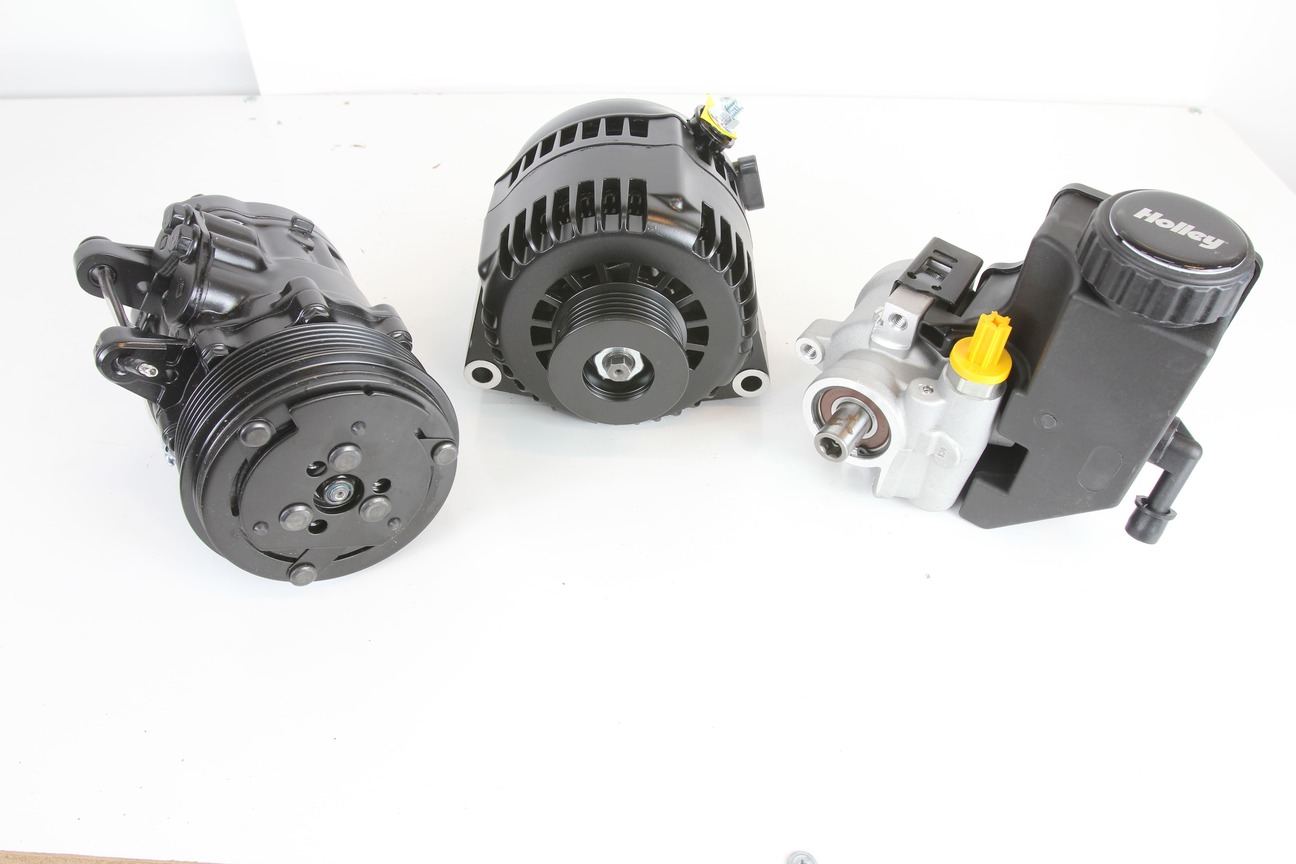
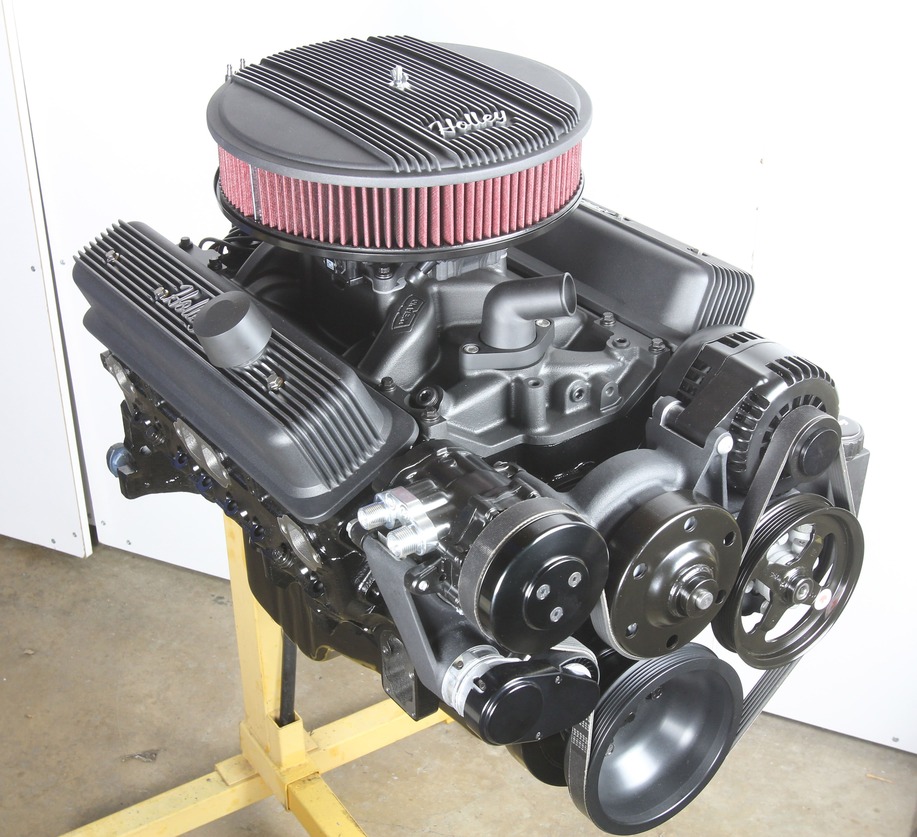
Typically, when an engine is tested on the dyno, the accessories (alternator, power steering pump, A/C compressor) are left on the bench. For our testing, we even left off the water pump, instead using Westech’s electric version since there was no way to drive the mechanical pump. That said, when we got the engine back to the shop, we had a few more components to install, not only to make the engine build complete, but to make it look great as well. Once again, we tapped the folks at Summit Racing and ordered up what we needed. The result is a sharp-looking, subdued small-block with the accessory components we require in a nice, tight package.
With the engine built, tested, and tuned, our 377ci stroker build is a wrap and ready to drop between the framerails of any classic Chevy! ACP
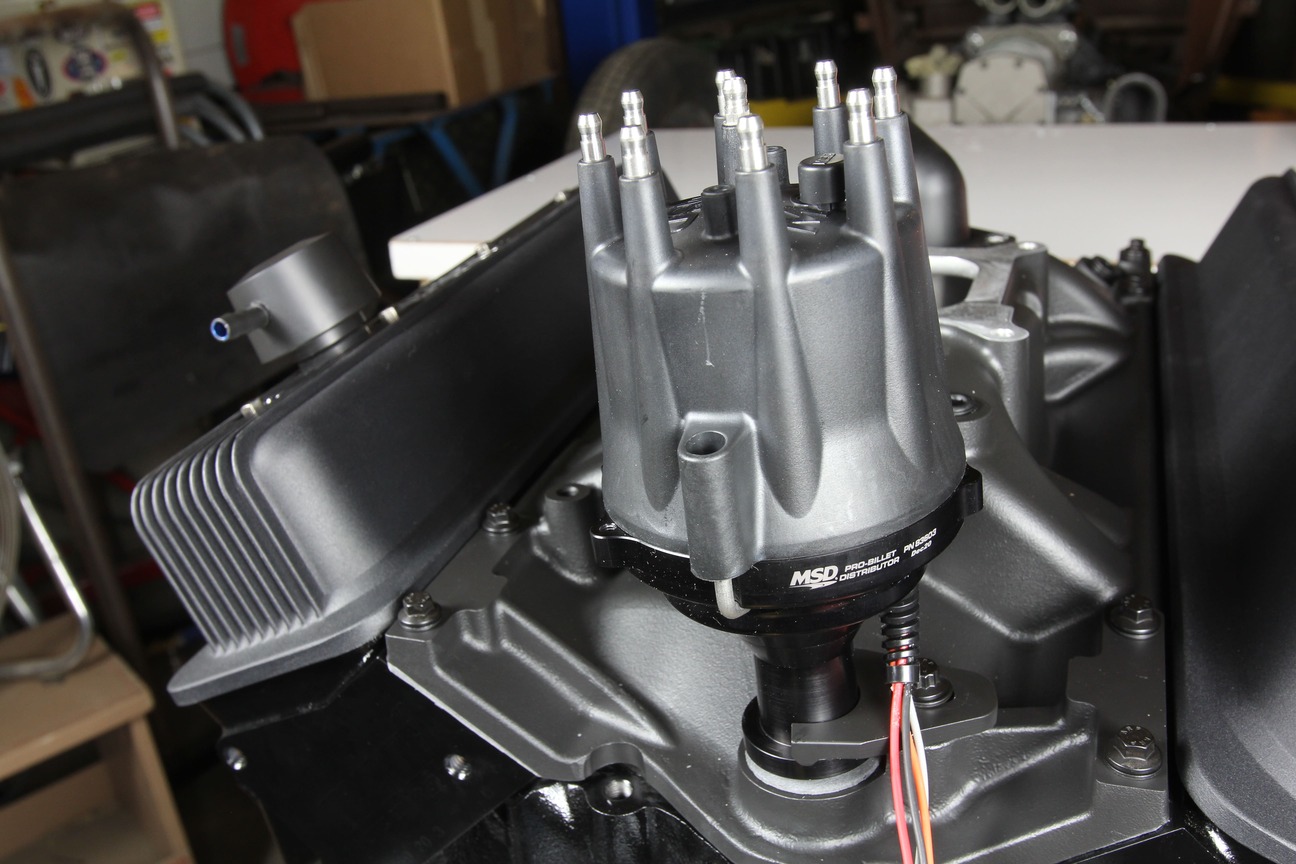
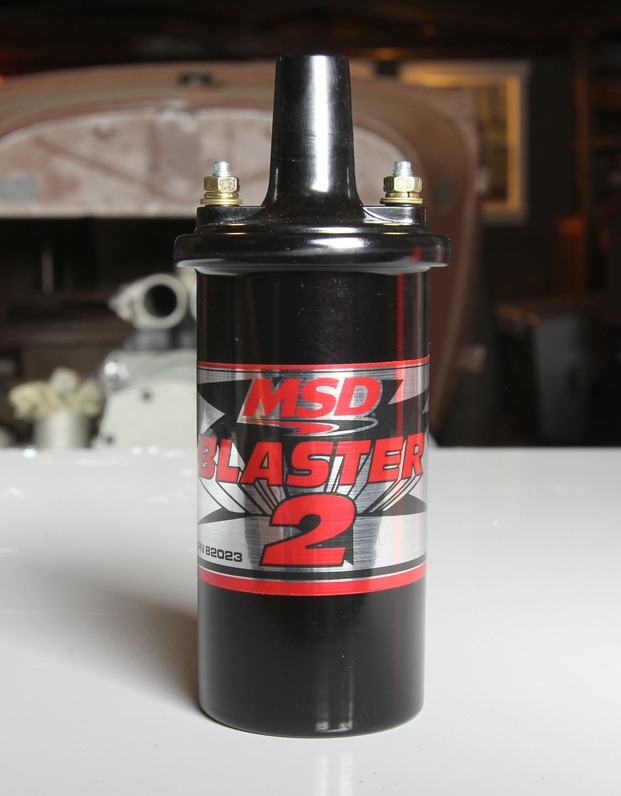
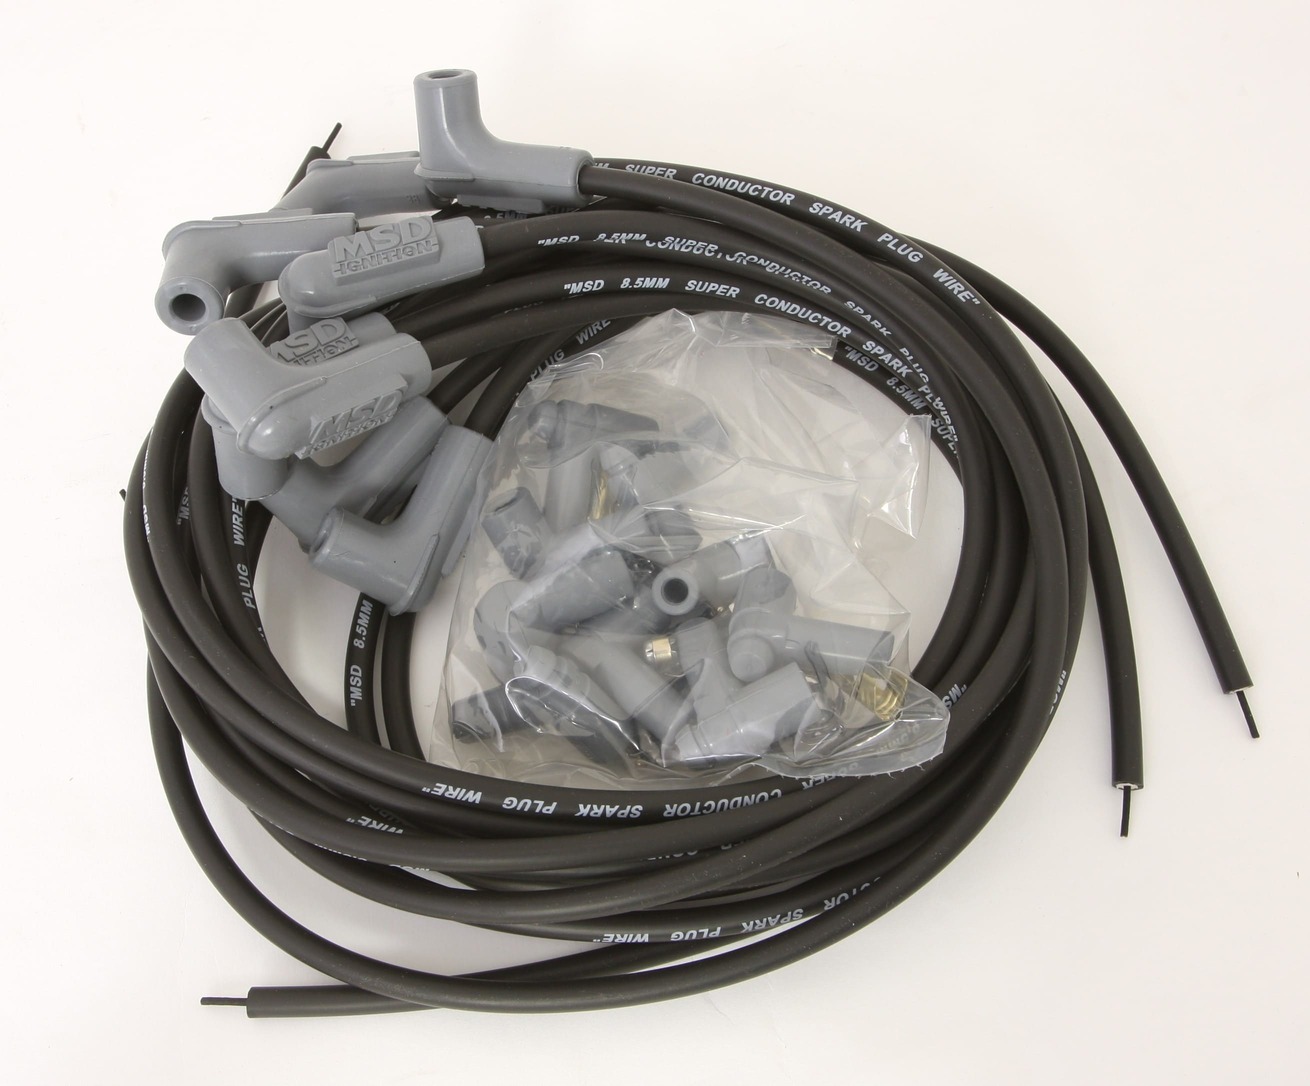
Ignition duties will be handled by an MSD Blaster 2 canister-style ignition coil (PN MSD-82023), sending spark out via an MSD Ready-to-Run Distributor (PN MSD-83603) through a set of MSD Super Conductor spark plug wires (PN MSD-35593).
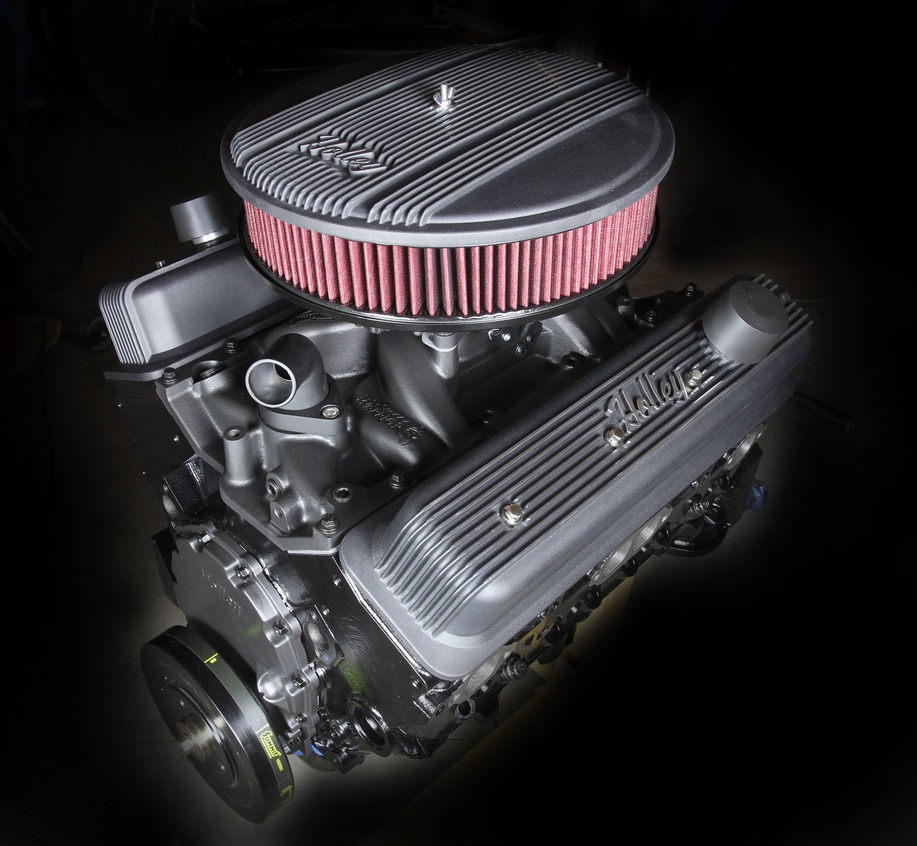
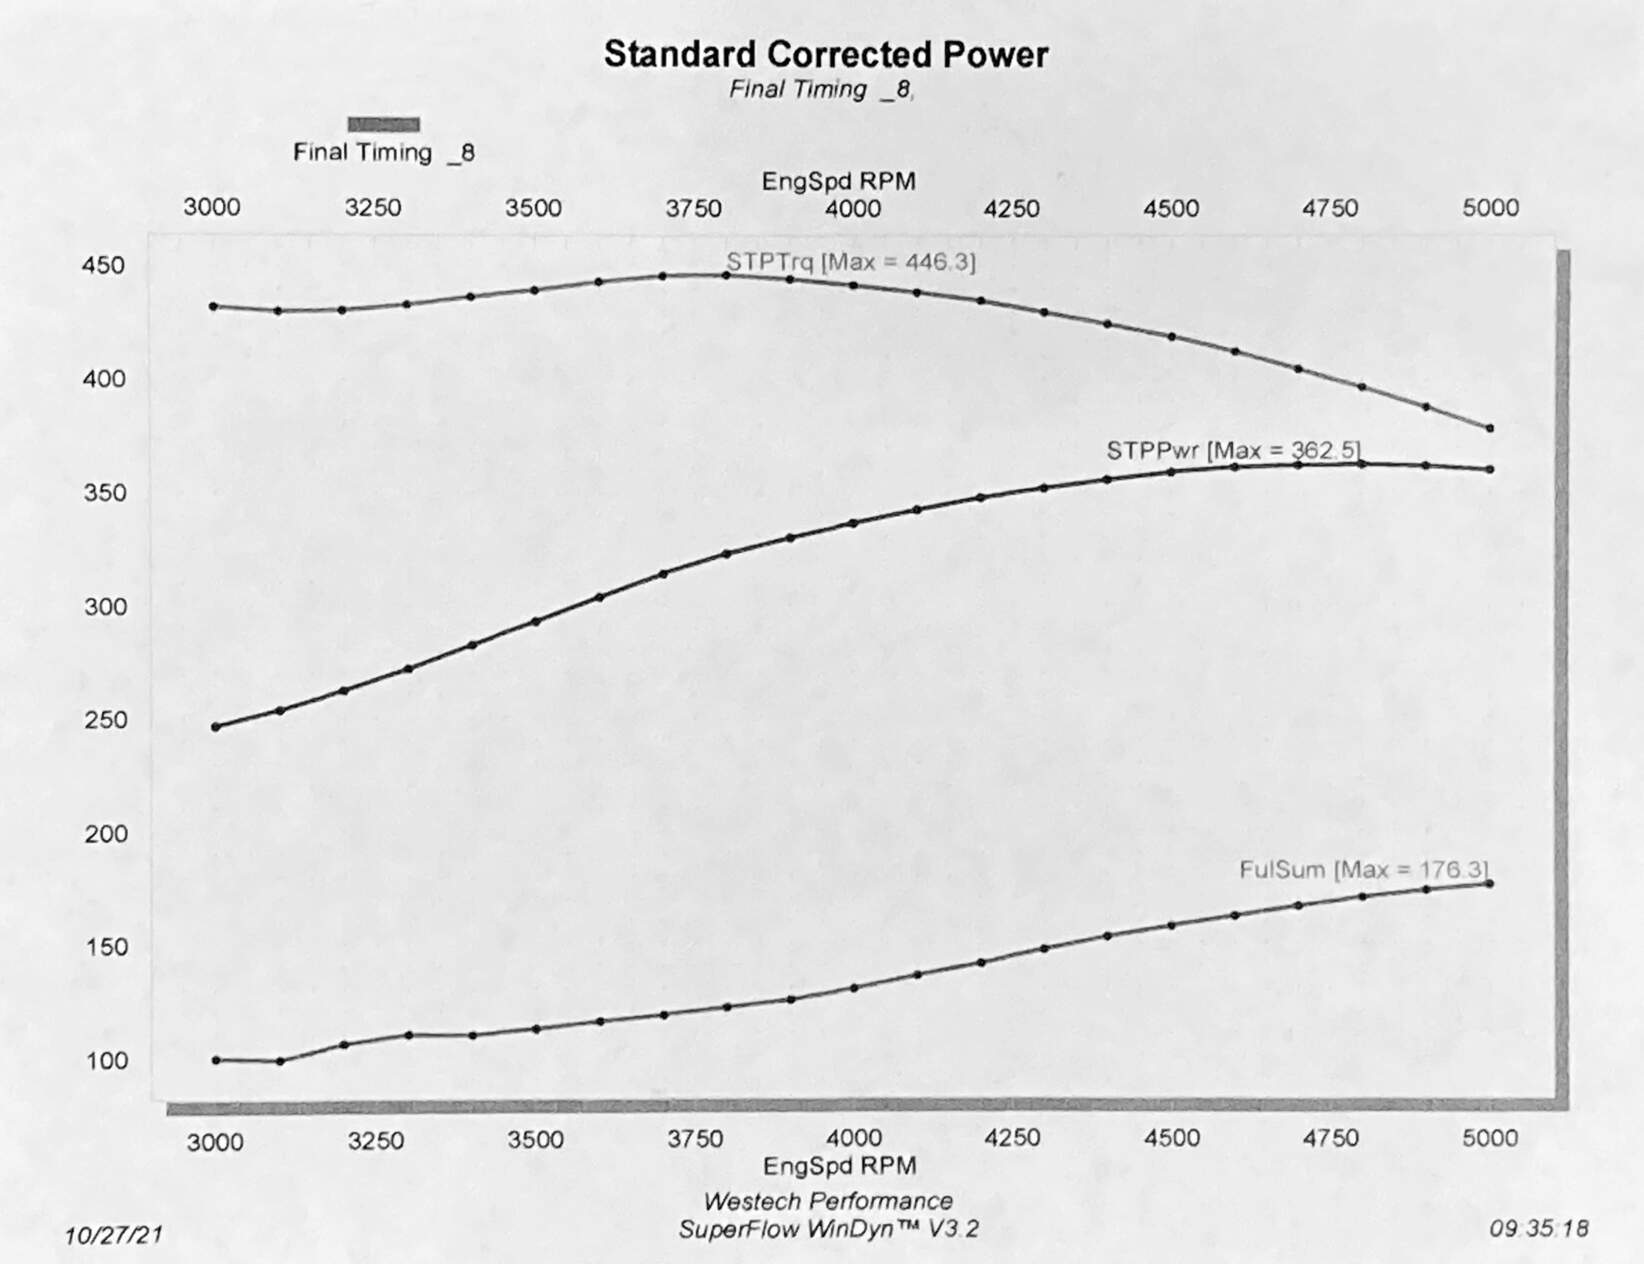
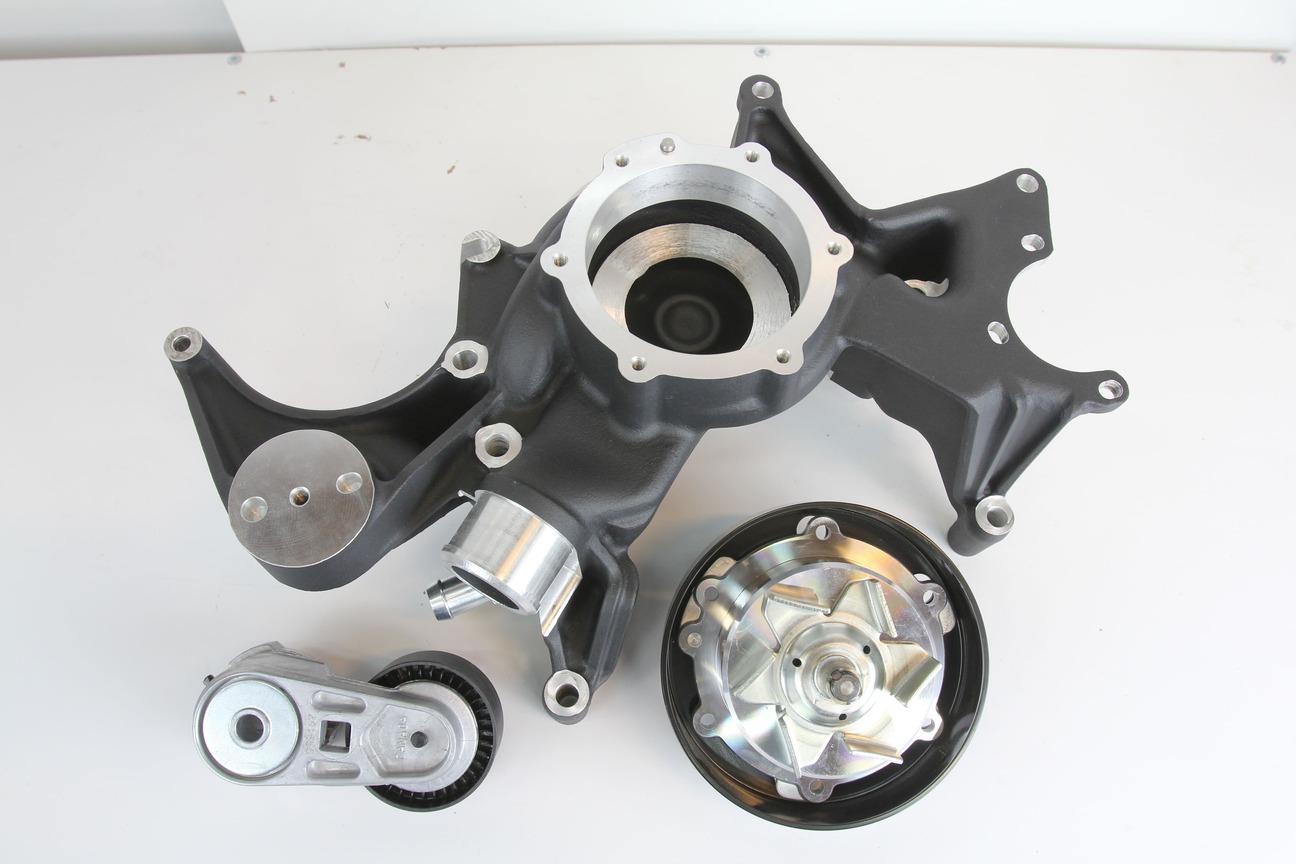
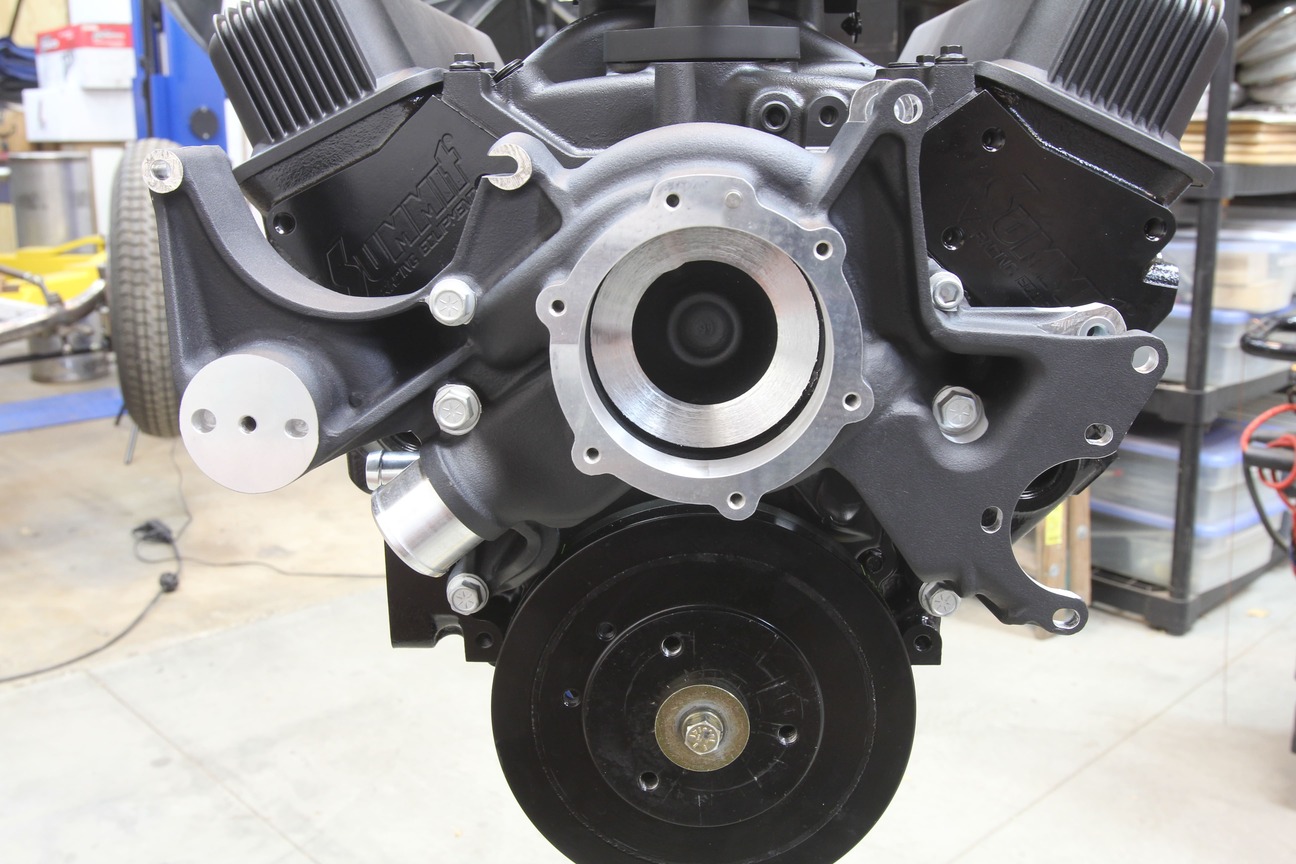
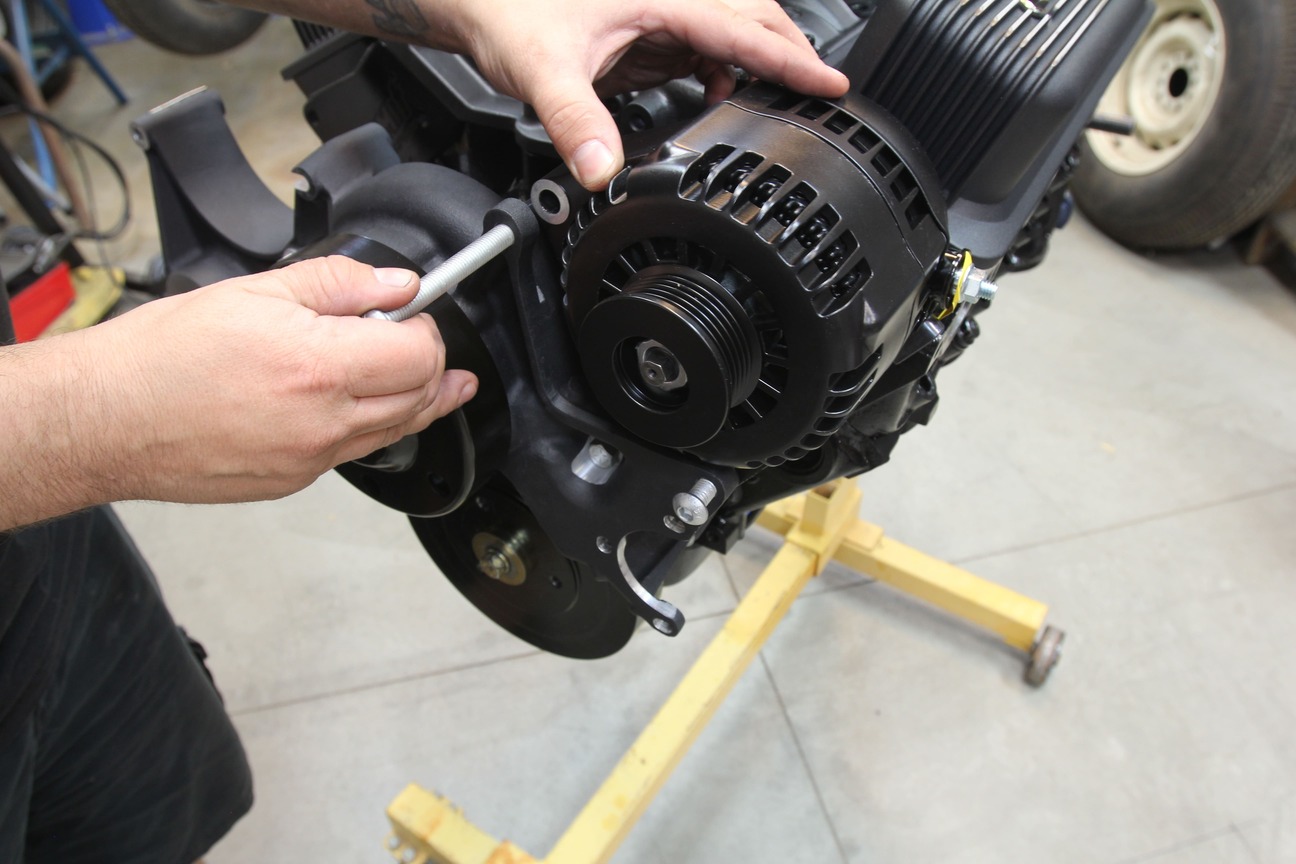
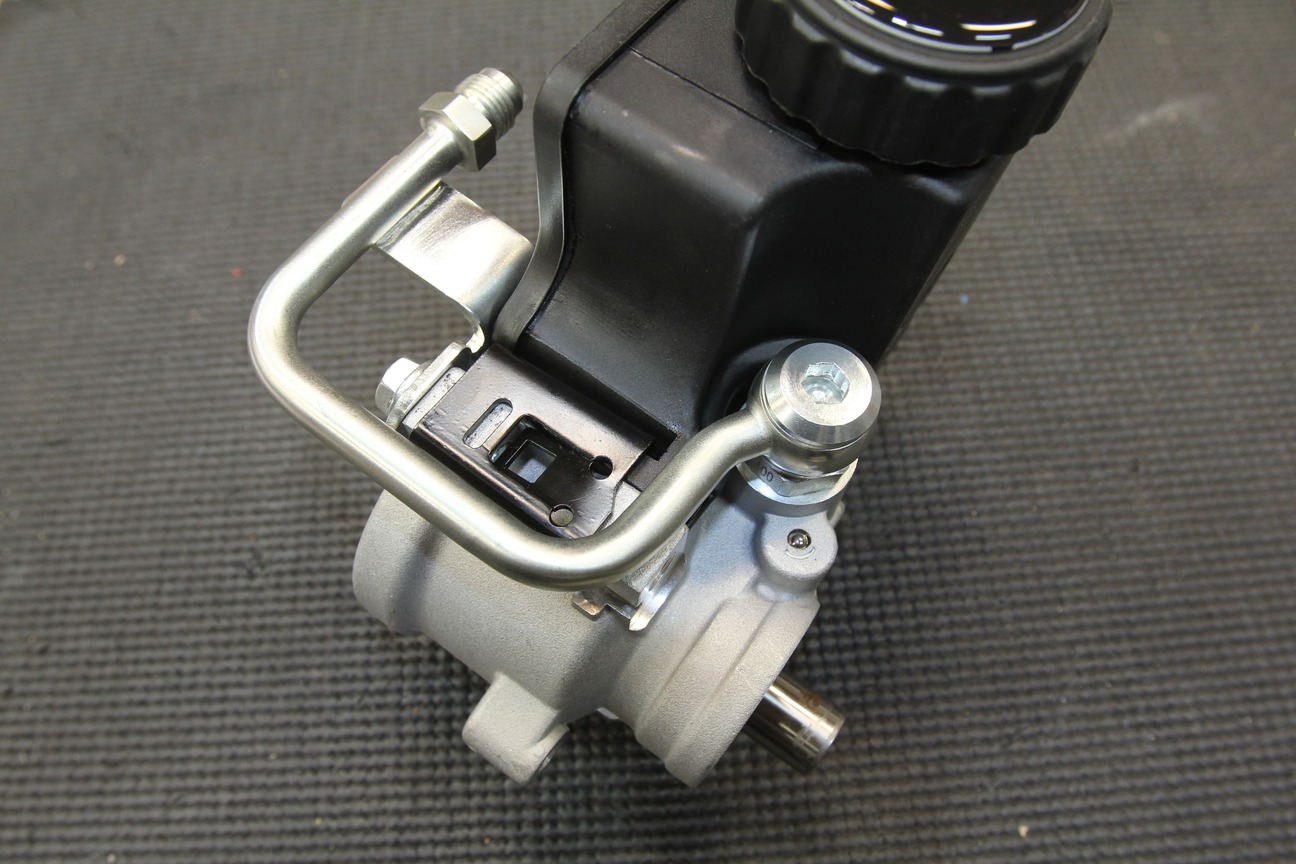
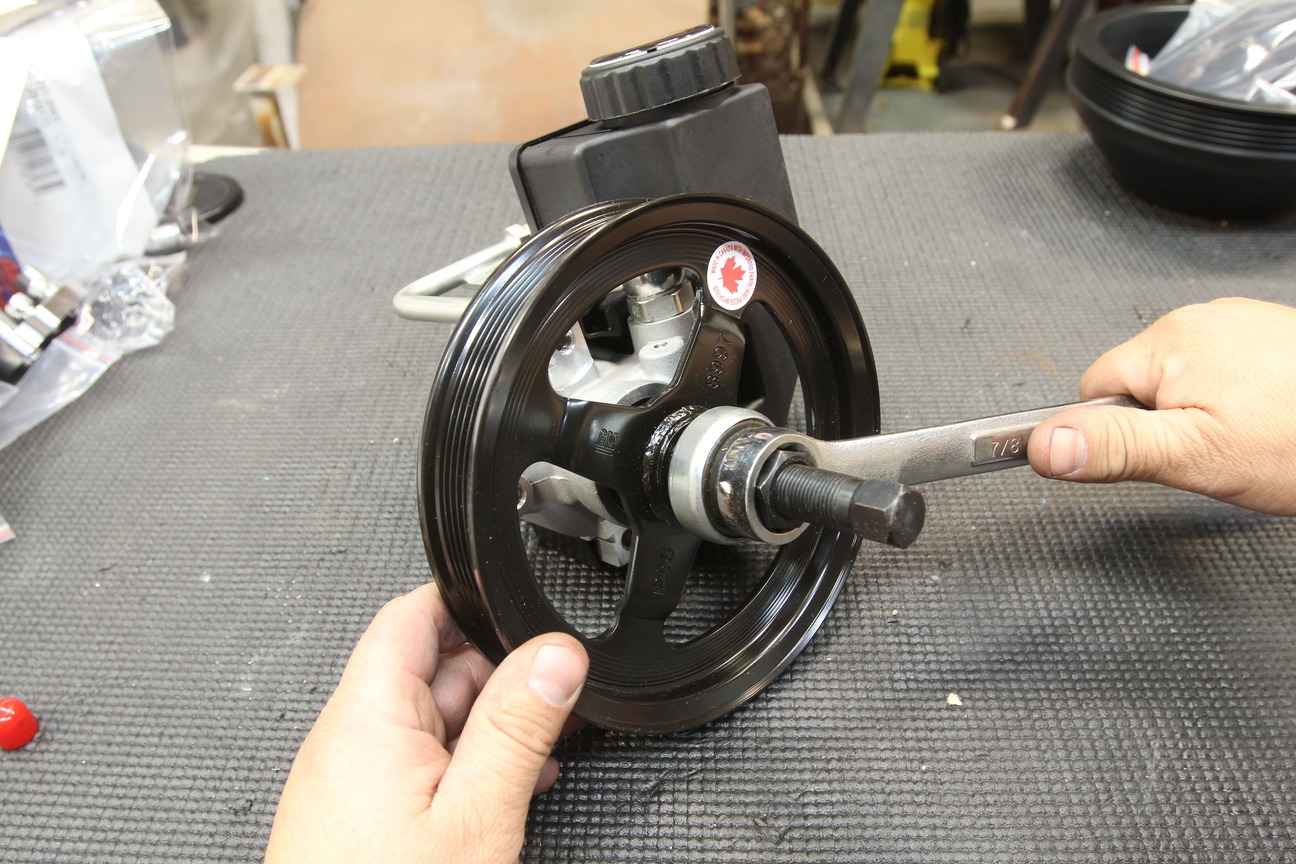
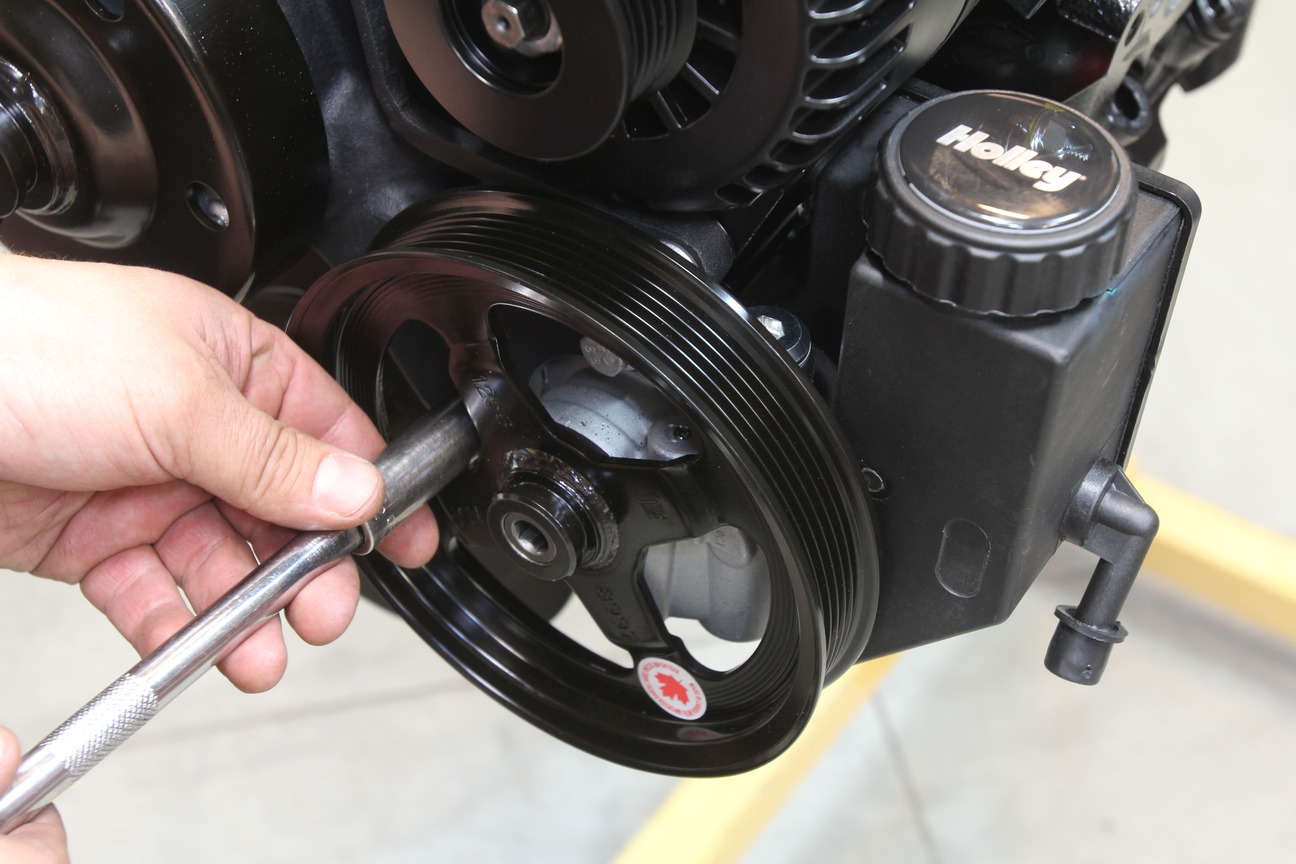
Making our engine pretty is achieved by using a pair of Holley Vintage Serie finned, die-cast aluminum satin black machined valve covers (PN HLY-241-247) paired with a similarly finned aluminum 14-inch die-cast aluminum air cleaner (PN HLY-120-153).With the last few loose ends of our build complete, it was time to head out to Westech for a couple hours of testing and tuning on their SuperFlow engine dyno. The half day spent on the engine dyno will not only result in learning our engine’s power output, it also allows the guys at Westech to dial in the timing and the EFI’s tune on the fly, getting us as close as possible to an actual plug-and-play situation when it comes time to installing the engine in our vehicle.The resulting dyno sheet from our session tells no lies, and the torque numbers look great. Our 377 build makes great torque down low in the rpm band, just like we wanted, and the horsepower curve ain’t half bad either!With the dyno testing in our proverbial rearview mirror, there are a few more items to address before our engine is ready to be installed. One of those items is the accessory drive setup. We opted to keep things in the Holley family, ordering their Small-Block Chevy Mid-Mount Complete Accessory System (PN HLY-20-240BK) from Summit Racing.The Holley system features a unique water pump manifold that incorporates all the mounting points for the accessories, negating the need for a bunch of extra brackets and uses a C7 Corvette bolt-in water pump for reliability.The water pump manifold is held in place by a total of six fasteners, torqued to 30 lb-ft. O-ring seals on the back side of the manifold ensure a leak-free installation.Next, the LT1 cartridge-style water pump is installed using the provided M6 button head bolts.A compact A/C compressor and Type II power steering pump are industry standard fare, but the Holley alternator is unique. Designed in-house by Holley engineers, this premium alternator utilizes six-phase technology, again found on C7 Corvettes, and features 150-ampere output, packaged in a compact, fully sculpted, all-aluminum housing.The alternator will be the first of the accessories to be installed, using the provided M10 x 80 button head bolts, torqued to 36 lb-ft.The power steering pump is next, but first an AN-6 hard line adapter is installed, as well as the power steering pulley.
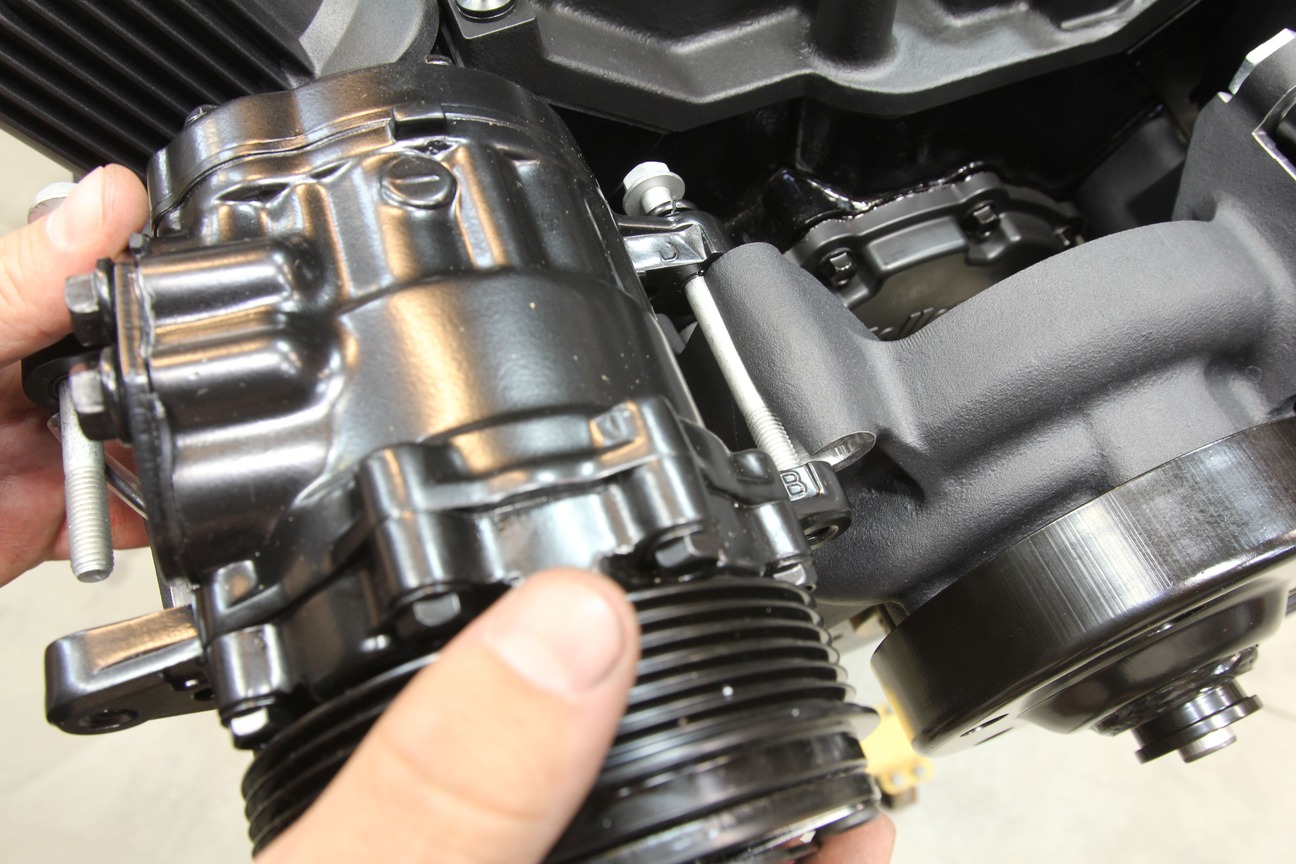
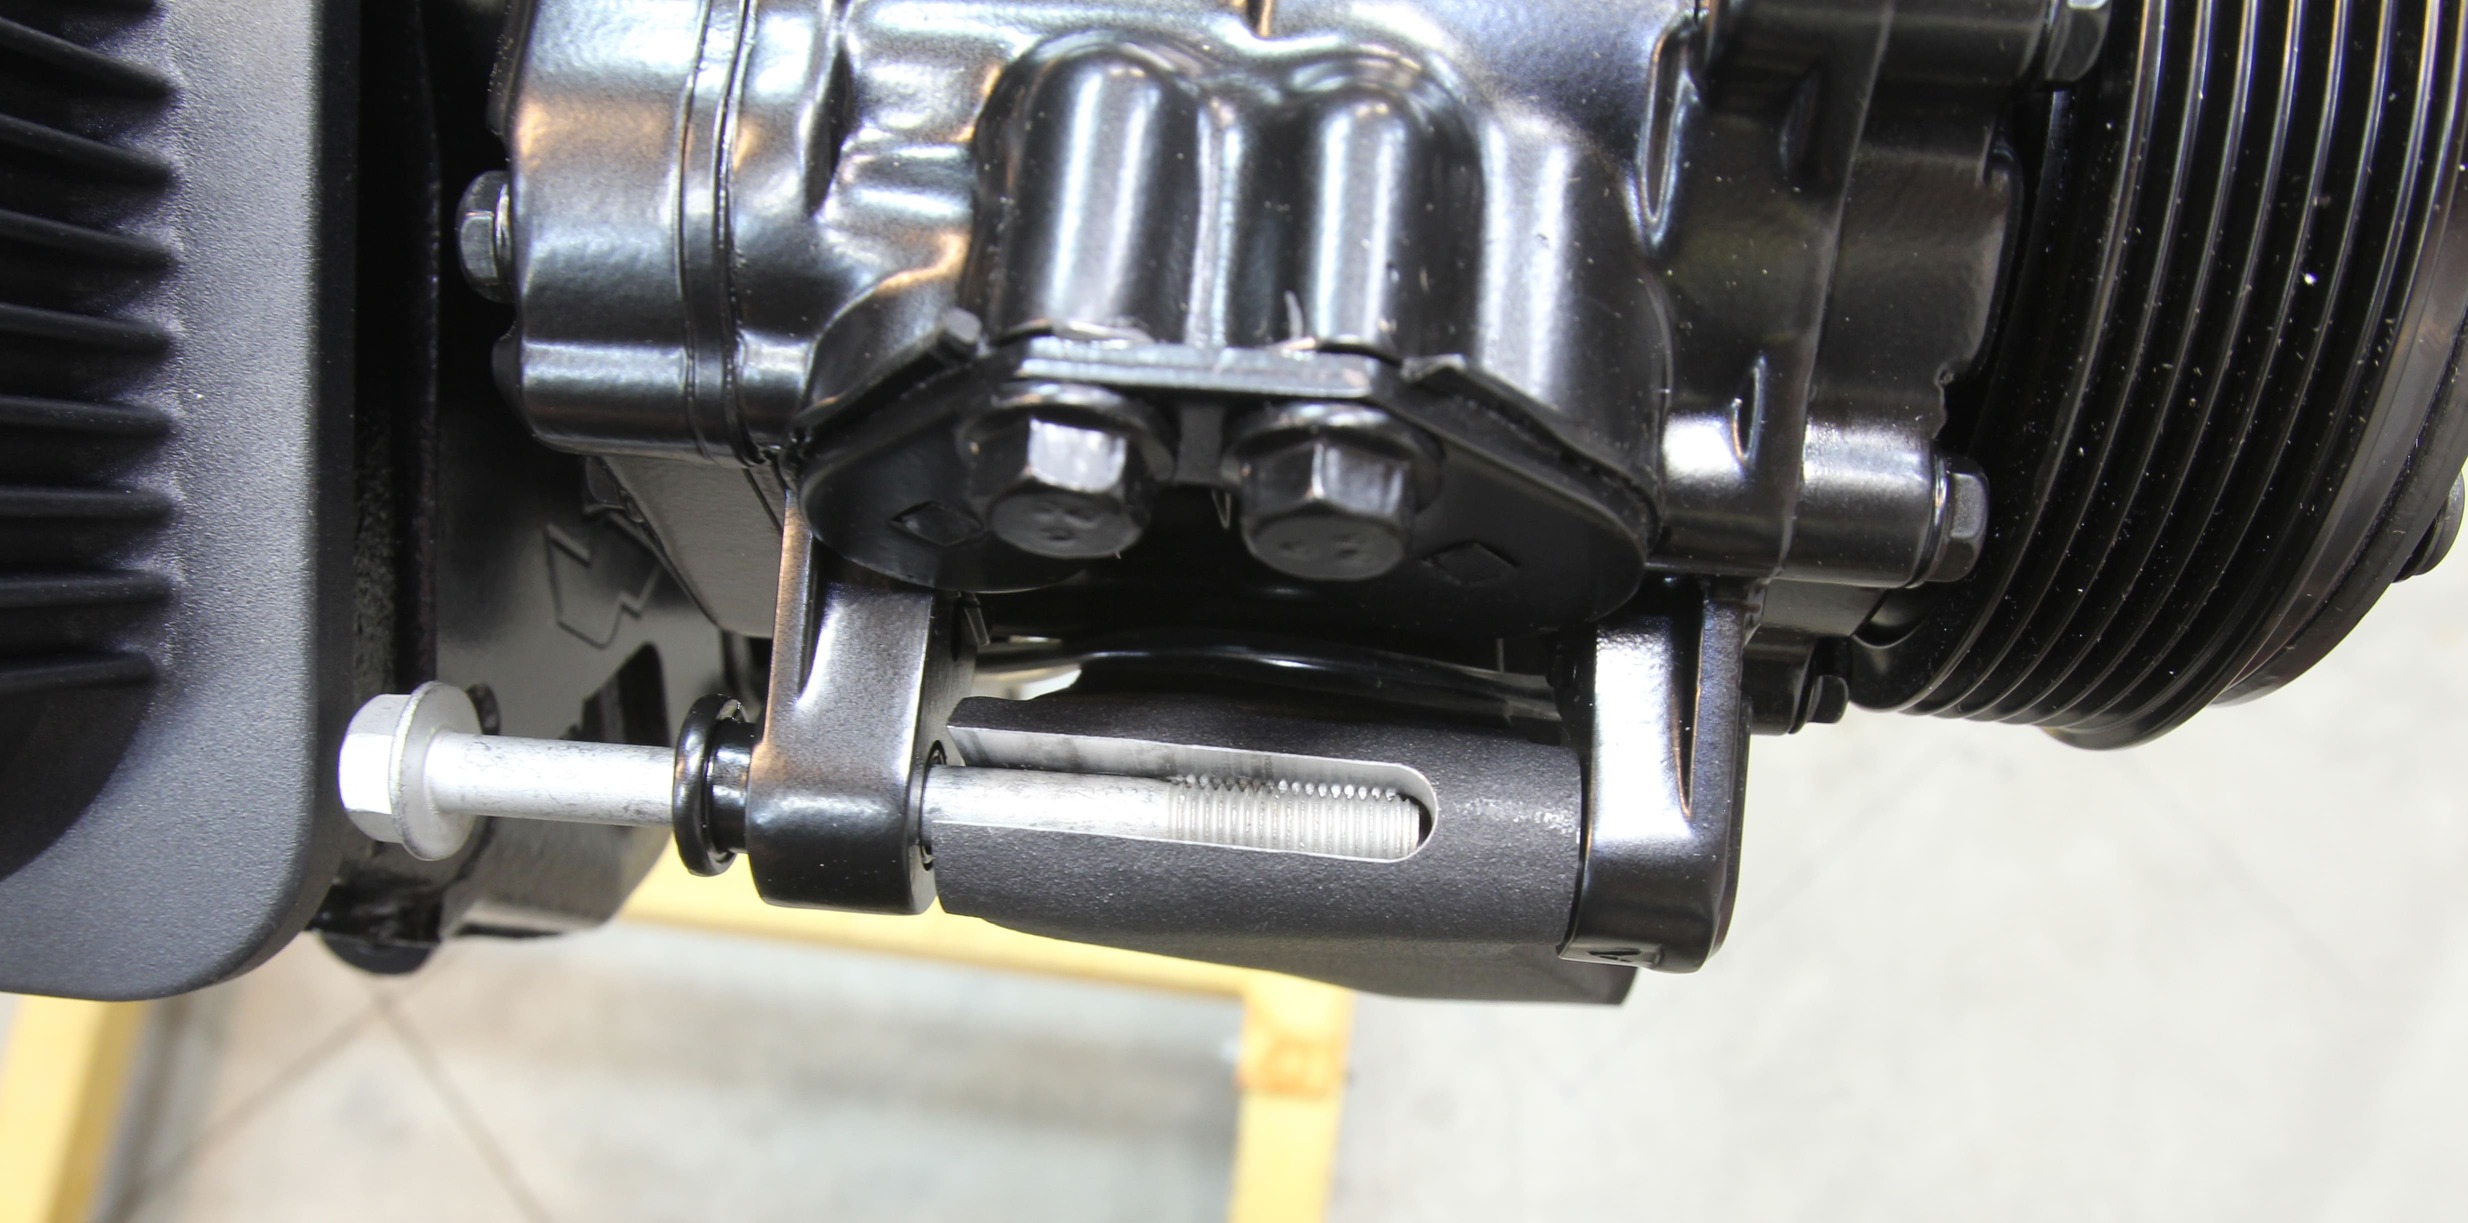
A trio of M8 x 30 fasteners attach the power steering pump to the water pump manifold, torqued to 18 lb-ft.The A/C compressor mount features unique machining that allows the A/C compressor to slide into place, held fast by two M8 x 95 fasteners, torqued to 18 lb-ft.
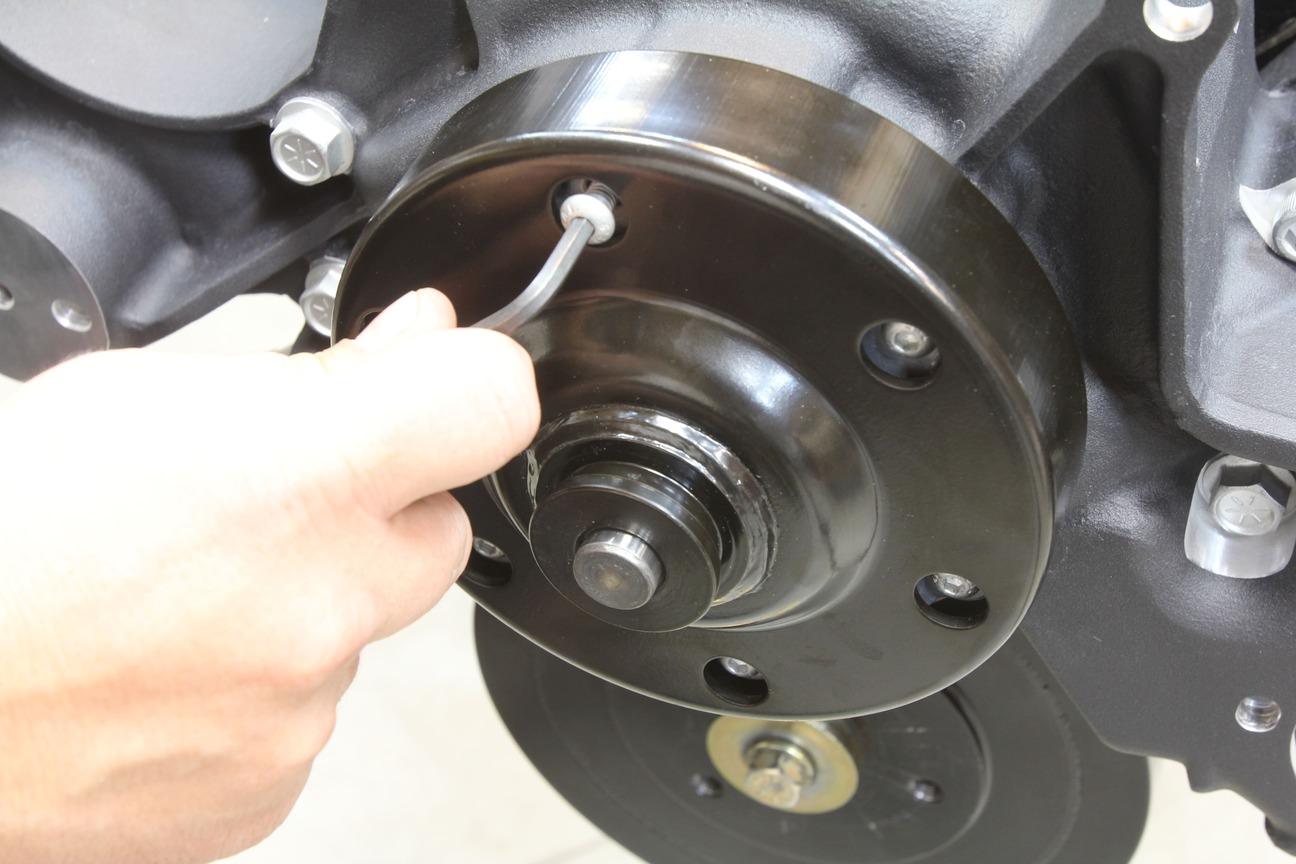
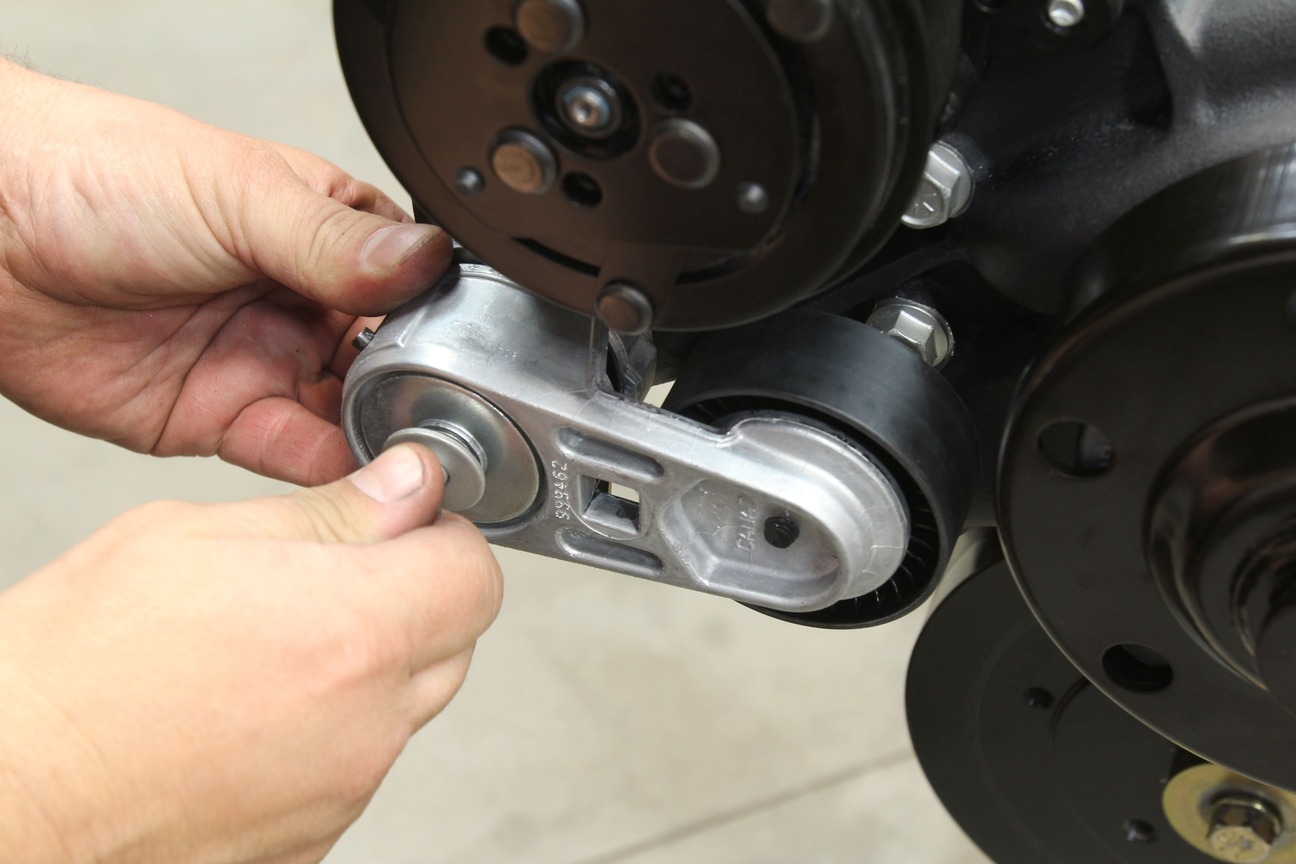
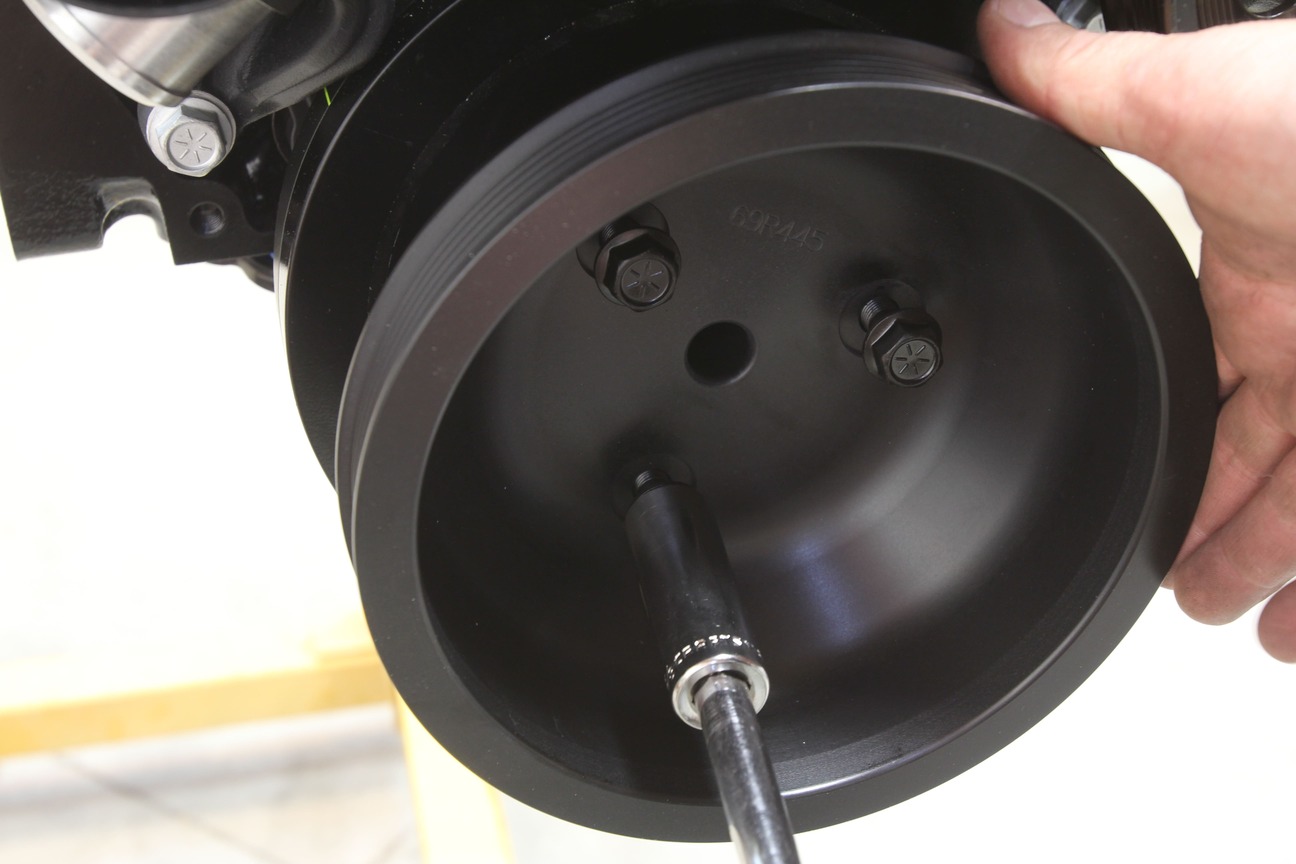
Since the Holley system uses a single serpentine belt, a belt tensioner is necessary to keep things taut.A billet aluminum crank pulley is the last major component to be installed, using the provided three 3/8-24 x 1 1/4-inch flange head bolts to attach the pulley to the damper. A new crank bolt and washer is also included, torqued to 60 lb-ft, while the damper bolts are torqued to 25 lb-ft.With the necessary pulleys and components installed, it’s now possible to install the serpentine belt.Pulley covers for the A/C compressor and alternator, as well as a cover plate for the belt tensioner further dress up the Mid-Mount kit.
And that’s a wrap! What started as a bare block has been fully assembled, tested, and tuned and is ready to drop in our vehicle.
Sources
Automotive Racing Products (ARP)
(800) 826-3045 arp-bolts.com
We use cookies to ensure that we give you the best experience on our website. If you continue to use this site we will assume that you are happy with it.