ITGMw
SUBSCRIPTIONtext
ProgressArrows
digital issues
ProgressArrows
online store
ProgressArrows
SUBSCRIPTIONtext
ITGMw
ACPnew header logo
CTP LOGOs
all cars

The Sound of Silence and Keeping Your Cool

OEM-Quality Insulation for Your Classic Performance Car

By Ron Ceridono – Photography by Jason Scudellari

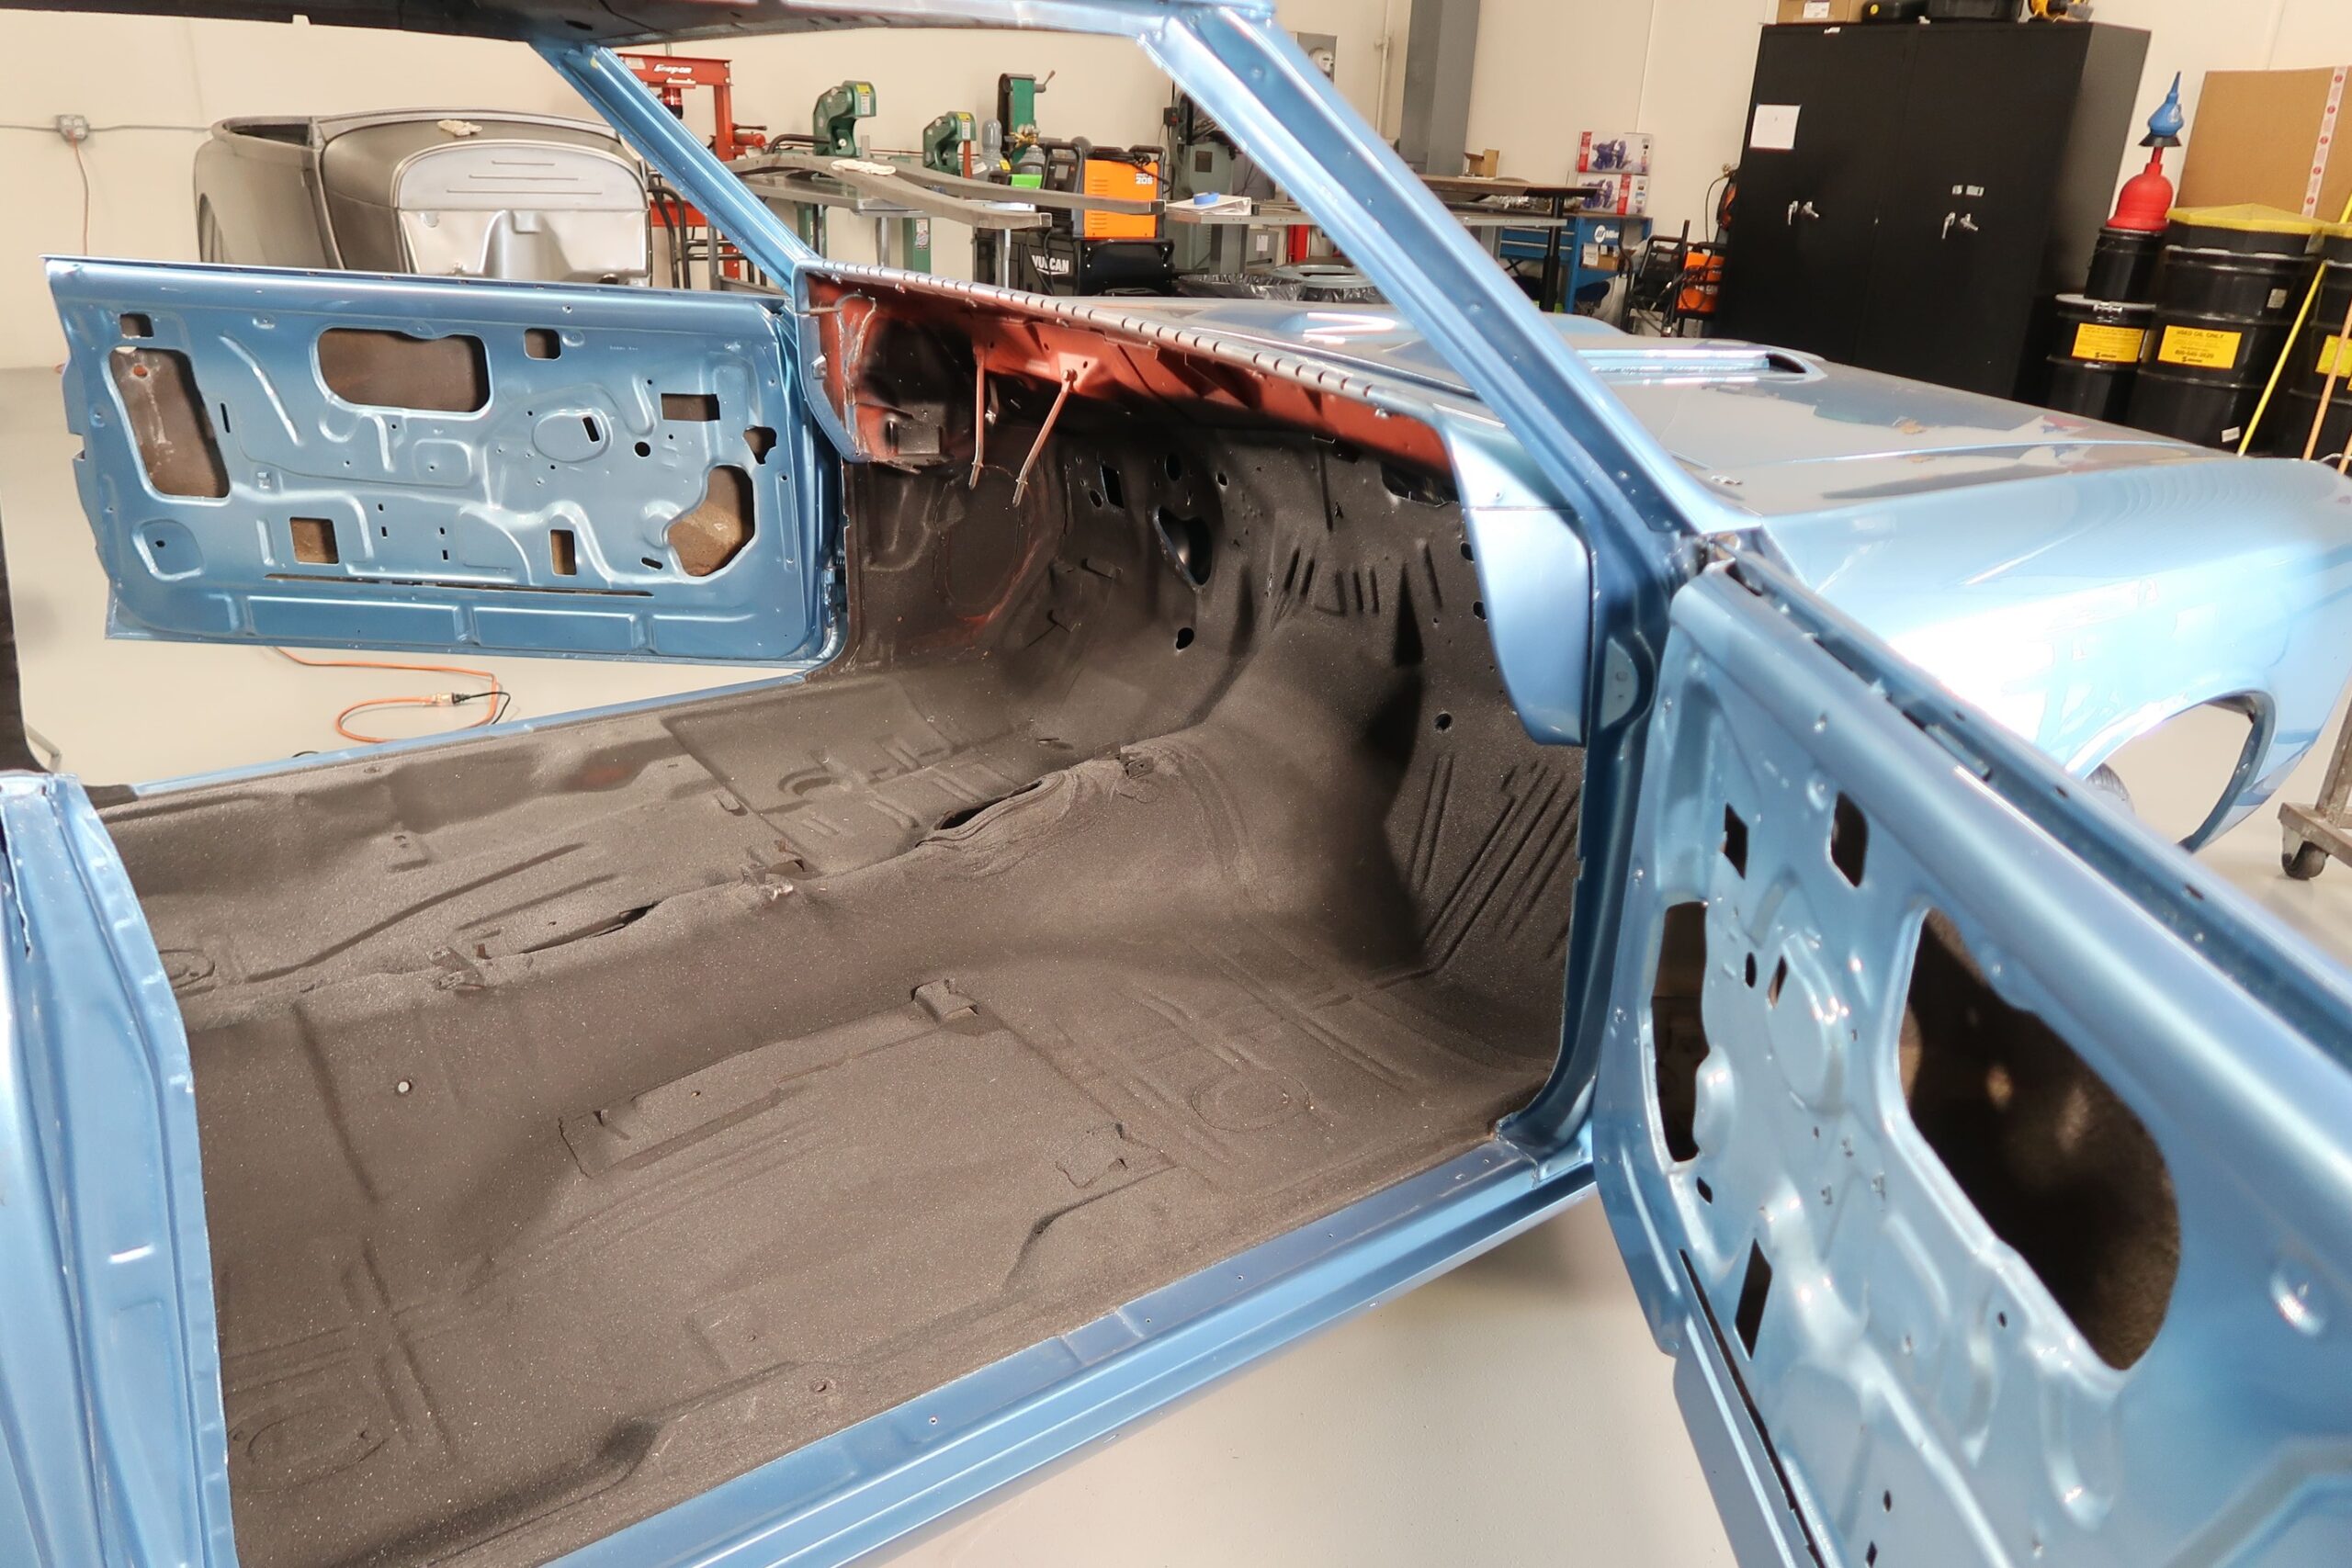
There was a time many years ago, around the time Editor Licata got his first Ramones T-shirt, that for many of us the comfort level inside a performance car wasn’t a concern. We put up with noise levels that were similar to being inside in a 55-gallon drum during a hailstorm and temperatures that rivaled those found in Death Valley during the summer—youthful enthusiasm often overrides pain and discomfort. But things have changed; today most of us expect more from our cars than we used to, which includes a quiet, comfortable interior.

01 hushmat installation chevelle
HushMat insulation is comprised of layers of special butyl rubber with a thin aluminum foil barrier on top. The foil reflects heat and vibration back into the rubber for effective control of both.

When auto manufacturers began taking passenger comfort more seriously in the late ’80s (primarily due to advertising campaigns on the subject by Lexus), they began to search for products to meet the challenge of sound reduction and reduced heat absorption. A company named Dexter Automotive had a specially compounded butyl rubber that proved to be that product and it was approved by General Motors, Chrysler, and other manufacturers for use in production vehicles. Today that company is HushMat and the product is known as HushMat Ultra, which is the only OEM specified and approved sound deadening and thermal insulating material available to the automotive aftermarket.

Check This Out: Ed Nash’s ’72 Camaro

02 hushmat installation chevelle HushMat offers custom vehicle kits
HushMat offers custom vehicle kits, like the one we used for this Chevelle, or it is available in bulk in a variety of sizes. Performance enthusiasts needn’t worry about excessive added weight, as HushMat Ultra weighs 0.47 pound per square foot.

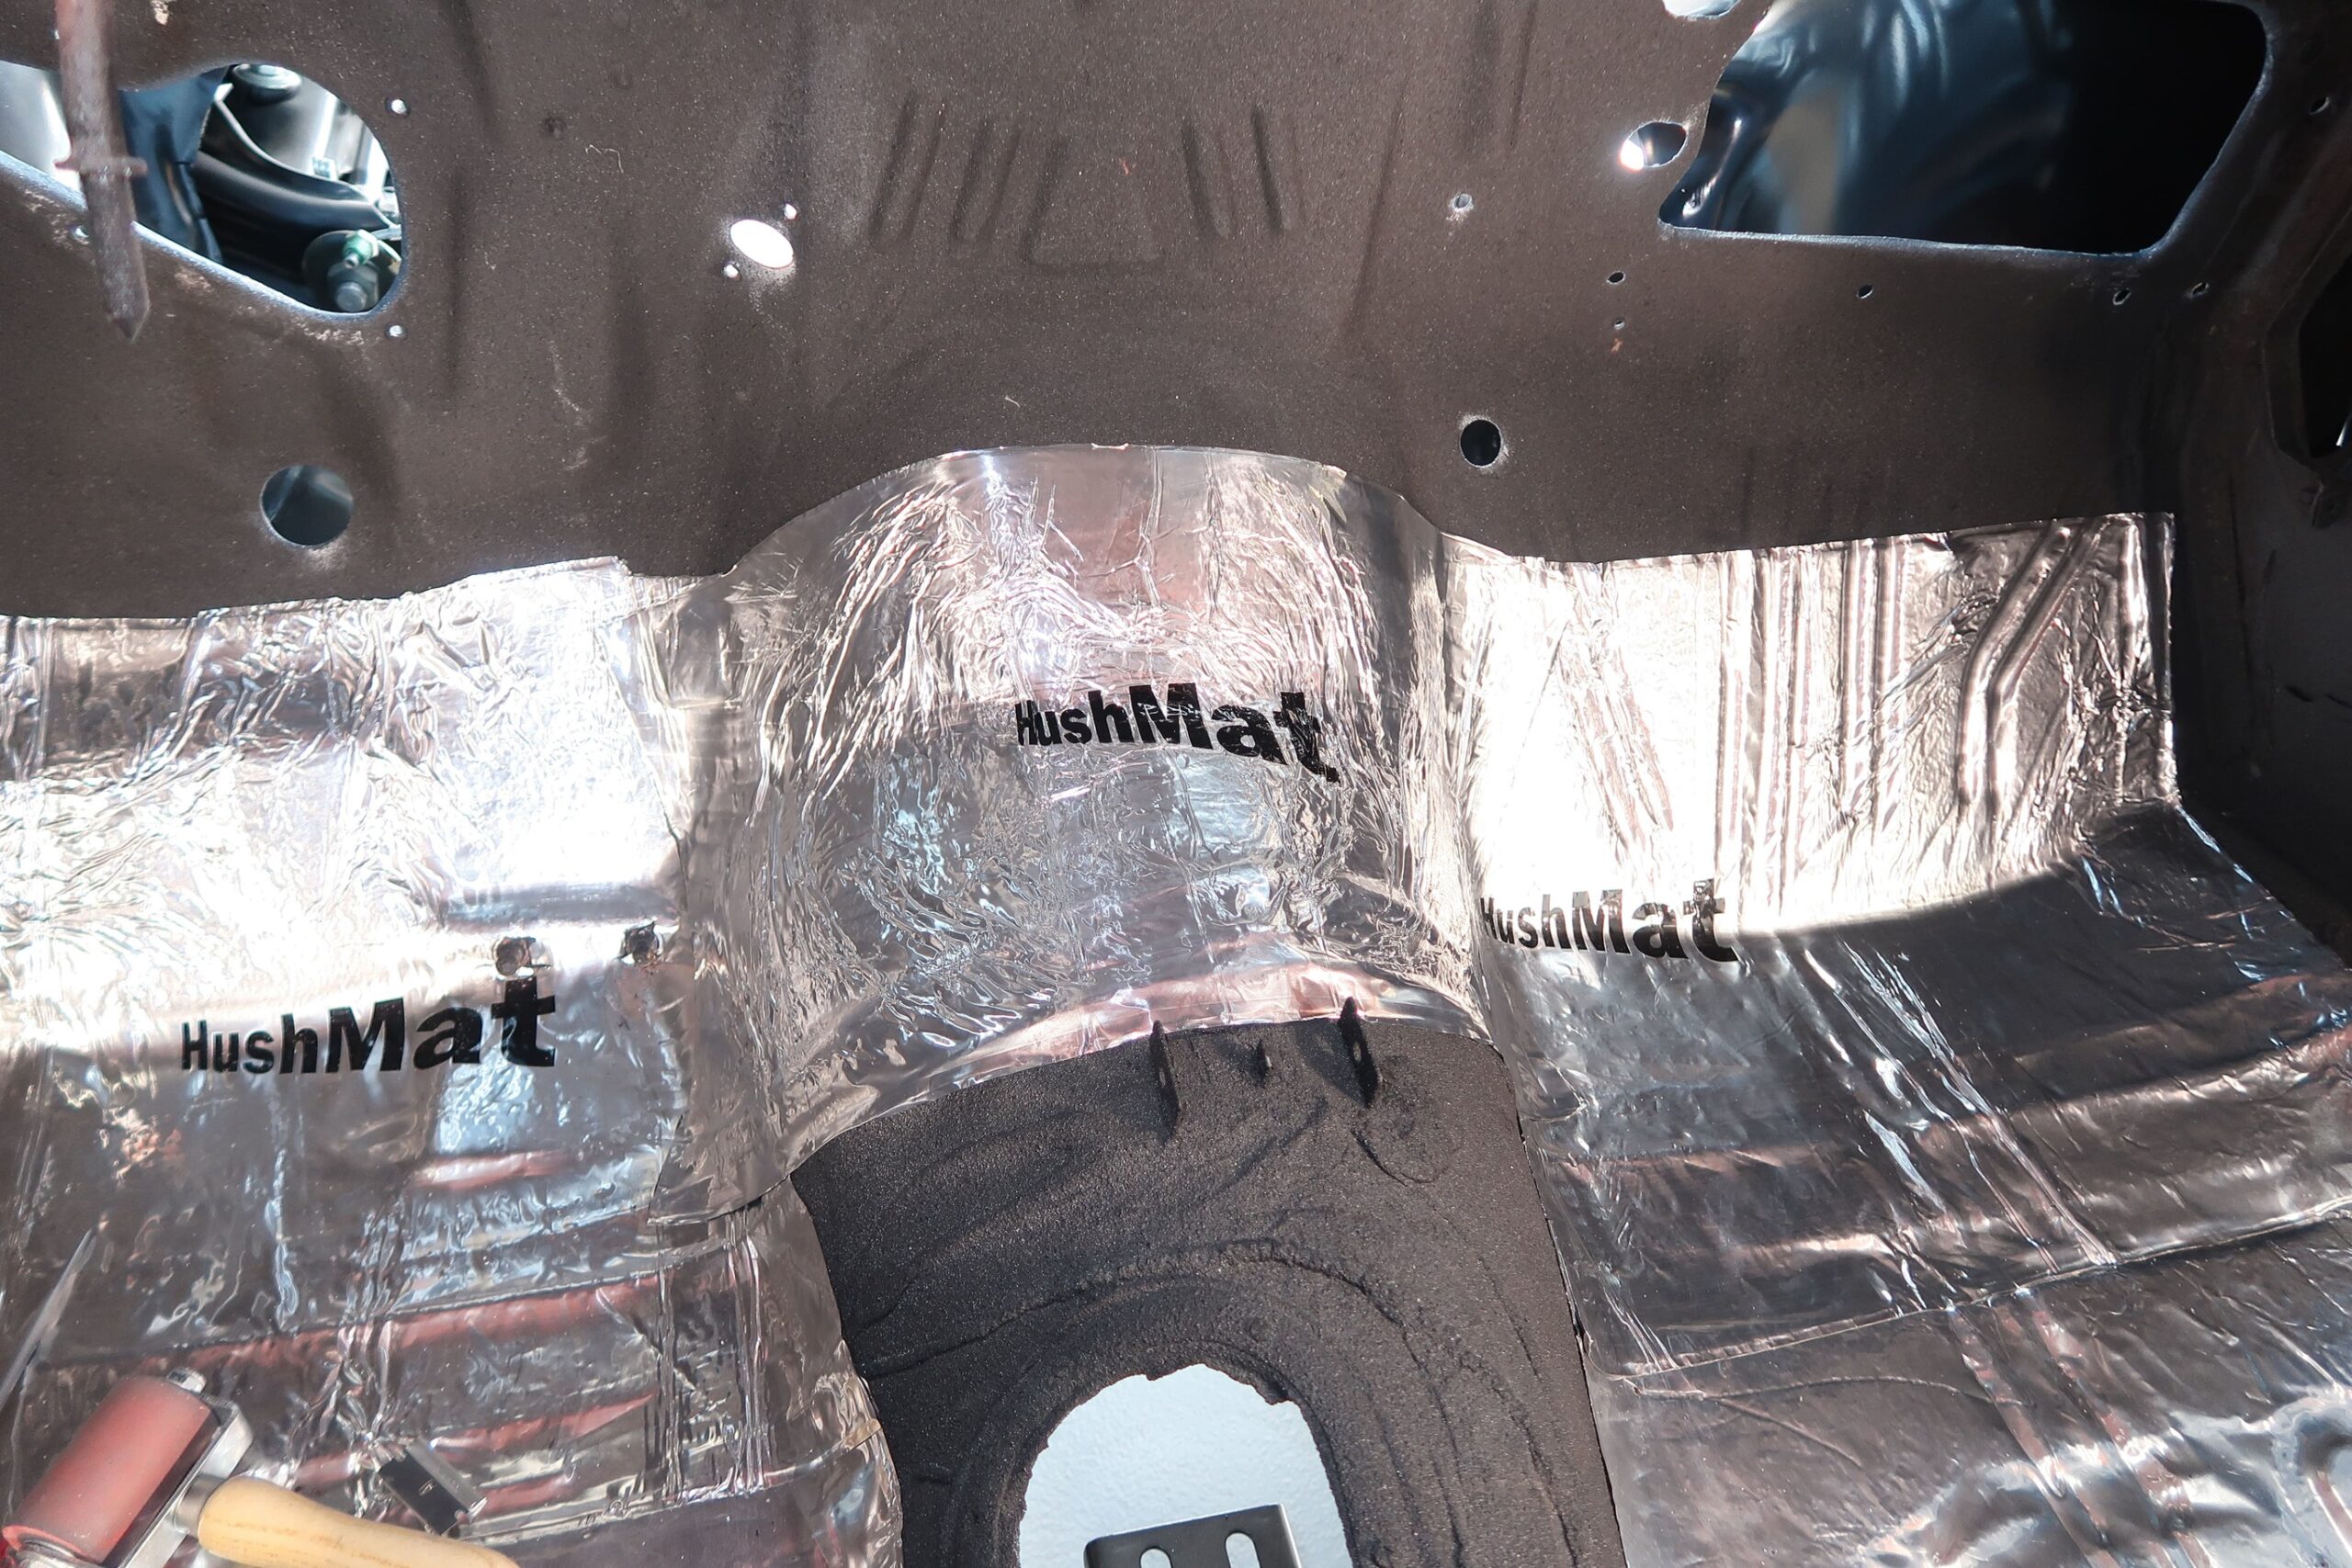
To emphasize the need for such products to performance car enthusiasts, Tim McCarthy, owner of HushMat, likes to ask this simple question: “Do you ever drive on the highway at 65-70 mph and then exit? When you come to a stoplight, what is the first thing you do? The first thing you do is turn the radio down because it is too loud! The noise in your vehicle while driving on the highway forced you to turn up the volume so you could hear it over the noise.” That pretty well sums up the situation many of us have gotten used to, but it doesn’t have to be so. According to McCarthy, installing the full complement of HushMat products can reduce interior sound levels from outside sources by over 50 percent with the added benefit of reducing interior surface temperatures by over 70 percent.

03 hushmat installation chevelle HushMat Ultra is self-adhesive
HushMat Ultra is self-adhesive. Just remove the paper backing and press it in place for a permanent installation.

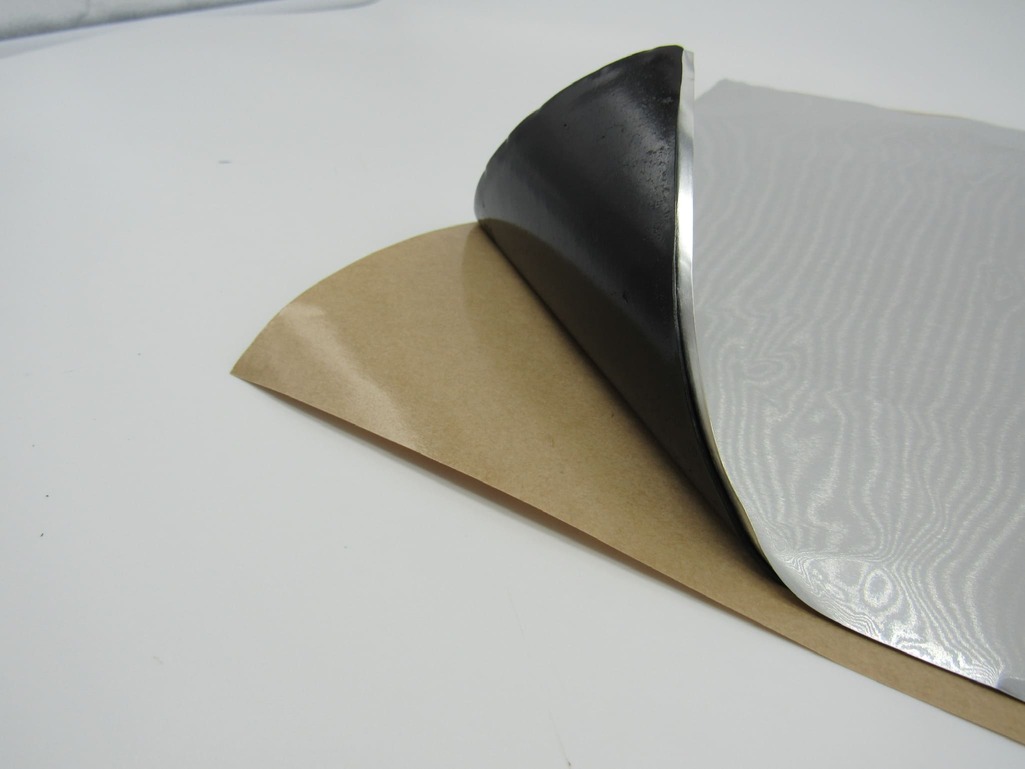
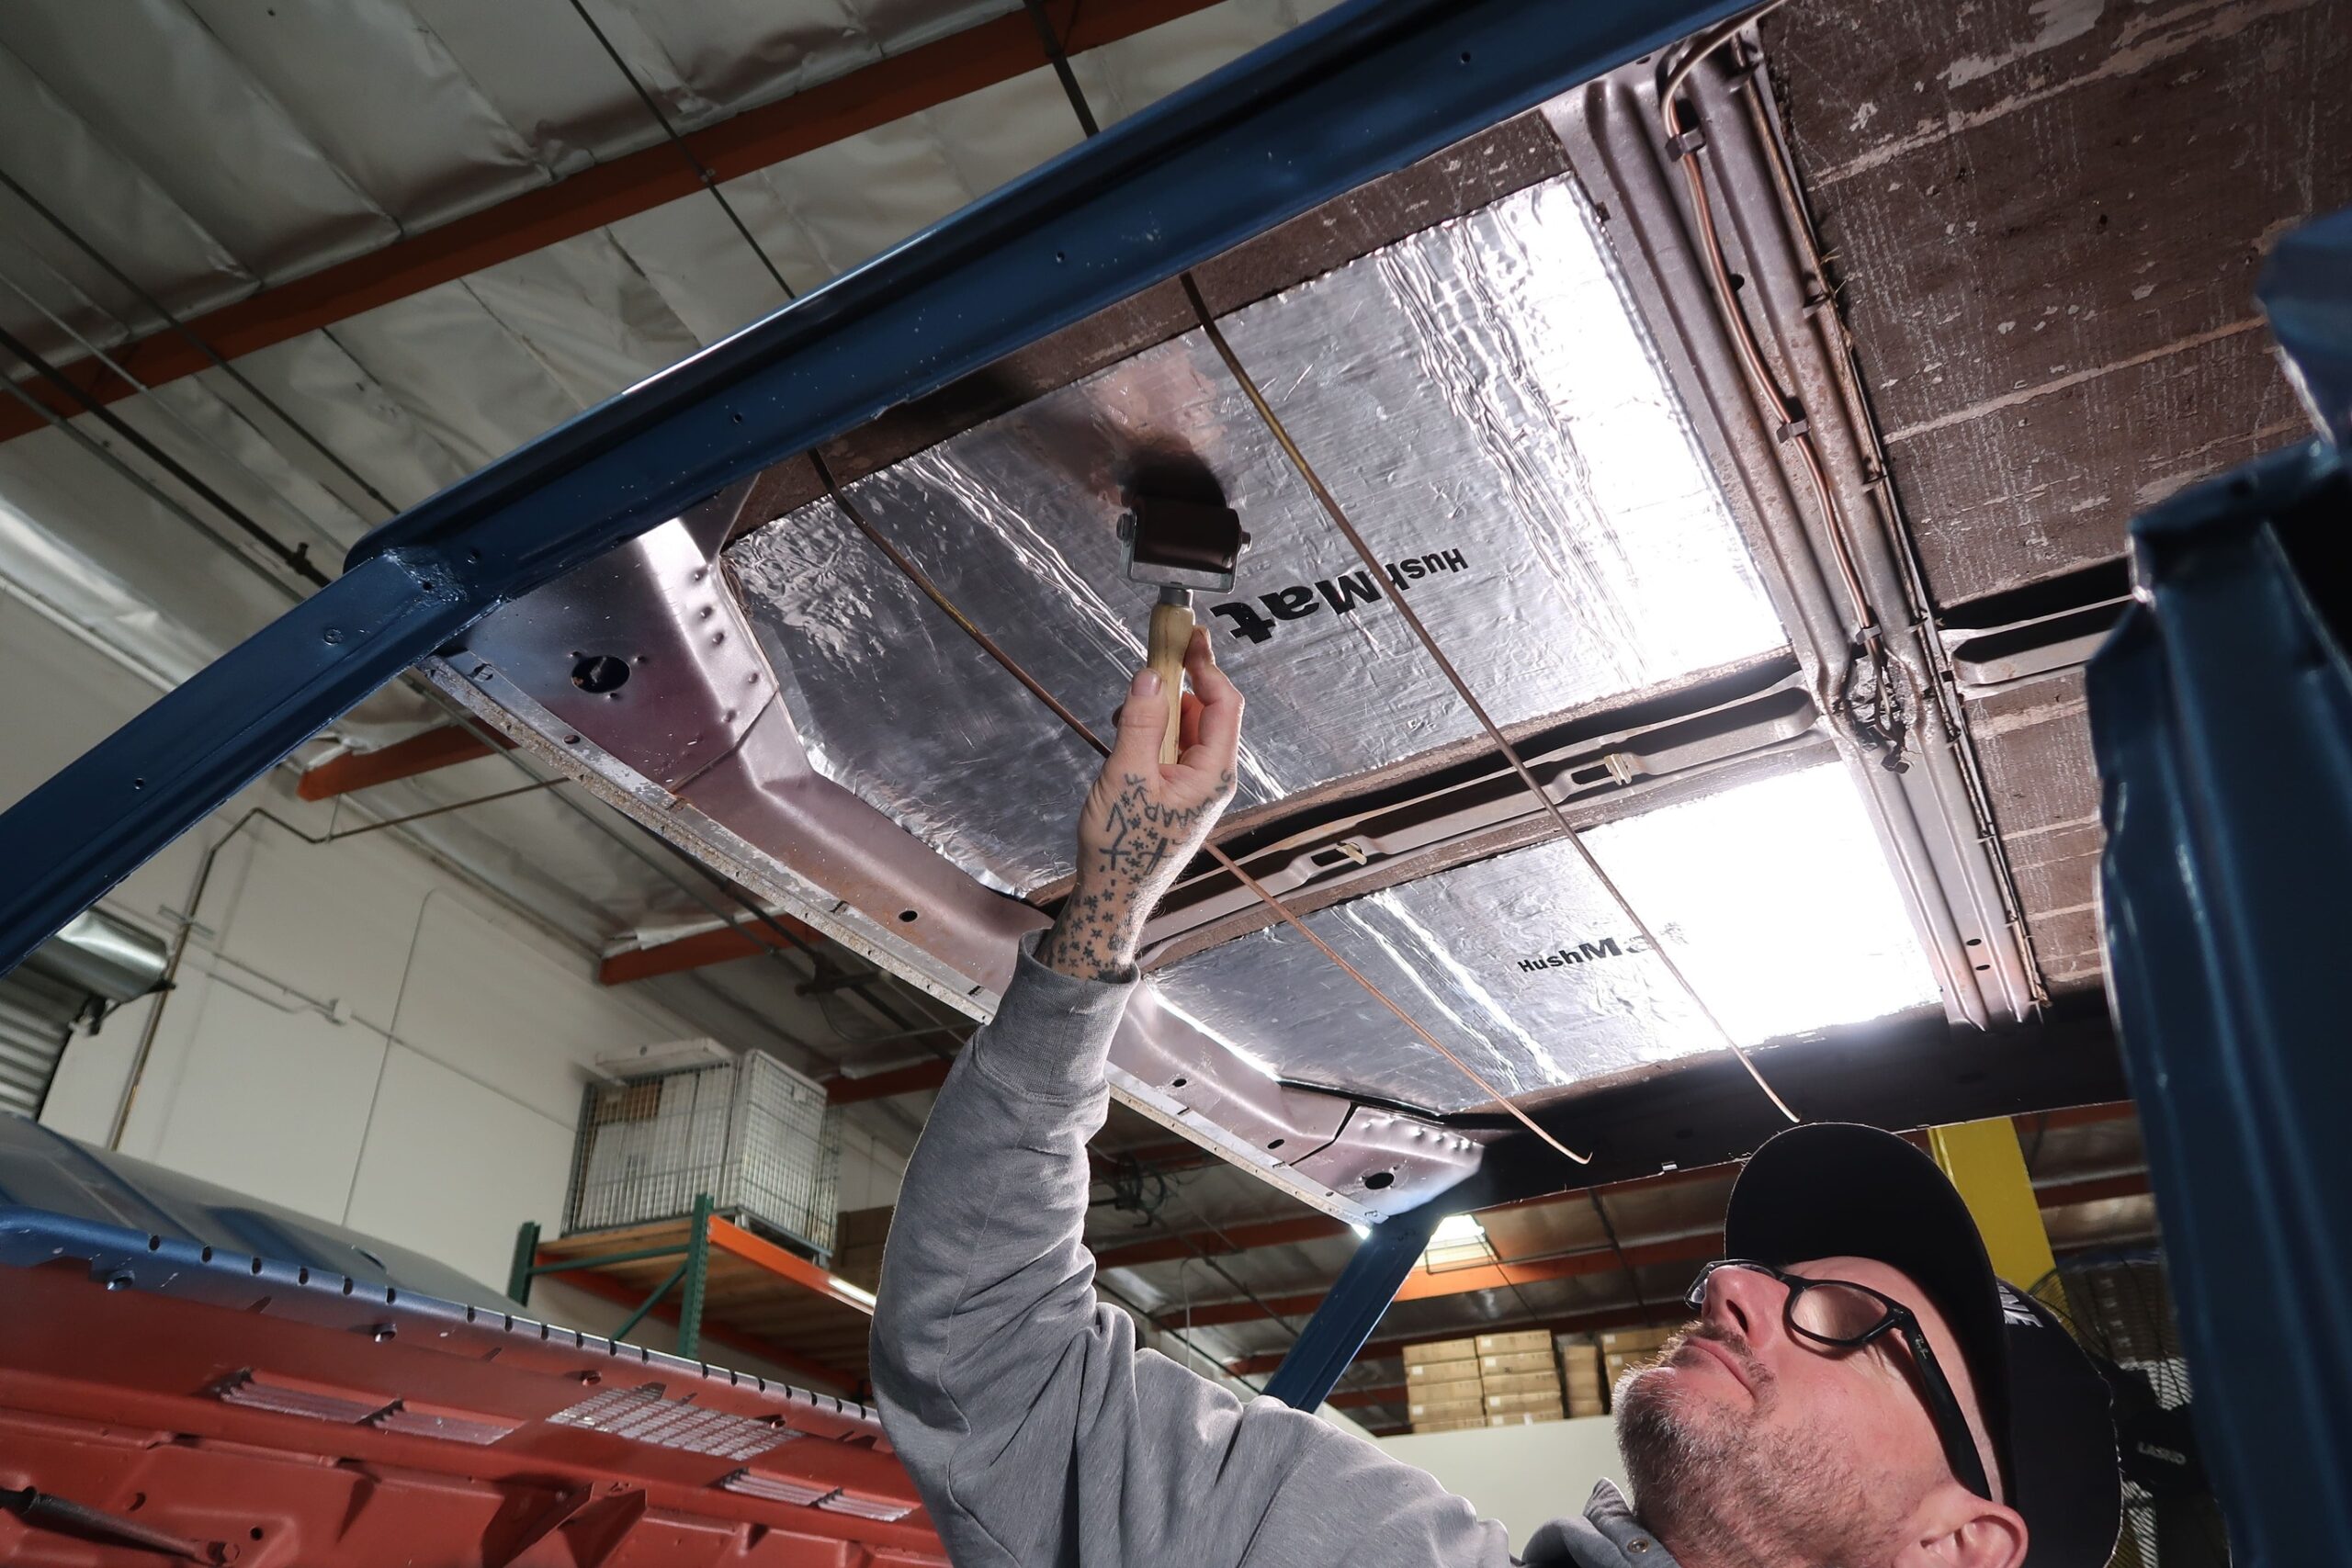
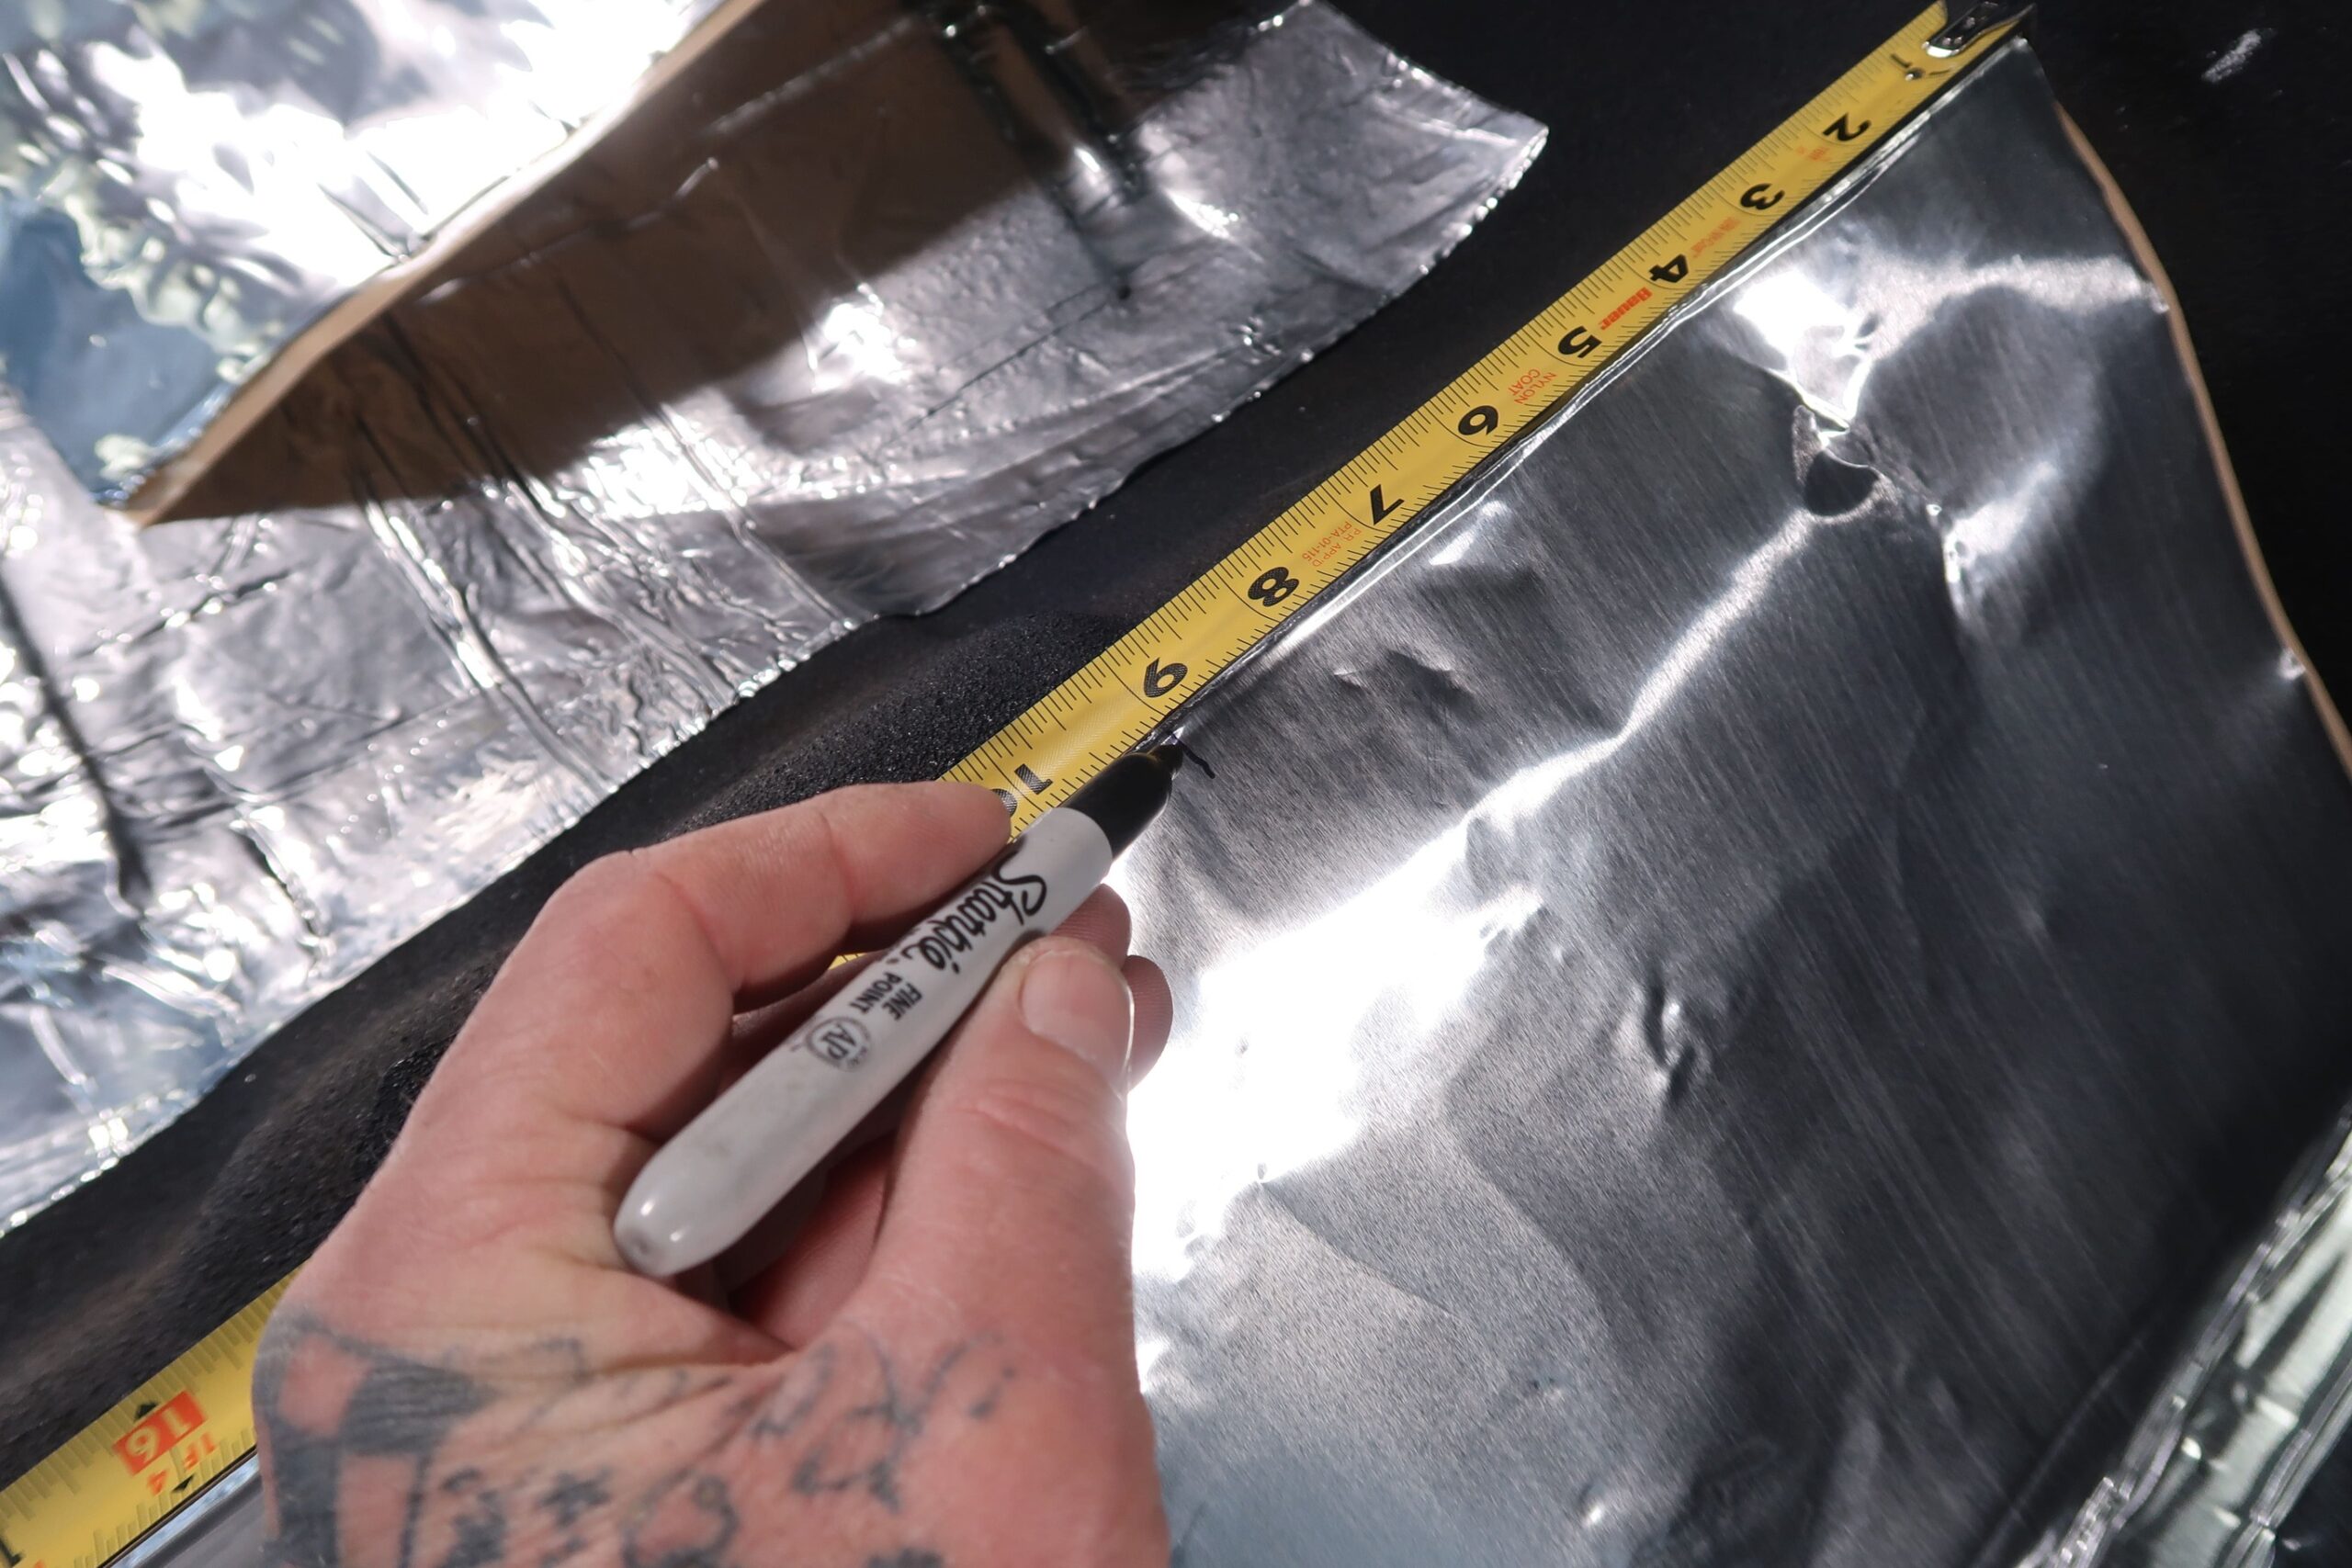
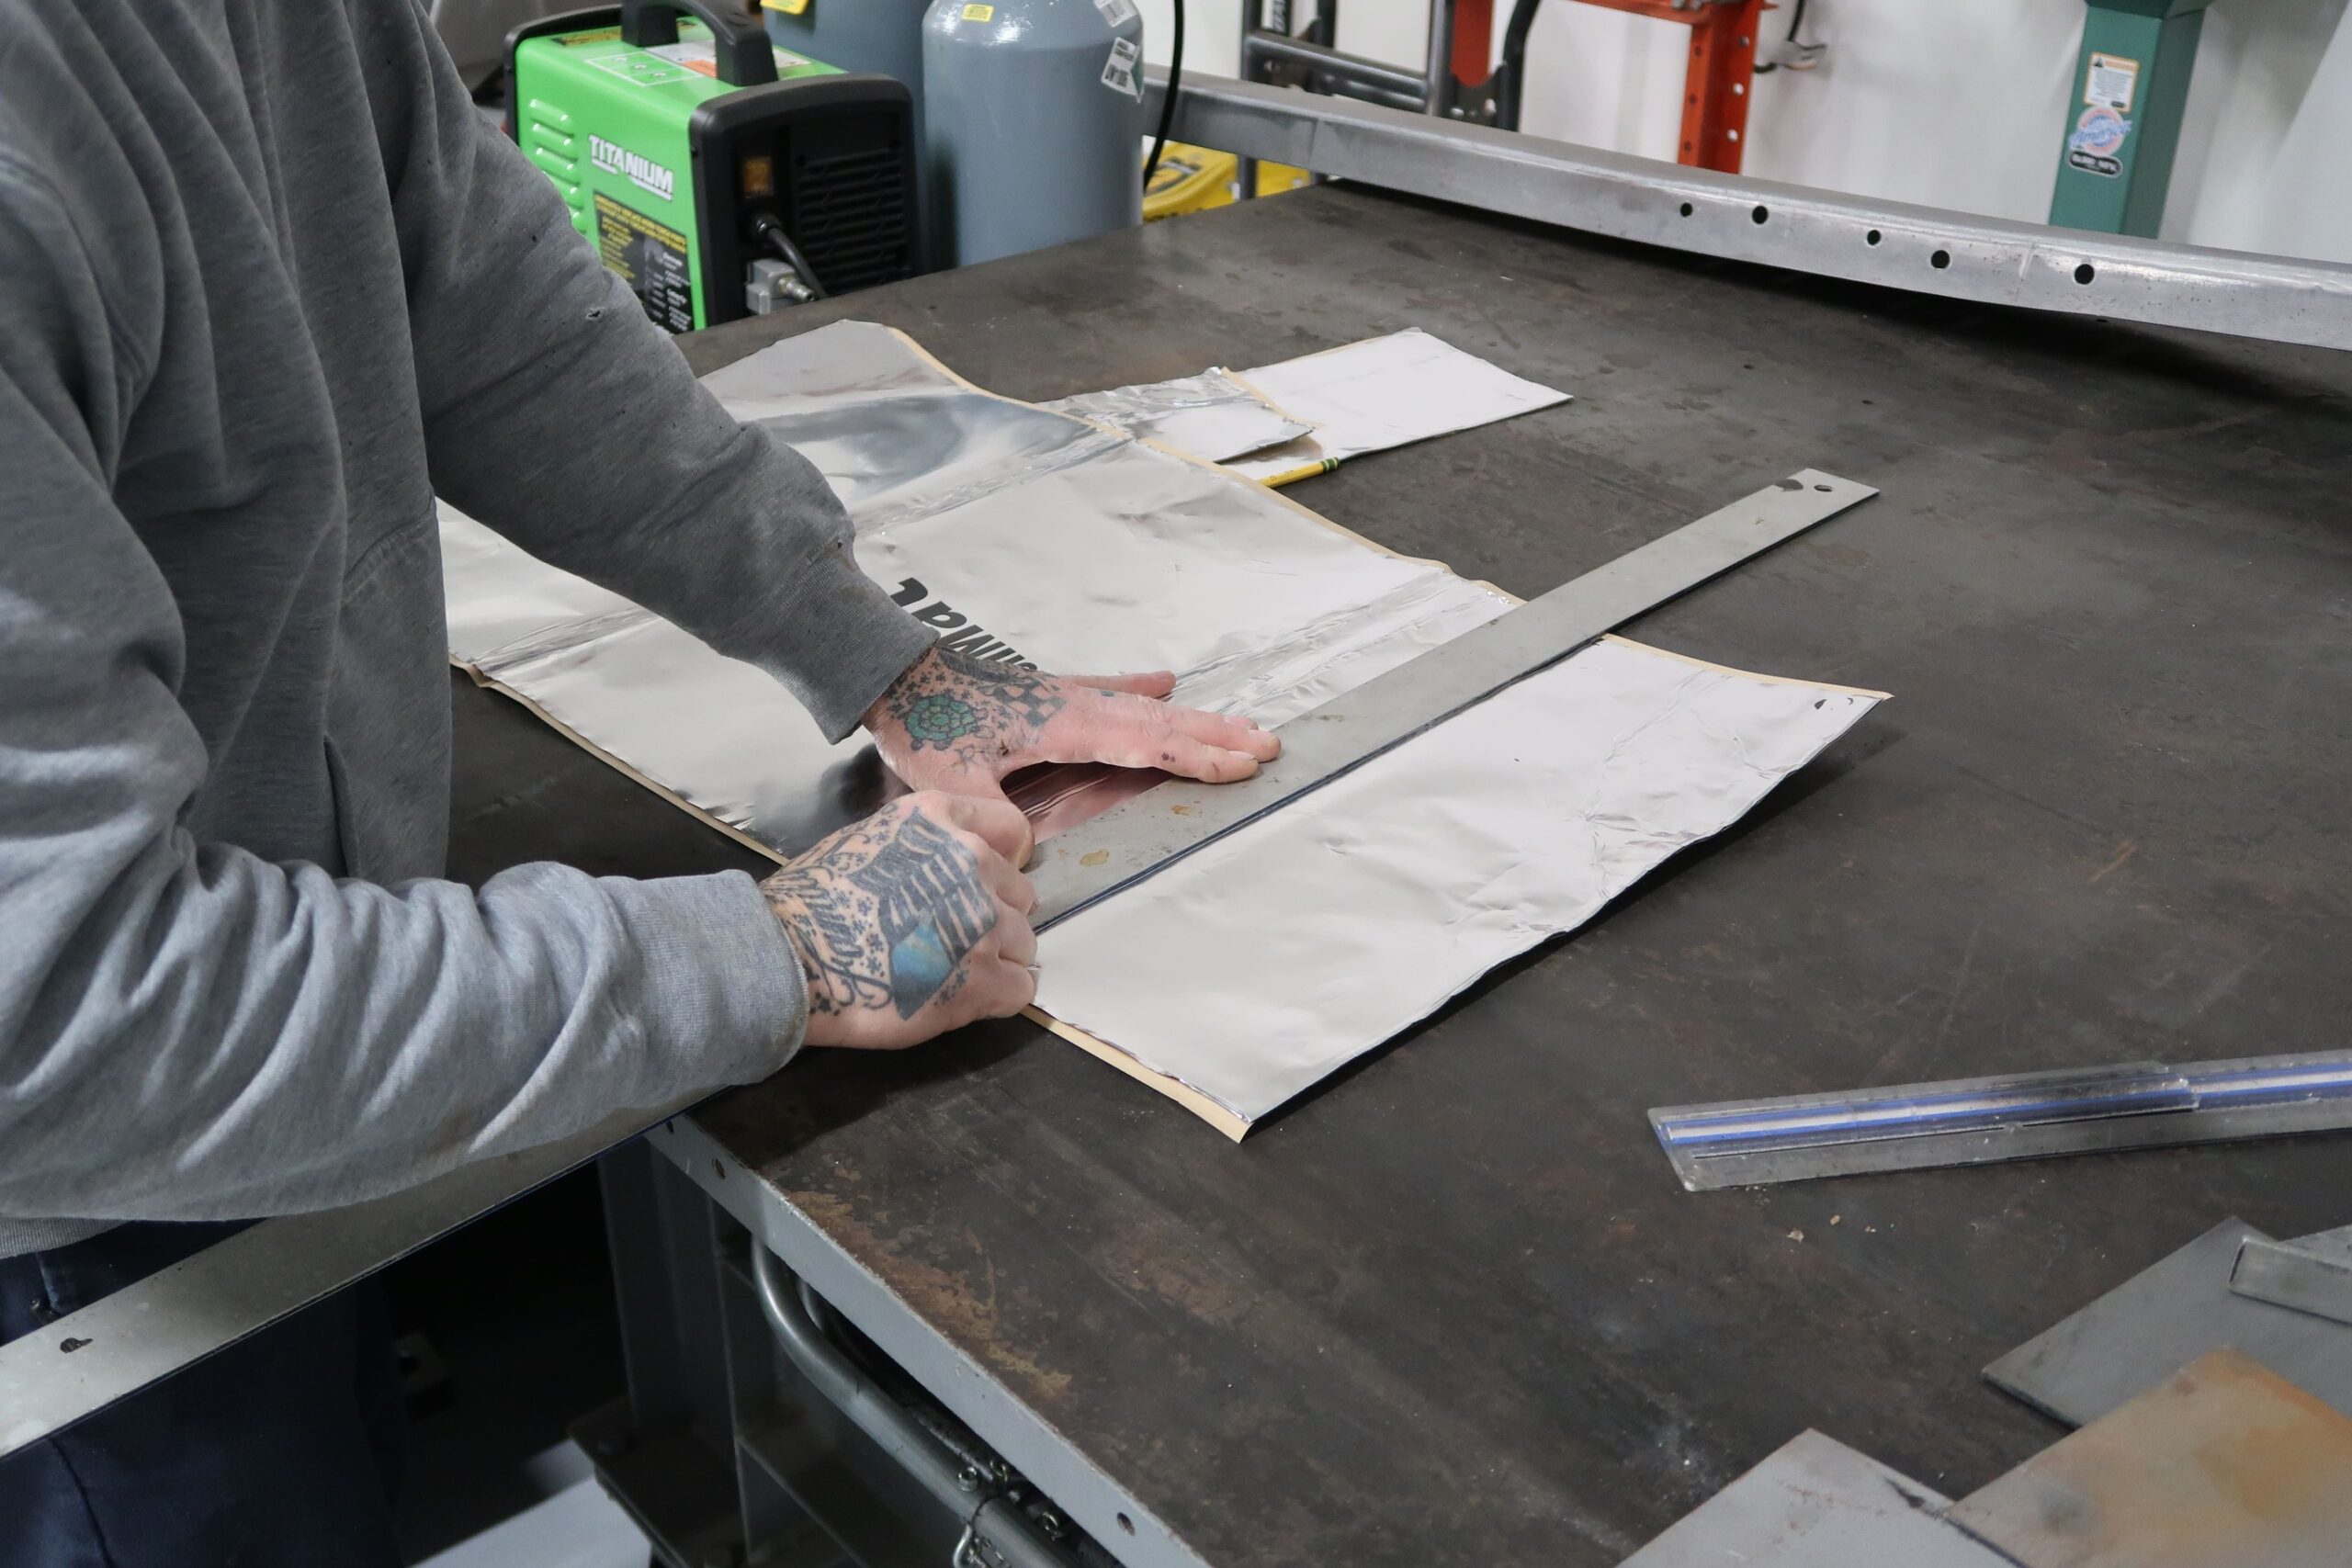
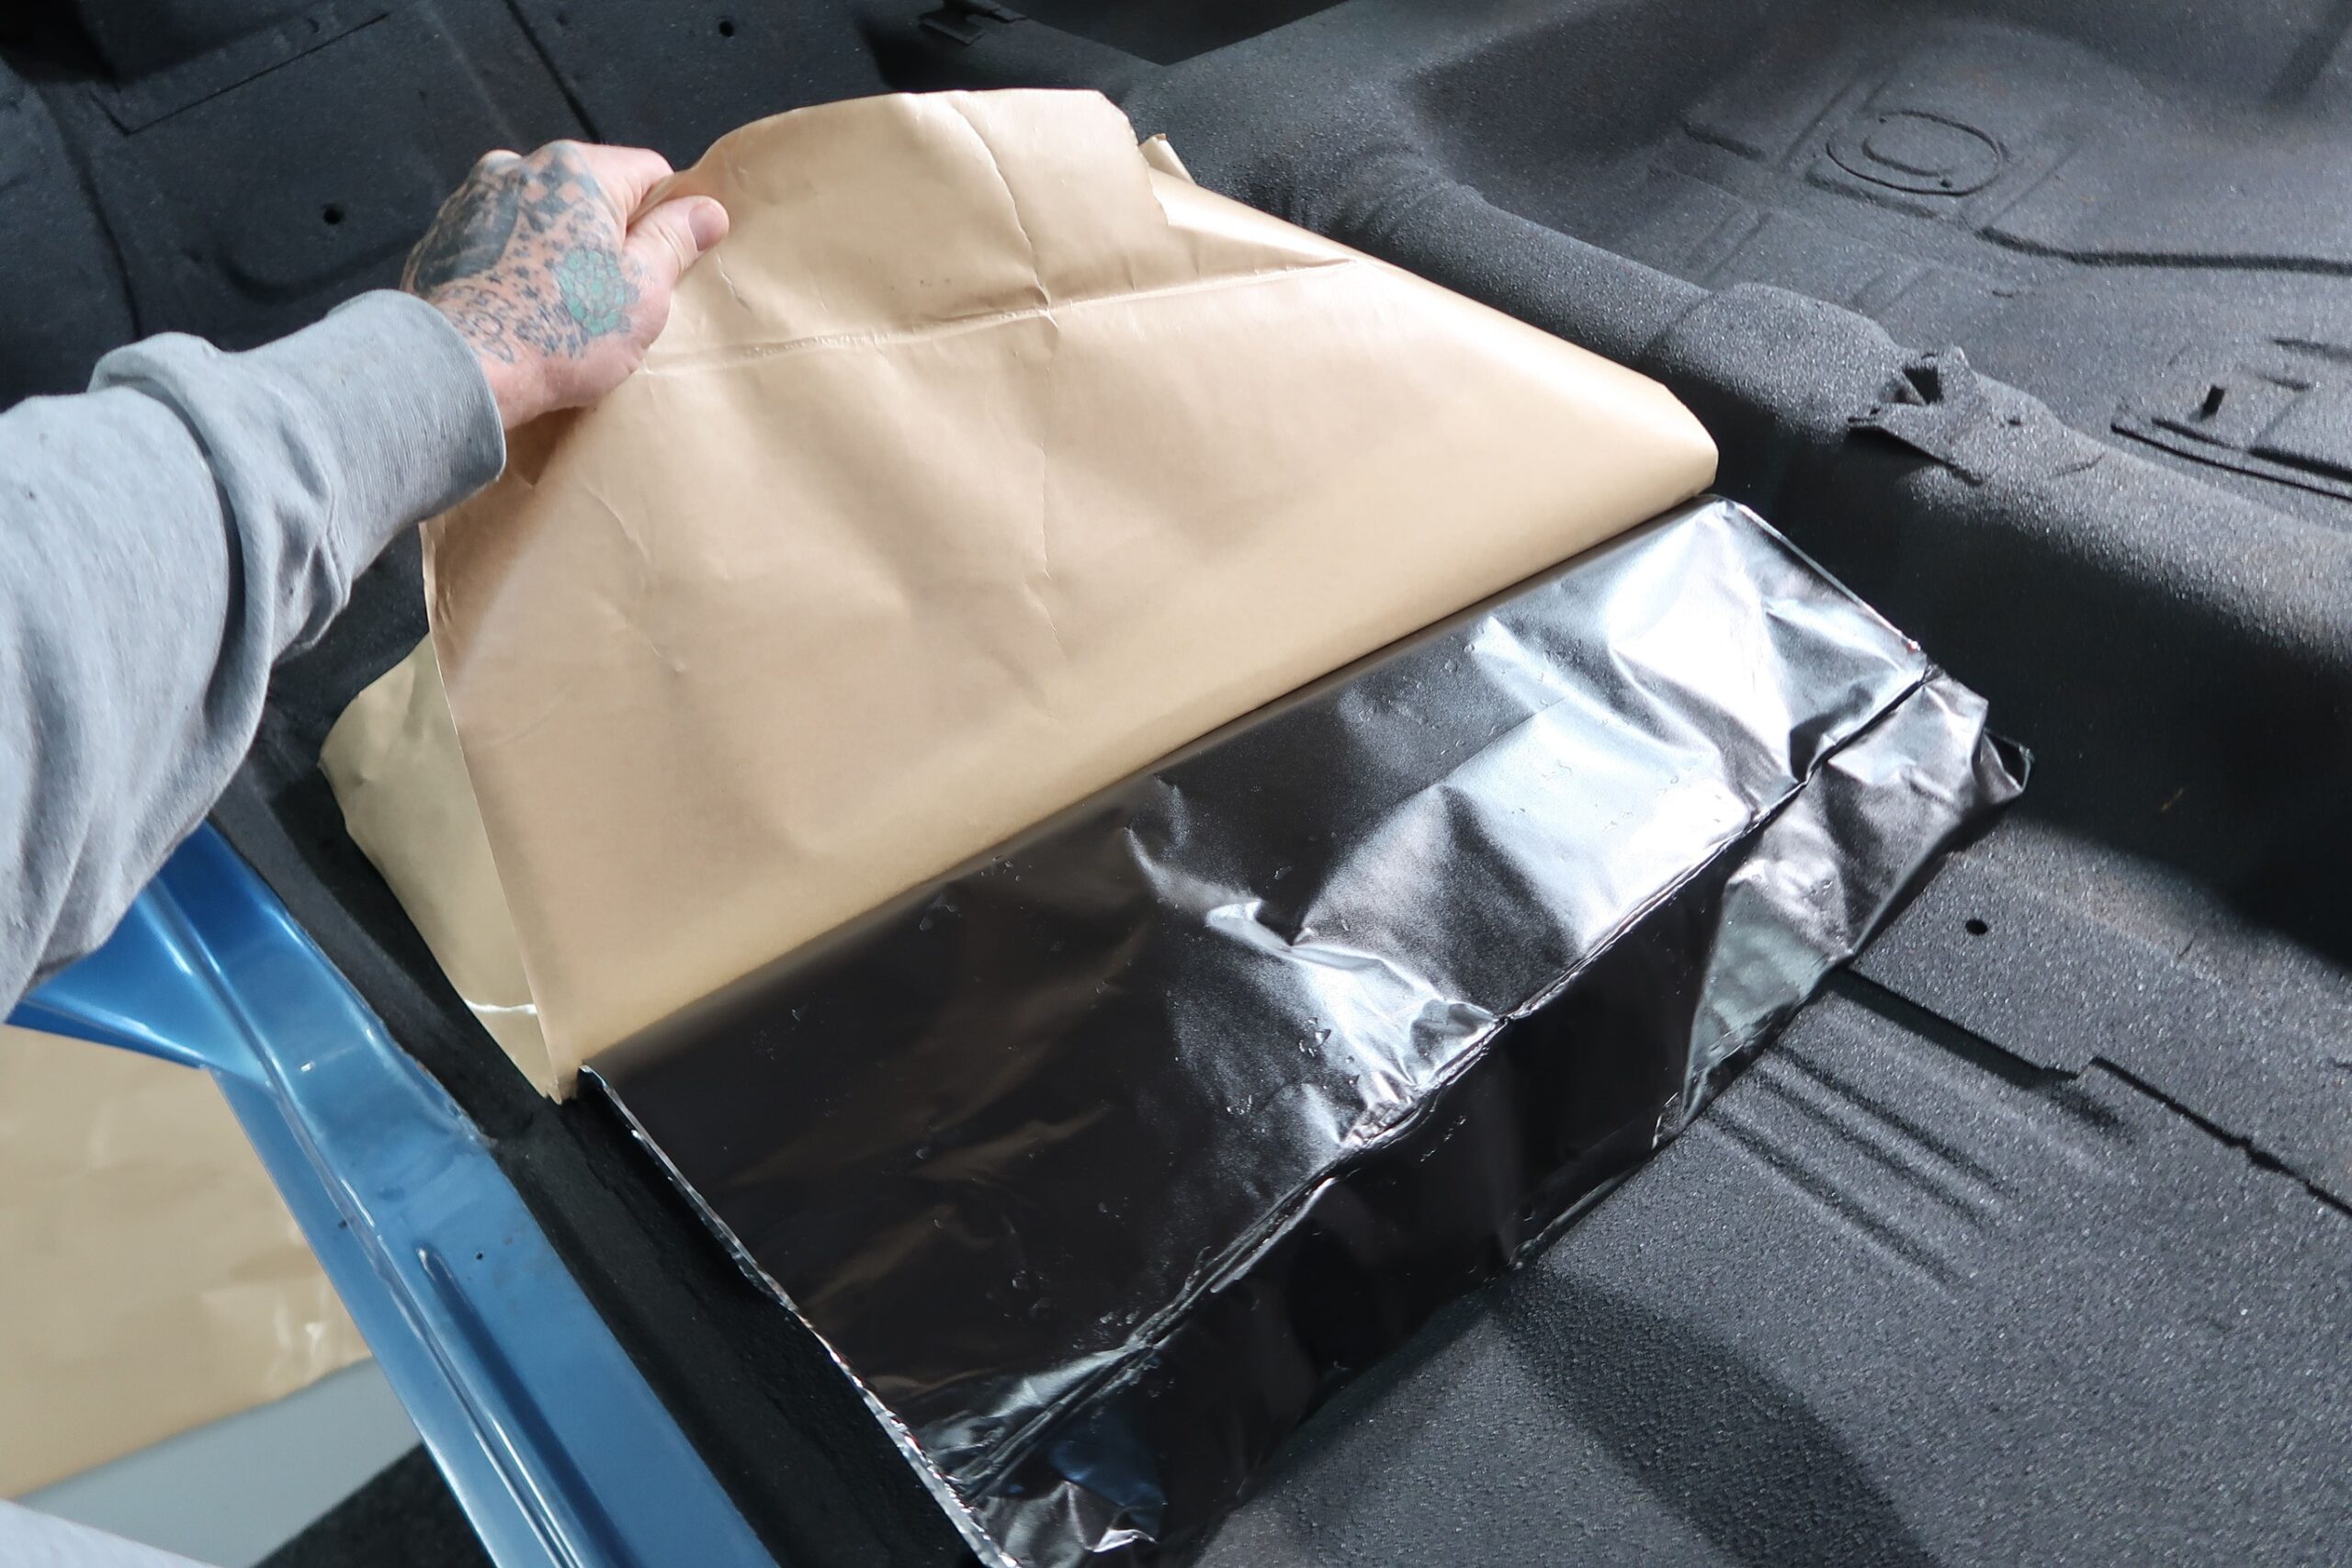
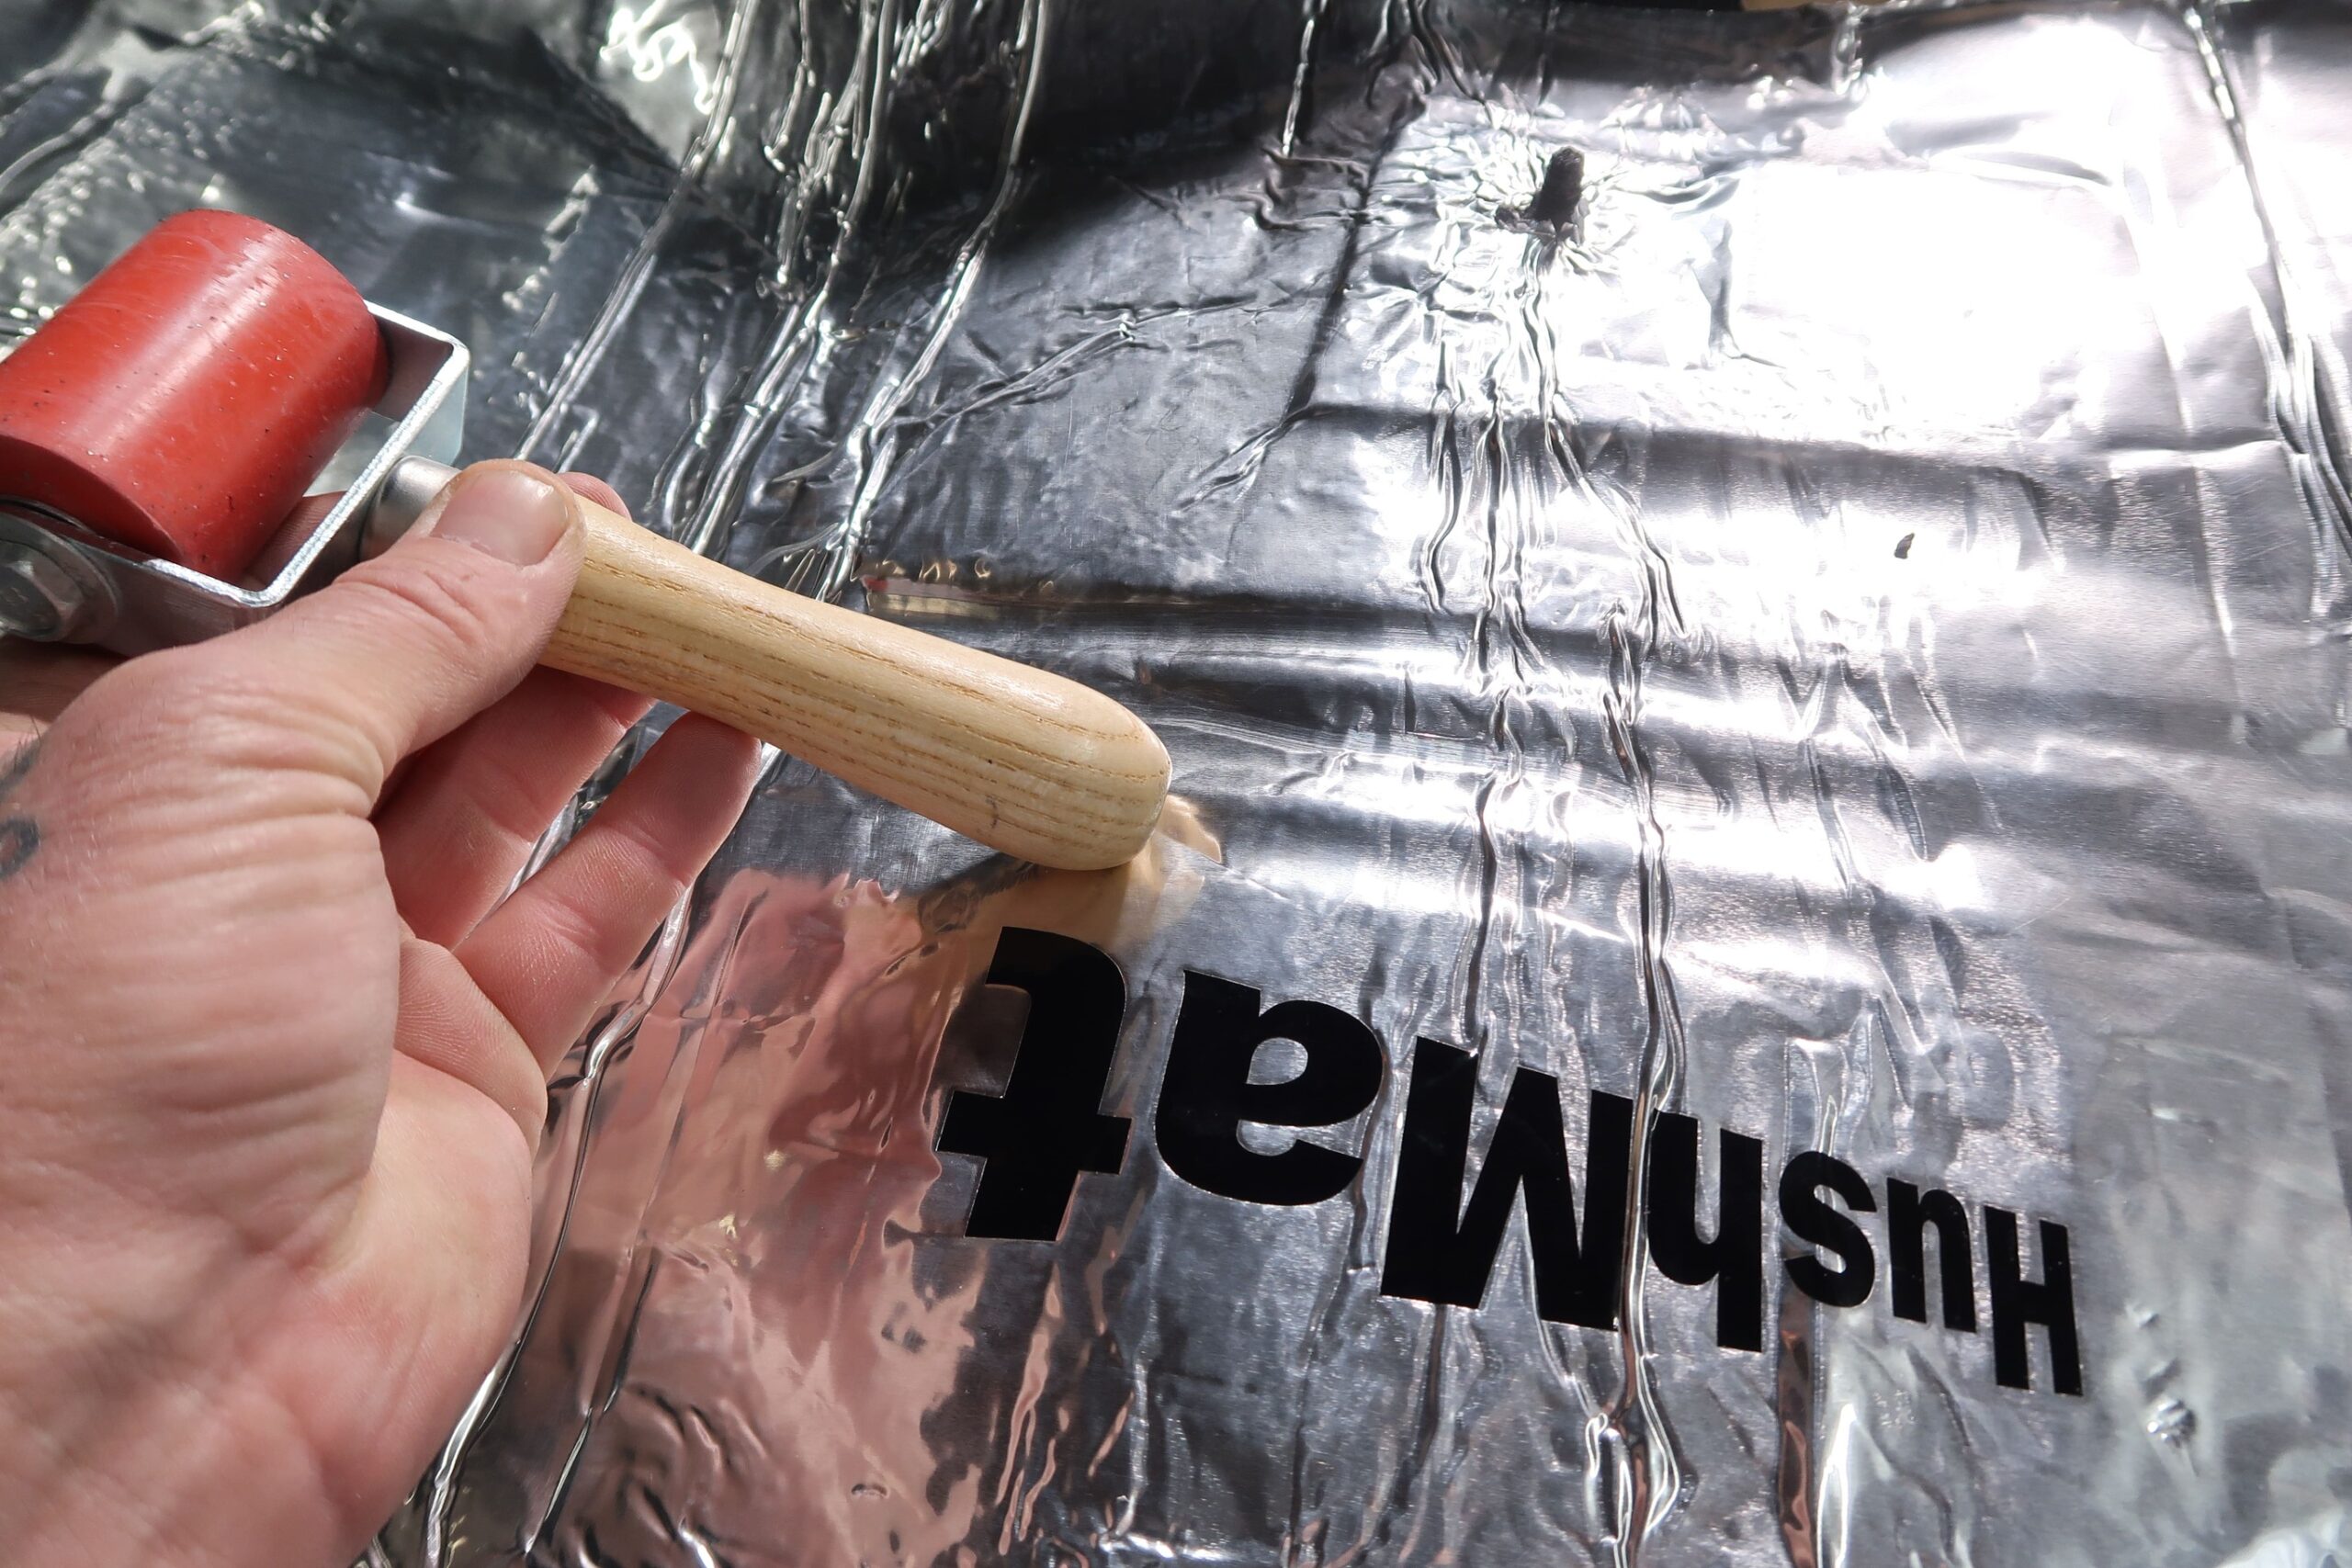
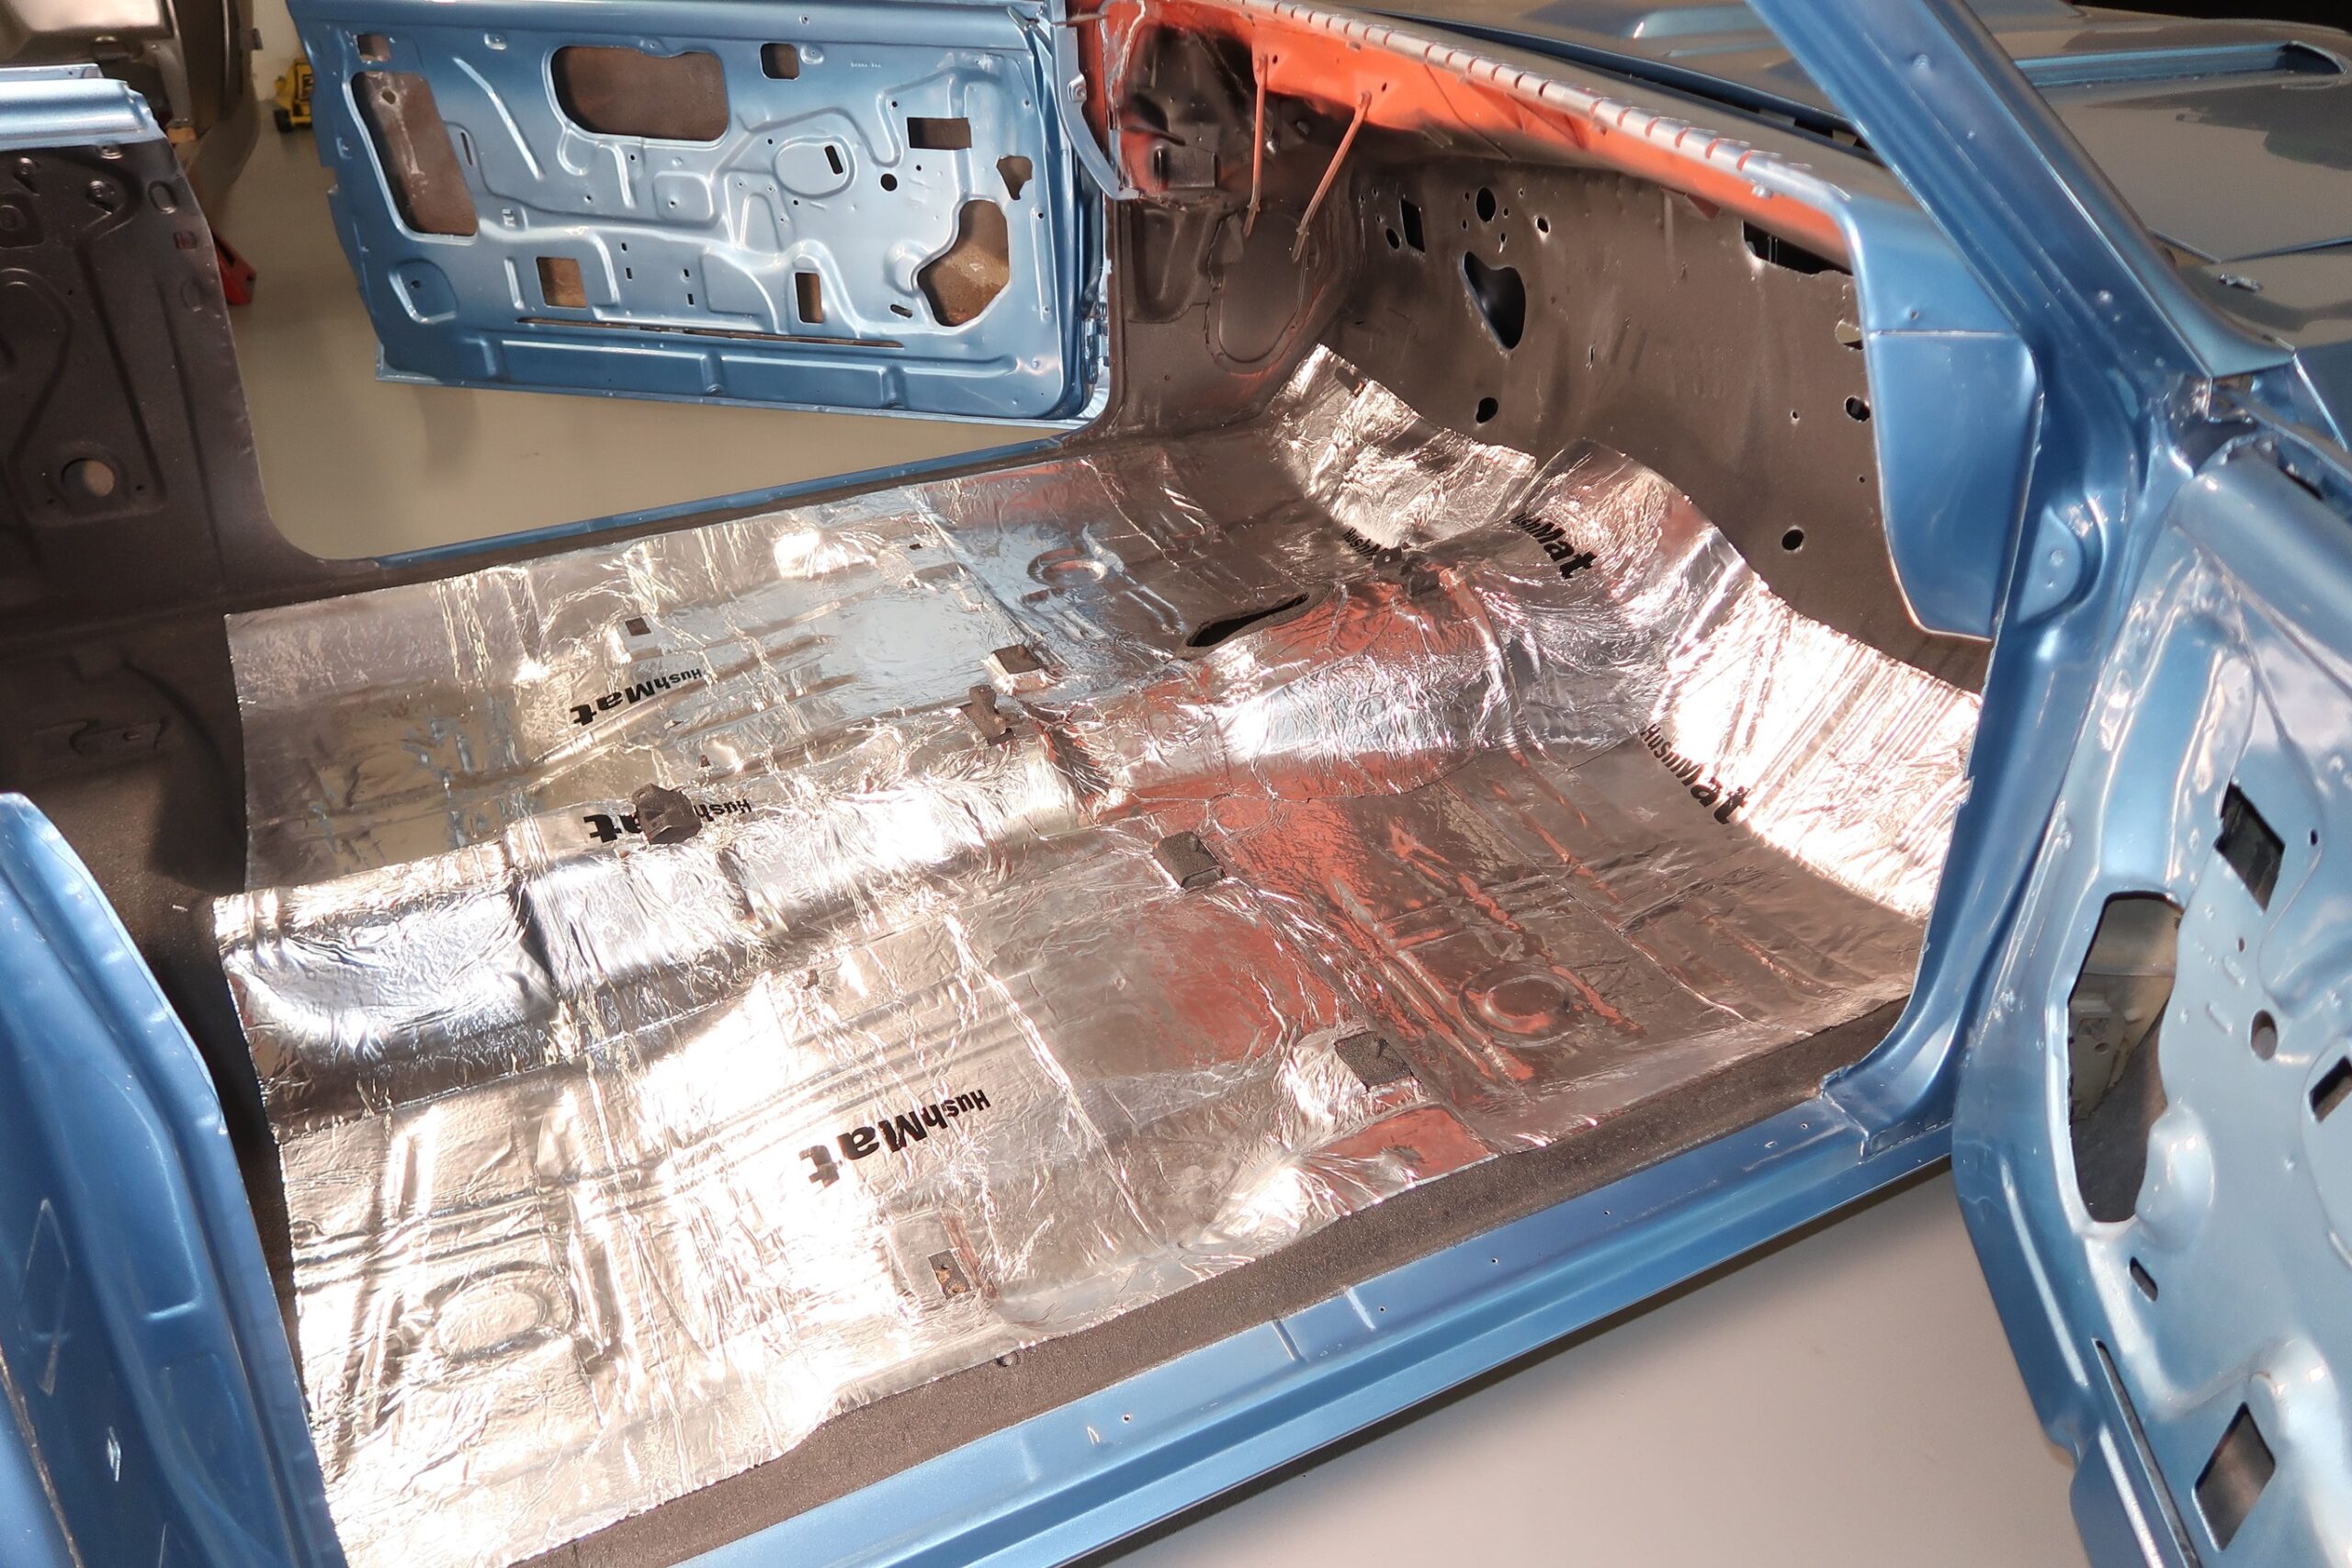
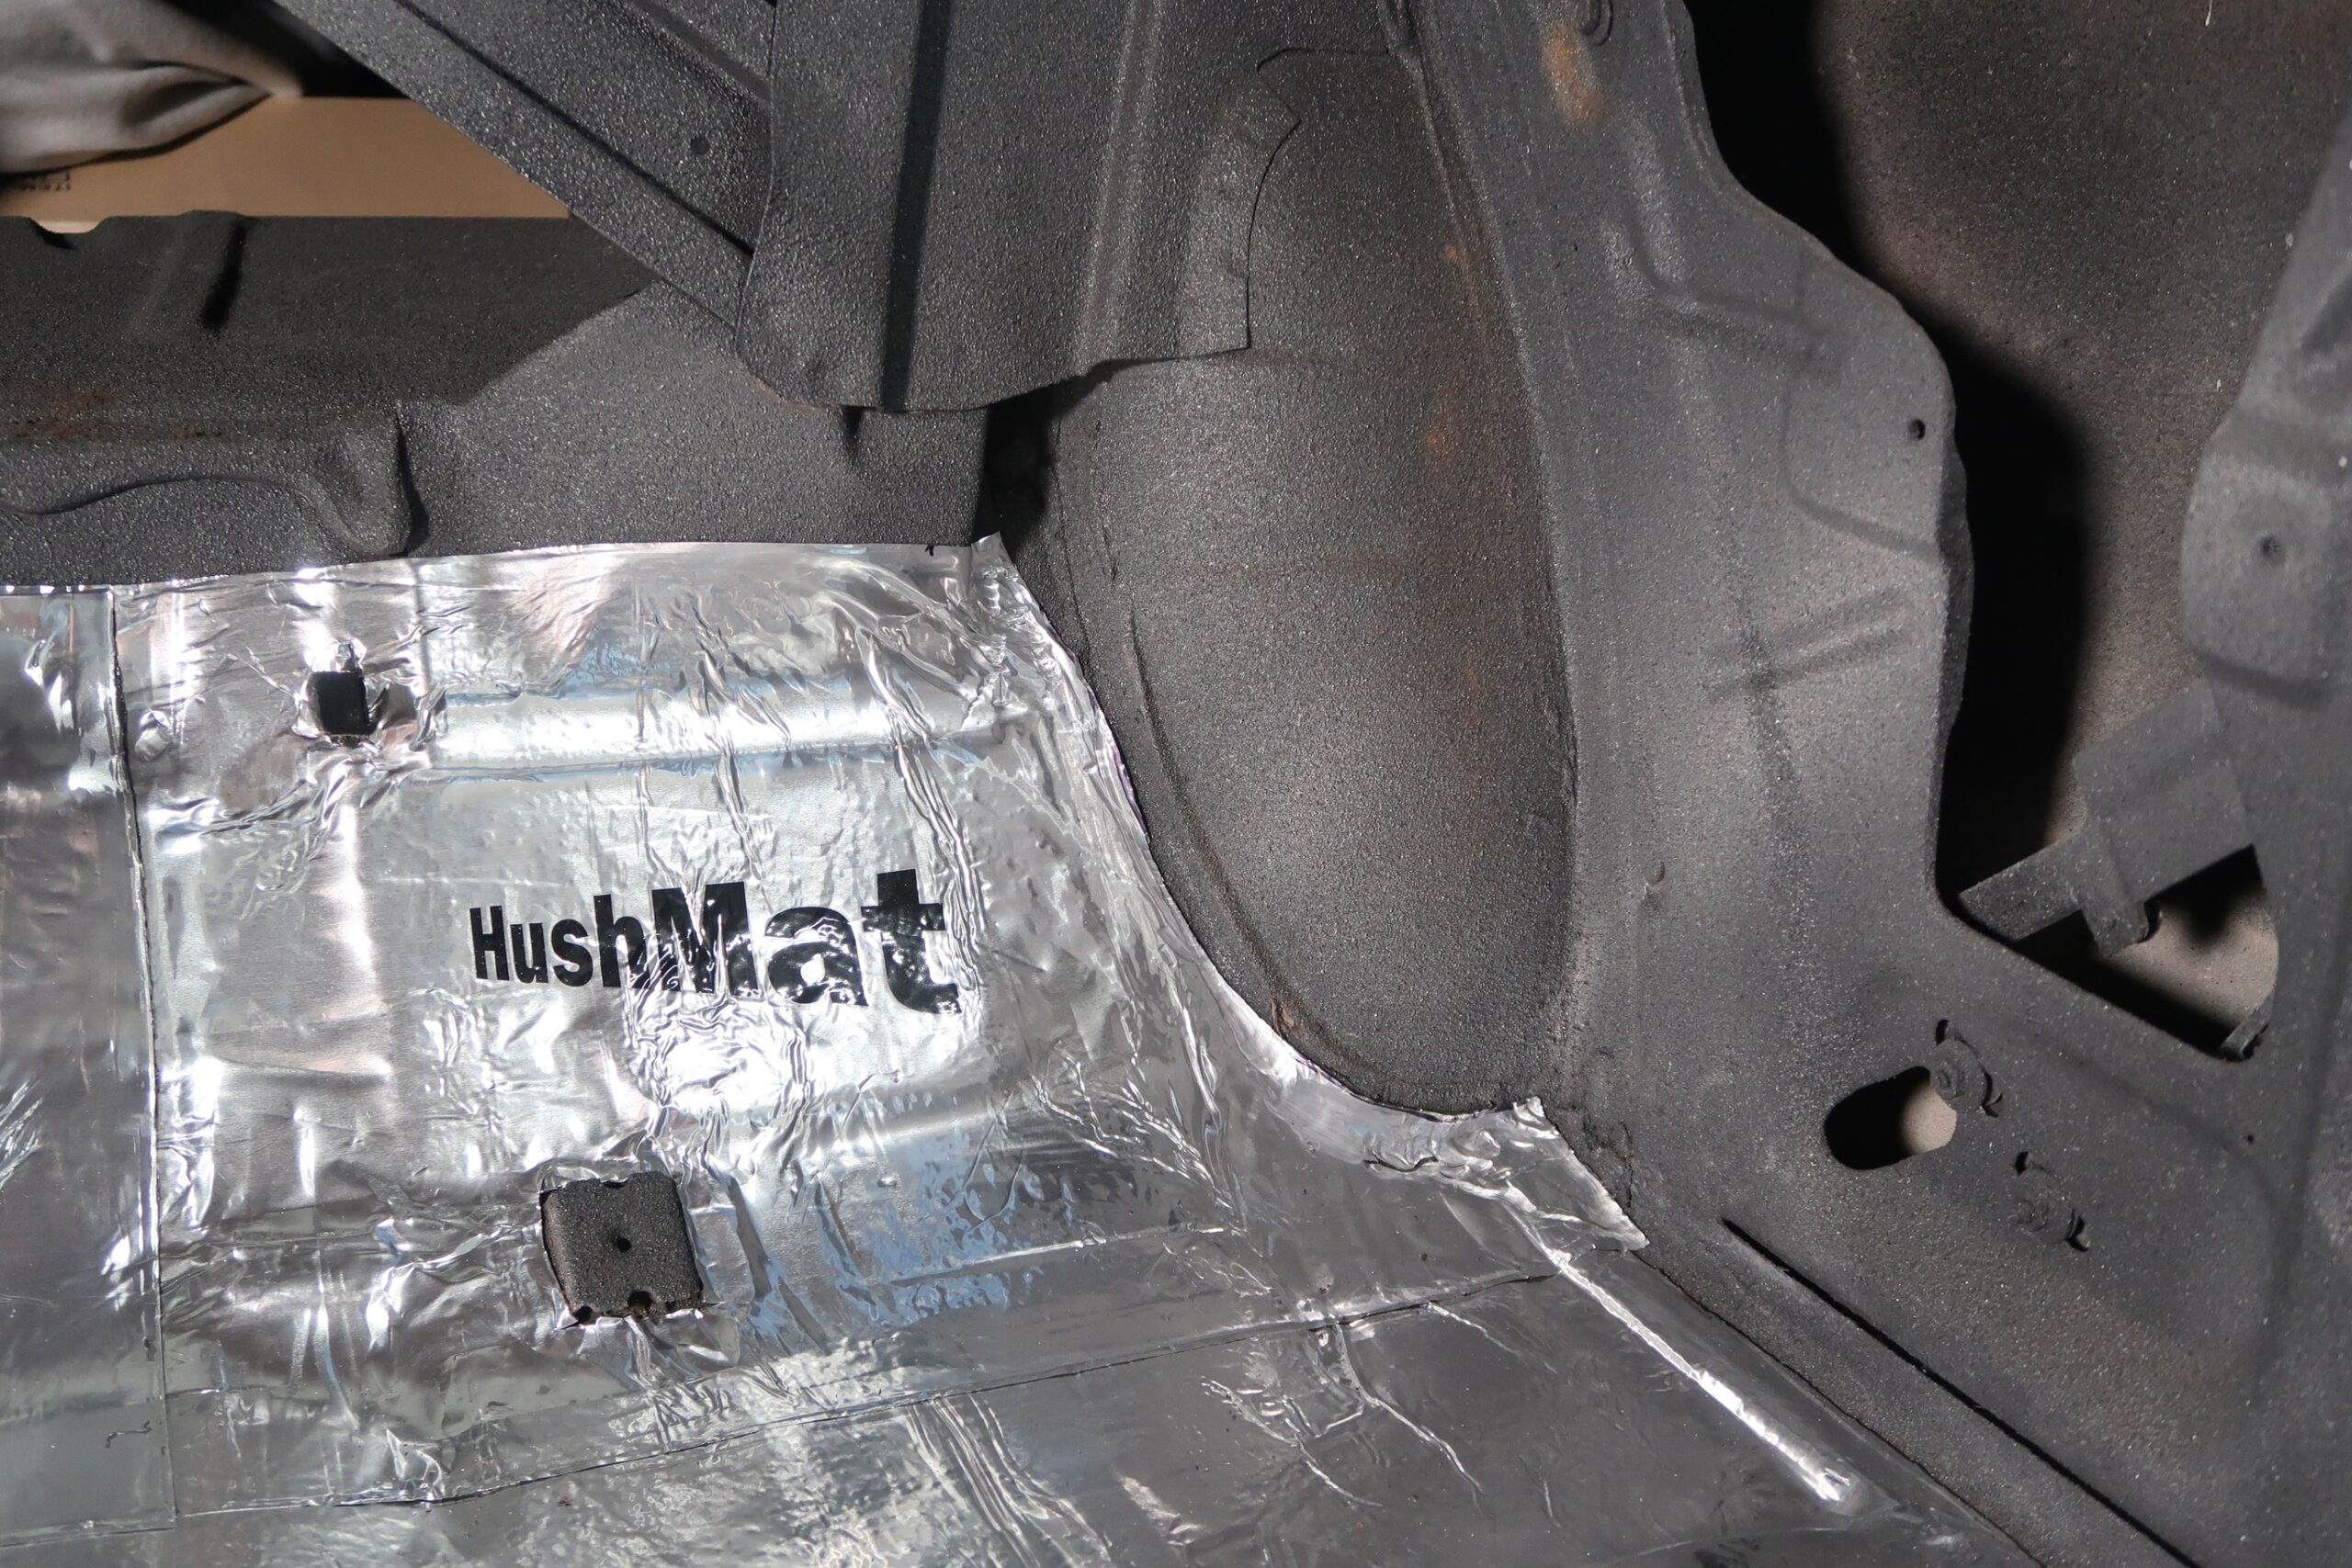
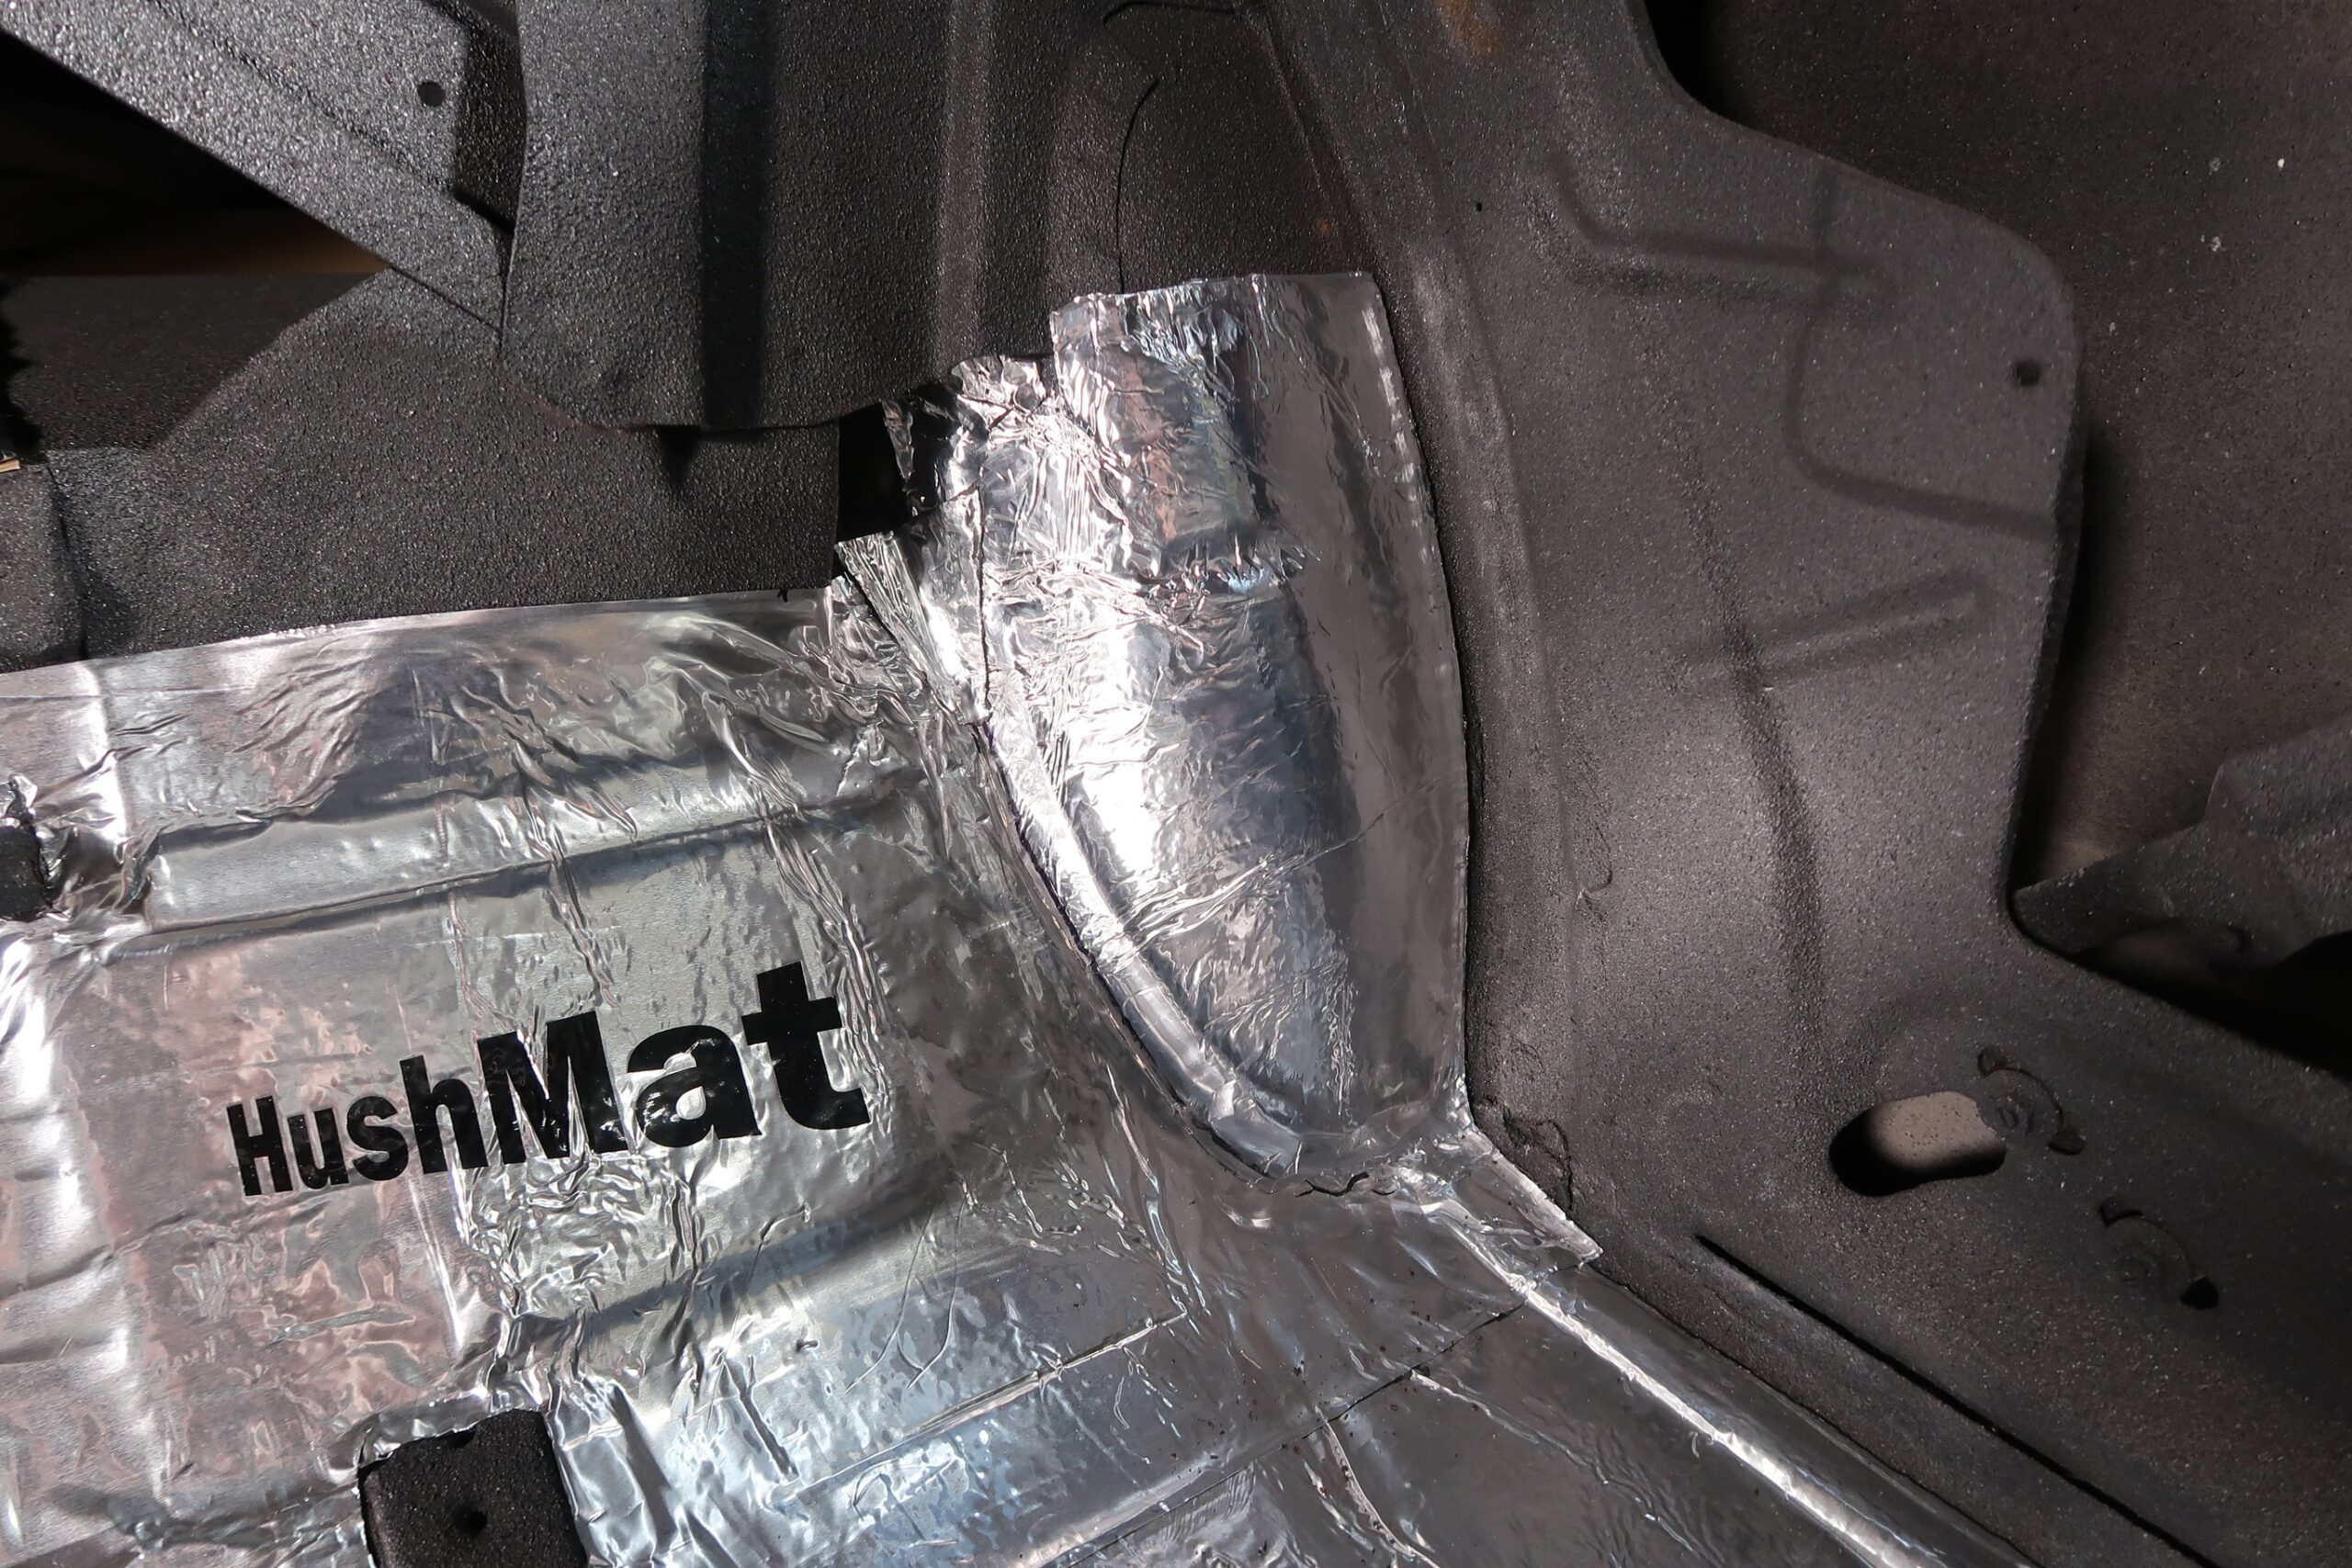
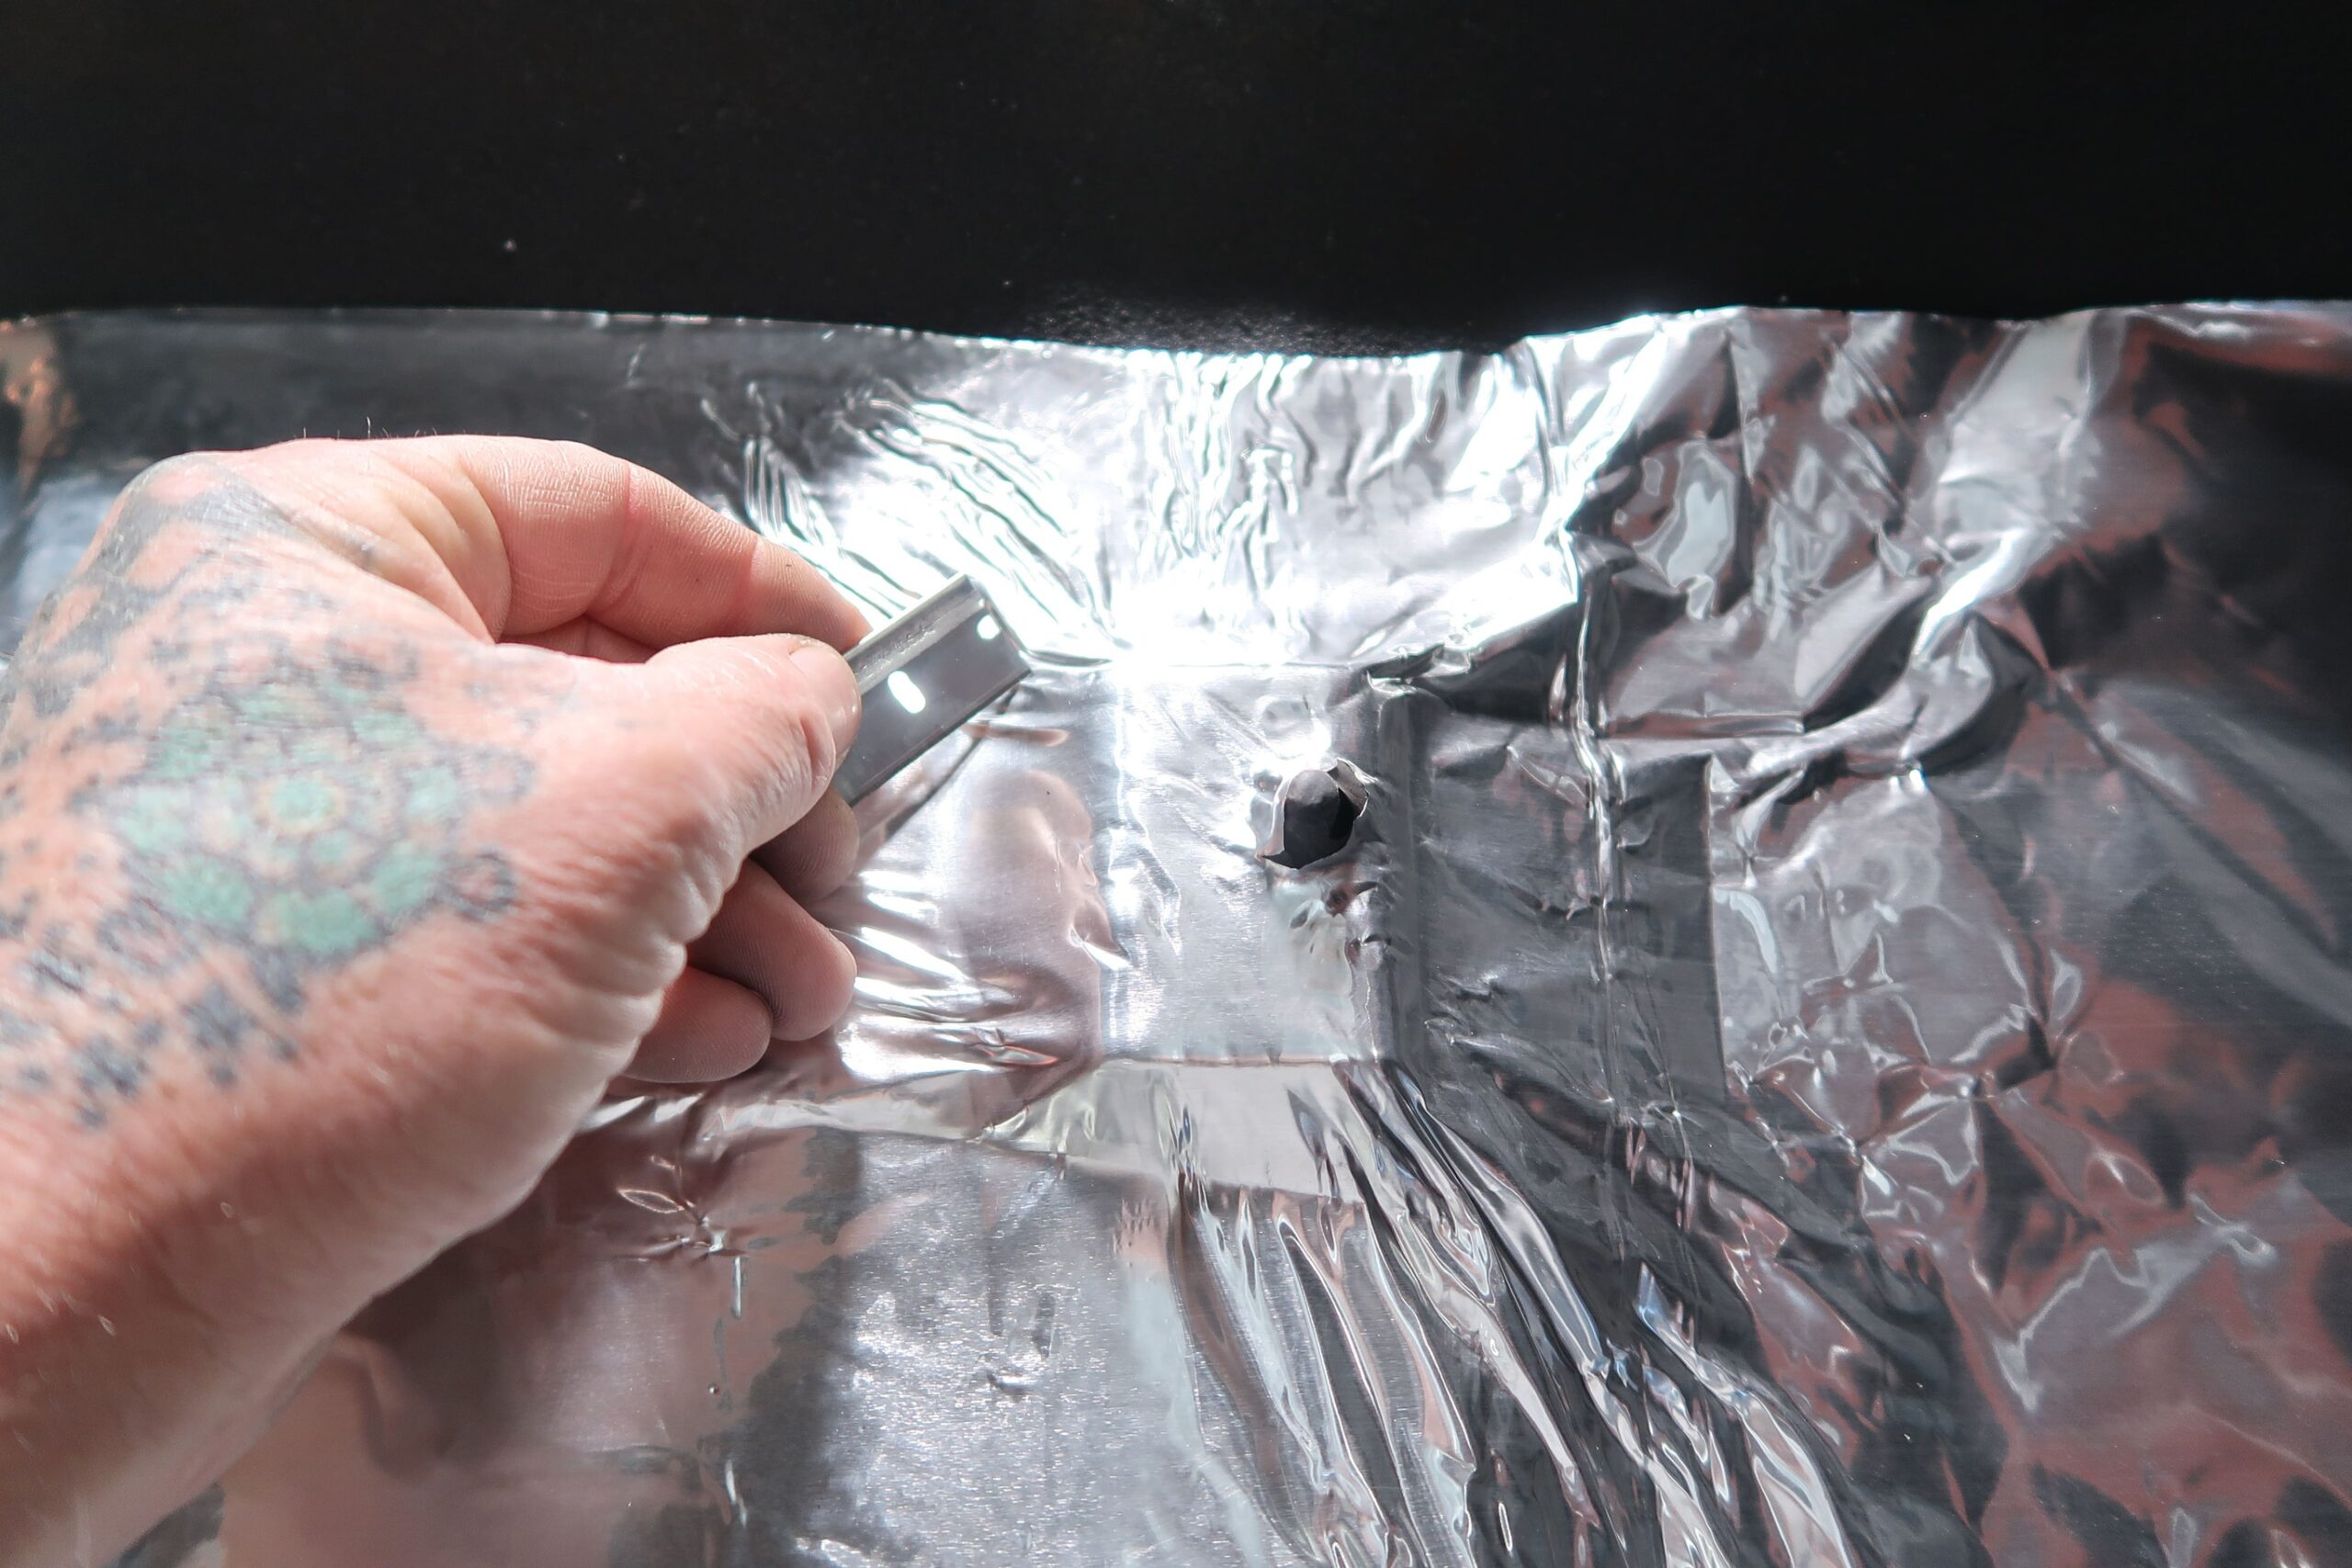
When shopping for HushMat Ultra you’ll find there are two different versions of the product, HushMat Ultra Silver and HushMat Ultra Black—the only difference is the color of the foil top layer and that Ultra silver can be painted but it’s not recommended for the Ultra Black (not all paints will stick to the black coating). In terms of performance, these products are identical, they easily mold and form as needed and adhesion is guaranteed for the life of the vehicle.

Read More: Henry and Garrett Fisher’s 1968 Chevelle was Built for Show and Go

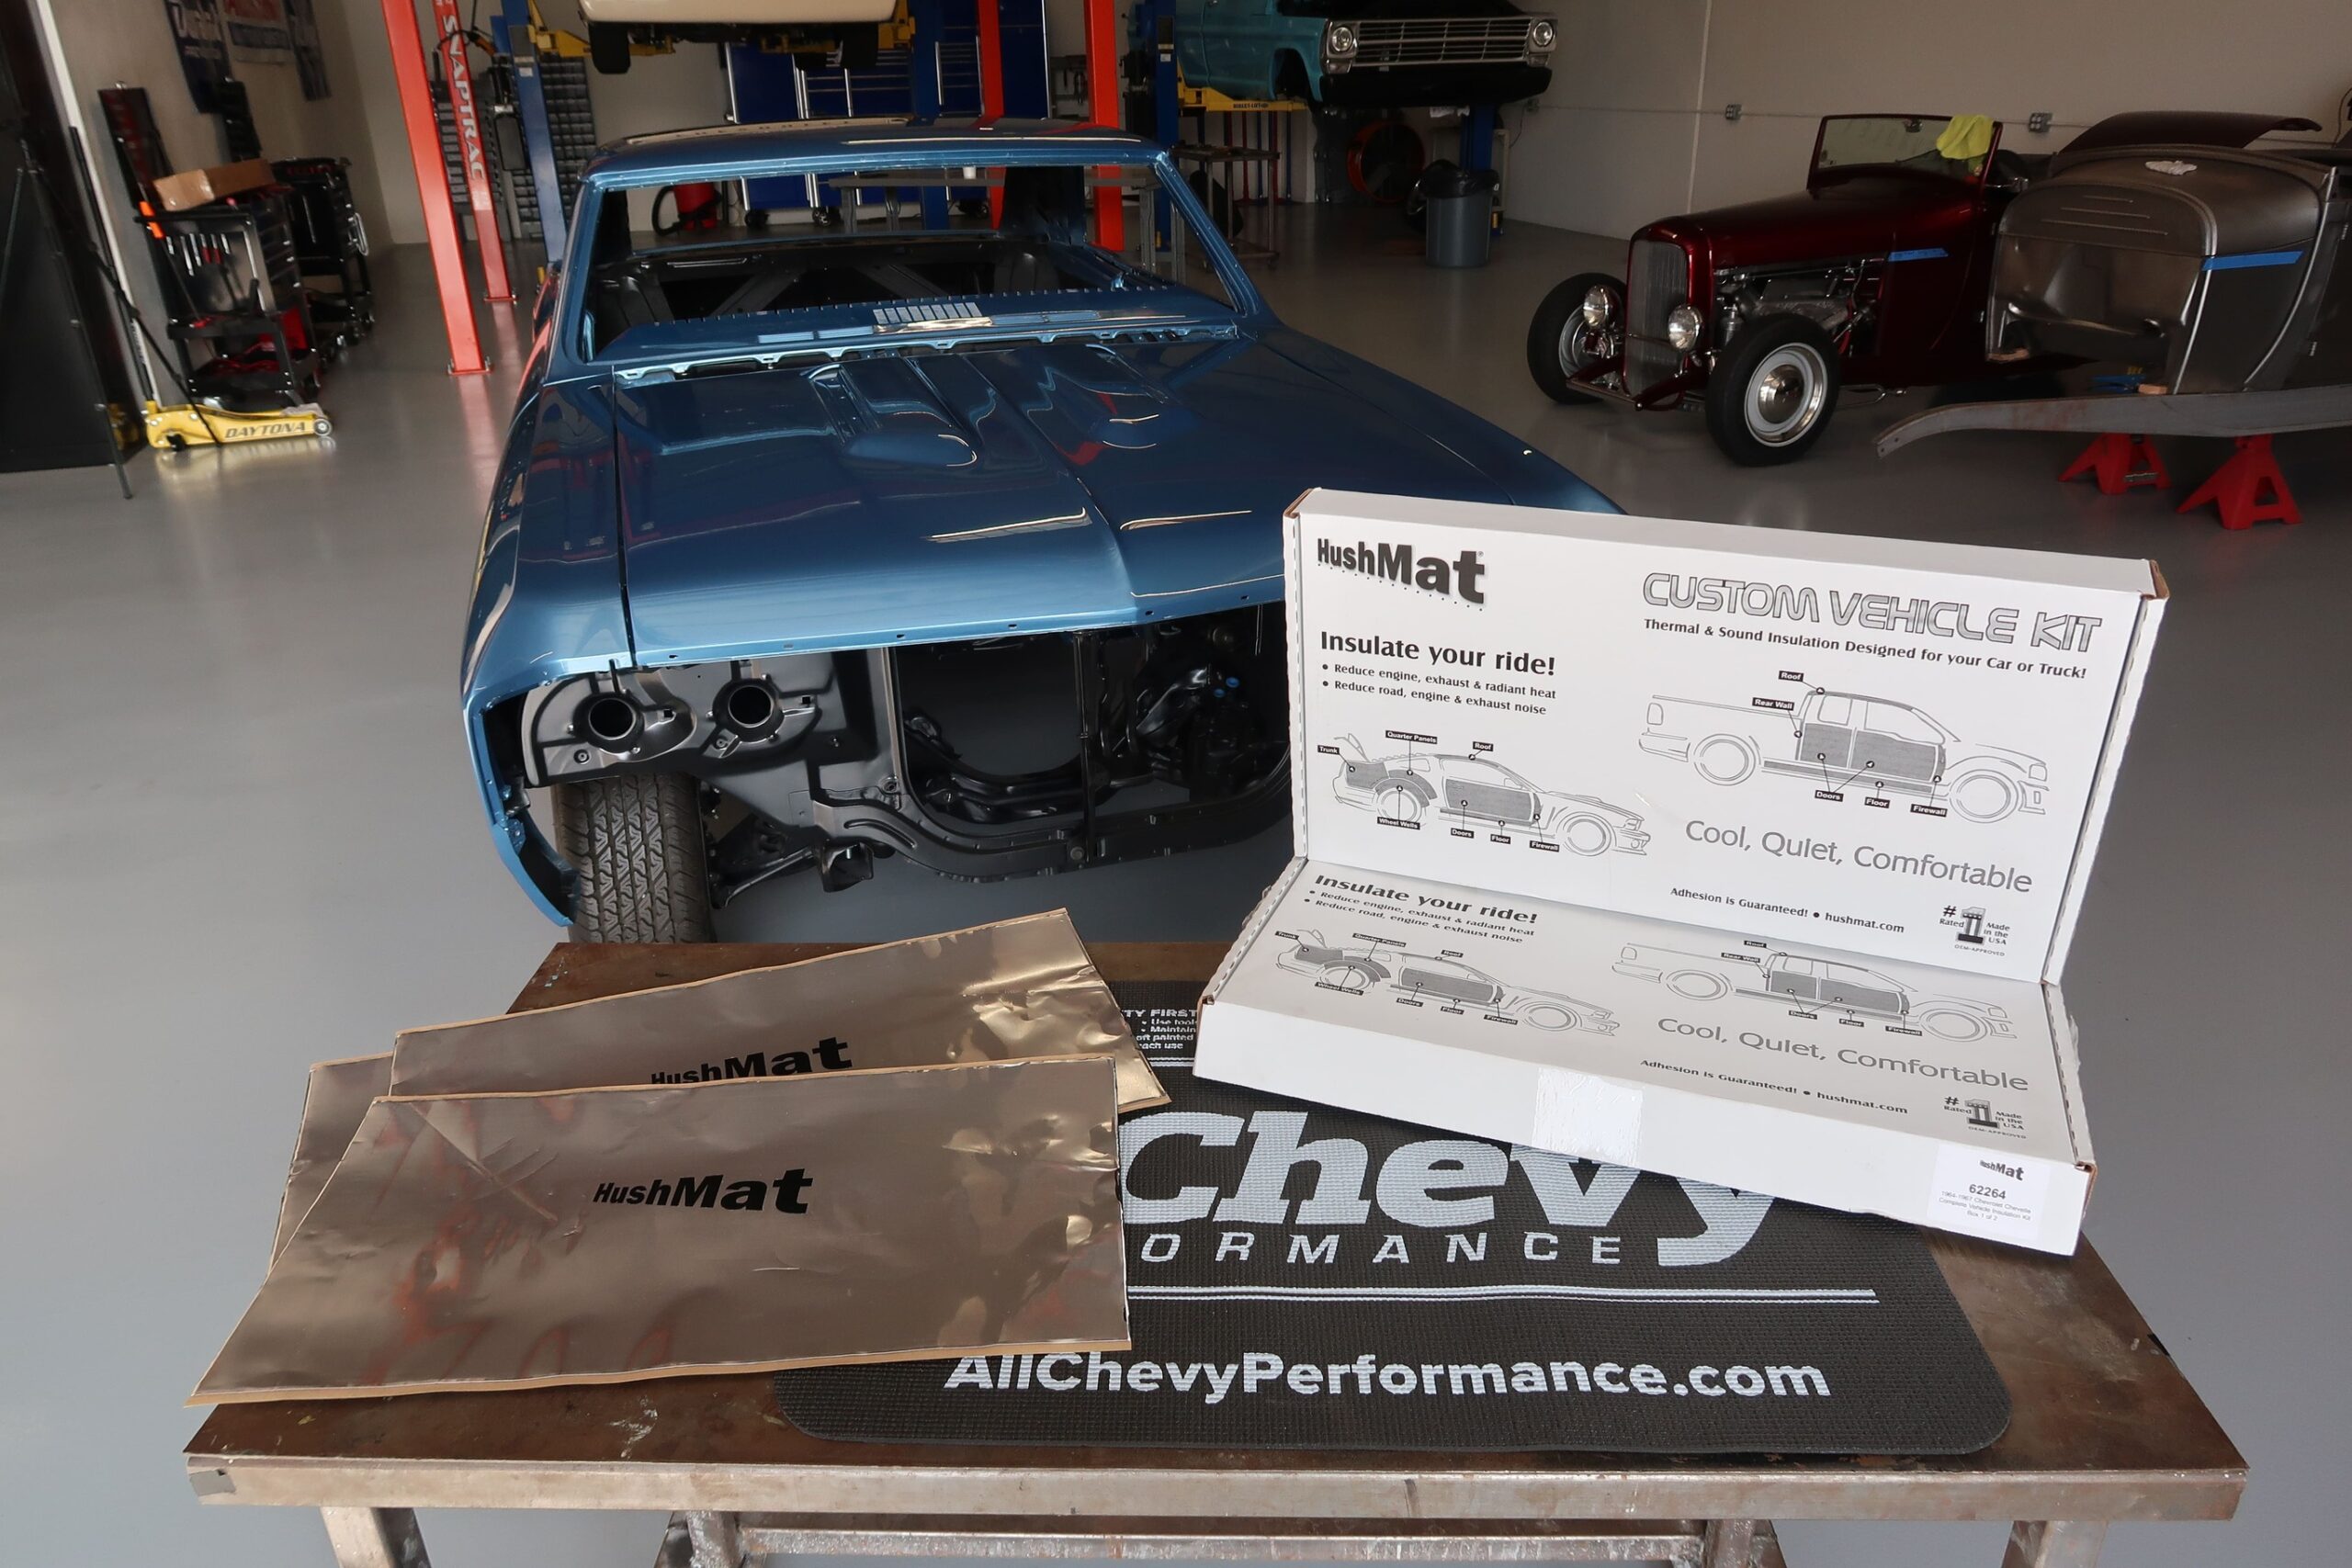
Along with HushMat Ultra, the company offers several other products that provide sound deadening and thermal insulation:

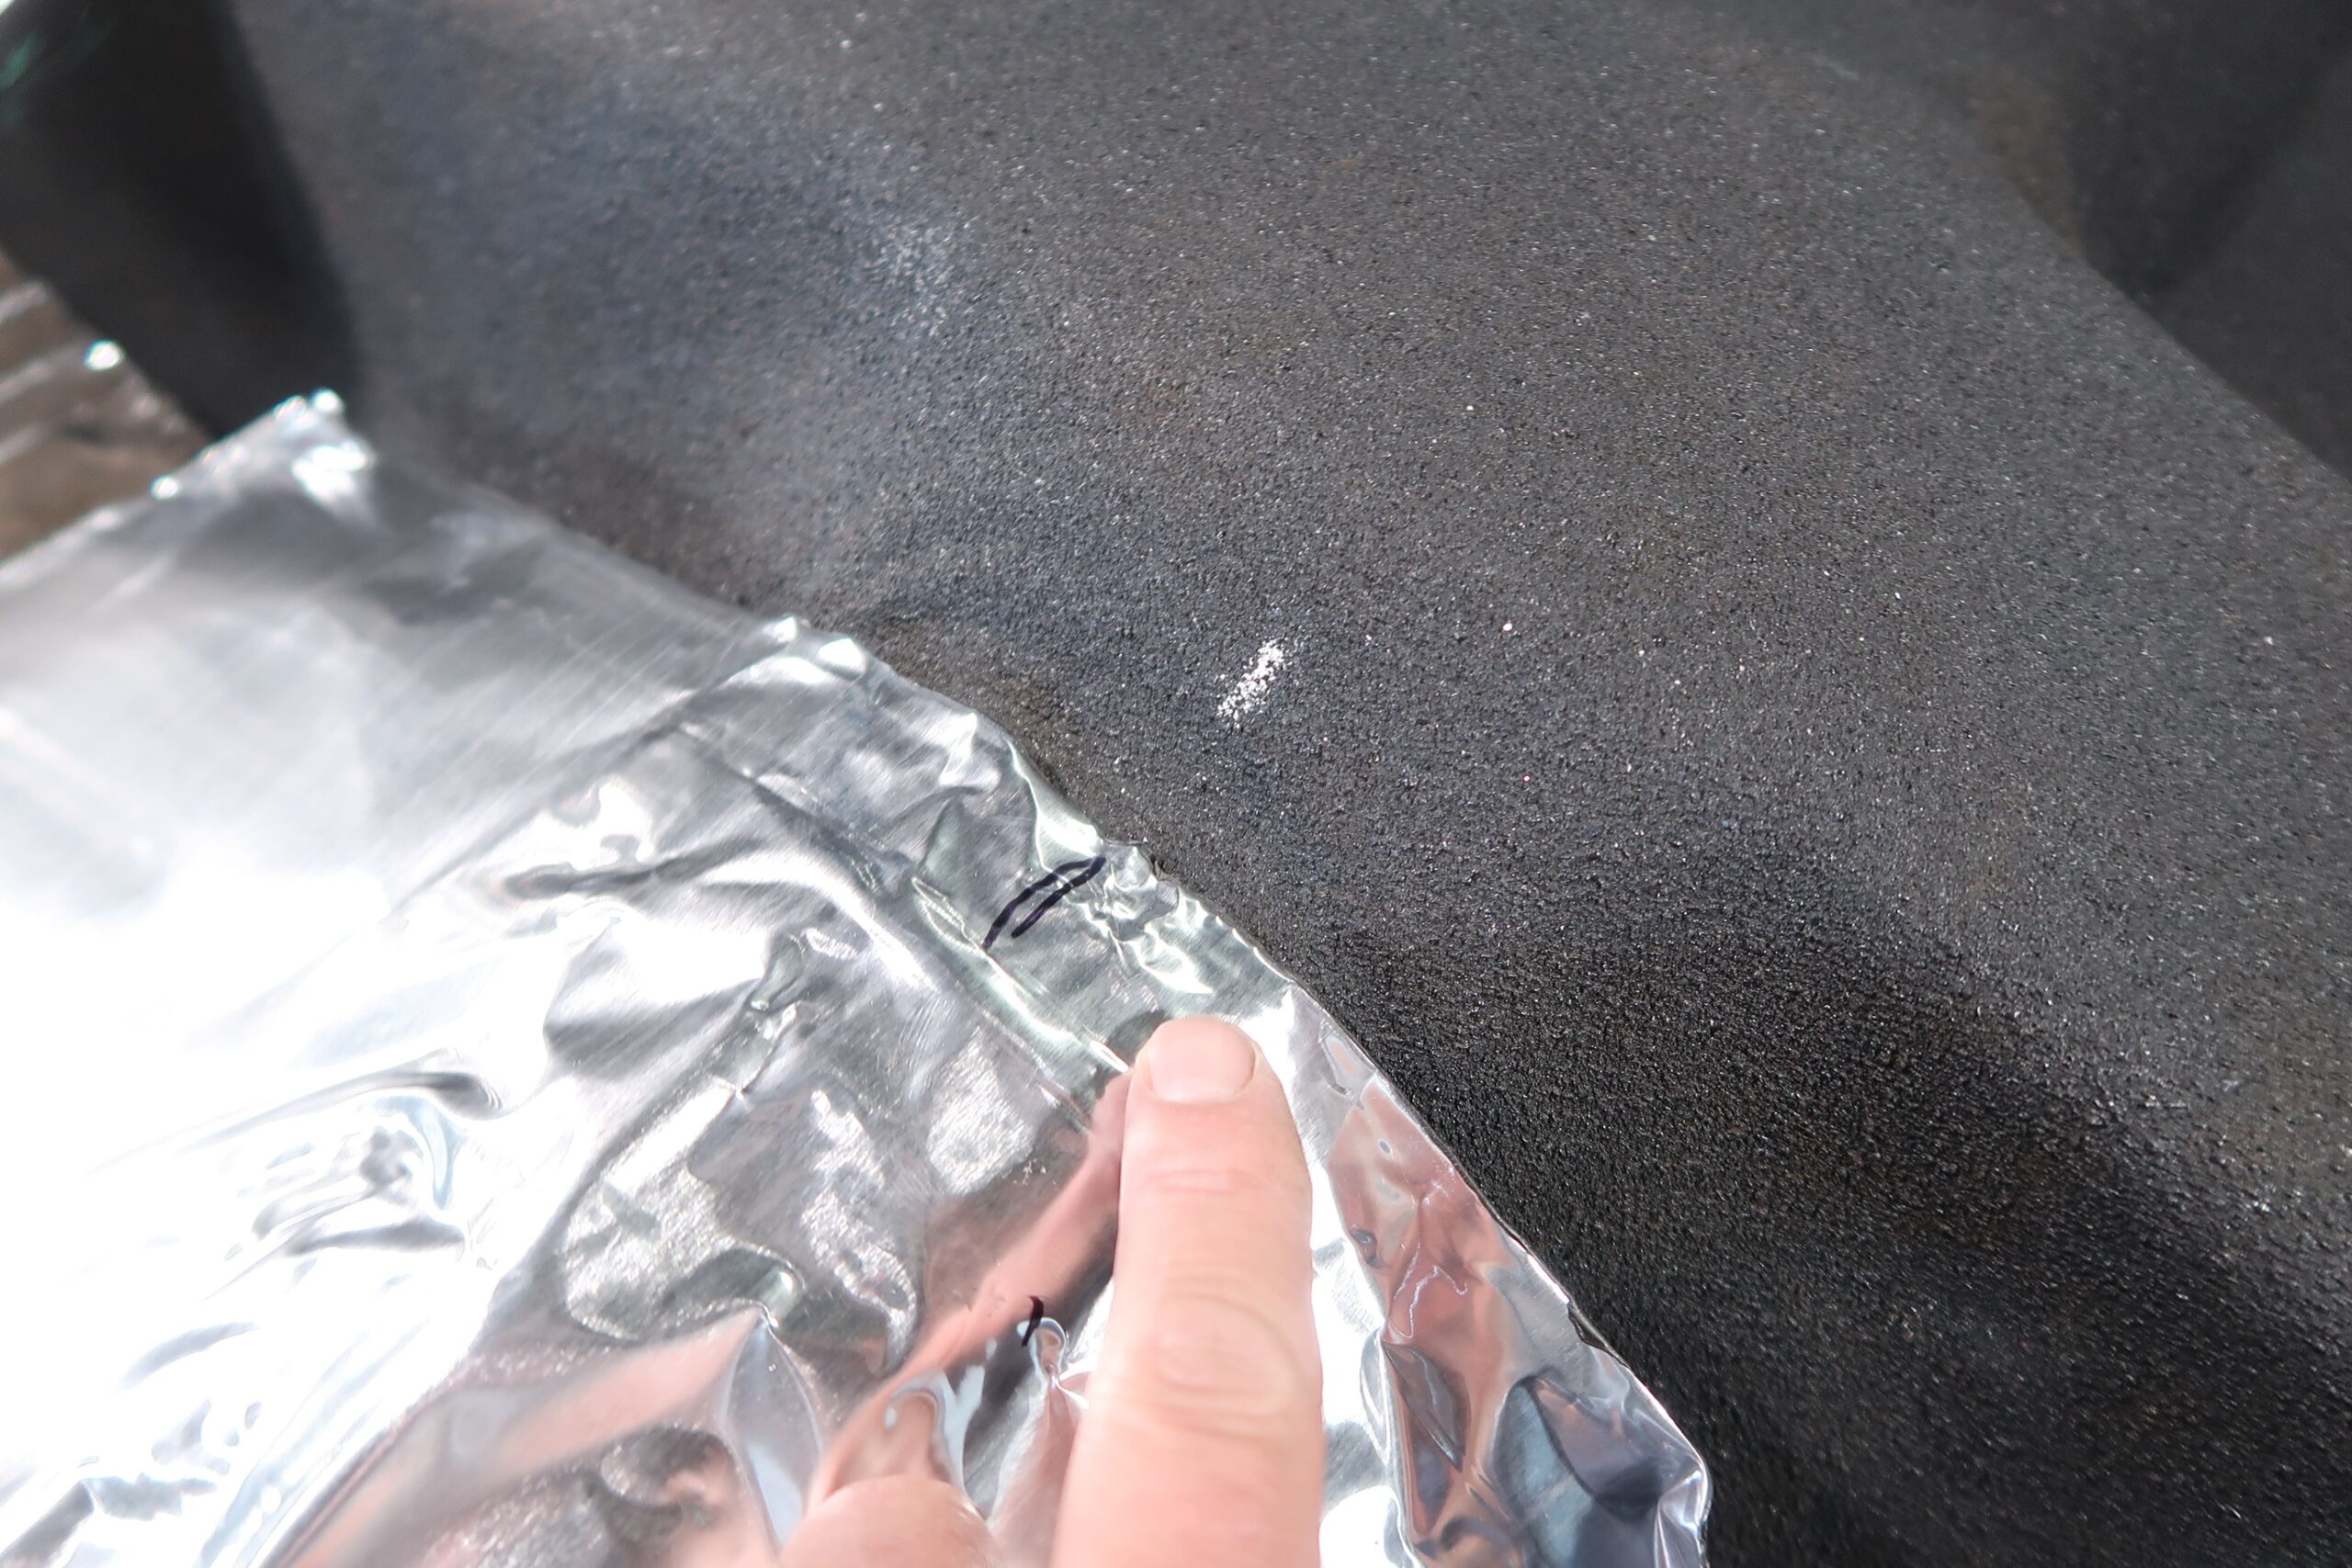
Silencer Megabond Sound Absorbing and Thermal Insulating Foam: It is used in place of the old-style Jute material commonly used under carpeting. It has outstanding thermal-insulating, sound-absorbing qualities. It doesn’t absorb moisture like Jute and adds an additional 30 percent thermal insulation over and above HushMat Ultra.

04 hushmat installation chevelle surface prep
Installing HushMat requires very little surface prep. Simply remove any loose debris, then wipe the surface off with a damp rag.

Wave Breaker: This material creates a defecting barrier between the speaker and the metal door. When the speaker cone moves the soundwaves will not reflect off the metal door and take the speaker out of phase, which diminishes audio quality.

Hood Liner: Placed on the underside of the hood, it keeps the paint safe from damaging heat from the engine and exhaust system.

Quiet Tape: Used to protect and secure wiring harnesses and cables, this single-sided foam tape is 1-inch wide self-adhesive foam tape. It can be removed and used over again with no loss of adhesion.

It’s important to note HushMat manufactures their products in the USA to ensure they are made to exacting standards from the highest quality and best materials available. Unfortunately, it’s a sign of the times that there are a variety of counterfeit, offshore products of all sorts being sold by unscrupulous vendors online. So, to make sure you are getting genuine HushMat products, always buy from one of the suggested retailers on their website.

Interested In Seeing More: Bowtie Boneyard – Stick Shockers

05 hushmat installation chevelle trial fit of each section
A trial fit of each section will indicate if any trimming is necessary. Here, Jason Scudellari measures and marks a section to be cut.

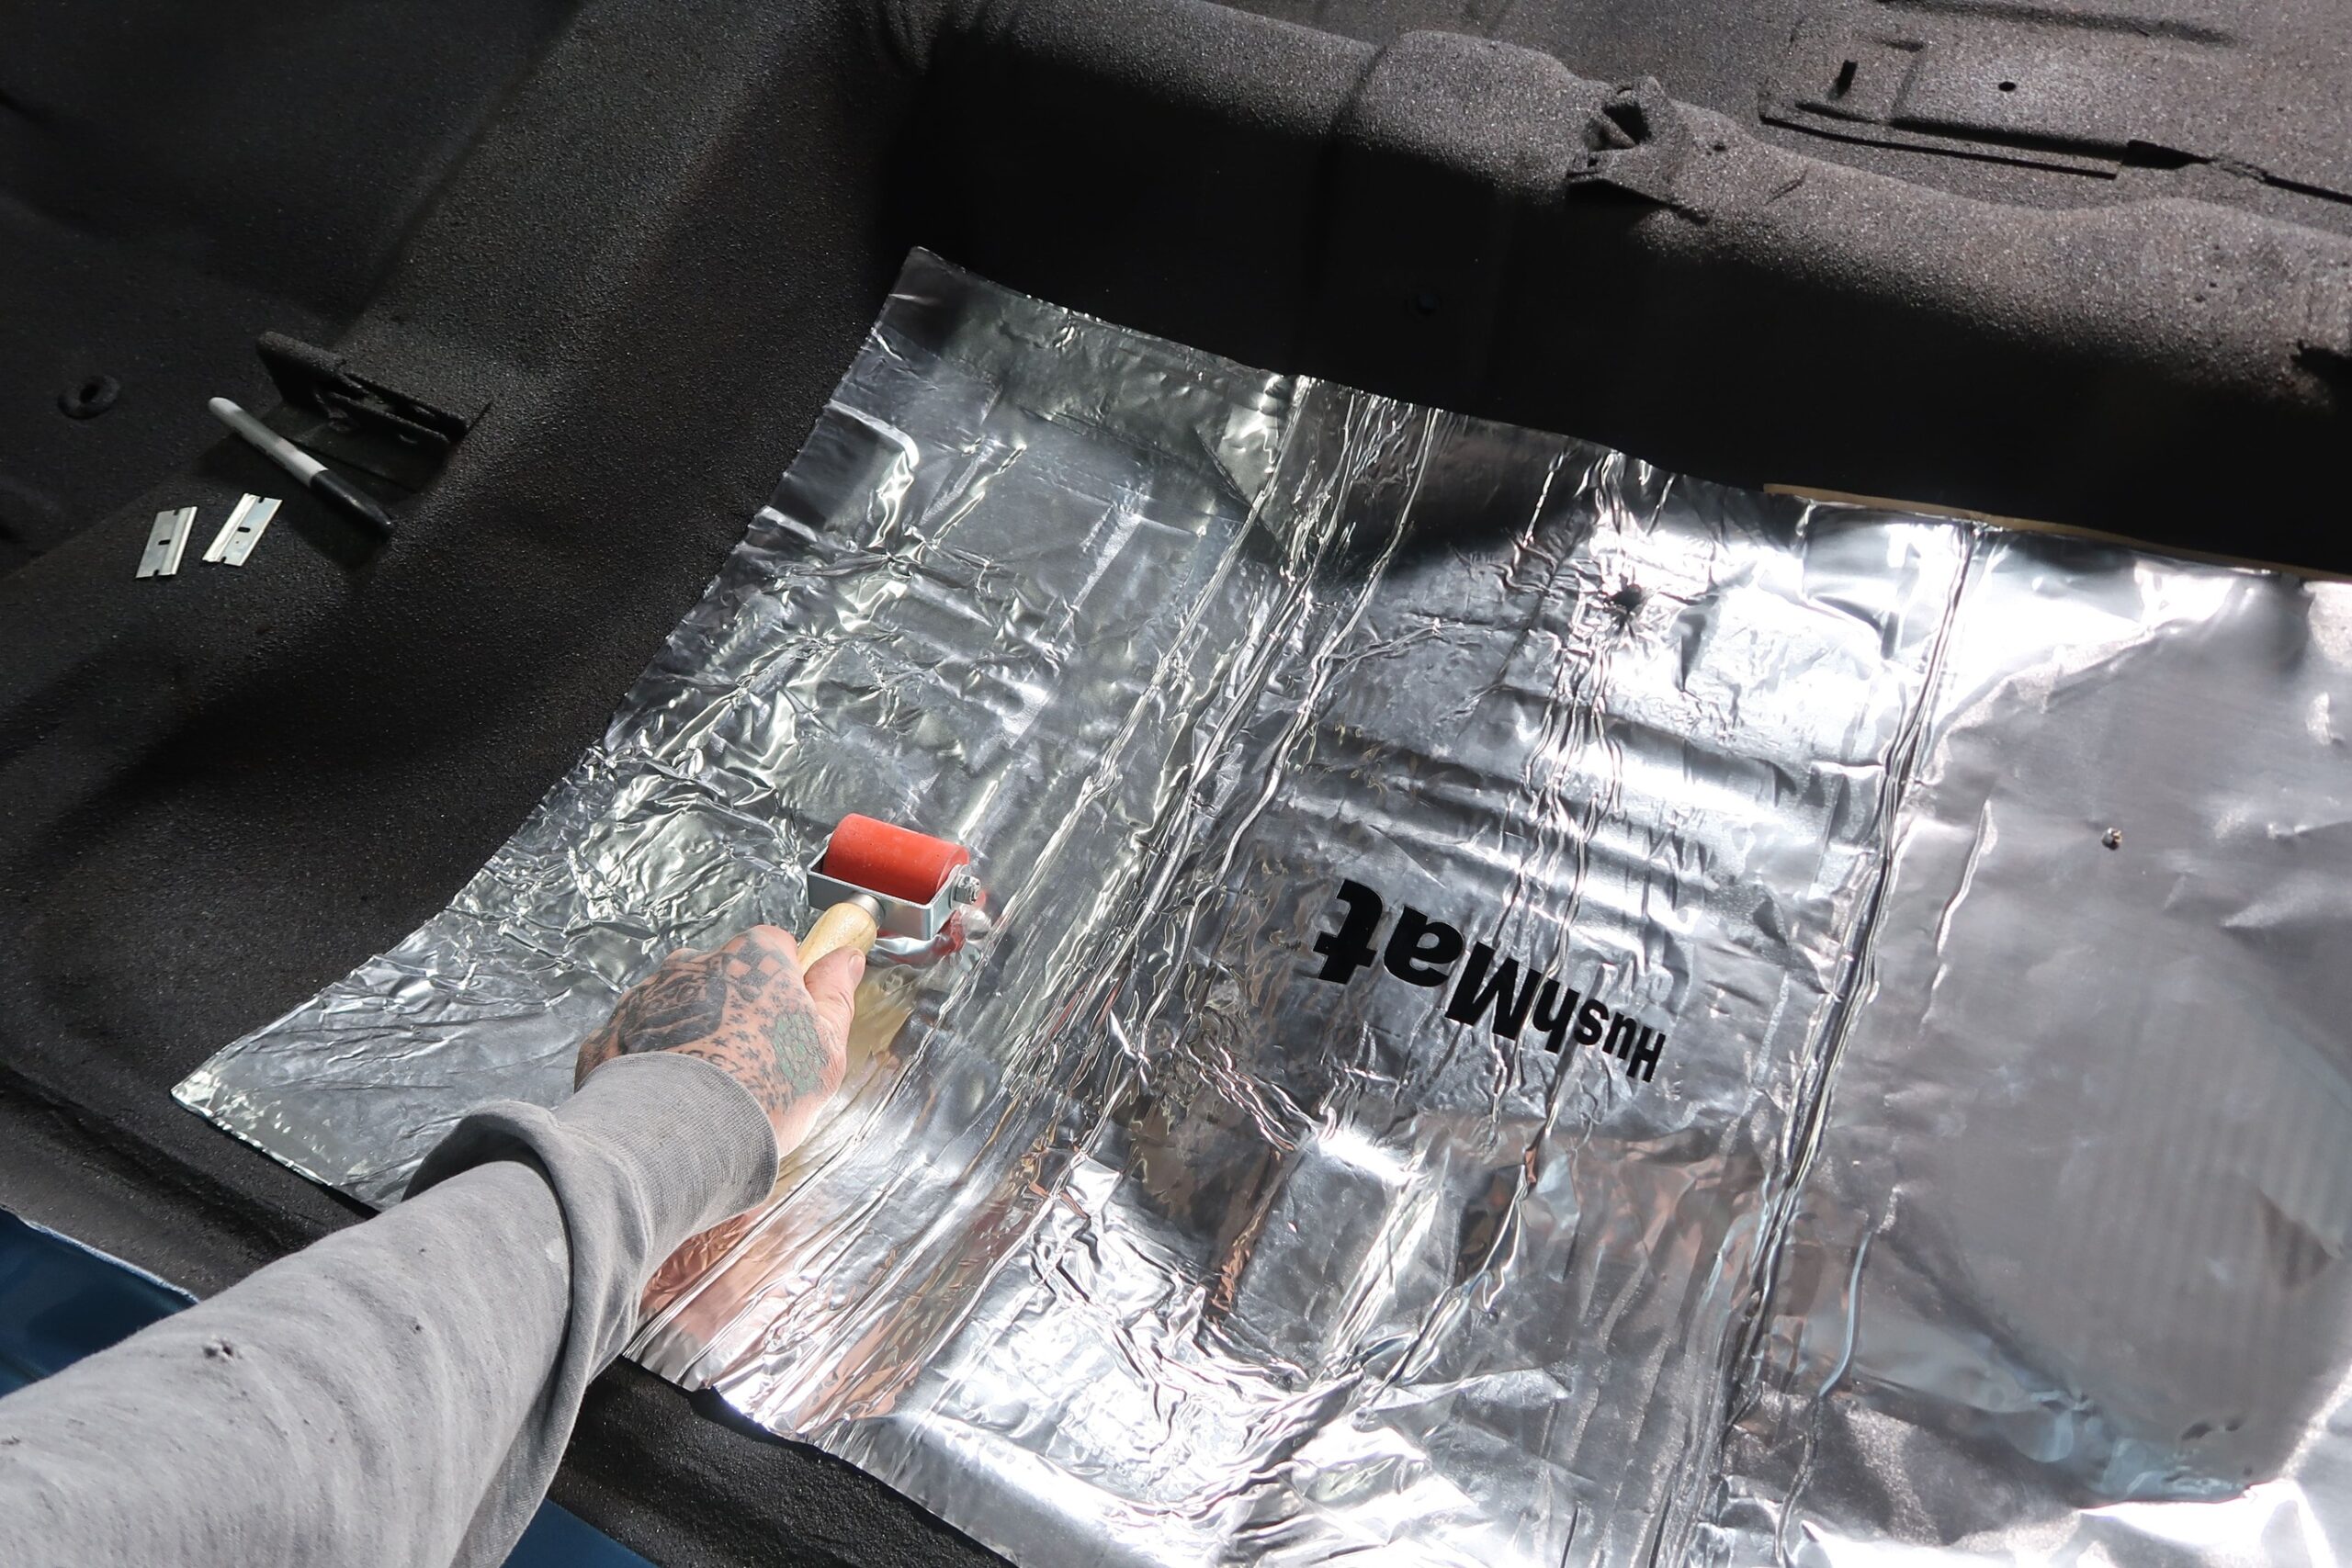
Adding HushMat products to your car is a quick, easy, and affordable way to reduce heat entering the passenger compartment and reduce road and running gear noise. It’s a great way to have a performance car that’s comfortable too, but if you still miss the old days, just dig out a vintage T-shirt.

06 hushmat installation chevelle ensure this section of the kit is centered on the driveshaft tunnel
To ensure this section of the insulation kit was centered on the driveshaft tunnel, Scudellari made alignment marks on each. It was then trimmed and positioned with the marks as a guide.
07 hushmat installation chevelle trimming HushMat Ultra is easily done with scissors or a utility knife
When required, trimming HushMat Ultra is easily done with scissors or a utility knife and a straightedge.
08 hushmat installation chevelle simultaneously press it in place while removing the paper backing
Installation of HushMat Ultra is accomplished by simultaneously pressing it in place while removing the paper backing. If you’re not happy with the placement, there’s approximately a 2-minute window during which it can be removed and repositioned.
09 hushmat installation chevelle easily formed to follow the contours and irregularities in the floor
HushMat Ultra is thin (1/16 inch) and is easily formed to follow the contours and irregularities in the floor.
10 hushmat installation chevelle installed using a roller
Although HushMat Ultra can be installed by hand, a roller (available from HushMat) will speed up the process.
11 hushmat installation chevelle overlapping sections won’t show up as lumps and bumps
As HushMat Ultra is thin, overlapping sections won’t show up as lumps and bumps in the carpet.
12 hushmat installation chevelle benefit of HushMat Ultra it prevents water and air intrusion that cause sheetmetal to rust
An added benefit of HushMat Ultra is that it prevents water and air intrusion that can cause sheetmetal to rust.
13 hushmat installation chevelle rear floor section trimmed to fit around wheelhouse
Here the rear floor section has been trimmed to fit around the wheelhouse. Note how a hole has been cut to accommodate the rear seat bracket.
14 hushmat installation chevelle a small piece was shaped to follow the contour of the wheelhouse
As HushMat Ultra is easily formed a small piece was shaped to follow the contour of the wheelhouse and blends into the floor section.
15 hushmat installation chevelle trimming is best done during a test-fit
In most cases any trimming HushMat products for any protrusions is best done during a test-fit and removal of the paper backing.


Source
HushMat
(913) 599-2607
hushmat.com

Related Articles

Search Our Site

More Chevy Performance

Pro Touring 1969 Chevy Camaro Restomod

By Nick Licata   -   Images by Luke Munnell There’s not...

1957 Chevy Gauge Upgrade With Dakota Digital RTX Gauges

By Ryan Manson   -   Images by the Author If you're...

1955 Chevy Bel Air Restomod

By Scotty Lachenauer   -   Images by the Author Mike Todd’s...

1979 Chevy Malibu Street and Strip Muscle Car

By Scotty Lachenauer   -   Images by the Author Marc Schankweiler...

Refreshing the Rear Bumper, Taillights, and Filler Panel on a 1977 Nova

By Tommy Lee Byrd   -   Images by the Author In...

Pro Touring 1974 Camaro

By John Machaqueiro   -   Images by the Author With a...
More Chevy Performance

How to Rebuild C3 Corvette Brake Calipers on a Budget

By Jeff Huneycutt   -   Images by the Author The whole...

1969 Yenko Camaro Restored to Perfection

By John Machaqueiro   -   Images by the Author In the...

Round Two – Chevy Muscle Cars From the Second Annual Triple Crown of Rodding

By Nick Licata   -   Images by the Author When car...

A Guide to Steel Wheels for Chevy Cruisers and Muscle Cars

By Tommy Lee Byrd   -   Images by the Author Tires...

1962 Chevy Bel Air Resto

By Nick Licata   -   Images by NotStock Photography The ’62...

Chevy Concepts – 1966 Corvette

Artwork by Tavis Highlander Instagram @tavishighlander TavisHighlander.com Owner: Dan Smith Builder: Full Circle...