Classic Performance Products (CPP) offers a number of full disc brake conversions running the gamut from cruisers with steel wheels to Pro Touring big- brake systems. For our Chevelle, we opted for a budget-friendly system that would fit behind our 15-inch rally wheels and improve our braking capabilities.
Improving the Stopping Performance of Your Chevelle
There is one important thing you need to remember about driving original, old cars: They drive and handle like old cars. That’s right, our favorite, unrestored old Chevys just don’t cut the mustard when it comes to braking, cornering, and tight handling. To most of us, however, that’s just part of the charm.
Our 1964 Chevelle remains very much original besides an updated 350 and overdrive transmission. We’re talking original suspension and rearend, door seals, steering, and non-functioning AM radio. And you know what? We’re fine with the excessive wind noise, OK with a little body roll, and actually enjoy the white noise of the small-block. One area that we were not cool with anymore was the single-pot master cylinder and manual drum brakes.
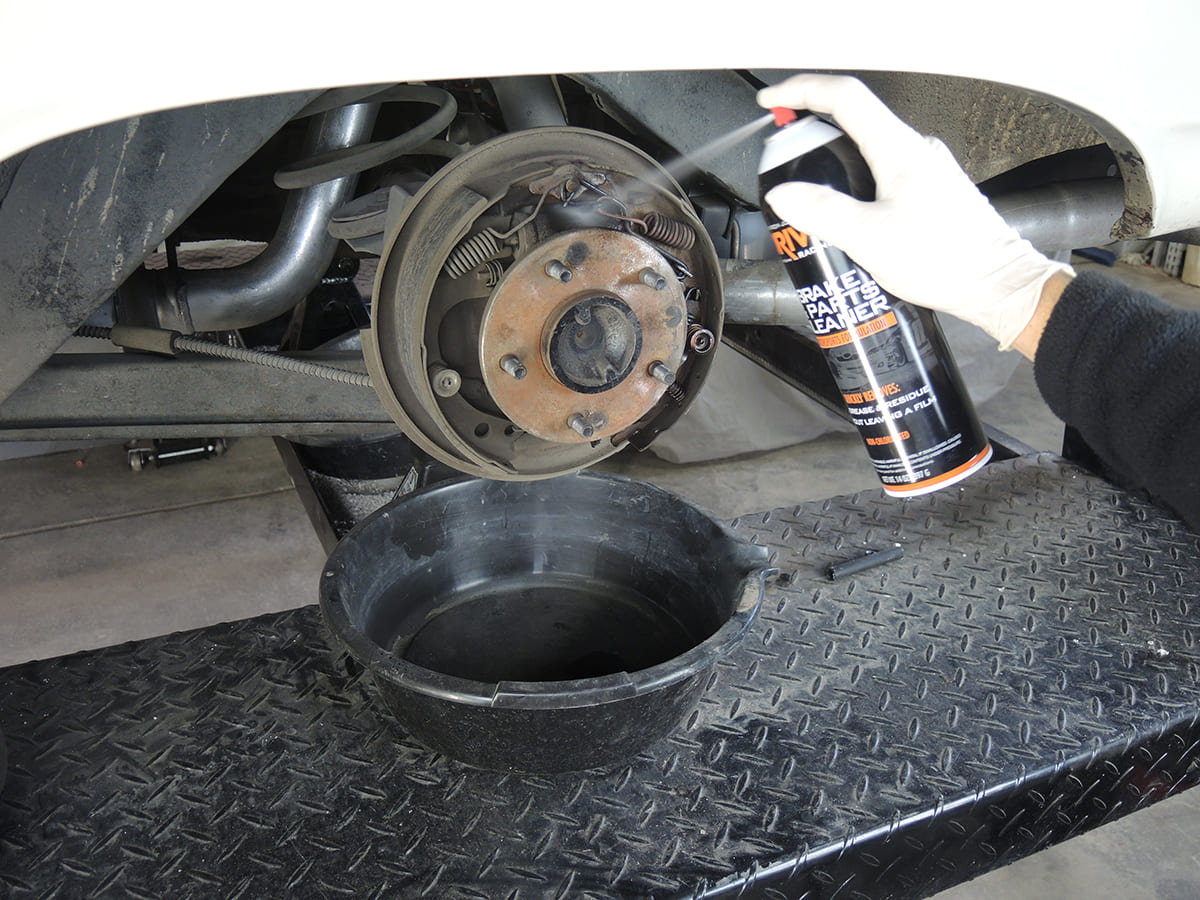
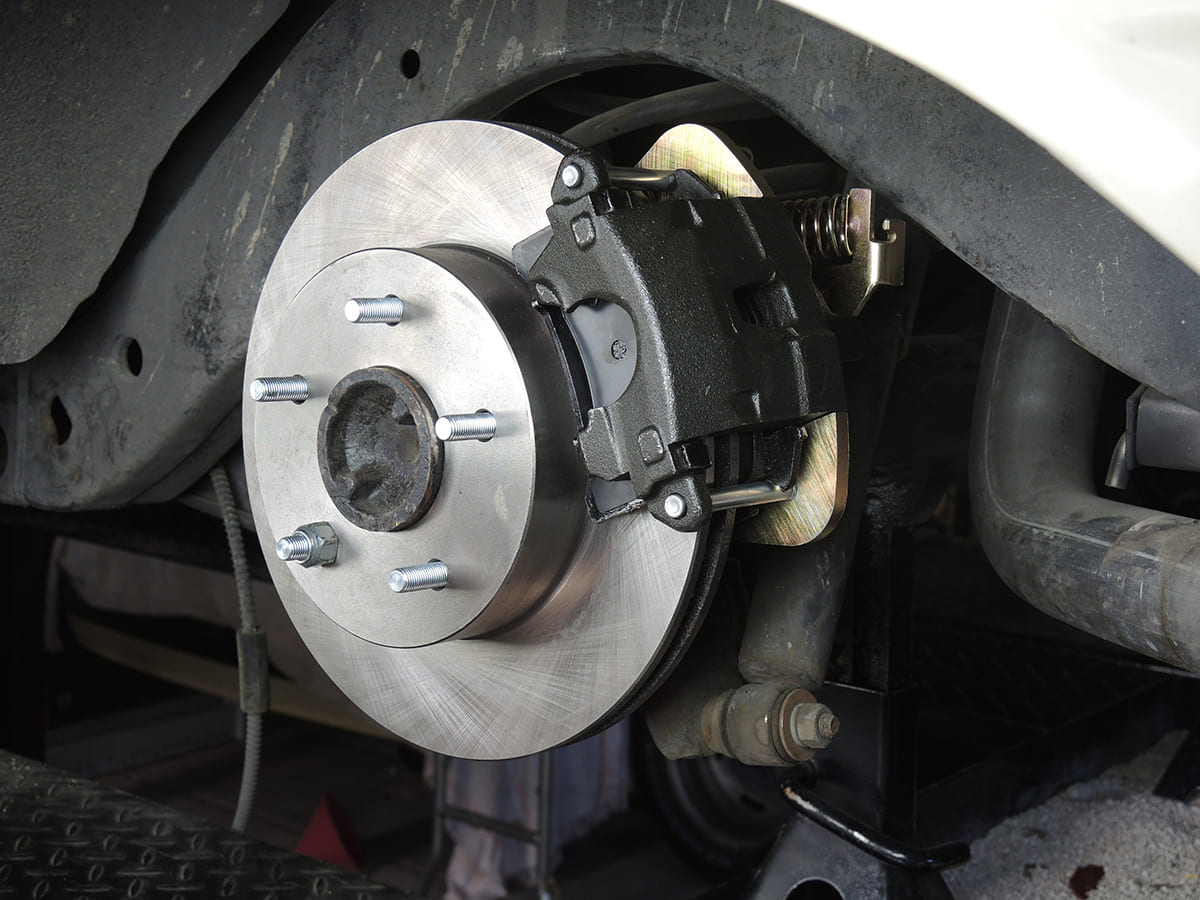
Before disassembling, do yourself a favor and spray the assembly off with brake cleaner to wash away a lot of the nasty dust, making for an easier and cleaner disassembly process.
We’ve driven the Chevelle for years with the inconsistent drum setup and were used to fighting a quick lane change under a firm stop, but with more traffic, a stronger drivetrain, and a couple kids in the back seat, braking performance suddenly became a little more important on our list of upgrades. And to be honest, we should have upgraded to a dual port master cylinder years ago.
One thing that was important in a brake upgrade for us was that we wanted to retain our 15-inch rally wheels. We weren’t looking for a set of four-piston calipers and big rotors, just a budget-friendly disc brake kit—and while we’re at it, the thought of adding power assist would go a long way to making the wife happier about taking the car out for a cruise (which we love to see!).
With those parameters, we dialed up Classic Performance Products (CPP) online (classicperform.com) to see what was available.
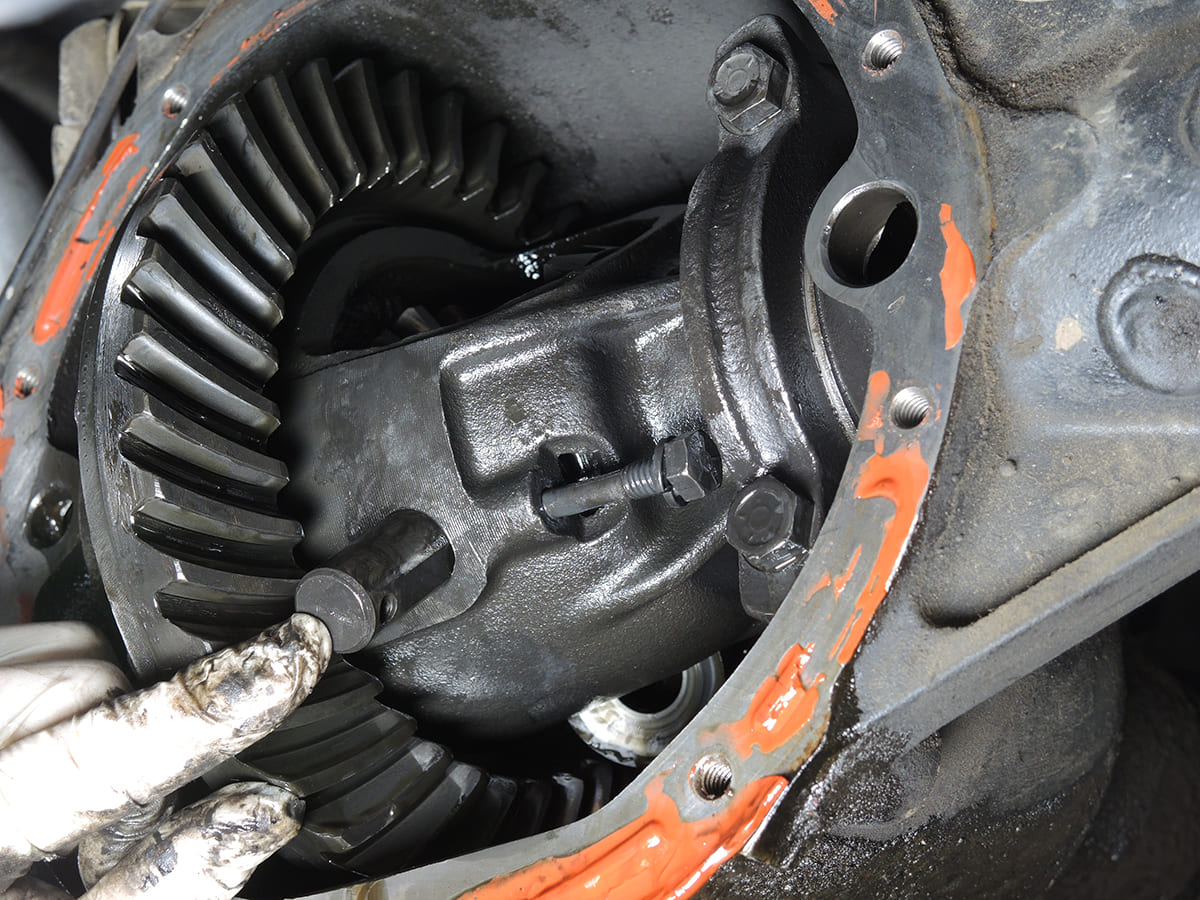
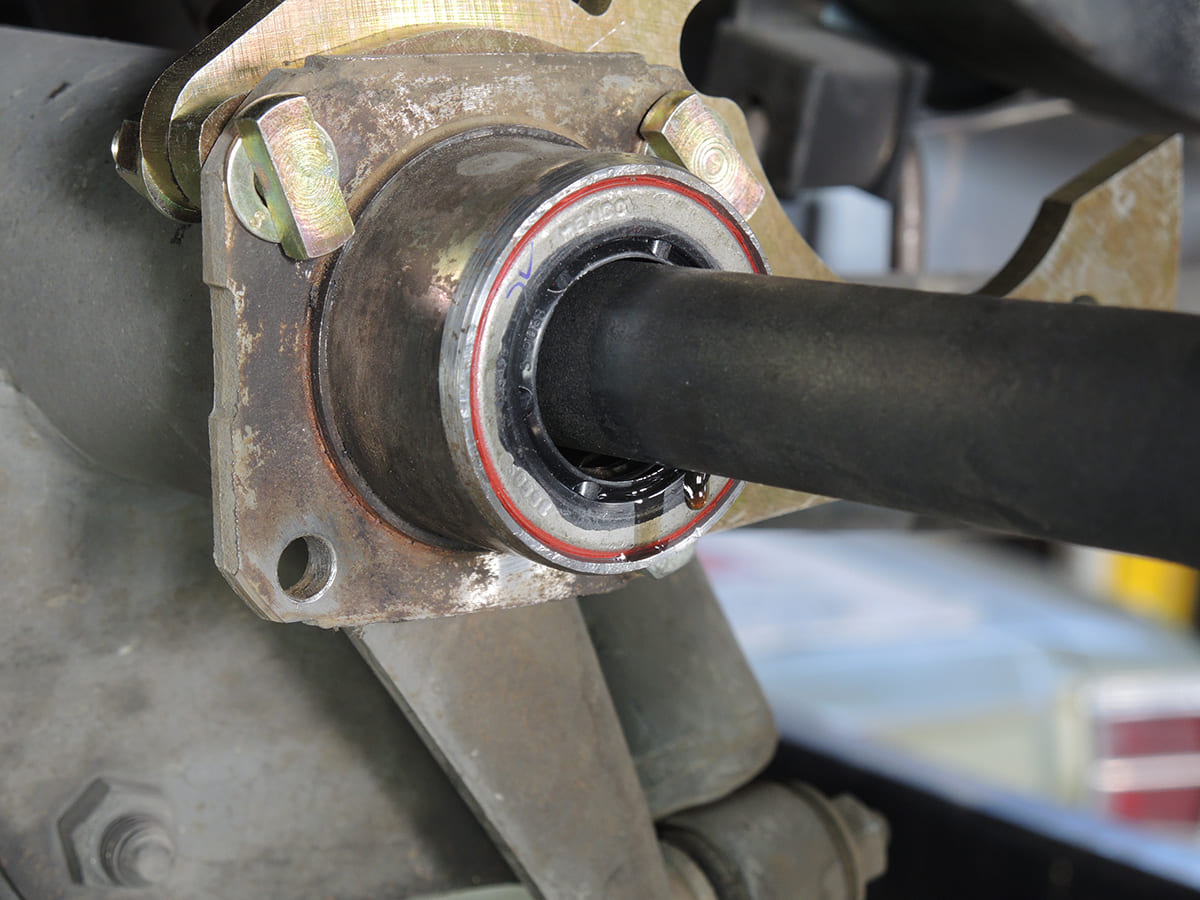
The rear axles need to be removed, so you’ll need to pull the rearend cover. Locate and remove the small bolt that goes through the center pin of the carrier (you’ll need to rotate the driveshaft). Remove the bolt and push the pin out of the differential assembly. Push the axles inward to release the C-clips and then the axles can be removed. Yes, this is all that holds the axles— – and the wheels— – in place on most Chevys.
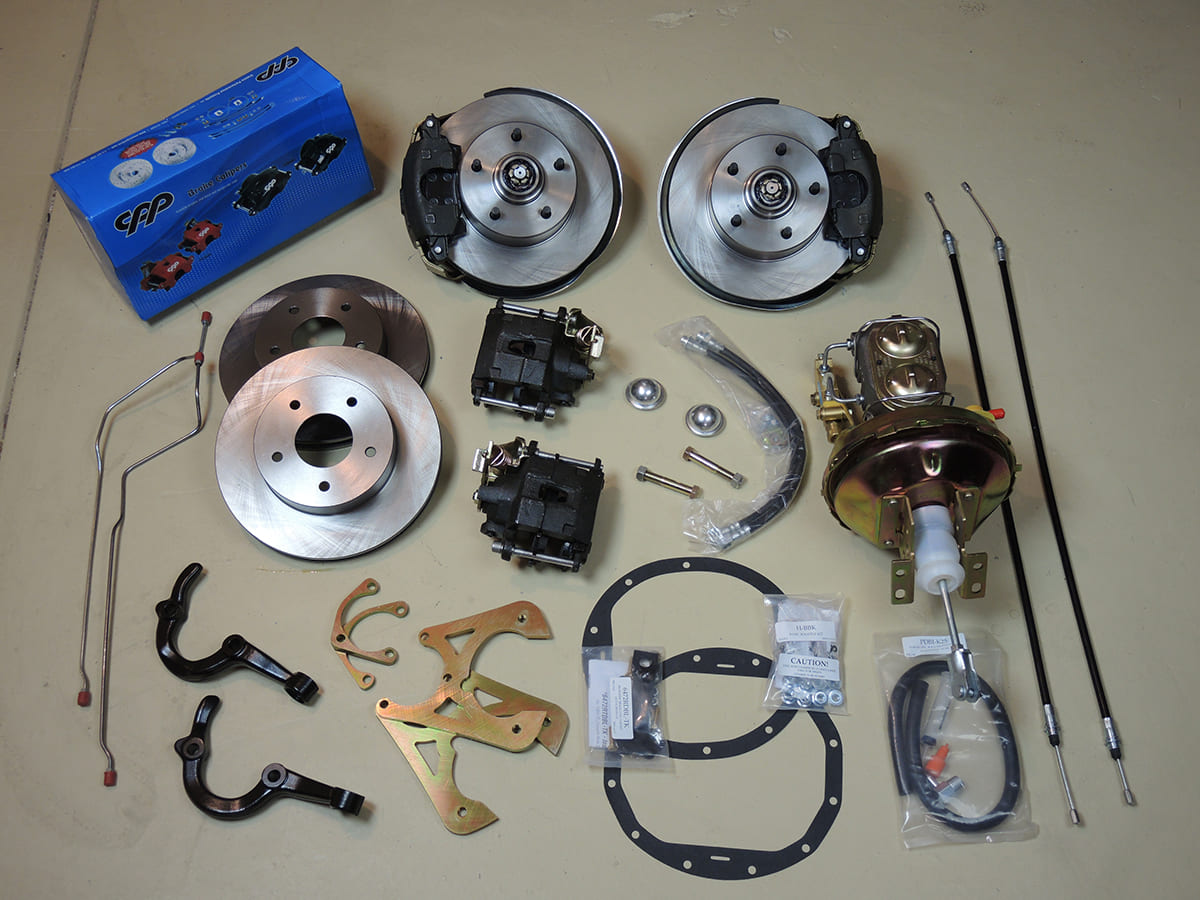
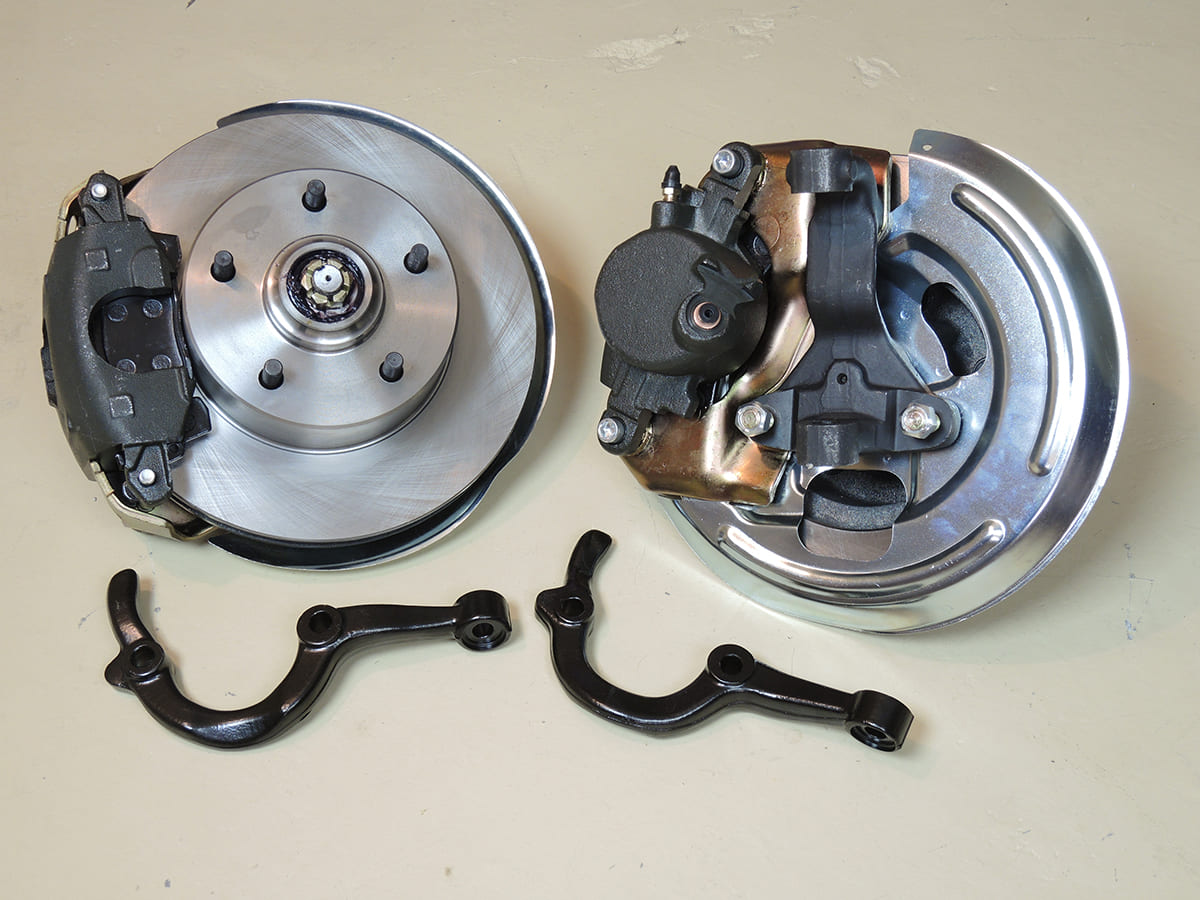
One of the first kits that popped up on the screen was a complete four-wheel disc brake conversion kit designed as a true bolt-in. The kit is available with a stock-style spindle (or a drop version), rotors, single-piston calipers (with a parking brake), an 8-inch booster assembly, including a combination valve along with new hoses and a prebent hardline kit for the rear. Pretty much everything we needed in one part number to upgrade the braking consistency and safety of our old Malibu.
The system arrived ready to install, even with the new rotors and calipers assembled and bolted together. The new bearings were even packed with grease and installed, though everything needs to be disassembled to bolt to the vehicle. New rear parking brake cables were also supplied to connect to the mechanism attached to the rear calipers. As for the booster and master cylinder, it too arrives as an assembled system, including new lines attached to the combination valve. Of course, the master cylinder was removed so we could bench bleed it, but you can tell that the system was well thought out and designed to function as a complete system.
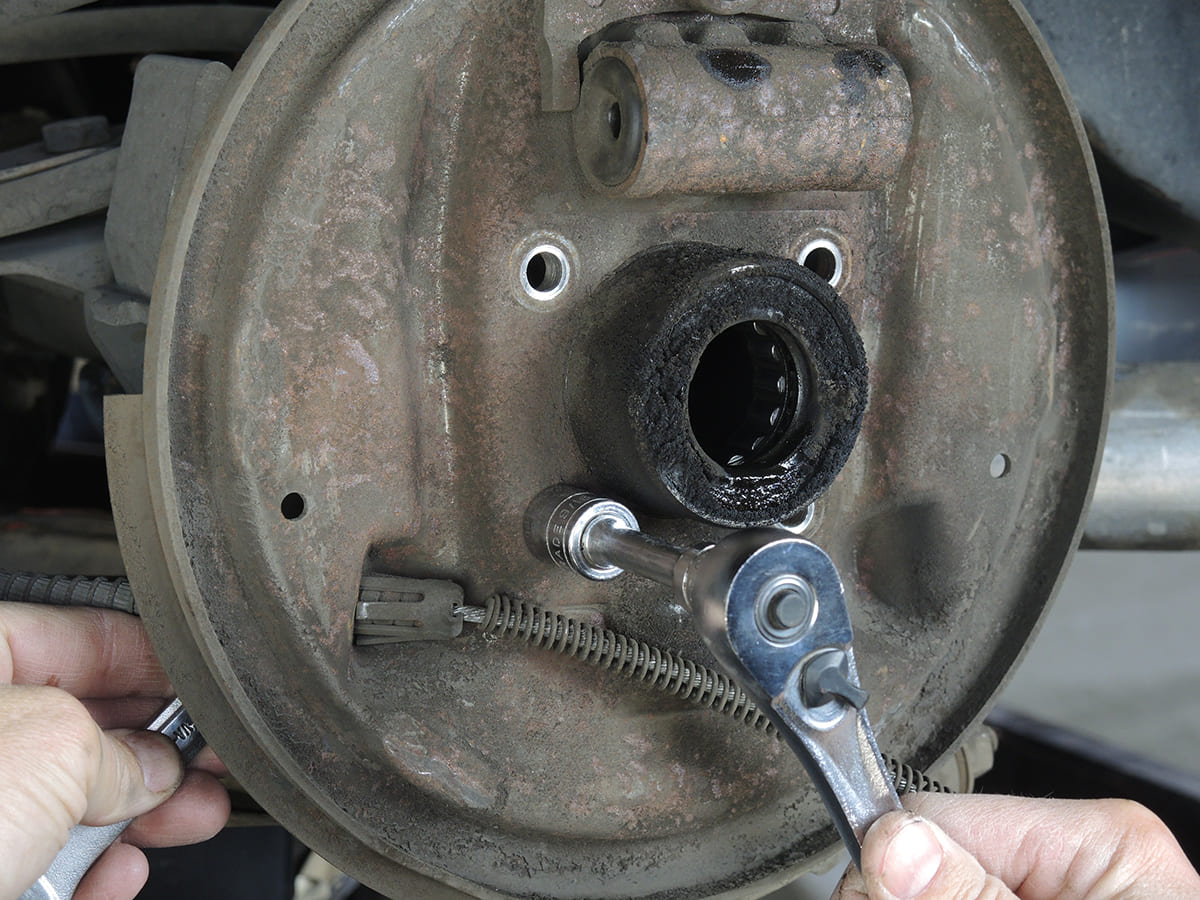
With the C-clips removed, the axles slide easily out of the housing allowing you to remove the four retainers that secure the backing plate. The parking brake cable can also be removed as the CPP kit is supplied with new cables. This is the last step before assembly, so take the time to clean up and organize your tools and parts.
The installation, as you’ll see, was about as straightforward as you could hope. Most anyone with a good set of tools and DIY mechanical aptitude can install the entire kit. CPP really did their homework as the new calipers bolted right into position and are complemented with new hoses and lines. This kind of swap is also the perfect time for other maintenance items like new axle seals, bearings, or tie rods, so plan accordingly before you start the build.
Once we had the system properly bled and topped off, the pedal feel was completely different than stock. We’re talking a firm pedal with positive braking results. Even with a few very quick, repeated hard stops, the pedal remained firm and the car remained in its lane! As for the power assist, to be honest it wasn’t high on our original list of upgrades, but we’re glad we added it as it has made quite a difference in the overall driveability of the car. The upgrade to disc brakes was exactly the improvement we had envisioned, and we have a much better peace of mind while cruising with the family and out on the road.
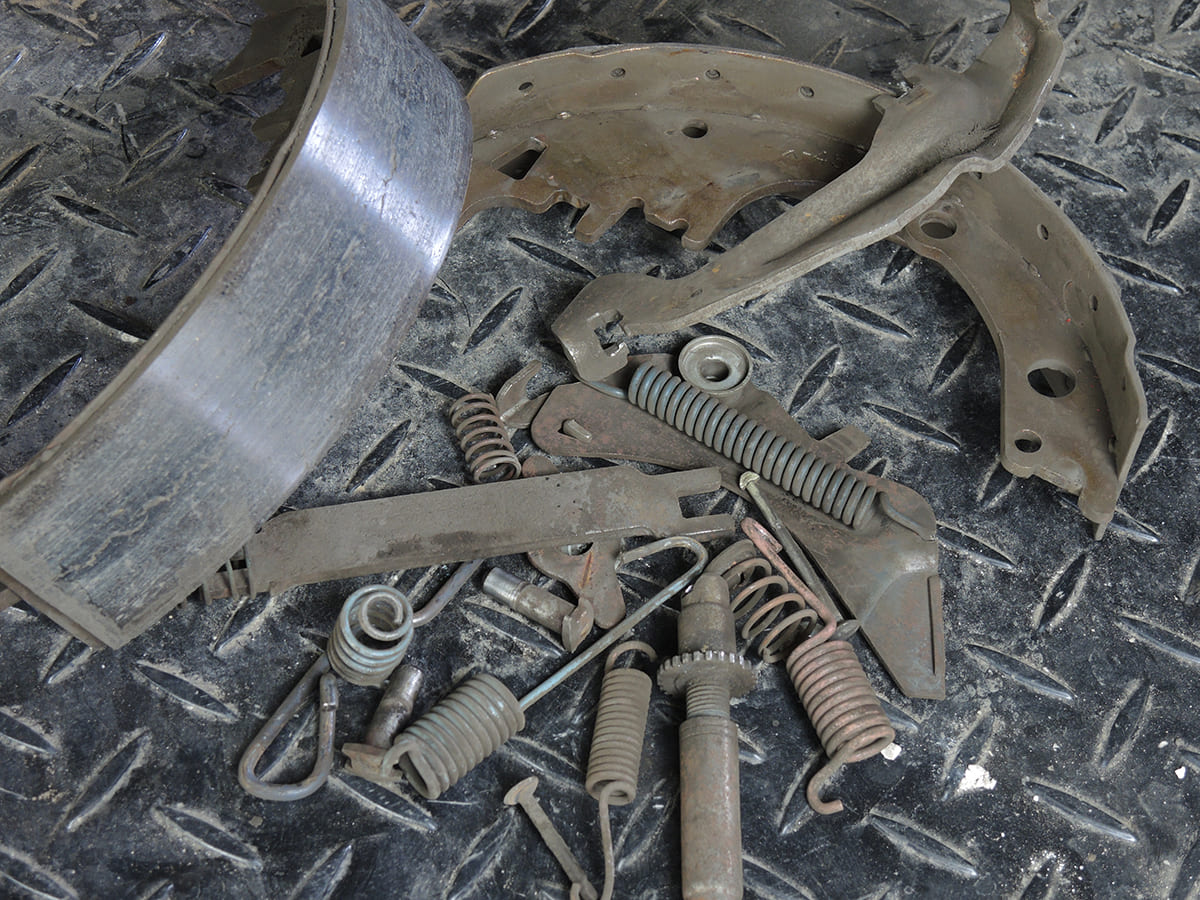
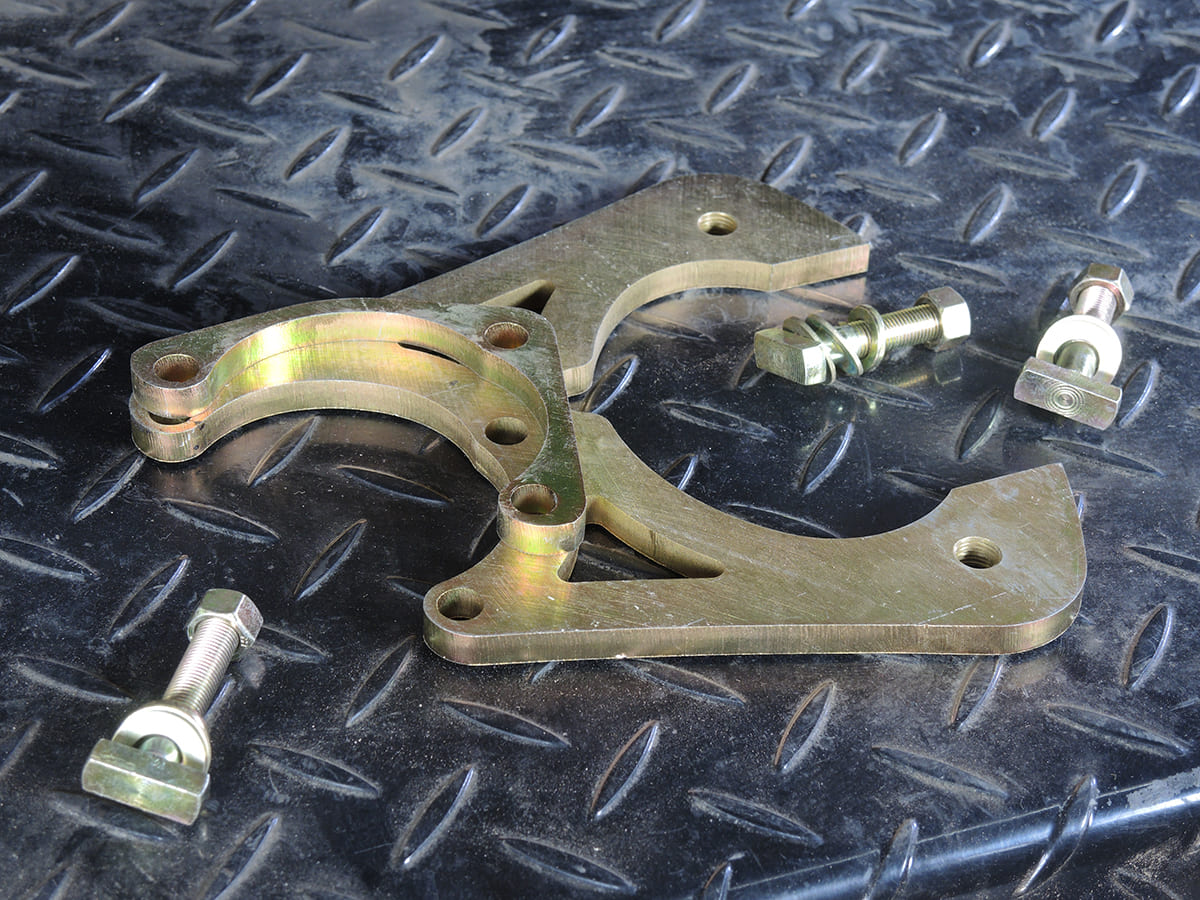
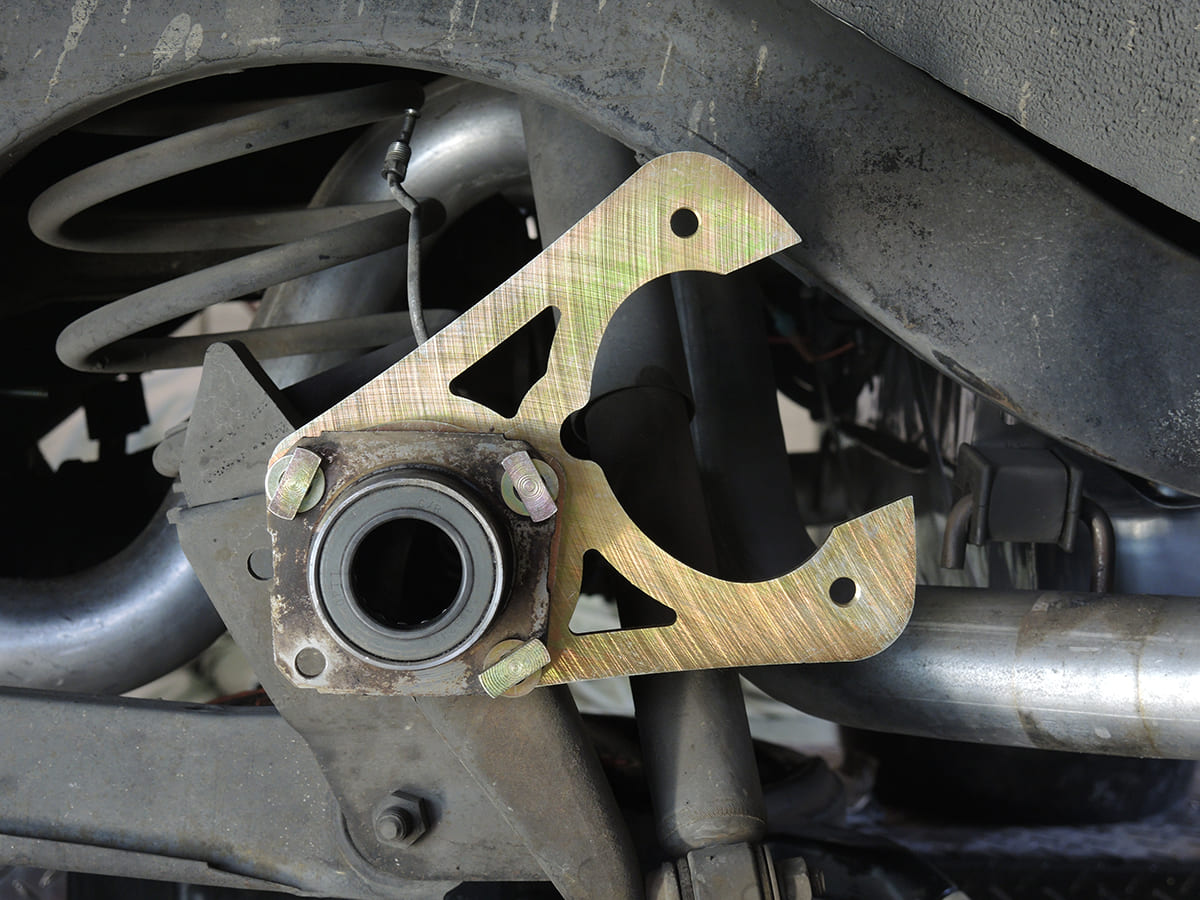
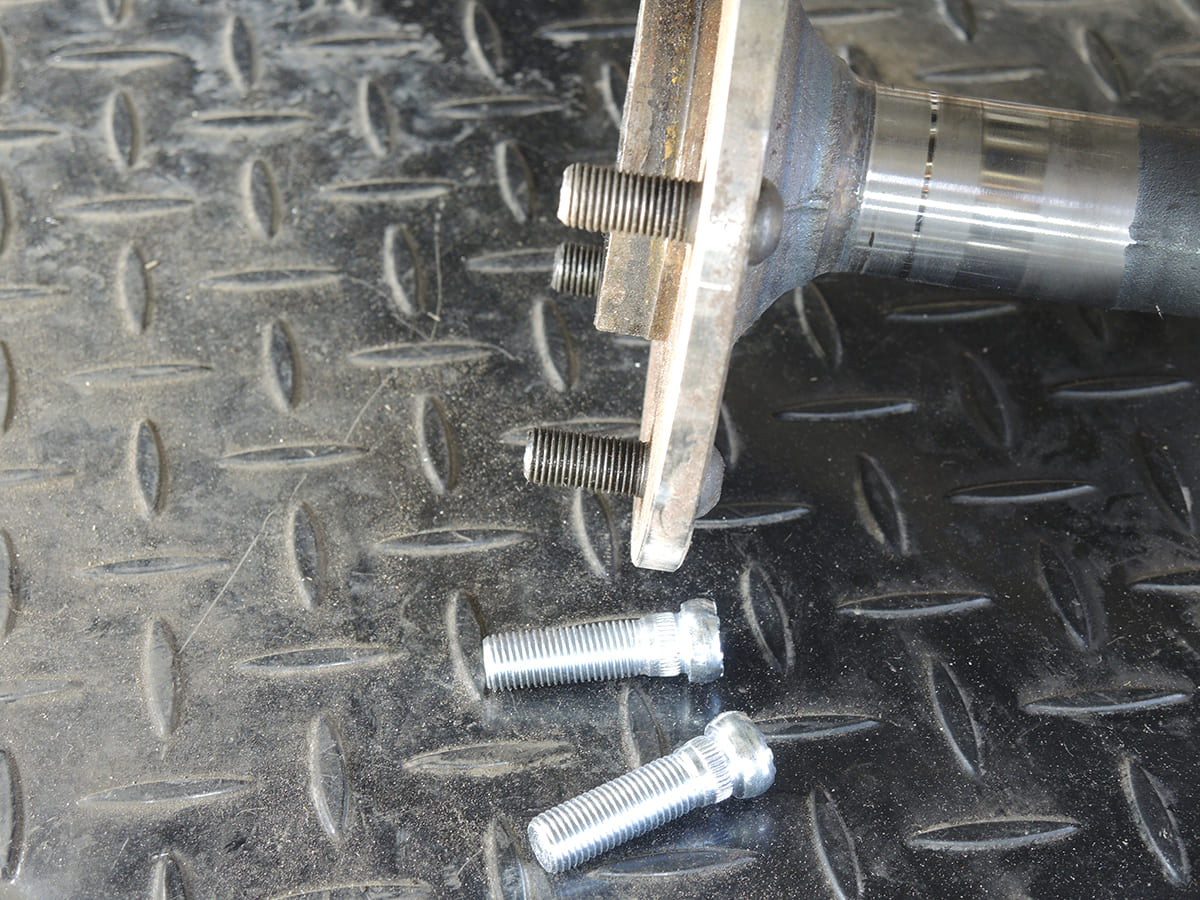
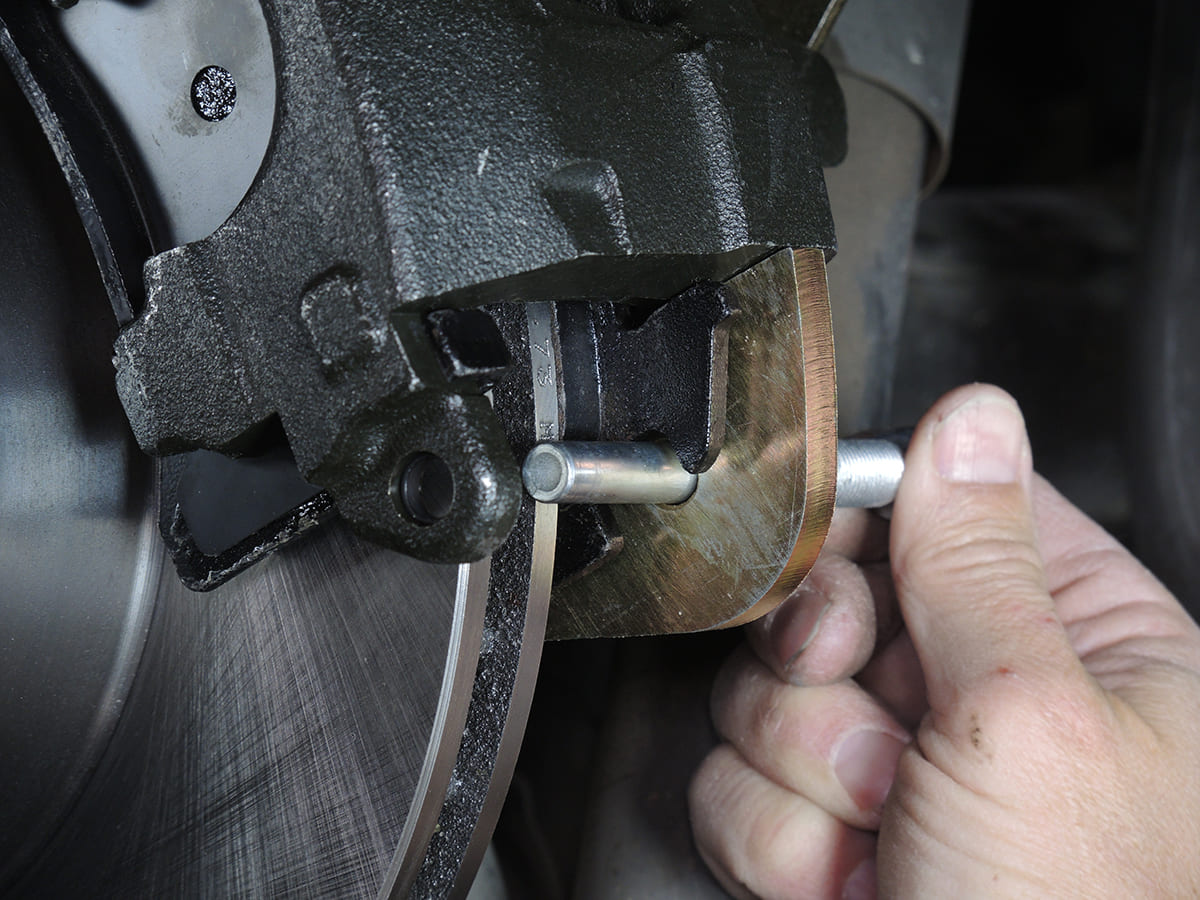
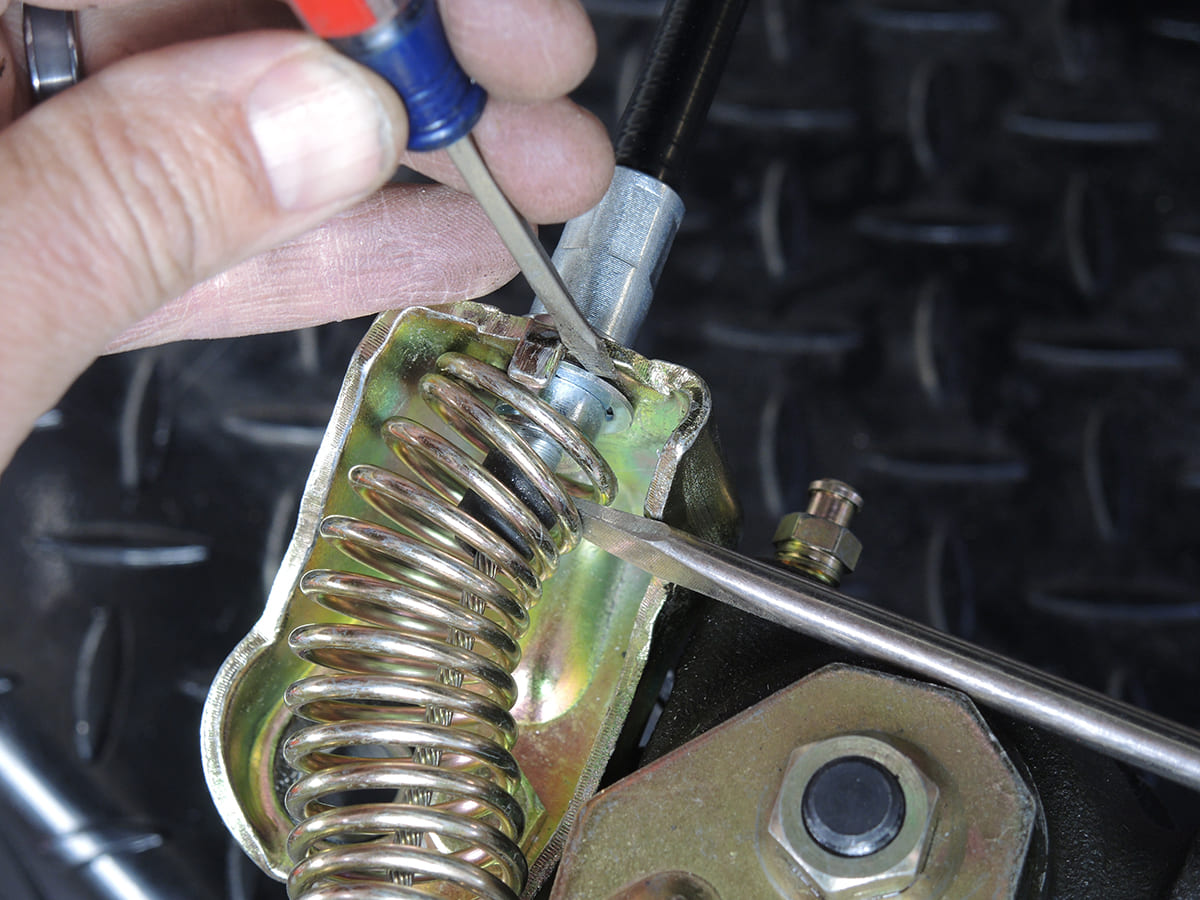
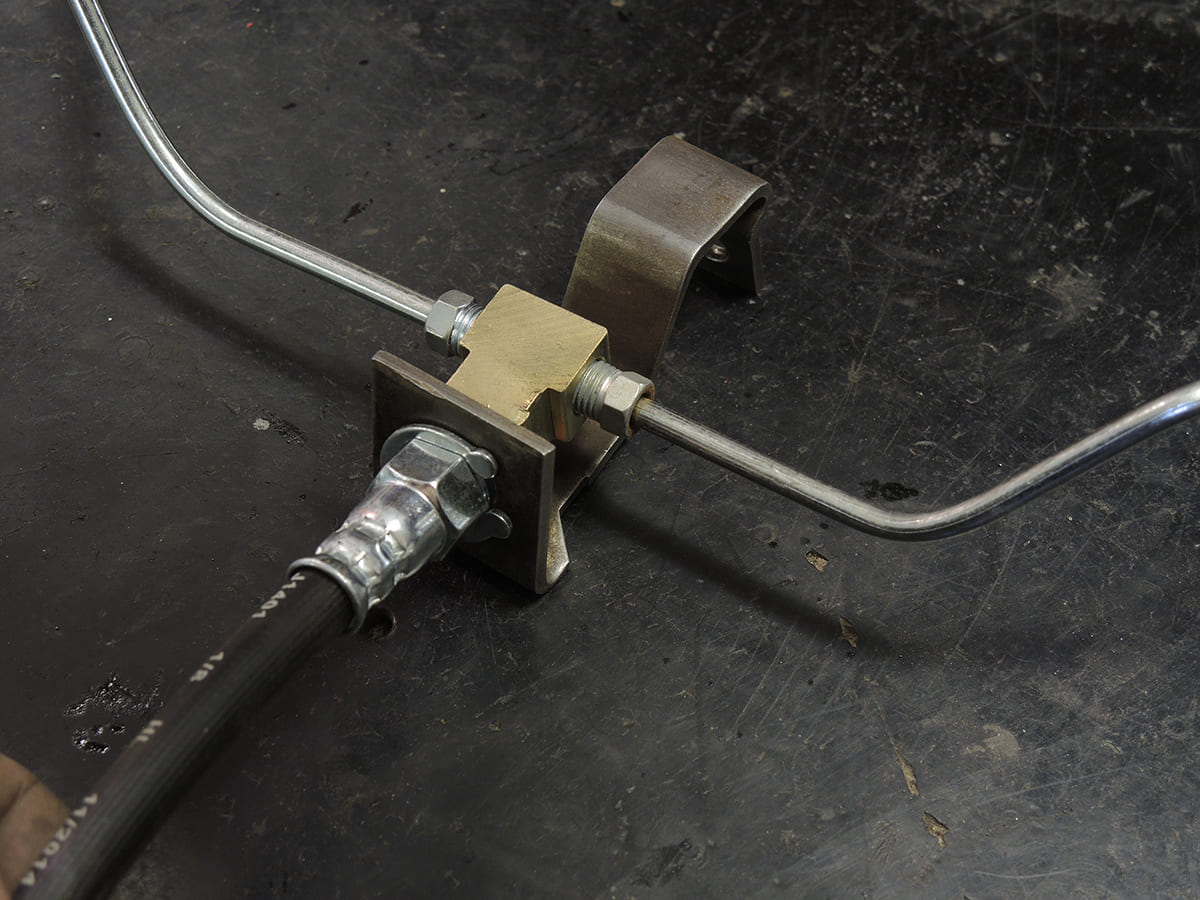
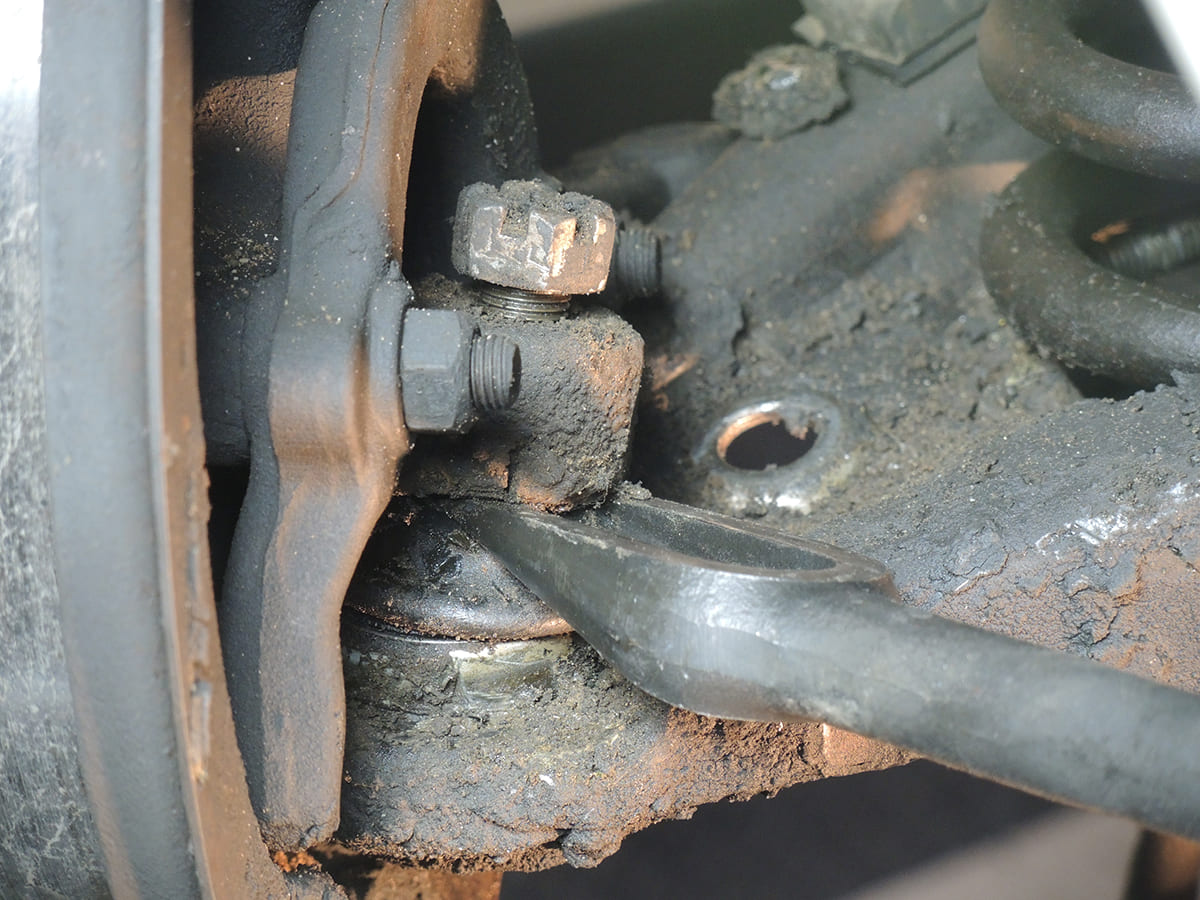
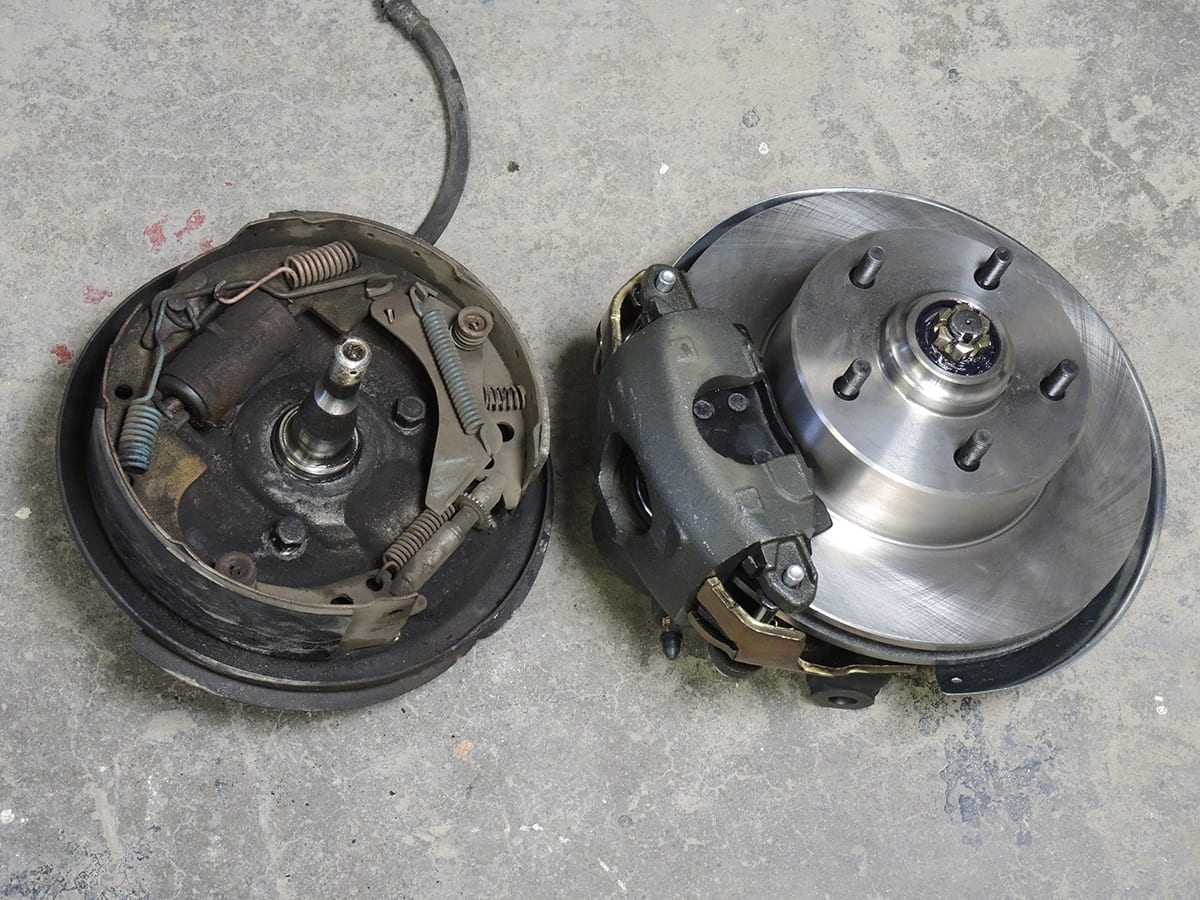
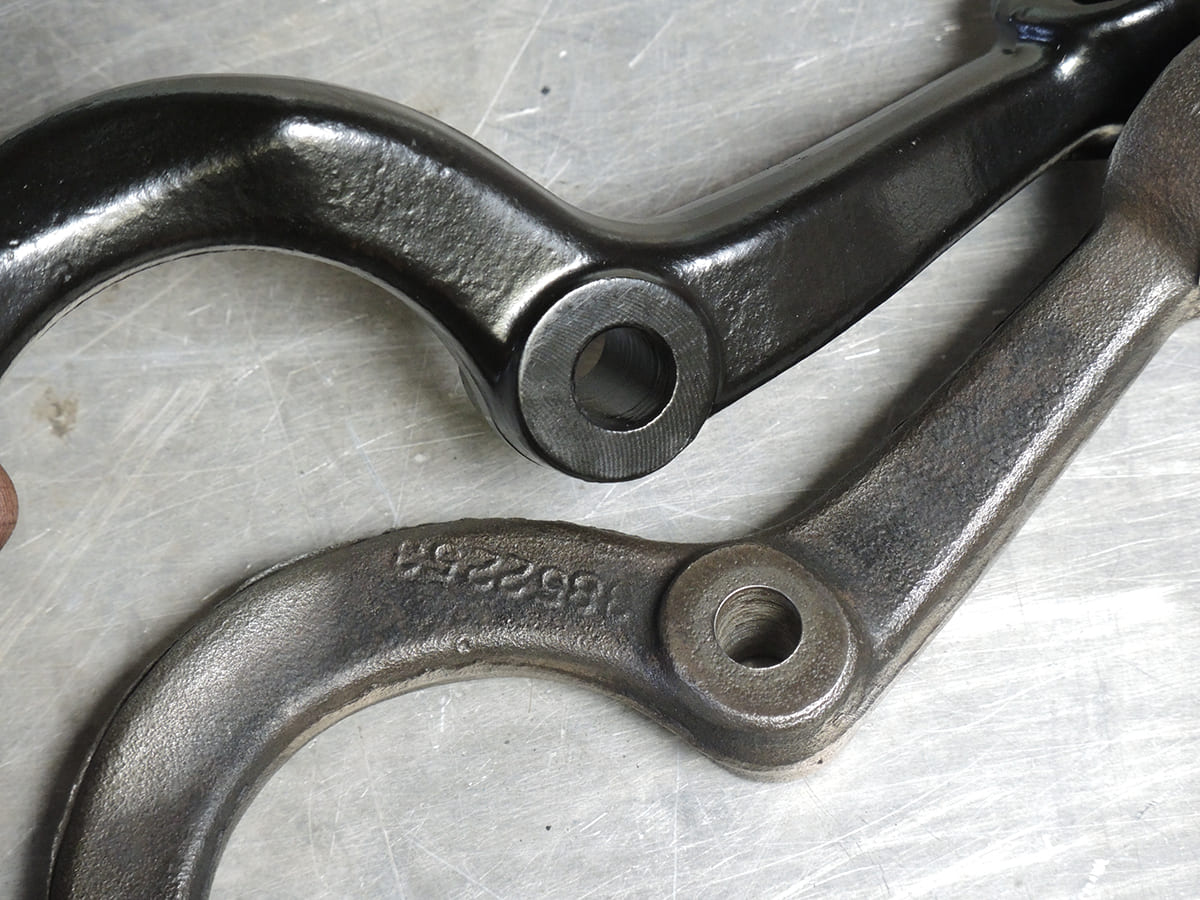
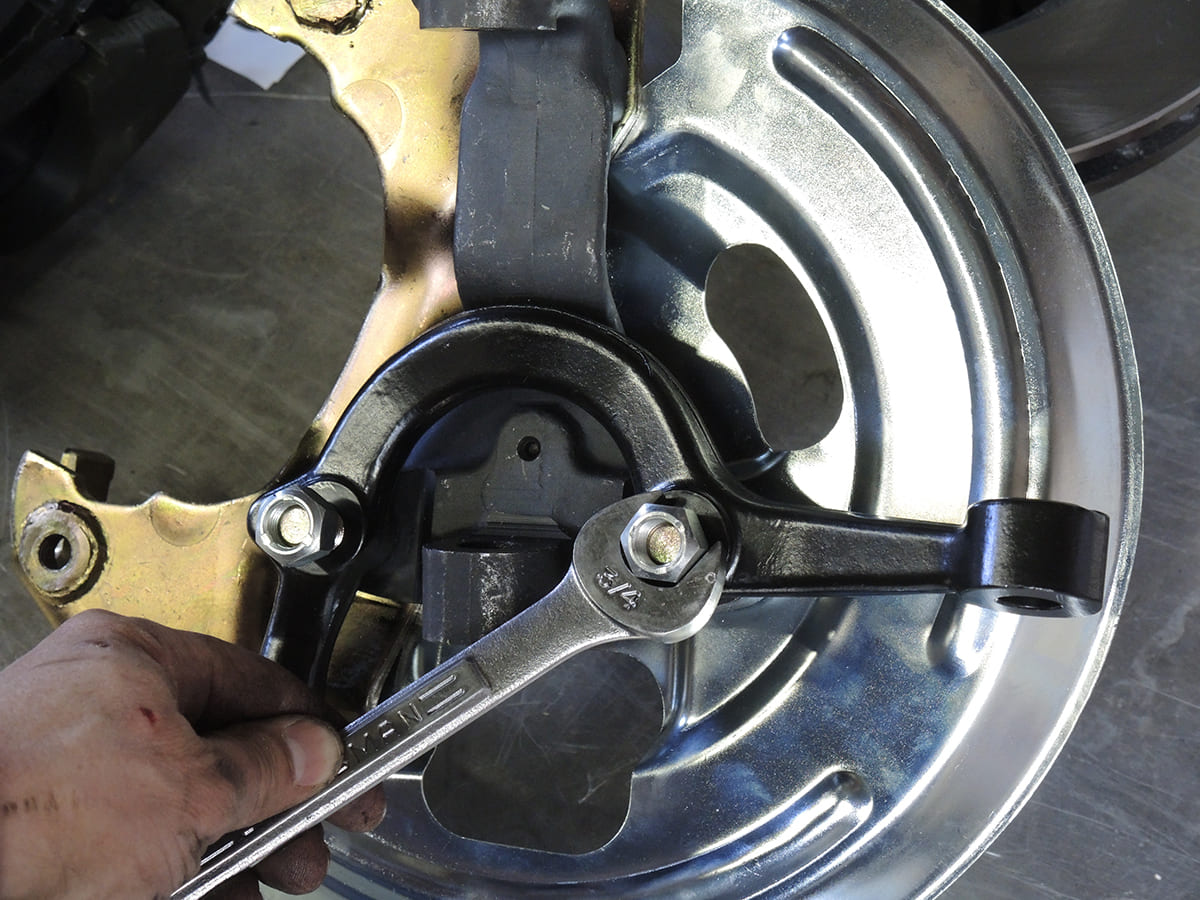
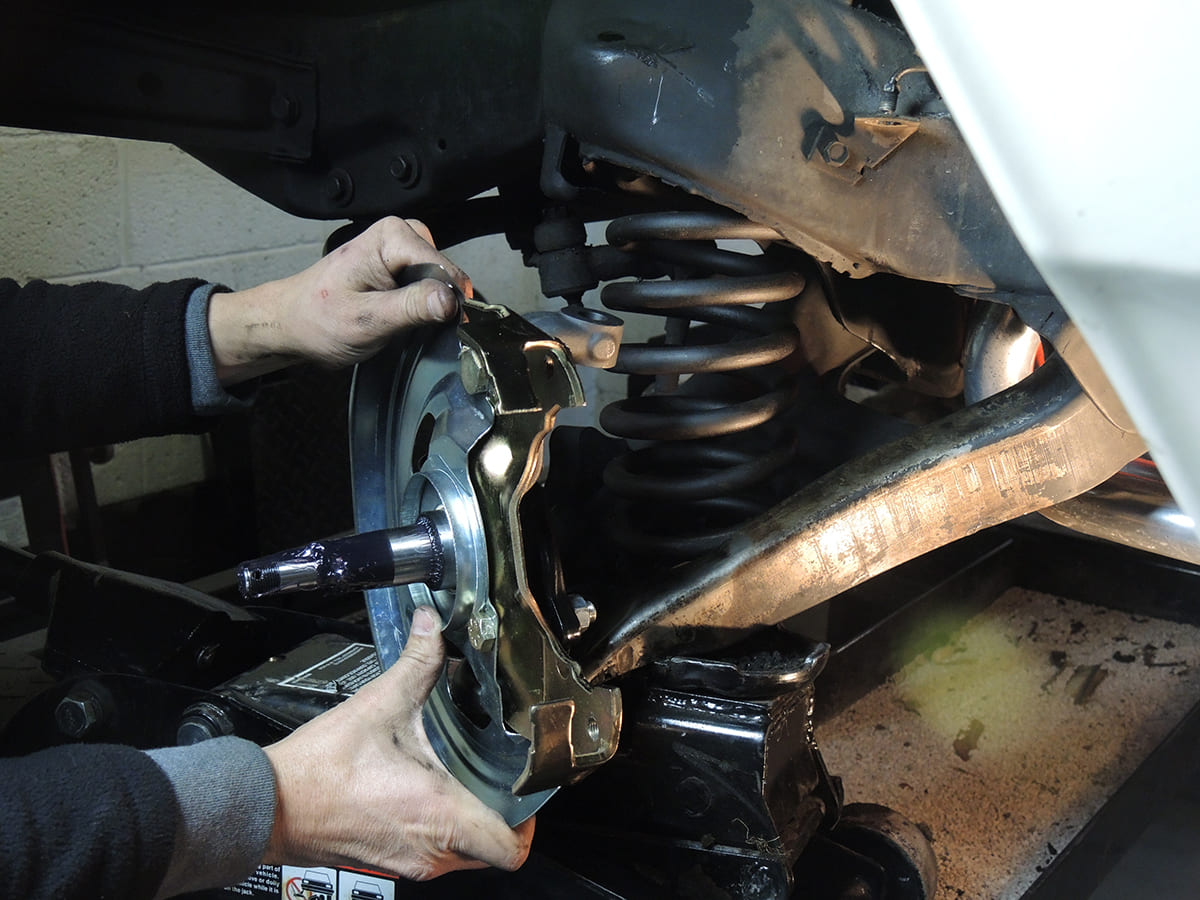
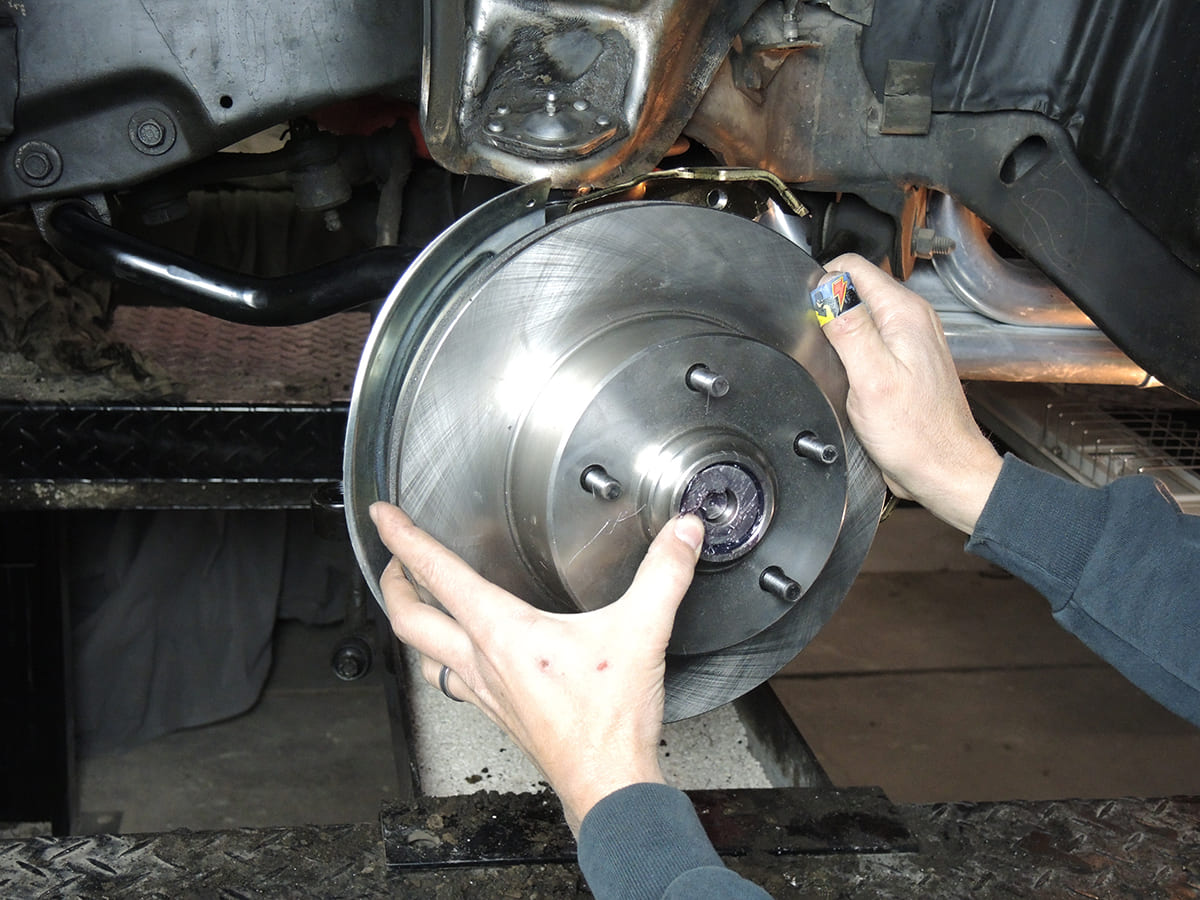
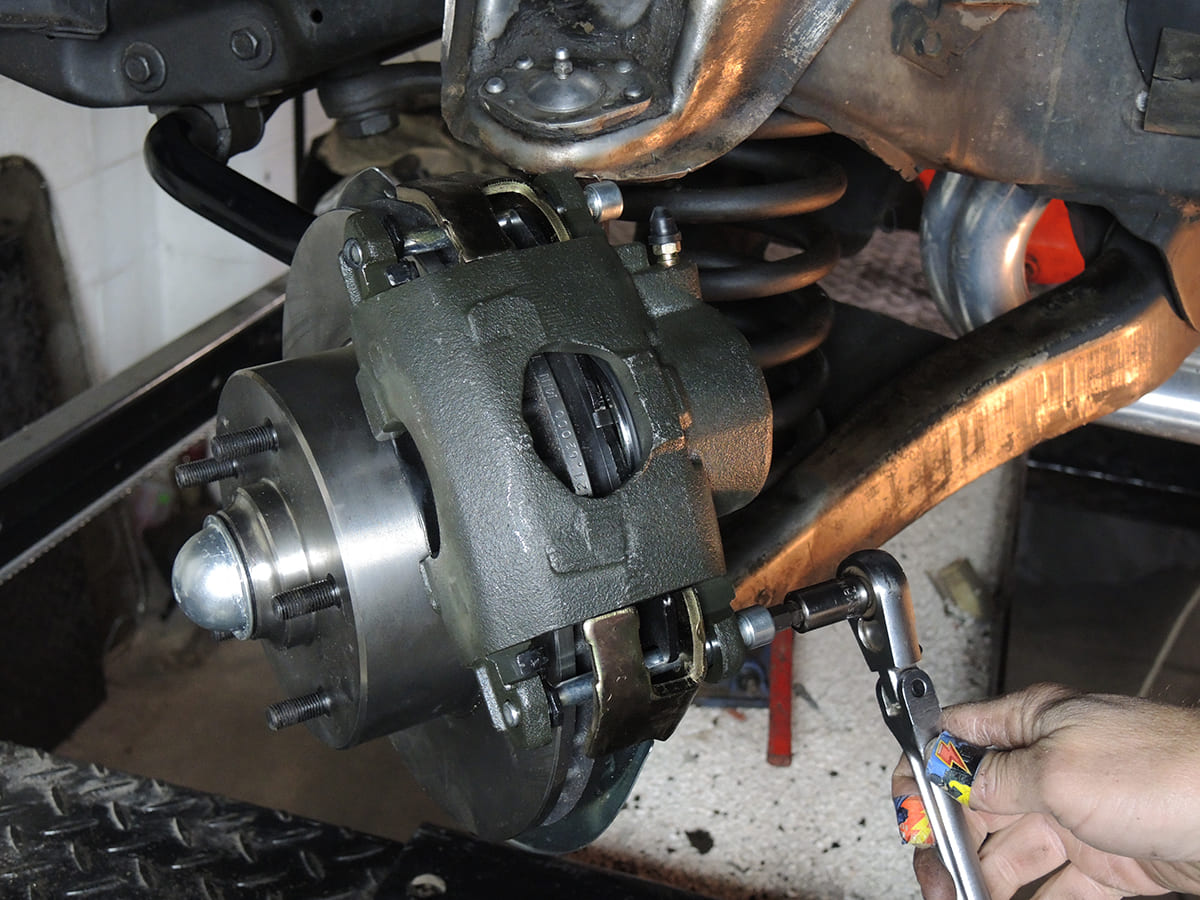
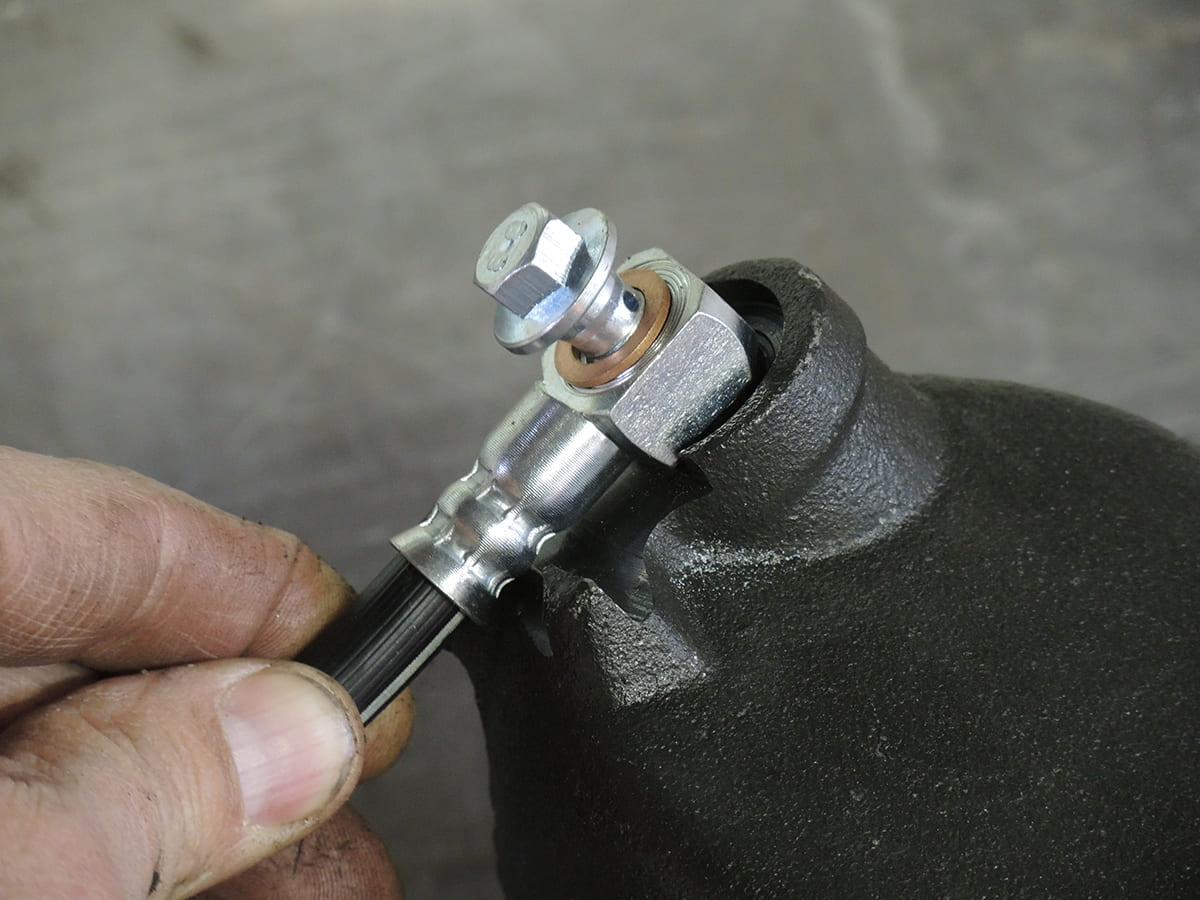
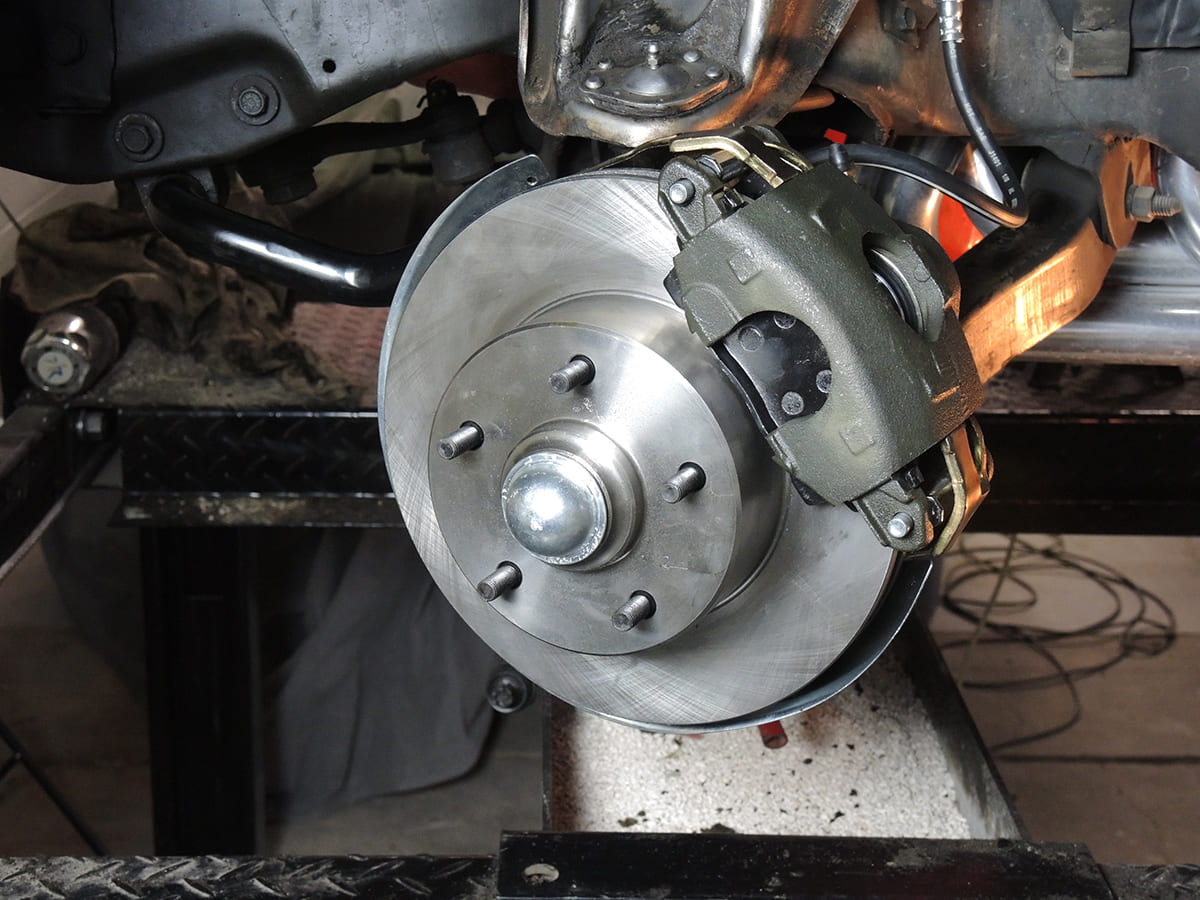
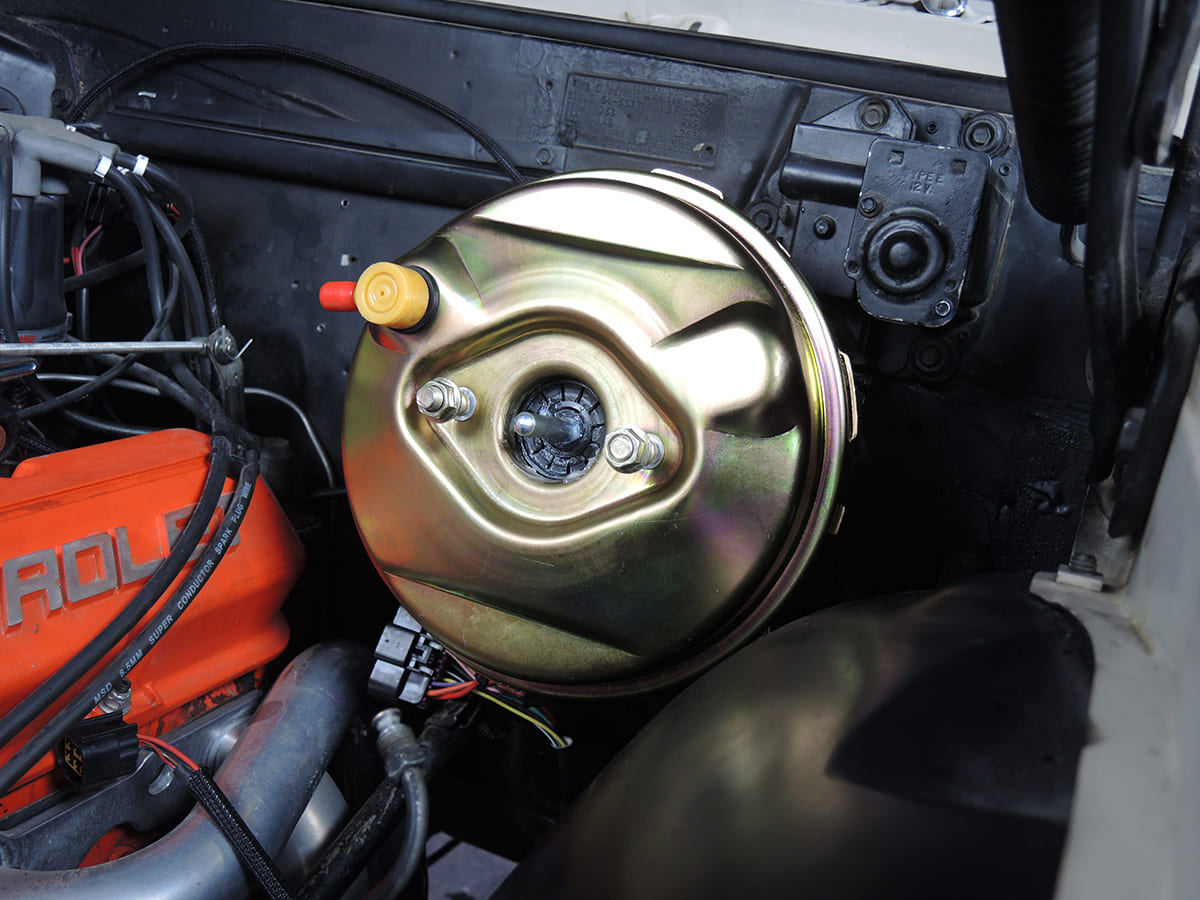
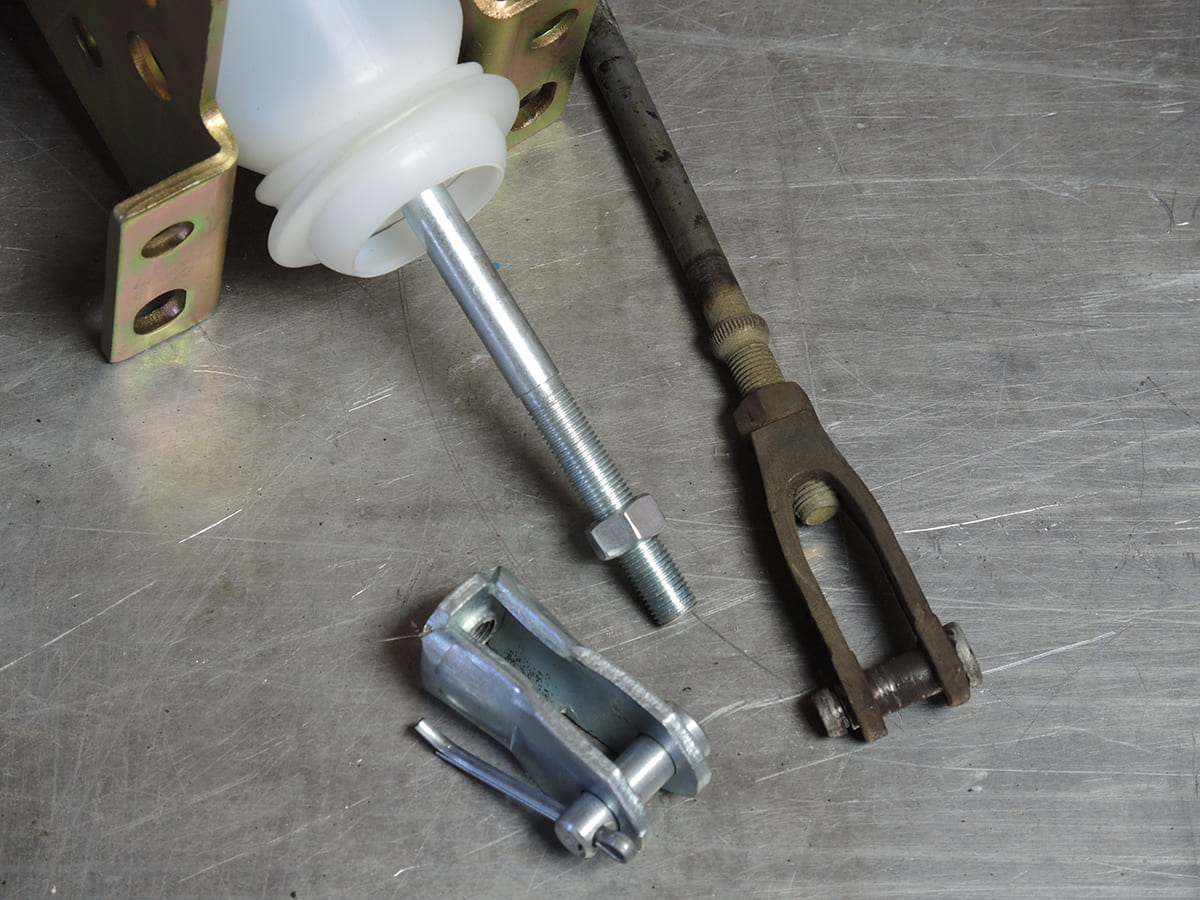
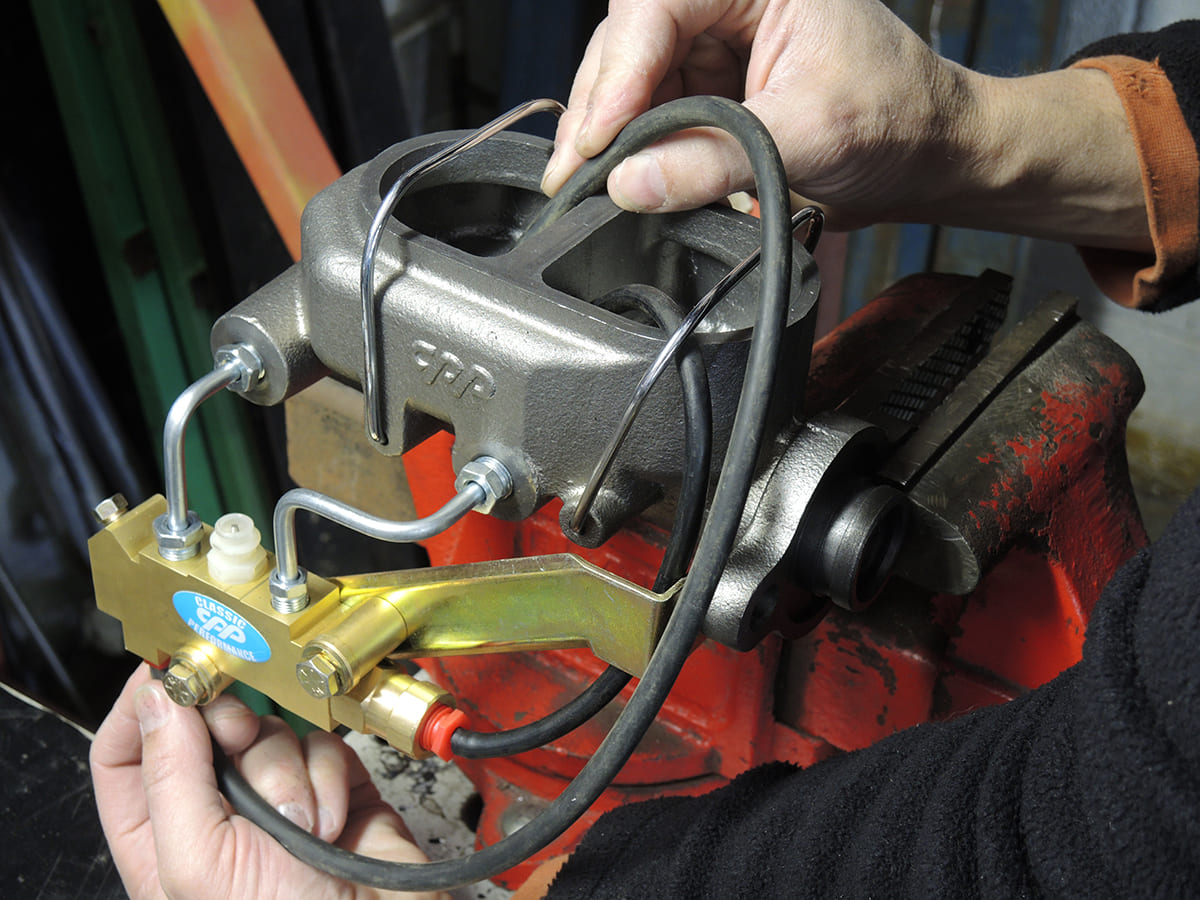
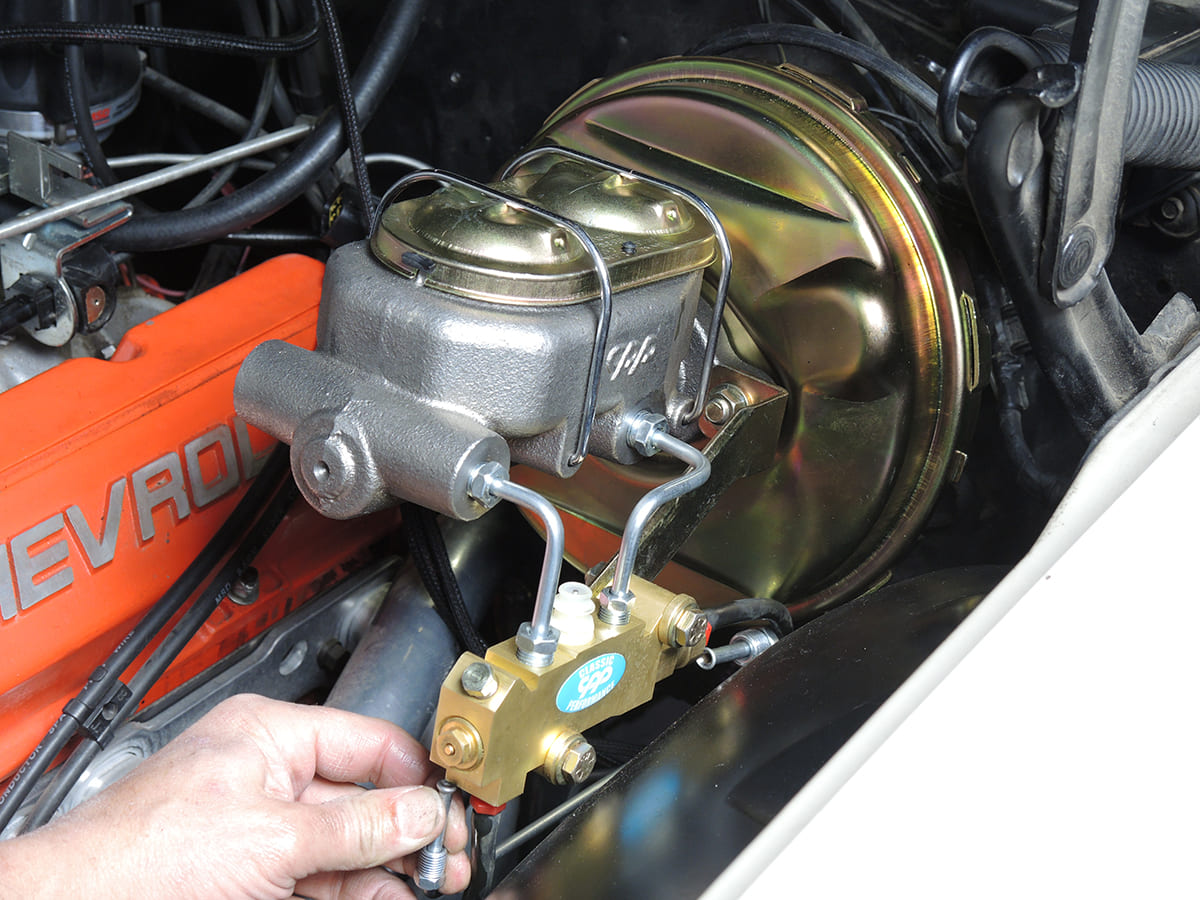
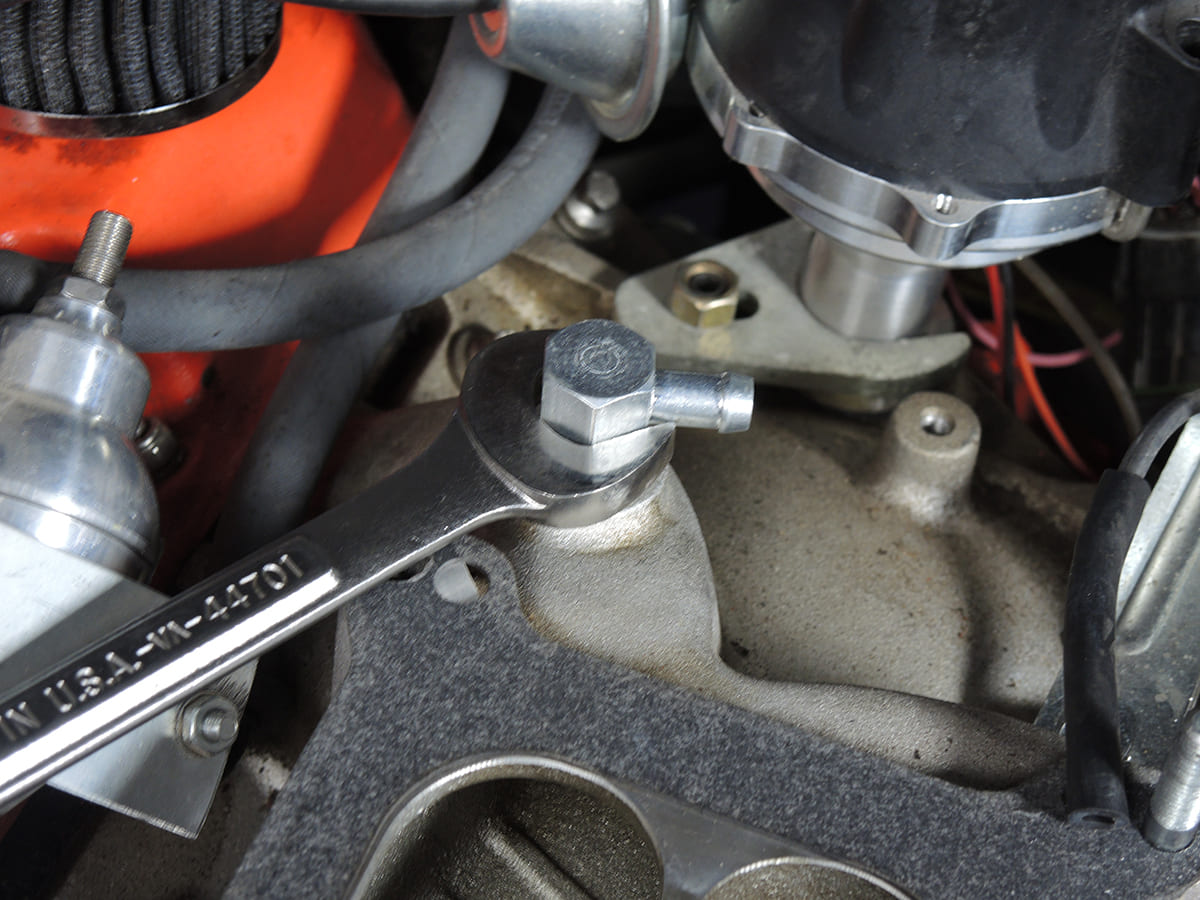
Look at all the parts it takes to assemble a rear drum brake assembly. Not only is the clamping function of a caliper more effective than the outward pushing of the shoes, they’re also easier to build and maintain.CPP supplies two brackets that mount to the rear axle housing. The two brackets are heavy-duty steel pieces that provide the proper spacing and distance for a secure mount for the new caliper. Mounting hardware is also supplied.CPP supplies two brackets that mount to the rear axle housing. The two brackets are heavy-duty steel pieces that provide the proper spacing and distance for a secure mount for the new caliper. Mounting hardware is also supplied.Longer wheel studs are required (and included) to compensate for the rotor flange thickness versus that of the thin drum flange. If you’re using your factory axles, it’s best to use a press or large vise to properly remove and install the new wheel studs.It’s a best practice to replace the axle seals while you’re at this point (consider the bearings as well). Use a seal removal tool to prevent damaging the axle tube and tap the new seal into place. Place a little lube on the lip of the seal and carefully install the axle without dragging it over the new seal.The new caliper (note that the bleeder always goes on top) was inspected and prepped for installation. Make sure the pads are opened enough to easily clear the rotor. You may need to press the piston into the caliper to make room.The caliper slipped right over the rotor and lined up with the mounting brackets. Long, hex head bolts are supplied to secure the caliper. Note that the caliper mounts have a flexible isolator and bushing. These must be in place to allow the caliper to move as the pads wear.CPP supplies new parking brake cables. First, you’ll need to remove the original cables from the chassis and disconnect them from the main cable connector. The new cables mount in the factory locations on the chassis with a C-clip.Before installing the diff cover, we pulled off the factory brake line junction block from the original lines. CPP supplied two new hard lines and we opted to replace the rubber line that connects from the chassis hard line to the rear end. Note the bracket that secures the assembly to the rearend cover.No more drums here! One down, one to go, then on to the frontThe front brake assemblies come out of the box assembled with packed bearings and all. The caliper and rotor still need to be removed for installation of the steering link bracket and to make it easier to mount to the control arms.Remove the Cotter pin from the upper and lower ball joints as well as the tie- rod end. Loosen the bolt but do not take it off. When you separate the ball joint from the spindle, the bolt will hold the assembly in place. Before removing the spindle and brake assembly from the control arms, ensure that the lower control arm is secured to keep pressure on the coil spring. Use caution during disassembly— – the coil spring is under load!Just like the rear, you can see how much more efficient a modern disc brake setup is compared to a factory drum.The new CPP steering arm is on the top, and you can see the difference in girth and the mounting hole diameters. The arms will only fit one way and are secured to the new spindle using the supplied locking offset nuts.The new CPP steering arm is on the top, and you can see the difference in girth and the mounting hole diameters. The arms will only fit one way and are secured to the new spindle using the supplied locking offset nuts.With the new steering arm installed, the spindle assembly was positioned on the upper and lower ball joints (make sure the rubber boots are in good condition). The castle nuts were reinstalled, torqued, and fresh Cotter pins were installed.After ensuring that each bearing was packed full of grease, the rotor assembly was reinstalled. The bearing was pre-loaded and locked in place with a new Cotter pin.The front caliper slid over the new rotor and the long socket head- cap screws were put into position and tightened.The new hose was installed on the caliper, making sure to have the two compression washers in place and that the offset side of the mounting block was positioned correctly. The other end of the hose connected to the hardline in the factory retainer on the chassis.The front brakes went together as smoothly as the rear. It was tempting to rebuild the control arms and update the steering linkage at this point, but there are time and budget restraints at work. Besides, the more we take things apart, the longer it takes to get them back together.The master cylinder, combination valve, and brake booster were all pre-assembled from CPP. The only lines left to connect are for the front and rear brakes.The booster mounted right to the firewall and was secured into place. Next was to connect the pushrod to the brake pedal through the use of the supplied adjustable clevis assembly. You’ll want to have a slight amount of clearance, 1/32 – -1/16- inch between the booster pushrod and the master cylinder.The booster mounted right to the firewall and was secured into place. Next was to connect the pushrod to the brake pedal through the use of the supplied adjustable clevis assembly. You’ll want to have a slight amount of clearance, 1/32 – -1/16- inch between the booster pushrod and the master cylinder.In our experience, bench-bleeding the master cylinder is the most effective way to get the air removed from the circuits. With the master cylinder mounted in a vise, we routed two rubber lines from the outlet ports of the combination valve into the reservoir and pumped the cylinder until all air bubbles were gone.With the master cylinder bled, it was mounted to the booster then our two new brake lines for the front and rear were connected to the combination valve ports. Next up was to call in an assistant and bleed the entire system, starting with the passenger rear side. Be sure to frequently check the level of the brake fluid so no air is introduced while bleeding.Got vacuum? Be sure to connect the booster to a manifold vacuum source as most boosters require 18 -inches of vacuum as a rule of thumb to function properly. Our intake had a ported vacuum source right behind the carburetor mounting flange.
We use cookies to ensure that we give you the best experience on our website. If you continue to use this site we will assume that you are happy with it.