“You get what you pay for.” We’ve heard that before. It’s generally true, and by now we ought to know that penny-pinching can be costly. In this particular instance, however, Kalispell, Montana’s Colten Hart wasn’t exactly pinchin’ pennies when he ordered some classic truck weatherstripping from Brand-X online.
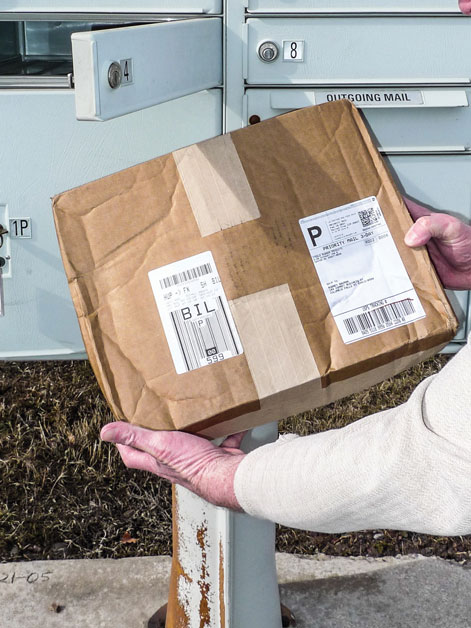
Not to skip too far ahead, but as it turns out the only difficult part of this job is waiting for the lost package as 3-Day Priority Mail arrives on Day 15.
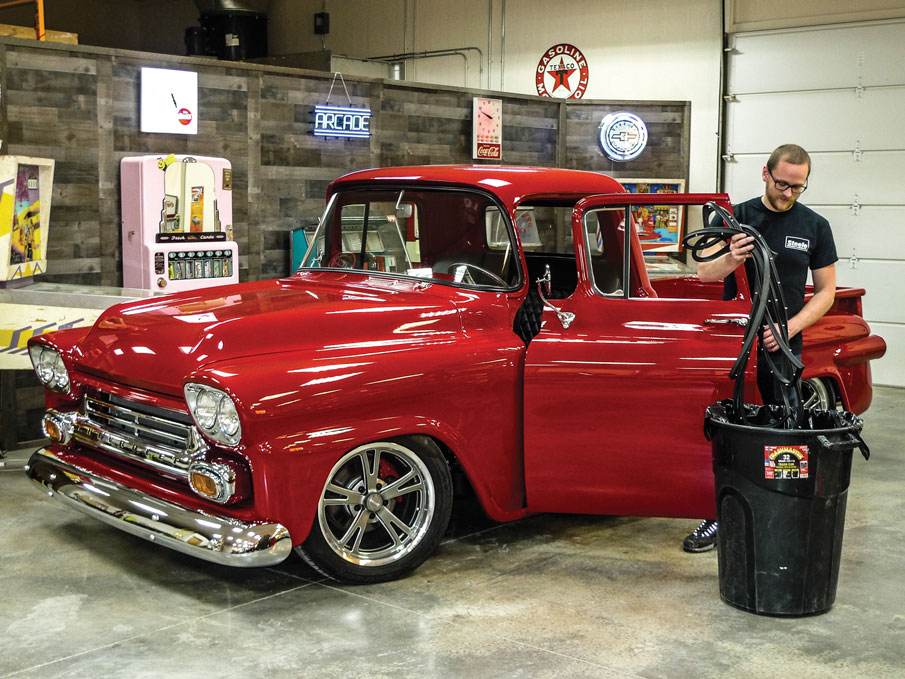
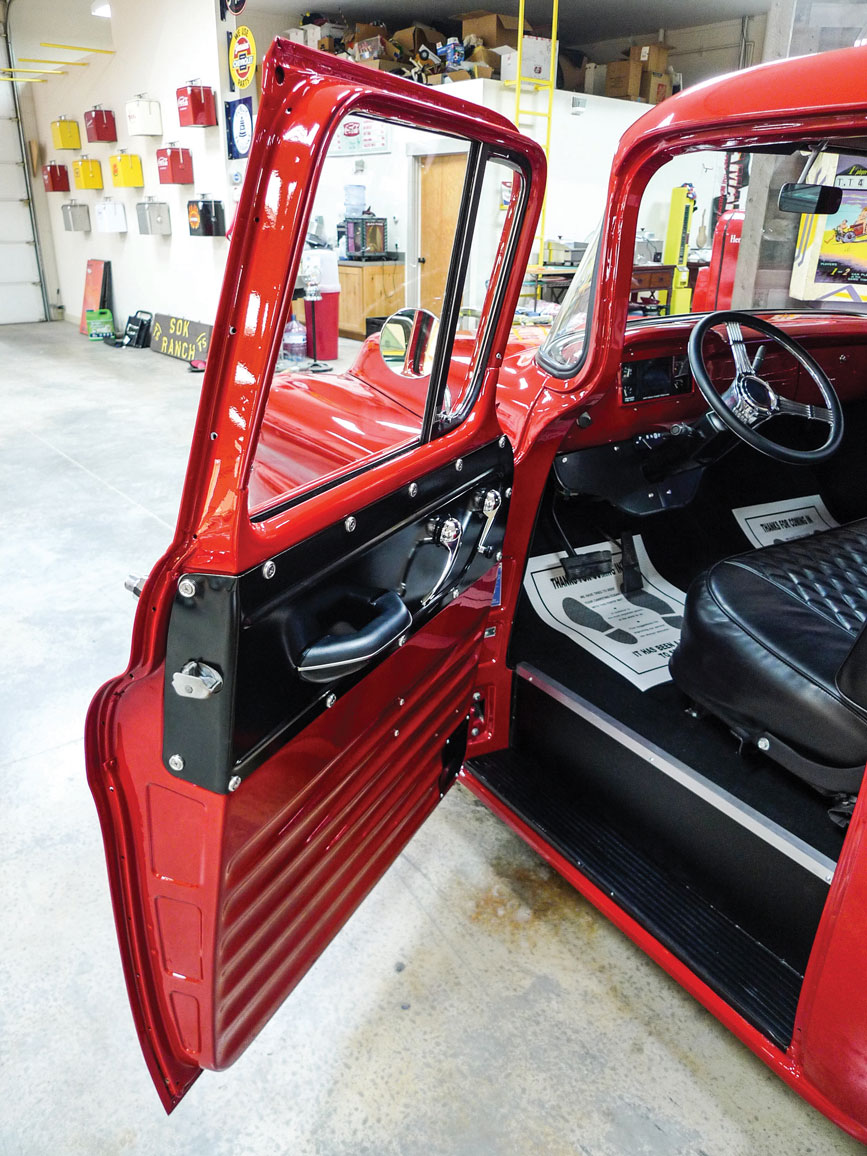
Hart is a young builder who’d purchased a roughly unfinished 1959 Chevy Stepside project. At the time of this typewriting that truck is nearly finished, and as you’ll see it’s looking pretty good.
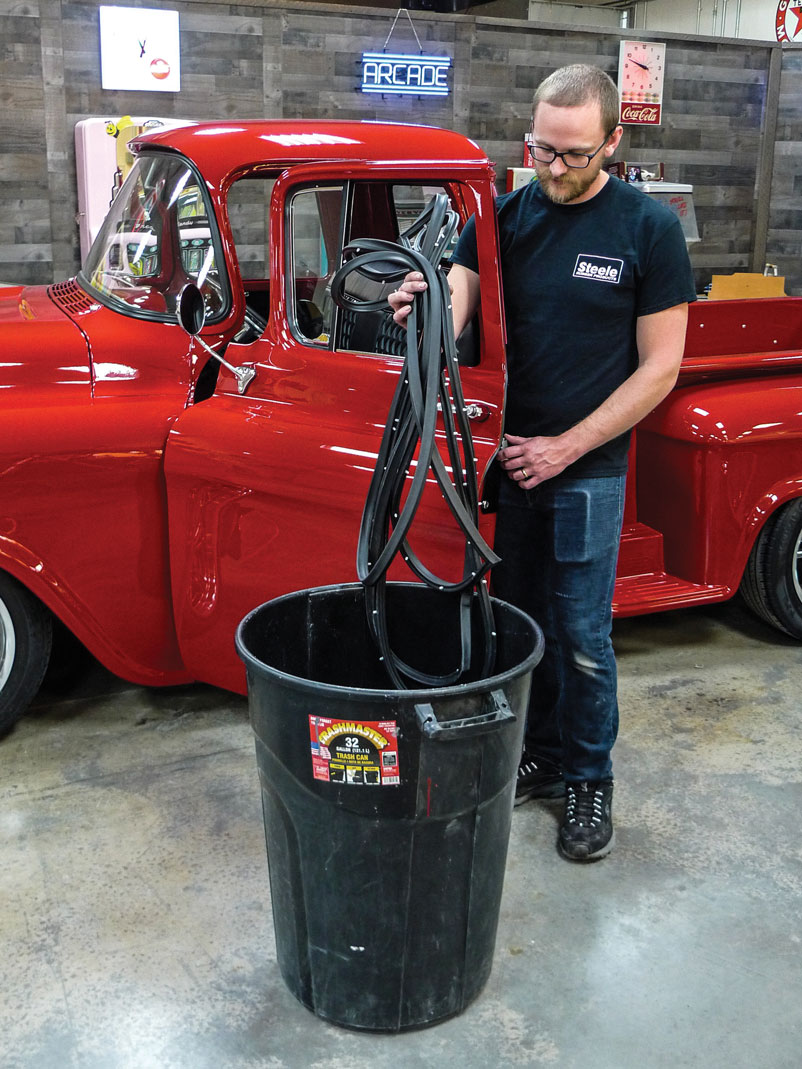
On the upside, the tattered package’s contents have survived. From here let’s go to Bob King’s shop where we’ll assist Colten Hart with the installation.
Here in the final assembly stages Hart is down to the proverbial short strokes, but so far installing new door seals has been a battle. It’s pretty normal for classic truck weatehrstripping to require some time to conform. Hart knows that but the Brand-X seals seemed too dang thick, especially at the cowl. With those parts in place and striker plates adjusted fully outward, the doors wouldn’t come close to closing as compressed rubber was squishing out through the frontal gap.
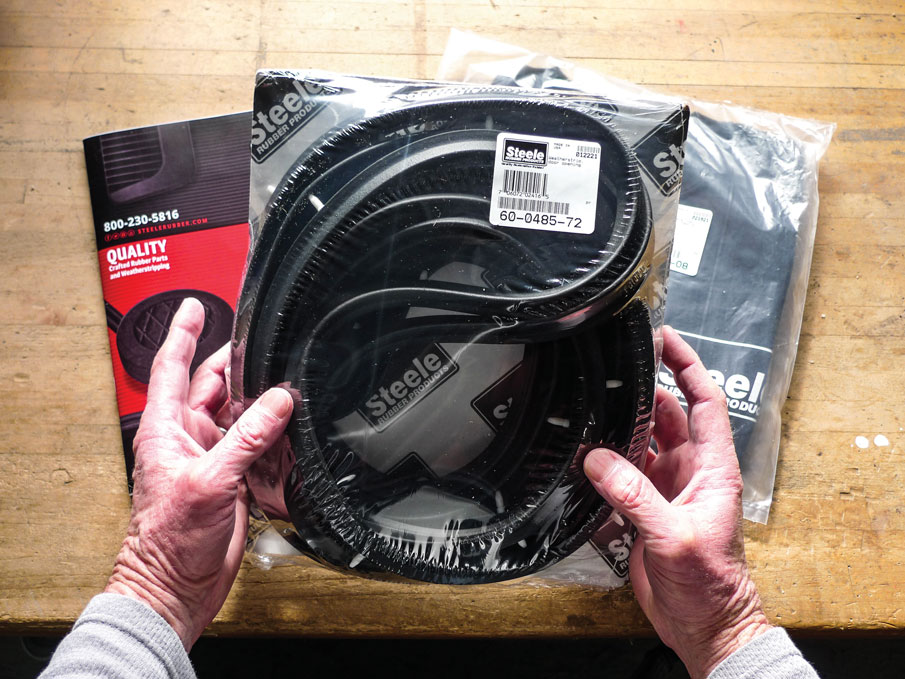
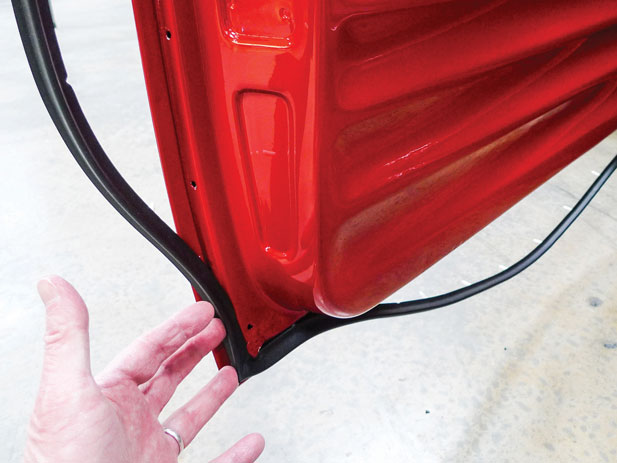
Here on the table we get a clear view of Steele’s slightly slimmer (PN 60-0485-72) weatherstrips. They’ve been coiled-up in their packaging but they’re relaxing now.
Knowing that we’re building a similar truck at our shop Hart asked if we’d had the same difficulty with door seals. Since we’re not as far along with our build, we called upon our go-to guru for Task Force trucks, Dave Symcox. Sure enough, he’s fought the same battle with classic truck weatherstripping, and he’s also learned from the experience. “The best weatherstrips come from Steele Rubber Products,” he told us, which pretty much confirmed what we’d been thinking, too.
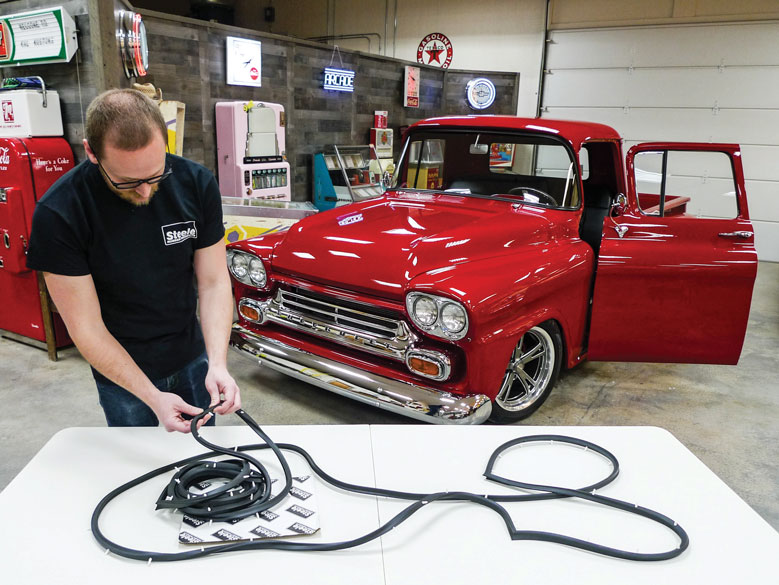
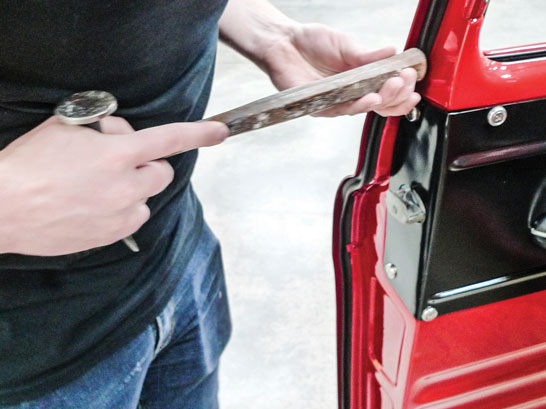
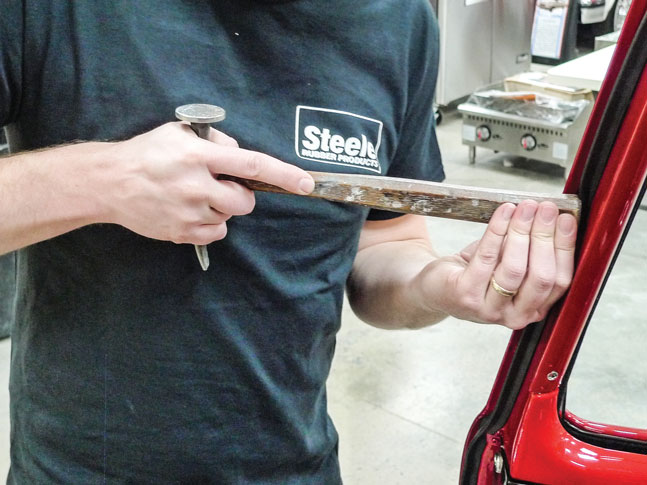
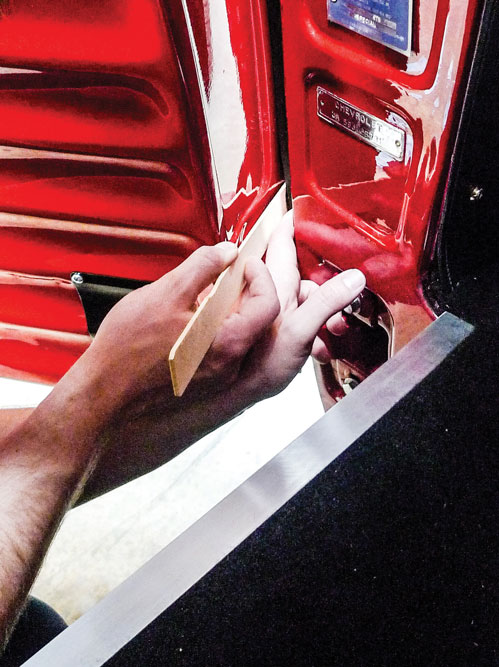
Before we begin, let’s round up a few things we’ll need: 3M (black) super weatherstrip adhesive, a wooden-handled body hammer, and a clip tool for the tight spots.
For the type of truck we’re working with, Steele offers two door styles for classic truck weatherstripping. One is made exactly to OE specifications, but the other is made slightly thinner. After all Hart has been through, either style would be an improvement but the slimmer version (PN 60-0485-72) could provide an added advantage.
Here’s where Hart’s instinct pays off. During his earlier struggle with Brand-X door seals, he stopped before gluing anything. Now let’s start over—fresh and clean.
The idea here is to achieve new weatherstrip break-in without putting excess stress on hinges, latches, and striker plates. Let’s also see what we can do—without slammin’ doors!
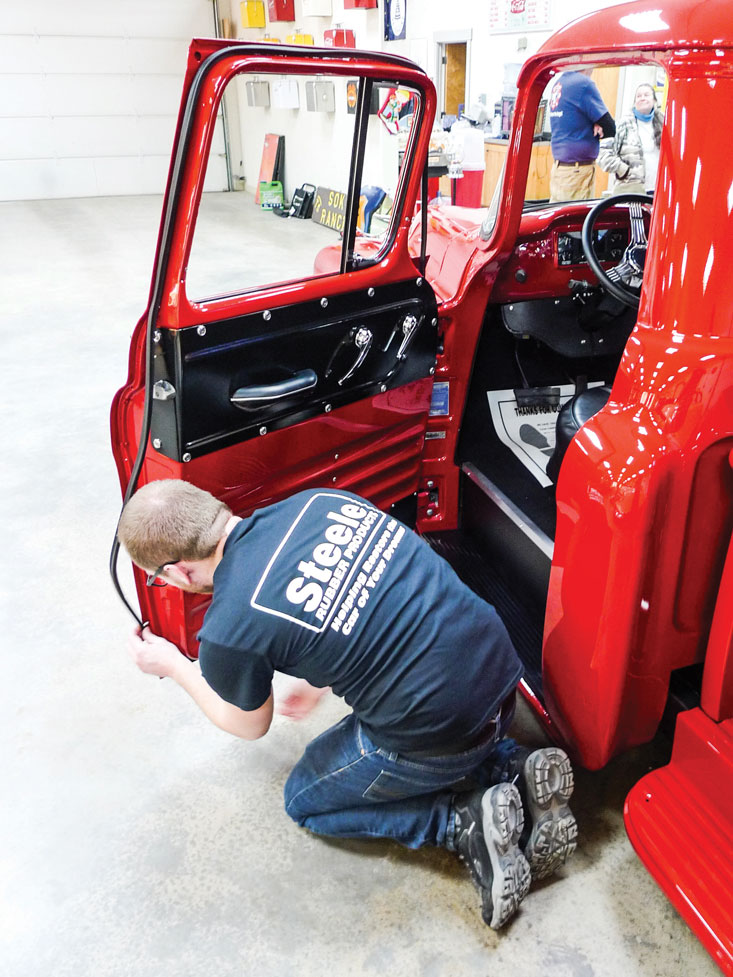
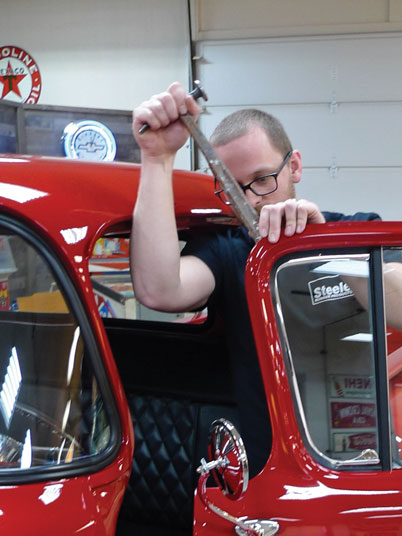
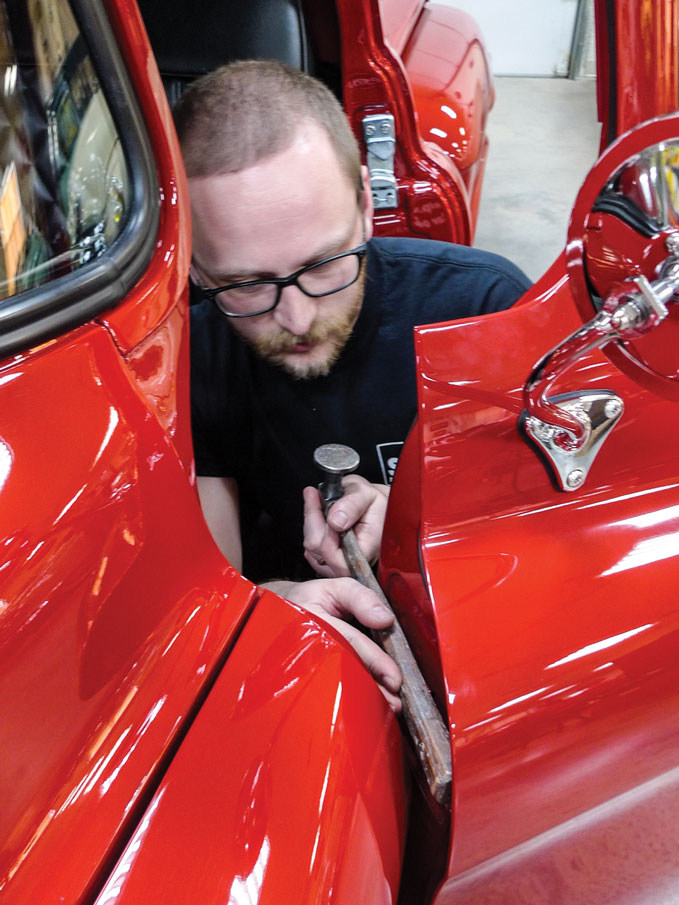
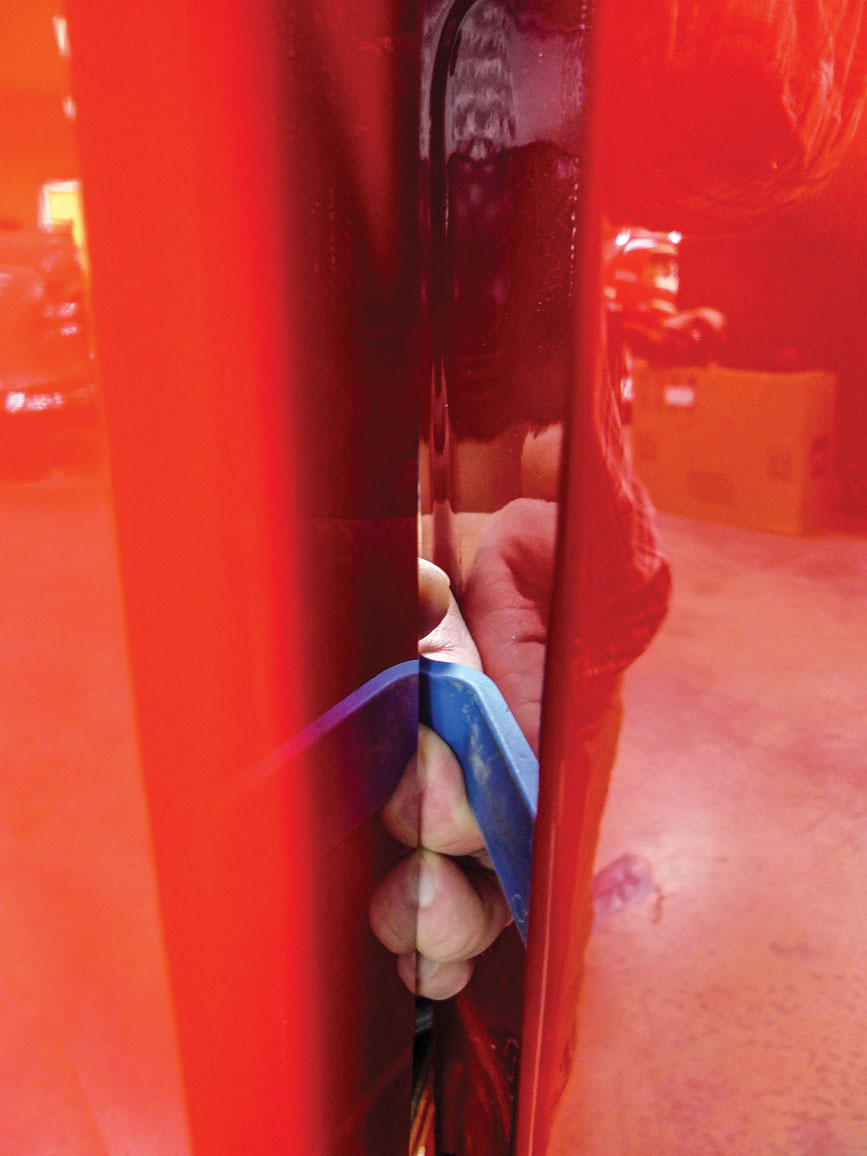
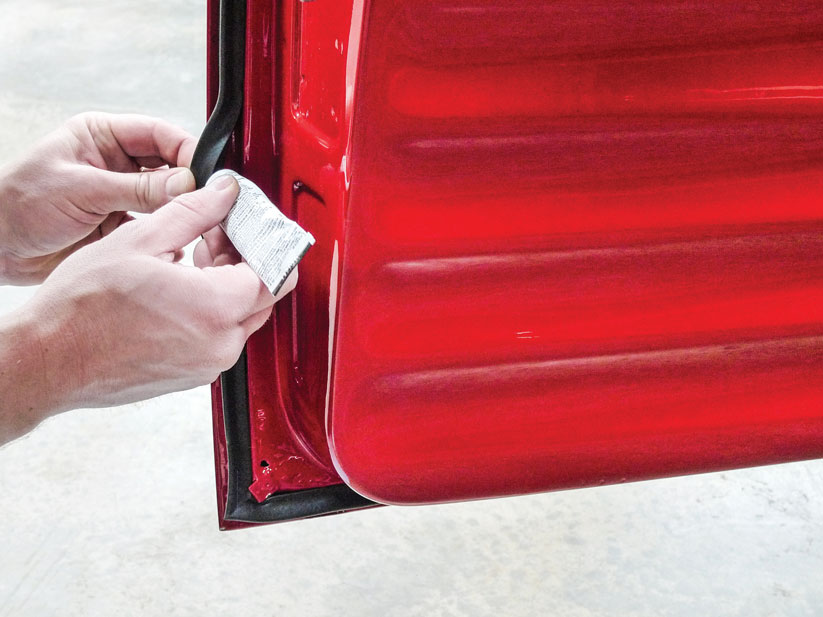
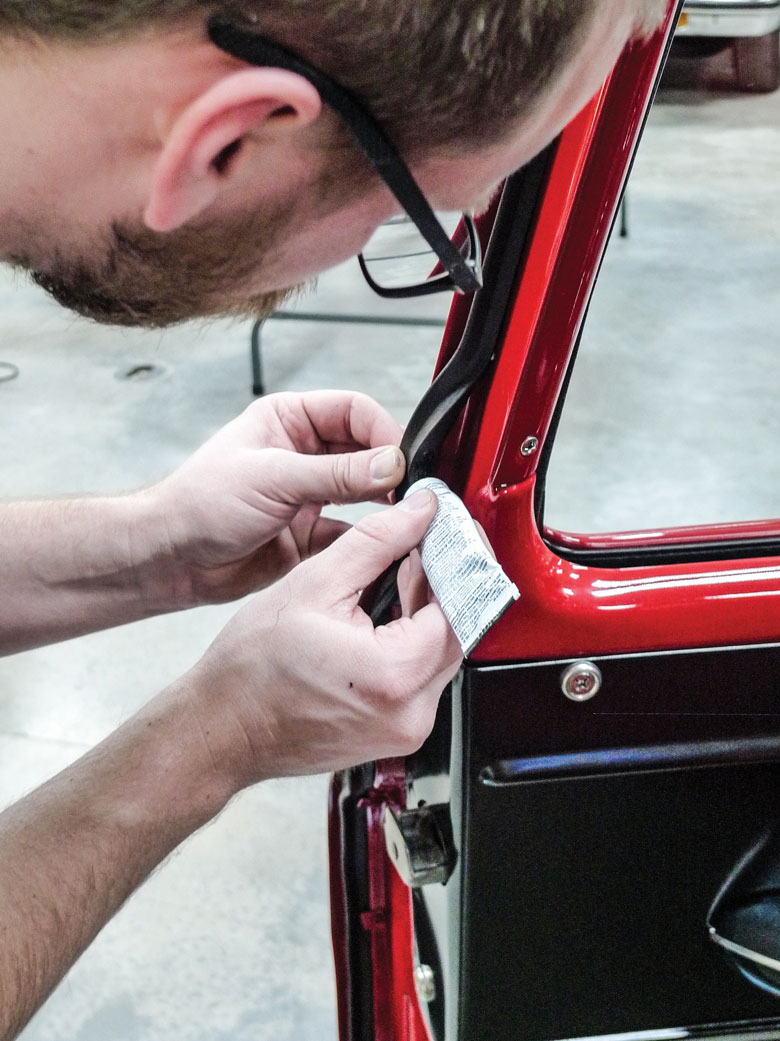
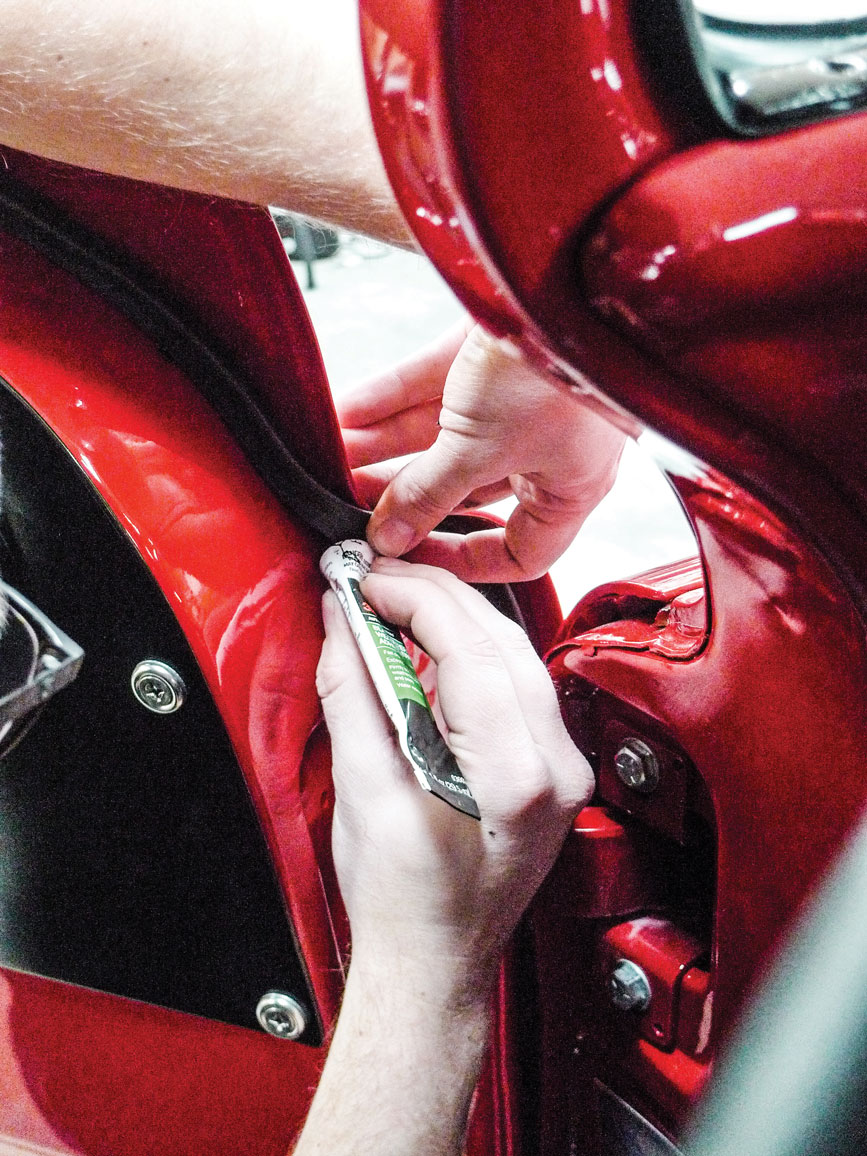
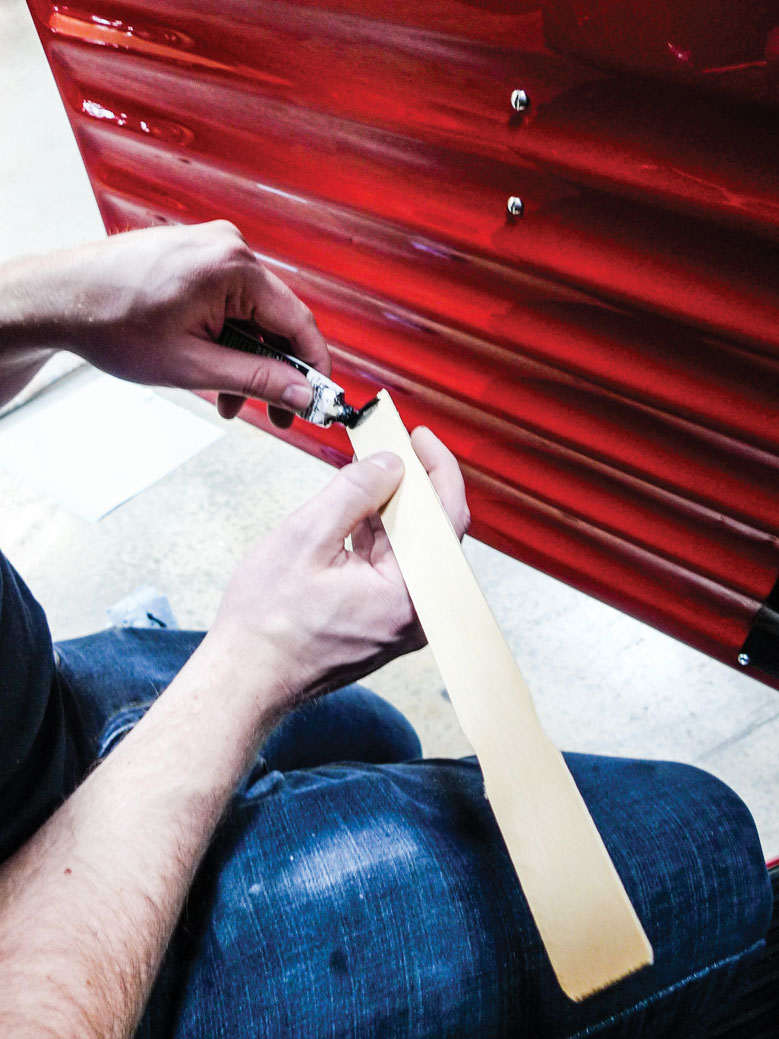
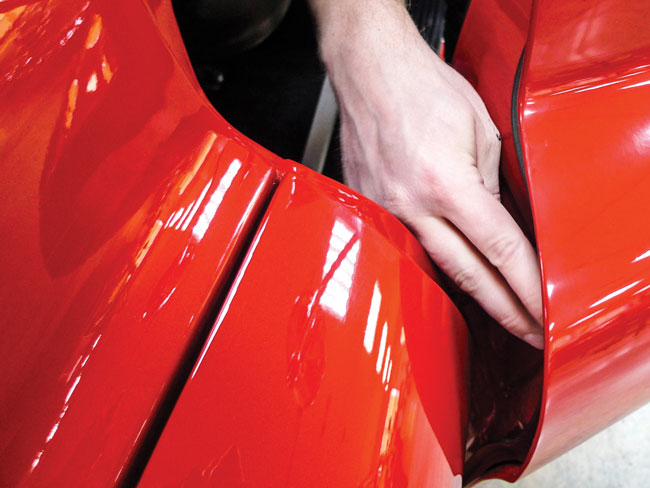
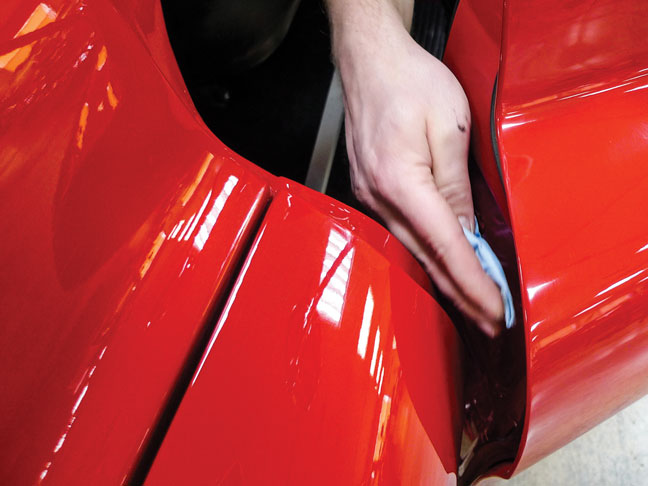
The flat backside of the new weatherstrip butts toward the door’s edge. Quite conveniently, push-in plastic pins are already installed from Steele.With lower corners located, the corner pins are pushed in slightly—just enough to hold the weatherstrip in place for now.Working his way around, Hart gets each pin started by hand. It’s nice when a new part fits without a fight. Here the pins are falling right into alignment with existing holes.So, now we know what the hammer is for. Its wooden handle makes a nice, controllable tool for setting the push-in pins.Working his way up and around, Hart continues easing the pins into their final-depth locations.So far, still so good. As he nears the truck’s A-pillar, however, there’ll be less room for a full-length hammer handle.Surprisingly to yours truly, the body hammer is still proper enough for setting the plastic push-in pins but it won’t be for much longer.Remember our tool choices back on the table? Here for the tight stretch of frontal doorjamb, the little clip tool is the hot tip indeed.At this stage, the new Steele weatherstrip is successfully installed. For in-between the push-in pins, a little dab of 3M (black) super weatherstrip adhesive is recommended.For best results, a small amount of adhesive should be applied to both surfaces. Since the weatherstrip is already in place, Hart must reach into his bag of tricks.After squeezin’ in a small glob of glue, Hart lets the two surfaces make contact. Then he pulls the rubber back a bit and waits as necessary for tackiness.Once again this all works fine till he reaches the tight stretch of frontal jamb. As wiggle-room diminishes, we’ll need a Plan B.A stroll around the shop has rendered a perfectly perfect adhesive applicator—an ordinary wooden paint stick.Even with the applicator, the method stays the same. After quick contact, the rubber is pulled back till the adhesive becomes tacky. The reunion to follow will be for keeps.The forward jamb-tight spots are the trickiest. Where little bits of adhesive have oozed beyond the new rubber, there’s some cleanup required.If the timing is right, a fingertip will roll away the excess in globular form. If it’s too late for that, a mild solvent like grease ’n’ wax remover can sometimes be helpful.
Don’t Slam It!
Once the new Steele classic truck weatherstrips were successfully installed with 3M (black) super weatherstrip adhesive applied between the push-in pins, we pretty much agreed to let it all set overnight. The next thing we knew, a weekend had passed, which was even better yet. On Monday the doors were closed for the first time.
As expected, they closed a little tough, but they closed without brute force, whereas the Brand-X seals that Hart had previously struggled with wouldn’t allow doors to close at all. Not even close.
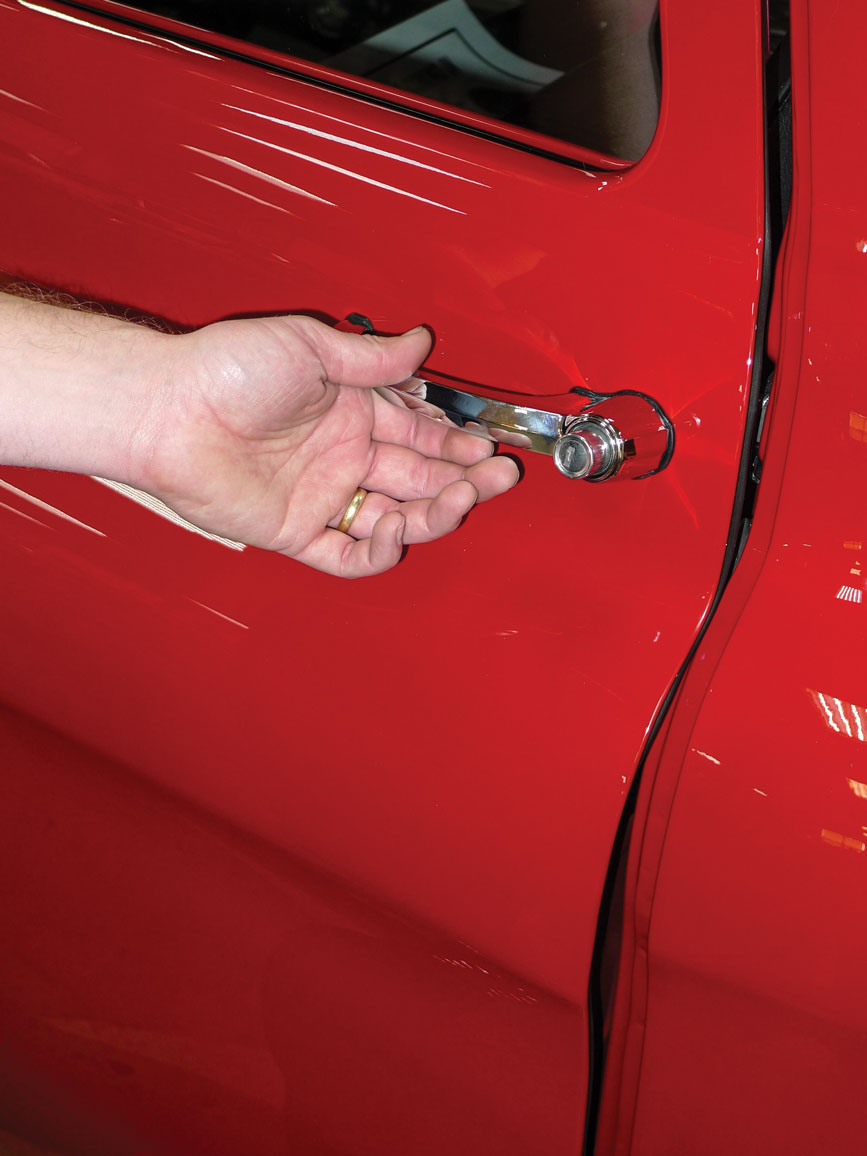
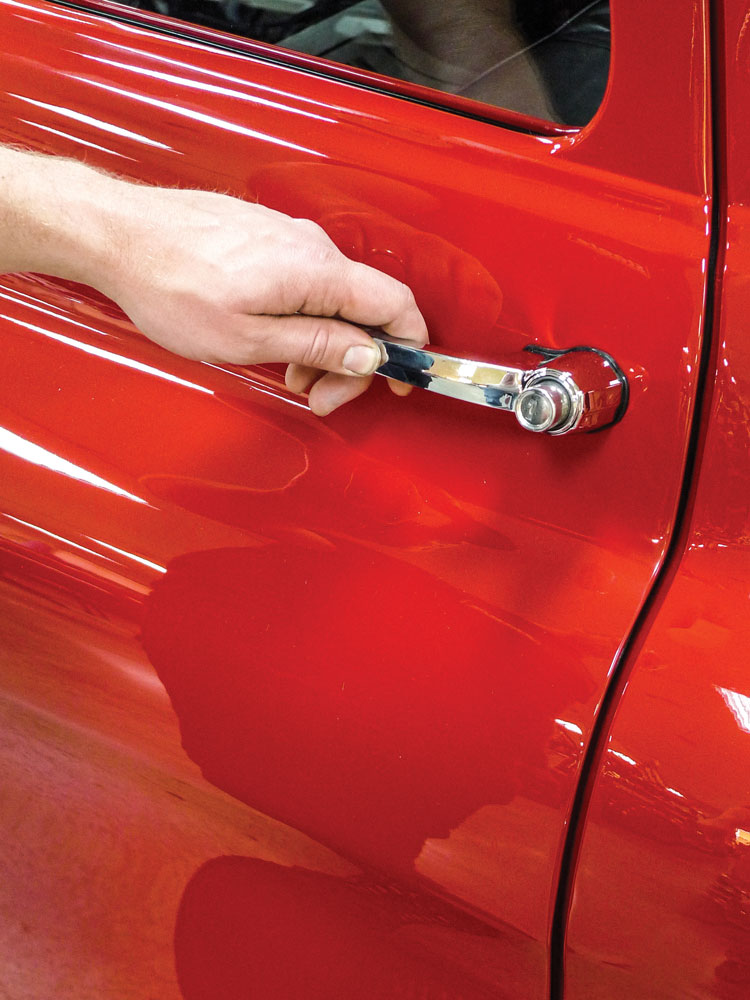
By Tuesday we’d gained more ground. Having the doors fully closed overnight made the difference. This truck hasn’t even felt the sunshine yet, but the doors close smoothly and easily. We still expect our new Steele weatherstrips will conform a little further. In another day or two Hart might even readjust striker plates a tad or two inward, but that’ll be up to him. For now, take a look at this!
What’s bright and shiny—and goes click-click? Thanks to Steele Rubber Products, we’re declaring a victory. We’re good!What’s bright and shiny—and goes click-click? Thanks to Steele Rubber Products, we’re declaring a victory. We’re good!“You get what you pay for.” Yeah, that sounds vaguely familiar, but back to the Brand-X door seals we started with—they weren’t exactly cheap! Lesson learned.
We use cookies to ensure that we give you the best experience on our website. If you continue to use this site we will assume that you are happy with it.