ITGMw
SUBSCRIPTIONtext
ProgressArrows
digital issues
ProgressArrows
online store
ProgressArrows
SUBSCRIPTIONtext
ITGMw
ACPnew header logo
CTP LOGOs
all cars

How To Install A Sway Bar On A 1967-72 Chevy Truck Or Suburban

Wrapping Up Our Budget Suspension Overhaul For 67-72 C10 & Suburban With This Sway Bar and Panhard Bar Bushings Install

By Todd Ryden   –   Photography by the Author

A couple months ago we finished rebuilding the stock control arms and steering linkage of our 1971 Suburban with parts from Duralast, Classic Performance Products, and Rare Parts. The result is a much smoother ride and tighter driving feel that is likely better than when the rig was new. With new coil springs and shocks complementing the rebuild there was one final upgrade we wanted to make: sway bars.

- Advertisement -
02 Each assembly includes all new end links bushings brackets and heavy duty fasteners to complete the installation
To help reduce the lean of our 1971 Suburban, we dialed up Classic Performance Products (CPP) and ordered a front and rear sway bar. Each assembly includes all-new end links, bushings, brackets, and heavy-duty fasteners to complete the installation.

Do Sway Bars Make a Difference?

Anti Roll bars, stabilizer bars, anti sway—or whatever you decide to call them—are key in reducing body roll to produce a smoother cornering action. When going around a corner, the outside corner of the car drops and leans over the wheel. By tying the right and left side of the suspension together via the sway bar, the bar helps resist the roll and pulls the opposite side of the vehicle down toward the wheel to keep the body more level and in control.

03 We started with the rear bar as it was going to take a little more work since this era of C10s were ever equipped with a rear bar
We started with the rear bar as it was going to take a little more work since this era of C10s were ever equipped with a rear bar. Locate an oval hole in the frame above the coil spring and measure 20 inches forward then 2 inches from the bottom of the rail to locate the end link bracket mounting hole.

Part 1: How To Rebuild Control Arms on a 1967-72 Chevy Truck Or Suburban

This of course oversimplifies the physics and design that engineers can build into true performance machines. Different materials, stiffness of the steel, form, and overall design vary per application. Depending on the year and trim level of your truck, it may have been equipped with a front sway bar (likely a small-diameter one) but for many classics, trucks weren’t built to handle better, they were just meant to haul and work.

- Advertisement -

04 Locate an oval hole in the frame above the coil spring and measure 20 inches forward then 2 inches from the bottom of the rail to locate the end link bracket mounting hole

Read More: Making A Canyon Carving C10: Big Brake Kit & Suspension Upgrades

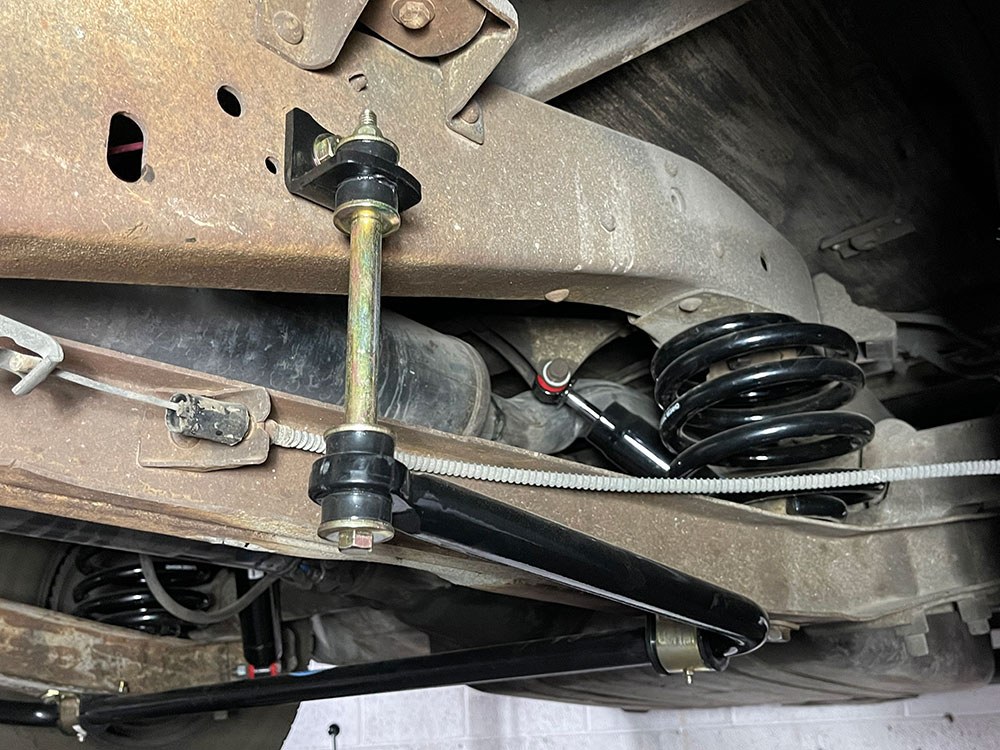
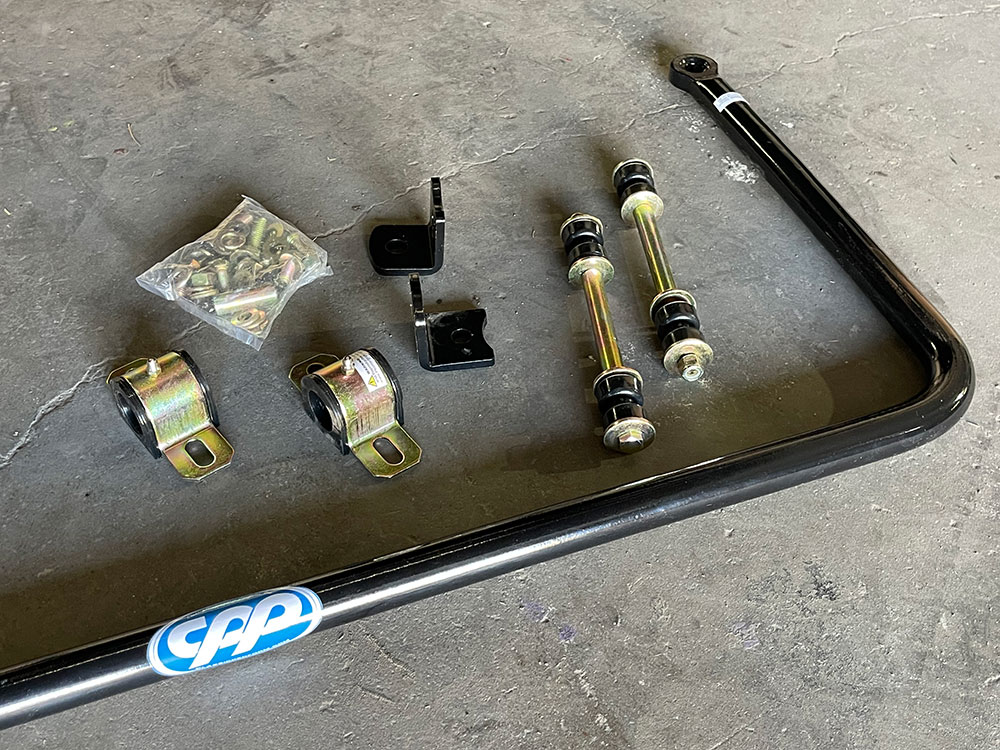
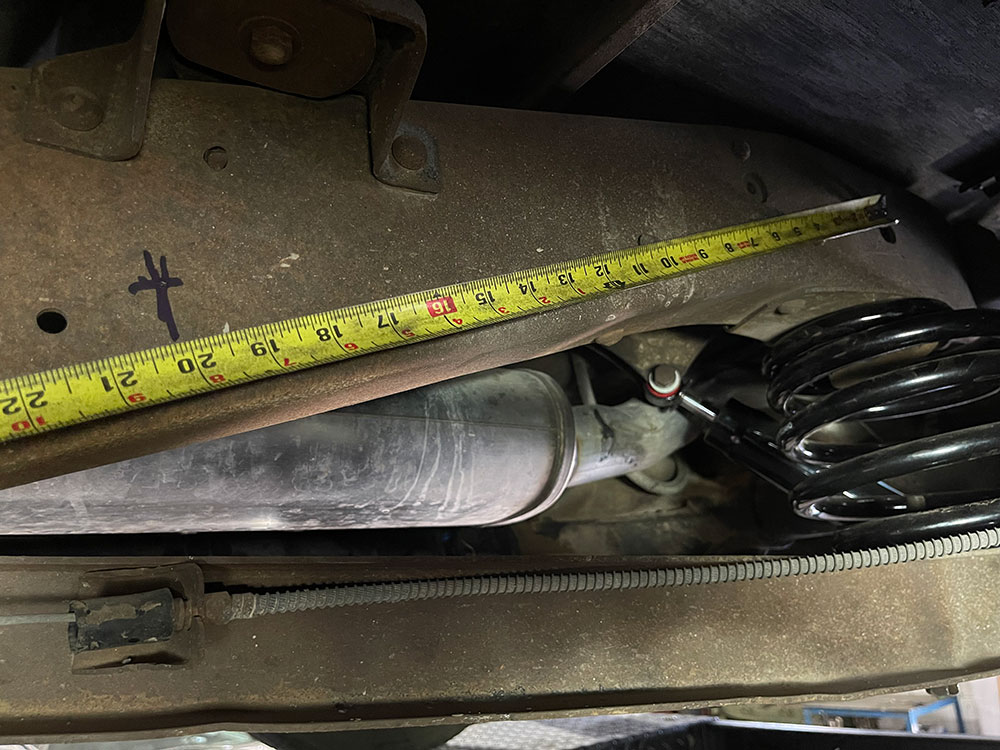
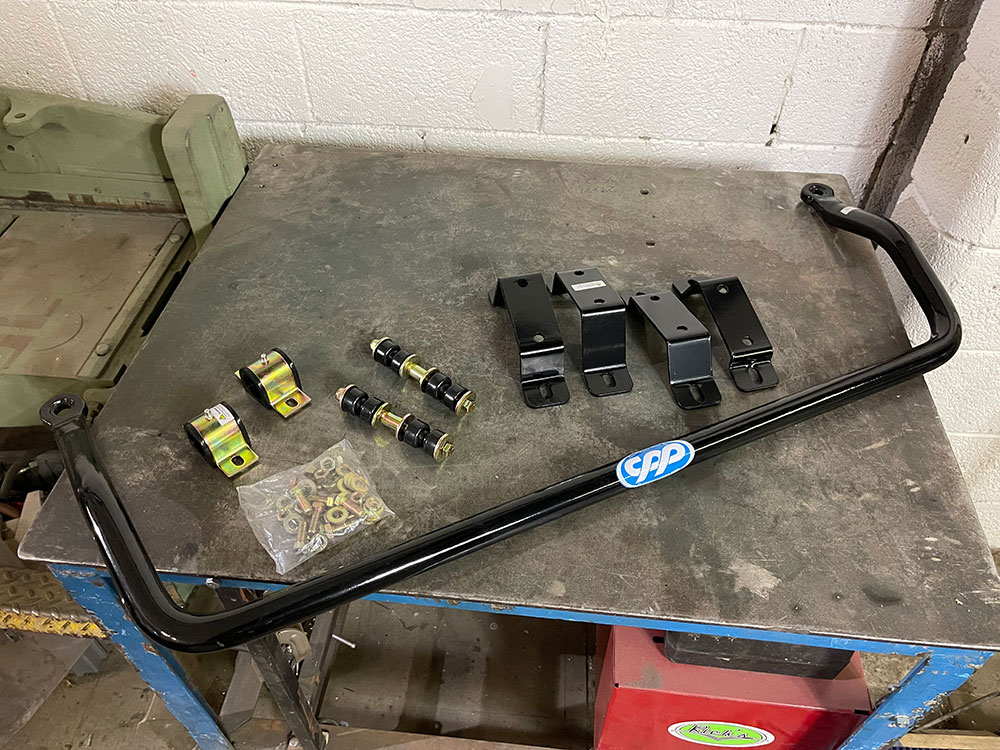
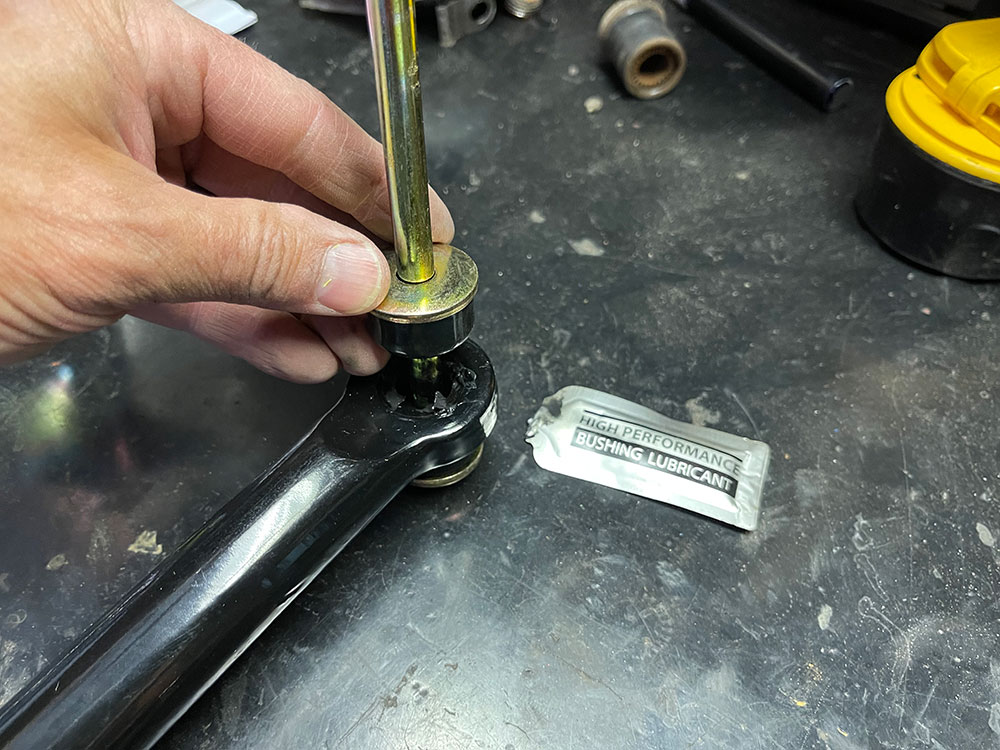
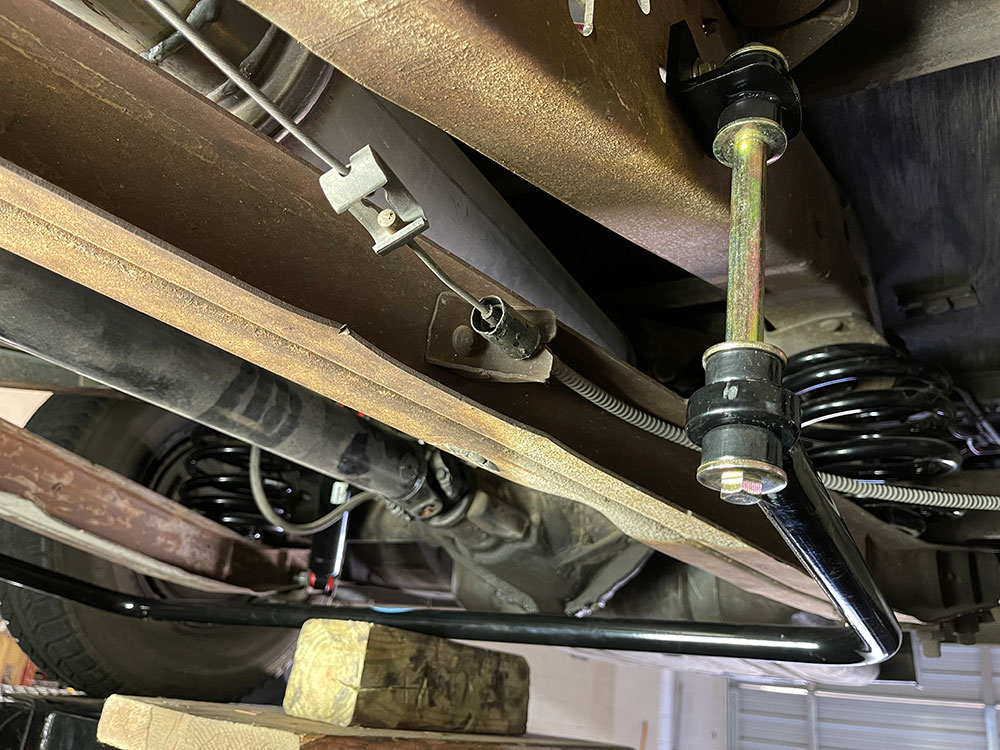
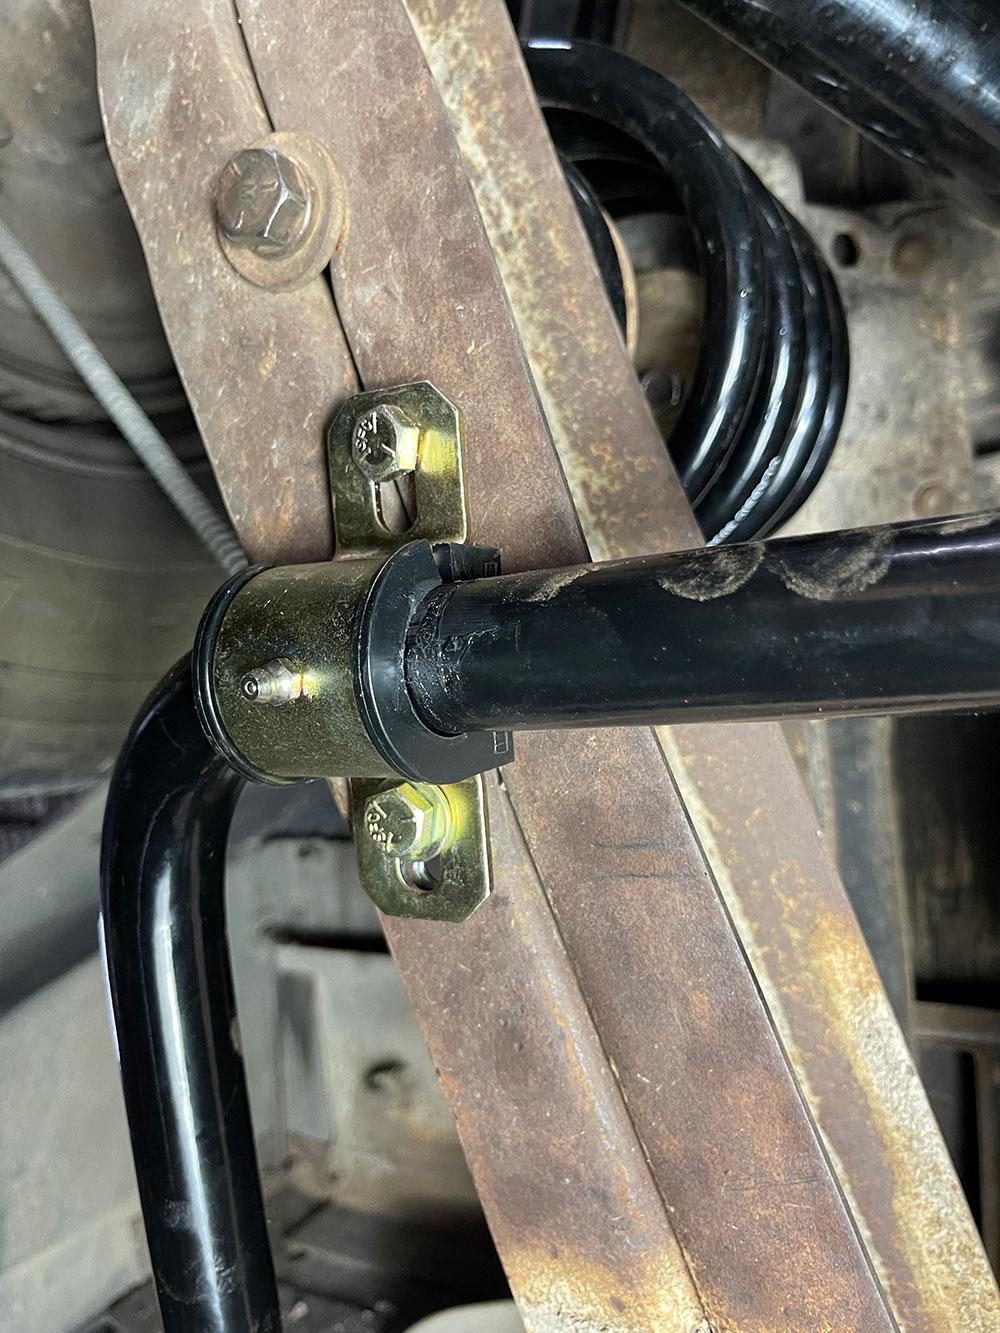
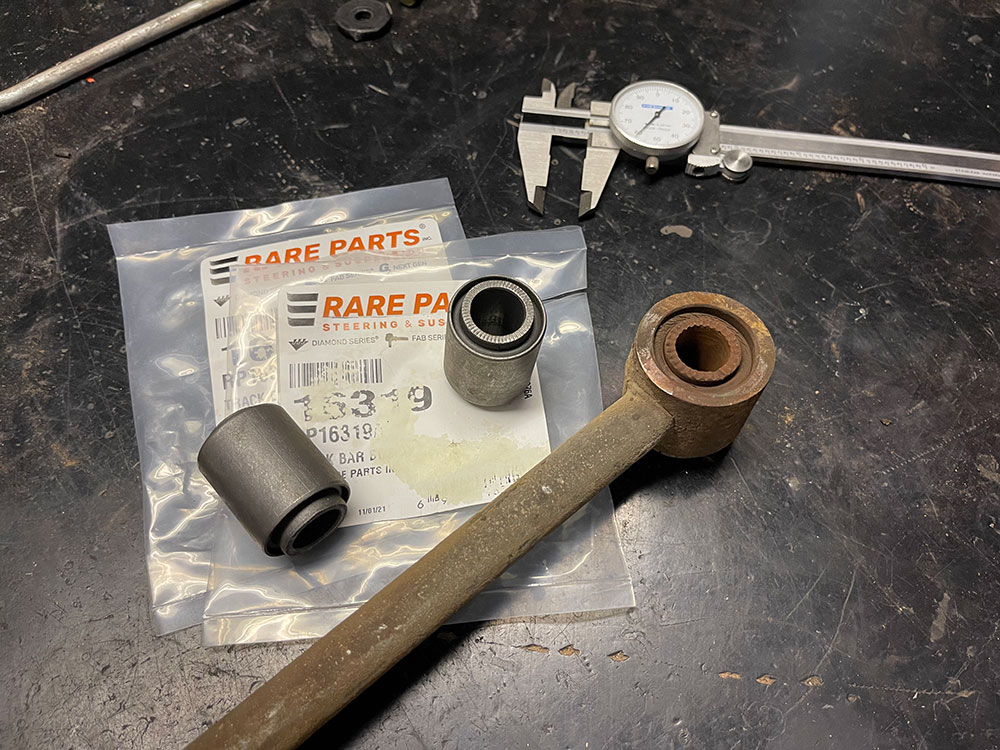
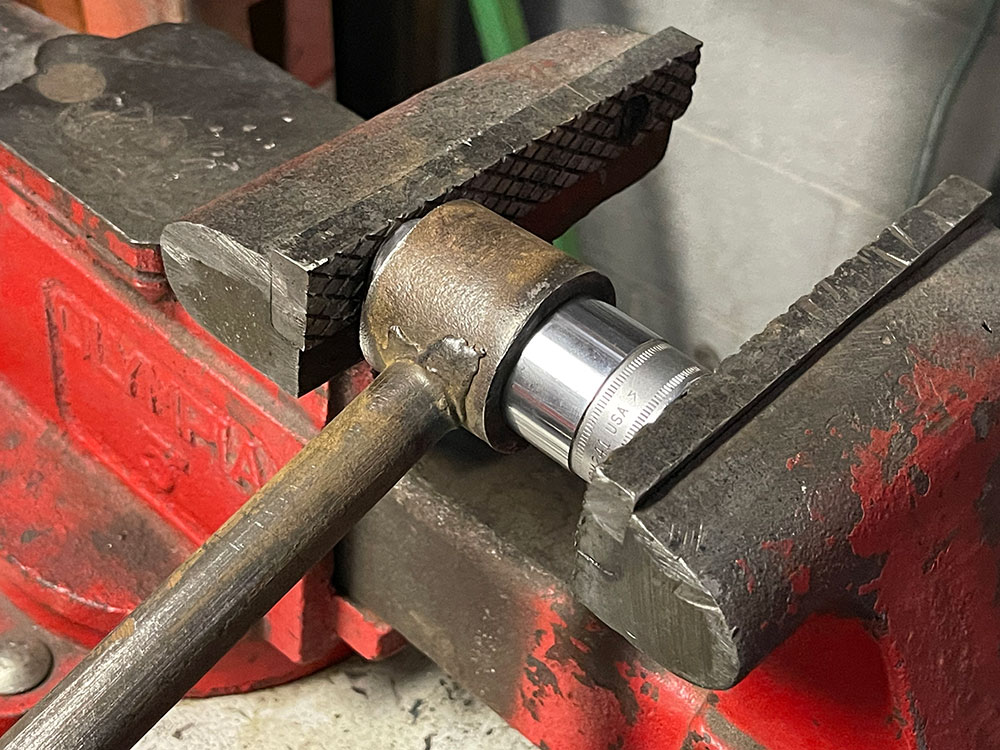
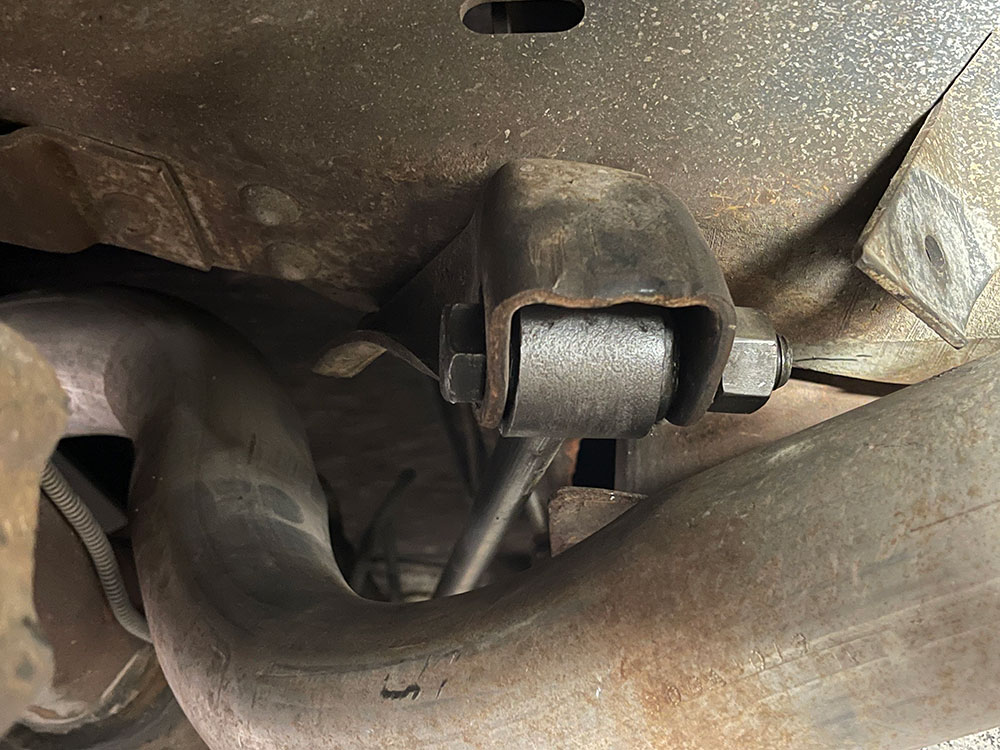
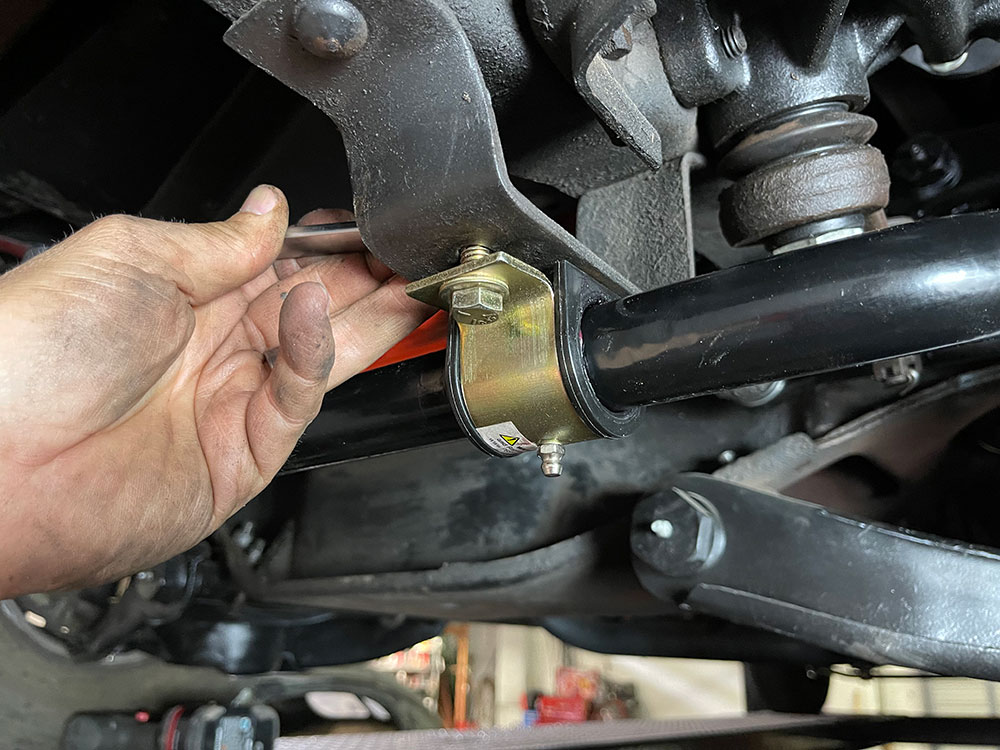
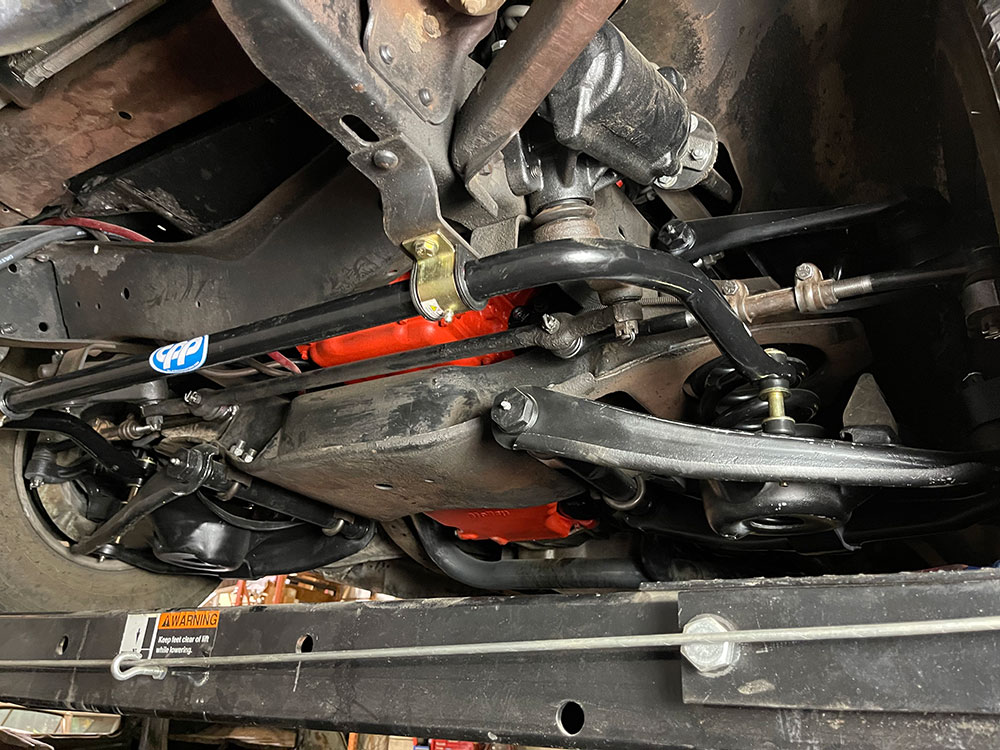
Obviously, that line of thinking is long gone and there are sway bars of varying sizes and shapes available for most classic trucks. We opted for Classic Performance Parts’ 1.25-inch front sway bar as well as their 1 1/8-inch rear bar, and while we were under the back of the old truck again we swapped out the stock Panhard bar bushings with a fresh set from Rare Parts. This bar is responsible for keeping the rear axle centered and from moving side to side during cornering or rough roads and we figured with over 50 years of use, it was time to replace the bushings.

05 Make sure there are no wires fuel or brake lines before drilling a 7 16 inch hole
Make sure there are no wires, fuel, or brake lines before drilling a 7/16-inch hole. New hardware is supplied to secure the bracket in place. Measure, mark, and repeat on the other side!

Read More: How to Install a Detroit Speed QUADRALink Suspension on 1973-1987 Chevrolet C10 square body pickup

- Advertisement -

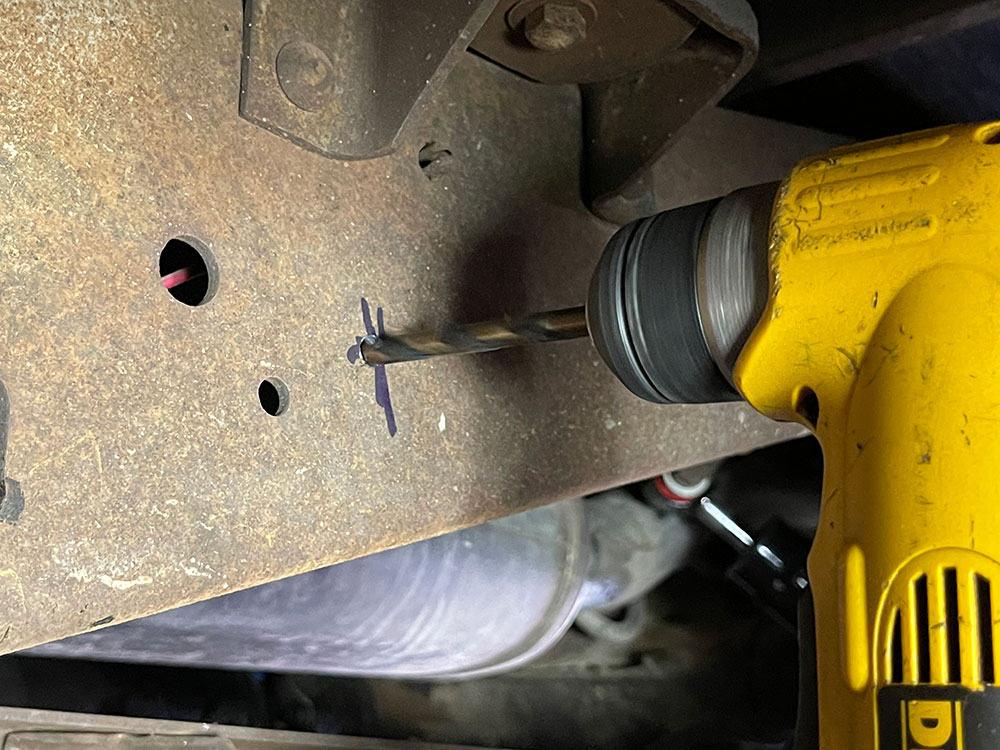
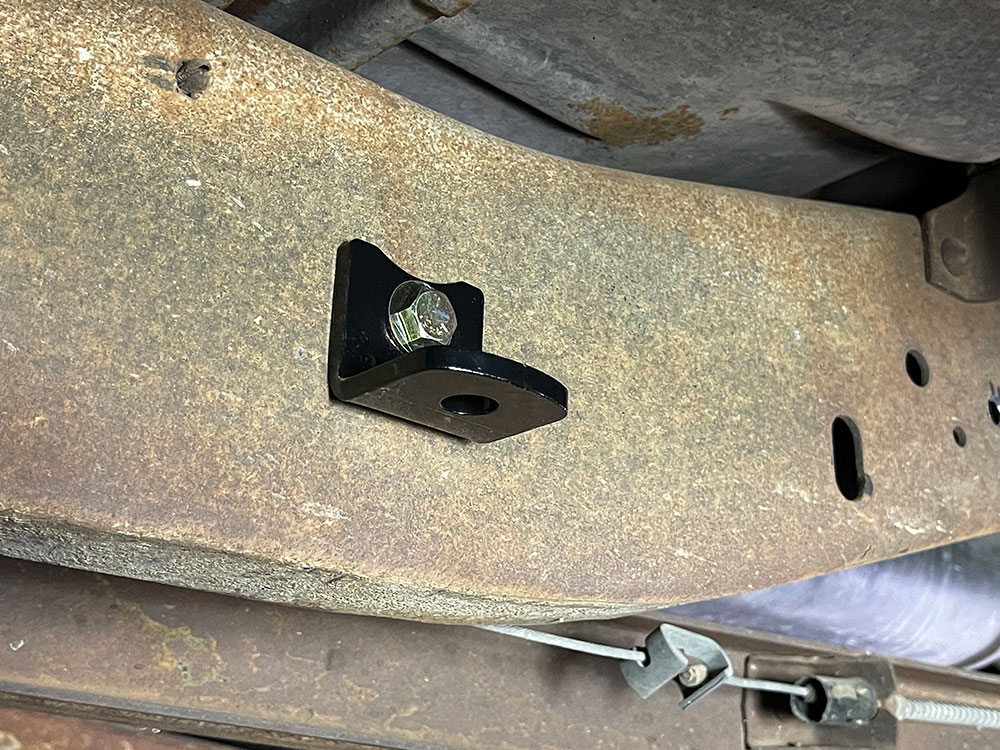
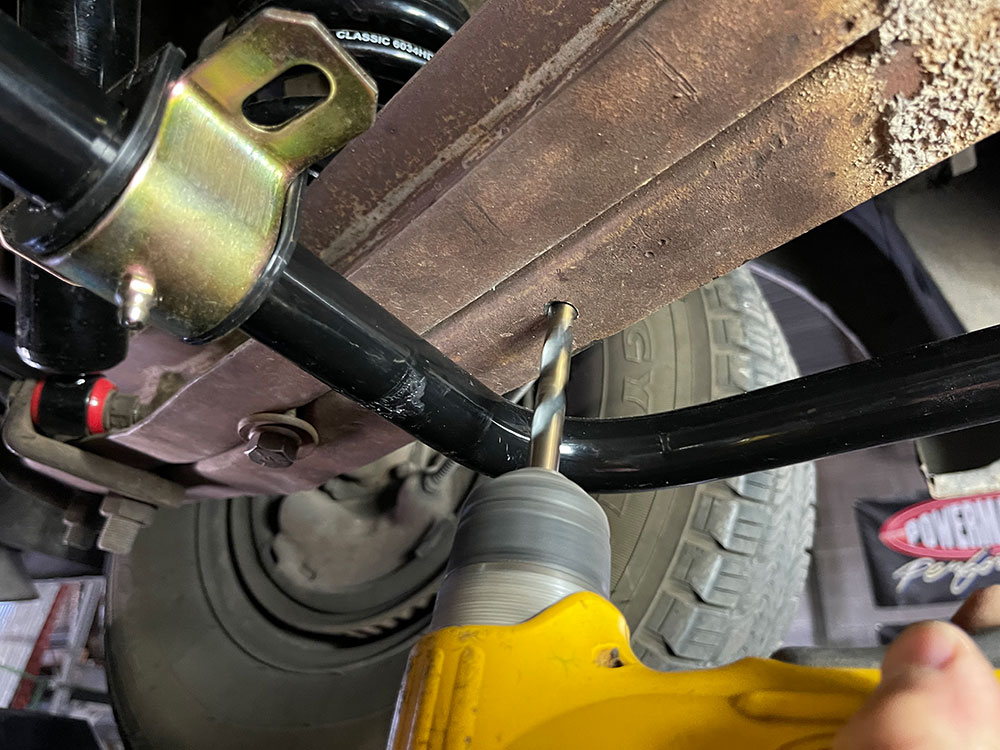
The front bar was a bolt-on affair and if your truck wasn’t equipped with a sway bar, Classic Performance Parts supplies the brackets to mount to the frame rails. The rear bar required an end link mount to be installed on each side along with drilling holes to the trailing arms to mount the pivot brackets on the rear. Nothing that can’t be handled with a tape measure, drill motor, and a couple bits.

06 New hardware is supplied to secure the bracket in place Measure mark and repeat on the other side

The results were immediate after a couple quick corners in the neighborhood followed by the benefit of less lean during everyday commuting. Combined with the rebuilt steering and suspension, our Suburban is ready for the road!

SOURCES
Classic Performance Products
(800) 760-7438
classicperform.com

Rare Parts
(800) 621-2005
shop.rareparts.com

- Advertisement -

Related Articles

Search Our Site

More Classic Truck Performance

The John Lamb/Tin Man’s Garage Triton V10-Powered 1961 Ford Unibody

By Brian Limberg (Excerpts from his Build Book)    -  ...

Mike Schott’s 1992 Chevy Silverado

By Tim King   -   Images by the Author 1988 welcomed...

Bob Ford’s 1957 Chevy Task Force-Series Truck Turns up the Heat

By Chuck Vranas   -   Images by the Author Somewhere on...

Updating a 1971 Suburban With a Lokar Floor Shifter and Ididit Tilt Column

By Todd Ryden   -   Images by the Author After upgrading...

The Evolution of Pat Floyd’s 1969 Chevy C10

By Chuck Vranas   -   Images by the Author The alluring...

A Windsor Bottom End With Cleveland Cylinder Heads and Intake for the Ultimate Old-School Hybrid

By Jeff Huneycutt   -   Images by the Author We’re building...
More Classic Truck Performance

Speedway Motors’ 1968 C10 Build Part 2: Chassis & Suspension

By Joe McCollough   -   Images by the Author In the...

Paul Close’s Y-Block Powered 1956 F100 is Layered with Custom Cool

By Chuck Vranas   -   Images by the Author As the...

Old Anvil Speed Shop Increases Our 1948 Chevy’s Voltage With XS Power

By Rob Fortier   -   Photography by Taylor Kempkes For as...

Josh Bentley’s Vini’s Hot Rods 1983 Chevy Squarebody C10 With a Roadster Shop SPEC Chassis

By Rob Fortier   -   Images by NotStock Photography Back in...

The GM Tailgate Tour is a Five-Day Road Trip for Trucks

By Tommy Lee Byrd   -   Images by the Author Road...

Horton’s Hot Rod Shop’s Wicked Hemi-Powered 1969 Dodge D200 Parts Hauler

By Chuck Vranas   -   Photography by the Author Through the...