Wish you had a C10 short-bed? Brothers Truck simplifies the process with this long-bed to short-bed conversion kit. Don’t get me wrong, long-bed pickup trucks are cool. They definitely have their purposes, plenty of devout fans, and are an important staple in this great hobby of ours. That said, the first thing I’d do to any non-4×4 or full utility old truck is cut it down to a short bed! And to all the complainers crying “just go find an SWB to begin with,” well, let me just remind you of the current surplus versus value (there are plenty of decent and affordable LWBs available, while the same cannot be said for their SWB brothers!). I will get off my preferential soapbox now and carry on with the story at hand.
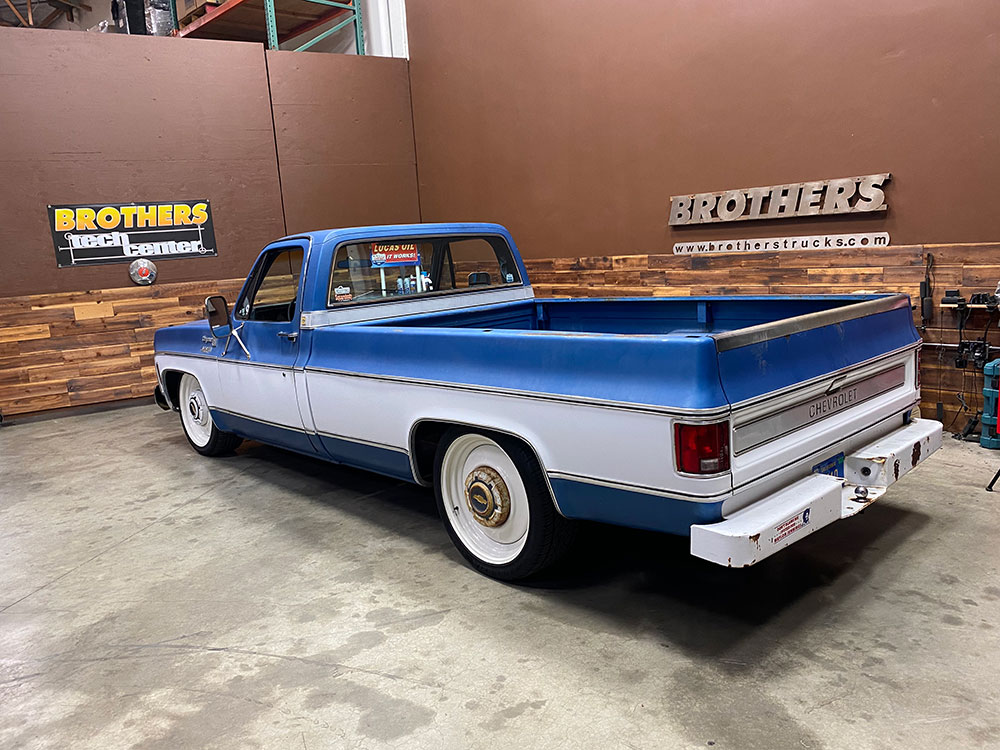
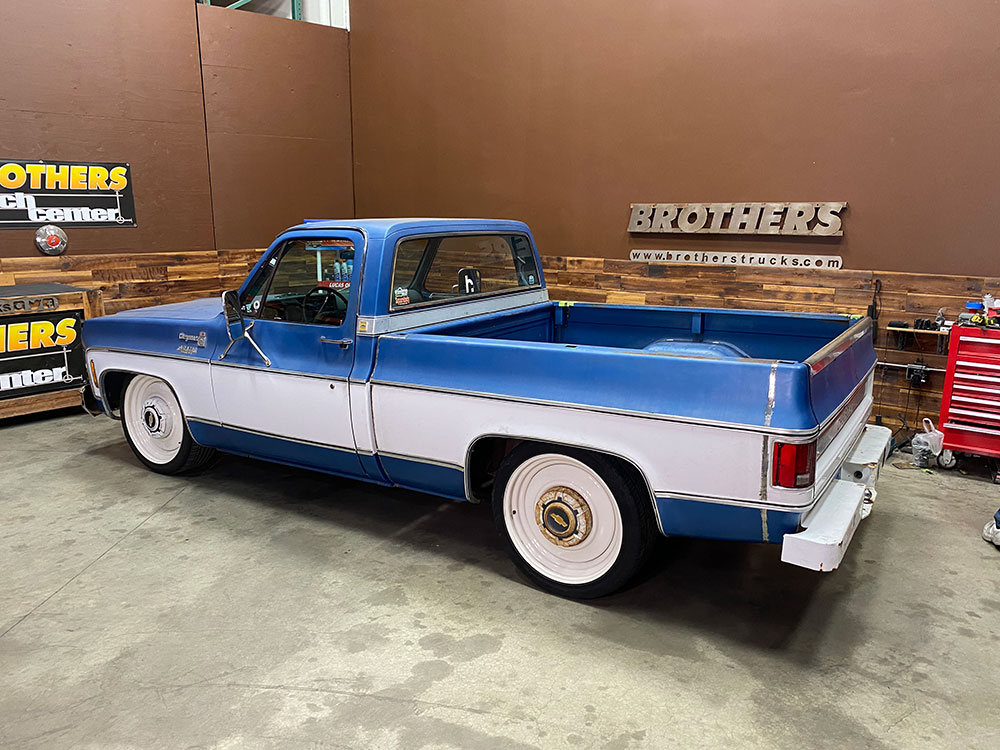
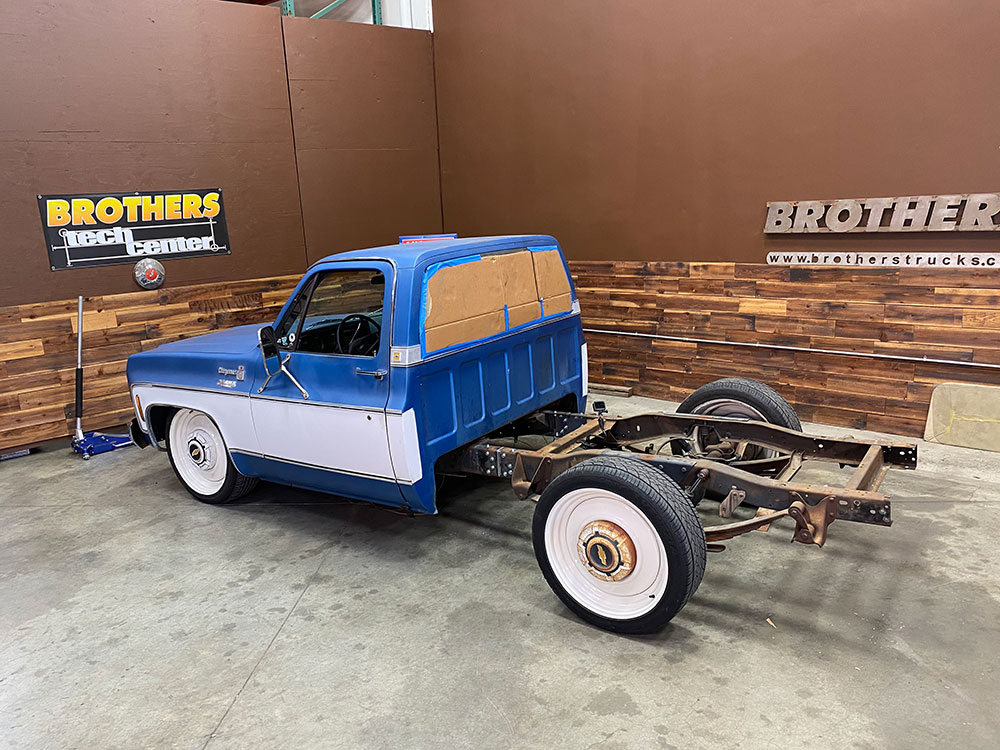
After.
In 2017, Brothers Trucks came out with their flagship long bed frame shortening kit for the ’63-72 GM trucks—and it instantly became popular, due not only to how amazingly affordable it is ($469.99) but because of how extremely easy it is to use and, ultimately, shorten your light- or heavy-duty 2WD chassis … without fear of f’ing up!
“Fourteen inches is all it takes …” Yep, that’s the difference between your standard long wheelbase (LWB) and a short wheelbase (SWB) ’73-87 GM pickup … and for under $500, Brothers Trucks has the goods in which to make that 14-inch magic happen! Follow along as we first document the frame shortening procedure at Brothers’ Tech Center, followed next month by the in-depth bedside shortening procedure..
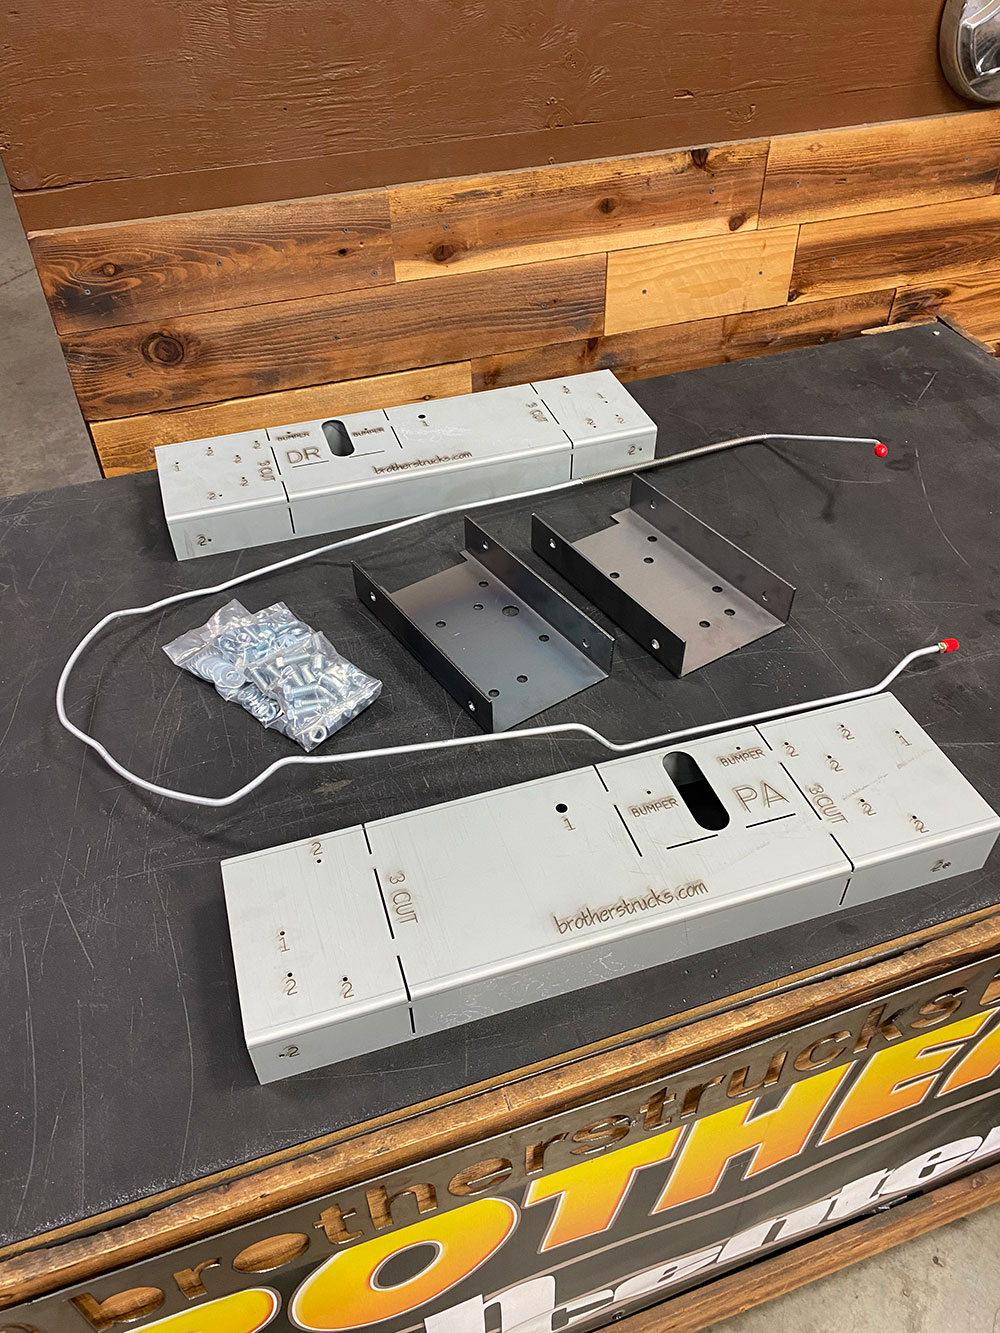
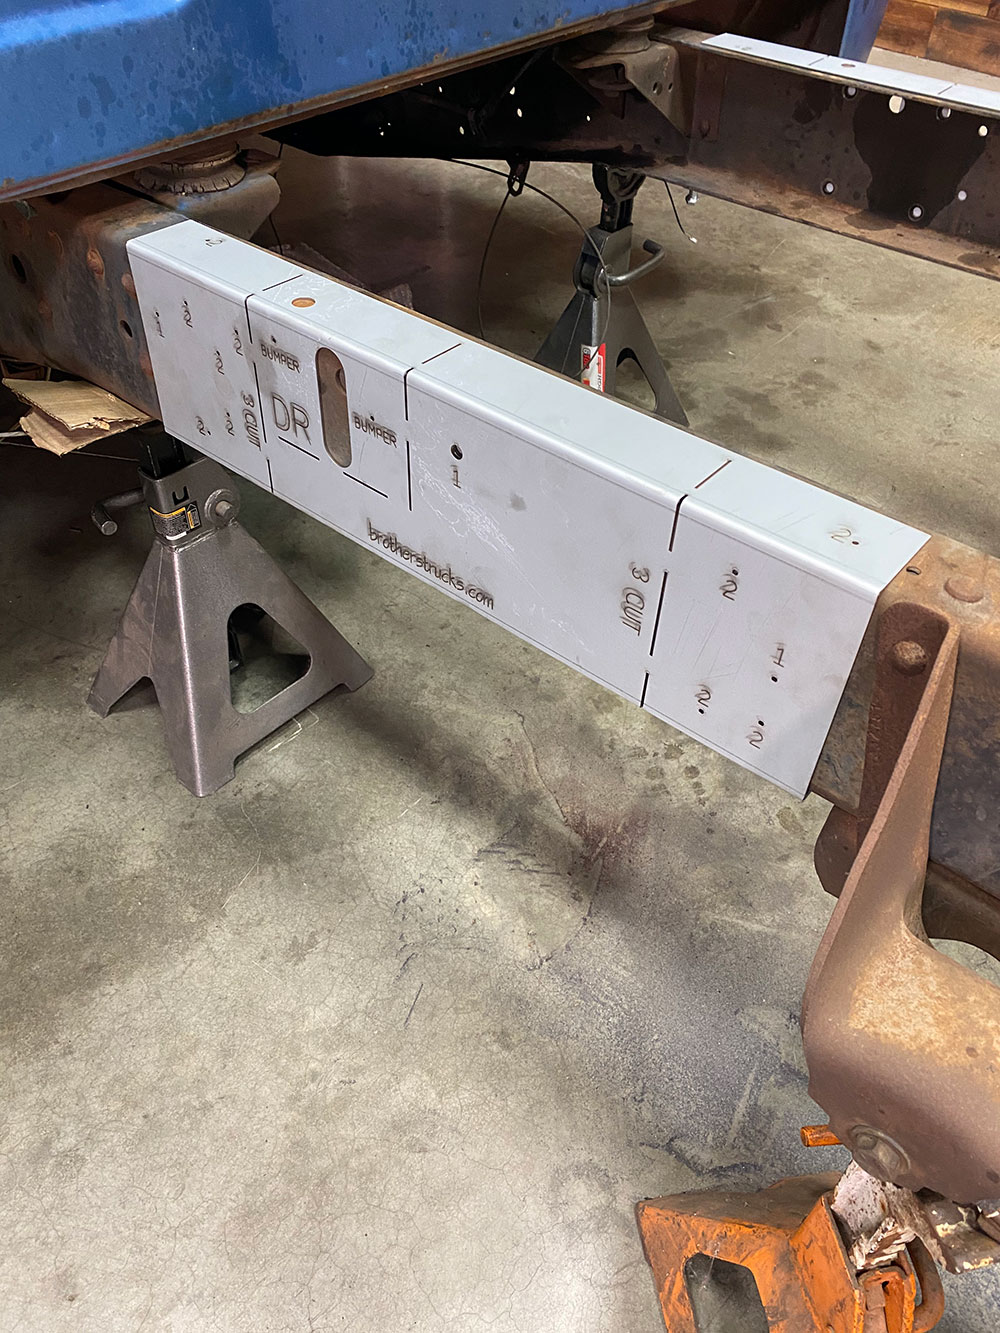
Brothers Trucks accomplished their “failsafe” aspect by developing a one-time-use, dual-purpose frame rail drilling and cutting guide that gives the user little room, if any, for error. In short (no pun intended), the guide or template, as it were, is used as a metal miter box to first remove the “long box” section of frame forward of the rear axle and just aft of the rearmost cab mounts, and then the remaining section from the tail end of the frame rails. It’s also used to mark and drill the required holes for installing the frame-gusseting C-channel supplied with the long-bed to short-bed conversion kit, as well as the relocation holes for the rear bumper.
We’ll skip the photographic formalities of removing the bed but will point out the following: one, disconnect all electrical wiring; two, disconnect the fuel filler/vent; three, pre-soak all the bed-to-frame hardware with a good penetrant before removing.
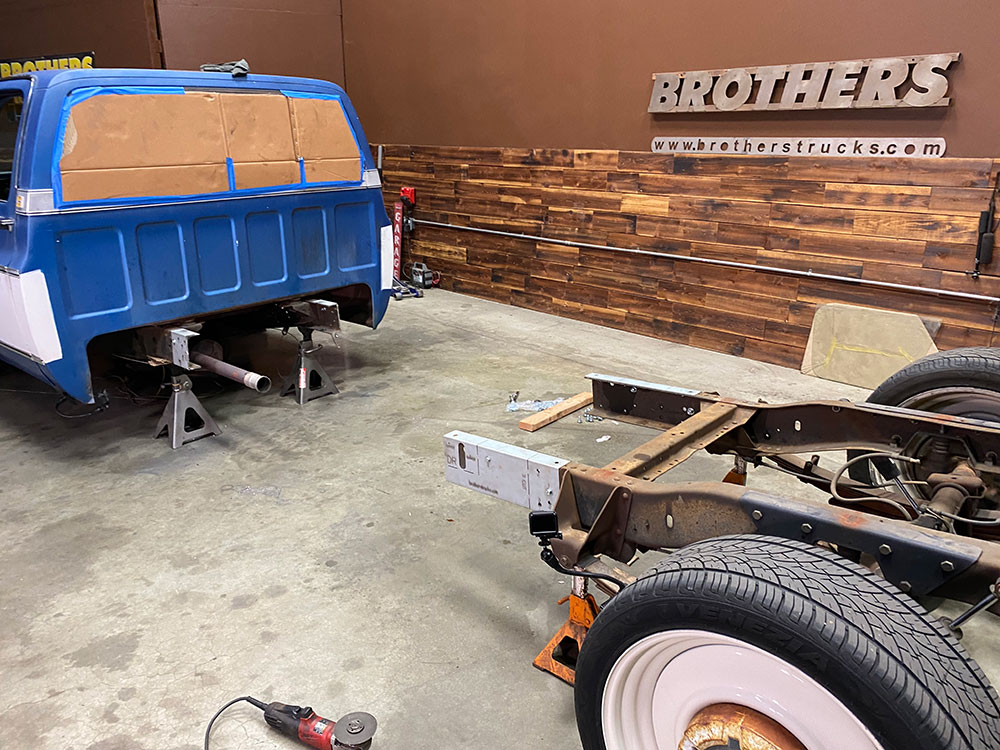
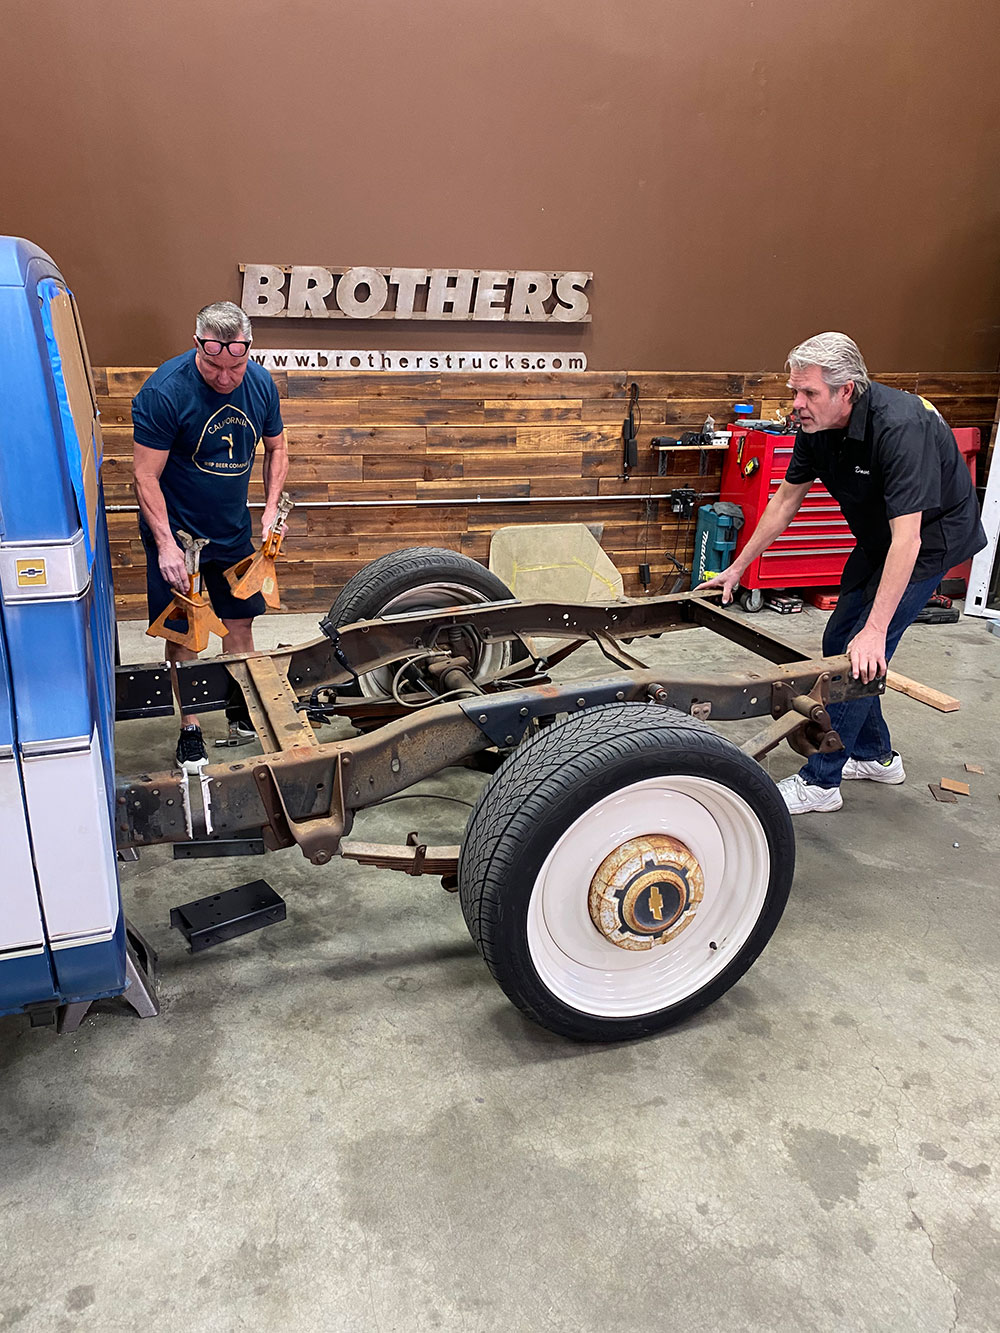
Five years later and the obvious has transpired—Brothers has finally developed and released their follow-up: the ’73-87 Squarebody truck long-bed to short-bed conversion kit. It should come as no surprise that it’s just as easy and affordable as their earlier model version … we know because we were right there as they reduced this one family-owned ’76 Chevy!
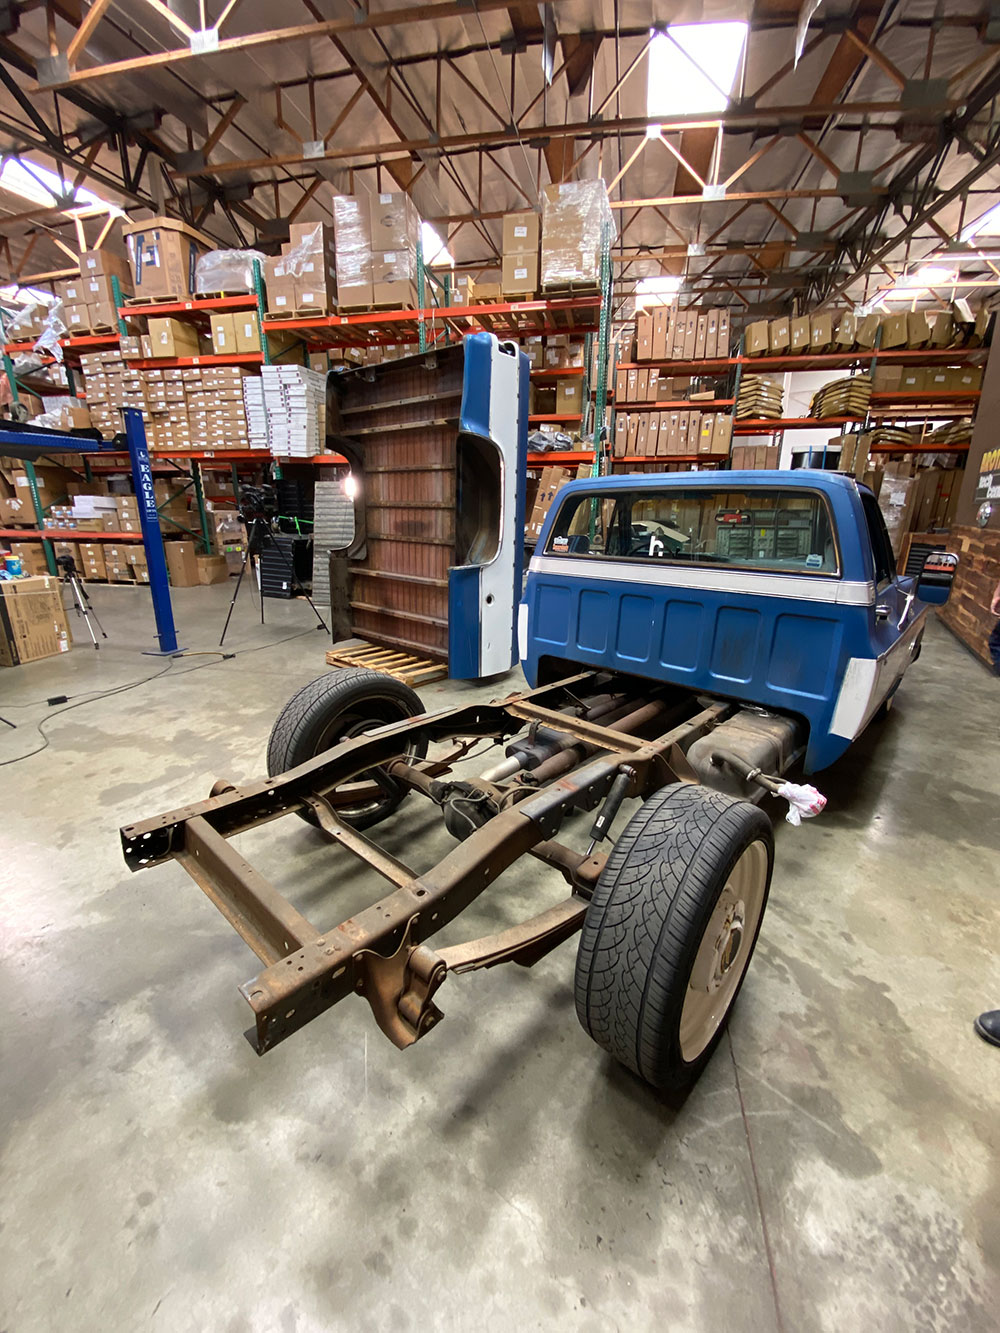
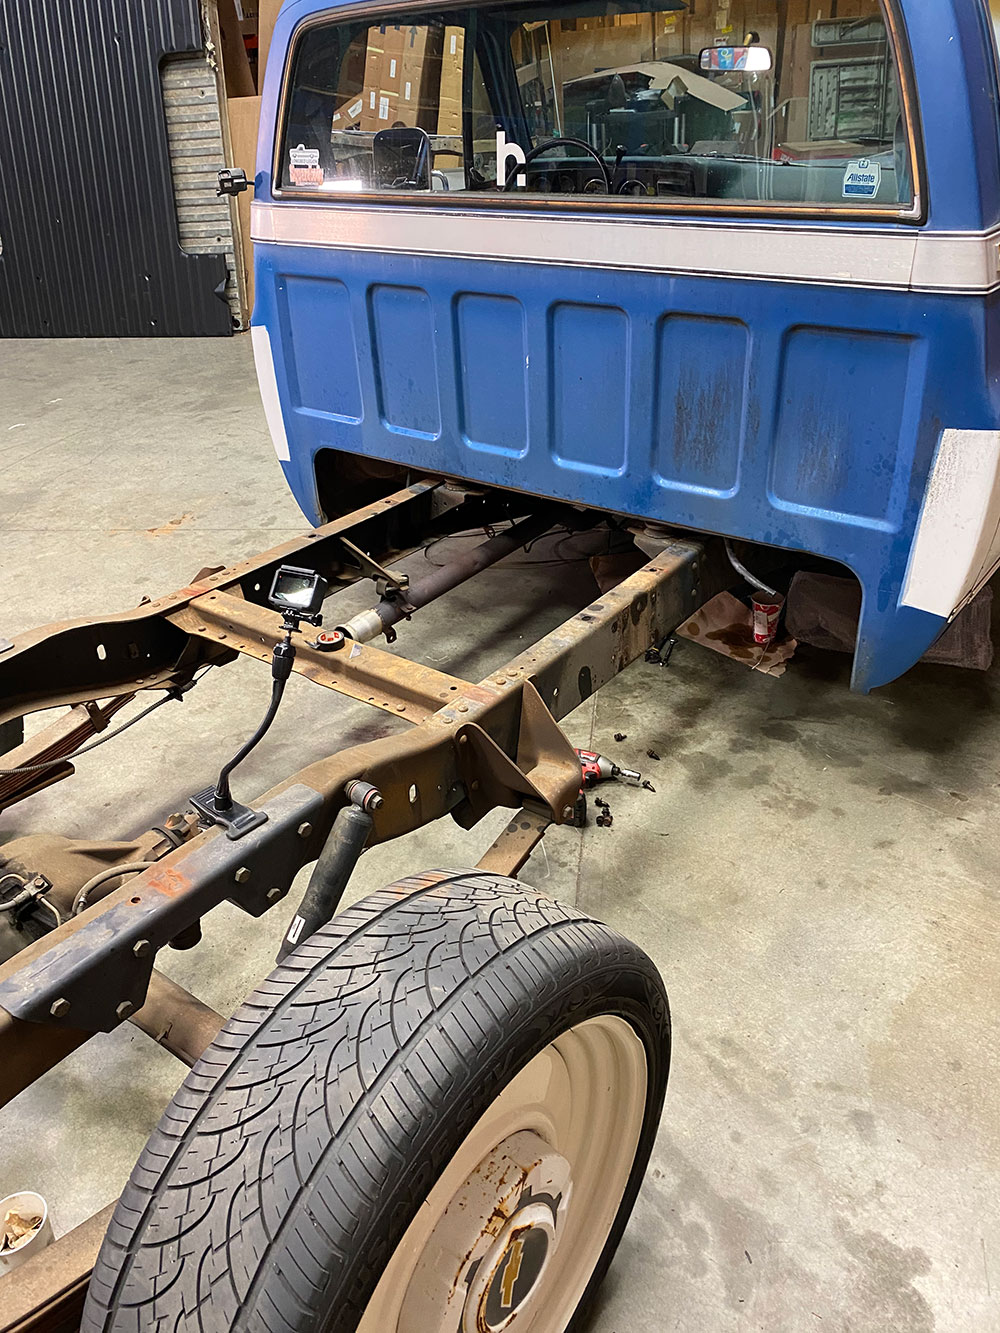
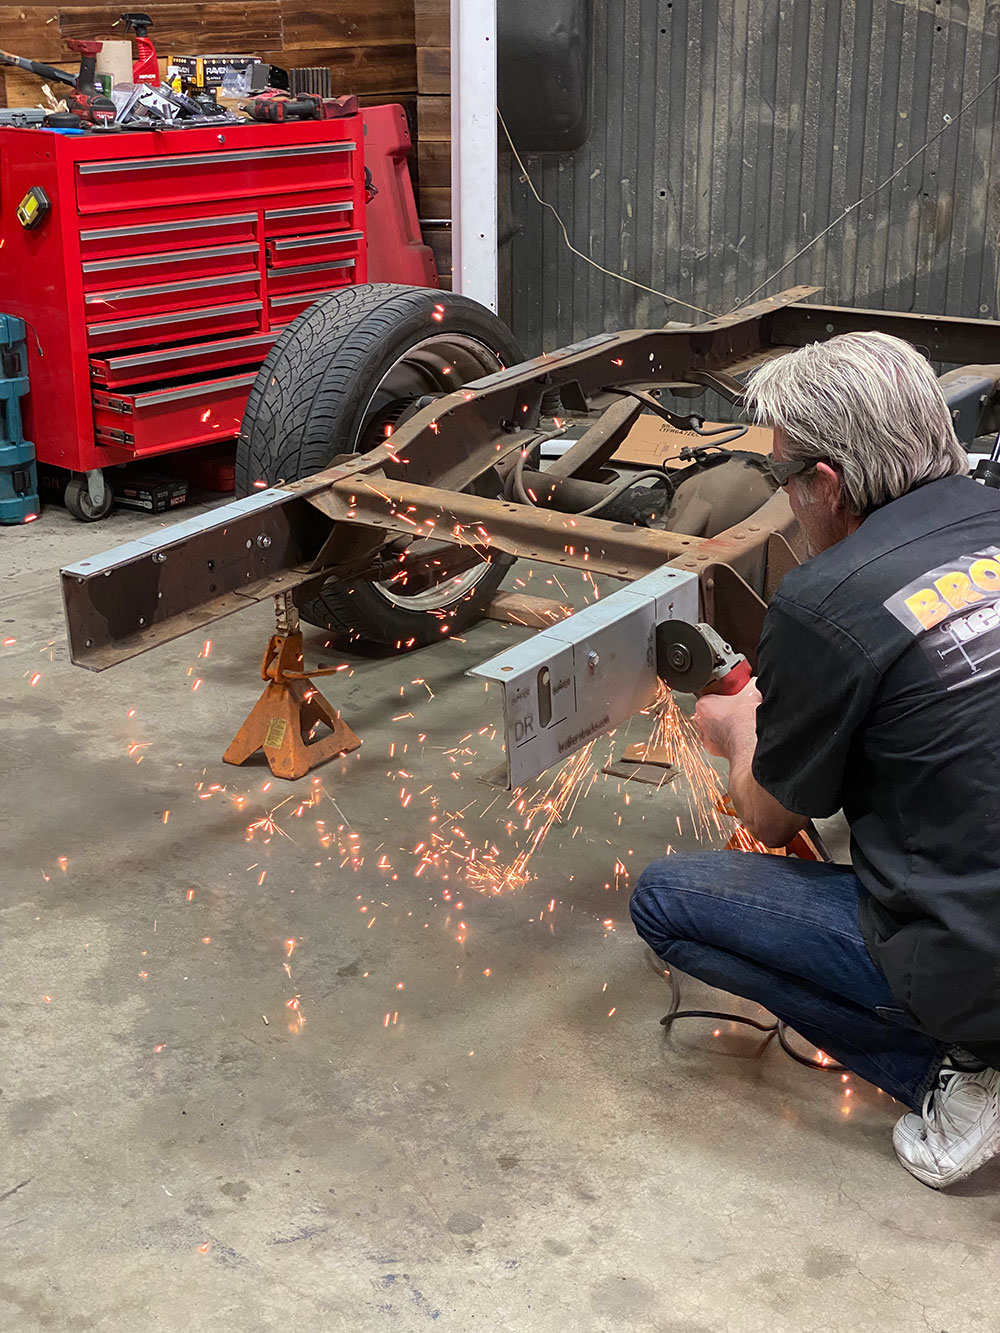
In preparing the chassis for its pending surgery you’ll need to remove the following: fuel tank, exhaust (from the cab back), rear bumper, and driveshaft. Bundle the taillight harness up out of the way as well (it does not need to be trimmed). Next, level the the long bed truck on four jack stands—“without” putting the frame in a bind or under a load!
This month we’ll cover the chassis reduction process as well as a variety of incidentals related to such. Next month, as an option to simply purchasing Brothers Trucks shortbed Fleetside bed panels and bed floor (the easiest way to finish up the job if you’re not concerned with “patina matching!”). We’ll show you how to cut down your existing long-bed Fleetsides and pair them up with a new bed floor and your stock tailgate and front bed panel. Stay tuned!
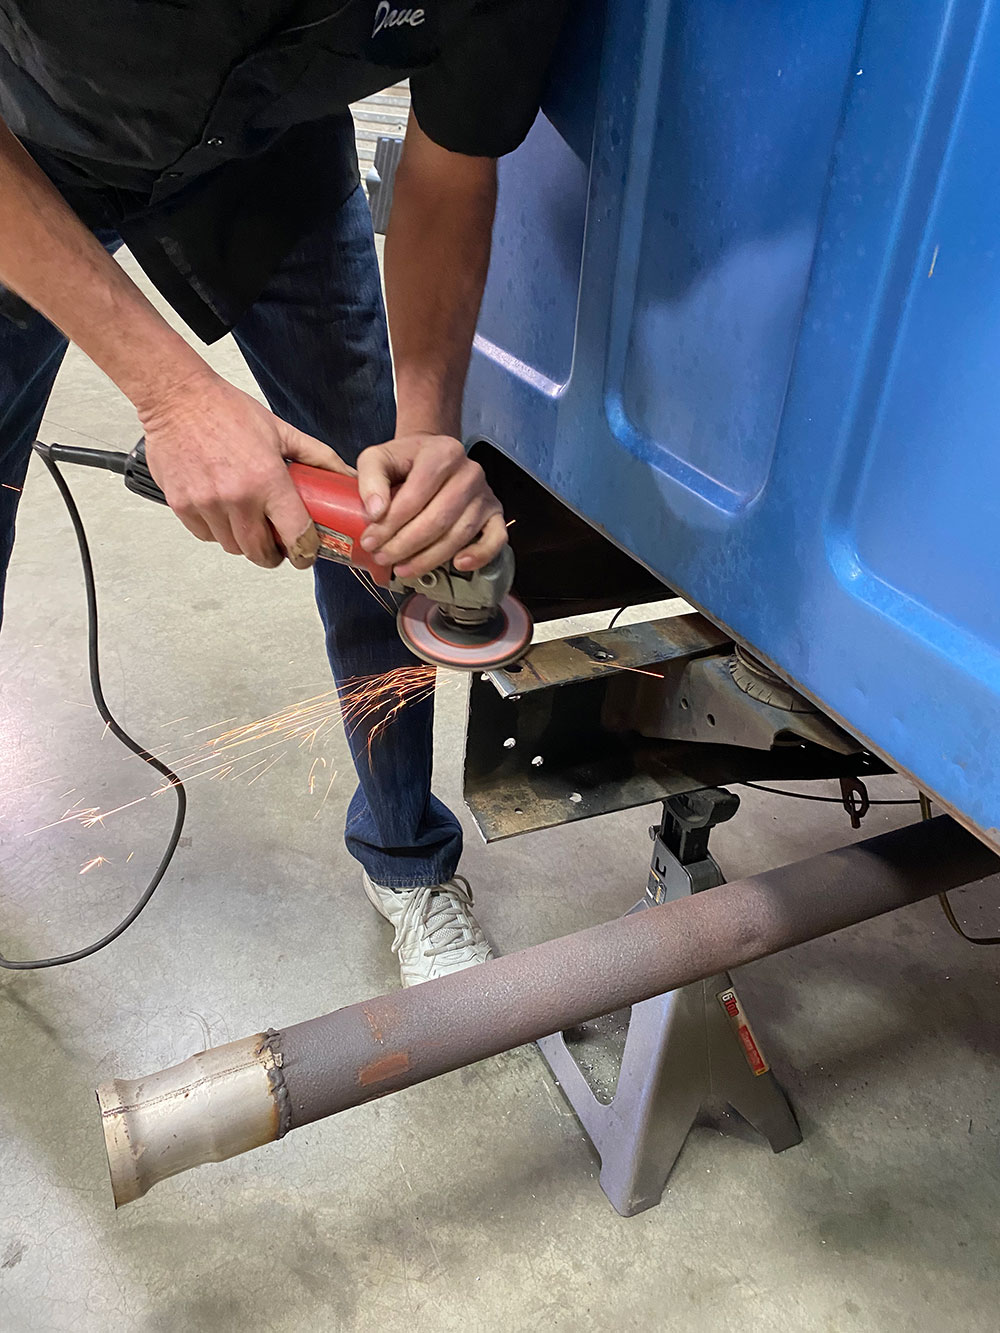
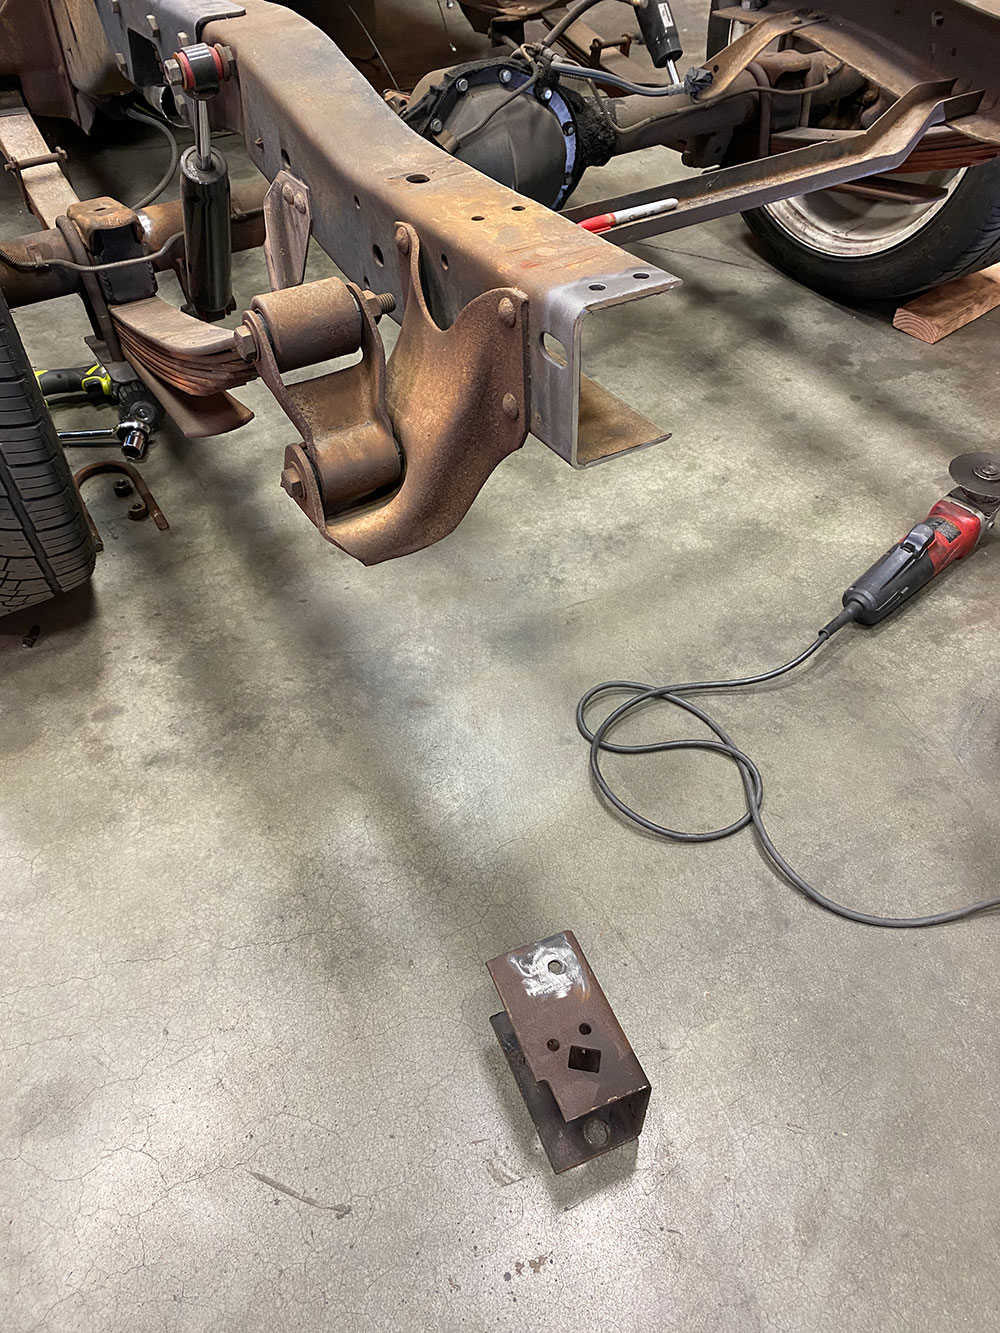
In preparing the frame rail itself you’ll need to remove the two factory rivets attaching the exhaust bracket on your 73-87 GM truck (and the bracket as well, which you’ll put aside for future use). Straighten any imperfections in the upper/lower ’rail section carefully with a large crescent or hammer and dolly.
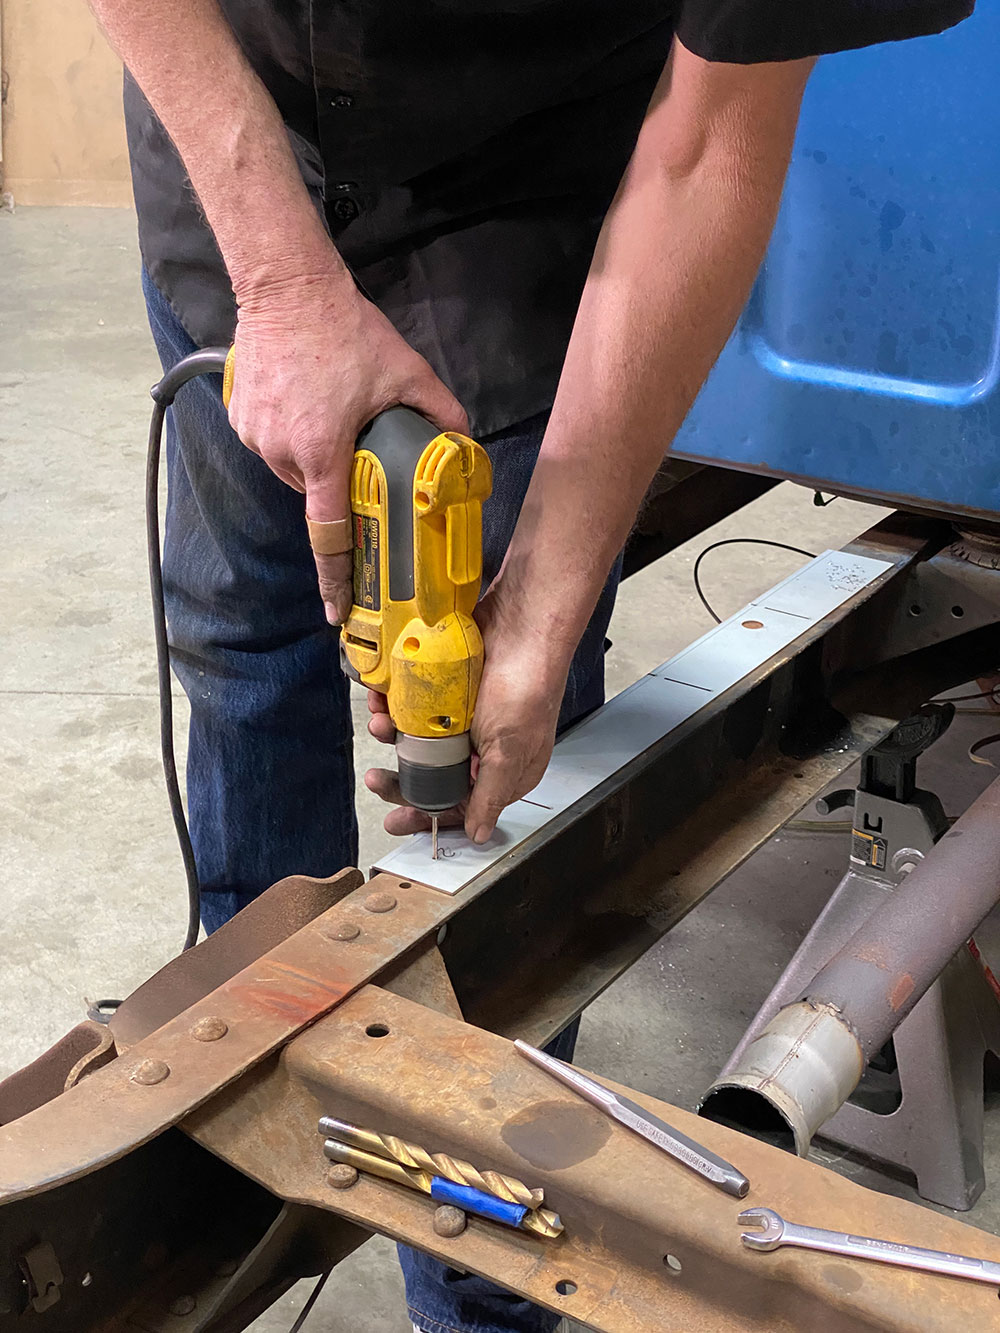
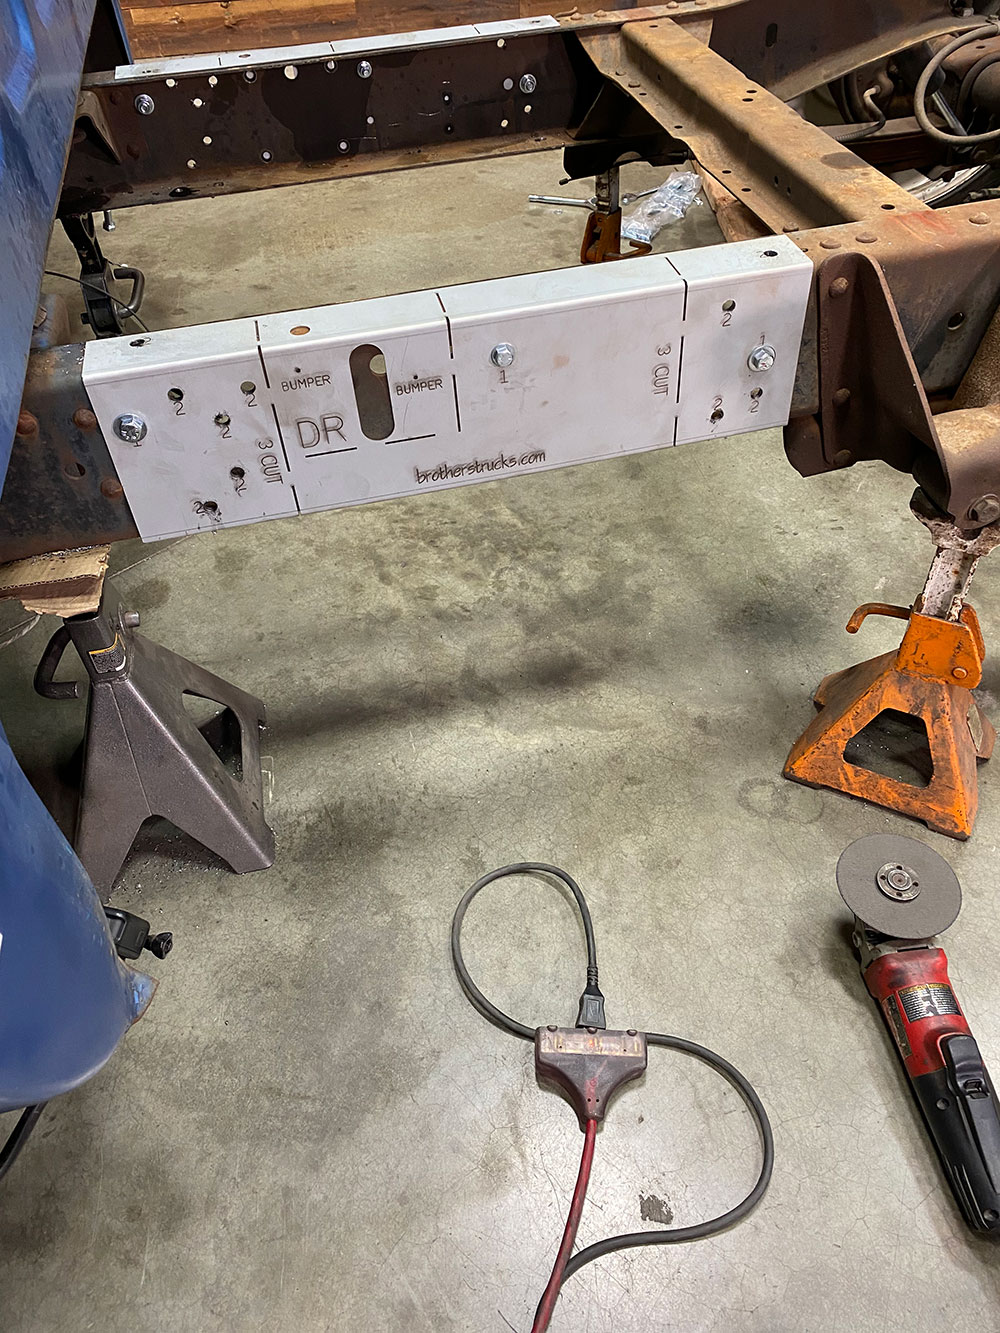
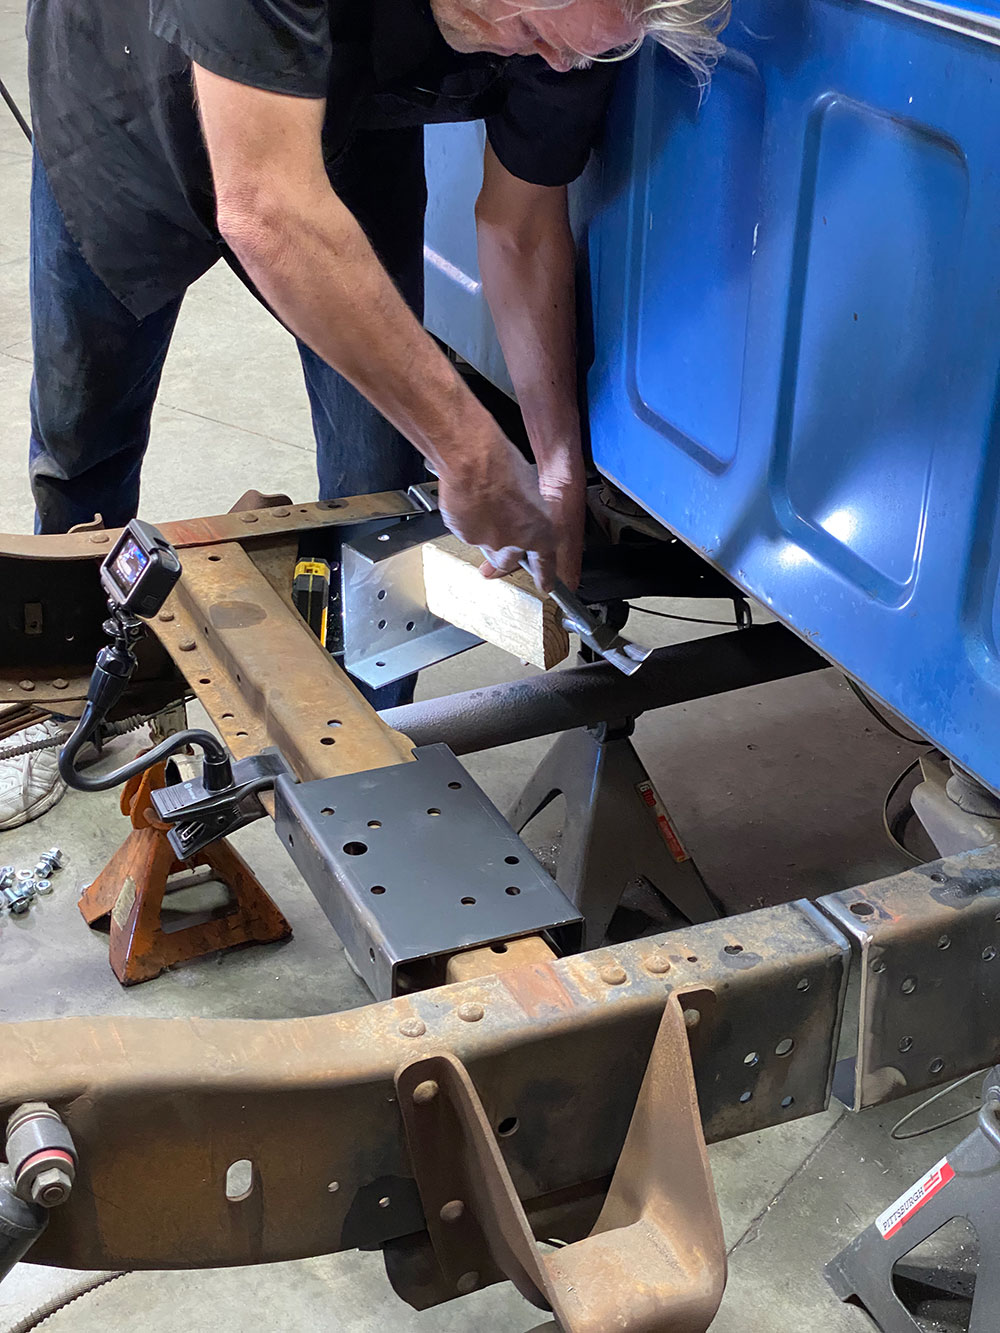
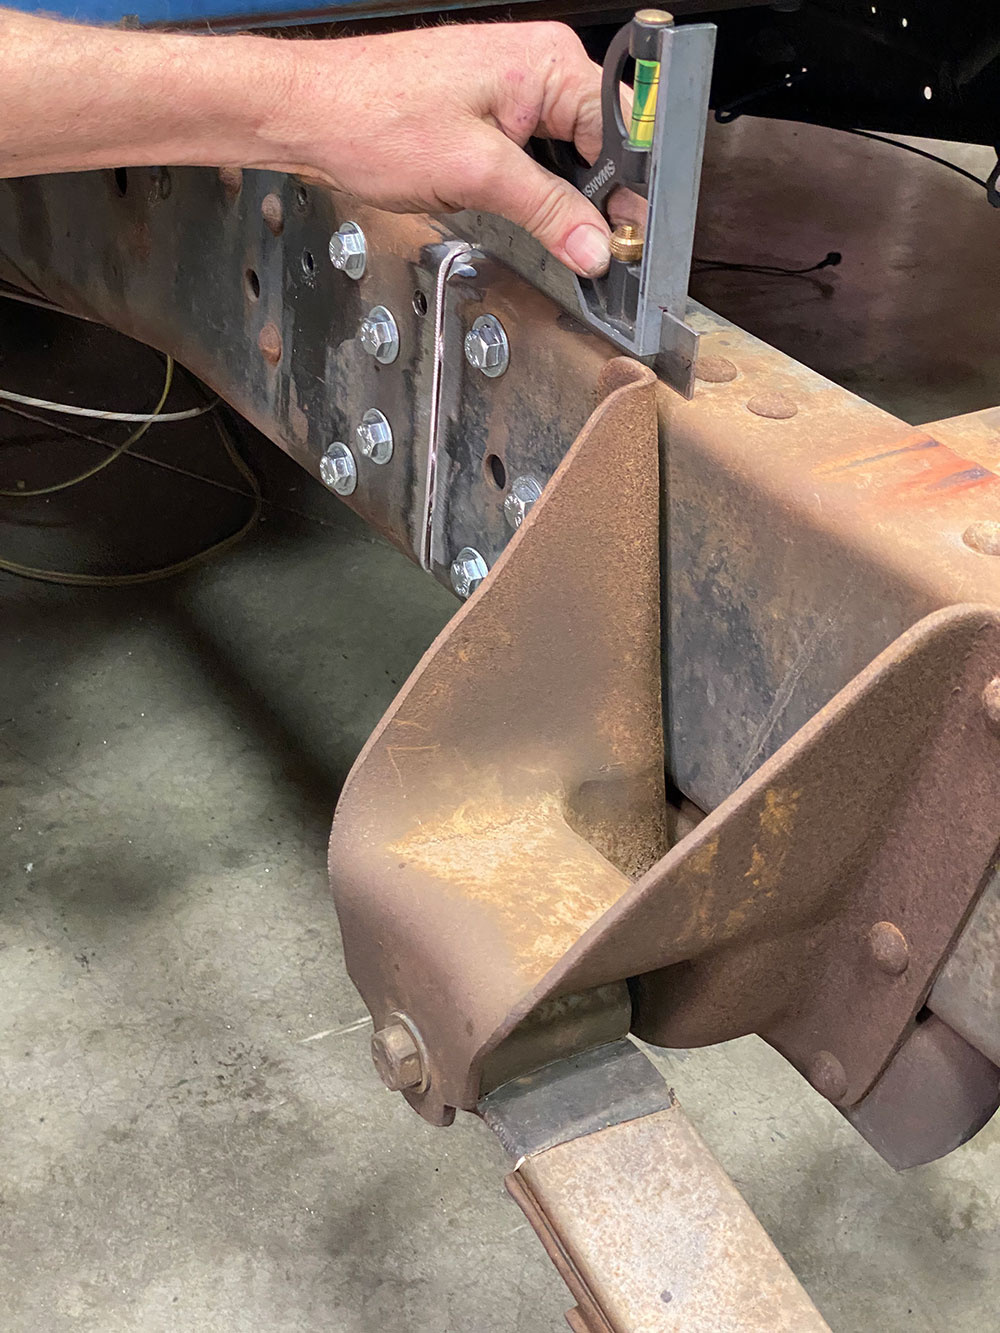
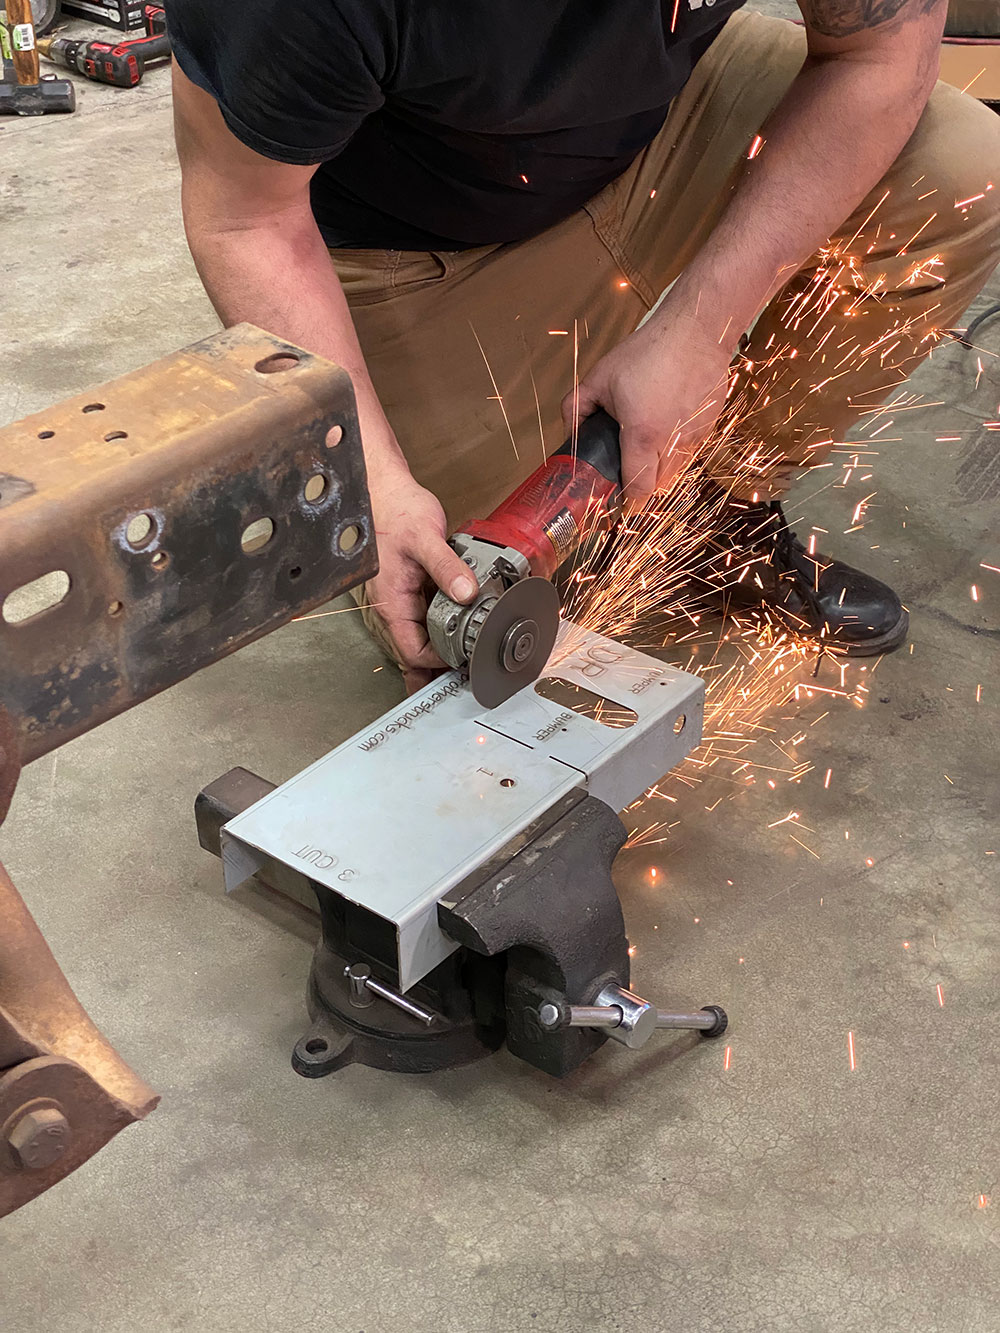
The supplied Brothers cutting guide will fit over the frame rail, forward of the front leaf spring hanger bracket, butting up against the rear cab mount rivets, as shown. Align your main (larger) number one guide hole in the center.
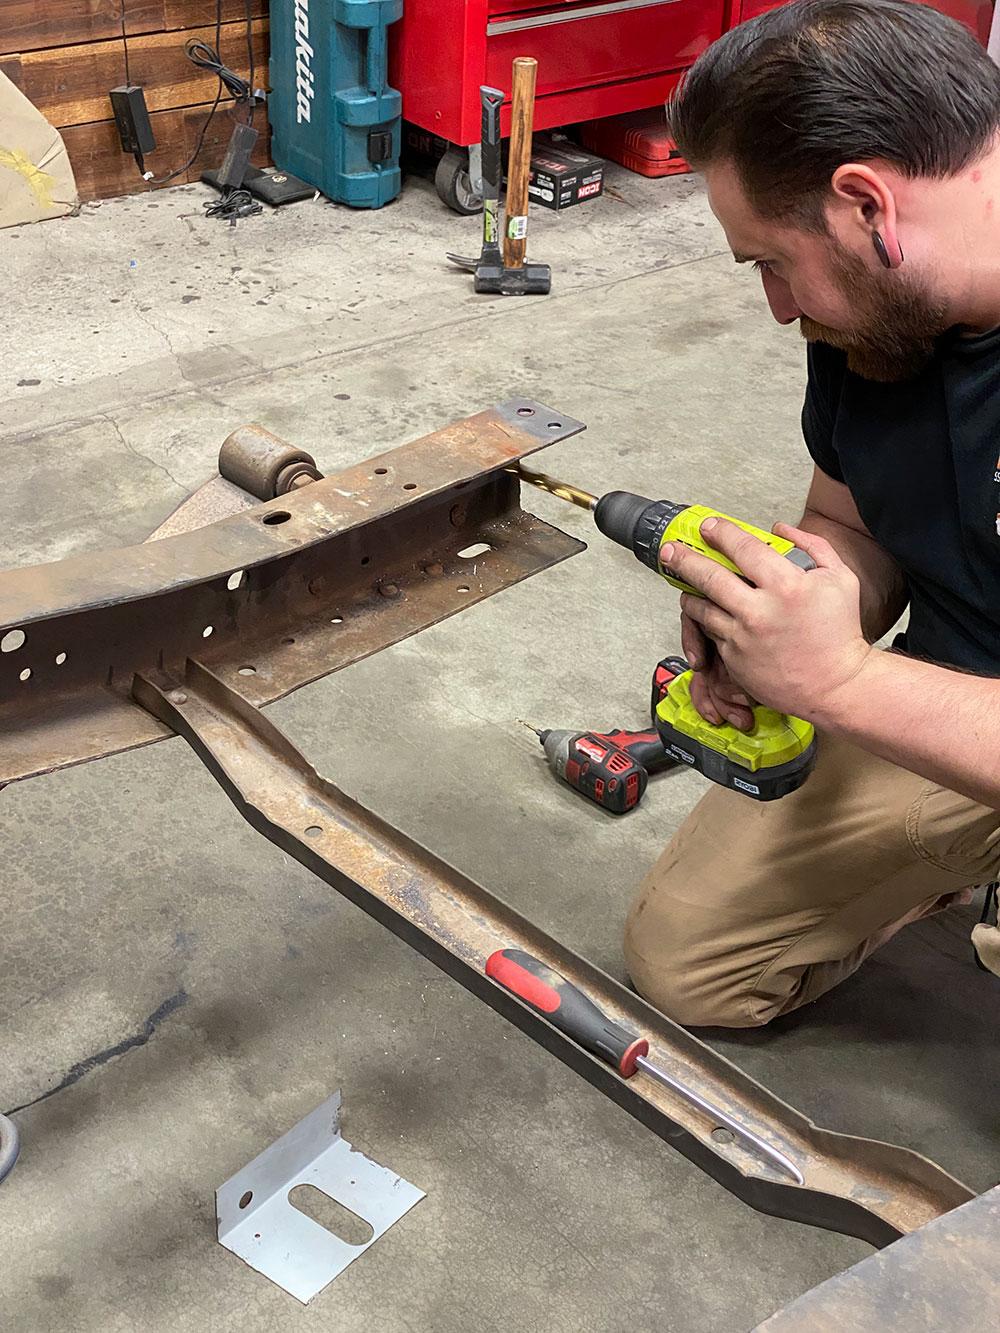
Start your drilling sequence with the smaller number one pilot holes, then open each up to the corresponding bolt size (7/16) and secure with the supplied hardware.The number two holes will follow the same process—with the exception of the hardware, as these holes are specifically for the C-channel you will be installing shortly. Follow the directions closely for bolt/hole sizing.
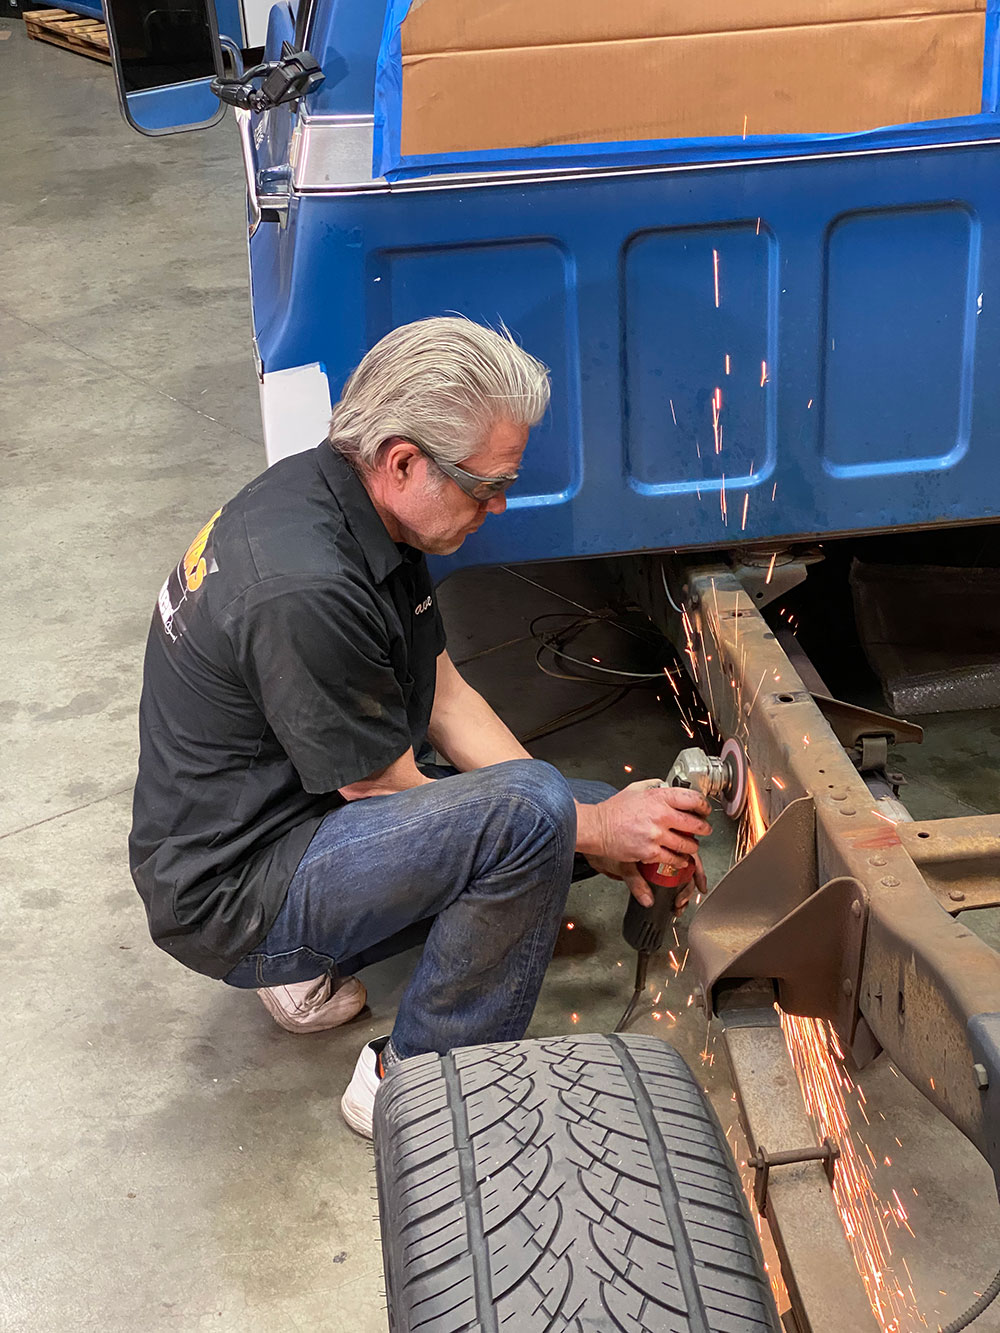
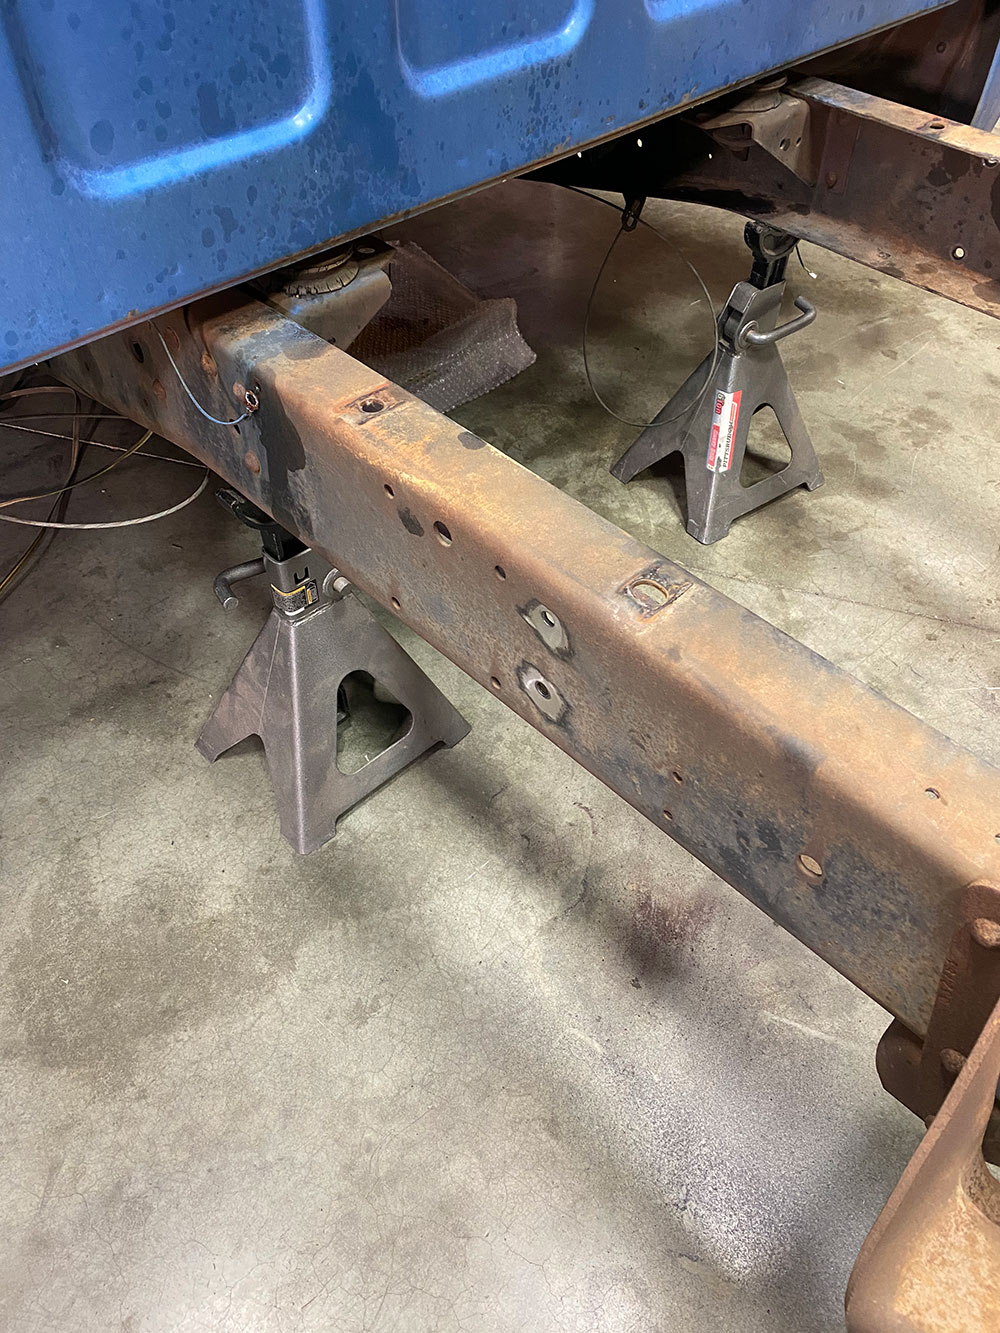
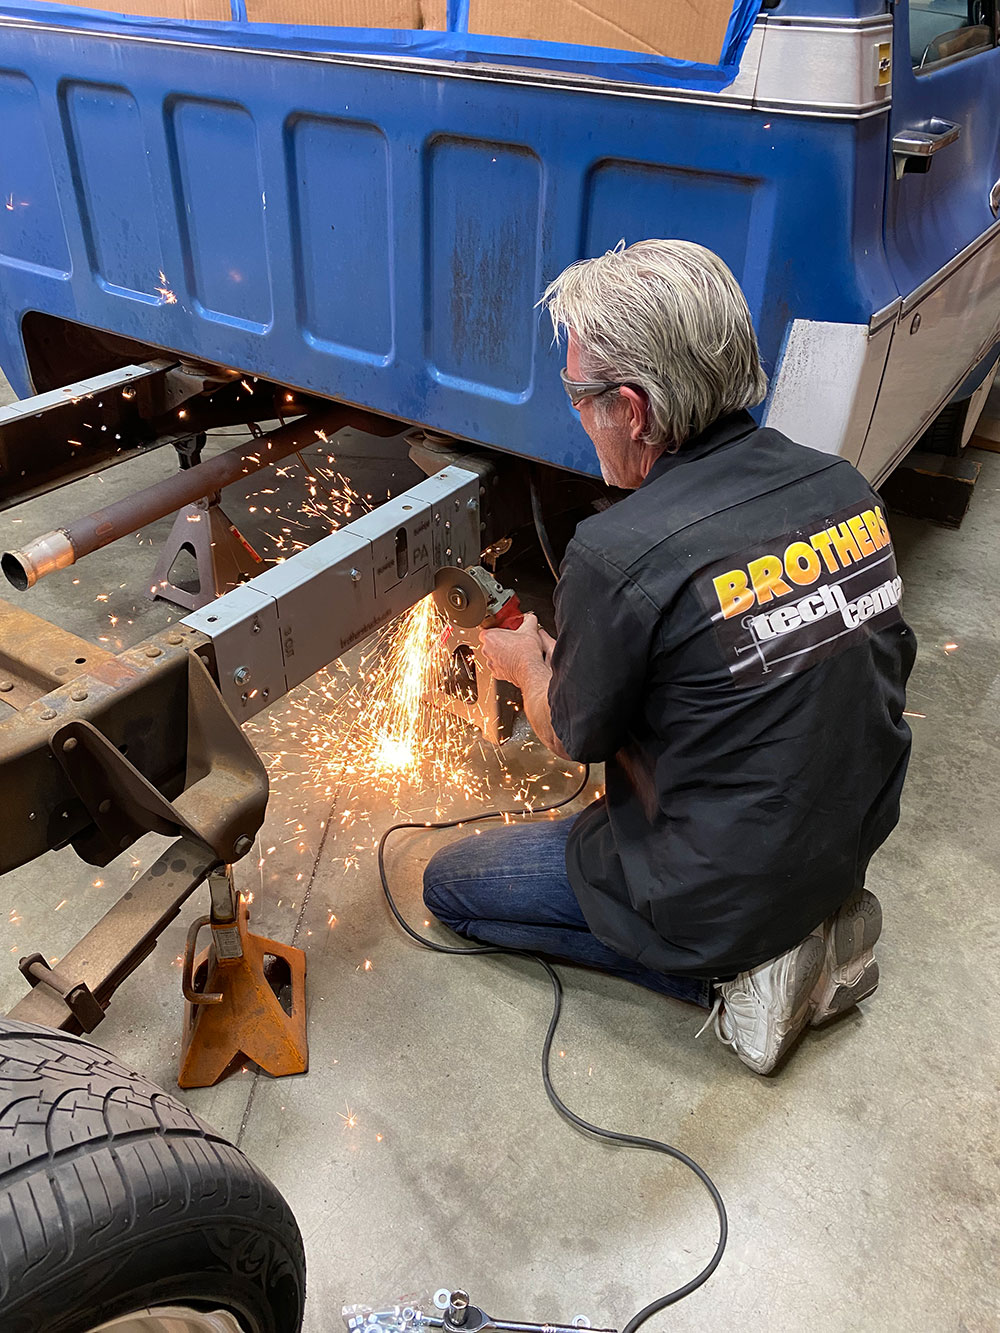
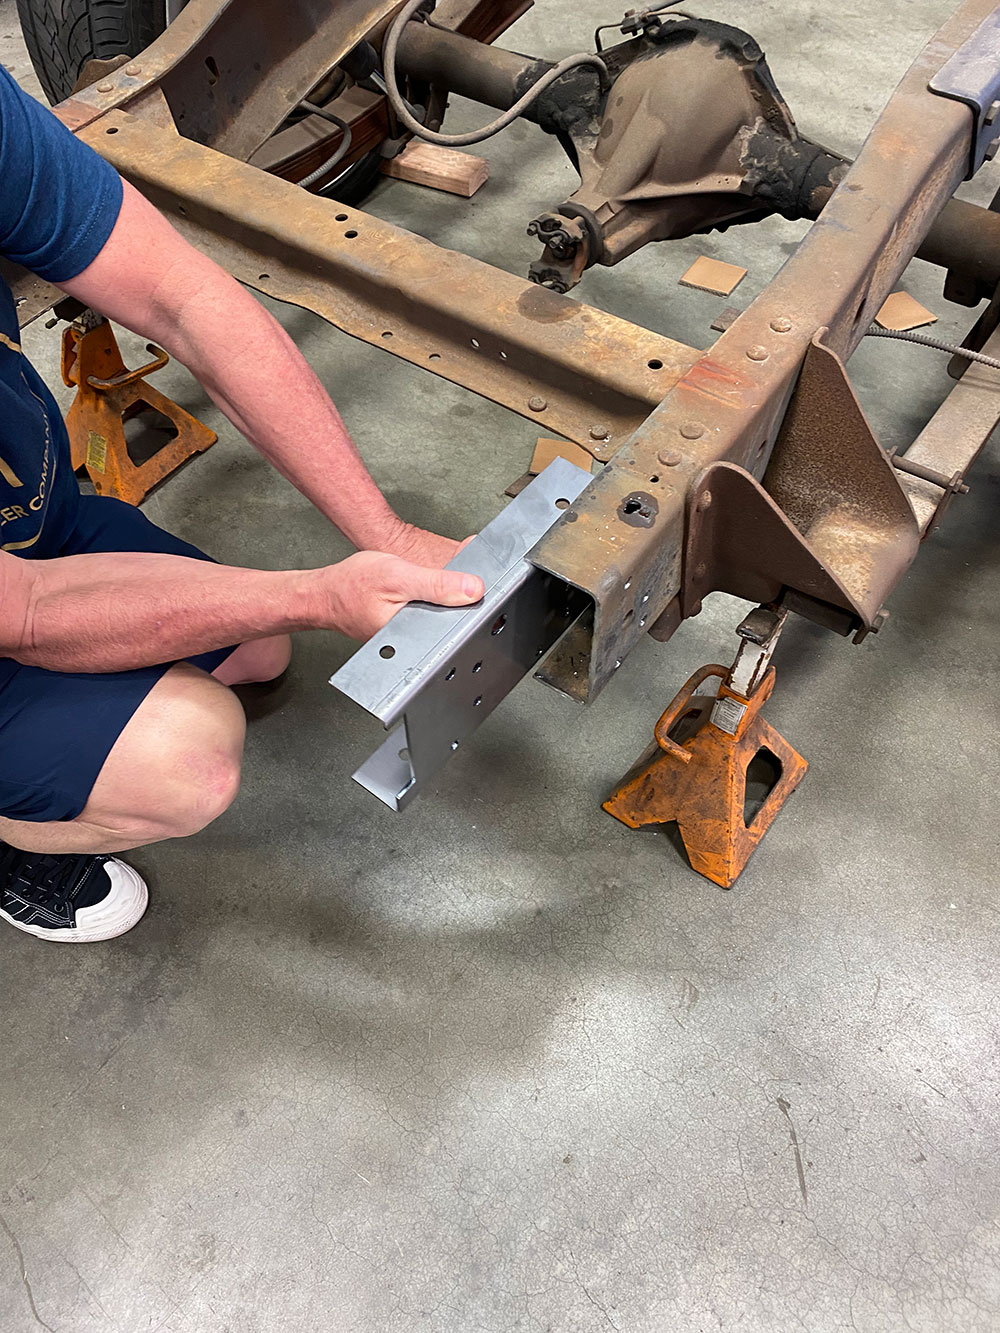
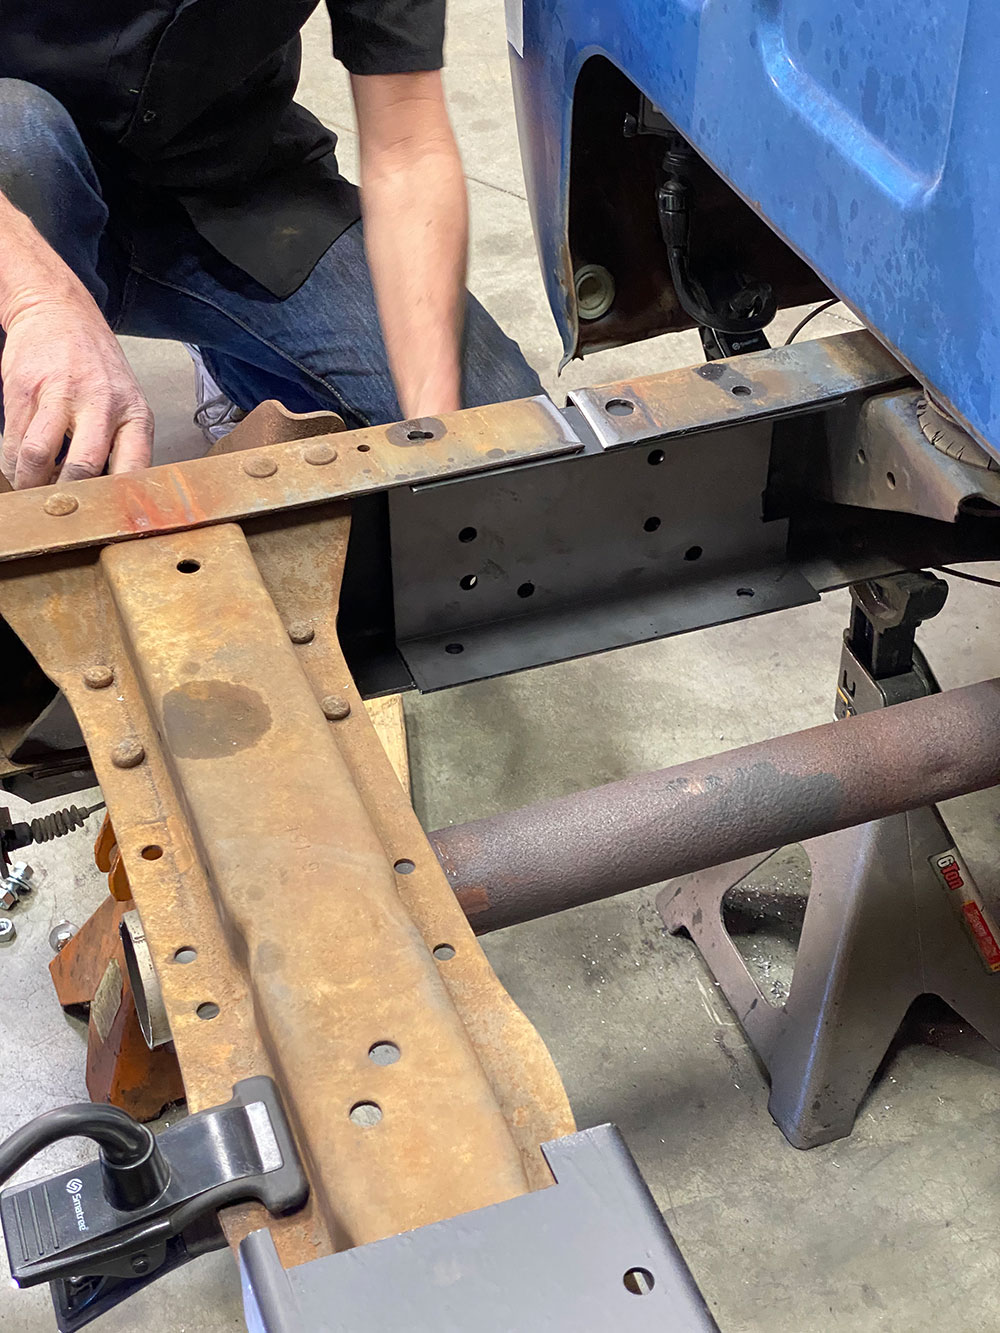
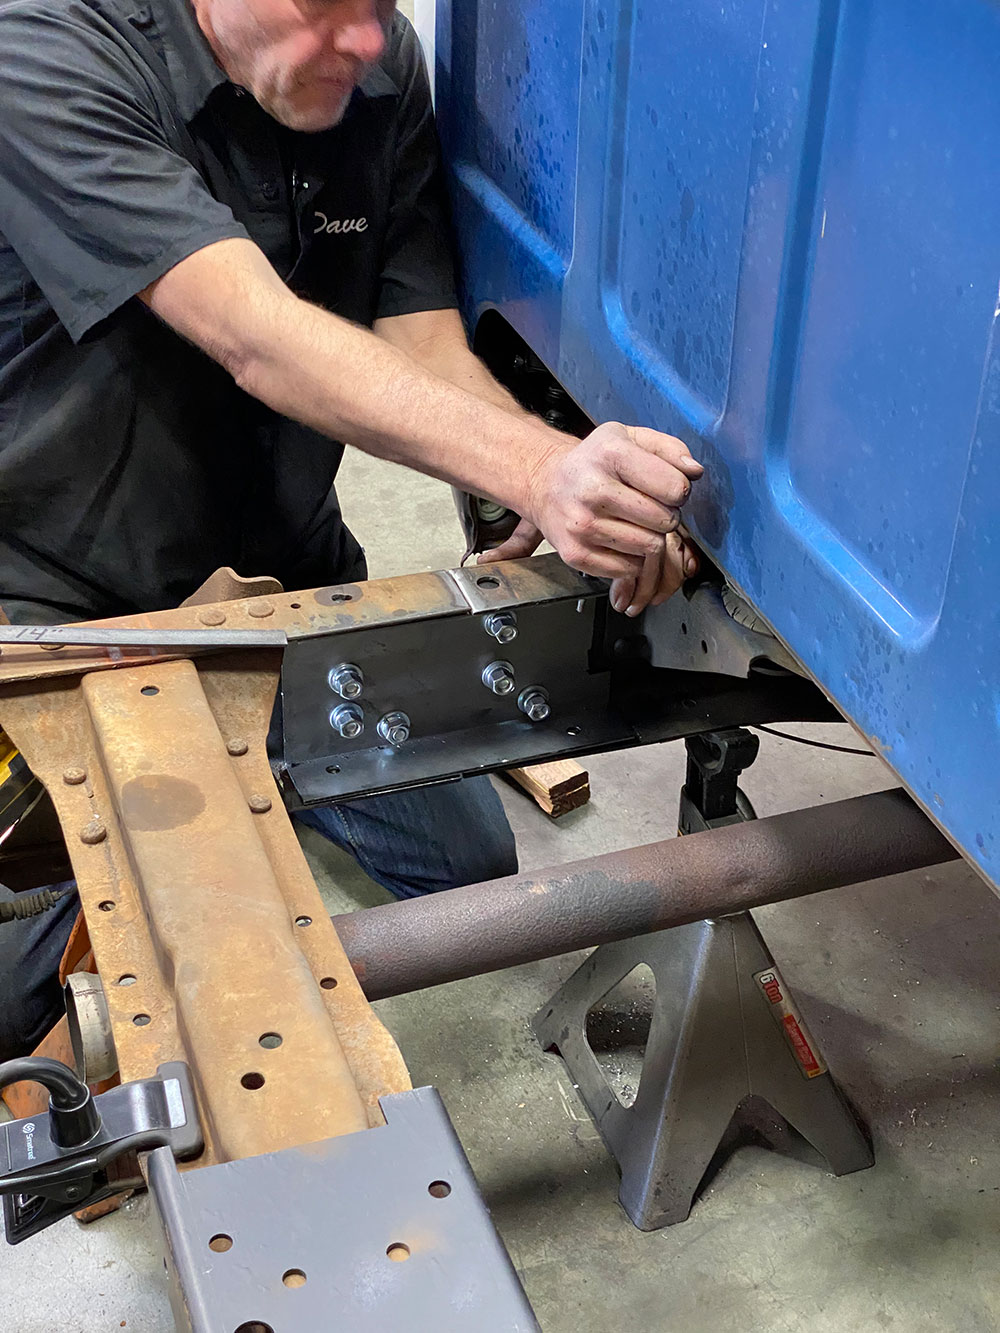
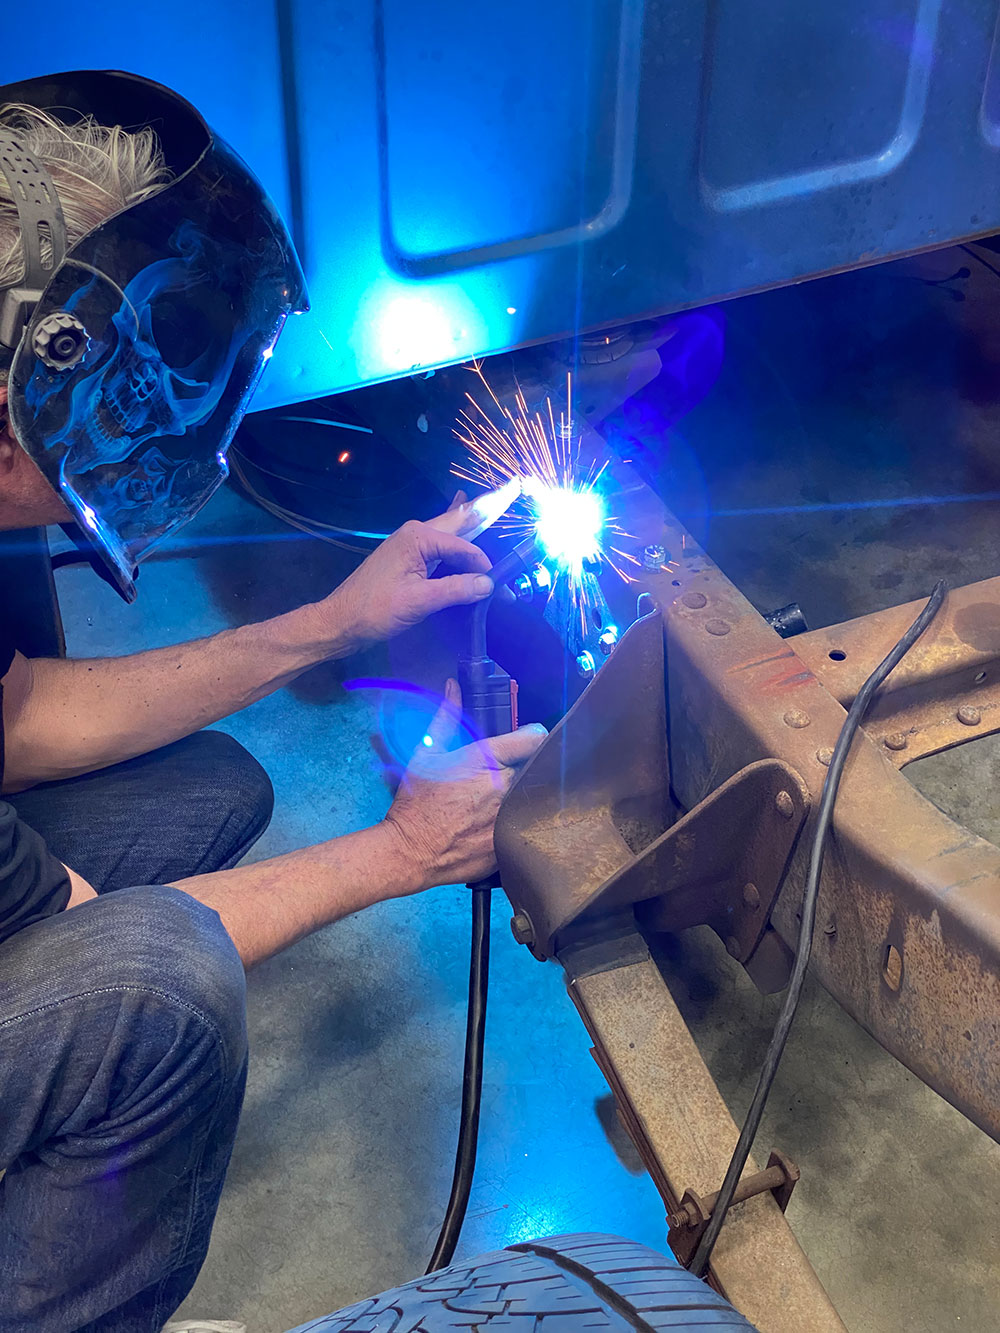
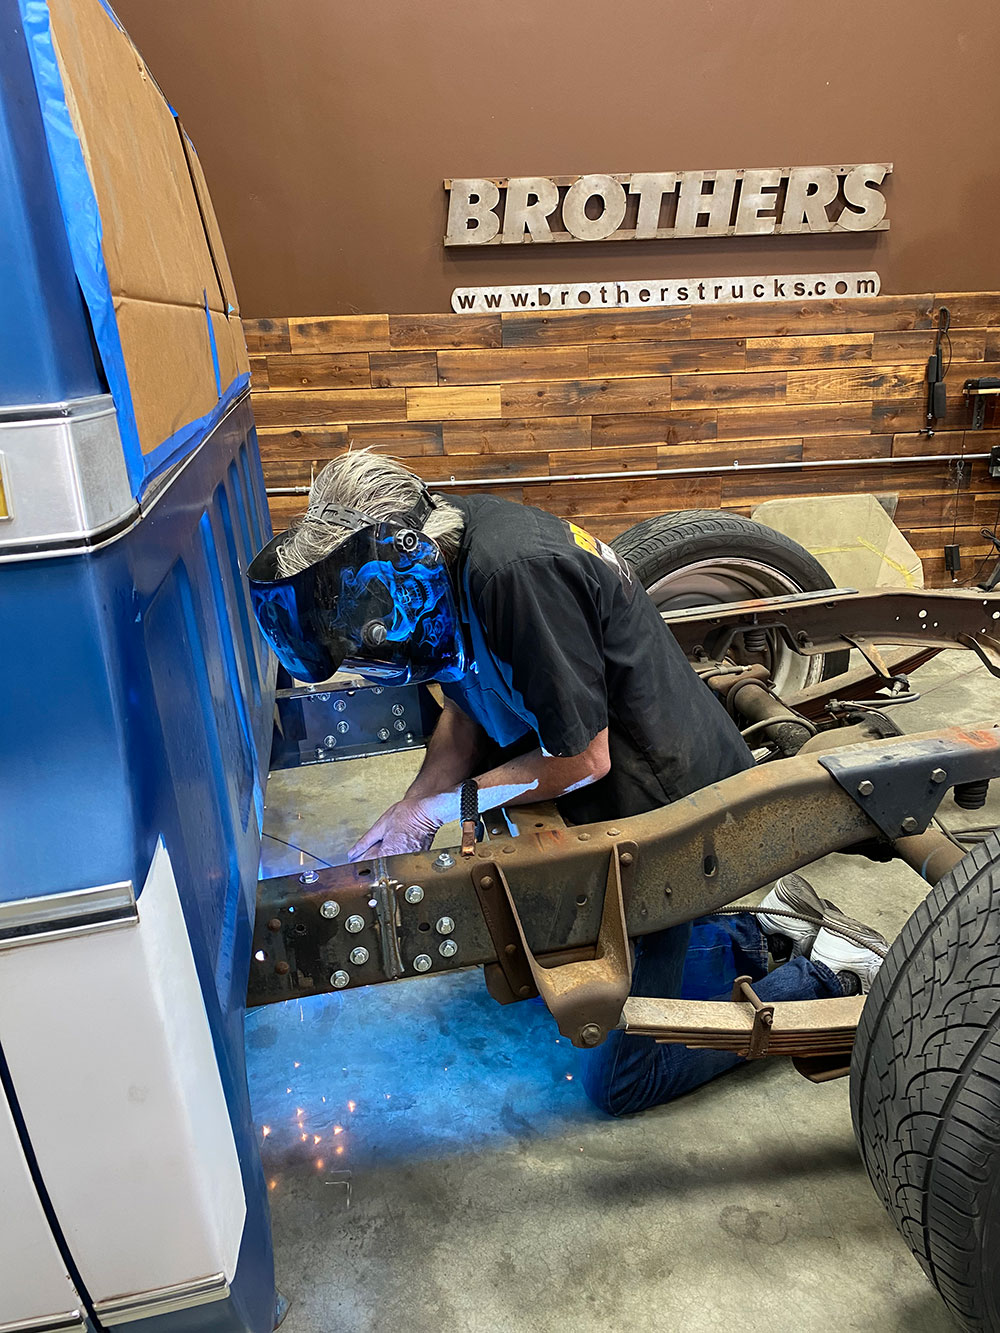
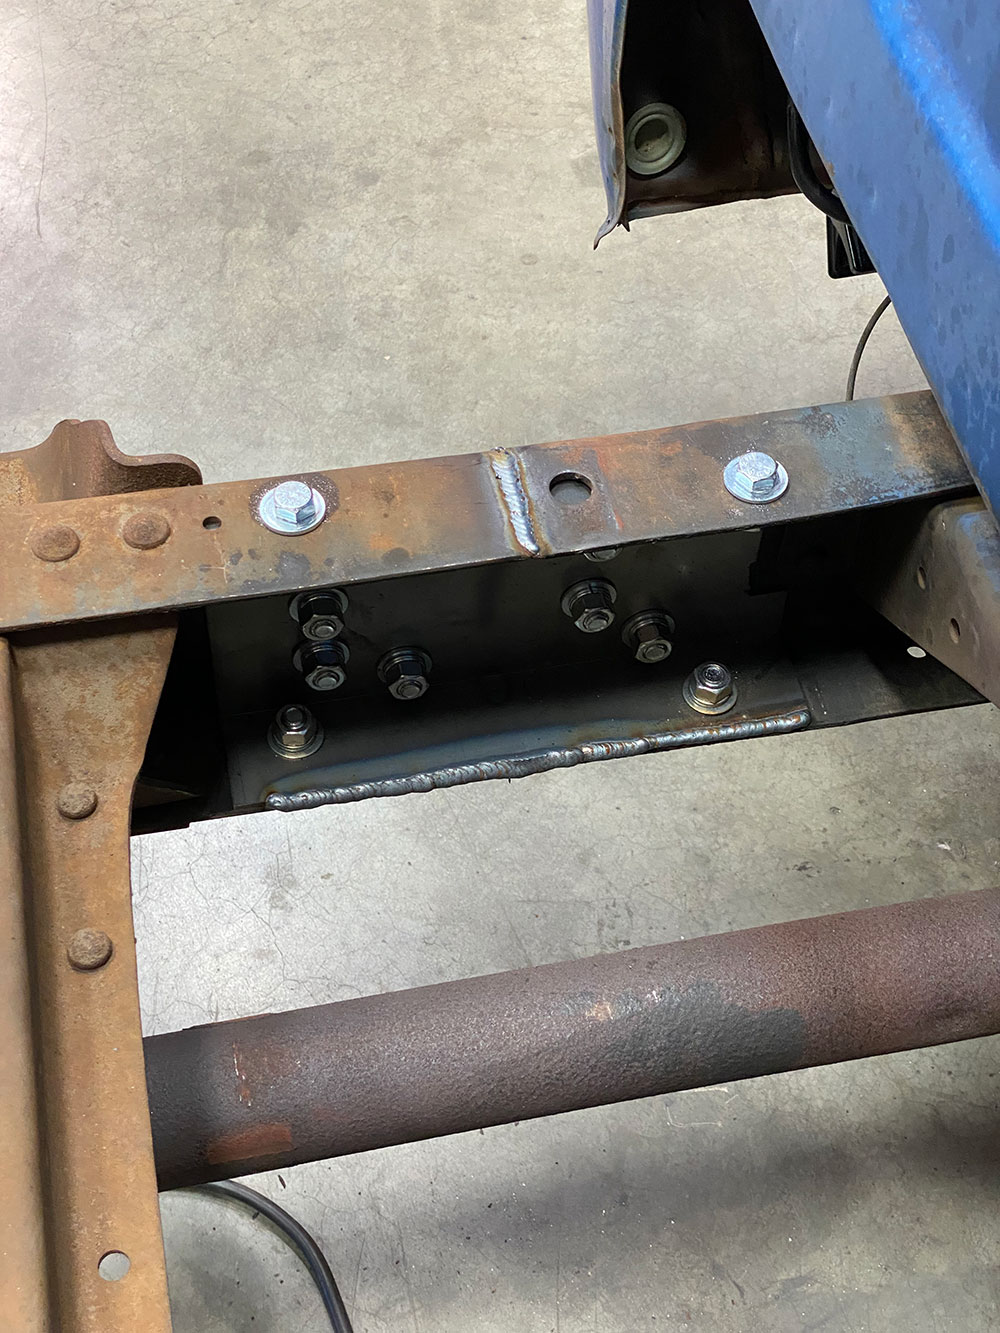
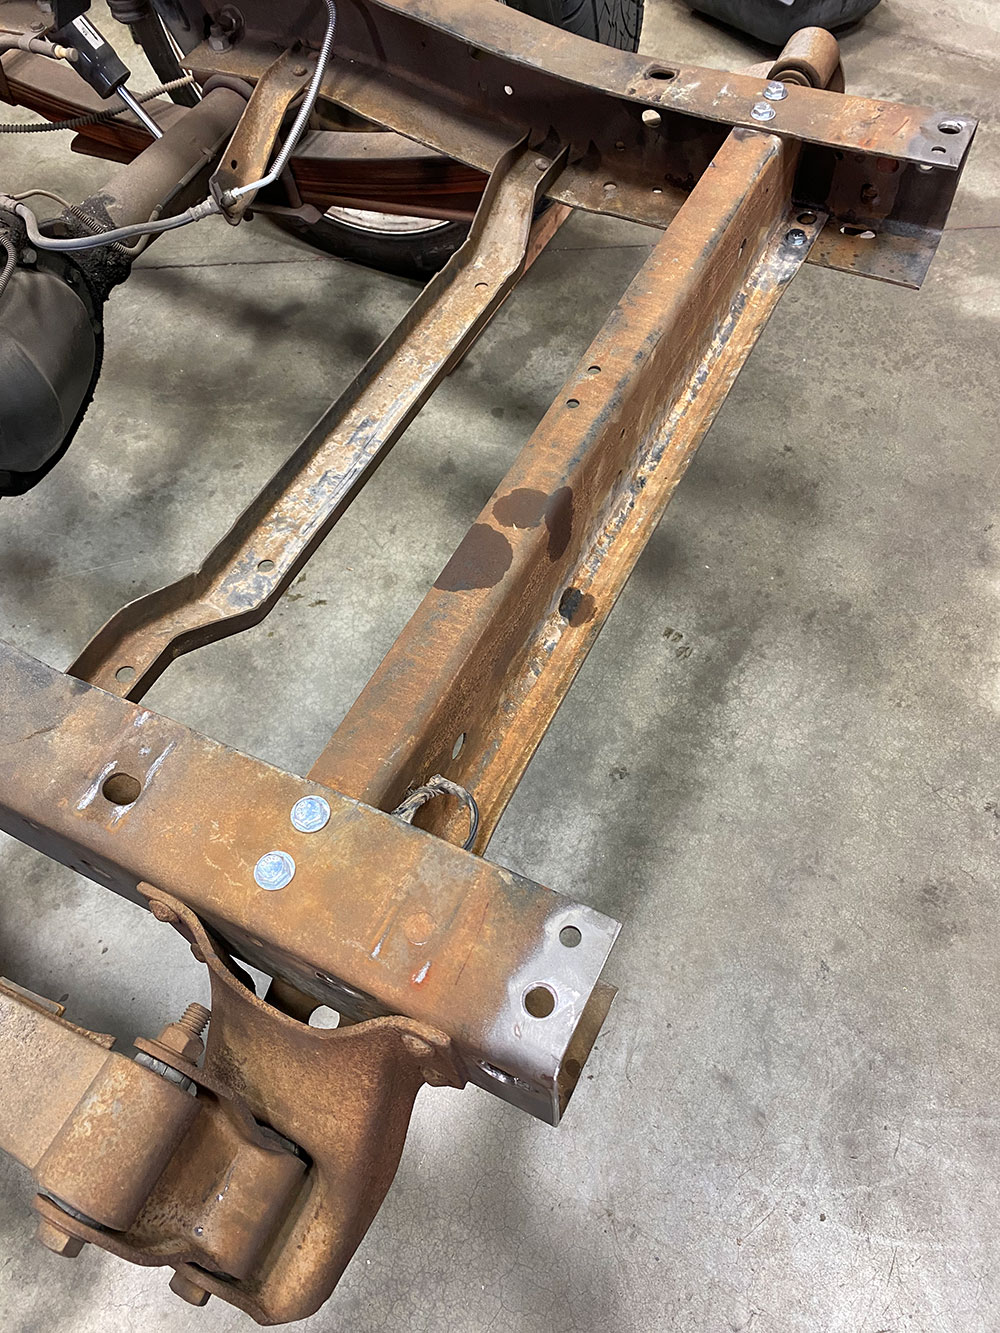
When all is said and done, this is what you should/will be looking at.After completing the drilling process (one and two), break out your favorite—and most accurate—cutting device. Dave here likes to use his thin-bladed cutoff wheel; a Sawzall will suffice as well. While a plasma cutter will do the job, unless you’re using a high-capacity machine, we don’t recommend it.Cut the frame using the forward “3 CUT” guideline, making sure the rear of the chassis as well as at the cab are still well/safely supported.This is what you’d call the point of no return!Now you can finish removing the 14 inches of frame section by cutting through the template at the rearmost “3 CUT” guideline.Dress each cut portion of the frame where you cut, providing a nice 45-degree bevel for the weld bead that will soon rejoin the two halves back together as one.Check fitment of the supplied C-channel on both halves of the frame prior to rolling the back half back up to align with the front section.Keeping the wheels attached to the rear end makes the job so much easier! The rejoining process is now about to begin.With the two halves butted up together, start by installing the C-channel into the front section of the frame—use a block of wood and hammer to help coerce. (Notice the frame bowing out on the bottom edge on the passenger side—this was/is due to the lack of carrier bearing crossmember. Once the C-channels are installed, the ’rails will square back up!)Adjust the sections of frame until the holes you previously drilled align with the holes in the C-channel. Do NOT use a drill to open up any misaligned holes; as the hardware is installed and tightened, use a punch to assist with hole alignment.Technically, as long as everything’s with just the hardware and C-channel installed, your frame is strong enough to be driven (carefully) to a shop to be professionally welded—either way, we’re now ready to move onto the final “major” portion of the procedure.
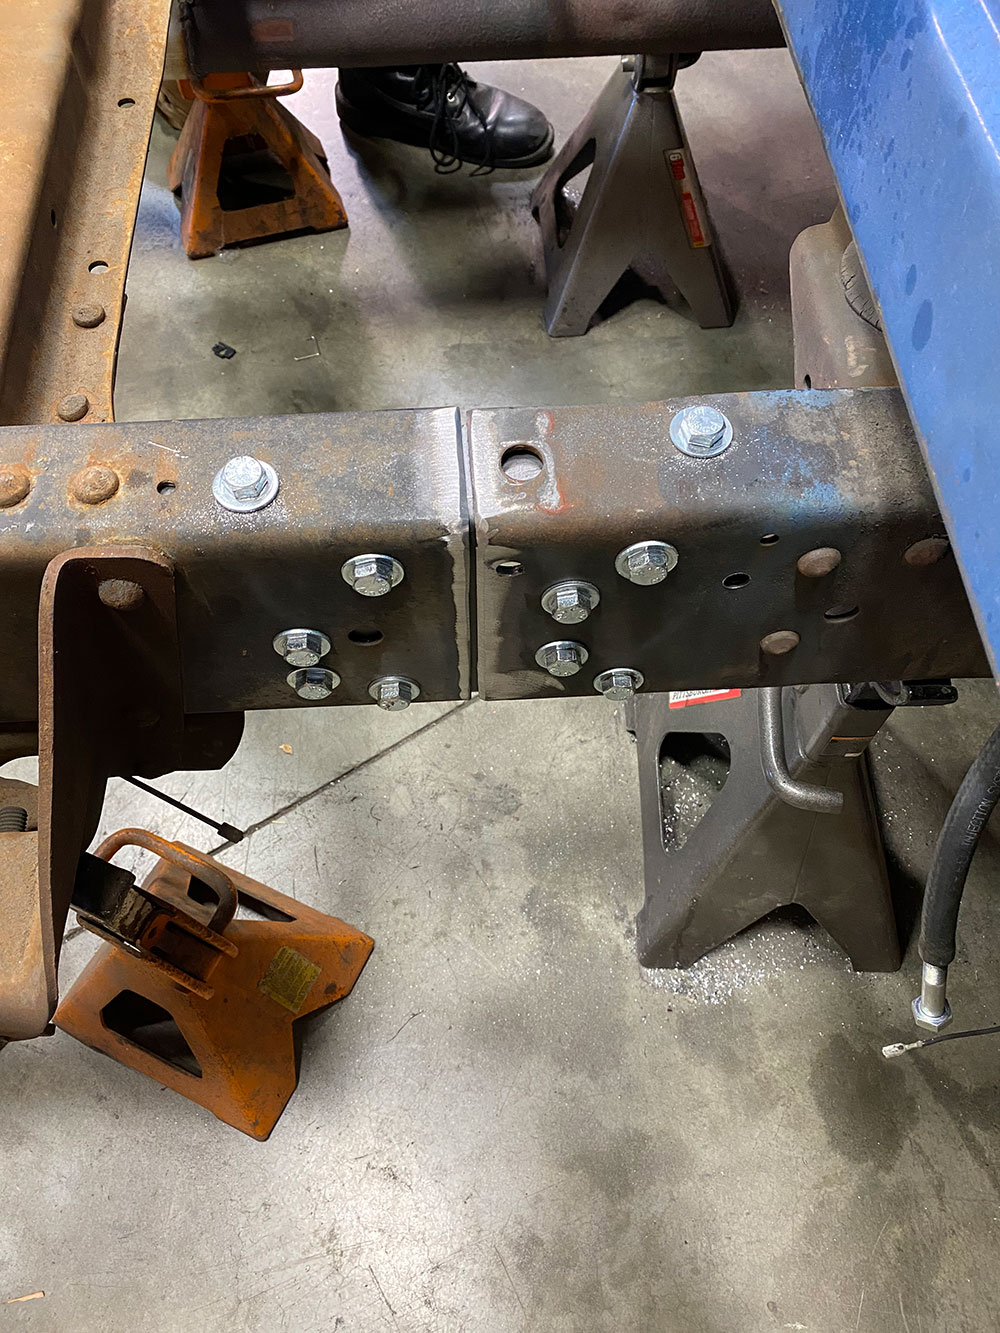
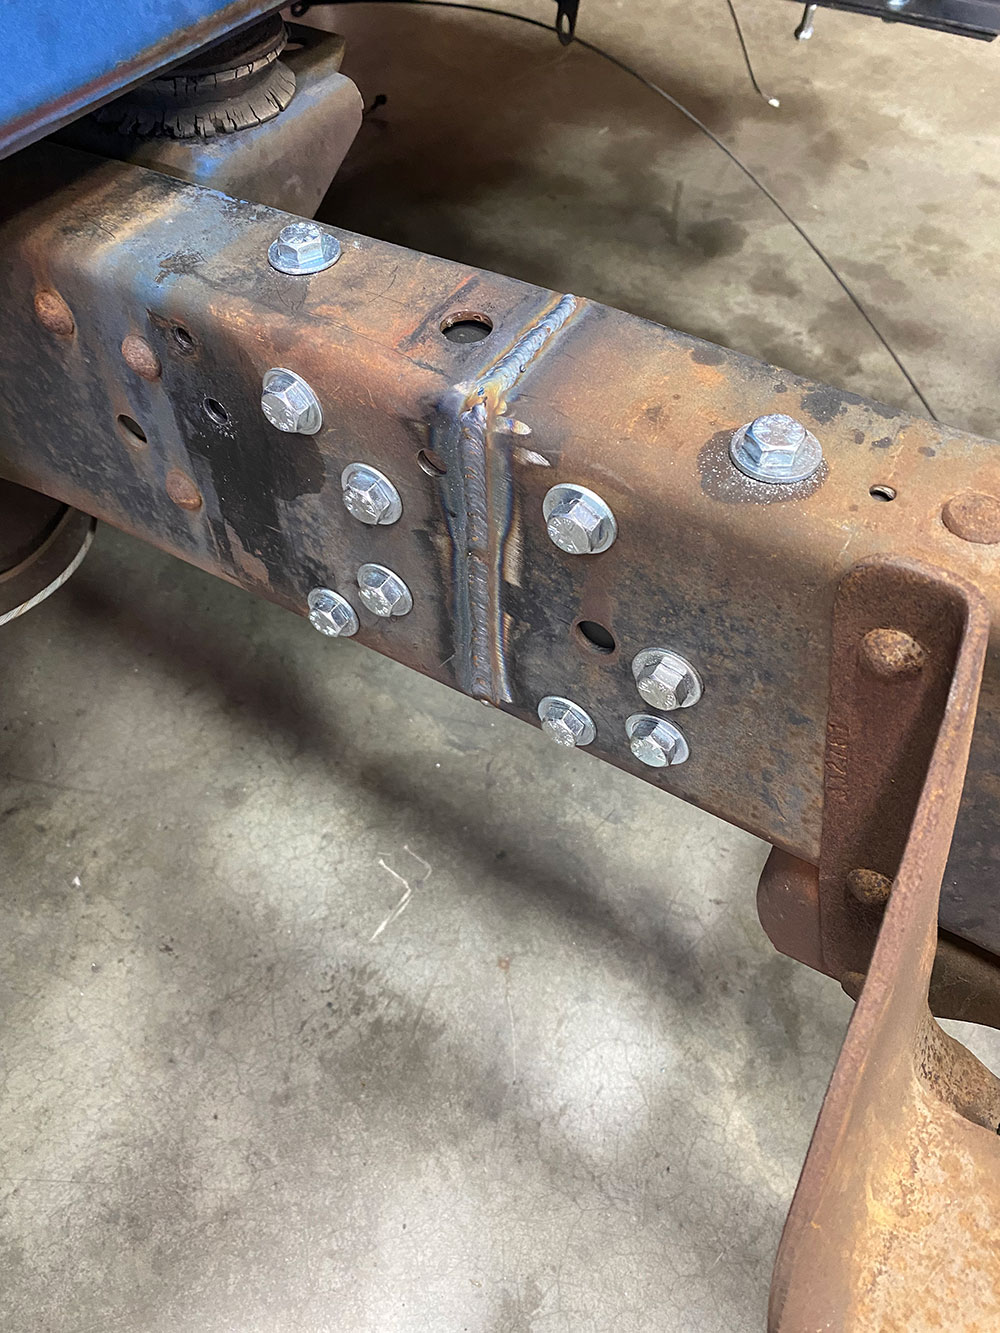
Completely weld (or, as mentioned above, have it professionally welded) from top to bottom, as shown. MIG or TIG, whichever is your preferred metal-fusing poison—just make sure the weld fully penetrates from the outside frame rail surface all the way to the underlying C-channel.
For additional strength and peace of mind, Dave likes to weld the lower horizontal edge of the C-channel to the frame lip as well.
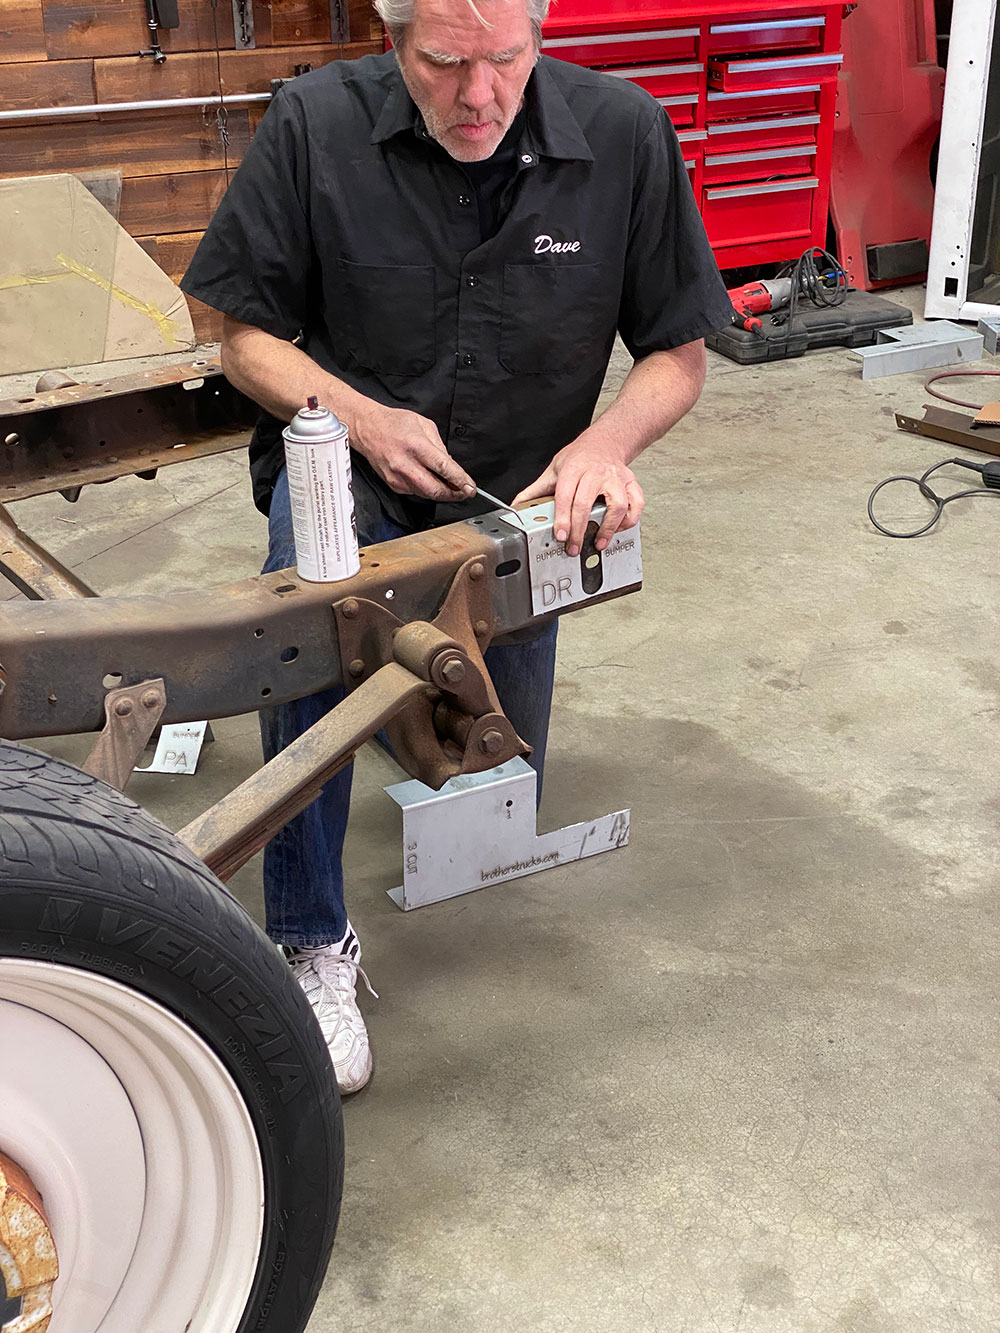
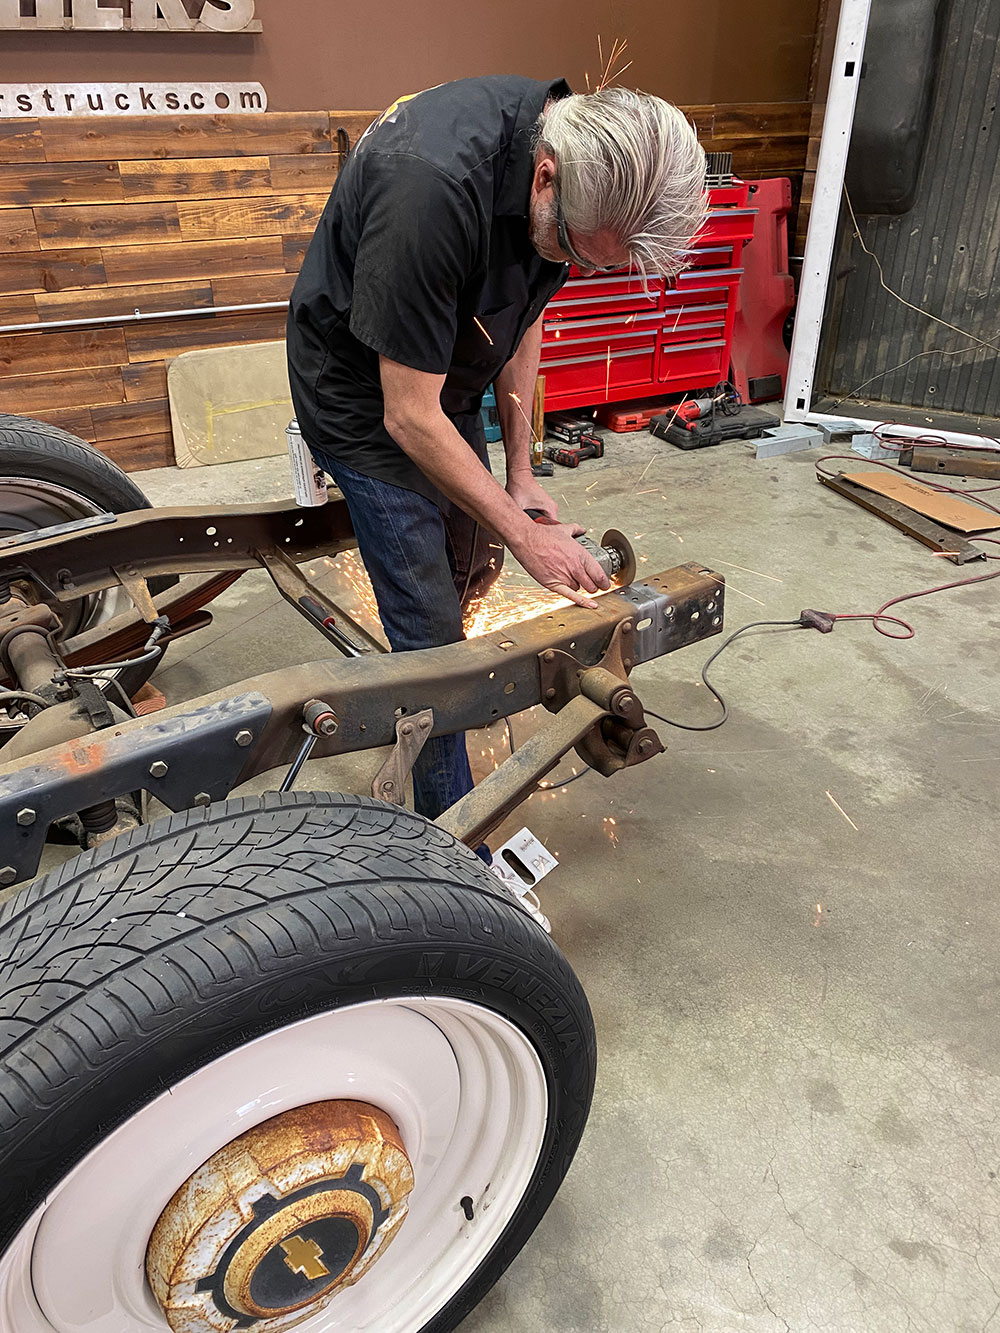
OK, now that the meat of the LWB has been reduced to SWB dimensions, use the remaining section of the template to shorten the rear frame horns down accordingly. Simply follow the cut guidelines …… and set the corresponding piece (DR for driver side, PA for passenger) on the rearmost end of the frame (at this point, the rear crossmember had already been removed—it relocates in the SWB holes already in the frame). Scribe the edge closest to the rear end and mark your new bumper bracket holes, then …
… off with the extra 6 inches of framehorn!
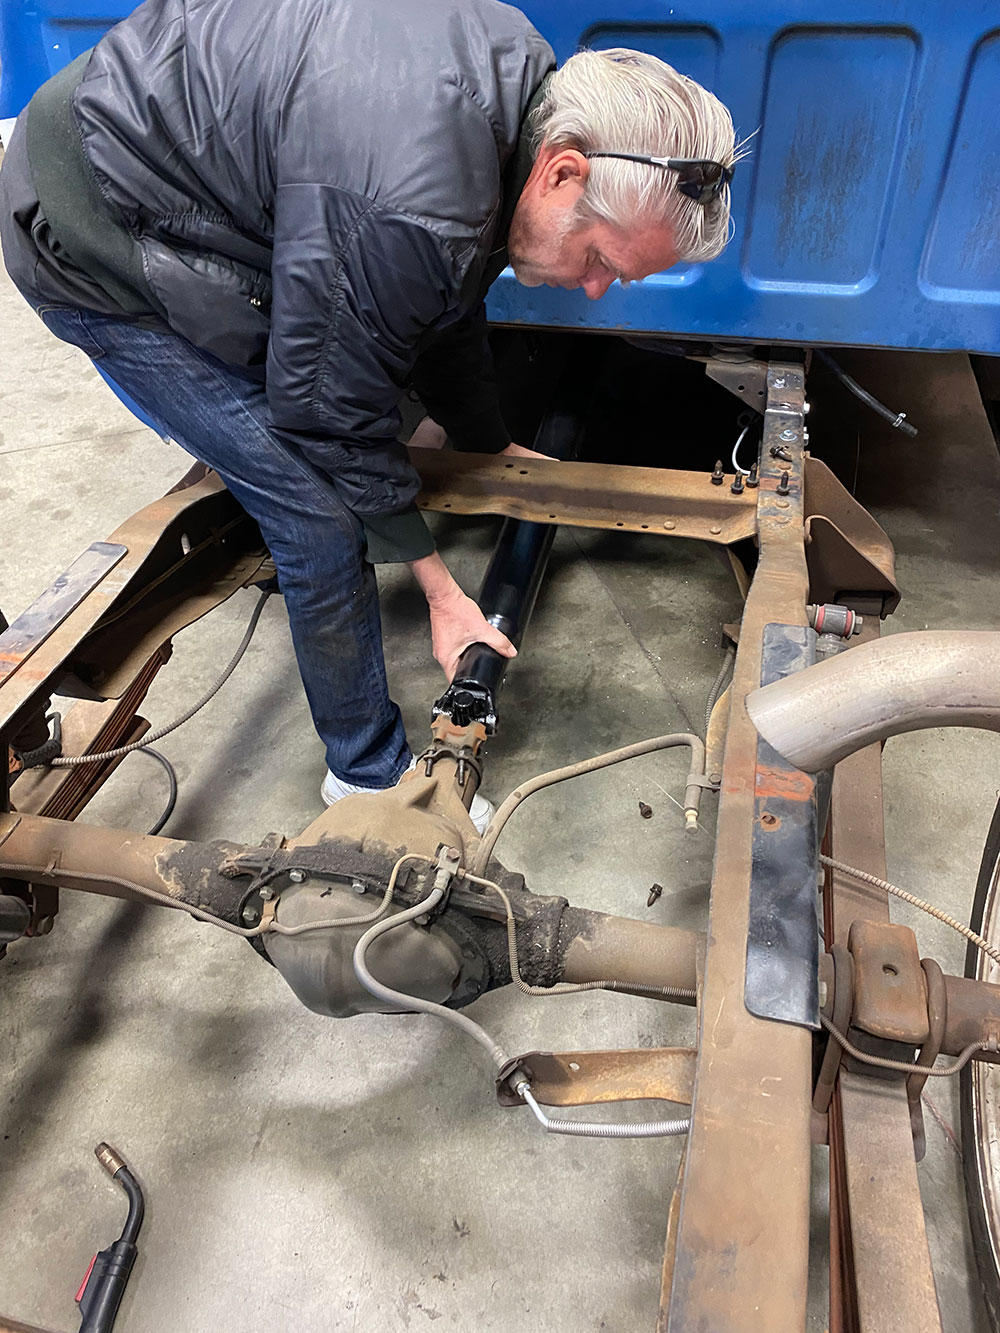
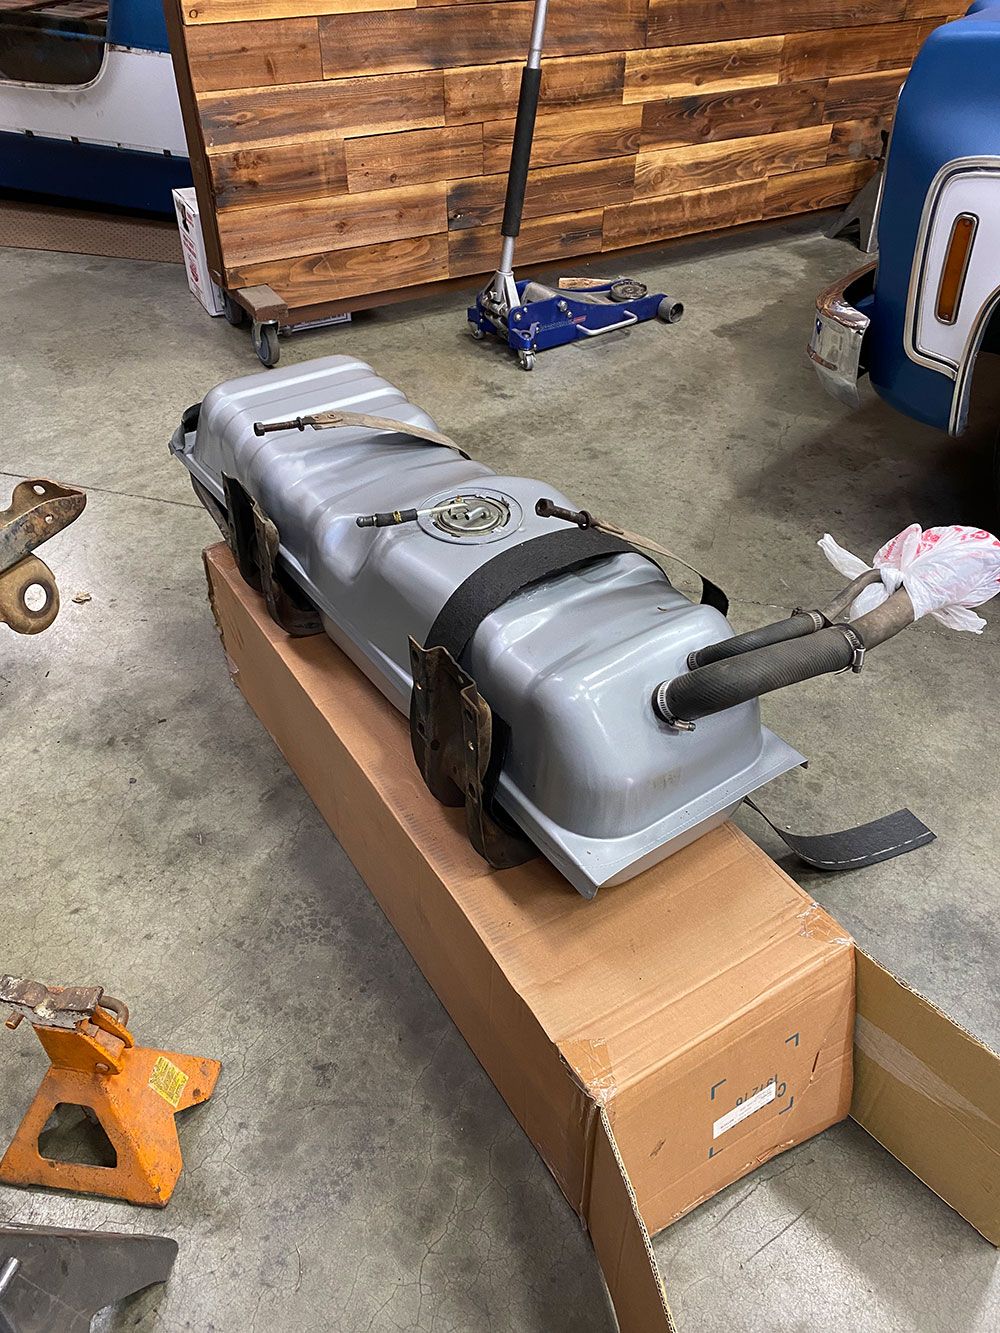
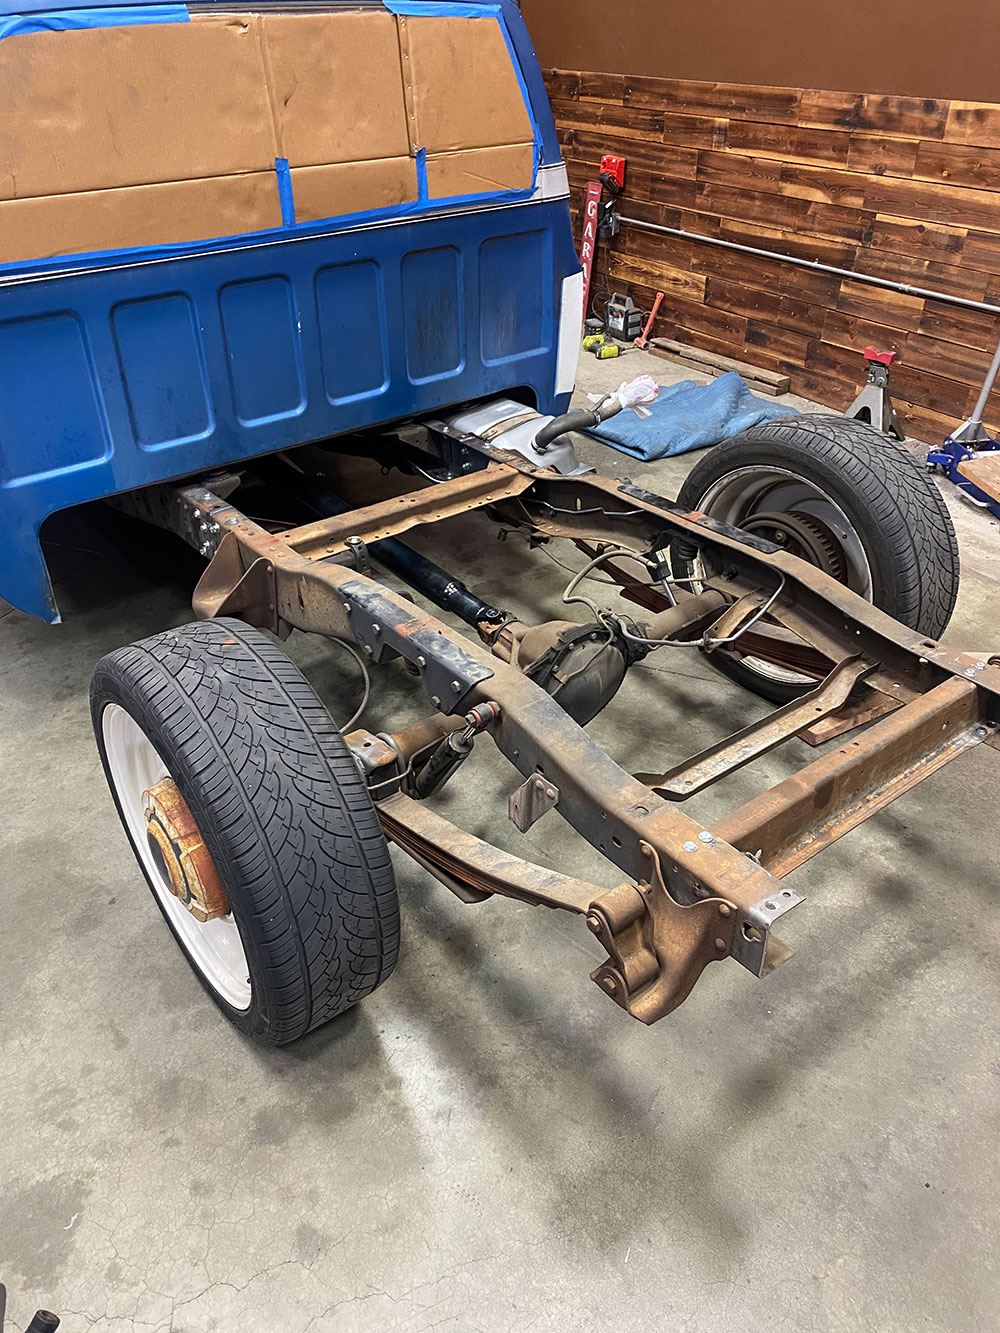
Drill out the holes you just marked for your rear bumper (now as opposed to later due to the bed preventing good drilling access once it’s reinstalled).Using the supplied hardware, relocate your rear crossmember in the two aligning holes situated in the middle of the rear leaf spring hanger bracket, as shown.Regardless of whether your truck has a one- or two-piece driveshaft, have it “professionally” shortened (and balanced, with new U-joints if yours show any signs of age/wear) the exact same amount you just shortened the frame: 14 inches!As for your fuel tank, if you prefer to stay with the OE saddle-style tank, you’ll need to use an SWB tank, such as the one shown from Brothers (not included in kit). Otherwise, you can figure out an alternative fuel supply option, such as an aftermarket aluminum one to mount in the rear of the frame. (Brothers does include an SWB rear brake line as well as the correct-length parking brake cable!)And that’s a wrap for the frame portion of the Squarebody shortening. Next month, Dave will show you how to cut down your factory LWB bedsides and, using a new floor from Brothers, complete the job 100 percent!
We use cookies to ensure that we give you the best experience on our website. If you continue to use this site we will assume that you are happy with it.