Our project 1936 Ford phaeton is making steady progress. After painting it at home (Apr. ’22 issue; Inflatable Spray Booth Makes it Easier To Paint Like a Pro) we cut, buffed, and started assembling the body. However, we had not addressed the dashboard, mostly because we were determined to be done with the bodywork and because the dash will be a different color than the body.
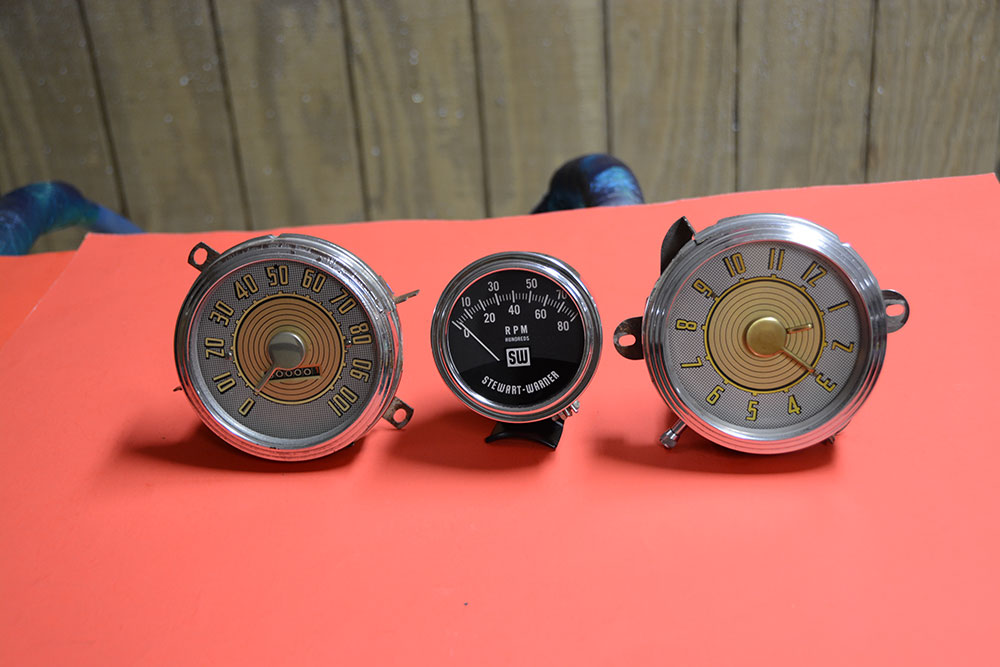
This how it all began, a circa 1961 Stewart-Warner tach and some swap meet 1947 Ford gauges. That combo will get you in trouble every time.
The dashboard would be our first step in building the interior. In my humble opinion, the 1936 Ford open-car dashboard is overly plain, heading toward ugly. It should be noted, closed cars had a better dash. Since the roadsters and phaetons had this plain-Jane look, it was perfect material for a little hot rod enhancement.
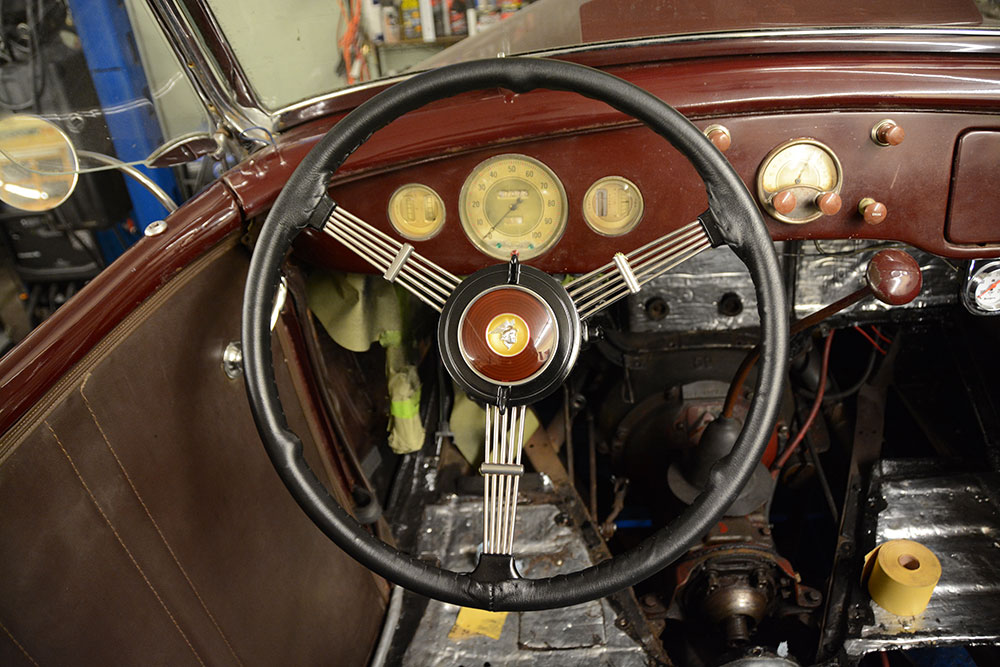
After leather-wrapping our 1936 Ford steering wheel and modifying the horn button, in our opinion the stock dash was looking a bit mundane, boring, and sleepy. Time for a little hot rod influence.
We decided to ditch the stock 1936 Ford gauges in favor of a ’47 Ford speedometer and clock. We liked the larger size and the art deco look of the later gauges. Since this is a very traditional car, we decided black Stewart-Warner gauges, fresh off SpeedwayMotors.com, would be the perfect mate for our 1961 vintage, black face Stewart-Warner tach.
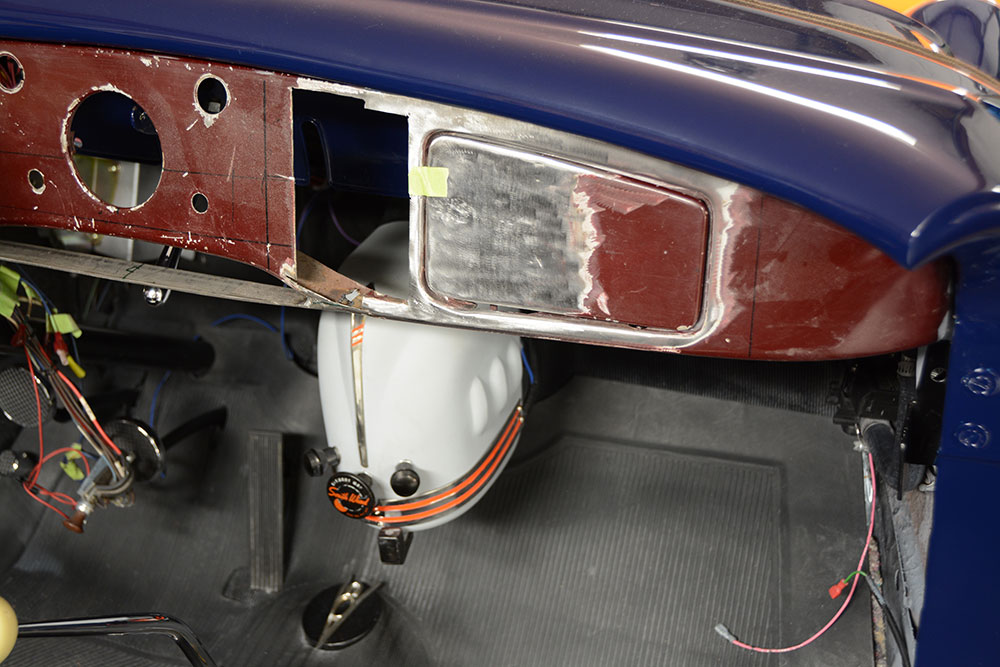
With the dash back out of the car we enlarged the speedometer hole and added about 3/8 inch to the bottom of the dash to make room for the new speedo. At the same time, we decided to eliminate the original step up in the center of the dash. Our T5 shifter won’t need the clearance.
Armed with that decision we took out our tape measure and quickly ran out of room for the gauges. It seems the glovebox was consuming a disproportionate amount of the dashboard; it was more like a footlocker than a glovebox. To make everything fit, the glove box would need to be shortened. We have seen hot rods with the glove box eliminated, but felt we needed all the weather-tight (relatively speaking) storage we could get in our topless tub.
Installing the dash back in the car told us we were on the right track. Notice how large the glove box is and you will also notice even Ford couldn’t get the gauges to look straight on the curvaceous ’36 dashboard.
So we set about a glove box reduction program, along with building a new steel glove box in place of the cardboard unit from 1936. Like most metalworking projects it was a matter of working slowly and measuring twice … cutting once. Our reduction in size was dramatic, yet with the dashboard back in the car it looked quite proportional, and chances are the untrained eye could assume it is an early ford factory glove box. (We may even start a rumor about the super-rare, “small glove box ’36 Ford phaetons;” only five were built, all on April 1, 1936. One known to survive.) (Editor’s note: This is what happens when you are living on an island off the coast of Georgia! —B.B.)
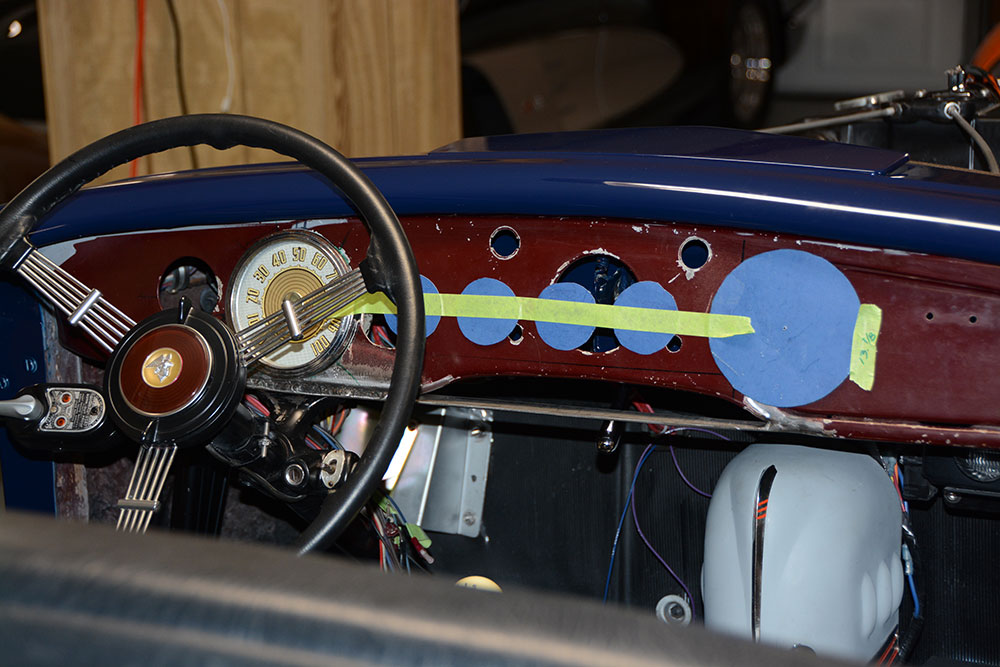
Tape measures are nice but we like to see things, and so some simple templates were cut out and taped in place. The verdict was in; it was time for some glove box reduction … a not-so common cosmetic procedure.
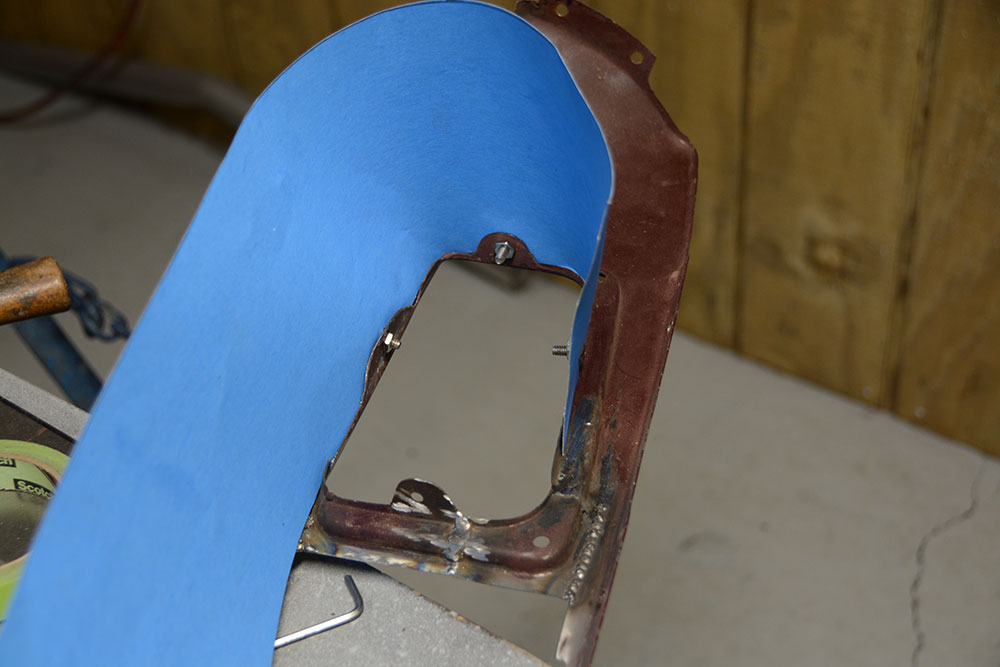
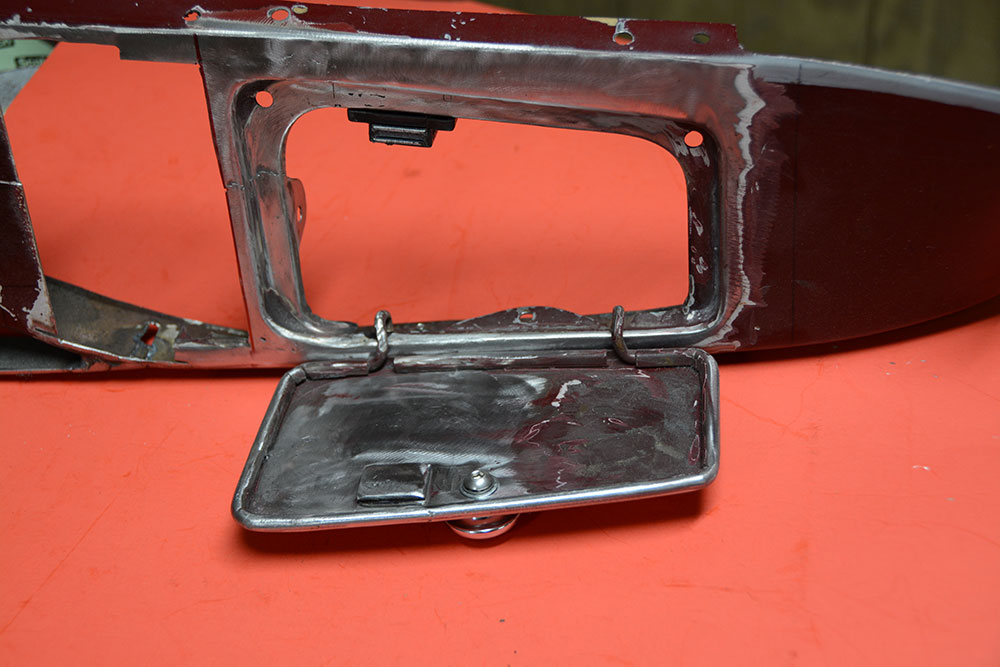
Because of the taper of the dashboard the glove box door is not square, rather it follows the contour of the dashboard. To reduce the opening and then fill it with a door involved cutting it both vertically and horizontally. The glove box door accents these tapers for a very pleasing look. We managed to make cuts that saved the factory mounting tabs for the actual glove box, again adding to the illusion of a factory unit.
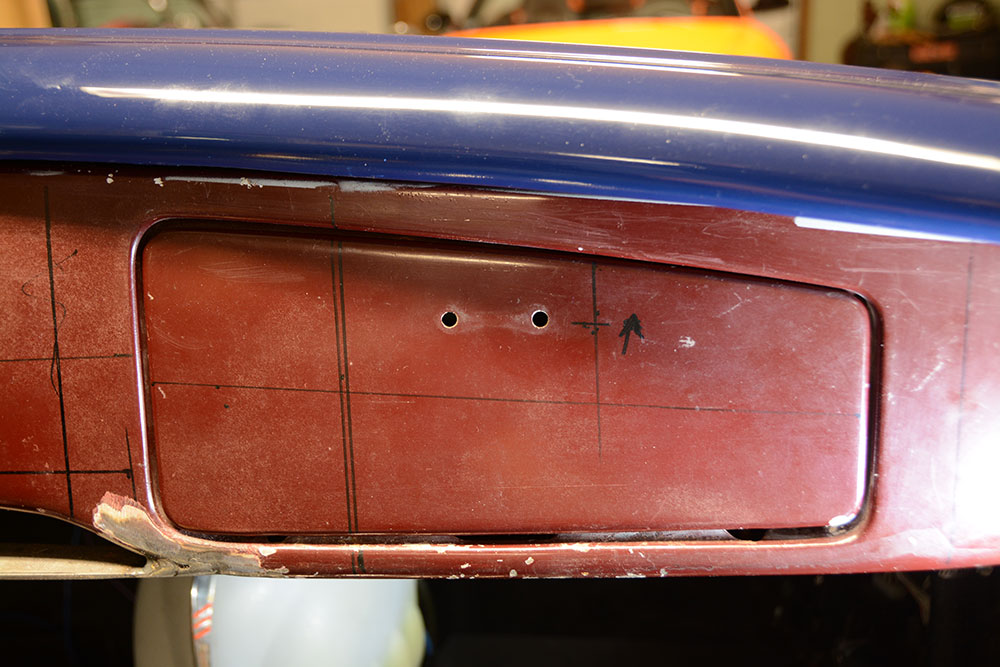
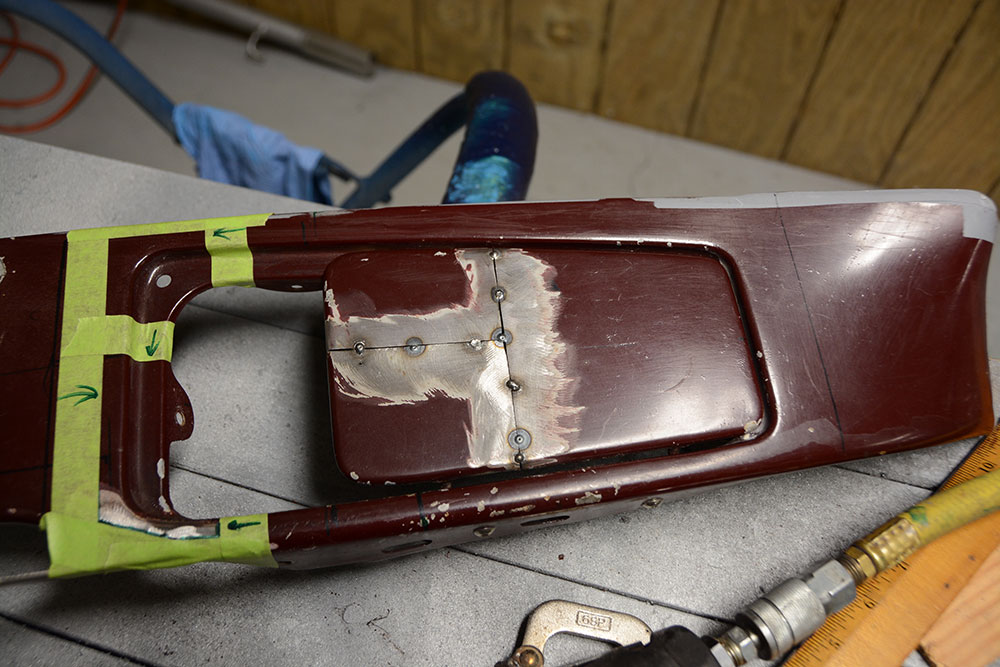
This is our basic marking, we found a horizontal centerline as a guide and decided to shorten the door approximately 2-1/2 inches. Both the door and the dashboard were marked for the new size.
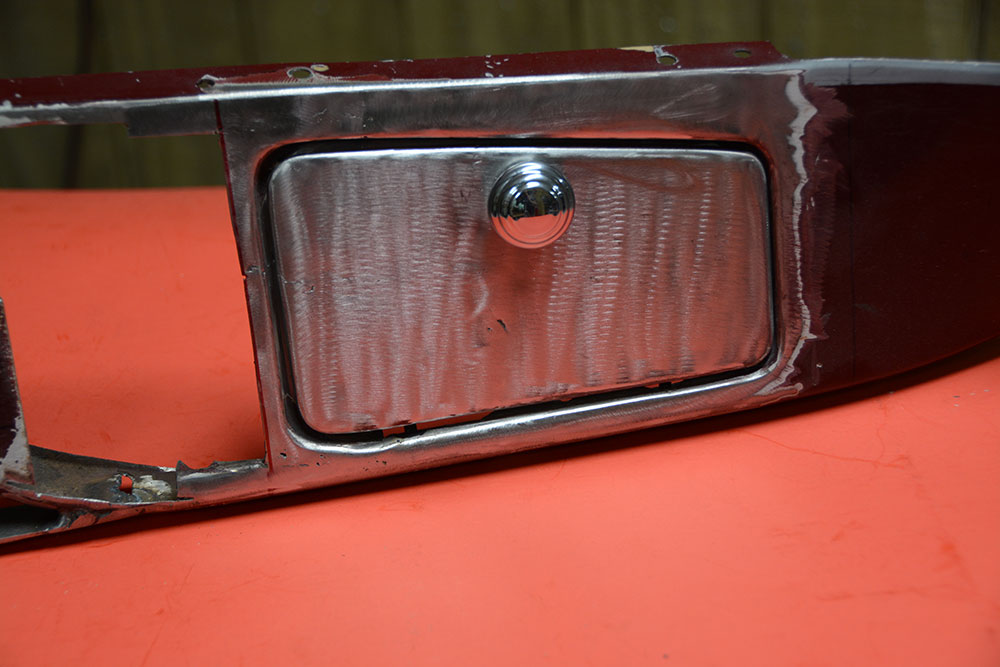
The glove box door hinge is a rudimentary unit made of a rod that rotates in two simple brackets. We shortened the rod and used one original hinge hole and drilled a second hole to complete the hinge. We drilled a hole in the center of the door and used a cool chrome knob from Lokar to complete the early hot rod look.
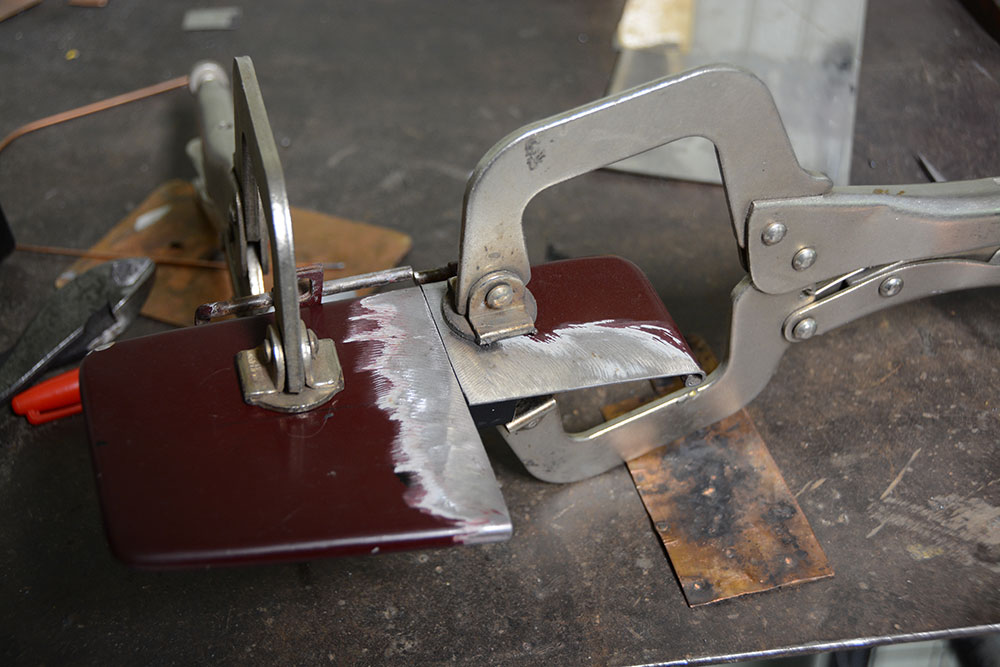
A quick pass with the trusty die grinder cut the door down to the desired opening size. This is just the first cut; it will be shortened once more.
After the glove box project was complete, we had the desired extra room for our gauges. We will show you the completion of the dashboard and gauges in the next issue. But for now, let’s take a closer look at reducing and reshaping our 1936 Ford glove box. MR
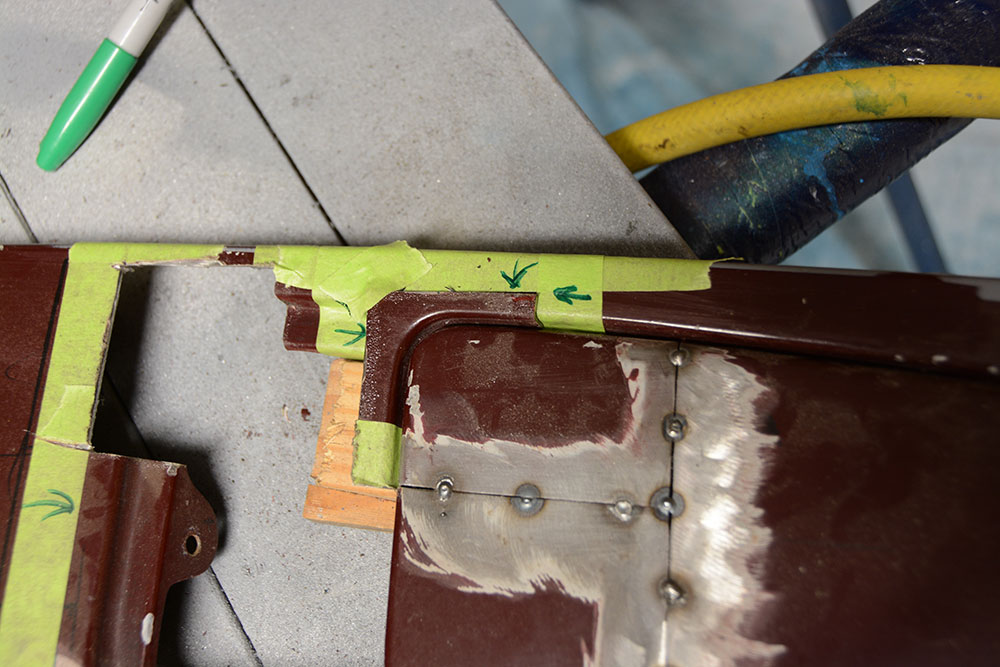
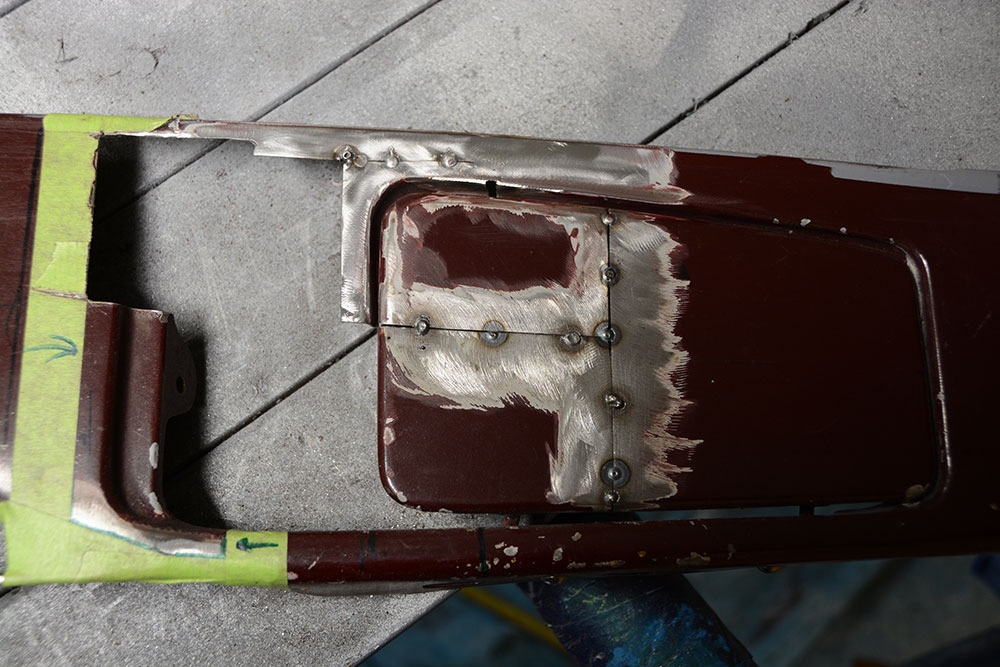
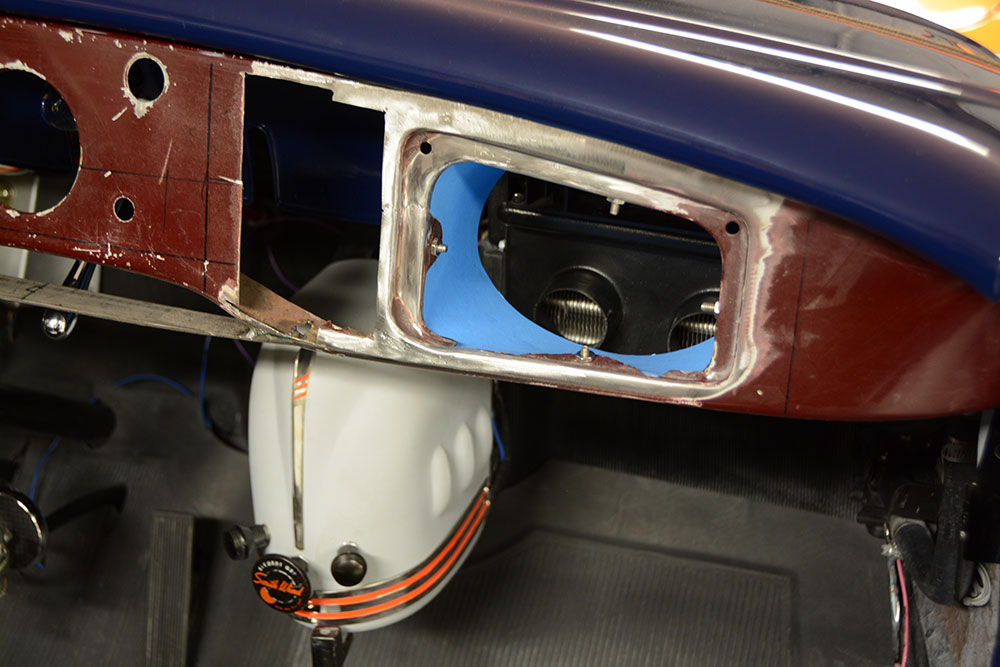
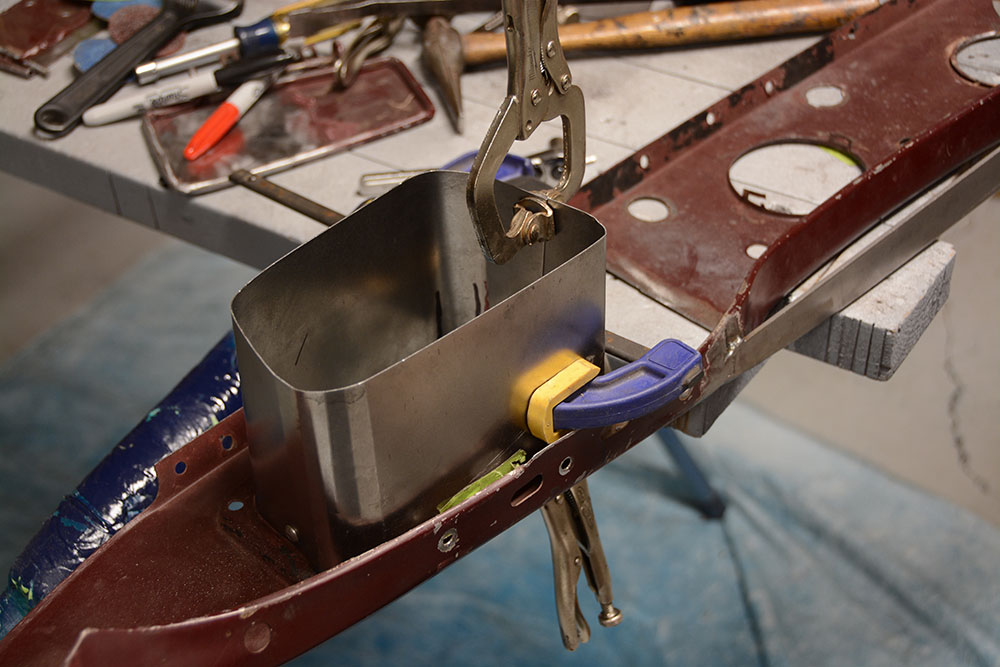
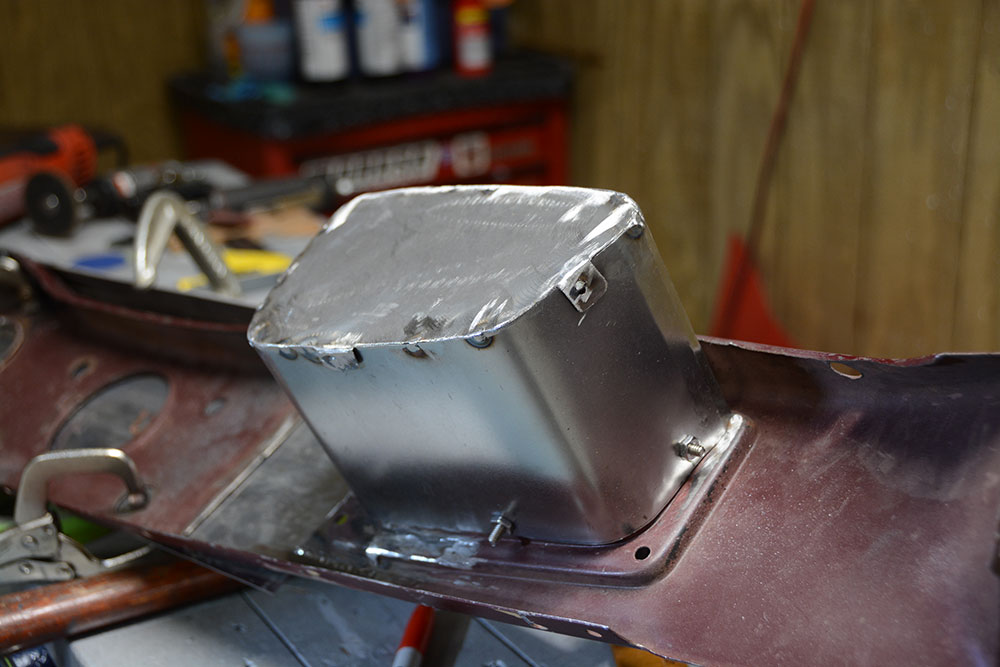
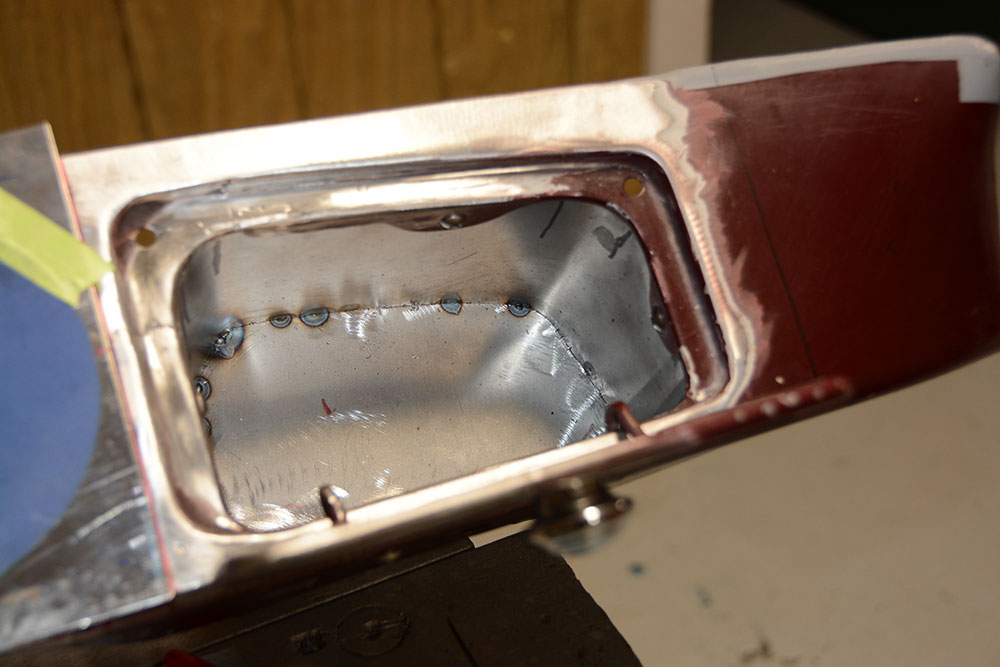
This is the initial cut, note we also cut the rod that constitutes the very simple hinge arrangement on an early Ford glove box.We reinstalled the door for a quick visual and liked the look. Next, we need to shorten the door one more time to make room for the corners.We shortened the door and hinge rod the amount of the cut-off corner piece. We simply held the cut-off piece in place, marked the door, and shortened it. Then some careful fitting and clamping completed the operation.Back for a test-fit we were pleased so far. Our bottom gap was nice and straight with an even gap. The lower gap is a bit larger to allow the hinge to work.We repeated the same procedure for the top corner. Again, careful fitting and trimming always pays. To our eye, the shorter door forms a more pleasant shape.Now the trick is to move the stock corners over to form the dashboard opening. We like to use tape to mark cut lines, and the arrows indicate which side of the tape to cut … not that we have ever cut on the wrong side!That small piece above the dashboard is the cutout piece we will use for the corner. Note we cut above the actual inside glove box mounting tab; we will need that tab later.Here we test-fit the corner piece with tape. Certain it would fit properly we used more tape to mark the cuts along the upper dash to permit the corner piece to be fitted in place.After cleaning the old paint off the corner piece we carefully fit it to the new opening and tack-welded it in place.We repeated the process, tack-welding the lower corner in place. Once satisfied with the fit, we finished welding and dressed the welds. We are pleased with the new shape and the extra gauge room.The next step is forming the actual box portion of the glovebox. We used posterboard to form a template. Notice how those original mounting tabs come in handy.Using our template we did a quick clearance check. That’s a Vintage Air heater peeking through our new opening. We had plenty of room.We formed the corners with a simple metal brake and bending the relatively thin 20-gauge metal around a piece of pipe. Yes, 20-gauge is thin, but this is a glove box, not a motor mount, and remember the stock one was cardboard.After forming the four corners (no two are the same) we trimmed the piece for a neat overlap joint and clamped it to place before tack-welding it together.Once again a simple poster board template came first then we formed the back piece from sheet metal. We added those little bend-over tabs to help hold things in place; they probably weren’t needed.Looking inside the glovebox we were pleased with the final shape and even the size is still suitable for what is supposed to be in a glovebox … gloves.We couldn’t resist this comparison shot; ole Henry didn’t plan on his cardboard glove boxes lasting 83 years.We opted for a simple magnetic latch to hold the door closed as there is little room for the factory-style spring clip on the bottom. The metal pad on the door contacts the magnet and those two holes in the corners of the opening are for the factory rubber bumpers.Here it is, an all-new, small glove box for the 1936 Ford. The chrome Lokar shift knob is the perfect touch for our vintage ride. Next up, smoothing the dash and mounting all those gauges, switches and more … stay tuned.
We use cookies to ensure that we give you the best experience on our website. If you continue to use this site we will assume that you are happy with it.